One of the most outstanding features of Odoo is Email generation. Moreover, we can directly send emails to the customers from the Odoo itself, no need to log in to your Gmail account separately, all we need is to configure Odoo mail server successfully.
This blog will explain how to configure both your outgoing as well as incoming mailing servers to Odoo.
Configuring the Outgoing Mail Server in Odoo
Let's now understand how to configure the Odoo mail server to your platform.
Make sure that the add-on fetch mail is installed.
Login only as admin as the admin user only has access to settings and configuration.
Follow these breadcrumbs to configure the mail servers:- Settings - Technical - Email - Outgoing Mail Servers.
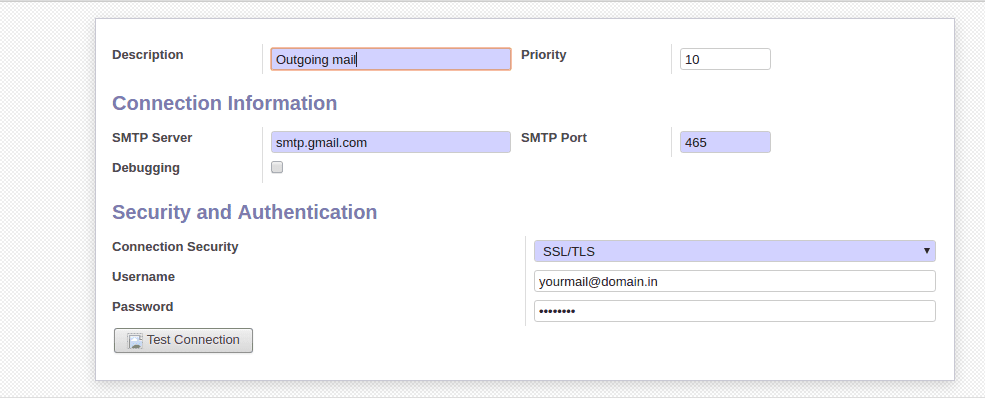
This will provide you with a form as shown in the following image:

Give field values as shown in the above screenshot
Provide the following details:
SMTP Server: smtp.gmail.com
Connection Security: SSL/TLS
Username: Your mail account
Password: Password of your email account
Priority: The lower the number higher the priority
SMTP Port: The port of your SMTP server
To test the connectivity you can click on the test connection smart button available in the window. Moreover, if testing is successful you will get a connection success full message. Now let's move on to understanding how to configure the incoming mailing server in the next section.
Configuring the Incoming Mail Server in Odoo
You have to follow the following breadcrumbs to obtain the incoming email configuration window:
Settings - Technical - Email - Incoming Mail Servers.
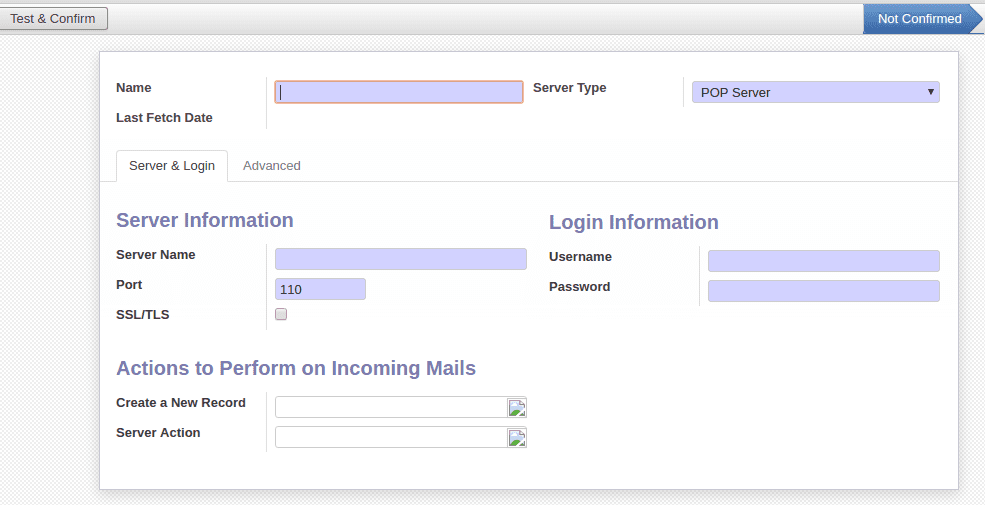
Now you will be shown with a form as in the following screenshot:

Provide the following details
Server Type: You can choose for POP, IMAP, and local here. Furthermore, POP is the most used one and is used for getting emails from the server to a client.
Server Name: The name for the server. (pop.gmail.com)
Port: The port of the server.
SSL/TLS: Check this to encrypt messages
Username: Your e-mail id
Password: The password of your e-mail