One of the vital needs for purchase operations in a company is Purchase Order and Request for Quotation (RFQ). A proper channel is necessary to carry out industrial products in an organization. Product price and quality attract most customers in the market nowadays. It is essential to request multiple vendors about a product. The document contains a buyer's requirements and requests a quote from a supplier for purchase is an RFQ. On another side, an official document containing information on goods is a purchase order. We can manage both purchase orders and requests for quotation using Odoo 15 Purchase module.
This blog explains RFQ and Purchase orders in the Odoo 15 Purchase module.
Odoo 15 Purchase module assists you in generating Purchase Orders and Requests for Quotations for various products. Within Odoo 15 Purchase module, you can add product variants, vendor price lists, product categories, purchase orders, vendors, and more. Now, let's view a detailed analysis of RFQ and Purchase orders in Odoo 15 Purchase module.
Purchase Orders
A document generated by a buyer and issued to a seller is a purchase order. A buyer can maintain product purchases using this document. We can process a purchase order when the buyer accepts the quotation from a vendor. You can quickly constitute Purchase Orders using the Odoo 15 Purchase module. Choose the Purchase Orders menu in the Orders tab, and you can view all created purchase orders here, as specified in the screenshot below.
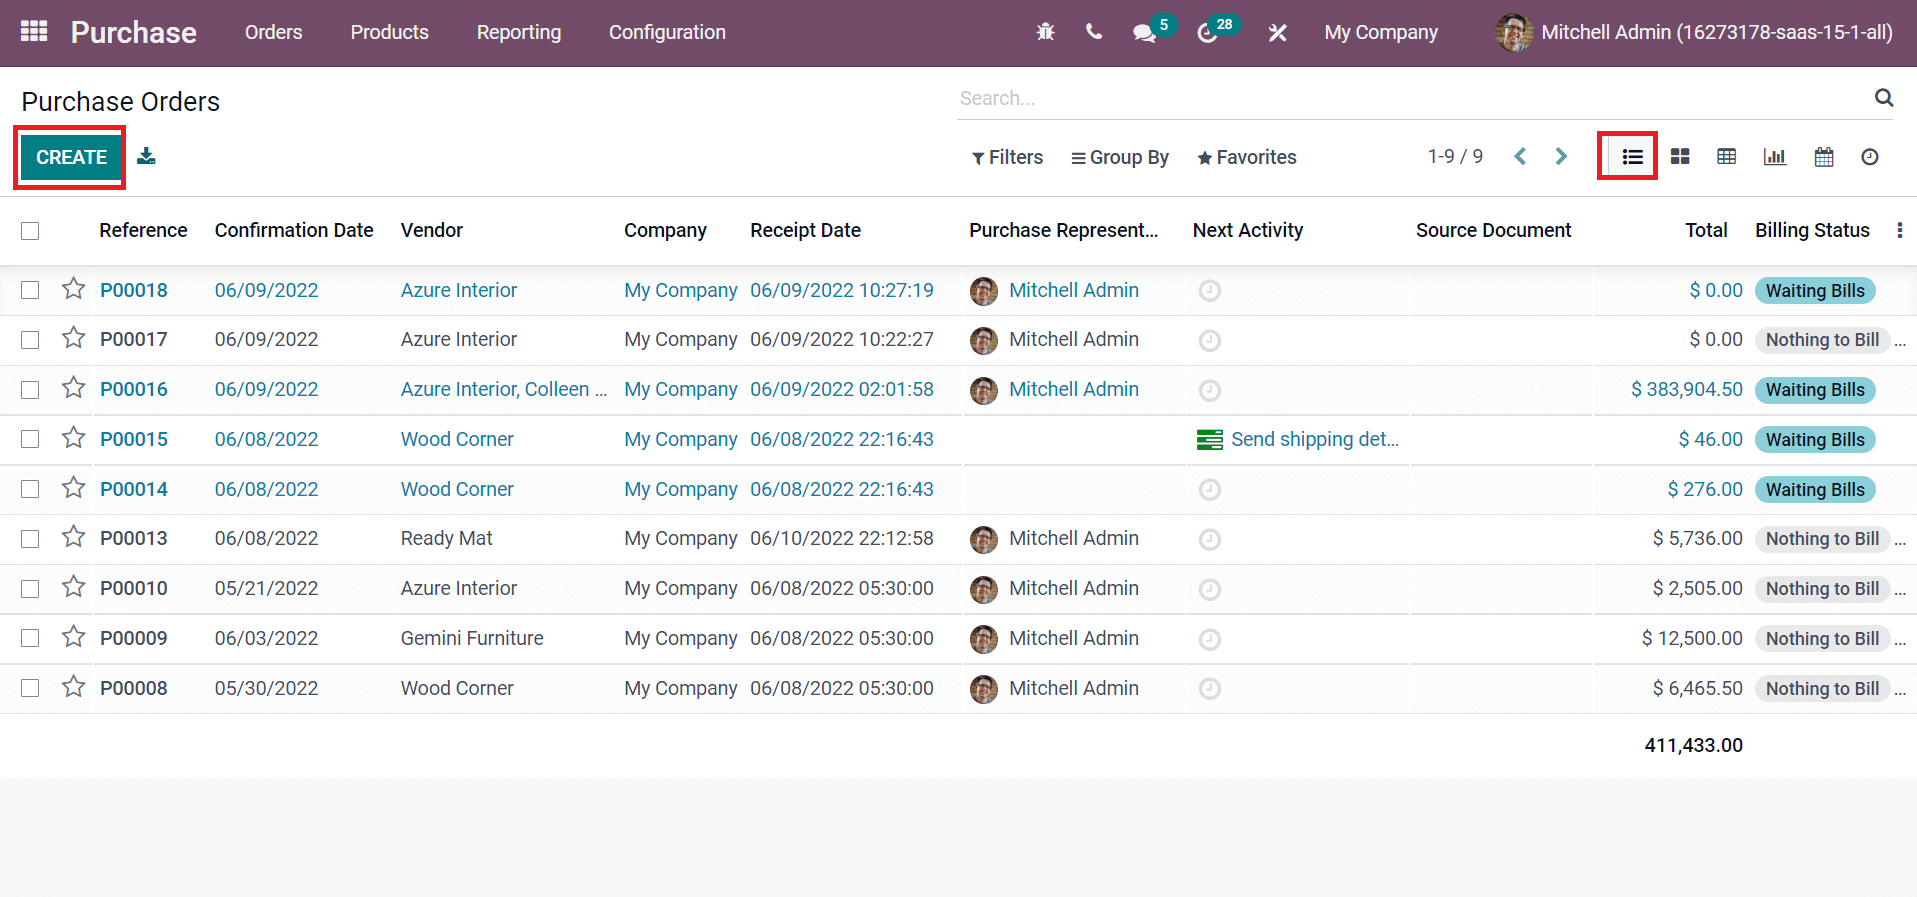
In the List view, you can see data such as References, Vendor, Receipt Data, Next Activity, Total, Confirmation Date, Billing Status, and more. Choose the CREATE icon to impart a new Purchase Order for a product, as marked in the screenshot above. In the Purchase Order window, select your Vendor and sales order reference in the Vendor Reference field, as denoted in the screenshot below.
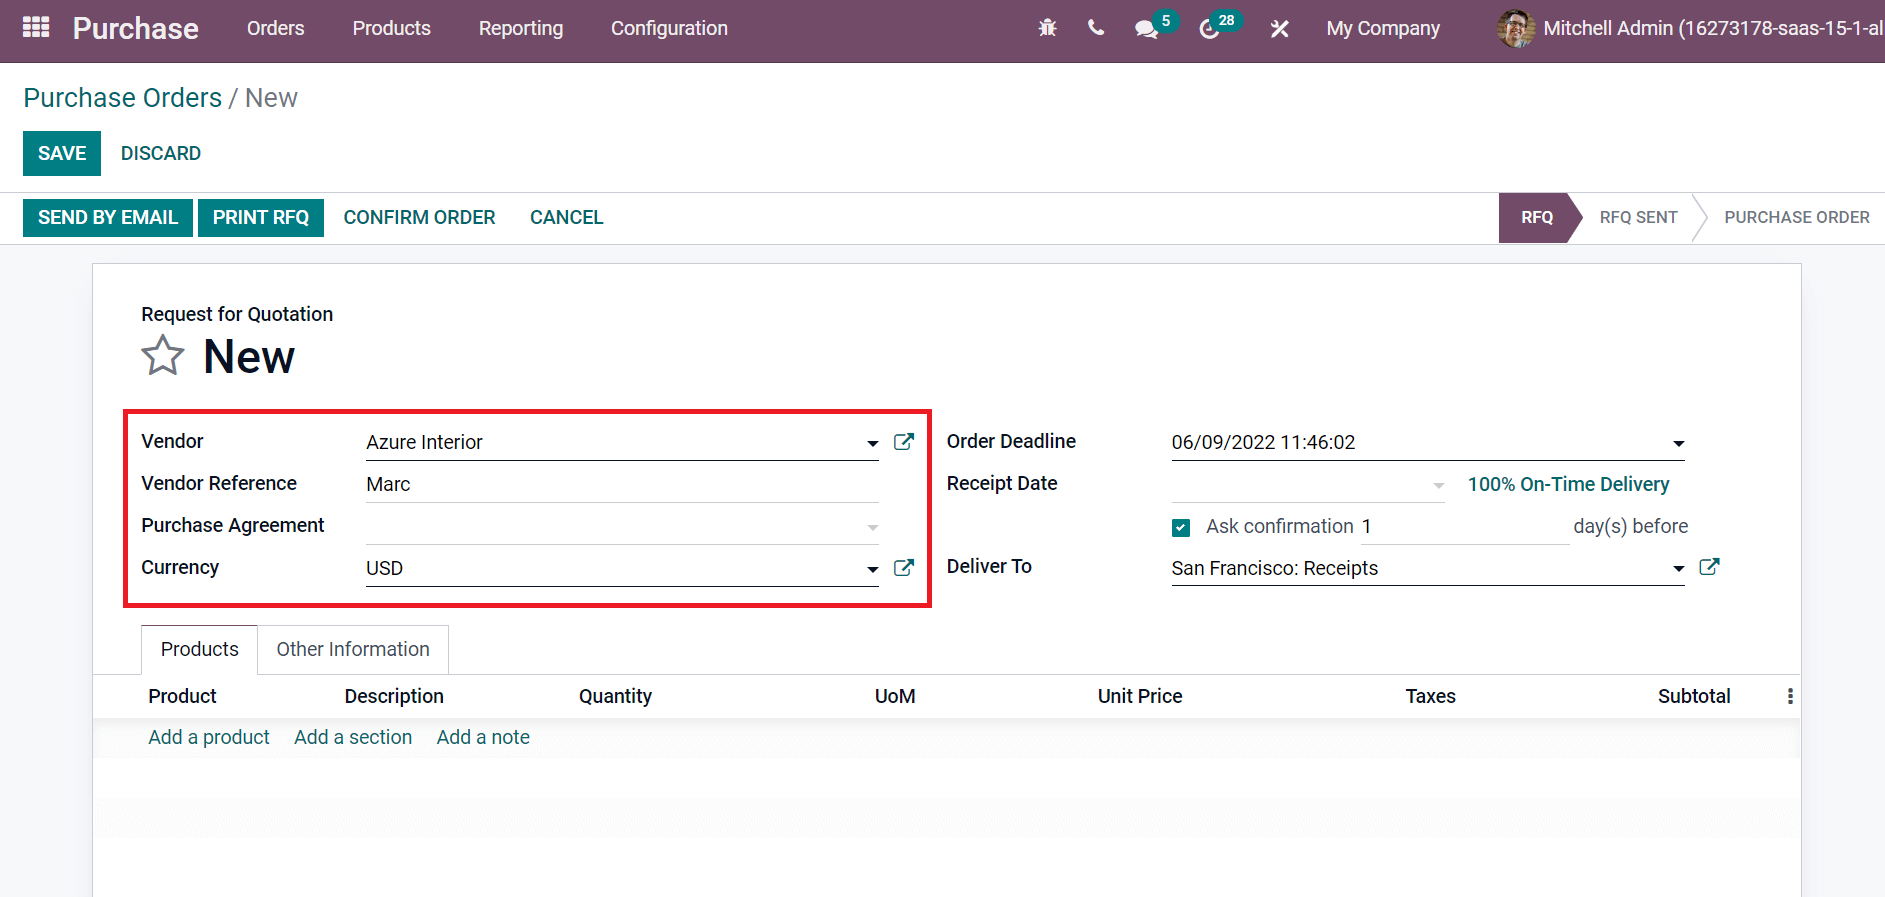
You can add the Currency and Purchase Agreement for a purchase order, as shown in the above screenshot. We can confirm the quotation date in the Order Deadline field and enter the delivery date promised by a vendor in the Receipt Date field, as displayed in the screenshot below.
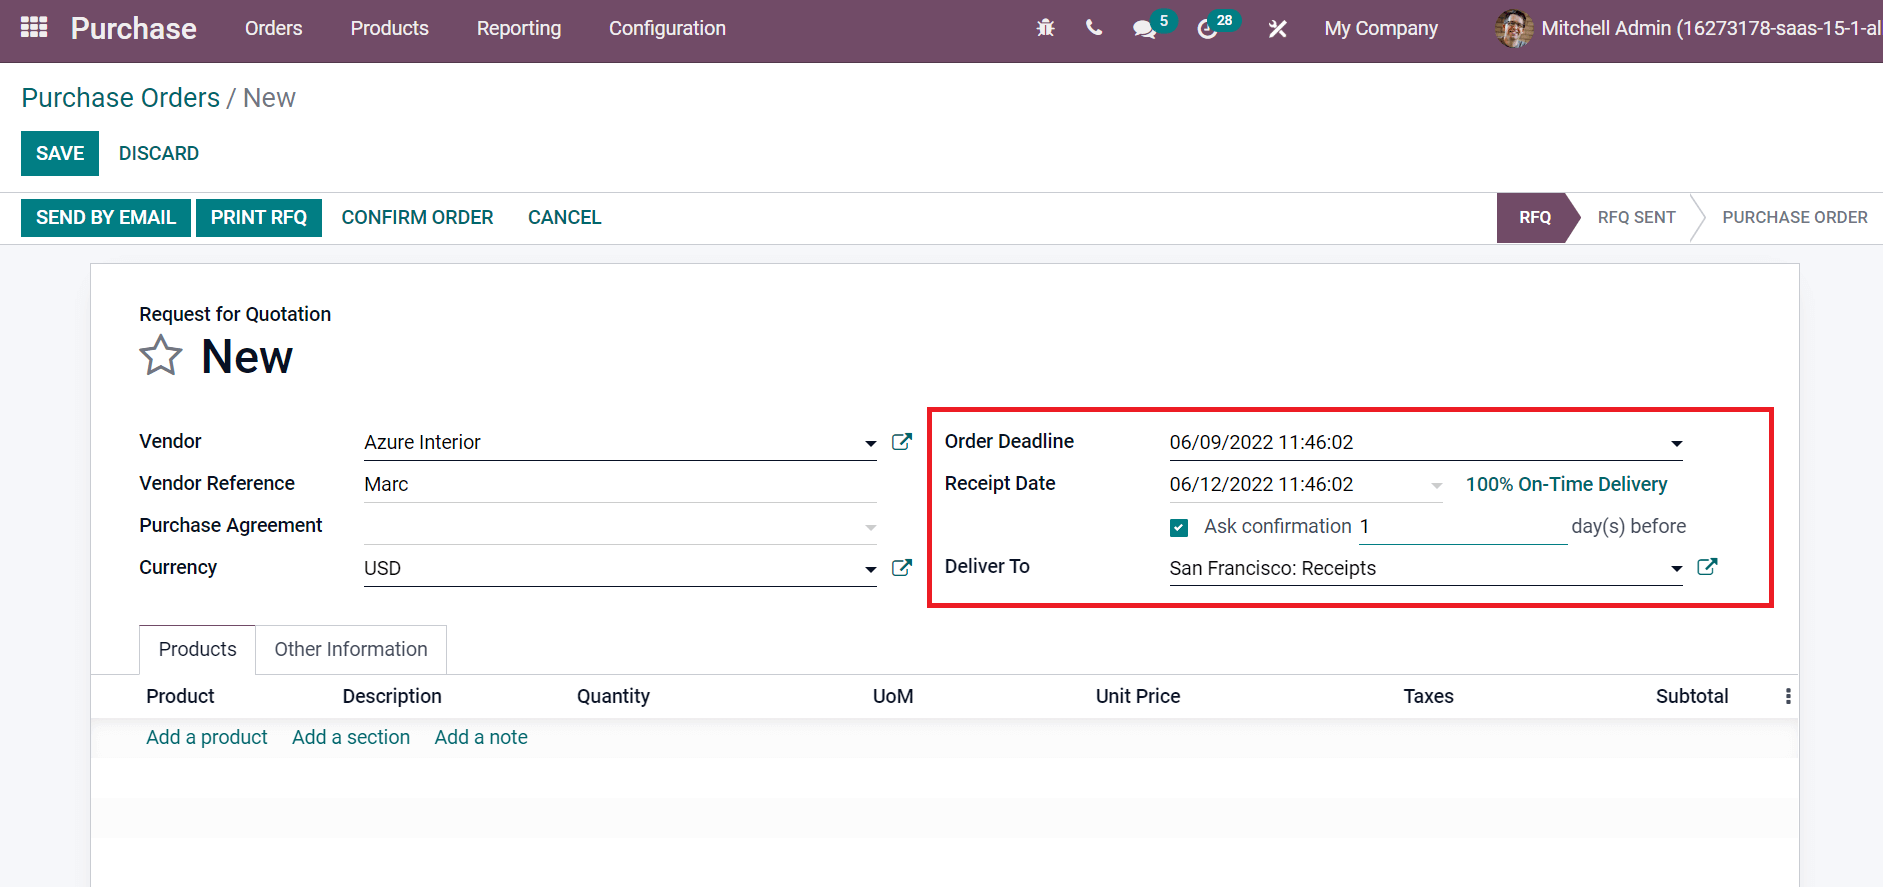
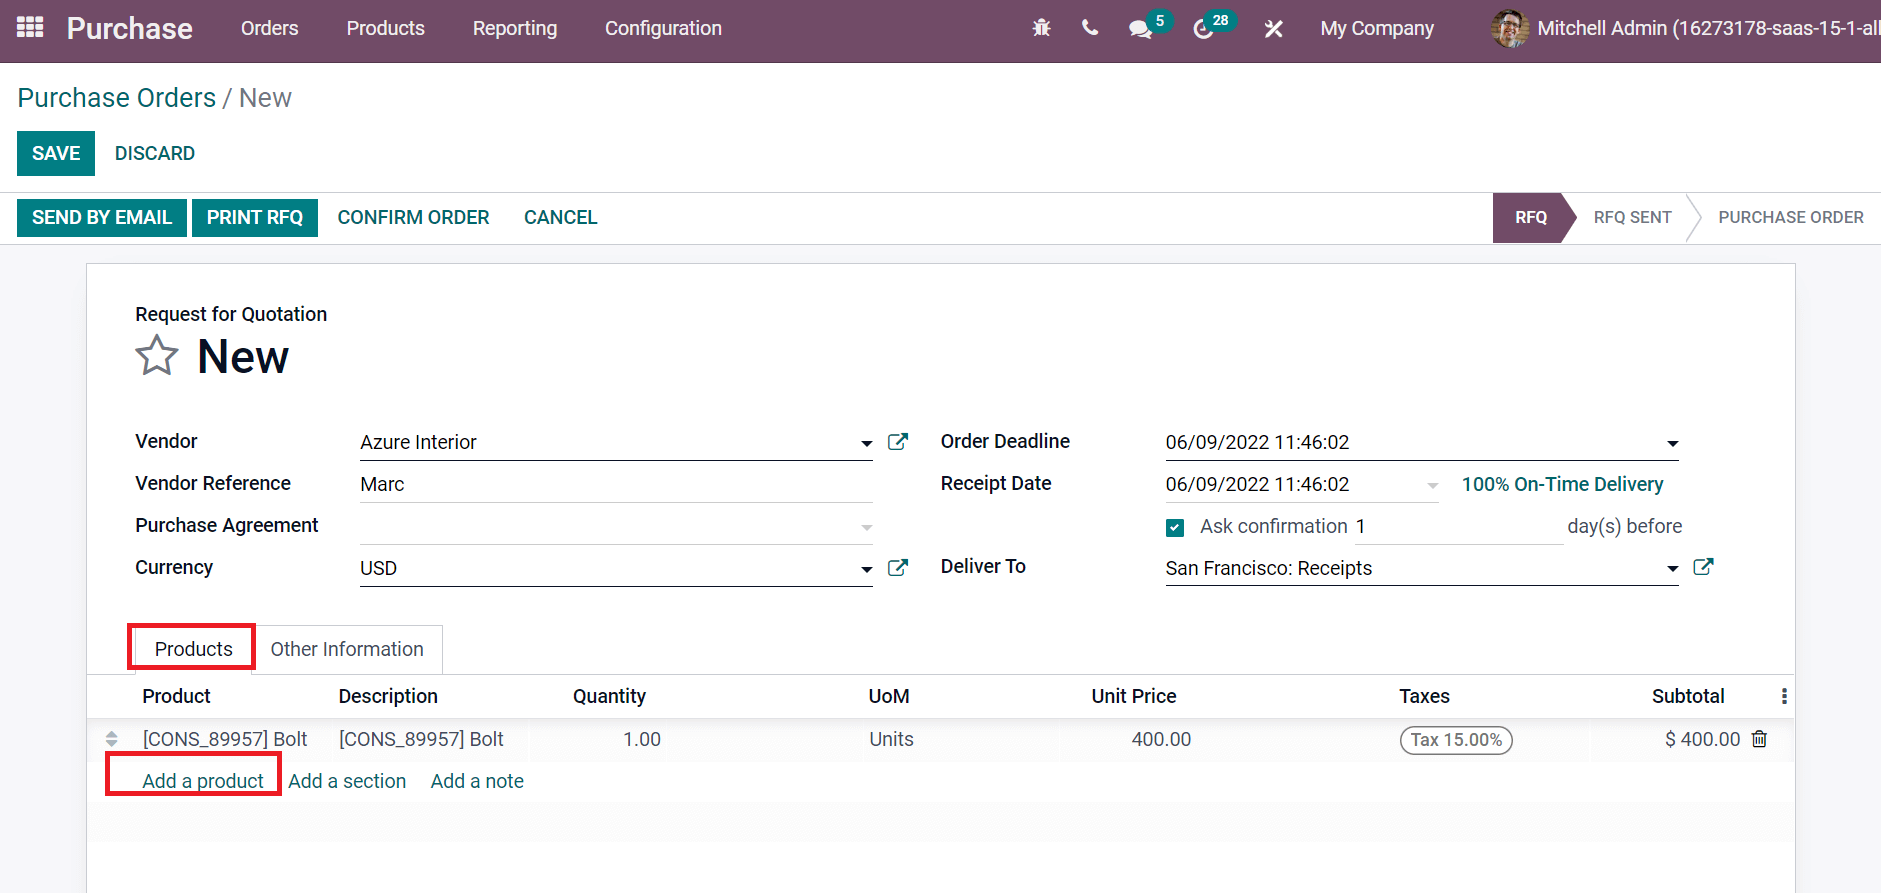
We can decide the operation type of shipment in Deliver To field as in the above screenshot. Click on the Add a product option inside the Products tab to process new material information in a Purchase Order as specified in the screenshot below.
On the Other Information tab, select the Purchase Representative, Company, and document reference in the Source Document field, as portrayed in the screenshot below.
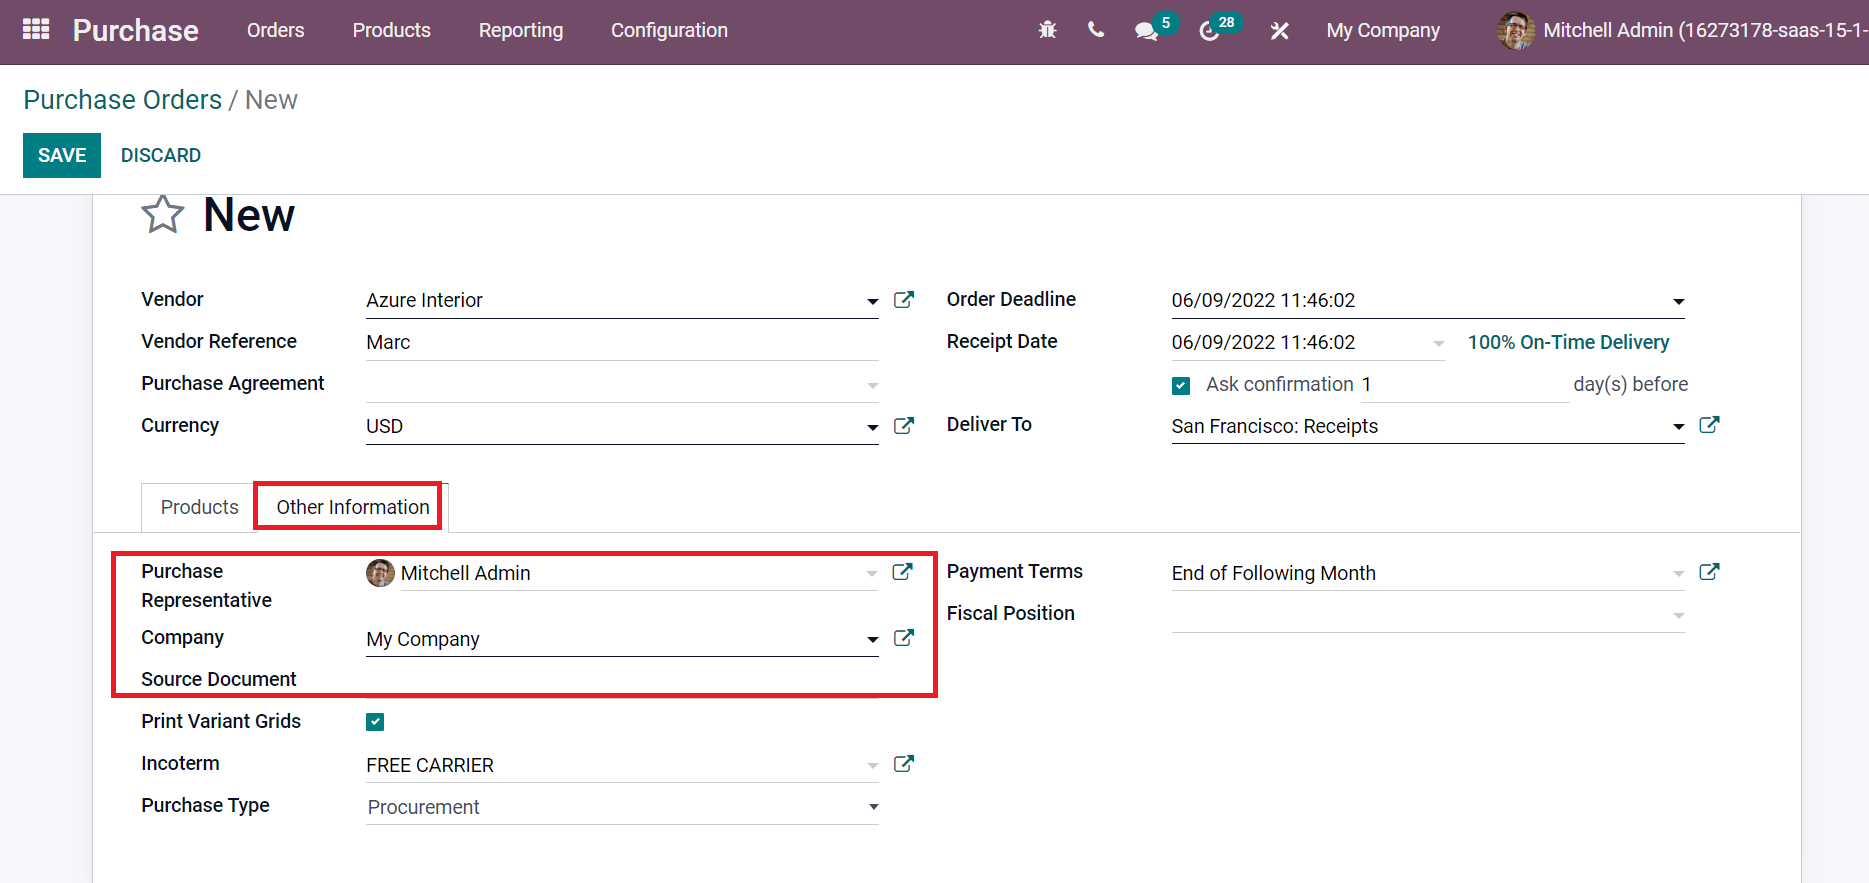
You can see the matrix of configurable products on the report order by enabling the Price Variants Grids option. Later, select the Purchase Type, and your Incoterm is a series of commercial terms usable in international transactions, as illustrated in the screenshot below.
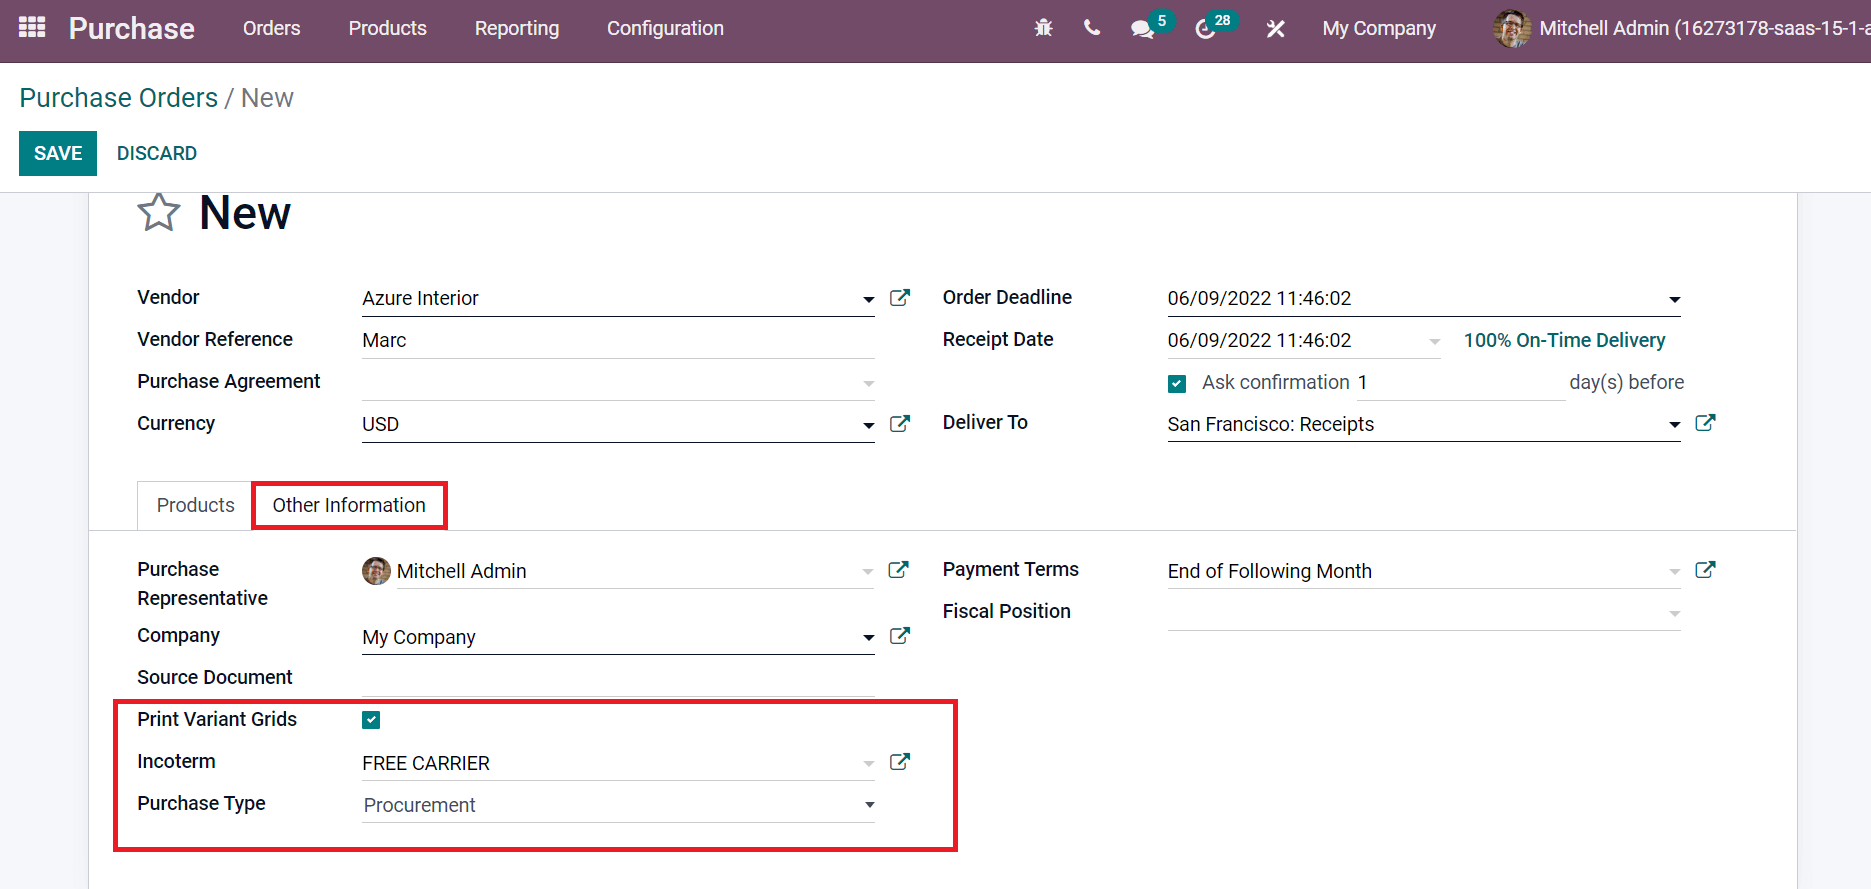
Now, we can enter Payment Terms and Fiscal Position below the Other Information tab, as in the screenshot above.
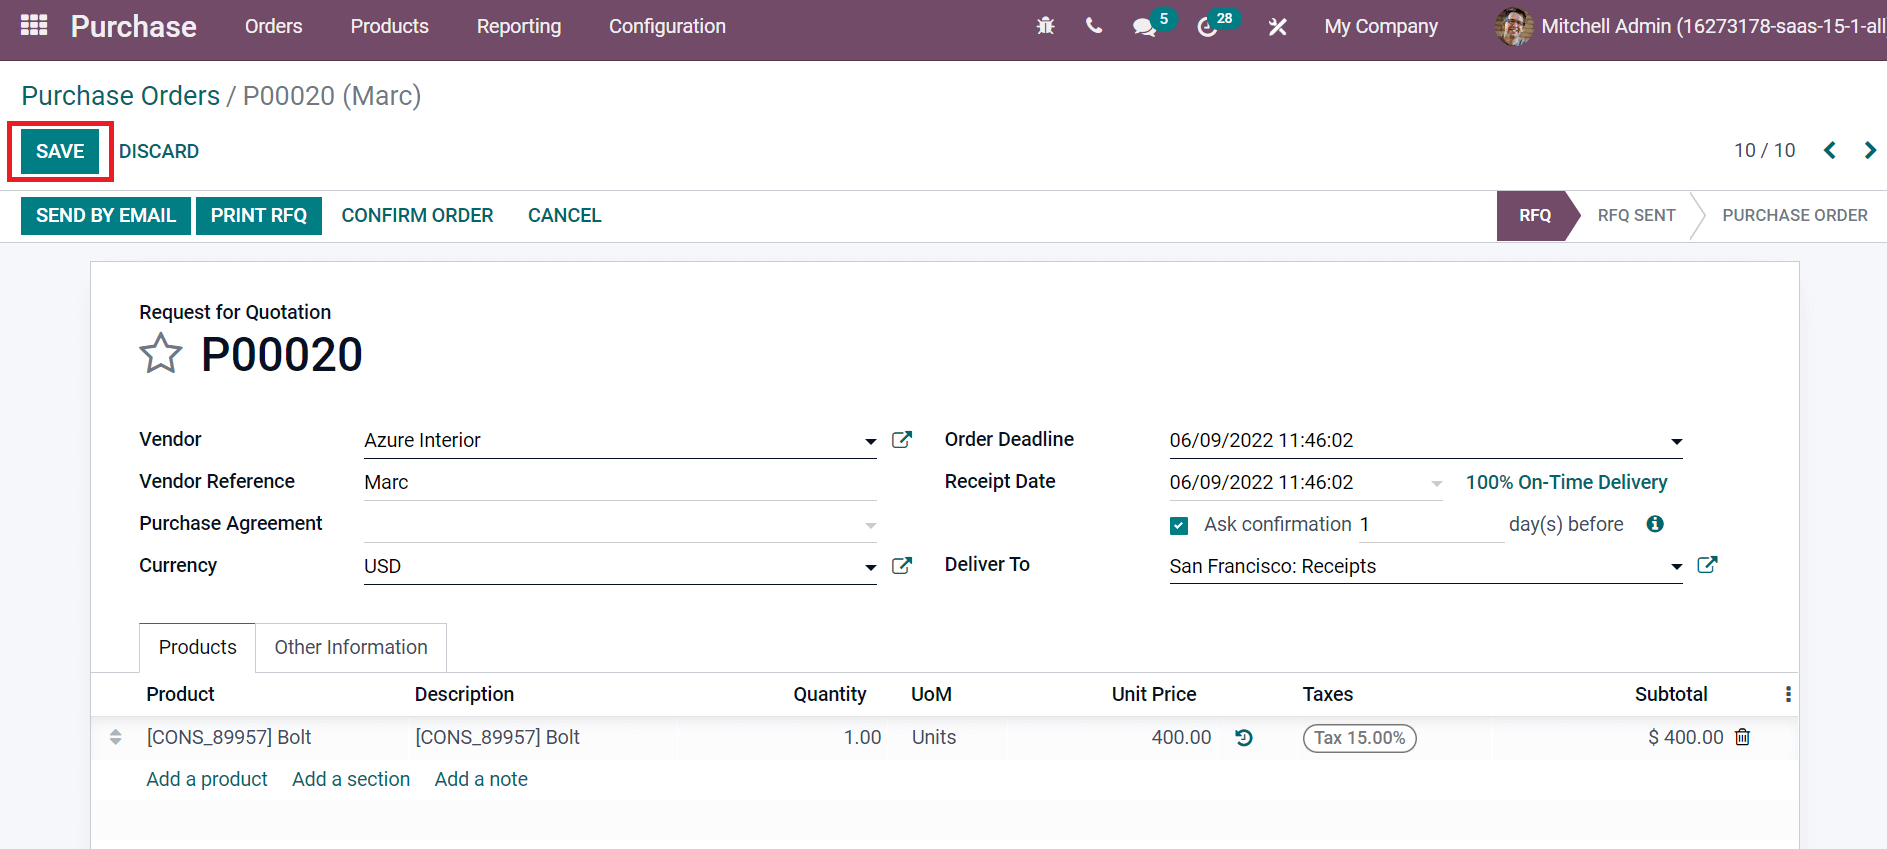
You can proceed with the purchase order by clicking on the SAVE icon as in the above screenshot.
How to Send Email to Customers about Purchase Orders?
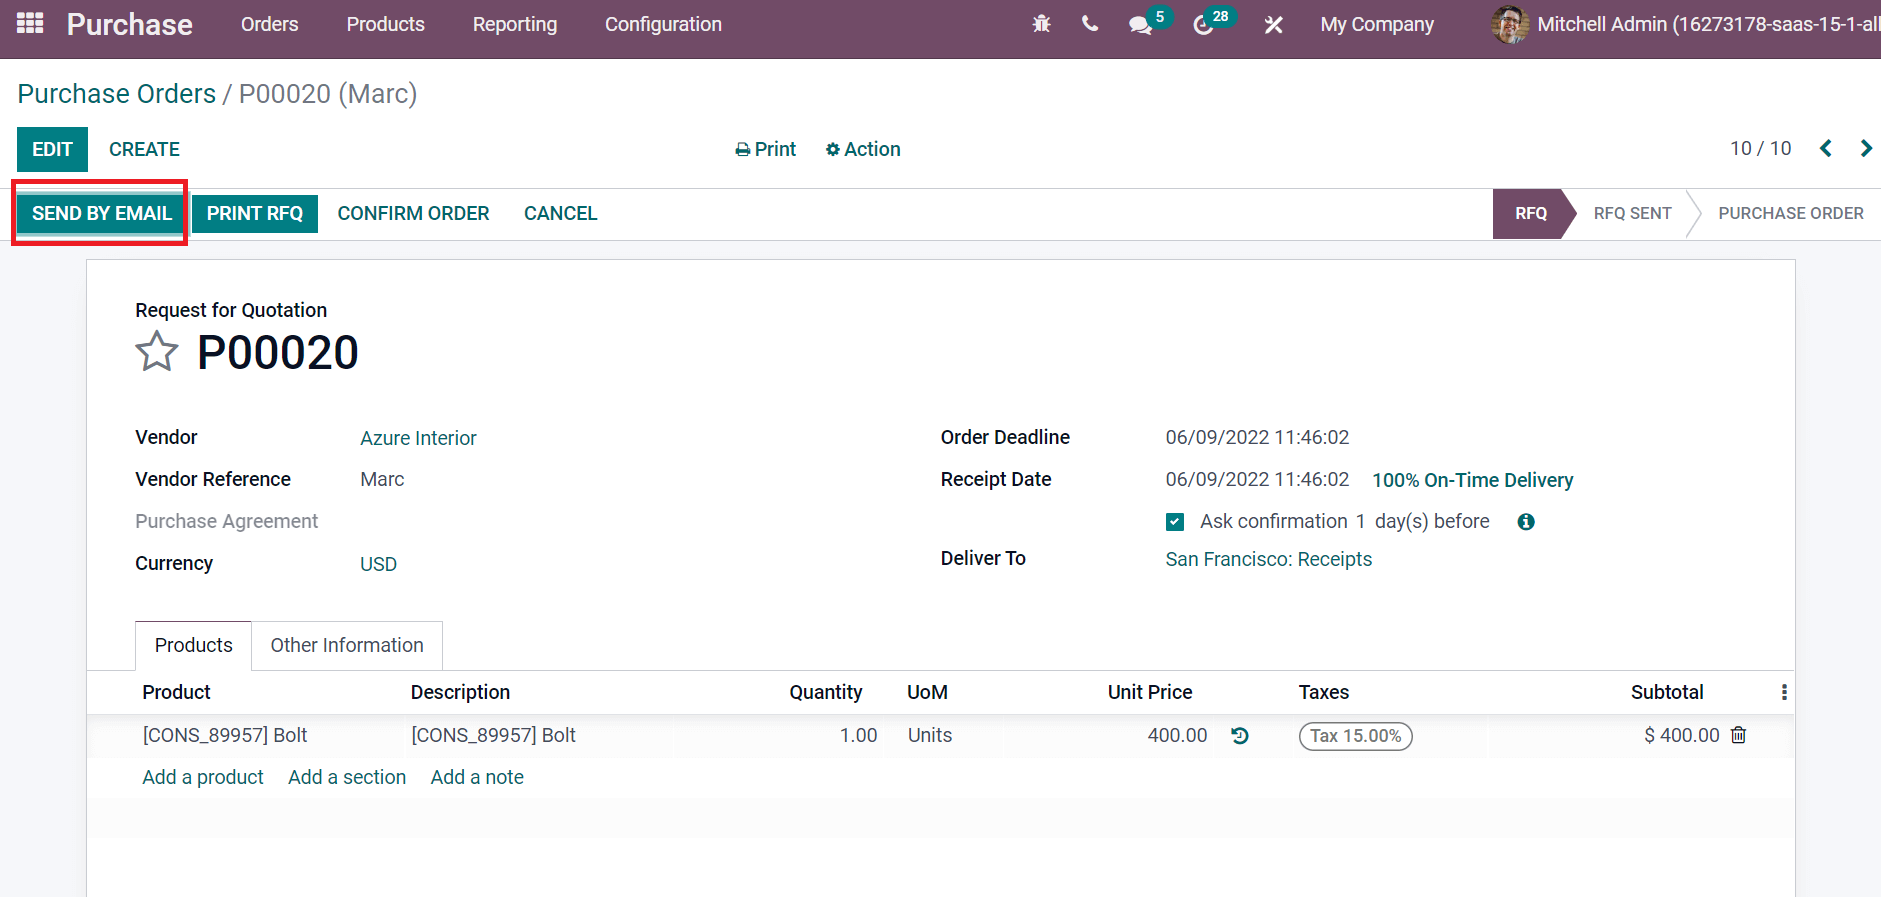
Click the SEND BY EMAIL icon in the Purchase Orders window after saving an order, as depicted in the screenshot below.
In the Compose Email window, add your document followers inside the Recipients field and Subject. You can also choose a template from the Load Template option and click on SEND icon as represented in the screenshot below.
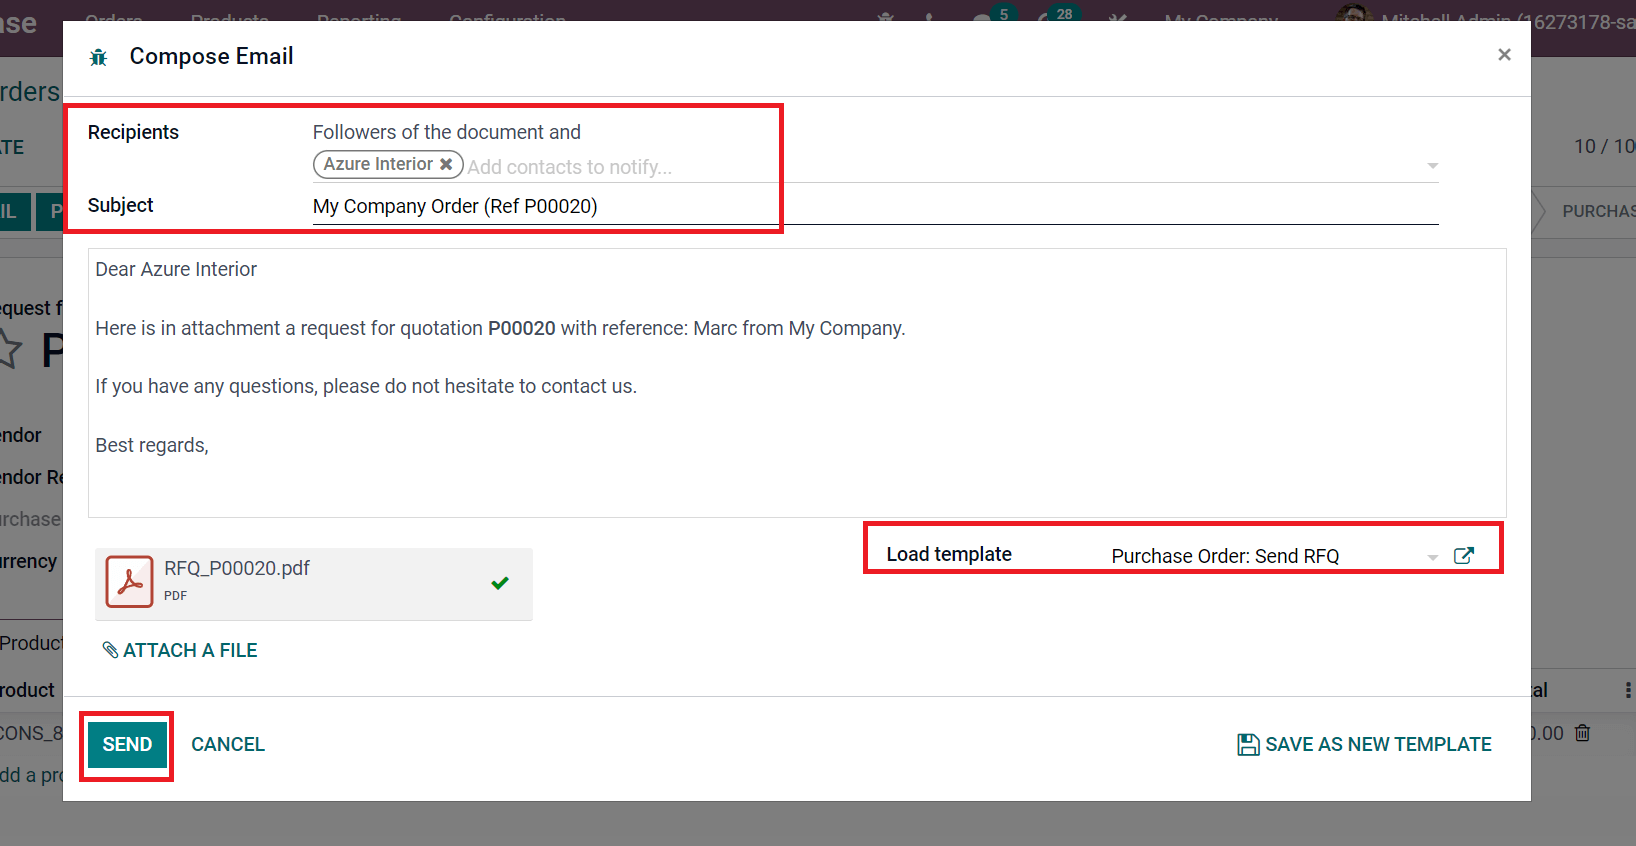
After clicking on SEND icon, we can see that the stage is changed from RFQ to RFQ SENT.
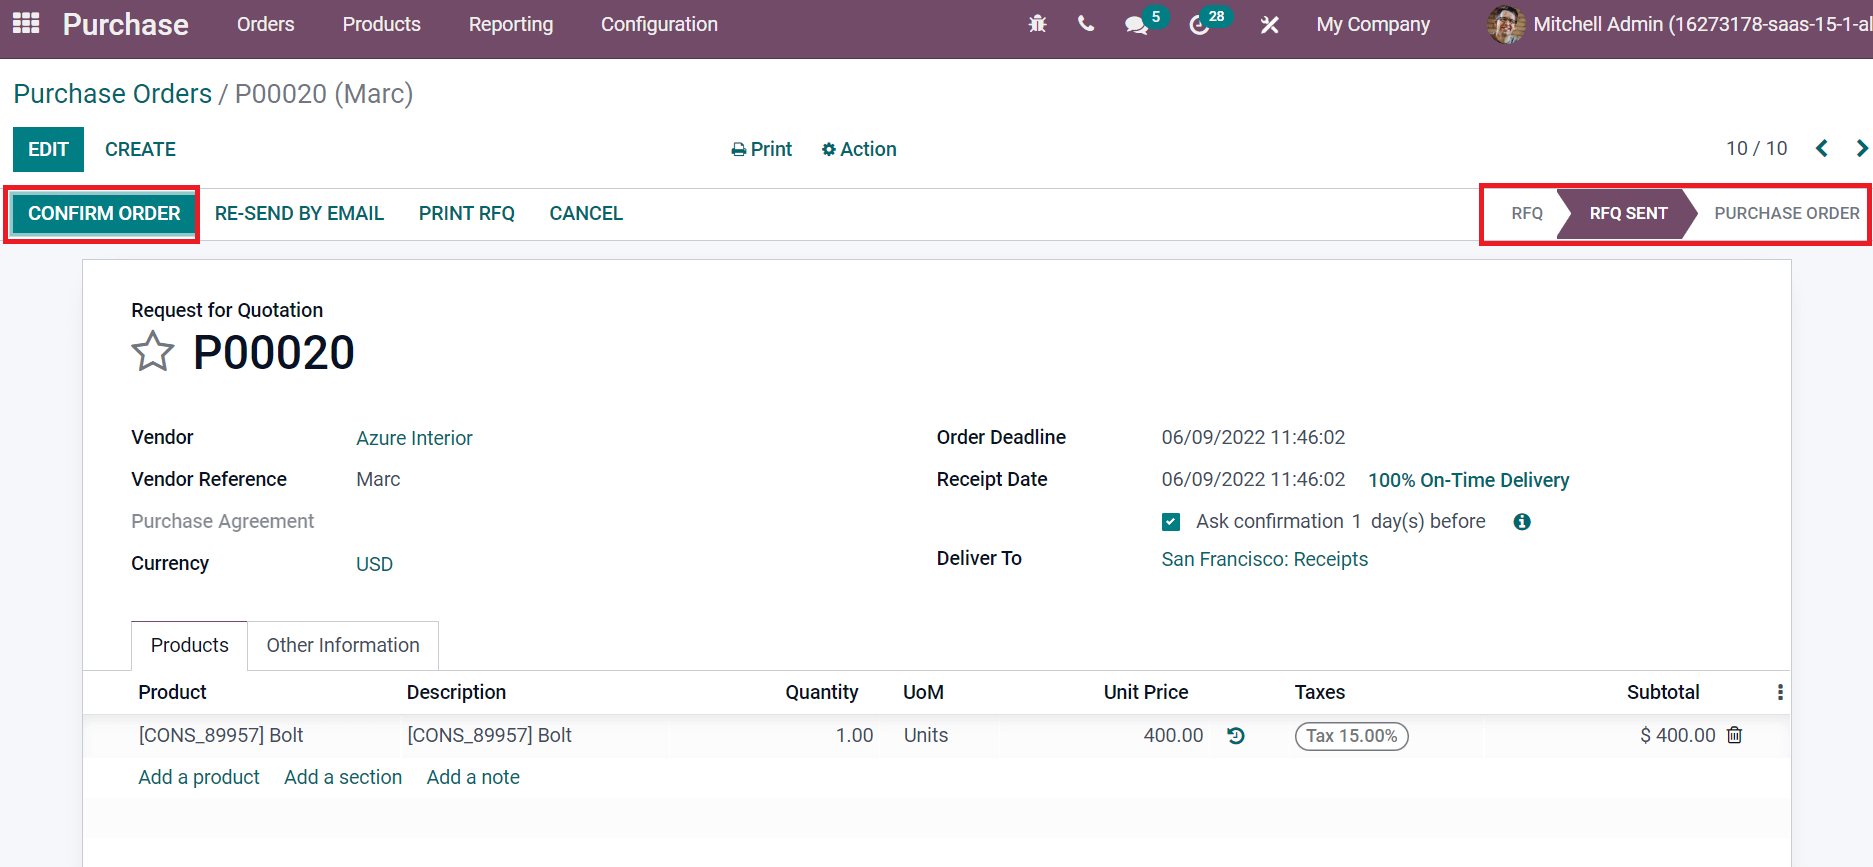
It is easy to confirm the purchase order by selecting CONFIRM ORDER icon. Now, we can generate bills and other processes by moving into the Request for Quotations window.
Request For Quotations
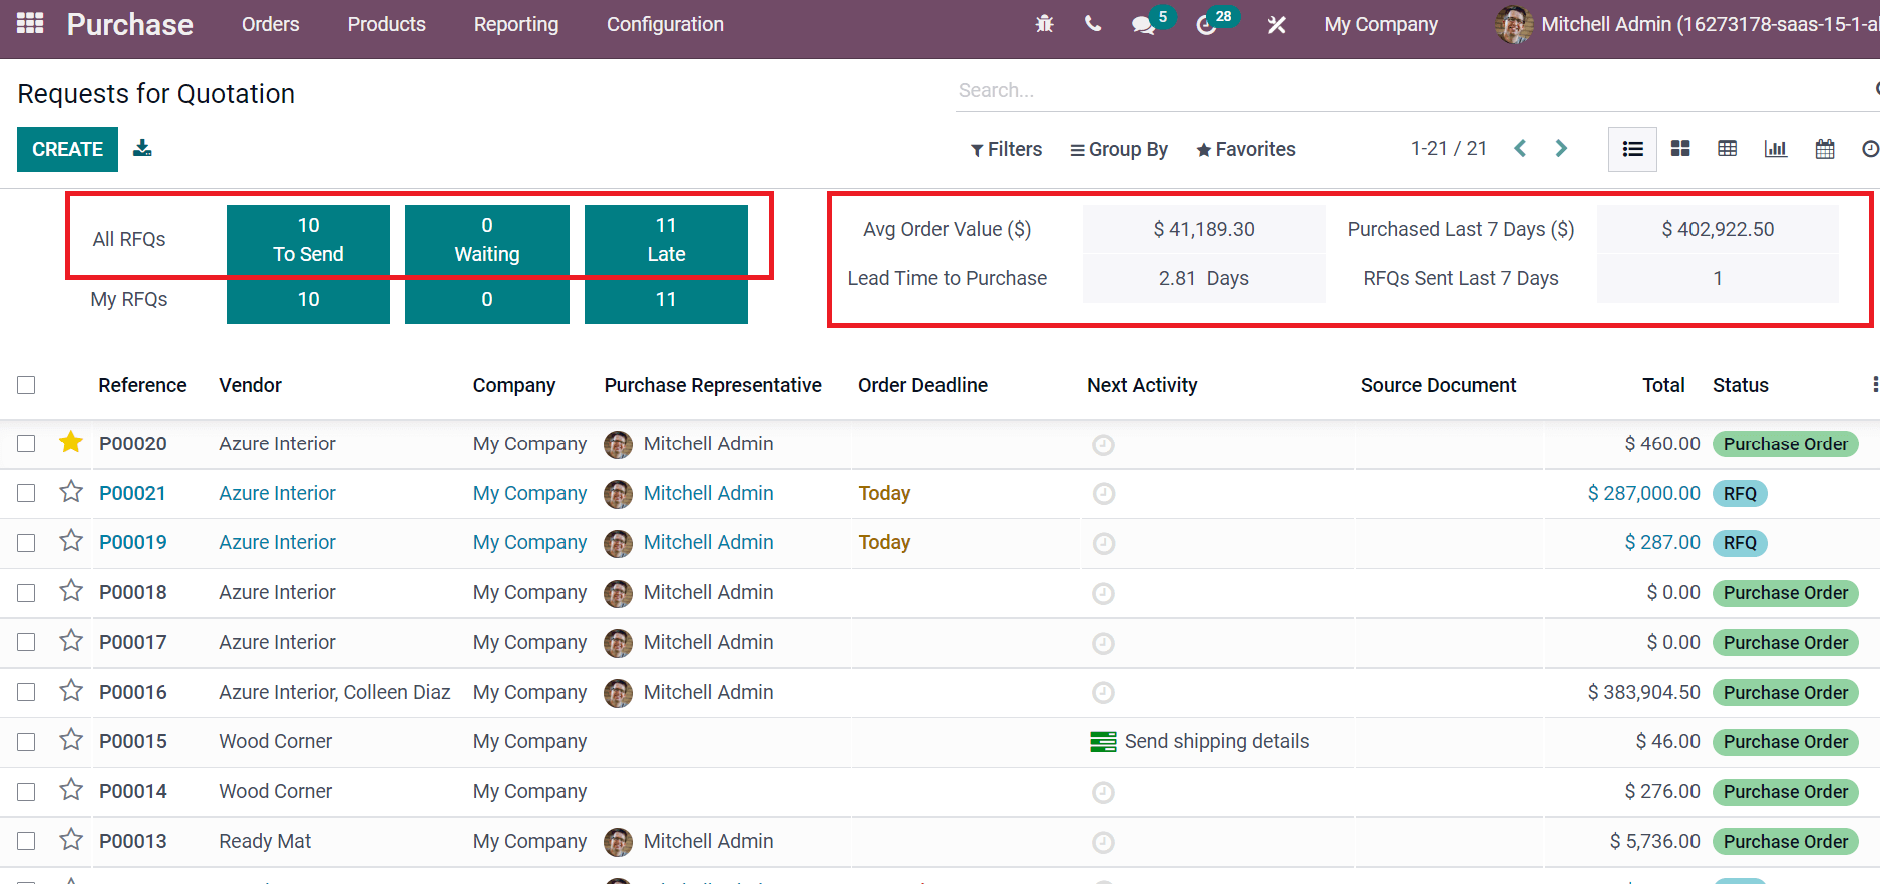
Select the Request for Quotations menu from the Orders tab, and we can see the quotation lists of your company. The information about All RFQs, such as To Send, Late, and Waiting, are visible here. In addition, Avg Order Value, Lead Time to Purchase, Purchased Last 7 Days, and RFQs Sent Last Days are viewable in the Requests for Quotations window, as demonstrated in the screenshot below.
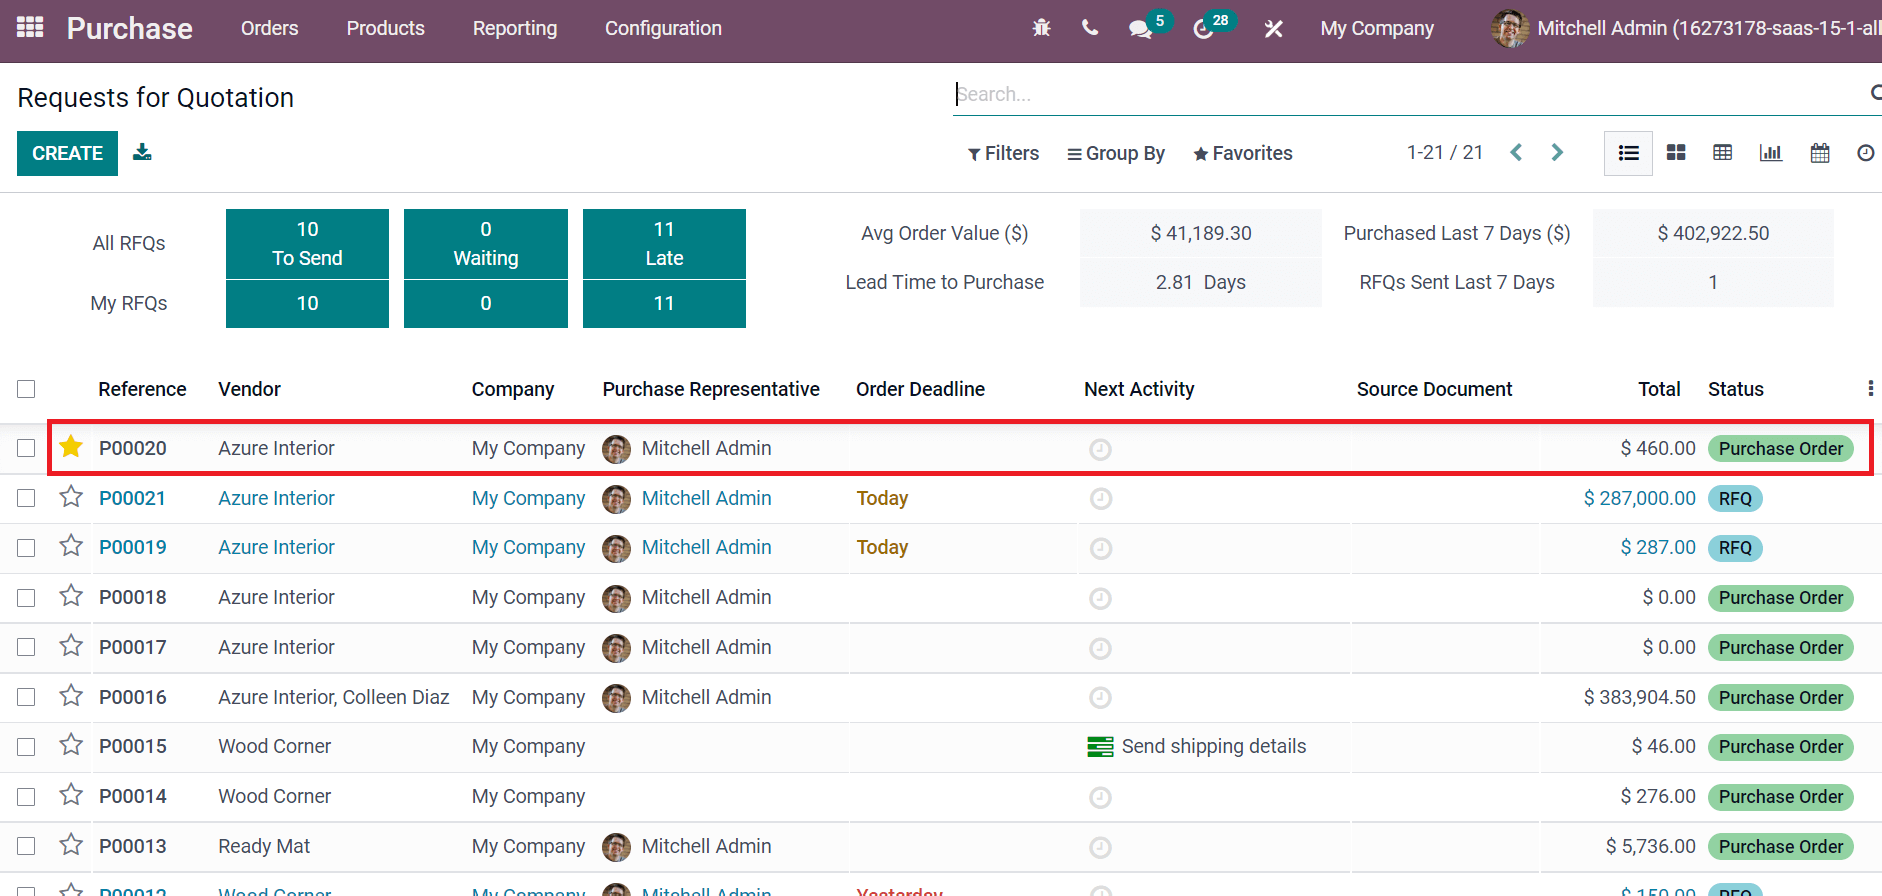
Users can view the created purchase order in the Request for Quotations window, as portrayed in the screenshot.
In the Request for Quotations window, you can see a Receipt smart button, as depicted in the screenshot below.
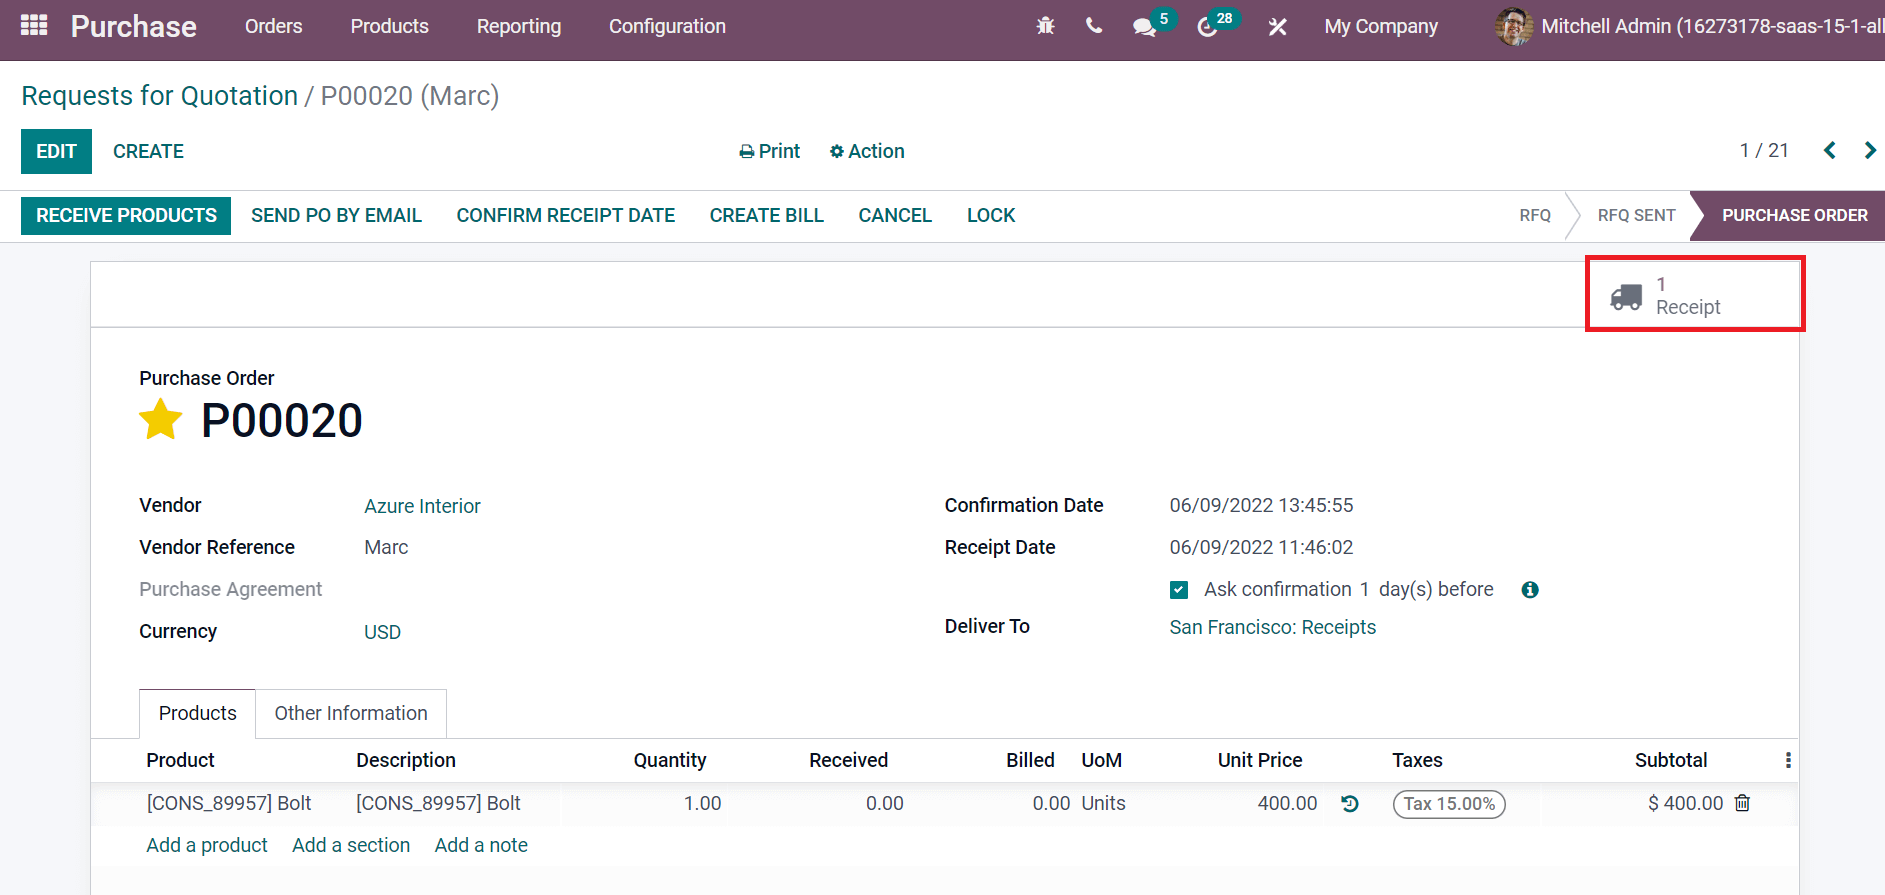
A new page opens before you after selecting the Receipt smart button. You can see information such as Destination Location, Receive From, Deadline, and more. The product details are also depicted inside the Operations tab, as specified in the screenshot below.
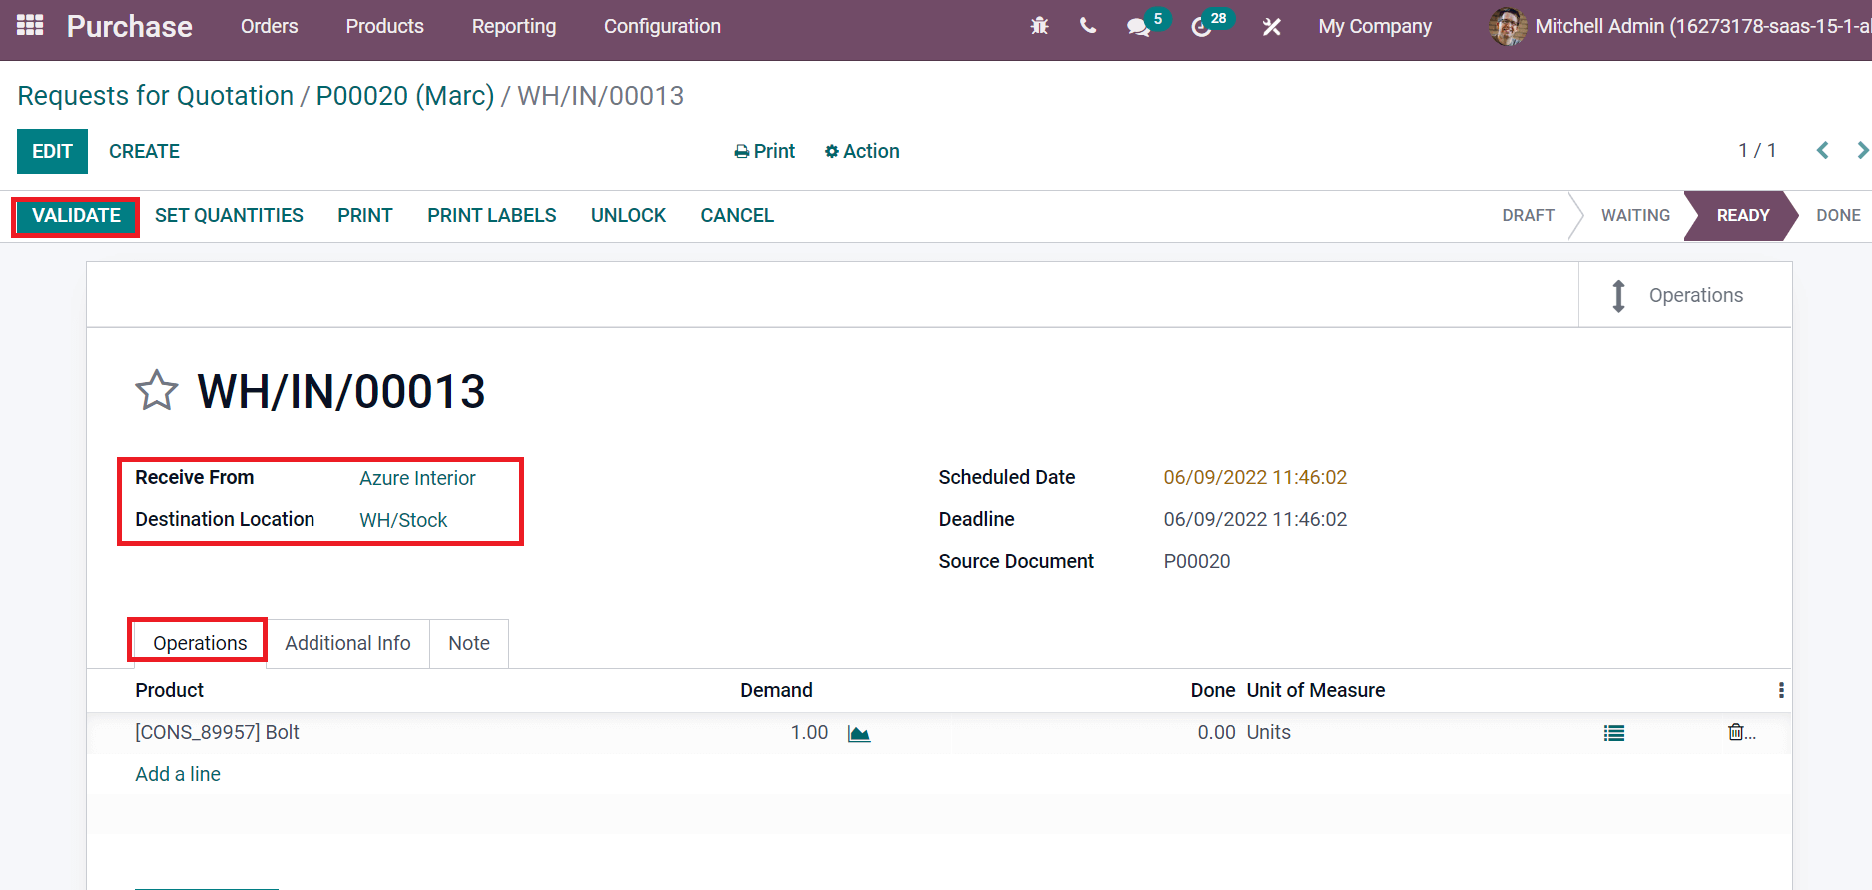
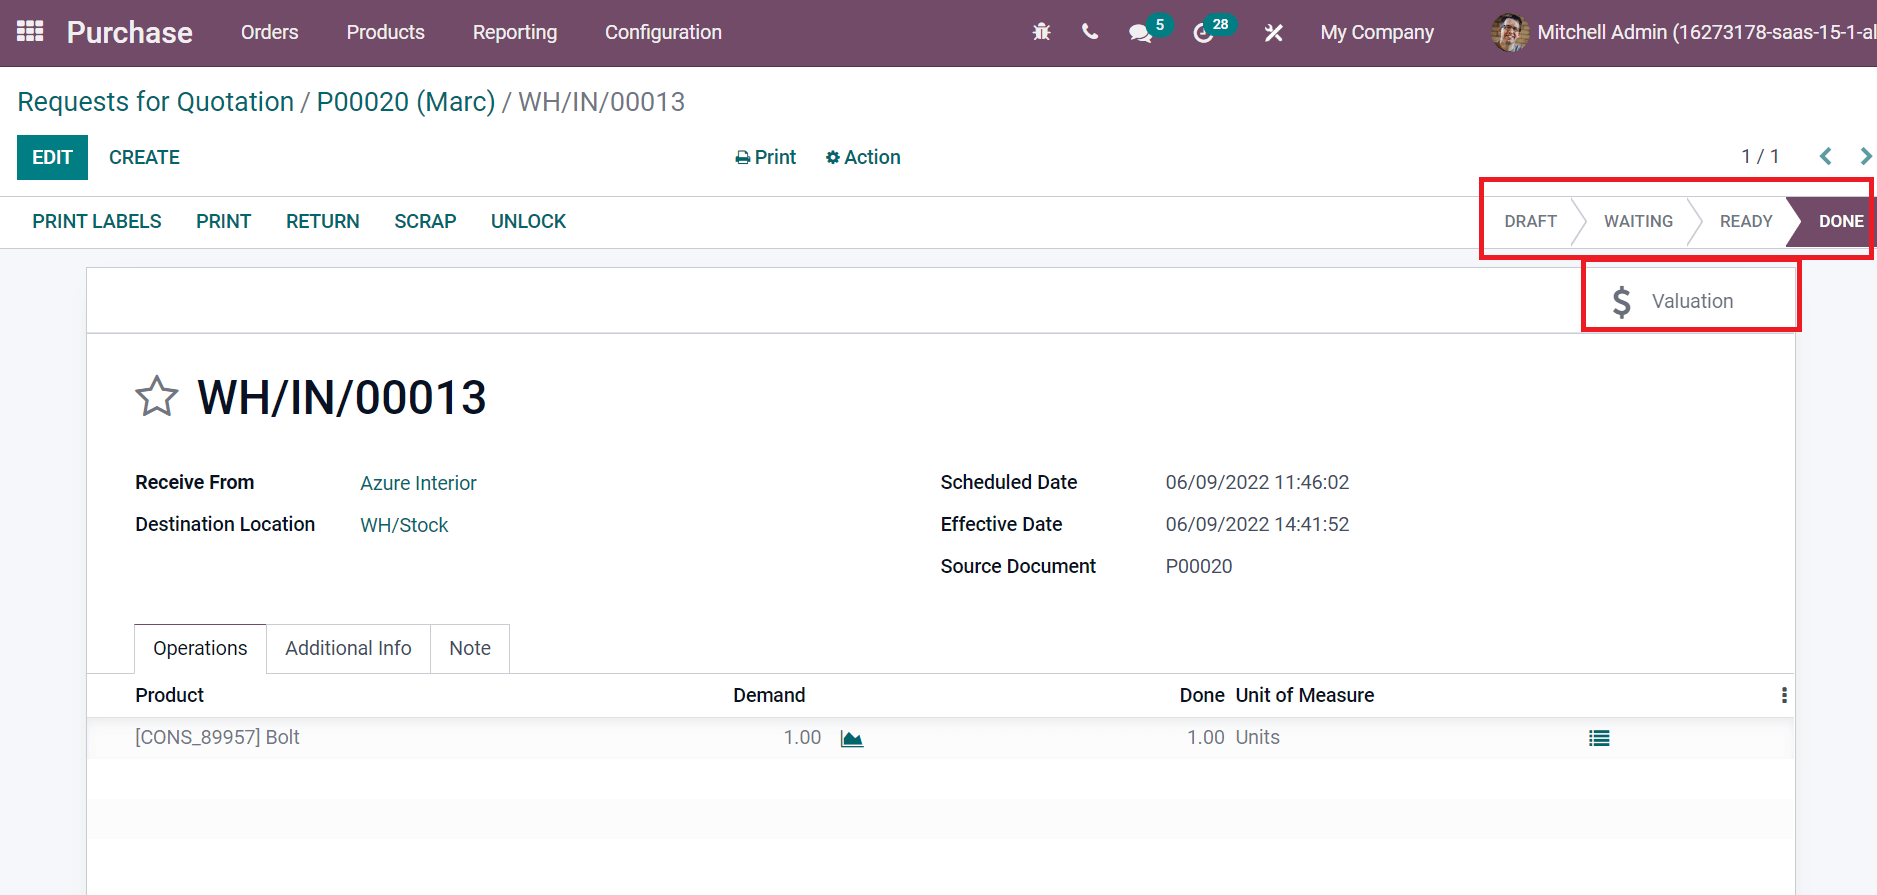
Choose the VALIDATE icon to confirm the receipt of your quotation, as displayed in the above screenshot. After validation, the stage changes from READY to DONE. Users can view the stock valuation by selecting the Valuation smart button, as mentioned in the screenshot below.
Now, we can generate a bill from the quotation window by selecting the CREATE BILL icon.
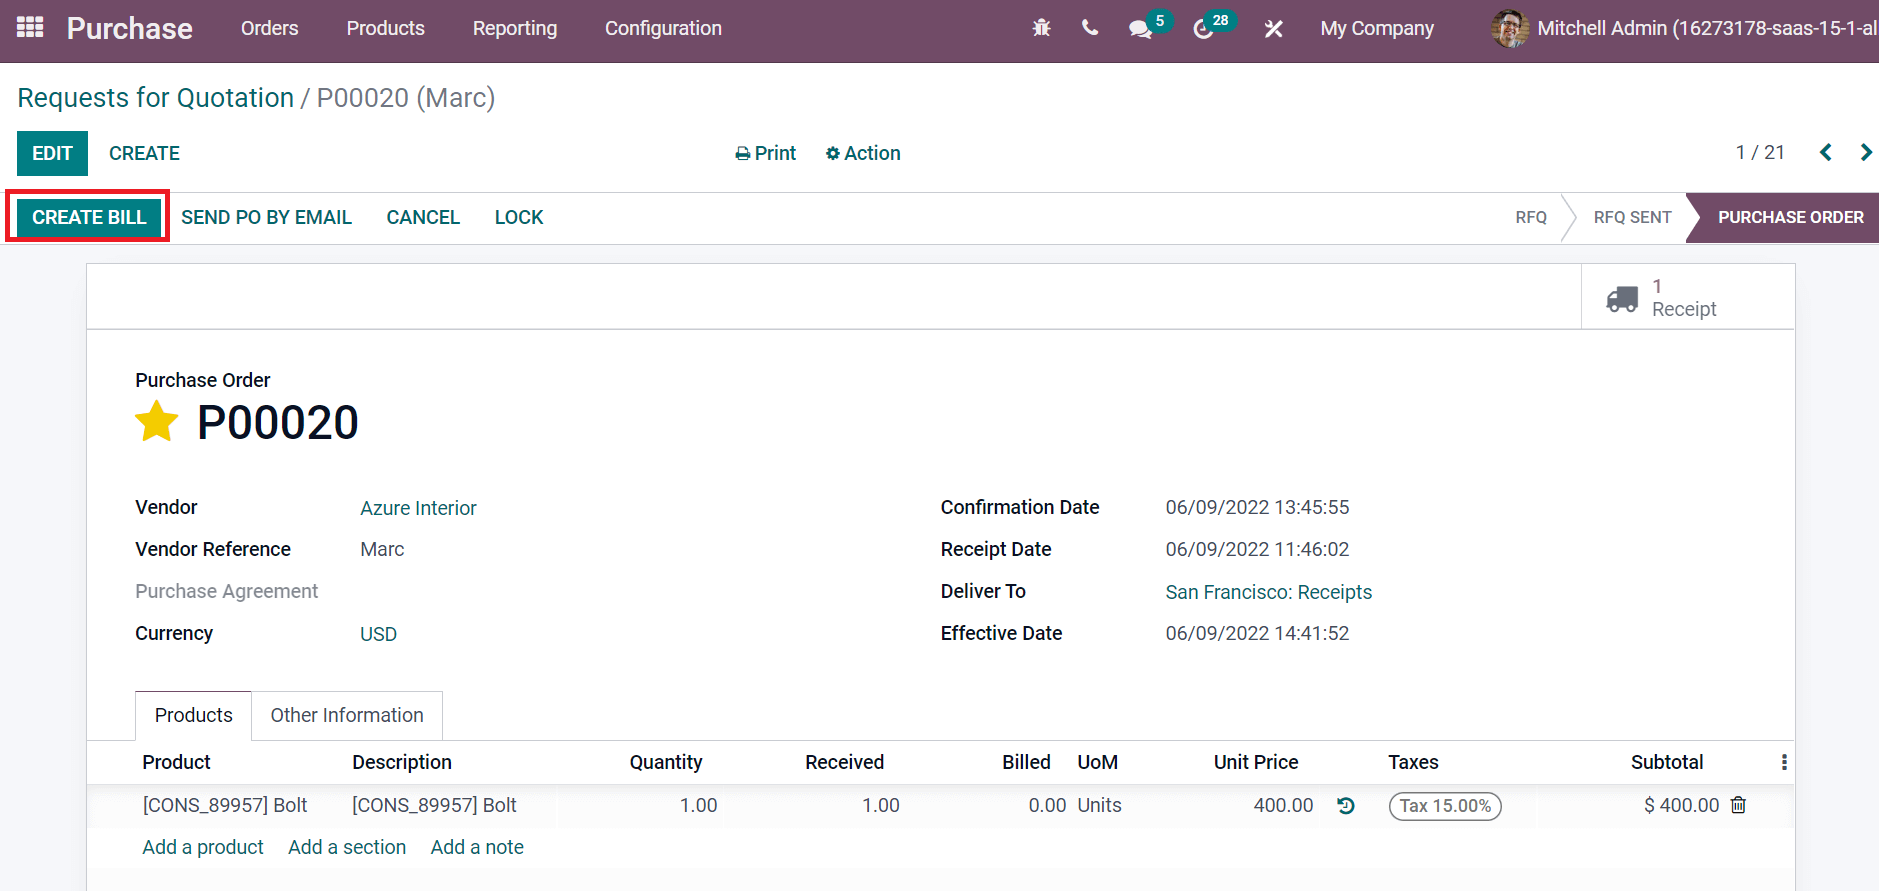
After choosing the CREATE BILL icon, a draft bill is opened before you. We can access Vendor data, Bill references, Journal, Due Date, and other information. Before confirming the Bill, add the Bill Date for your Bill as denoted in the screenshot below.
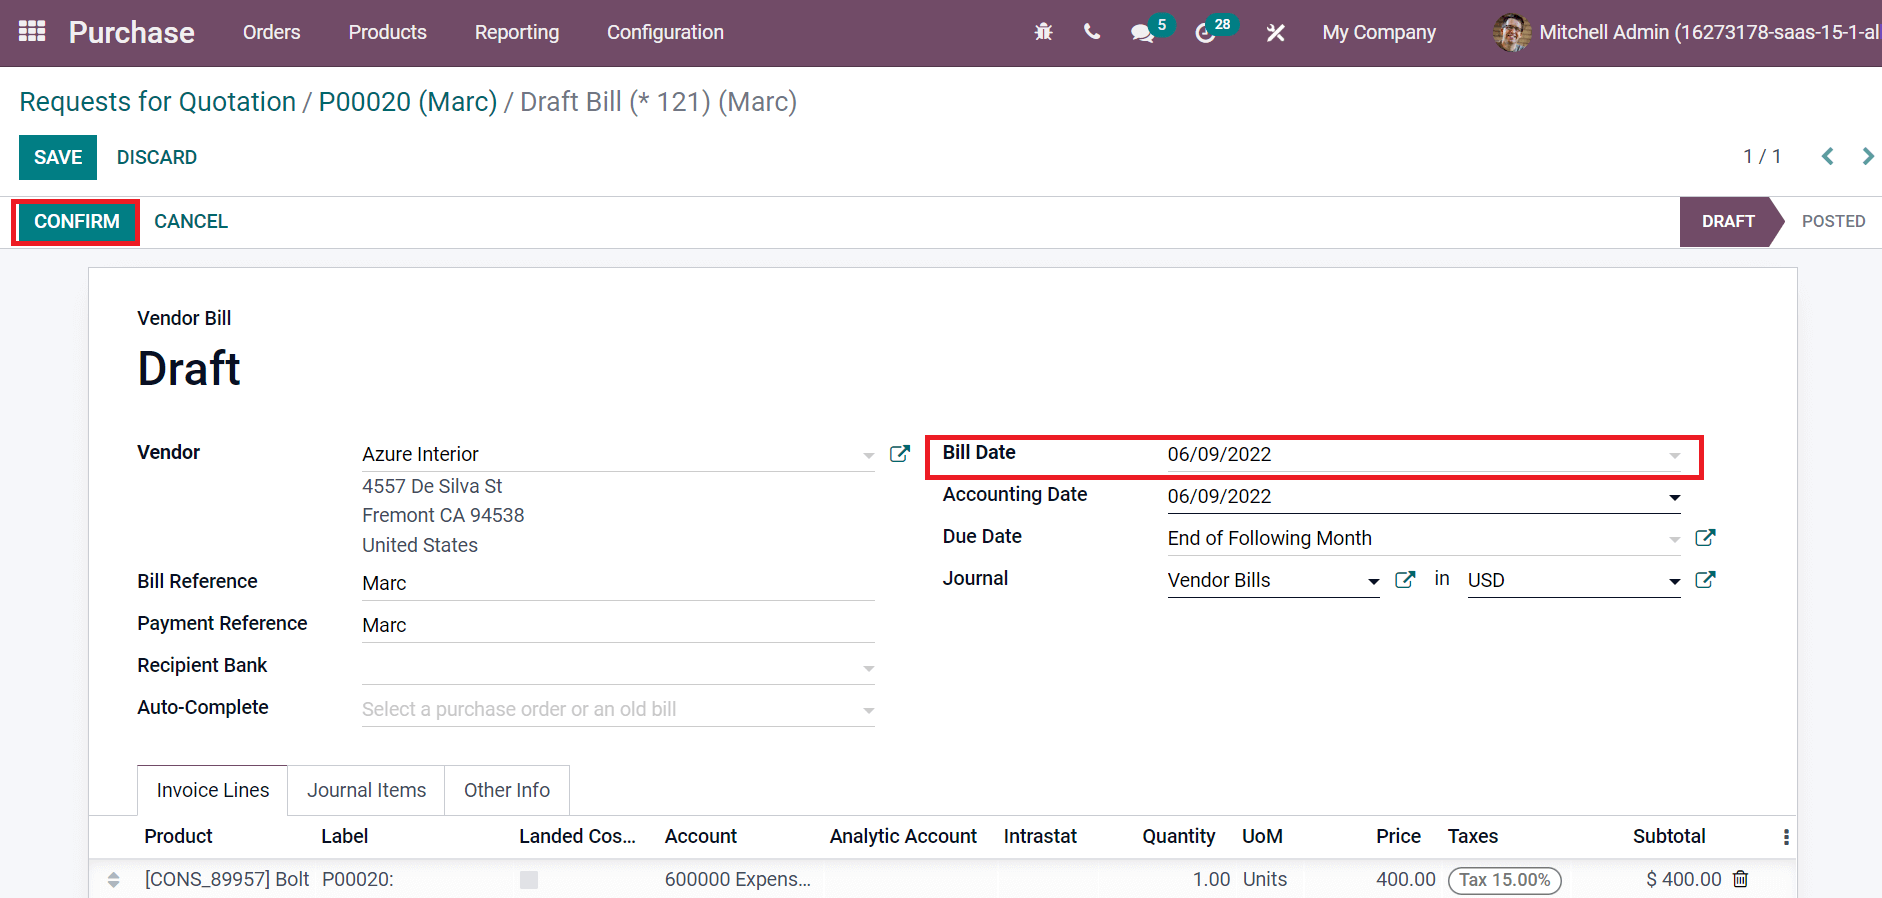
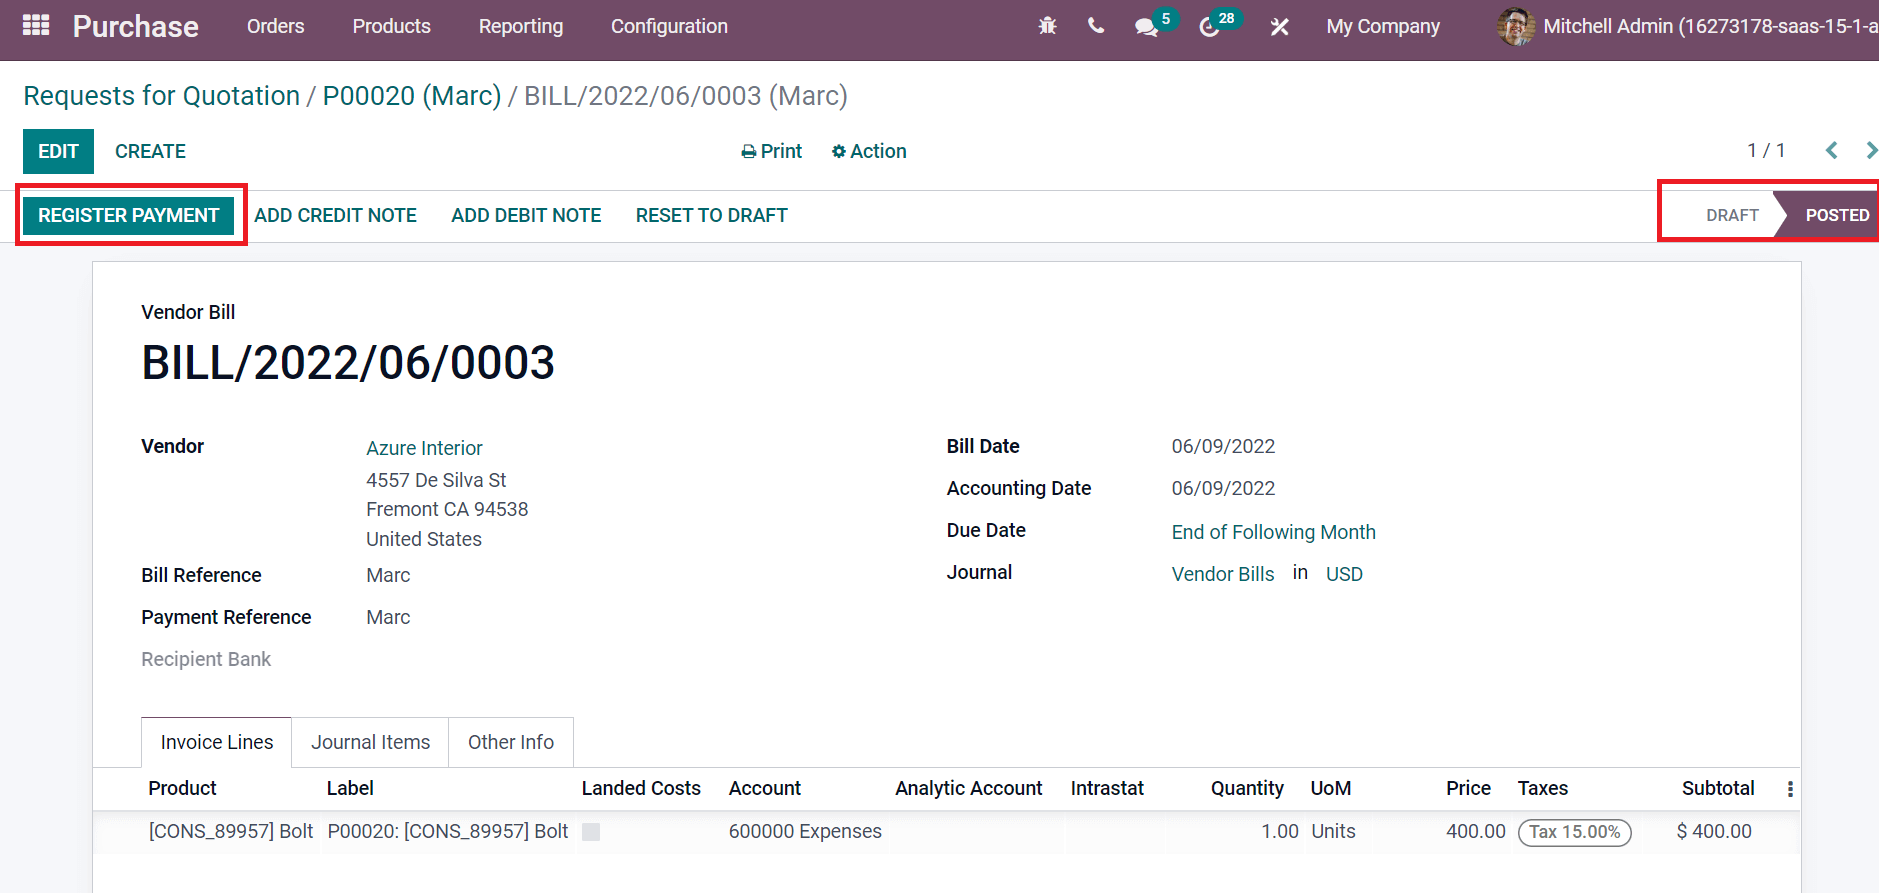
Choose the CONFIRM icon after saving the details in the Draft Bill window. Hence, a vendor bill is generated, and the stage changes from DRAFT to POSTED. Users can make payment by clicking on the REGISTER PAYMENT icon in the Bill window, as illustrated in the screenshot below.
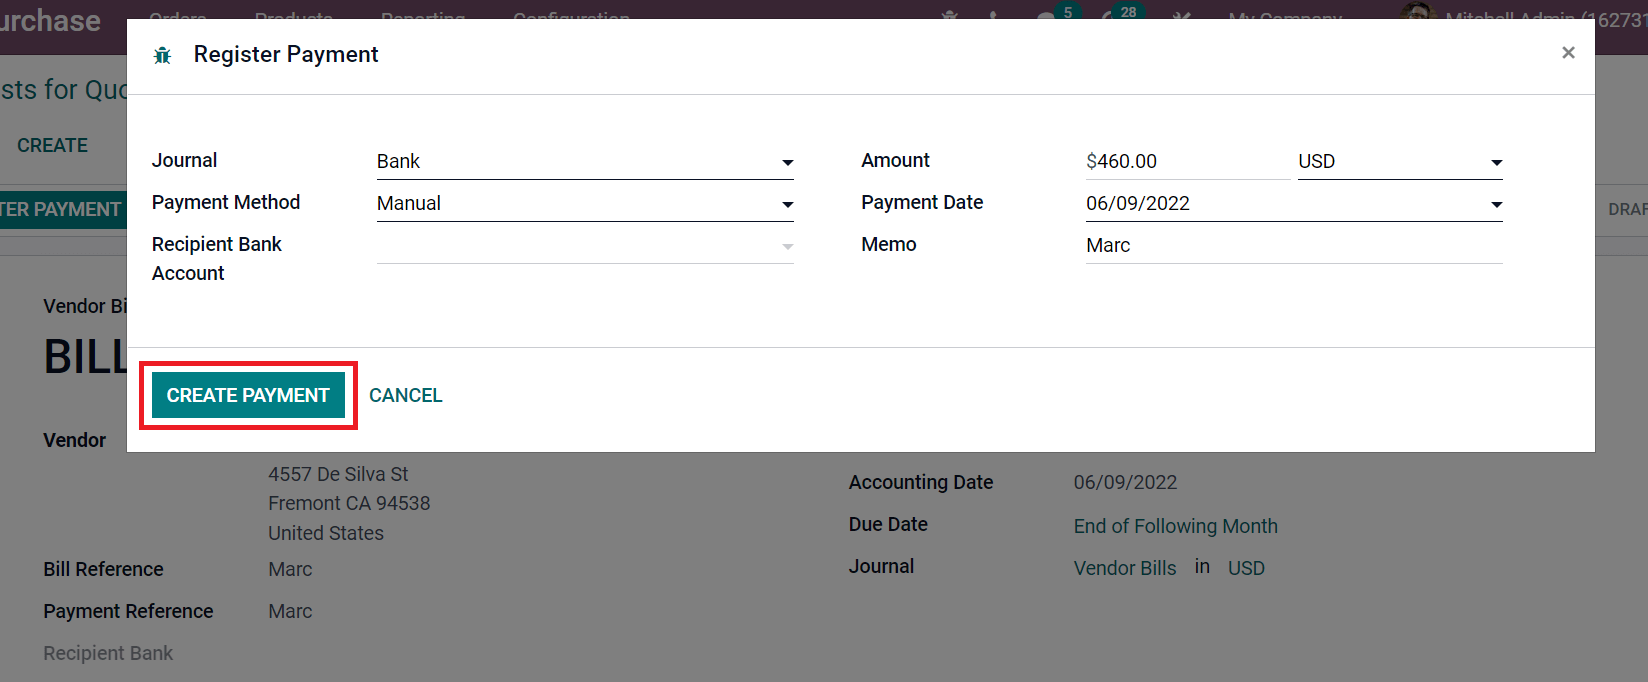
Select your Payment method, Journal, Amount, and Payment Date in the new Register Payment window. Next, click on CREATE PAYMENT icon in the Register Payment window.
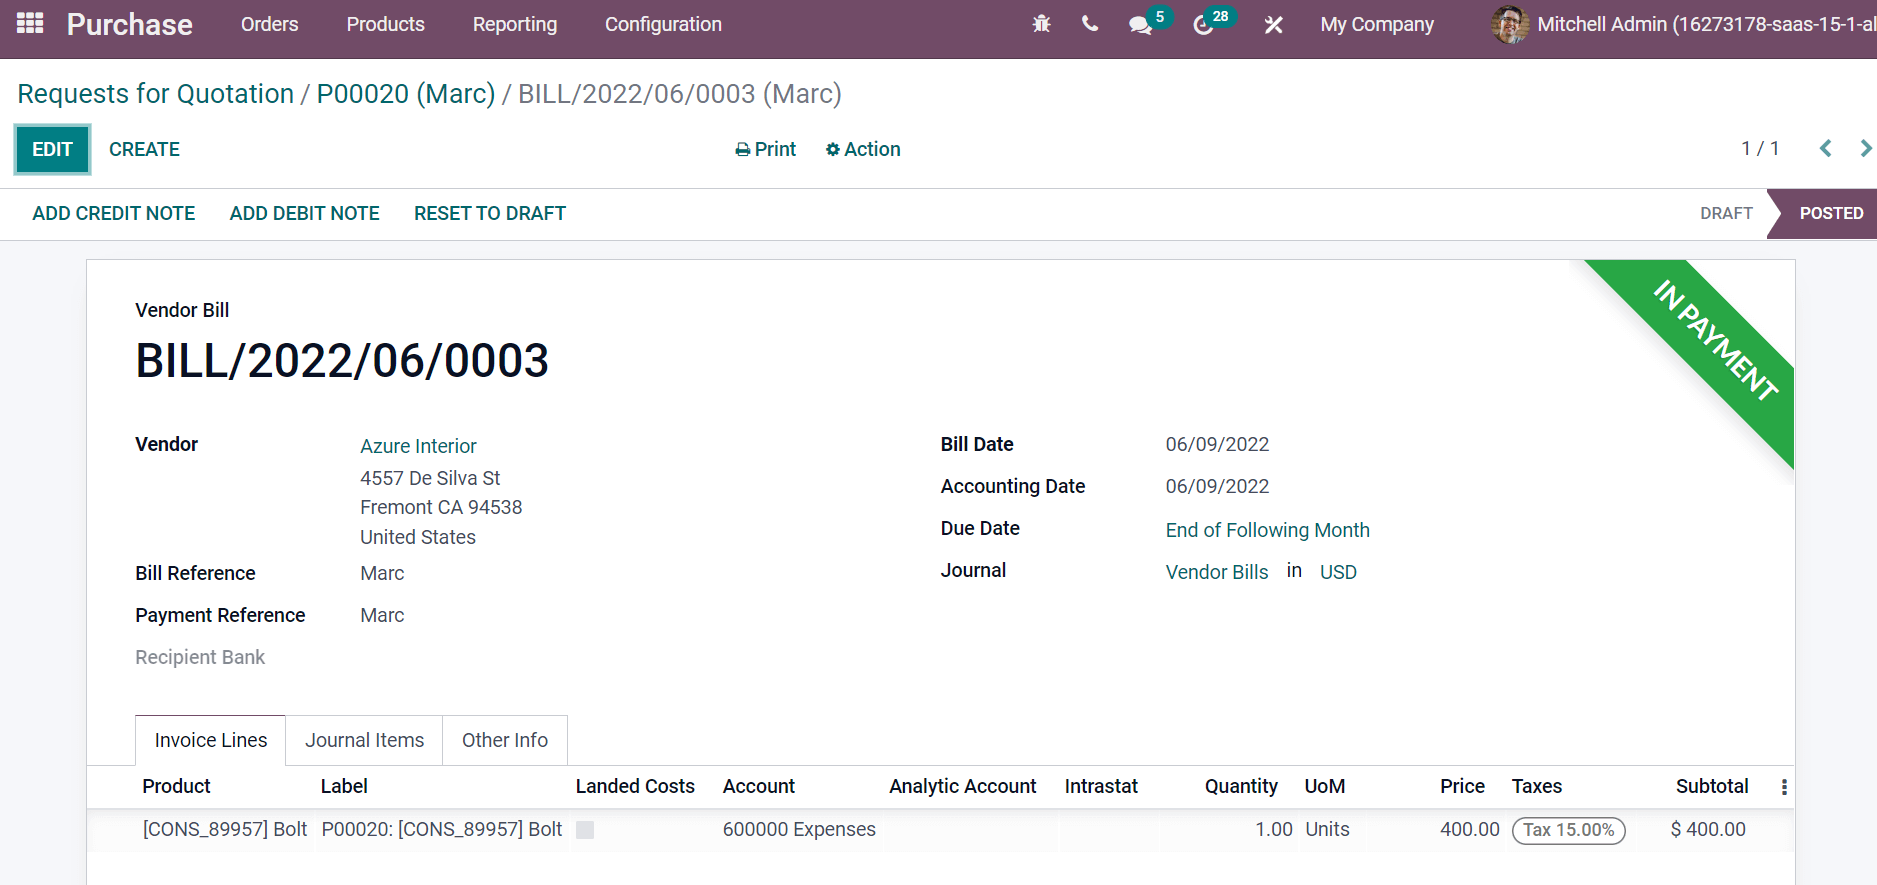
Payment is completed, and a green line of IN PAYMENT is viewable in the Vendor Bill window.
Users can quickly generate purchase orders and request for quotations within Odoo 15 Purchase module. It is easy to develop a vendor bill for your purchase order in a company and make payments using an Odoo ERP. Refer to the following link to identify about Odoo 15 Purchase module: https://www.cybrosys.com/blog/how-to-create-purchase-order-in-odoo-15-purchase-module