Contact management becomes difficult for a business due to the many contacts. One of the integral parts of entrepreneurship is secure contact information for future references. We can store all relevant information regarding companies or customers with the support of ERP software. Using the Odoo 16 Contacts module, it is possible to gather contacts by applying a filter and developing facts concerning a new customer. The administration of localization, bank accounts, and tags associated with contacts is secure efficiently in Odoo 16 Contacts window.
This blog analyzes the Configuration feature in the Odoo 16 Contacts module.
One of the vital peculiarities in the Odoo Contacts module is Configuration. We can generate Bank Accounts, Countries, Contact Titles, Website Tags, Federal States, and other details using the Configuration feature. Let's view information on each menu inside the Configuration tab separately.
Contact Tags
A tag regarding the specific contact information of a customer is a contact tag. When creating a new contact, we can apply particular tags concerning the job position of a customer or a firm in the Odoo 16 Contacts module. Select the Contact Tags menu in the Configuration tab, and the list of all created tags will be viewable to you. Users can see each tag's information separately, such as Display Name and Color, as defined in the screenshot below.
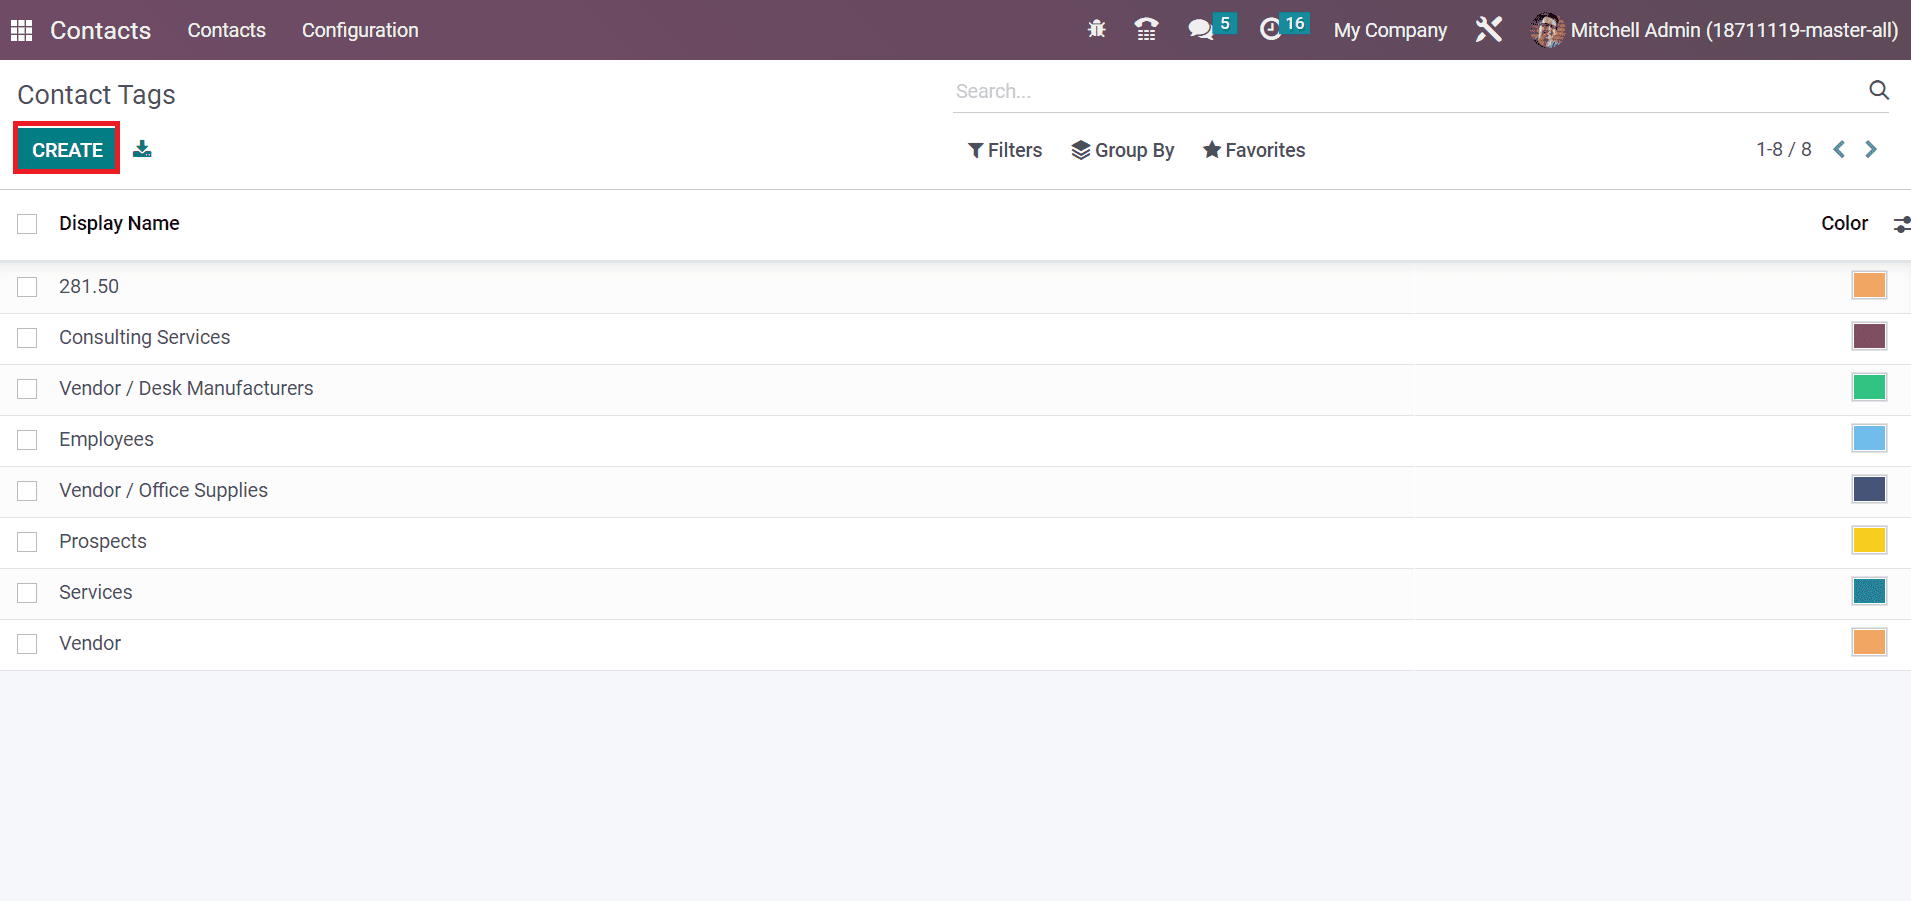
Choose the CREATE icon to formulate a new Contact Tag for a customer, as defined in the screenshot above. Users can also apply the tag when creating a further contact. For that, move to the Contacts window and select a specific contact of an individual. Inside the Tag field in the Contacts window, we can apply necessary tags related to a person or company, as marked in the screenshot below.
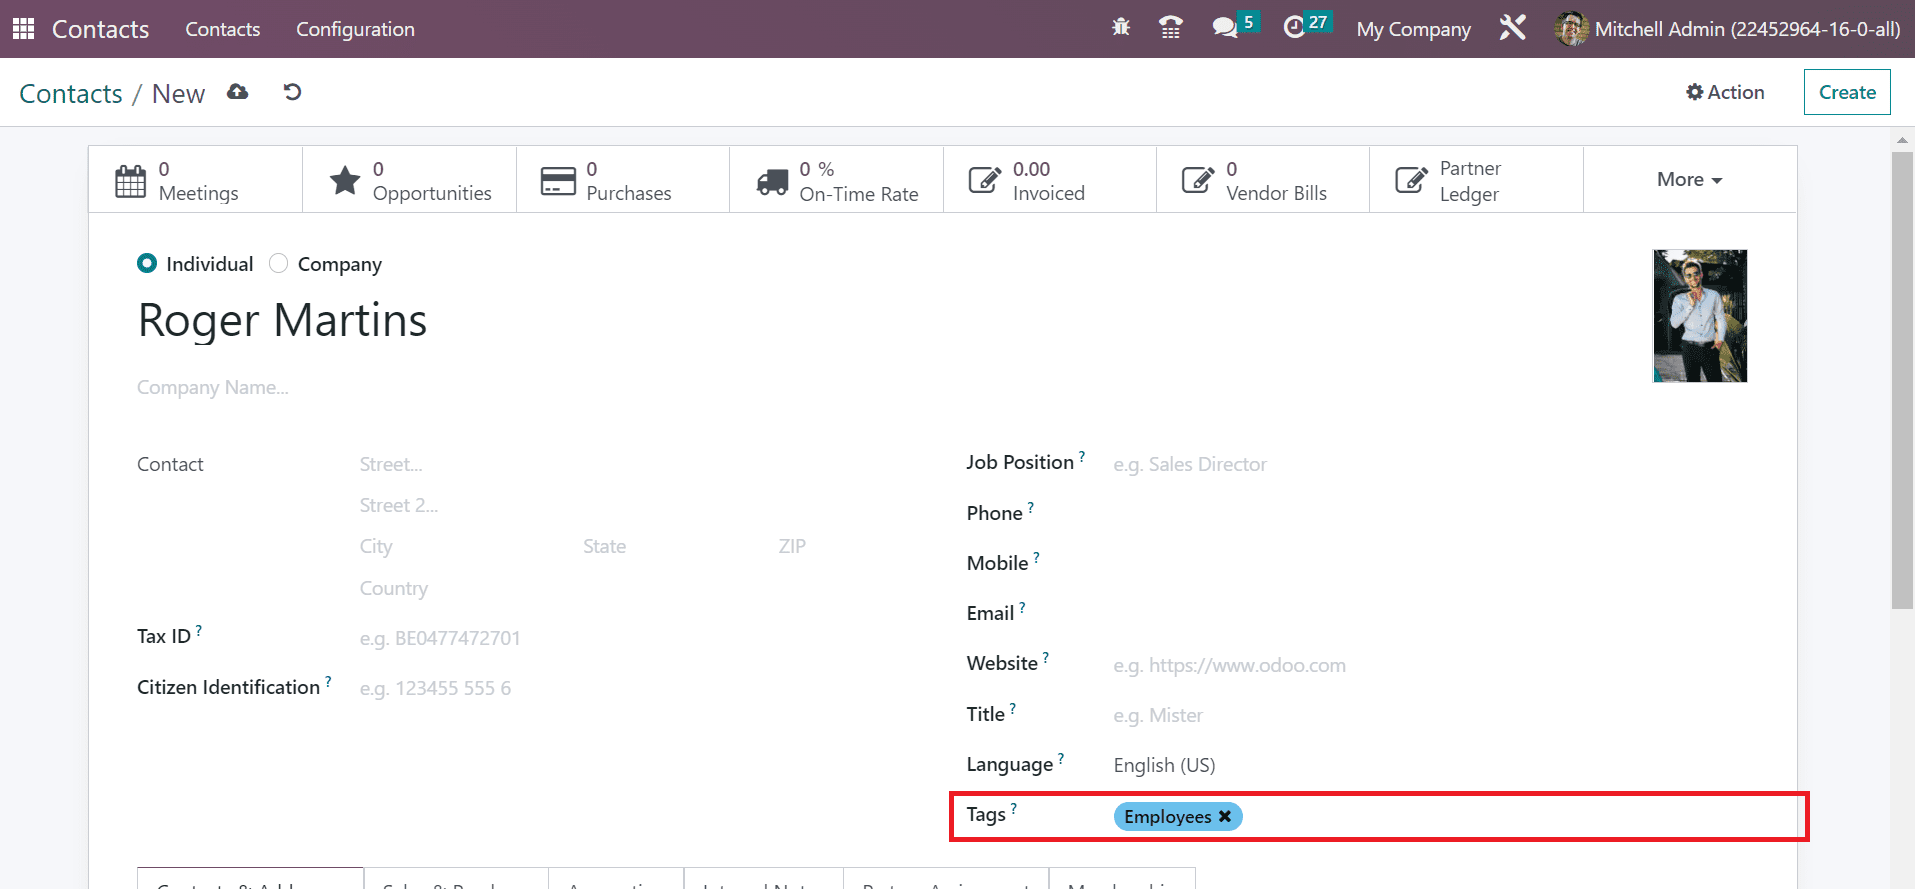
Here, we specify the tag Employees for Roger Martin within the Tags option.
Website Tags
Users can develop tags regarding specific websites using the Website Tags feature in Odoo 16 Contacts module. Choose the Website Tags menu inside Configuration, and the record of each website tag is viewable to you. Users can view the details of each website tag, including Category Name, Is Published, and Class, as denoted in the screenshot below.
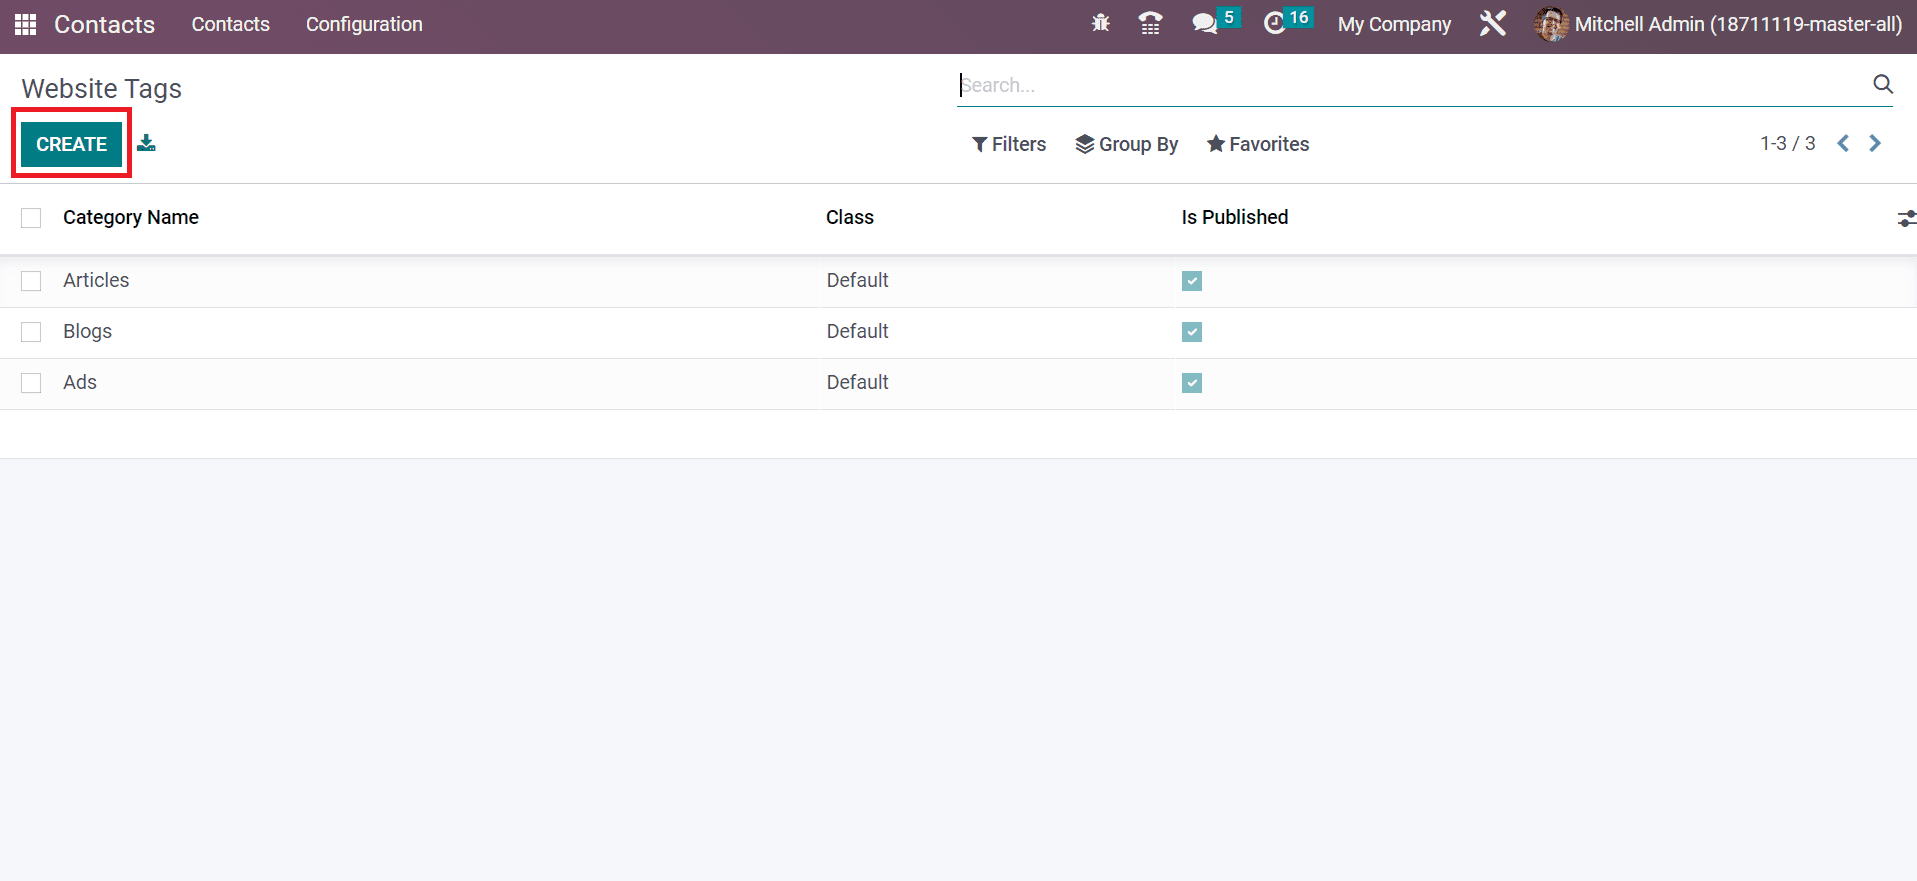
To develop a new Website Tag, click the CREATE icon in the screenshot above. After pressing the CREATE button, we can quickly formulate various website tags for customers.
Contact Titles
A contact title is essential in a business when we communicate with others. It is possible to call an individual as per the designation as a contact title. Choose the Contact Titles menu in the Configuration, and the list of created titles is viewable to you, as portrayed in the screenshot below.
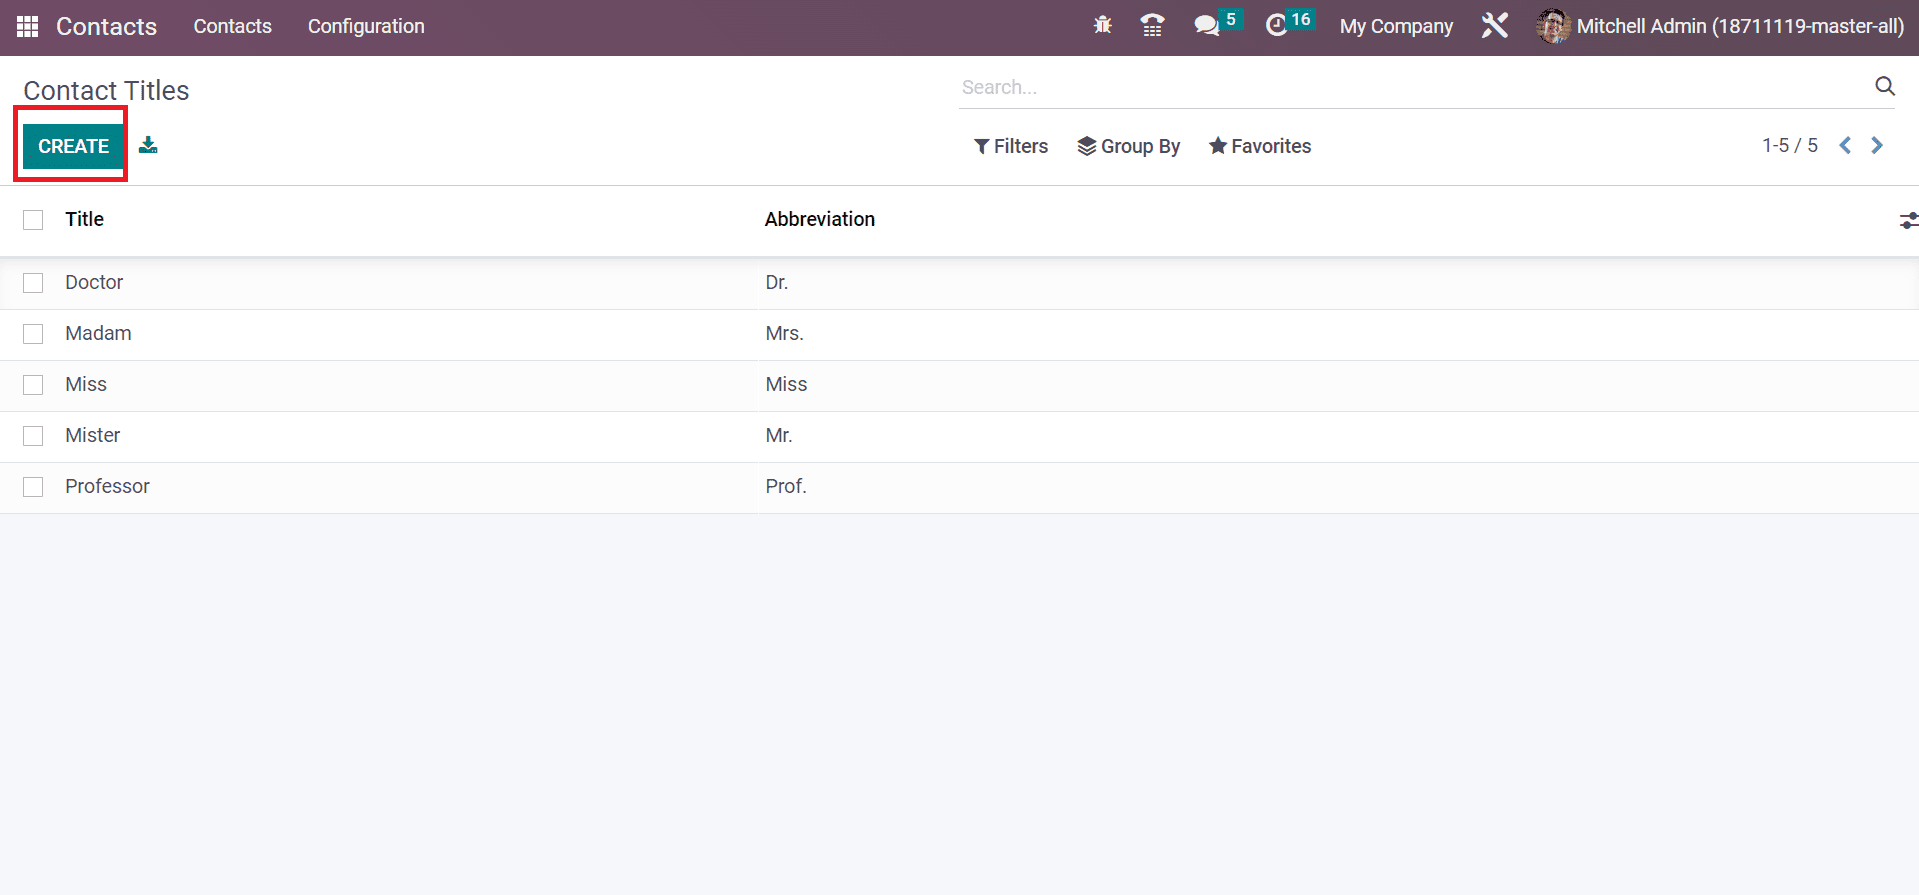
Click the CREATE icon to produce a new Contact Title, as pointed out in the screenshot. After creating a contact title, we can quickly add it when developing further customer information. Inside the Contacts window, we can view a Title option that shows details of all created contact titles, as specified in the screenshot below.
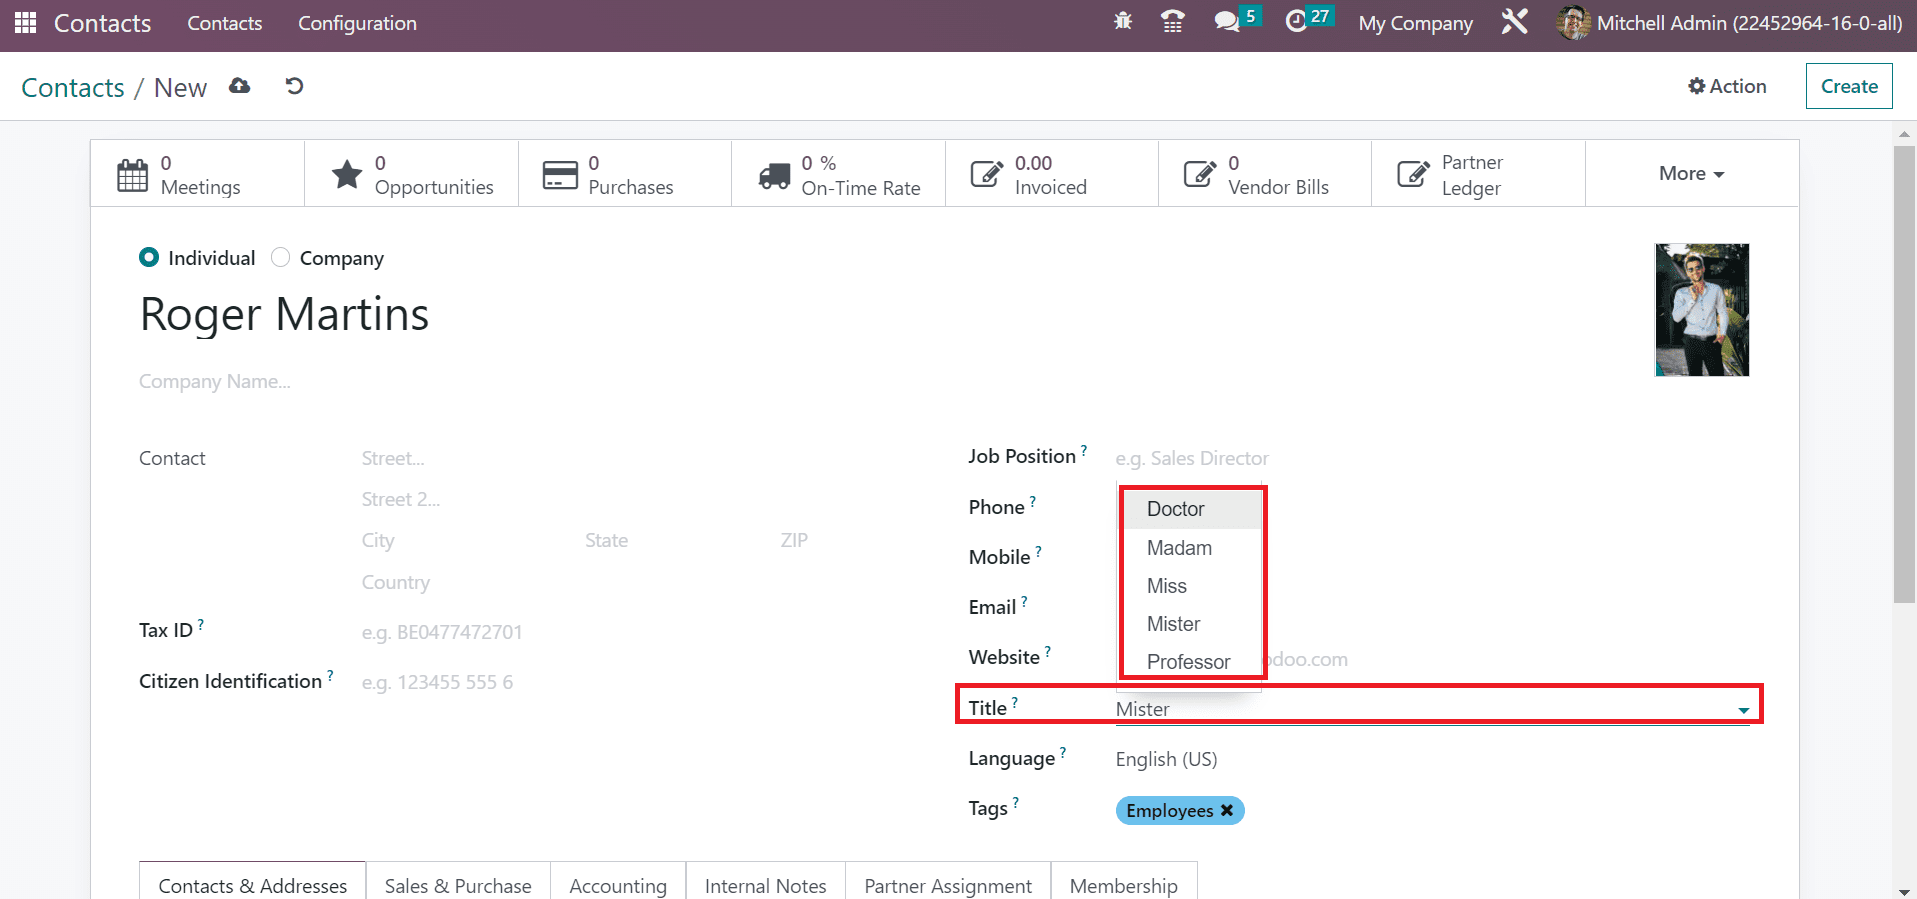
Hence, choosing a title for an individual using Odoo 16 CRM Module is simpler.
Industries
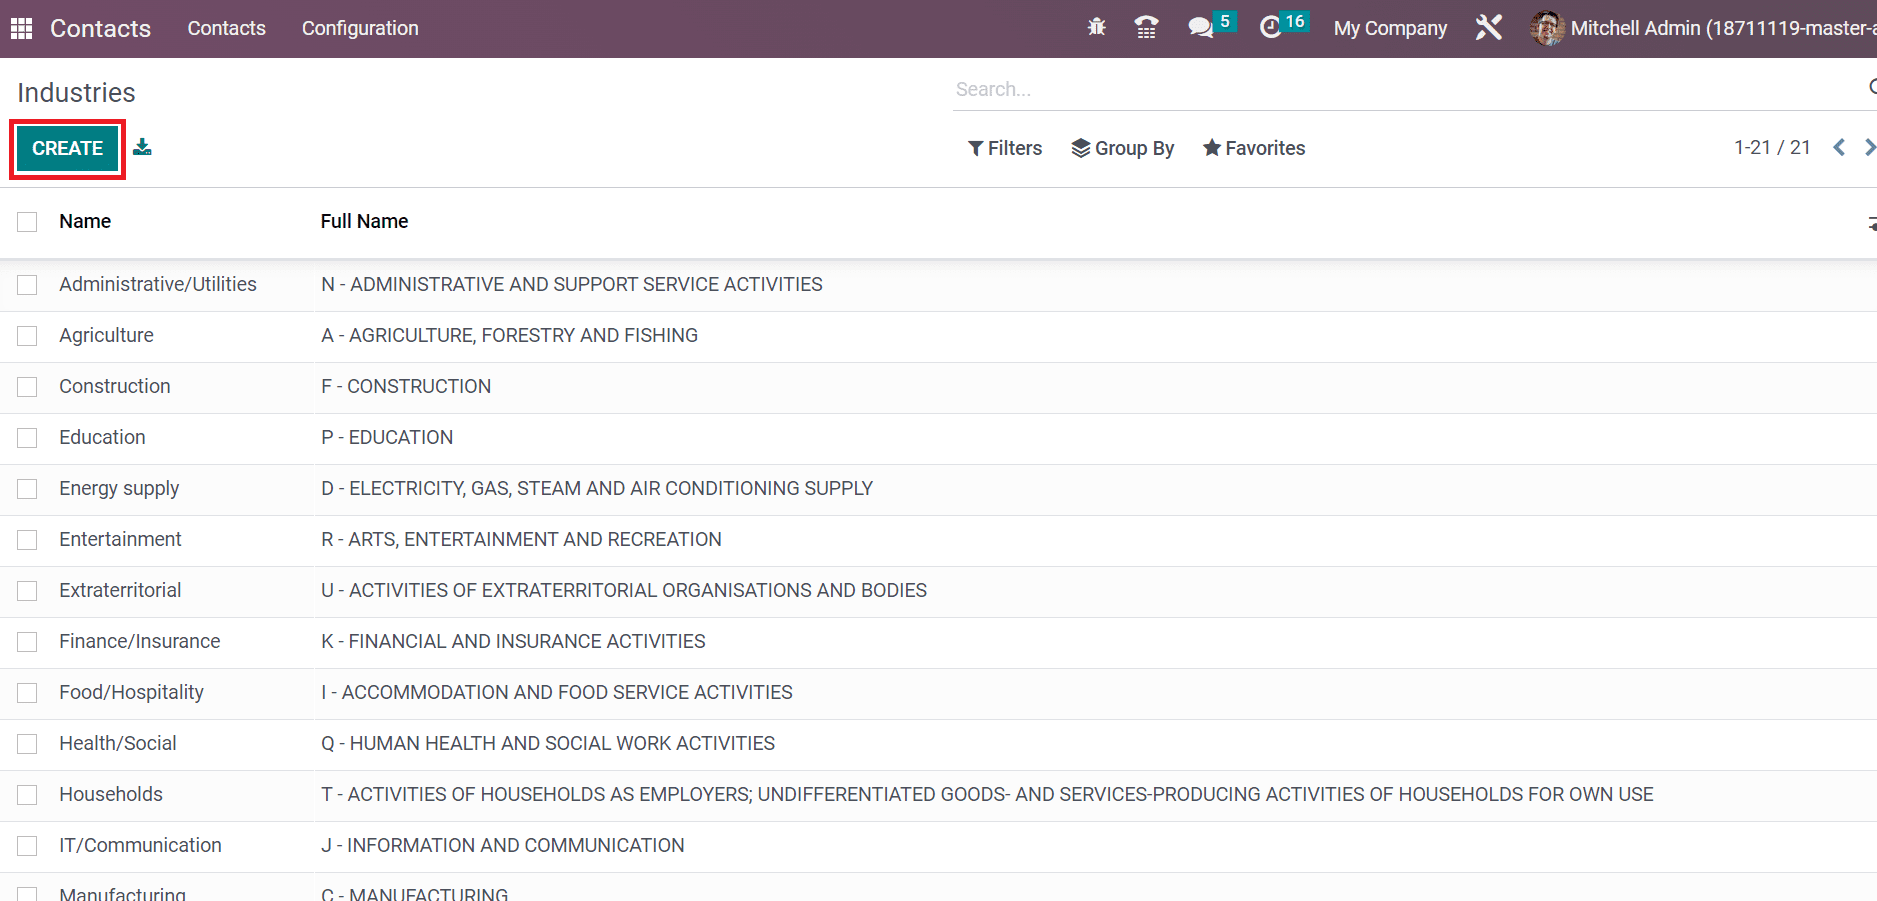
Users can develop various industry details by choosing the Industries within the Configuration tab. The list of all created industries is viewable in the Industries window of the Odoo 16 Contacts module. You can view the details separately from the Industries window, including each sector's Name and Full Name. Choose the CREATE button to add a new industry entry, as pointed out in the screenshot below.
After pressing the CREATE button, a new space opens at the Industries window end. Enter your industry's Name and Full Name in the open space, as demonstrated in the screenshot below.
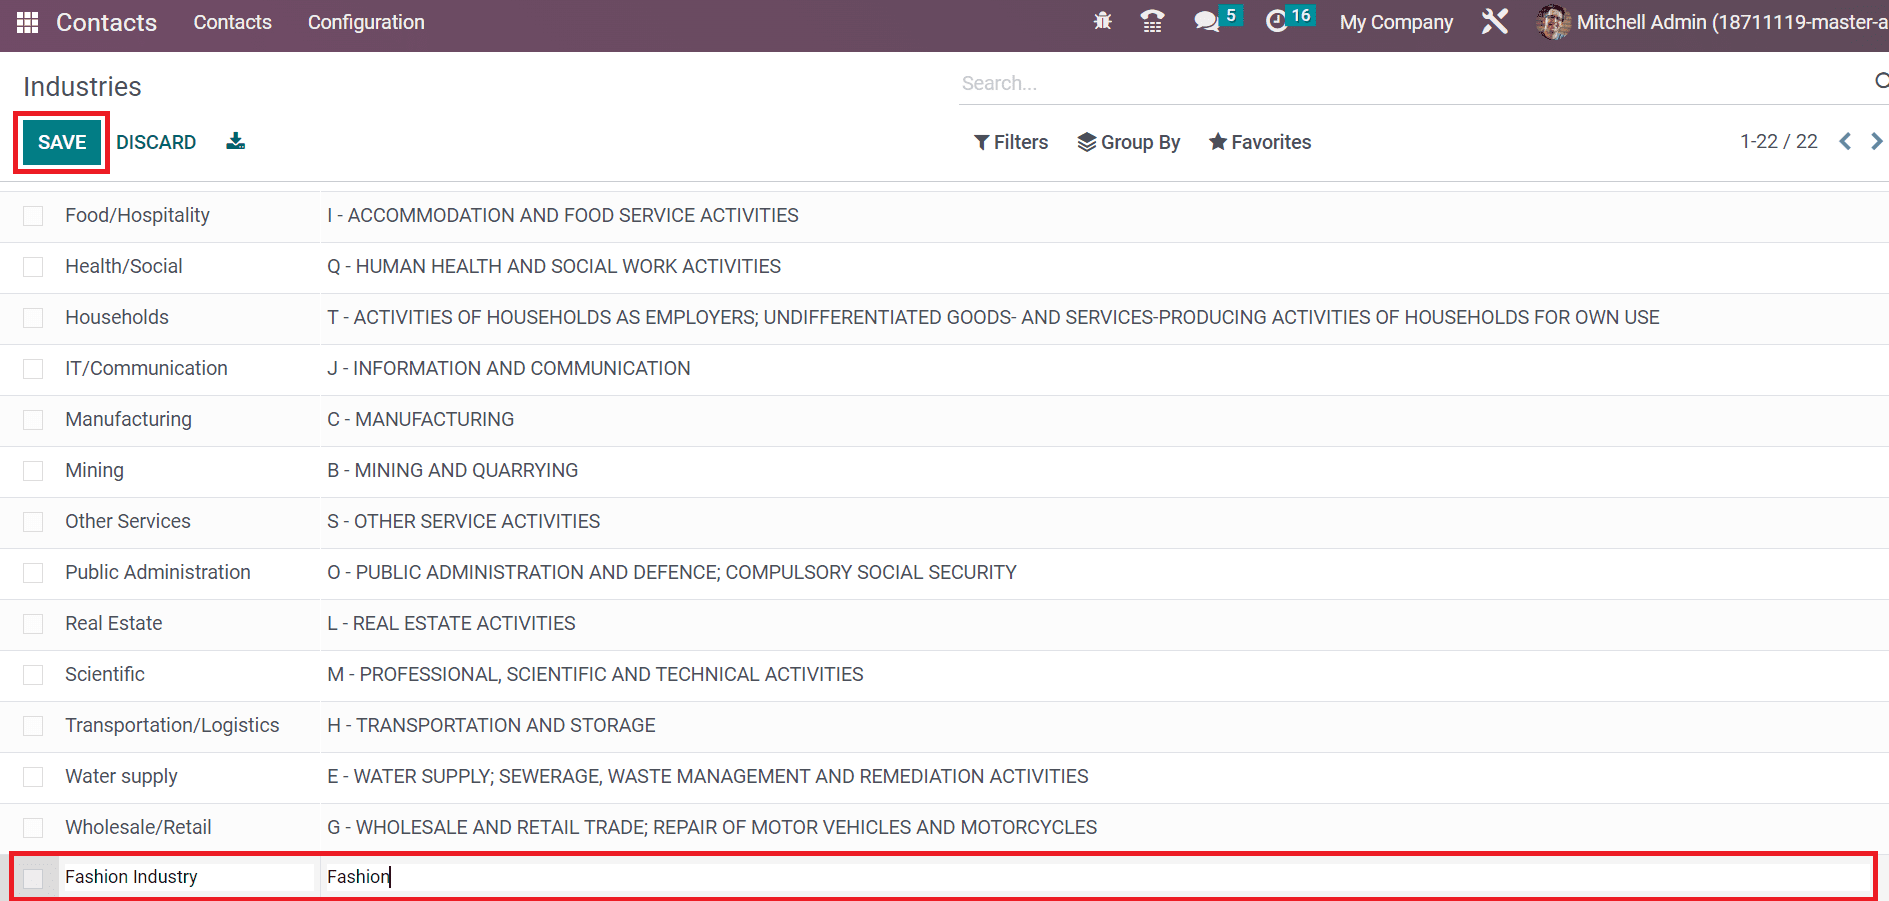
Click the SAVE icon once applying the industry details, as noted in the screenshot above.
Localization
In Odoo, the localization feature helps the user to identify various countries, states, and country groups about a specific individual. Using Odoo 16 Contacts module, we can manage multiple localization settings for customers. You can view the Localization section below the Configuration tab. Inside the Localization section, several menus such as Countries, Fed. States and Country groups are viewable to users, as disclosed in the screenshot below.
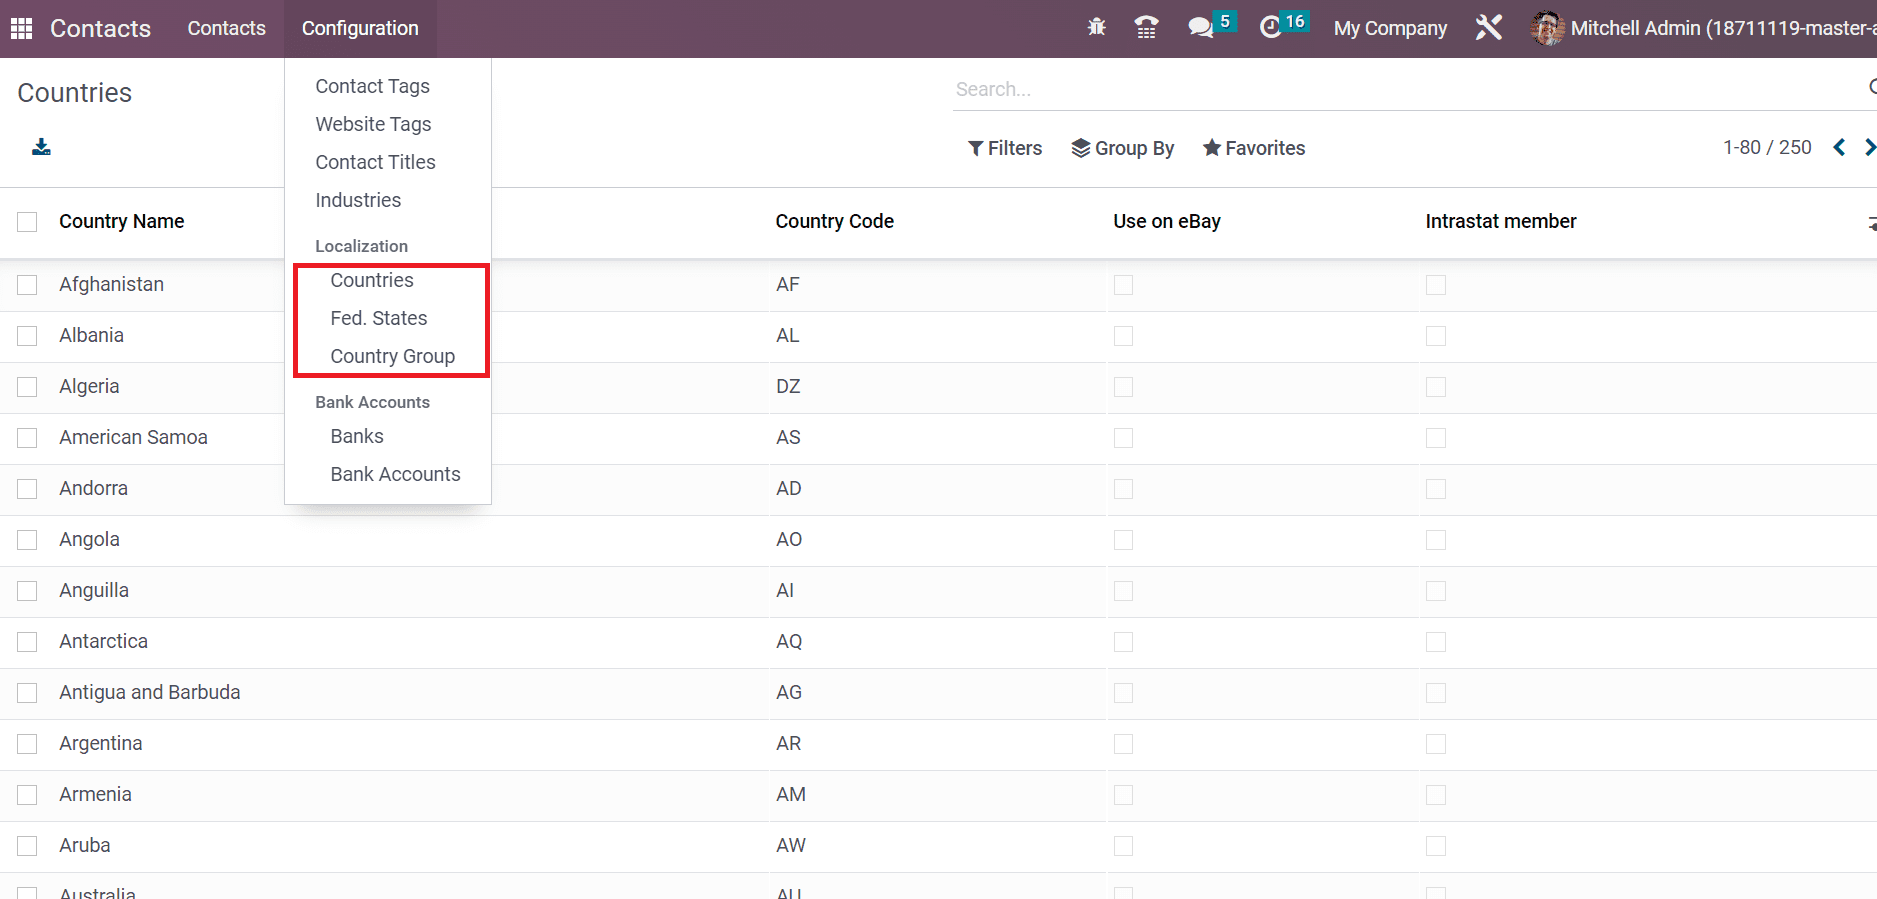
Next, we can see details about each localization feature in the Contacts module.
Countries
Records concerning different countries are visible to the user after choosing the Countries menu from the Configuration tab. The data relating to each country, including Country Name, Use on eBay, Country Code, and Intrastat member, is available in the Countries window as described in the screenshot below.
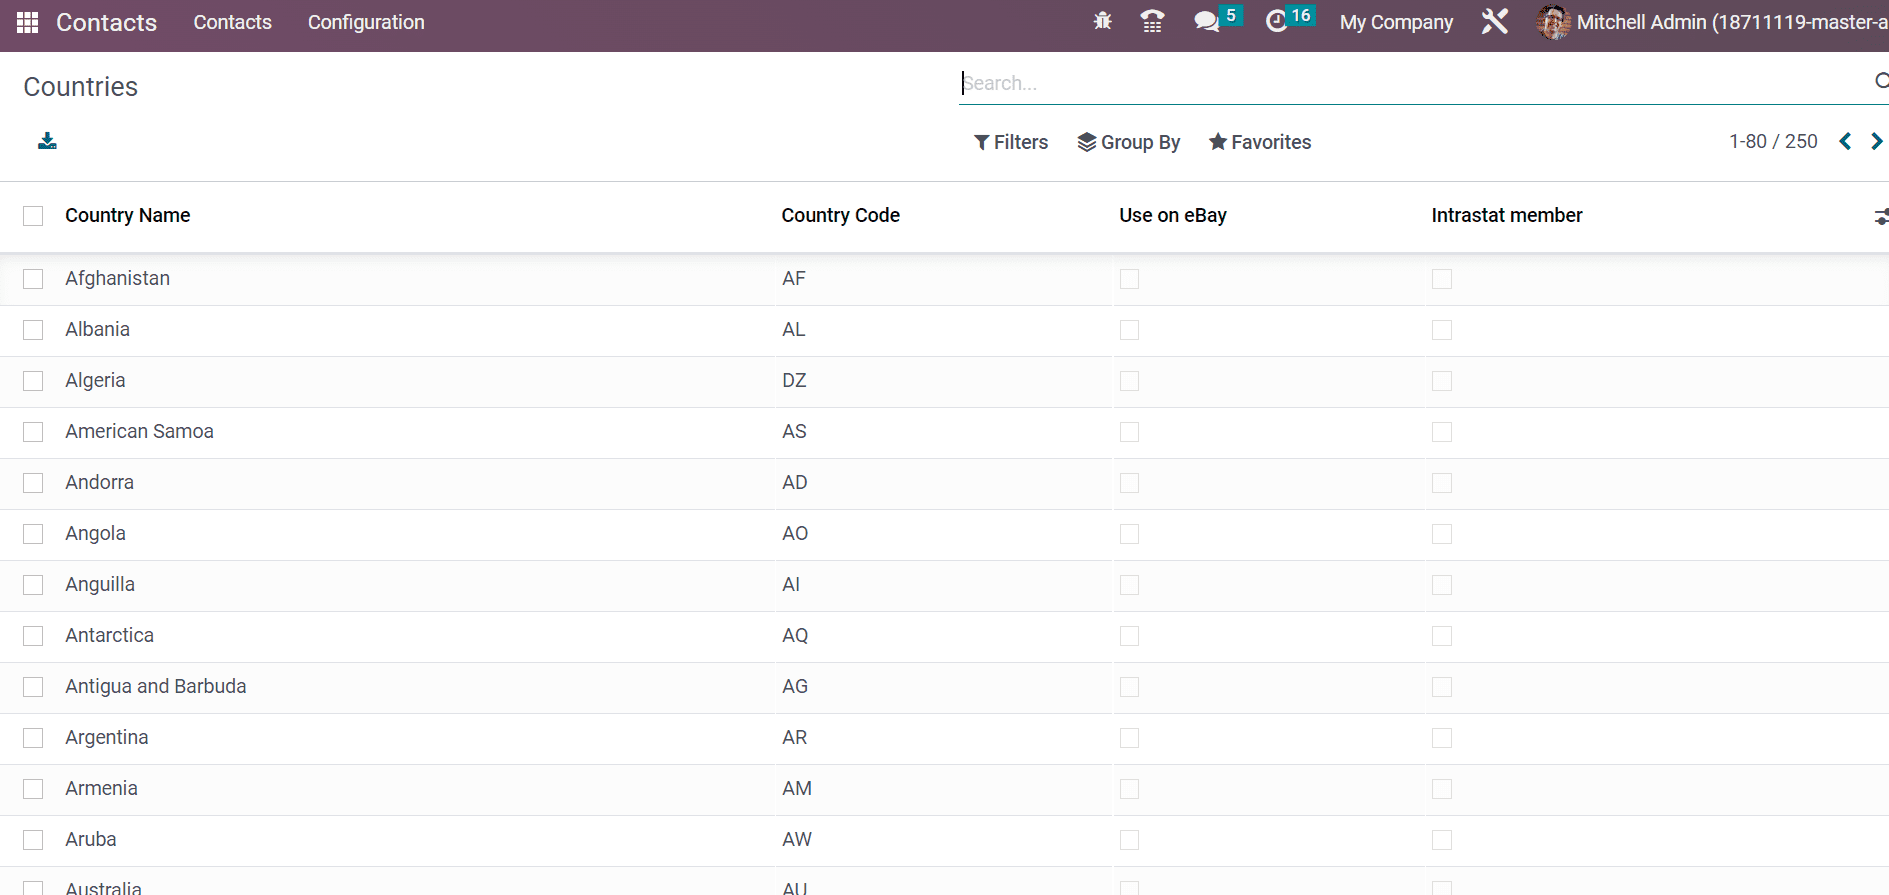
By choosing a specific country, you can obtain more data. We can view the Country Name, Code, Currency, City, Customer name, and other data in the Countries window.
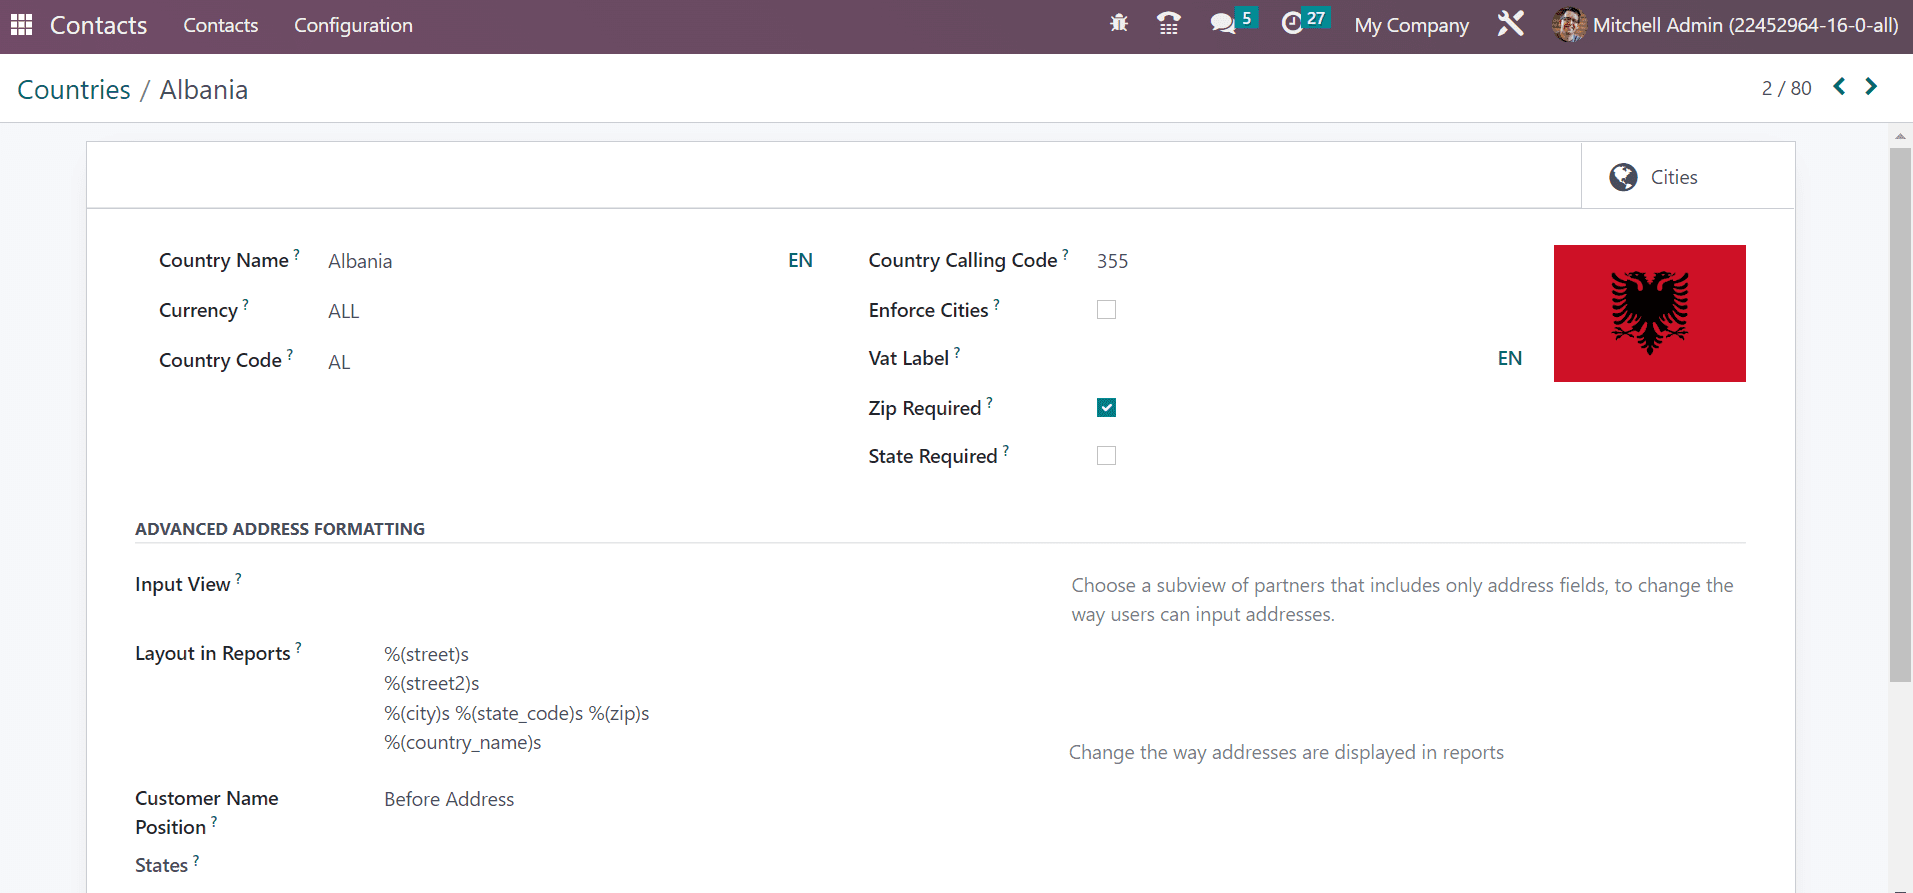
Hence, users can quickly manage different countries' records in the Contacts module.
Fed.States
The information regarding each state of contact is available inside the localization feature. Several states inside a country are known as Fed. States or the Federal States. Select the Federal States menu below the Configuration tab; a user can view the list of created states. We can obtain the record in regards to each state separately, including State Name, Country, and State Code, as illustrated in the screenshot below.
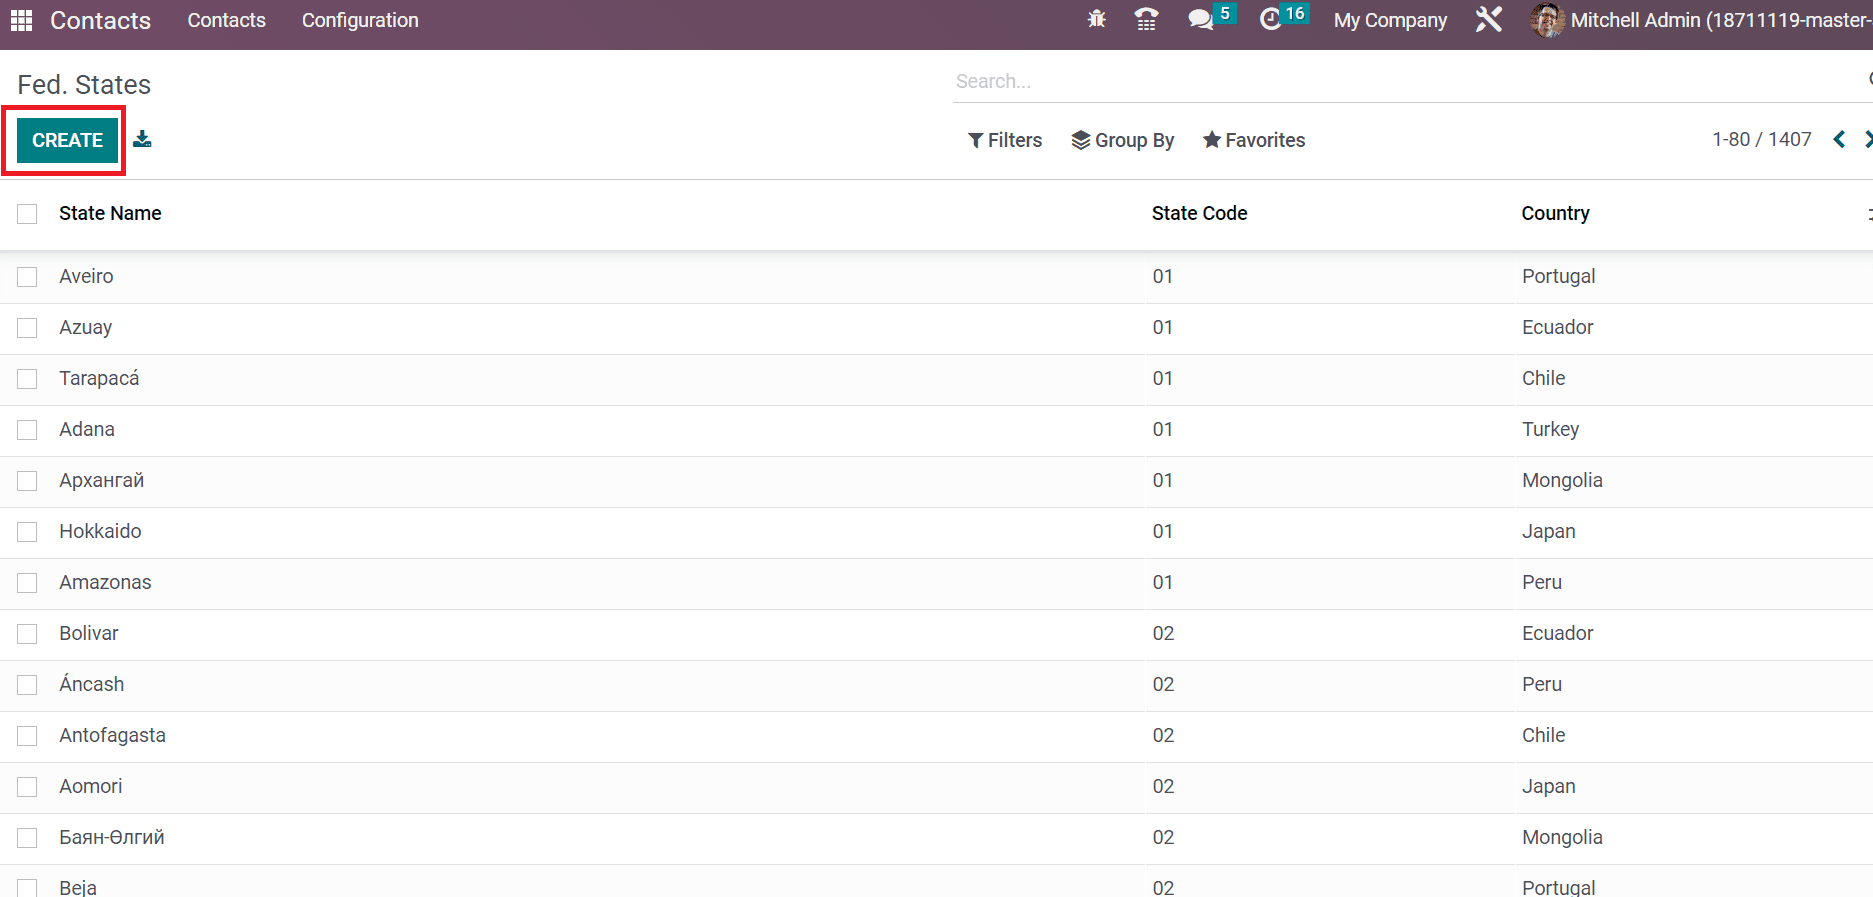
By choosing the CREATE icon, we can formulate the data of a new federal state. It is possible to apply the state when developing further contact. As noted in the screenshot below, we can easily pick up a state in the Contacts window.
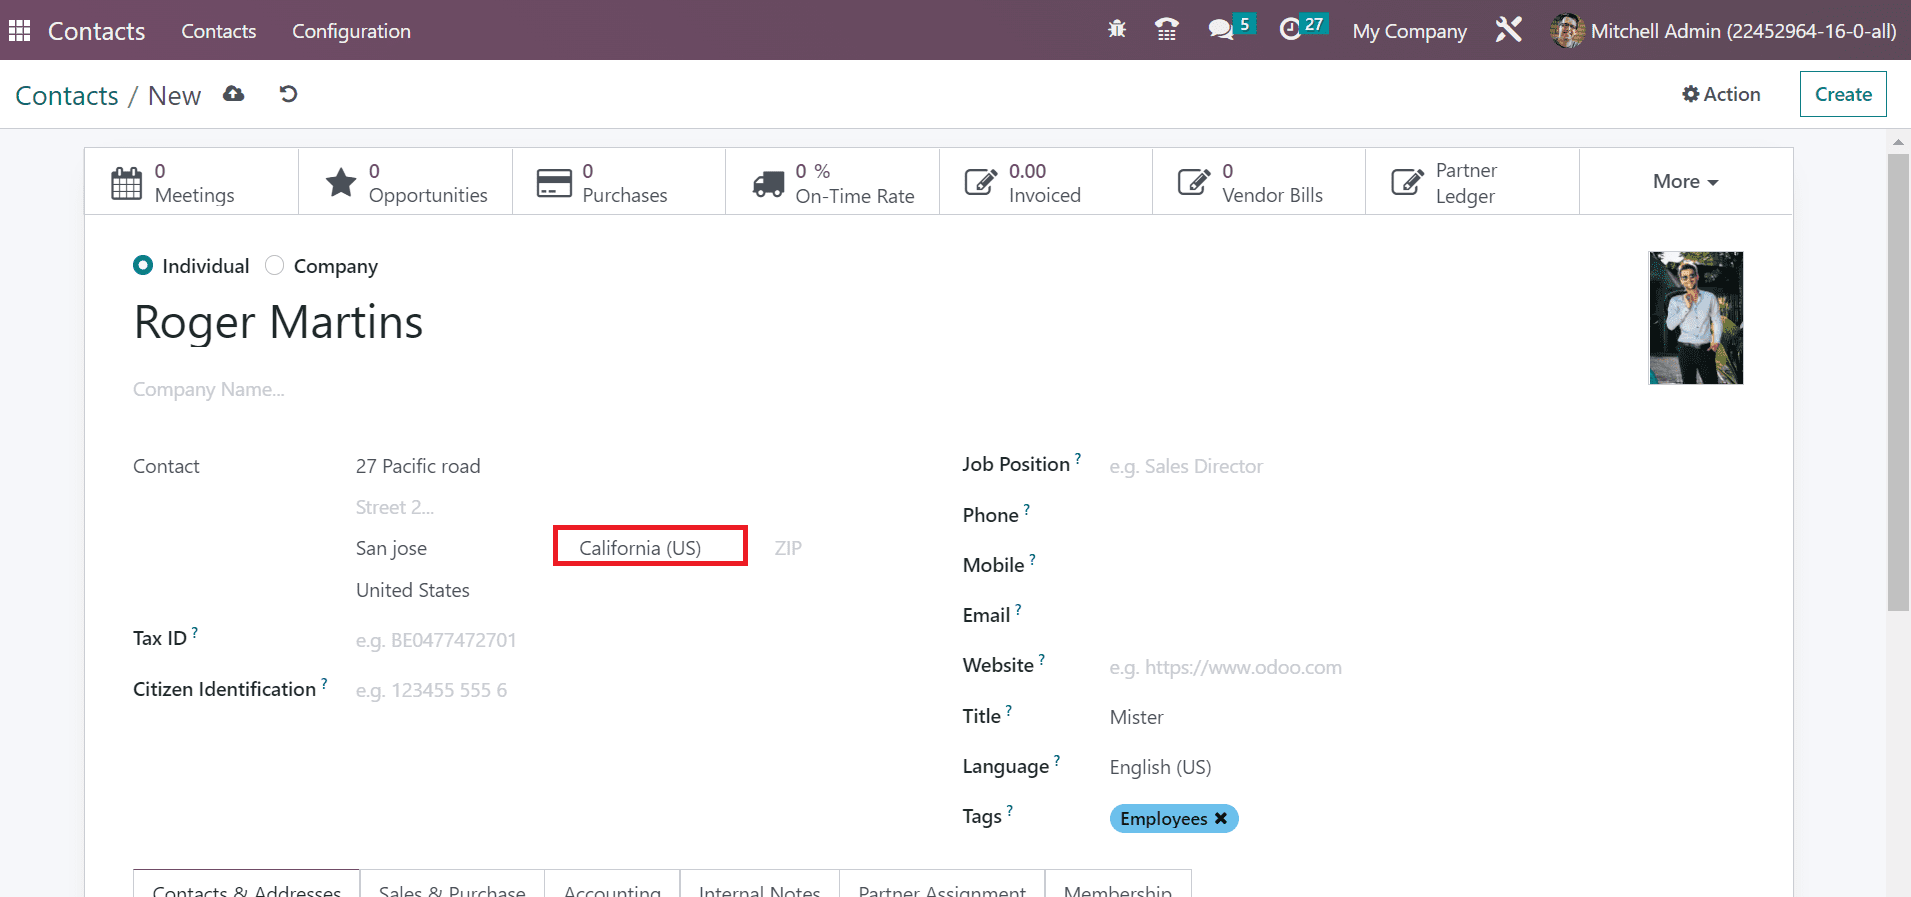
So, it is simple to produce state data and apply it to a specific contact.
Country Group
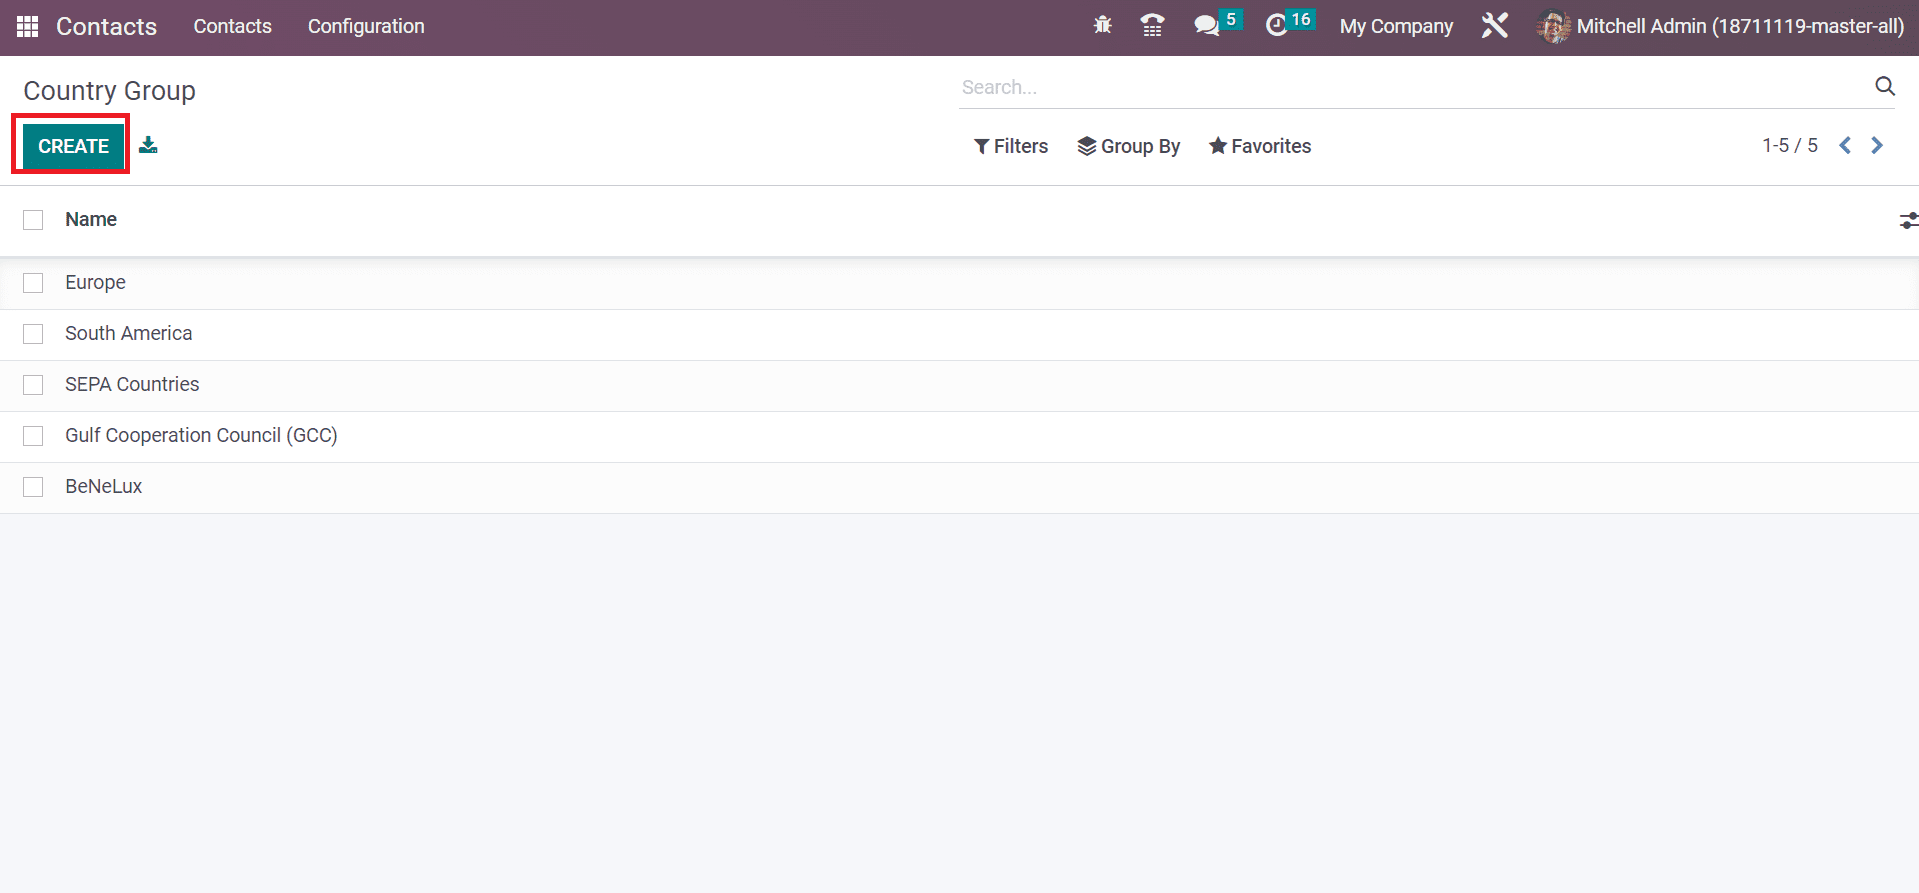
Classification of countries applying under a particular rule such as pricelists is known as Country Group in Odoo 16. We can spot the Country Group menu below the Configuration tab, and a listing of all country groups is accessible to the user. Click the CREATE button to proceed with a new Country Group, as signified in the screenshot below.
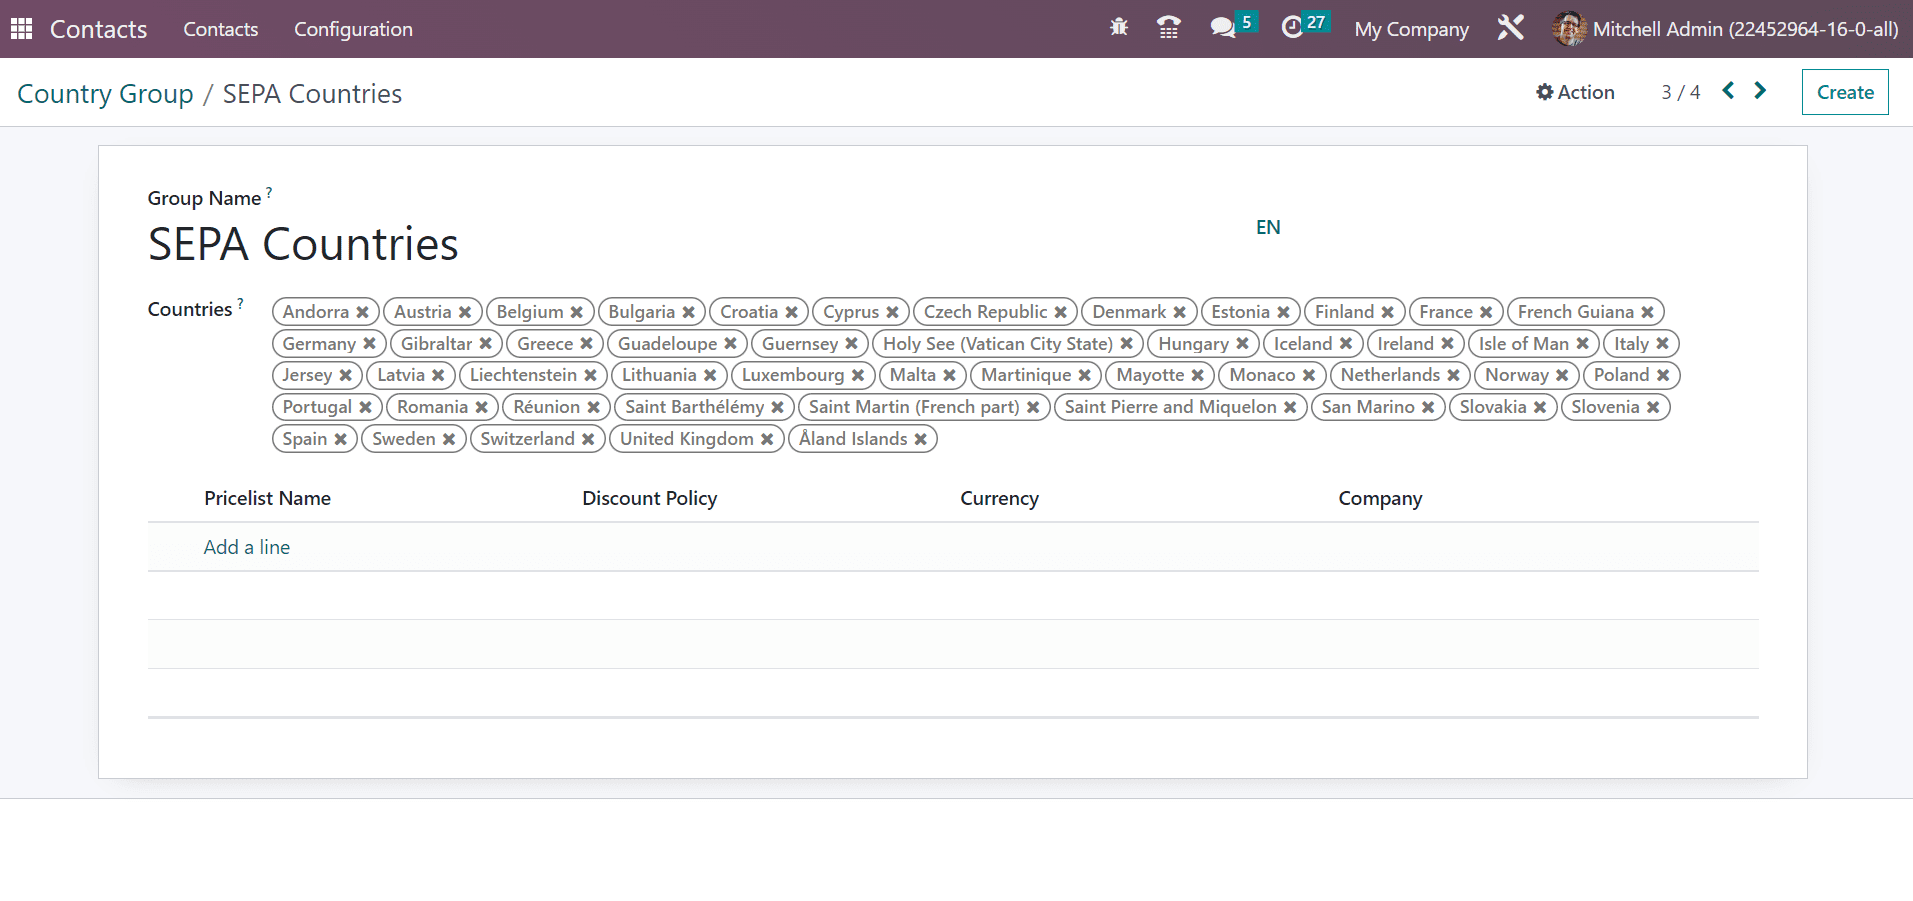
We can apply a Group Name and countries inside the group when developing a new country group.
Banks
The bank details of customers in a company are necessary to transact a business. In the Odoo 16 Contacts module, users can quickly enter specific banks' information. Click the Banks menu below the Bank Accounts section inside the Configuration tab. A list of all developed banks in the Banks window is viewable to you. Users can obtain the Country, Bank Identifier Code, and Name as represented in the screenshot below.
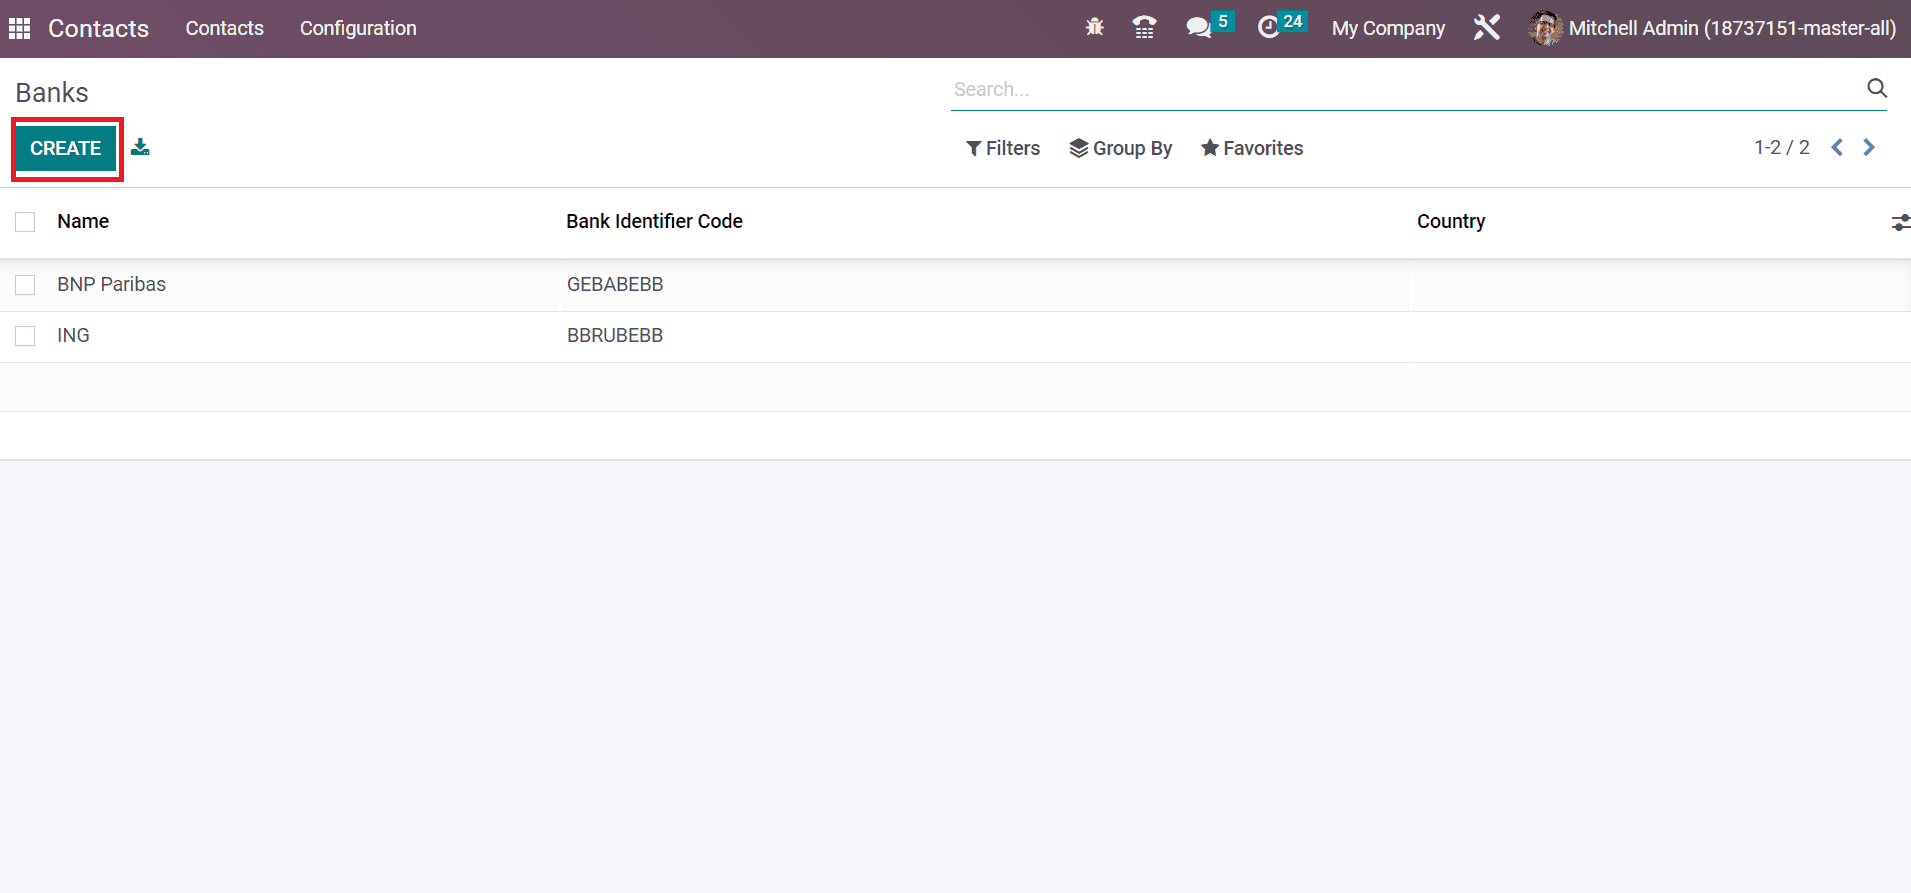
Select the CREATE button to formulate new bank data, as visualized in the screenshot above.
Bank Accounts
A financial account that deals with agreements between the bank and the customer refer to a bank account. It is essential to exchange cash dealings with anyone. We can enter several bank accounts for different customers or contacts within the Odoo 16 Contacts module. Choose the Bank Accounts menu inside the Configuration, and created bank accounts are viewable for the user. We can access details of each bank account, including Account Number, Company, Name, etc.
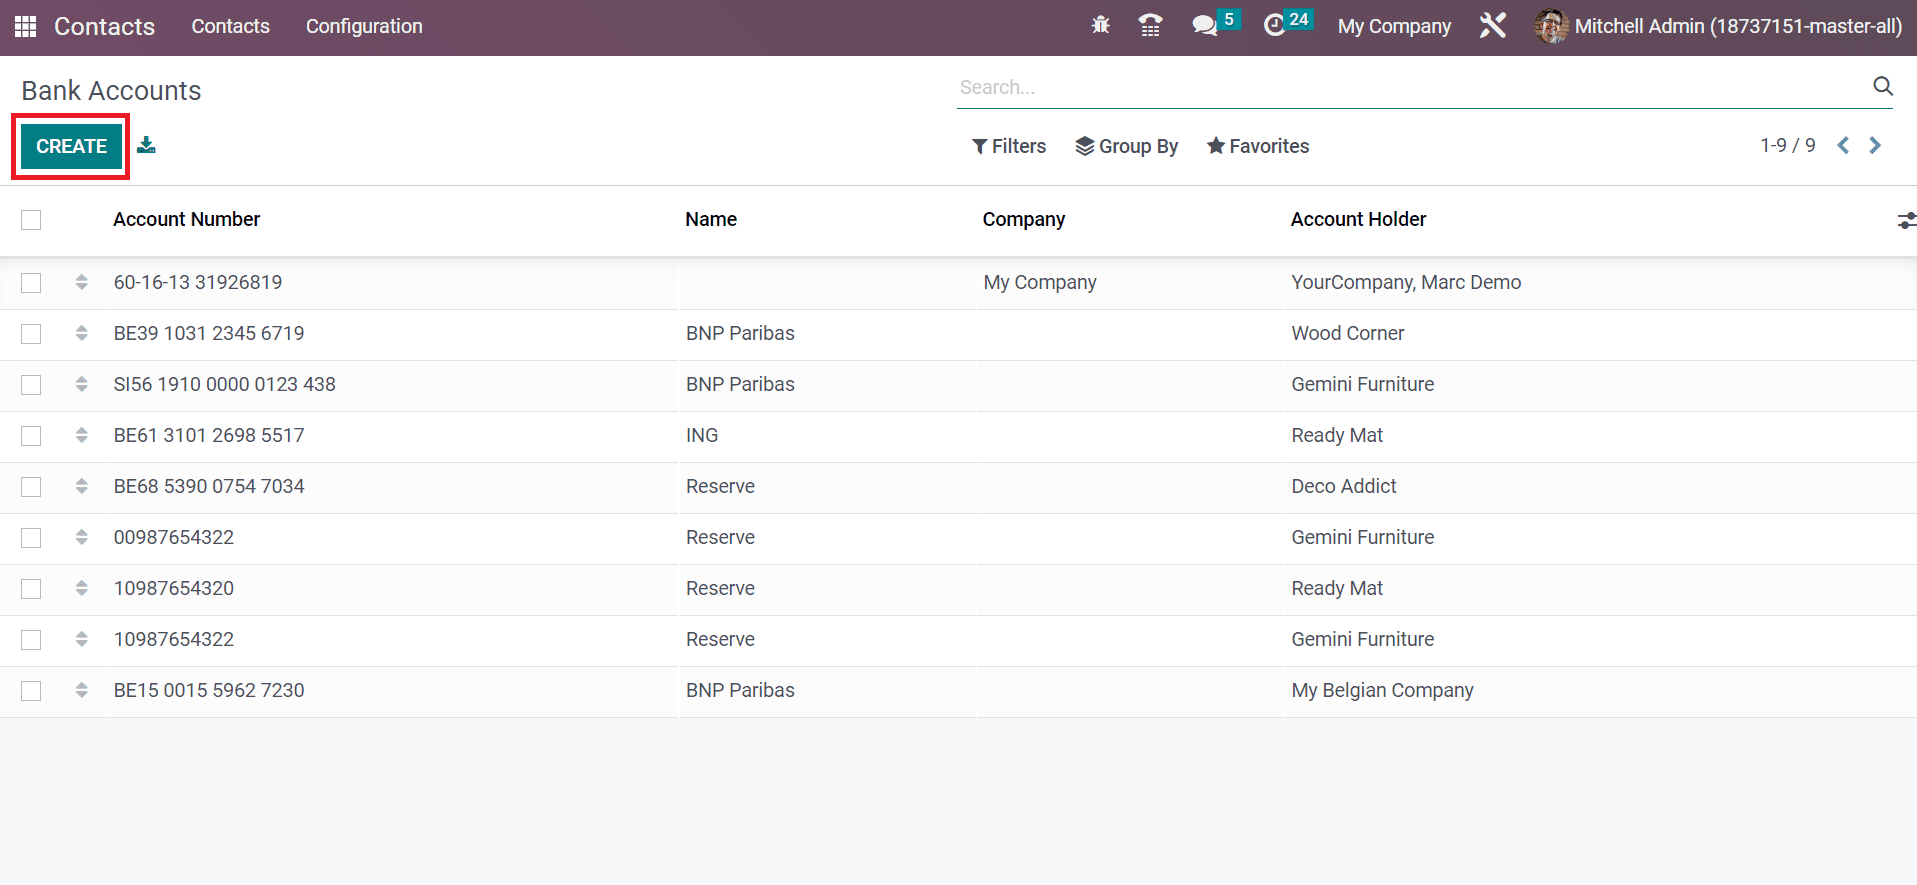
Press the CREATE icon to generate a new bank account, and we can easily manage all account details.
All the contacts in a firm maintain easily using the configuration attribute of the Odoo 16 Contacts module. The essential data of contacts are tracked quickly and stored securely using Odoo ERP support.