In the previous blog, we have discussed how to define views for the model we have created. In this blog, let me help you with how to define the filters and search view for the model we have created. The search view comes in the views rather than in the form, as the form is a single record and there is no need to search in the form view.
Right now, if you activate the developer mode and click on the Edit Search View button from the lady debugger button, near the logged user’s name, you can see an empty/undefined view just like the below image.
Here we are getting like this because we haven't defined the search view for our model.
So let's get into the search view.
First of all, what is the use case of the search view?
What is the need to define it?
Right now if you type and search something in the search box available in the tree view, you will only get the result based on the field name.
So what should we do if we have to make the search based on the other fields in the model, what to do if we have to search the student having the age 24?
Here comes the necessity of defining the search view.
If you click on the Filters and Group By, you cannot see any filters there.
What to do if the end-user needs to filter the student with Gender as male, presently they have to add a custom filter all the time, as shown in the below image.
It will be so easy for the end-users if there are such filters by default. So here, we will see how to do it.

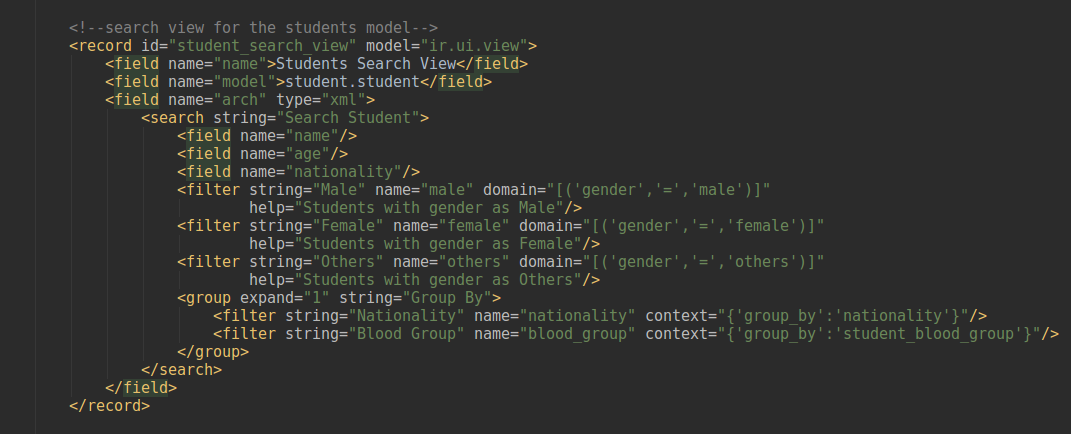
If you check the above image you can see is the search for the student. Student model has been defined.
Code:
<record id="student_search_view" model="ir.ui.view">
   <field name="name">Students Search View</field>
   <field name="model">student.student</field>
   <field name="arch" type="xml">
       <search string="Search Student">
           <field name="name"/>
           <field name="age"/>
           <field name="nationality"/>
           <filter string="Male" name="male" domain="[('gender','=','male')]"
                   help="Students with gender as Male"/>
           <filter string="Female" name="female" domain="[('gender','=','female')]"
                   help="Students with gender as Female"/>
           <filter string="Others" name="others" domain="[('gender','=','others')]"
                   help="Students with gender as Others"/>
           <group expand="1" string="Group By">
               <filter string="Nationality" name="nationality" context="{'group_by':'nationality'}"/>
               <filter string="Blood Group" name="blood_group" context="{'group_by':'student_blood_group'}"/>
           </group>
       </search>
   </field>
</record>
Inside the search tag, the search view is defined as a tree, and form tag used for the tree and form view respectively.
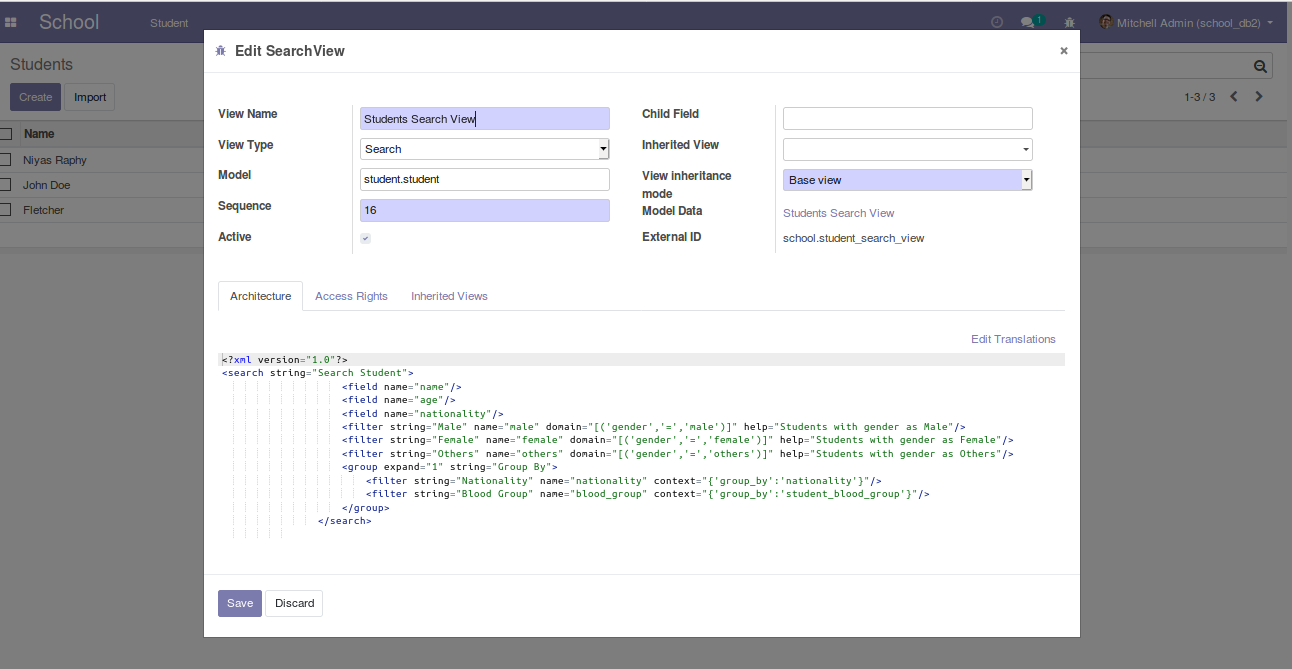
Now lets us upgrade the module and see the changes in the search view. Later then, we can explain the code we have used. After upgrading the module and clicking on the Edit search View option, one can see if it gets filled with the code we have added. Earlier it was empty hope you remember it.
Now let us look at the changes we have when we search for something in the search box.
Looking at the above Gif- you can see the option right now, the search can be done based on the name, age or nationality.
The above three fields which we have defined in the search view is providing this. So now let us come to the Filter section,

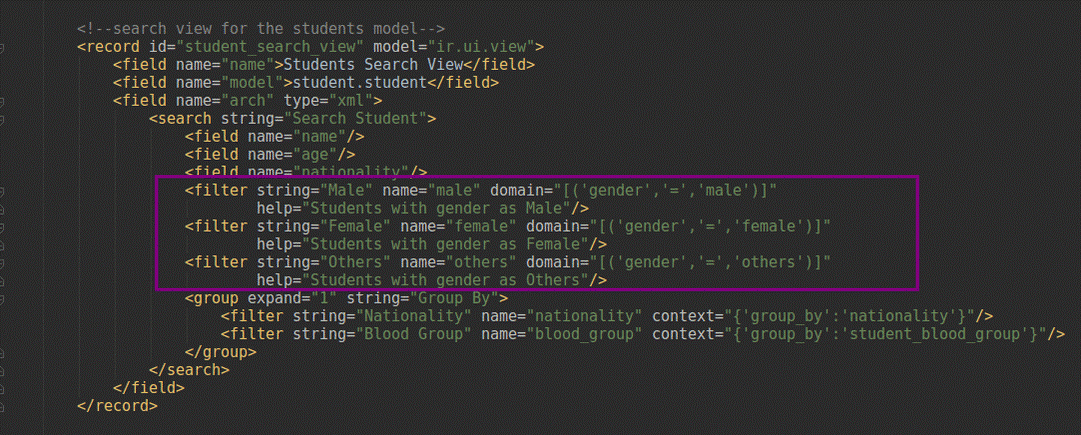
Here is a marked section of the above image. There you can see the three defined filters using the filter tag. Here we have added three options to filter the records, ie, Male, Female, and others. For the filtered mail we have given domain like gender = Male, so that while clicking the filter male, we will get only the records with gender set as male. The same procedure is done for the case of the Female and others too.
<filter string="Male" name="male" domain="[('gender','=','male')]" help="Students with gender as Male"/>
Here in the above filter, the string is the one we see in the front end, while defining the filters in the Odoo 12, the name attribute is required, we can give a name as we wish, so have given the name as male and the real things comes with the domain, In the domain, we have the field named gender in our model, so in the domain, it is given gender = ‘male’, the male is the key we have given for the male selection.
So lets us look at the filters in the front end.
Right now we can see those three filters have come over there. So now, the end-user doesn't need to add the custom filter to filter the students with gender male, he just has to click on the male filter, we have added. Once the end user clicks the multiple filters at a time, the operation gets executed.
Now let us look at the Group By option we have added, if you check the code, you can see we have to group by options added.
Inside the group tag, we have added two filters and passed the group_by in the context.
<group expand="1" string="Group By">
                <filter string="Nationality" name="nationality" context="{'group_by':'nationality'}"/>
                 <filter string="Blood Group" name="blood_group" context="{'group_by':'student_blood_group'}"/>
 </group>
Here the string is what we see in the front end and the name attribute is required while defining a filter. Then the working comes in the context section. Inside the context, we have to pass the field_name based on which the grouping has to be done.
context="{'group_by':'field_name'}"
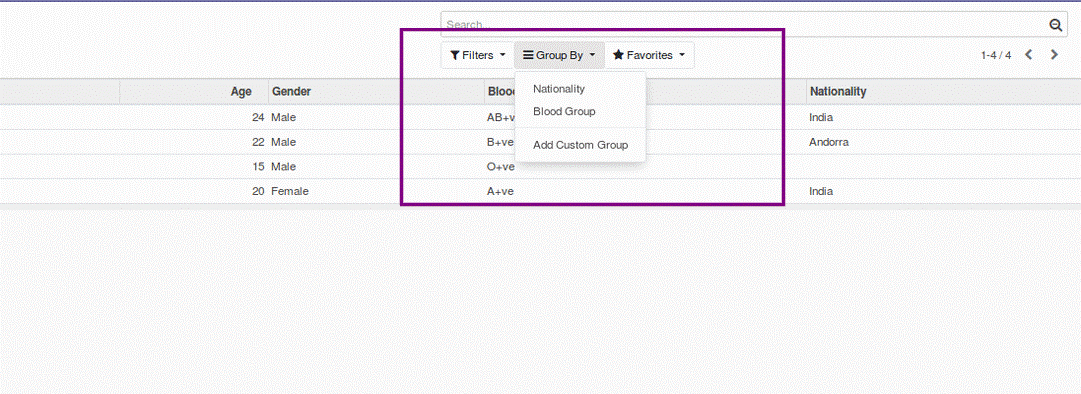
Now let us see the change in the front end.

Now we can see in the Group By Nationality, Blood Group has been added.
This is all about the search view and how to define it. Suppose if we have multiple search views for a single model, and we want to get a specific search view for a menu, then inside the menu action, we can specify the search view id for the menu action.
See the sample below:
<record id="student_menu_action" model="ir.actions.act_window">
            <field name="name">Students</field>
            <field name="res_model">student.student</field>
            <field name="view_type">form</field>
            <field name="view_mode">tree,form</field>
            <field name="search_view_id" ref="student_search_view"/>
            <field name="domain">[]</field>
            <field name="help" type="html">
                <p class="oe_view_nocontent_create">Create The First Student
                </p>
            </field>
</record>
This was the menu action, we have created earlier for the student menu, in this action, we have added a new line to specify the search view(see the bolded line).
How to Give Default Filter for the Menu?
Suppose if we click the student's menu, and we want to get the male filter, we have added to come selected by default. So let us look at how to achieve it.
For this purpose, the change has to be made inside the action defined for the menu. Add a new line in the action as below,
<field name="context">{'search_default_filter_name': 1}</field>
The above shown is the format of passing the default filter in the context. Search_default followed by the filter name is the format.
 <filter string="Male" name="male" domain="[('gender','=','male')]"
                        	help="Students with gender as Male"/>
This is the filter we have defined in the search view earlier and suppose if this has to come by default, we have to pass the context like this, search_default_filter_name here filter name is male, so it should be search_default_male:
See the updated action of the menu.
<record id="student_menu_action" model="ir.actions.act_window">
        	<field name="name">Students</field>
        	<field name="res_model">student.student</field>
        	<field name="view_type">form</field>
        	<field name="view_mode">tree,form</field>
        	<field name="search_view_id" ref="student_search_view"/>
        	<field name="context">{'search_default_male': 1}</field>
        	<field name="domain">[]</field>
        	<field name="help" type="html">
            	<p class="oe_view_nocontent_create">Create The First Student
            	</p>
        	</field>
  </record>
Just upgrade the module and see whether the filter is coming by default or not.

So this is all about the search view.
You can also have look on Advanced Views - Search View in Odoo 13