In an inventory stock can be transferred as single units or multiple units and products. Many times, we may need to manage the materials and products in batches to ease the batch transfer operations. This allows us to transfer a set of products from one storage location to a different location. Here different transfers can be batched together to complete the process.
We can use batch transfer for managing different types of inventory operations such as internal transfer, dropship, delivery management, receipt etc. We can use batch transfer for managing manufacturing operations and point of sale operations also.
Odoo Inventory management tool is an efficient solution to manage batch picking and batch transfer. This module offers support for batch transfer and batch transfer is a functionality that can be managed along with other operations. Odoo supports packaging and batch picking together. We can also set picking policies so that the process is made simple and effective.
We can check different methods to pick an order from a warehouse or other distribution centres. It is easier to coordinate this using batch picking support. We can complete the order picking process with the help of single orders or batch picking or batch transfer support.
While a single order allows us to pick a single item, batch transfers allows us to manage multiple items or batches of the same product.
We can begin the process with the help of the inventory module.
We can go directly to Configuration> Settings in Inventory
Then check the Operations Segment where we can find the option batch picking.
Enable this option so that the function will be enabled in the Inventory module.
After this we can move to the Operations menu.
We can find the Batch Transfer option below the operations menu along with transfers and replenishment.
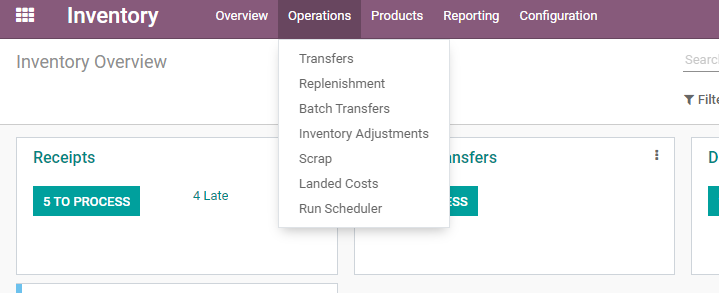
Our next task is to create a new transfer. We can find pre-configured batch transfers also in this page if any.

Using the Create tab we can create a new batch transfer from here itself.
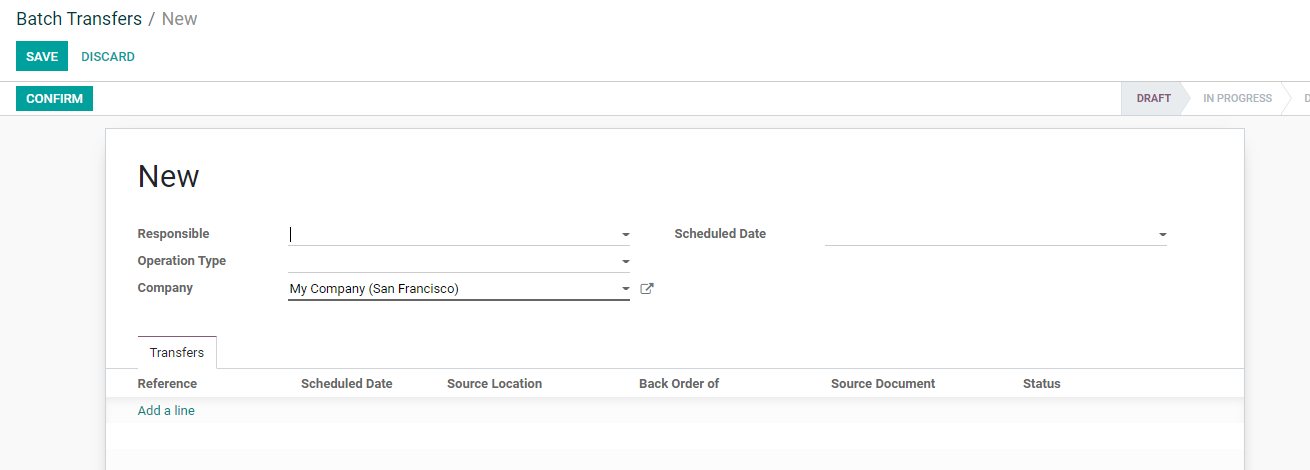
Using the above-given form we can create the batch transfer. We can find many fields here.
Responsible: The person who is responsible for the batch transfer operation
Operation Type: The type of operation used for the batch transfer.
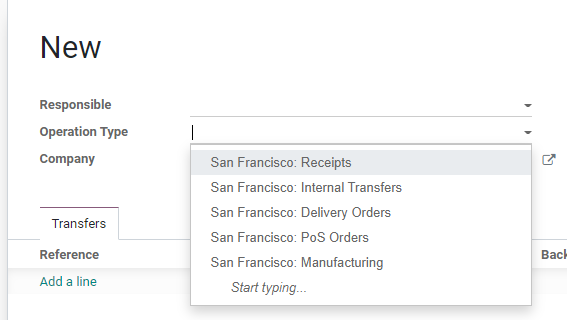
We can choose any of the operation types from Receipts, Internal Transfer, Delivery Orders, PoS orders, and manufacturing. We can also create new transfer methods from here.
Scheduled Date: We can add the date of the scheduled transfer.If the scheduled date is added manually the same date will appear for all products in the batch.
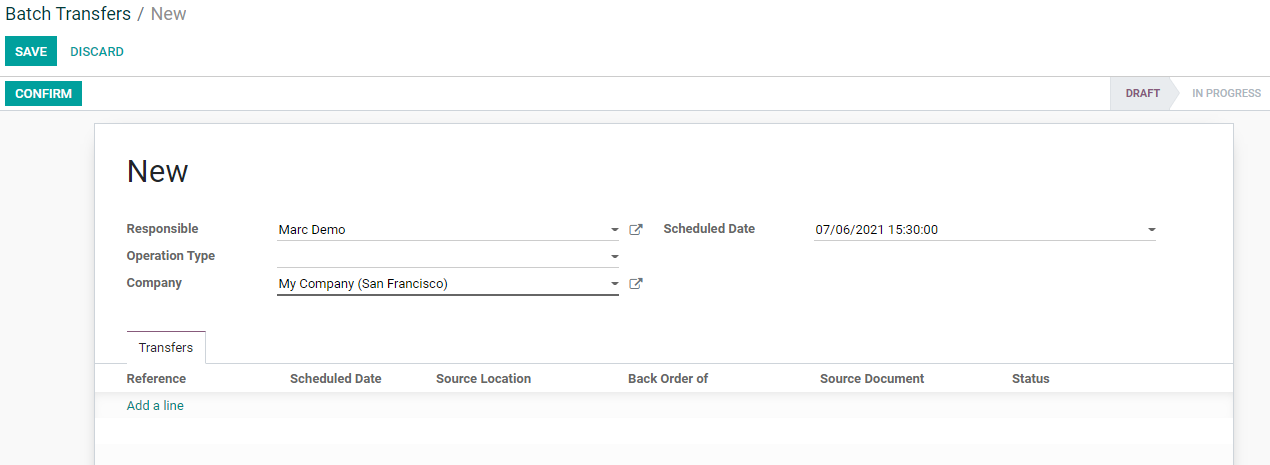
Transfers tab:
Below this tab, we can add a transfer. The transfer can be picked from the list and will have details like scheduled date, source location, backorders of and the source document. The transfer status can be found here.
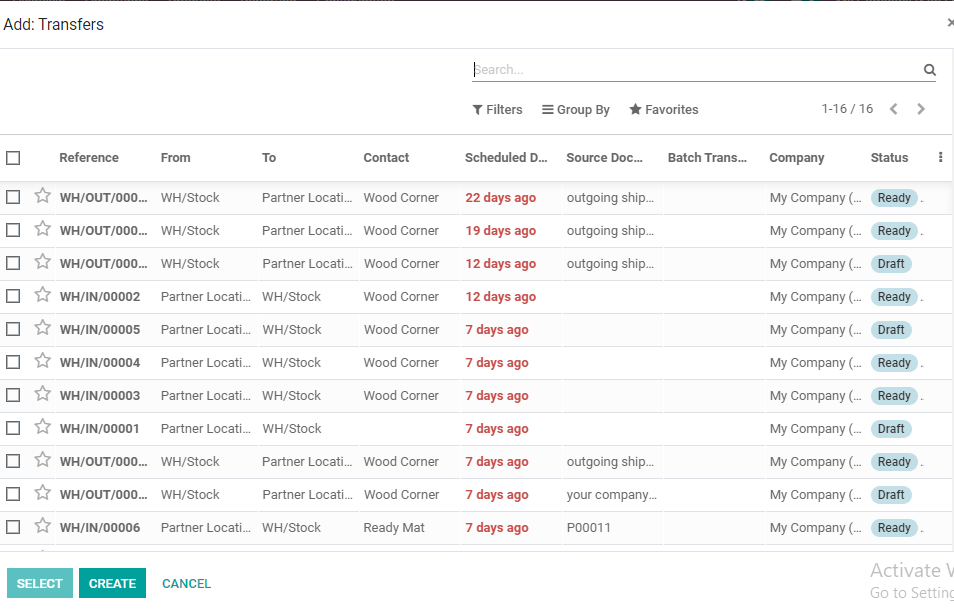
We can either select any of the transfers or create new transfers. We can use the filters and group by support on the page to easily pick the transfer.
To show how the process is done I will pick a few transfers in the ready state. Want to manage the process immediately? Choose this option.

We have chosen three such transfers for the batch.

We can find the reference, scheduled date, source location, source document, and status here. We can find cross marks near every transaction. This can be used to remove any of the transactions from the list.
After making all necessary changes we can Save the changes and Confirm the process.
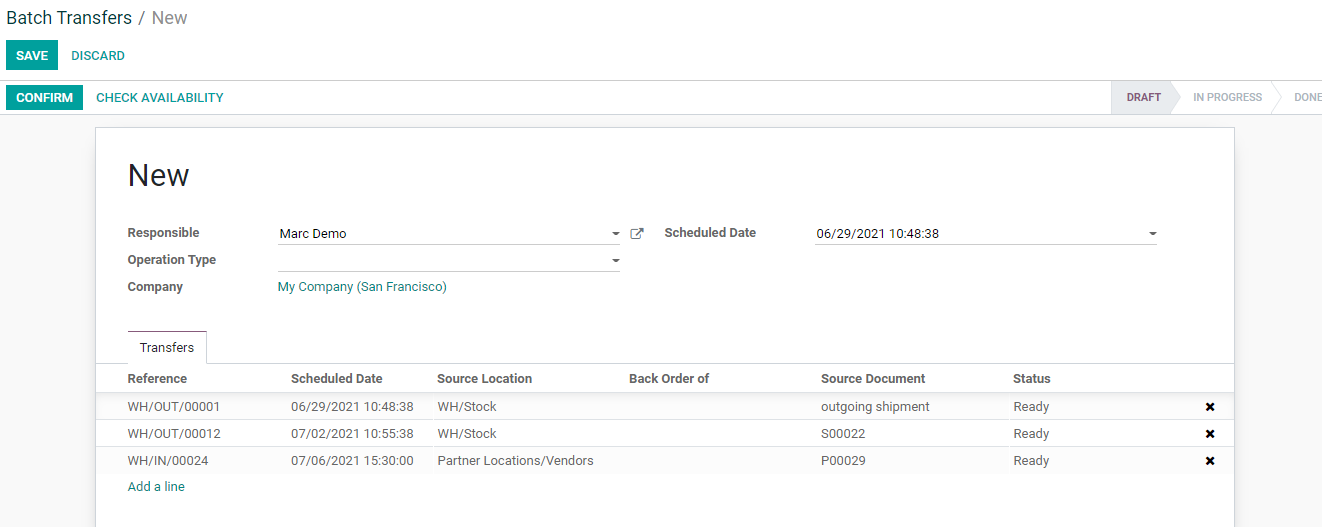
If we want we can also check availability before confirming the transfer.
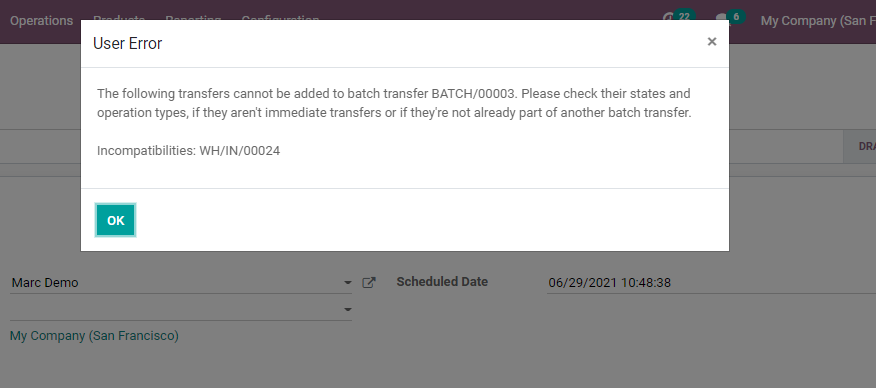
when I clicked the CHECK AVAILABILITY button I got the above message. As per the message I cannot add reference number WH/IN/00024 to the batch.

So I have removed the transfer from the batch.
Now that I have checked the availability and removed transfer from the batch we can CONFIRM the transfer.
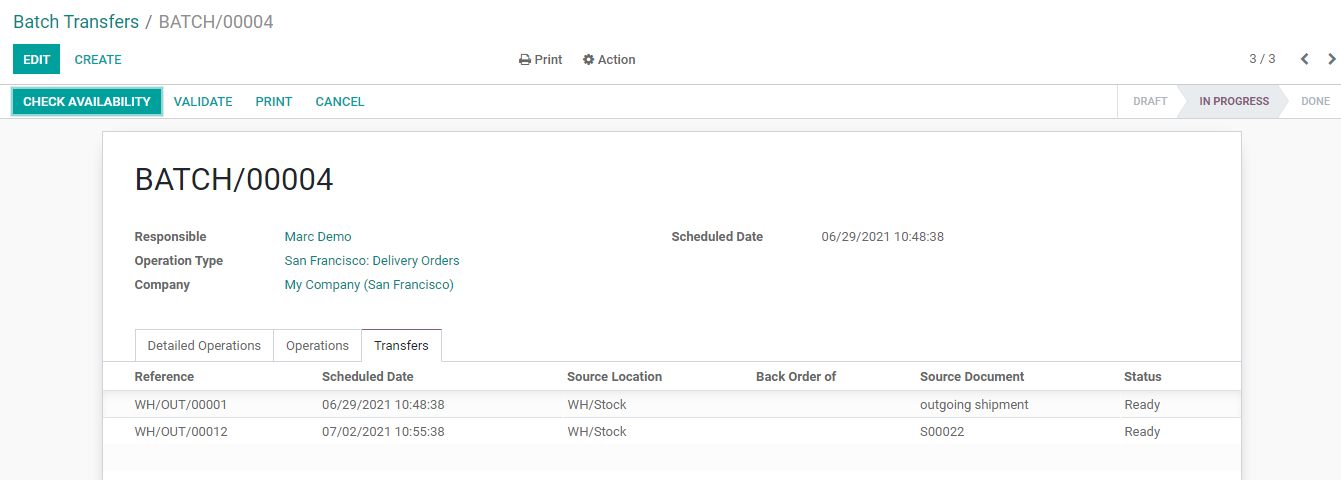
As we have CONFIRMED the transfer the status of the batch transfer has changed to IN PROGRESS from DRAFT.
Here, again we have a few options. VALIDATE, Cancel, or CHECK AVAILABILITY.

As we had checked the availability earlier, we don’t have to do it again. So we can choose the CANCEL option if we do not want to proceed with the batch transfer.If we are ready to go ahead let us choose the VALIDATE option.
So VALIDATE.

We can click apply if we are planning an immediate transfer.

We have got yet another question: Create backorder?
We can choose CREATE BACKORDER if we would be processing the remaining products later. We can choose NO BACKORDER; we would not be processing the remaining products later. This is because we have processed fewer quantities than the demand.
I am choosing the No Backorder option.

Here we can find that one of the transfers is in a Done state and the other one remains in a Ready state.
So I have removed the transfer and added a new one.

Now we cango back to batch transfer

Herewe have added the filter Draft or In Progress. So to view the recently createdbatch transfer we have to remove the filter.

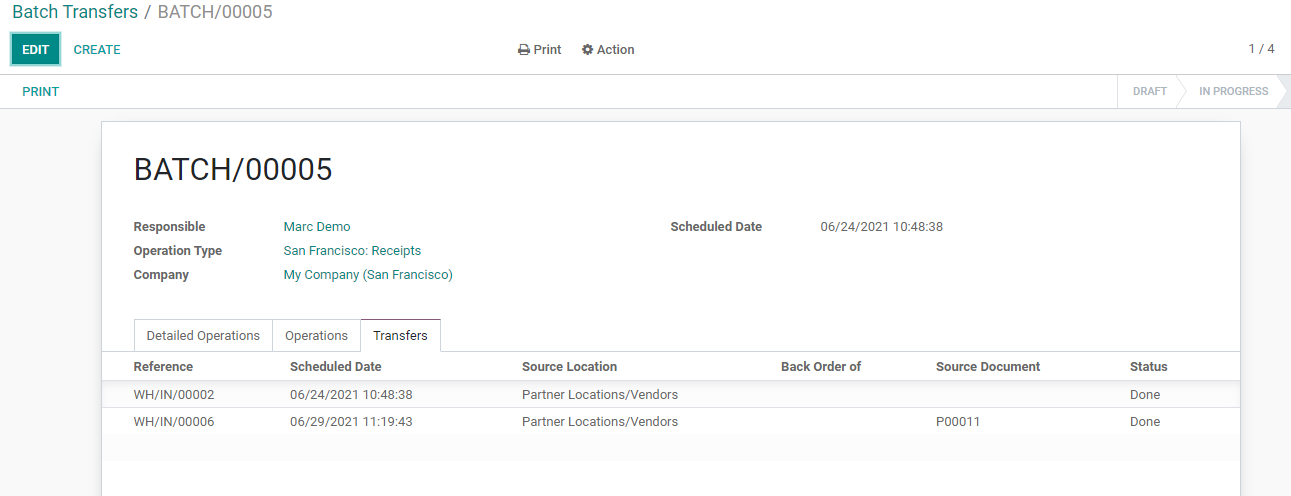
Batch transfer BATCH/00005 can be found in Done state in the above pics.
Clicking on that particular batch transfer we can find the transfers included in the batch transfer.
Now we can see how to cancel a batch transfer.

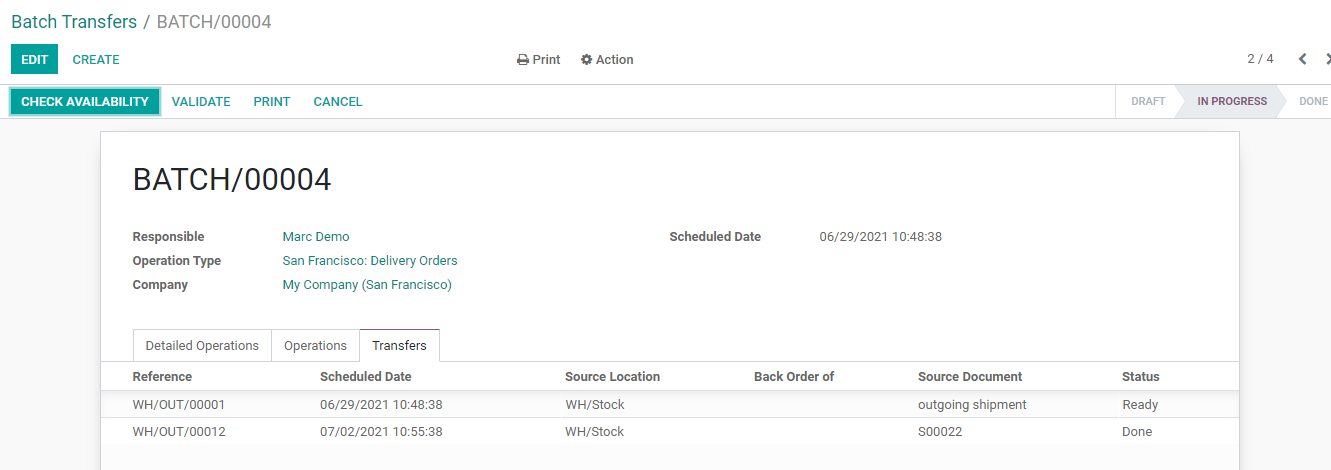
We can use a batch transfer in progress and cancel the batch transfer.

The cancel button is given above. It can help to CANCEL the transfer if you find it unnecessary.
On Cancelling the transfer we can find the status changed to canceled.

The batch transfer has been canceled and it is now in the cancel state.
This way we can create and manage batch transfers with the help of Odoo 14.
Our YouTube channel will help you know more about the Odoo Inventory module and other modules.
Cybrosys also offers technical and functional support to manage all ERP-related requirements. Gold Partner of Odoo Cybrosysis the ultimate support system for Odoo users.