You can use automated actions to trigger actions based on time conditions automatically. They can be used to automatically perform some operations on datasets that meet certain criteria and time constraints. Schedulers are automated actions that run automatically over a period of time and can do many things. It performs actions without manual intervention and makes background jobs a lot easier. Just insert a record into the ir.cron table, and Odoo will do it as defined.
Automated Actions and Server Actions, which are related, are a potent approach to extending the functionality of Odoo without having to write any code (or with only a few lines of Python code). Additionally, you cannot perform development or install add-ons from third parties when using Odoo Online, but you can use automated actions (and server actions).
Odoo functionality can be improved and customized in a number of ways through automated actions:
1. Simple workflow: based on rules, alter a document's "stage" automatically.
2. validation if a user tries to alter the "stage" manually.
3. Create follow-up tasks for users.
To make data entry easier and to cut down on mistakes, automatically assign values for fields based on rules. Validation to stop users from entering data incorrectly (e.g., Preventing duplicate products from being created)
On the creation, deletion, or update of a database record in the given Odoo Model (database table), automated actions may be initiated. They may also be based on form modification or a timed condition. In order to specify "business rules," automated actions can be conditioned on domains and/or "watched fields" (an action for one group of customers, or one type of product, etc.), and Python code can be used to implement more sophisticated logic.
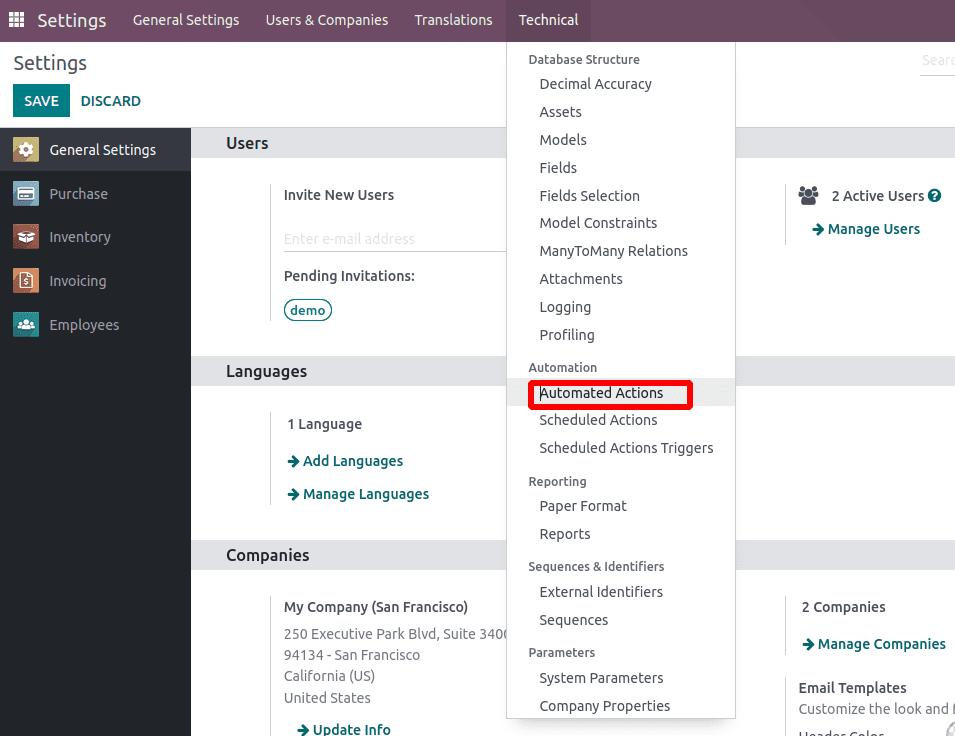
Start by enabling developer mode and navigating to Settings, Technical, / Automated Actions.

Installation
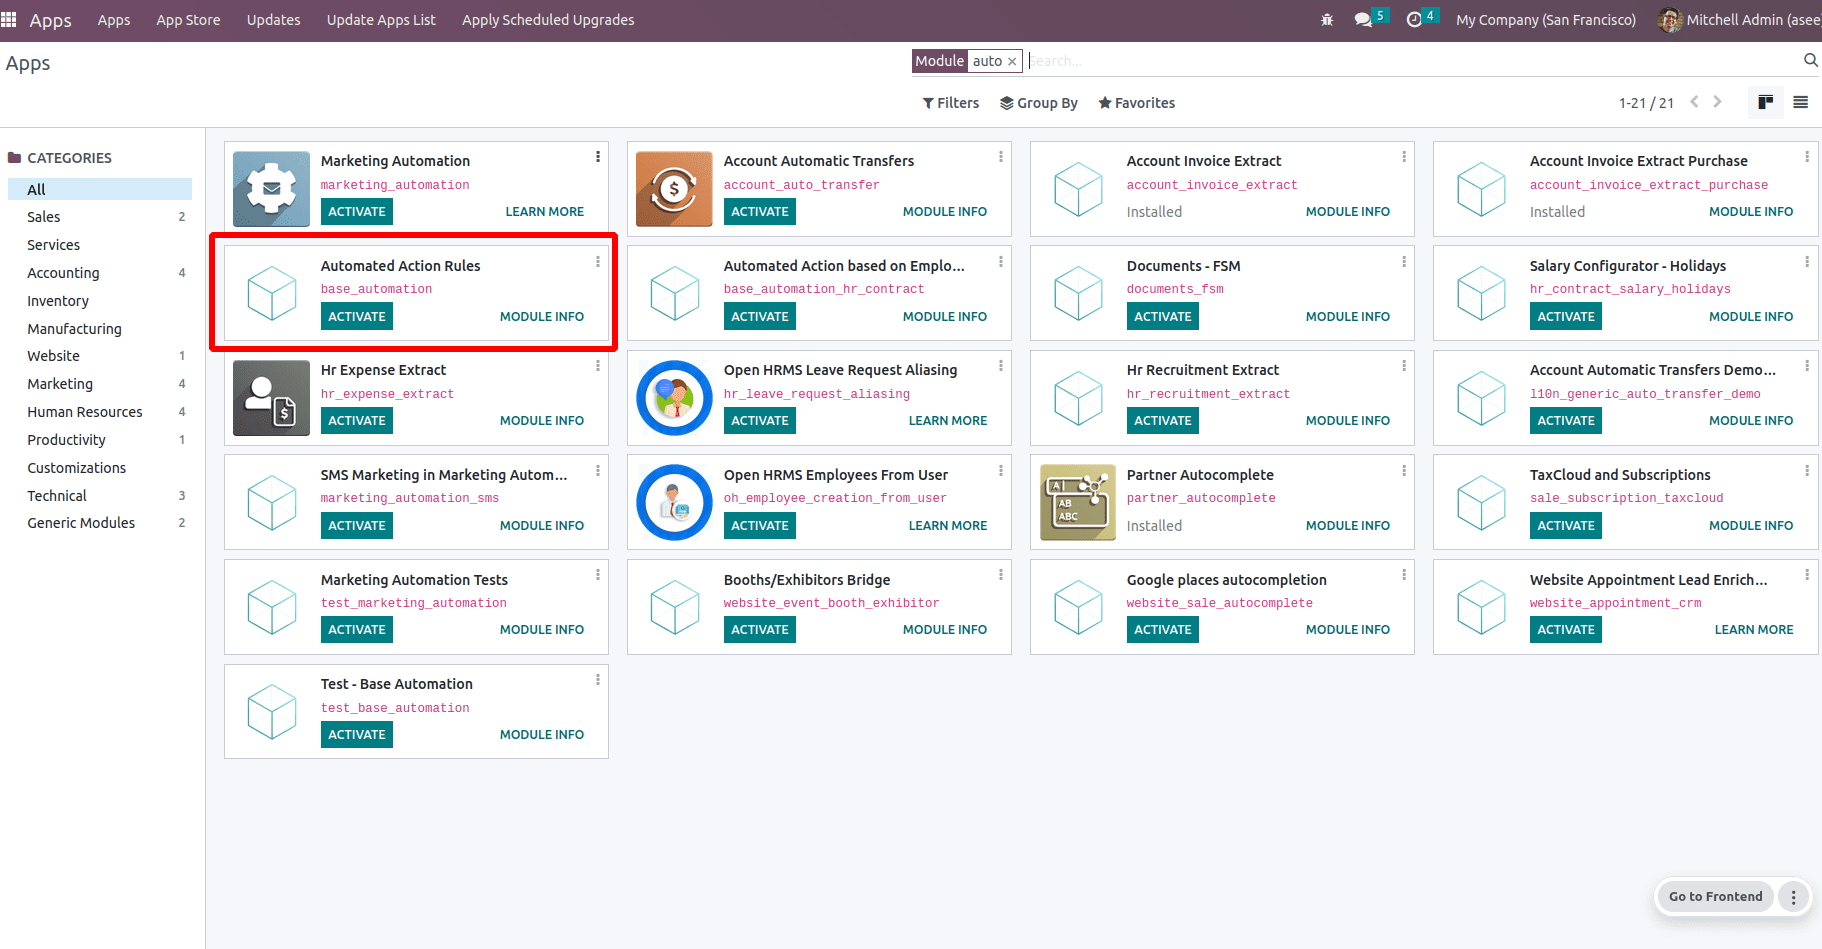
If you can't find this option, you may need to install the Automatic Action Rules module.
First, remove the “Apps” filter by clicking on the ‘X’:

Schedulers are automated actions that run automatically over a time period and can do a lot of things. It performs actions without manual intervention and makes background jobs a lot easier. Just insert a record into the ir.cron table, and Odoo will do it as defined.
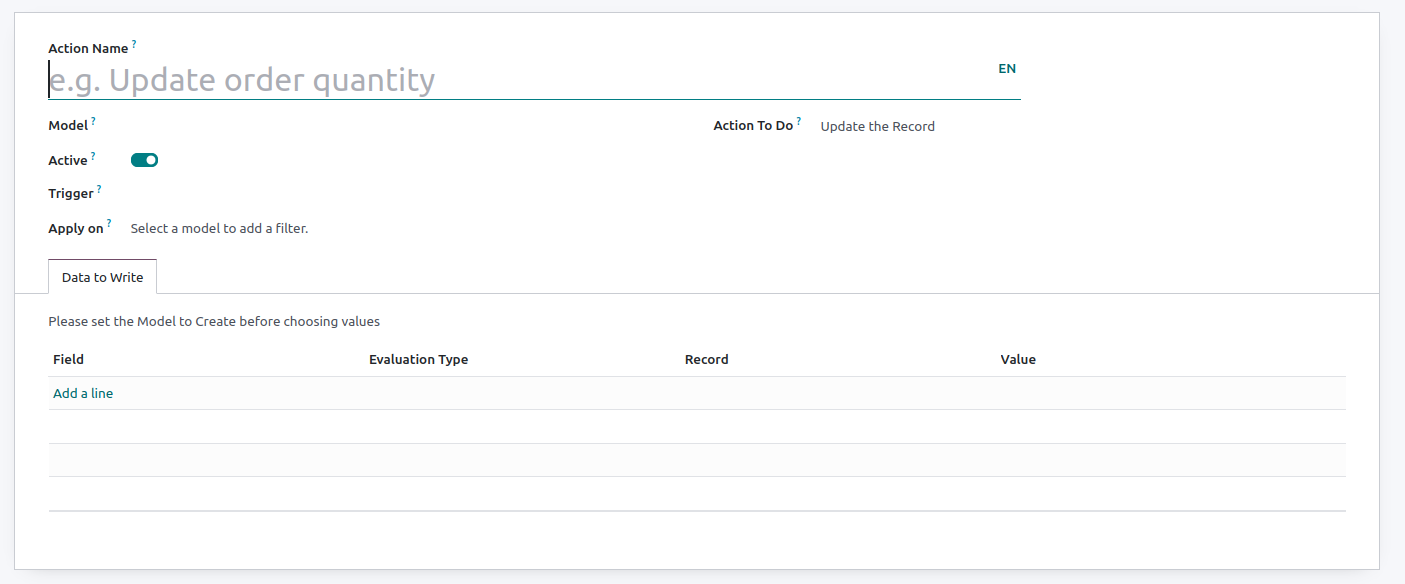
When creating an automated action, ensure to define the Model, the Trigger, the Apply on, and the Action for each one.
First we can define a action name.

Model
Specify the model where the automated action will take effect.
Triggers
1. On Creation: This trigger activates the action when a new record is created and subsequently saved.
2. On Update: This trigger activates the action when a previously saved record is modified and then saved.
3. On Creation & Update: For the "On Creation & Update" scenario, the action is initiated upon the creation and subsequent saving or editing and saving of a record.
4. On Deletion: Regarding "On Deletion," the action is activated upon the deletion of a record.
5. Based on Form Modification: The action is triggered when any change is done to a trigger field’s value on the Form view, even before saving the record. This trigger only works on the user interface when a modification is made by a user. If the field is changed through another action and not by the user, the action will not run.
6. Based on Timed Condition: The action is initiated when the date or date & time value of a trigger field reaches a specific point in time. To activate the action after the Trigger Date, specify a duration in minutes, hours, days, or months under Delay after the trigger date. Alternatively, to trigger the action before the specified date, input a negative duration.
Apply on:
Specify the criteria for applying the automated action to records within the model, to apply filters on a model.
Action:
Define the desired automated action (server action). There are eight types of actions available:
1. Execute Python Code: This action executes Python code. The available variables are detailed on the Python Code tab, where you can also write your code, or on the Help tab.
To enable the action to be executed via the website, check the box for Available on the Website and provide a Website Path.
2. Create a new Record: This action is utilized to create a new record within any model.
3. Update the Record: This action is utilized to assign value(s) to field(s) of any record within the current model.
4. Execute several actions: This action is employed to trigger multiple actions simultaneously. To do so, click on "Add a line" under the Actions tab. In the Child Actions pop-up, select "Create and configure the action."
5. Send Email: This action is utilized to send an email to a contact associated with a specific record. To achieve this, either select an existing Email Template or create a new one.
6. Add Followers: This action is used to subscribe existing contacts to the record.
7. Create Next Activity: This action is employed to schedule a new activity linked to the record. Utilize the Activity tab to set it up as usual. Instead of the "Assigned to" field, choose an Activity User Type. Opt for "Specific User" and specify the user under "Responsible" if the activity should consistently be assigned to the same user. To dynamically target a user associated with the record, select "Generic User From Record" and adjust the User field name if necessary."
8. Sending SMS Text Message: This action is utilized to dispatch an SMS to a contact associated with the record. To accomplish this, choose an existing SMS Template or create a new one
To link the record that initiated the creation of the new record, choose a field under Link Field. For instance, you could automatically generate a contact when a lead is converted into an opportunity.

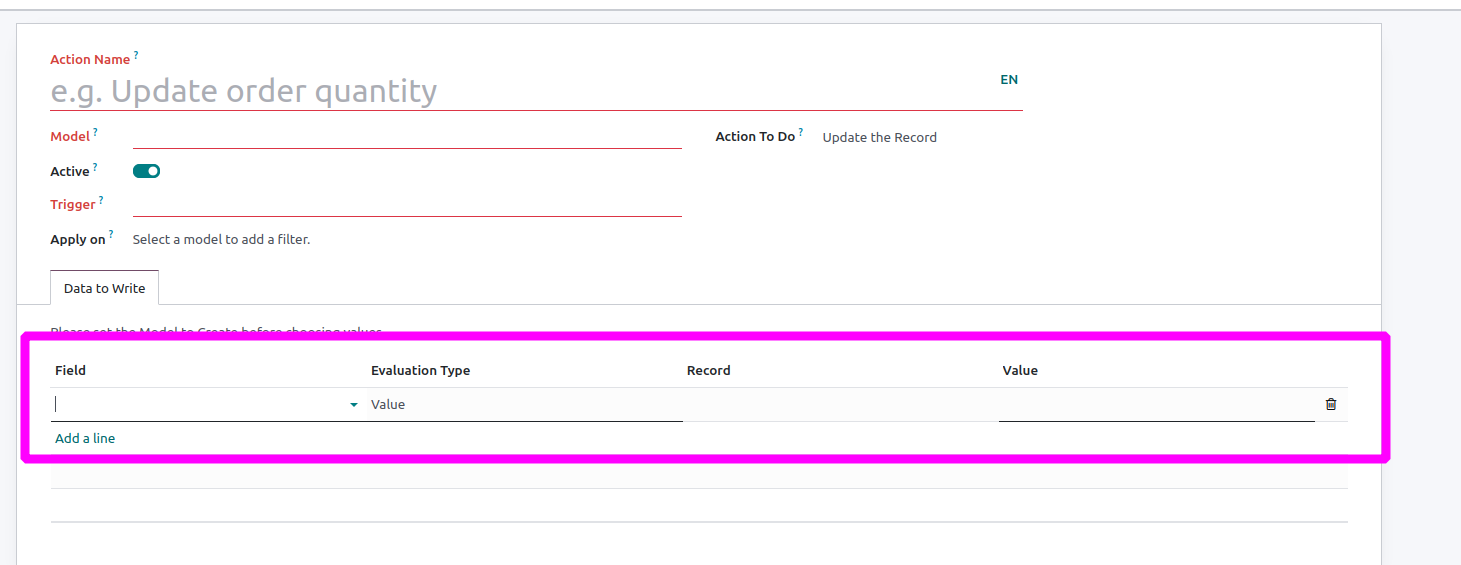
Data to Write tab: This tab is utilized to define the values of the new record. After selecting a Field, designate its Evaluation Type:
Value: This type is employed to directly assign the field’s raw value in the Value column.
Reference: This type enables the selection of the record under the Record column, allowing Studio to append the internal ID in the Value column.
Python expression: Employed to dynamically specify the value of the newly created record's field using Python code within the Value column.
Let's see how to create a record through the backend
<record id="test_rule_on_create" model="base.automation">
   <field name="name">Base Automation: test rule on create</field>
   <field name="model_id" ref="purchase.model_purchase_order"/>
   <field name="state">code</field>
   <field name="code" eval="'records.write({\'user_id\': %s})' % ref('base.user_admin')"/>
   <field name="trigger">on_create</field>
   <field name="active" eval="True"/>
   <field name="filter_domain">[('state', '=', 'draft')]</field>
</record>

In conclusion, automated actions in Odoo 16 are a powerful tool for extending the functionality of the software without having to write any code. With automated actions, you can trigger actions automatically based on time conditions or other criteria, making background jobs much easier. Additionally, with schedulers, you can automate tasks over a period of time without any manual intervention. Automated actions can be used for a variety of purposes, such as altering a document's stage, preventing incorrect data entry, and creating follow-up tasks for users. By enabling developer mode and navigating to Settings / Technical / Automated Actions, you can create automated actions and customize them according to your business needs. Overall, automated actions are a great way to improve the efficiency and accuracy of your business processes in Odoo 16.