Product variants in Odoo 16 are a potent feature that lets businesses manage many product variations, such as size, color, or material, within a single product template. The management of intricate product catalogs can be made simpler by allowing these variants to have distinctive characteristics, costs, and inventory levels. Users can more easily set up and maintain their product offerings with the help of Odoo 16's user-friendly interface for generating and changing product variants. Additionally, by ensuring precise stock management and pricing for each unique product option, variations can be leveraged to streamline the sales and purchasing processes. For companies using Odoo 16, this feature improves product catalog management and boosts overall productivity.
When the user needs to create a new attribute, they need to configure it from the Settings. So first, go to Settings to enable the Variants option. The settings are available in the Configuration tab.
: Configuration > Settings > Variants
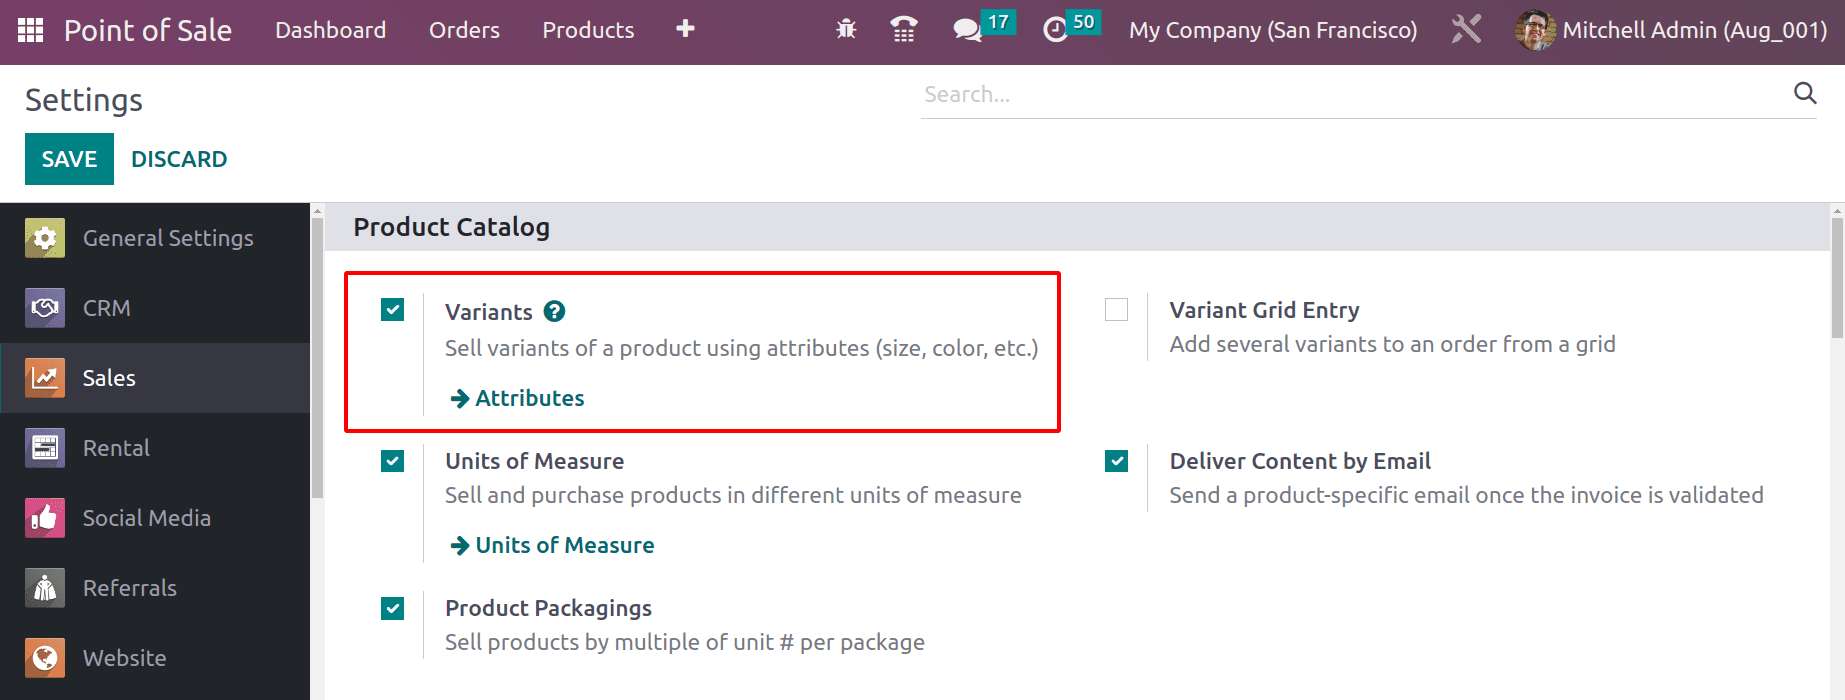
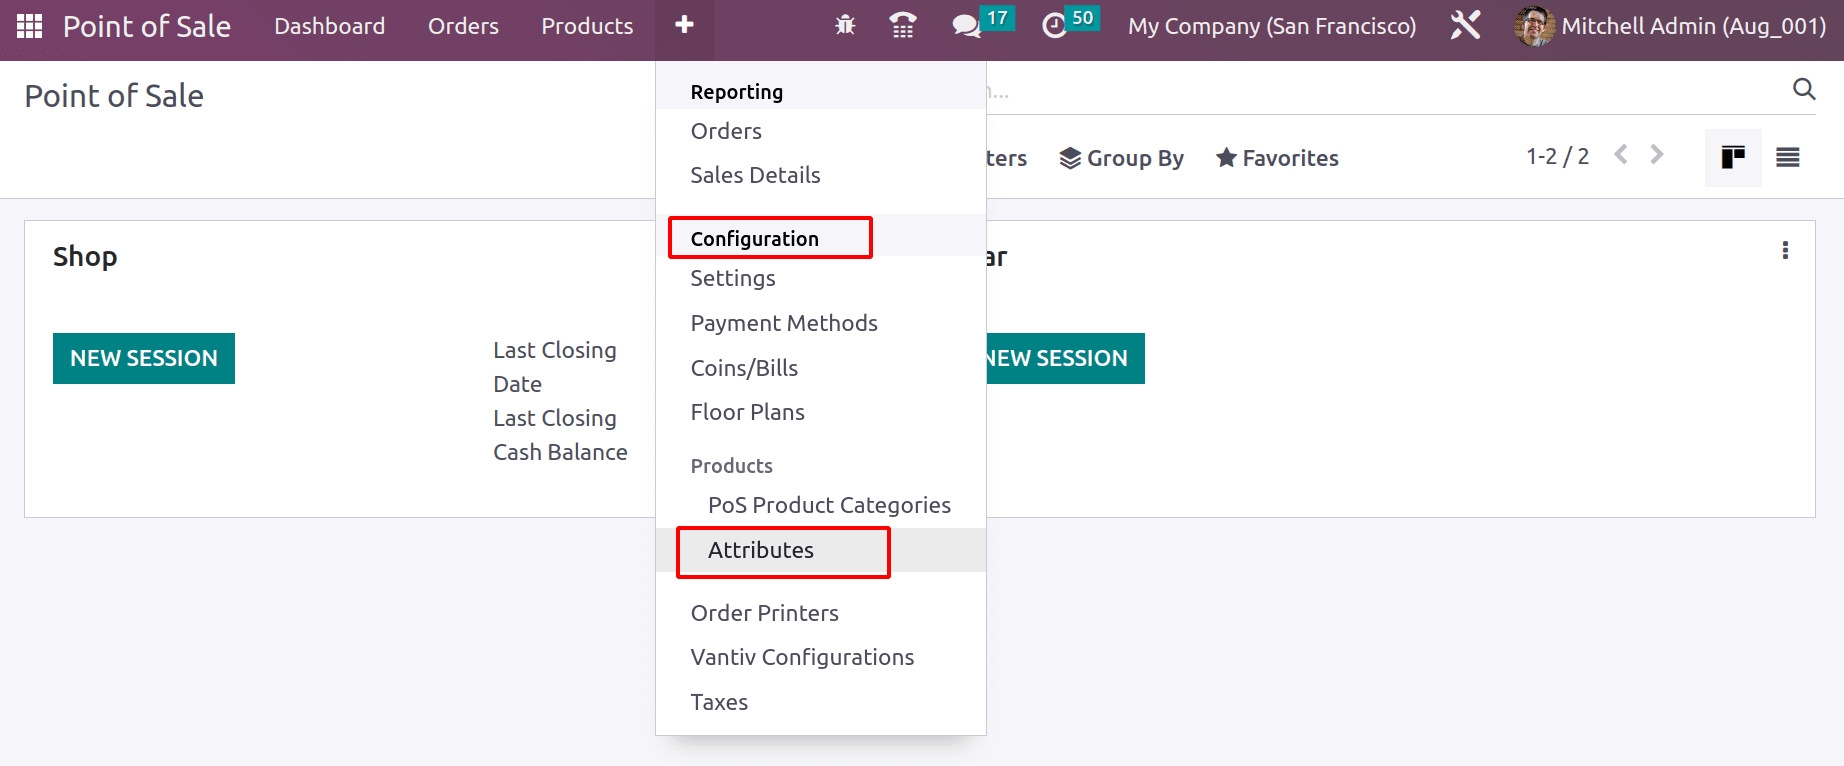
After enabling that, a new feature named Attributes will appear under the Configuration tab of the Point of Sale module. Click on it to open.
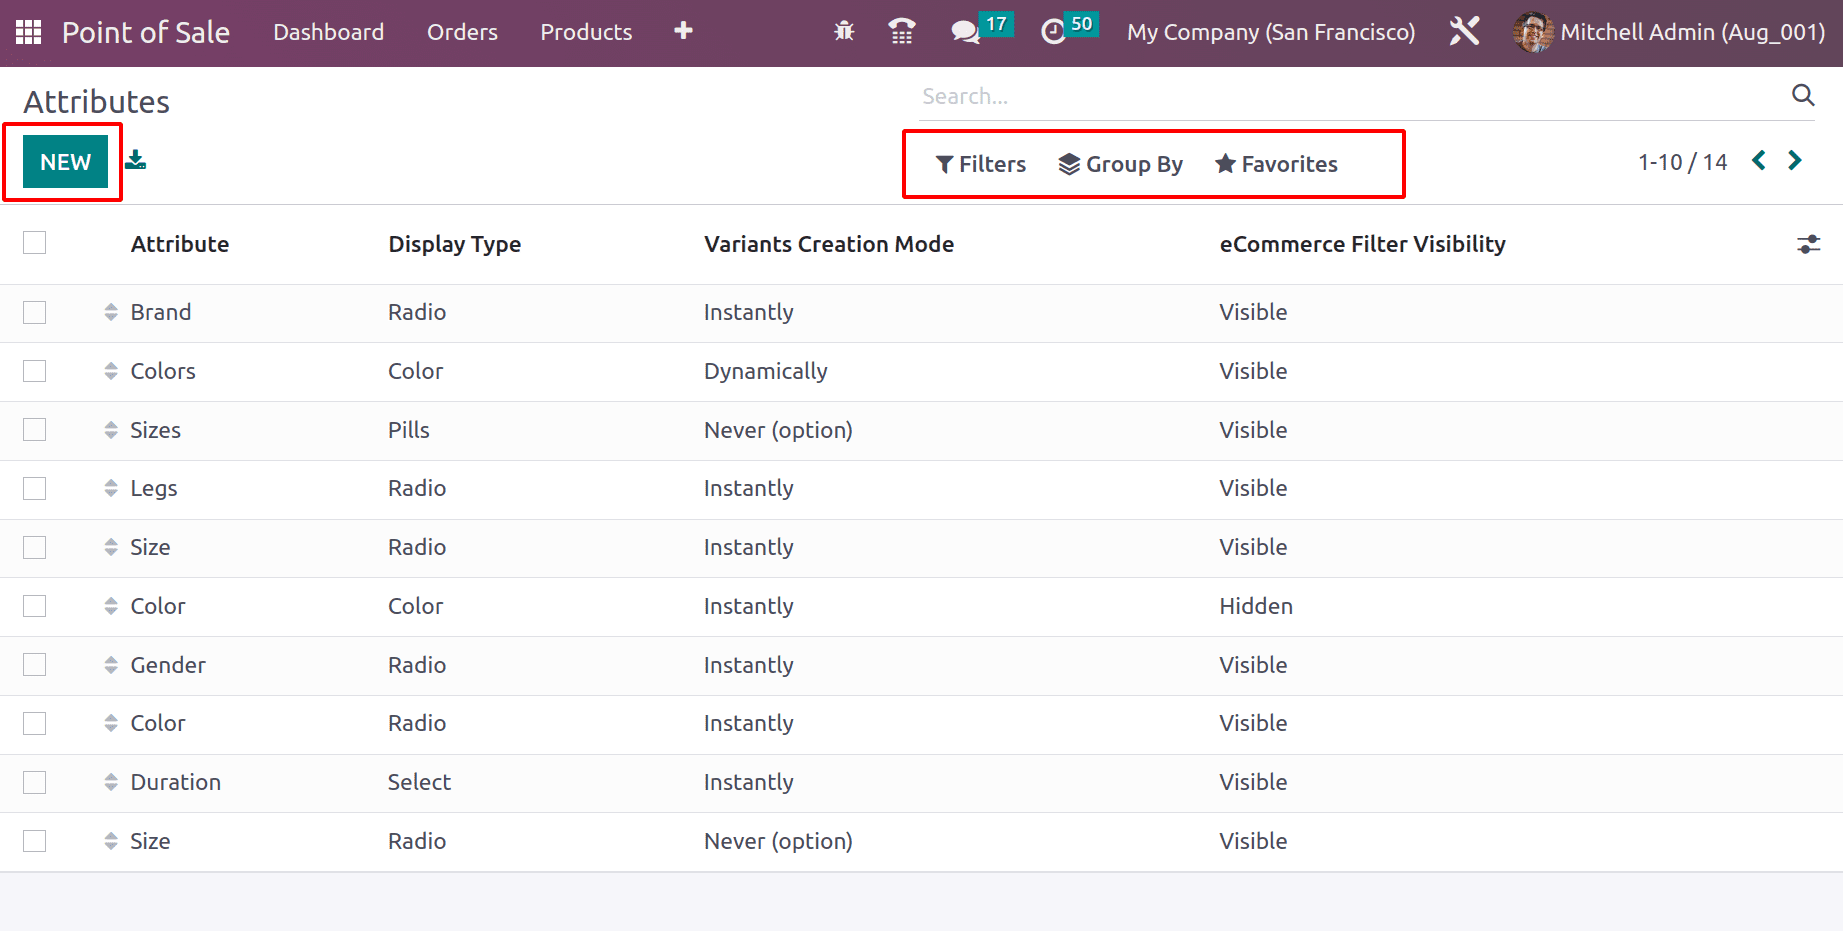
Let's check how the Attributes are created. The attributes window shows a list of previously created attributes. Filter Group By and Favorites options are also available inside this window. It's also possible to Import the attributes to the system or create a new one by using the NEW button.
Inside the Attributes Name field, add the name of the attributes. The name may be Brand, color, size, etc. The field is Display Type. There are four display types, which are Radio, Pills, Select, and Color. These display types are available inside the product configurator.
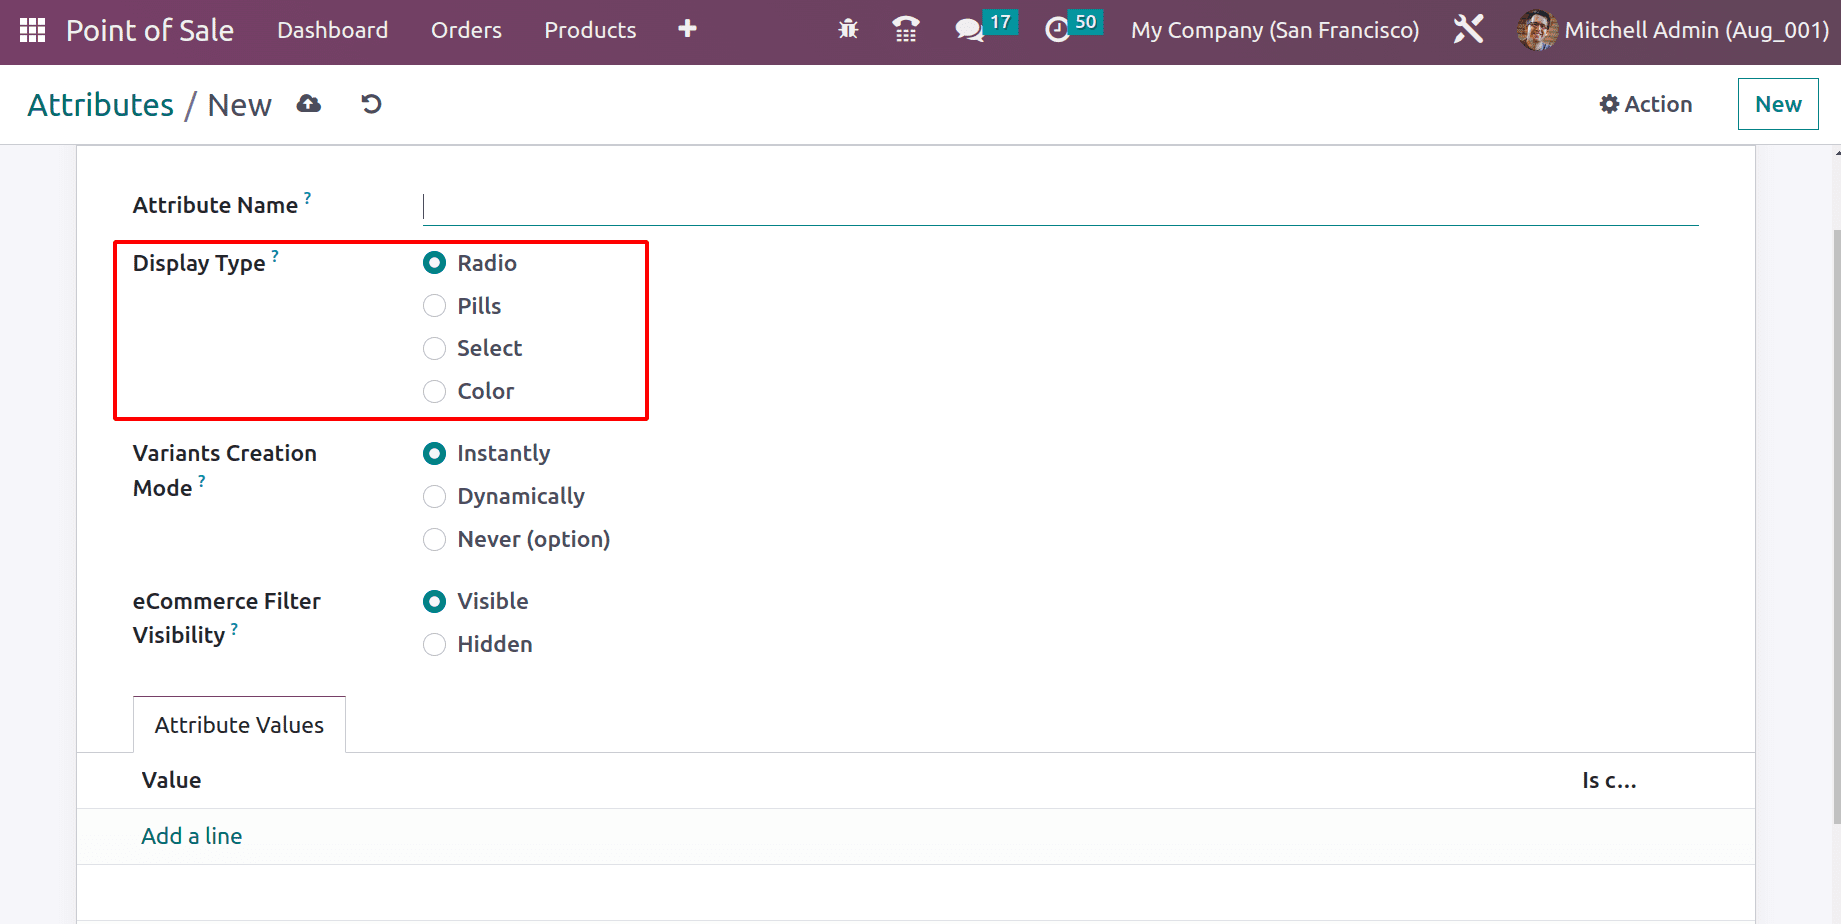
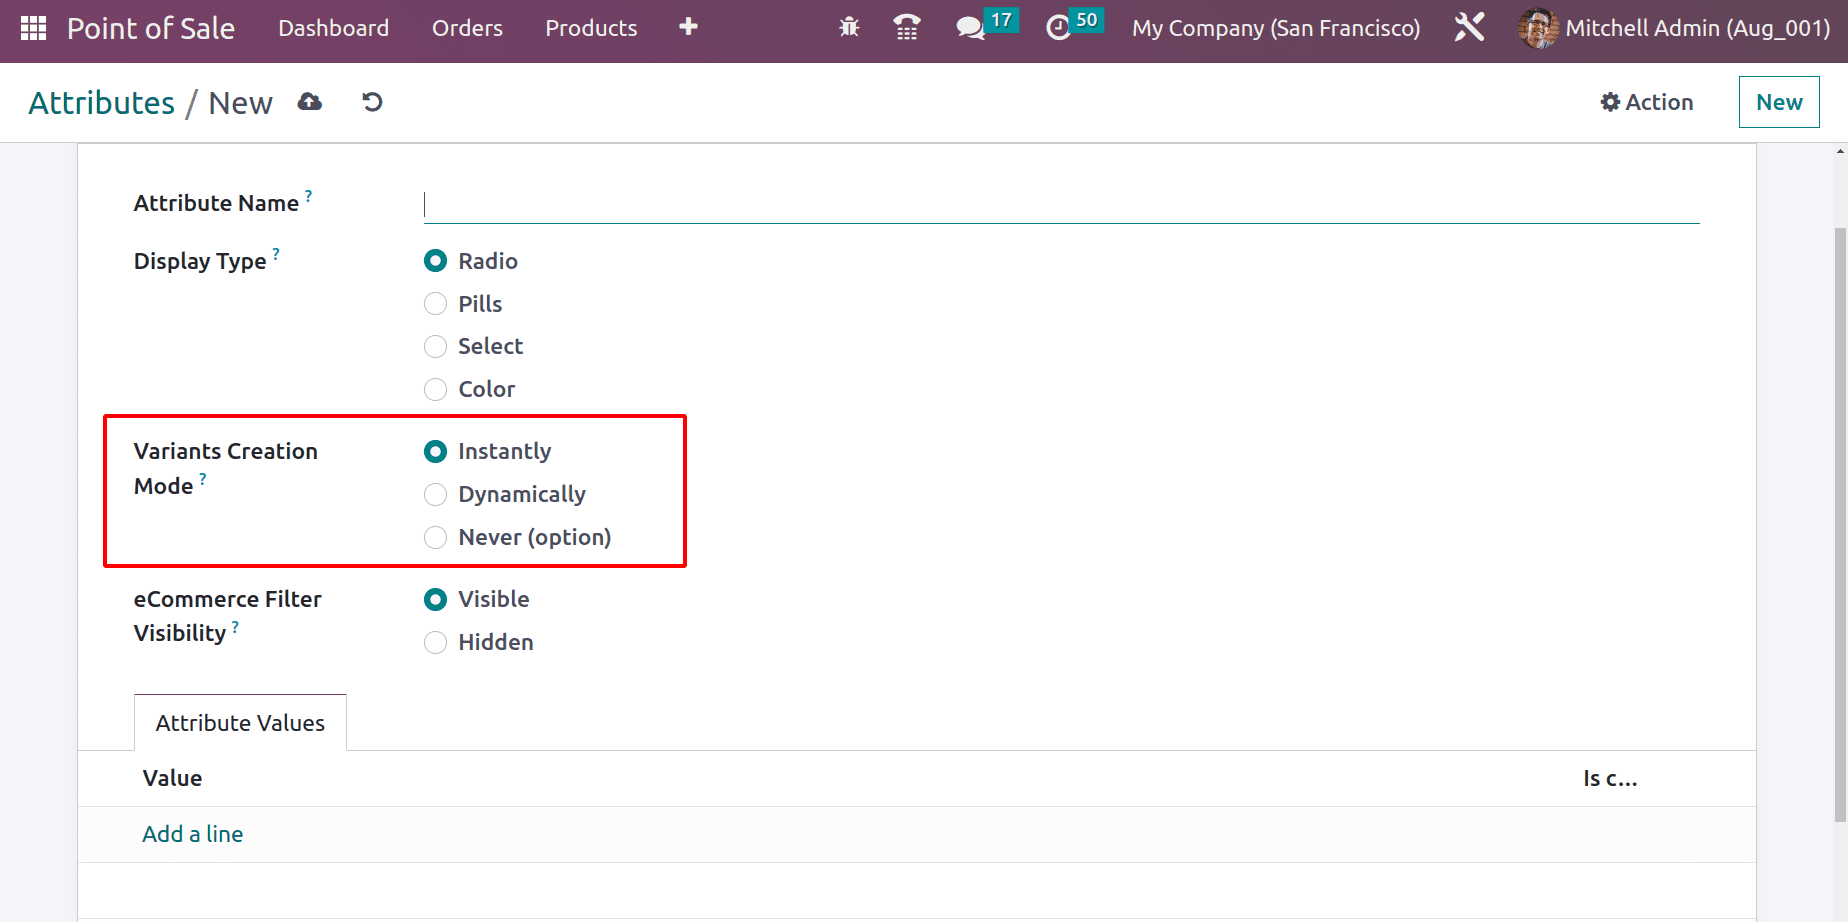
Next is Variant creation mode. In Odoo 16, there are three different variant creation modes. They are
*Instantly: Instantly implies that the attributes added inside the product itself will also automatically generate variants at the same moment. When a user adds attributes and their values to a product in the Instantly Creating mode, after saving, a new smart tab displays all the produced versions. Here, variations are made right away, hence the name Instantly.
*Dynamically: The product variants are not created once the variants and values have been added when the variant creation option is set to Dynamically. When attributes and values are added, no smart tab indicates that a product variant will be produced. Variants of these products won't be made until a sale or purchase has been completed. The system will only generate attributes that complete a transaction.
For instance, there is a product referred to as Shirt. Color is the attribute, and we put the colors Black and Blue as values inside the Attributes & Values tab of the product. The user then just bought/sold the Black Shirt. Then the system will generate the product version for Shirt Black. After making a purchase or sale on it, the White shirt is only generated as a variant.
*Never: The never type is the last. The product variants in this case, won't display inside the system, but the user can still select them in the order.
Let's discuss each mode separately in this blog.
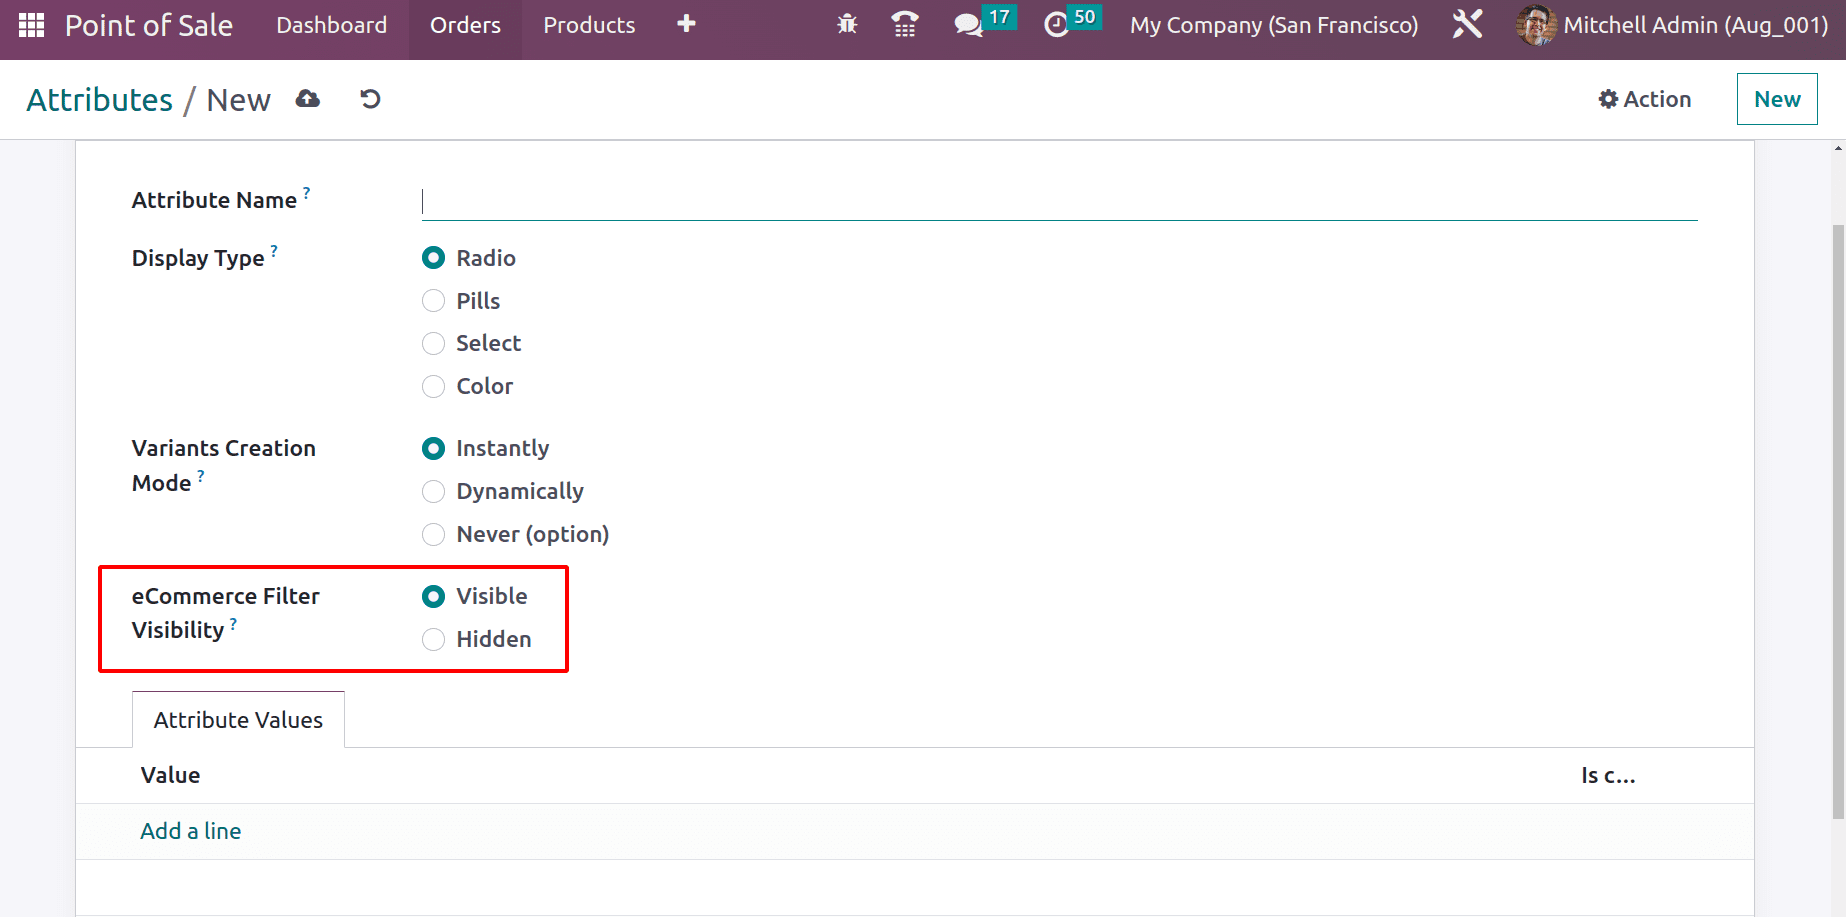
The variant visibility inside the website can be set as either Hidden or Visible in the e-Commerce Visibility Field.
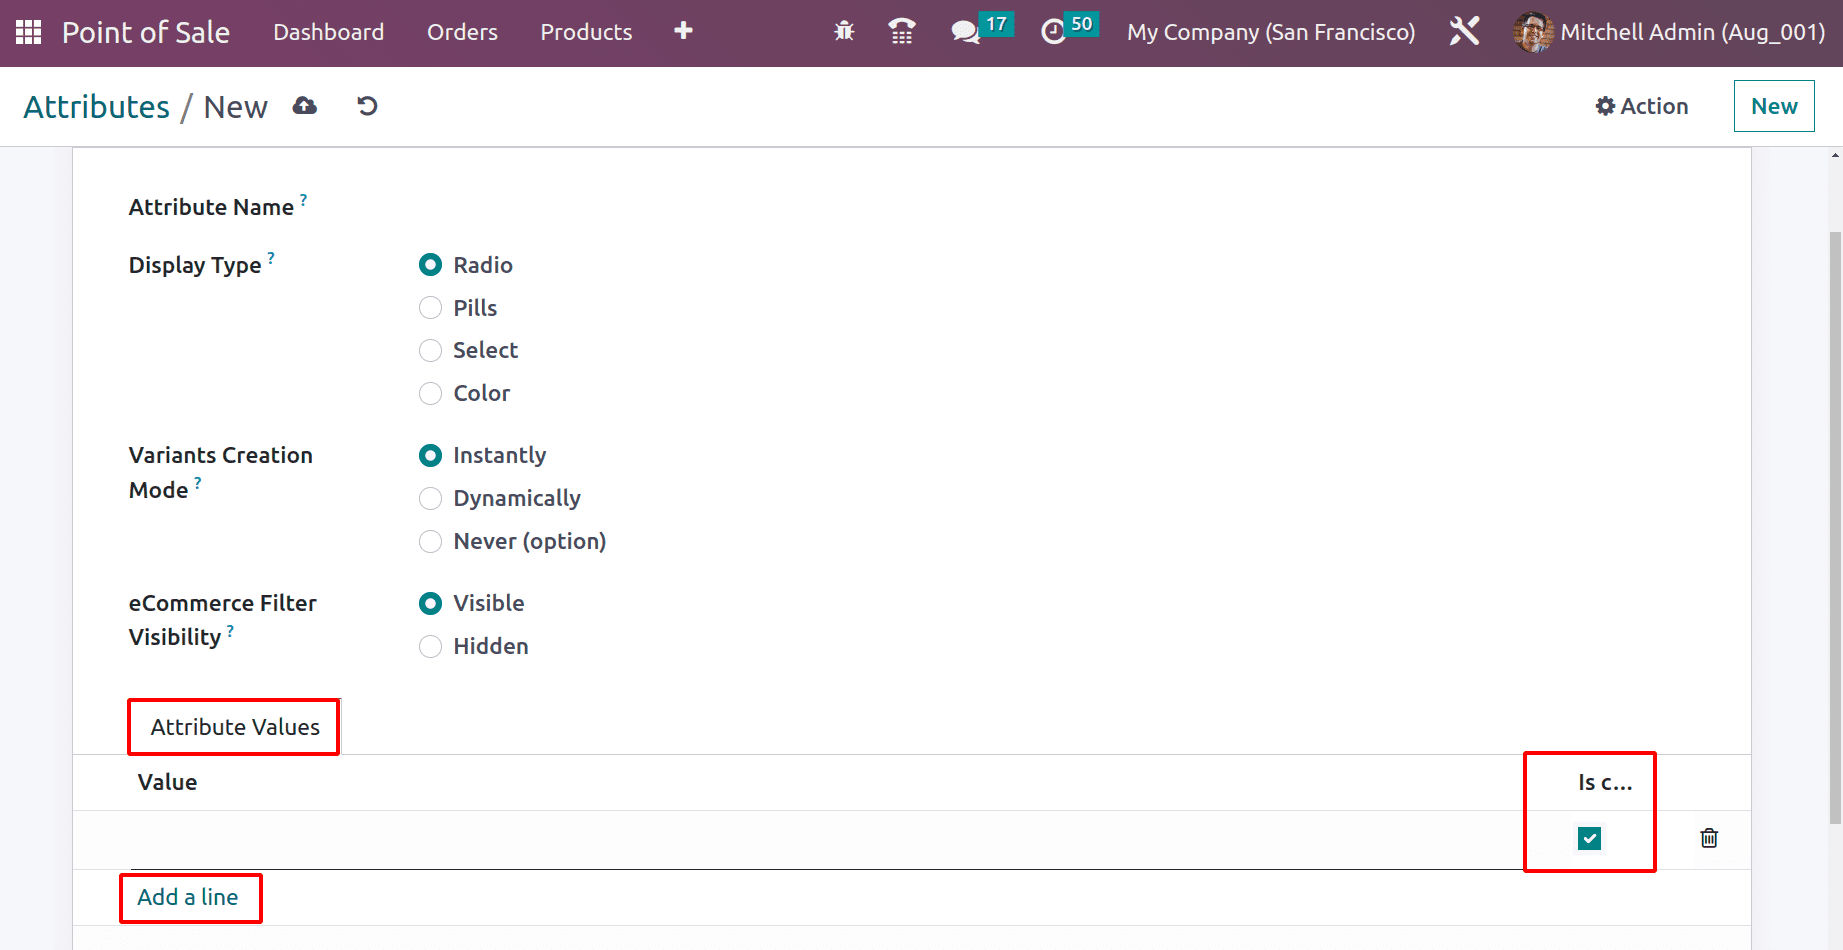
Inside the Attributes Values tab, the Add a Line button can be used to add values. Customizing the values is possible by enabling the ‘Is Custom’ checkbox.
Now, as said before, let's check the three variant creation modes separately.
Instantly
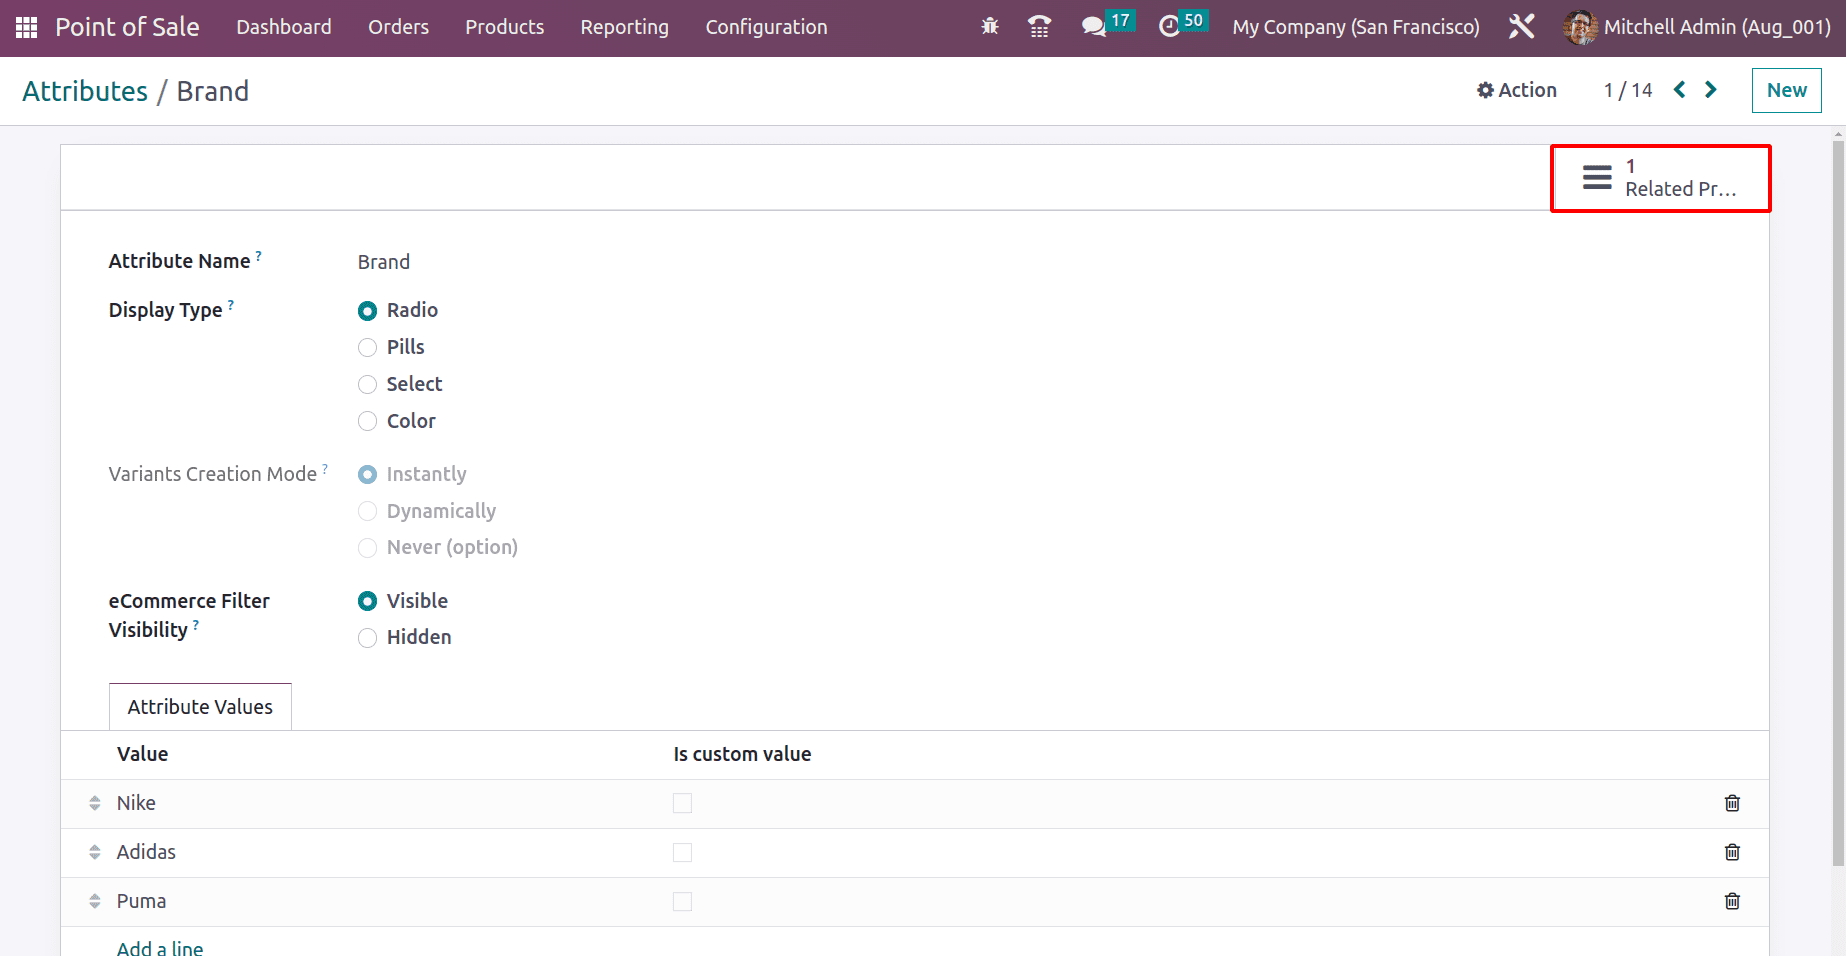
An attribute is created with the name Brand. Here, the Variant Creation Mode is set to Instantly. Here, the Attributes Values added are the brand names Nike, Adidas, and Puma.
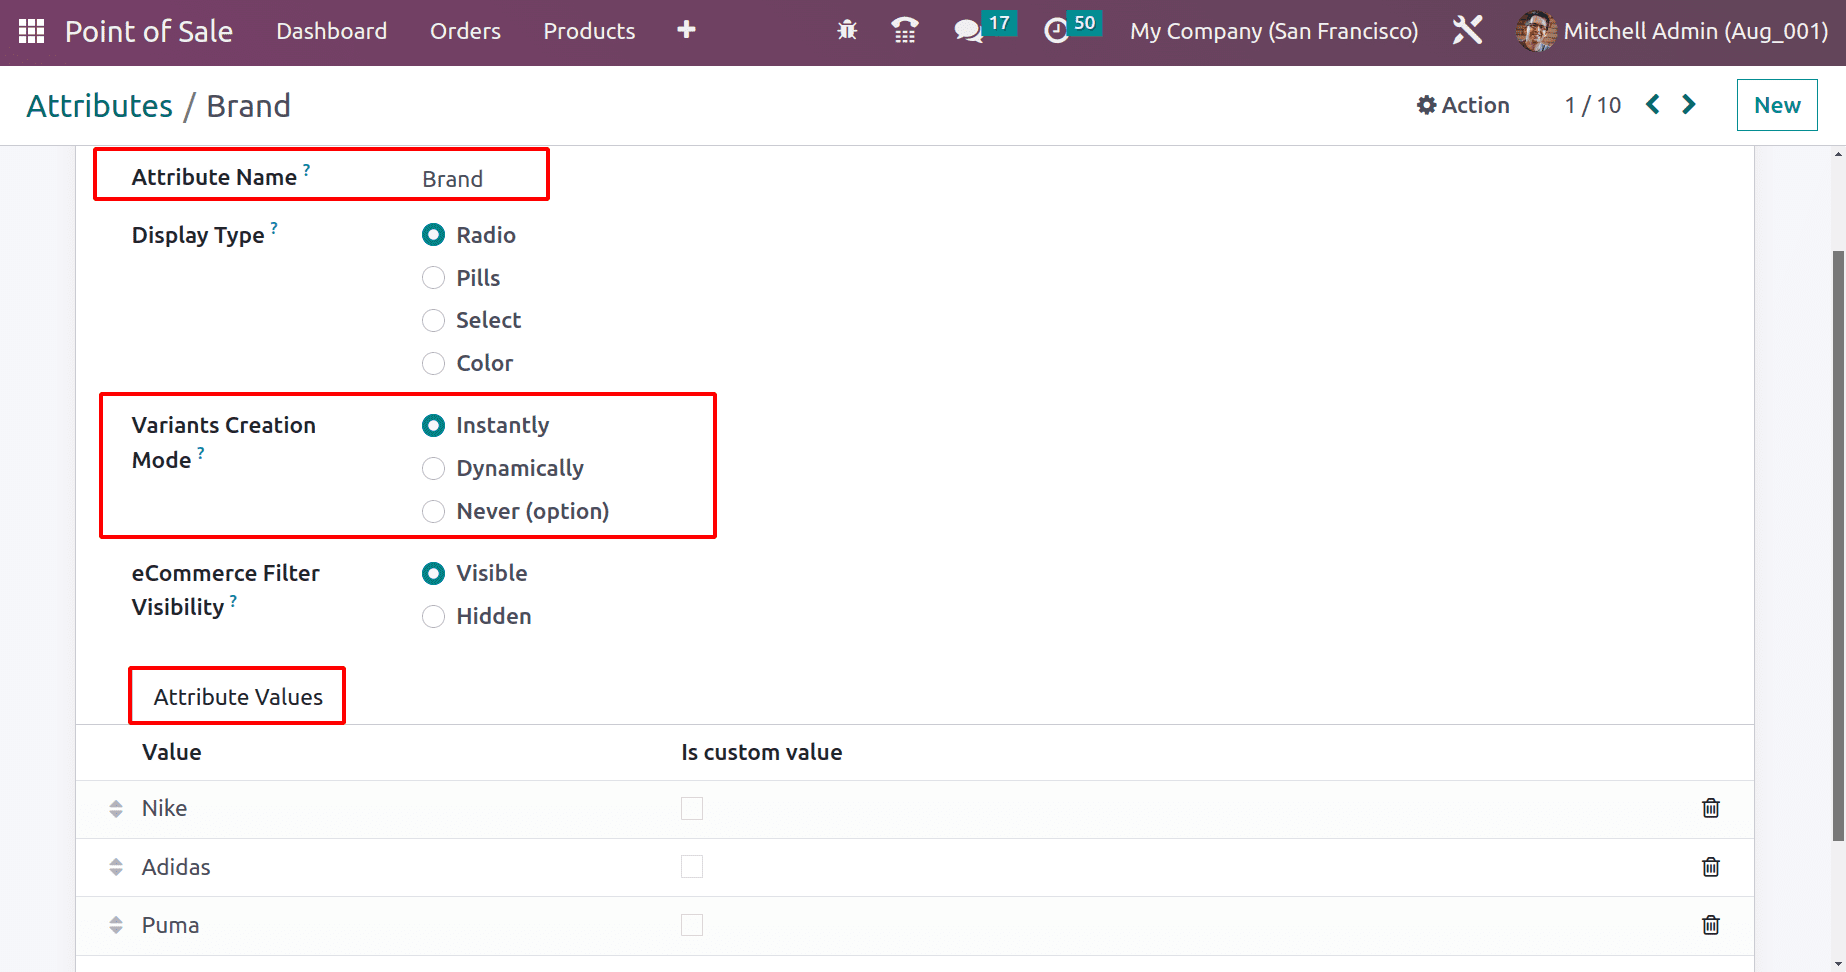
Save the Attribute.
The smart tab named Related Products shows all the products related to this attribute. So, currently, here is one product. So open the smart tab to view that product.
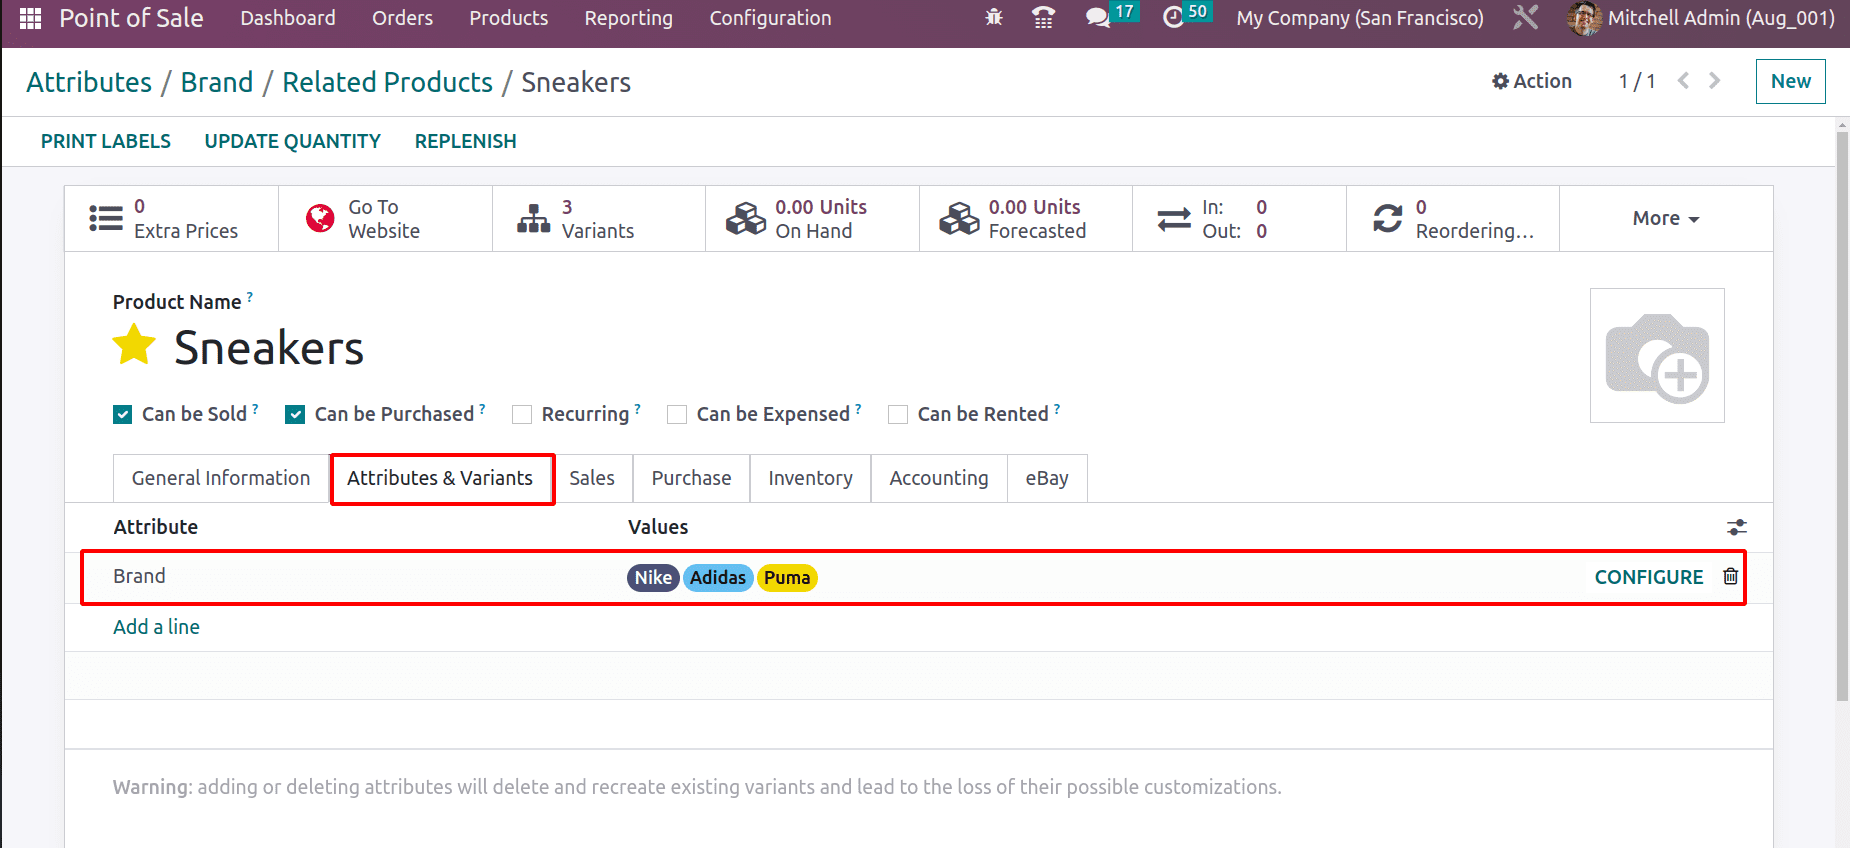
Here the product is Sneakers, a storable one. Inside the Attributes & Variants tab, the attribute Brand has already been added with three values: Nike, Adidas, and Puma.
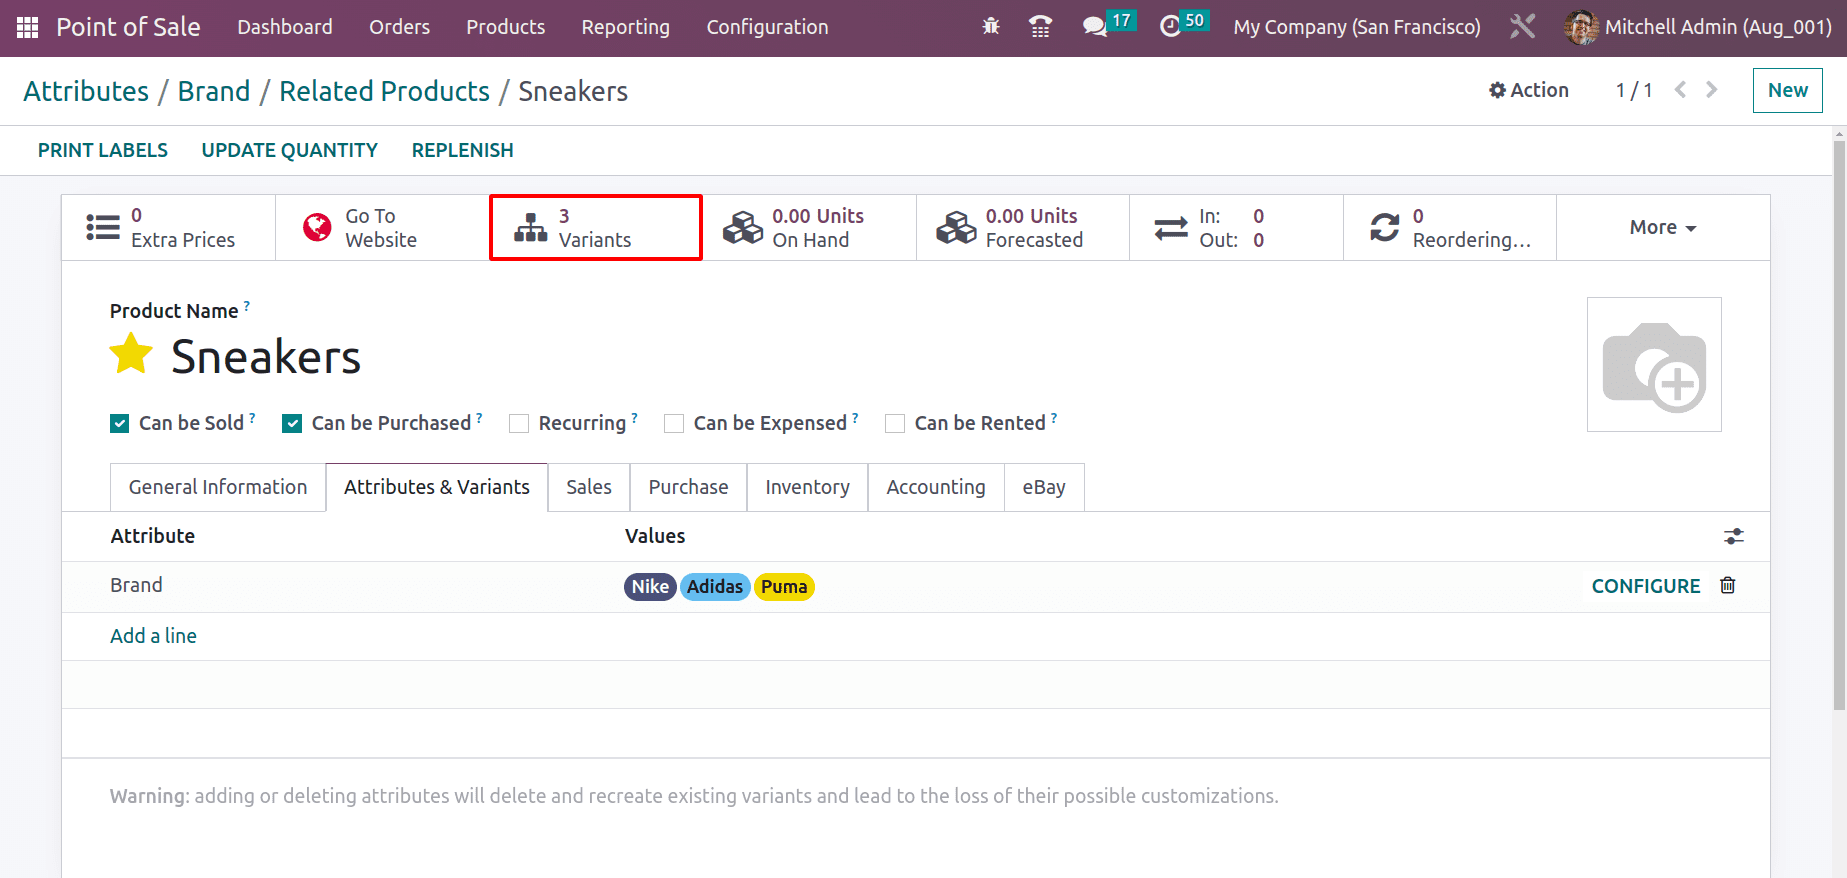
Here, the variant creation mode is Instantly. So as said before, here the variant creation mode is Instantly, so an additional smart tab is added with the name Variants. So, three variants are created.
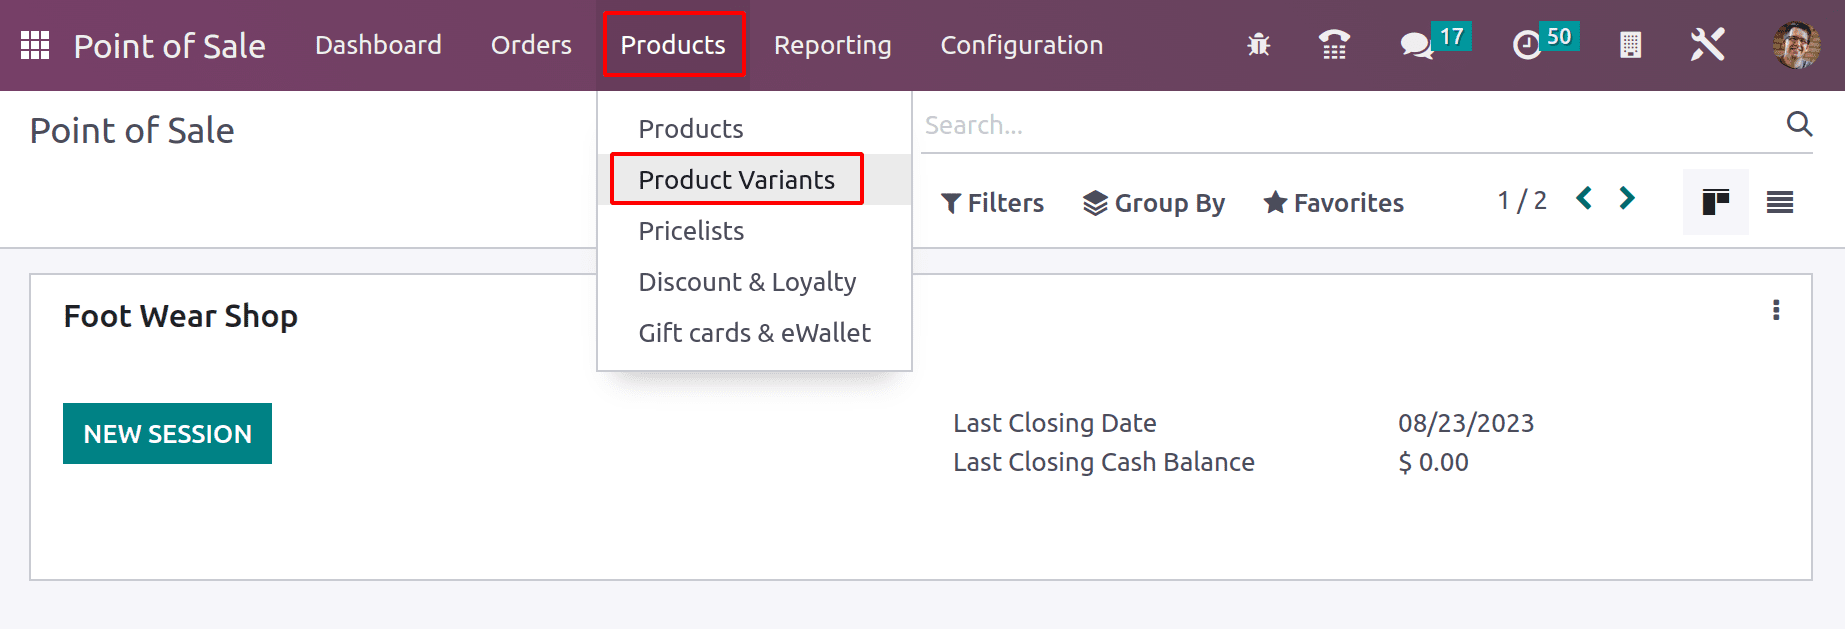
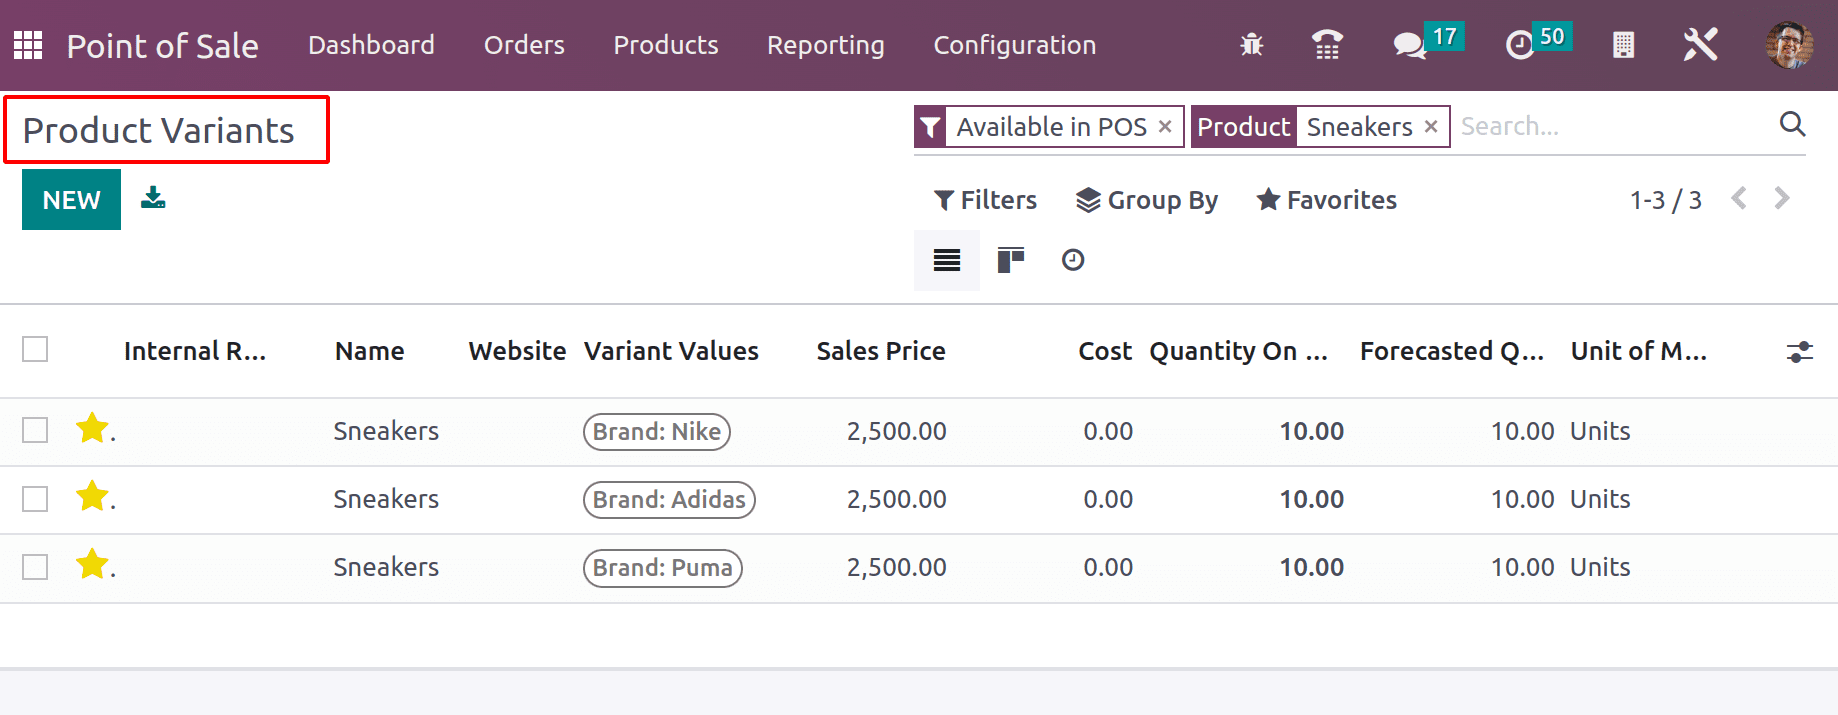
Let's check those variants inside the Product Variants tab. Product variants are available under the Product tab.
Here in Odoo 16, each product variant is considered a single product. So we can say that three products are created here. Sneakers (Brand: Nike), Sneakers (Brand:Adidas), Sneakers (Brand:Puma). All three of them have updated quantities to 10.
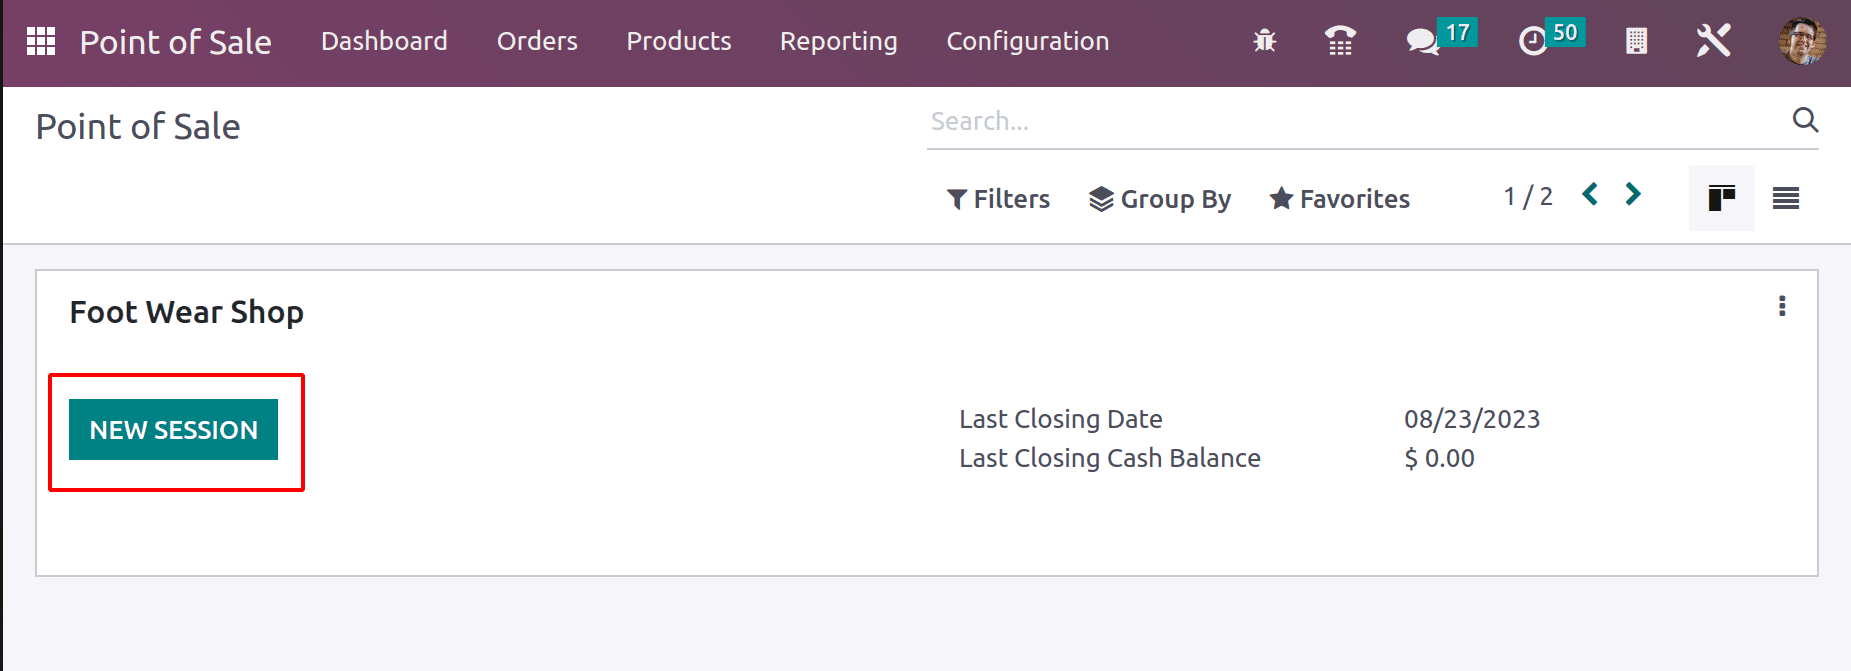
So let's go to the shop session. The Dashboard shows there is a Foot Wear Shop. Go into that session to sell the product. So click on the NEW SESSION Button.
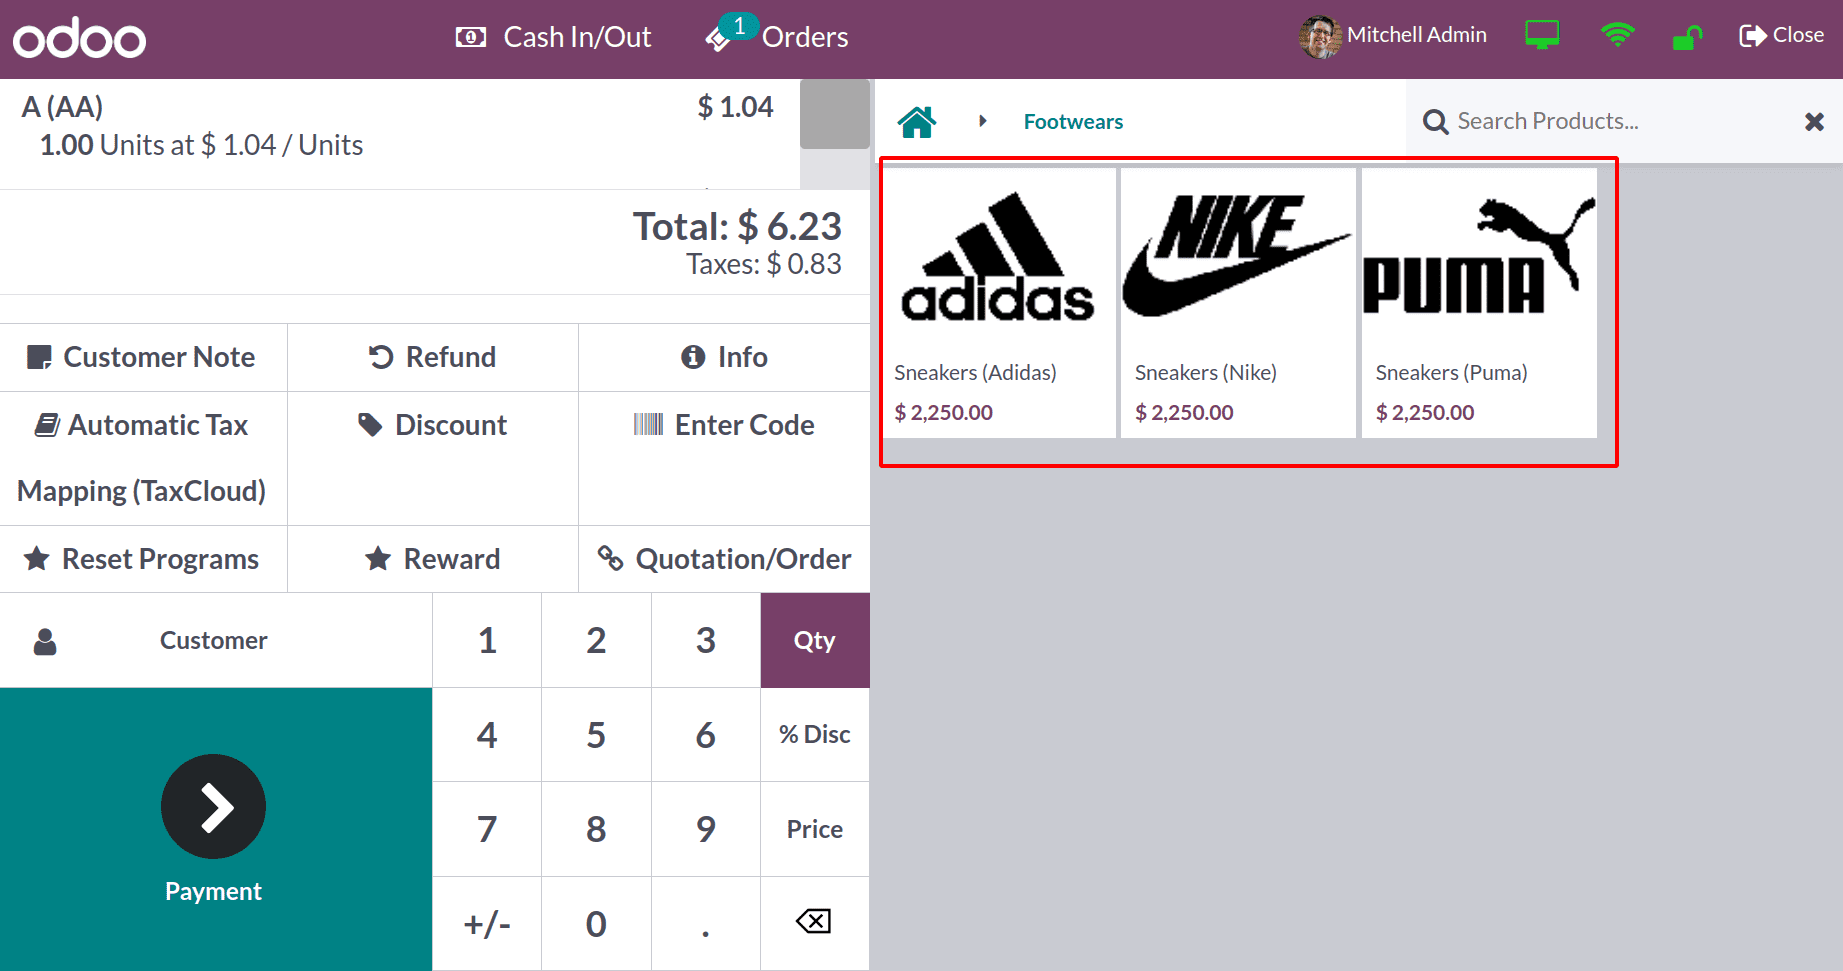
While opening the Footwear Shop, the three product variants created are available inside the shop. The variant creation mode is Instantly. So, these variants are also instantly created. The customers can easily buy the product from the shop.
Dynamically
The next variant creation mode is Dynamically for the Attribute Colors. Four values added inside the Attribute Values tab. White, Black, Blue, and Yellow are the values added. The Related Product tab also contains one product.
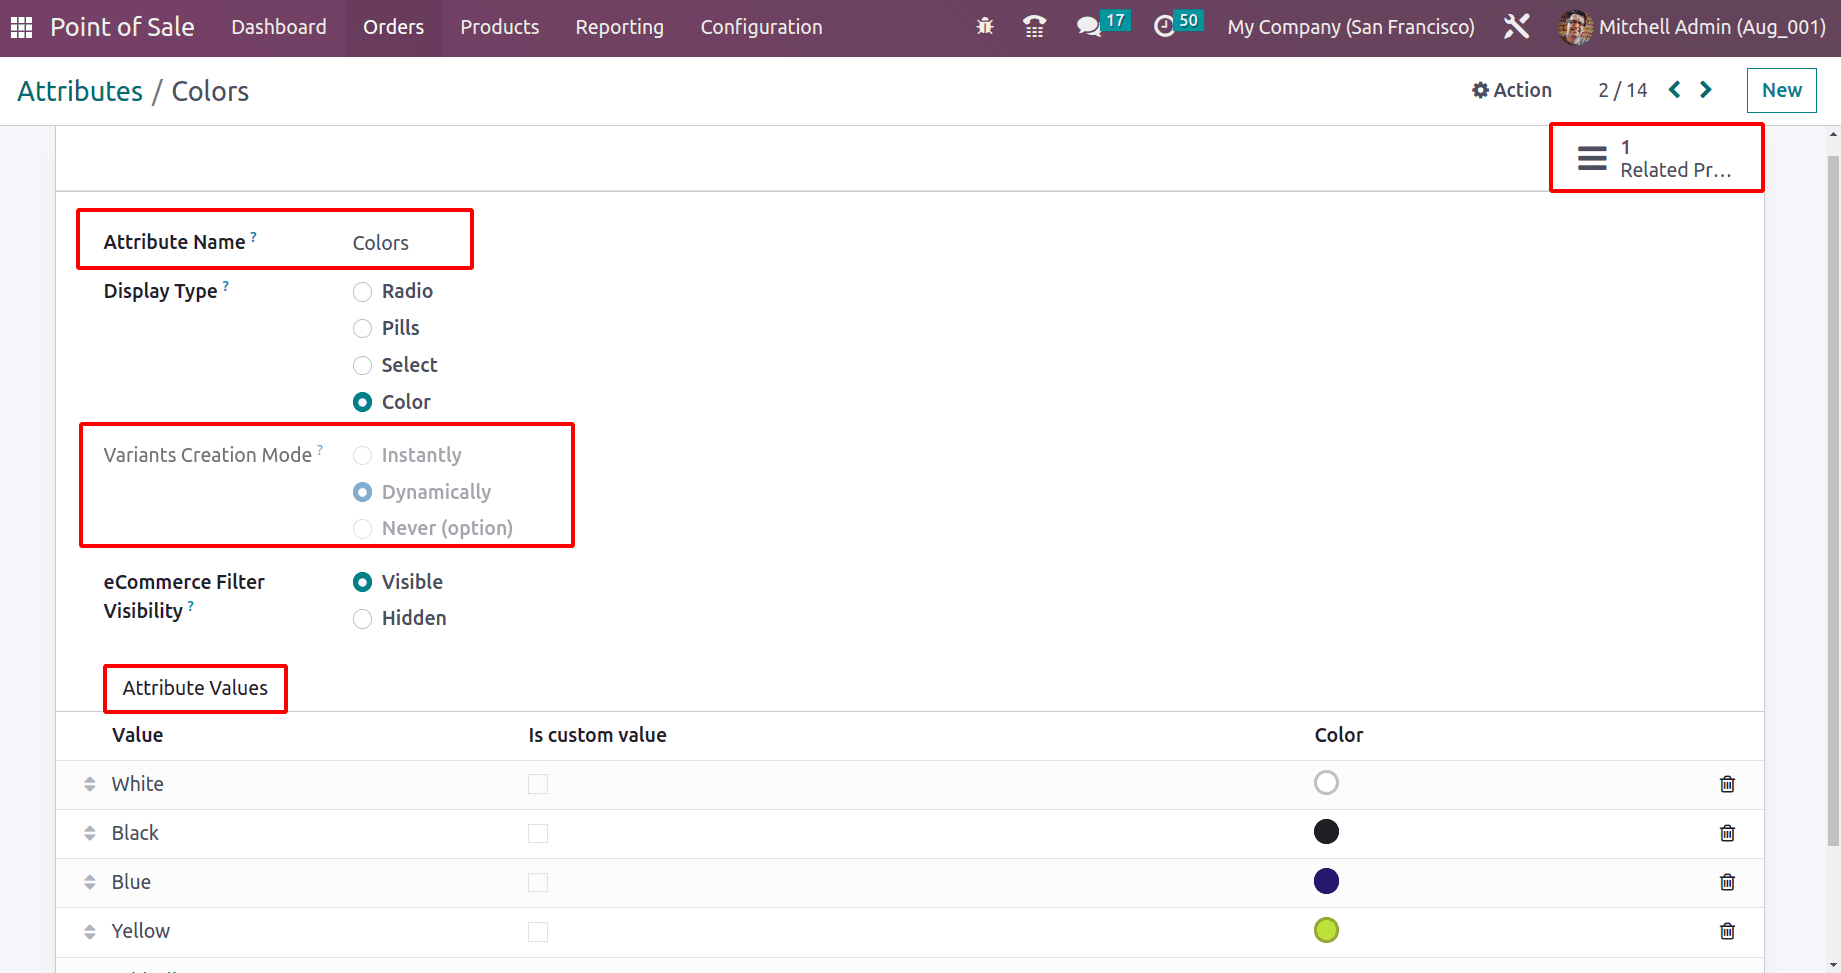
So, as said before, open that tab to view the created product. The created product is Crocs. Inside the Attribute & Variant tab, the created attribute is already added.
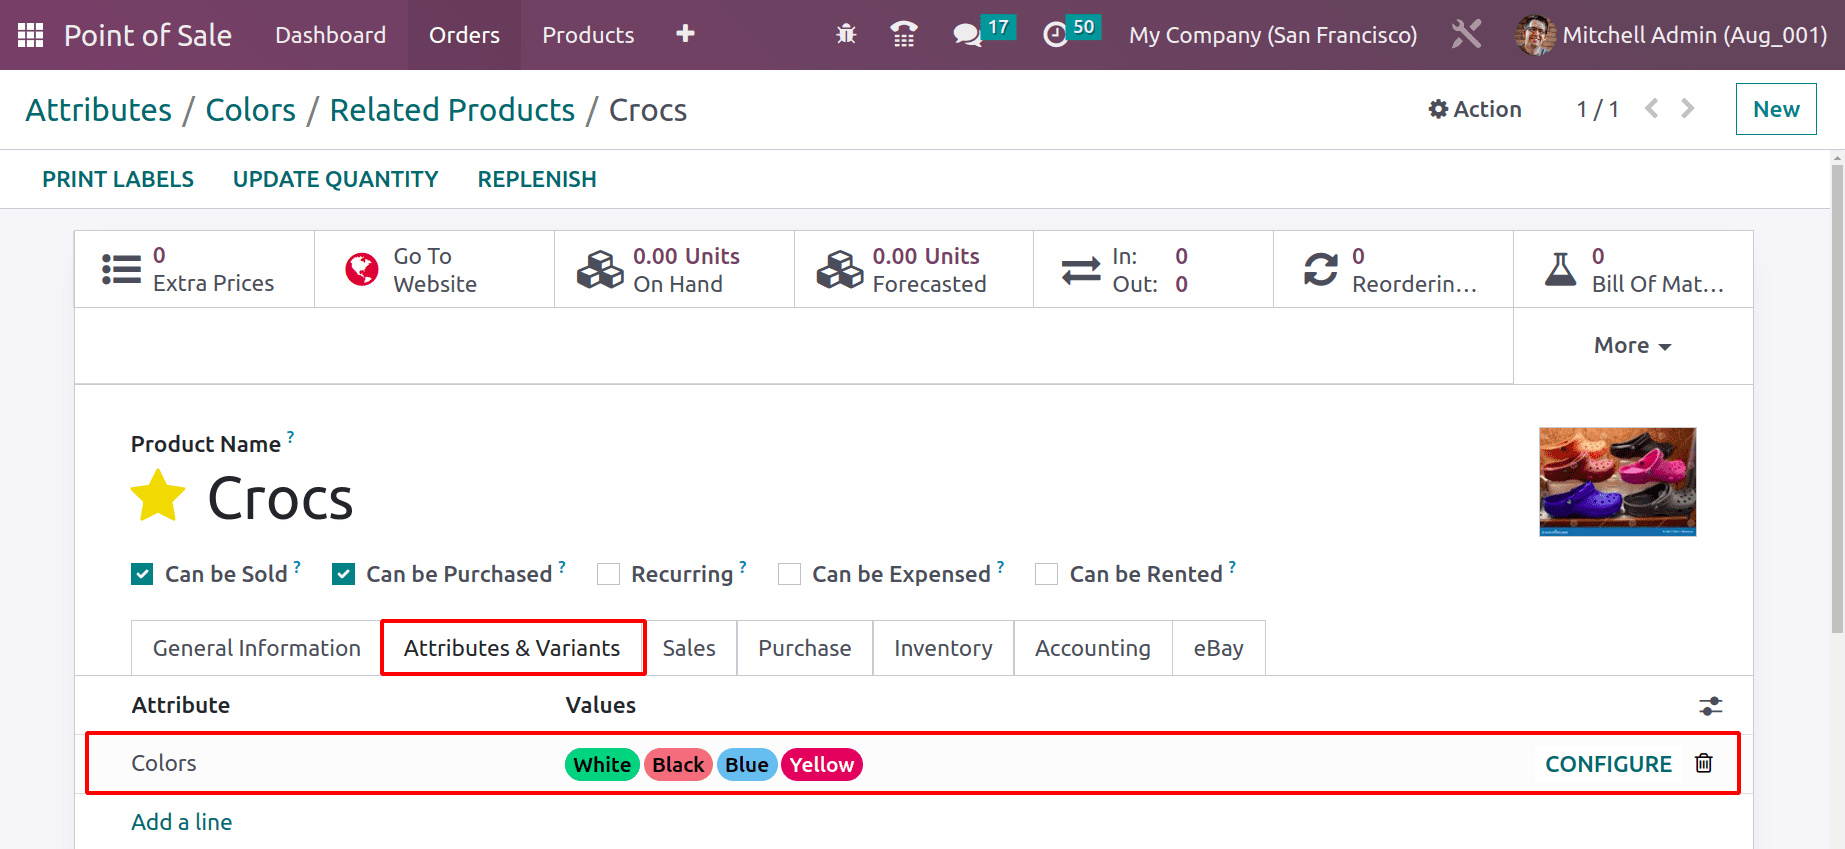
But like the previous product, the smart tab Variants are not shown here. Which means that the variants are not created here because the variant creation mode is dynamic.
Let's search for the product inside the product variant menu. The product variant is not created.
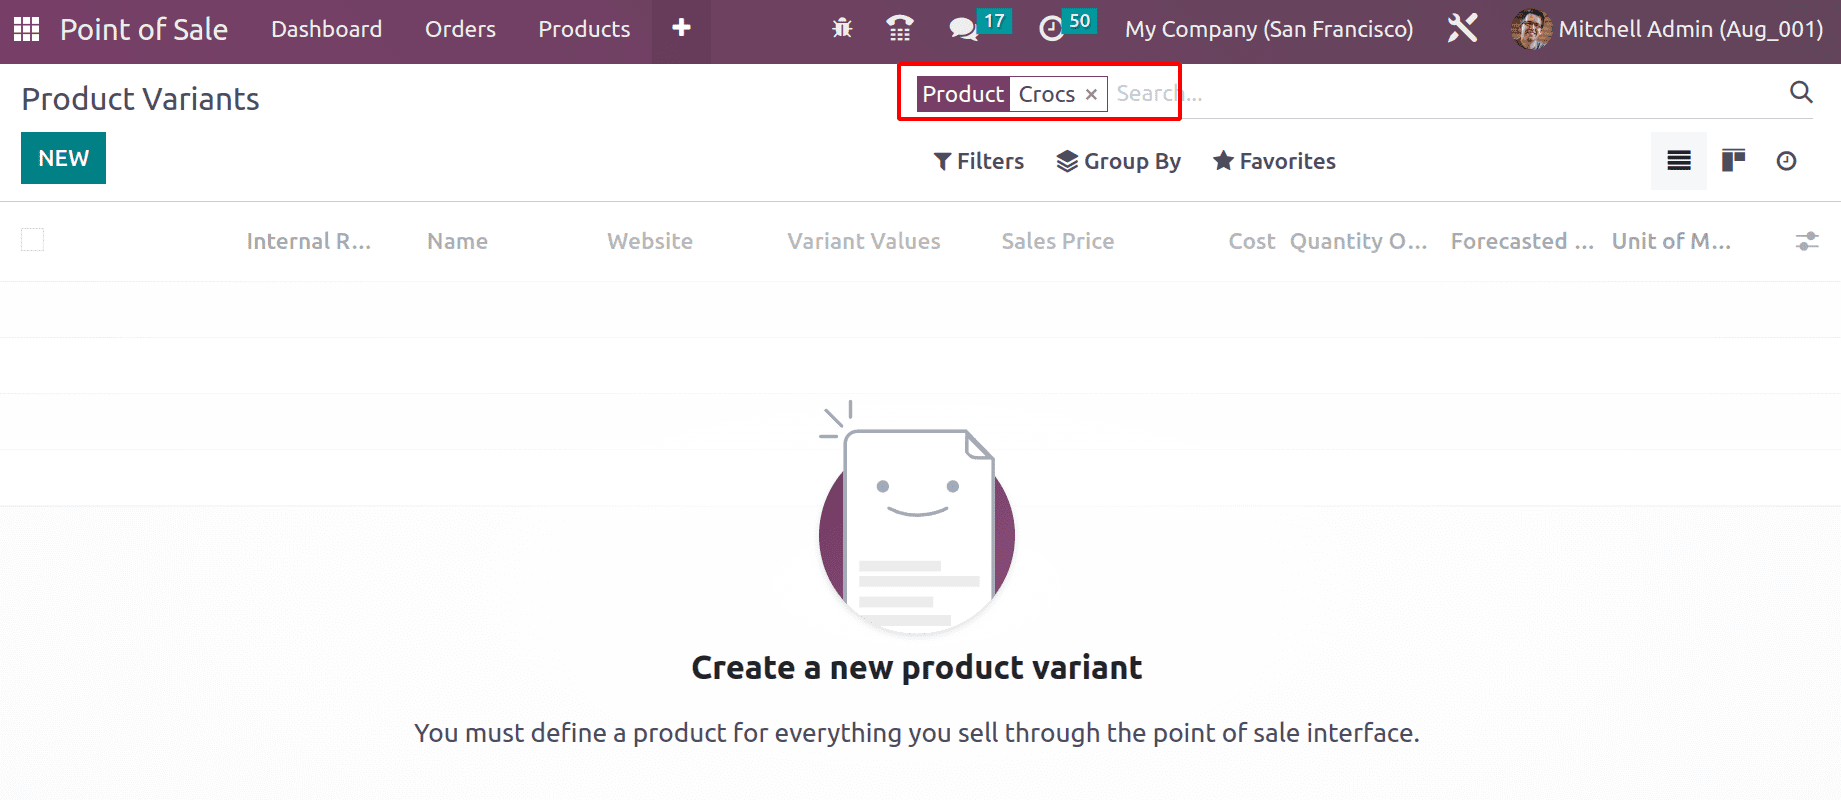
So let's enter the Foot wear shop again. So, as shown in the screenshot below, there is no product in the name of Crocs.
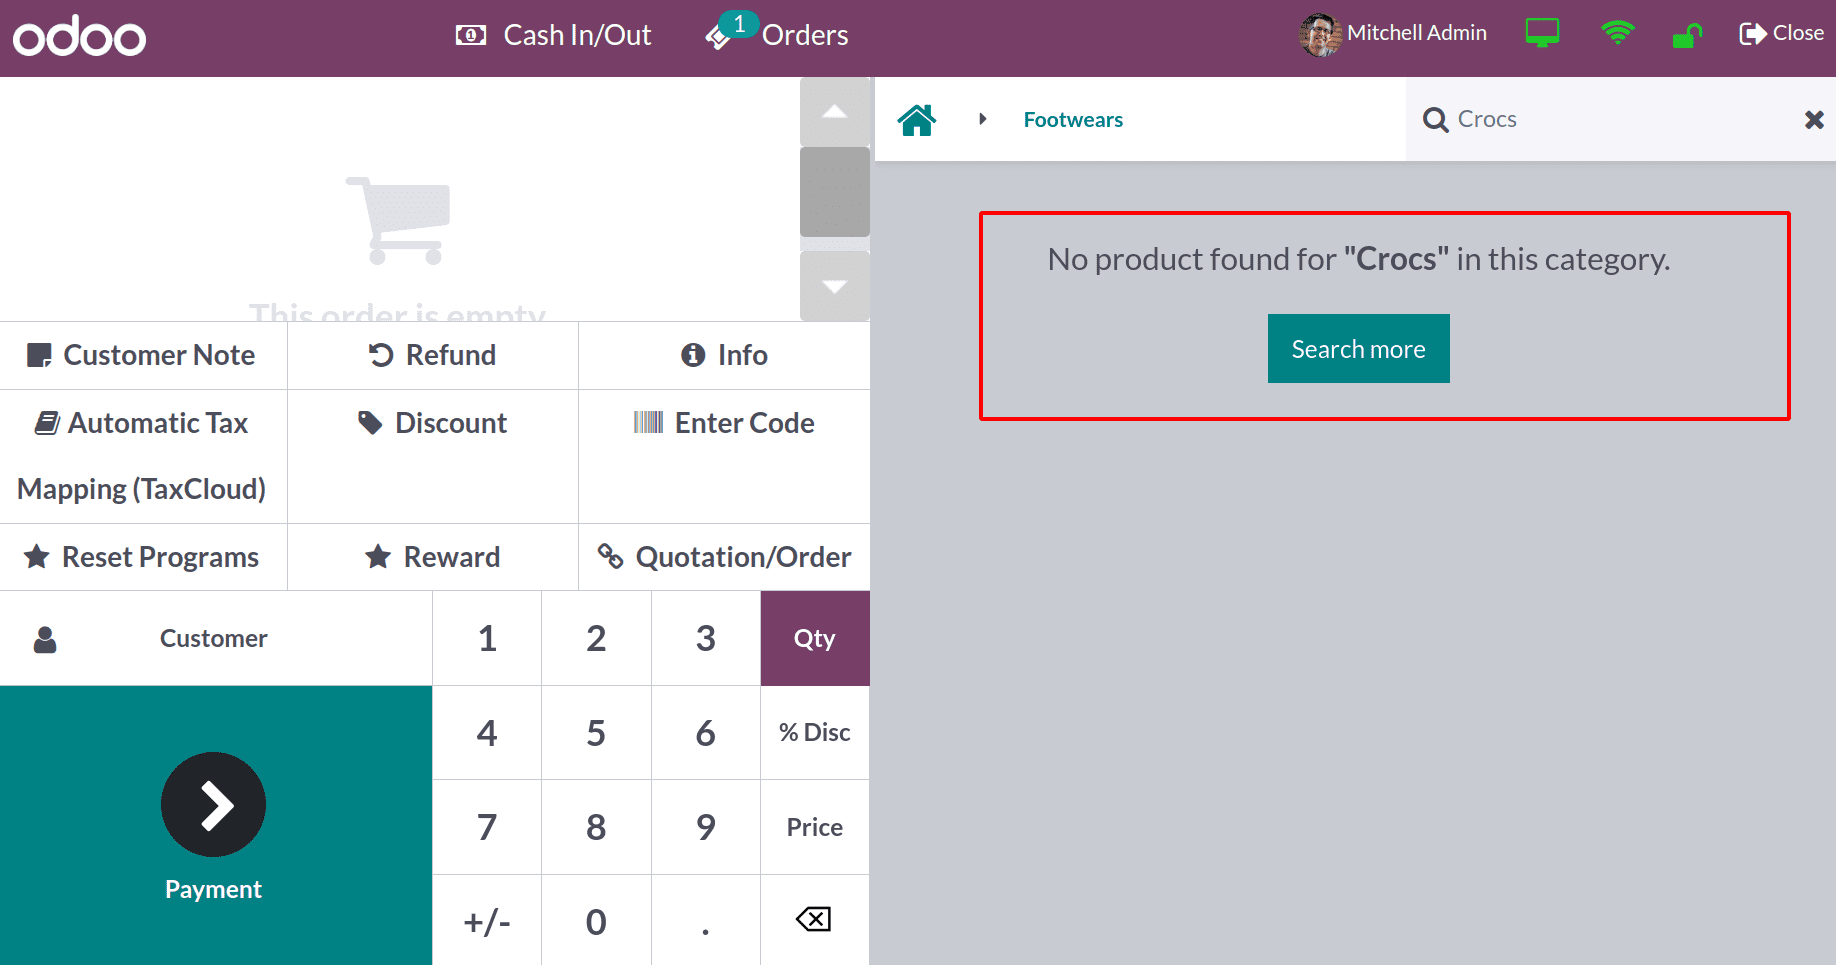
It's because the variant creation mode is Dynamically here. So the product variants will not be created at the time of product creation. In Dynamical mode, to create the product variant, the user needs to perform either a sales or a purchase. product variants will only be created after completing some transactions.
So let's first purchase the product. For that go to the PURCHASE module.
An RFQ is created here, which is created for the vendor Ready Mat. inside the Orderline, add products using the Add product button.
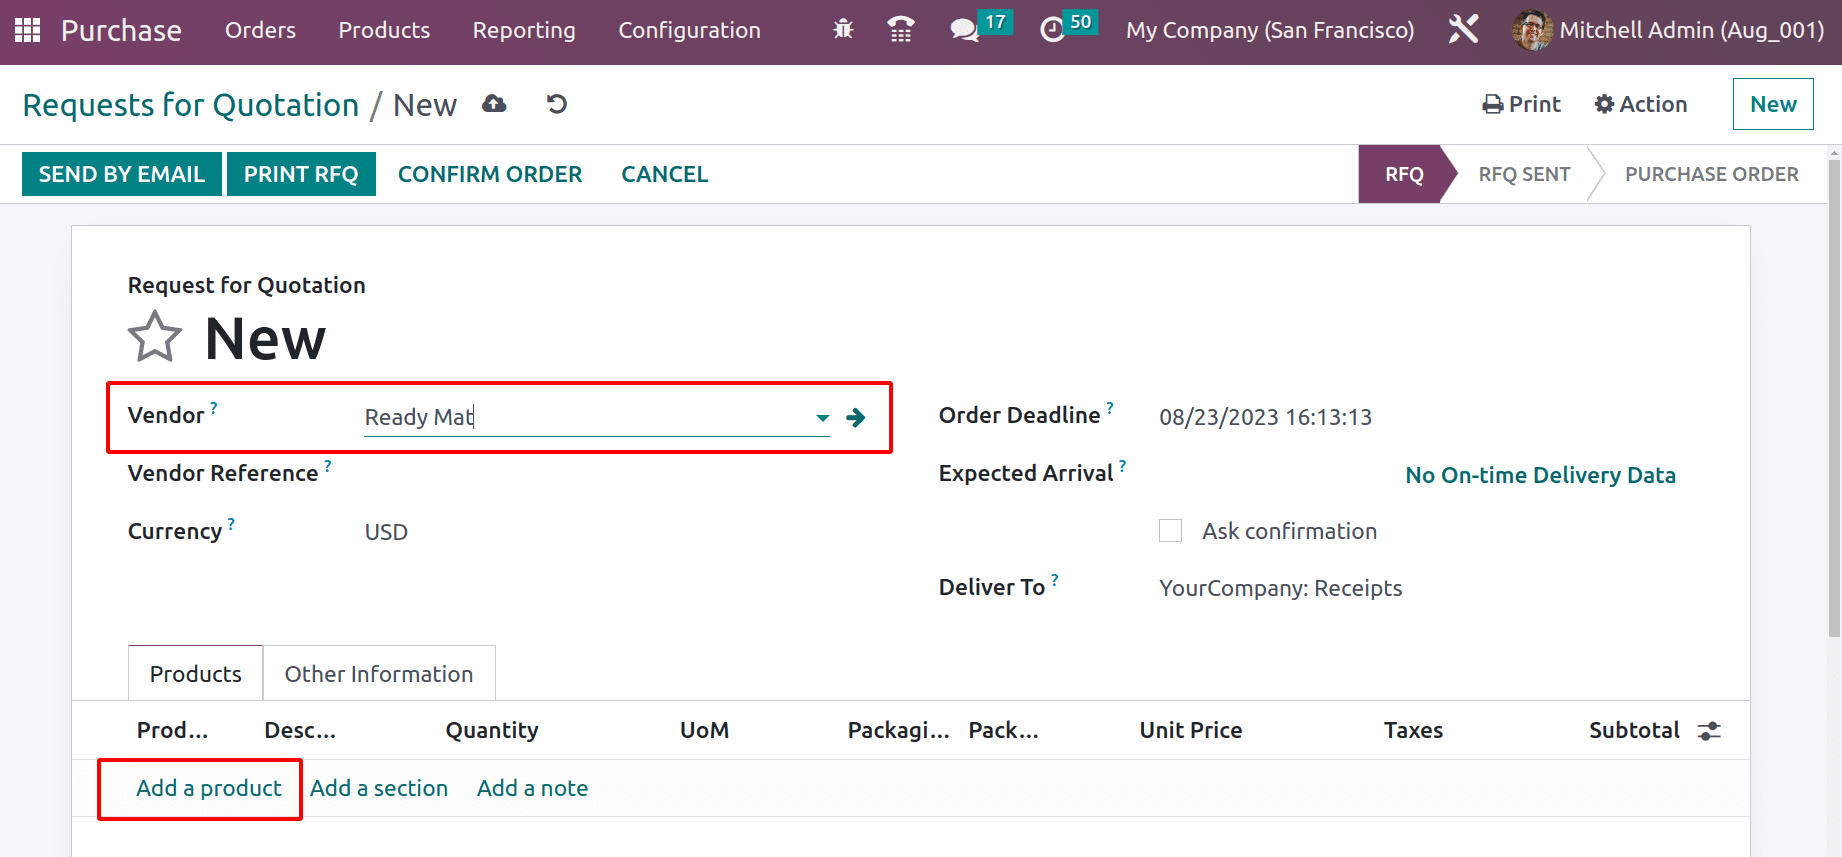
When clicking on the add product button, another window will open. Which is a gridview for variants. So from the grid view it's very easy to choose variants with quantity.

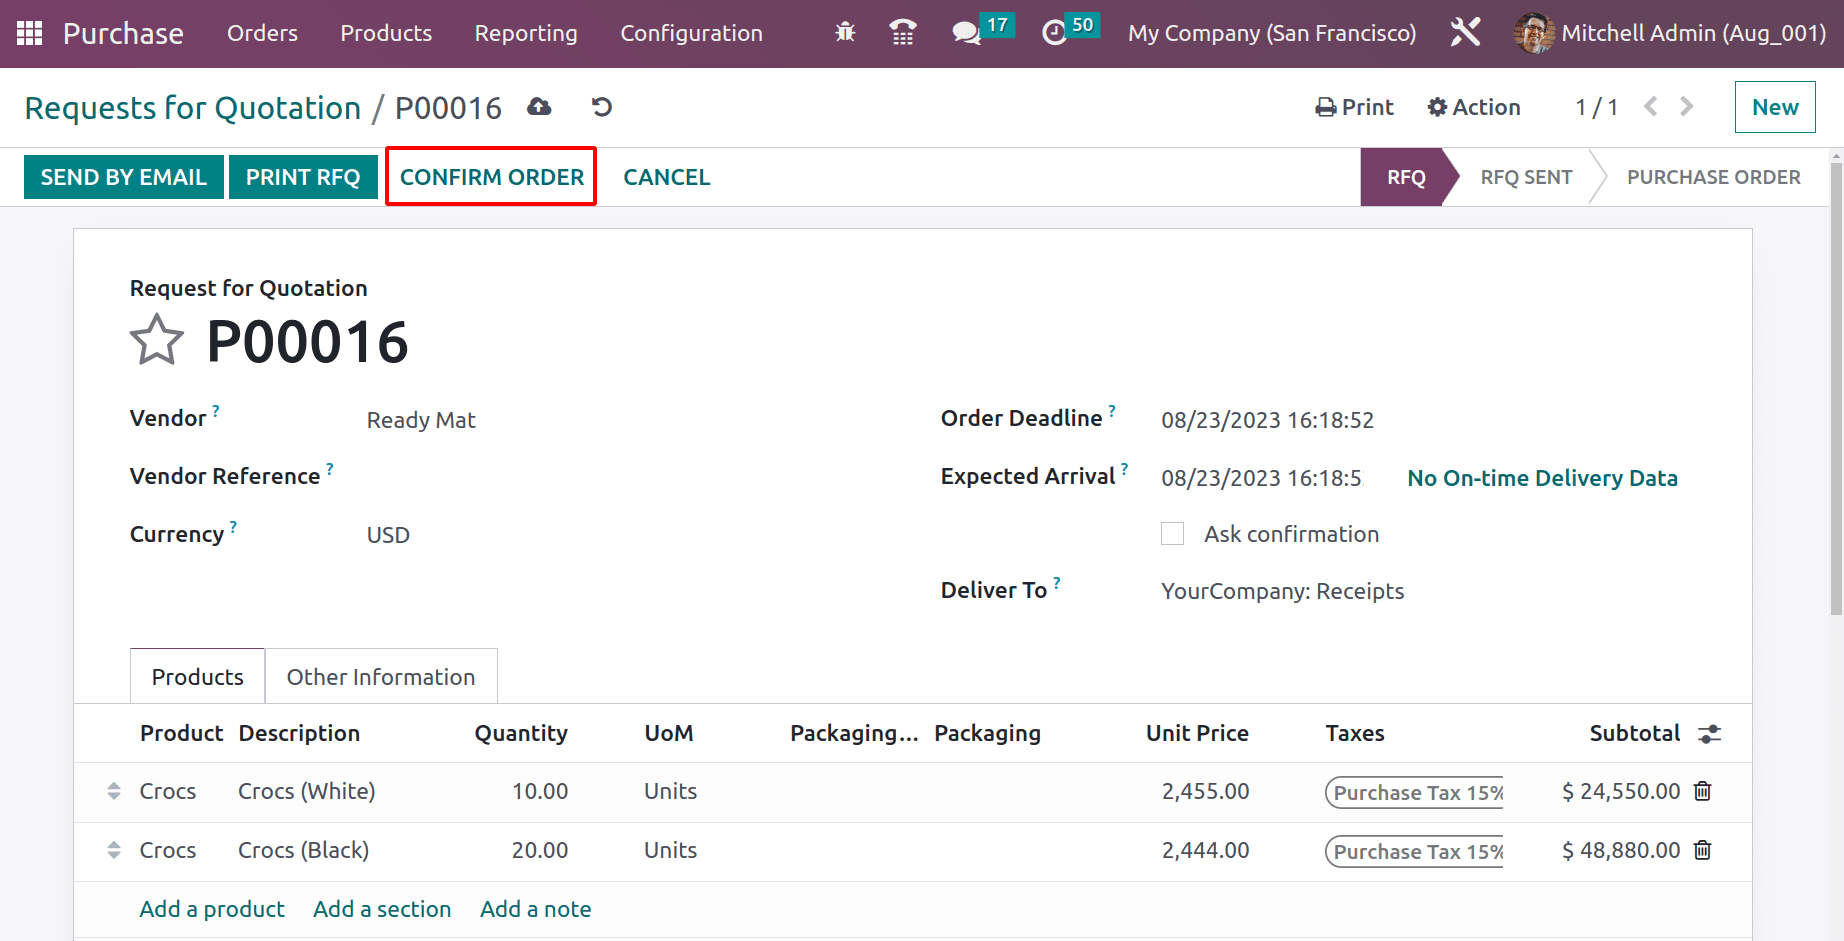
10 quantities of Crocs with White color and 5 quantities of Crocs with Black color are chosen here. Blue and Yellow colored Crocs are not purchased in this order. So the products are added with quantity inside the RFQ. Click on the Confirm button to get the Receipt.
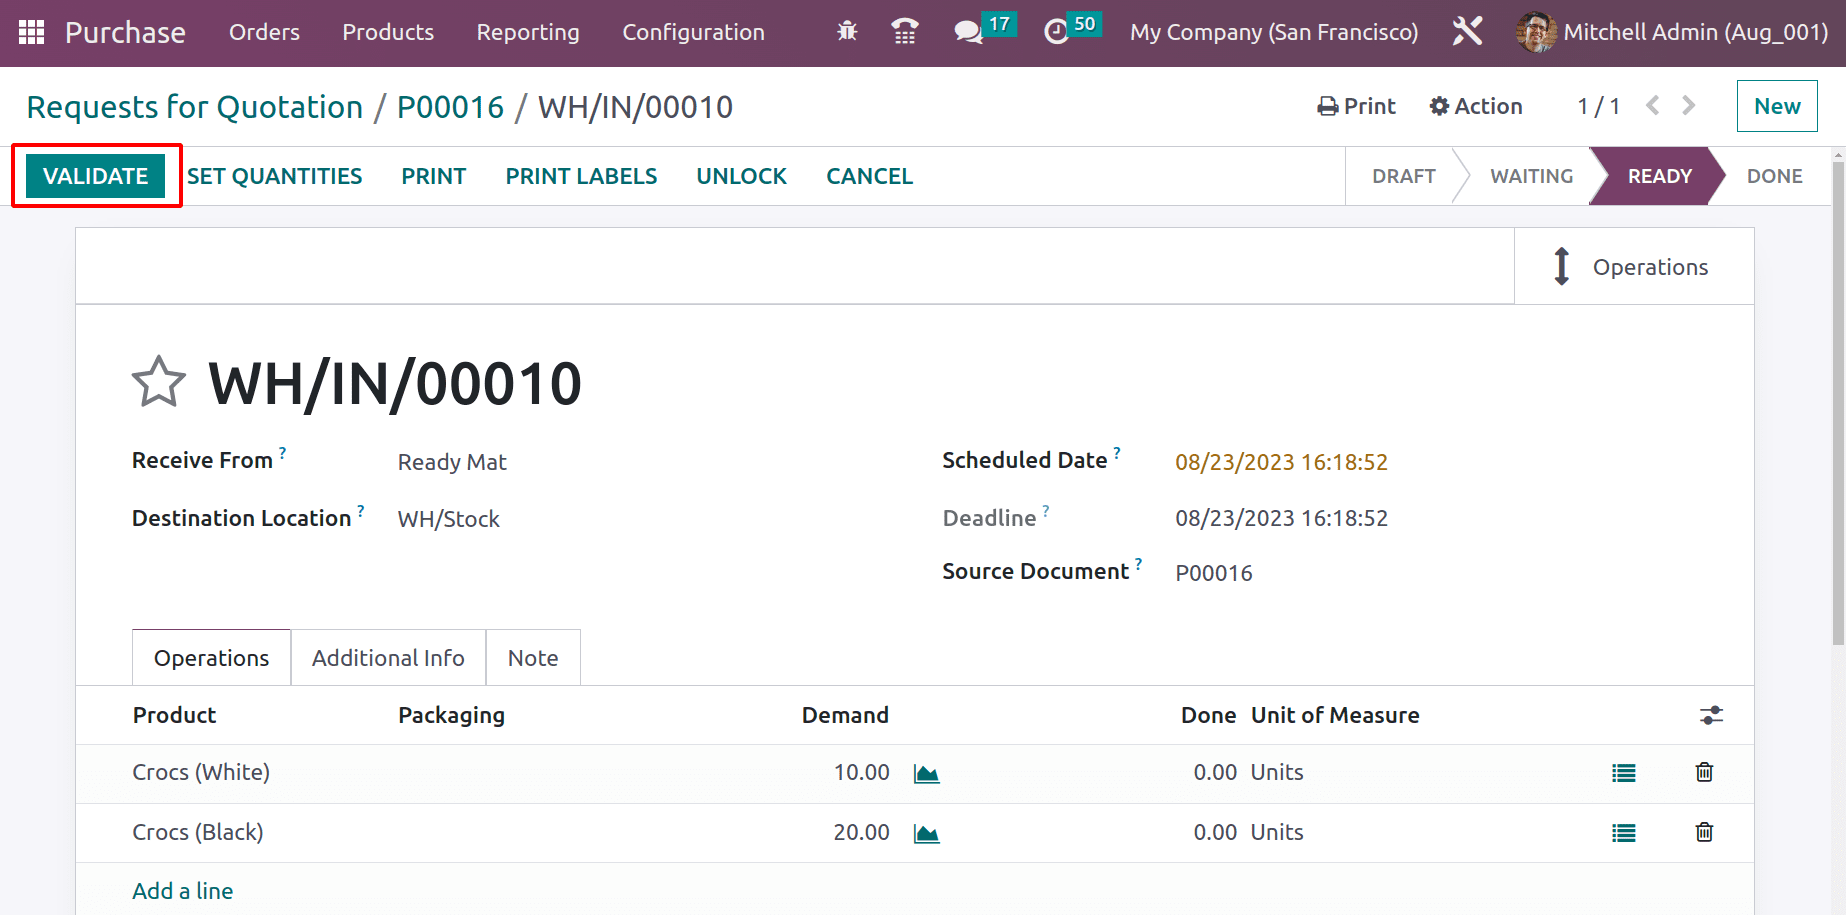
The Validate button can be used to receive the goods to company stock.
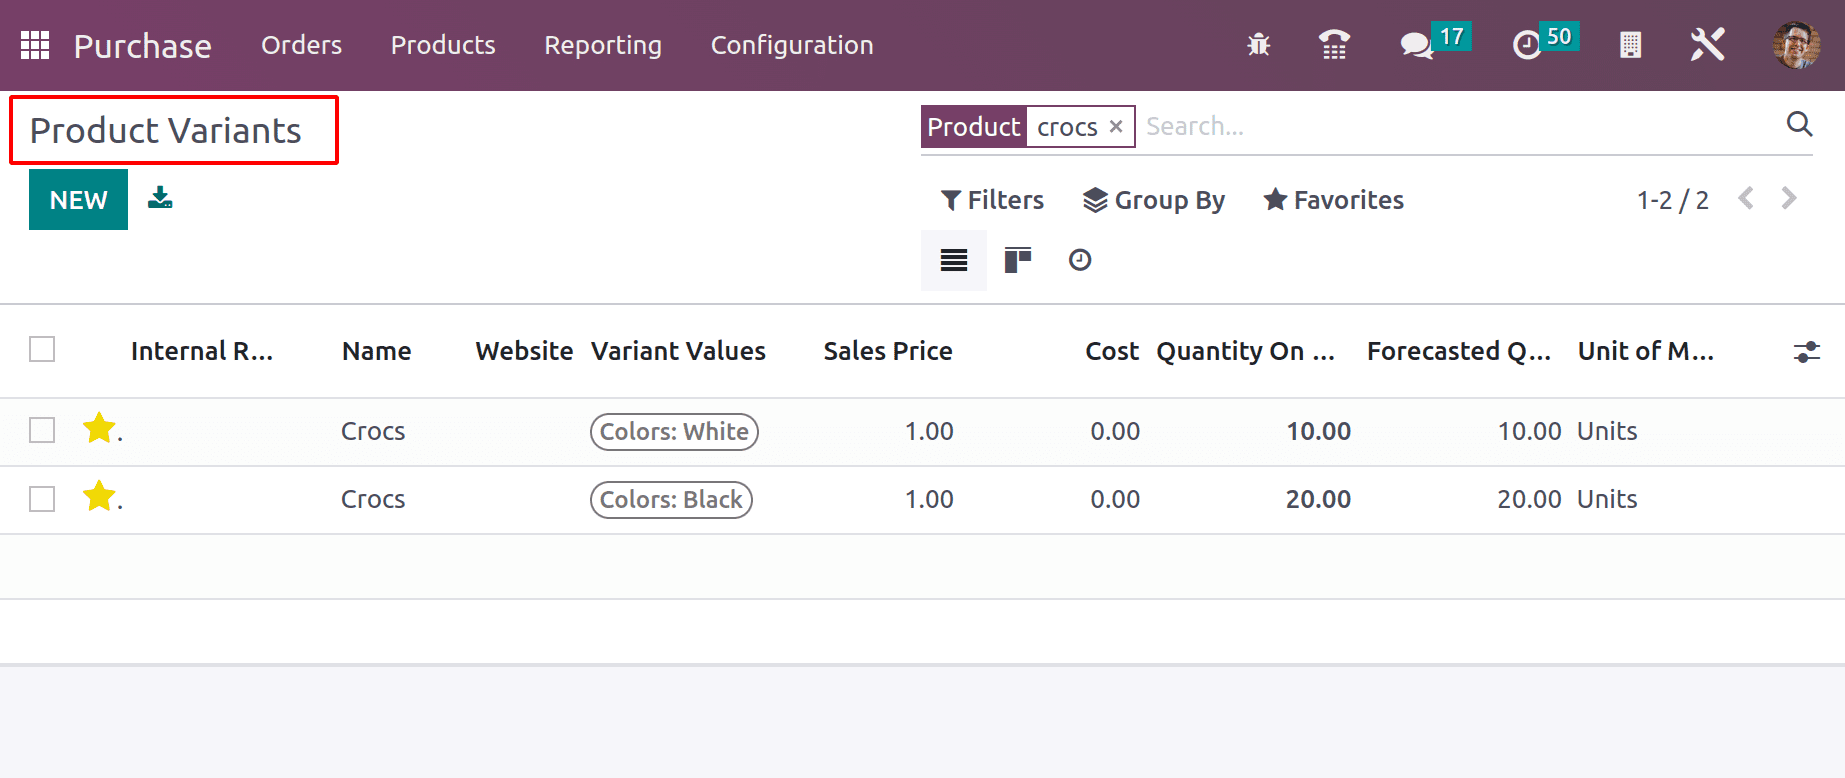
After receiving the product, go back to the product variants to check the variants. Only the purchased variants are available there. This means Crocs with white color and Black colors are formed there. But crocs with Blue and Yellow colors are still absent here.
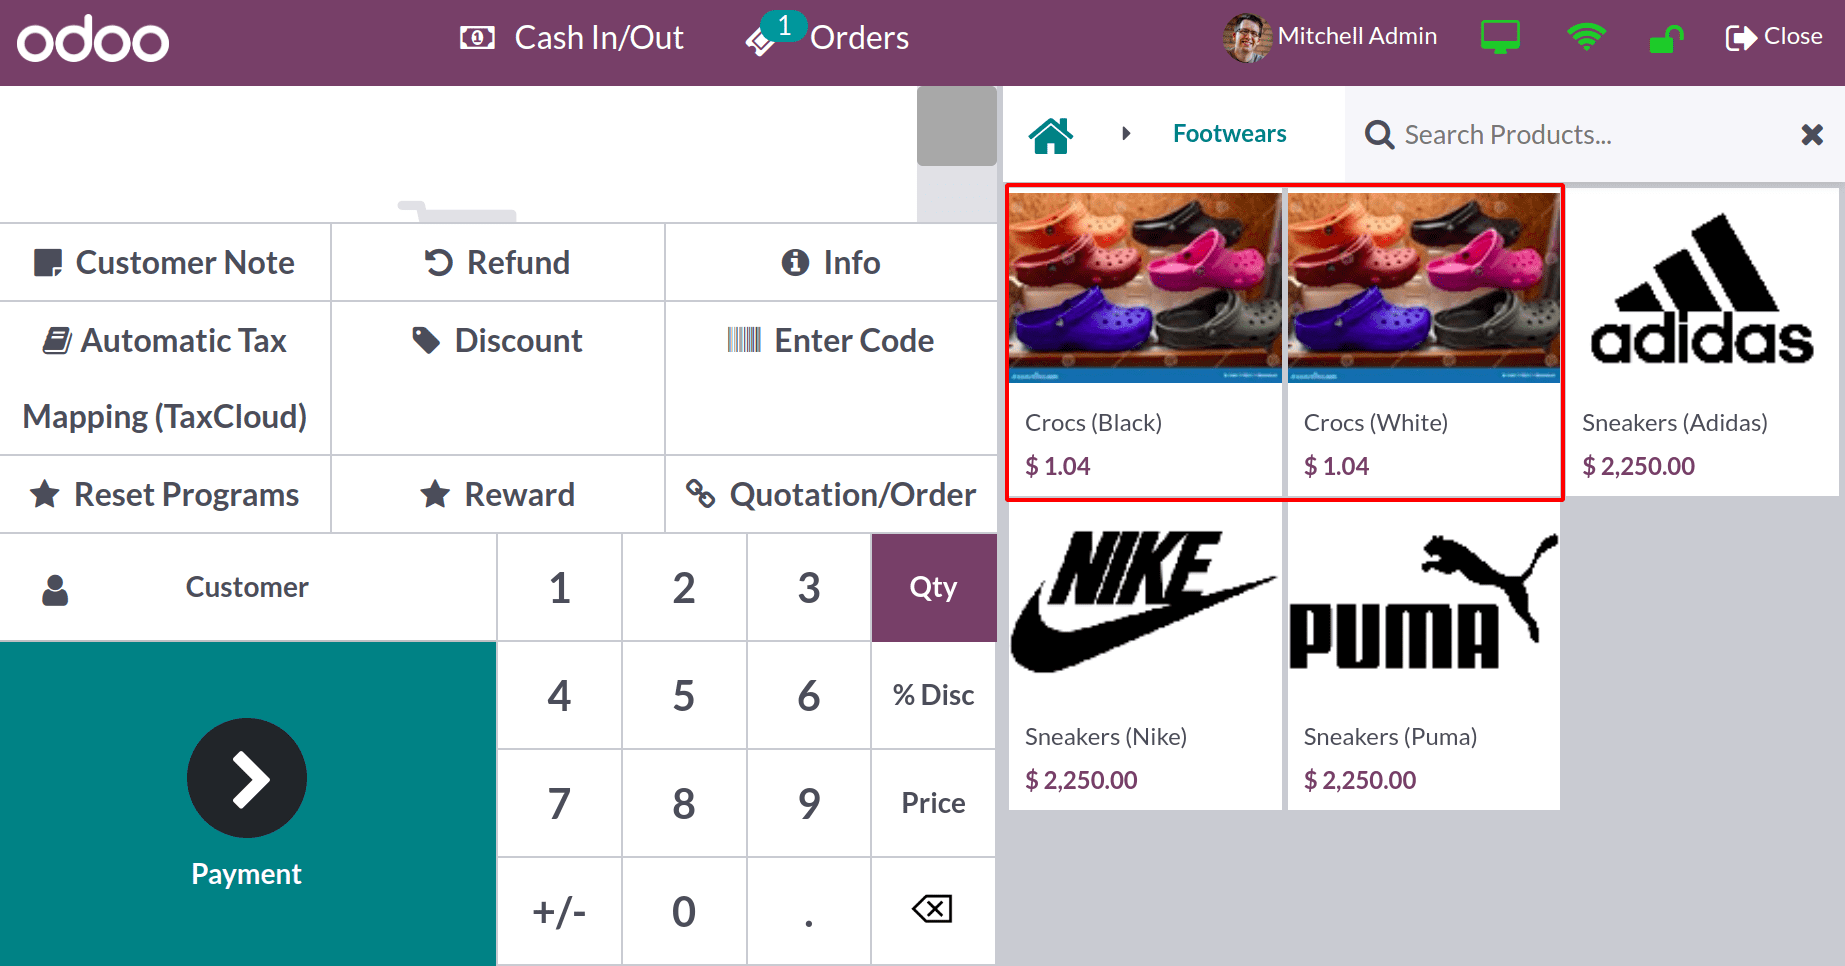
Let's go back to the Point of Sale session and open the FootWear Shop again.
As said before only two variants are created here. Now it's possible to sell those two products inside the shop.
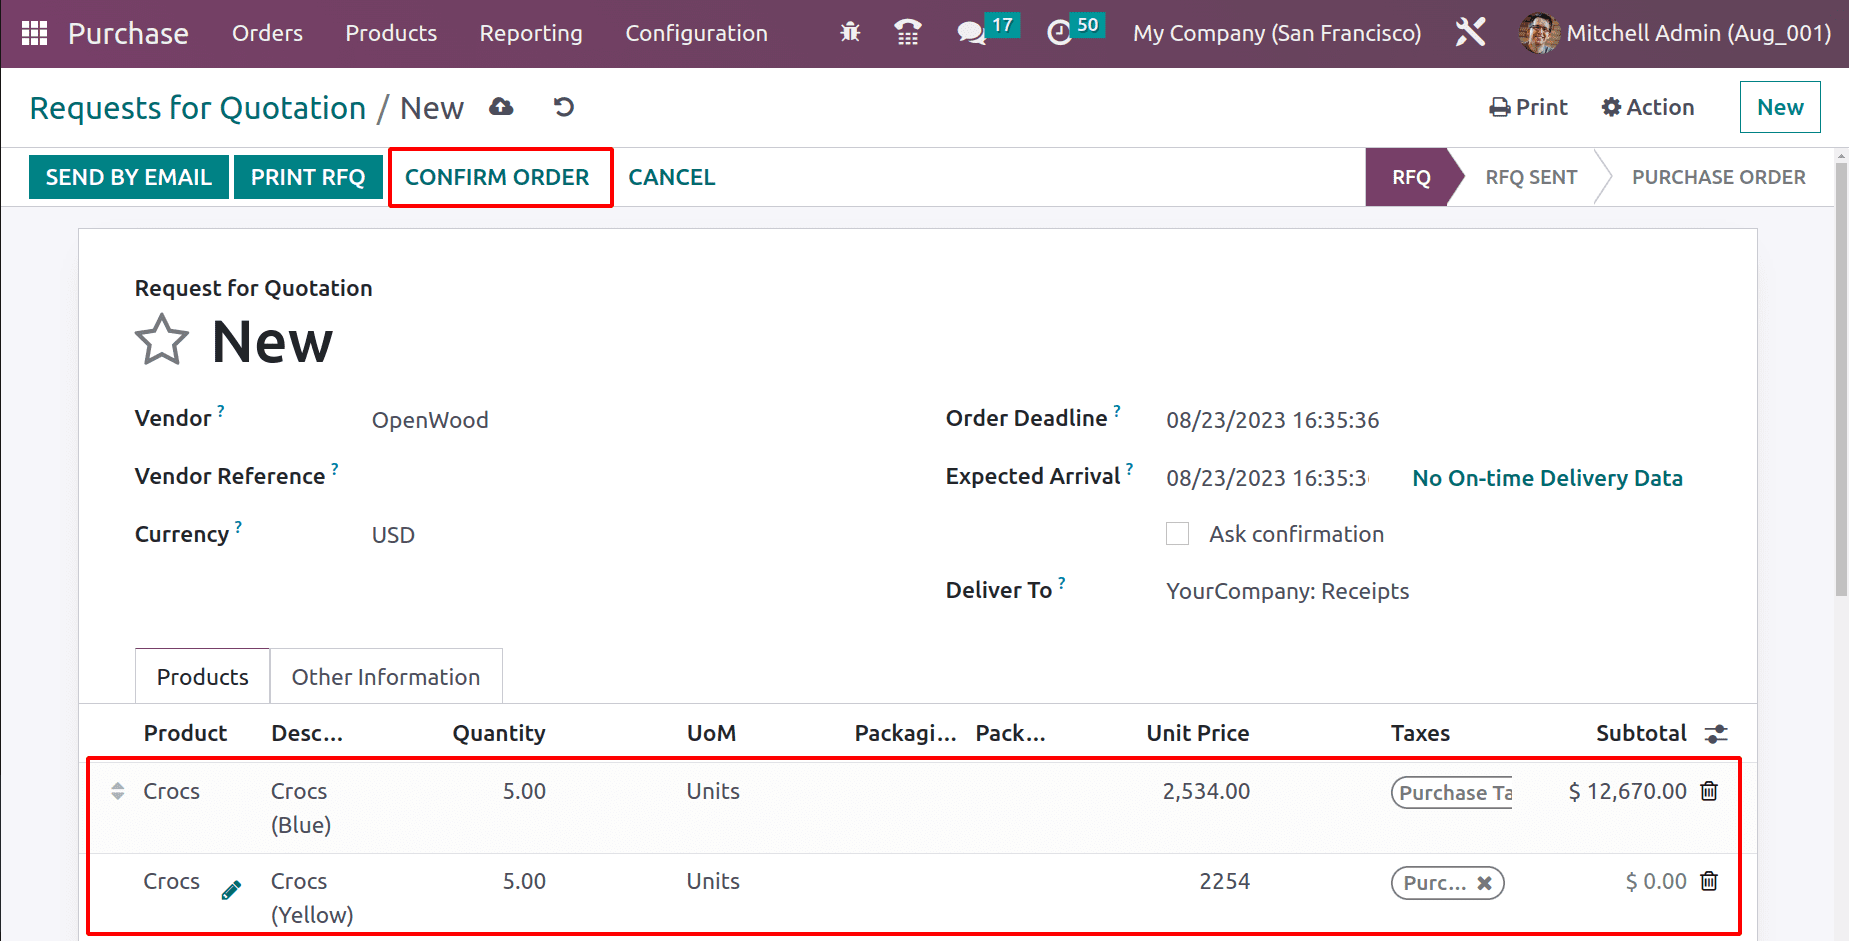
Again create another purchase order for another two variants. Here the vendor is OpenWood. The Crocs Blue color and Crocs Yellow color are added with 5 quantities each. So then Confirm the order.
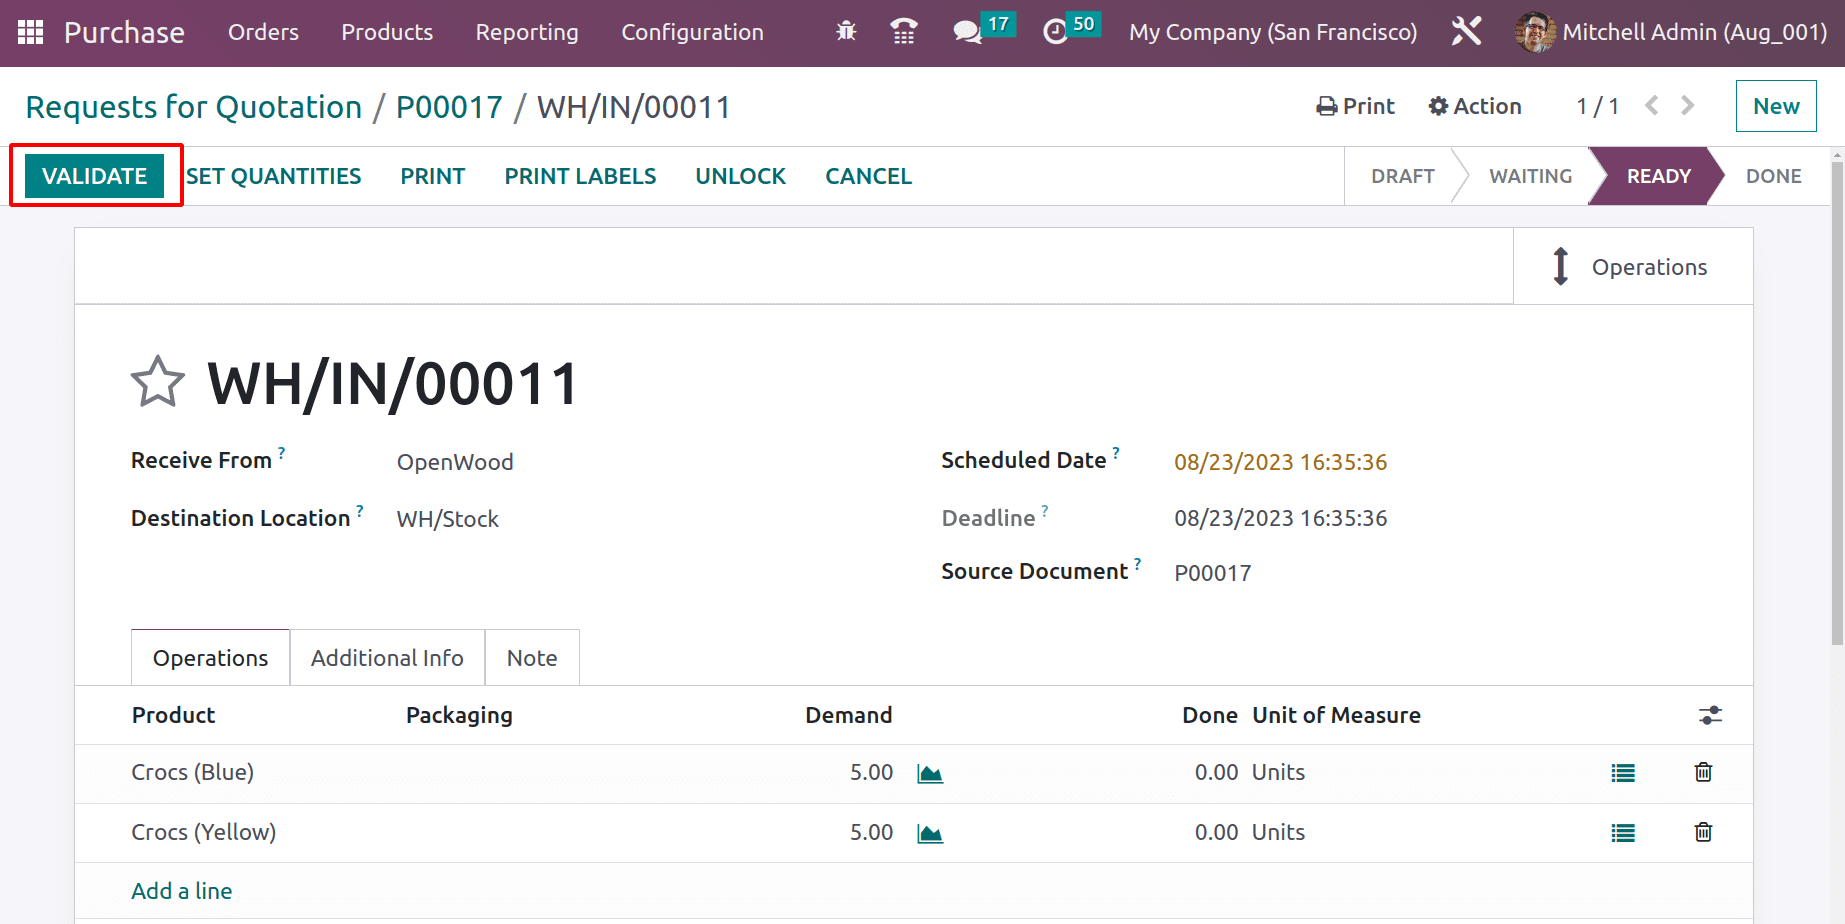
Validate the receipt to get the products from vendor to company stock.
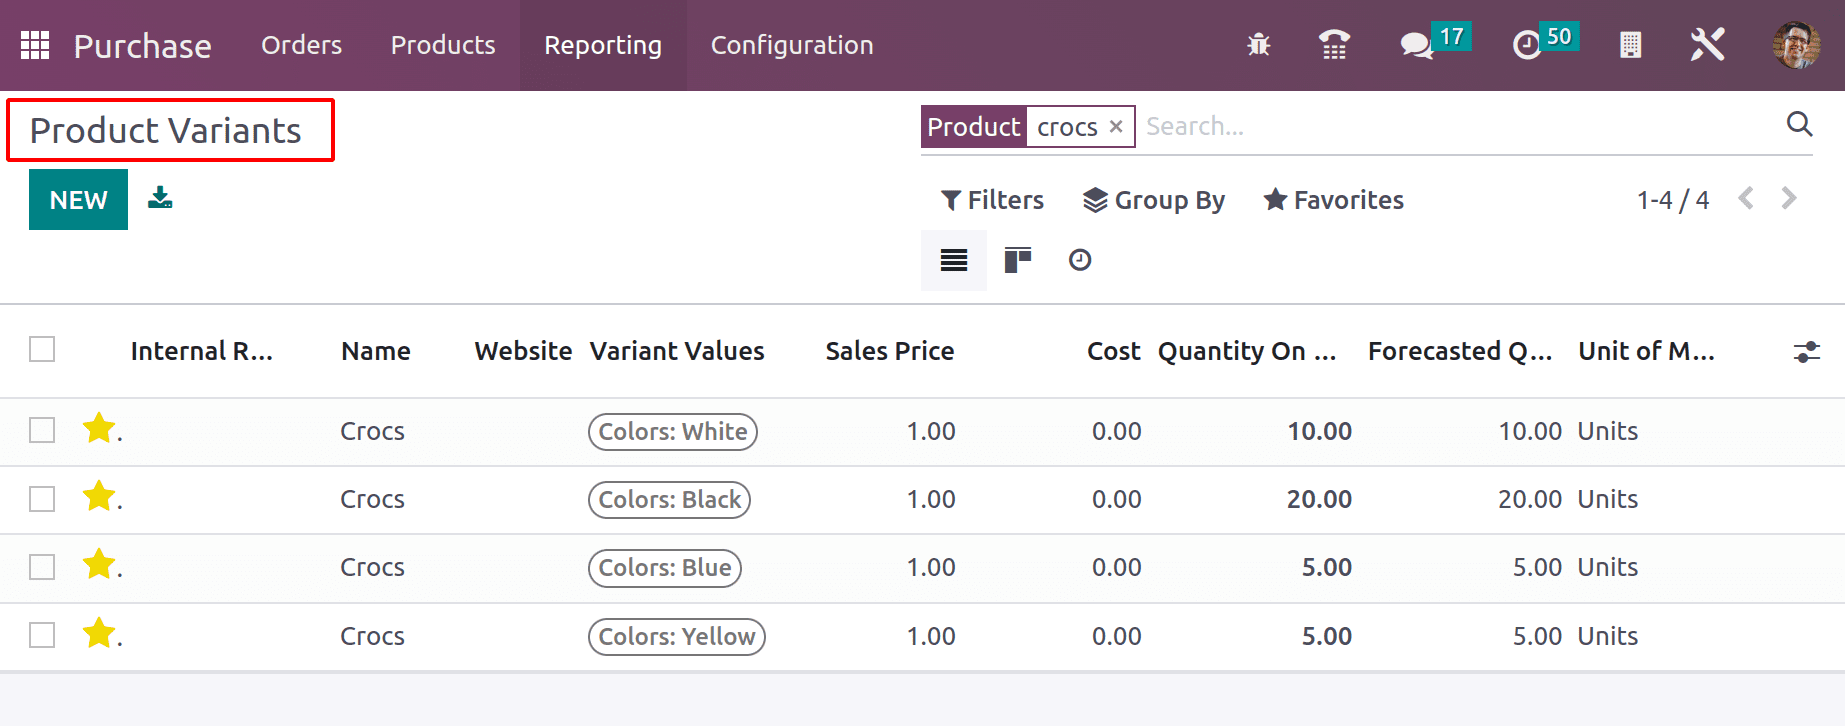
Inside the Product Variant menu, now the four variants are available.
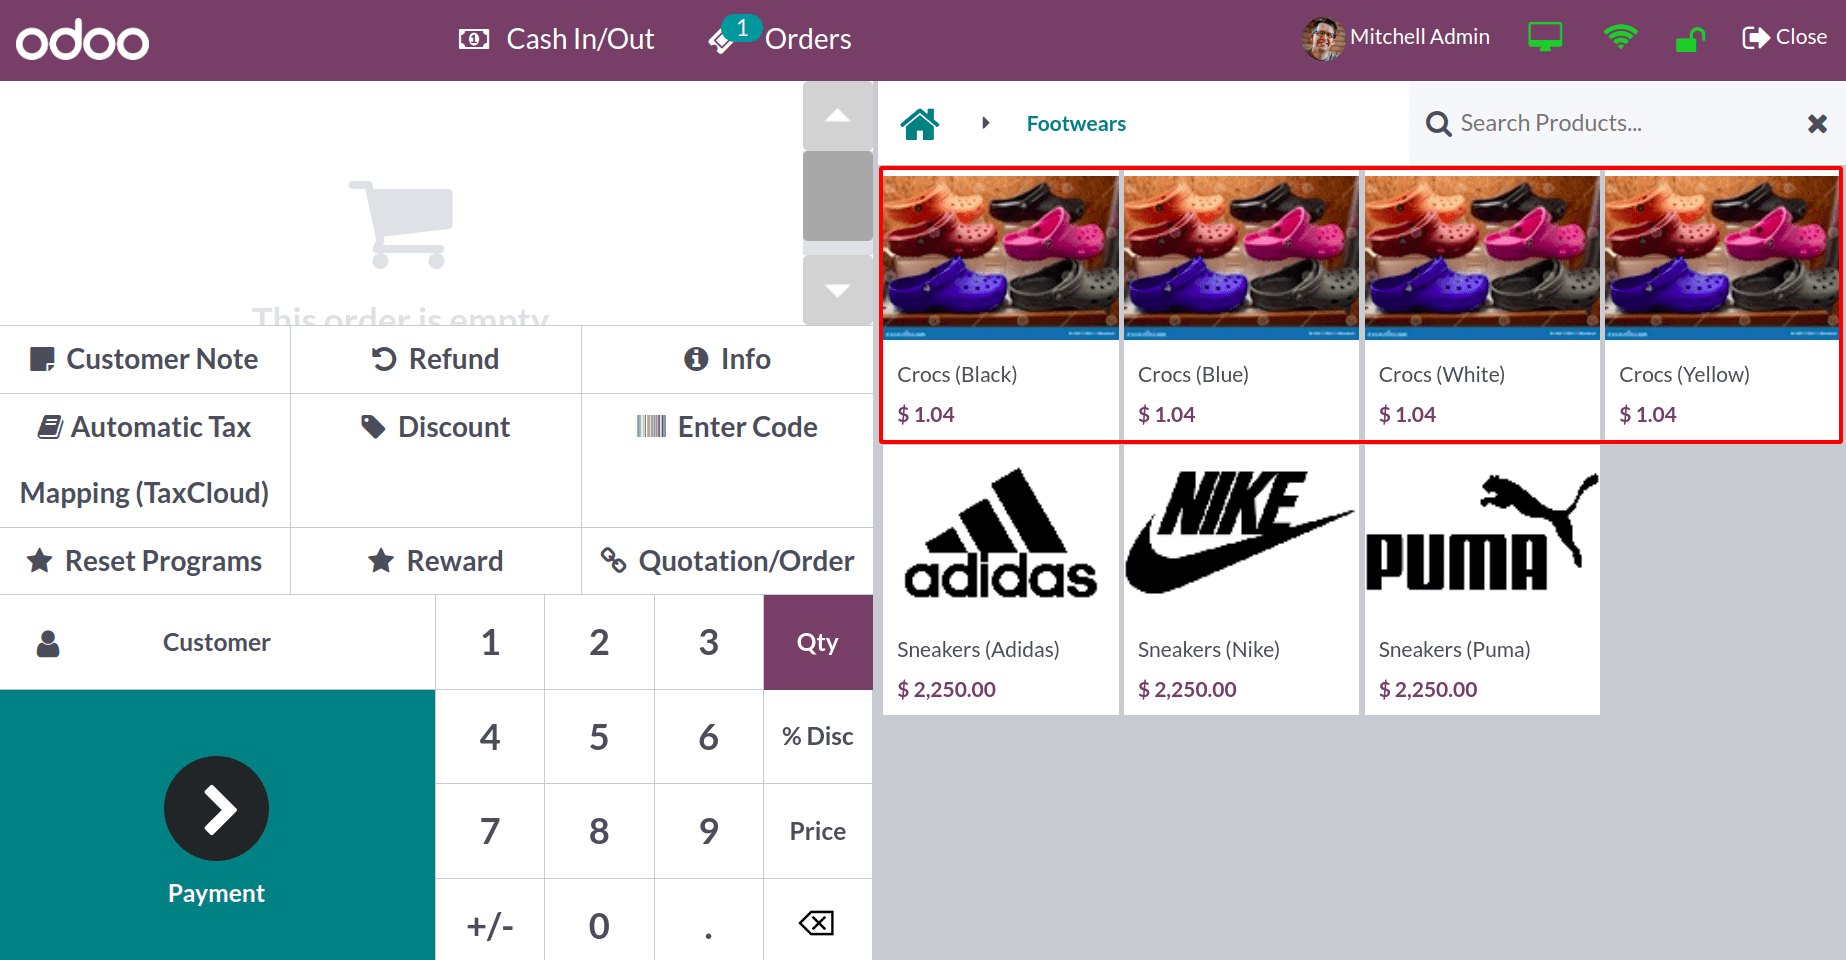
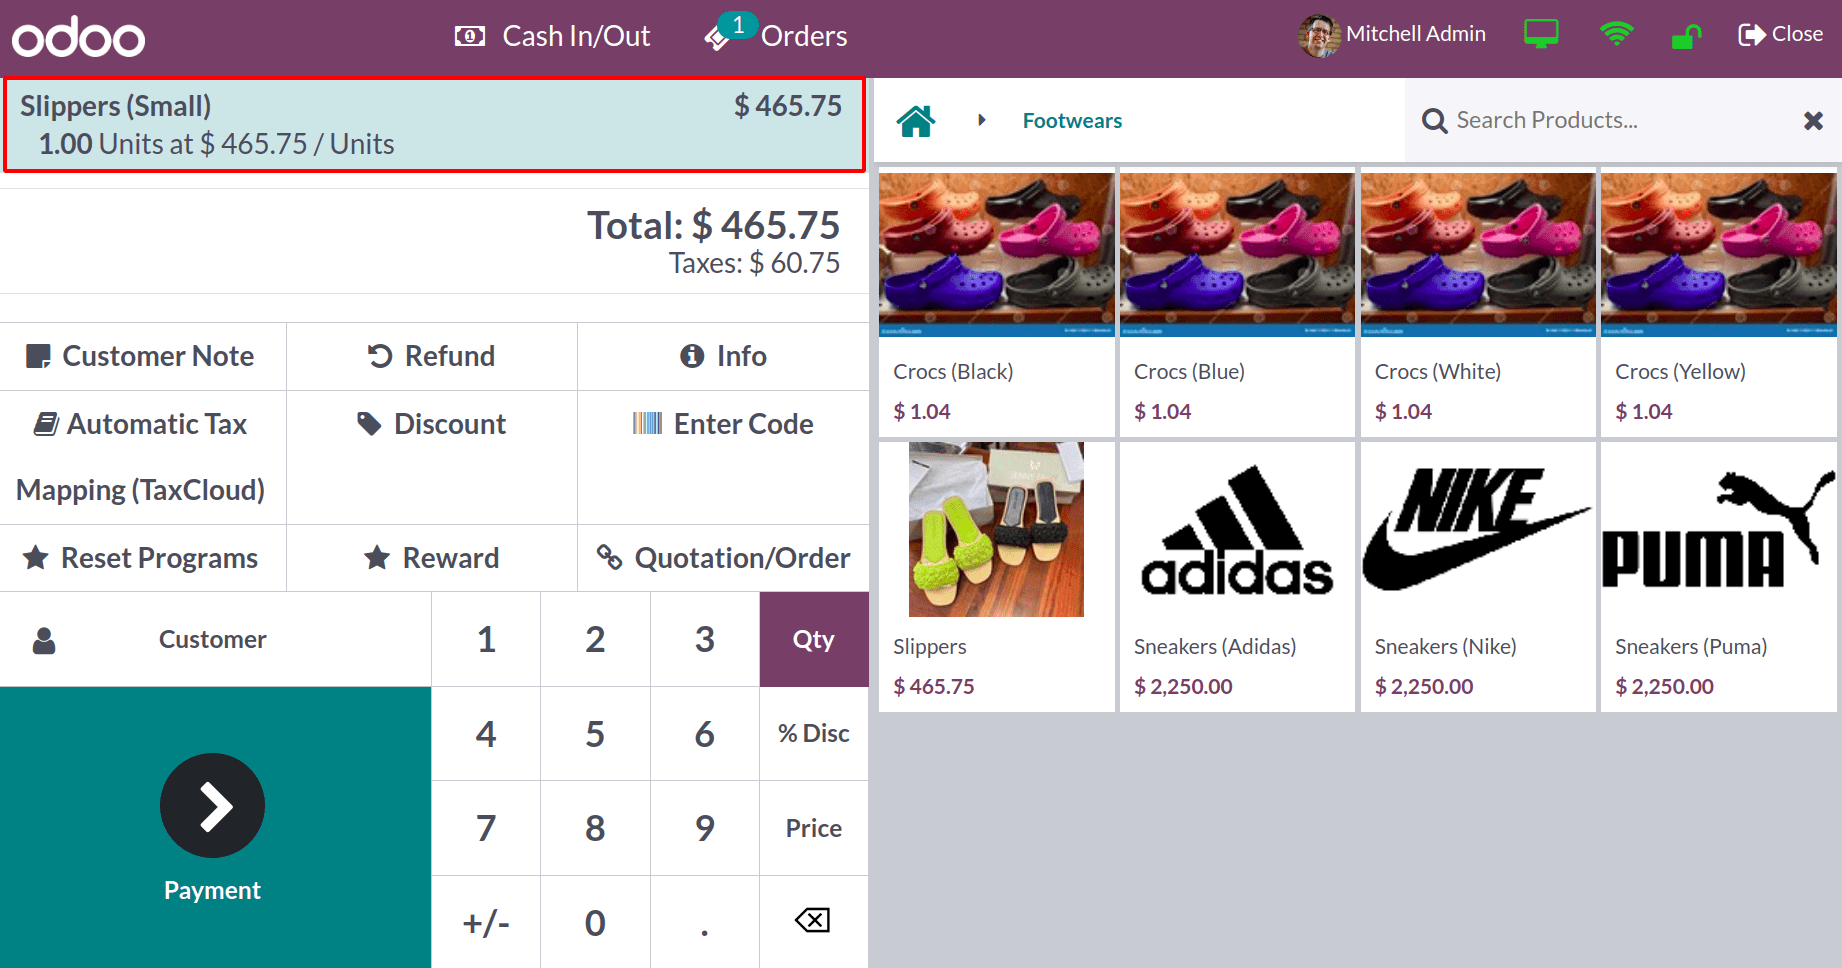
Then open the shop again and check the available products inside the shop. Currently the four different products are available in the name of Crocs.
Never
Another Attribute is created here. The attribute name is Sizes. The variant creation mode is set as Never(optional). Small, medium and large are the values added inside the Attribute Values tab.
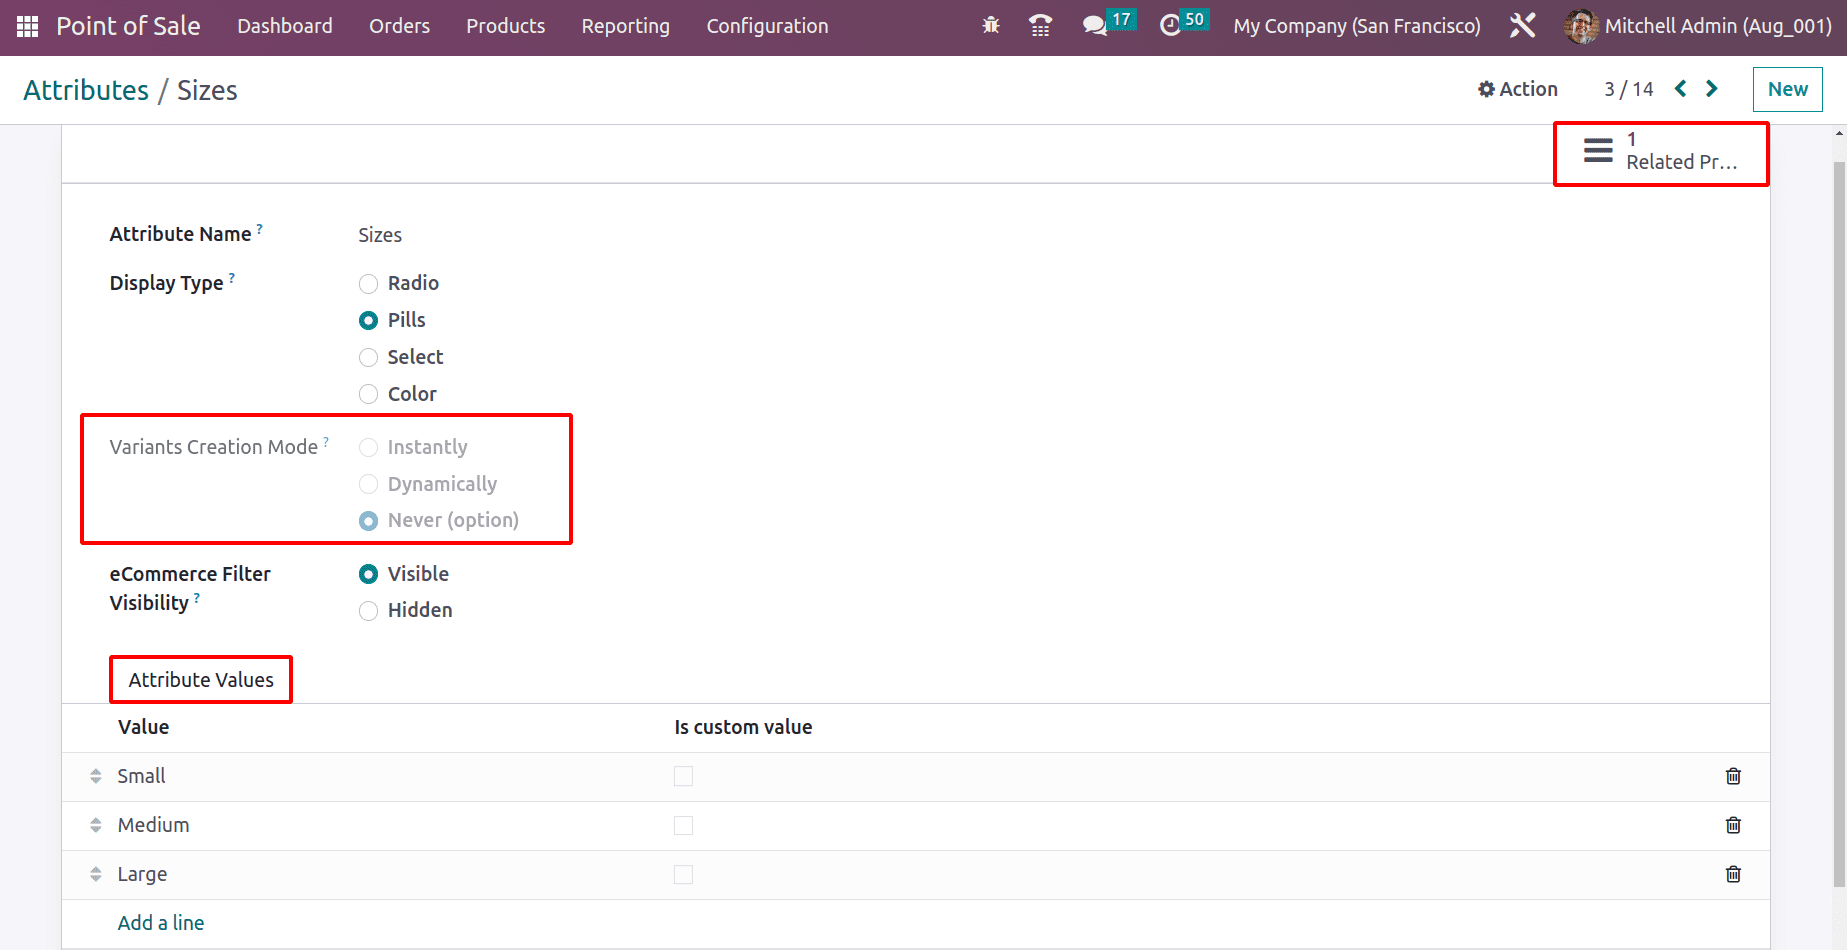
The smart tab Related products shows a product. Open the smart tab. Here the product is Slipper. Inside the Attribute & Variants tab the attribute Sizes added and the three configured values also added.
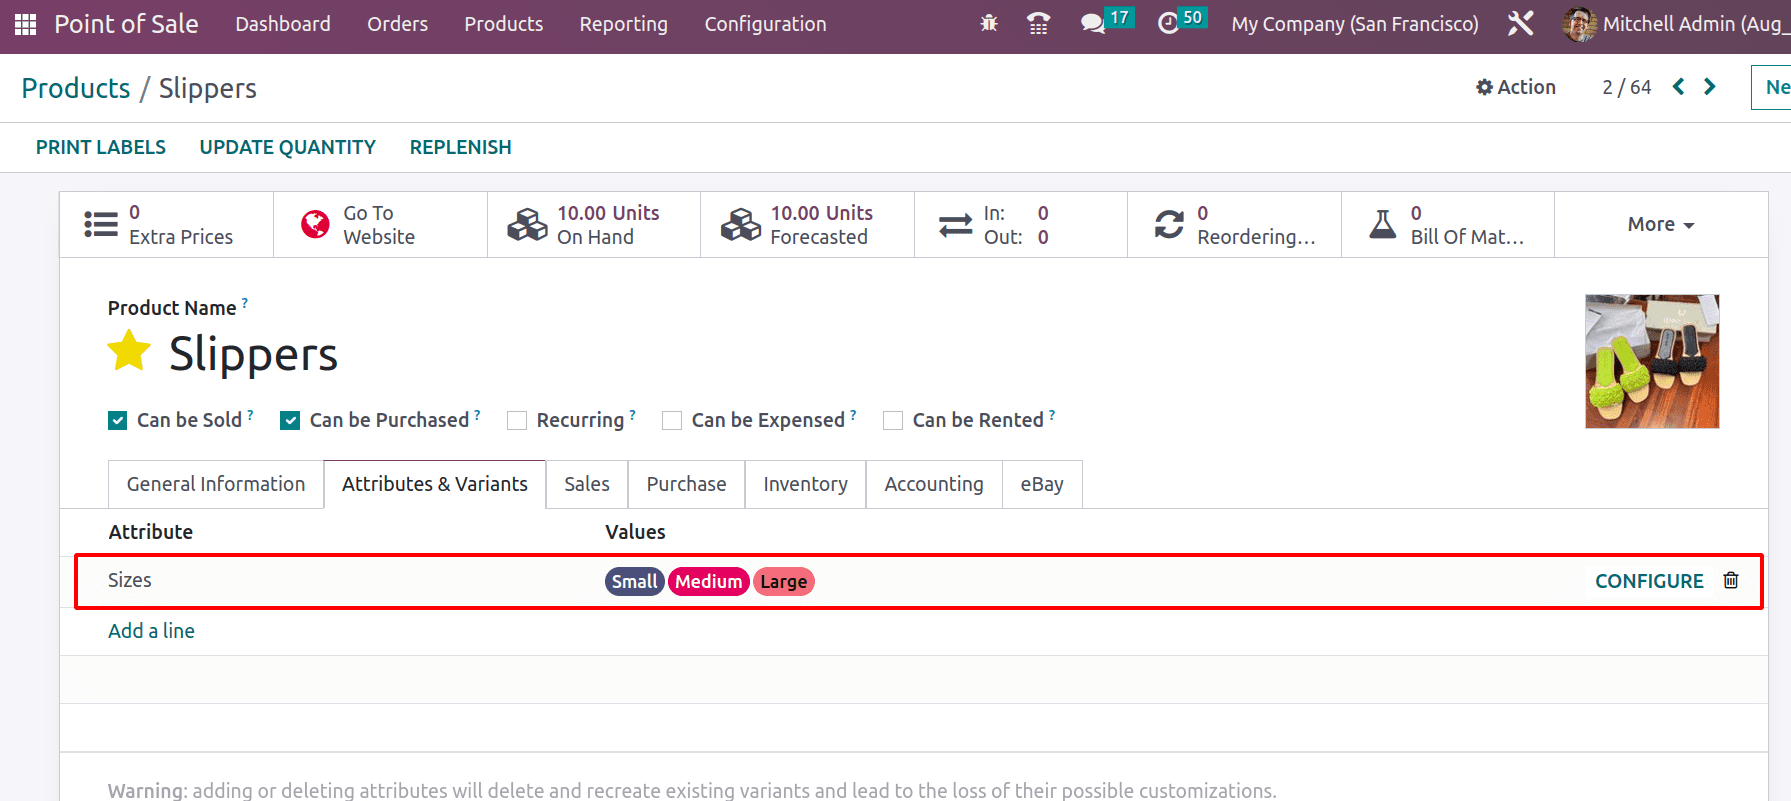
Check the variants in the Product Variant menu. Unlike the previously mentioned two cases, here the product Slipper is available. But the created variants are not shown here. Here the variant creation mode is Never ,that's why the product variant is not created yet.

Then check the product inside the shop. For that, open the session FootWear Shop again. A single product Slipper is shown inside the shop, but variants are still absent here too.. So it's possible to search the product name inside the search bar.
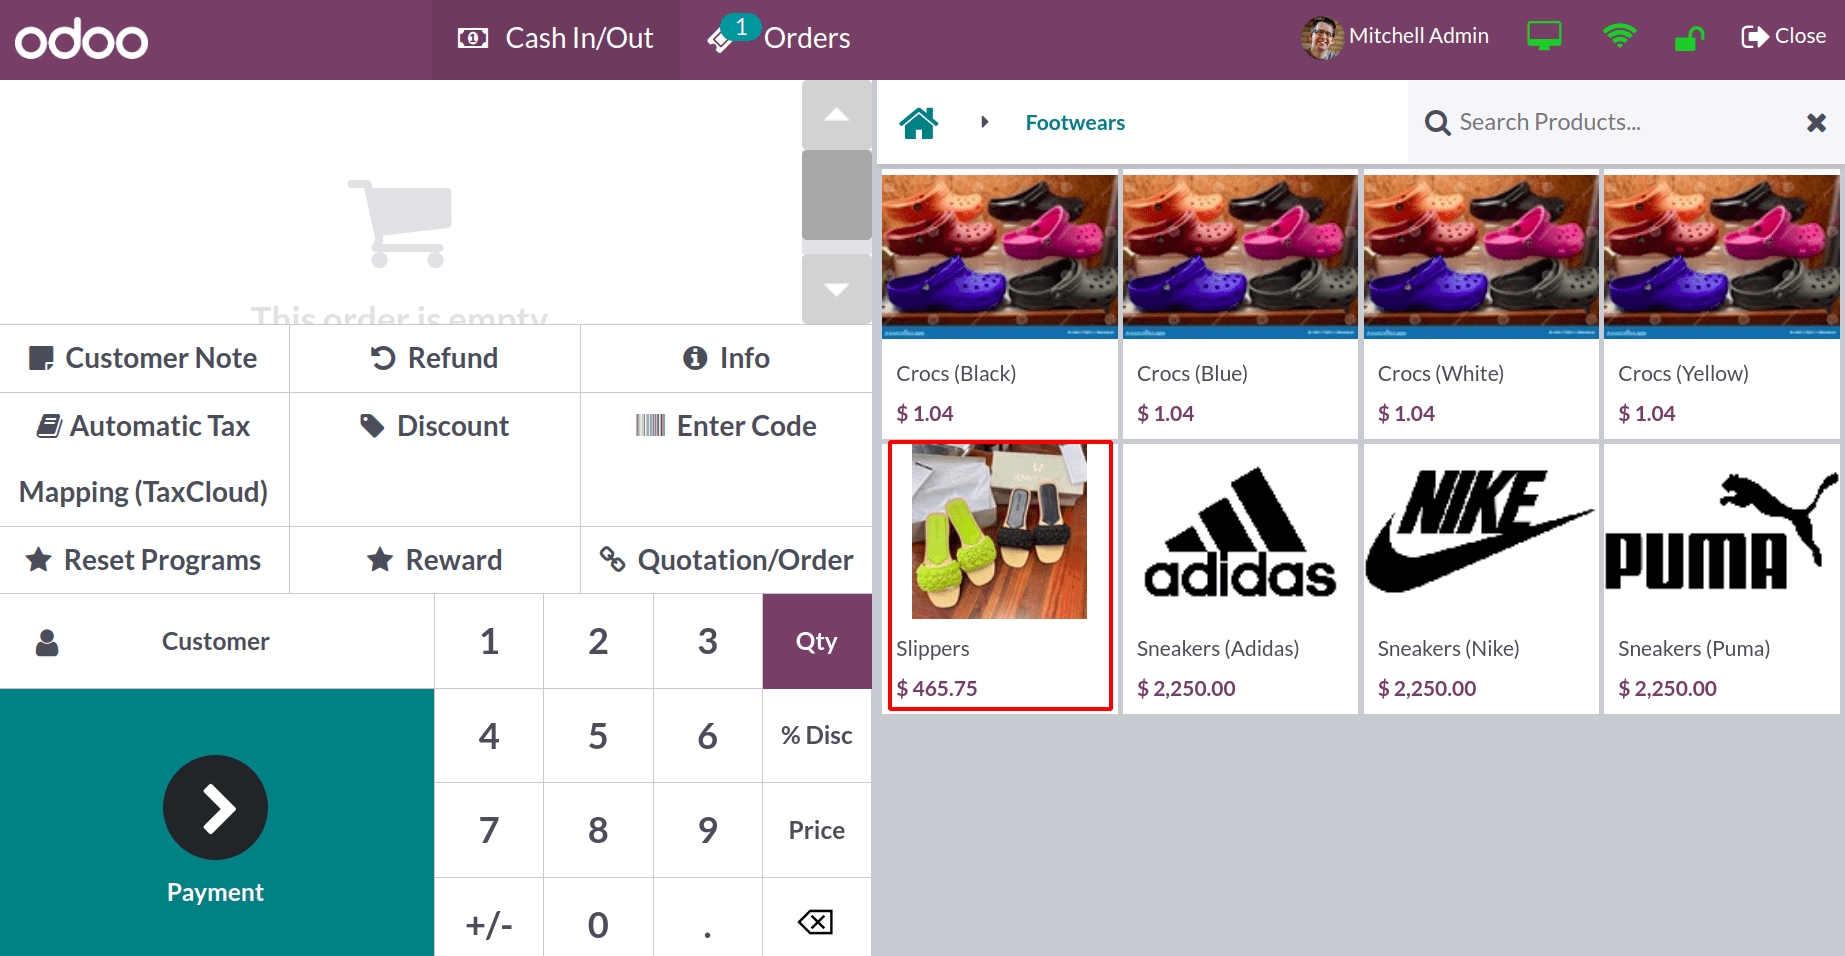
Click on the product Slipper to choose it into the cart. Then another popup window will appear there. It is a Product Configurator. The popup configurator includes all the variants of the product. It's possible to choose them.
It is the Product Configurator view. So the user can only choose a single variant at one time. After choosing the variant, click on the Add button.
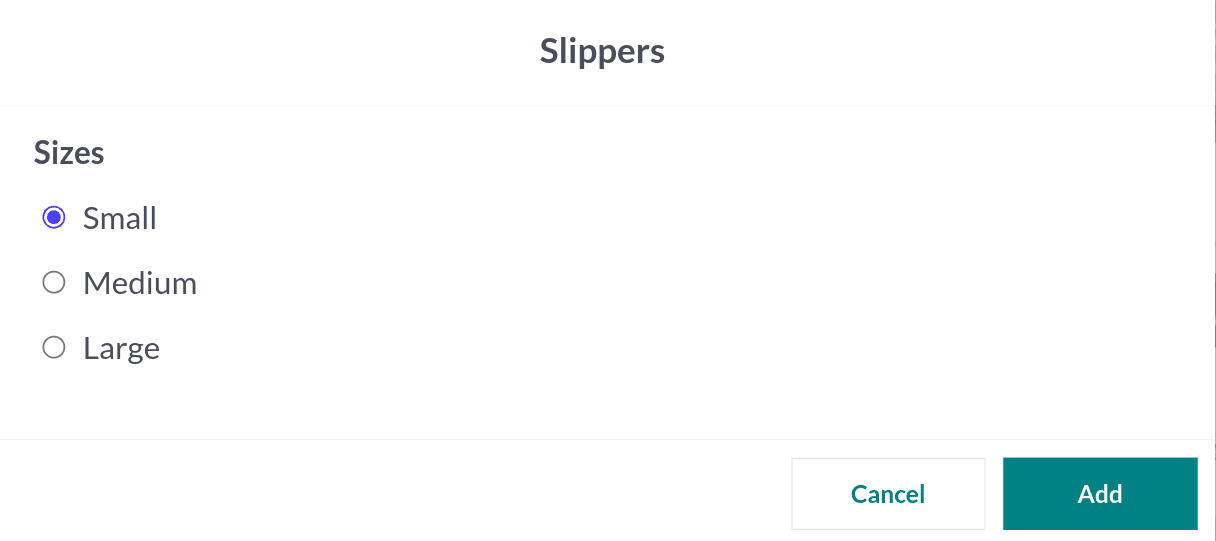
A Slipper with a small size is added to the cart now. The customer can pay for the product to purchase them. If the client wants the same product with another size, again click on the product and repeat the same process again.
In conclusion the three types of variant creation modes are very crucial in sales. So configuring and managing them are explained in detail above. The Product Configurator and Variant Grid entries are also shown in this blog.