The combination or merging of several things into a single unit is the process of consolidation. On the other hand, the fusion of various financial statements is the consolidation process in accounting. Multiple investments and acquisitions occur with the growth of the parent company. Most companies store the consolidation records regarding subsidiary companies and their financial statements. The consolidation of a company's financial statements becomes more accessible with the Odoo 15 Consolidation module.
This blog provides an insight into the Dashboard window of the Odoo 15 Consolidation module
An overview of consolidation reports is visible inside the Dashboard window of the Odoo 15 Consolidation module. Consolidation procedures occur in three types: Consolidation scope, Chart of Accounts, and Analysis period. Let's look at the detailed view of the Dashboard window in the Odoo 15 Consolidation module.
Dashboard
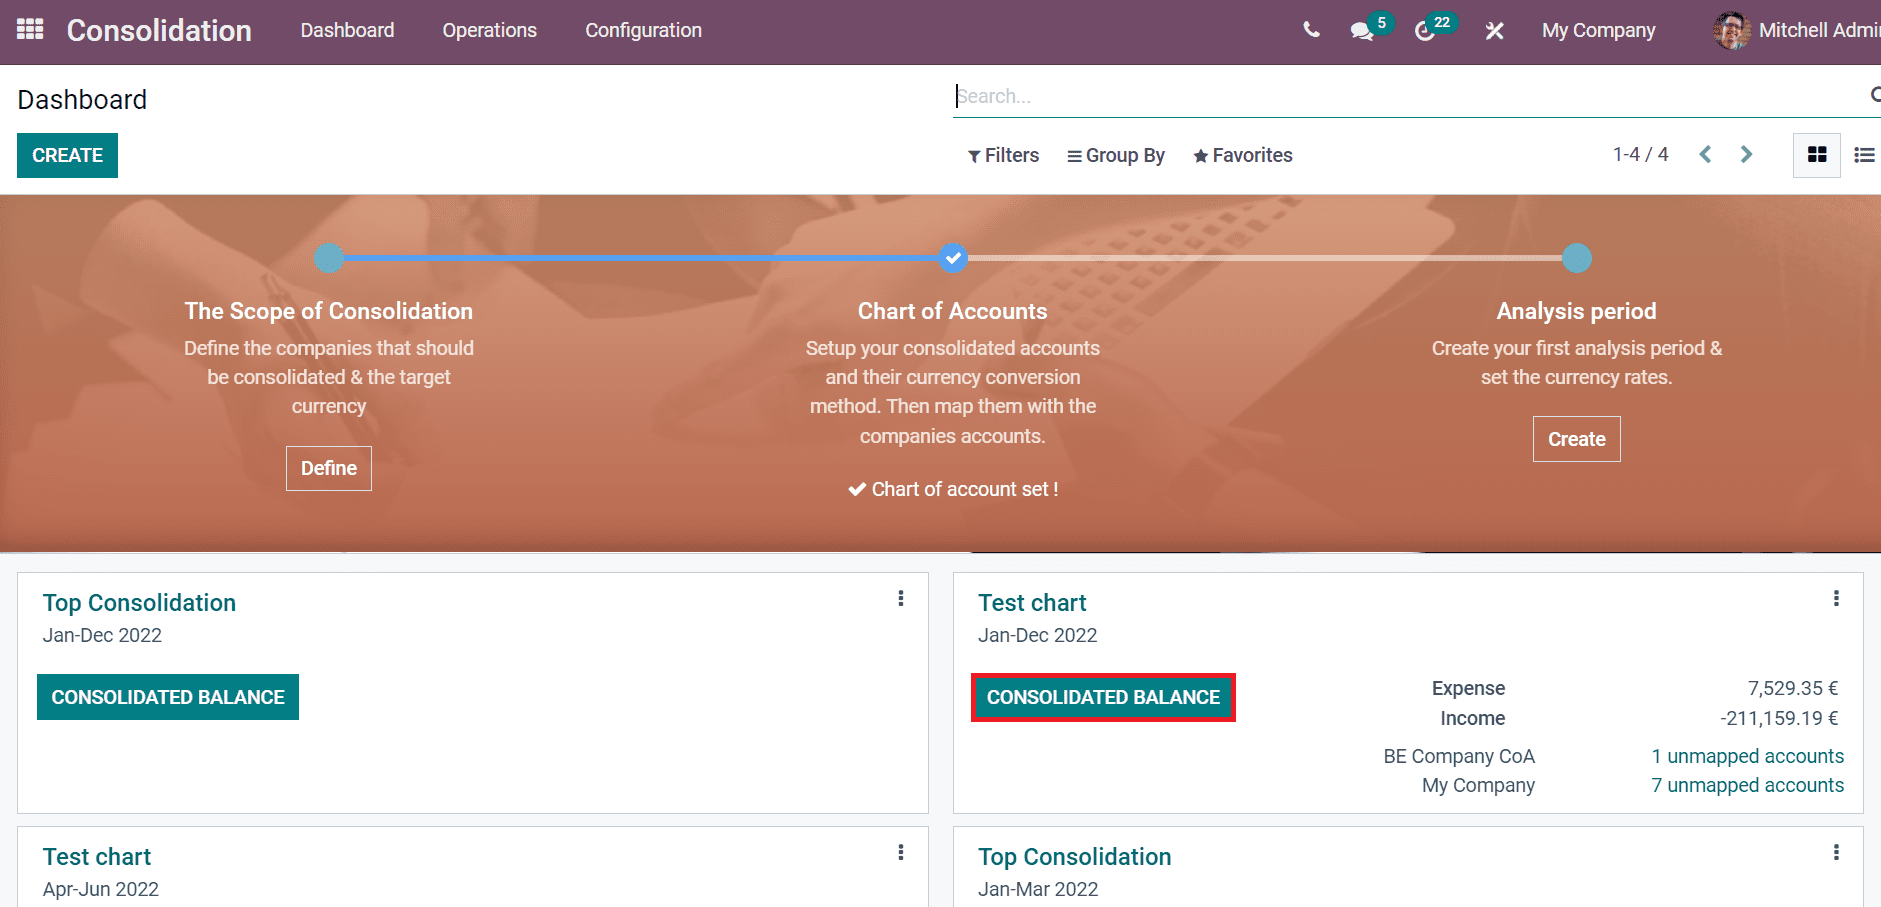
Users can create their consolidated financial reports with the Odoo 15 Consolidation module. The consolidation takes place in three processes in Odoo, and it includes the Scope of consolidation, chart of accounts and analysis period as displayed in the screenshot below.
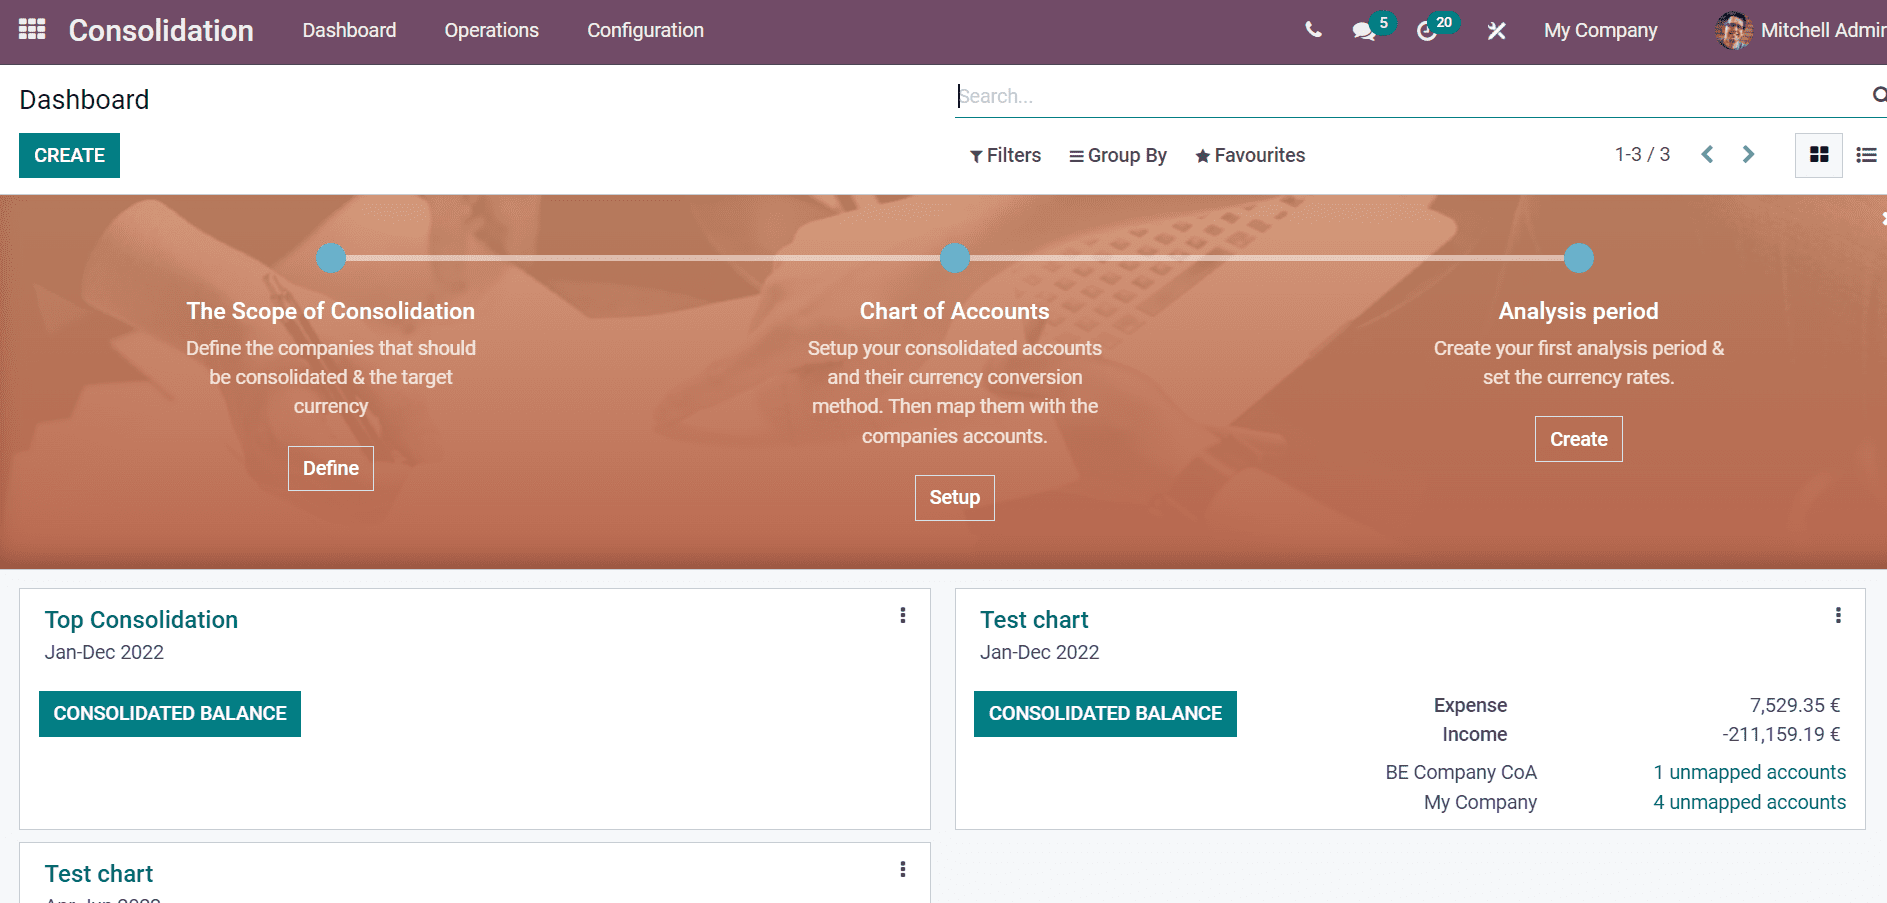
We can figure out the detailed information regarding each process now.
The Scope of Consolidation
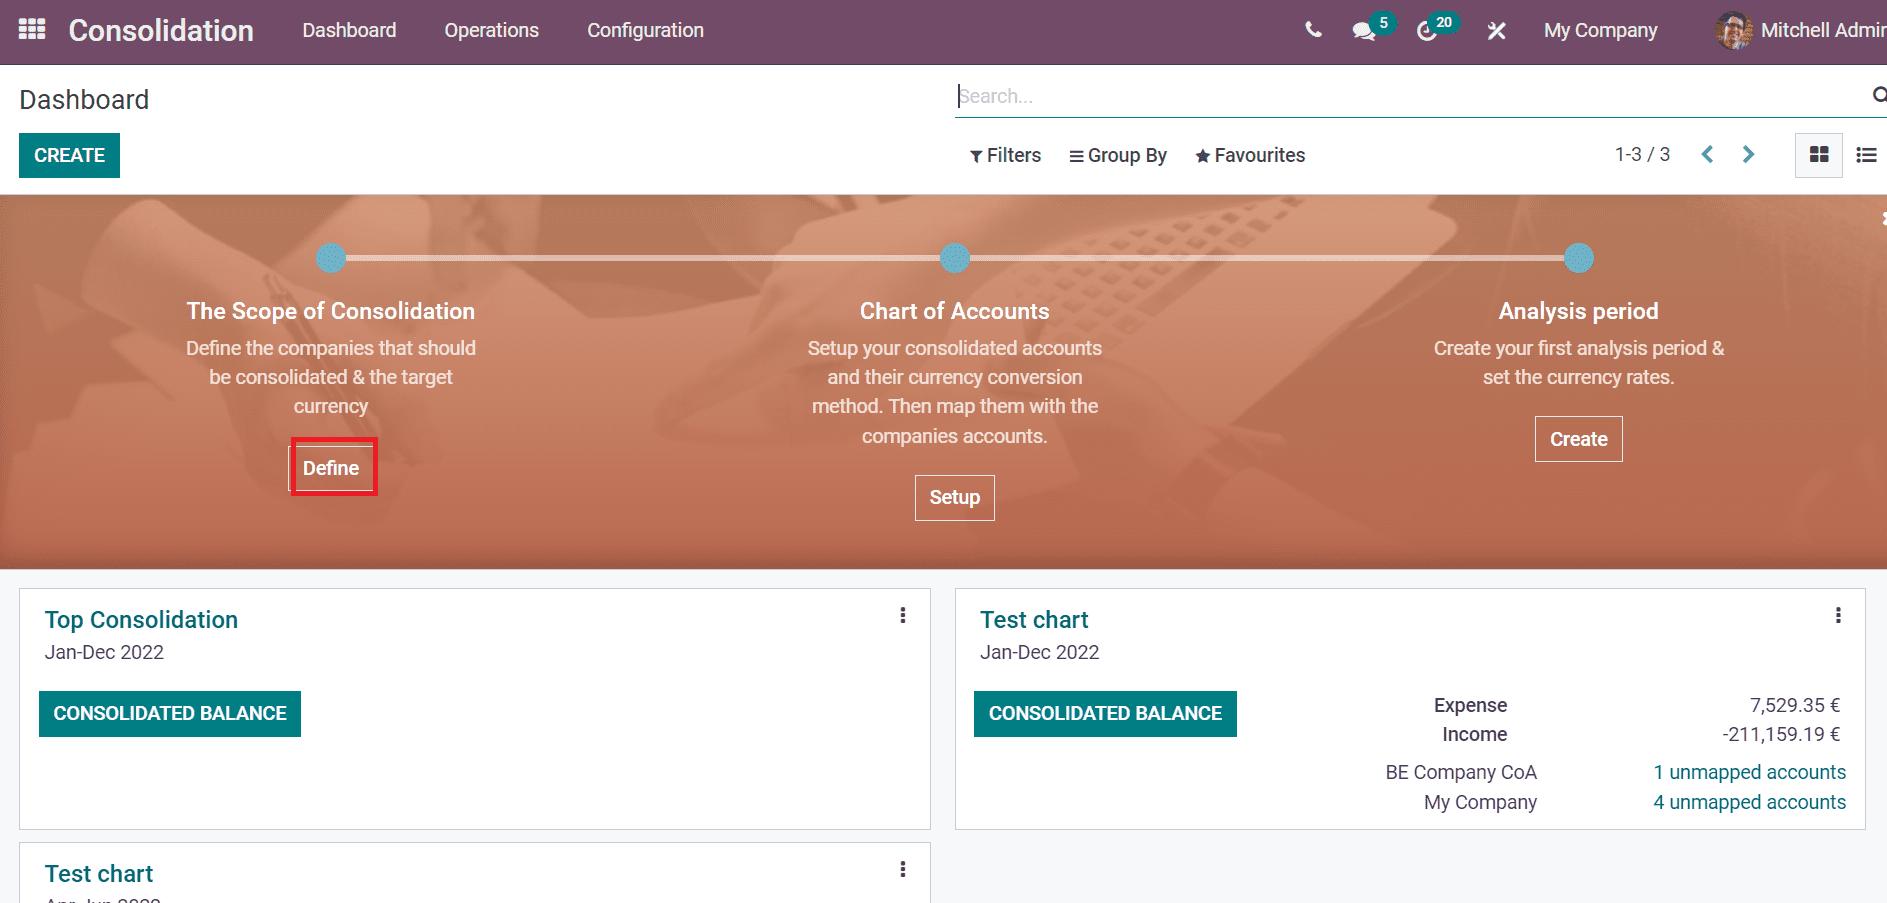
The details regarding consolidated companies and their target currency specify inside the Scope of the Consolidation process. You can develop a new consolidation for the company by clicking on the Define icon below the Scope of Consolidation title, as displayed in the screenshot below.
A new consolidation window opens before you after clicking on the Define icon. Here, add the Consolidation Name, and Target currency in which consolidation occurs inside the Consolidation window. The firms and subsidiaries in a consolidation company form individually or collectively. We can add a list of Consolidated Companies by clicking on Add a line option below the Company name as displayed in the screenshot below.
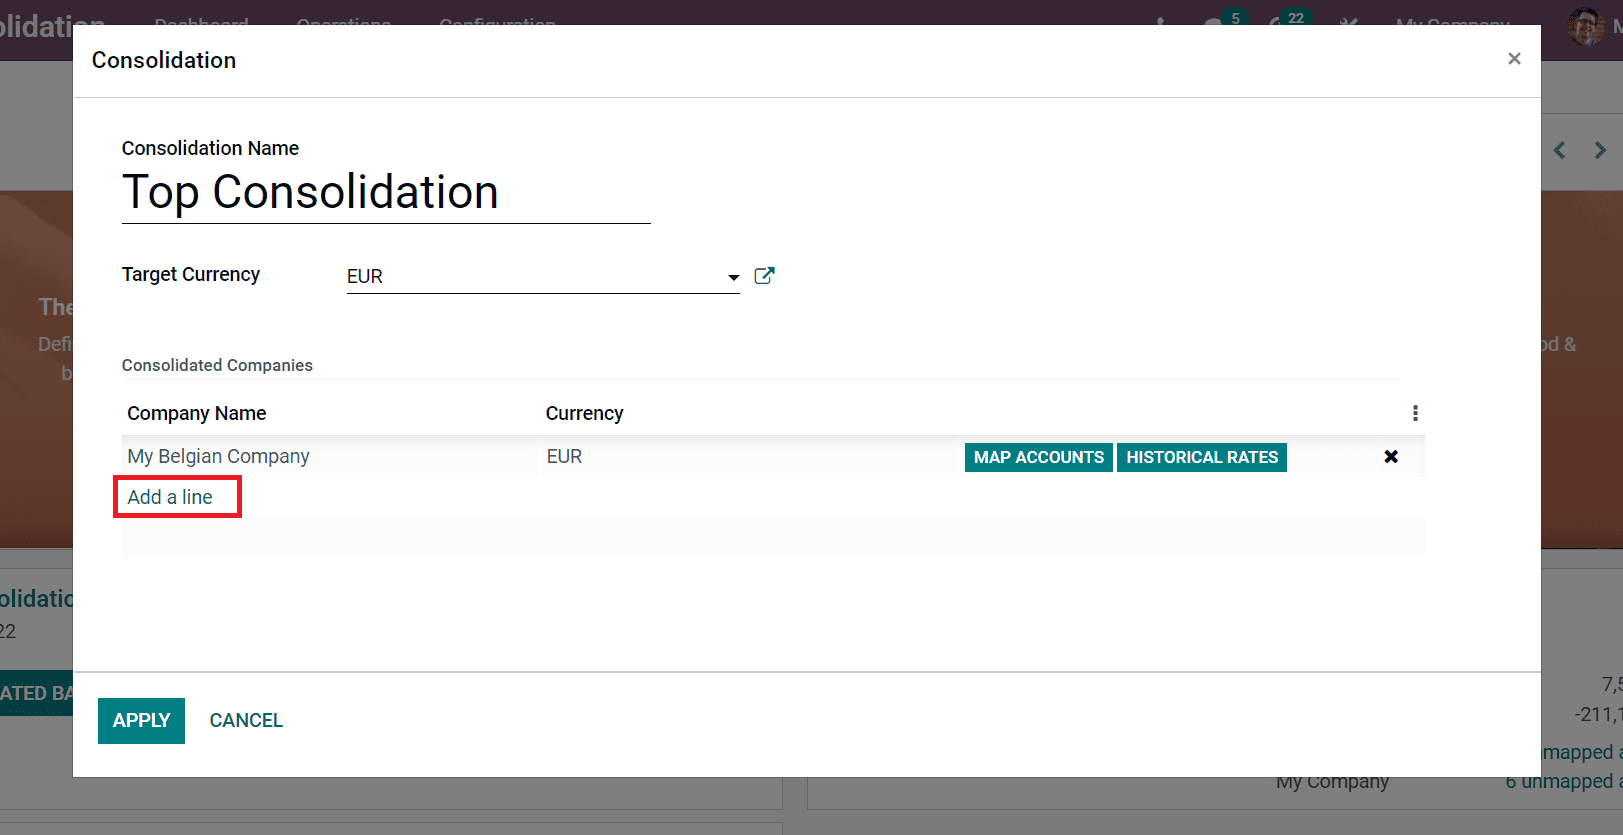
You can add the necessary companies after selecting the Add a line option. All selected companies are visible below the Company Name and Currency of respective companies generated automatically here. The Map Accounts and Historical Rates button lets you view consolidated companies' map accounts and historical rates. Moreover, the Scope of consolidated is defined after clicking on the Apply icon. We can see a tick mark in the Dashboard window after defining the Scope of Consolidation, as shown in the screenshot below.
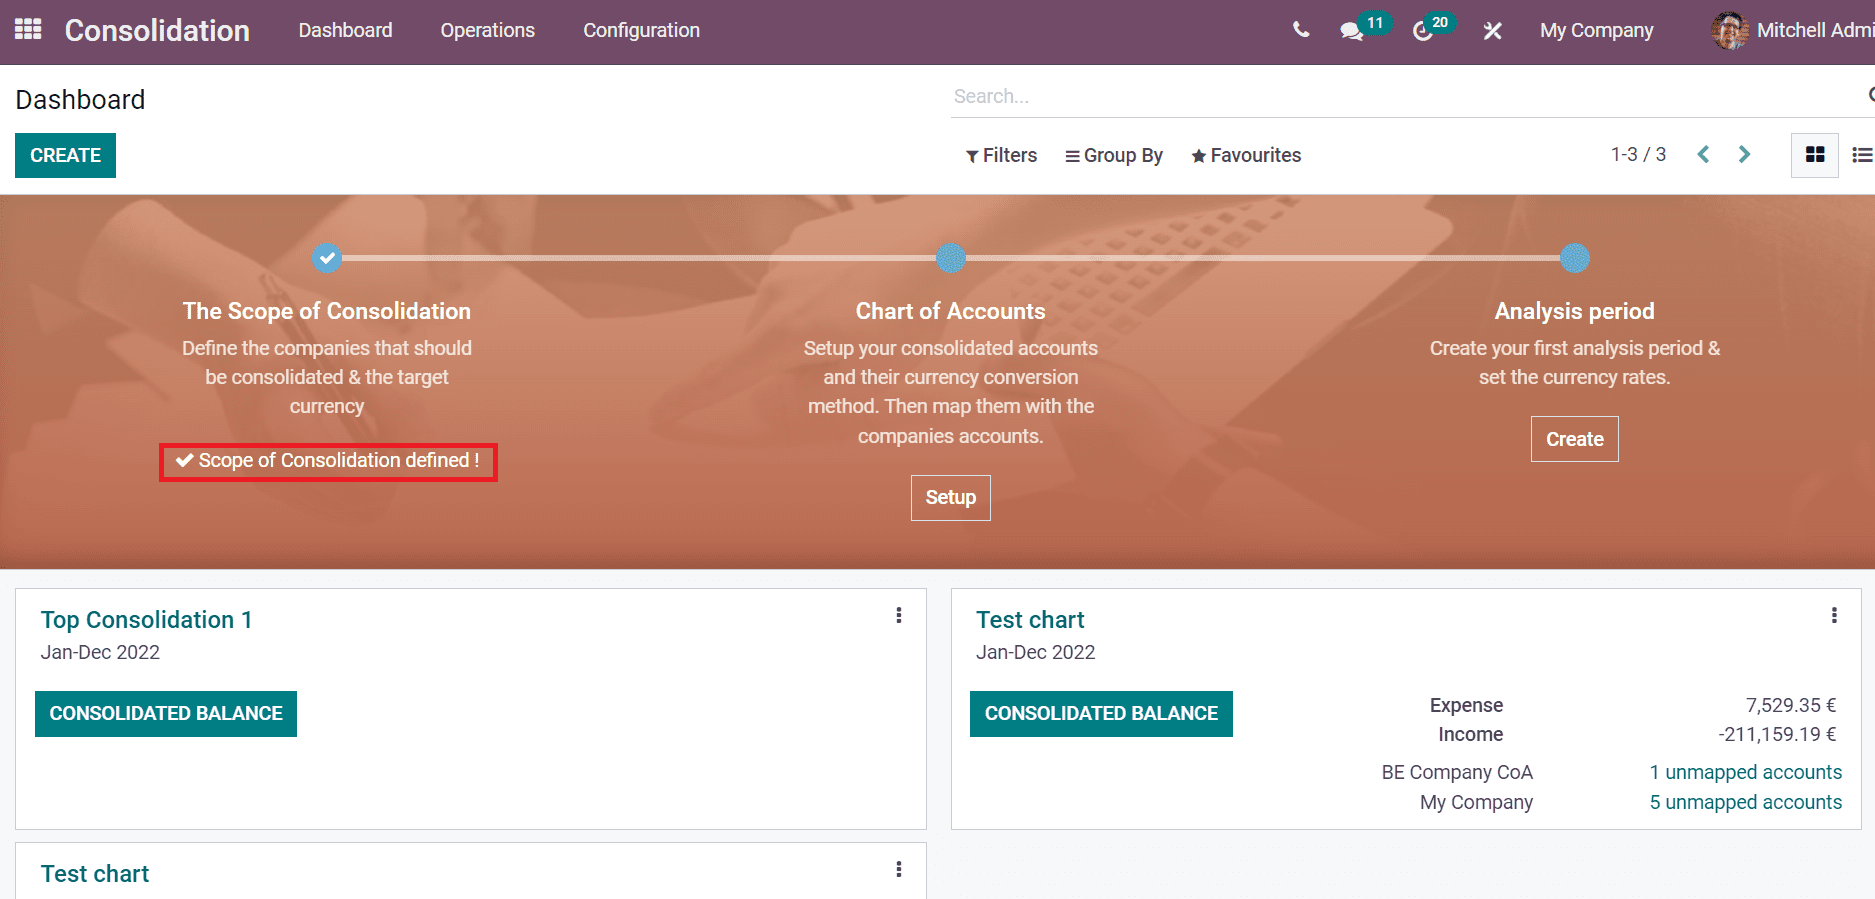
Chart of Accounts
We can set the currency conversion method for consolidated accounts inside the Chart of Accounts section. It is easy to map them with companies' accounts, and the Setup icon assists to view the created list of consolidated accounts as displayed in the screenshot below.
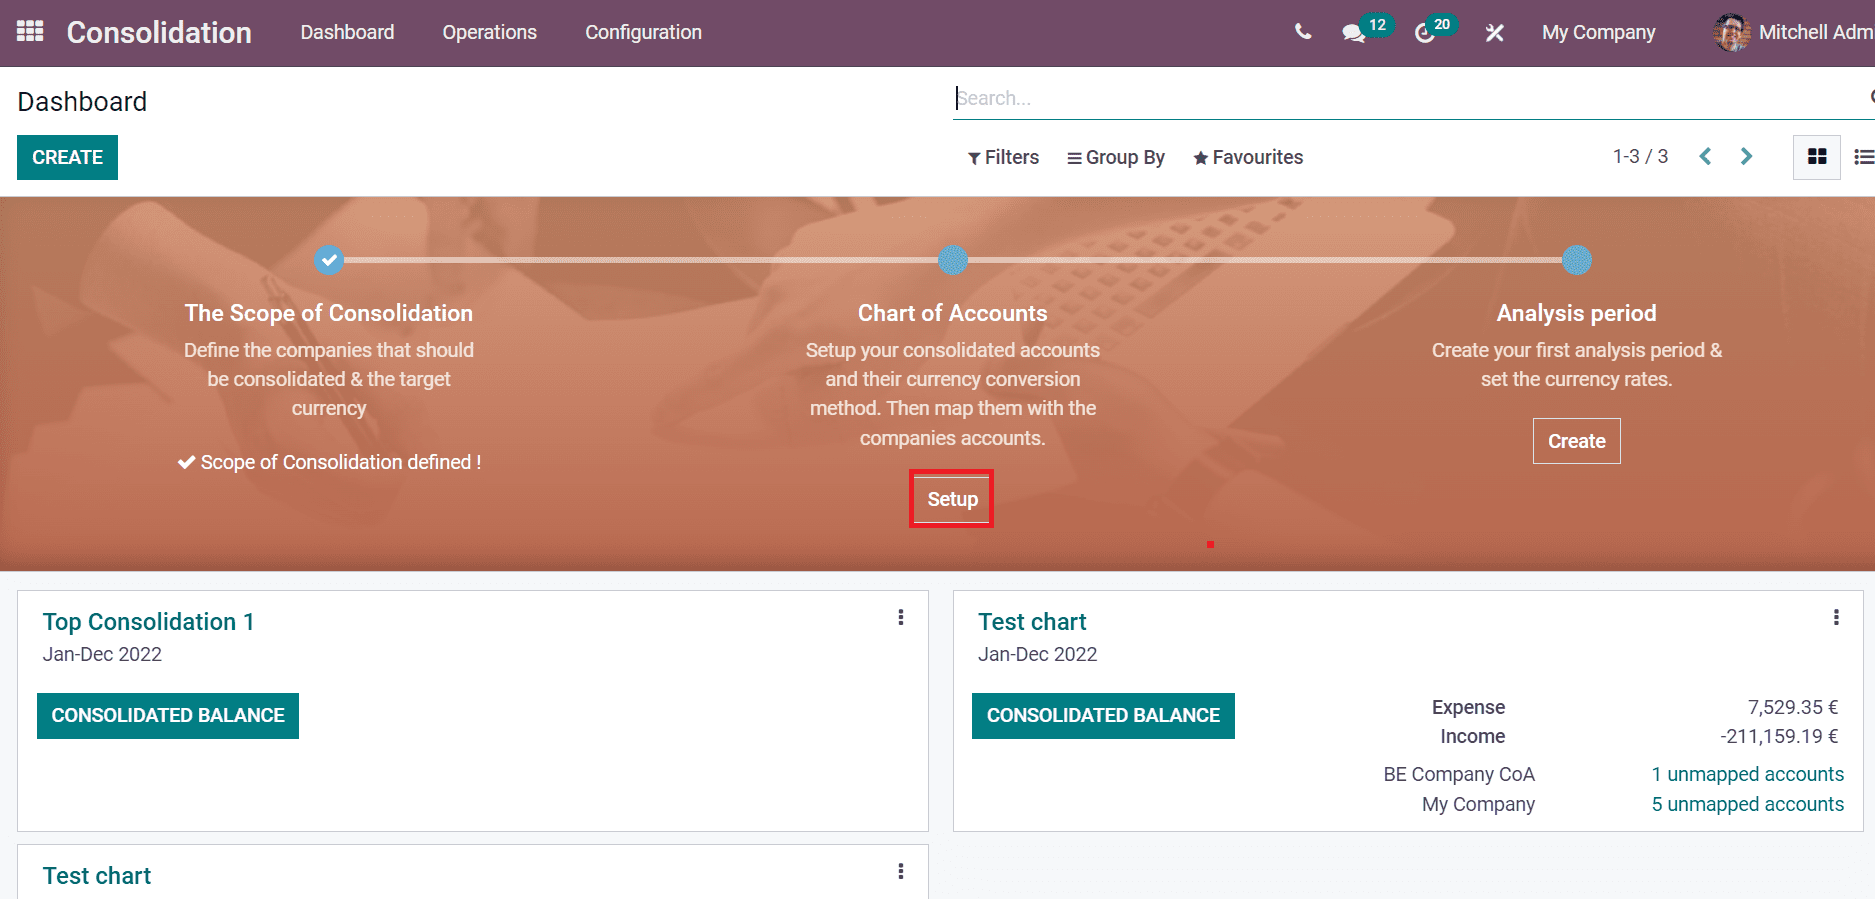
A new page of Consolidation Accounts is viewable for you after clicking on the Setup button. Here, we can see the information such as Mapped Accounts, Currency Conversion Method, Group, and Name.The Currency Conversion Method is classified into three types. Closing Rate defines at the last of trading day or month that exchange two currencies rates. Another one is the Average Rate depicts the rate at which currency is exchanged into other currencies. The last one is Historical Rate denotes historical reference of defined currencies and their trades in past situations. The Consolidation Accounts window with various Currency Conversion Methods is denoted in the screenshot below.
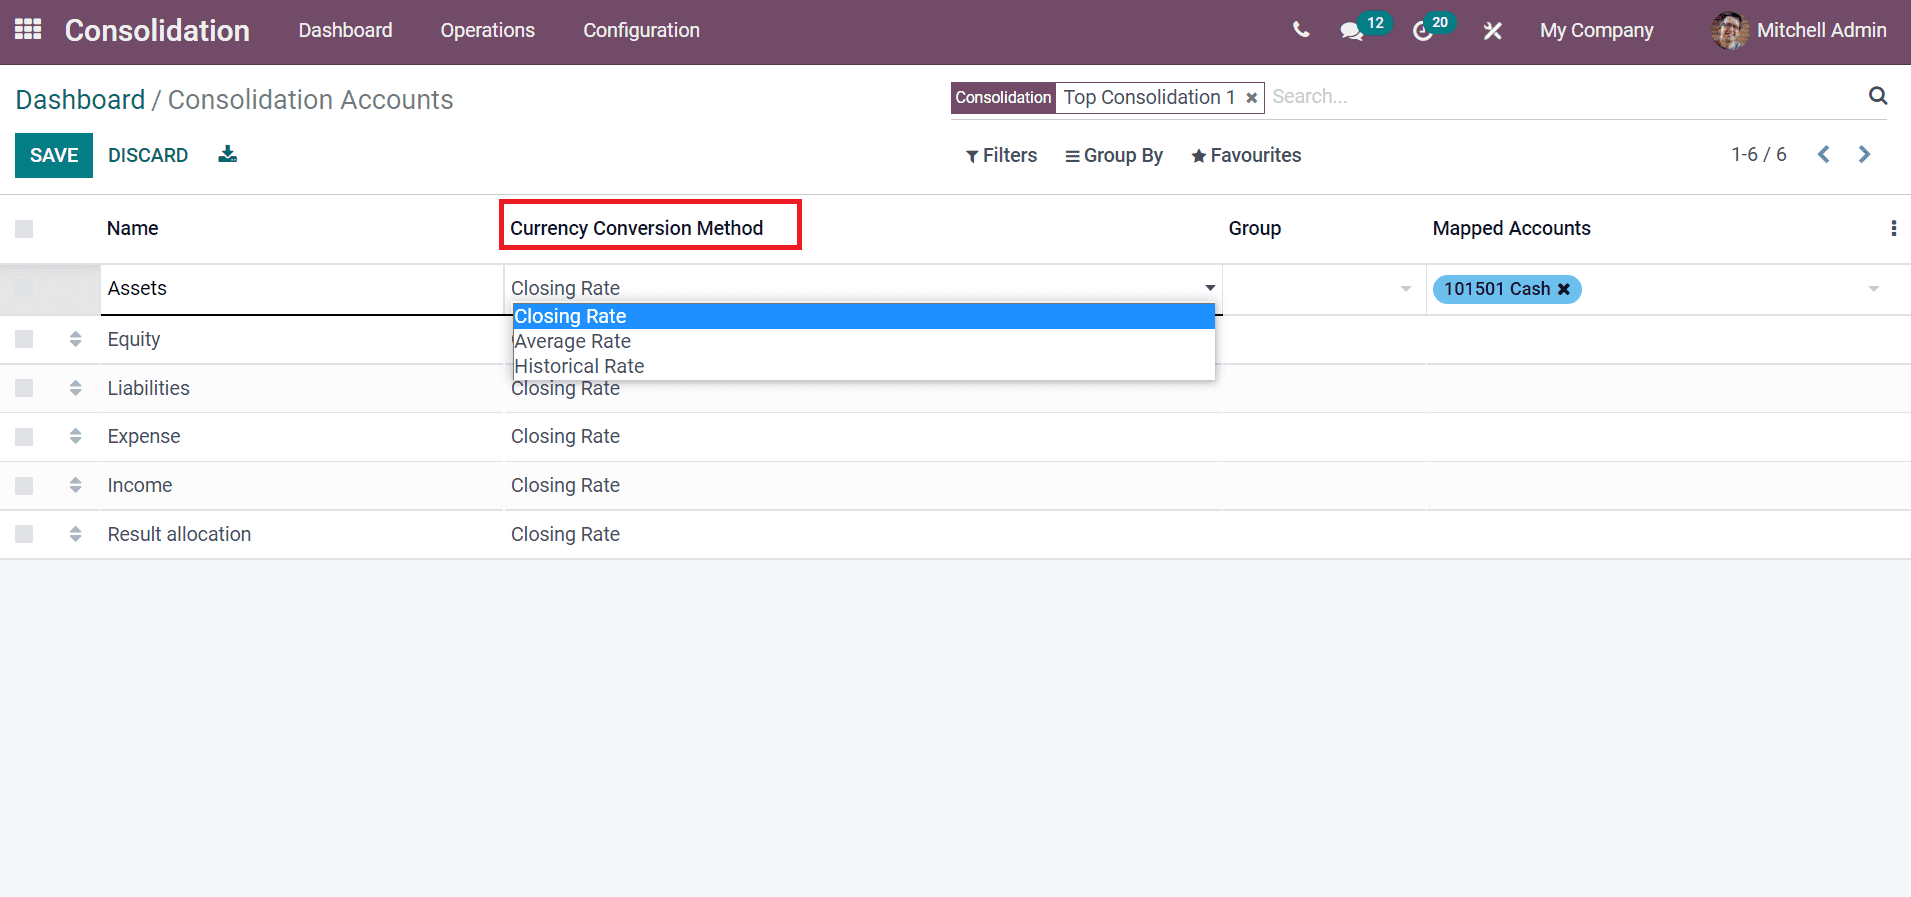
The Create button ensures to development of a new Consolidation Account for you. A new space opens at the end of the Consolidation Account window after clicking on the Create button, as depicted in the screenshot below.
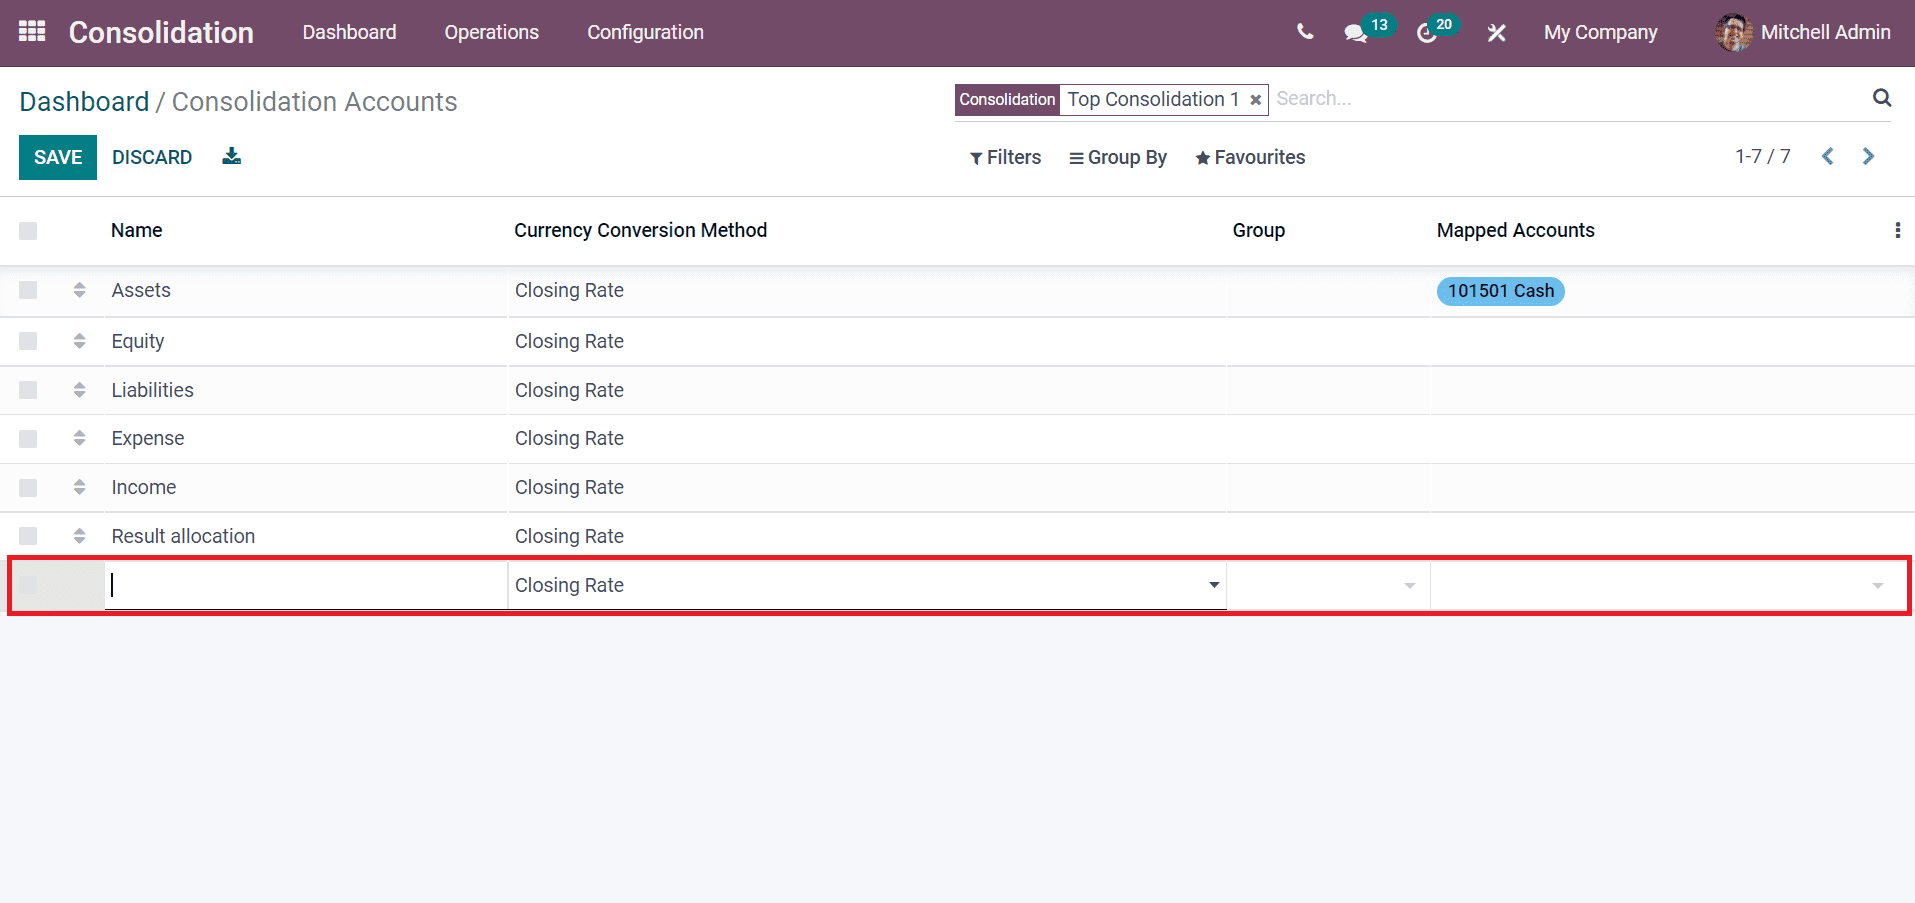
Here, add the Currency Conversion Method, Name, Group and Mapped Accounts in the new bar at the bottom of the window.
Analysis Period
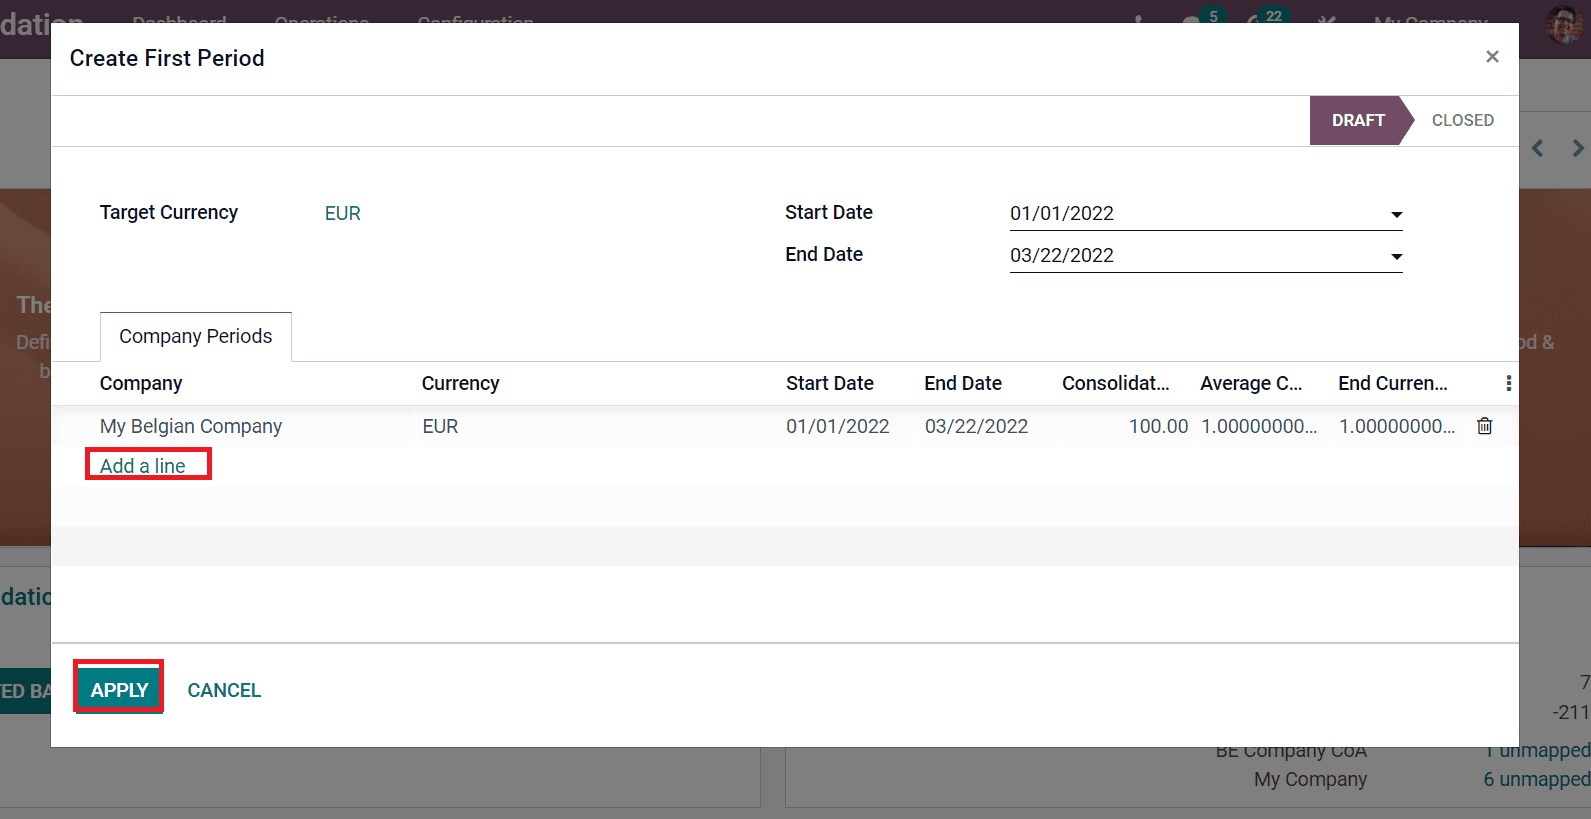
It is easy to set the currency rates and your first analysis period in this stage. The Create icon below the Analysis period assists in developing the first period. In the new window, you can view the Target Currency, Start Date and insert the End Date period for the time which analysis should be done. The Company Periods tab is visible for you after choosing the End Date. You can add the company by clicking on Add a line option inside the Company Periods tab. Later, click on the Apply button to create your first Analysis period, as portrayed in the screenshot below.
Consolidation
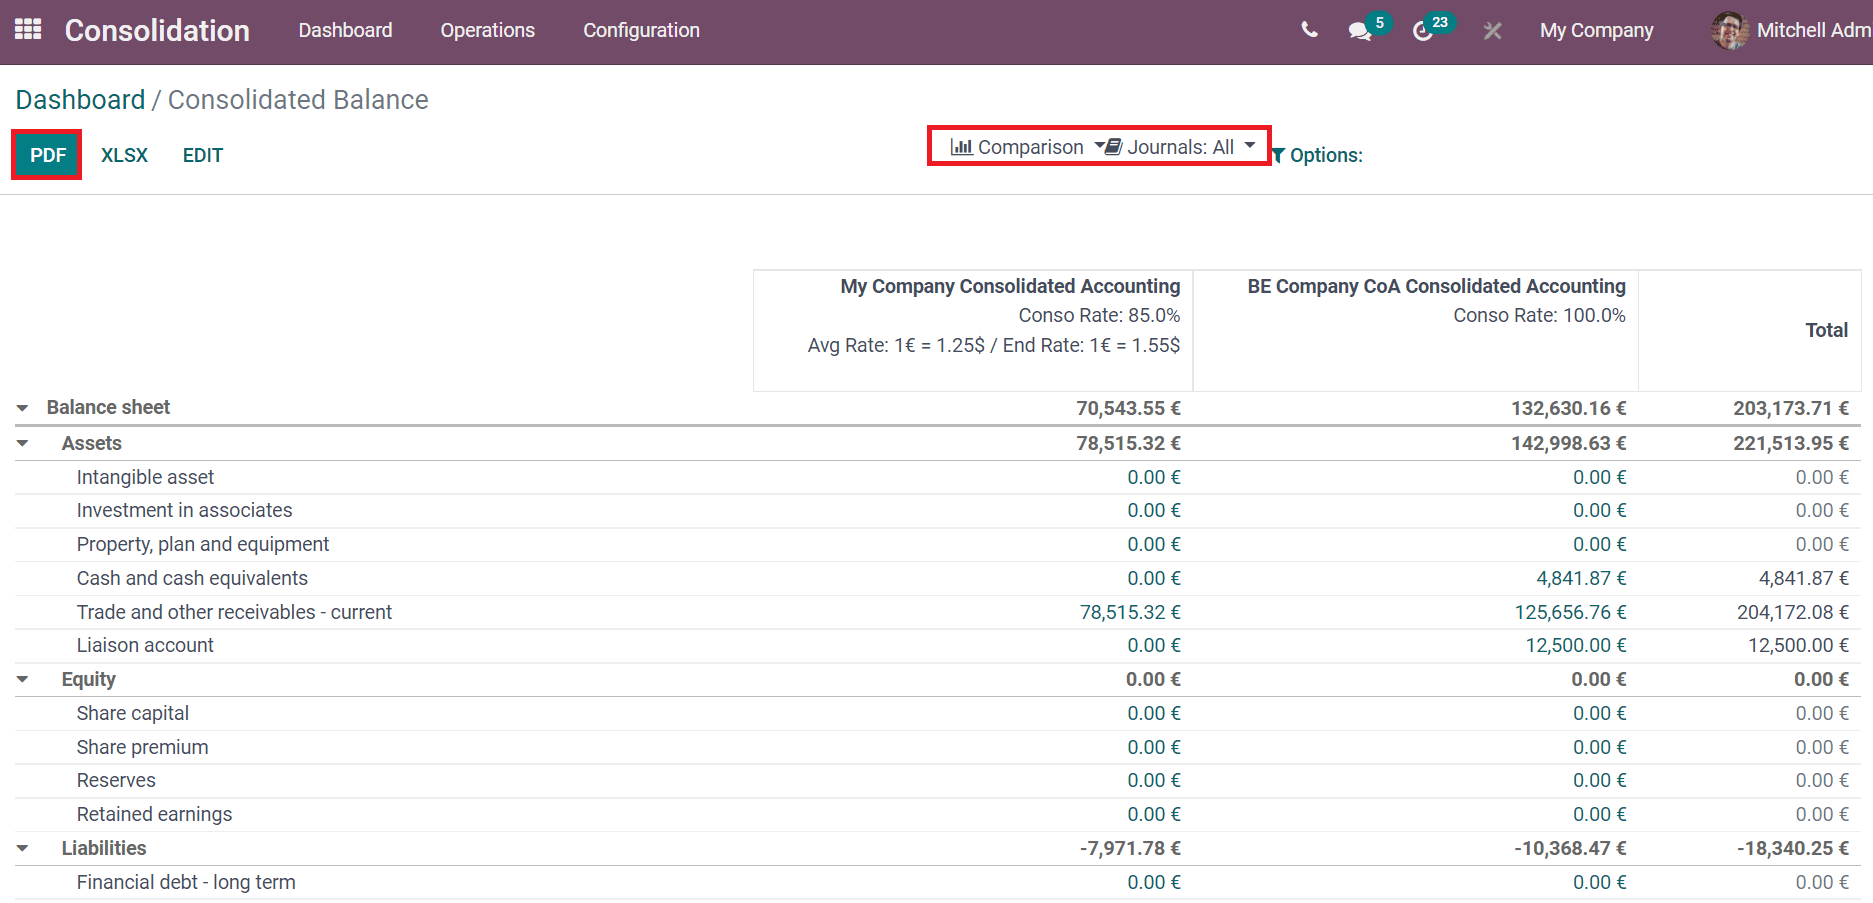
You can access information about consolidation by clicking on a particular consolidation report in the Dashboard window. By selecting the Consolidated Balance icon in a specific Consolidation, we can view particular companies' balance sheet and consolidation rate.
We can print the consolidated balance details by selecting the PDF icon, and the XLXS button ensures to export data into a spreadsheet. The Journals option assists in accessing the consolidated companies' journals. We can differentiate the balance sheet with separate consolidated balances using the Comparison option, as depicted below.
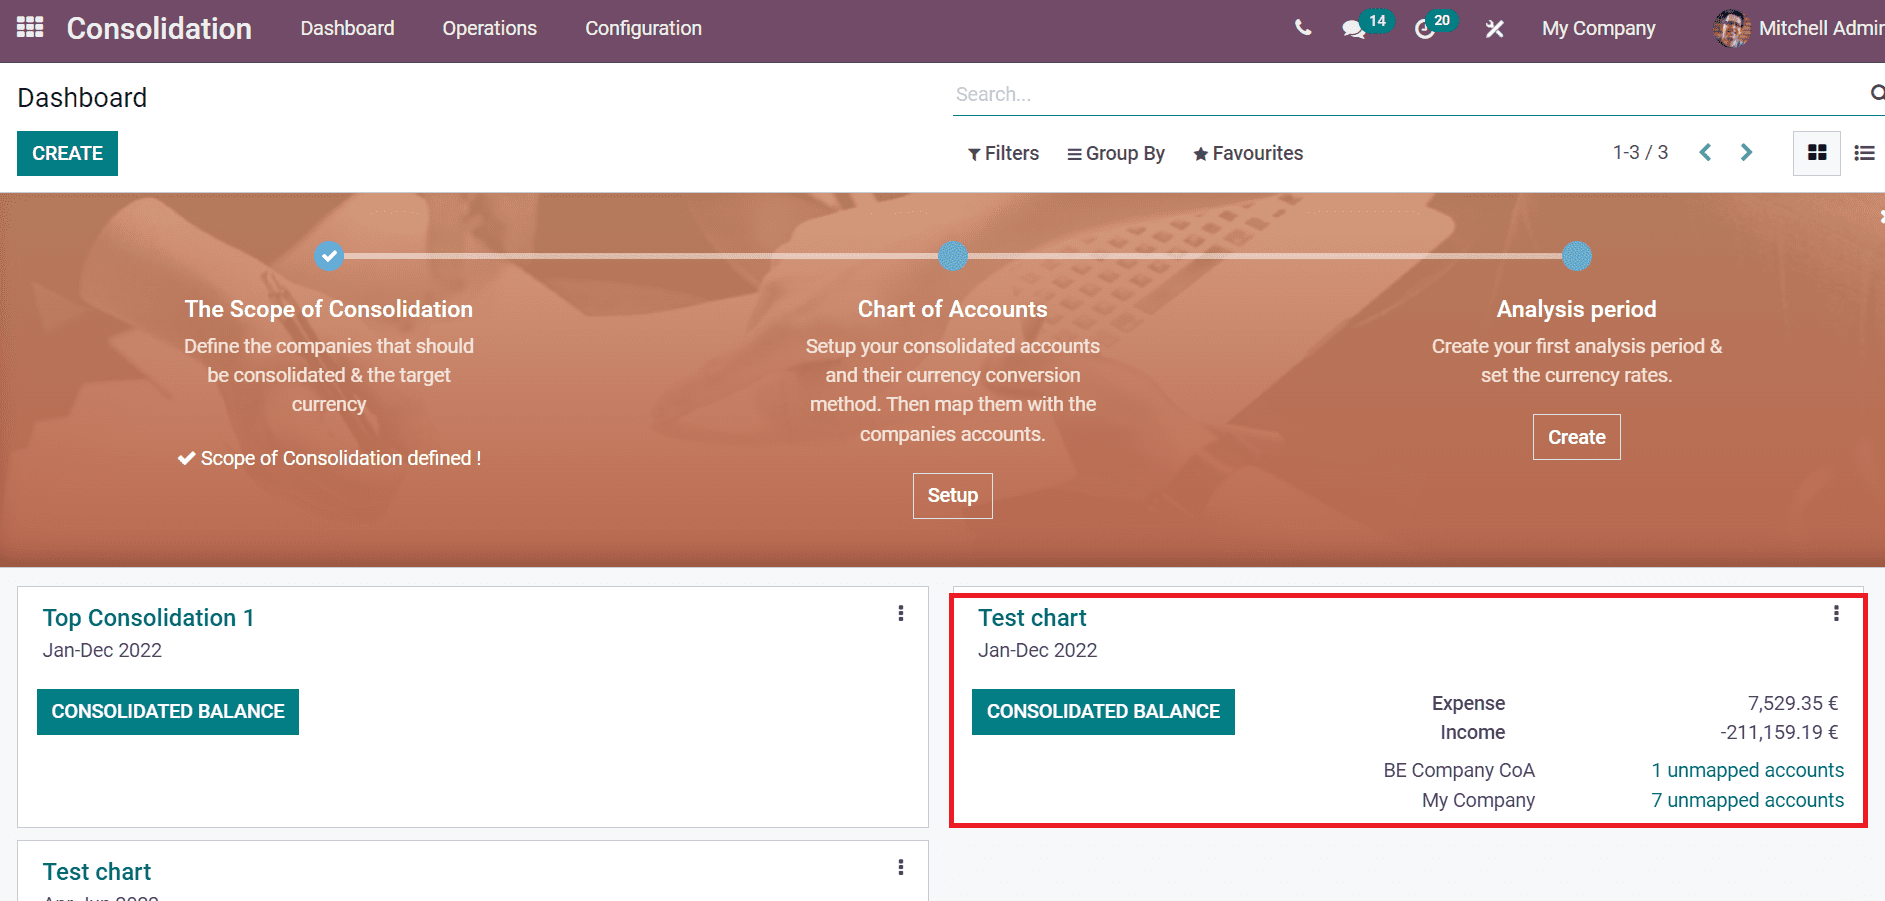
As displayed in the screenshot below, we can see the unmapped/mapped accounts in specific companies with Expenses and Income inside each consolidation report.
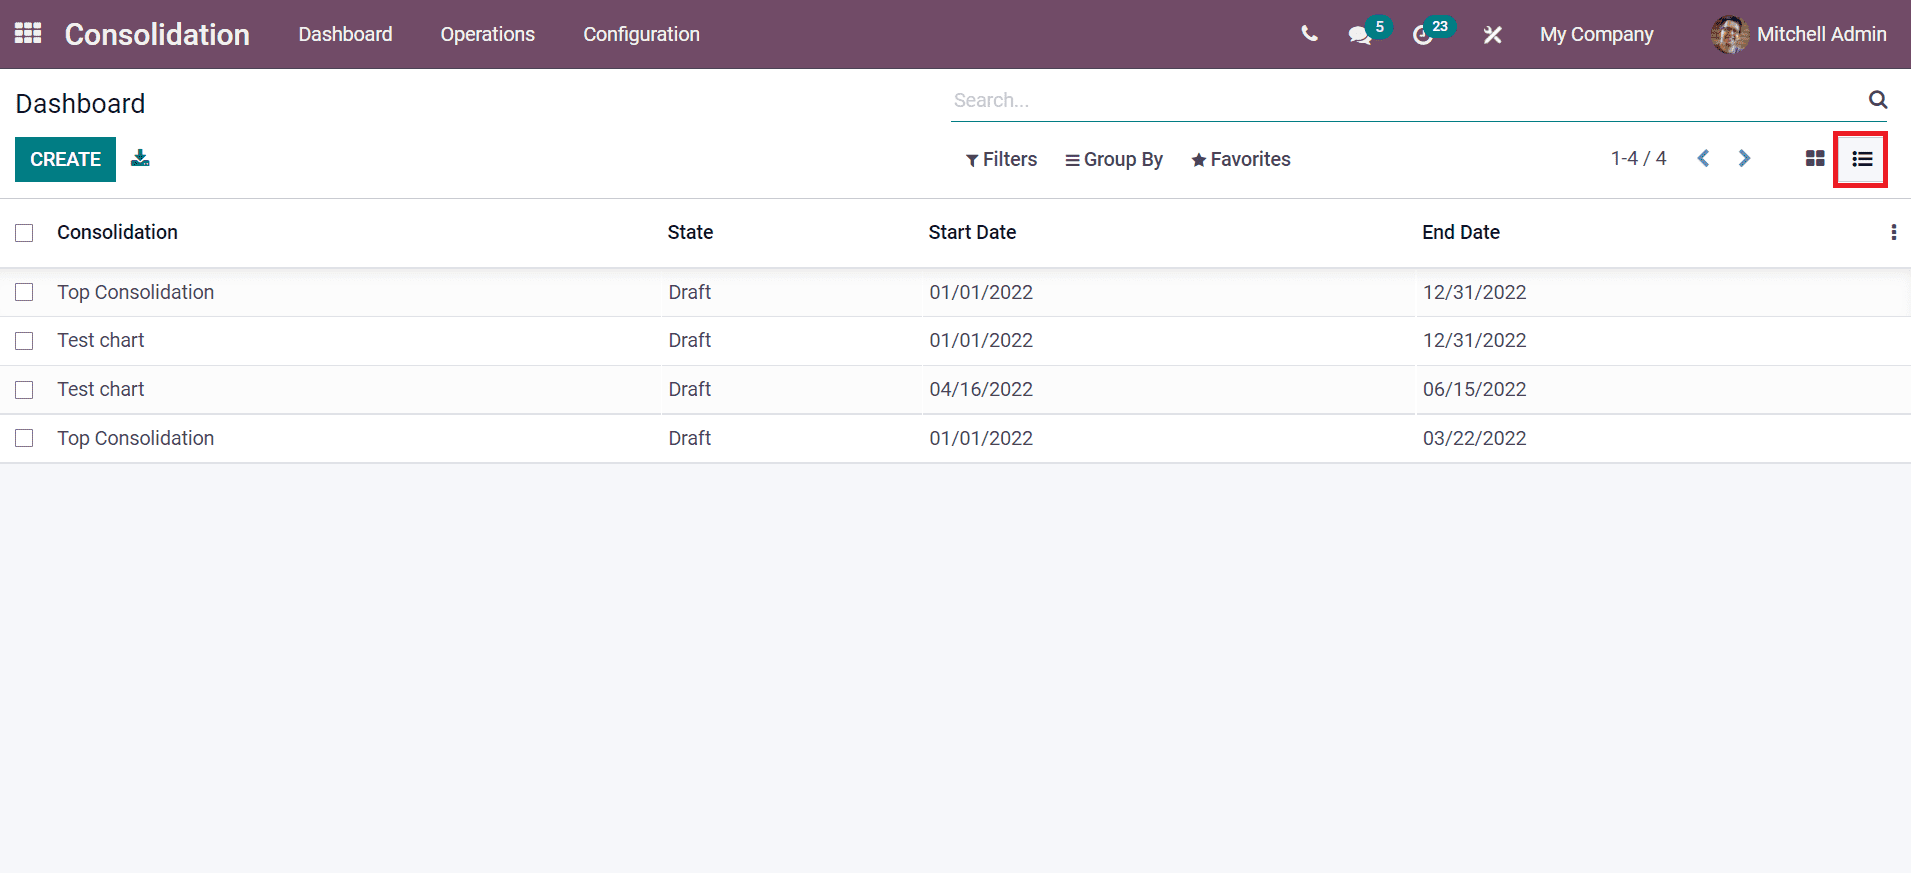
The dashboard window is visible in Kanban and List formats. In the List view of the Dashboard window, you can view the Consolidation name, Start Date, State and End Date as shown in the screenshot below.
The Create icon in the Dashboard enables you to generate a new Consolidation Analysis. Choose your consolidation from the drop-down menu in the new dashboard window, and the Target Currency for the consolidation report is visible at the end. Later, add Start Date and End Date at the right end of the window. According to your Target Currency, Respective companies are displayed below the Company Periods tab after choosing the End Date. We can modify the Average Currency Rate, Start Date, Currency, End Currency Rate, Consolidation Rate and Company details after defining the End Date. After that, click on the Save icon, and several new icons will appear before you after saving a Consolidation record, as displayed in the screenshot below.
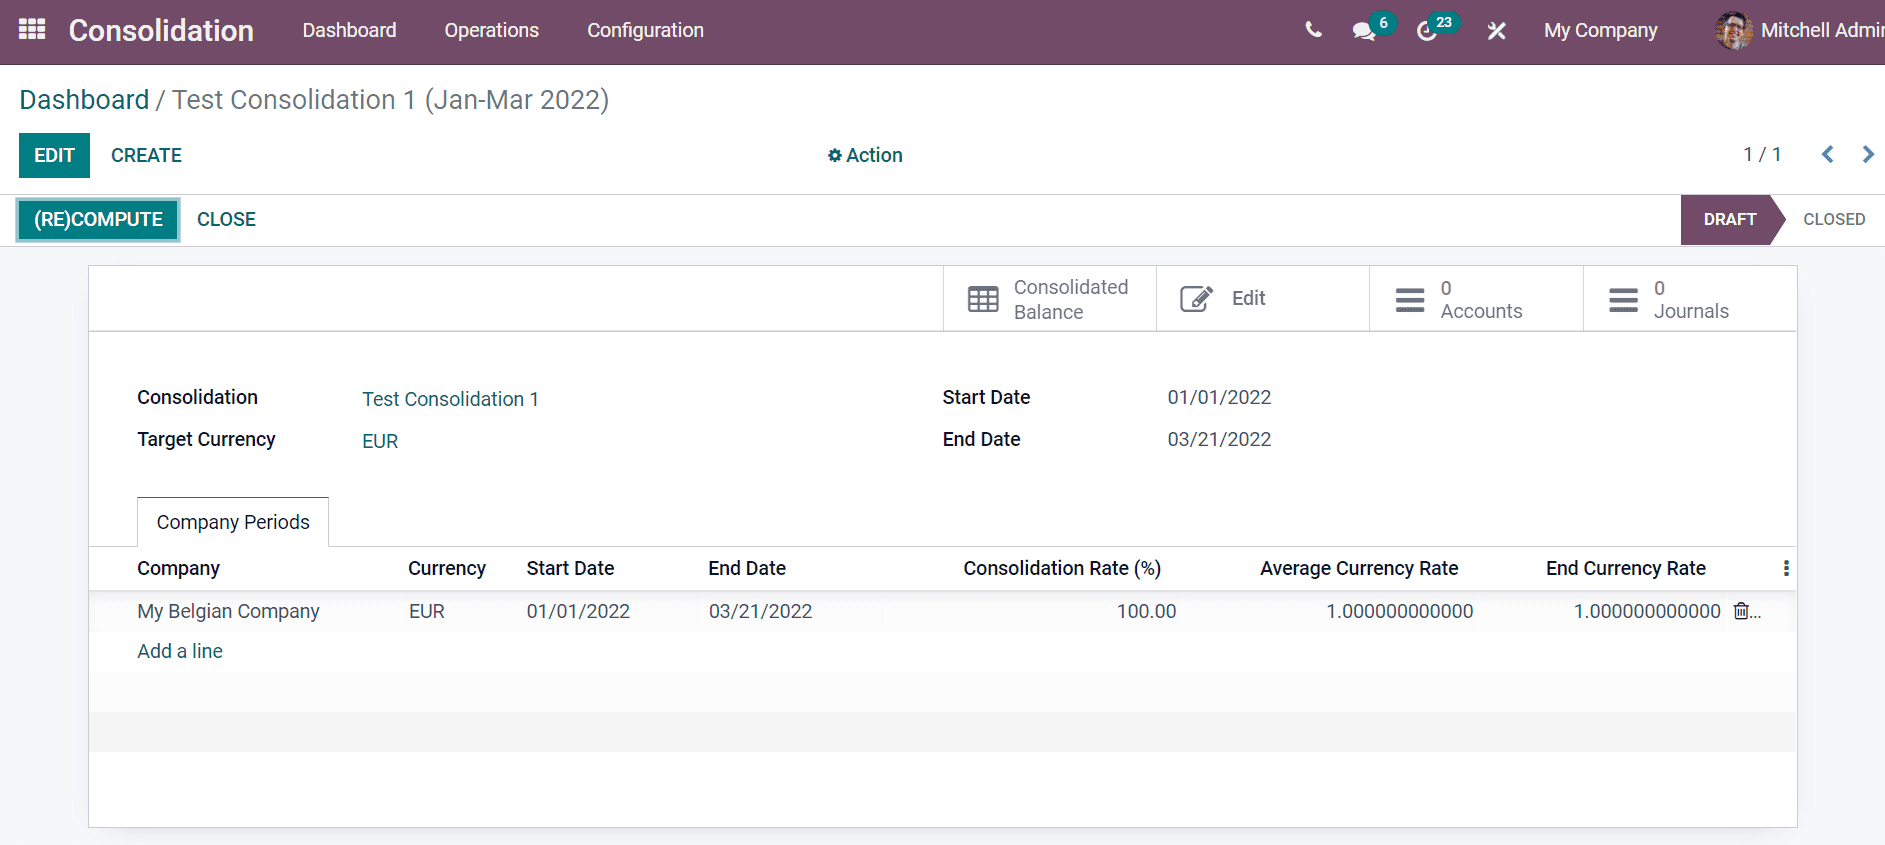
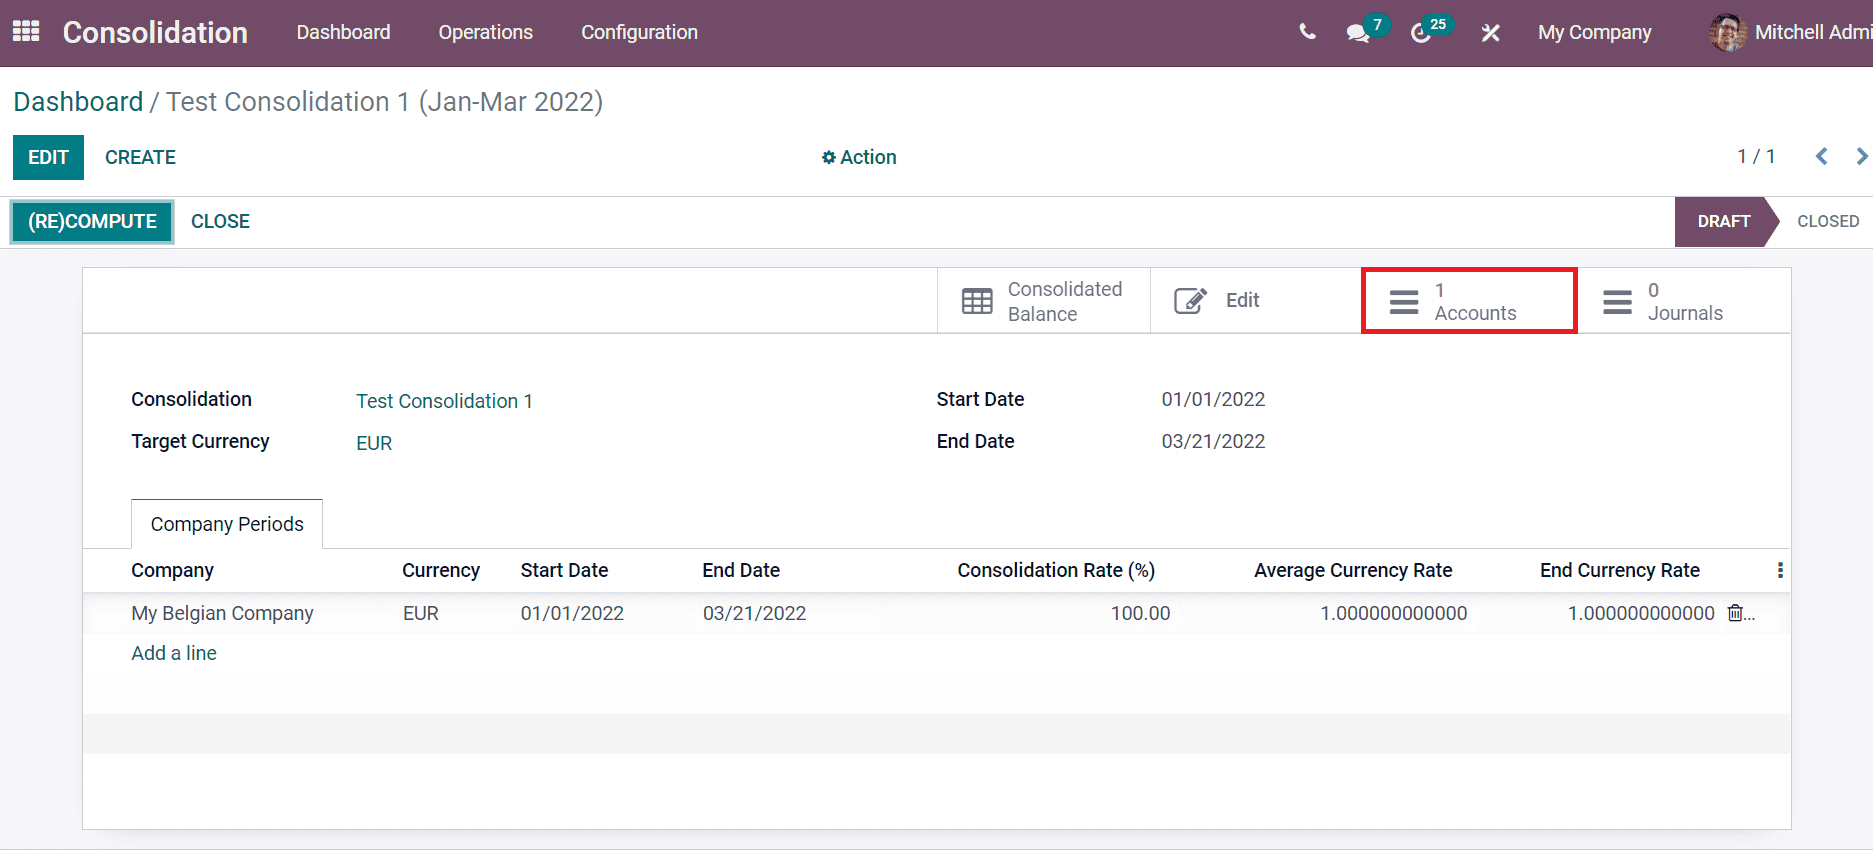
We can access a specific consolidation's account details and journal entries from the window. Your consolidation window shows several smart buttons such as Consolidated Balance, Edit, Accounts and Journals. The consolidation report is put on the Closed stage after clicking on the Close icon. Users can create a new consolidation account for your consolidation report by selecting the Accounts smart button. Select the Create icon, and a new Consolidation Accounts window appears before you. Here, you can add the Account Name, Group, Code, Currency Conversion Methods such as Historical Rate, Closing Rate and Average Rate. Later click on the Save icon to develop a Consolidation Account for your consolidation report. The created number of Consolidation Accounts is displayed in the screenshot below.
In conclusion, various stages take place for the consolidation process, and we can manage all these steps quickly with the Odoo 15 Consolidation module. Users can evaluate the Consolidated Balance, generate a new consolidation record, and more aspects with the advanced features of the Consolidation module.