Every organization regardless of its size has to maintain a proper attendance management system to ensure stability in employee management. As important as the process is, attendance management can be a hectic task. The Odoo 15 Attendance module is a dedicated attendance management module in Odoo. The module has many advanced features and tools kits installed, for covering all grounds of the Attendance management procedures in any organization.
This blog will give you a note on Attendance management with Odoo 15 Attendance module
It is easy to set up and manage the module. Odoo has the ability to recognize the employees based on their login information and after the initial congratulations on the module, Odoo can automatically recognize the Employees and direct them to their respective log-in or check-in pages as shown below.
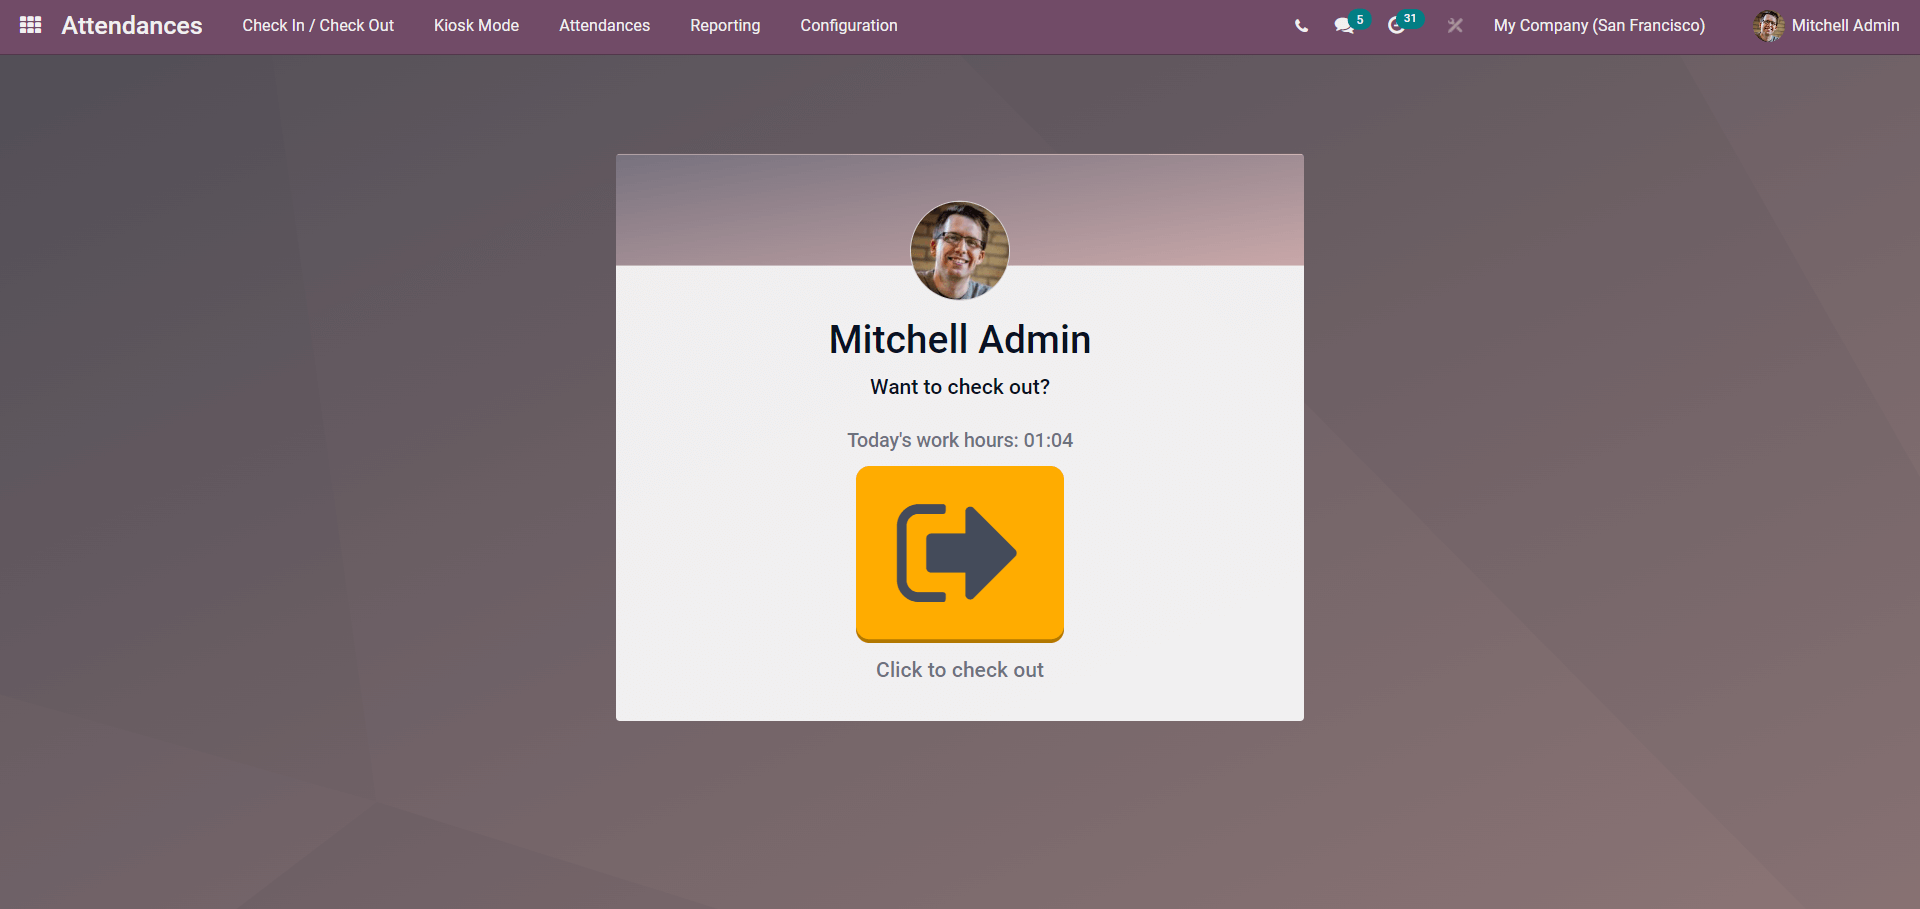
The Employee can check-in by clicking on the Check-in button as shown in the image given above. The check-in and check-out times will be displayed right above the check-in key as shown below.
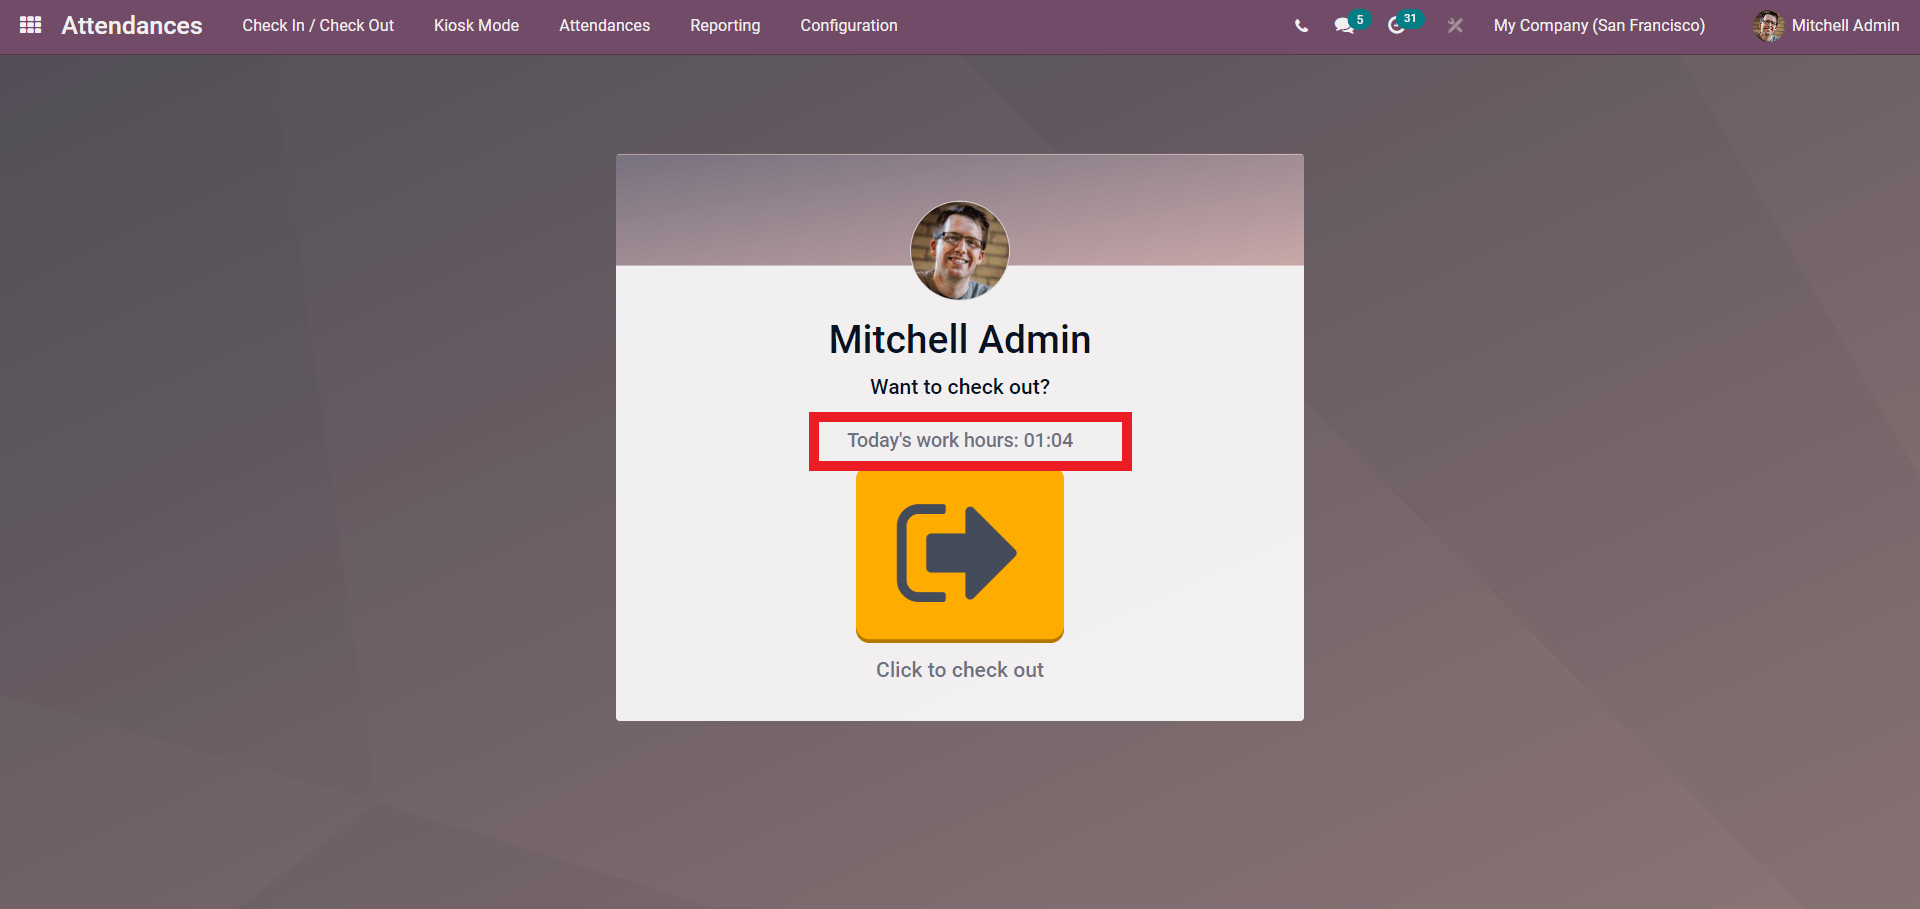
Similarly, the Check out time will also be displayed in the same place with the number of total hours worked. As all of the data is instantly saved into the databases you can access the live data in the employee attendance by clicking on the Reporting tab from the dashboard of the Attendances module. Employees can be given separate unique identification codes or pins for checking in to Odoo. The pin can be set from the employee under the HR settings tab as shown below.
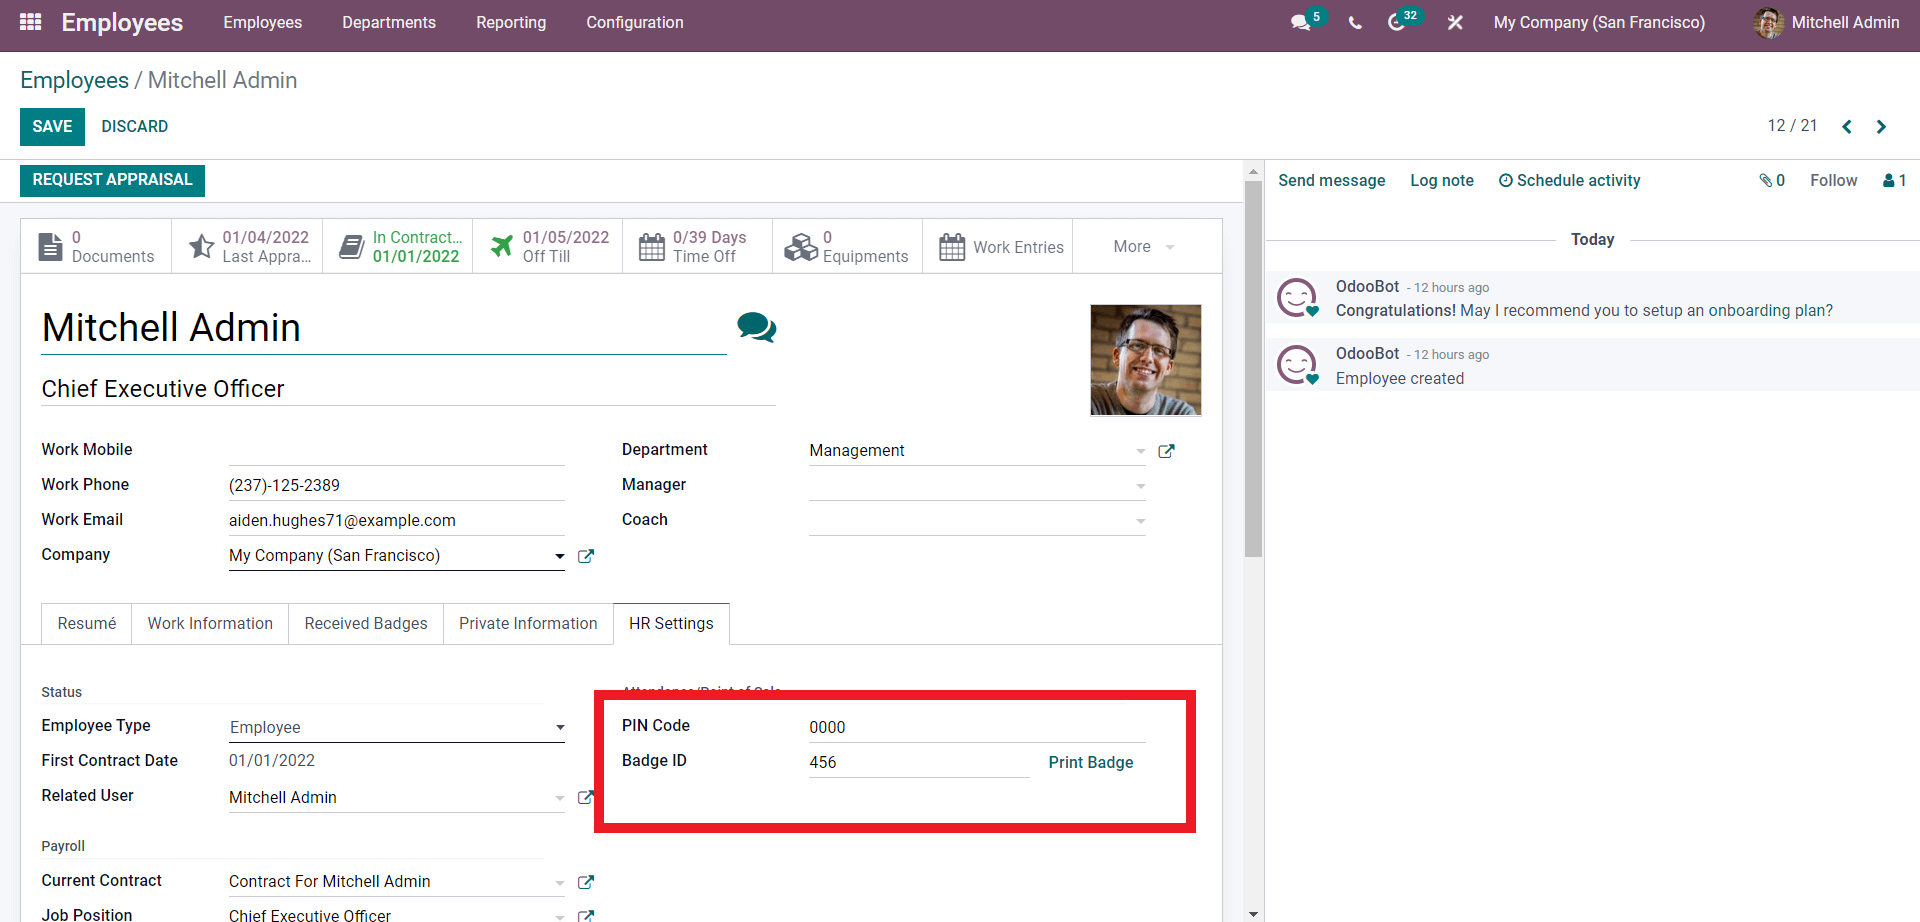
To set the Employee Pin go to the Employee module and from the dashboard of Employee, profile click on the employee profile that you want to apply the PIN to, and under the HR settings tab, you can find the options for configuring the PIN code and the Badge ID as highlighted in the image shown above. After the configurations click on the SAVE button and from now on the employee has to enter the PIN code to enter Odoo. The employee can go to the Kiosk Mode tab from the dashboard of the Attendance module. The Kiosk mode page will open up as shown below.
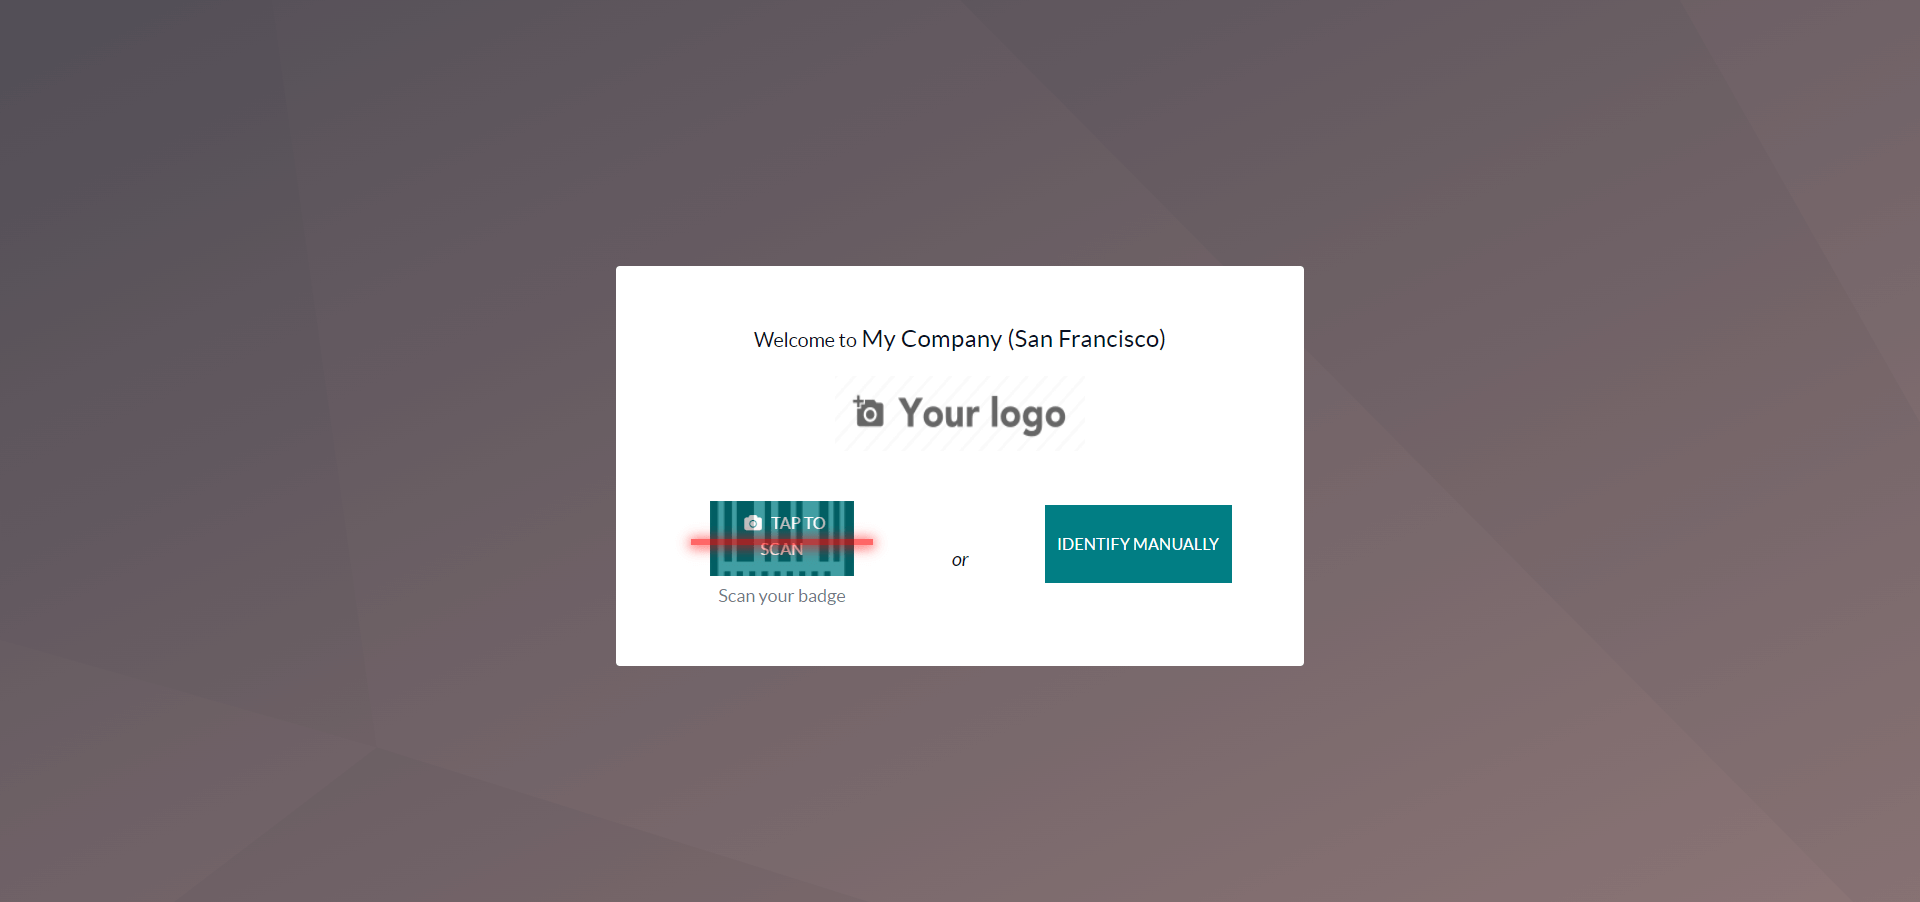
From here you can choose a method for check-in. If you click on the IDENTIFY MANUALLY button then a page will open up asking for the Pin of the employee as shown below.
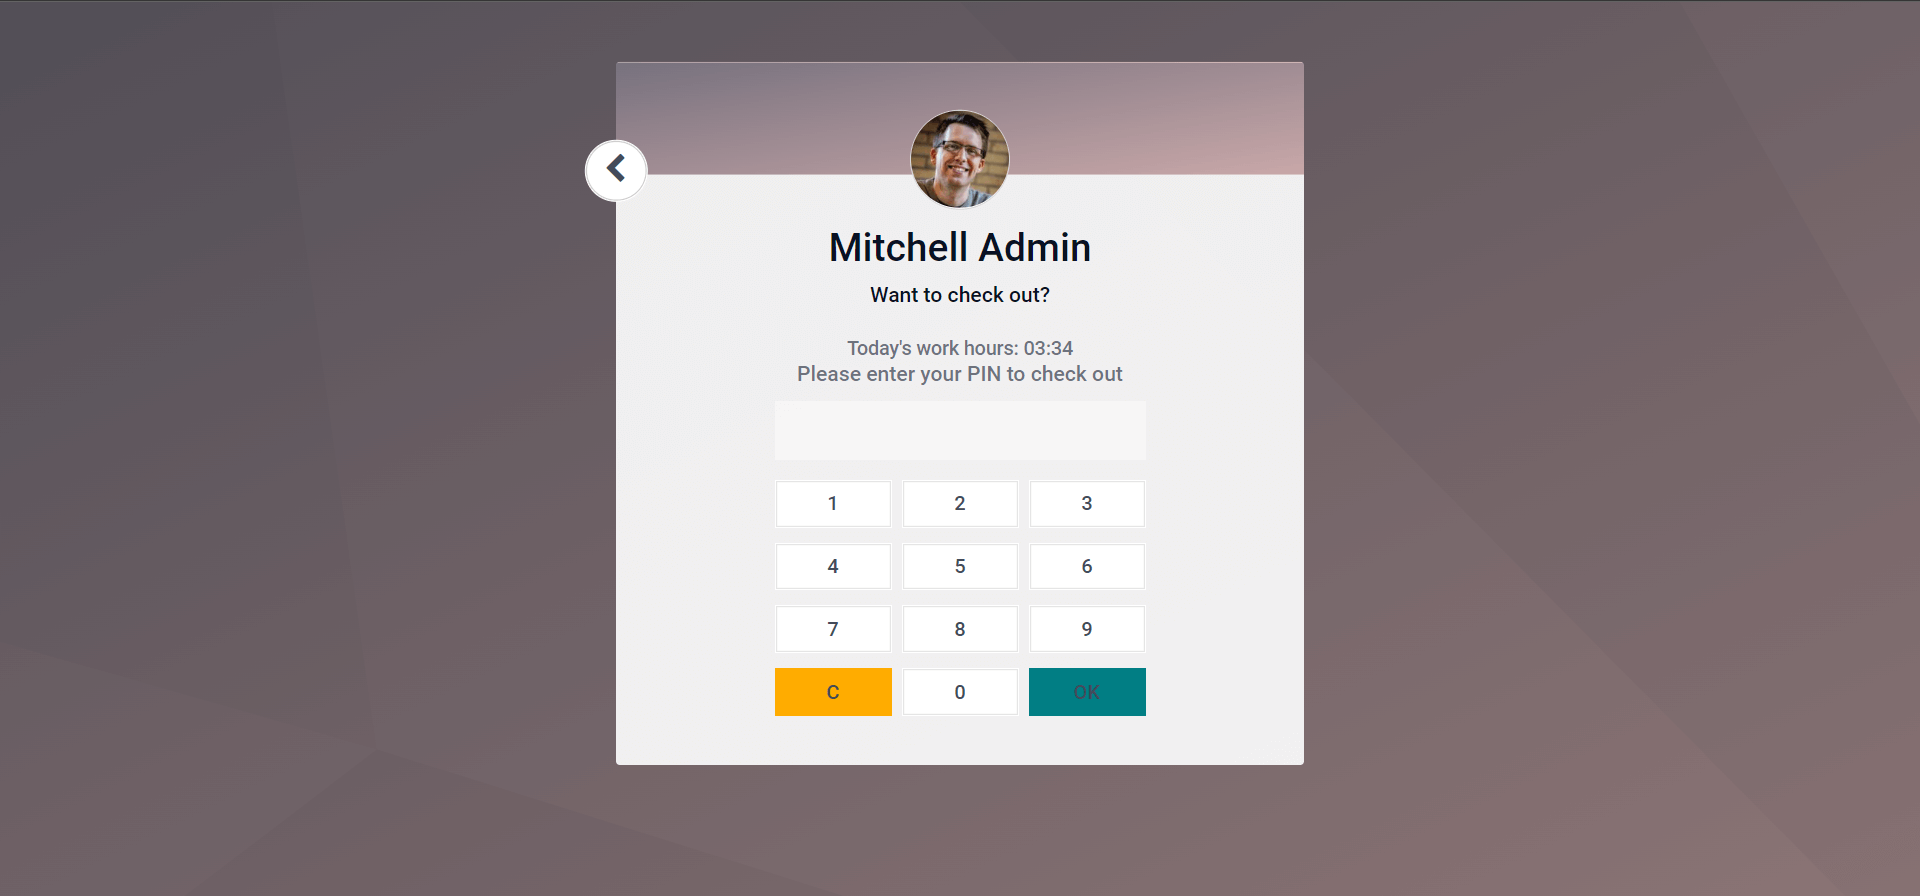
Type in the ID and click on the OK button to check-in. The check-in process can be also called Attendance marking. The marked attendance will be instantly saved into the Odoo database which you can check by going to the Attendance tab from the dashboard of the modules as shown below.
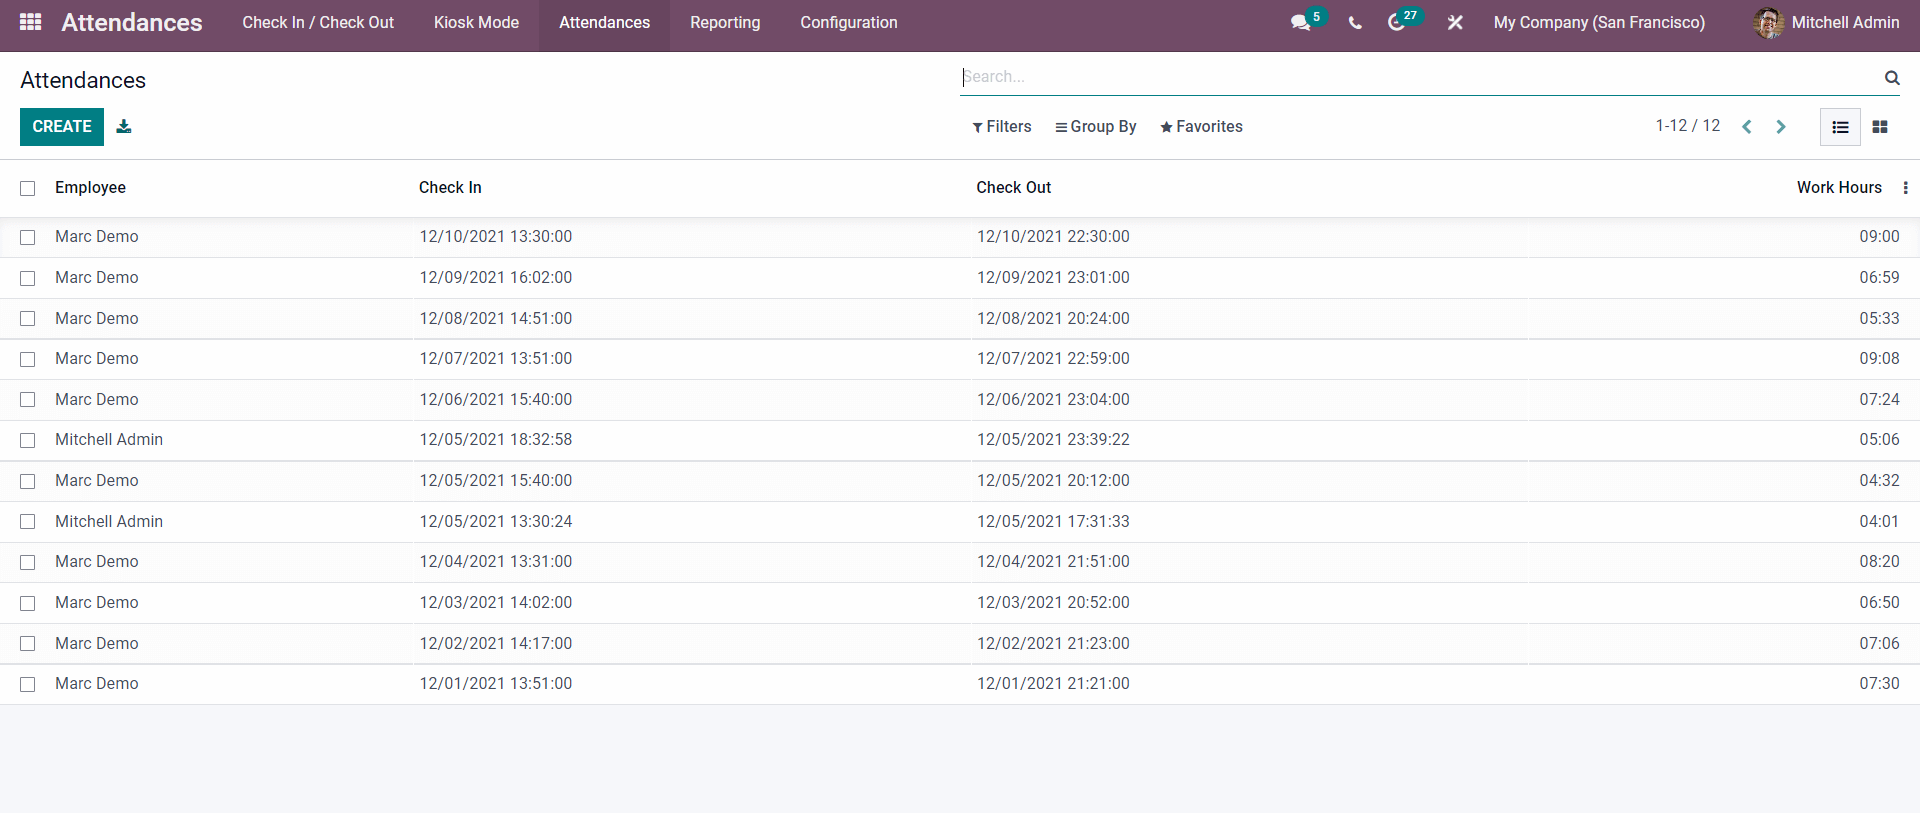
Click on the CREATE button to create a new Attendance. A new field will open up as shown below to create the new Attendances shown below
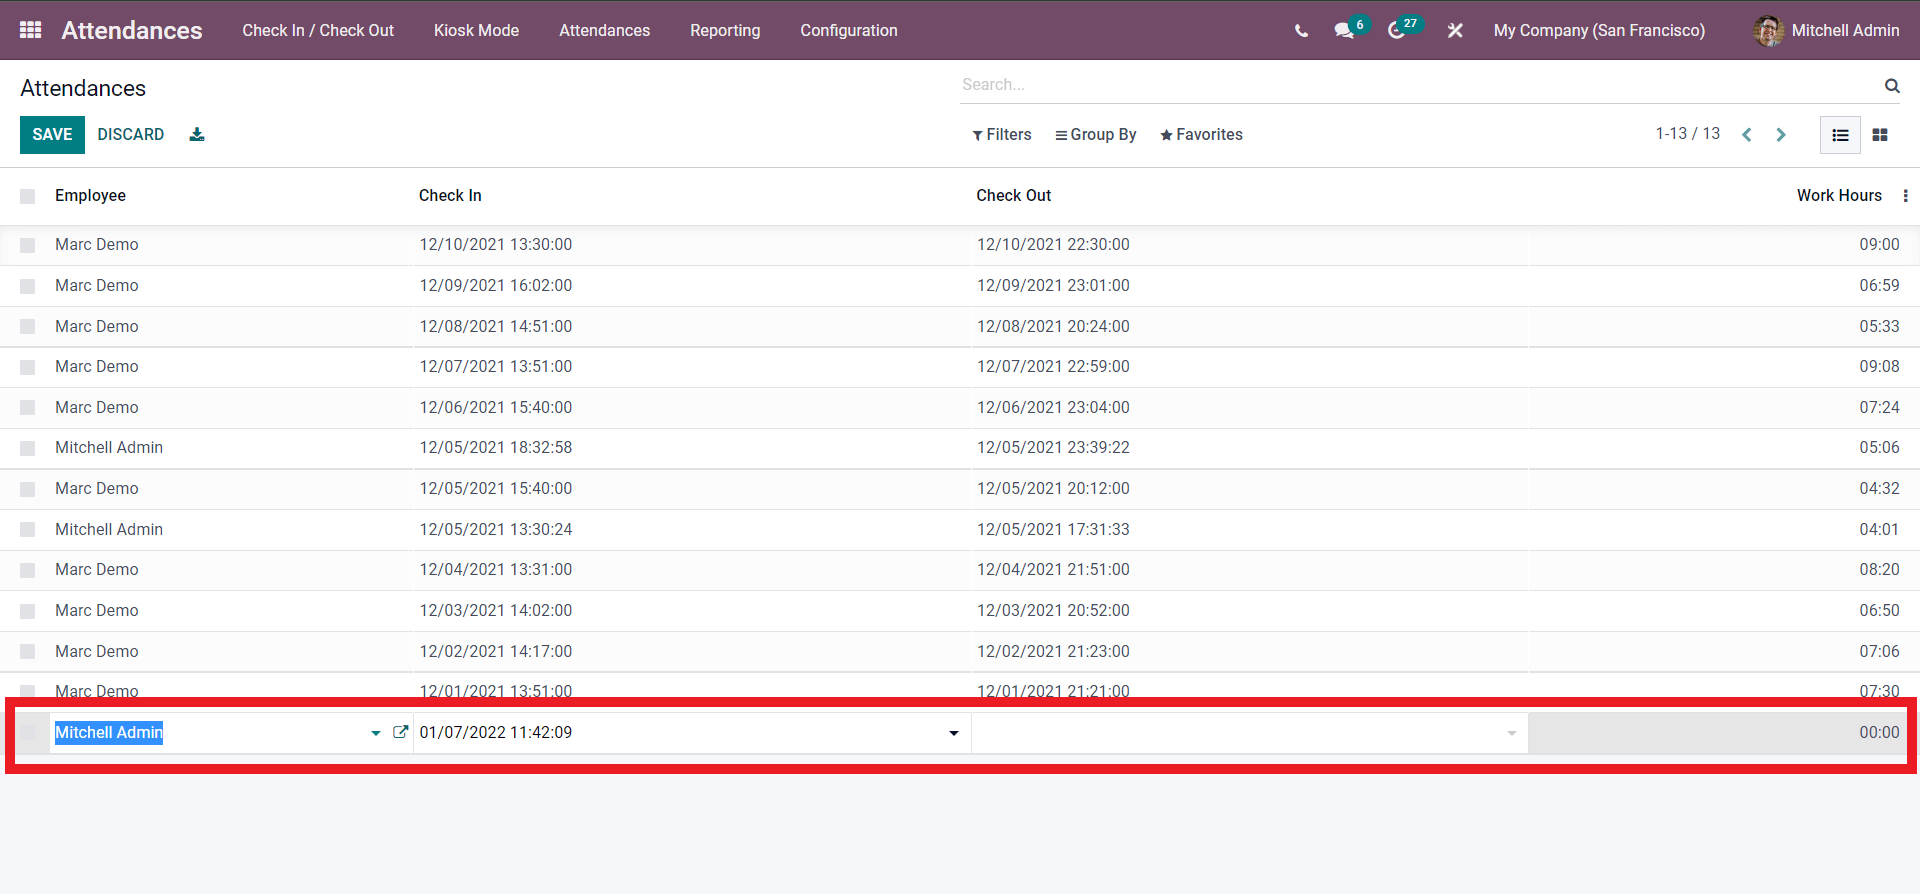
Click on the Employee field to select the employee for the drop-down list as shown below.
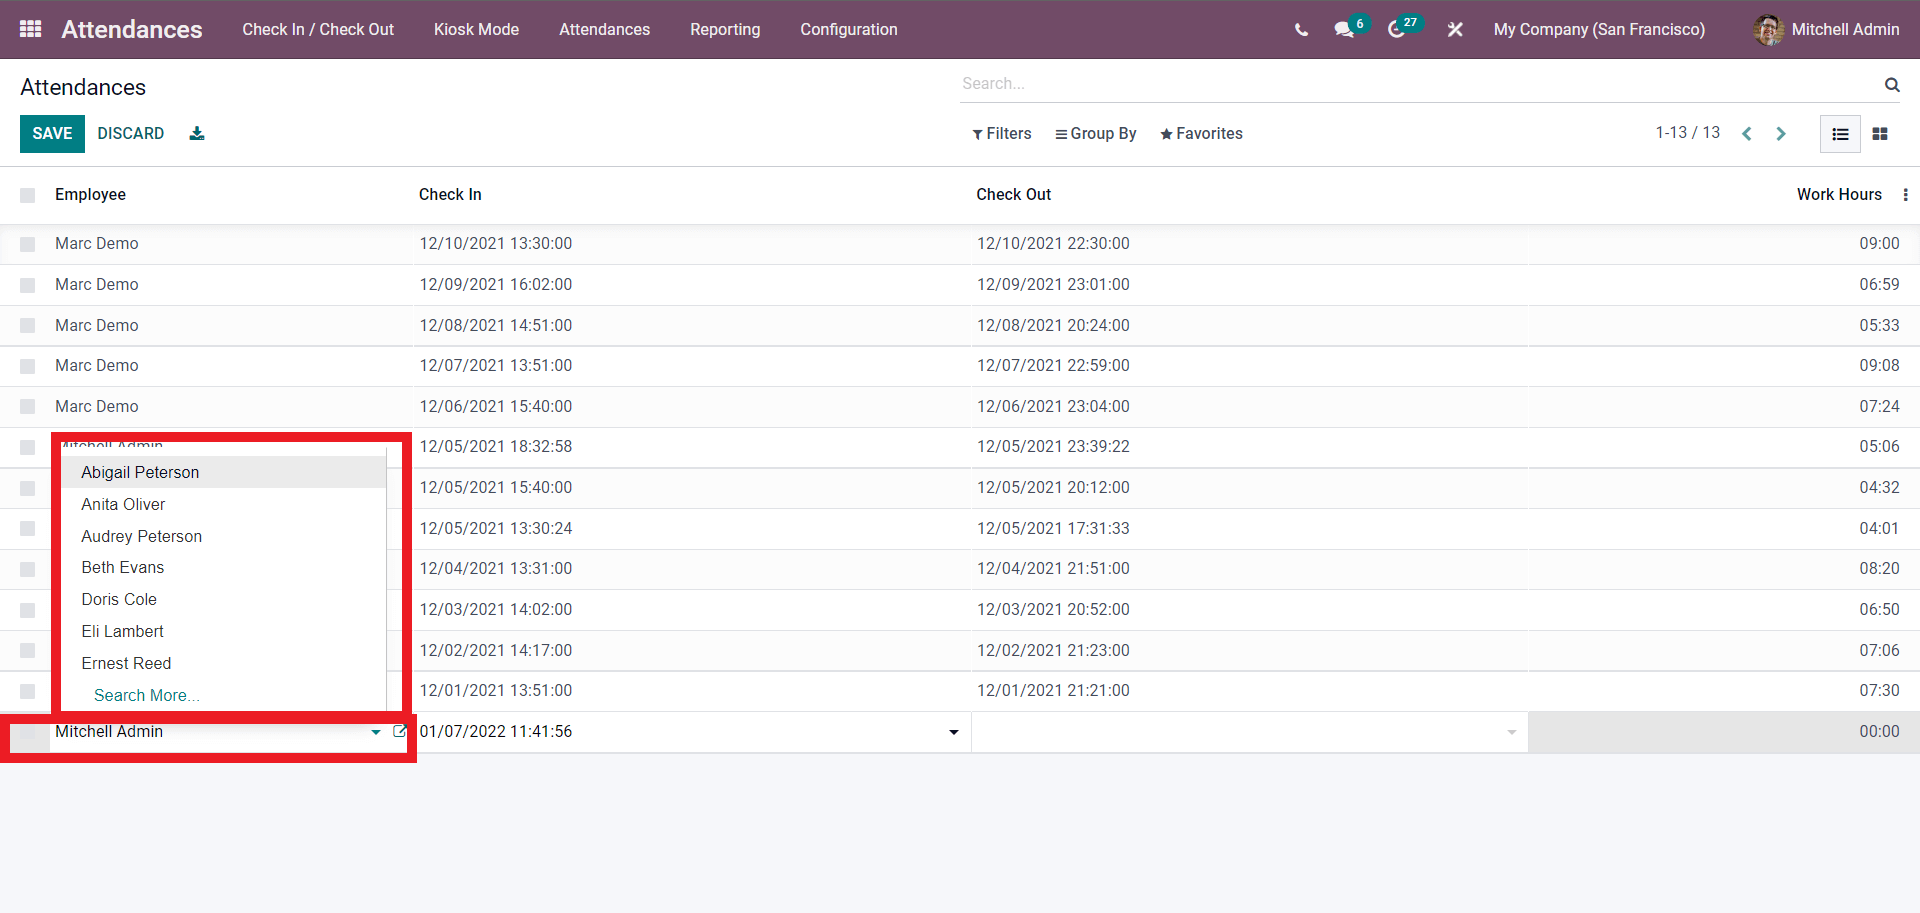
Select from the list and In the Check-In field add the check-in time as shown below.
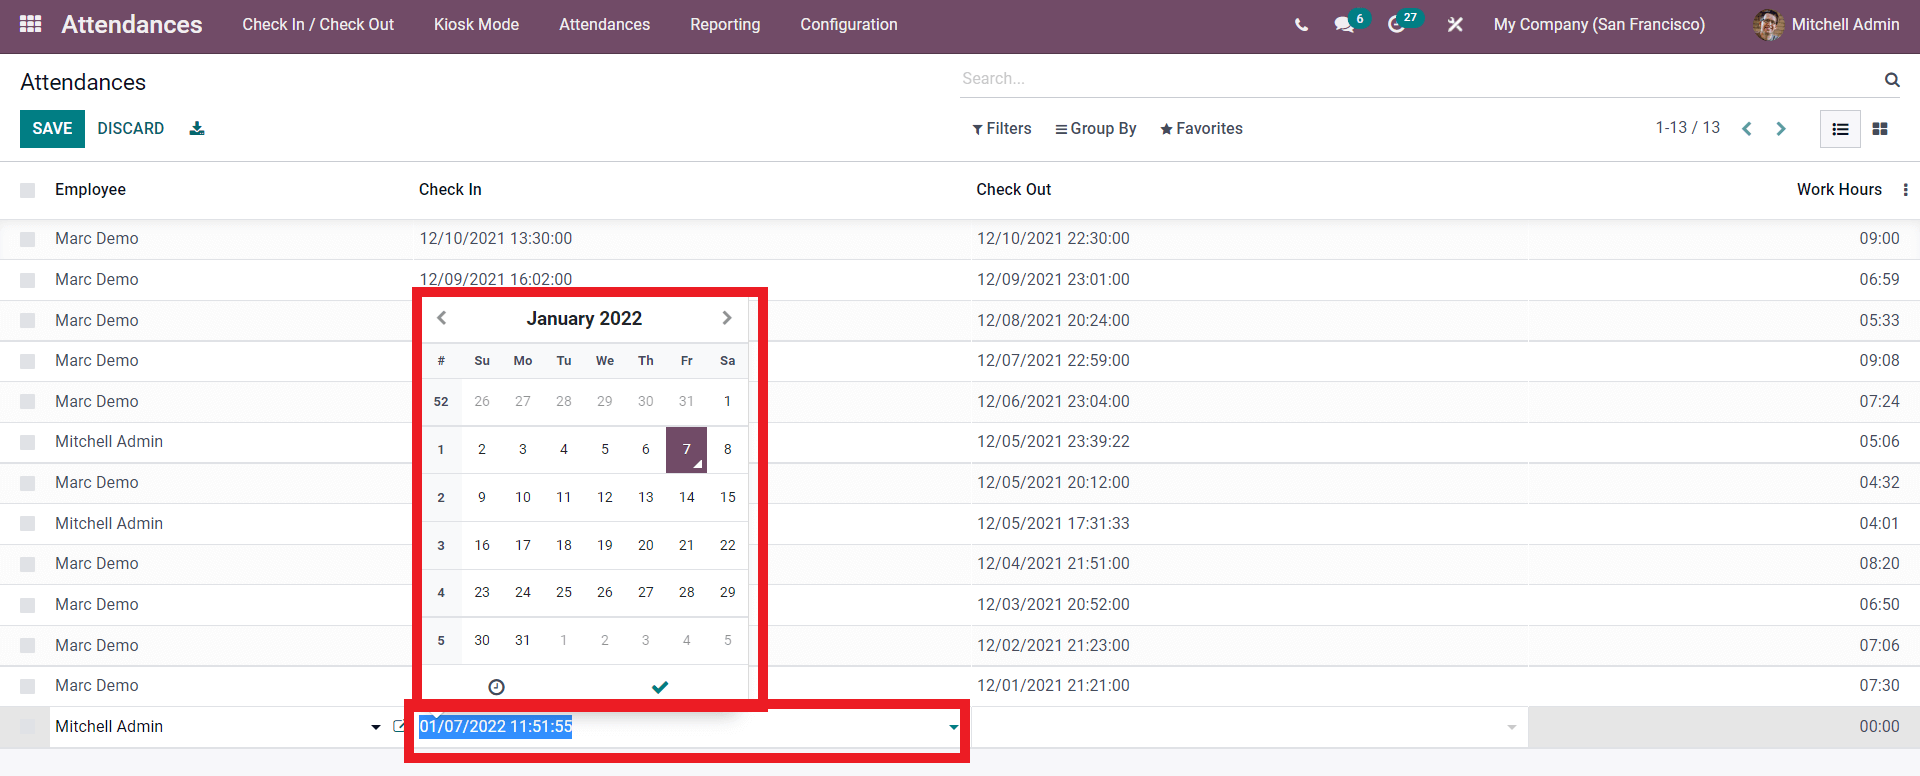
Click on the Check-in field and a calendar tab will open up as shown above. You can choose the date and time from here. Similar to the Check-in setting you can add the Check out date and time.
You can use the filter and grouping options on the page to filter and sort the Attendances list for easy management and viewing.
Attendance Reporting
As mentioned earlier Odoo will automatically store all of the Attendance details in the Reporting tab of the Attendance module. The reporting tab holds the Attendance analysis. Attendance analysis plays an integral part in improving the efficiency of Employee Attendance management. The Attendance Analysis page of the Attendance module is actually a graphical representation based on the real-time data collected on employee attendances. The below-given image below represents the attendance analysis page.
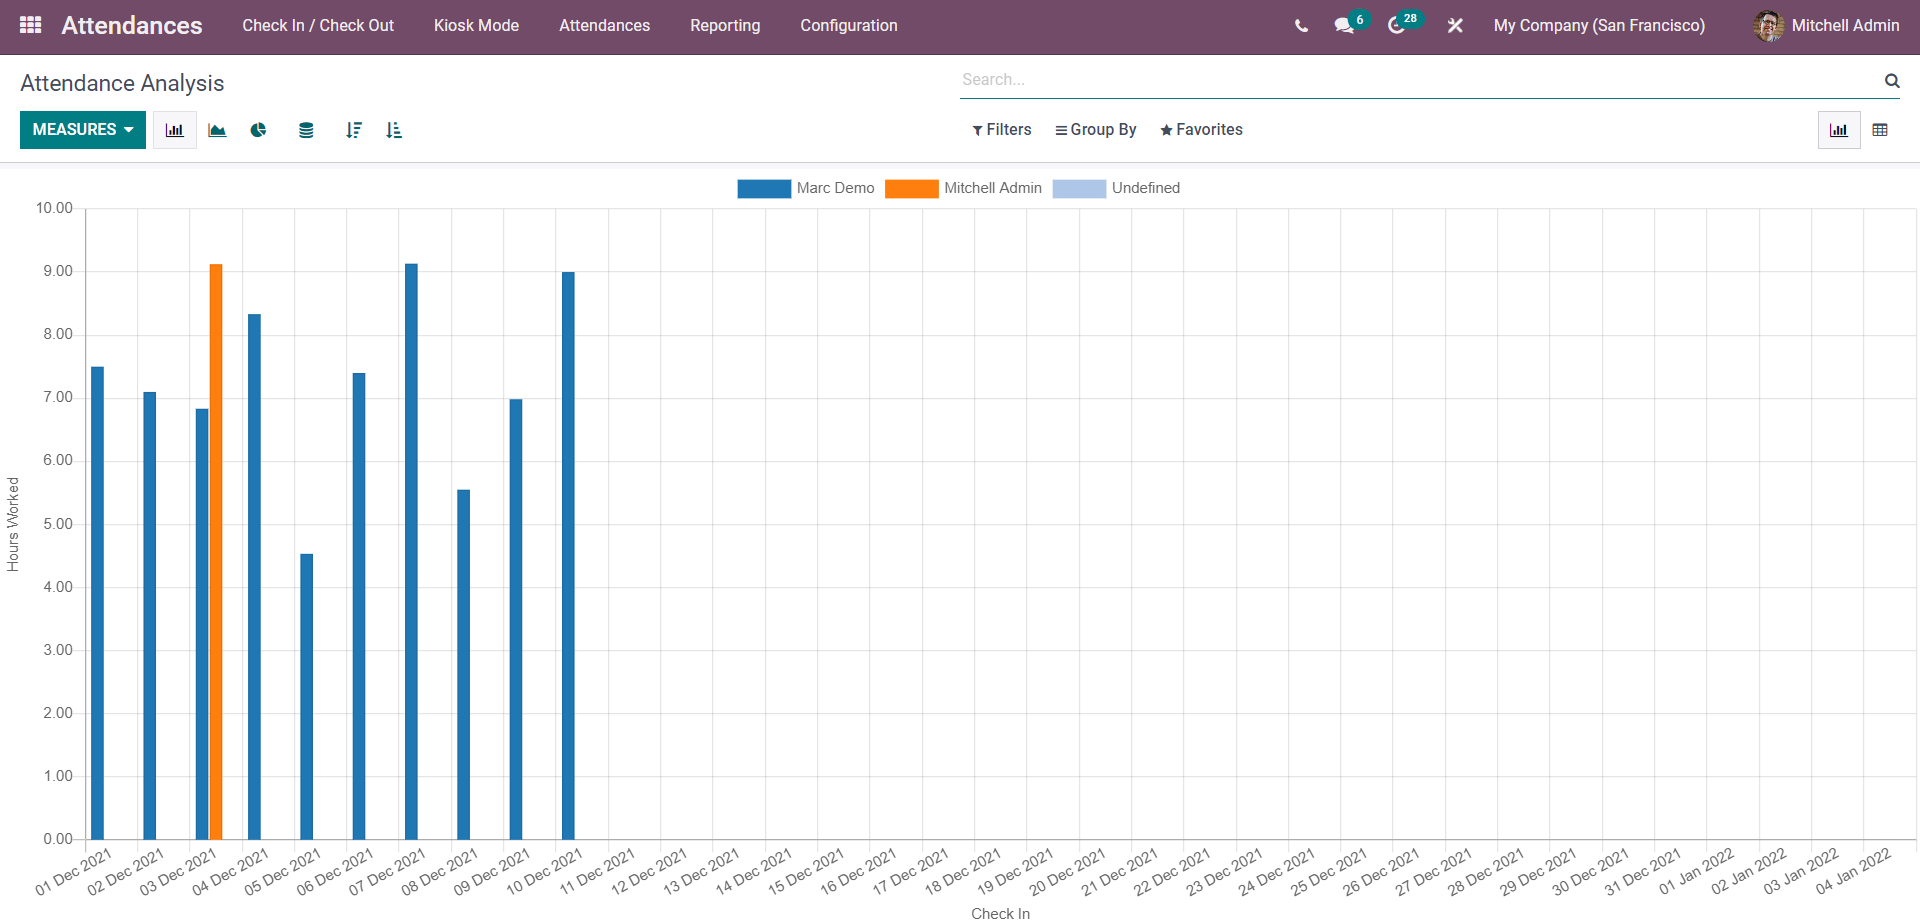
Here in the Above given chart, the Employees are denoted by different colors. From the upper deck of the page, the employee and their respective colors will be shown highlighted in the image given below.
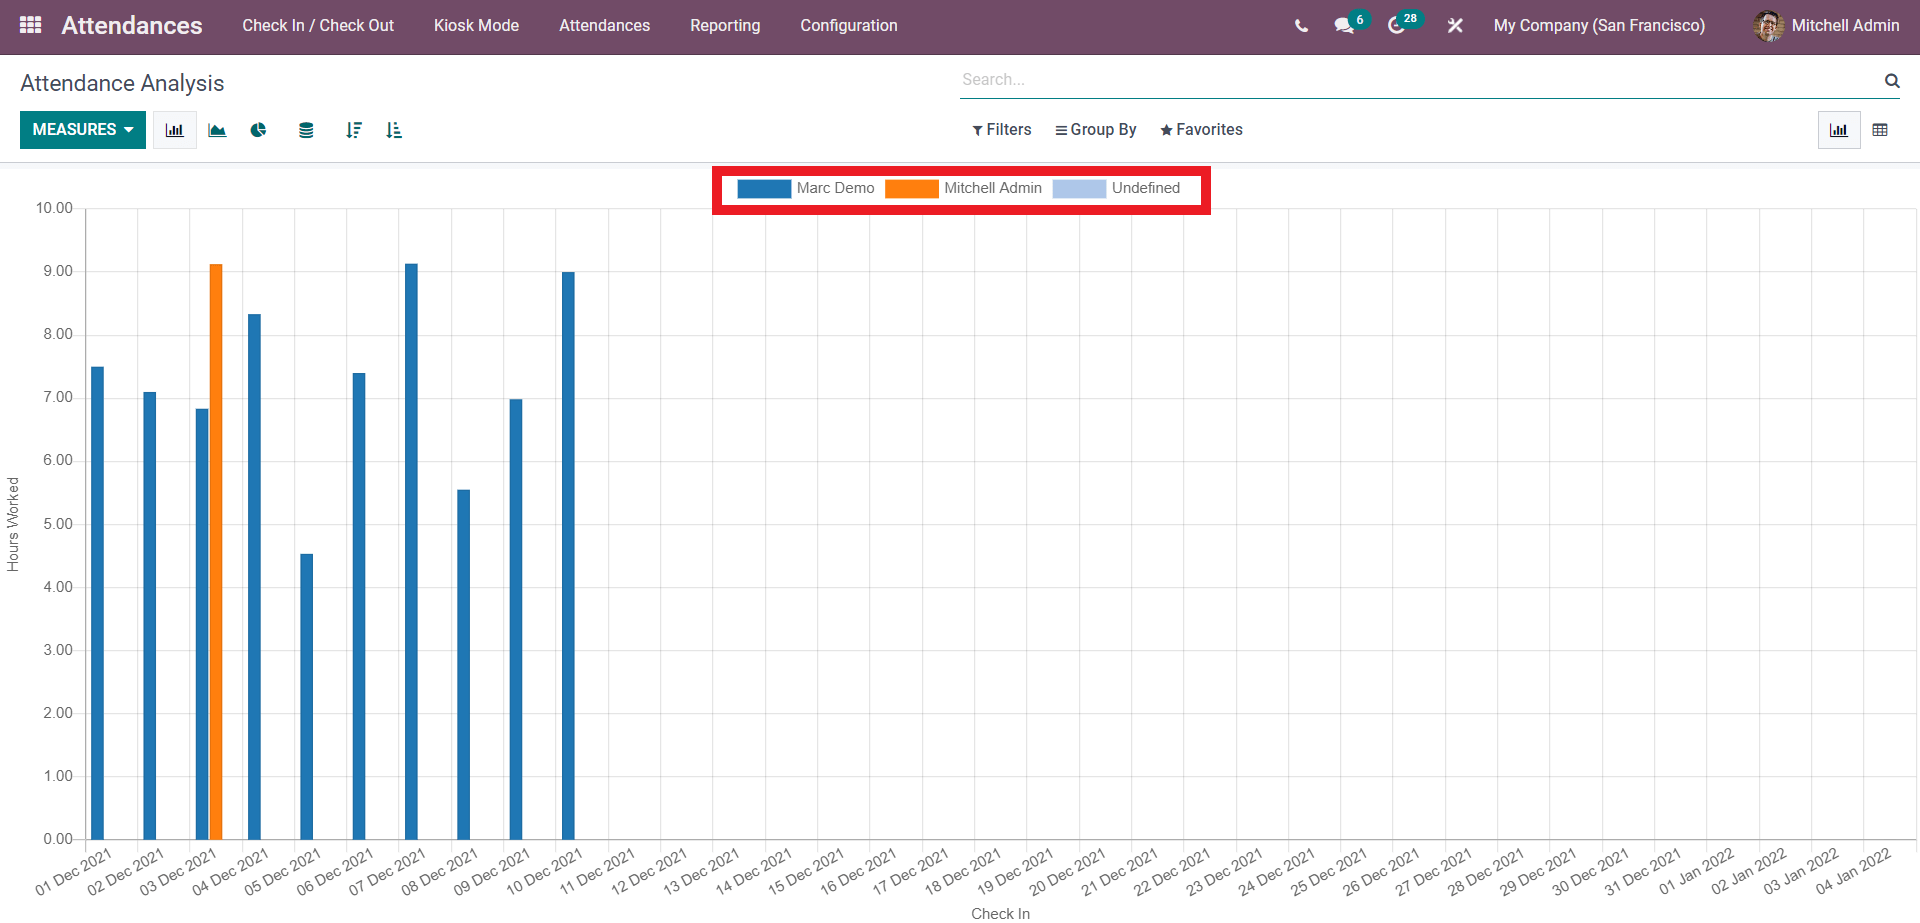
The X and Y-axis hold the Date and the Hours worked. Click on the MEASURES button to change the measures by which you want to view the chart. There are three Measures, Extra Hours, Hours Worked, and Count as shown below.
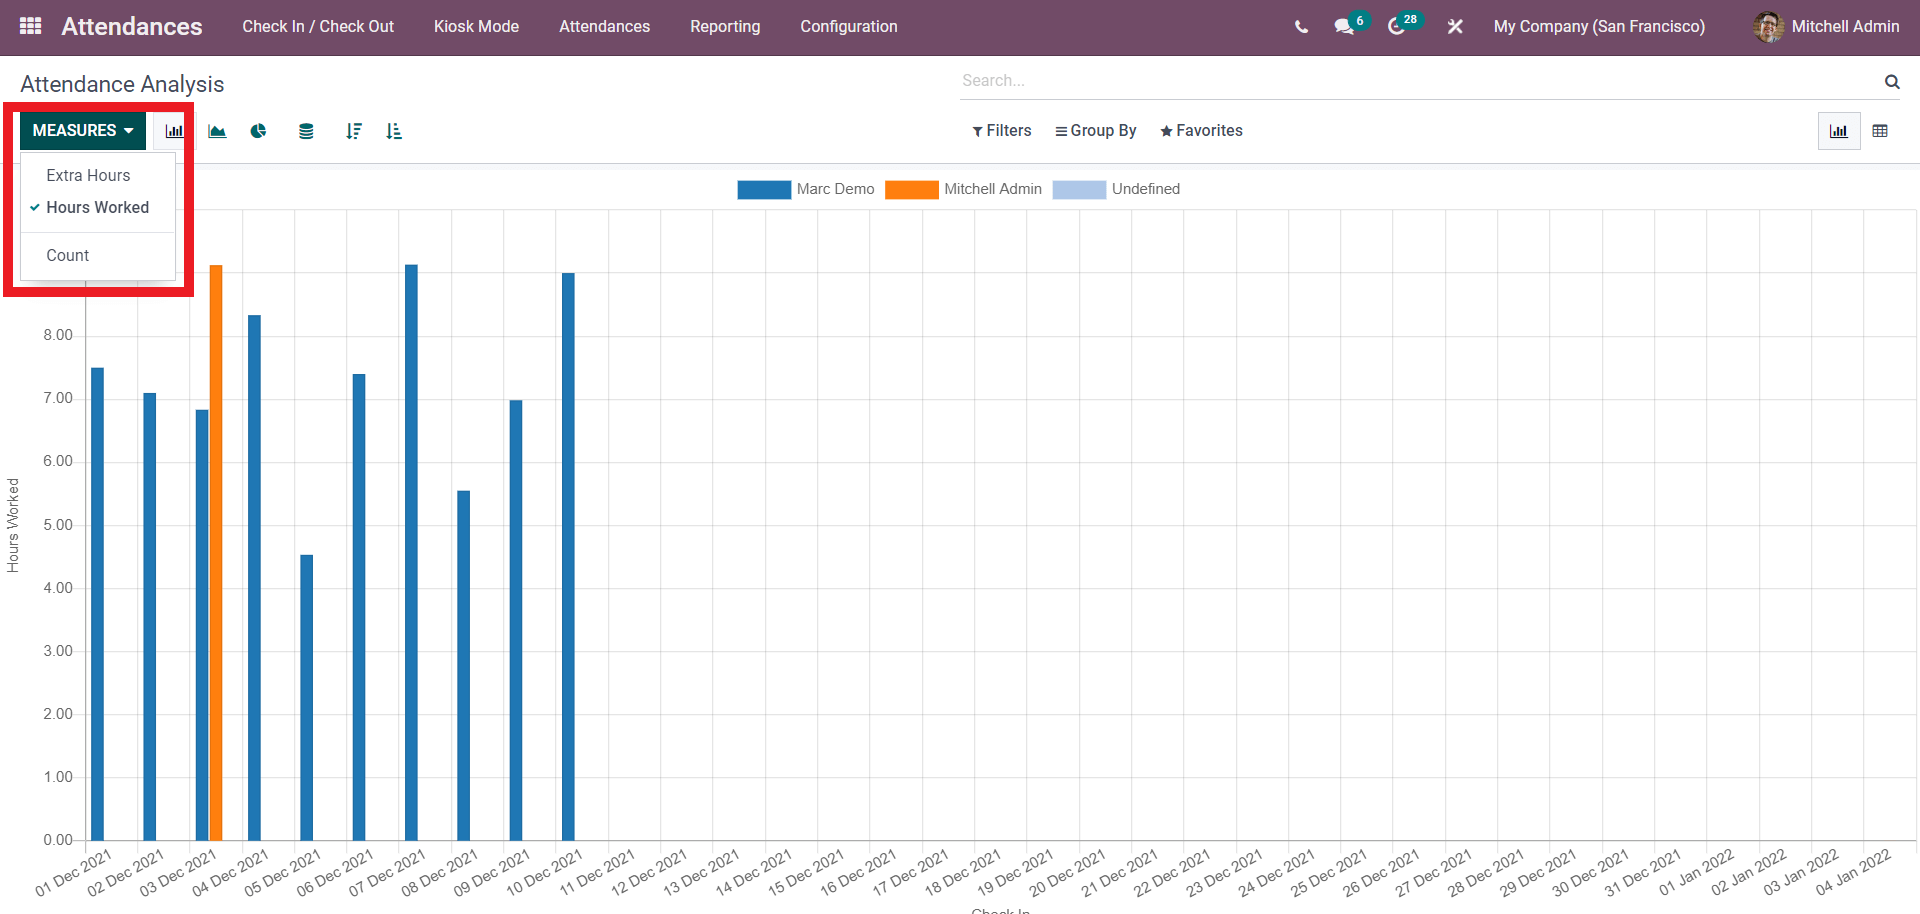
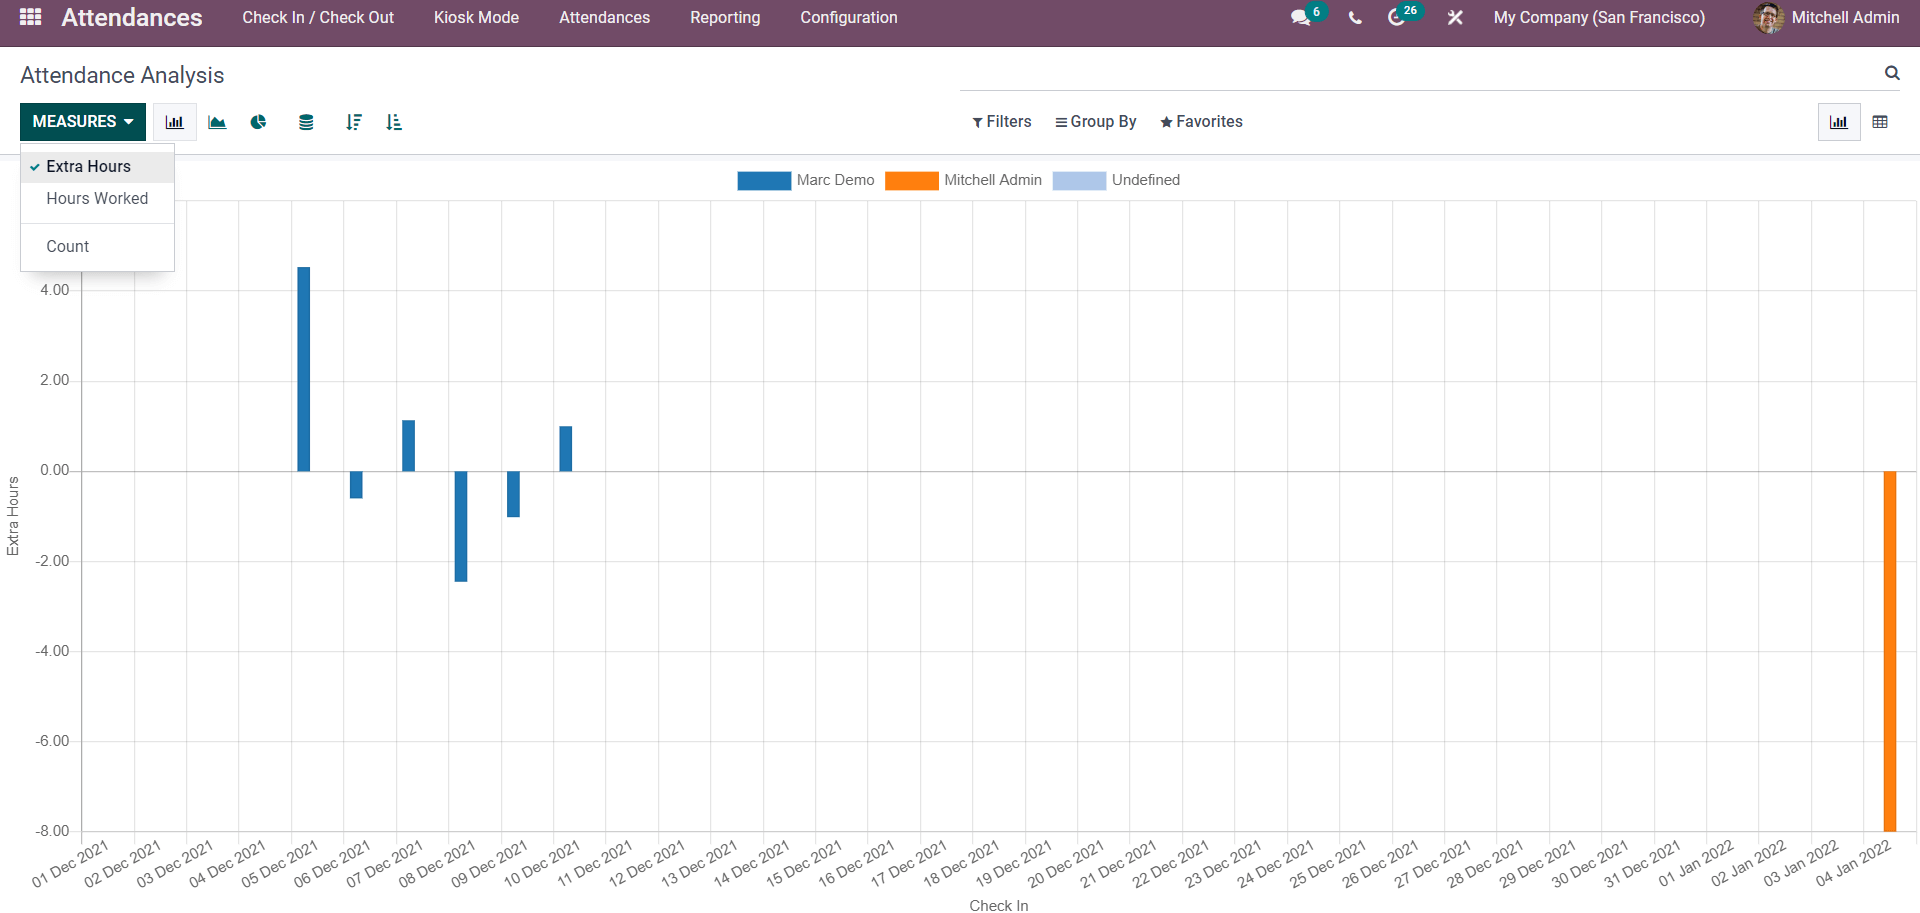
Note that the Default viewing measure will be Hours Worked. The above-given graph represents the Hours worked data. Click on Extra hours as shown below to view the graph on the employee extra hours as shown below.
Similarly, you can view the data based on the count shown below.
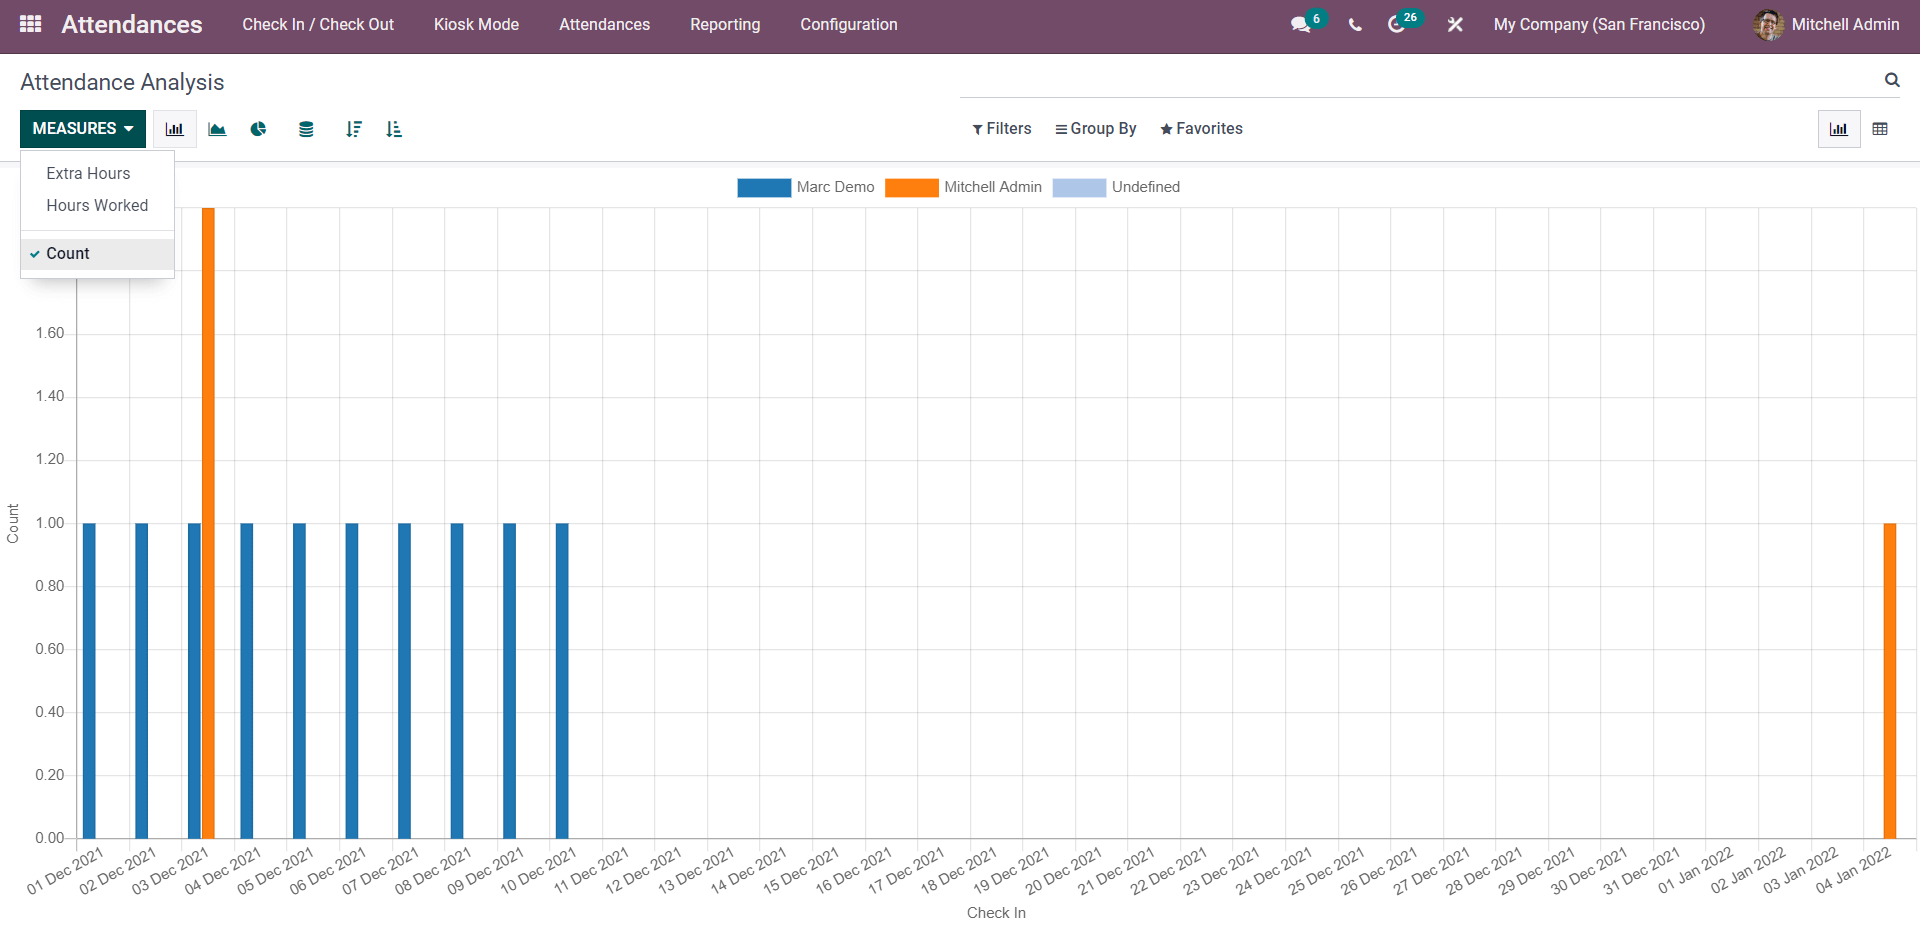
You can use these measures to get a more accurate picture of the Attendance data.
Similar to the measures there are multiple chart viewing options. The charts include Bar Chart (Default), Line Chart, and Pie chart. For the Bar Chart, there are additional options for arranging the data on the chart. The options include Stacked, Ascending, and Descending as shown below.
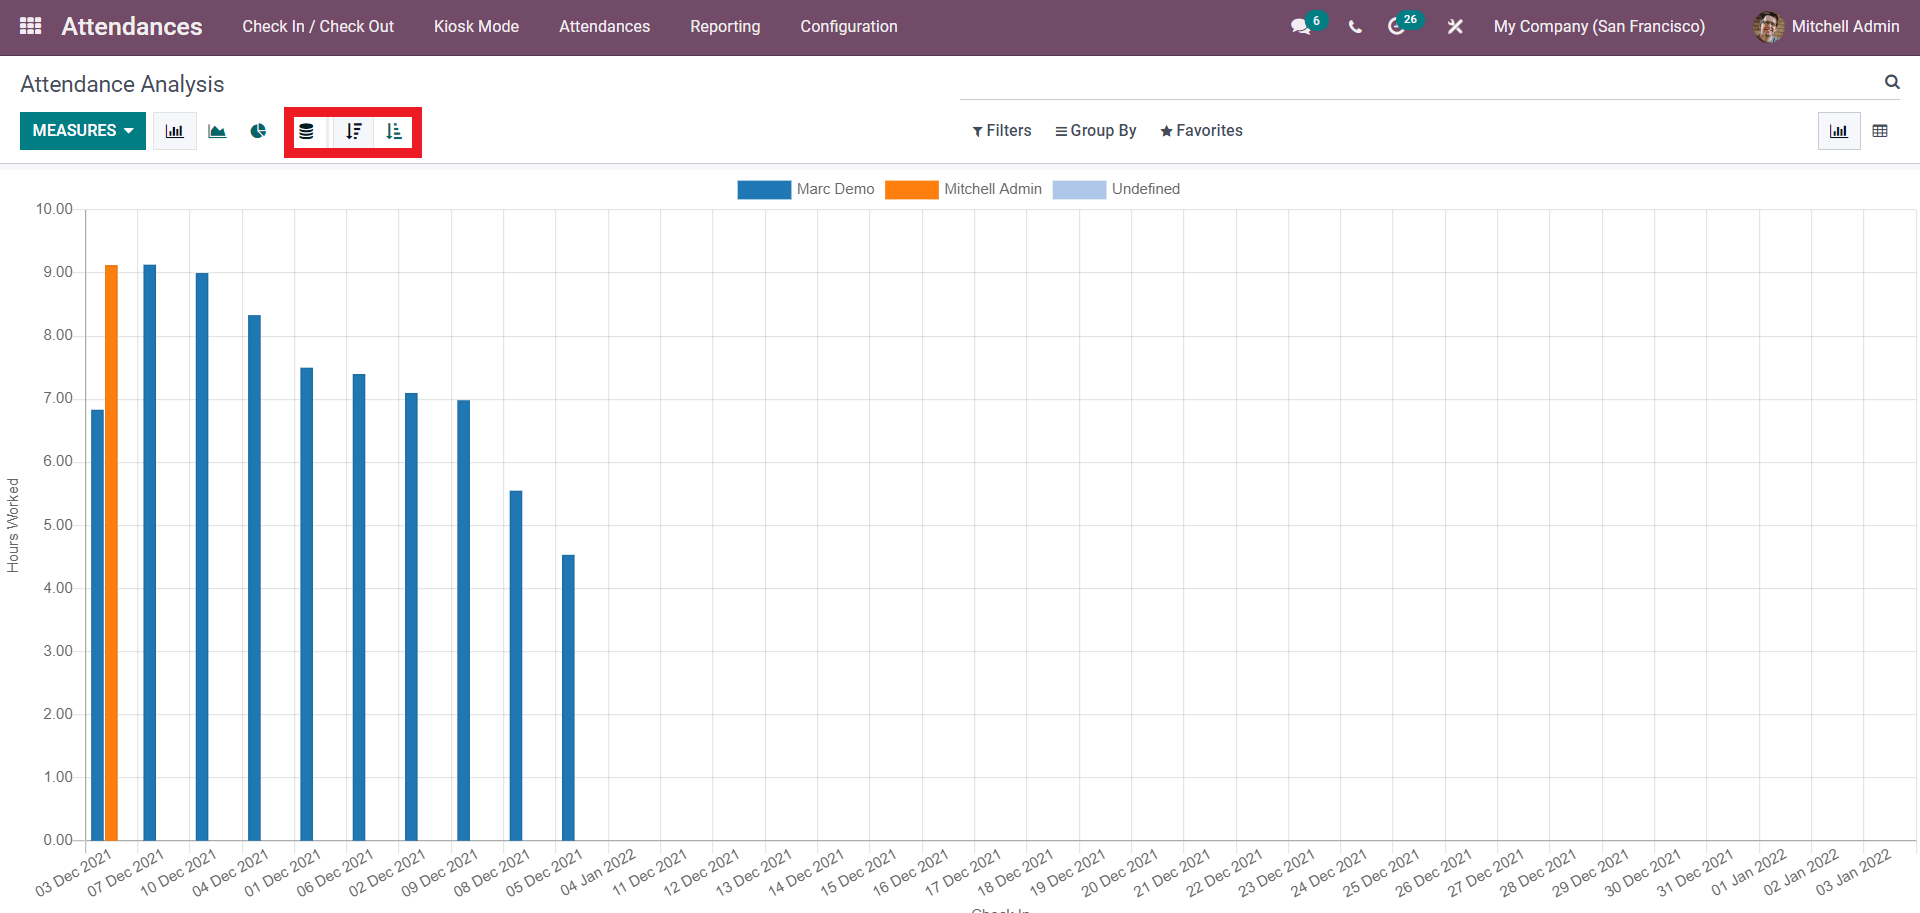
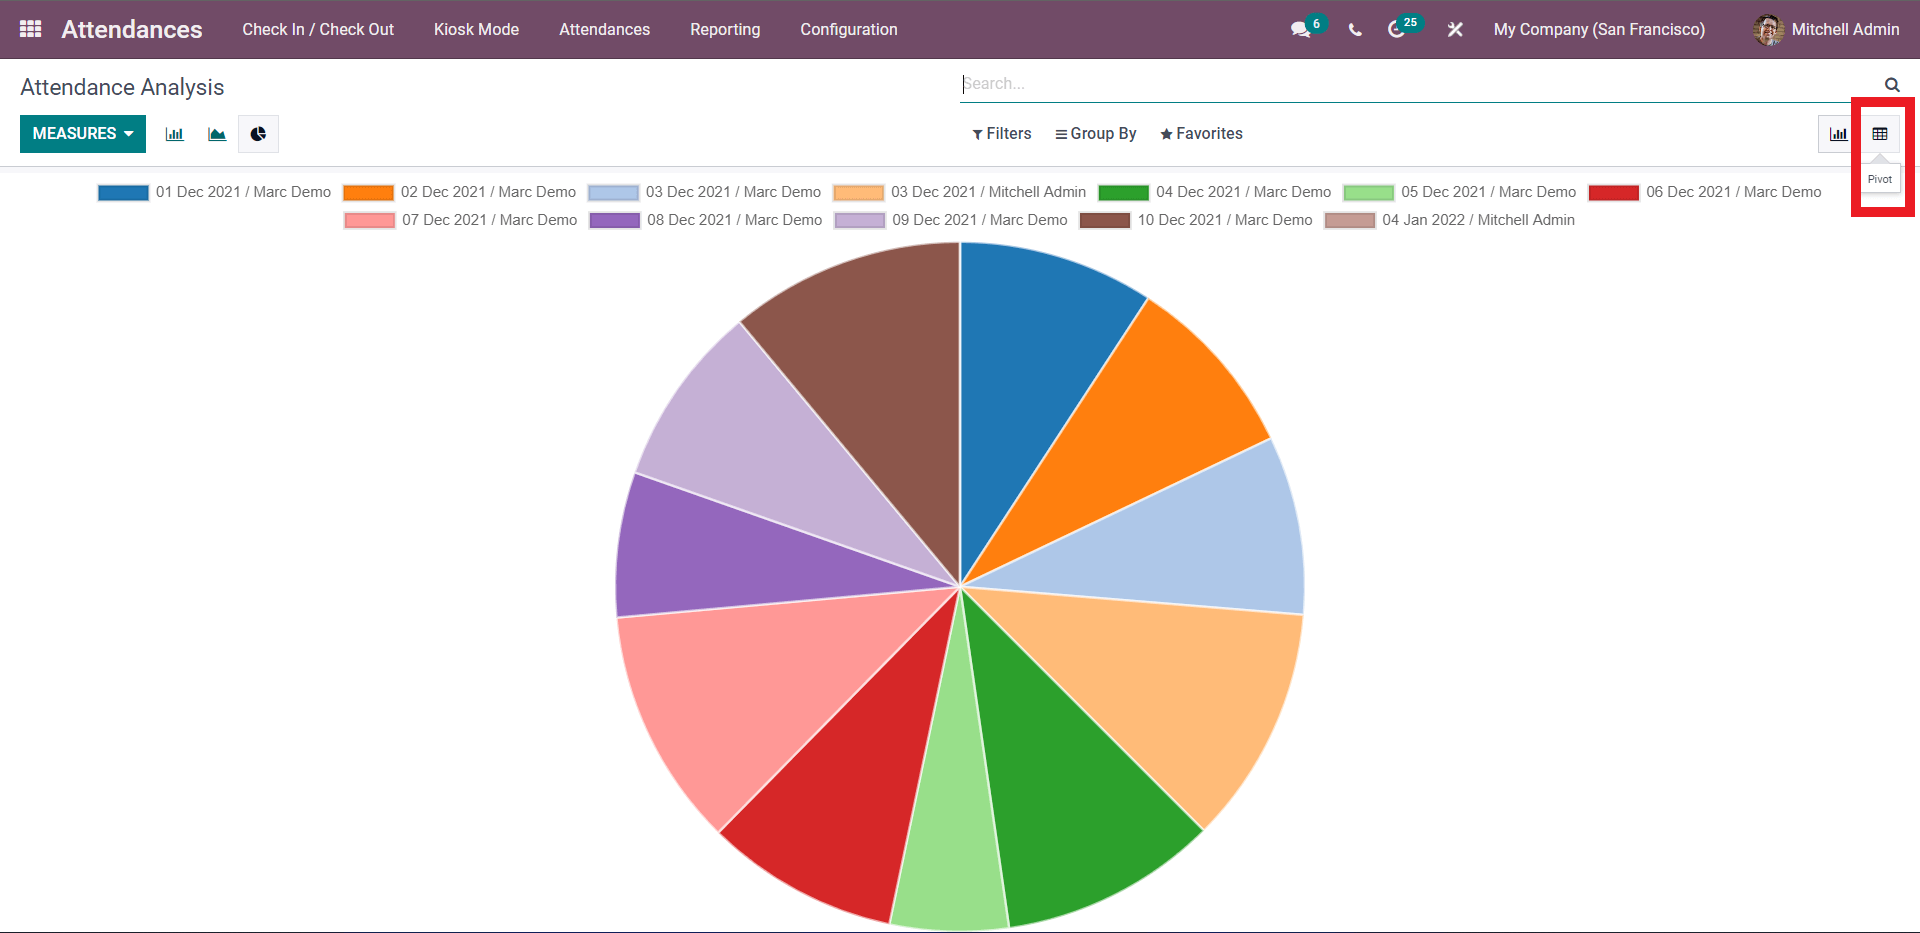
Click on any of the options to arrange the data in the chart. The stack will stack the data and the Ascending and Descending options will arrange the graph accordingly. Similar to the Bar chart the Line graph will also allow you to arrange the graph in ascending or descending order. You can also choose to view the data in the Pie chart as shown below.
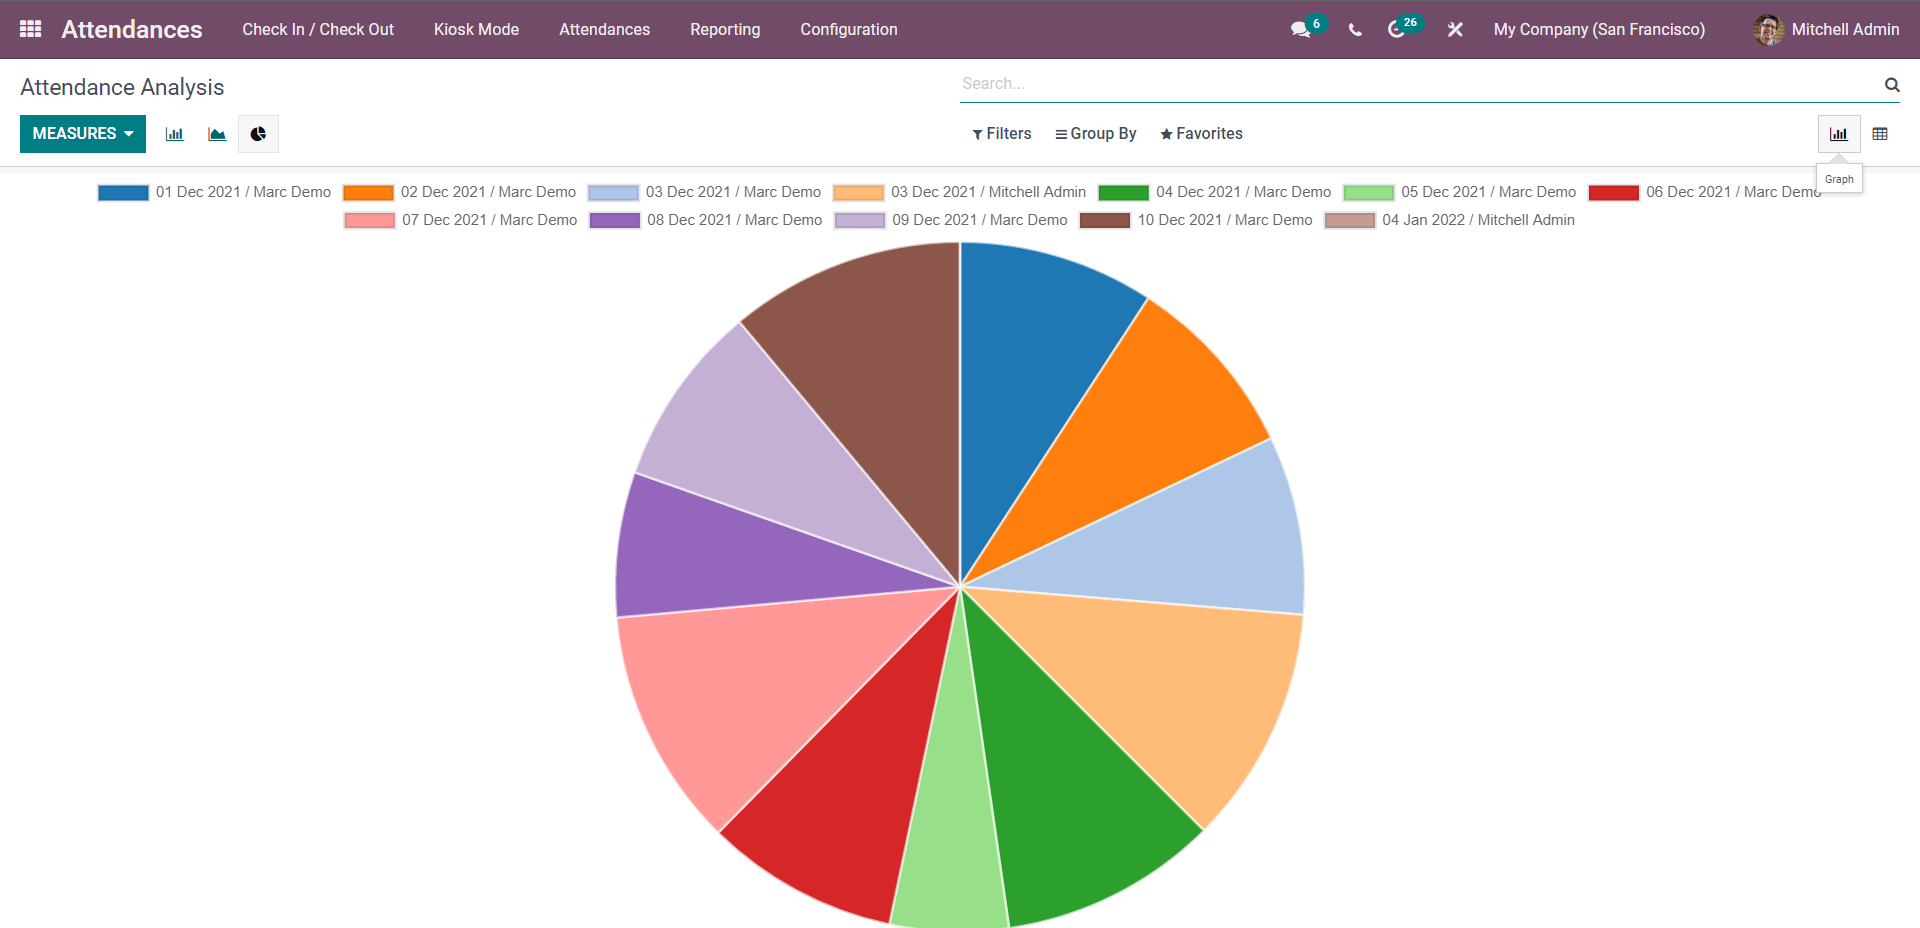
With Charts you can’t possibly get all of the detailed analysis data. For getting detailed and clean-cut data on the Attendance Analysis you have to change the view from Graph to Pivot using the Pivot key as shown in the image given below.
This will give you the Pivot view of the Attendance analysis as shown below.
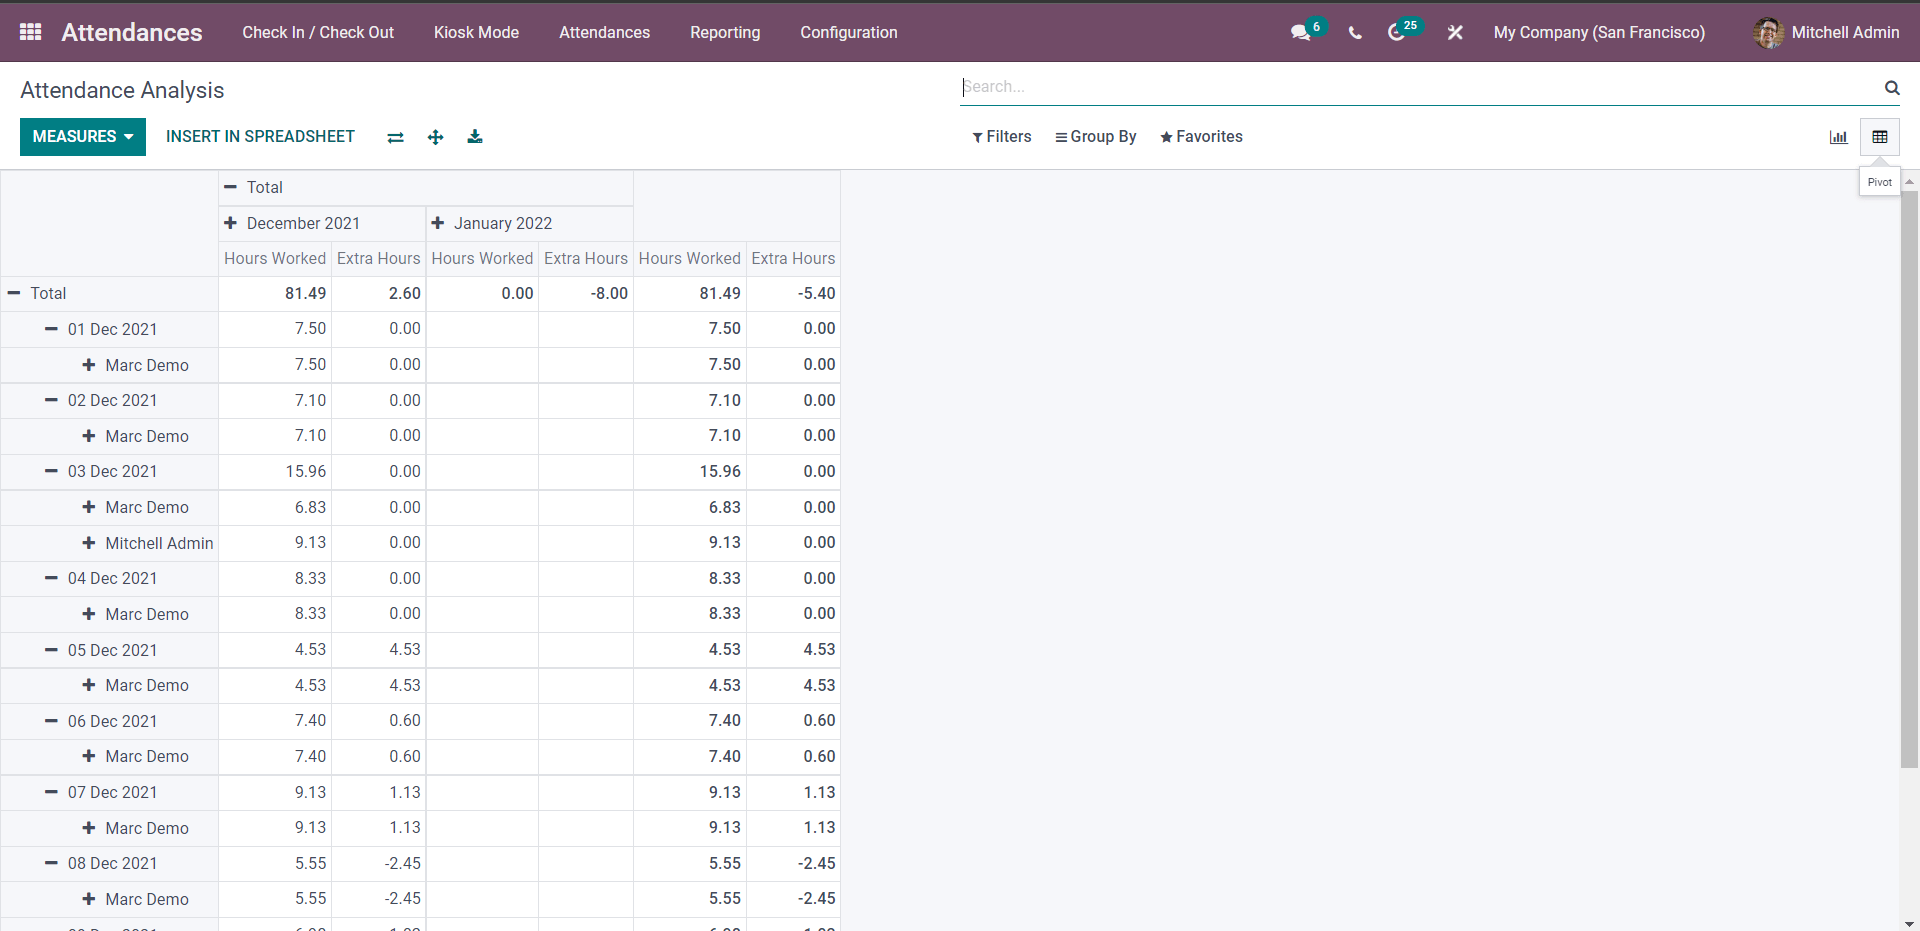
This will give you a more detailed overview of the Attendance Analysis. Similar to the Graphs you can filter out the data that you want to view immediately on attendance analysis. Click on the INSERT IN SPREADSHEET to insert the data on your Spreadsheet. Similar to the graph you can also change the Measures for the MEASURES button. Attendance analysis with the Pivot view will allow you to gather data on employee attendance more quickly and efficiently and manage the employees accordingly.