Odoo offers a flexible solution to enhance user experience on your website portal by allowing you to add sorting options tailored to your specific needs. In this blog post, we'll guide you through the process of adding sorting options to your Odoo website portal, empowering your users to effortlessly find the content they seek.
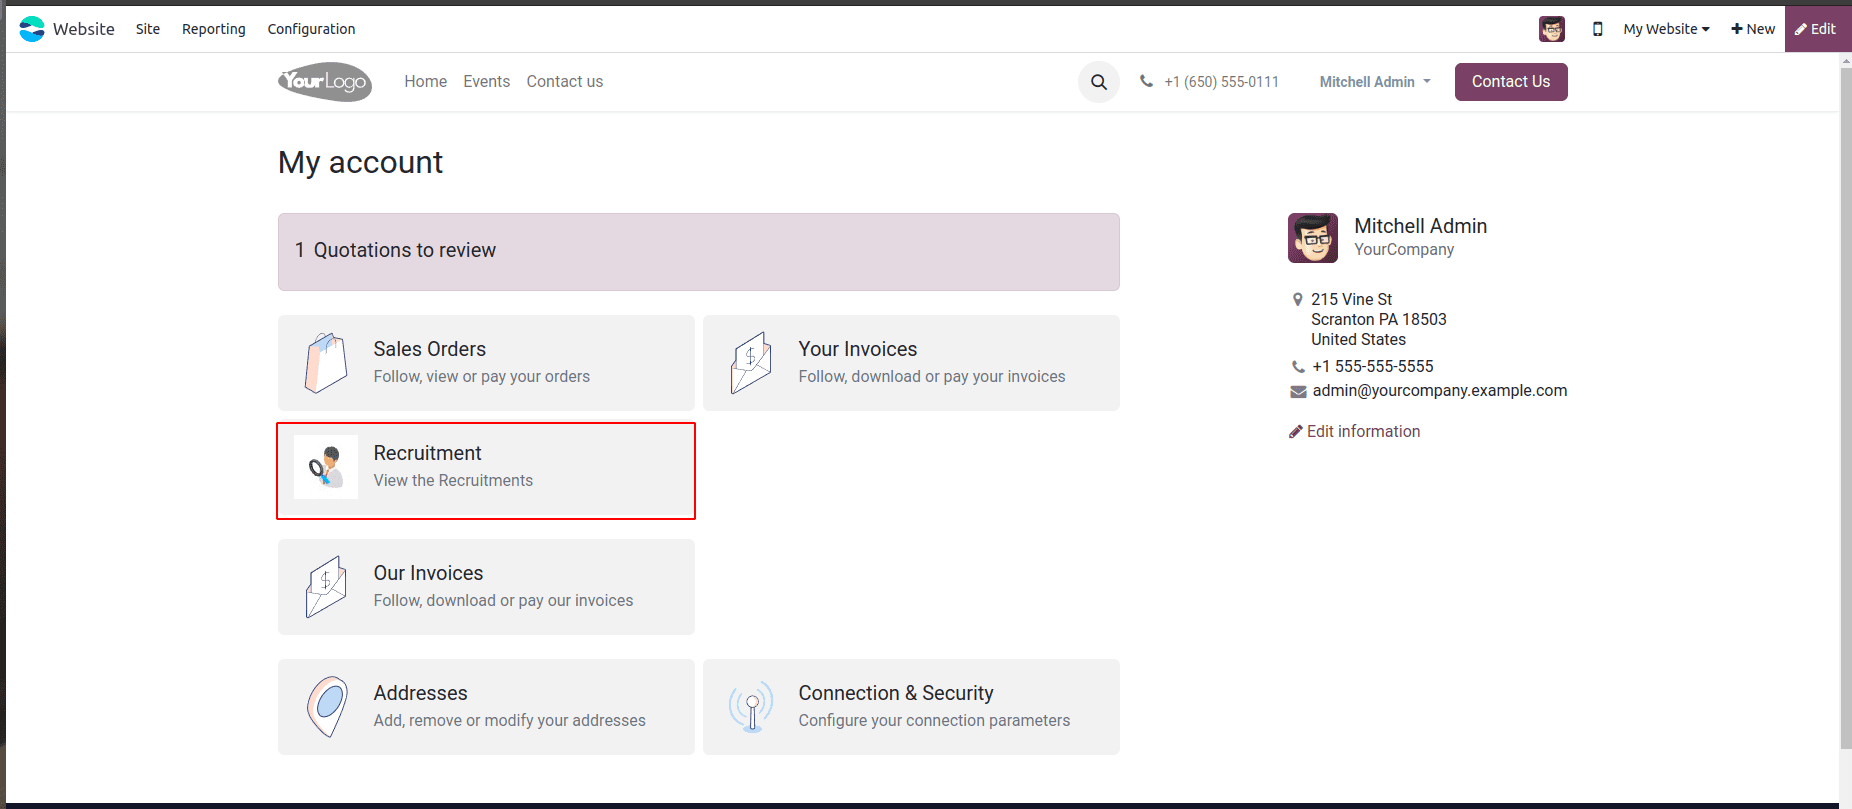
In Odoo while clicking on "My Account" provides access to the customer portal, where options such as Quotations, Sale Orders, Purchase Orders, and others are available. Further details can be viewed by selecting each menu.
Now we have created a custom menu "Recruitment" on the customer portal in Odoo17.
Using the following XML template, we can add a custom menu to the website customer portal:
<template id="portal_recruitment" name="Recruitment" inherit_id="portal.portal_breadcrumbs" priority="30">
   <xpath expr="//ol[hasclass('o_portal_submenu')]" position="inside">
       <li t-if="page_name == 'recruitment'" t-attf-class="breadcrumb-item #{'active ' if recruitment else ''}">
           <a t-if="recruitment" t-attf-href="/recruitment?{{ keep_query() }}">Recruitment</a>
           <t t-else="">Recruitment</t>
       </li>
   </xpath>
</template>
<template id="portal_my_home_menu_recruitment" name="Recruitment" inherit_id="portal.portal_my_home"
         customize_show="True" priority="30">
   <xpath expr="//div[hasclass('o_portal_docs')]" position="before">
       <t t-set="portal_client_category_enable" t-value="True"/>
   </xpath>
   <div id="portal_client_category" position="inside">
       <t t-call="portal.portal_docs_entry">
           <t t-set="icon" t-value="'/portal_recruitment/static/src/img/recruitment.png'"/>
           <t t-set="title">Recruitment</t>
           <t t-set="url" t-value="'/Recruitment'"/>
           <t t-set="text">View the Recruitments</t>
           <t t-set="placeholder_count" t-value="'portal_recruitment'"/>
       </t>
   </div>
</template>
<template id="portal_my_home_recruitment_views" name="Recruitment">
   <t t-call="portal.portal_layout">
       <t t-set="breadcrumbs_searchbar" t-value="True"/>
       <t t-call="portal.portal_searchbar">
           <t t-set="title">Recruitment</t>
       </t>
       <t t-call="portal.portal_table">
           <thead>
               <tr class="active">
                   <th class="text-left">Applicant</th>
                   <th class="text-center">Create Date</th>
                   <th class="text-center">Job Position</th>
                   <th class="text-end">Status</th>
               </tr>
           </thead>
           <t t-foreach="recruitment" t-as="record">
               <tr>
                   <td class='text-left'>
                       <span t-field="record.partner_name"/>
                   </td>
                   <td class='text-center'>
                       <span t-field="record.create_date"/>
                   </td>
                   <td class='text-center'>
                       <span t-field="record.job_id.name"/>
                   </td>
                   <td class='text-end'>
                       <span t-field="record.stage_id.name"/>
                   </td>
               </tr>
           </t>
       </t>
   </t>
</template>
We need to define a function within the Python controller to display and implement the custom menu. The following code can be used for this purpose.
class WebsiteEvents(portal.CustomerPortal):
   """To get the recruitments in the website portal"""
   def _prepare_home_portal_values(self, counters):
       """To get the count of recruitments in portal"""
       values = super()._prepare_home_portal_values(counters)
       if 'portal_recruitment' in counters:
           values['portal_recruitment'] = request.env[
               'hr.applicant'].sudo().search_count([('user_id', '=', request.env.uid)])
       return values
Next, we have to create a controller function, for the specific URL that we defined in the template.
@http.route(['/Recruitment', '/Recruitment/page/<int:page>'], type='http', auth="user", website=True)
def portal_recruitment(self, sortby=None):
   """To sort the recruitments in the portal"""
   searchbar_sortings = {
       'date': {'label': _('Date'), 'order': 'create_date desc'},
       'stage': {'label': _('Status'), 'order': 'stage_id'},
   }
   if not sortby:
       sortby = 'date'
   order = searchbar_sortings[sortby]['order']
   recruitment = request.env['hr.applicant'].sudo().search([
       ('user_id', '=', request.env.uid)], order=order)
  return request.render('portal_recruitment.portal_my_home_recruitment_views',
                         {
                             'recruitment': recruitment,
                             'searchbar_sortings': searchbar_sortings,
                             'sortby': sortby,
                             'page_name': 'recruitment',
                         })
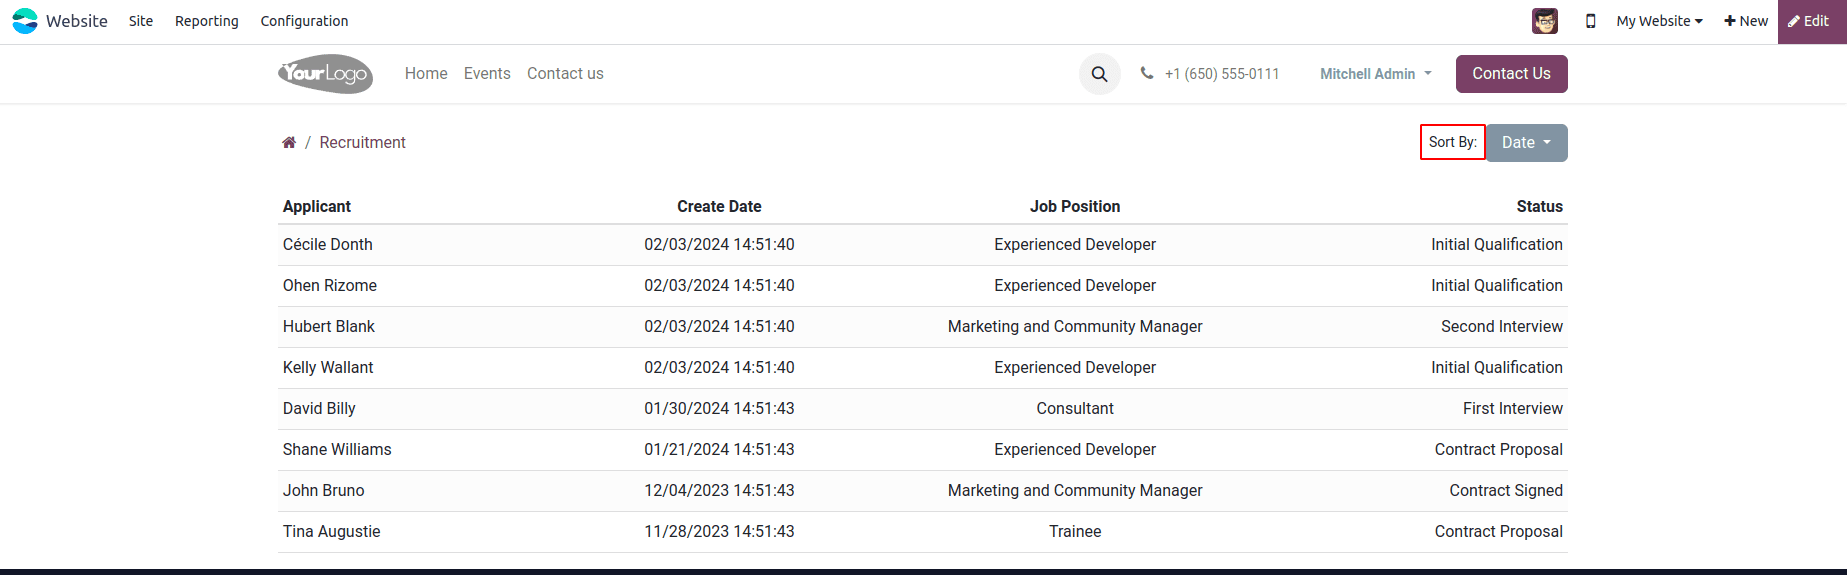
When we click on the menu, we can see the following view, and there, on the top right, we can see the Sort By option.
In the function, def portal_recruitment(self, sortby=None):
We have to pass the parameter sortby=None to the function.
searchbar_sortings = {
       'date': {'label': _('Date'), 'order': 'create_date desc'},
       'stage': {'label': _('Status'), 'order': 'stage_id'},
   }
The key value in this dictionary is "date," and we have another dictionary with that value. We define the label or the name that we want to view on the sorting option inside the dictionary. And the ‘order’ is the field by which we need to sort the data on the view,
The word "desc" here denotes a descending order for the sorting. If there is no specified order, the sorting order is ascending as default.
  if not sortby:
       sortby = 'date'
We are checking with this code whether a value has been provided for the'sortby' option. Following that, we can set a default value if it hasn't been given. Here, the default sorting order for the records is according to the decreasing order of the date.
order = searchbar_sortings[sortby]['order']
   recruitment = request.env['hr.applicant'].sudo().search([
       ('user_id', '=', request.env.uid)], order=order)
Next, we are extracting the records in the 'order', which is based on the
sorting order (descending or ascending) that we would like to apply.
 return request.render('portal_recruitment.portal_my_home_recruitment_views',
                         {
                             'recruitment': recruitment,
                             'searchbar_sortings': searchbar_sortings,
                             'sortby': sortby,
                             'page_name': 'recruitment',
                         })
In order to execute the method of sorting properly, we have to provide this order value within the search() method. We include the searchbar_sorting and sort by when we return the values to the XML.
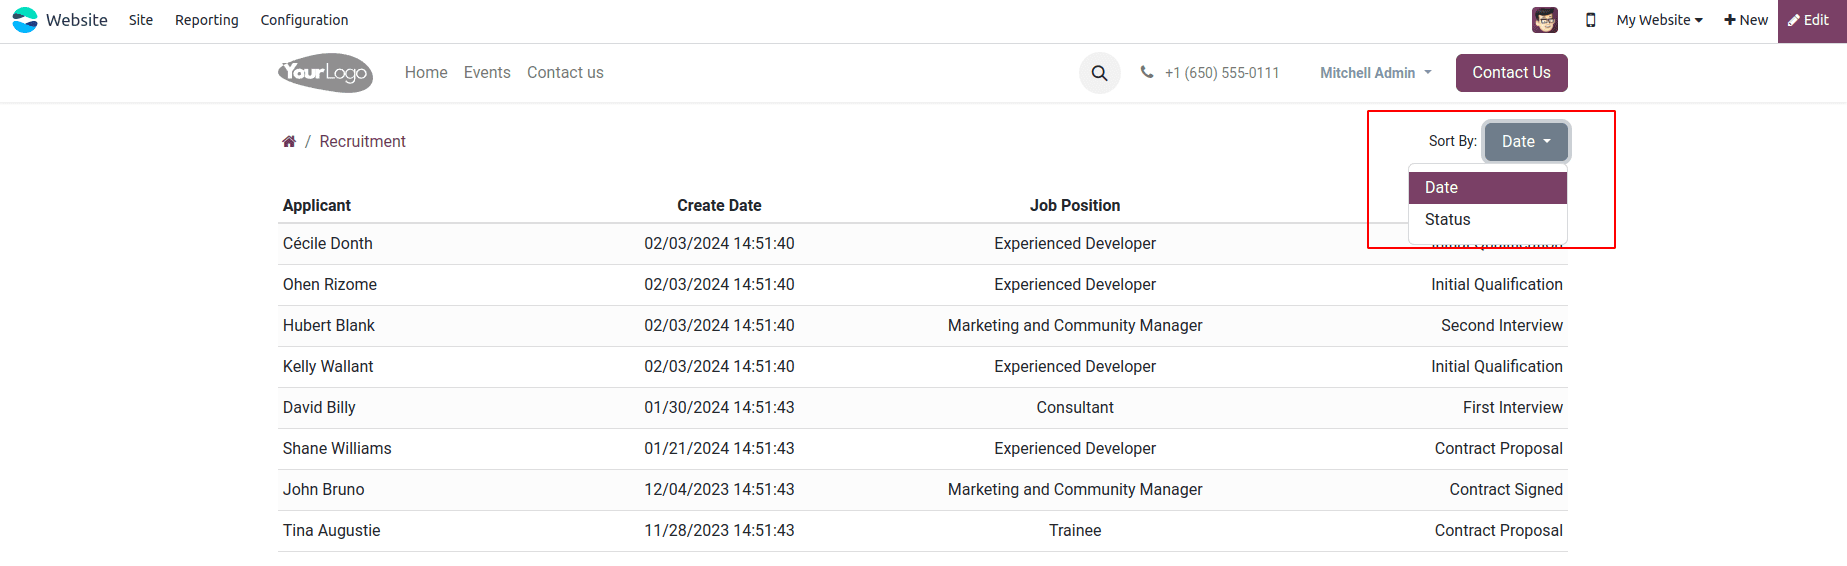
We can now sort the records in a specific order according to the specified fields by choosing the "Sort By" option.
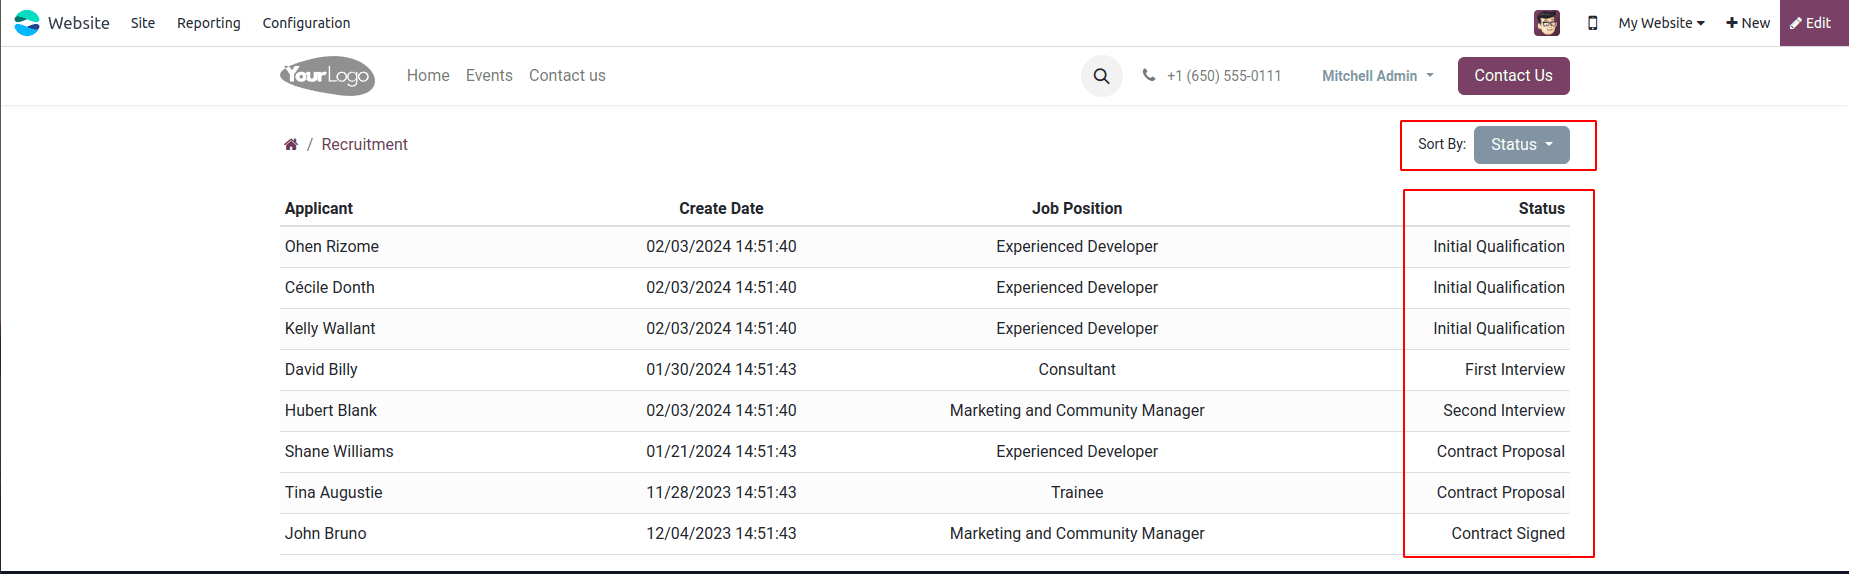
Here, the records are sorted according to the stages of the recruitment process. By following the steps, you can add the sort option to your Odoo website portal and customize the sorting functionality to meet your specific needs.