In Odoo, on the Website module, there is a Customer Portal option for accessing the documents from the website, like Quotations, Sale orders, Purchase Orders, and many more options. In this blog, we'll explore the simple steps you can take to integrate filter options seamlessly into your Odoo website portal.
Adding filters to your website portal not only makes navigation simpler but also helps users find exactly what they're looking for quickly. Using filters, users can generally minimize or change the range of content that is displayed in a web portal to better suit their preferences or requirements.
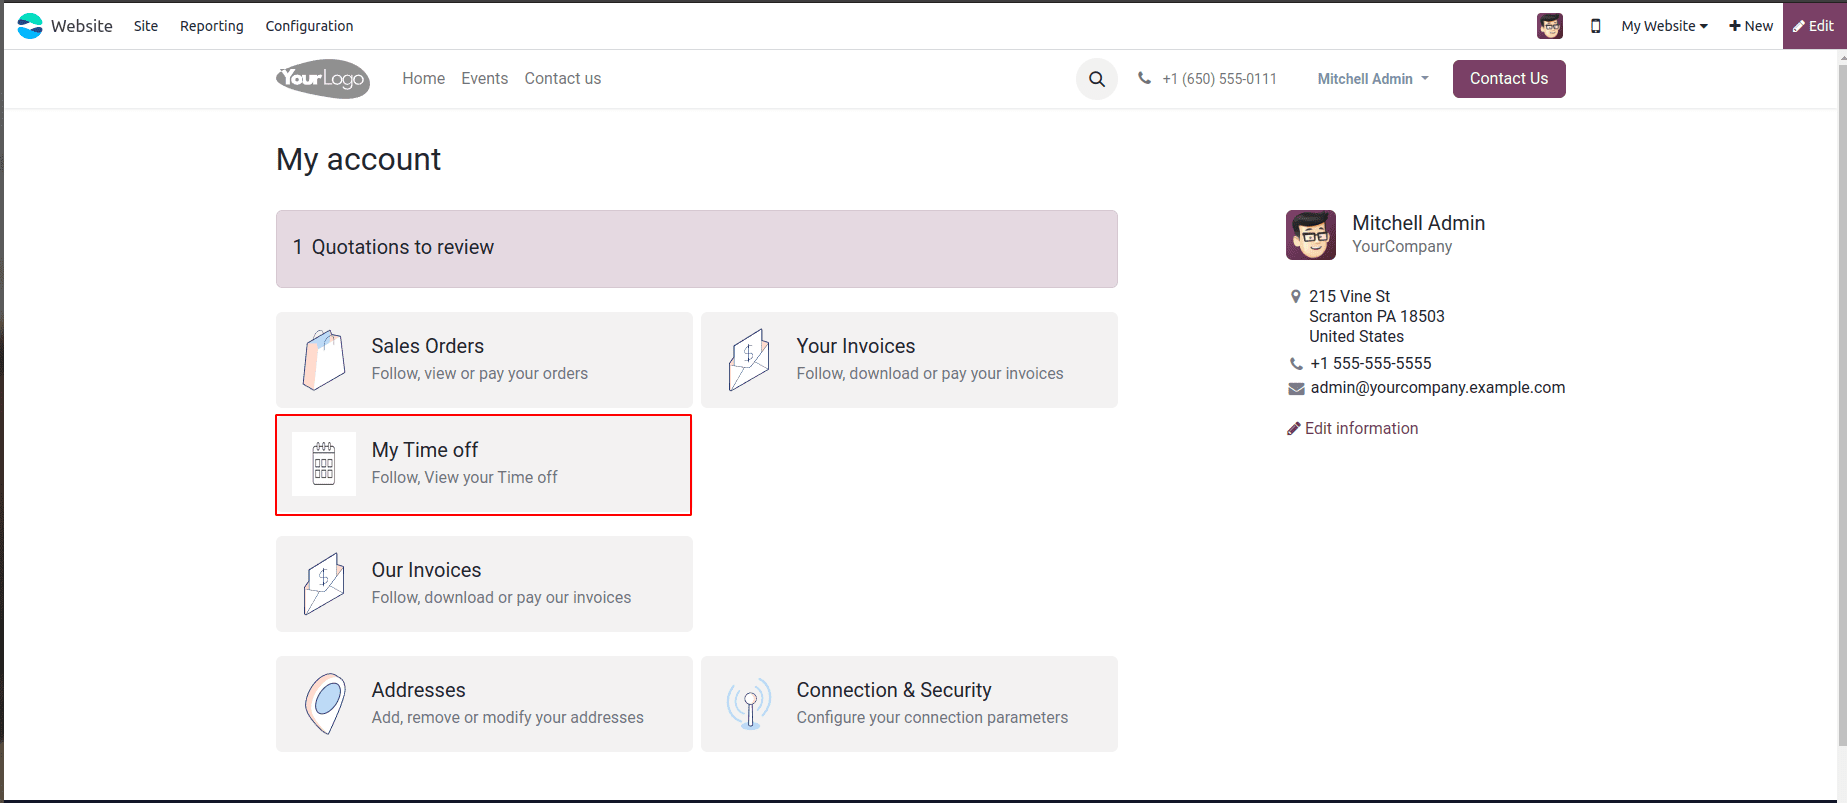
Let's now discuss the implementation of the filter option for the customized menu on the website portal. We created a menu option, "My Time Off" in the customer portal in Odoo17.
Using the XML template below, we can add a custom menu to the customer portal website:
<template id="portal_my_time_off_menu" name="my_timeoff" inherit_id="portal.portal_breadcrumbs" priority="30">
   <xpath expr="//ol[hasclass('o_portal_submenu')]" position="inside">
       <li t-if="page_name == 'my_timeoff'" t-attf-class="breadcrumb-item #{'active ' if my_timeoff else ''}">
           <a t-if="my_timeoff" t-attf-href="/my_timeoff?{{ keep_query() }}">My Time Off</a>
           <t t-else="">My Time Off</t>
       </li>
   </xpath>
</template>
<template id="portal_my_home_menu_my_timeoff" name="My Timeoff" inherit_id="portal.portal_my_home"
         customize_show="True" priority="30">
   <xpath expr="//div[hasclass('o_portal_docs')]" position="before">
       <t t-set="portal_client_category_enable" t-value="True"/>
   </xpath>
   <div id="portal_client_category" position="inside">
       <t t-call="portal.portal_docs_entry">
           <t t-set="icon" t-value="'/my_timeoff_portal/static/src/img/timeoff.png'"/>
           <t t-set="title">My Time off</t>
           <t t-set="url" t-value="'/my_timeoff'"/>
           <t t-set="text">Follow, View your Time off</t>
           <t t-set="placeholder_count" t-value="'timeoff_count'"/>
       </t>
   </div>
</template>
Next, we can use the following code to add and show the custom menu for defining a function inside the Python controller.
class PortalMyTimeoff(portal.CustomerPortal):
   """To get the my time off in the website portal"""
   def _prepare_home_portal_values(self, counters):
       """To get the count of my time off in portal"""
       values = super()._prepare_home_portal_values(counters)
       if 'timeoff_count' in counters:
           values['timeoff_count'] = request.env[
               'hr.leave'].sudo().search_count(
               [('employee_id.user_id', '=', request.env.user.id)])
       return values
In this function, we override the _prepare_home_portal_values() function to add features to an existing function.
We included the custom menu's URL in the template. When we click our custom portal, it initiates the appropriate URL. We must then create a controller function for that particular URL.
@http.route(['/my_timeoff', '/my_timeoff/page/<int:page>'], type='http', auth="user", website=True)
def my_timeoff_portal(self, filterby=None):
   """To add filter for records in the website portal"""
   employee_id = request.env[
       'hr.employee'].sudo().search(
       [('user_id', '=', request.env.user.id)])
   domain = [('employee_id', '=', employee_id.id)]
   searchbar_filters = {
       'all': {'label': 'All', 'domain': []},
       'to_approval': {
           'label': 'To Approve',
           'domain': [('state', '=', 'confirm')]},
       'second_approval': {
           'label': 'Second Approval',
           'domain': [('state', '=', 'validate1')]},
       'approved_timeoff': {
           'label': 'Approved',
           'domain': [('state', '=', 'validate')]},
       'refused_timeoff': {
           'label': 'Refused',
           'domain': [('state', '=', 'refuse')]},
   }
   my_time_off = request.env['hr.leave'].search(domain)
   if not filterby:
       filterby = 'all'
   domain += searchbar_filters[filterby]['domain']
   filtered_time_off = my_time_off.search(domain)
   total_time_off = my_time_off.search_count(domain)
   page_detail = pager(url='/my_timeoff',
                       total=total_time_off,
                       url_args={'filterby': filterby})
   return request.render("my_timeoff_portal.portal_my_home_menu_my_timeoff_views",
                         {
                             'my_time_off': filtered_time_off,
                             'page_name': 'my_timeoff',
                             'pager': page_detail,
                             'default_url': '/my_timeoff',
                         'searchbar_filters':OrderedDict(sorted(searchbar_filters.items())),
                             'filterby': filterby,
                         })
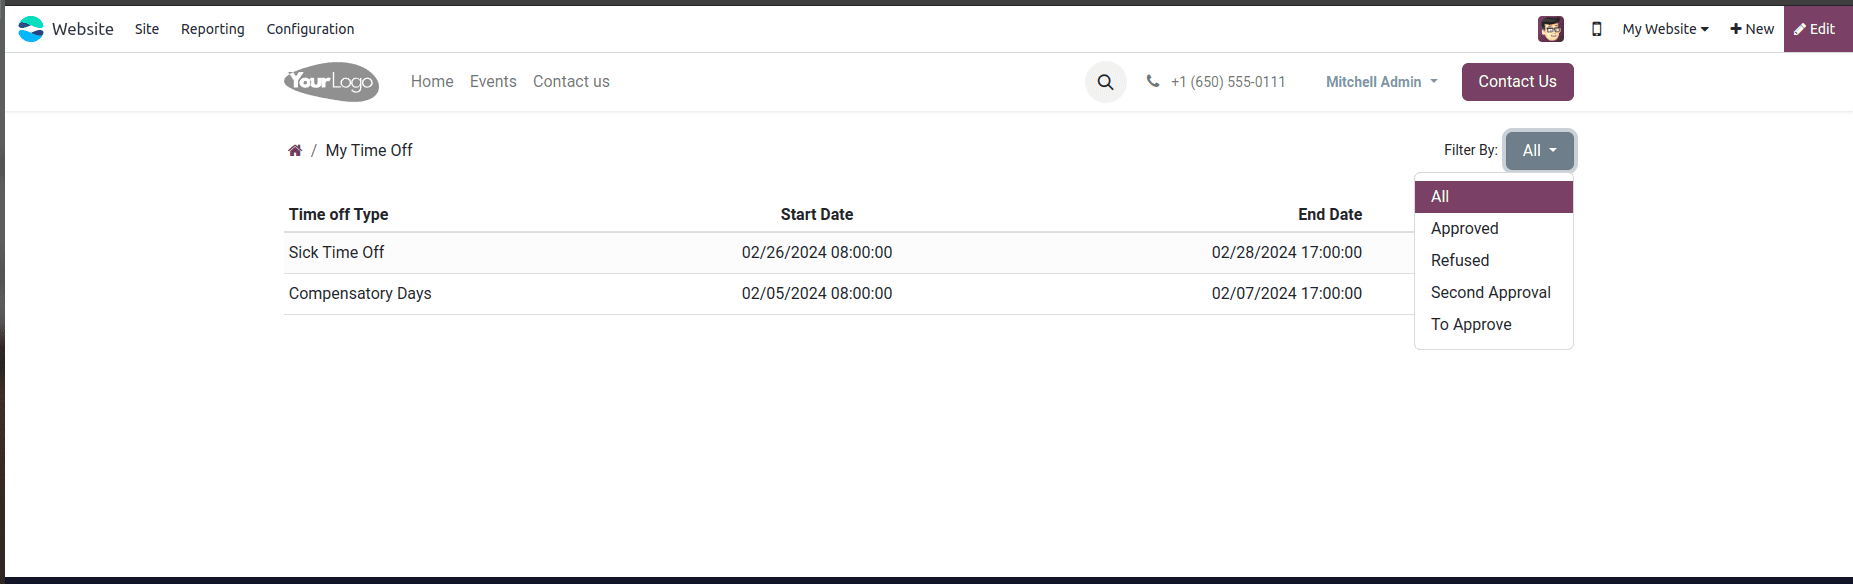
When we click the custom menu that we created, the above controller will trigger. We have included the following five filters: "All," "To Approve," "Second Approval," "Approved'," and "Refused.” We have the "All" filter option selected as the view's default option.
Next, we have to set up each filter's label and filter domain. For that, we can use the code that follows.
searchbar_filters = {
   'all': {'label': 'All', 'domain': []},
   'to_approval': {
       'label': 'To Approve',
       'domain': [('state', '=', 'confirm')]},
   'second_approval': {
       'label': 'Second Approval',
       'domain': [('state', '=', 'validate1')]},
   'approved_timeoff': {
       'label': 'Approved',
       'domain': [('state', '=', 'validate')]},
   'refused_timeoff': {
       'label': 'Refused',
       'domain': [('state', '=', 'refuse')]},
}
The timeoff record must then be retrieved from the database using the filter that we choosen using the code:
if not filterby:
       filterby = 'all'
domain += searchbar_filters[filterby]['domain']
   filtered_time_off = my_time_off.search(domain)
   total_time_off = my_time_off.search_count(domain)
   page_detail = pager(url='/my_timeoff',
                       total=total_time_off,
                       url_args={'filterby': filterby})
Next, we need to create a template for viewing the record.
<template id="portal_my_home_menu_my_timeoff_views" name="My Time Off">
   <t t-call="portal.portal_layout">
       <t t-set="breadcrumbs_searchbar" t-value="True"/>
       <t t-call="portal.portal_searchbar">
           <t t-set="title">My Time Off</t>
       </t>
       <t t-call="portal.portal_table">
           <thead>
               <tr class="active">
                   <th class="text-left">Time off Type</th>
                   <th class="text-center">Start Date</th>
                   <th class="text-end">End Date</th>
                   <th class="text-end">Status</th>
               </tr>
           </thead>
           <t t-foreach="my_time_off" t-as="time_off">
               <tr>
                   <td class='text-left'>
                       <span t-field="time_off.holiday_status_id.name"/>
                   </td>
                   <td class='text-center'>
                       <span t-field="time_off.date_from"/>
                   </td>
                   <td class='text-end'>
                       <span t-field="time_off.date_to"/>
                   </td>
                   <td class='text-end'>
                       <span t-field="time_off.state"/>
                   </td>
               </tr>
           </t>
       </t>
   </t>
</template>
Then, we must send the values to the template we made for the view after retrieving the records.
return request.render("my_timeoff_portal.portal_my_home_menu_my_timeoff_views",
                     {
                         'my_time_off': my_time_off,
                         'page_name': 'my_timeoff',
                         'pager': page_detail,
                         'default_url': '/my_timeoff',
                         'searchbar_filters': OrderedDict(sorted(searchbar_filters.items())),
                         'filterby': filterby,
                     })
The filter by option has been added to the right corner after the code was given.
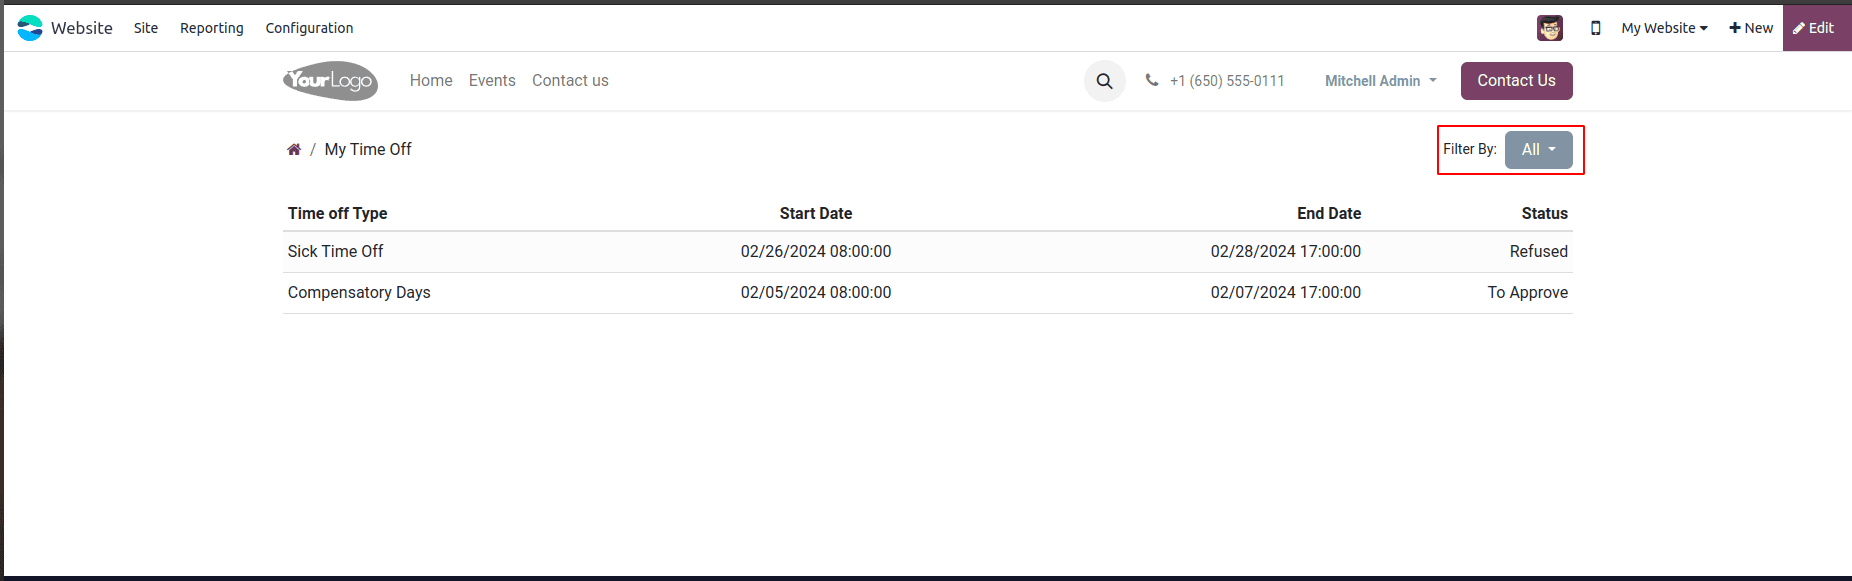
We have access to all records by default. By selecting the filter options, we may apply the filters.
Here the records are filtered by the stage of the recruitment process that we selected on the filter option.
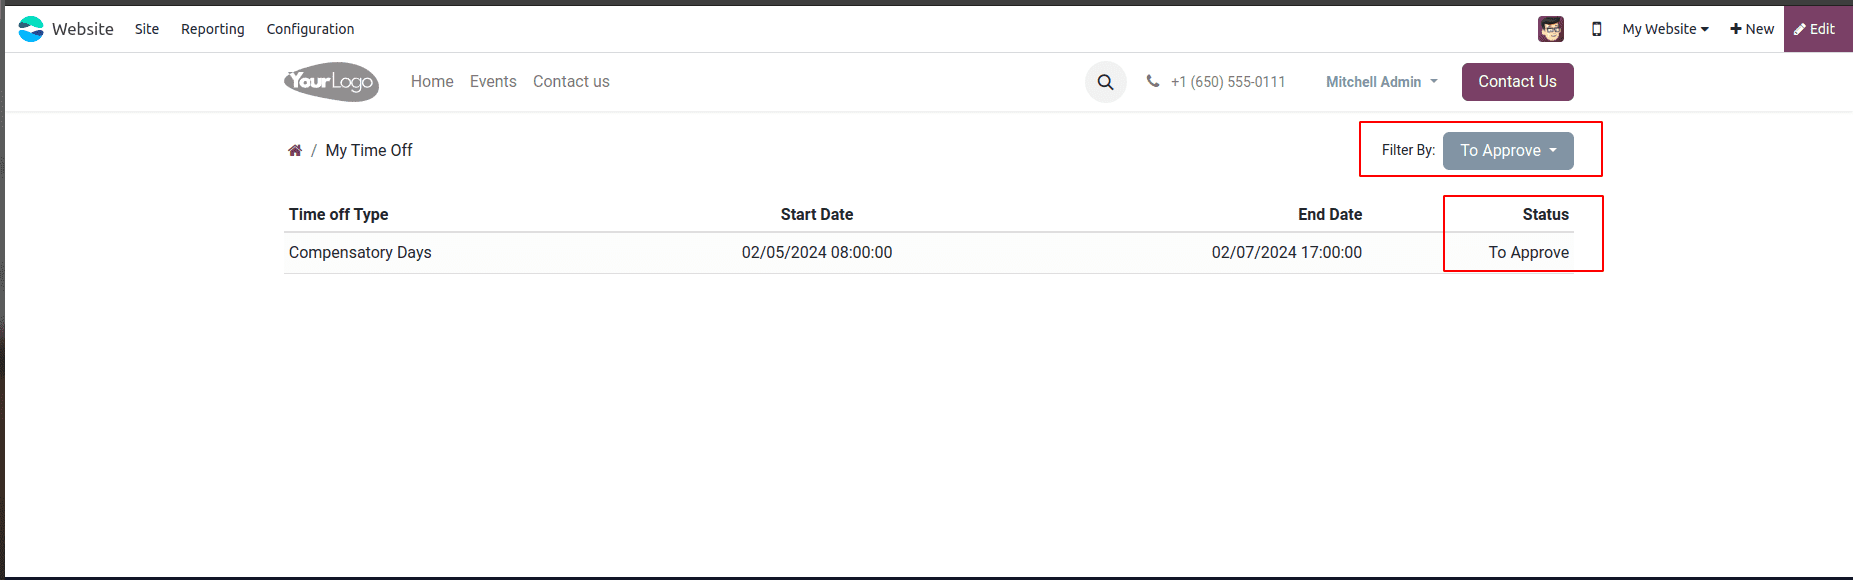
This is how we can set up a custom filter by preference in a custom menu in the customer portal. Users can access the data by selecting appropriate filters through the filter by functionality.