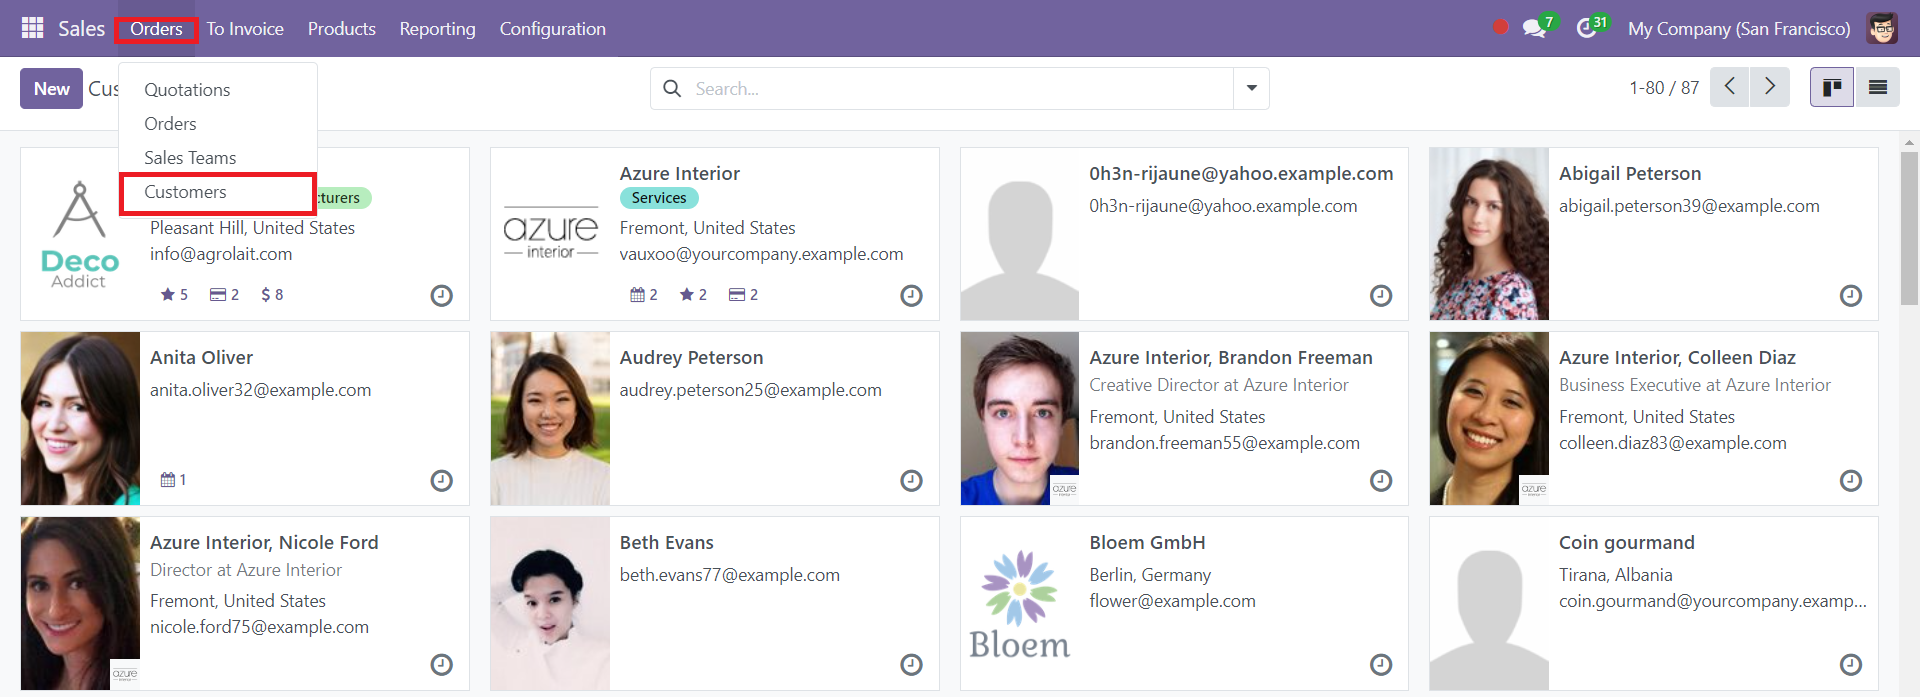
The customer management platform within Odoo 18's Sales module makes it easy to access all the information you need about your customers quickly and efficiently. This platform is conveniently located in the Orders menu of the Sales module. In the Kanban view, customers' photos and essential details such as names and contact information are displayed, offering a visual and organized layout for managing customer relationships.
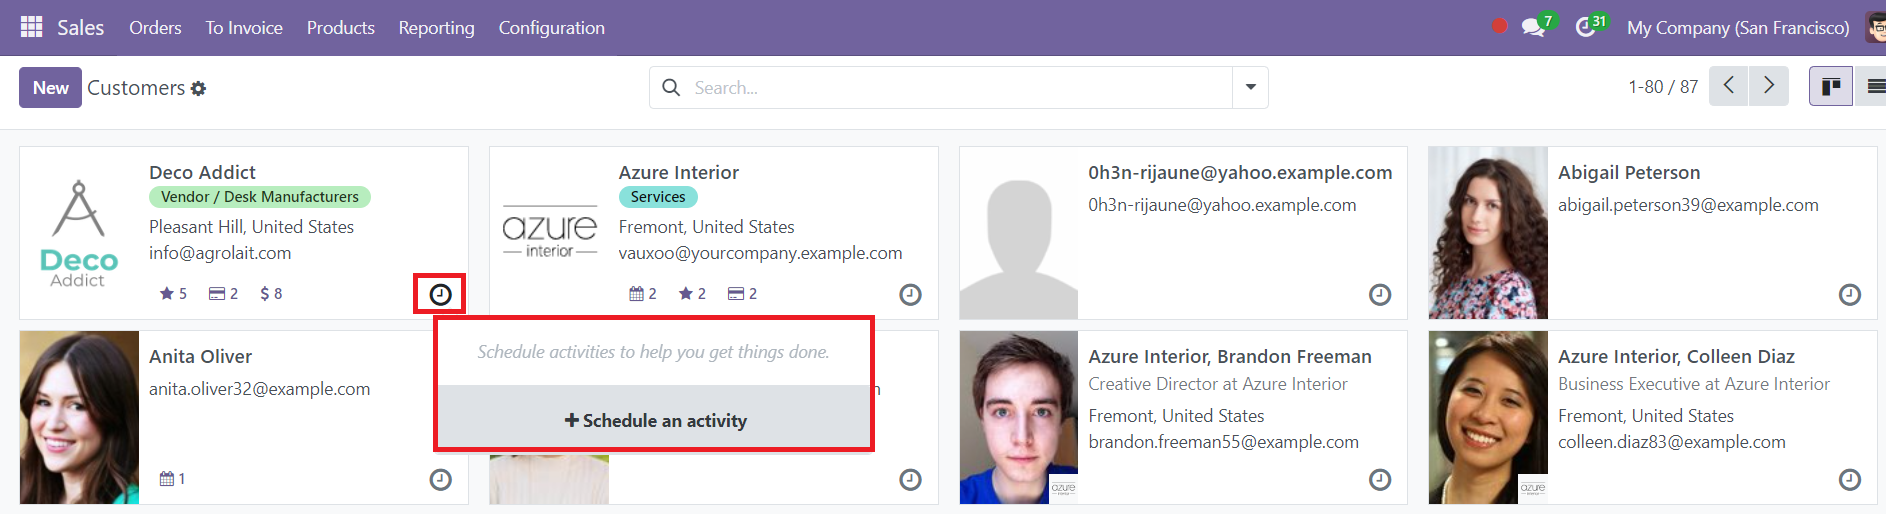
The interface also provides various functionalities to streamline sales activities. By clicking the small clock icon, users can schedule sales-related activities, ensuring timely follow-ups and interactions.
The customer data can be filtered based on several criteria, including Individuals, Companies, Archived, Vendor Bills, Customer Invoices, and Subcontractors, allowing users to refine their search for specific customer categories.
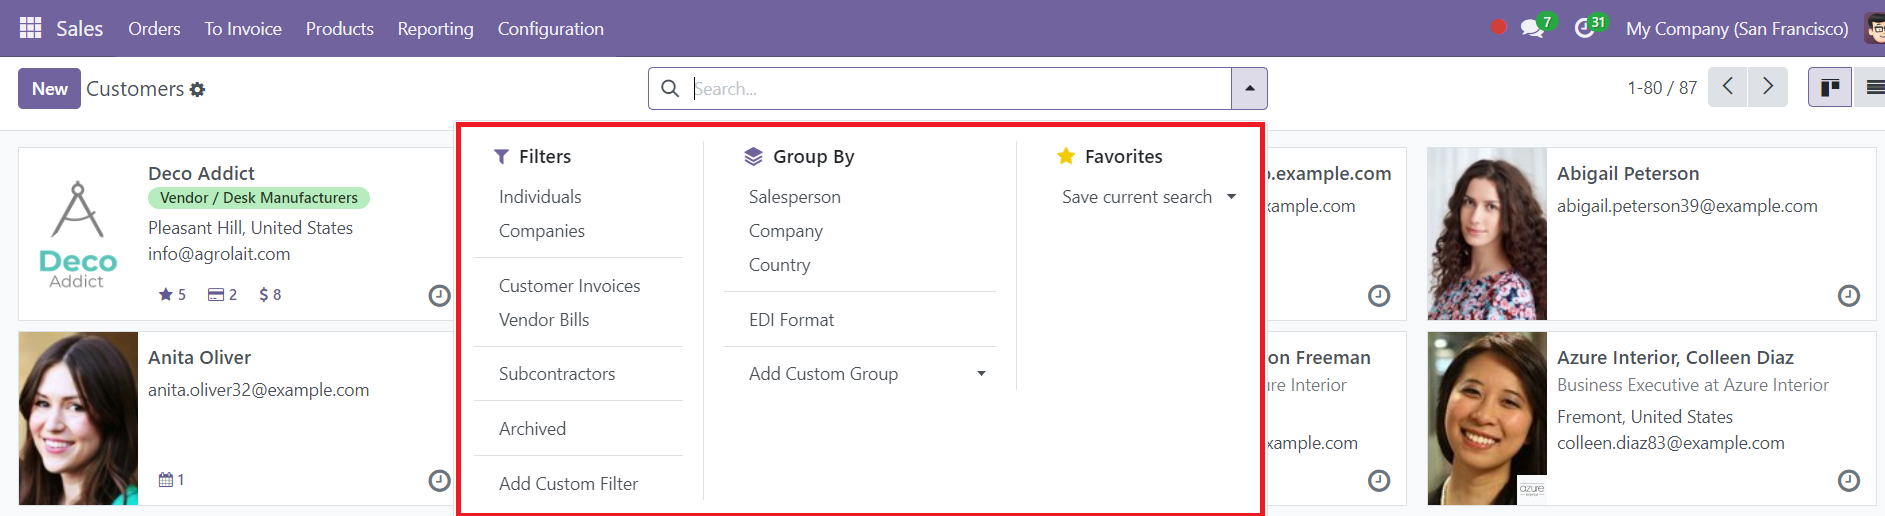
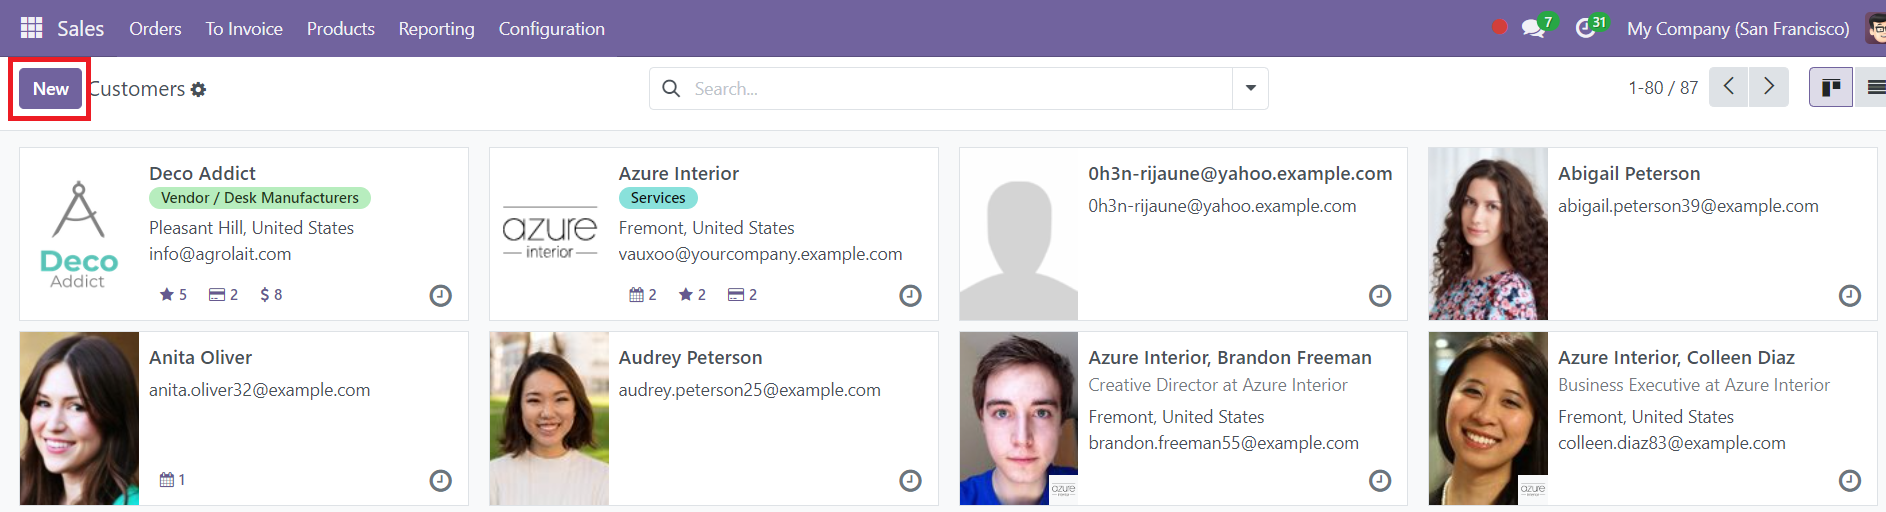
Additionally, the Group By option lets users categorize customers by Company, Country, or Salesperson, helping businesses segment their data for better management. To add a new customer profile, users simply need to click the New button, making the configuration process straightforward and accessible.
Configuring customers in the Odoo 18 Community Sales module is a vital step for managing sales interactions and maintaining accurate records of customer information. This process allows businesses to store comprehensive details about their customers, enabling smoother workflows from quotations to invoicing. Below is a detailed description of how to configure customers in the Odoo 18 Community Sales module.
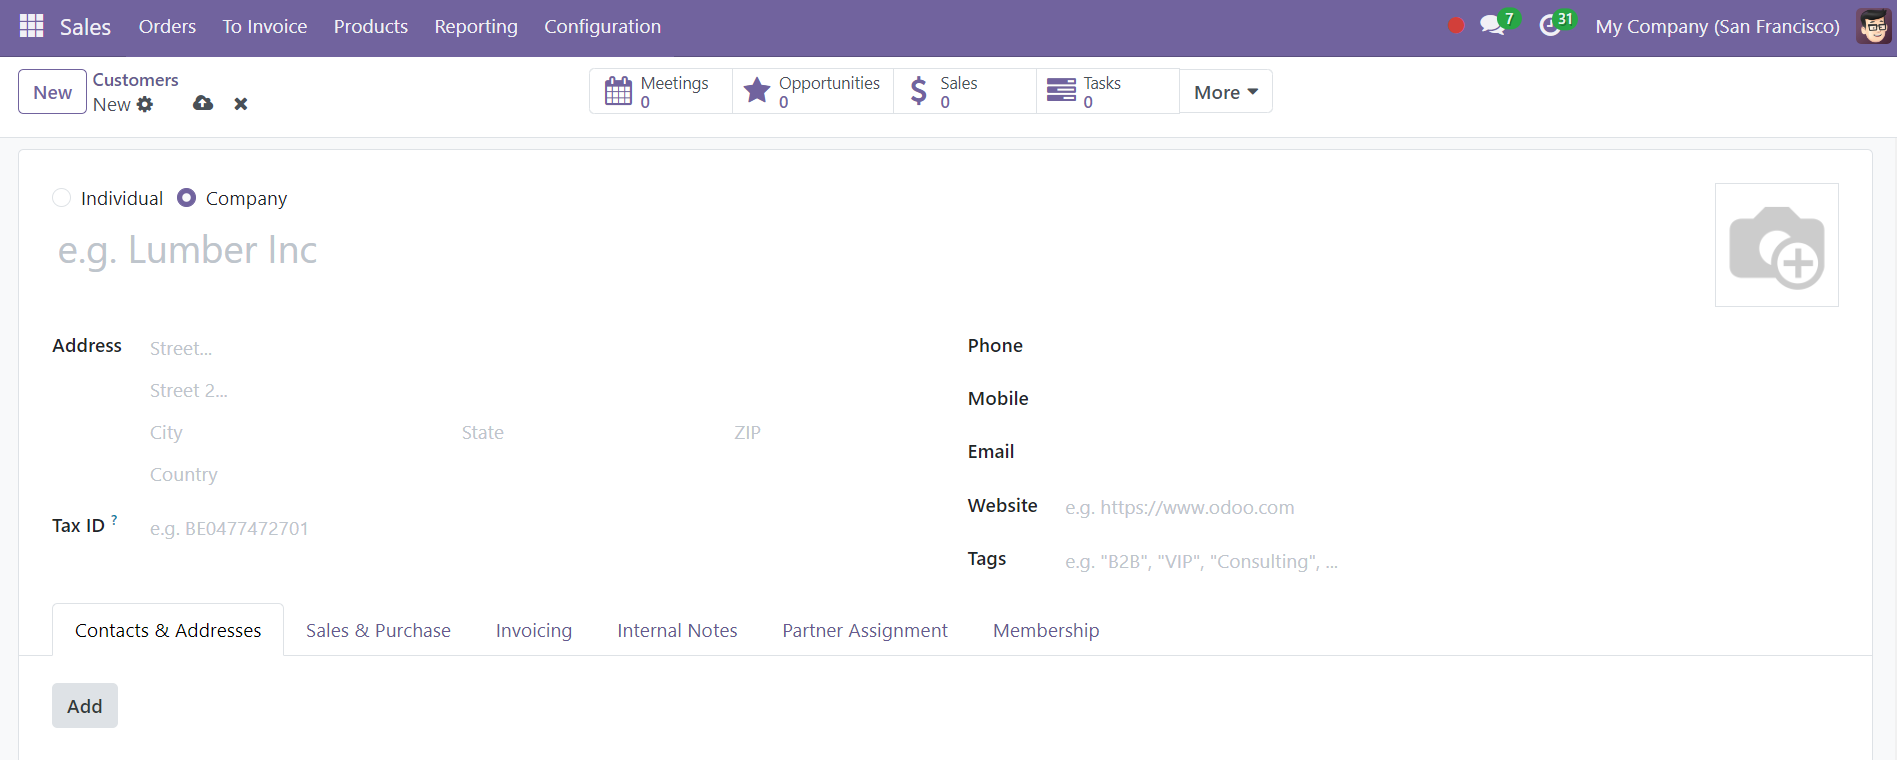
Once you click on the New button, a new window will open, as shown in the screenshot above, to configure a new customer in your database. Input the name of the customer (this could be a company or an individual). Choose whether the customer is a Company or an Individual. Enter the customer’s physical address. Odoo allows multiple addresses for a single customer (e.g., billing and shipping addresses). Input the contact details, such as Phone, Mobile, and Email, which are critical for communications, and the Tax Identification number in the given fields. If applicable, enter the customer’s website URL. Add tags to categorize customers for better segmentation (e.g., VIP, Wholesale, Retail).

Using the Add button in the Contacts & Addresses section of the Odoo 18 Sales module, you can easily add multiple addresses and contact details for a customer. This functionality allows you to define various types of addresses such as Contact, Invoice, Delivery, or Other Address, depending on the customer’s needs.
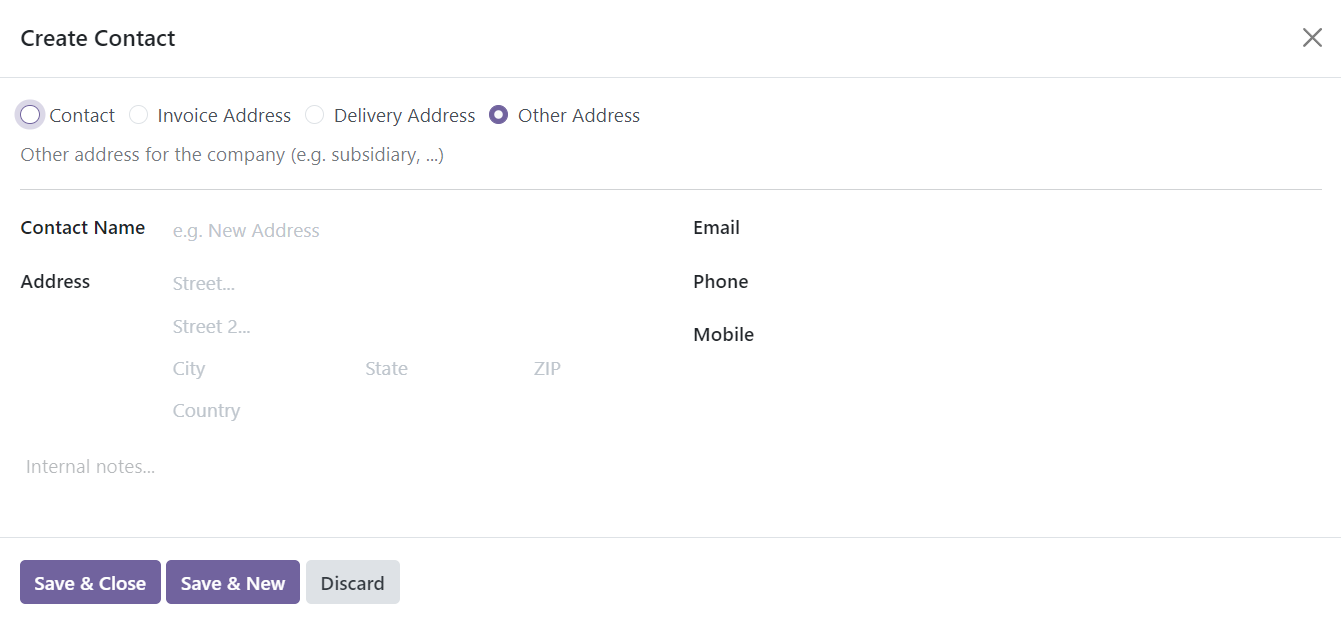
In the pop-up window that appears, you can input key contact information including the Contact Name, Address, Email, Phone, and Mobile Number. This feature provides flexibility for businesses that need to maintain separate addresses for different purposes, such as billing and shipping.
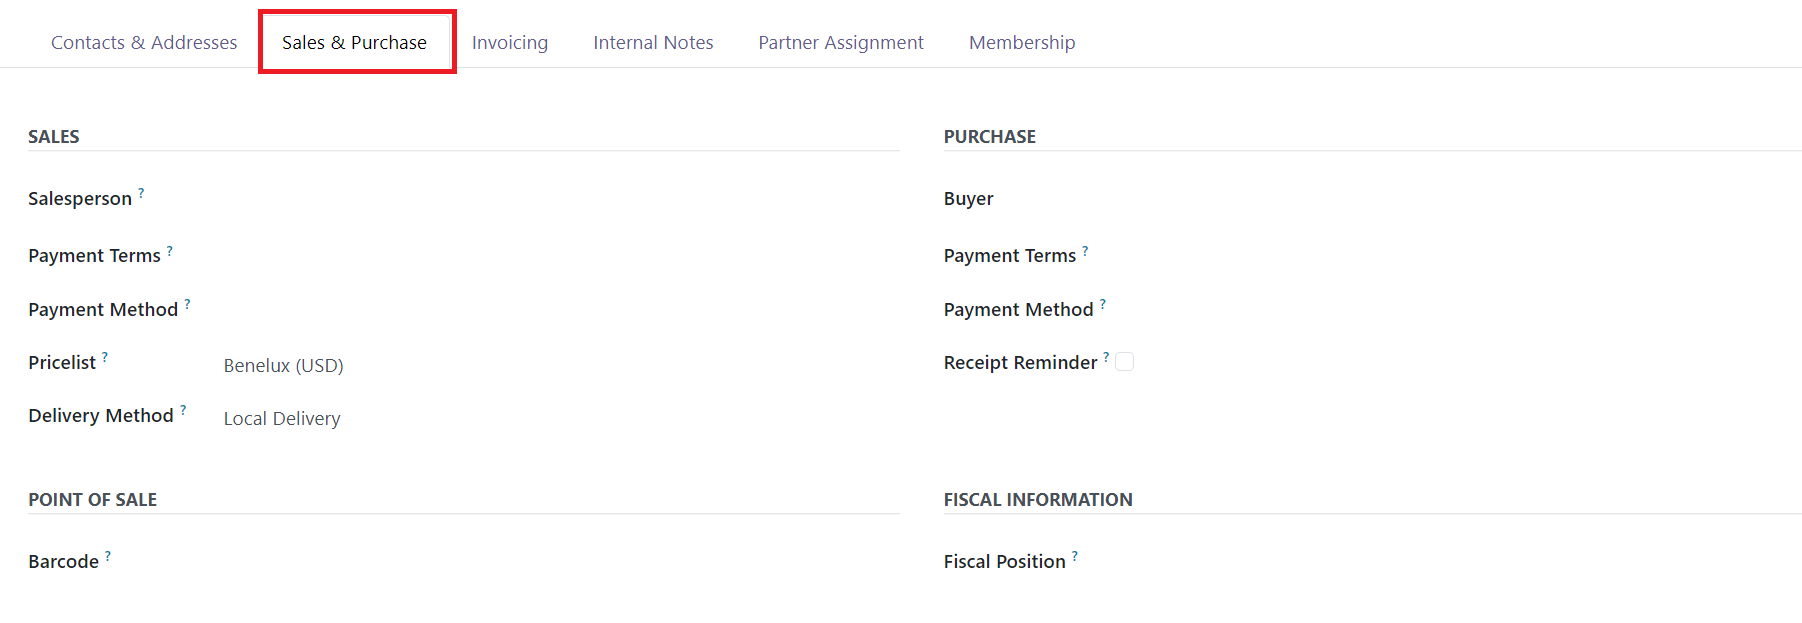
In the Sales and Purchases tab of the Odoo 18 Sales module, businesses can configure several essential settings to streamline sales and procurement activities. To manage sales, you can assign a Salesperson to each customer. This assignment helps track and manage sales activities effectively. When creating sales orders or invoices, Odoo will automatically apply the specified Pricelist, Payment Method, and Payment Terms for that customer, overriding the default settings. Additionally, you can set a default Delivery Method for the customer's sales orders.
In the Purchase section, the Buyer field allows you to specify the individual or entity responsible for making purchasing decisions or managing procurement for the customer. You can specify alternative Payment Terms for purchase orders and vendor bills, replacing the default terms if needed. The preferred Payment Method for transactions with the customer can also be defined here. To enhance communication, you can set up a Receipt Reminder which sends an automated notification to the customer a set number of days before the expected receipt date, prompting them to confirm the receipt date. The Barcode field can be utilized to generate a unique identifier for the customer, facilitating easy recognition in Point of Sale sessions.
The Inventory section allows you to set the Customer Location for delivery and specify the Vendor Location for receiving goods. You can also indicate the Subcontractor Location used for subcontracting operations, streamlining inventory and logistics management
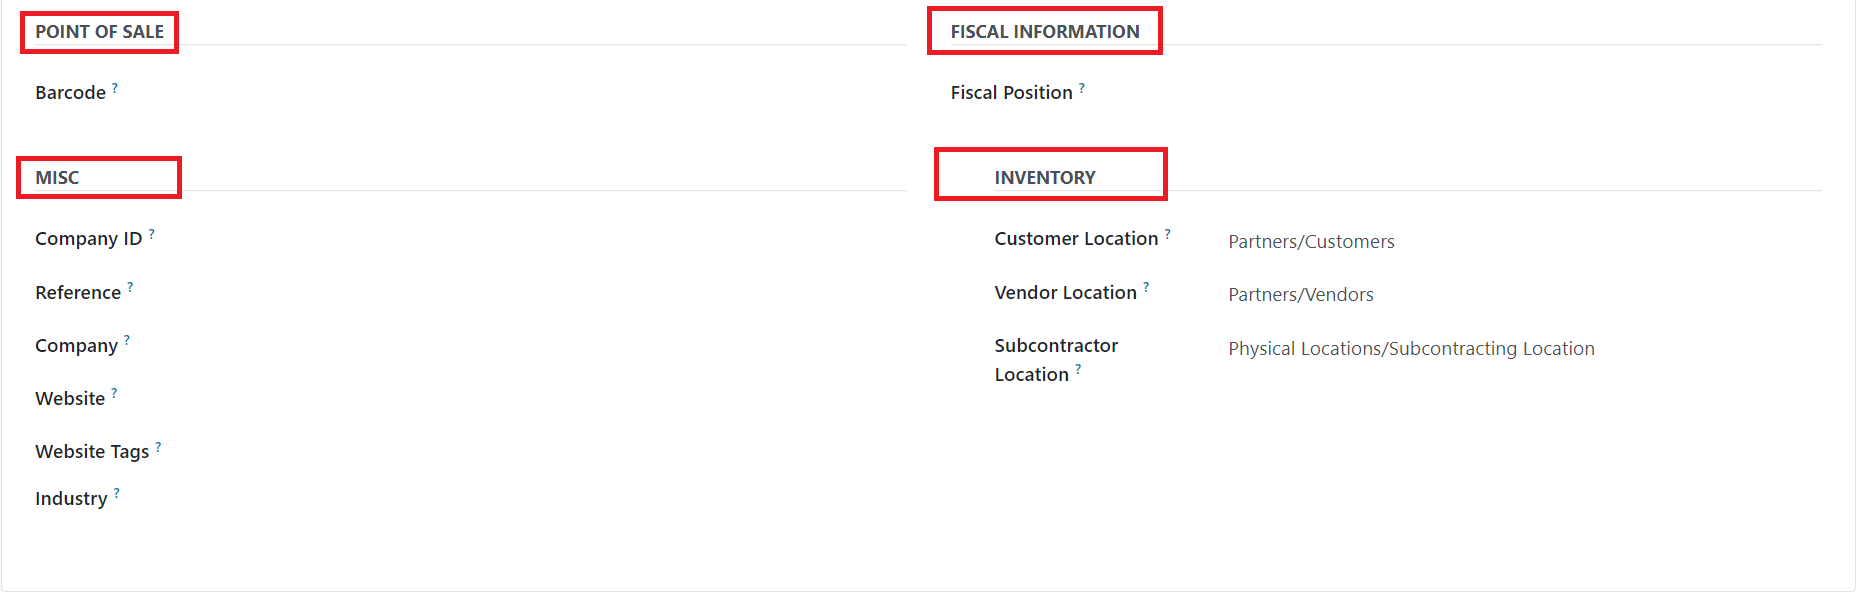
Lastly, in the Miscellaneous area, you can provide additional details such as the Company ID, reference numbers, company details, website URL, website tags, and the industry in which the customer operates. For fiscal management, the Fiscal Position field helps determine the applicable taxes or accounts for the customer, ensuring accurate financial processing.
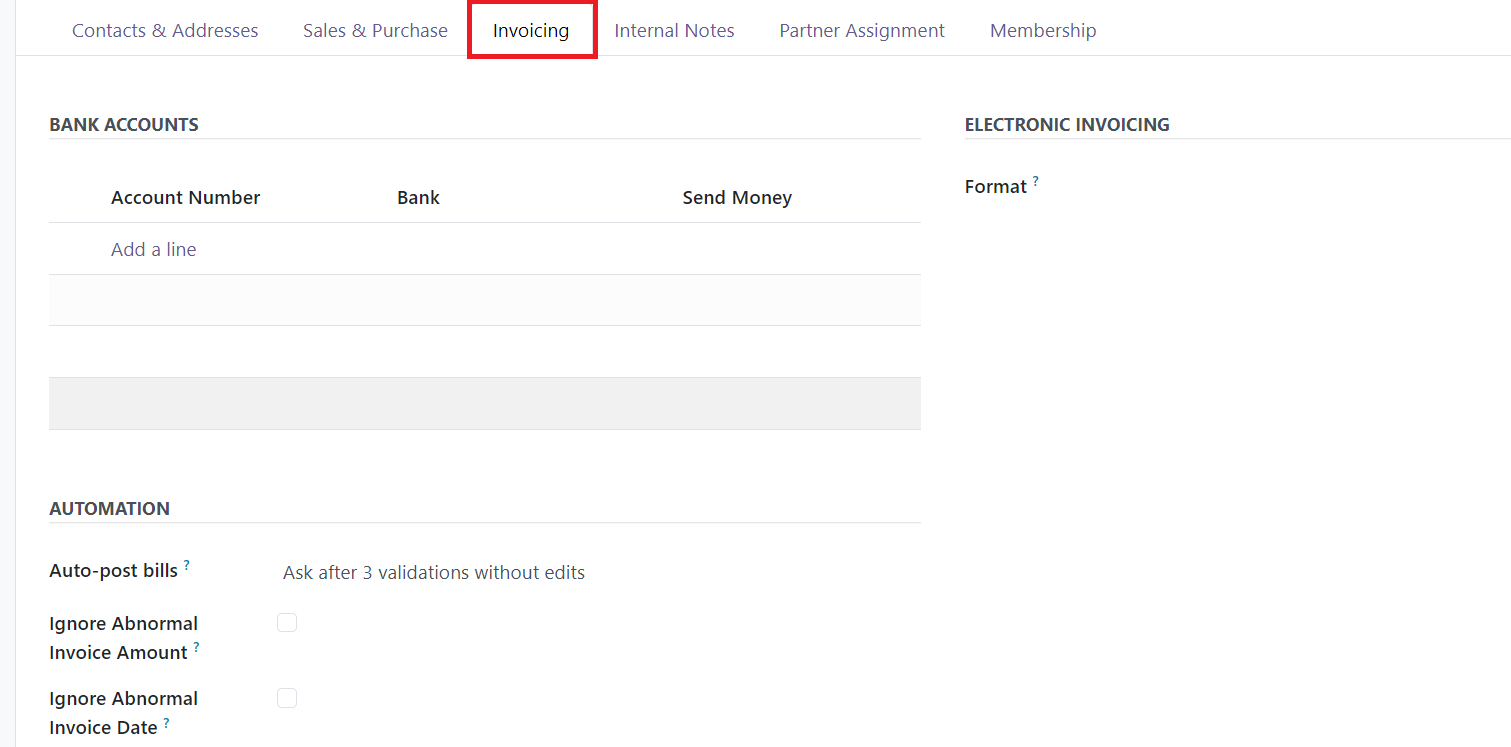
In the Invoicing tab of Odoo 18, you can use the Add a Line button to input the customer's bank account details. This includes essential information such as the Bank Name, Account Number, and the option to select Send Money, which determines how payments will be processed. This setup ensures that the customer's payment preferences are clearly defined for smoother financial transactions and invoicing.
Additionally, the Automation tab offers advanced automation options for streamlining invoice processing. Here, you will find features like Auto-post bills, which automatically posts bills without manual intervention, saving time and reducing errors. The Ignore abnormal invoice amount option allows you to bypass any alerts for unusual invoice amounts, and the Ignore abnormal invoice date option prevents the system from flagging discrepancies in invoice dates.
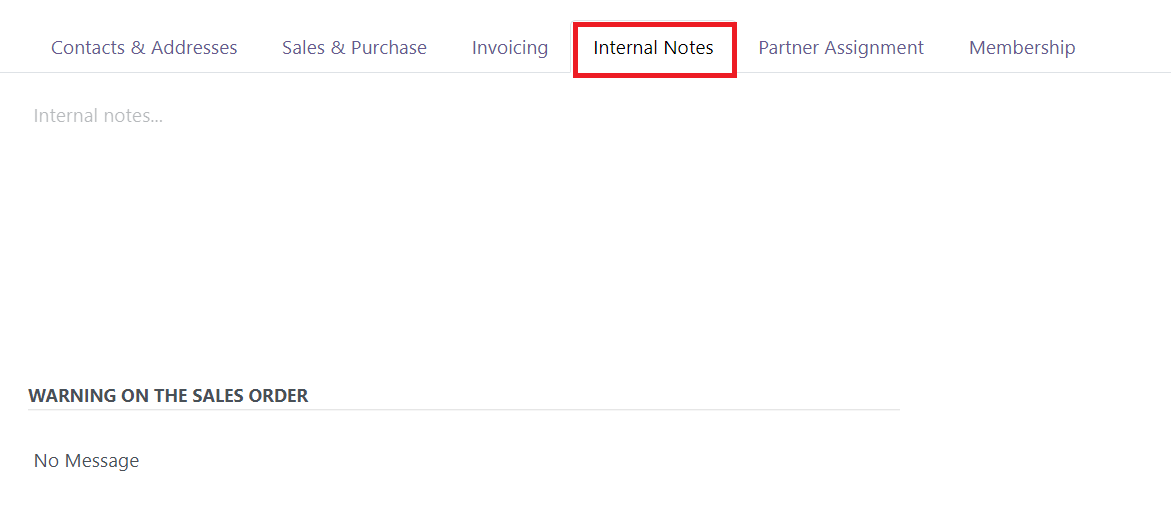
In the Internal Notes tab of Odoo 18's customer configuration, you can enter any internal notes related to the customer’s sales activities. These notes are for internal use only and can include important details, reminders, or instructions specific to the sales team that should be considered when dealing with this customer.
Additionally, Odoo provides the option to set up warnings on sales orders. By enabling the Sales Warning option in the Settings menu, you can configure alerts that will be triggered whenever a sales order is created for this customer.
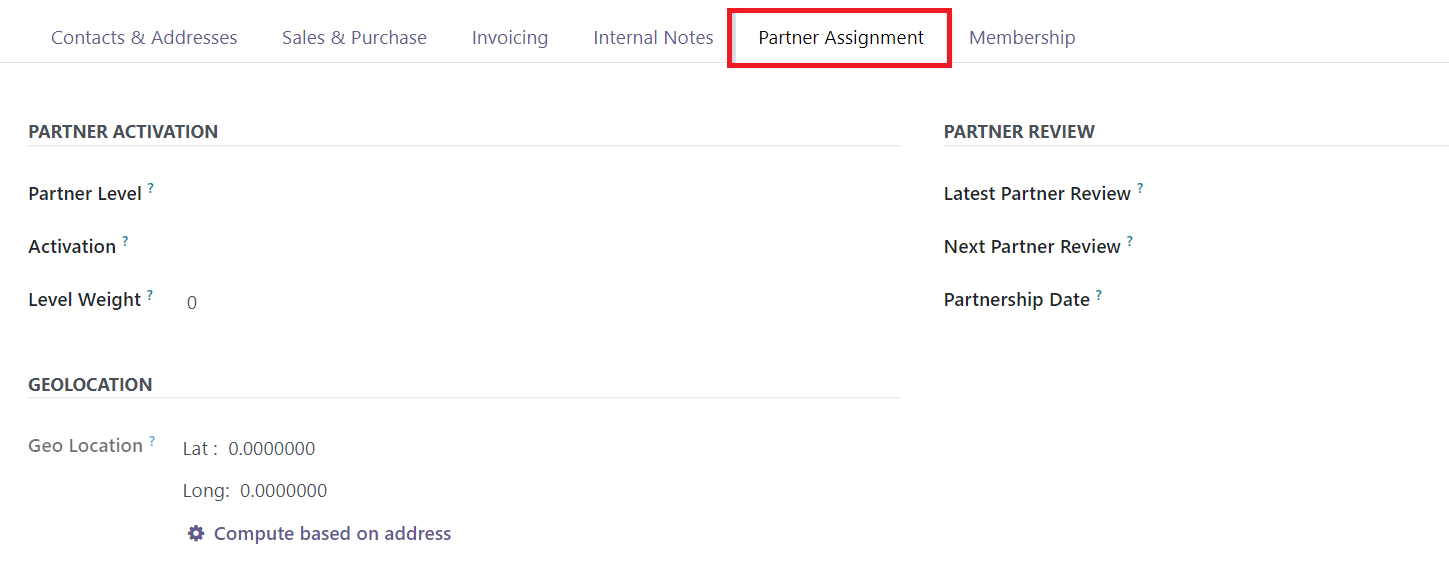
The Partner Assignment page in Odoo 18 provides detailed information on managing and tracking partnerships through features like Partner Activation and Partner Review. On this page, you can configure the Partner Level, which indicates the current status or tier of the partnership, along with the Activation status, showing whether the partnership is active or pending. The Level Weight allows you to assign a value or importance to the partnership based on its significance to your business. You can also record the Partnership Date to mark the beginning of the relationship, as well as track the Most Recent and Next Partner Reviews to ensure periodic evaluation of the partnership’s progress and performance.
Additionally, you can input the Geo-Location in the designated field, which helps in identifying the physical location of the partner. This can be done manually by entering the address or automatically using the Compute function, which calculates the geolocation based on the provided information.
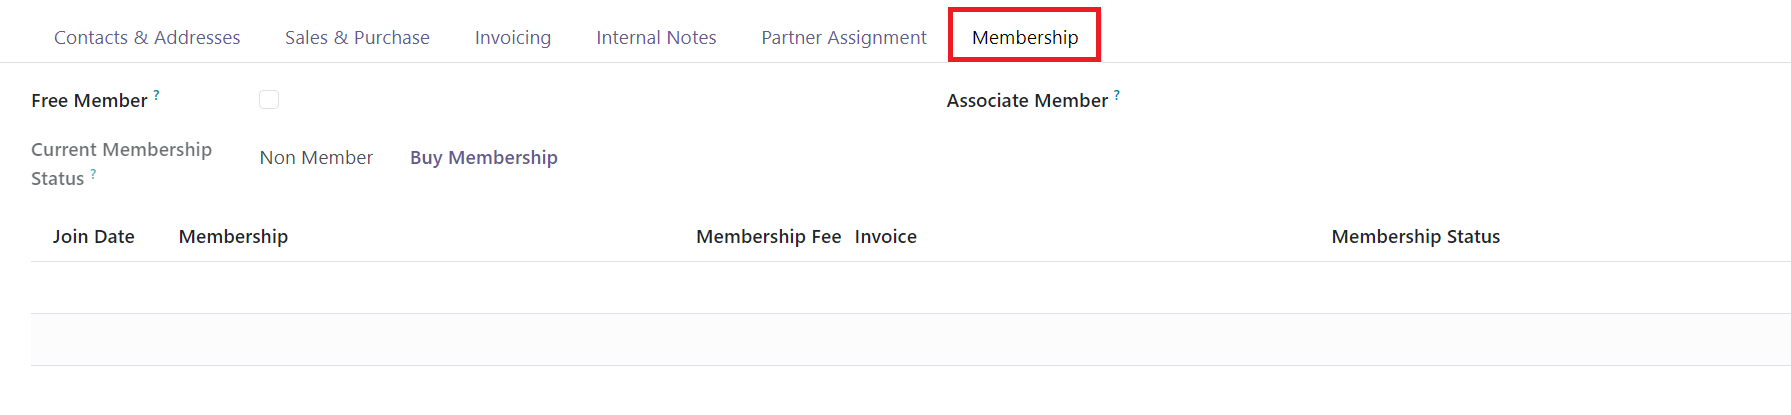
In the Membership tab of Odoo 18, you can configure customer membership settings, including offering free memberships. To provide a free membership, simply select the Free Member option, allowing the customer to be enrolled without a membership fee. This page will display key membership-related information, such as the Join Date, the type of Membership, the Membership Price (if applicable), the corresponding Invoice, and the Membership Status, which indicates whether the membership is active or pending.
Additionally, the Current Membership Status provides a clear overview of the customer's current membership status, ensuring that the business can track the duration and validity of the membership. By configuring customers effectively in Odoo 18, businesses can ensure accurate data management, foster stronger customer relationships, and streamline their sales operations from start to finish.