The Configuration menu in Odoo 17 Recruitment provides several options that allow users to manage various aspects of the recruitment process, including settings for job positions, UTMs, applications, employees, and activities. Here's a detailed breakdown of the available configurations:
Settings
The Settings option in the Configuration menu contains two main sections: Job Posting and Recruitment Process.
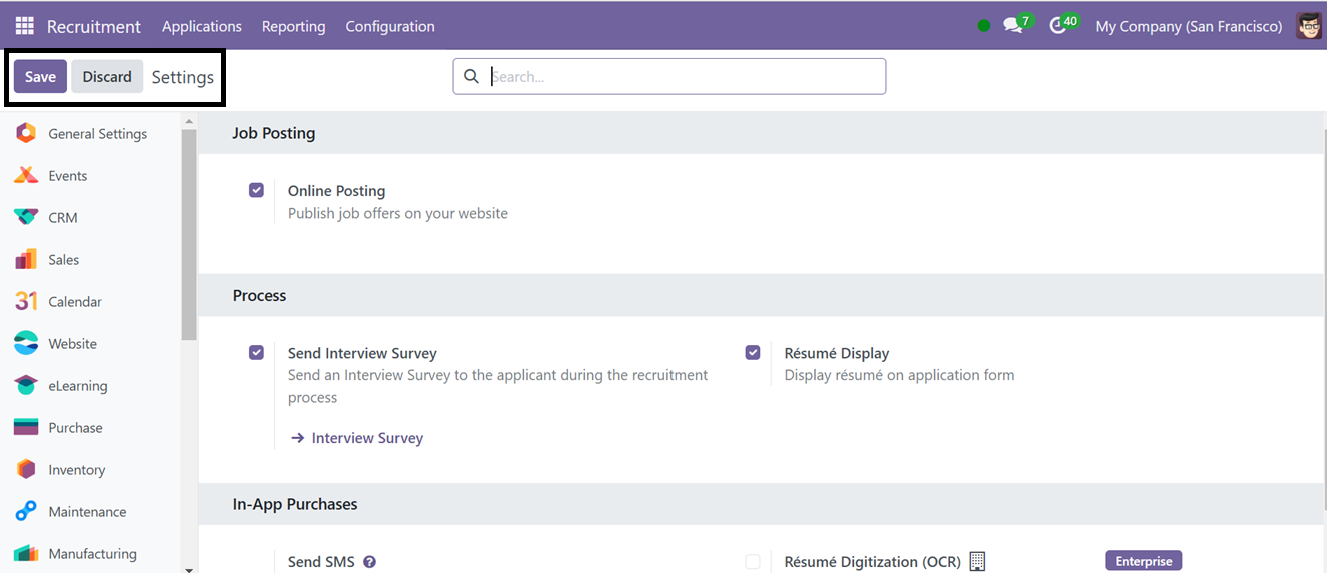
Job Posting: This section includes the option to enable Online Posting, which allows users to post job openings directly on the company website.
Process: This section offers additional tools, such as the Send Interview Survey feature, which automates the process of sending interview forms to candidates.
With the 'Resume Display' feature in the Odoo Recruitment module, recruiters can view and access candidate resumes directly in the application. You can see the candidate's resume after receiving their job application in the chatter area of the application form, as depicted in the screenshot below.
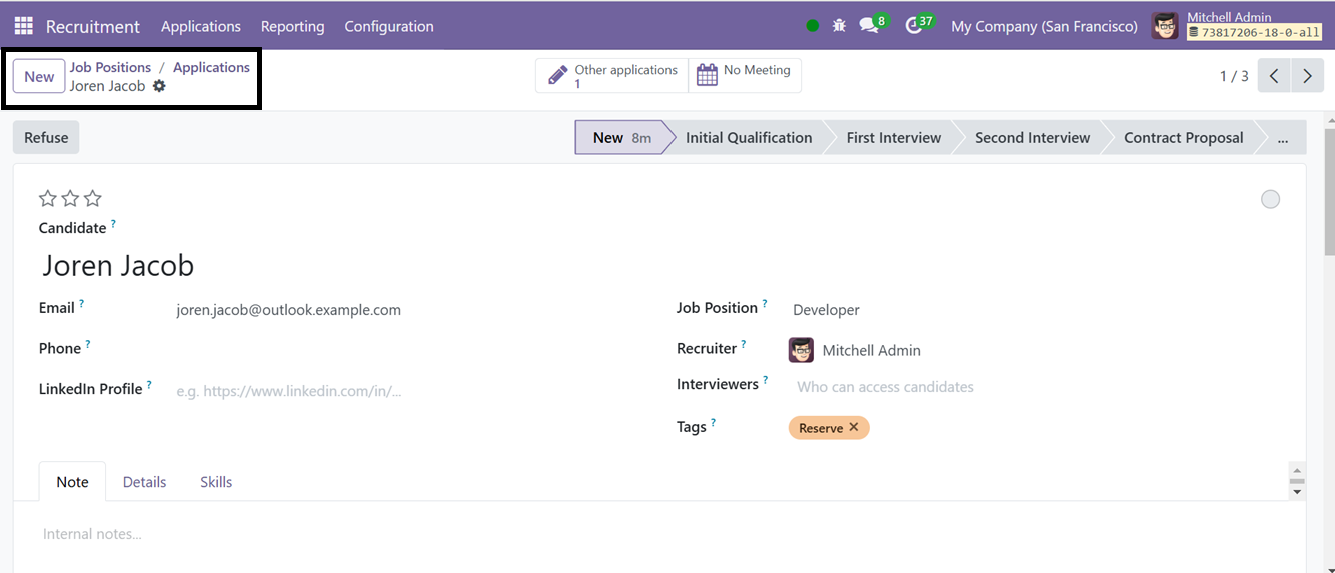
The ‘Resume Display’ feature simplifies the hiring process by providing quick access to candidates' detailed information through a single-click CV attachment option, enabling more informed recruitment decisions.
In-App Purchases: Other options include Send SMS, which allows recruiters to communicate via text.
Employment Types
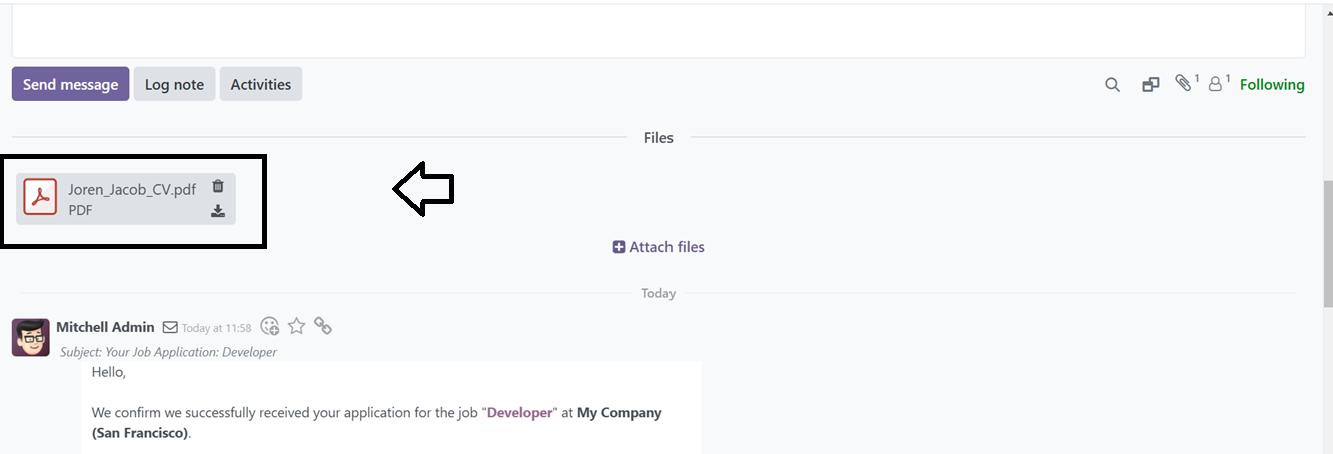
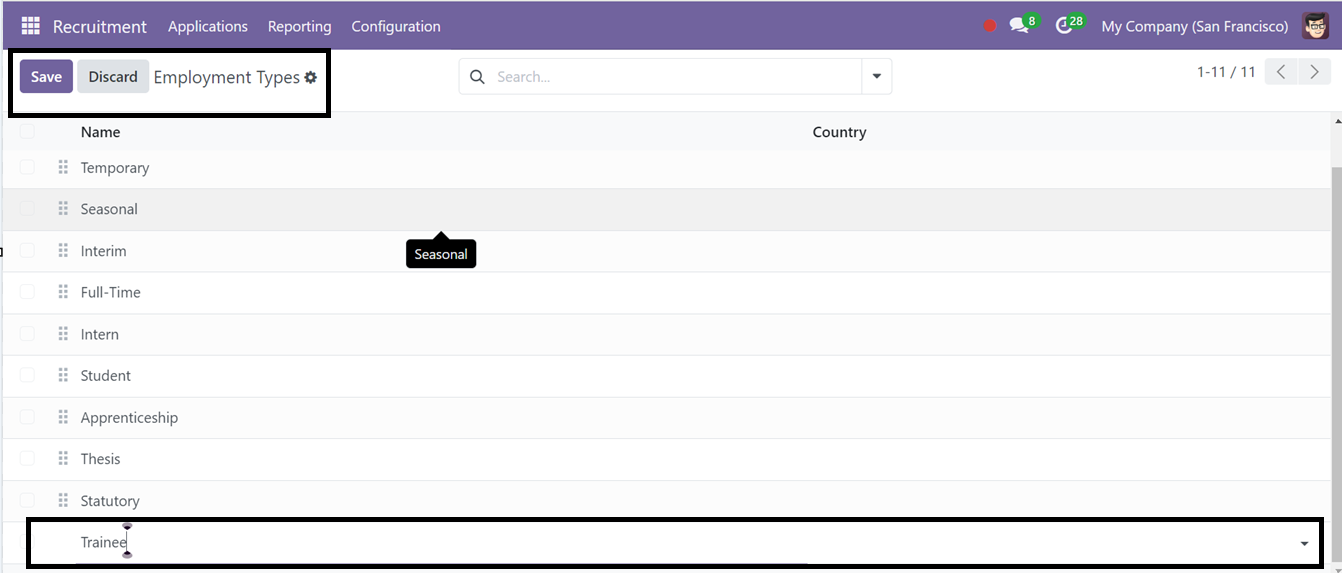
Organizations typically offer different types of employment, such as temporary, part-time, and full-time positions. Under the Job Positions section in the Configuration menu, users can manage and modify these employment categories. The pre-configured employment types, such as Replacement, Interim, and Permanent, are listed in the current window.
If a new employment type needs to be added, users can easily do so by clicking the New button and just typing the new employment type name as illustrated in the screenshot below.
Degrees
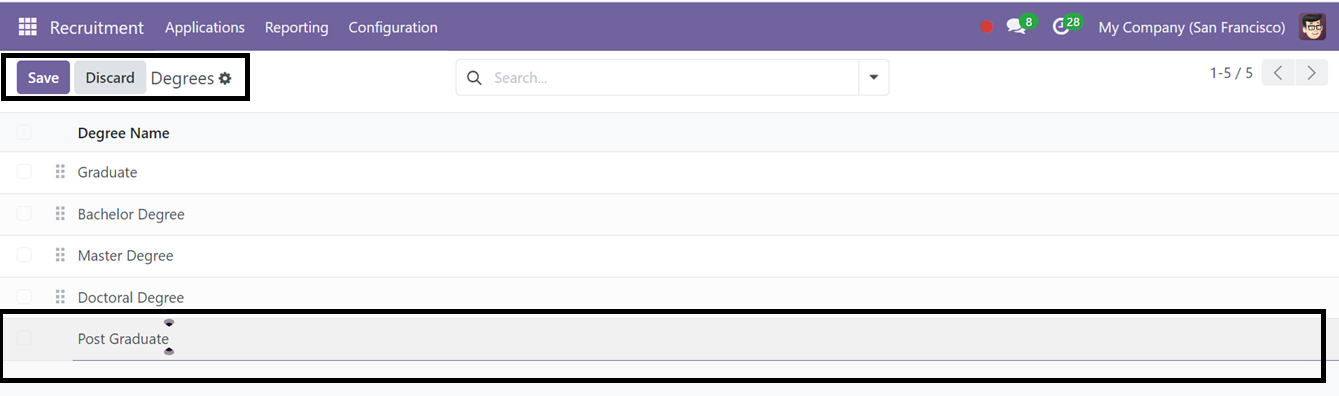
Recruiters may require candidates to include their educational qualifications in the job application. The Degree section in the Configuration menu allows users to configure various educational levels.
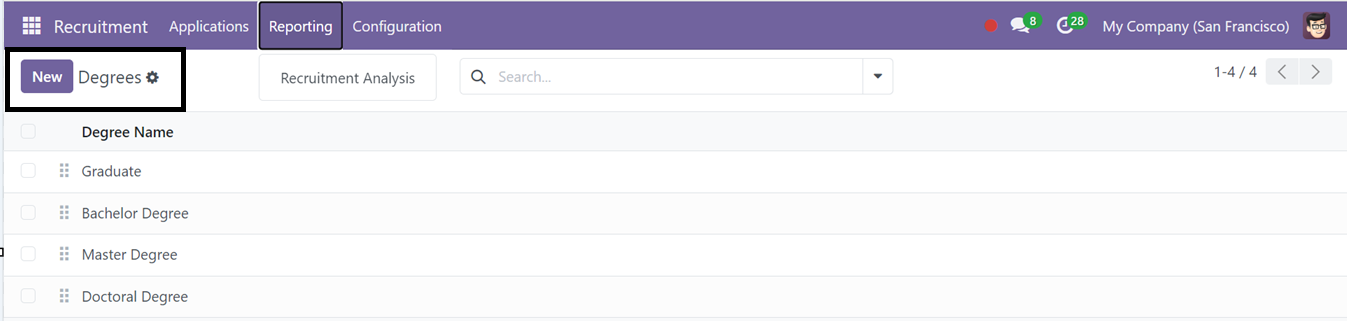
To add a new degree, simply click on the New button and enter the degree details.
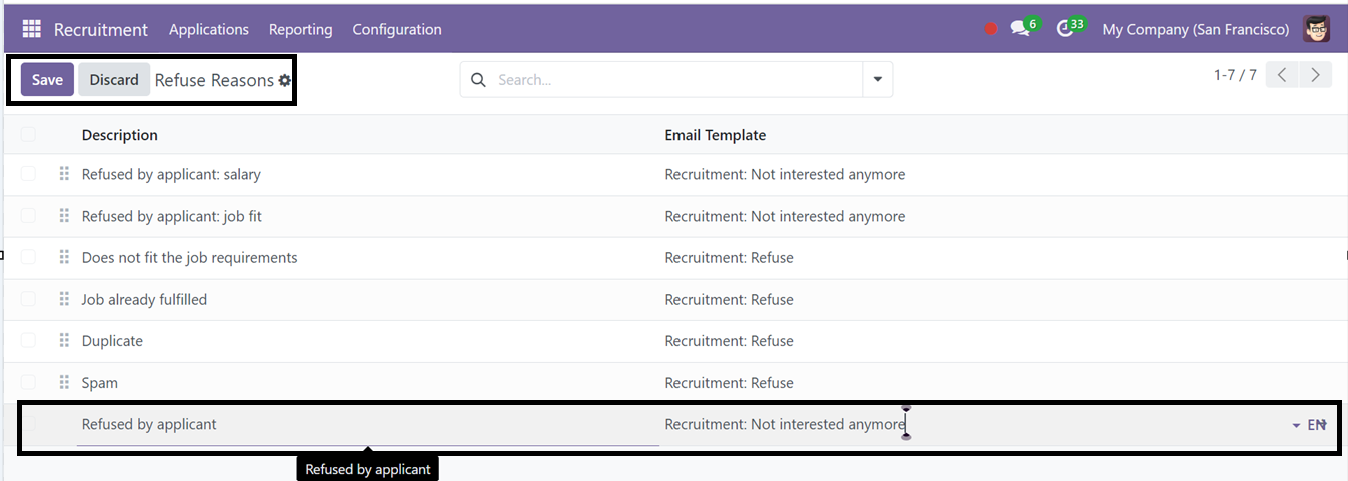
Refuse Reasons
When an application is rejected, it’s important to provide a reason. The Refuse Reasons section in the Configuration menu allows users to define and manage reasons for rejecting applications. This section includes a template with an email description and a list of possible rejection reasons.
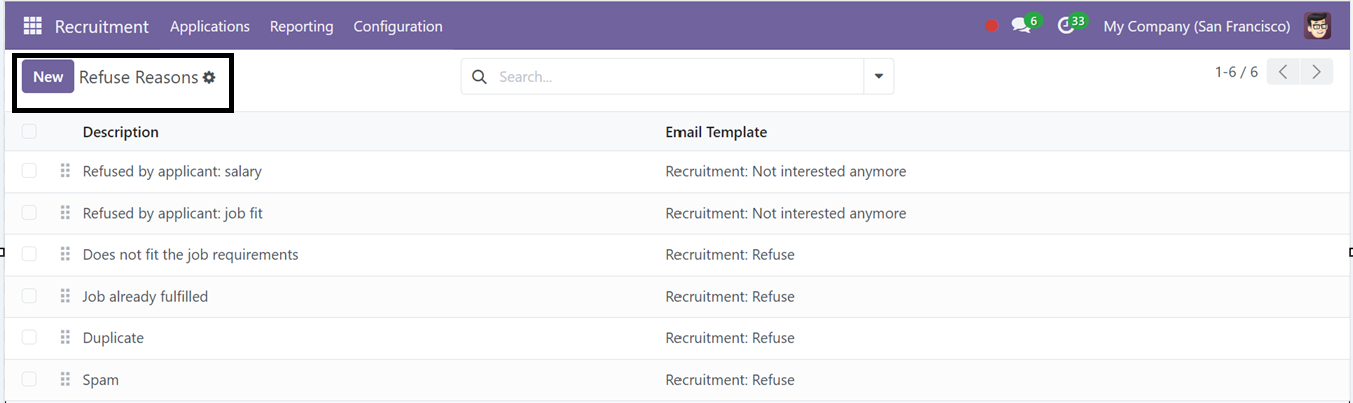
Users can add new reasons by clicking the New button, making it easy to expand or update the list as needed.
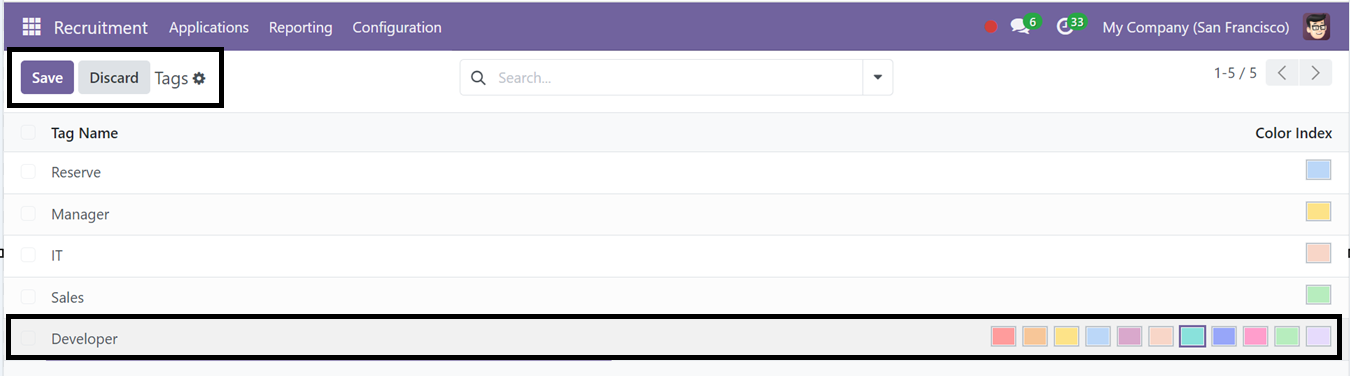
Tags
The Tags option from the Configuration menu helps categorize and search through recruitment data efficiently. Tags improve the organization of candidate profiles and job postings within the system.
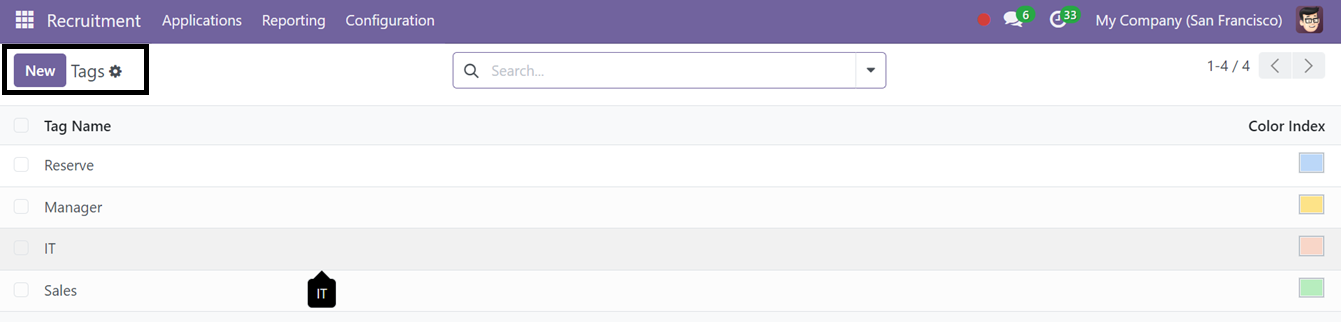
New tags can be added by clicking the New button. Once added, users can input the tag name and assign a color index for easy identification.
Departments
The Department option under the Configuration menu allows users to manage organizational departments. The displayed fields include the department's name, manager, parent department, company, and staff members.
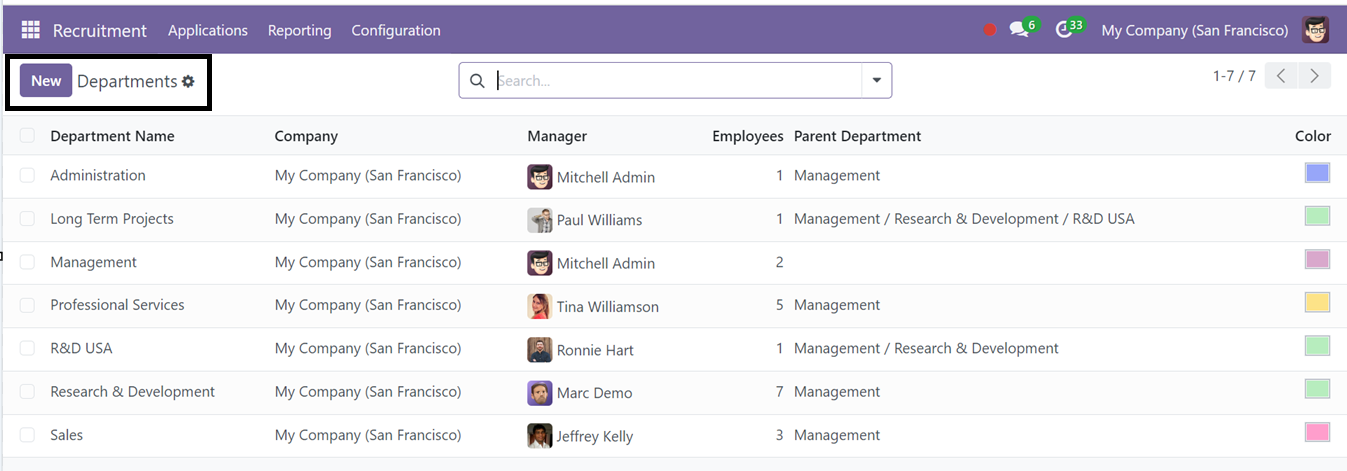
To add a new department, users can click the New icon and input the required details, such as the Department Name, Manager, and any related Parent Department, Company, and relevant Color for highlighting. Once completed, users can save the new department by selecting the Save icon.
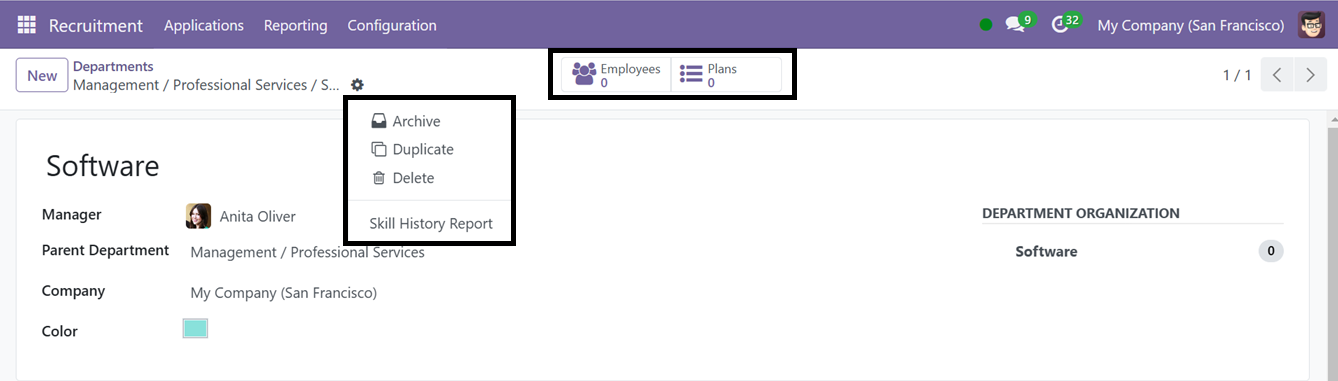
After completing the Department configuration process, you can see the ‘Employees’ smart button which shows the details of the employees available in this particular department. The ‘Plans’ smart button can be used to manage various plans available in the department.
The ‘Action’ menu available at the top of the form can be used to Delete, Duplicate and Archive the form data.The ‘Skill History Report’ button in Odoo Recruitment provides a detailed view of a candidate’s skills, certifications, and career progress, aiding informed hiring decisions. Clicking on this button will take you to a reporting analysis window with the suitable employee details who are suitable for this department, as shown in the screenshot below.

From the ‘Skill History Report’ window, you can filter the employee data using the various Filter and Grouping options available in the search bar area as per your preference. The graphical records view can also be changed into List and Pivotal view.
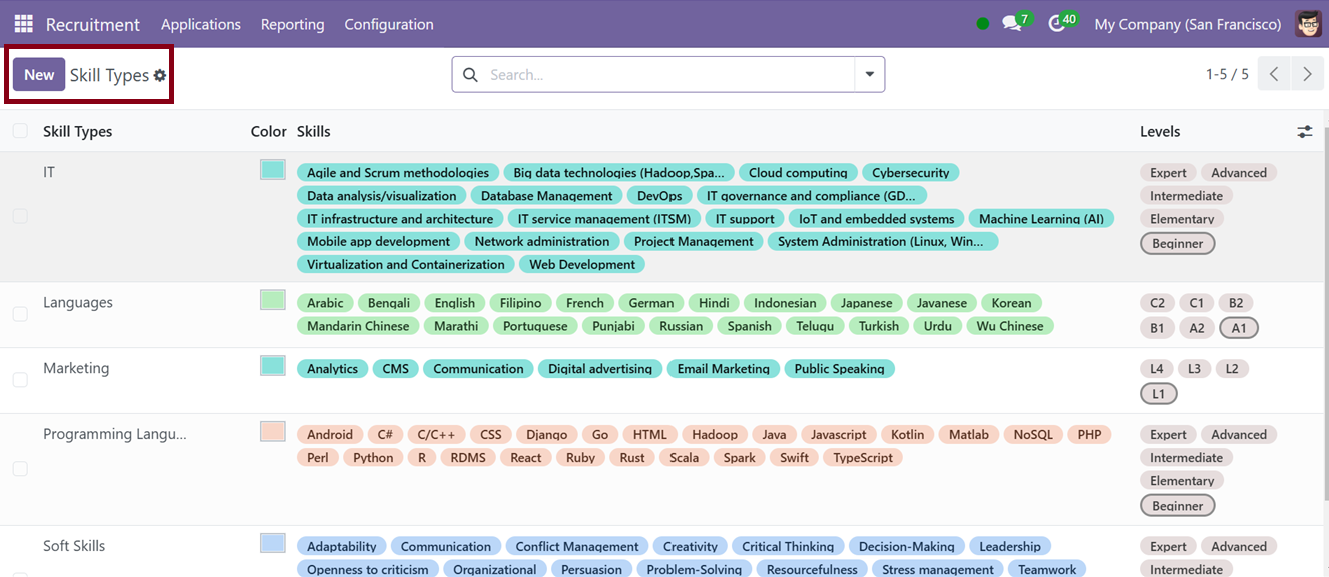
Skill Types
Skills, such as language proficiency or specific expertise, are vital in recruitment. Under the Skill Types option in the Configuration menu, users can generate and manage lists of employee skills.
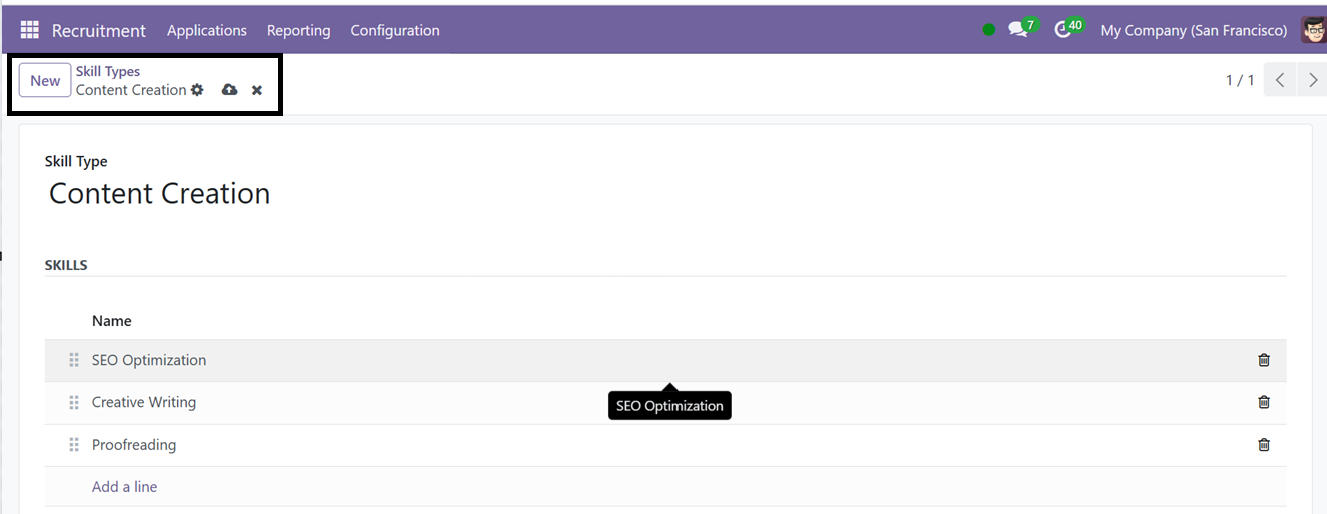
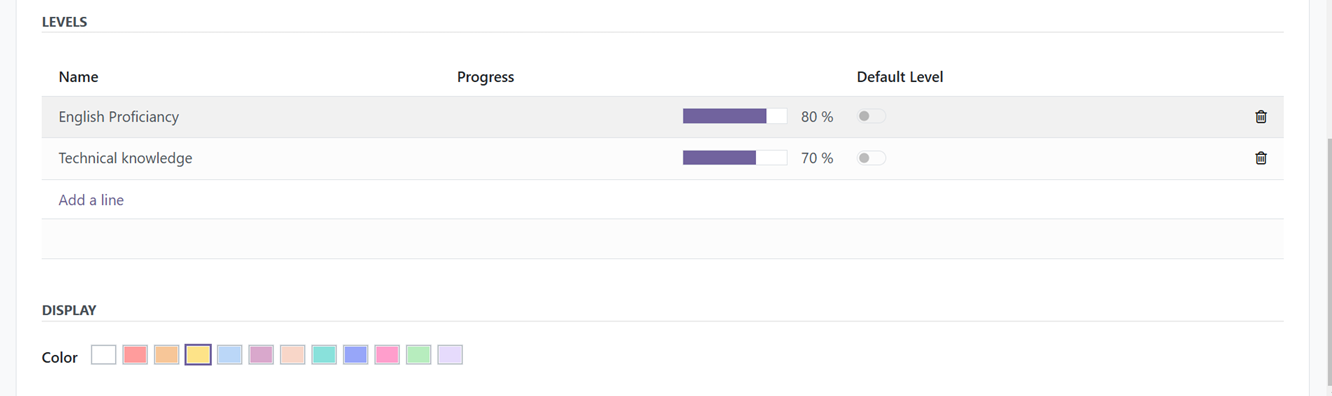
To add a new skill type, click the New button, specify the skill type, and then add related skills. Users can also define skill levels for more detailed employee profiles as shown in the screenshot below.
Activity Types
The Configuration menu also includes Activity Types, which are essential for tracking recruitment activities. These activities can include tasks like interviews, follow-ups, and candidate assessments.
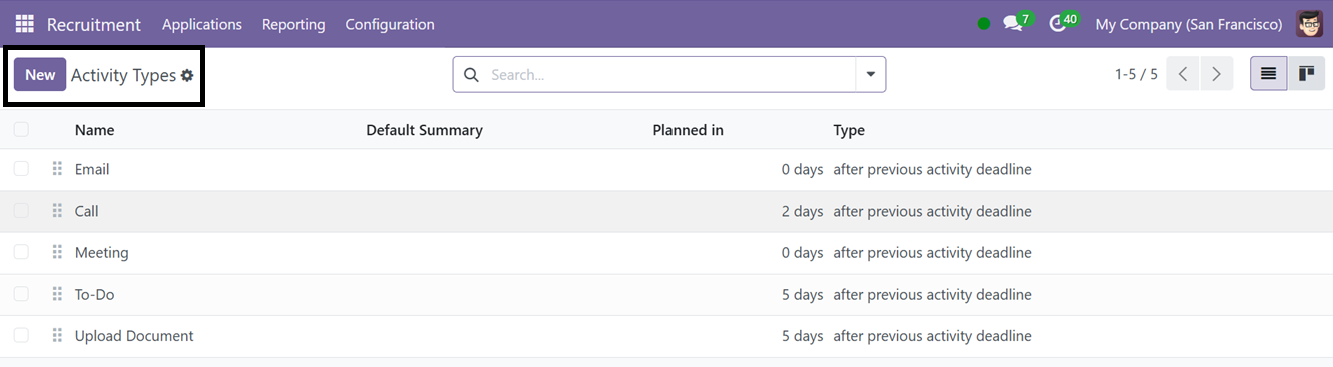
To create a new activity type, click the New icon. On the creation page, users can enter the name of the activity, and configure various settings, such as actions, default user, mode, default summary, and icons. Users can also set up automatic activity triggers or proposals and schedule activities using the built-in email template feature.
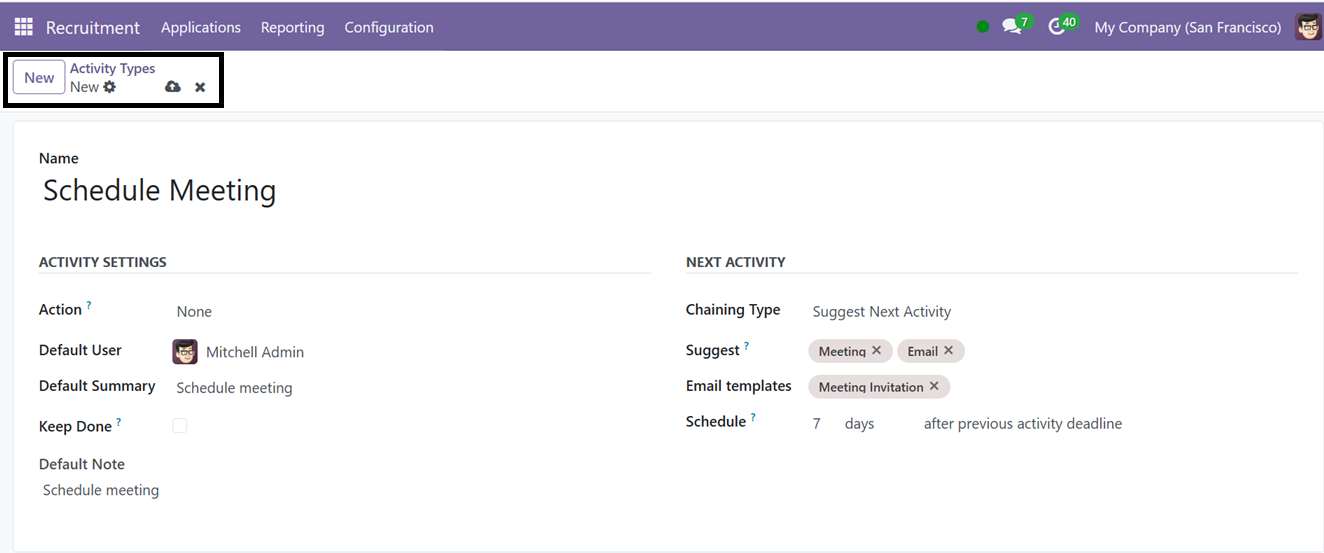
After entering all relevant details, click the Save icon to finalize the activity type.
Activity Plans
Activity Plans from Odoo are preset lists of tasks or activities that lead users through a methodical workflow, frequently in project management, sales, or CRM. They may be customized for a variety of use cases, including project milestone management, HR onboarding, and CRM lead nurturing. Every task includes a description and a predetermined deadline.
The ‘Activity Plans’ menu will show the list of all preconfigured Recruitment plans as shown in the screenshot below.

To create a new Activity Plan, click on the ‘New’ button and edit the relevant details in the form fields including the Plan Name, Model, Company and Department. Then, under the "Activities To Create" tab section, generate the required number of different activities or tasks that must be completed in order to finish this activity process.
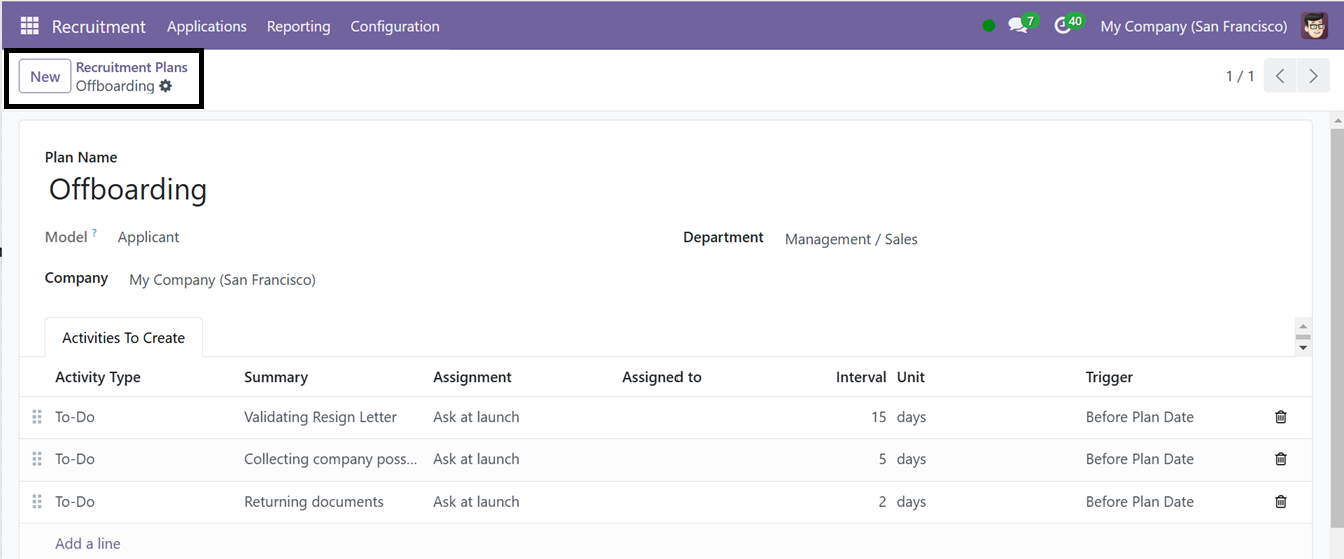
After editing the form data, save the details. By automating scheduling, these strategies increase efficiency, standardize procedures, and guarantee that crucial stages are not overlooked.
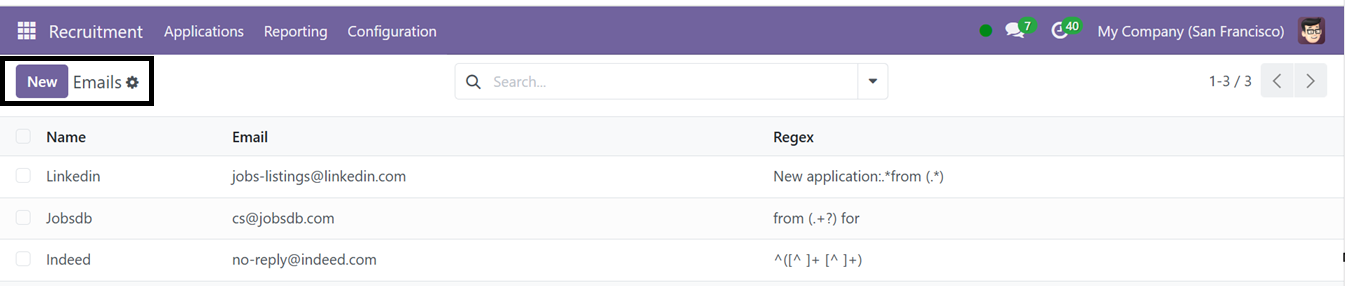
Emails
You may handle the different email addresses of different recruitment channels using the 'Emails' settings options. This window shows the email lists of various channels with their Regex (Regular Expression) patterns as shown below.
You can quickly create new Emails using the ‘New’ button from this window and filling the relevant fields as depicted in the screenshot below.

Interviews
The Odoo 18 Recruitment module's Interviews menu streamlines the interview process by scheduling, tracking, and managing interviews.
The ‘Interviews’ section of the Configuration menu helps you to manage various interviews from different job applications. This window will provide the dashboard of available interviews with their Recruitment Form, Questions, Average Duration, Registered, and Completed details as shown in the screenshot below.

The users can take the test and check their test status using the ‘Test’ and ‘See results’ buttons provided on each interview column. Creating new Interviews are also possible from this window. After opening a new interview configuration form, provide an interview name and enter the ‘Responsible’ and ‘Restricted to’ user names.
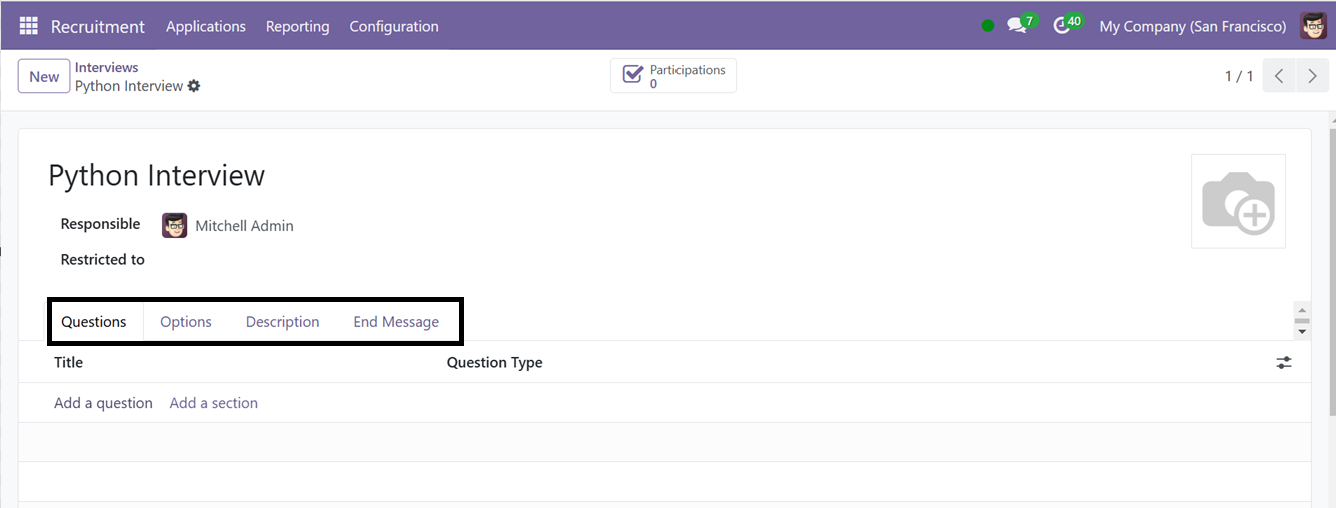
The ‘Questions’ tab allows for the creation of interview questionnaires, with the ability to add sections and provide descriptions for each question. To add a new question, click on the ‘Add a question’ button. This will open a new pop-up wizard as shown below.
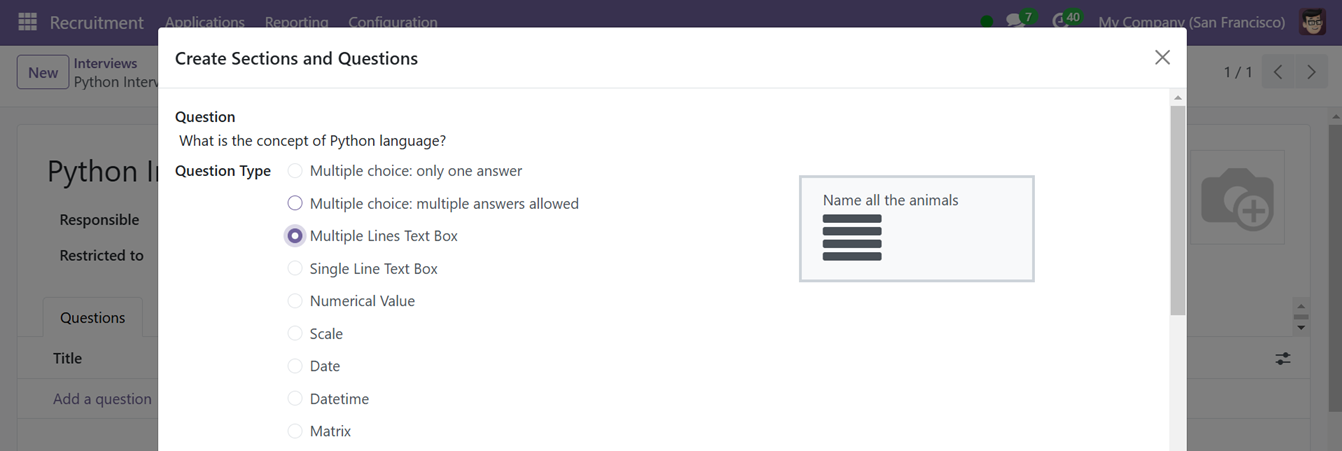
In the ‘Question’ field session, define questions and select the type of question. The ‘Question Types’ include Multiple Lines, Text Box, Single Line Text Box, Numerical Value, Date, Datetime, Multiple choice, Multiple choice, or Matrix. Single Line Text Box is the default. So, choose the Question type as per the answer style.
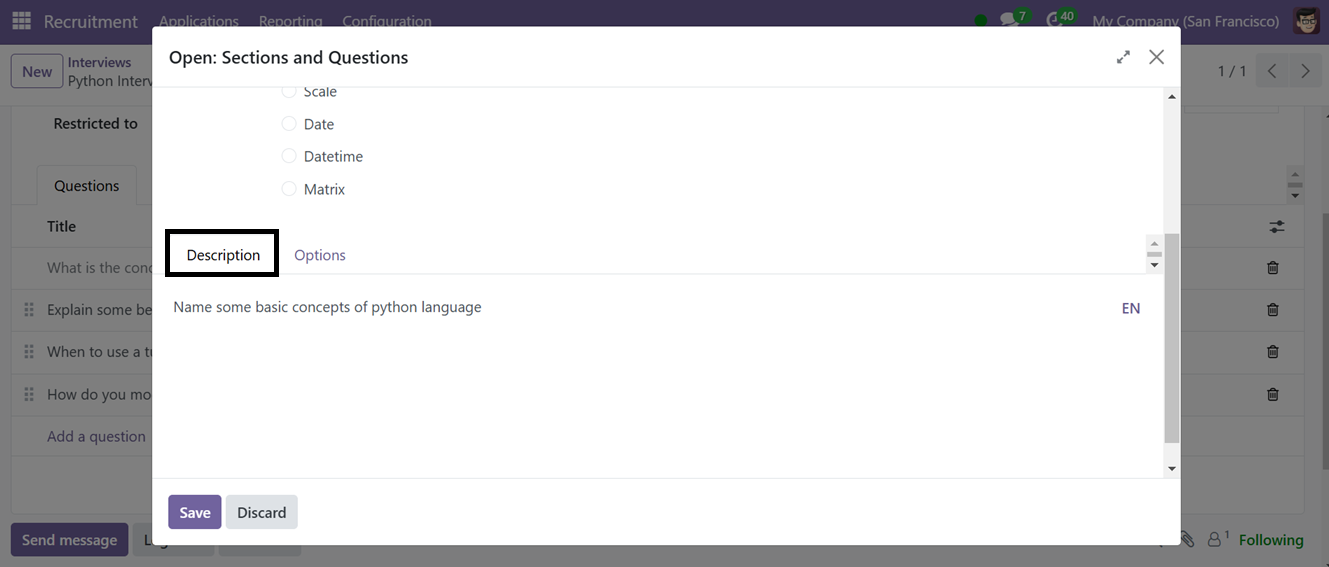
Inside the ‘Description’ tab of the ‘Create Sessions and Question’ form, provide a brief description about the motive of the question. The ‘Options’ tab can be used to set the Placeholder of the answer, Triggering Answers, Error Message and activating Mandatory answer as illustrated in the screenshot below.
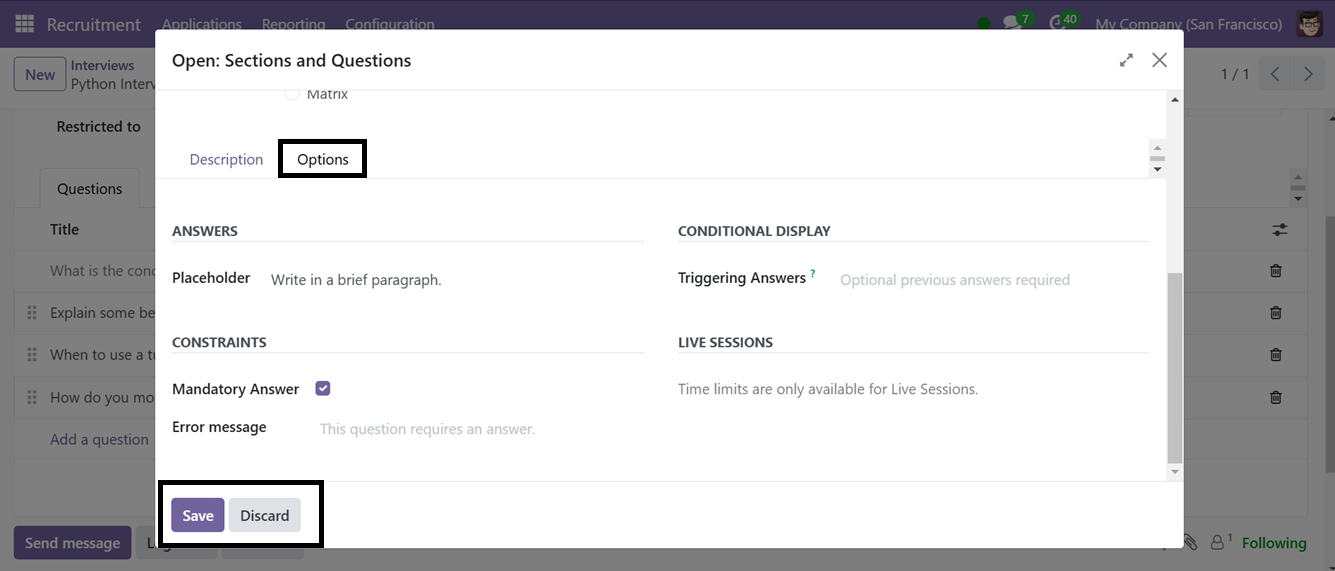
After creating the question specifics, save the data. In this way, you can create multiple interview questions as per the requirement.
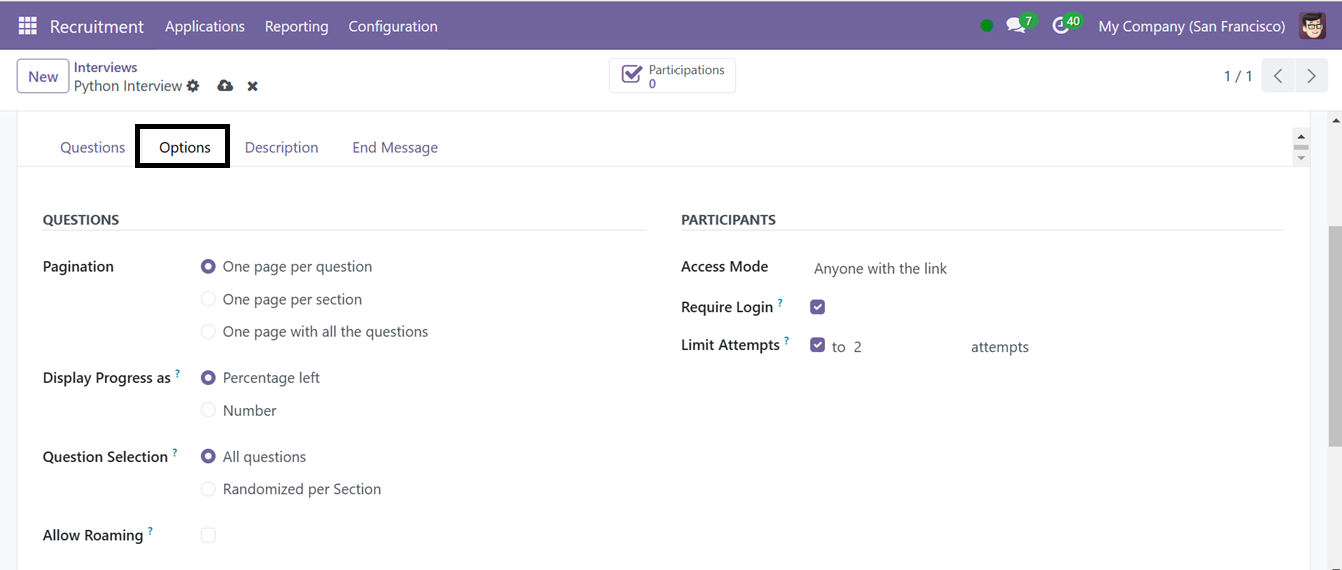
Then in the main interview configuration form, go to the ‘Options Tab.’ Here, you may specify choices like “Pagination,” “Display Progress as,” “Question Selection,” Enable or disable “Allow Roaming,""Access Mode ""Require Login,” and “Limit Attempts” options according to the requirements.
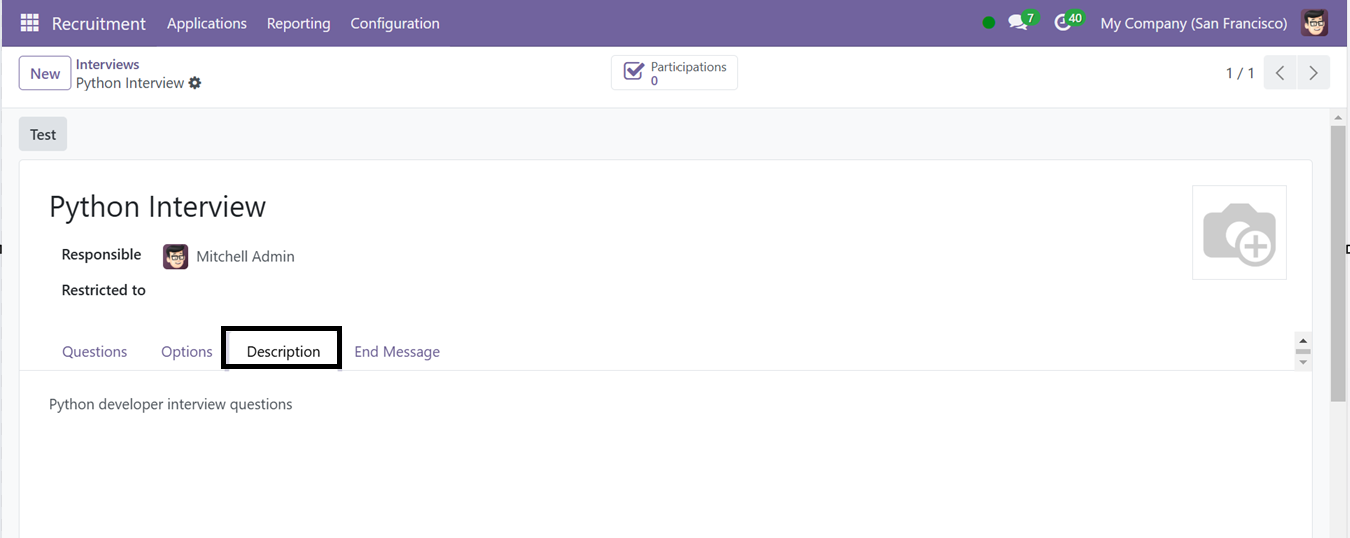
In the ‘Description’ tab, offer a brief explanation of the intention or purpose of this prticular interview section.
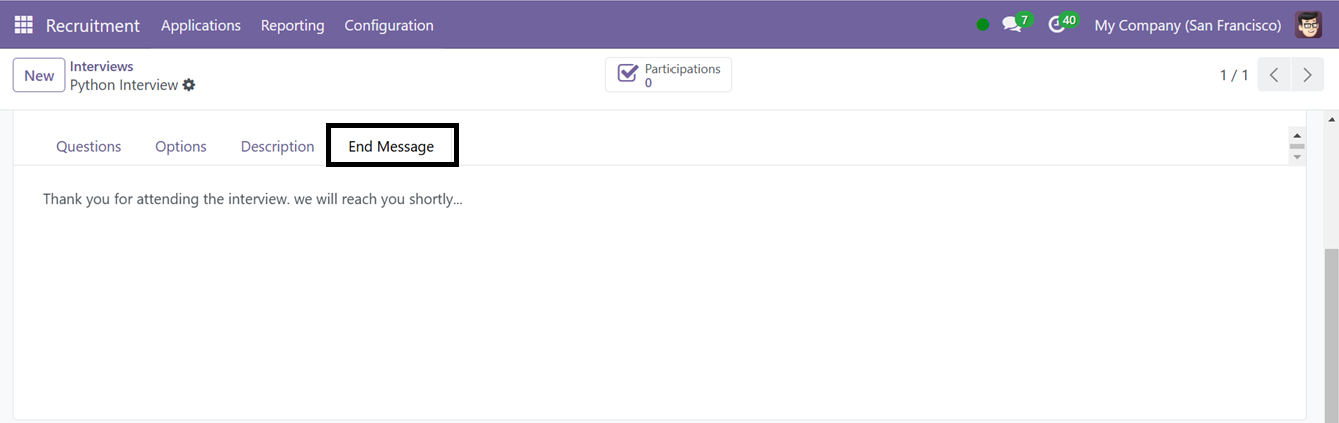
The ‘End Message’ tab can be used to provide a final message that must be shown at the conclusion of the survey.
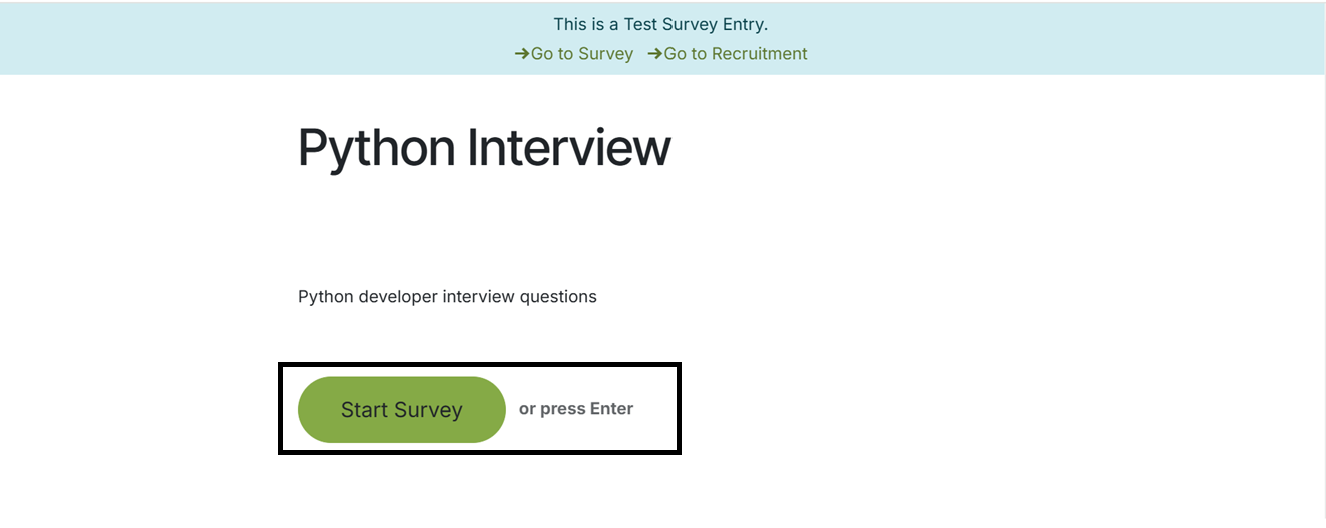
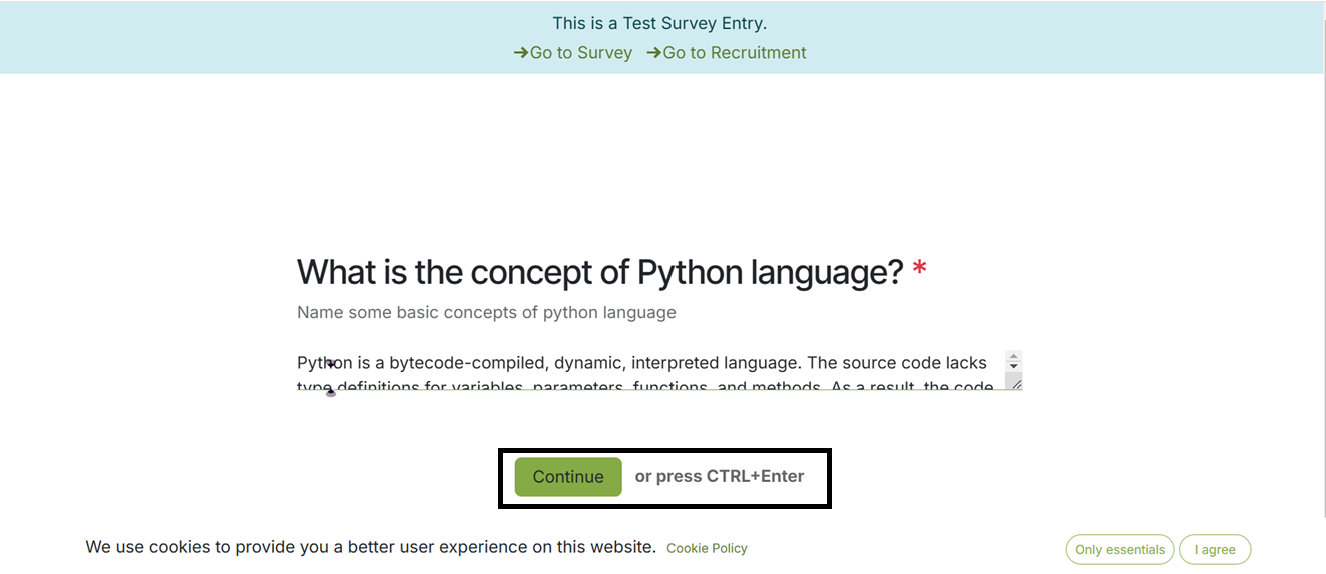
After configuring the interview details, save the data using the ‘Save’ icon. Then, you can check the interview test using the ‘Test’ icon provided at the top left corner of the form. This will take you to the interview website page. To start the interview, click on the ‘Start Survey’ button as shown below.
You can change the button name and website specifics using the Odoo studio editing features. This button will open the interview questions page. So, you can answer the questions one by one and navigate to the next questions using the ‘Continue’ button as shown in the screenshot below.
After completing the questions, press the ‘Submit’ button and complete the process. Then you can retry the interview as per the attempts that you have mentioned earlier in the interview form using the ‘Retry’ button. It is also possible to review the answers provided.

It allows for scheduling, tracking, attaching interview details, syncing with the calendar, allowing feedback collection, and generating reports on interview outcomes. After completing the interview, you can check the participants' details from the ‘Participants’ smart button of the interview configuration form.
Odoo 18 Recruitment Module is a user-friendly tool that streamlines the hiring process by allowing recruiters to schedule interviews, collect feedback, and manage candidate communications. It also includes reporting tools for analyzing recruitment performance, such as time-to-hire and application conversion rates. The module's interface and advanced features ensure efficient and data-driven hiring, with centralized management of interviews, improved collaboration, and streamlining of candidate evaluation. The interview menu enhances the overall hiring workflow.