The "Application" menu in Odoo 18 Recruitment provides a centralized platform for managing job applications, allowing recruiters to efficiently review, filter, and process candidate information. It offers features like filtering tools, candidate profile management, and real-time updates through its submenu options including; ‘By Job Positions,’ ‘All Applications,’ and ‘Candidates.’
On the module’s home page, you can view all open job positions which is also the ‘By Job Positions’ submenu, as shown in the screenshot below.

The recruitment module displays job details in both Kanban and List views. You can use the Group By, Favorites, and Filters options for a more personalized view. Each listed job opening includes an option for viewing new applications.

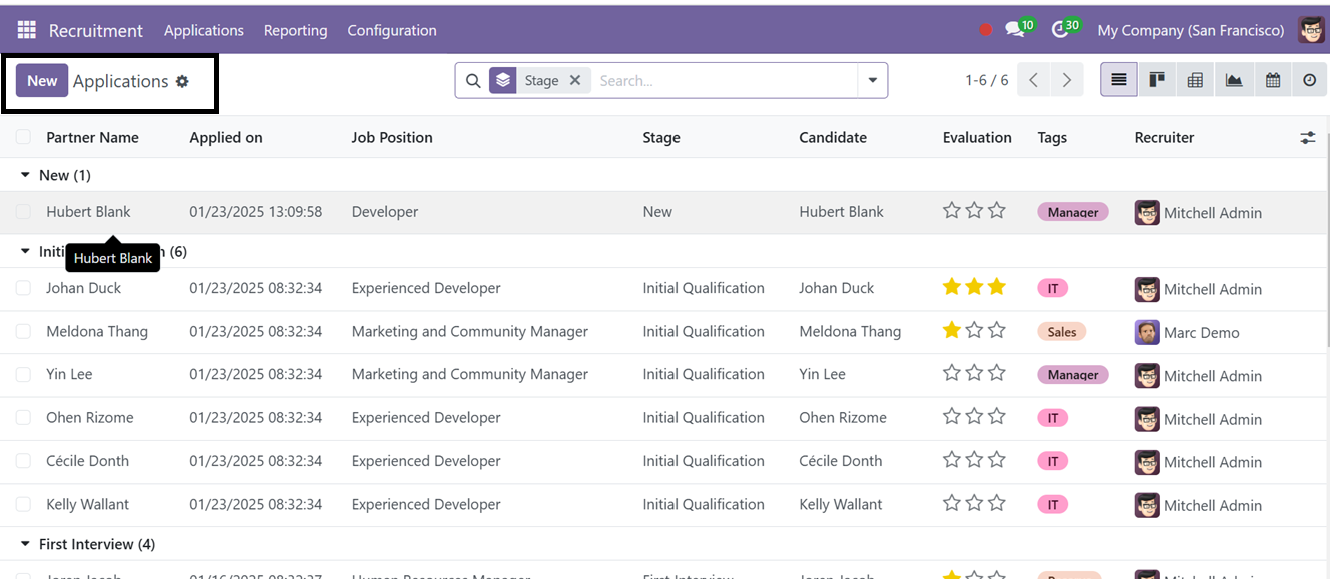
When you select an existing job application, the screen shown below will appear. Here, we can see the applications that you have for this particular job position as a dashboard.
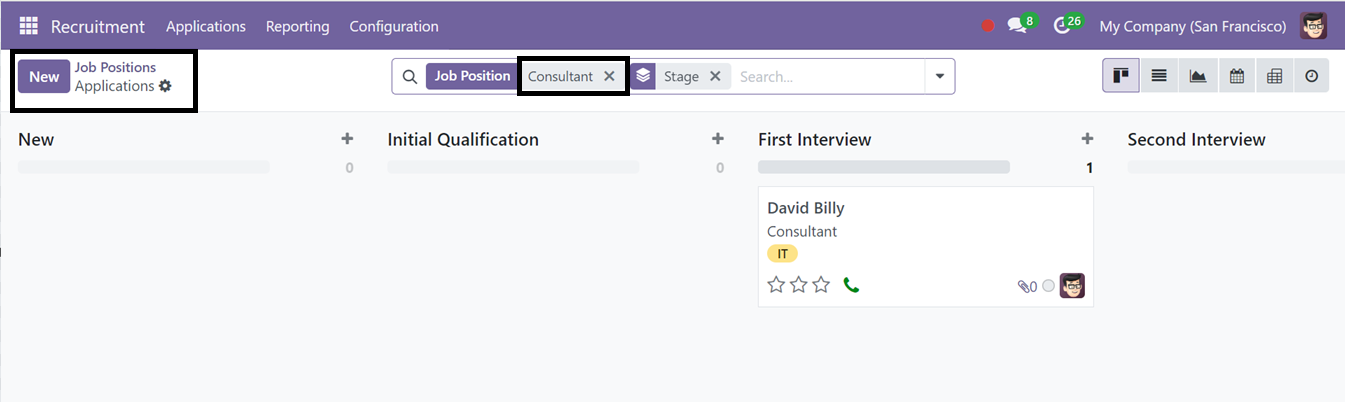
This page outlines the various stages of the recruitment process for specific candidates, such as initial qualification, first interview, second interview, contract proposal, and signed contract. New stages can be added using the plus icon, and filters like Group By and Favorites are available for sorting.
The settings icon on each step offers additional options such as Fold, Edit, Automation, Delete, Archive All, and Unarchive All.
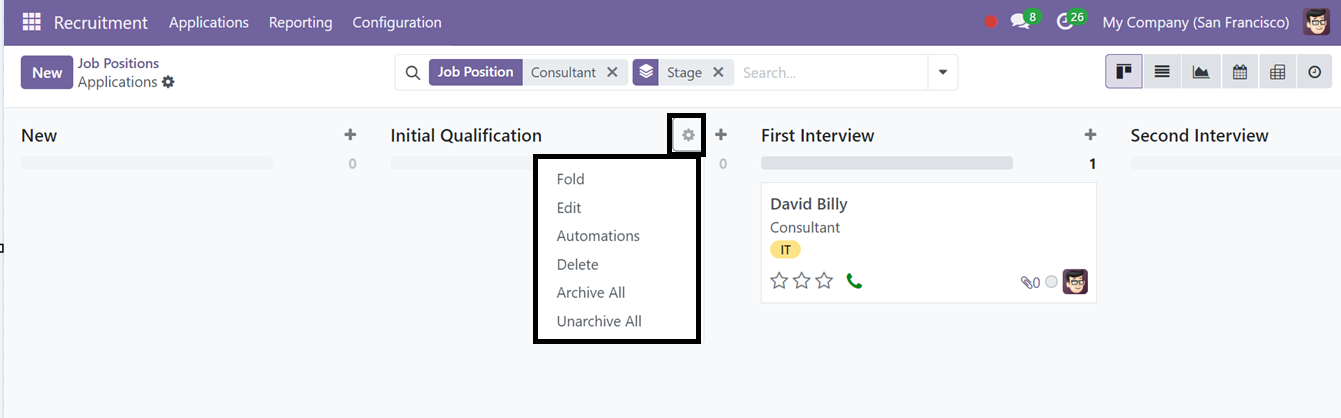
In the Kanban view, stages can be folded using the Fold option, and pre-created stages can be edited. Selecting the Edit stage option will bring up a page like the one shown below.
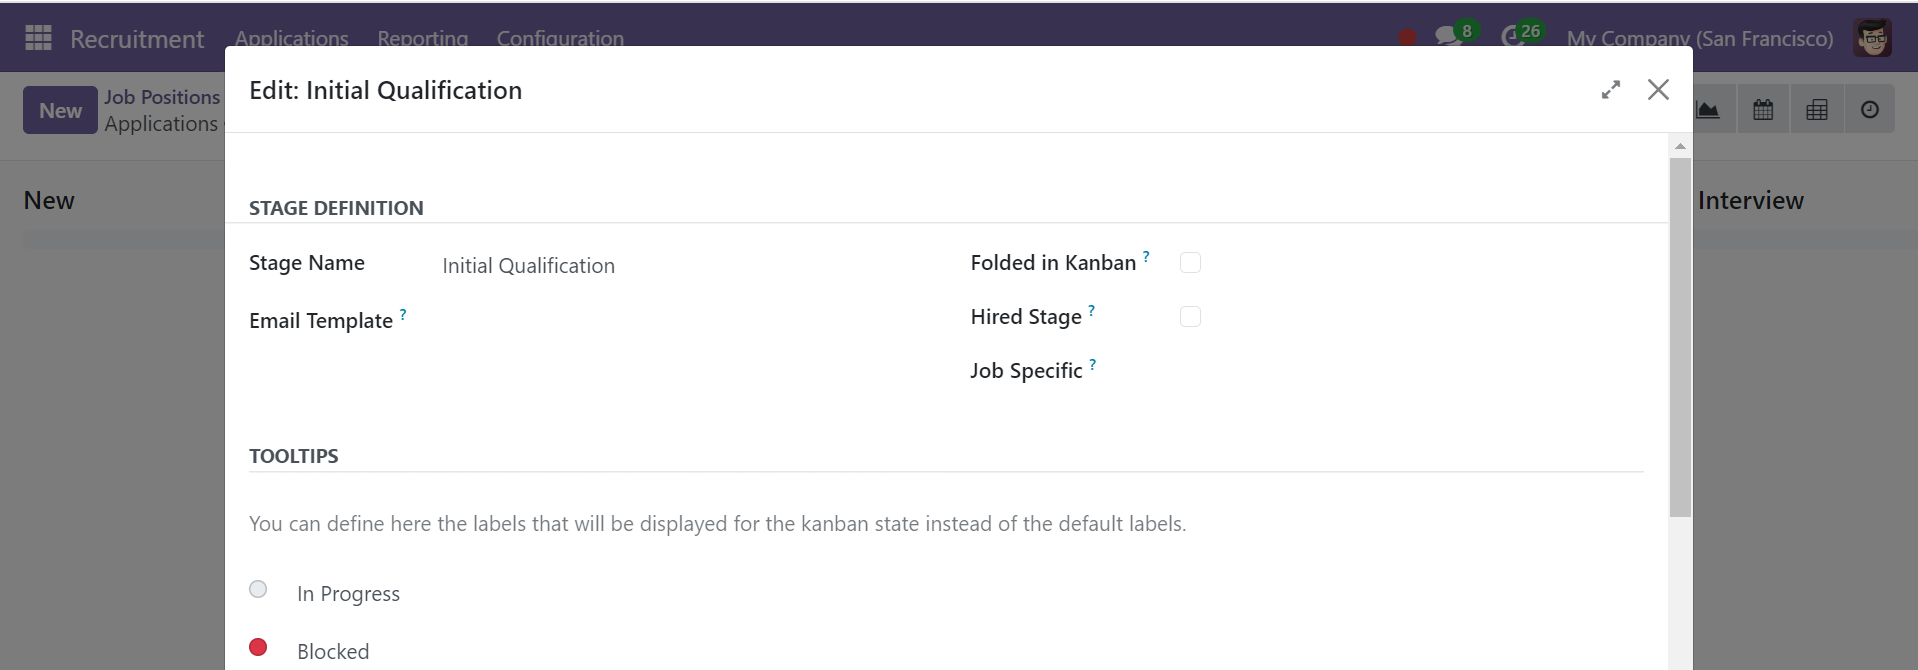
On this page, you can modify the stage name and add an email template. These Email templates streamline communication between recruiters and job applicants, allowing users to create predefined templates for various stages, saving time and improving the recruitment experience.
You can also choose options like Fold in Kanban and Hire Stage, which help decide when to hire a candidate. Additionally, the stage can be customized for specific job positions using the Job-Specific option.
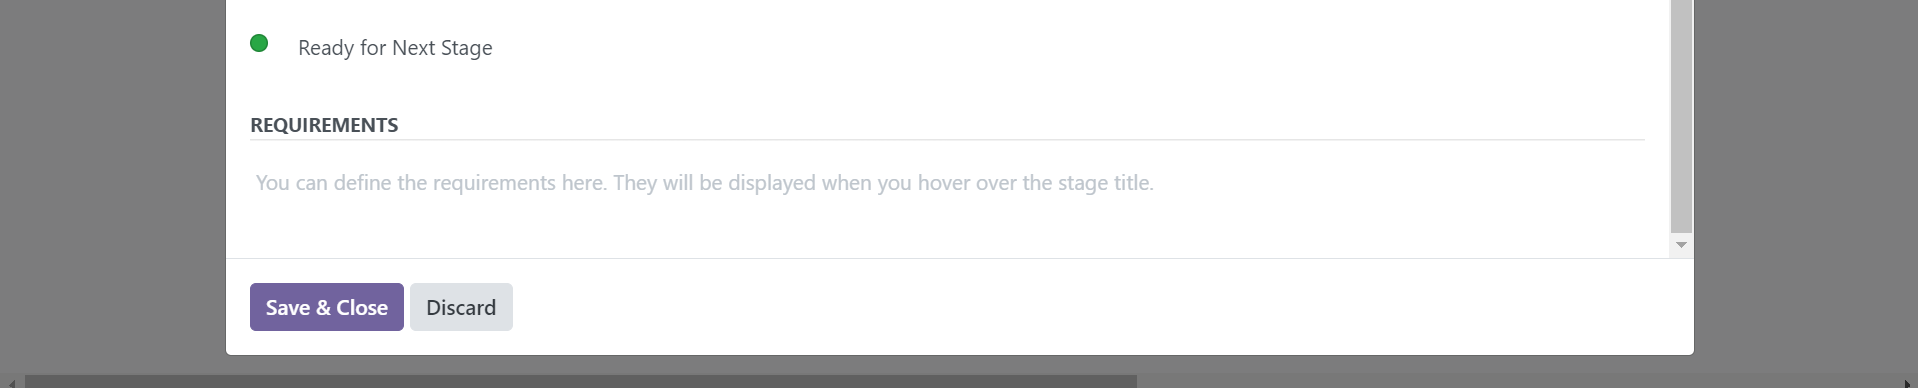
Under the TOOLTIPS tab, you can set the stage to be "In Progress," "Blocked," or "Ready for the Next Stage." Enabling developer mode allows access to the Stages menu in the setup menu, where new stages can be created and modified. You can automate tasks by selecting the Automation option. This will open the automation Rules window as shown below.
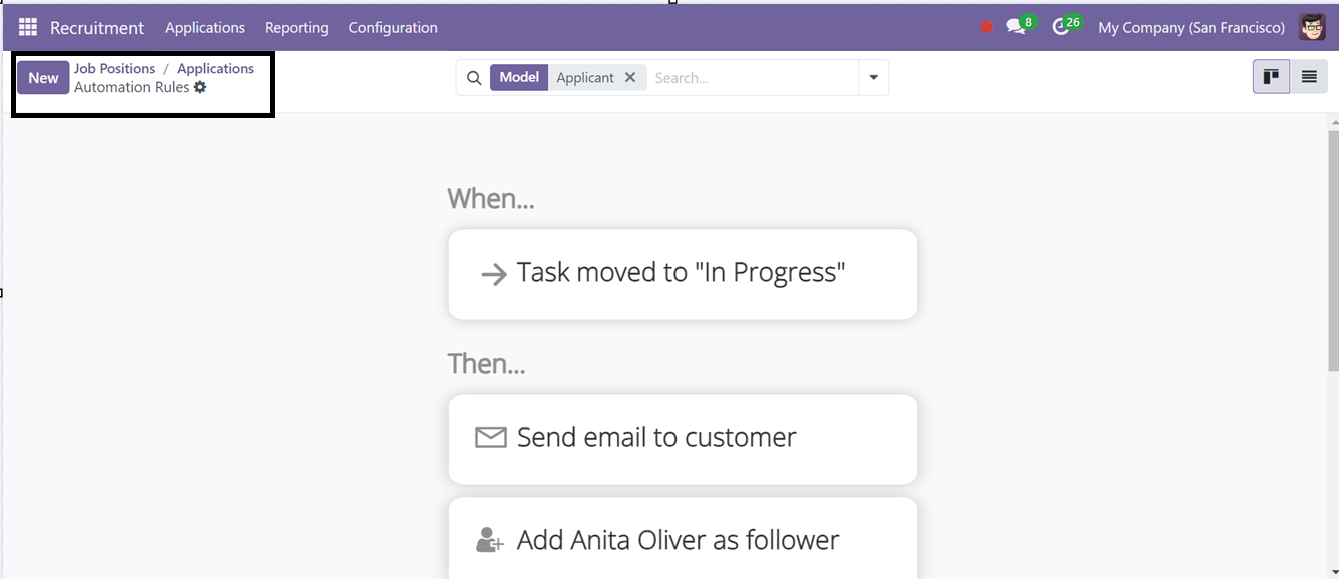
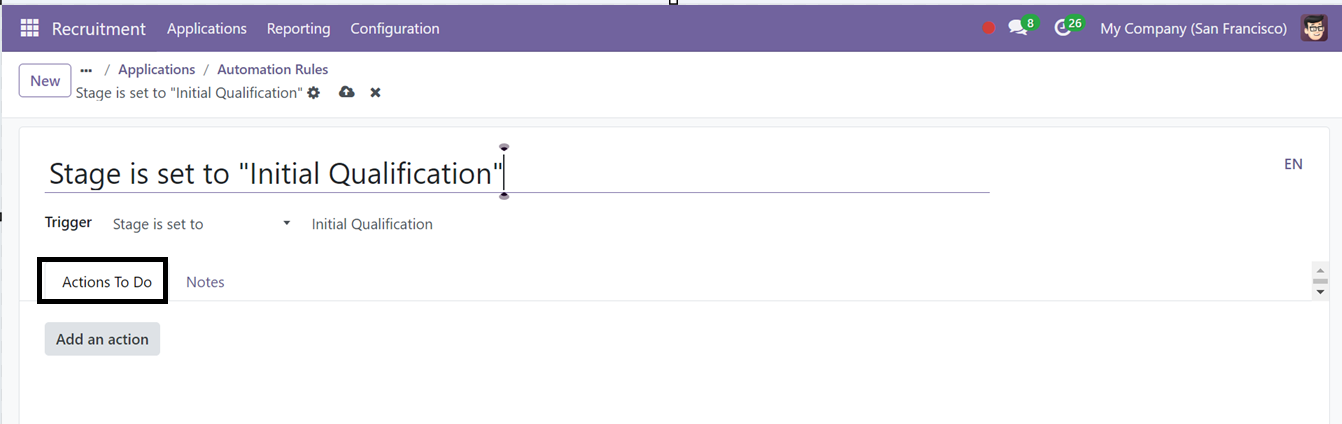
Pressing the New button opens a window where you can specify the model and trigger conditions. If the Before Update Domain is set, it must be fulfilled before the record is updated. The necessary action is then set under the Actions to Do tab.
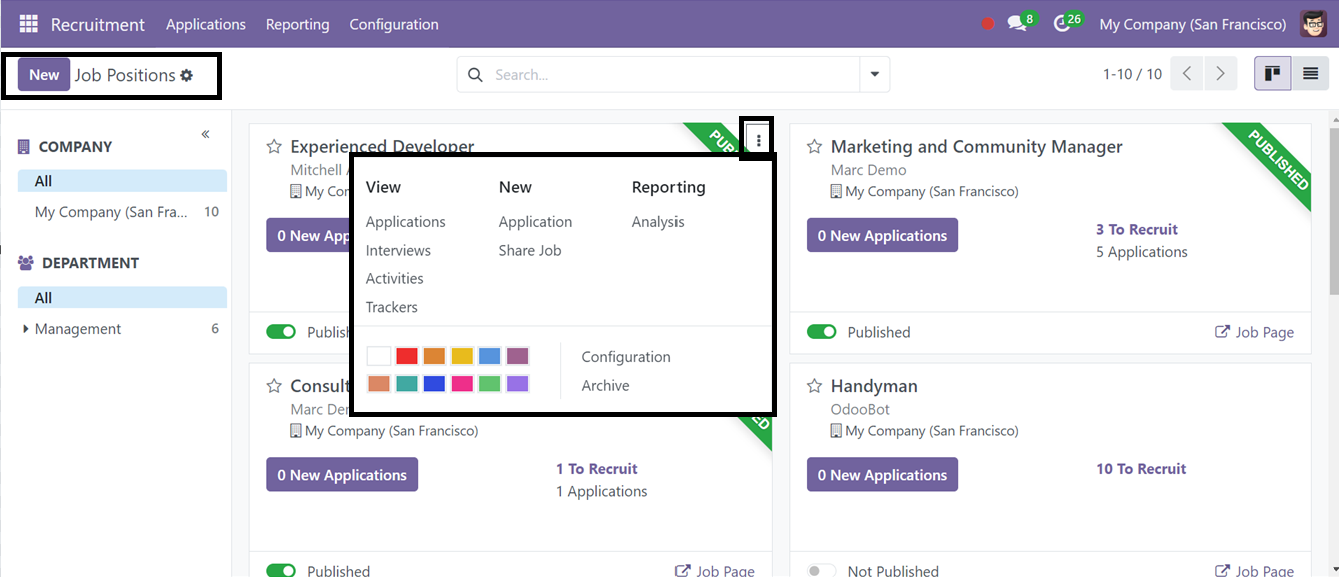
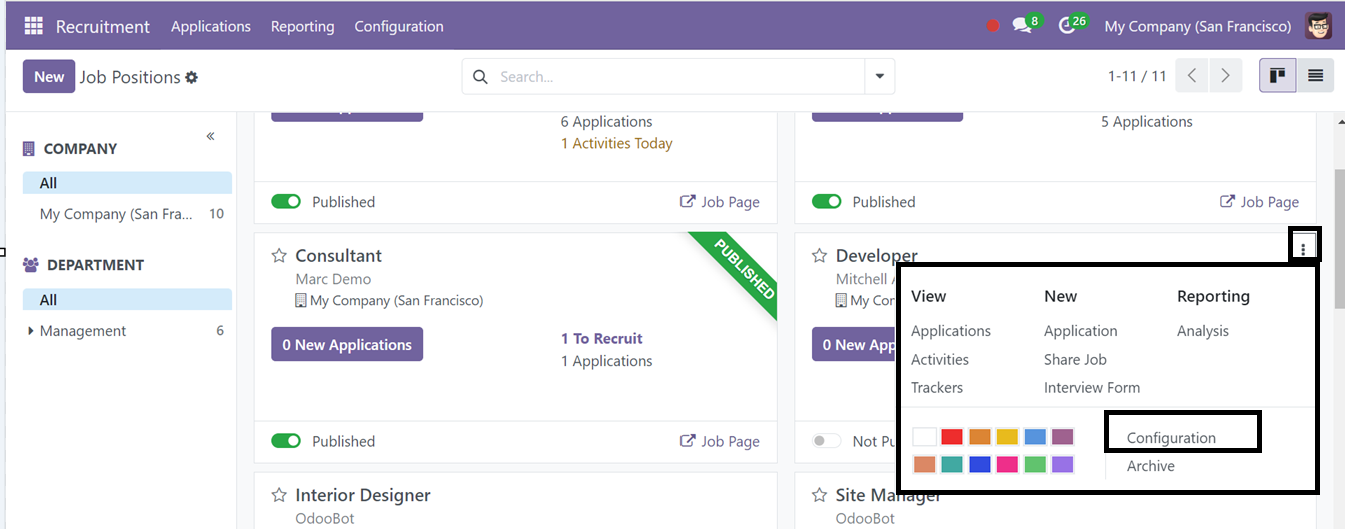
Each job listing includes three dots that provide access to several options like View, New, and Reporting. Under View, you can check applications, interviews, activities, and trackers. The New option allows you to create new applications, while the Reporting section provides an Analysis option. The configuration and archive options are also available.
You can create a new job position opening by clicking the ‘New’ icon.
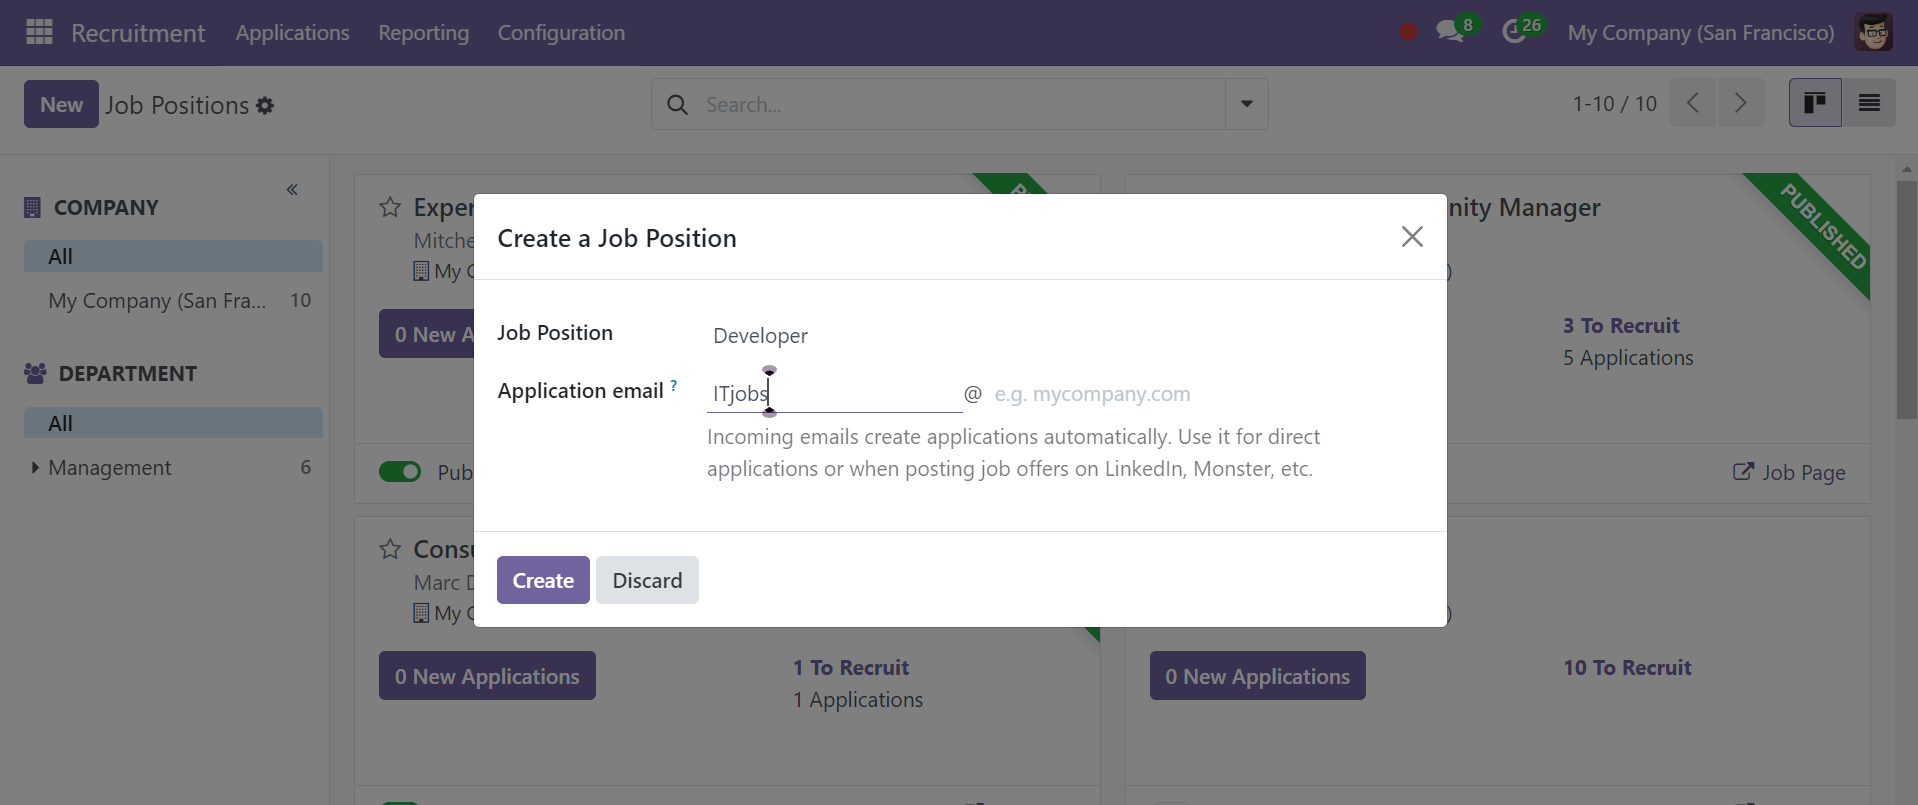
Add the job position details in the designated fields and click the Create icon to add it to the dashboard. From the three dots, select the Configuration option.
The configuration page looks like the screenshot below. The job title must be entered at the top of the page, followed by tabs for ‘Job Summary’ and ‘Recruitment.’
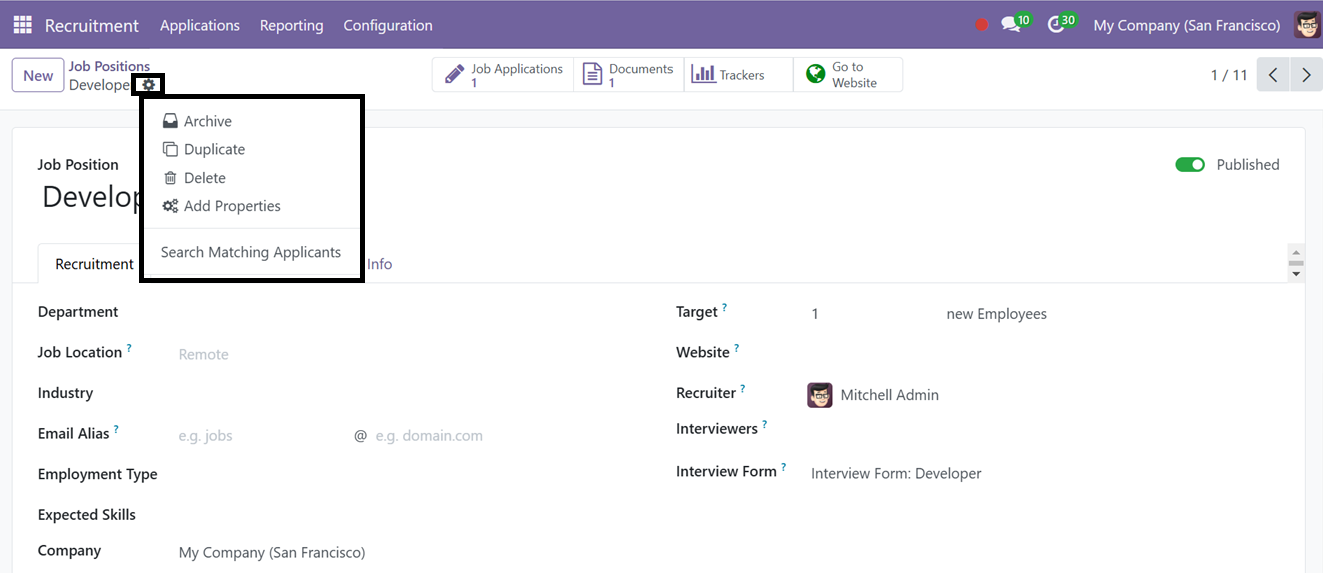
Inside the form view, you can utilize the ‘Action’ button to Archive, Duplicate and Delete the form data as per the requirement. The ‘Add Properties’ button can be used to add new editing fields and its properties according to the job application requirements.
Clicking on this button will add a new field, which can be customized as per your job post specifications. Here, name the new field in the ‘Label’ area. Then, choose the ‘Field Type’ whether it is a Texting field, Tag, Line, Column, Check box, Date, Decimal Value etc.
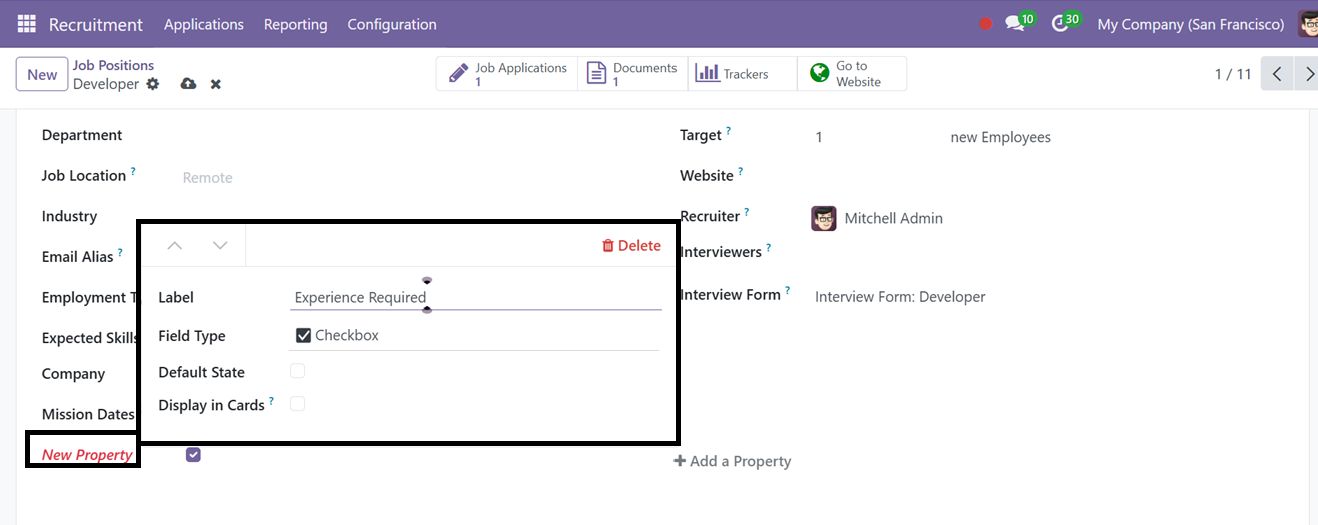
Then, choose whether it is a Default State or not and choose the ‘Display in Cards’ option and save the new field.
Finally, by searching the database by abilities, credentials, or experience, the Odoo Recruitment module's new "Search Matching Applicants" tool assists recruiters in finding applicants whose profiles meet job criteria in a timely manner.
From the job applications, the details of shortlisted candidates are displayed in a list view. If there are no matching candidates, a warning message will appear, as shown in the screenshot below.
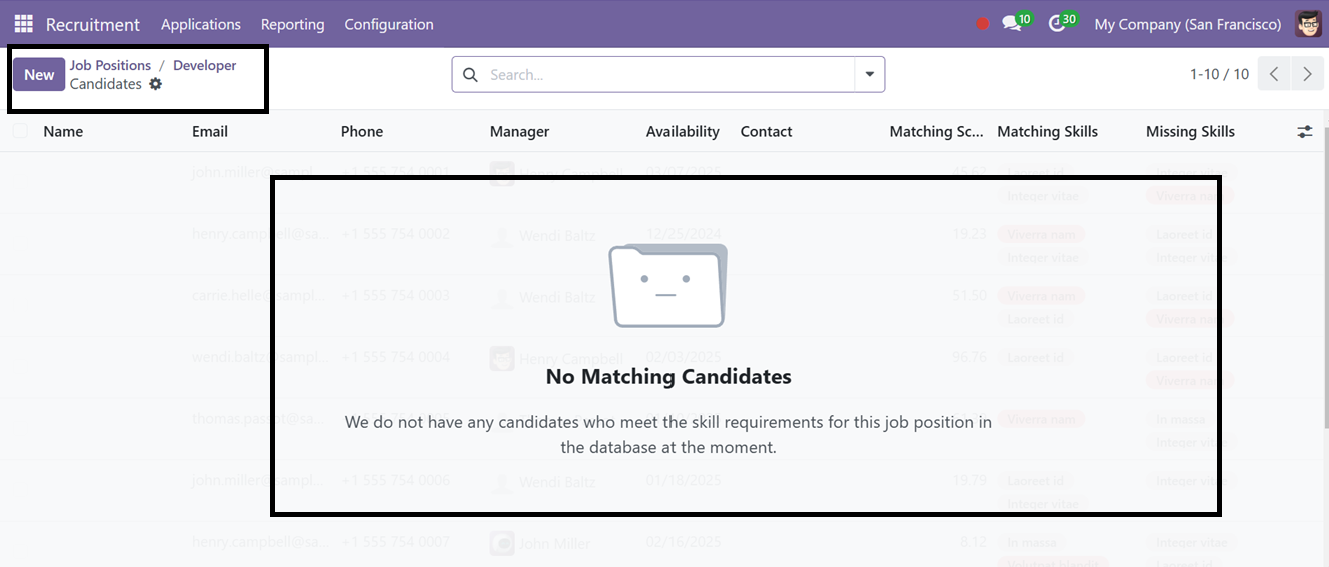
By streamlining the selection process, this "Search Matching Applicants" feature improves overall recruiting efficiency and enables effective filtering and shortlisting.
In the Recruitment tab of the job position configuration form, you must add details such as Department, Job Location, Employment Type, Company, number of vacancies, published option, Website, Recruiter, Interviewer, Interview Form, employment type, and expected skills for this job position. If you want to capture emails for this job, you can assign an Email Alias.
In the Job Summary tab, a brief job description can be added.

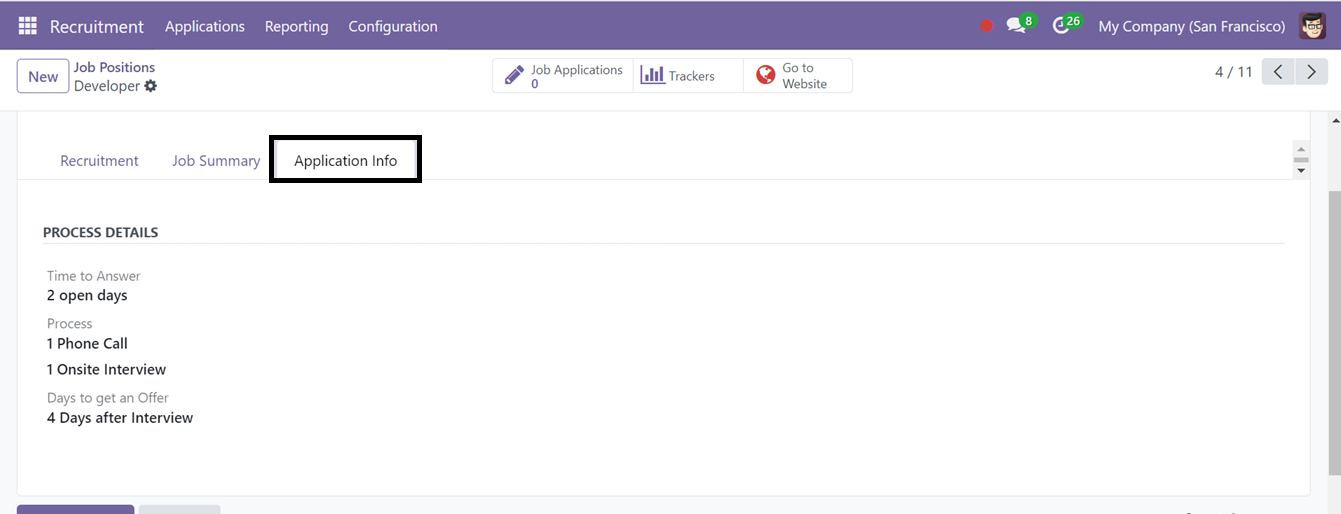
Under the Process Details section of the Application Info tab, you can specify information like the number of days to receive an offer and response times.
After entering all necessary information, click the ‘Save’ button to add the newly created job position to the list of available openings. You can access the website view by clicking the Go to Website option at the top right corner.
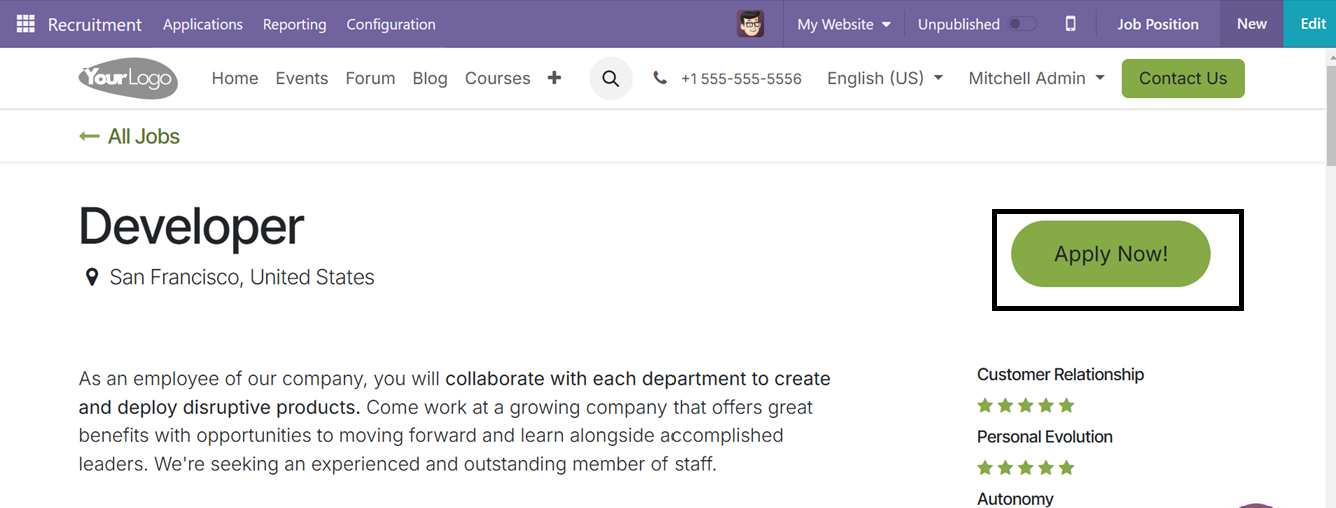
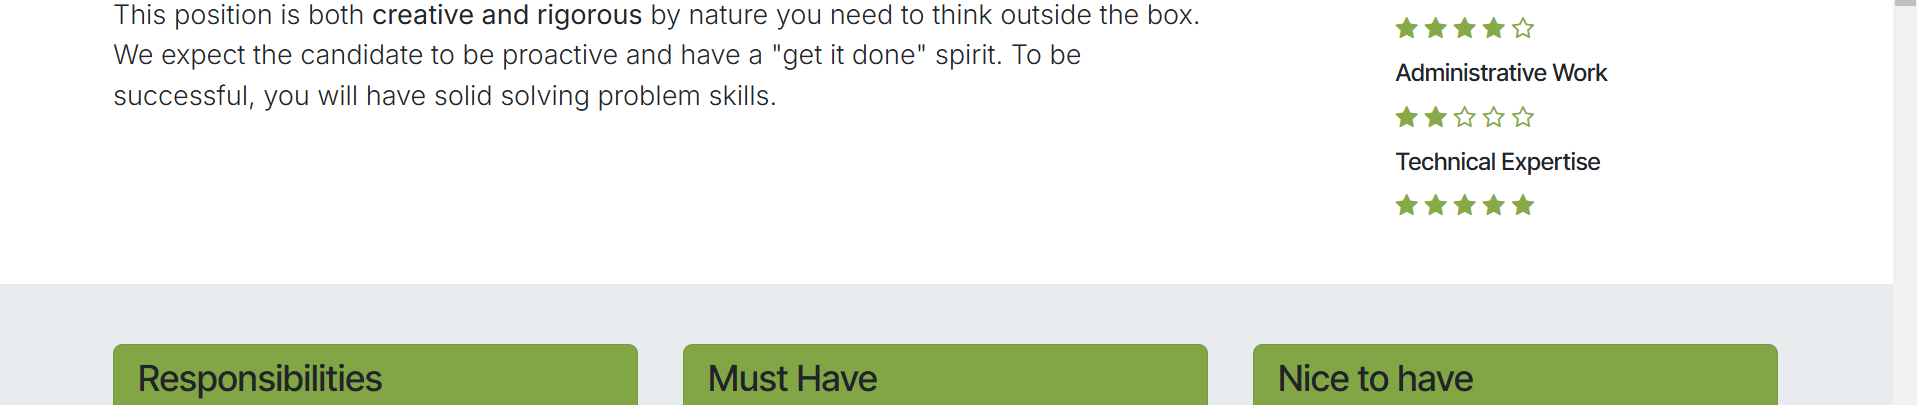

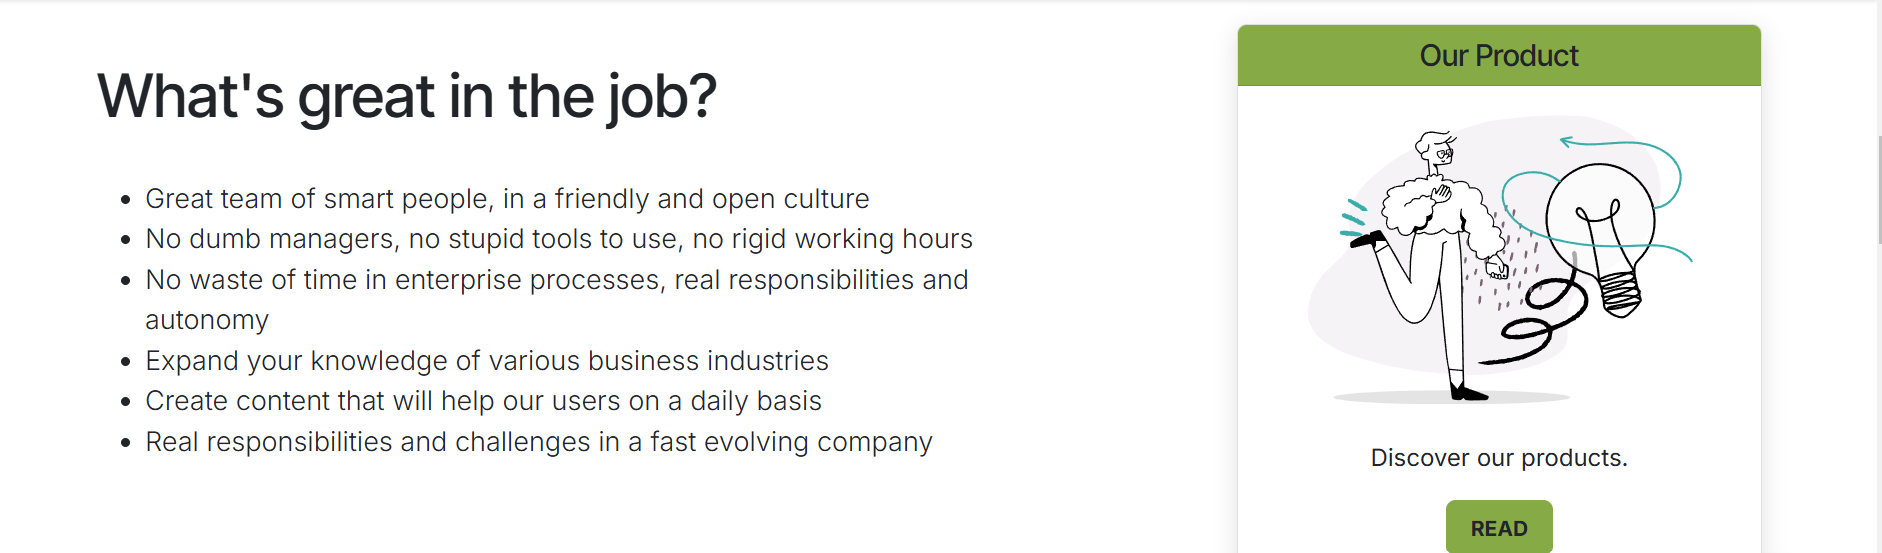

The website page appears as shown above when you choose the Go to Website option. You can apply for jobs directly through the "Apply Now" button. The job application form, as seen in the screenshot below, will appear when you select "Apply Now." This will open an application form as shown below.
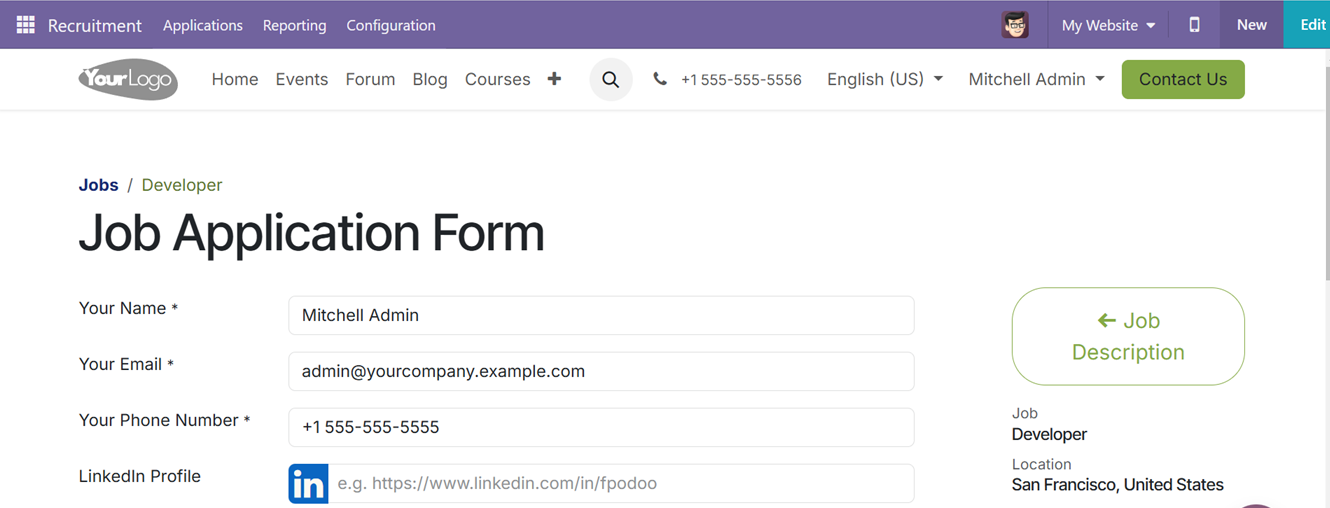
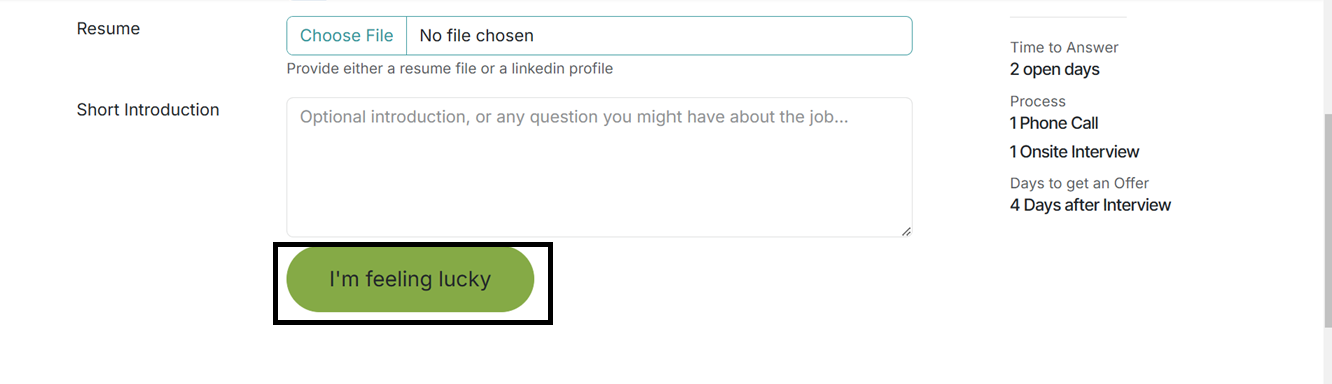
In this form, applicants can enter their name, email, phone number, LinkedIn profile, resume, and a brief introduction. After filling out the information, clicking the “I’m Feeling Lucky” (Submit) button will complete the application submission for the selected job.
By toggling the ‘Published,’ and ‘Not Published’ button provided at the right side of the job configuration form, you can publish and publish the job post on your website without moving into the website interface.

All Applications
The Recruitment module's ‘All Applications’ menu offers a single area to manage all job applications. The application page shows specific details including the applicant's name, applied job, subject, stage, evaluation, cellphone number, associated tags, and recruiter, as seen in the screenshot below.
Among the several viewing modes available on the website are Kanban, List, Pivot, Graphical, and Activity views. You may access the comprehensive information about an application by selecting it from the list.
The Group By, Favorites, and Filters choices from the search bar area contains many search tools that users may utilize to efficiently arrange and manage programs. You may use the ‘New’ button on the right-hand side to create a new application.
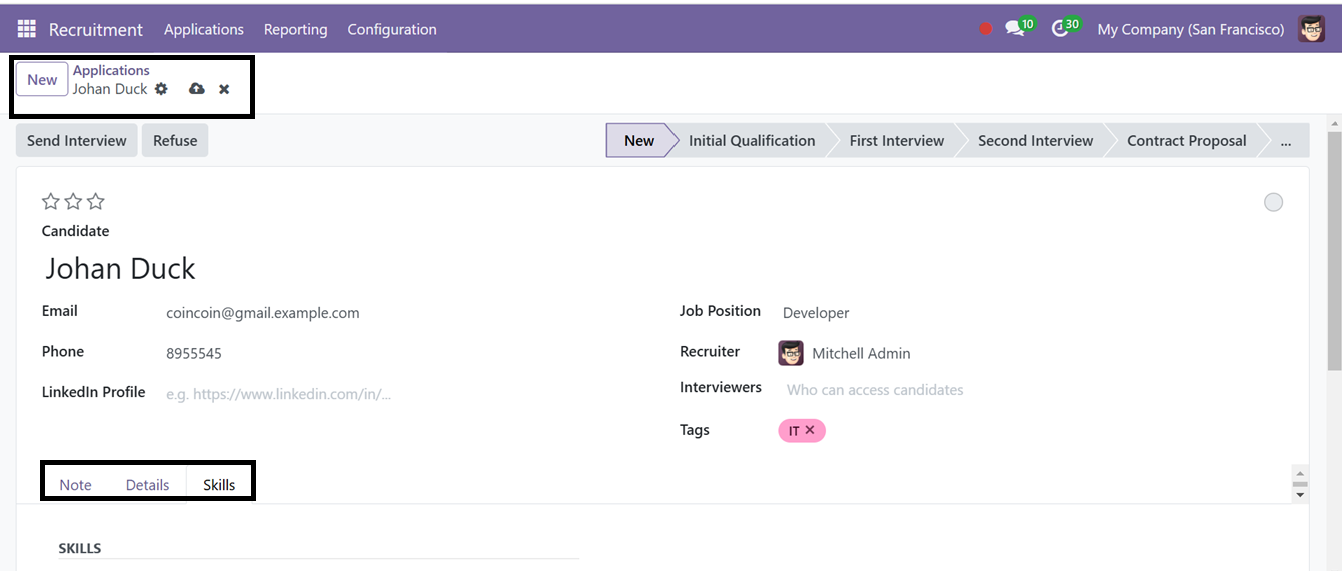
The application page allows you to view and edit detailed information about candidates, including the Candidate Name, Email, Phone, LinkedIn Profile, and Job Position. Moreover, recruiters can opt to add information like the designated Recruiter, Interviewers and the relevant Tags, as illustrated in the screenshot below.
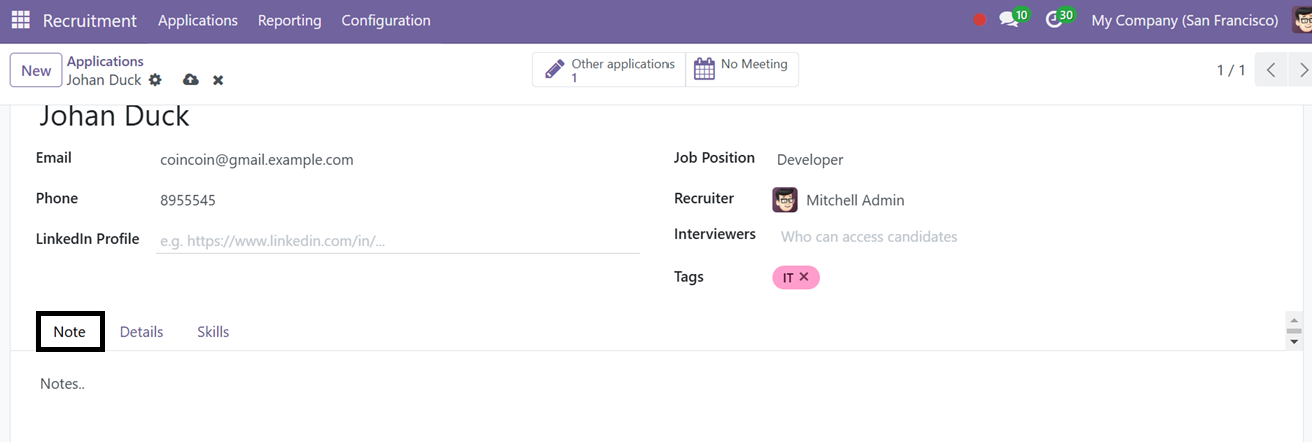
You can edit any notes regarding the job or about your application under the ‘Notes’ tab.
The ‘Details’ tab includes fields for entering the applicant details including applicant qualification, Salary Package, Job availability, and Sourcing details in the APPLICANT, SALARY PACKAGE, JOB and SOURCING sections of the tab.
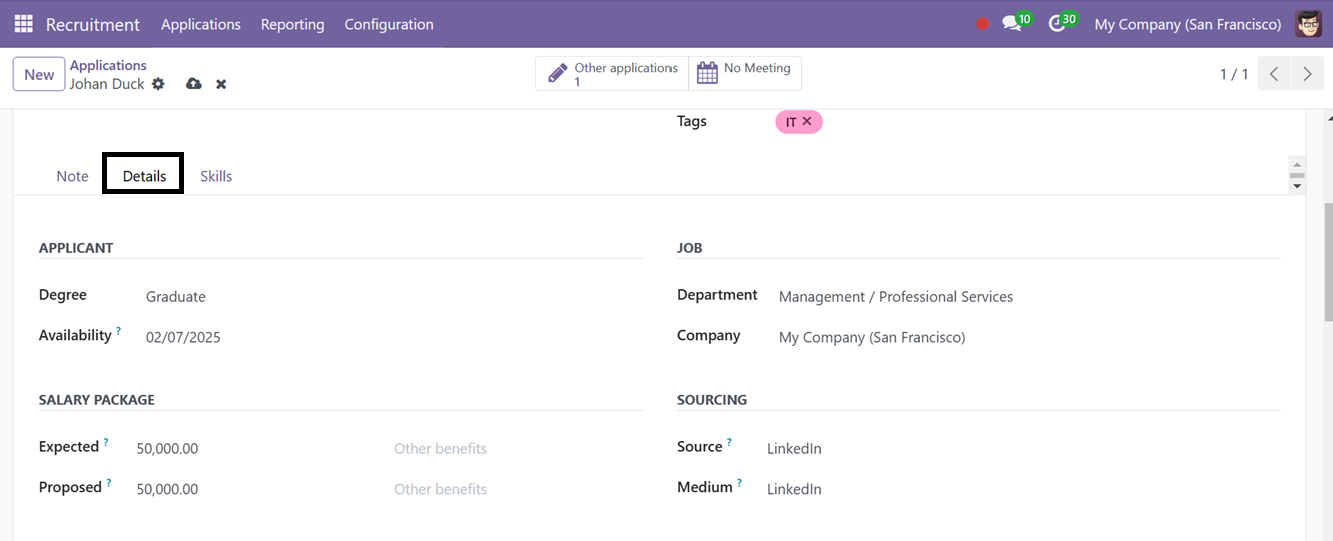
So, choose the Degree, Availability for the job from the ‘APPLICANT’ area. Then, choose the Department and mention your Expected and Proposed Salary. Then you can choose the Source and Medium of this job application information from the available options in the designated fields.
The Skills tab section allows for the inclusion of an application summary and the candidate's skills. So, click on the ‘Pick a skill from the list’ button to add your skill set.
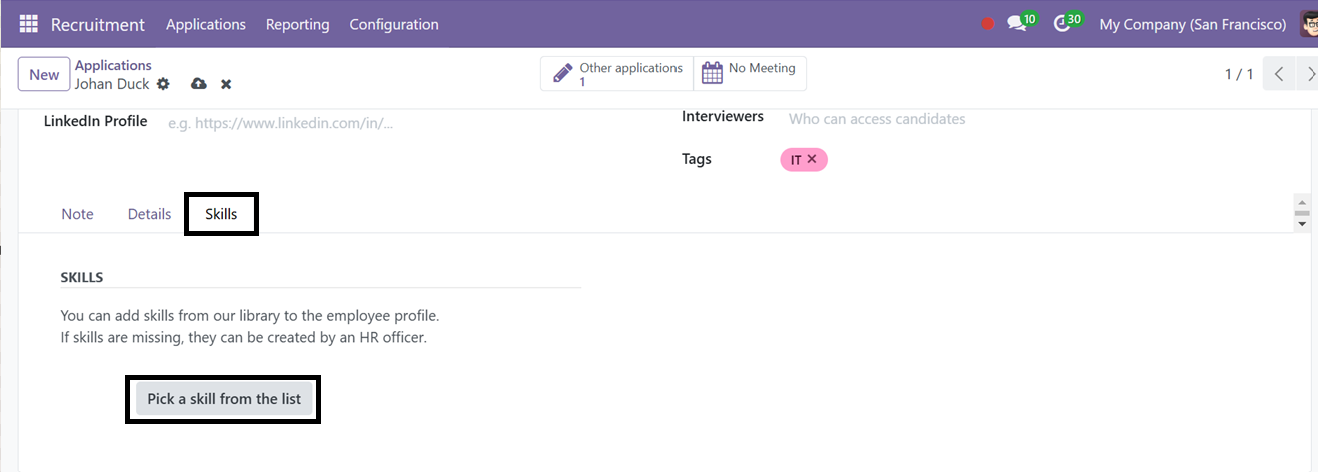
Then, the ‘Pick a skill from the list’ button will display a new pop-up where you can choose the skill from the available list. After choosing a Skill Type, select any Skill related to that skill type and choose the relevant Skill Level according to your proficiency as illustrated in the screenshot below.
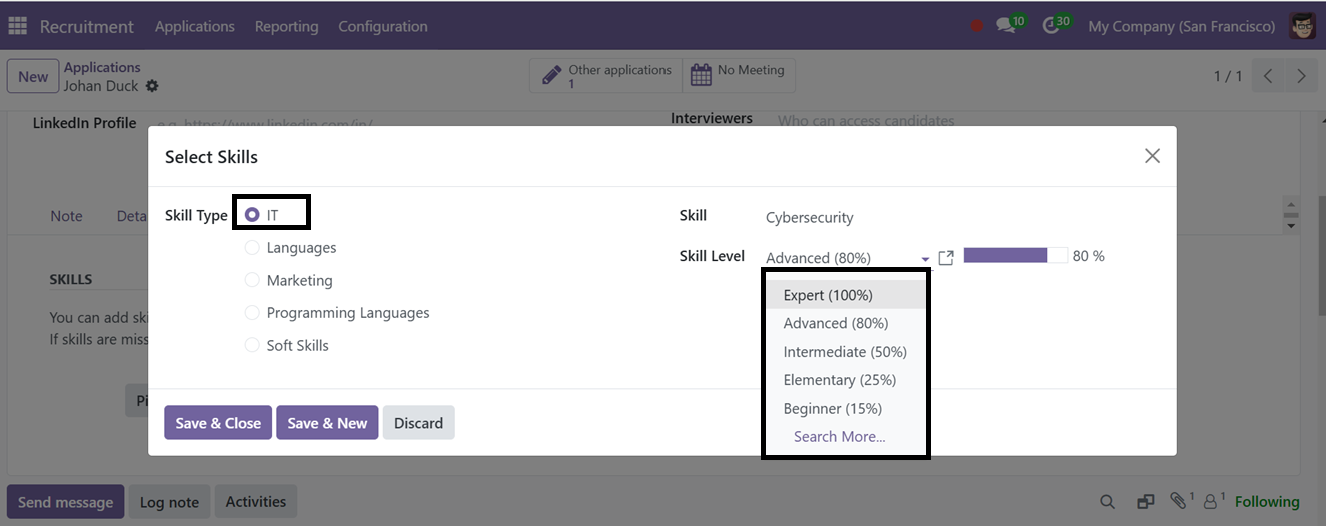
Then, save the skill set and you can add a different skill set to the ‘Skills’ tab using the above method.
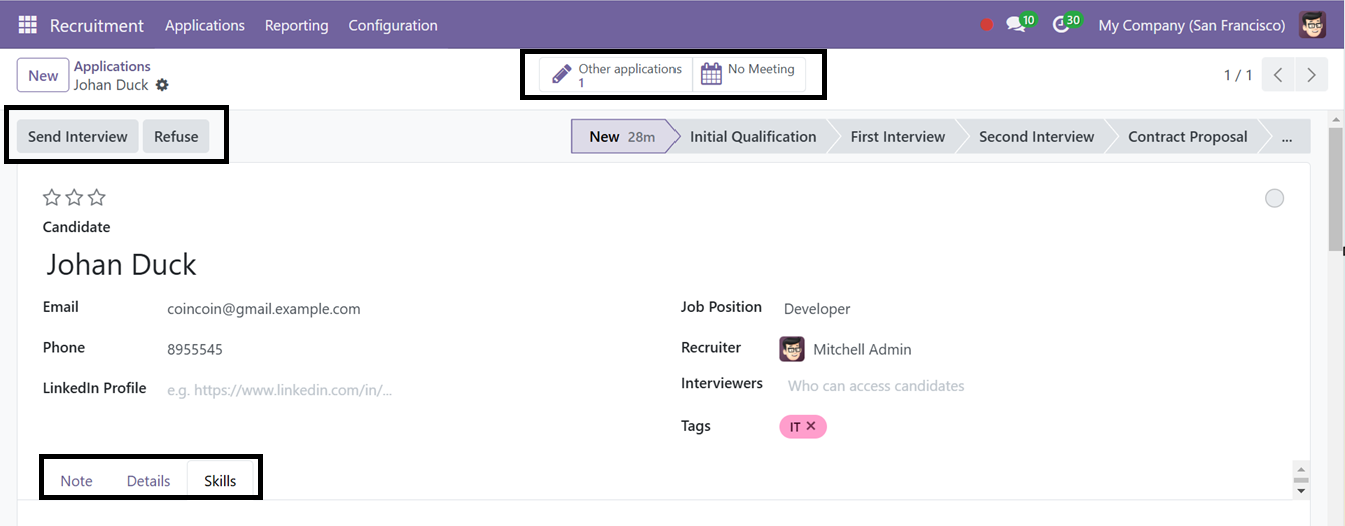

After saving the Candidate details, the managers can send the interview call mails using the ‘Send Interview’ button and refuse the application using the ‘Refuse’ button.
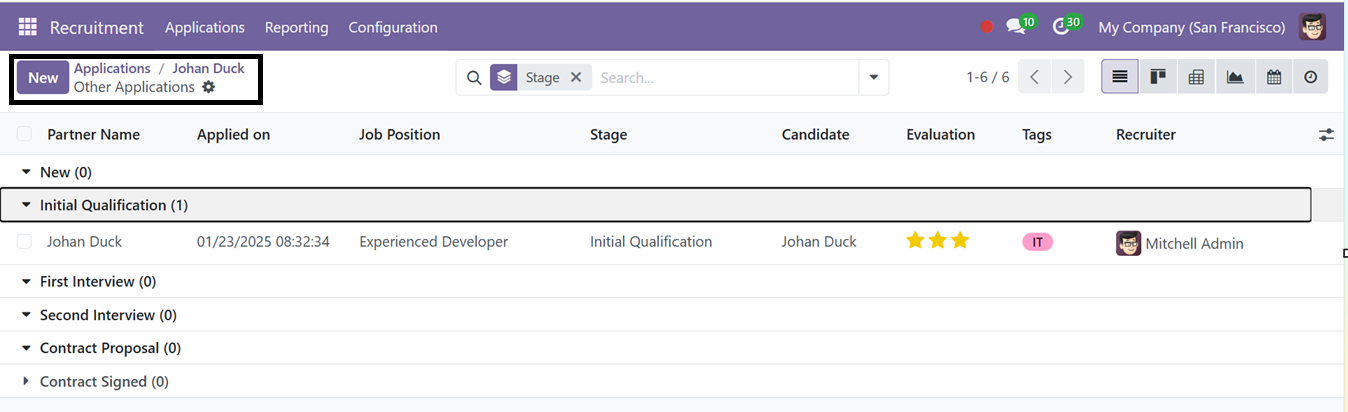
The ‘Other application’ smart tab will show the details and status of the other applications sent by the same candidate with the Partner Name, Applied On Date, Job Position, Stage, Candidate Name, Evaluation, Tags and Recruiter details, as shown below.
The ‘Meetings’ smart tab will help you to notify and manage new meetings regarding the job application interview.
The ‘Action’ menu placed at the top left corner of the form will help you to Archive, Delete, Duplicate the form data and the ‘Refuse’ button can be used to reject the job application.
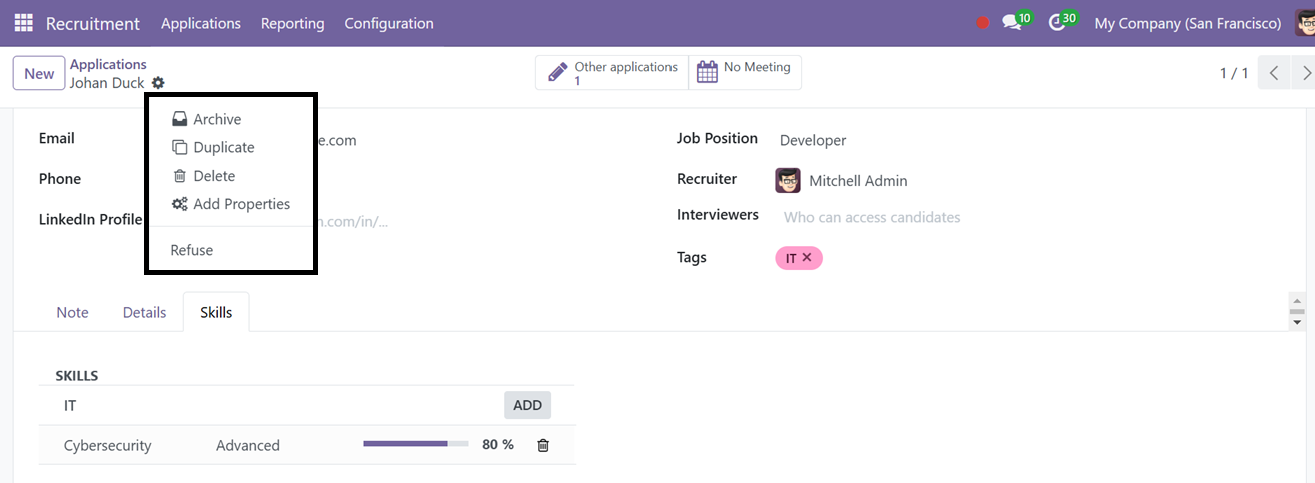
The “Add Properties’ button of the Action menu can be used to add extra editing fields in the form according to the requirements of the application. Clicking on it will display an field properties editing section as shown below.
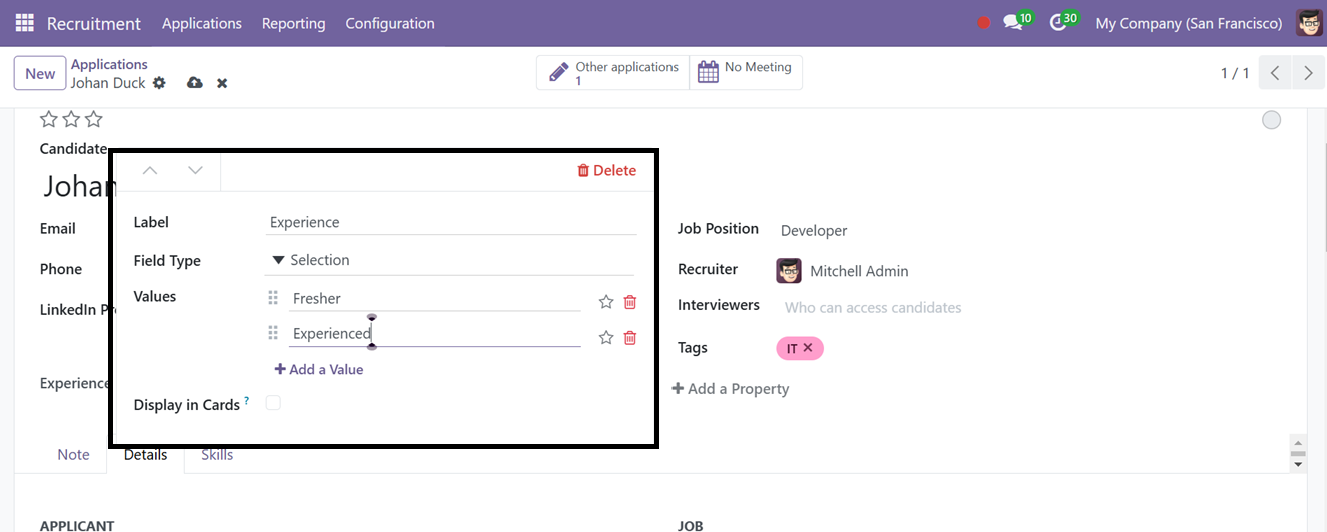
You can specify a Label Name, which serves as the field name, and select the appropriate Field Type from various options such as Selection Dropdown, Checkbox, Text Area, Date Field, Tag, Separator, Many-to-One Field, Decimal, and others. Upon selecting a Field Type, Odoo will display the corresponding property configuration fields.
For example, here, I have chosen a Selection Dropdown. So, an additional ‘Values’ field appears, allowing you to define the expected and available values that users can select. Additionally, you can enable the ‘Display in Cards’ option to ensure this property field is visible in Calendar and Kanban view formats. Finally, save the new field using the ‘Save’ icon from the form. This will add the new field in the form view as illustrated in the screenshot below.
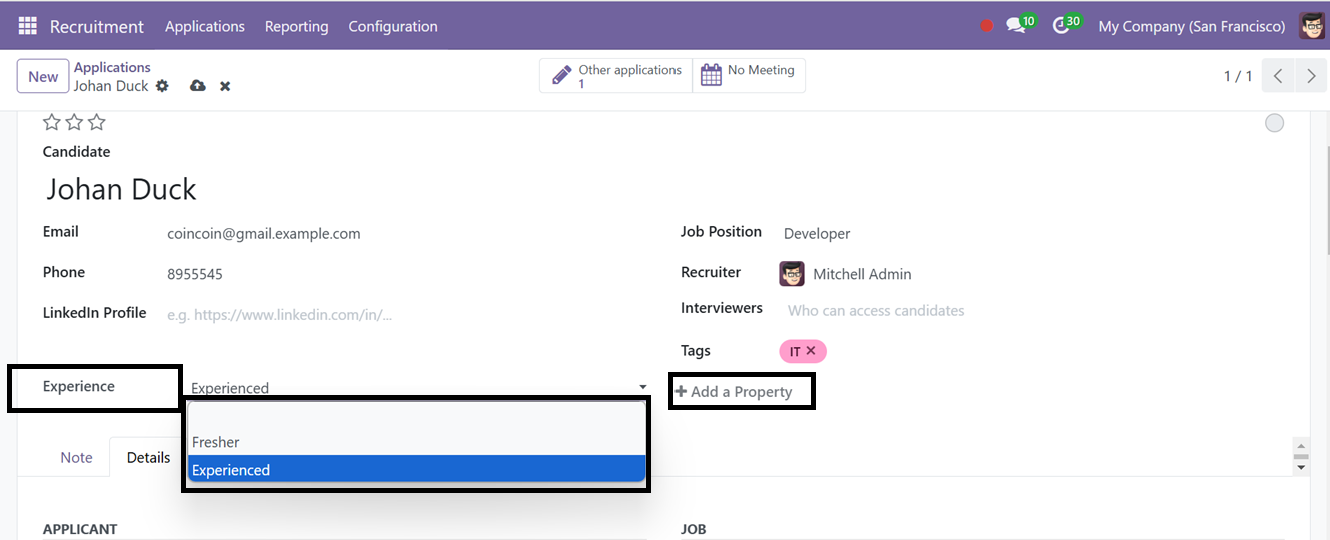
You can add multiple fields using the above explained method according to the requirements. From this application, the managers can refuse the application using the ‘Refuse’ button or proceed with the interview process according to the employee skills and other job criteria.
Interview Completion and Create Employee Button
You can advance the interview process manually through the various pipeline stage buttons displayed on the application. These stages include ‘Initial Qualification,’ ‘First Interview,’ ‘Second Interview,’ ‘Contract Proposal’ and the final stage ‘Contract Signed’. As the interview procedure progresses, you can move candidates to the appropriate stage by selecting the corresponding button, as illustrated in the screenshot below.

When the candidate reaches the ‘Contract Signed’ stage, a ‘Create Employee’ button will appear on the form, allowing you to convert the candidate into an employee. At this point, you can complete the interview process and finalize the recruitment by advancing to the final stage, ‘Contract Signed.’
At this stage, the candidate has successfully progressed to the final phase and has been hired for the specified job position. A ‘HIRED’ banner will be prominently displayed within the application form to indicate this status, as shown below.
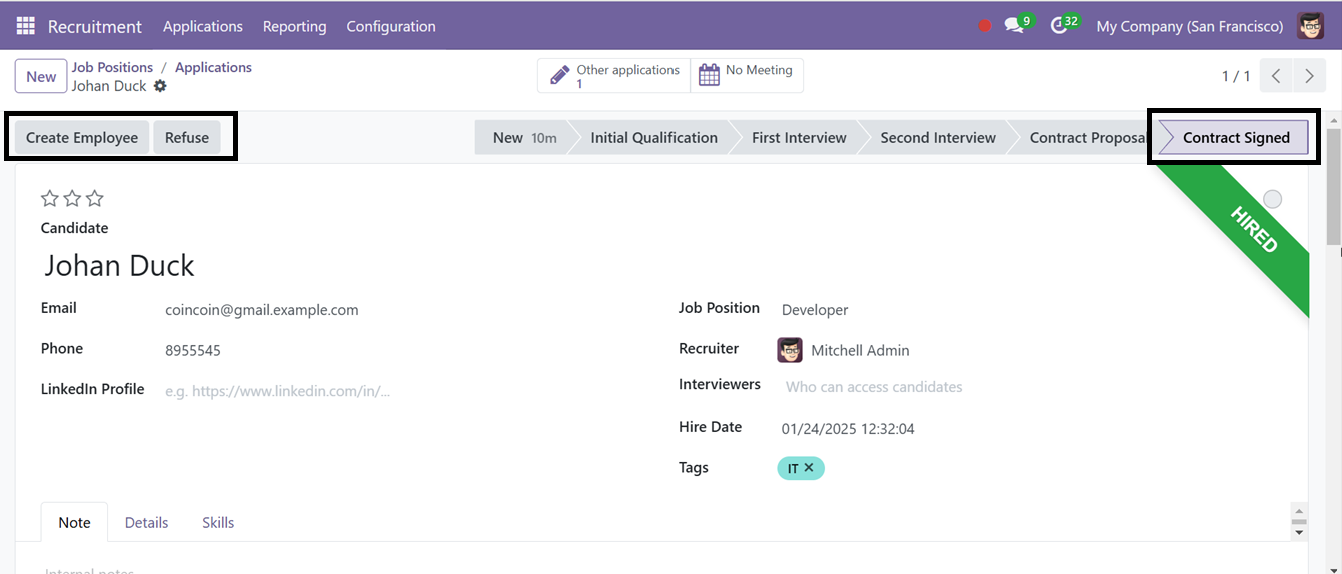
Using the ‘Refuse’ button, you can reject the candidate application or proceed with the ‘Create Employee’ button to create a new Employee Record.
Candidates Menu
In Odoo 18 Recruitment, the ‘Candidates’ menu provides a centralized platform for the efficient management of candidate profiles. It enables recruiters to see, filter, and arrange candidates; monitor their advancement through recruitment phases; refresh records; and connect candidates with pertinent job applications.
You can see the availability of candidates from this dashboard arranged in kanban format as depicted in the screenshot below.
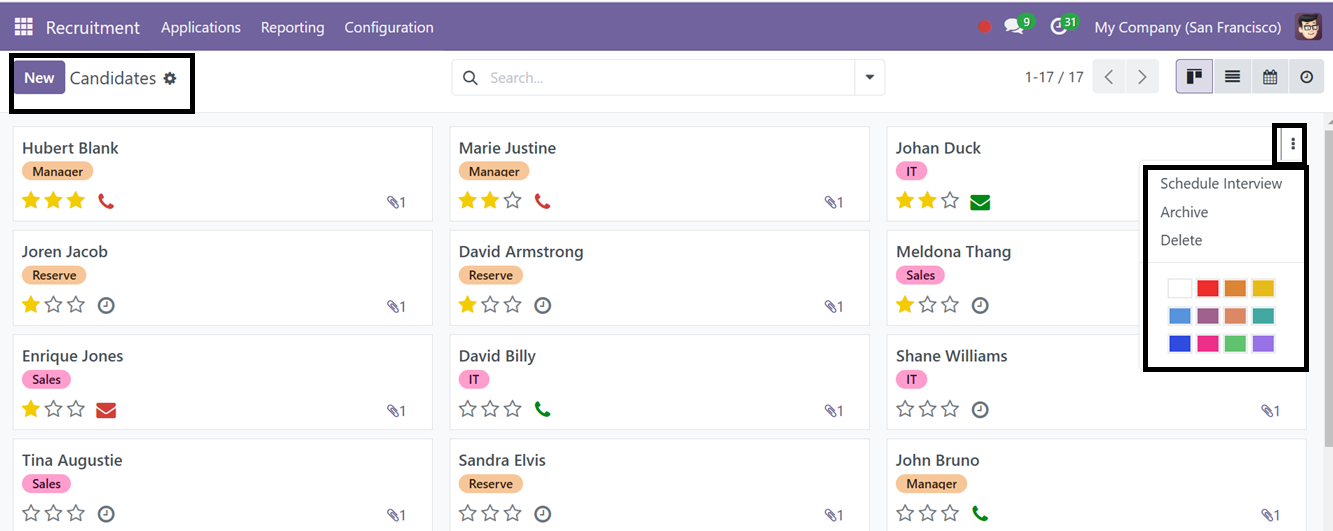
Using the three dotted menu placed on each kanban view, you can Archive and Delete the candidate data. Then the ‘Schedule Interview’ option can be used to quickly schedule an interview with the candidate. The ‘Schedule interview’ button will take you to the calendar interface where you can create a new meeting using the ‘New’ button.
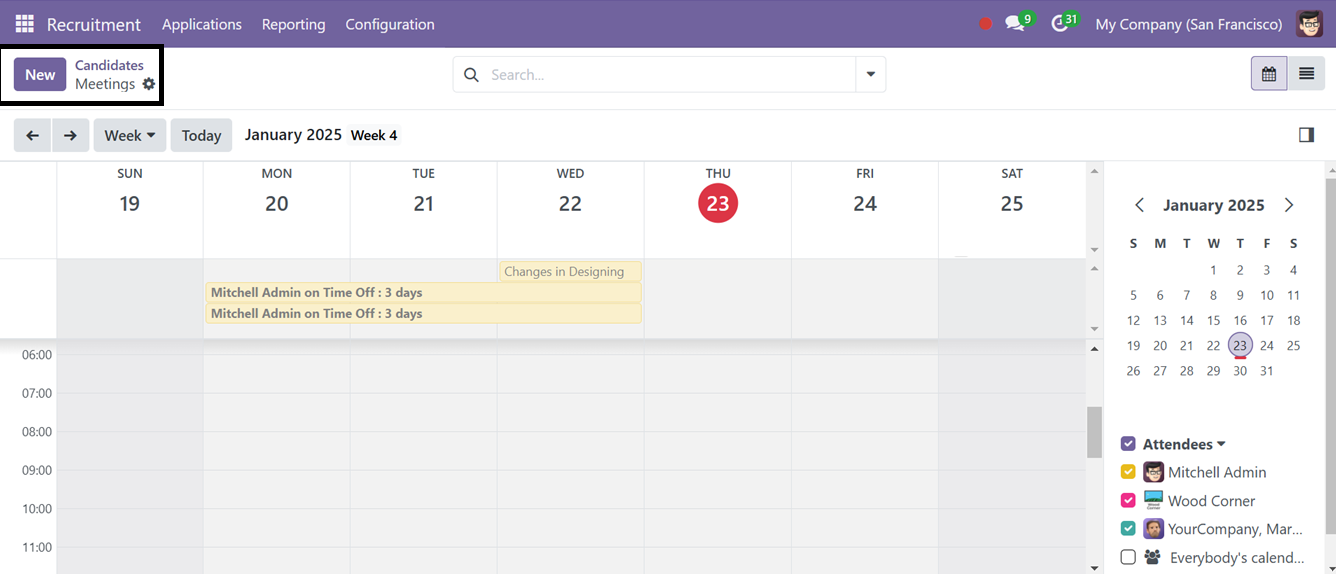
In the new meeting configuration form, you can edit the meeting details including the Start and End Dates, Duration, Recurrent or not, Location, Reminder, Videocall URL, Tags, Organizer etc as shown in the screenshot below.
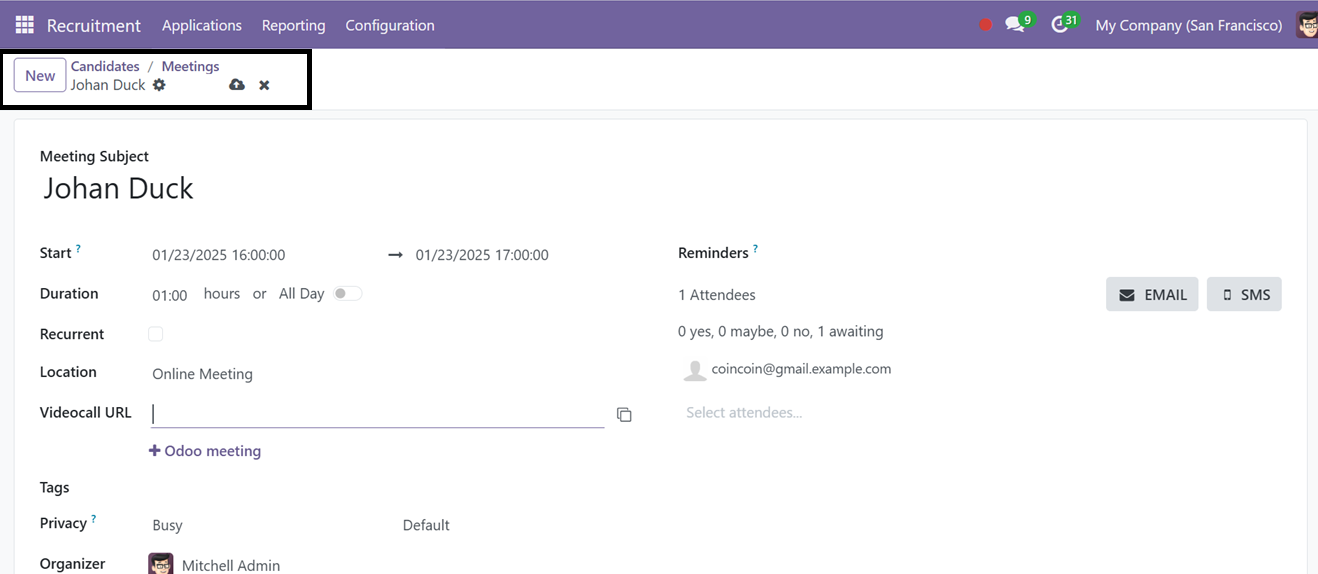
After configuring the meeting data, save the details and send the notifications through emails or via text messages using the ‘Email,’ or ‘SMS’ buttons.
Opening the Candidate Kanban card will display its form view with all the basic candidate data that we have saved earlier. Here, you can see the total number of job applications that this person has sent from the ‘Applications’ smart tab. The ‘Meeting’ smart button will show the meeting details.
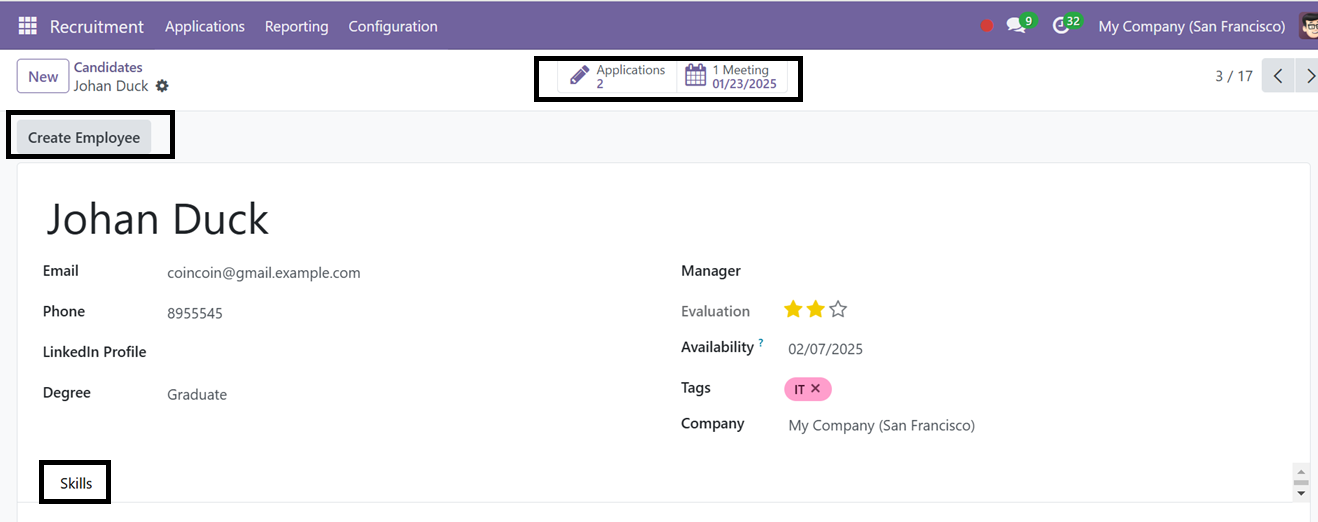

With Odoo, you can easily transform a candidate into an employee without completing the recruitment process straight from the Candidates form view by using the ‘Create Employee’ button.
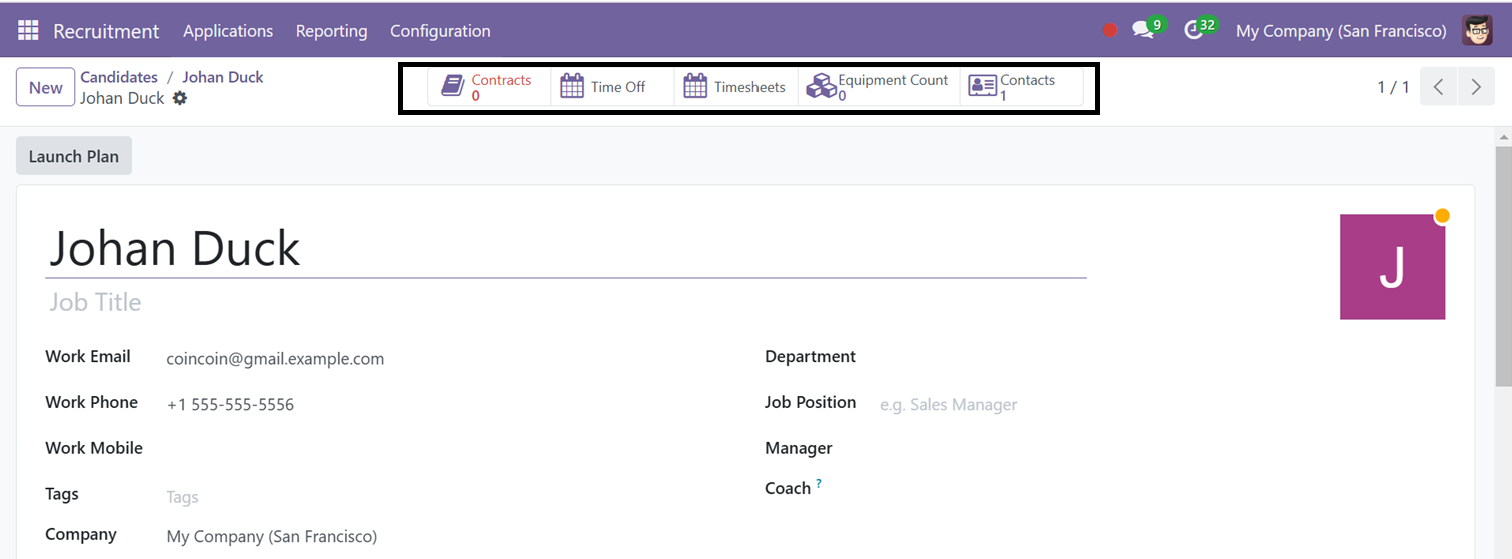
Clicking on this button will create a new employee record for this candidate and enable some smart buttons including Contracts,Time-Off, Timesheets, Equipment Count and Contacts.
You can review and manage the employee contracts for a candidate through the ‘Contracts’ smart button. The ‘Time-Off’ smart button provides access to the employee's time-off details, while managing employee timesheets can be done via the ‘Timesheets’ section. Additionally, the ‘Equipment Count’ button allows for the management of company equipment possessions. For candidates with multiple contact details, the ‘Contacts’ smart button simplifies the process of managing employee contact information.
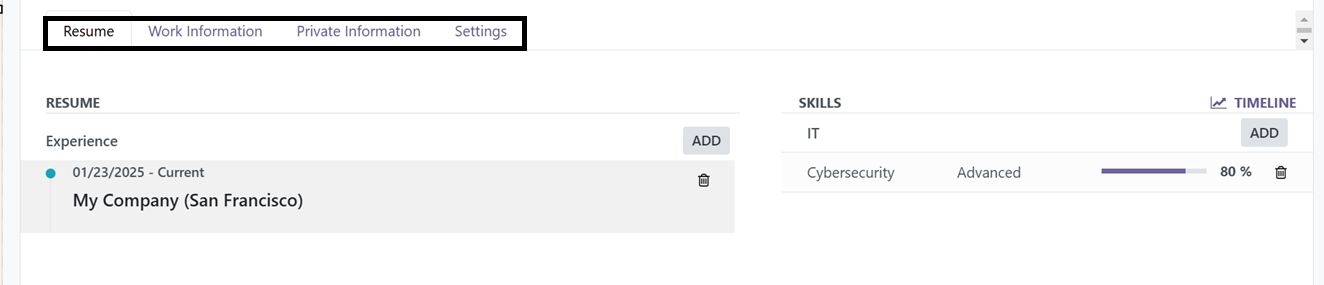
The ‘Resume’ tab contains the employee’s current experiences and skills and qualifications. The ‘ADD’ button provided on the Skills section can be used to add new skill sets.
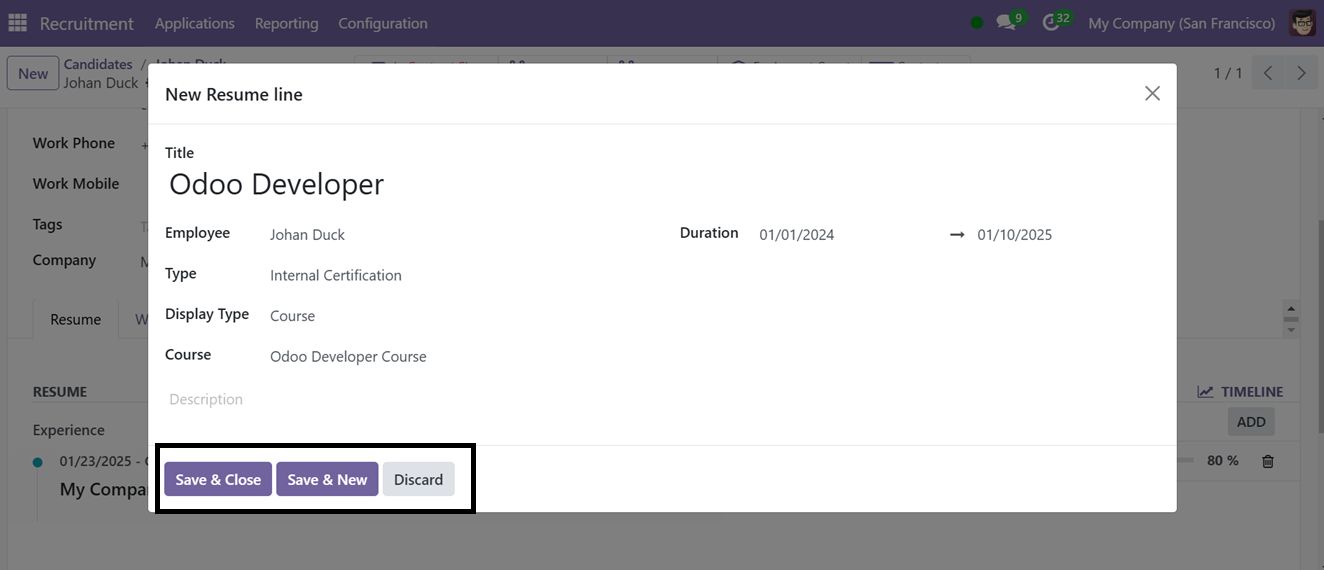
To add a new experience, click the ‘ADD’ button and provide the necessary details by editing the Resume Line Title and selecting the appropriate Type, such as job experience, course, education, or side project. Depending on the selected Type, the subsequent form fields will vary to suit the specific scenario. Specify the Display Type, indicating whether it is a certification or course. Finally, include the Course Name and the Duration of the course.
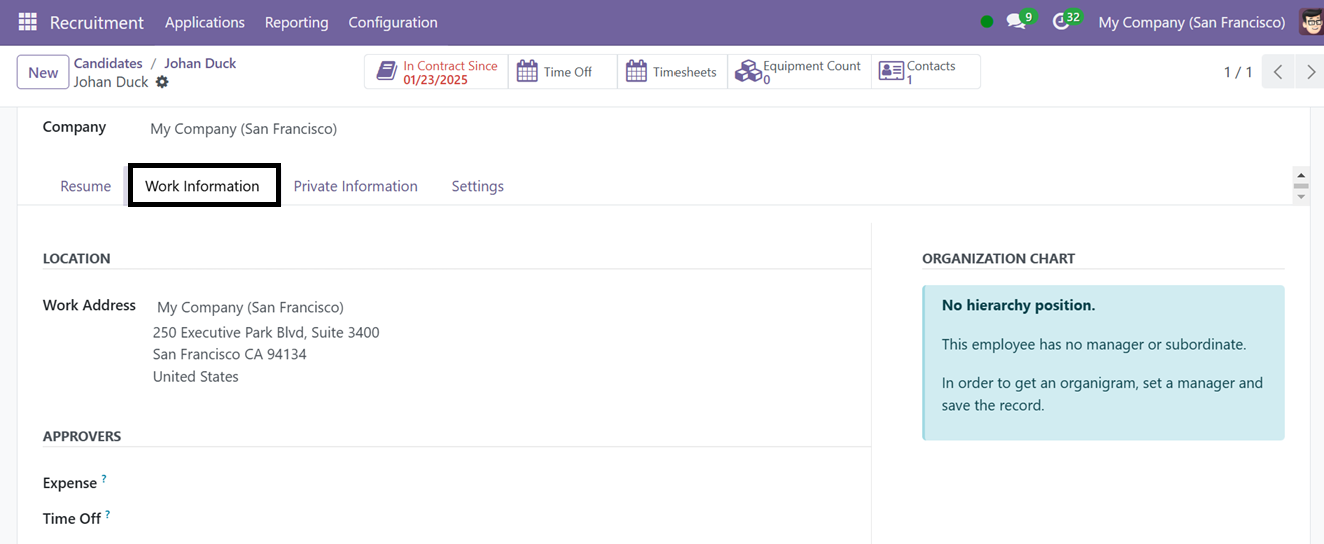
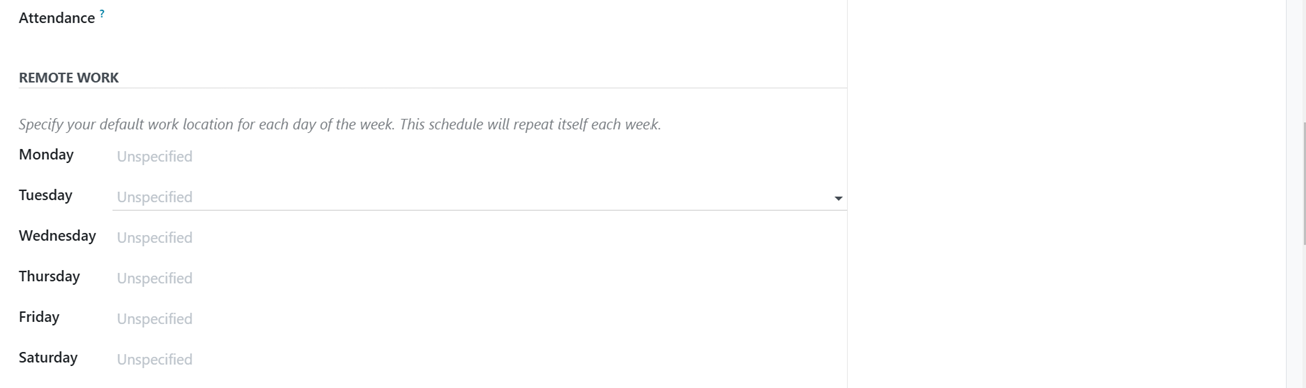
After saving the Resume line, you can configure the work details in the ‘Work Information’ tab. This tab can be used to configure the APPROVERS, REMOTE WOK and the working SCHEDULE as per the company policies.

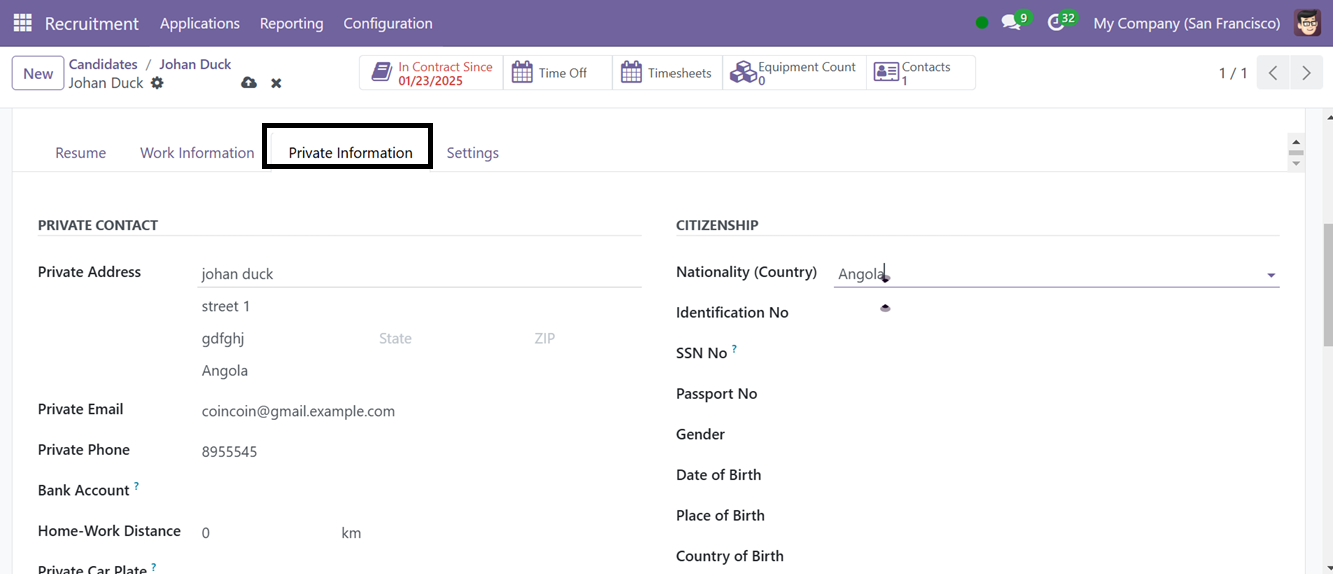
The ‘Private Information’ tab helps to store the personal information about the employees including their PRIVATE CONTACT, CITIZENSHIP, EMERGENCY CONTACT DETAILS, EDUCATION, FAMILY STATUS and WORK PERMIT details in the respective form sections as shown in the screenshot below.
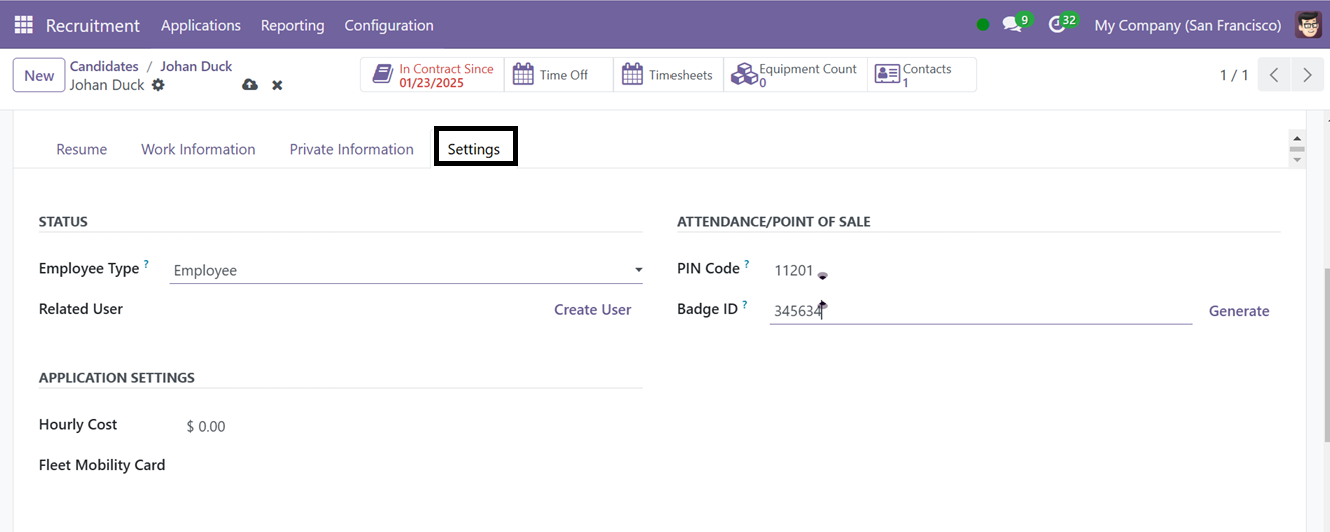
Finally, the ‘Settings’ tab helps to add the employee’s current working STATUS and APPLICATION SETTINGS. In the ATTENDANCE/POINT OF SALE area,you can generate the employee PIN Code and Badge ID for the purpose of check in and check out.
After saving these employee details, the new employee data will be stored in the Recruitment database. So, the employee can move to the next joining procedures.