Requests for Quotations
In Odoo 18, the Purchase module offers an enhanced and intuitive process for generating and managing Requests for Quotations (RFQs) from vendors, allowing businesses to streamline their purchasing operations with increased efficiency. Whether you're looking to purchase goods or services, Odoo 18 enables you to create RFQs, compare multiple vendors, and make data-driven decisions to choose the best supplier. Let’s explore how you can seamlessly manage RFQs in the Odoo 18 Purchase module.
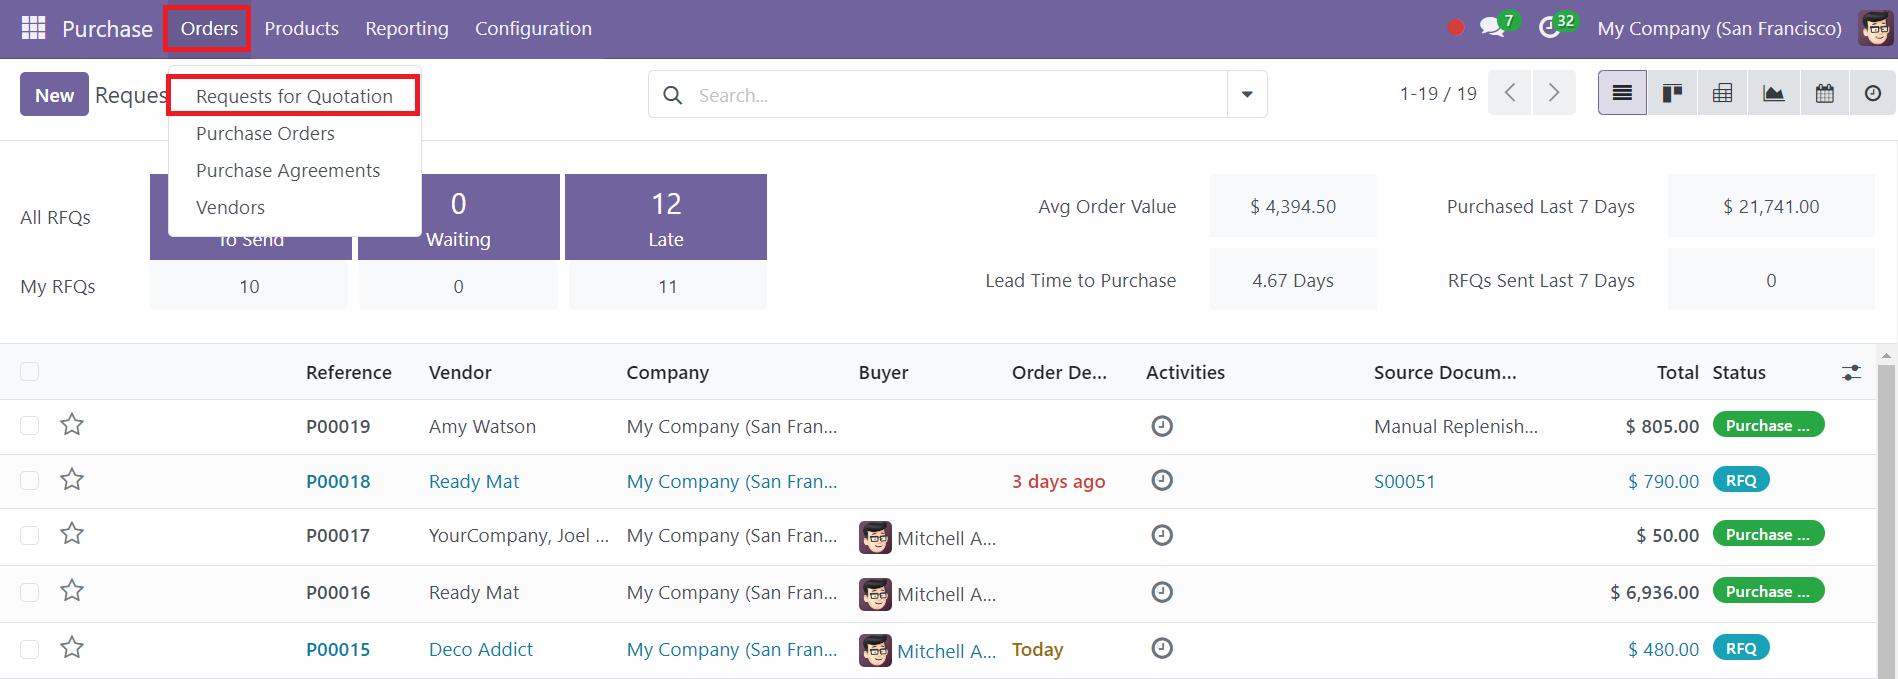
To manage RFQs in Odoo 18, navigate to the Orders menu within the Purchase module. Here, you'll find a dedicated platform that displays all active and past RFQs. This platform provides an organized layout for users to view and manage their requests, making it easier to keep track of various procurement activities.

By default, the RFQ list view presents a clean table displaying key information about each RFQ, including:
● Reference Number
● Vendor Name
● Company
● Buyer
● Order Deadline
● Source Document
● Total Amount
● RFQ Status
In Odoo 18, users have the flexibility to switch between different views such as Kanban, Pivot, Graph, Calendar, and Activity views, depending on their preference or operational needs. Each view offers unique insights into the data, helping you visualize the status of your RFQs and the overall purchasing process.
Odoo 18's Filters and Group By features make searching for specific RFQs more efficient. You can apply both default and custom filters to narrow down the results based on criteria like: My Purchases, Starred, Purchase Orders, Requisition, To Approve, Order Date, Draft RFQs, Waiting RFQs, Late RFQs, and Warnings. Additionally, the system allows grouping RFQs by Vendor, Purchase Representative, Order Date, or other custom fields, which helps users easily organize and review quotations.
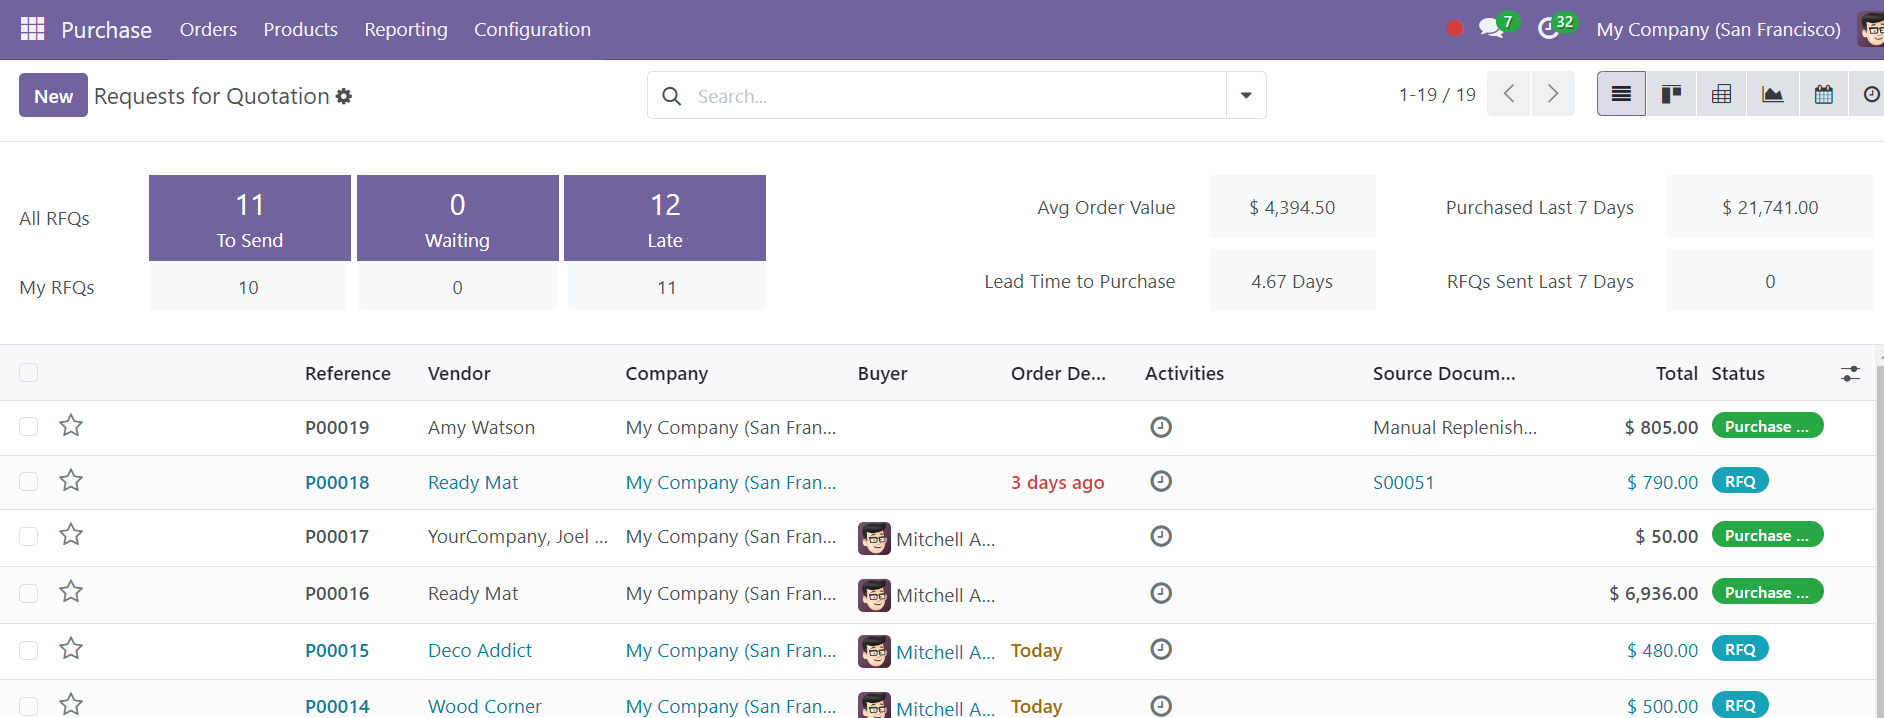
In the RFQ window, Odoo 18 provides useful performance metrics to help you monitor your procurement activities. You can access insights such as:
● Average Order Value
● Products Purchased in the Last 7 Days
● RFQs Sent Last 7 Days
● Lead Time to Purchase
These metrics offer a holistic view of your purchasing patterns, helping procurement teams optimize vendor selection and improve order processing times.
To prioritize specific RFQs, Odoo 18 introduces a star icon that you can click to mark important or urgent RFQs. This feature allows you to easily distinguish high-priority RFQs from others, ensuring that they receive timely attention and follow-up.
Creating New Request for Quotation
To issue a new RFQ in Odoo 18, click the New button from the Request for Quotation menu. In the creation window, start by selecting the Vendor from the list of pre-configured vendors. You can set up vendors in the Vendors section of the Purchase module.
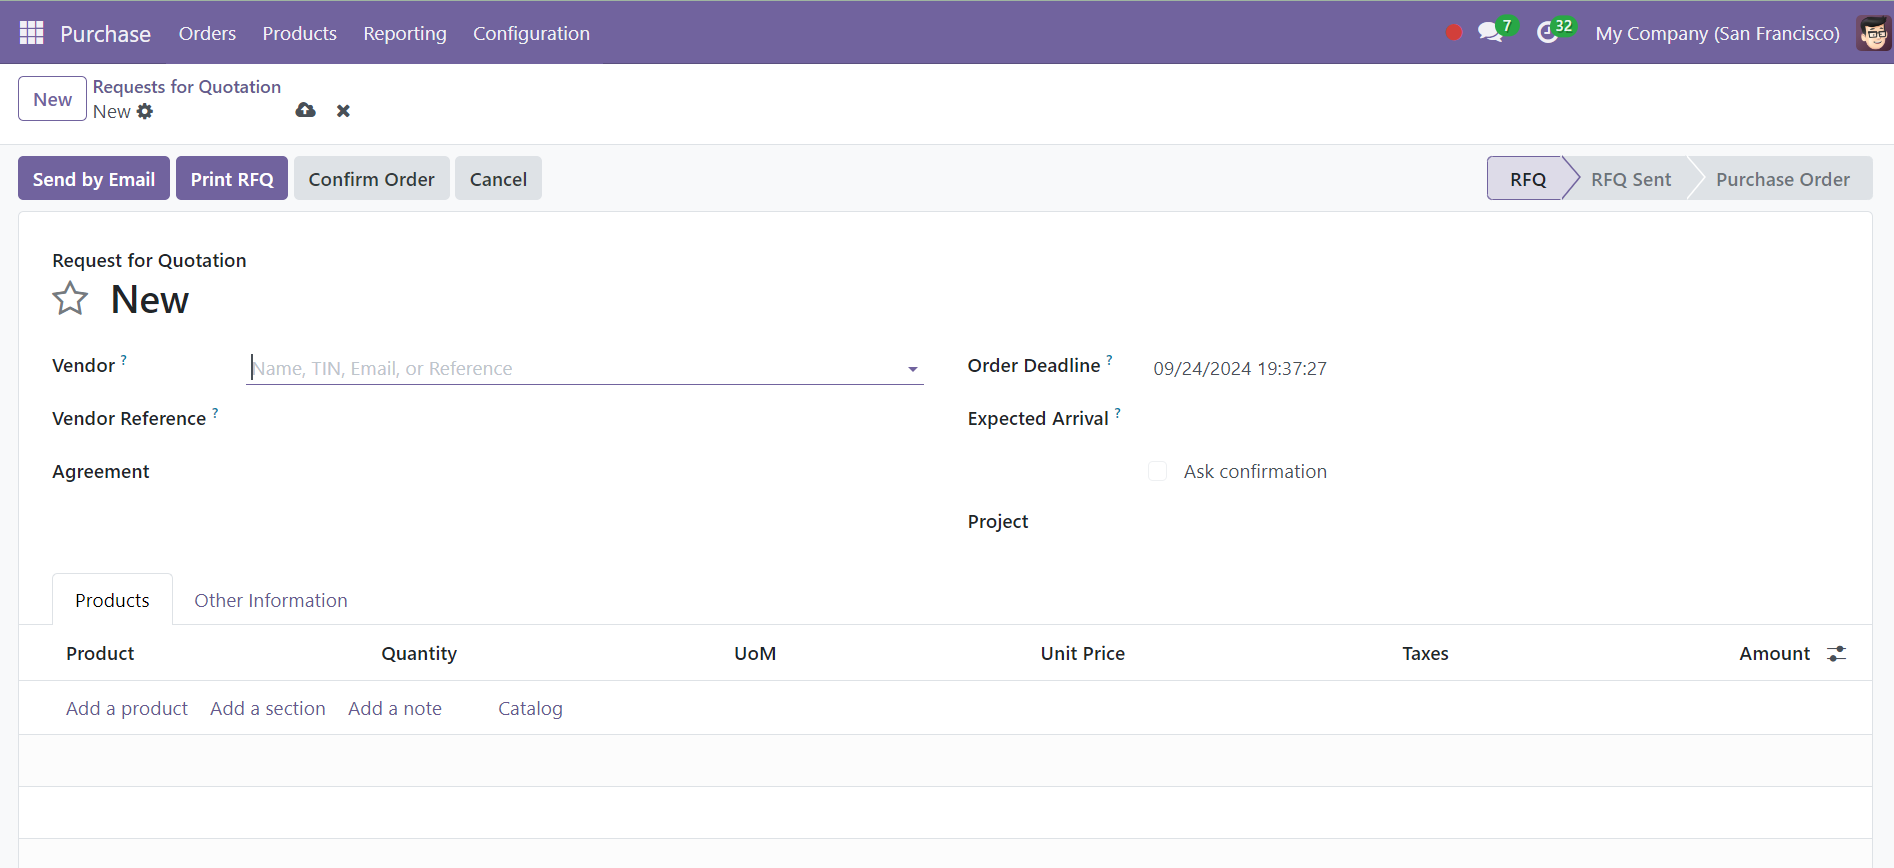
Add a reference to the order or bid provided by the vendor in the Vendor Reference field. This reference is typically used to match the vendor’s delivery order with your RFQ. Optionally, select a Purchase Agreement if a draft agreement exists between you and the vendor. Set an Order Deadline to specify when the quotation must be confirmed before converting into a purchase order. In the Expected Arrival field, enter the estimated date by which you expect the products to arrive. Use the Ask Confirmation feature to automatically send a confirmation email to the vendor and request verification of the expected delivery date.
Adding Products to RFQs
Odoo 18 streamlines product selection by allowing users to easily add items from a predefined catalog of products. Click on the Add a Product button in the Products tab to select the items you want to purchase from the vendor.

The product line will display the following details:
● Product Name
● Description
● Quantity
● Unit of Measure (UoM)
● Unit Price
● Taxes
● Amount
Once you’ve added all required products, the Total Cost of the RFQ will be automatically calculated and displayed.
Odoo 18 offers the flexibility to add sections and notes within the RFQ using the Add a Section and Add a Note buttons. This allows businesses to include important instructions or divide products into categories for clarity. You can also define the Terms and Conditions for the purchase, ensuring that both you and the vendor agree on all aspects of the transaction.
Configuring Other Information
In the Other Information tab, you can enter details such as the:
● Buyer responsible for the purchase
● The company making the purchase
● Source Document (if any)
● Payment Terms (allow businesses to define and manage payment schedules and conditions in RFQs)
● Fiscal Position (automates tax mapping and account configurations in RFQs based on regional or company-specific tax rules)
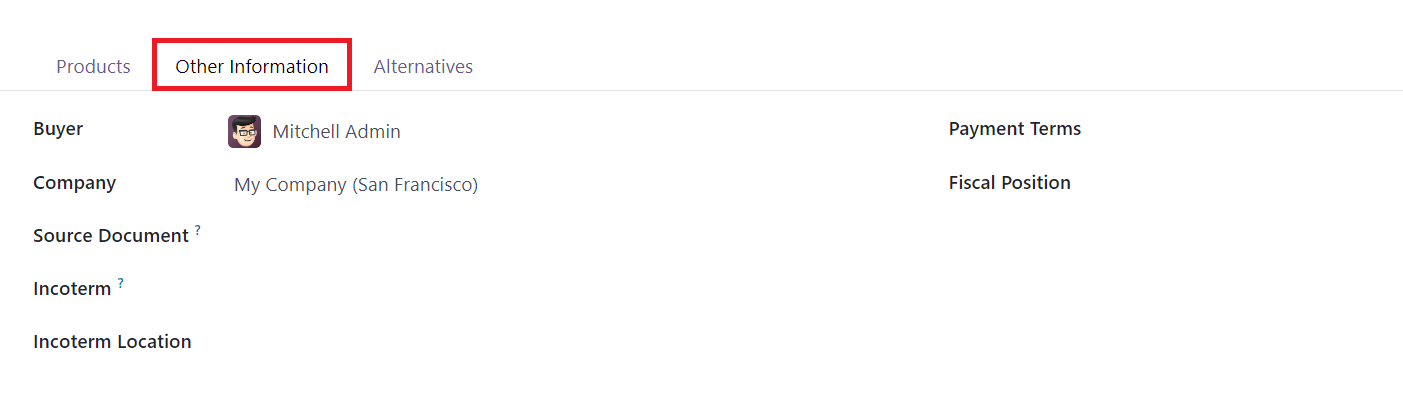
For international purchases, you can also specify the Incoterm (International Commercial Terms) and Incoterm Location. These terms outline the responsibilities of each party in terms of shipping, insurance, and customs.
Comparing Vendors: The Alternatives Tab
An advanced feature in Odoo 18 is the Alternatives tab, where you can add additional RFQs for the same product from other vendors.
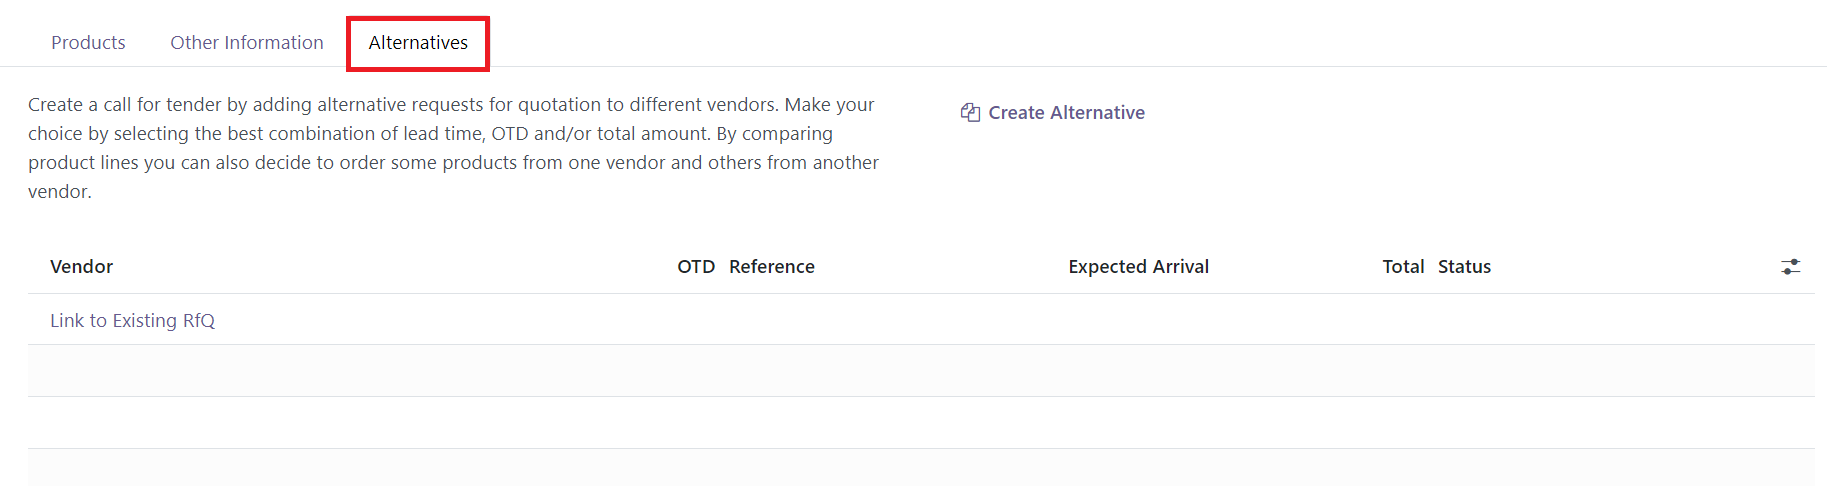
This feature is particularly useful for comparing prices, lead times, and delivery conditions across multiple suppliers.
By clicking the Create Alternative button, you can generate alternative RFQs for the same product, choosing different vendors.
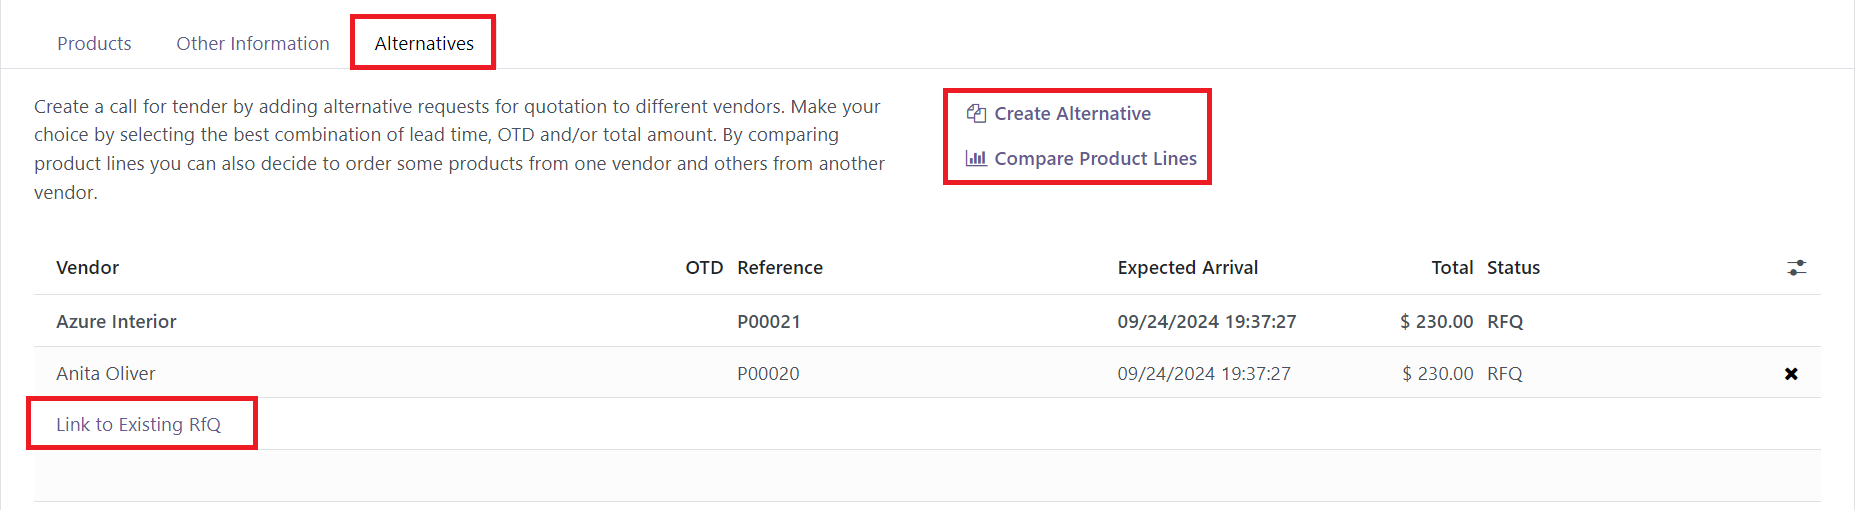
You can also use the Link to Existing RFQ feature to add previously generated RFQs to this comparison.
Once alternatives have been created, use the Compare Product Lines button to compare vendor offers side by side.
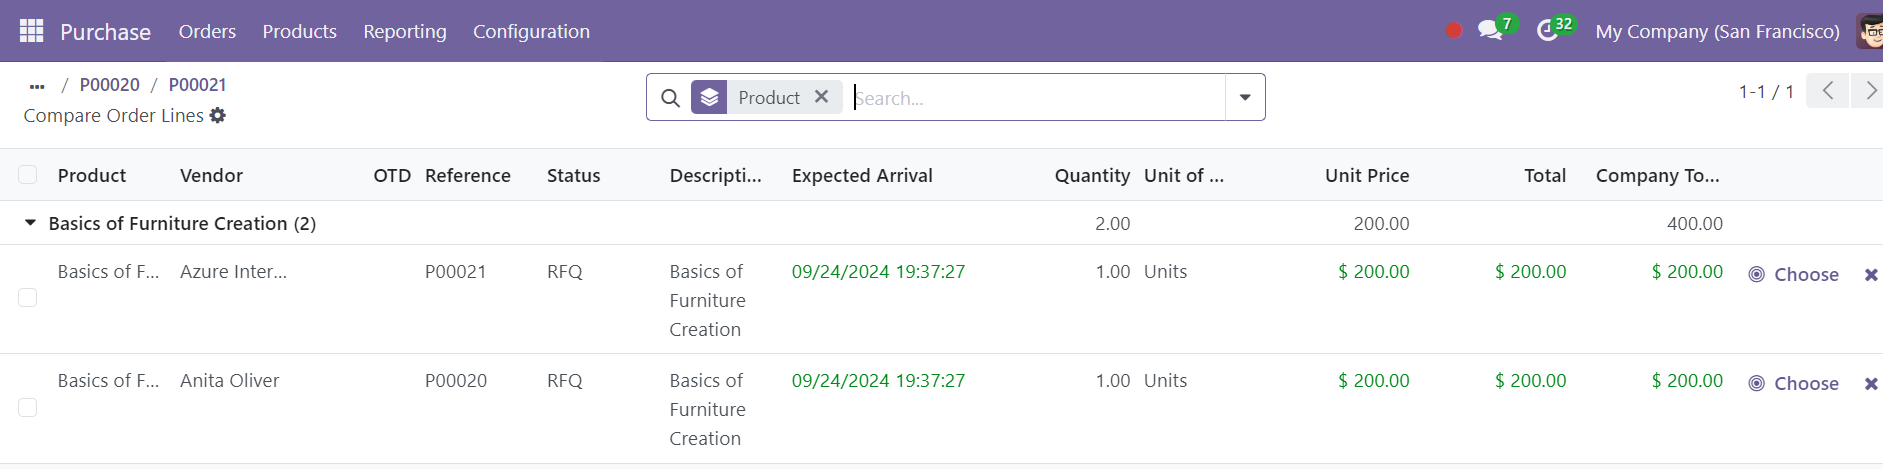
This page will display critical information, including Product Name, Vendor, Reference, Status, Description, Expected Arrival Date, Quantity, Unit Price, Total Cost, and Company.
This comparison tool allows you to make informed purchasing decisions, ensuring that you choose the best vendor for each product.
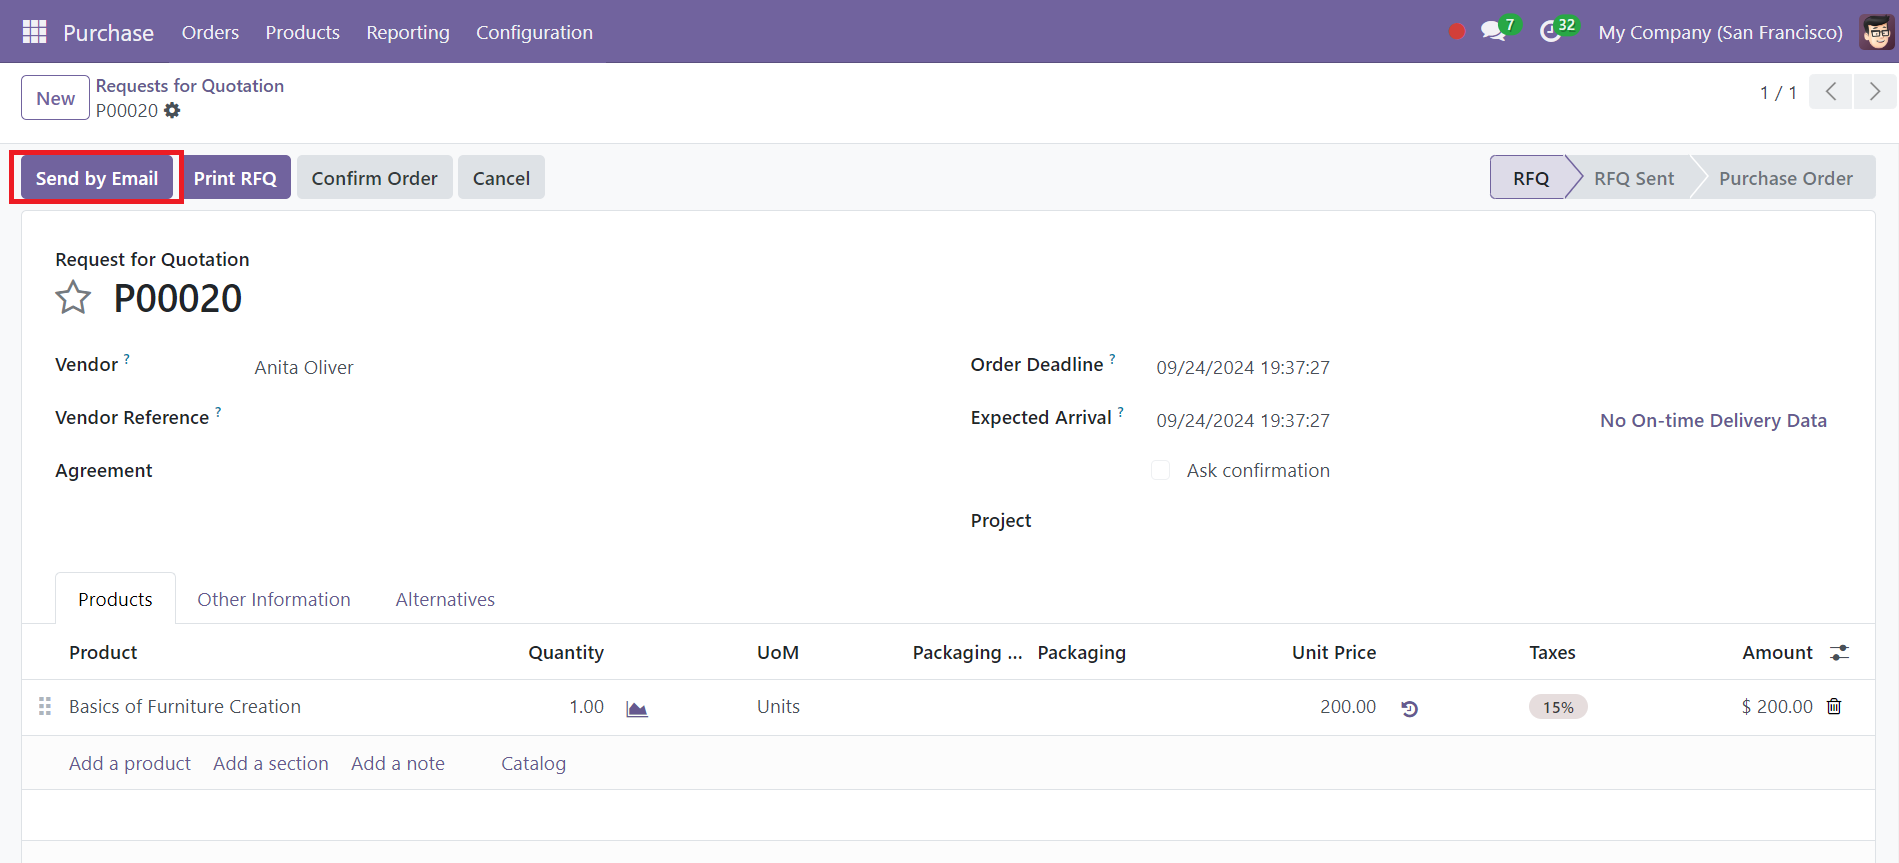
To send the RFQ to your vendor, select the Send By Email button. Odoo 18 will automatically generate an email template for the RFQ, which you can customize as needed.
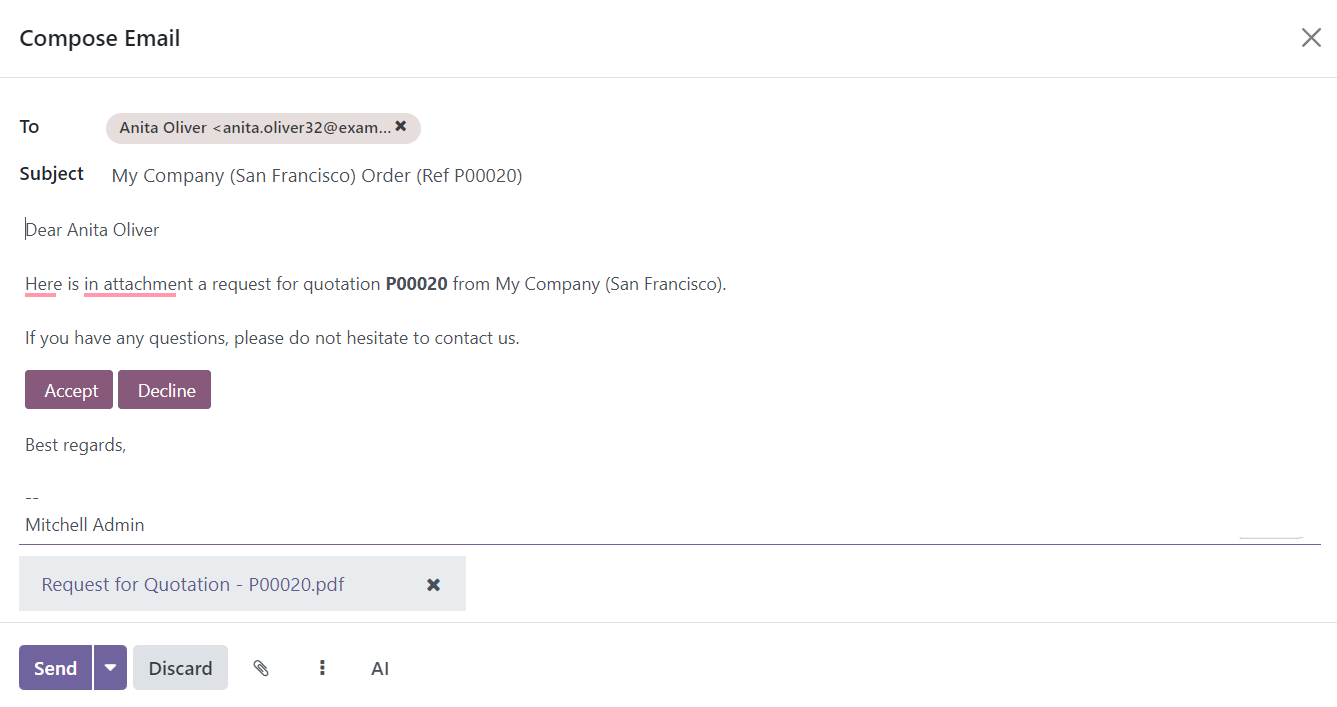
You can also attach additional files using the Attachments button and select the recipients in the To field. After reviewing the email, click Send to transmit the RFQ to the vendor.
After the RFQ has been sent, its status will update to RFQ Sent. If necessary, you can cancel the RFQ by clicking the Cancel button.
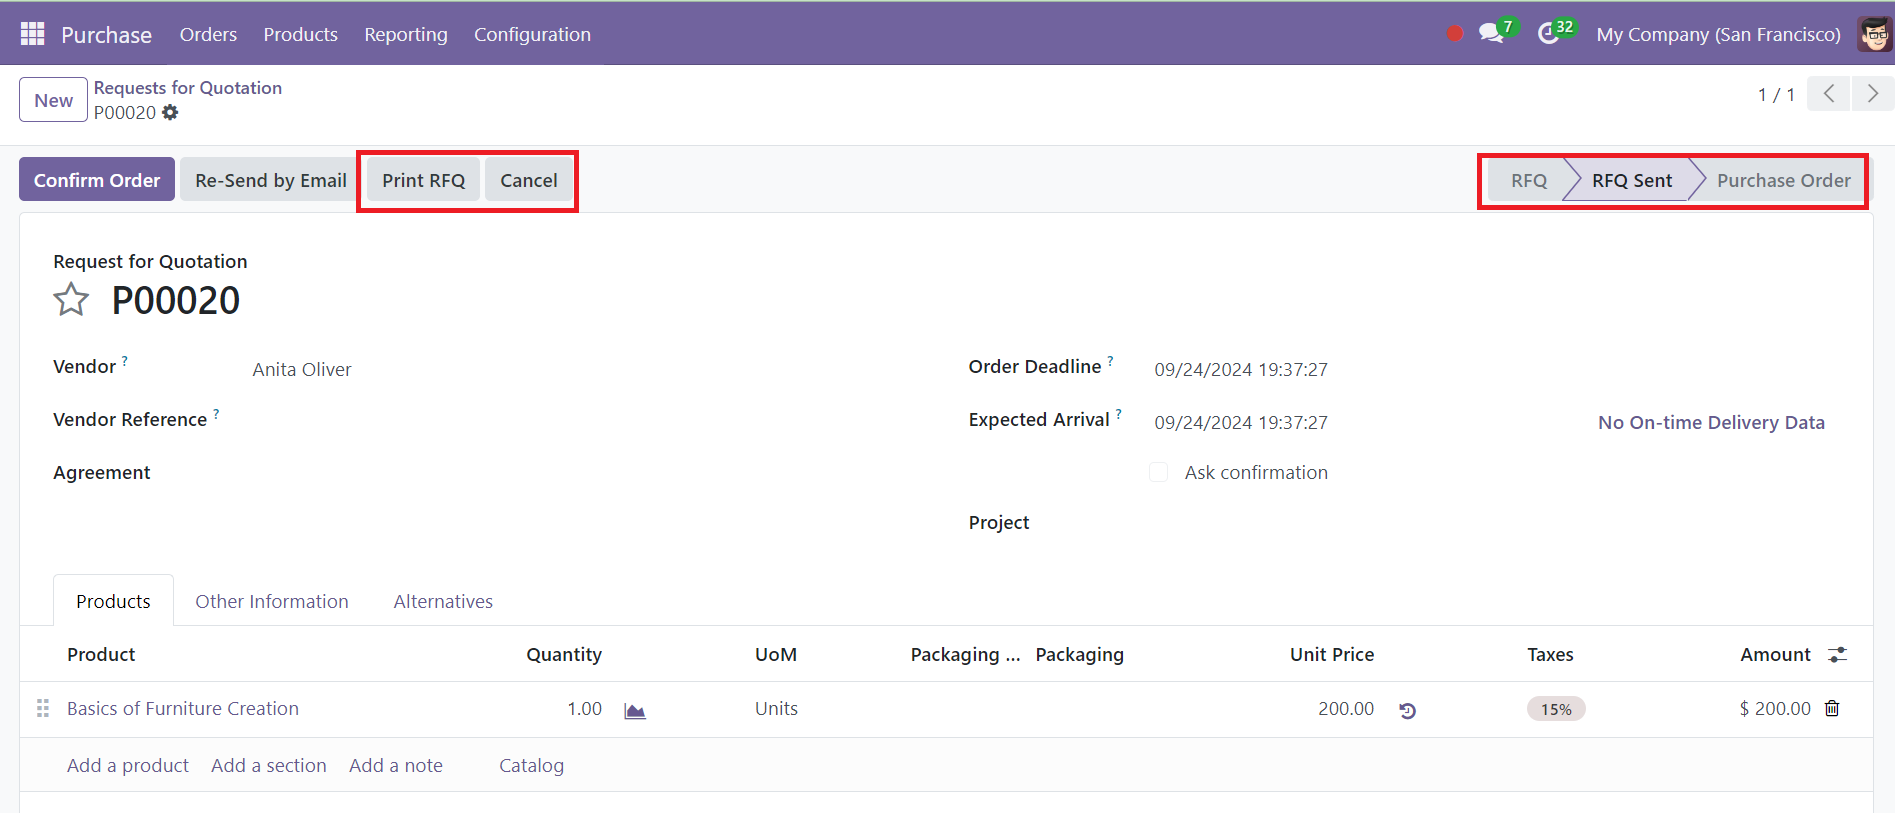
Odoo 18 also offers a Print RFQ function, allowing you to print a copy of the RFQ for your records.
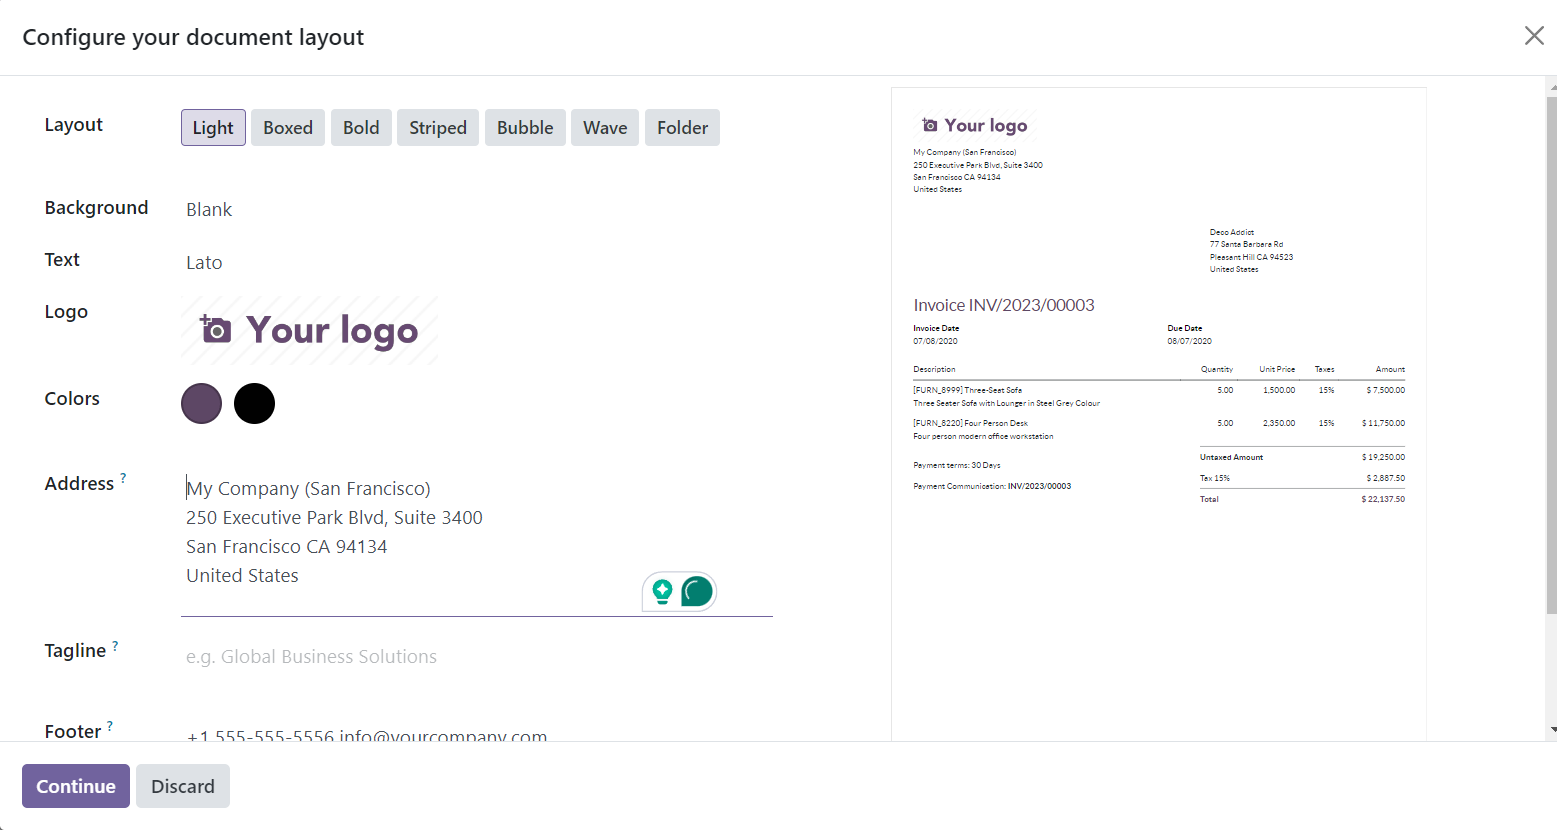
The print wizard lets you customize the document layout by selecting options for Layout, Background, Text, Logo, Colors, Address, Tagline, Footer, and Paper Format.
Once you finalize the print settings, click Continue to generate a hard copy of the RFQ.