Invoicing a Project
In Odoo 18, invoicing a project is an efficient and structured process that allows users to manage billable tasks with ease. To initiate invoicing for a project, the first step is to add the desired project within the project management section. However, before proceeding with invoicing, it is essential to activate the Billable option from the project management module's settings menu. This feature facilitates the invoicing process by enabling the appropriate billing options within the system.
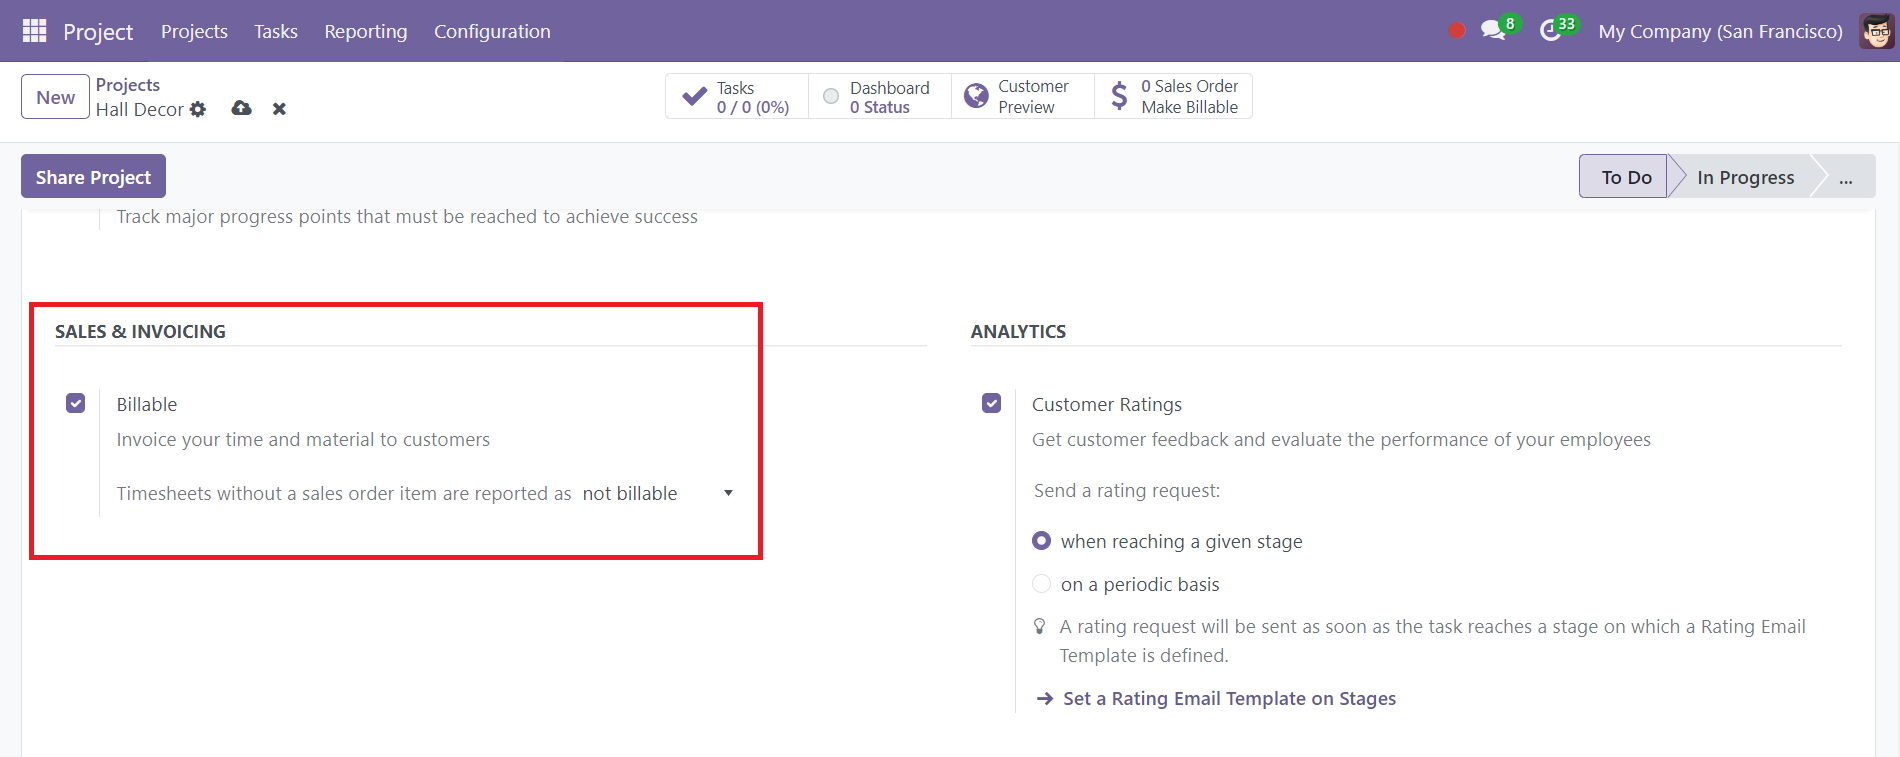
Once the Billable option is activated, users can access the Invoice tab within the project settings.
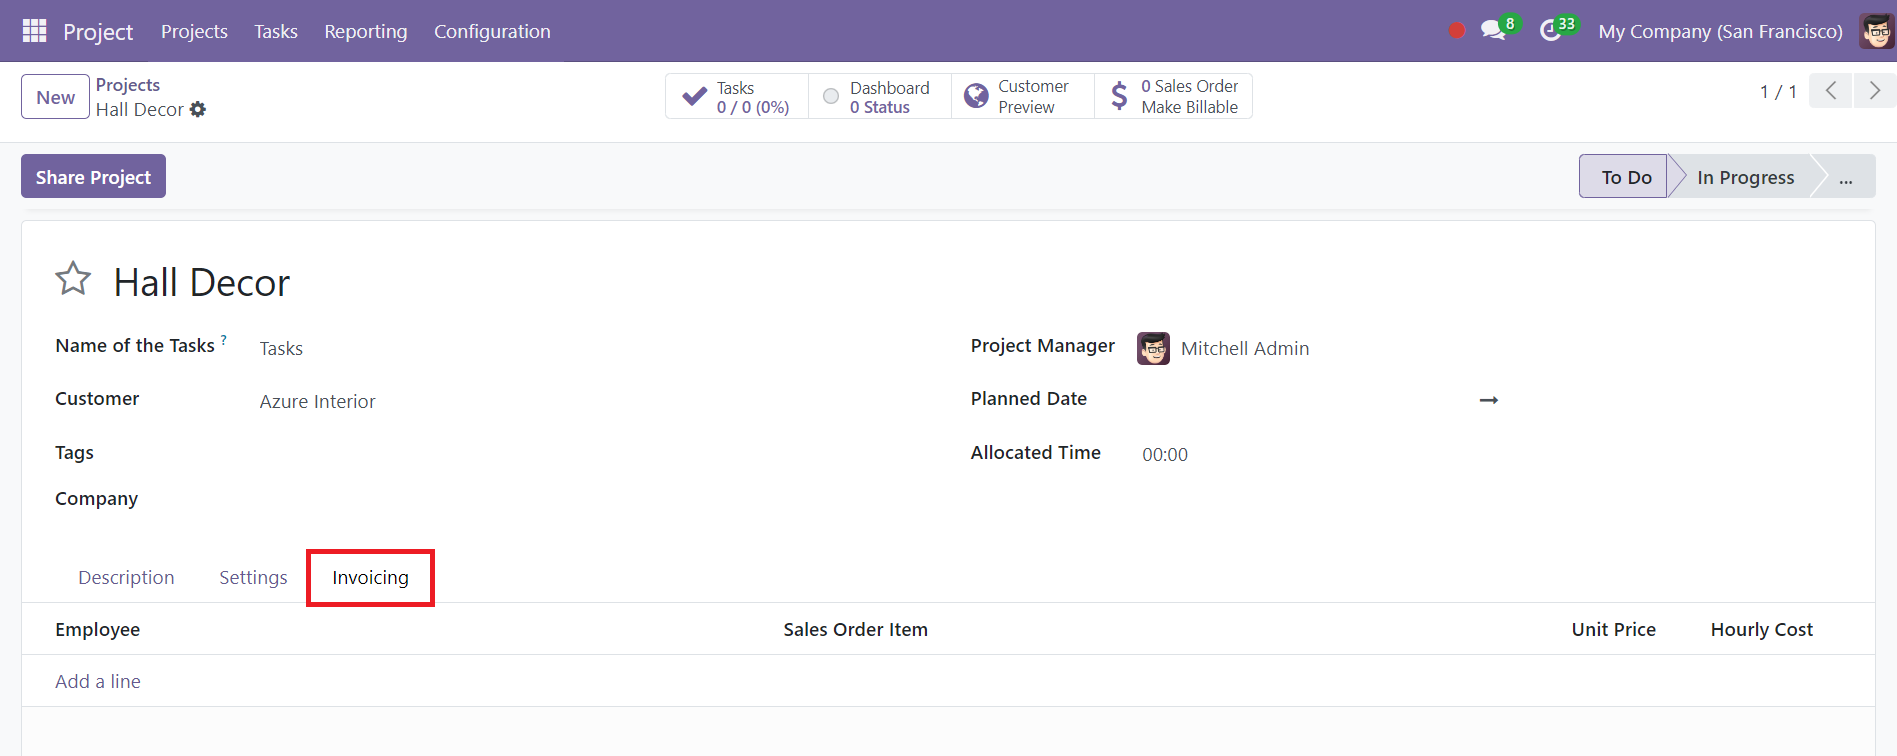
This tab provides essential features related to invoicing, allowing users to link the project or task with specific sales order items. Here, users can enter crucial details such as the cost per unit, the total hours worked on the project, and the names of the employees involved. The interface also includes a function to add additional lines for further details, ensuring that all relevant information is captured. Once all necessary details are entered, users can save the project, and the invoice options will become available.
Under the project management module, there are four distinct invoicing methods available: Timesheet, Fixed/Prepaid, Delivered Quantities, and Milestone invoicing. Each of these methods serves a unique purpose in capturing the financial aspects of project work. The Timesheet method allows for accurate invoicing based on the exact hours worked by employees on the project. To utilize this method, users must create a sales order and activate the invoicing policy to correspond with the timesheets.
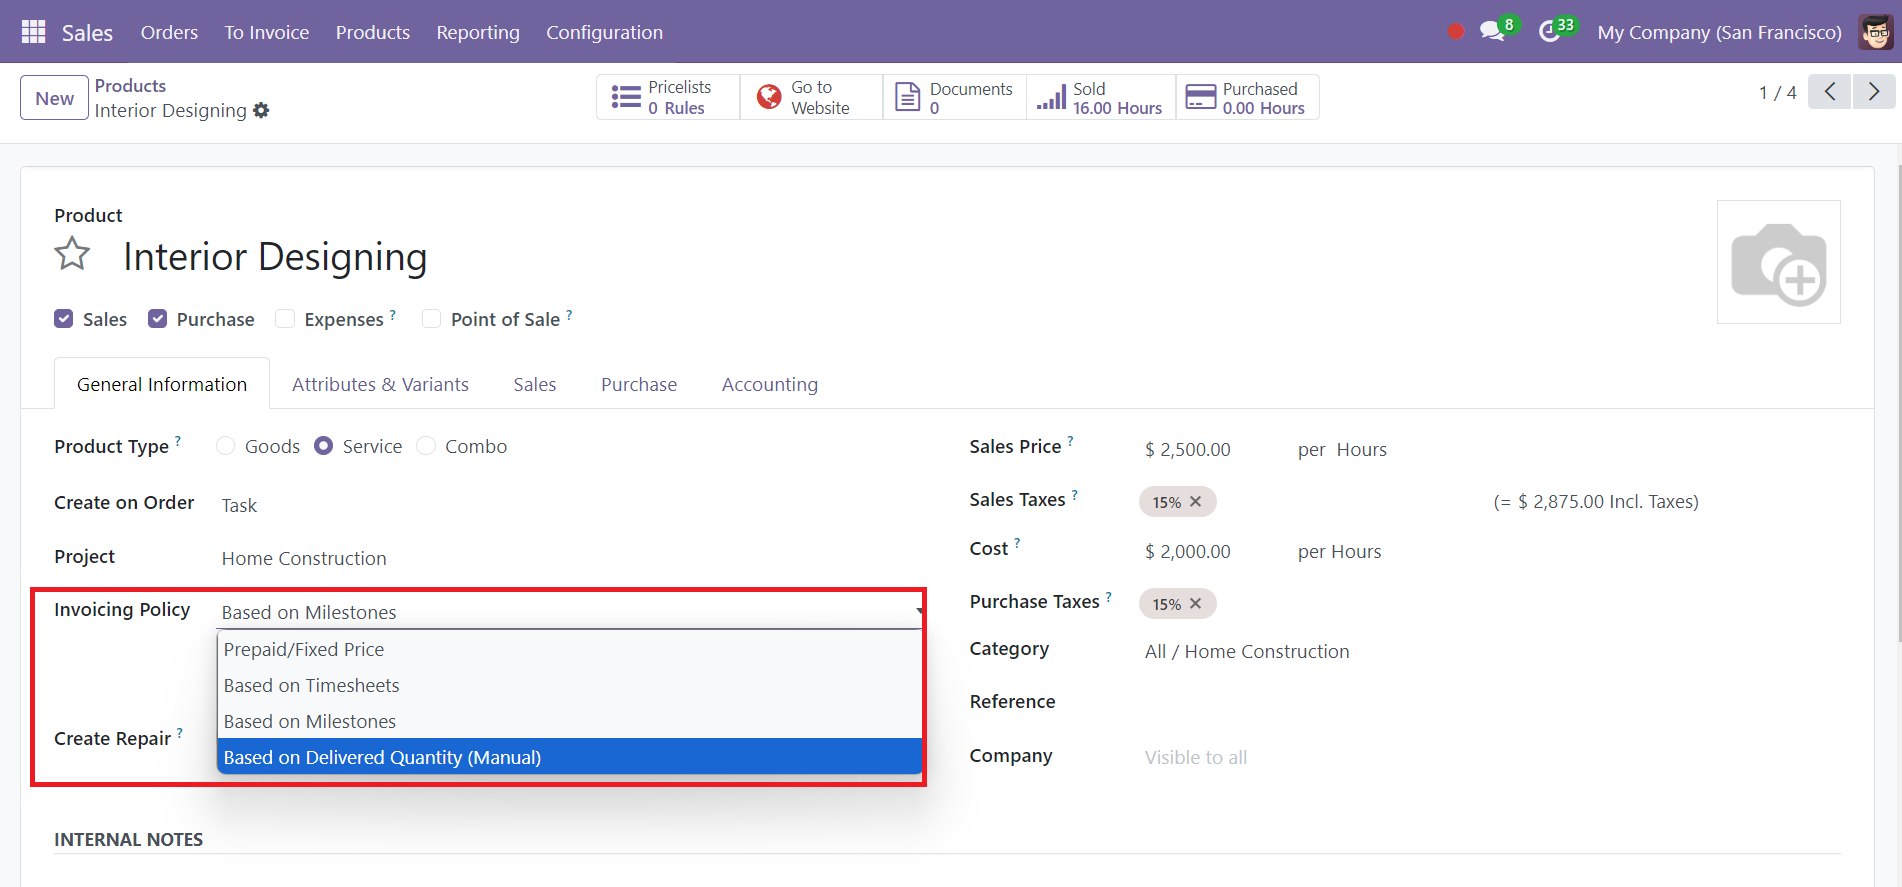
When creating a service-type project, it is important to select the correct invoicing policy. The available policies include Prepaid/Fixed, which invoices ordered quantities as soon as the service is rendered, Based on Timesheet, which allows for invoicing only according to the actual time recorded, Based on Milestones, which bills according to the number of milestones achieved within the project timeline, and Based on Delivered Quantity (Manual). If a project is set up for milestone invoicing, users can generate invoices at various stages of the project, such as design, testing, and planning phases, billing each completed stage.

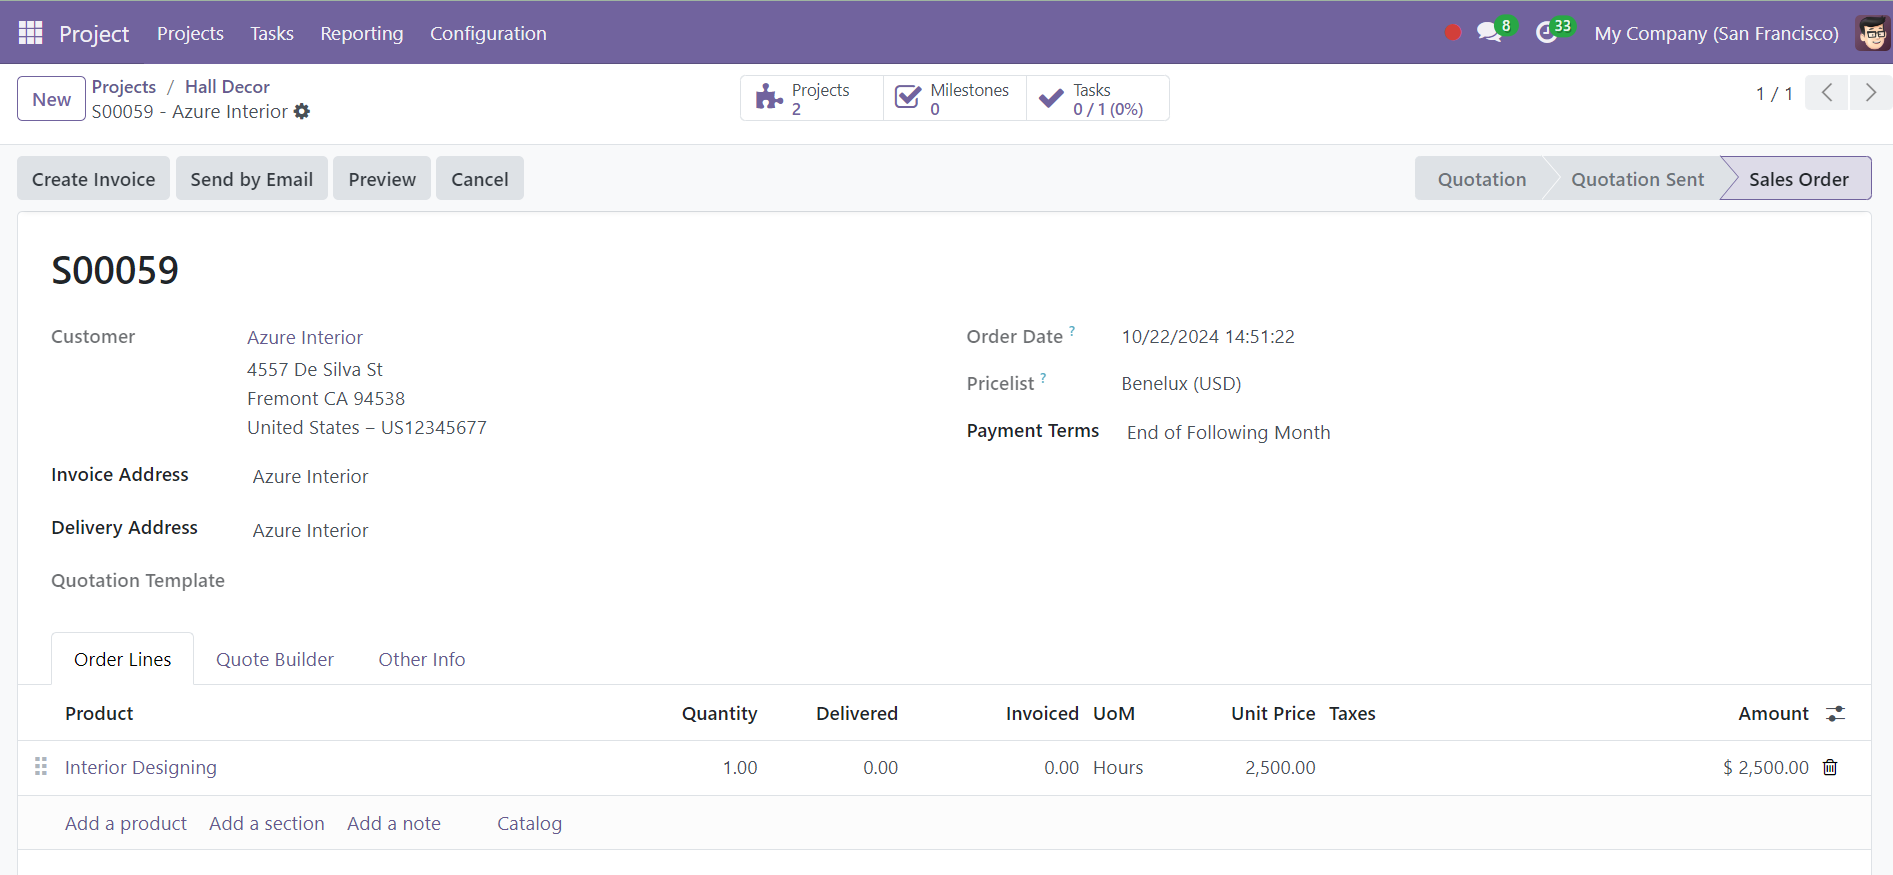
After confirming the sales order, users can create an invoice from the sales order page. This functionality ensures that all relevant sales orders are captured and allows for easy access to the invoicing feature.
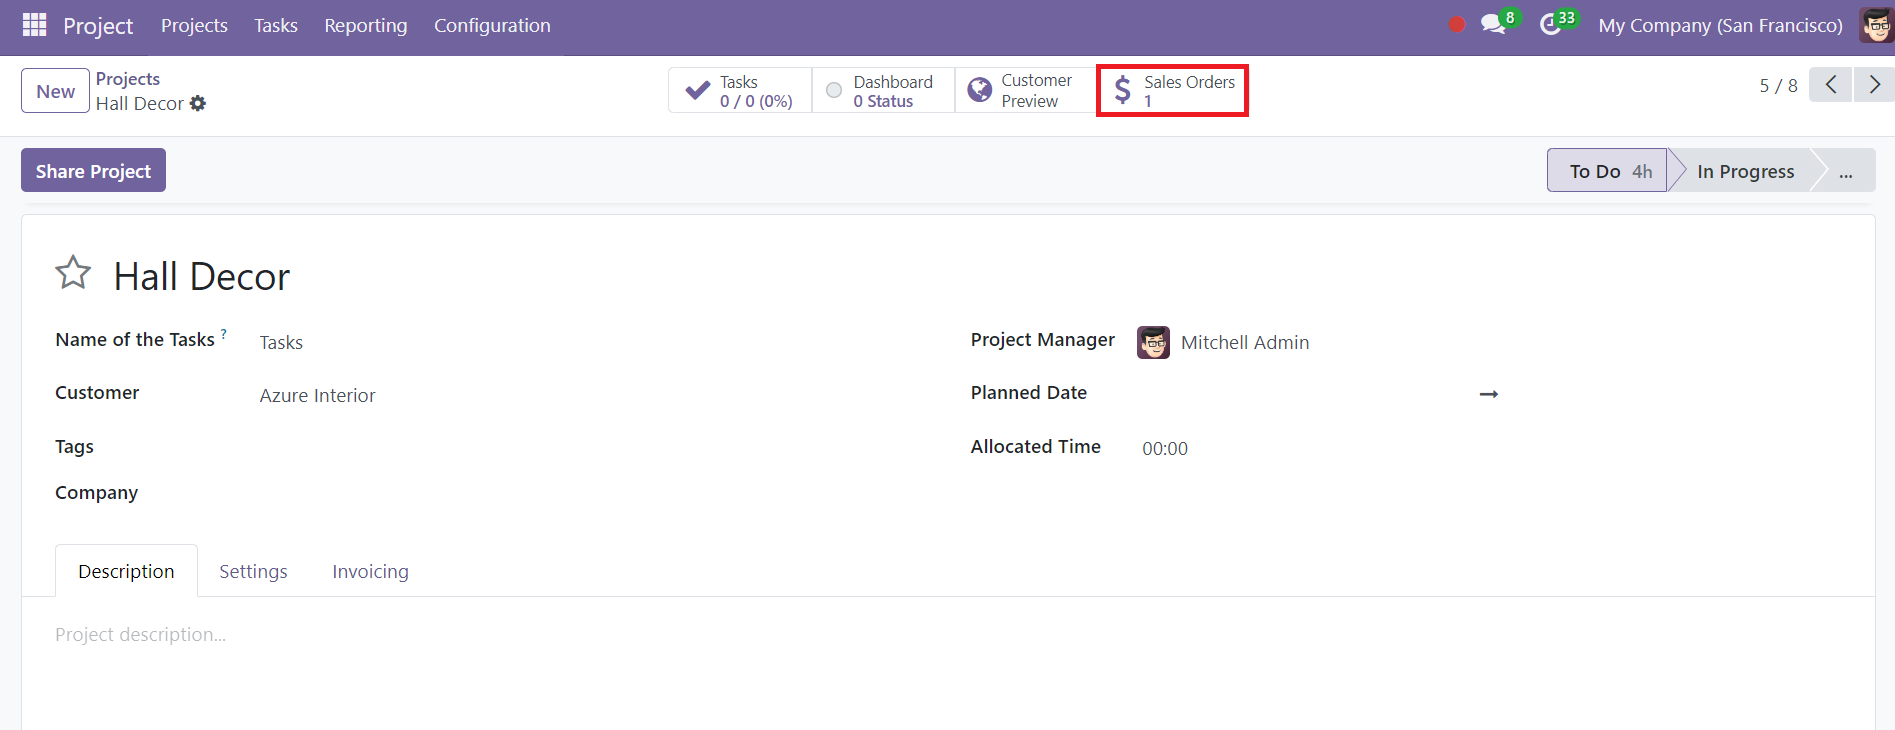
Within the project, the sales order smart panel provides a direct link to the invoicing options. By clicking on Create Invoice, a pop-up window appears, prompting the user to specify the type of invoice to be generated—either a regular invoice or a down payment invoice.
When creating the invoice, it’s crucial to verify the quantities delivered against those ordered. After reviewing the invoice details, users can confirm the invoice, thus completing the invoicing process.
Invoicing Based on Timesheet
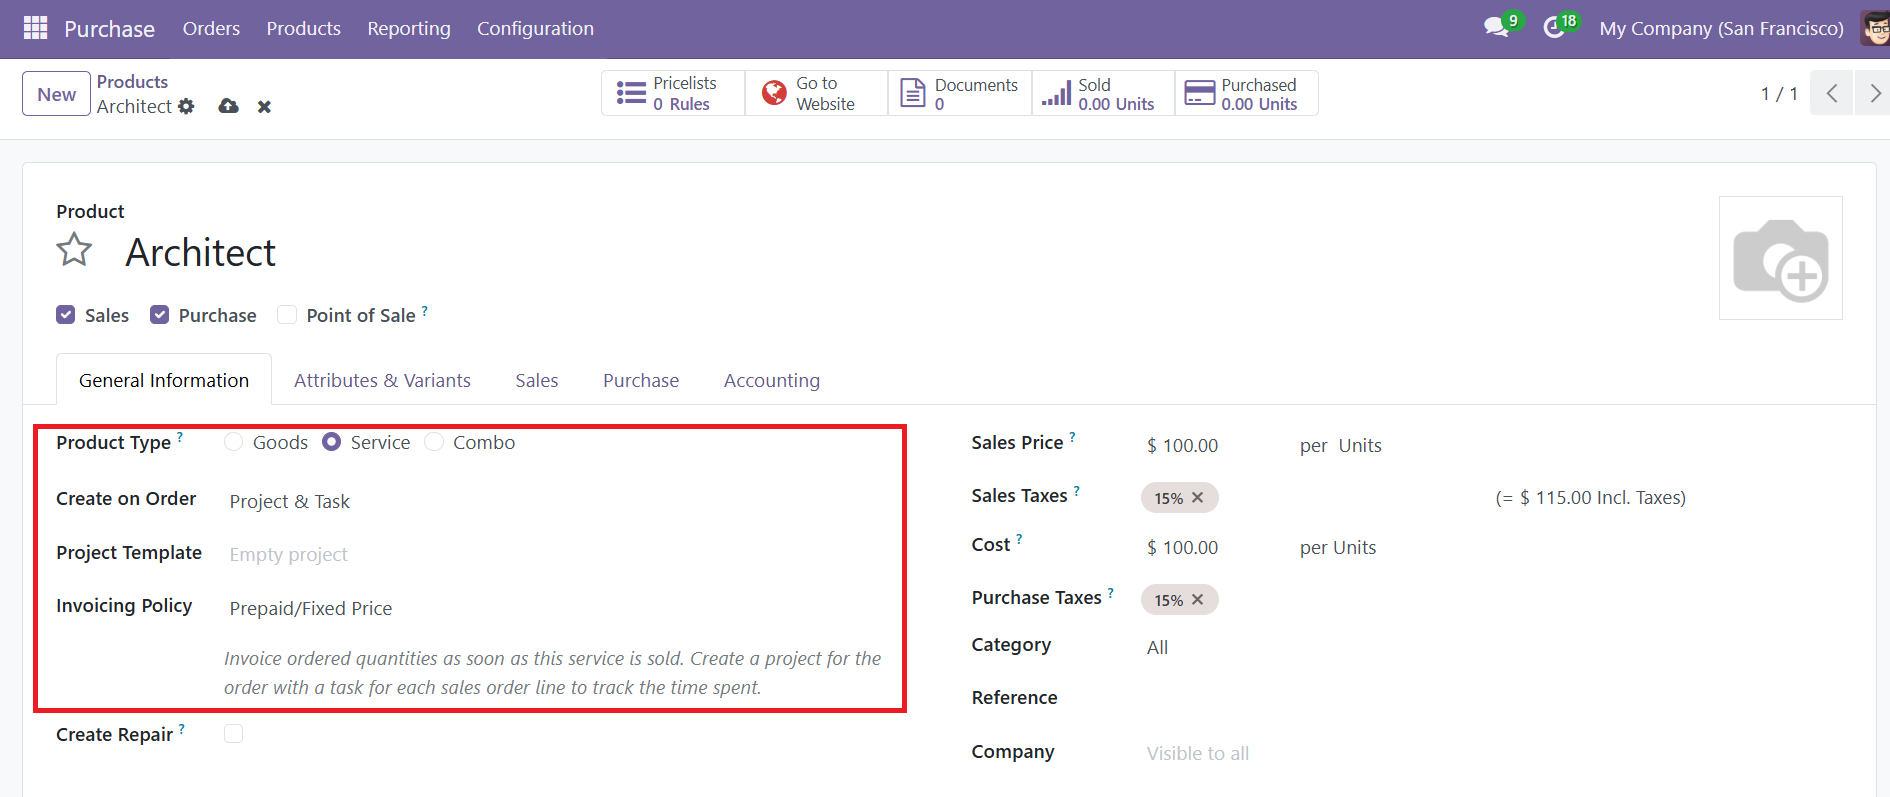
In the Odoo 18 Project module, invoicing a project based on timesheets is a straightforward process that ensures businesses can bill clients accurately for time spent on tasks. To enable this feature, certain configurations must be completed. A service product must be configured to link timesheet-based invoicing to sales orders. In the Sales app, navigate to Products > Products, select or create a service product, and set its Product Type to "Service."
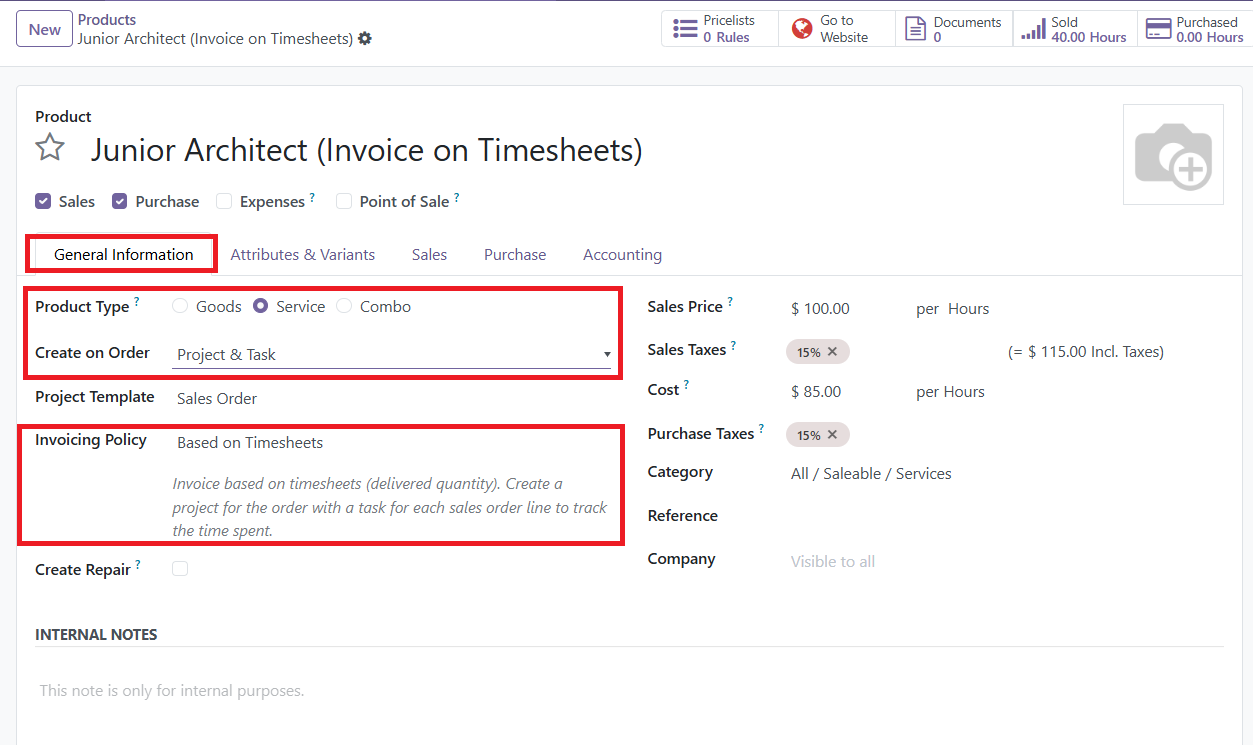
Next, adjust the Invoicing Policy to "Based on Timesheets" and set the Create on Order field to "Project & Task" or "Task" depending on whether a new project or task should be created for each sales order.
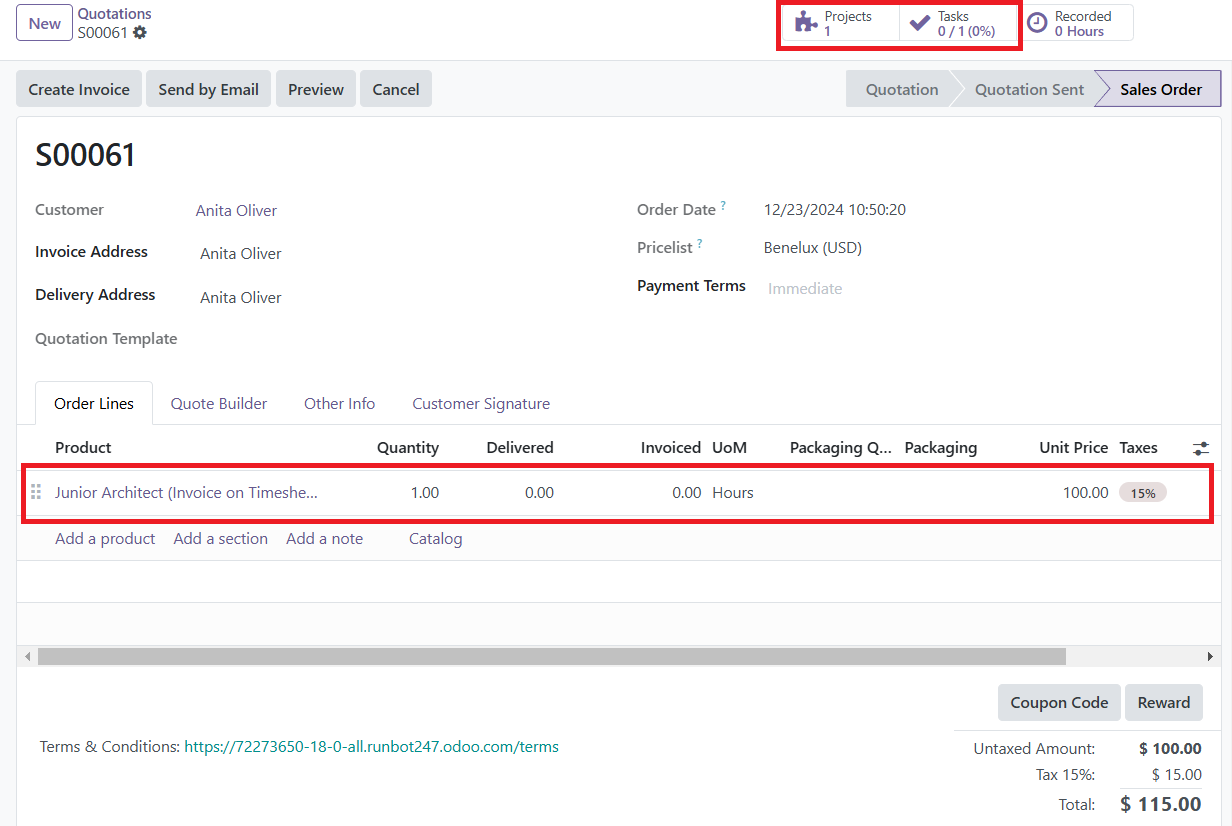
When a sales order is created using this configured service product, a corresponding project and task are automatically generated in the Project app. Clicking the Projects smart button opens the specific project associated with the sales order while clicking the Tasks smart button displays the corresponding task. Both the project and task can also be accessed directly from the Project module.
To record time spent on a sales order, start by clicking the Tasks smart button. This opens the related task form, where you can navigate to the Timesheets tab. In this tab, employees can be assigned to the project, and the time they spend working on the task can be logged by either the employees themselves or the sales order creator.

To add an employee and log their time, click Add a line within the Timesheets tab. Then, choose the relevant Date and Employee from the fields provided. You may also include a brief description of the work completed in the Description column, although this is optional. Finally, input the number of hours worked in the Hours Spent column. Click outside the field to save the entry. Repeat these steps for all employees and the corresponding hours worked on the project.
The hours entered in the Hours Spent column are automatically updated in the Allocated Time field at the top of the task form, displayed as a percentage. This percentage indicates the progress made toward the total allocated work hours for the task.

Additionally, the same data is presented as numerical values in the Hours Spent and Remaining Hours fields, located at the bottom of the Timesheets tab.
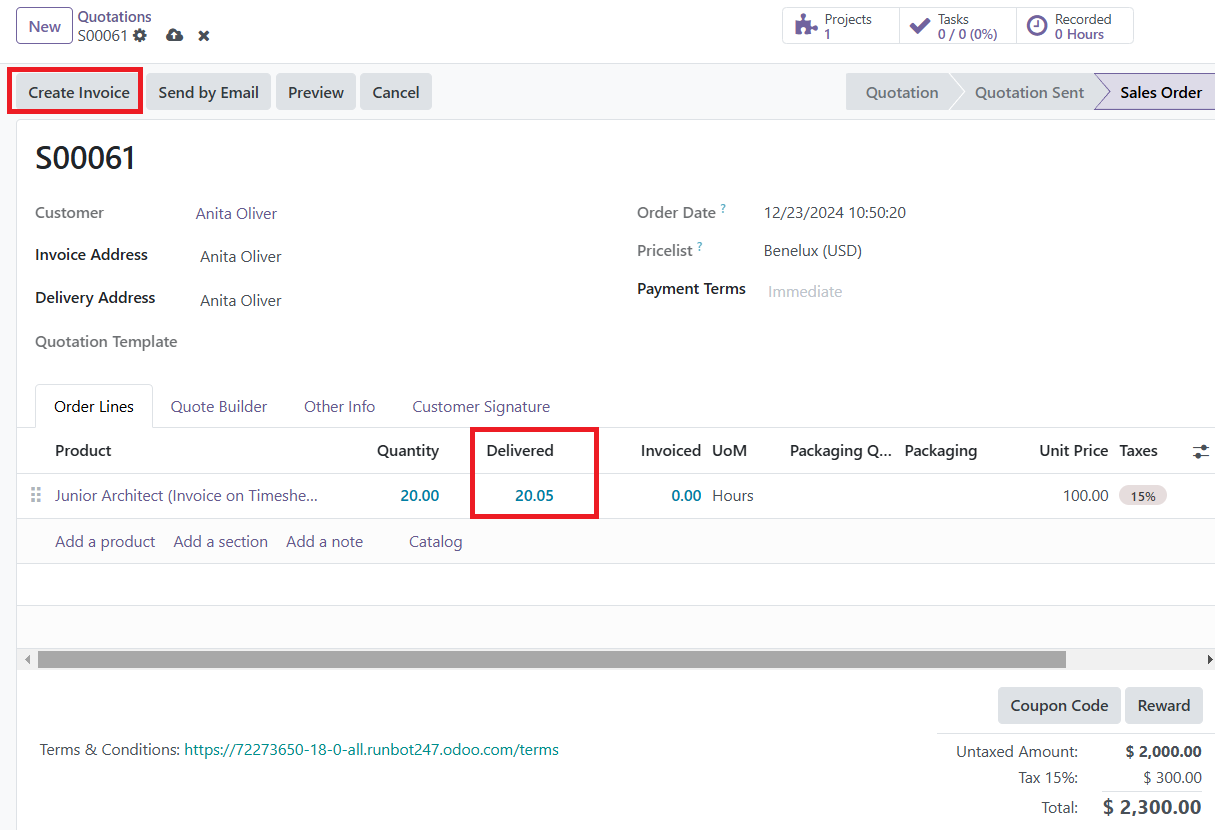
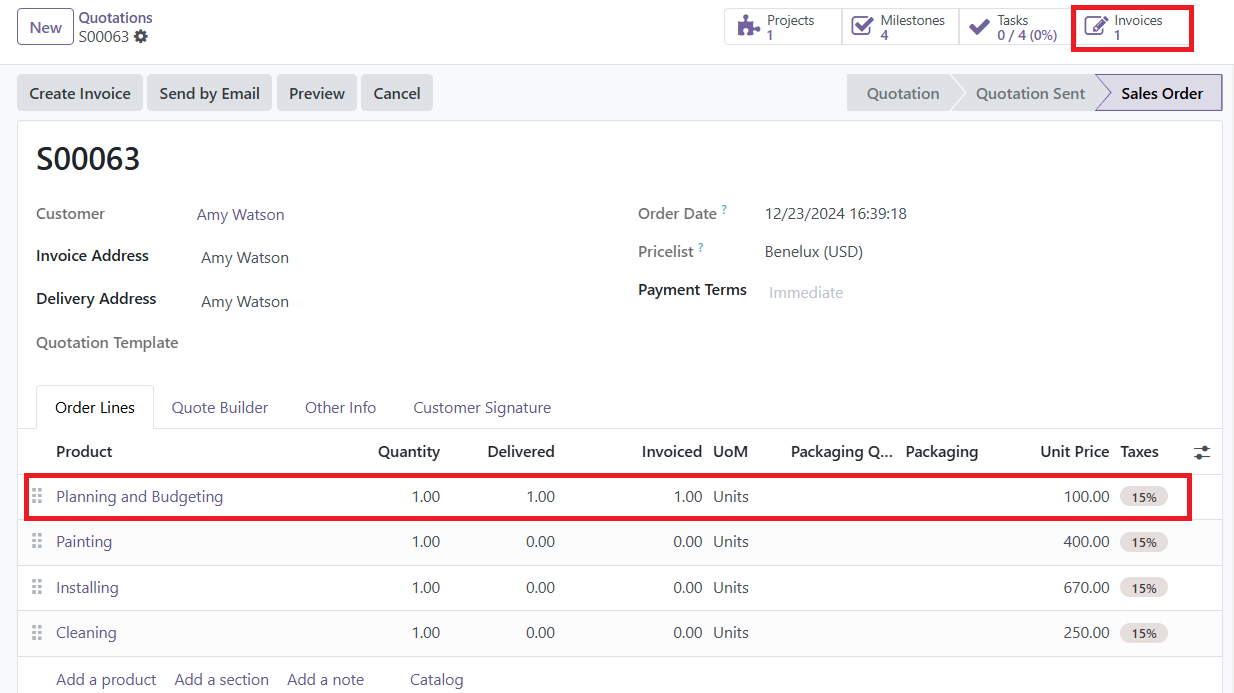
To invoice the customer, return to the sales order where the time spent is displayed in the Delivered column under the Order Lines tab. Click Create Invoice and choose the "Regular Invoice" option.

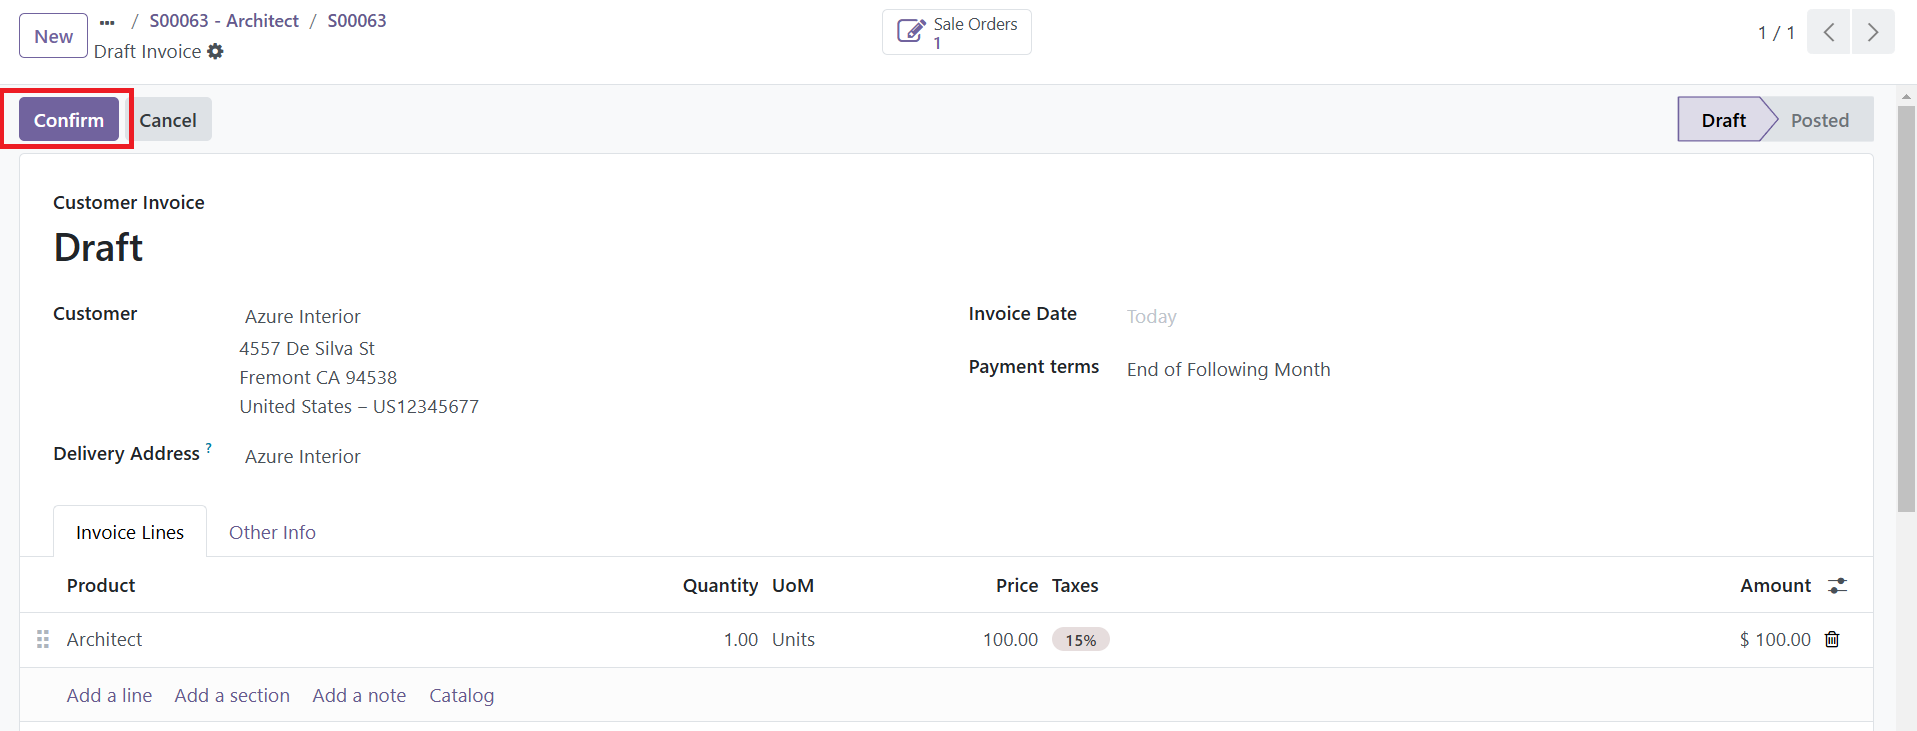
A draft invoice is generated, showing the recorded hours under the Invoice Lines tab, including analytic distribution details. Finally, confirm the invoice to complete the billing process.
This workflow ensures a seamless transition from task management to invoicing, enabling accurate billing for time used in a project.
Invoicing Based on Project Milestones
Invoicing based on project milestones is a practical approach for managing large-scale or high-cost projects. Milestones represent distinct phases of work that lead to the project's or contract's completion. This invoicing method ensures a steady cash flow for the company throughout the project's duration and enables customers to pay in manageable installments while tracking the project's progress.
In Odoo, each project milestone is treated as an individual product. To configure such products, navigate to Sales module > Products > Products. Select an existing product or create a new one by clicking New. On the product form, within the General Information tab, set the Product Type field. Then, choose Based on Milestones from the Invoicing Policy drop-down menu.
Next, configure the Create on Order field. By default, it is set to Nothing, but clicking on it reveals options in a drop-down menu.
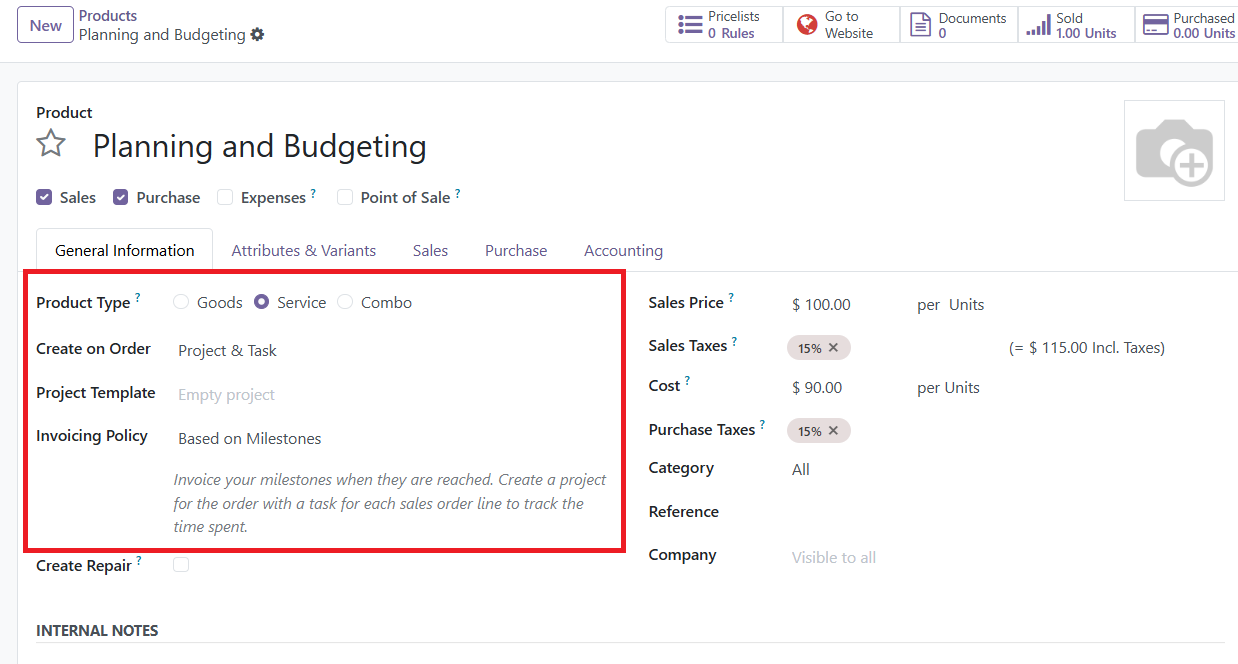
If Task is selected, a Project field appears where an existing project from the Projects app can be chosen. Selecting Project & Task or Project introduces an additional field: Project Template. The Project Template field allows the selection of a template for the created project.
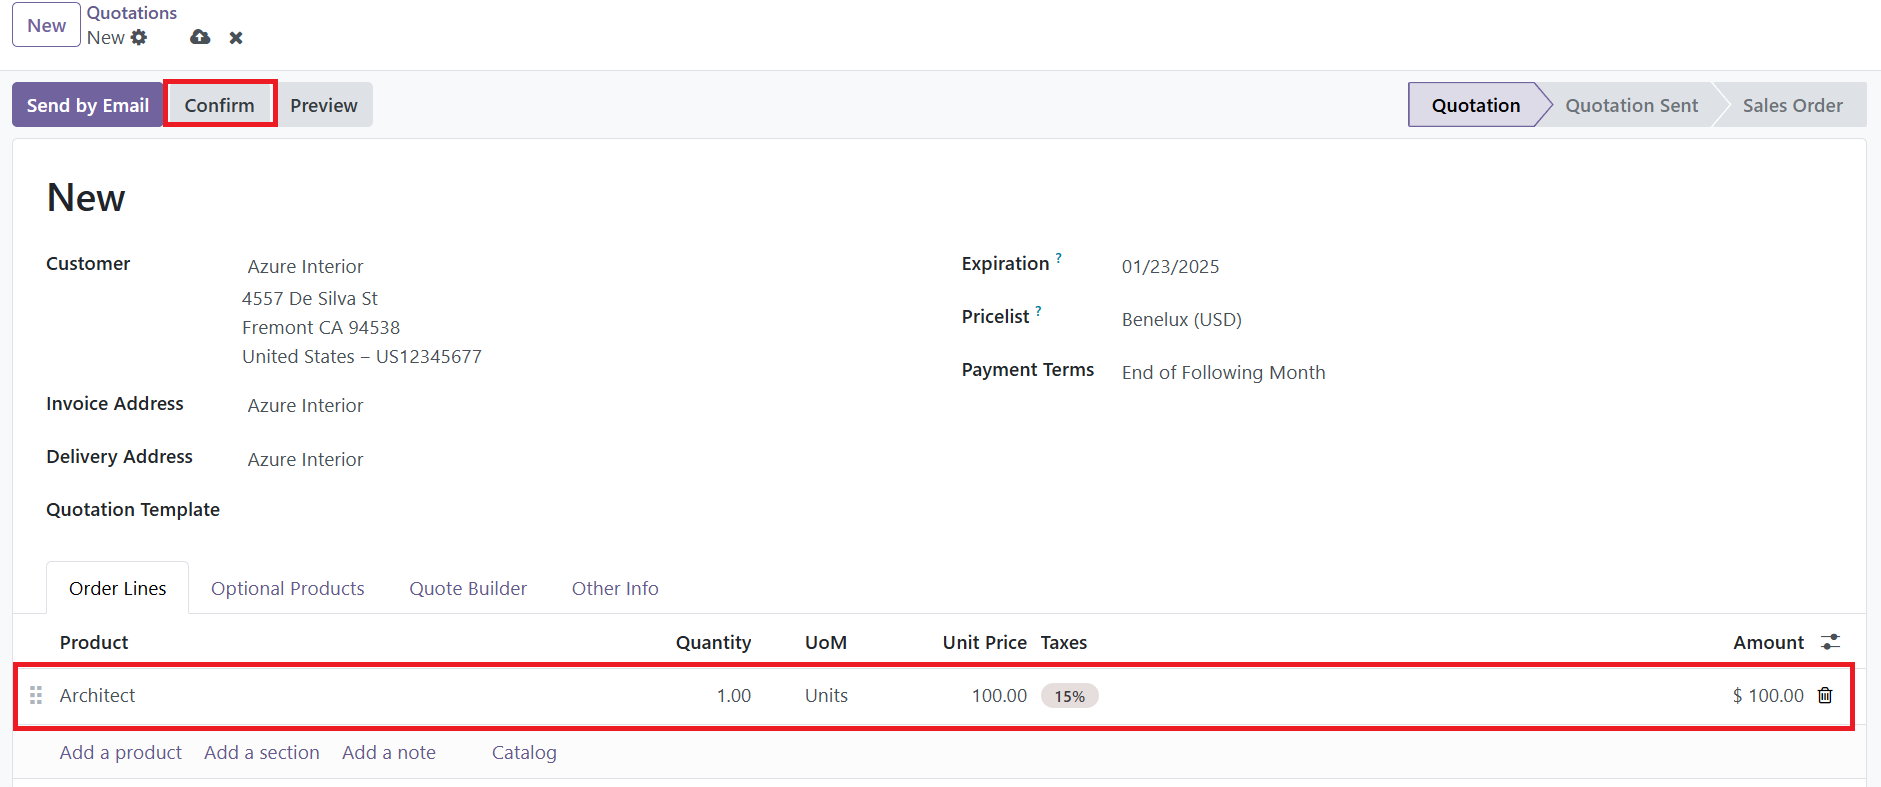
Invoicing based on project milestones begins with creating a sales order containing milestone product(s). To start, navigate to the Sales module and open a blank quotation form by clicking on New. In this form, the customer details need to be added to the Customer field. Next, in the Order Lines tab, click on Add a product and select the milestone product(s) from the product list. These products represent the specific project milestones for which the customer will be invoiced.
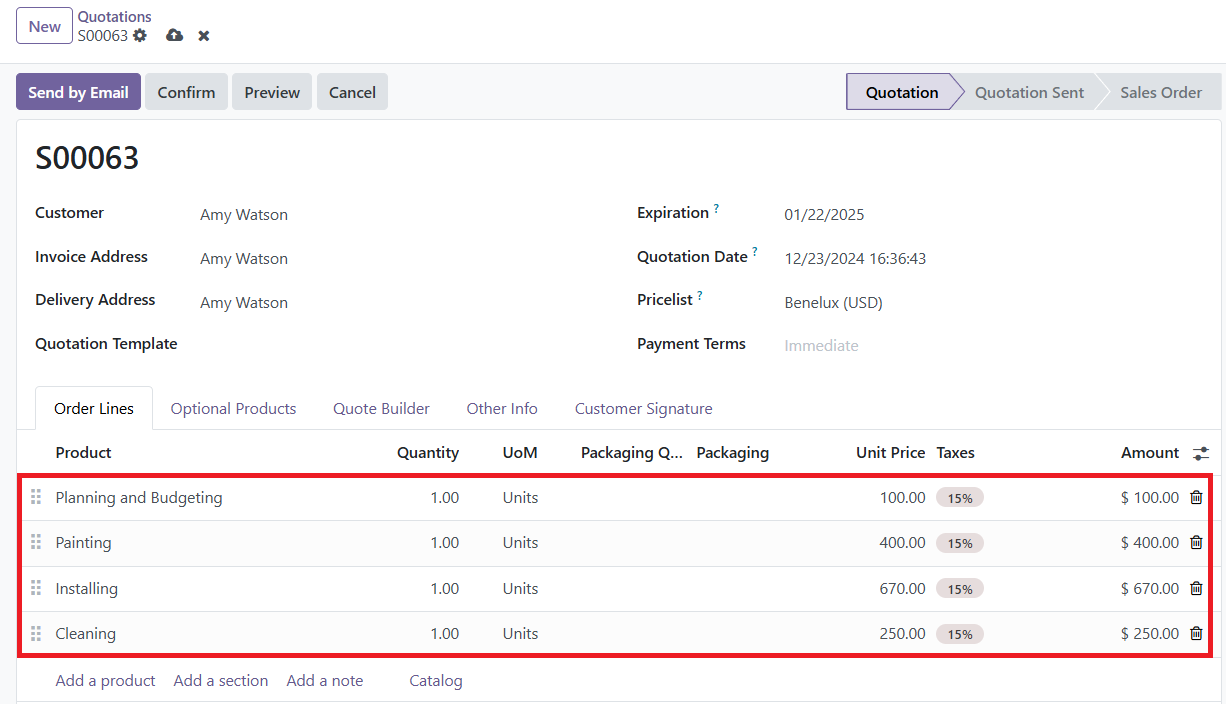
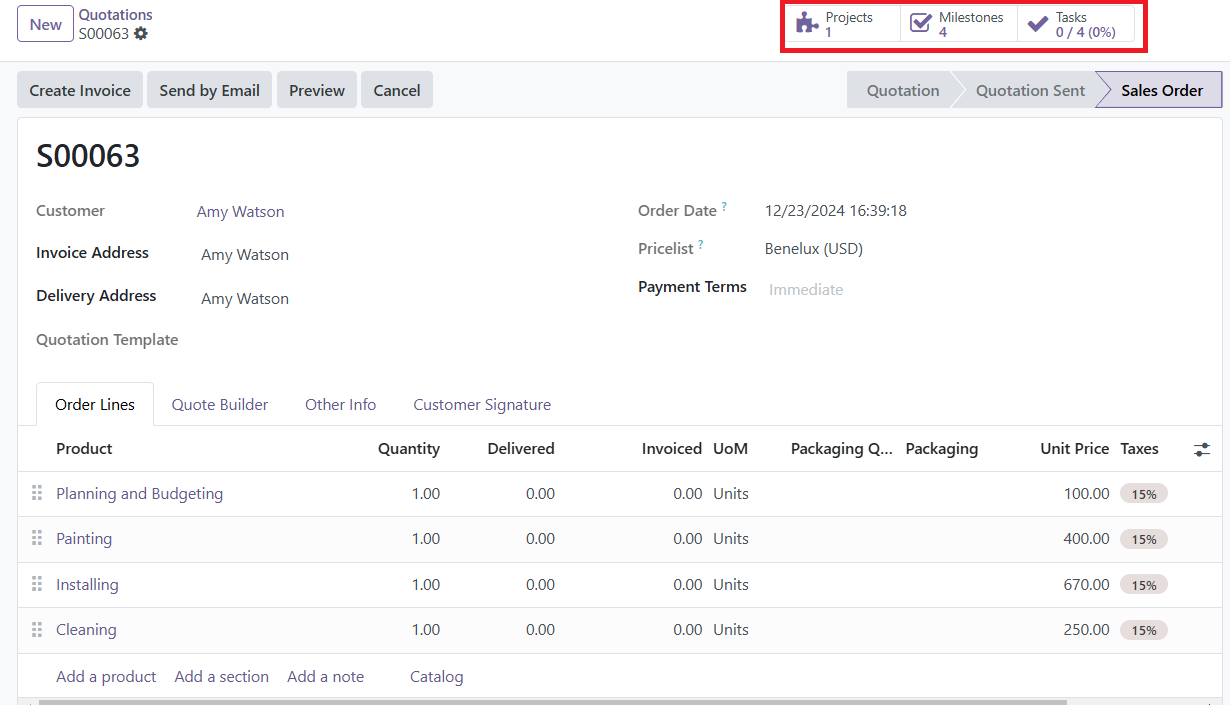
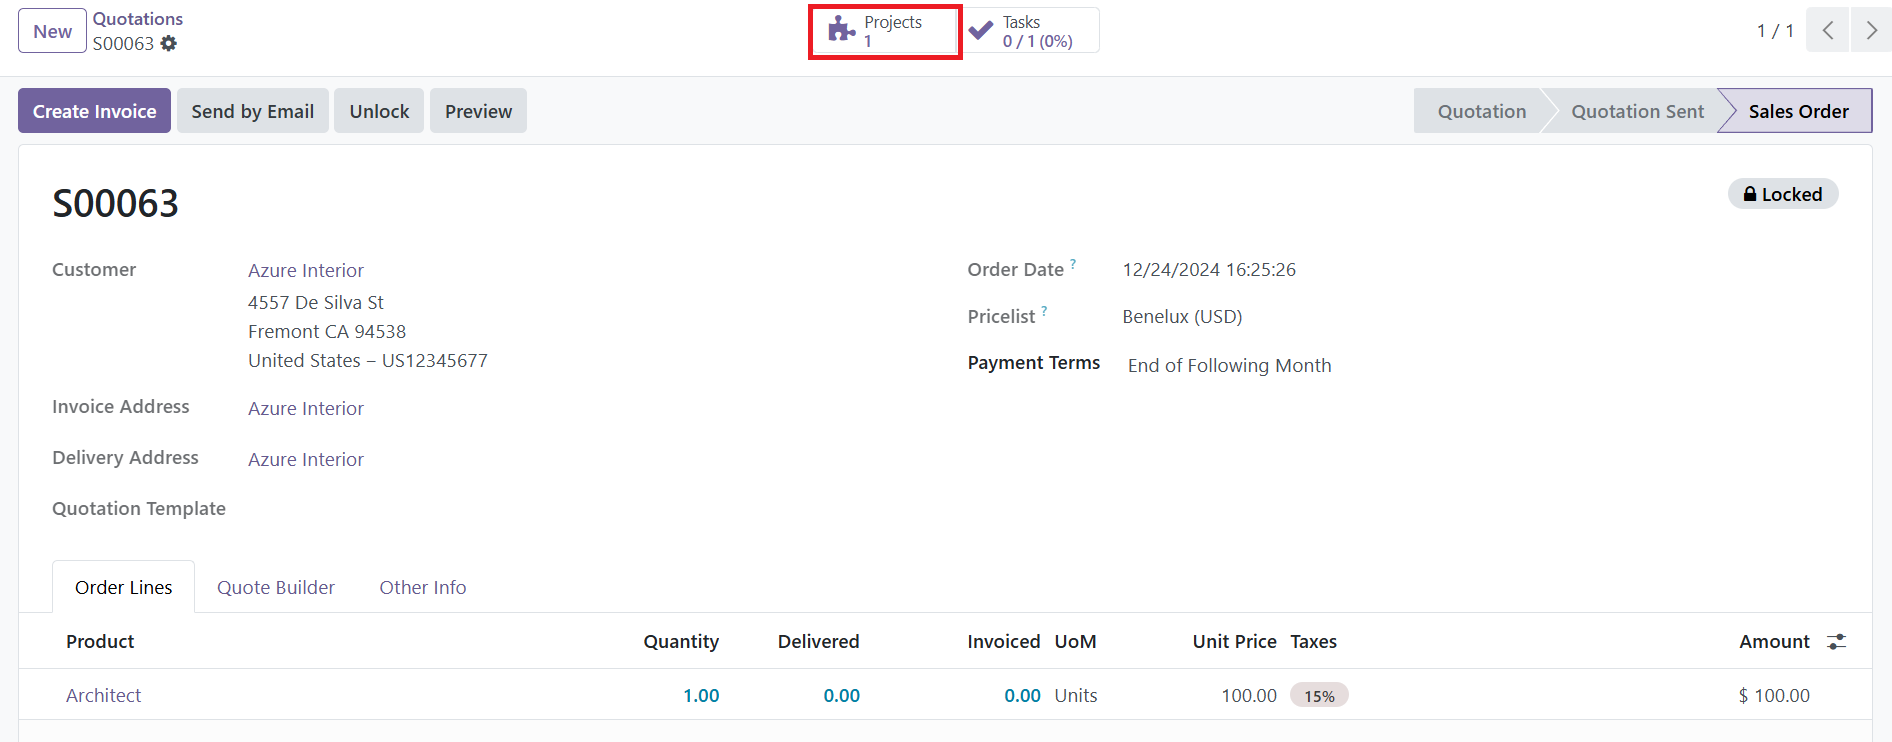
Once all necessary milestone products have been added, confirm the order by clicking the Confirm button. This action converts the quotation into a sales order and triggers the appearance of additional smart buttons at the top of the form.

These smart buttons are generated based on the configuration of the Create on Order field in the product setup. Among them is the Milestones button, which is essential for managing and tracking project milestones.
Clicking on the Milestones button opens a dedicated page where all milestones related to the project can be managed. Initially, this page will be blank. To create a new milestone, click on New and provide relevant details.
After adding the milestones, return to the sales order using the breadcrumbs navigation at the top of the page.
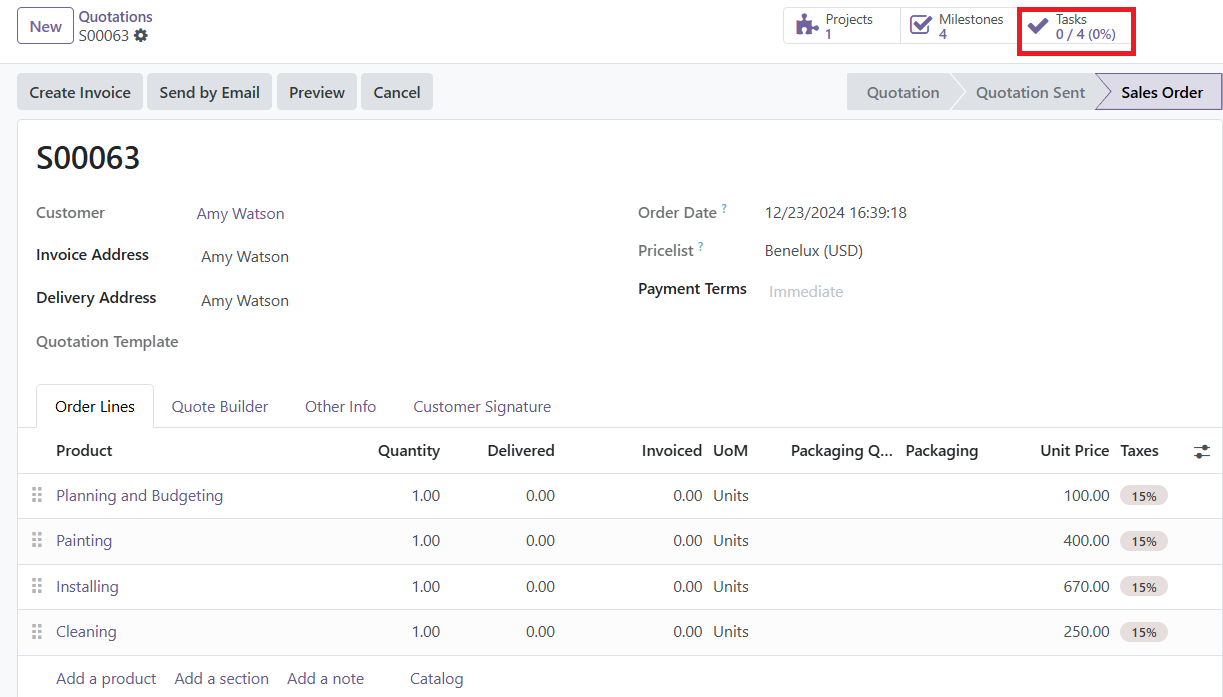
From the sales order, click on the Tasks smart button. This action opens a dedicated Tasks page, where a task is created for each sales order item configured with the appropriate option in the Create on Order field during product setup.
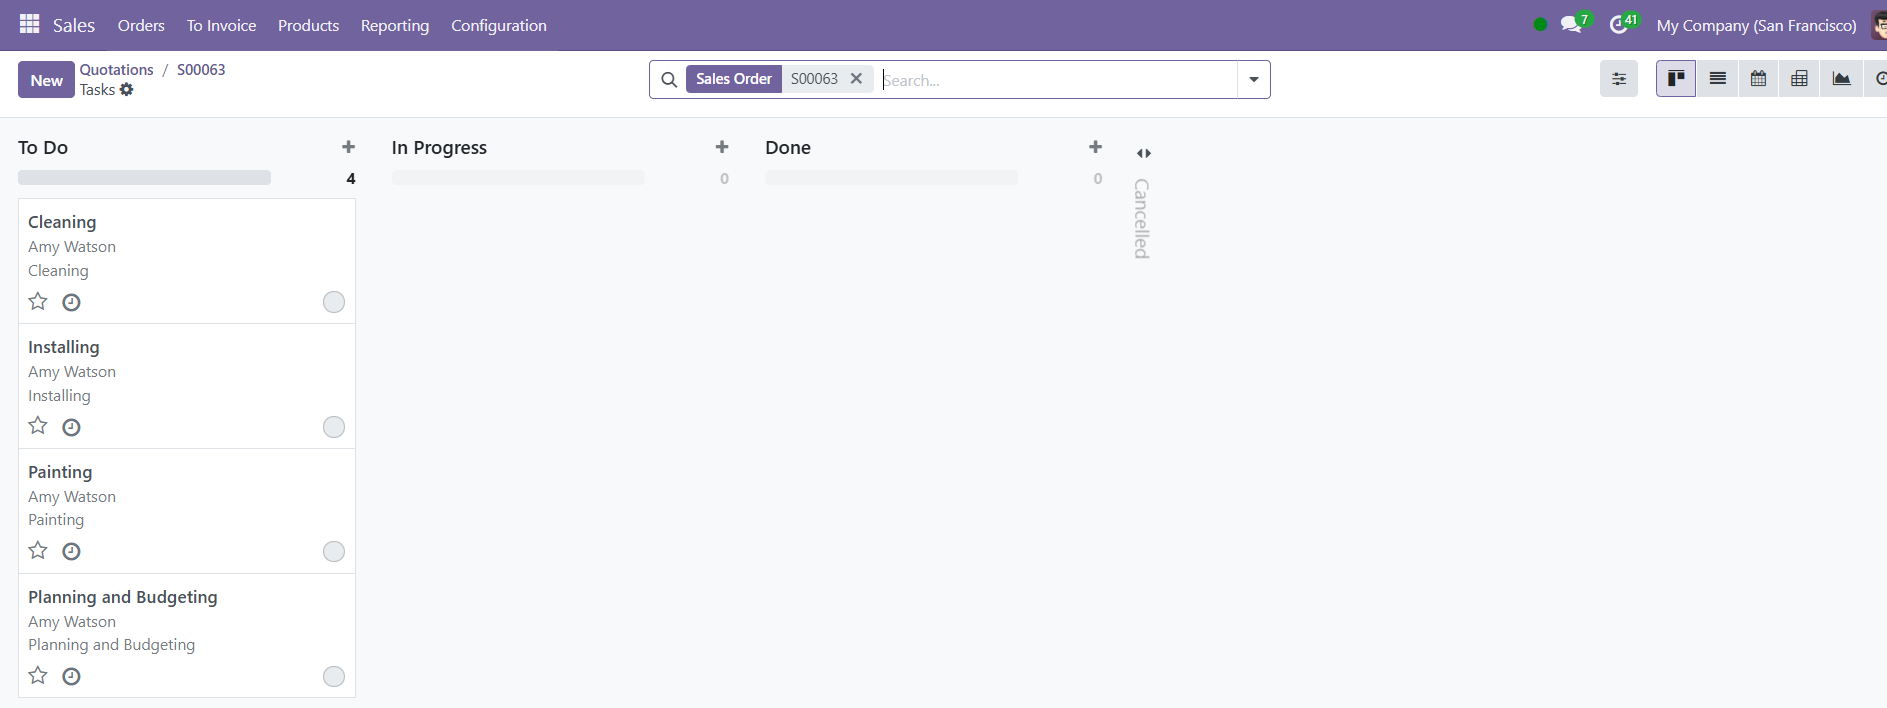
To manually link a configured milestone to a specific task, start by selecting the desired task from the Tasks page, which will open the task form. Within the task form, locate the Milestone field. From this field, choose the milestone with which the task should be associated.
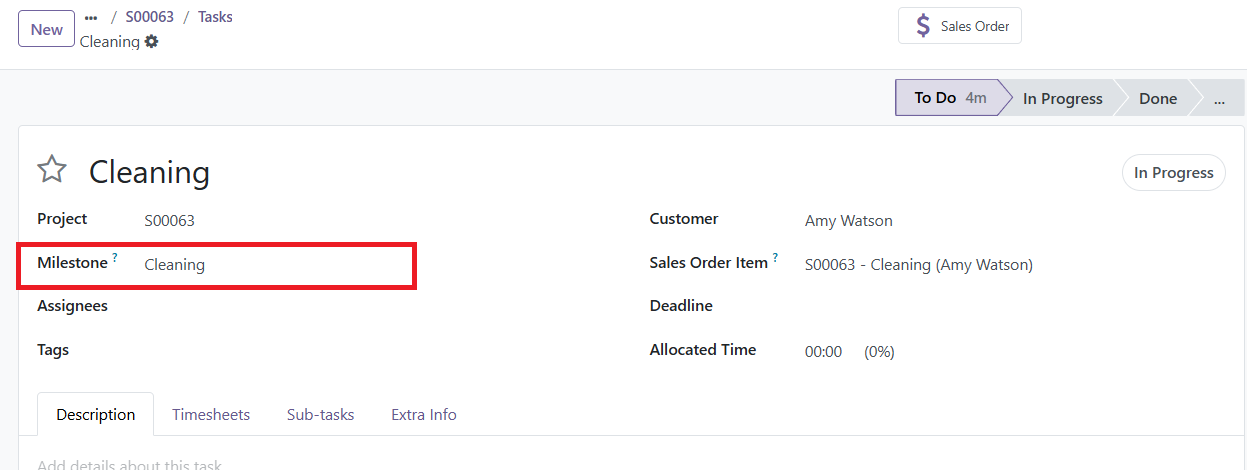
Repeat this process for all tasks associated with the project's milestones to ensure proper configuration. Once these tasks are aligned with their respective milestones, employees can begin logging their progress directly into the task, adding relevant notes as needed.
When a task is fully completed, it signifies that the associated milestone has been reached. At this stage, it's time to proceed with invoicing the milestone. To do so, return to the sales order, either by using the breadcrumb navigation links or by navigating through the Sales module: go to Orders > Orders, and select the appropriate sales order from the list.
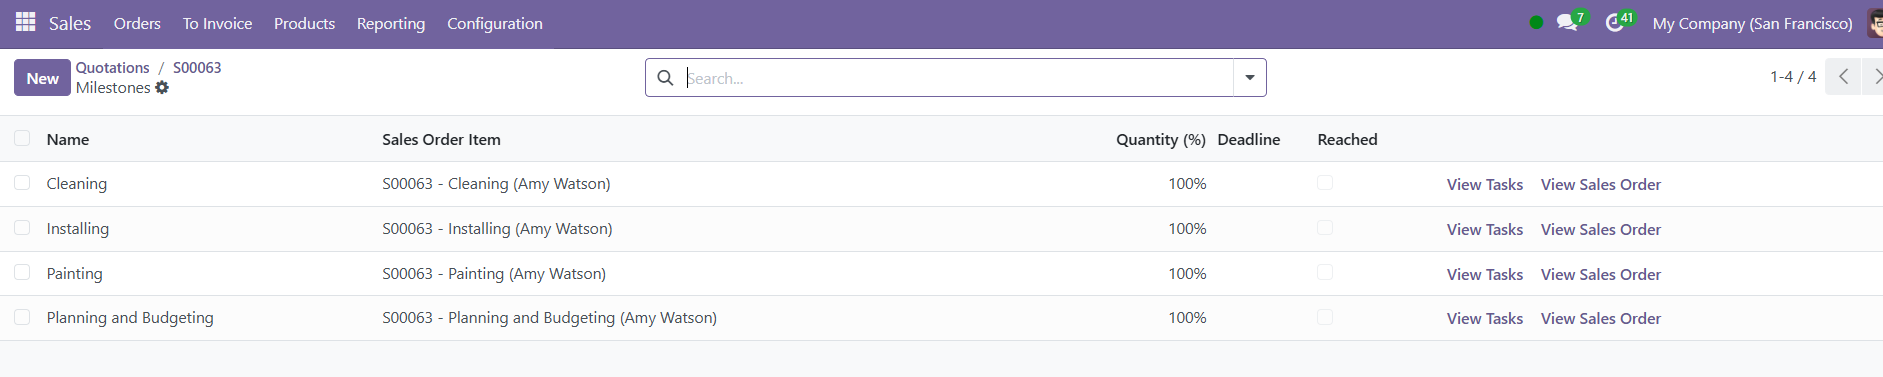
Once on the sales order form, click the Milestones smart button to view the milestone list. Locate the completed task’s corresponding milestone and mark it as achieved by checking the box in the Reached column.
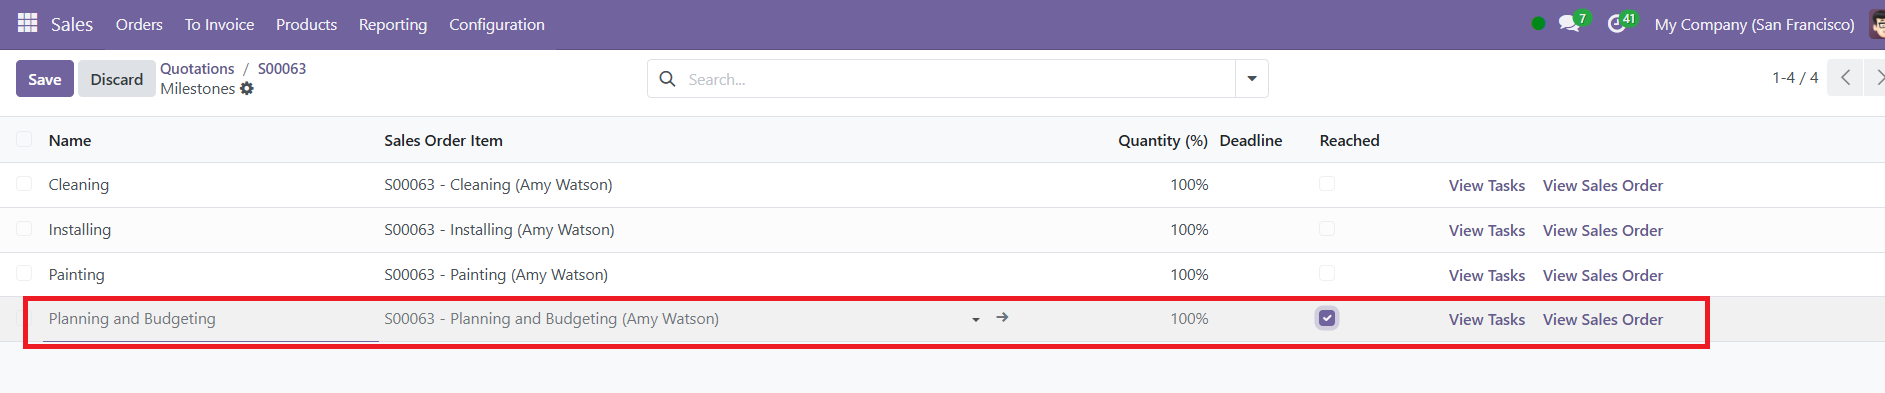
This action confirms the milestone's completion and prepares it for invoicing. To proceed, return to the sales order by clicking View Sales Order on the Milestones page or navigating back using the breadcrumb links.

On the sales order, observe that the line item corresponding to the milestone that has been reached now displays an updated Delivered column. This update signifies that the milestone has been achieved and marked as delivered. To create an invoice for a milestone, click the Create Invoice button in the upper-left corner of the sales order. This action opens a Create Invoices pop-up window.
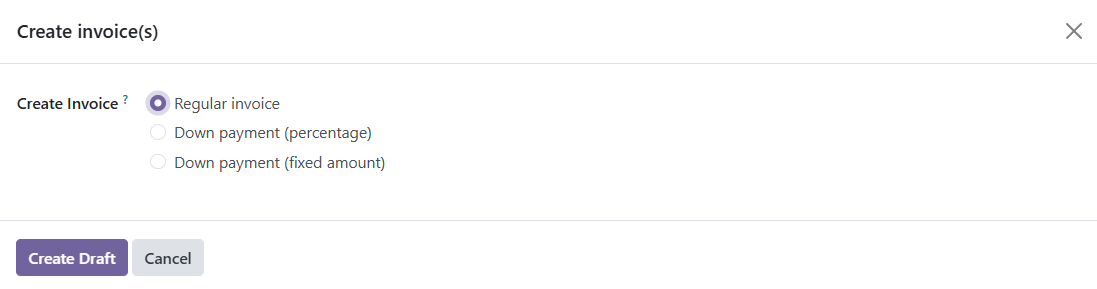
In the pop-up window, leave the Create Invoice option set to the default selection, Regular Invoice, and click Create Draft Invoice. This generates a draft invoice showing only the reached milestone in the Invoice Lines tab.
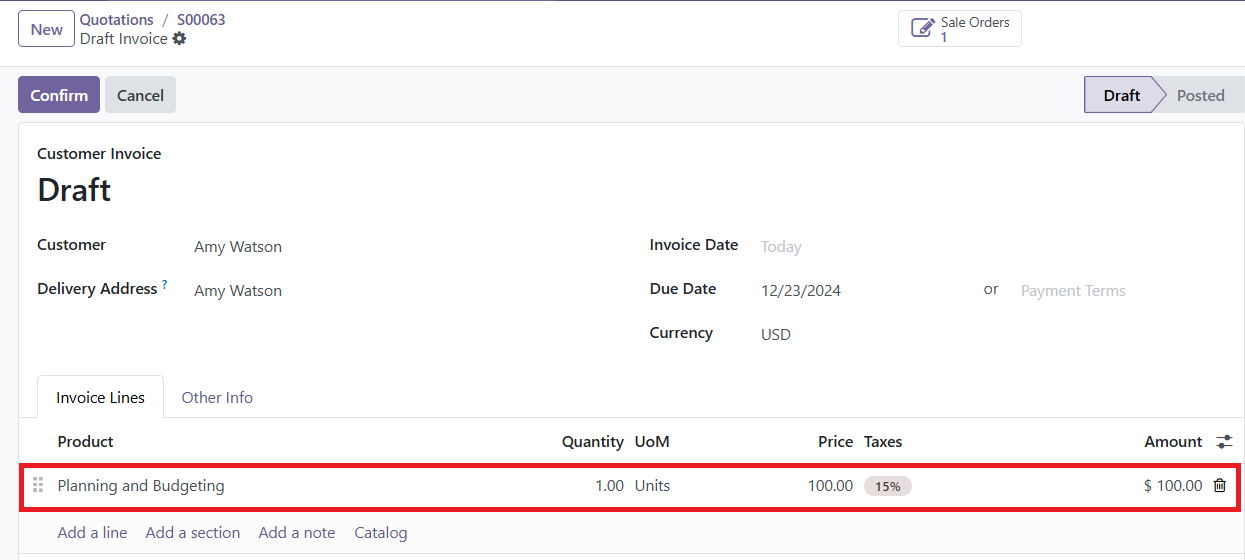
On the draft invoice page, click the Confirm button to finalize the invoice. Once the customer pays for the milestone, click Pay. This opens a pop-up window where the payment details can be reviewed and confirmed.
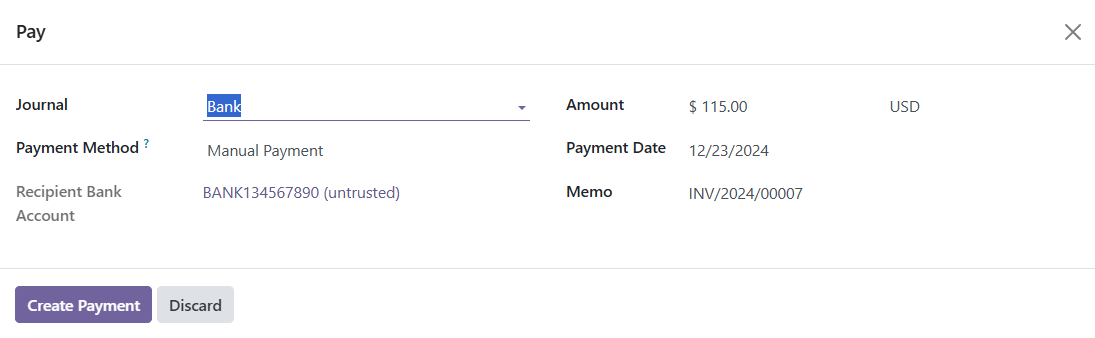
Click Create Payment to register the payment.
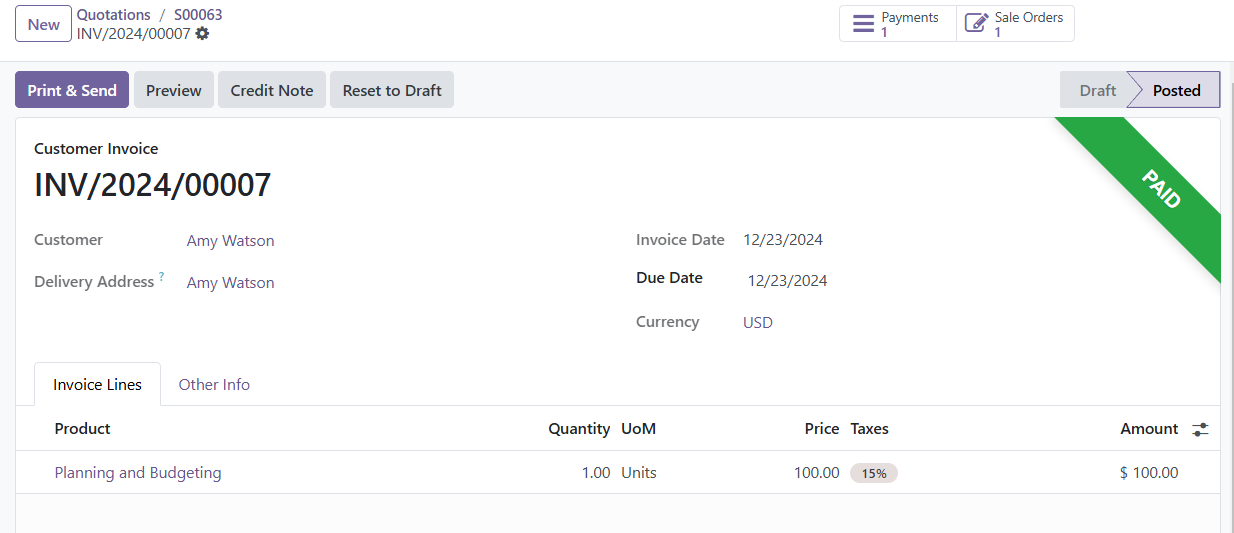
After the payment is registered, the invoice page displays a green Paid banner, indicating the payment has been recorded.
On the sales order, in the Order Lines tab, the milestone product that has been invoiced and paid will now have its Invoiced column updated. Additionally, a new Invoices smart button will appear at the top of the sales order, providing access to all invoices related to this order.
Repeat this process for each milestone as it is completed. Continue invoicing and recording payments until all milestones are completed, invoiced, and the entire order is paid in full.
Invoicing Based on Prepaid/Fixed
To generate invoices for fixed-price or prepaid services in Odoo 18, you can use the Invoice Based on Prepaid/Fixed Pricing technique. This method allows invoices to be created for all ordered quantities, either before or after the completion of a project.
To begin, ensure the product type is set as a Service, and its Invoicing Policy is configured to Prepaid/Fixed Price. Once this is done, create a sales order using this product and confirm it by clicking the Confirm button.
With the prepaid/fixed price method, the customer is required to pay the total amount for the purchased quantities upfront.
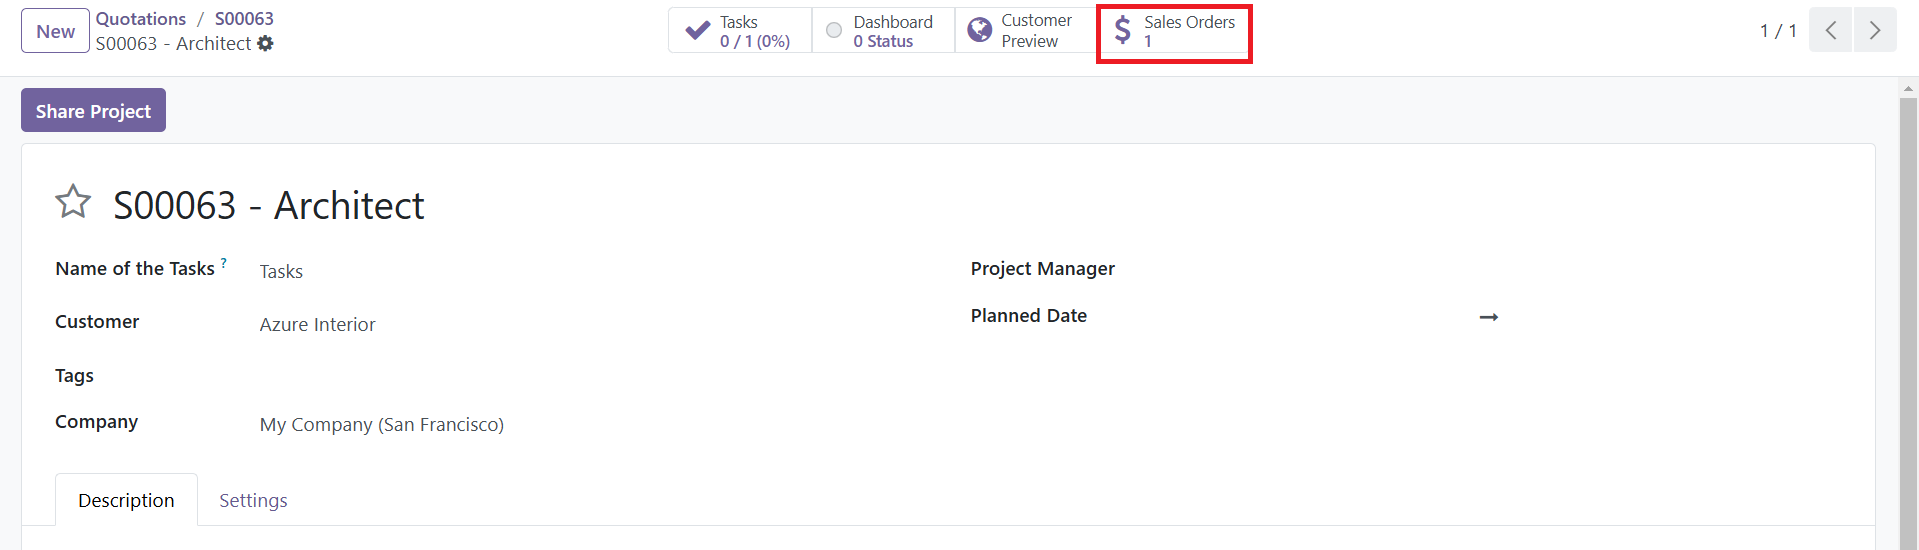
To create an invoice for a project, navigate to the Projects section under Project Module > Configuration > Projects. There will be a smart button to open the respective project from the Sales Order itself.
You can use this button to open the respective project. Here, you will find the option to Create Invoice.
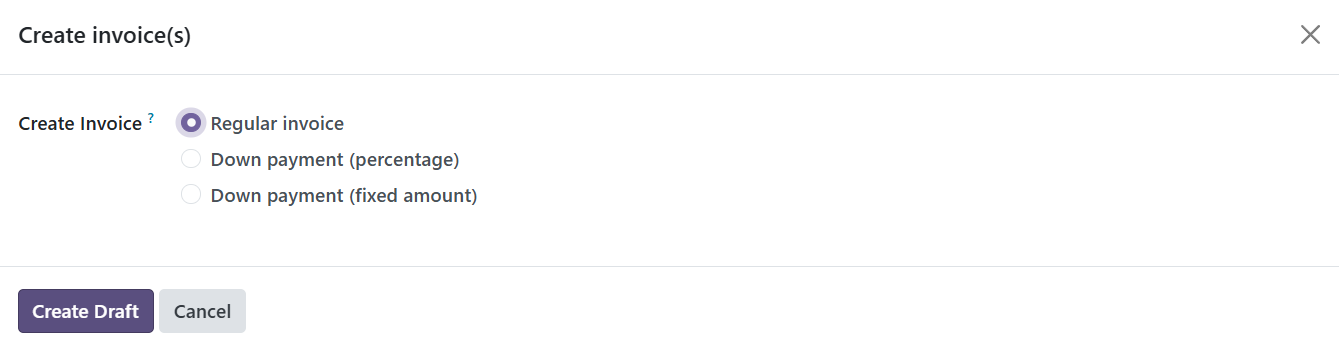
Clicking this option opens a window where you can select from three invoicing options: Regular Invoice, Down Payment (percentage), or Down Payment (fixed amount). Once the desired option is selected, the invoice is created.
Next, open the corresponding sales order using the smart button, where an Invoice tab will appear at the top-right corner of the page.
By accessing this tab, you can confirm the created invoice. This process ensures that invoices for fixed-price or prepaid projects are accurately generated and linked to their respective sales orders.
Invoicing Based on Delivered Quantity (Manual)
In Odoo's Project Module, invoicing based on delivered quantity (manual) allows businesses to bill their clients for the actual work delivered rather than relying on predefined milestones or fixed rates. To set up this feature, you first need to enable the necessary settings. For the services offered, you need to configure products appropriately.
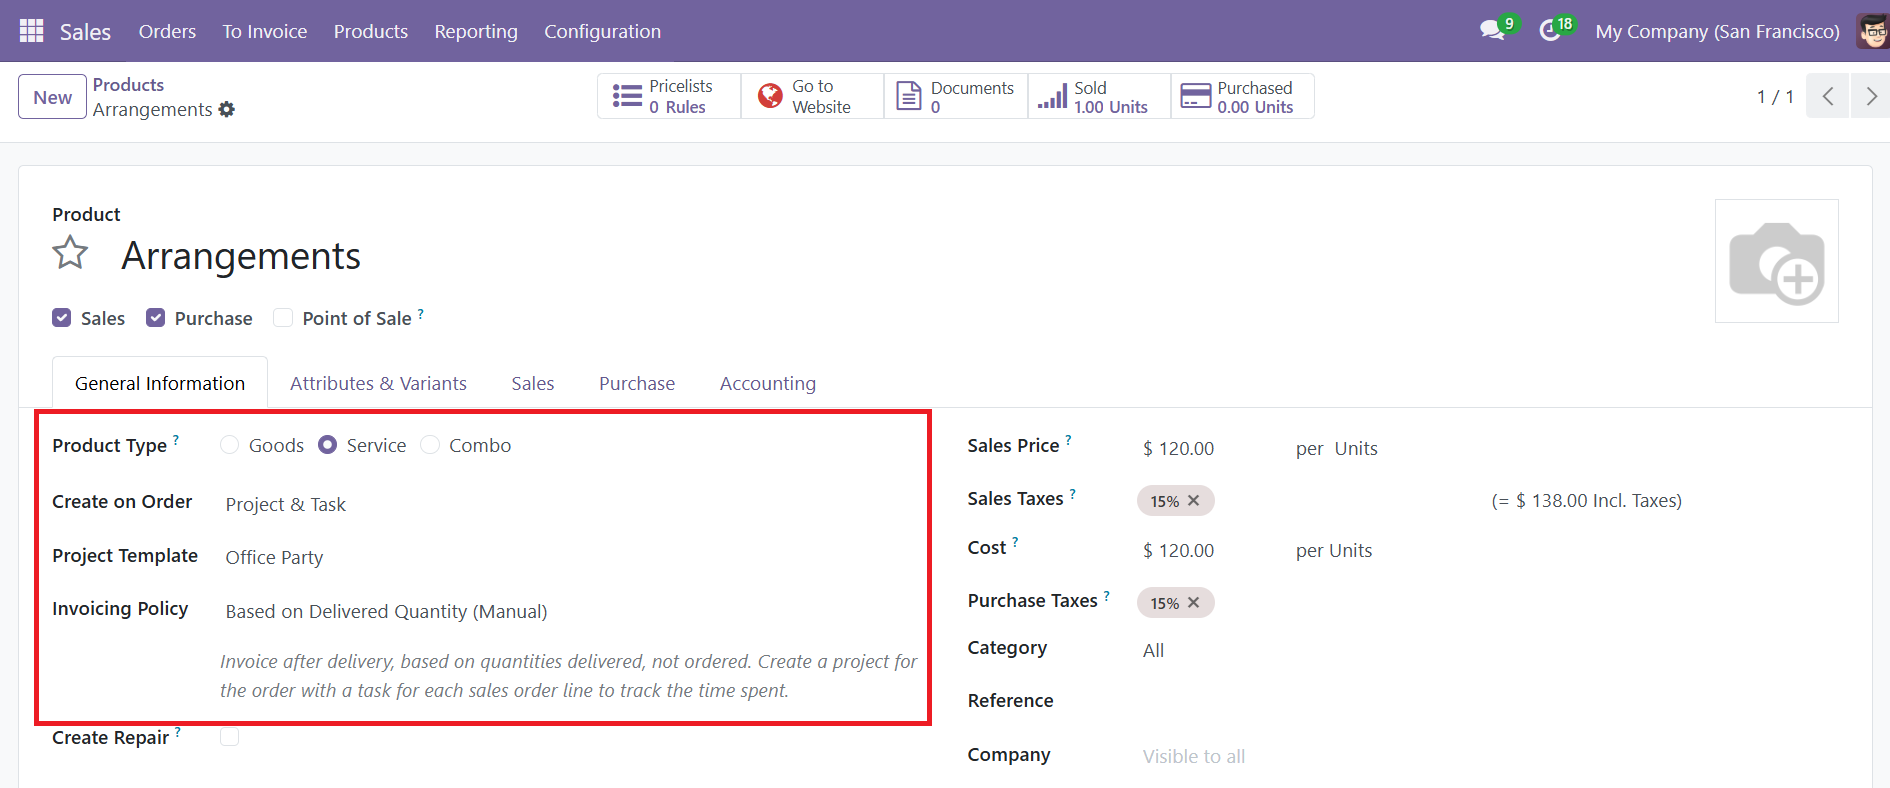
Set the invoicing policy to "Based on Delivered Quantity (Manual)" and use the "Project and Task" option in the Create on Order field. This configuration ensures that when a sales order is created using this service product, a corresponding project, and associated tasks will be automatically generated.
Once the service product is configured, create a sales order for your customer, including the newly set-up service products.
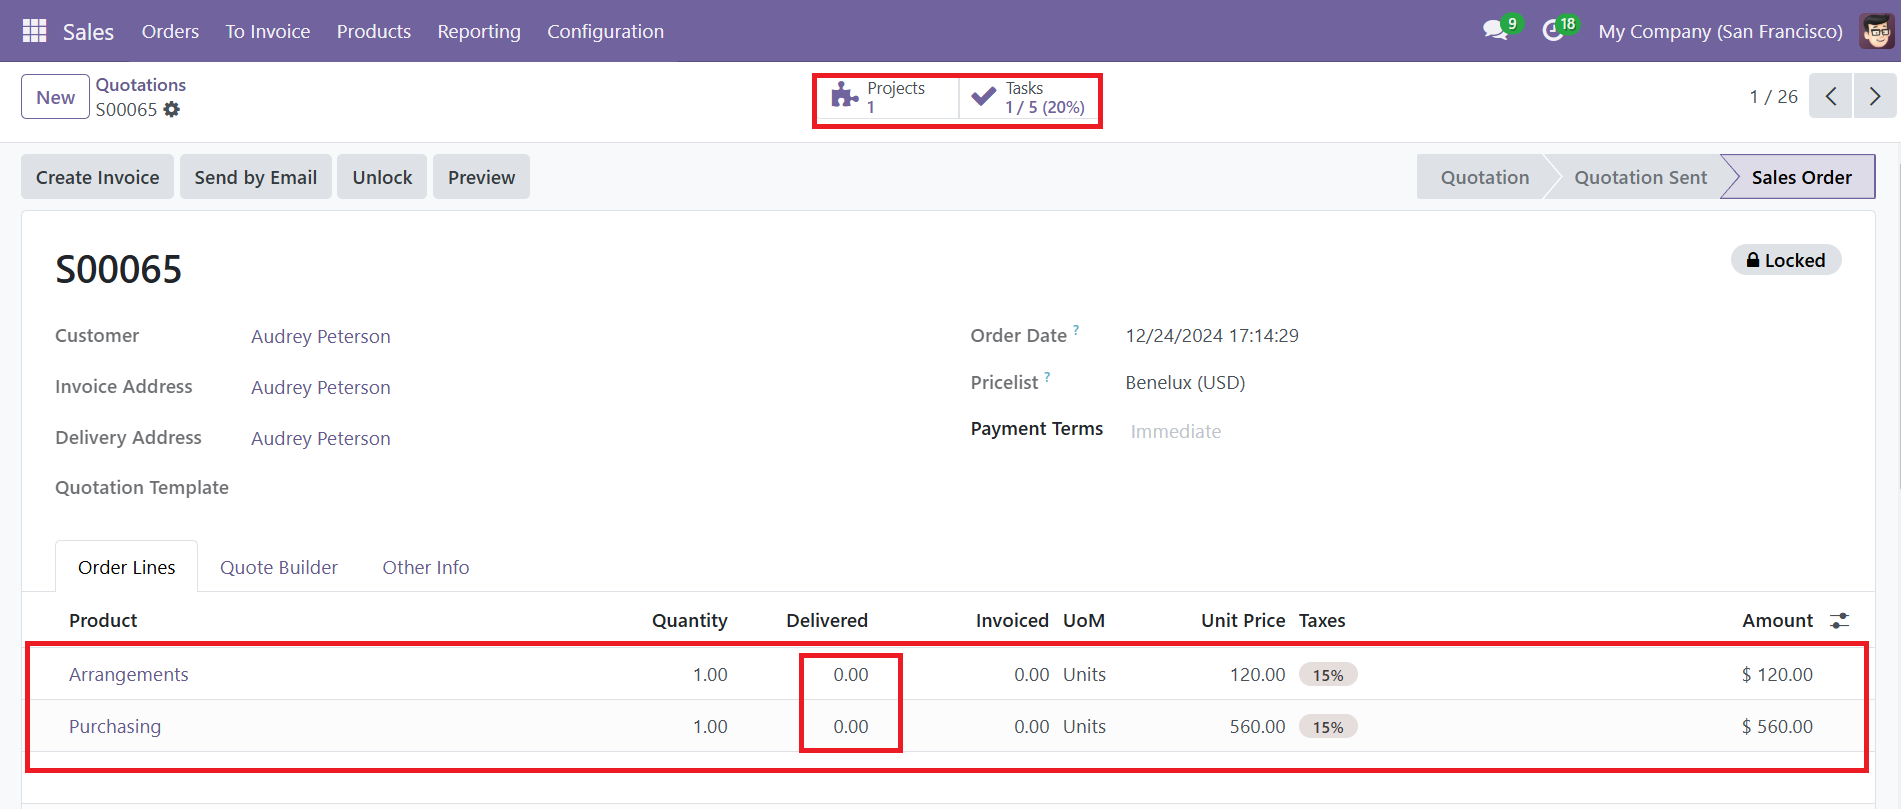
Upon confirming the sales order, you will notice the Projects and Tasks smart buttons appearing in the sales order view, indicating that a corresponding project and its tasks have been created. At this stage, the Delivered Quantity field in the sales order line will display "0" since no work has been marked as delivered yet.
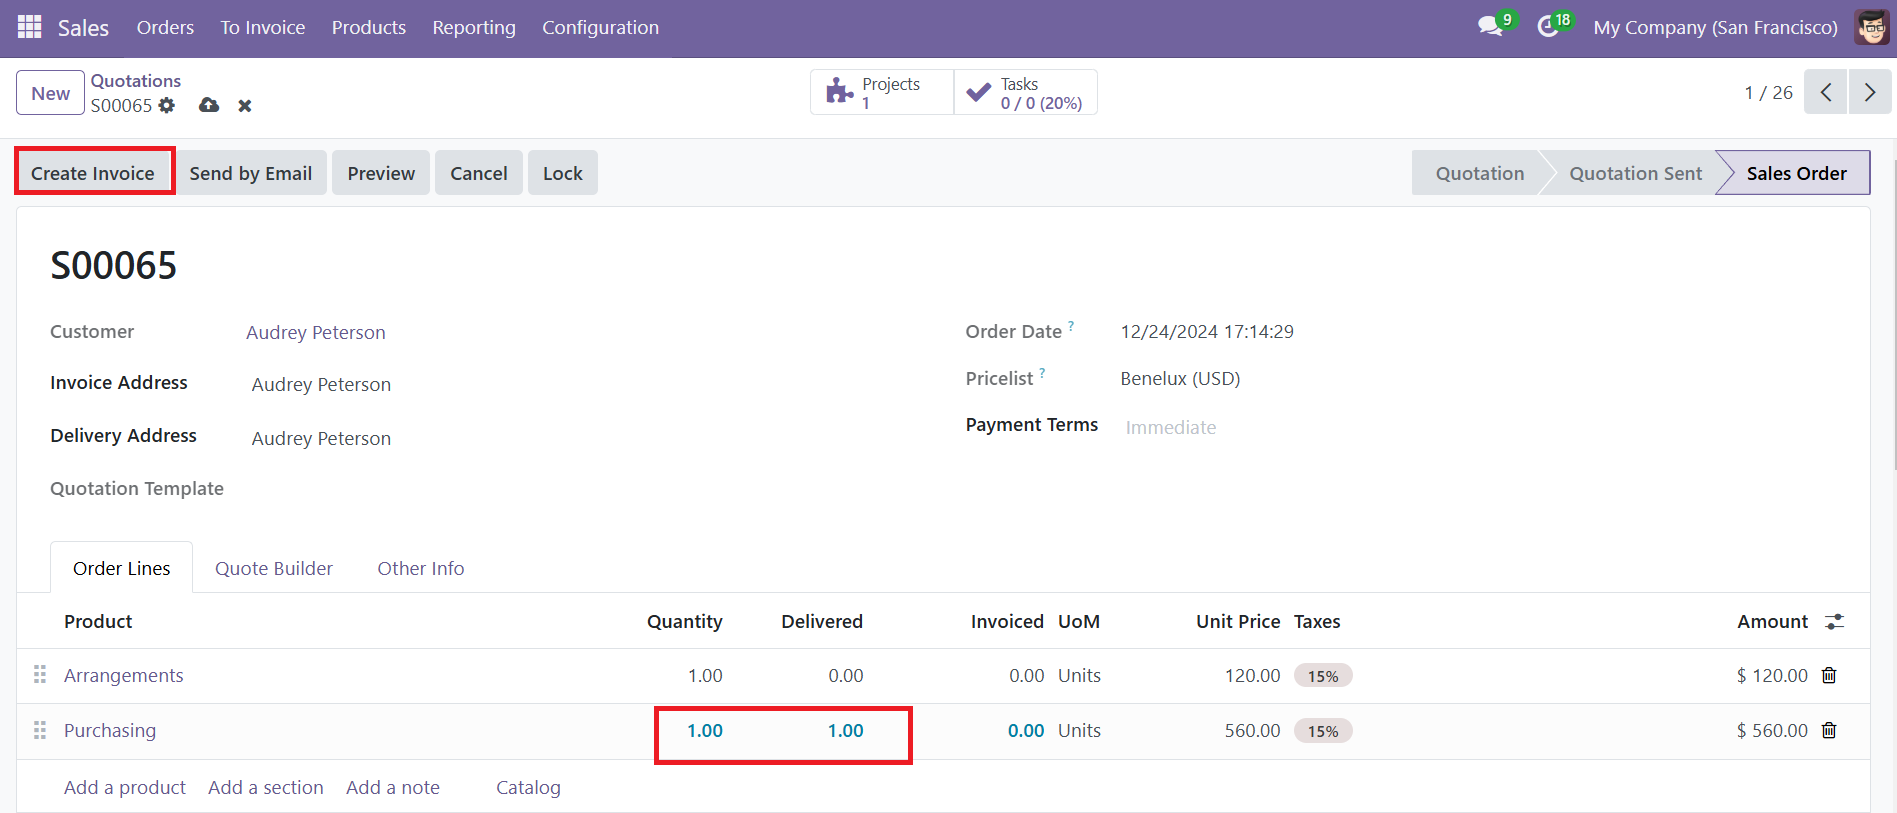
As you complete the service specified in the sales order, you can manually update the delivered quantity in the order line. This manual adjustment ensures that the invoice will reflect only the work that has been completed and delivered. Once the delivered quantity is updated, click on the Create Invoice button to generate an invoice.
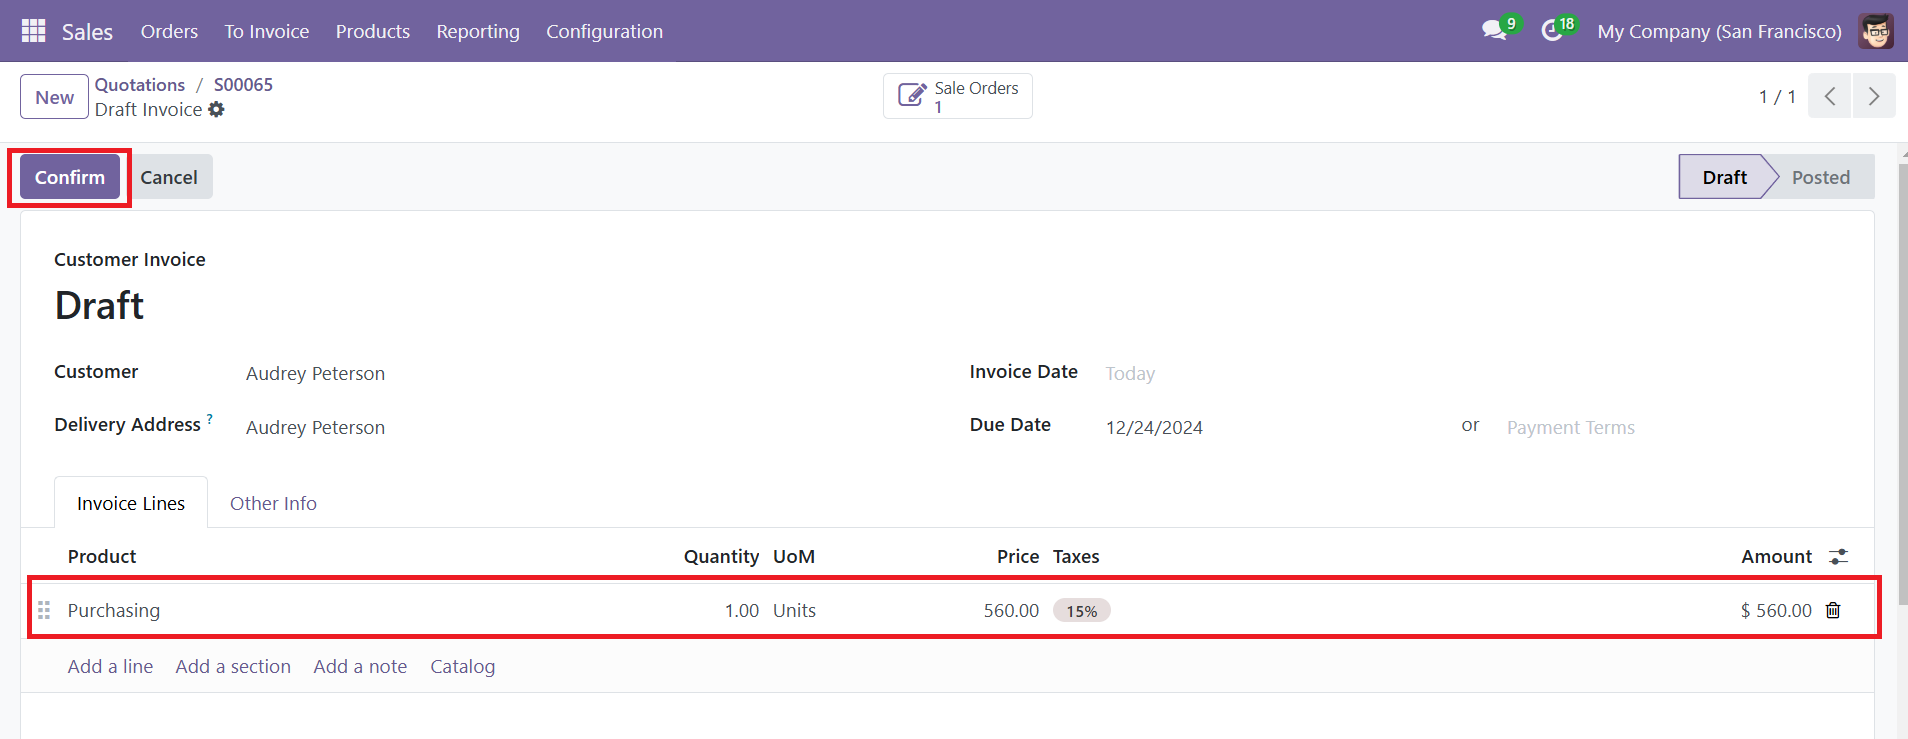
The draft invoice can then be reviewed and confirmed. After validating the invoice, you can see that the order line is marked as invoiced.
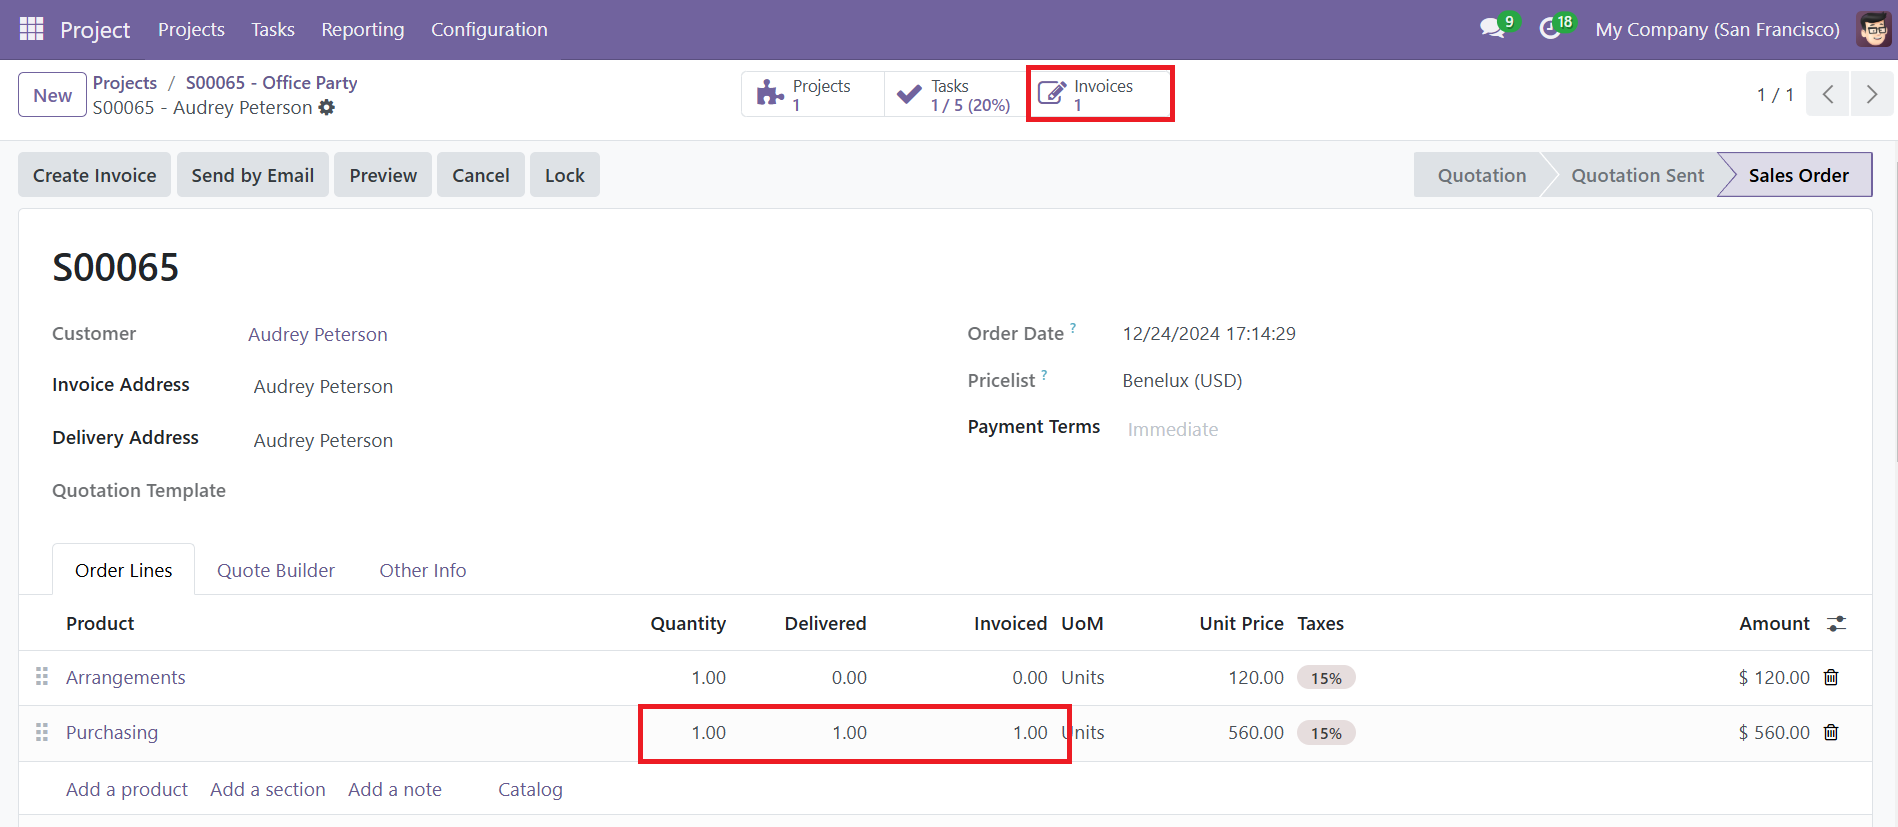
Additionally, the corresponding invoice for the delivered services will be accessible through the Invoices smart button in the sales order.