Configuration
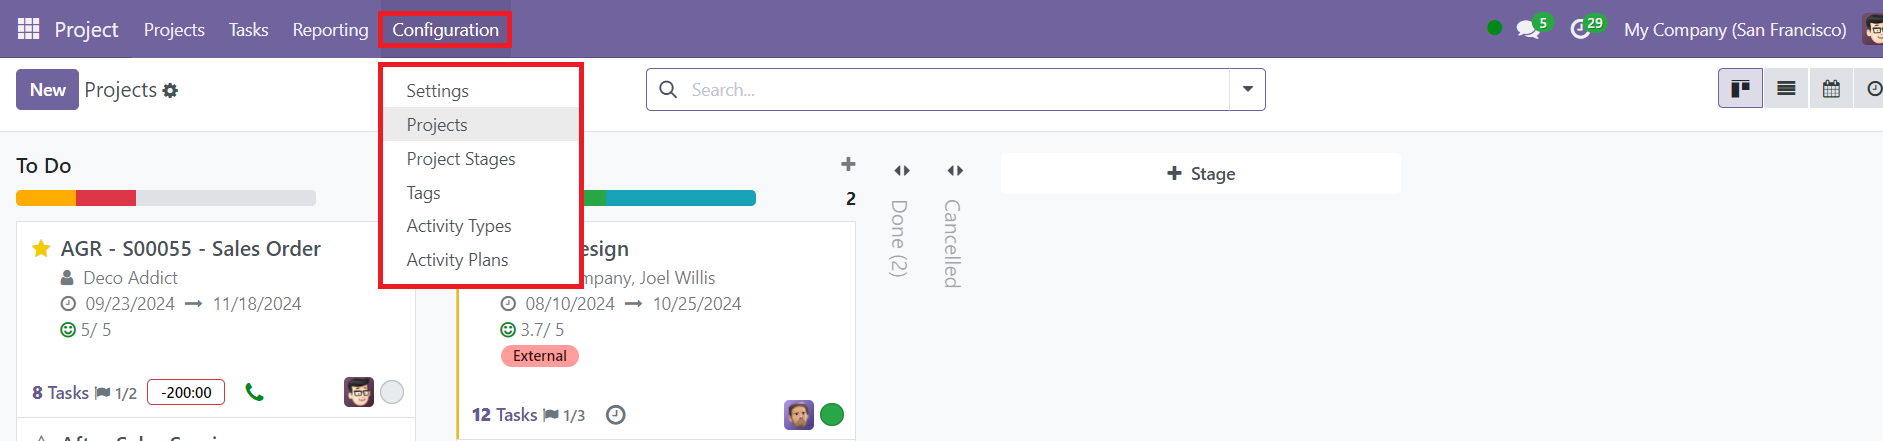
In Odoo 18, the Configuration menu within the Project module offers several key options for customizing and managing projects efficiently. These options include Settings, Project, Project Stage, Tags, Activity Types, and Activity Plans, each serving a specific function to help configure your project environment.
Recurring Tasks
In Odoo 18, the Recurring Tasks feature enhances task management by allowing users to automate the creation of tasks for recurring actions, streamlining workflow efficiency.
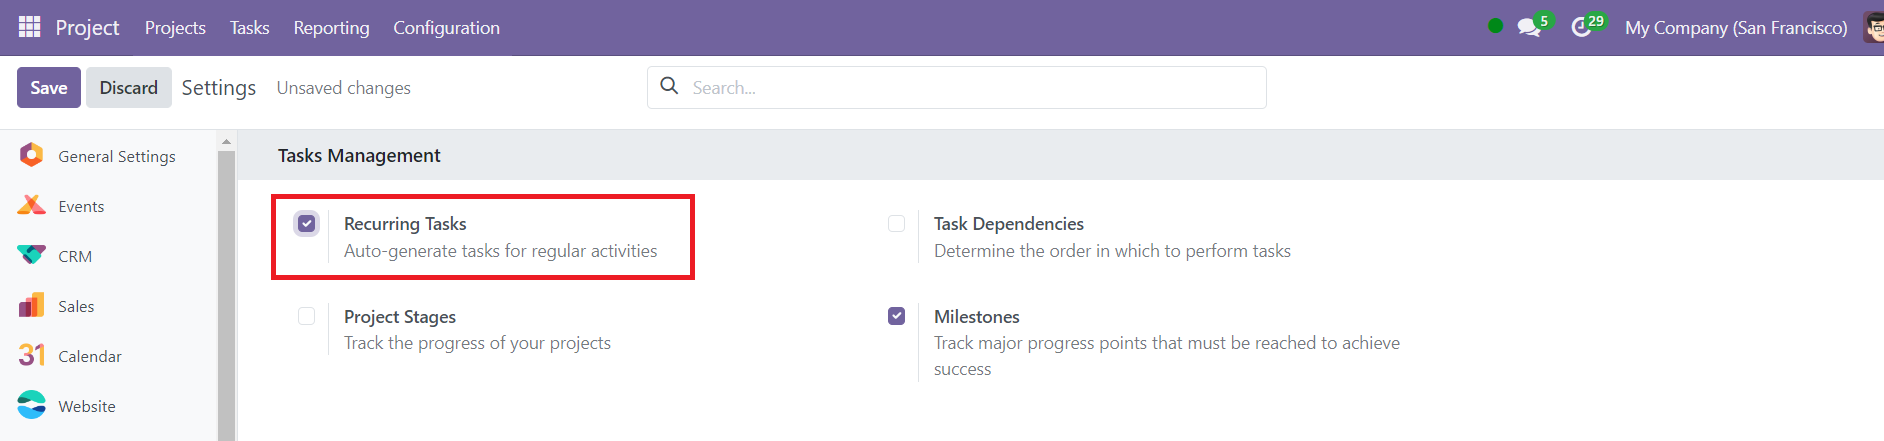
Once this option is enabled within the Task Management settings, users can easily configure tasks to recur at specified intervals. To set up a recurring task, users first need to create a task as usual. Within the task form, they will notice a recurring icon adjacent to the deadline box; clicking on this icon prompts the addition of a new field labeled "Repeat Every."
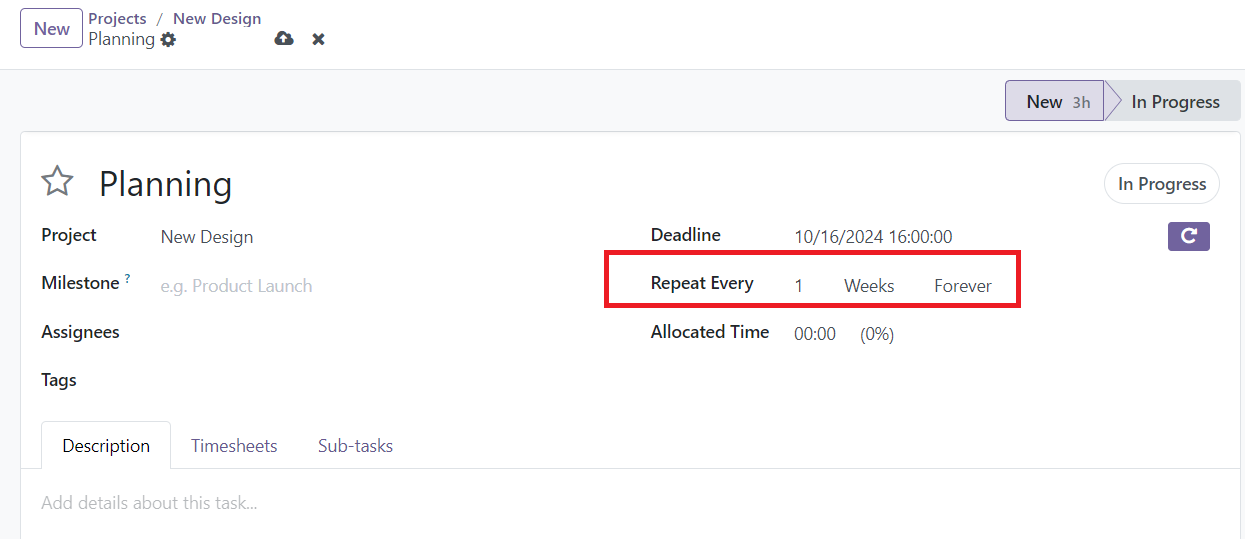
In this Repeat Every field, users can define the frequency at which the task should recur, whether it's daily, weekly, monthly, or at any other interval that suits their needs. After selecting the desired recurrence option, it is crucial to save the task to ensure these settings are applied.
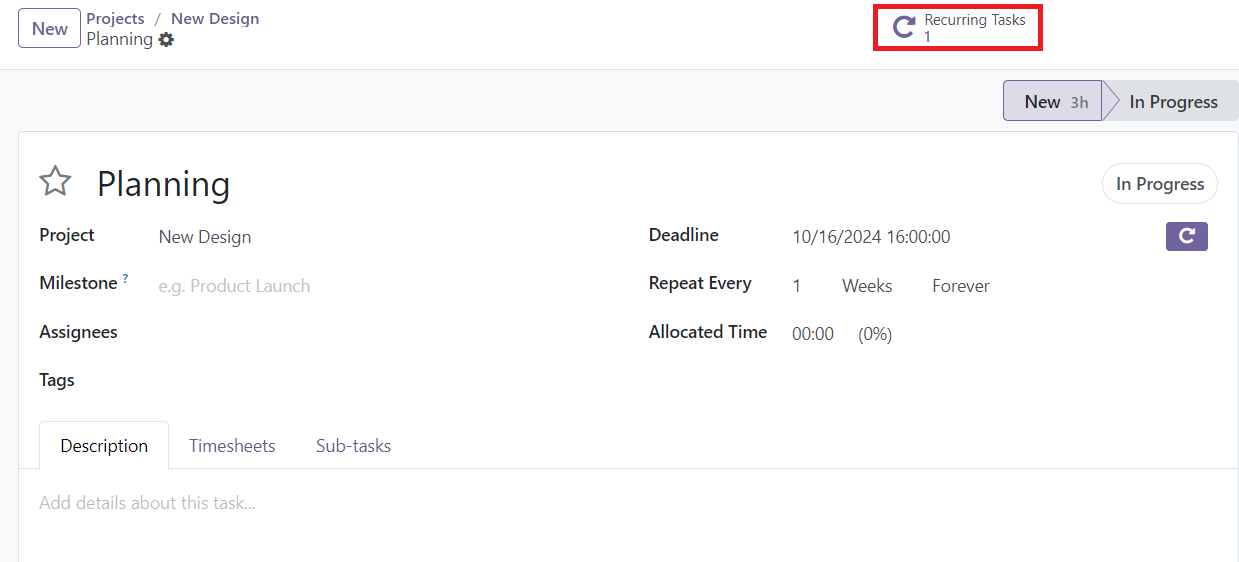
Once saved, a new smart tab labeled Recurring Tasks will appear, signifying that the task has been set up for recurrence. This tab allows users to manage and view all recurring instances of the task easily. To see the details of the created recurring task, users can click on the smart button associated with this feature.

Notably, Odoo 18 automates the process by generating the next recurring task automatically once the current task is marked as completed.
Task Dependencies
The Task Dependencies feature in Odoo 18 streamlines project management by allowing users to set a clear order of operations for tasks. This functionality helps teams prioritize their workload effectively, ensuring that tasks are completed in the necessary sequence.
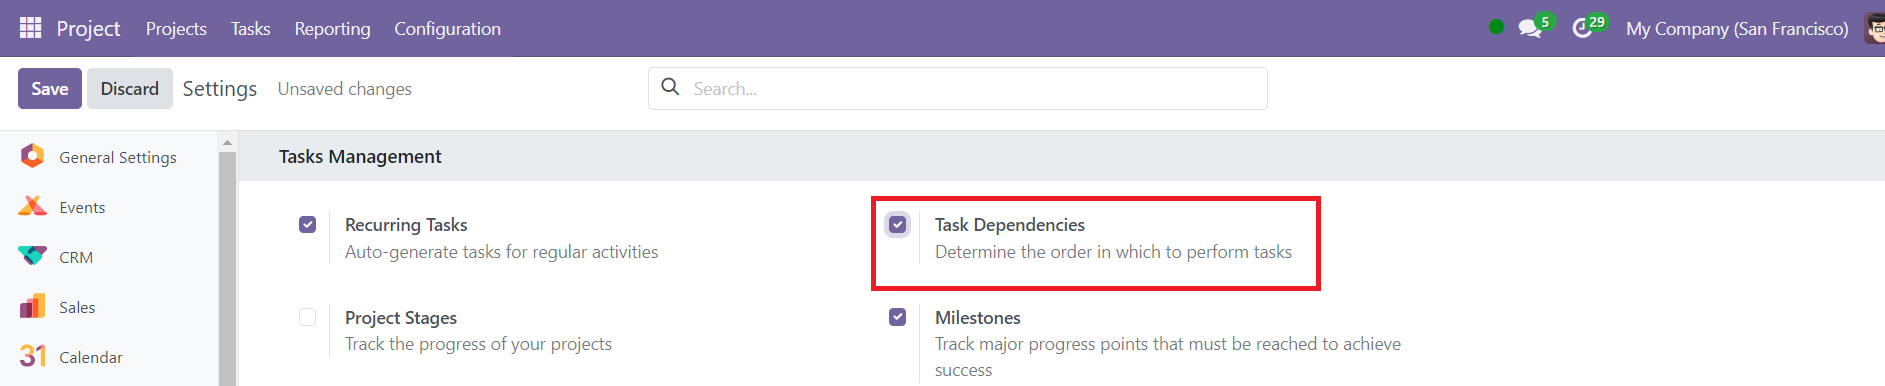
To start using Task Dependencies, navigate to the project settings. Once you enable this feature and save your changes, a new boolean option labeled "Task Dependencies" will appear in the Settings tab of your Project module. This setting can be found in the Task Management area, making it easy to locate and manage.
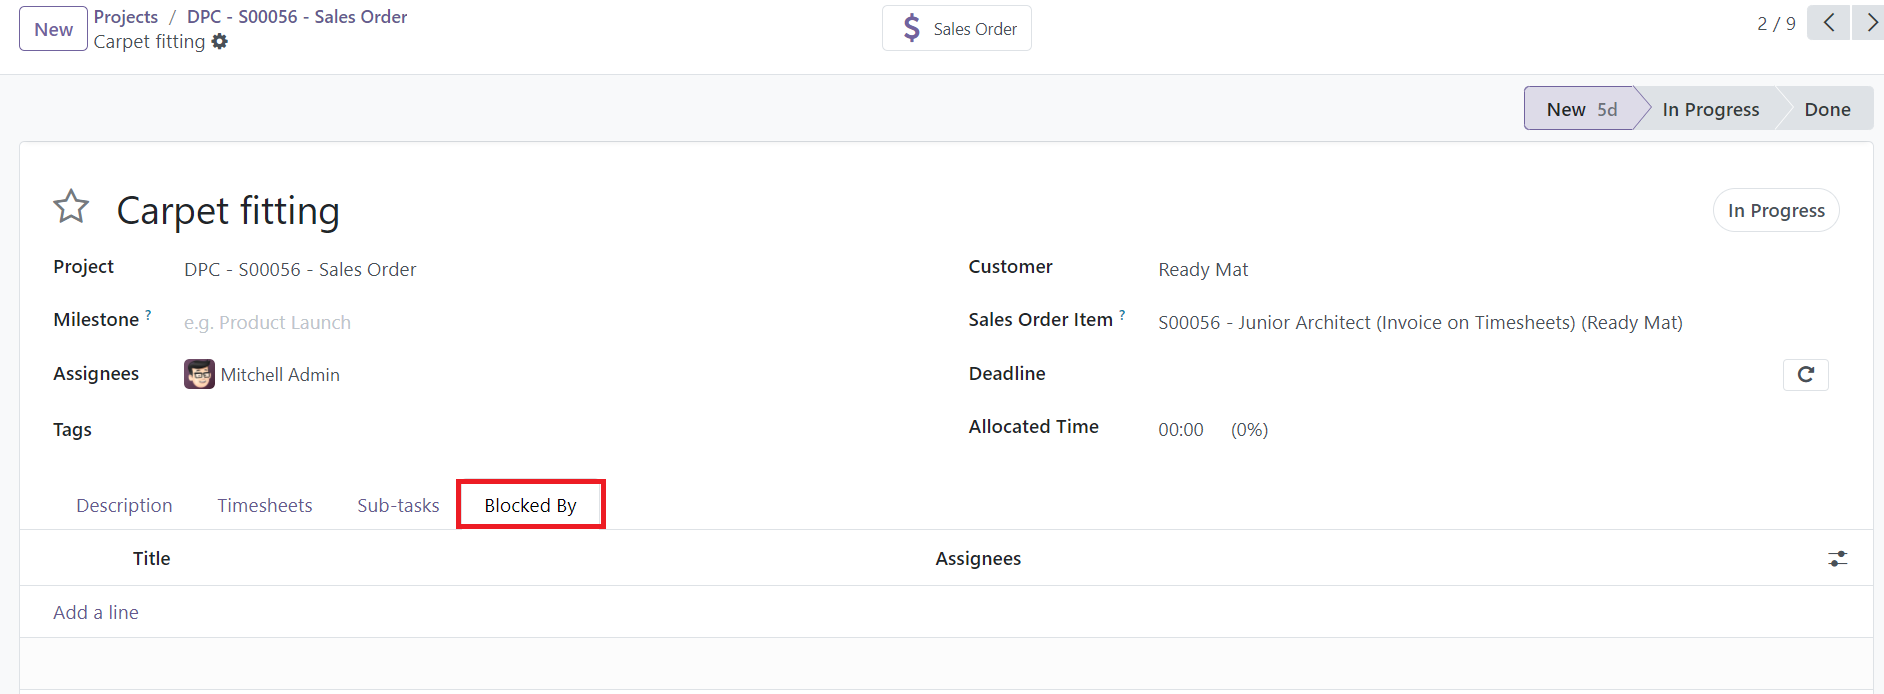
Once Task Dependencies are enabled, a new subtab named Blocked By will be added within the task interface. This subtab is critical for specifying the order in which tasks need to be performed. In the Blocked By subtab, users can list the tasks that must be completed before the current task can proceed. Click on the Add a Line option to begin adding dependencies.
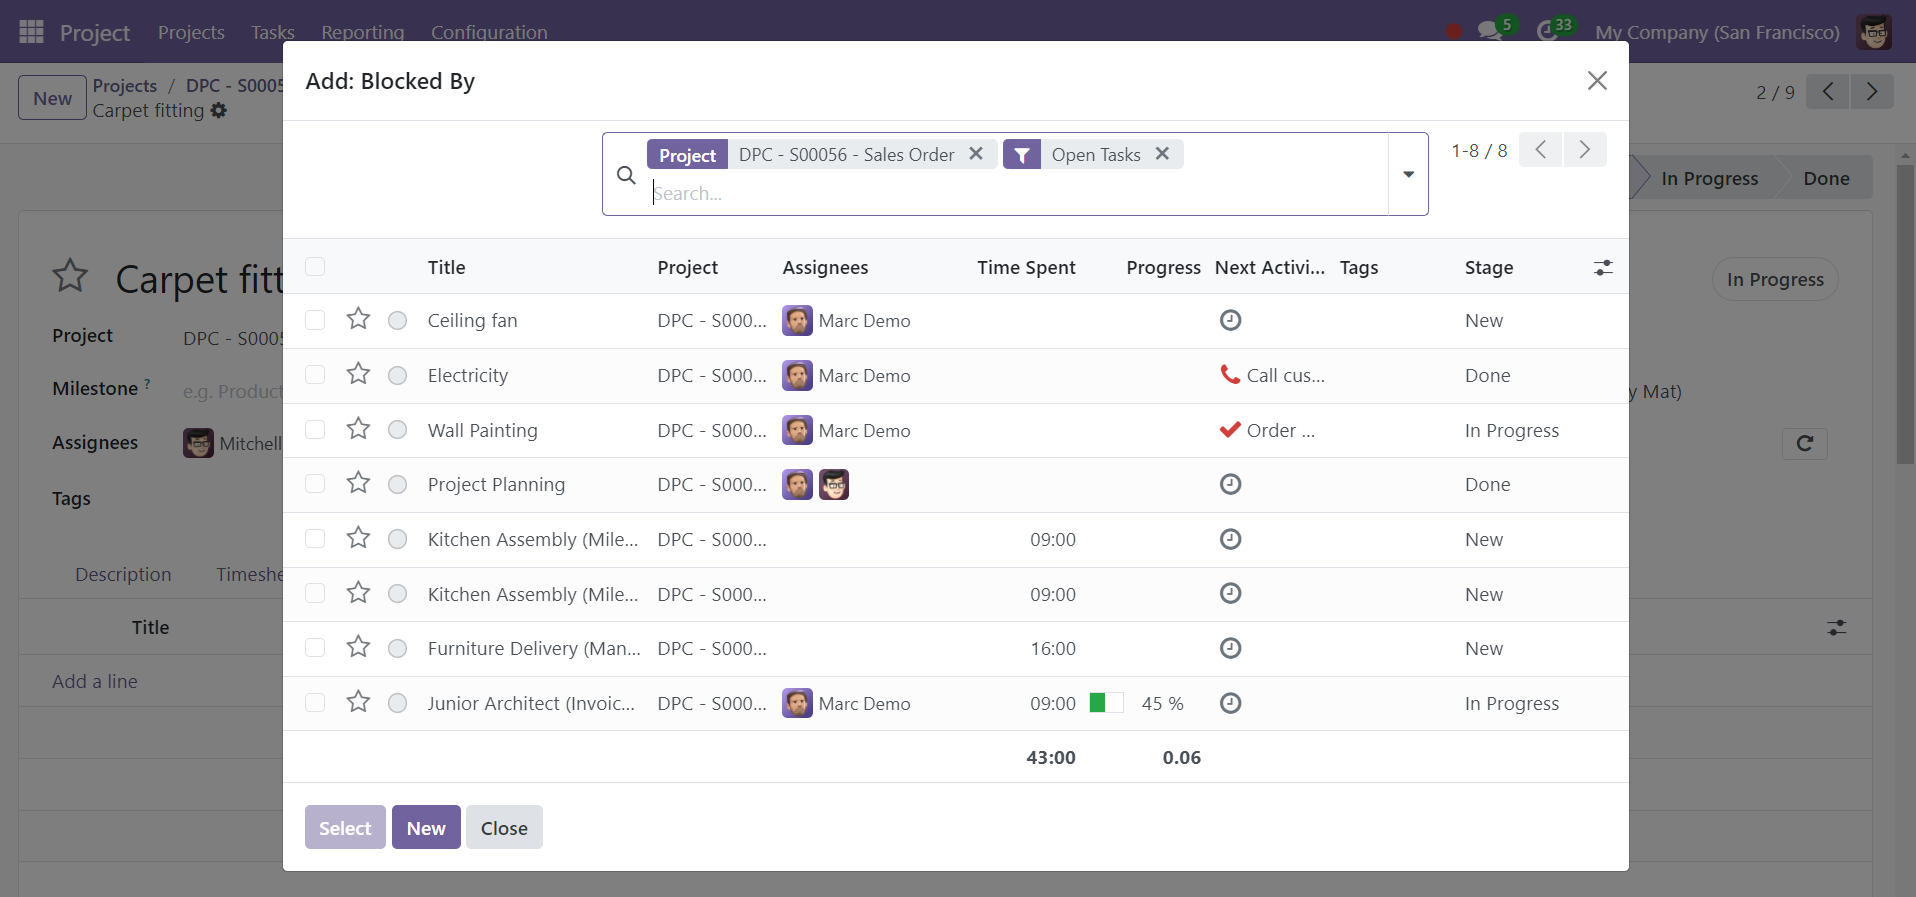
Upon selecting Add a Line, a new window will open, displaying all available tasks in the project. You can easily navigate through this list to select the tasks relevant to your current assignment. After reviewing the assignments, choose the tasks that the current task is dependent on and click the Select button. This action will create a link between the tasks, establishing a clear dependency relationship. To add additional dependencies, simply click the New button within the window to repeat the process for each task you wish to add.
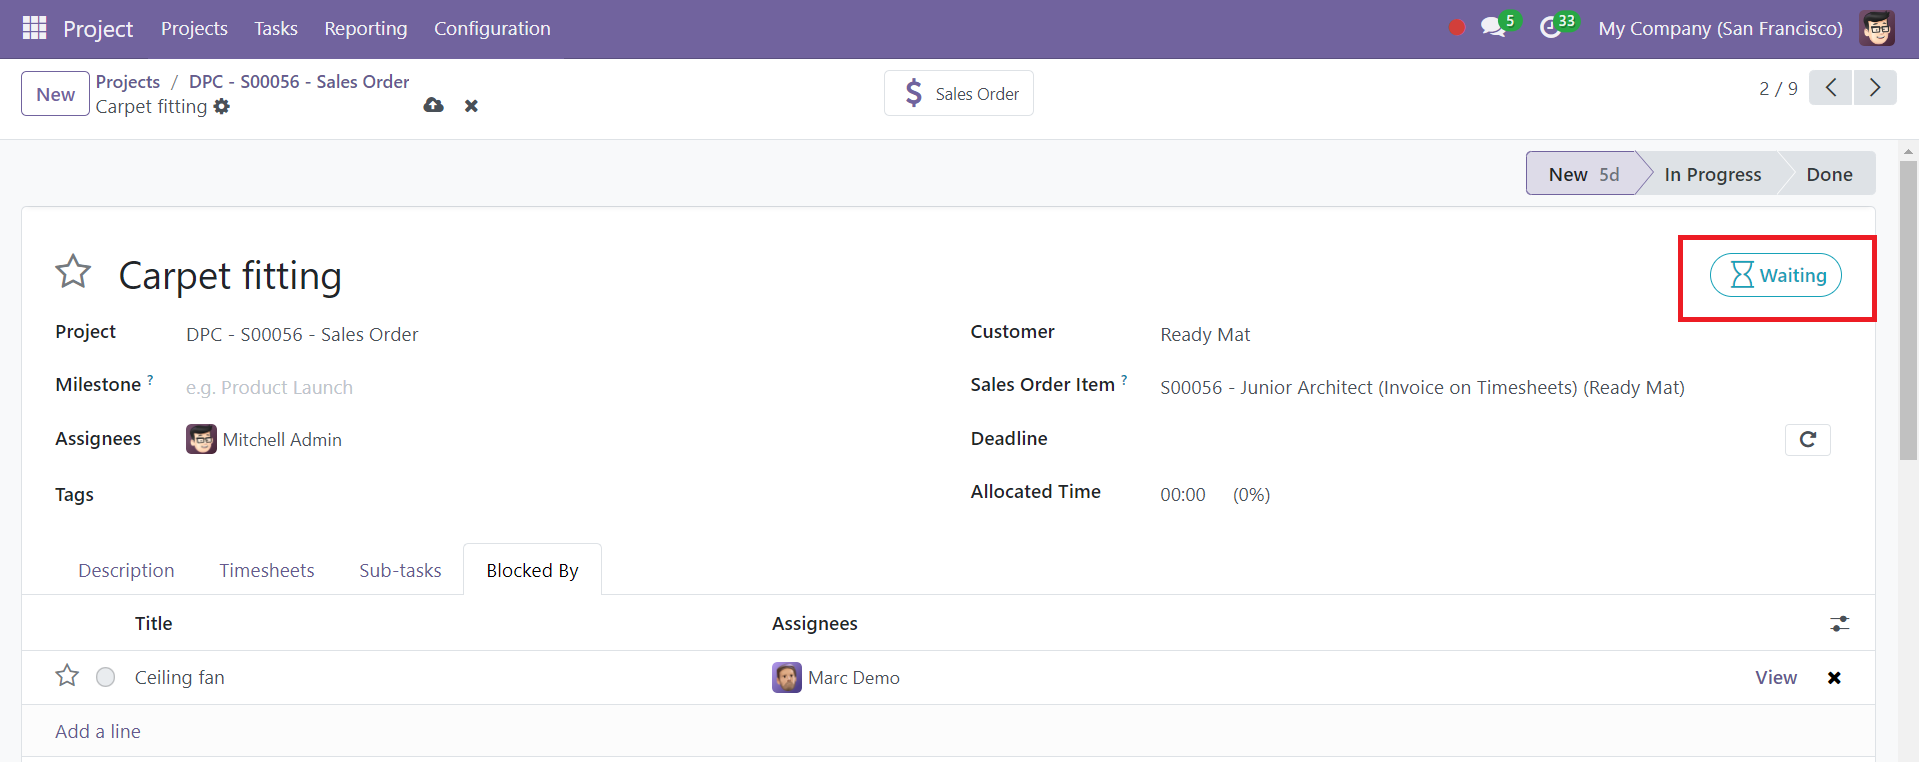
Once you have specified the dependencies, the tasks will be displayed under the Blocked By tab. A Waiting tag will appear at the top of the task card, indicating that this task is currently blocked by its dependencies.43
Project Stages
Project stages in Odoo 18 allow teams to organize tasks into various phases or steps, providing a clear structure for tracking task progress. By customizing and managing these stages, project managers can gain better insights into the project's workflow and ensure tasks are completed efficiently.
Before using project stages, you’ll need to activate this feature. Go to the Project module from the Odoo dashboard. Inside the Project module, click on the Configuration menu at the top and select Settings. In the settings, scroll down to the Tasks Management section. Here, you’ll find the option to enable Project Stages. Once you check this option, click Save to apply the changes.

After enabling the feature, you can add and customize project stages for each of your projects. This allows you to align the stages with your project workflow. Go to the Configuration menu and select Project Stages.
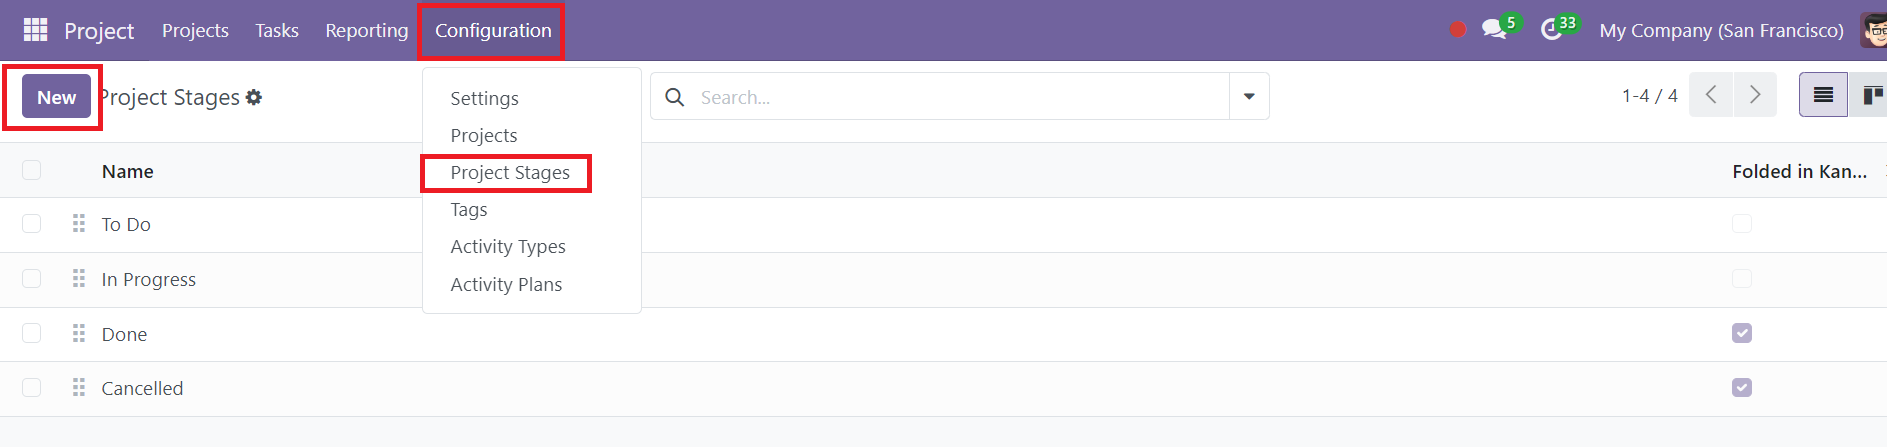
Click the New button to add a new stage.
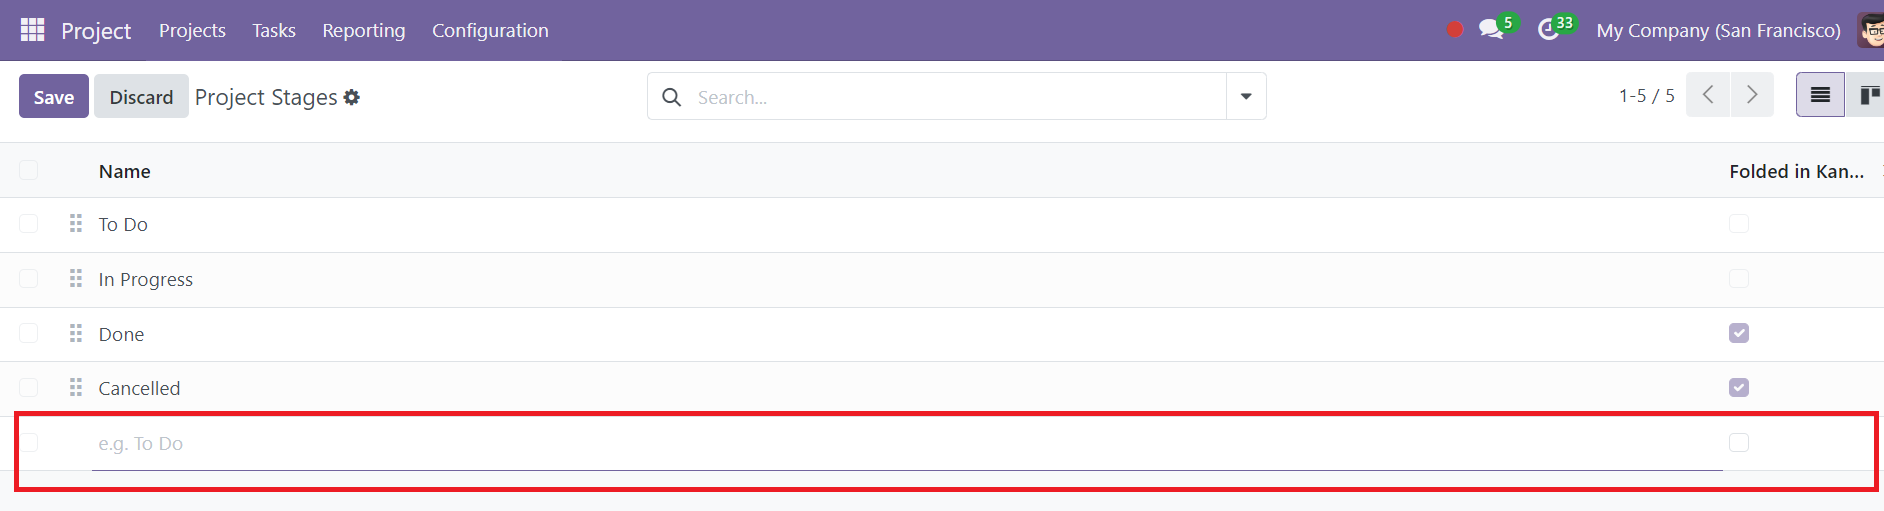
Define the Stage Name and set its properties such as: Folded in Kanban: When enabled, this stage will collapse in the Kanban view when there are no tasks in it.
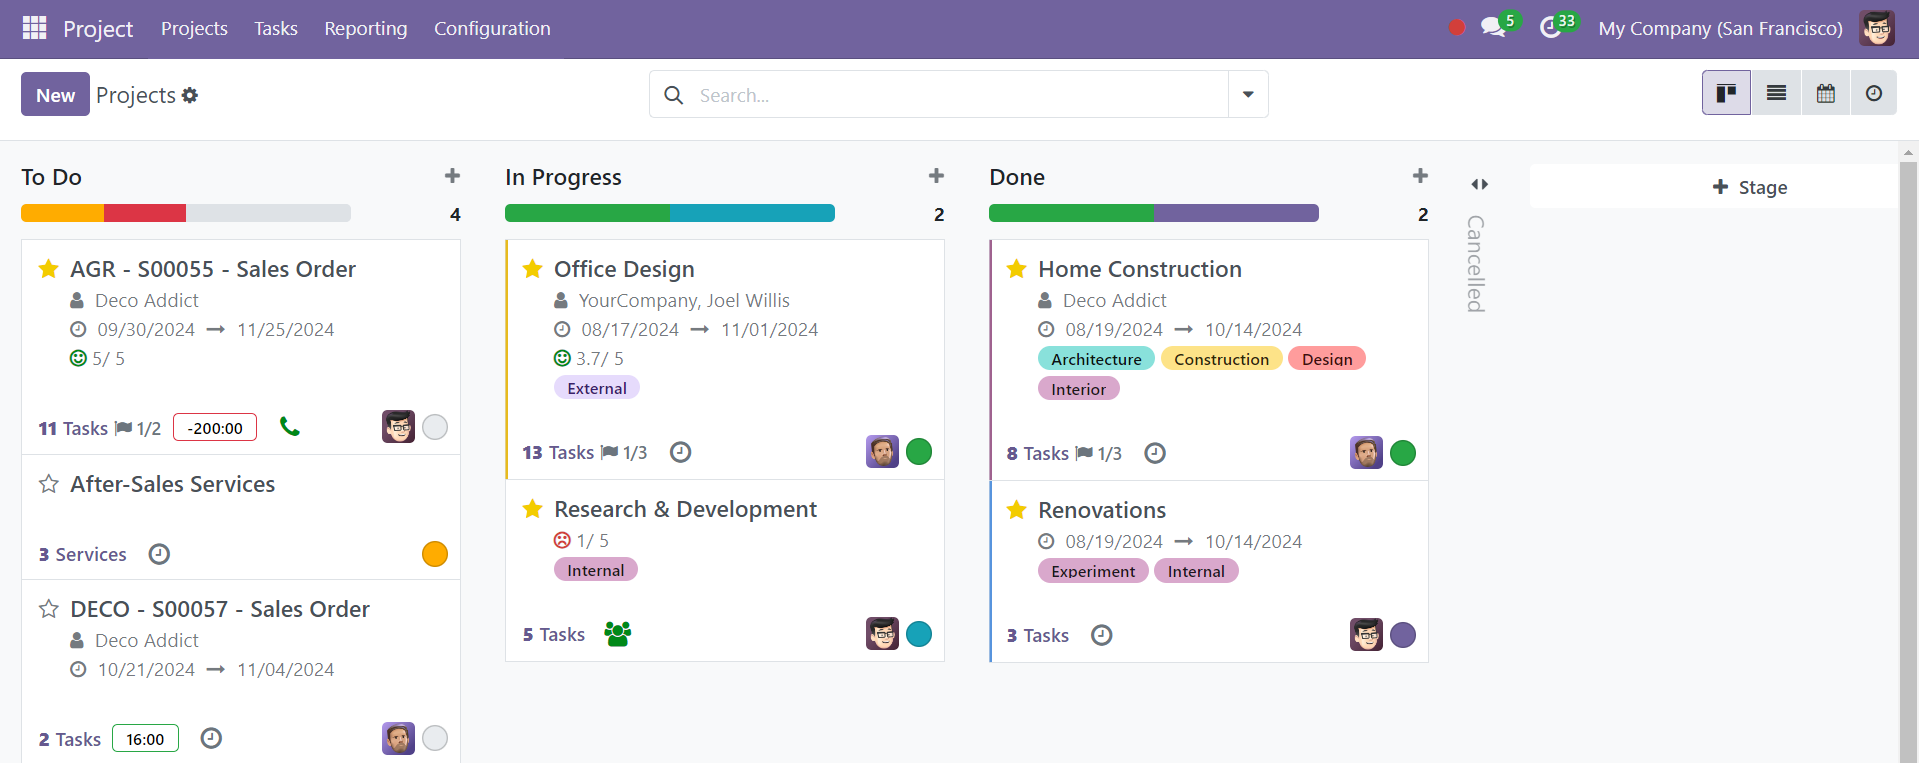
Once the project stages are set up, they can be used to manage tasks in the project effectively. The Kanban view of the project tasks will display the defined stages as columns. Each task card can be dragged and dropped between these stages to reflect the task’s progress.
Milestones
Milestones in project management serve as critical checkpoints or benchmarks that represent key achievements within a project. They help teams and project managers track progress and ensure that certain goals are met on time. In Odoo 18, managing milestones is a straightforward process, enabling users to monitor the advancement of their projects efficiently.
To activate the Milestone option in Odoo 18, go to the Project module and click on the Configuration menu at the top. From there, select Settings. Scroll down to the Tasks Management section, where you will find the option to enable Milestones.

Check the box next to it and click Save to apply the changes. Once activated, the Milestone feature will be available in your project settings, allowing you to create and manage milestones for tracking key achievements within your projects.
From the list of active projects, choose the project to which you want to add milestones. Click on the Milestones tab located within the project details.
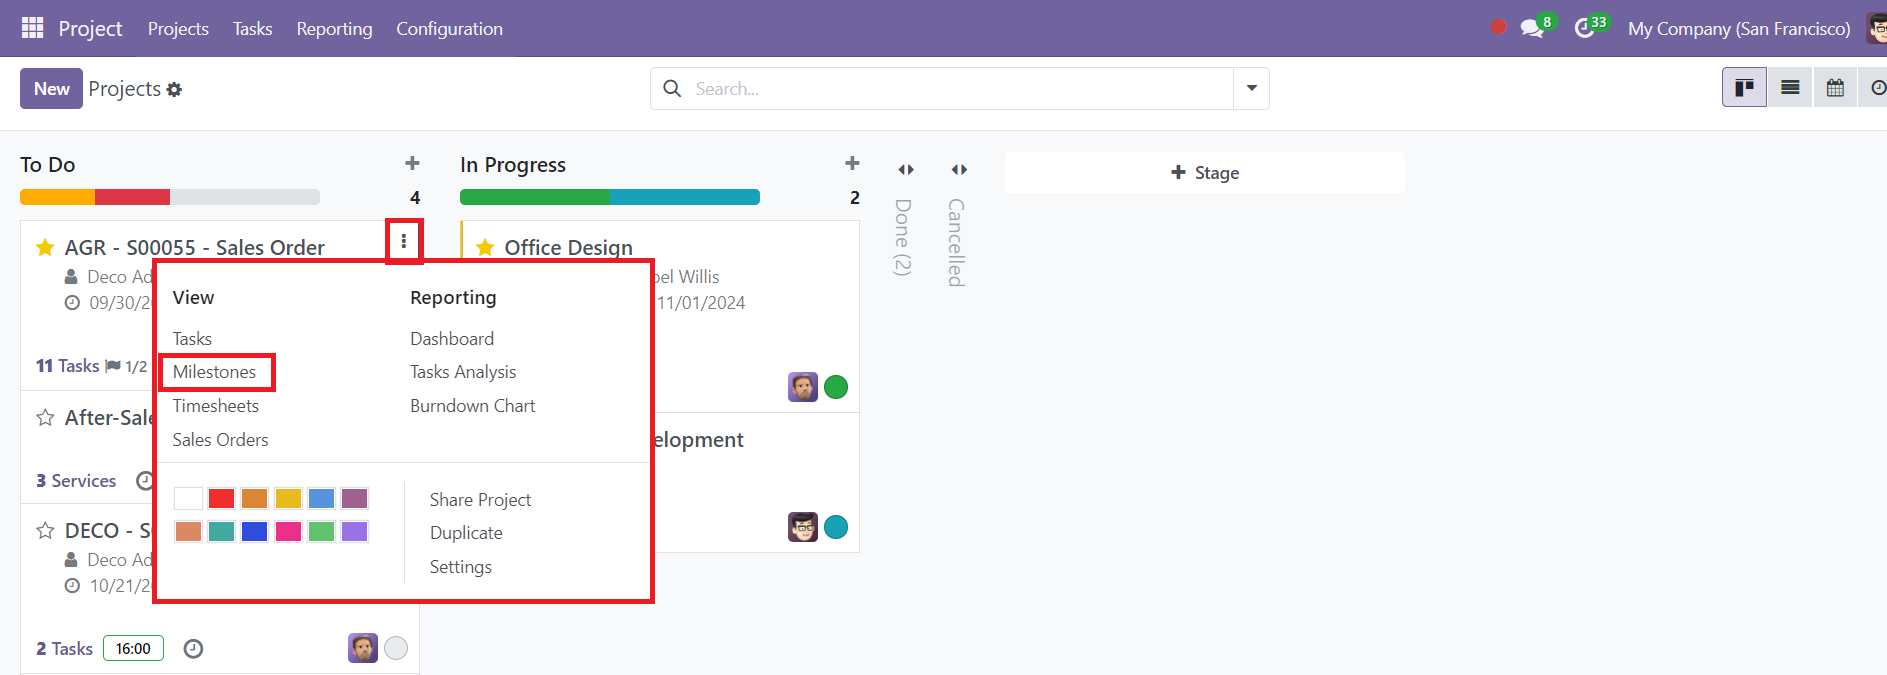
To create a new milestone, Click on the New button at the top of the Milestones page.
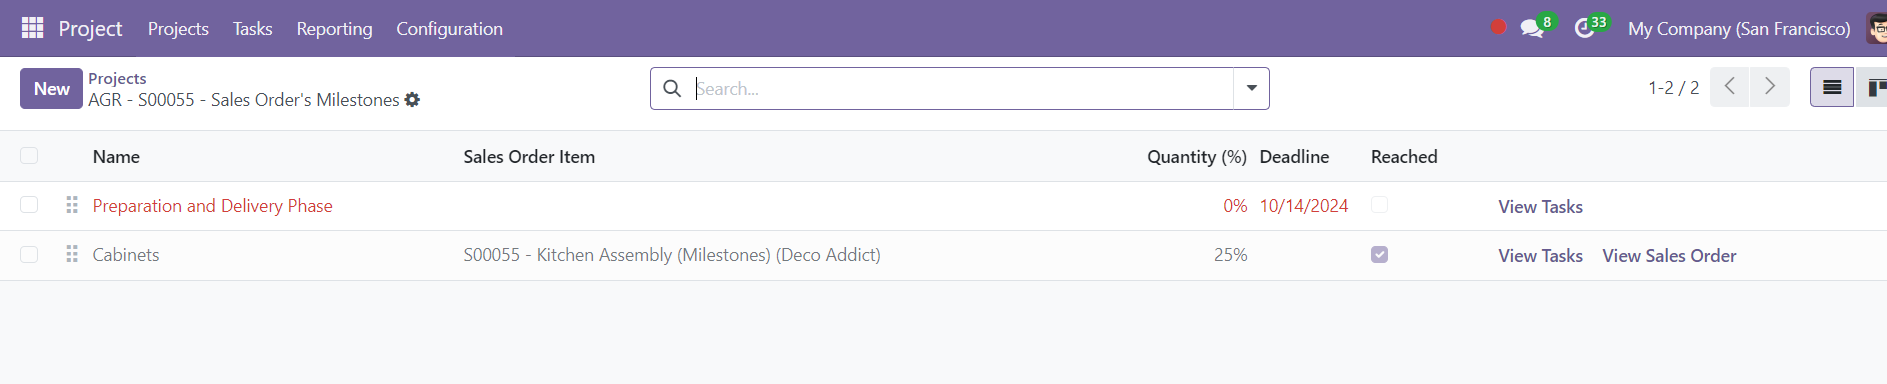
In the field that appears, provide a descriptive name for the milestone. For example, if the milestone marks the completion of a project phase, you could name it Phase 1 Completion or Design Approval. Once you’ve named the milestone, specify its deadline. The deadline represents the expected date by which the milestone should be achieved. This feature helps ensure that milestones are met on time, and it serves as a useful tool for tracking project schedules. Once a milestone has been successfully achieved, it can be marked as Reached. This action helps project managers keep track of completed milestones and stay focused on upcoming ones.
Task Logs
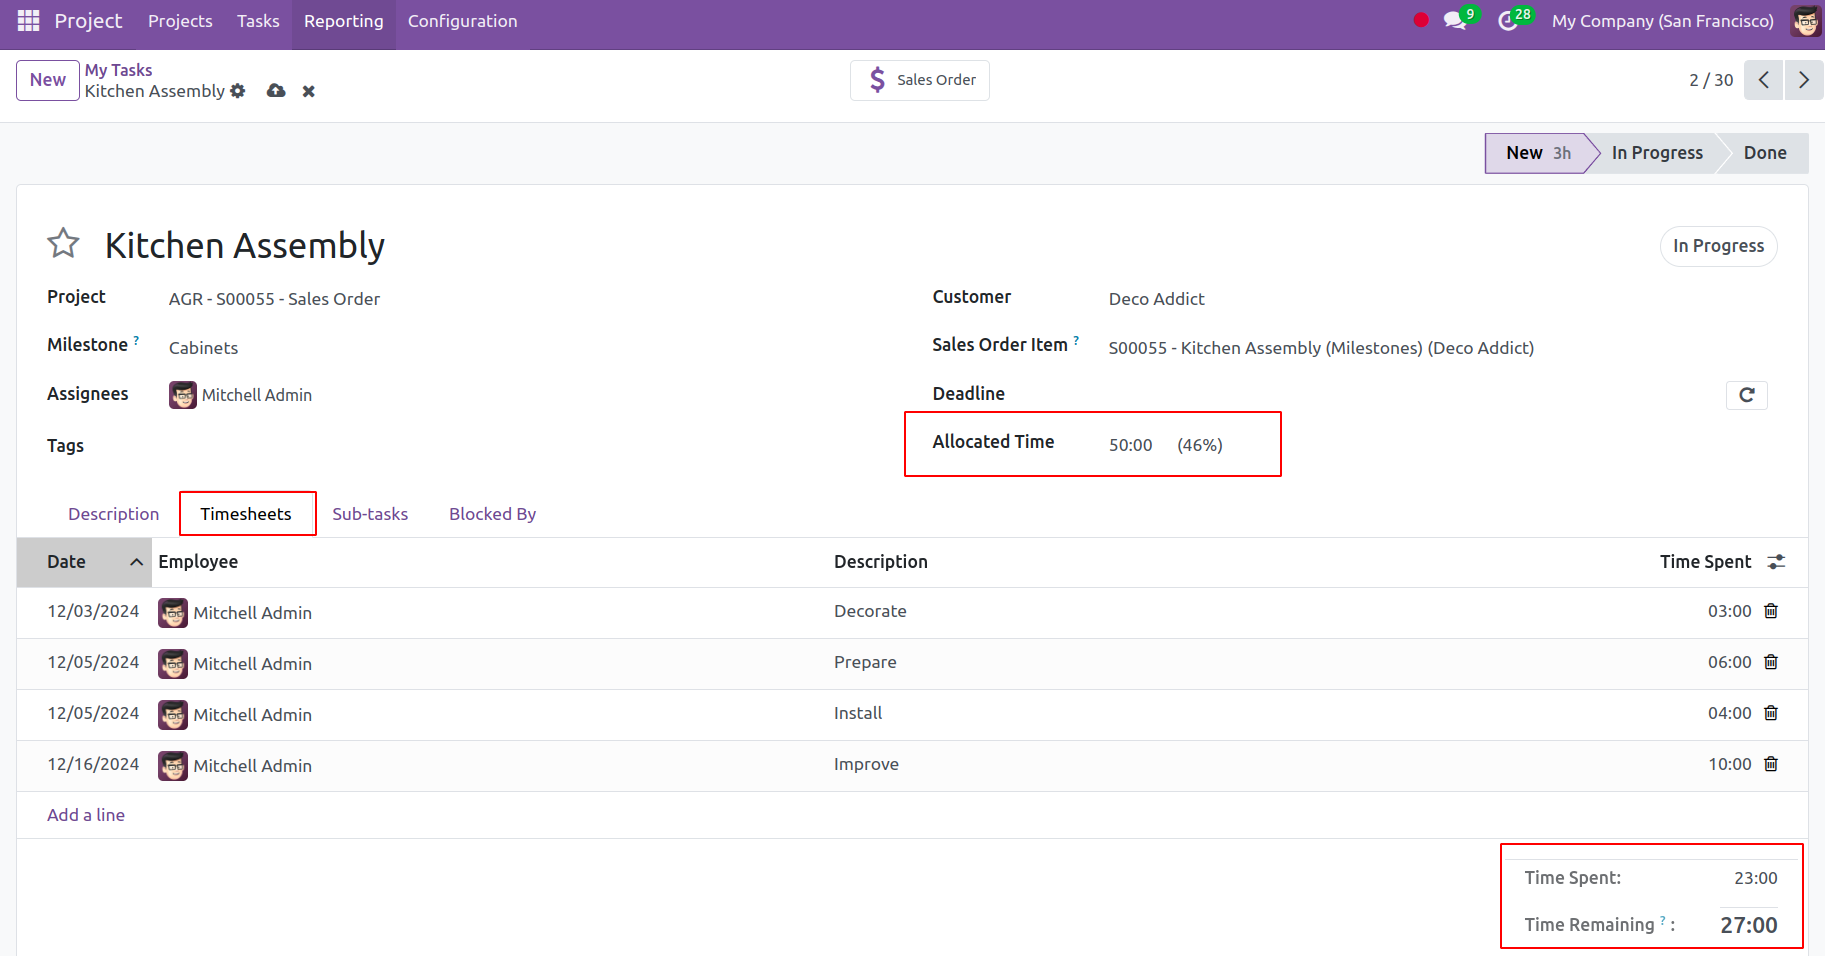
In Odoo 18, the Task Logs feature helps teams keep track of the time spent on tasks and projects, providing valuable insights into task management and productivity. This feature allows project managers to monitor the time logged by team members on specific tasks, ensuring that resources are efficiently allocated and deadlines are met.
To activate and use Task Logs for time tracking in Odoo 18, navigate to the Project module from your Odoo dashboard to start managing your projects. Once inside the Project module, click on the Configuration menu at the top and select Settings from the dropdown menu.
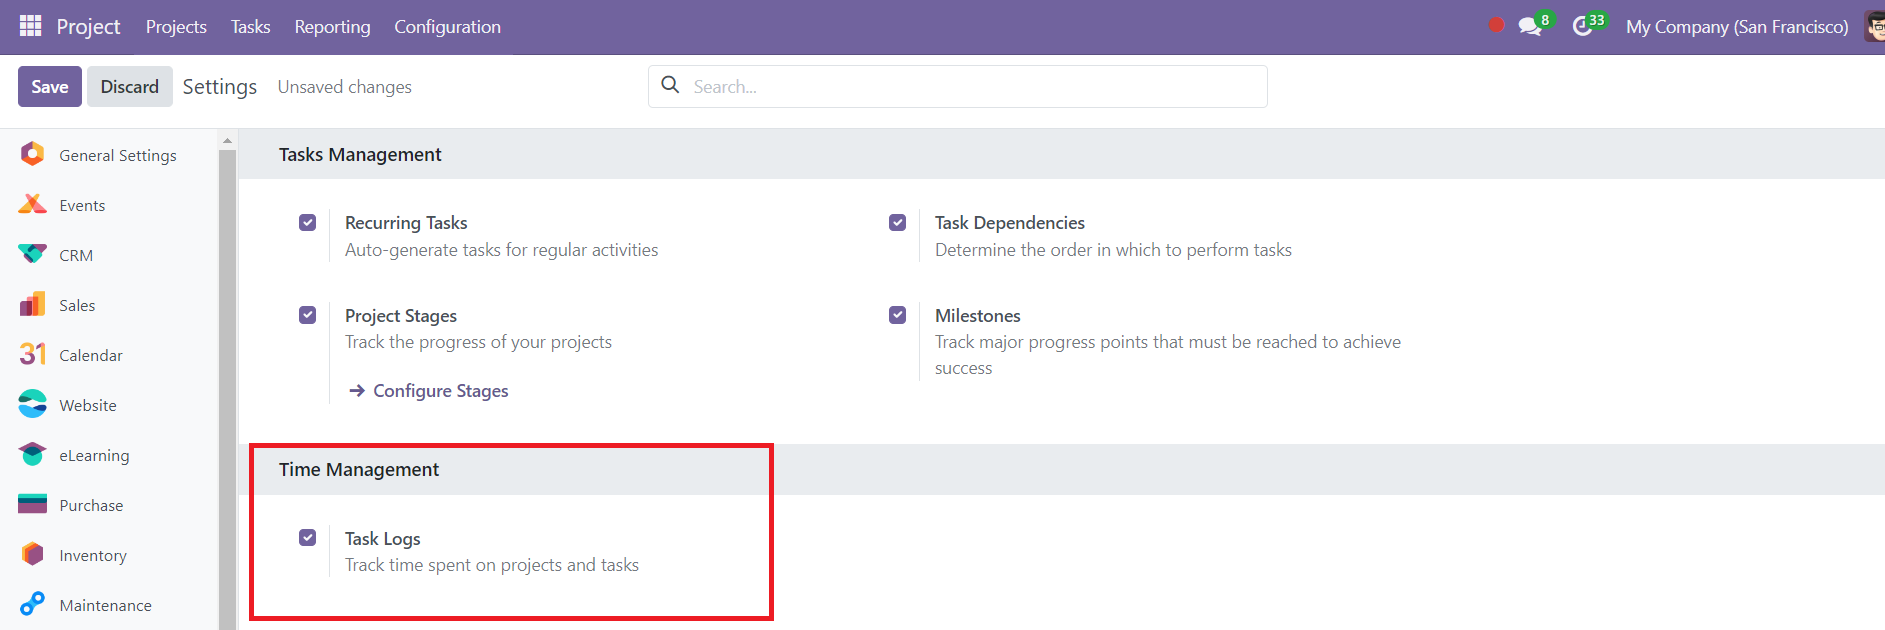
On the Settings page, scroll down to the Time Management section. Here, you’ll find the option to enable Task Logs. This feature allows you to track the time your team spends on various tasks within a project. Simply check the box next to Task Logs and click Save to apply the changes.
Customer Ratings
In Odoo 18, the Customer Ratings feature within the Analytics section enables project managers and teams to track customer satisfaction by gathering feedback on tasks. This valuable tool helps maintain strong client relationships and ensures continuous improvement by allowing customers to provide feedback on the quality of services received.
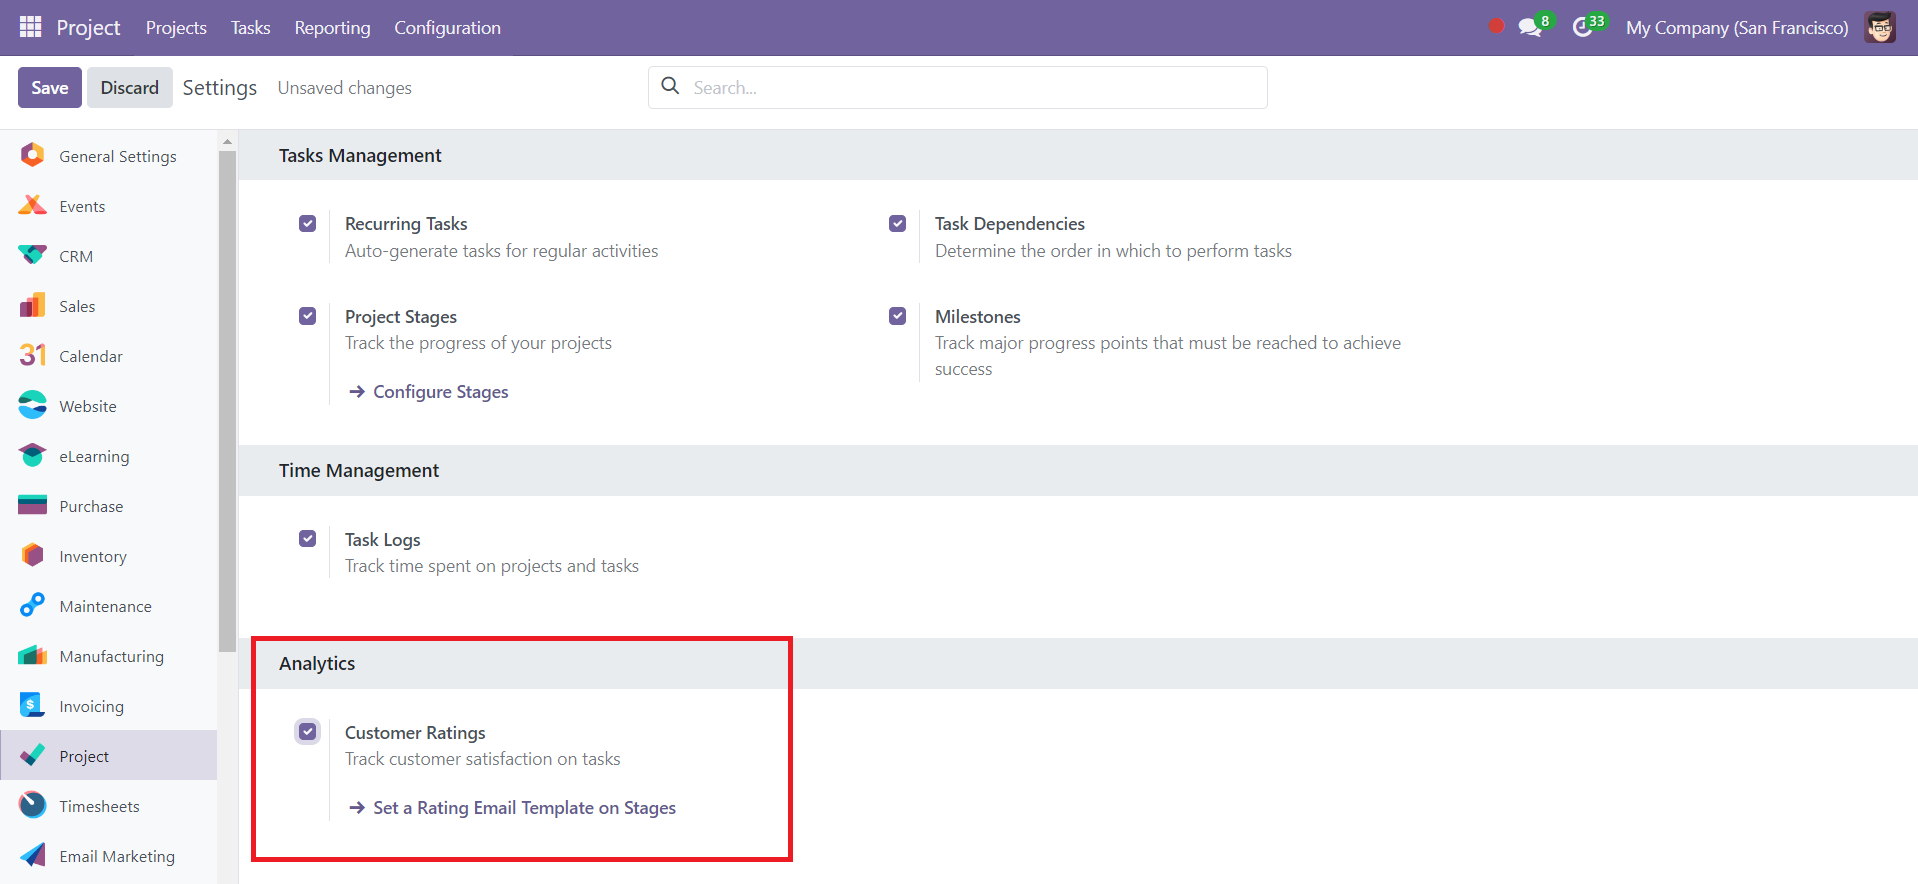
Click on the Configuration menu at the top and select Settings. Scroll down to the Analytics section, where you will find the Customer Ratings option. Check the box next to Customer Ratings to enable this feature, allowing customer feedback to be collected at specific stages of task completion. After enabling the feature, click Save to apply the settings.
With the Customer Ratings feature enabled, the next step is to set up a system that automatically requests feedback from customers once a task reaches a certain stage. This is done by configuring a Rating Email Template.
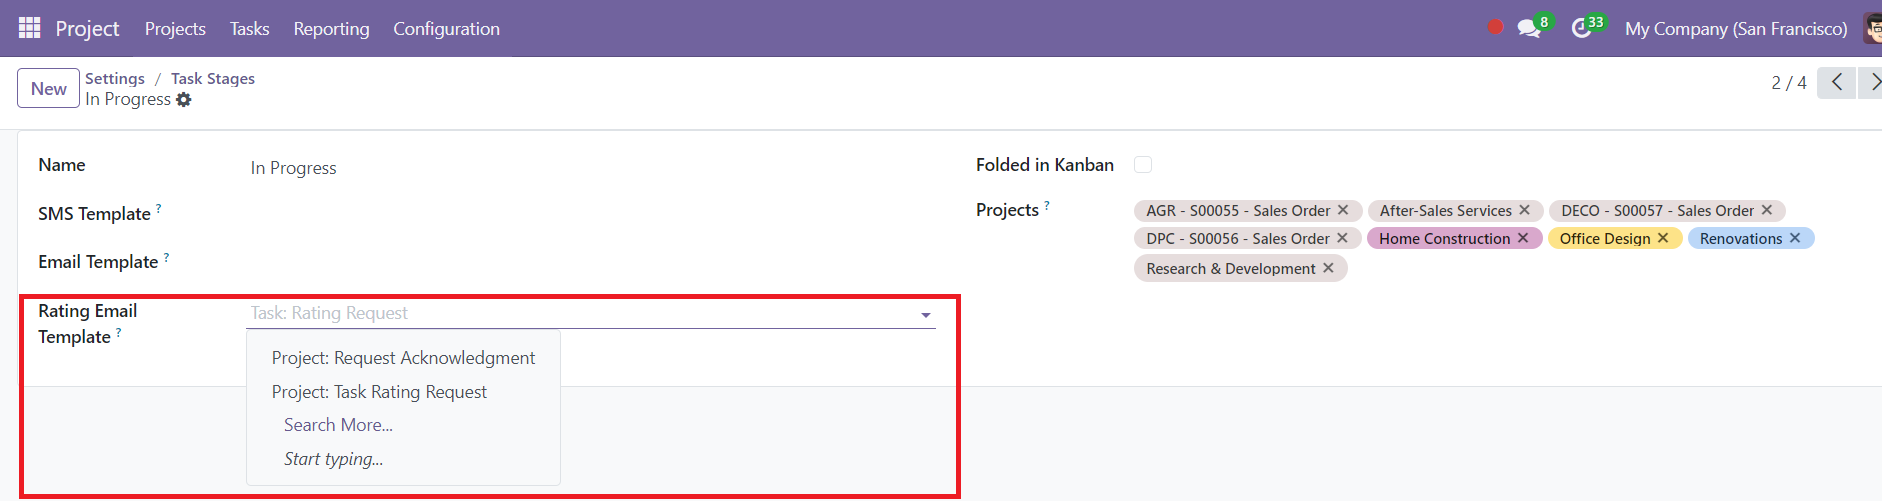
When editing a specific stage, you’ll see a field labeled Rating Email Template. Select or create a custom Rating Email Template by clicking on the dropdown menu. This template will serve as the email that is sent to customers once a task reaches the defined stage.
Tags
In Odoo 18 Project Management, adding relevant tags to a project is a streamlined process using the Tags option available under the Configuration menu. When you select Tags from the configuration settings, you’ll be directed to a page that displays a list of existing tags, each associated with a unique color for easy identification. This page also offers tools such as Favorites and Group By Filters to help organize and manage your tags effectively.
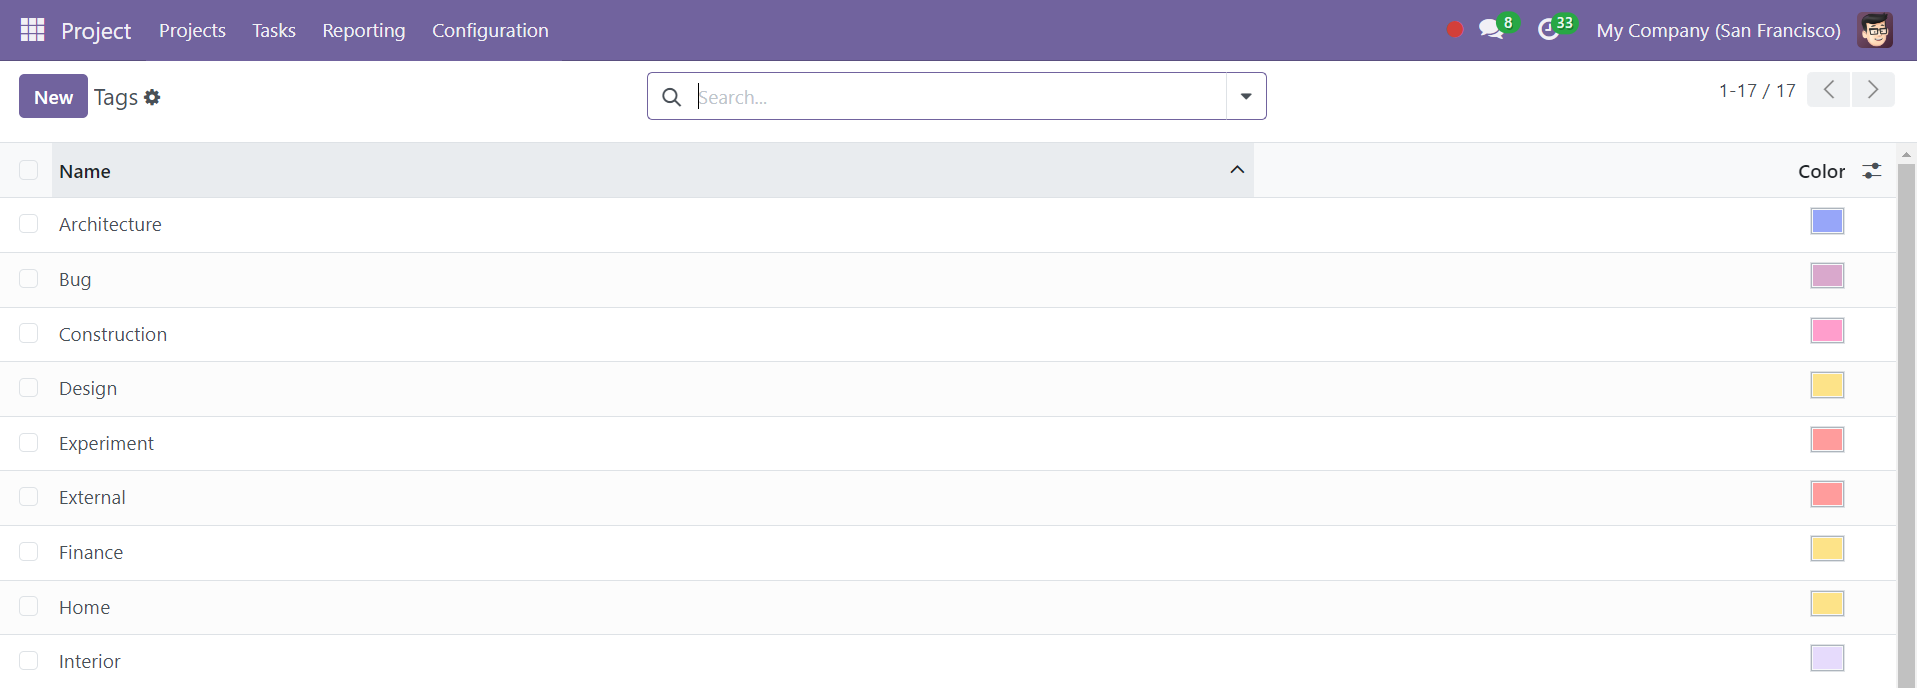
To create a new tag, simply click the New button, which will add a new line to the list where you can define the tag’s name and assign a color. This process is quick and efficient, making it easy to customize your project tags to suit specific needs. With just a few simple steps, you can create and manage project tags, enhancing organization and categorization within your projects.
Task Stages
In the Odoo 18 Project module, configuring task stages allows businesses to organize and manage their workflows efficiently.
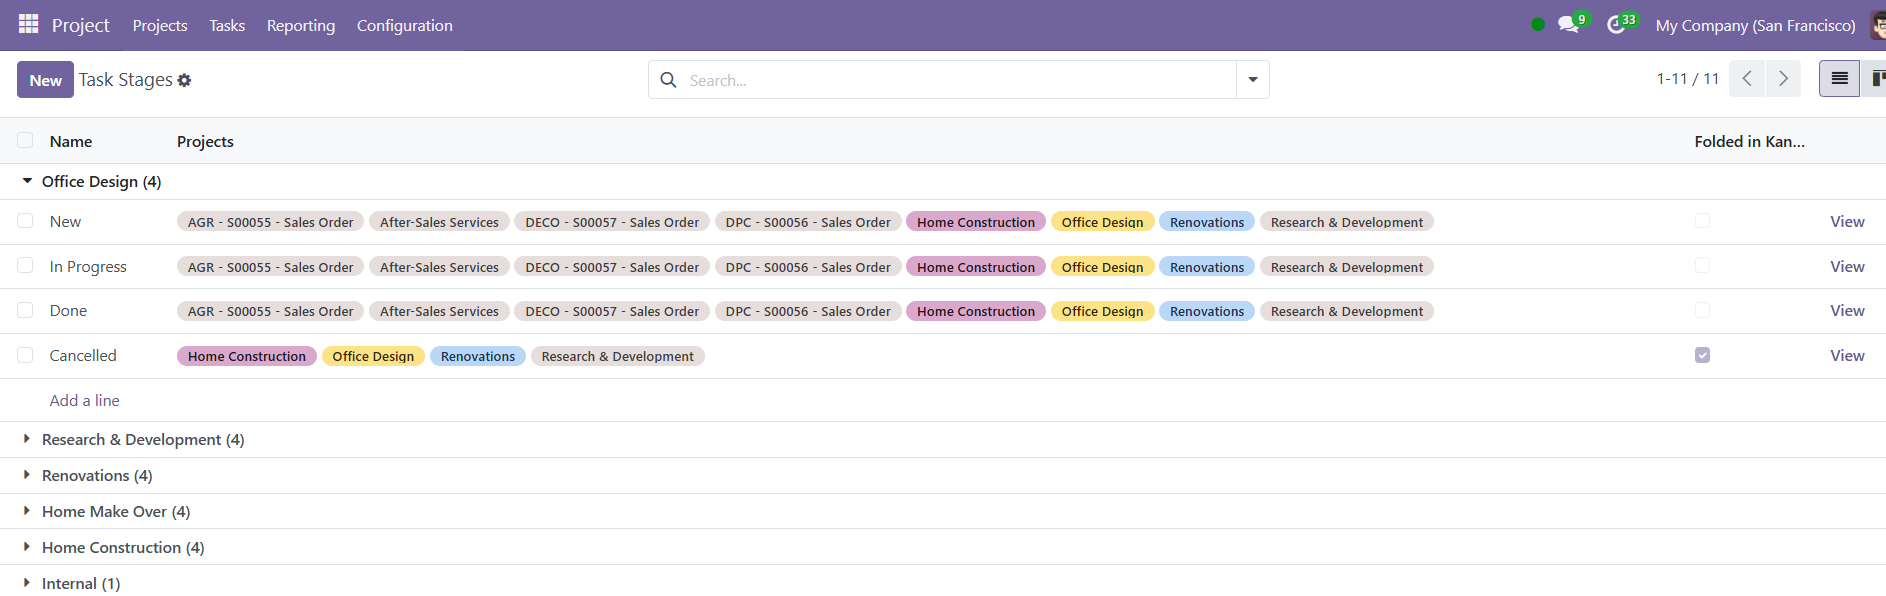
The Task Stage Configuration window includes several fields to define and customize the stages. The Name field is where you specify the stage's title, such as "To Do," "In Progress," or "Completed," representing different steps in the workflow.

If you wish to automate communications, you can assign an SMS Template or an Email Template to the stage. These templates will trigger automated messages when a task enters that specific stage, streamlining notifications to team members or stakeholders.
The Sequence field determines the order of the stages within the task view. Lower numbers will appear earlier, helping organize the flow logically. The Folded in Kanban option, if enabled, collapses the stage by default in the Kanban view, providing a cleaner interface and focusing attention on active tasks.
Lastly, the Projects field allows you to assign the stage to specific projects, ensuring that task stages are tailored to the workflow of each project. Configuring these fields effectively ensures that the task management process in Odoo 18 is seamless and aligned with project-specific requirements.
Activity Types
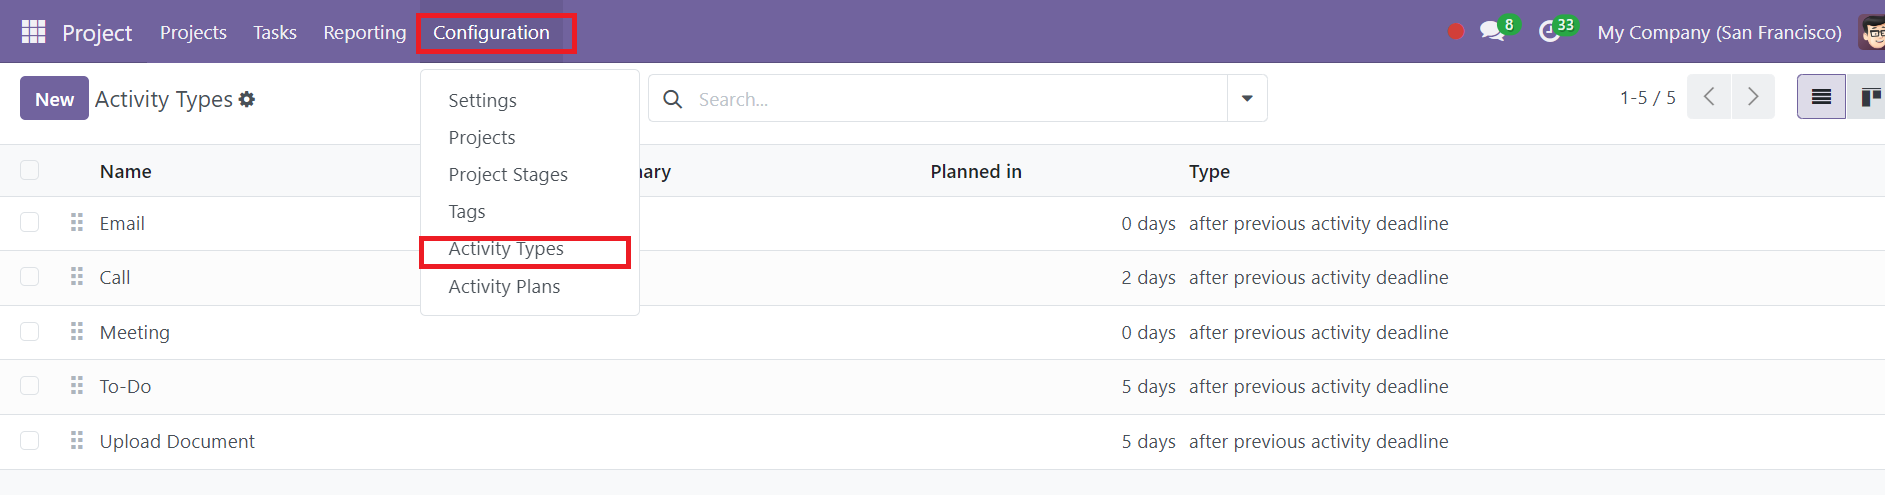
In Odoo 18’s Project Management module, scheduling activities is made simple with the Activity Types option found under the Configuration menu. When you select Activity Types, a list of all pre-configured activities is displayed, including key details such as the activity name, default summary, scheduling time, type, model, and associated icon. This list provides a comprehensive view of all planned activities within the system.
To create a new scheduled activity, click the New button, which opens a form where you can input relevant details about the activity. At the top of the page, enter the activity’s name, and then configure further settings under the Activity Settings section. Here, you can select the Action from a dropdown menu, add a Default Note, mention Default Summary of activity, and set a Default User. Additionally, the Keep Done option will keep the activities marked as done in the activity view.
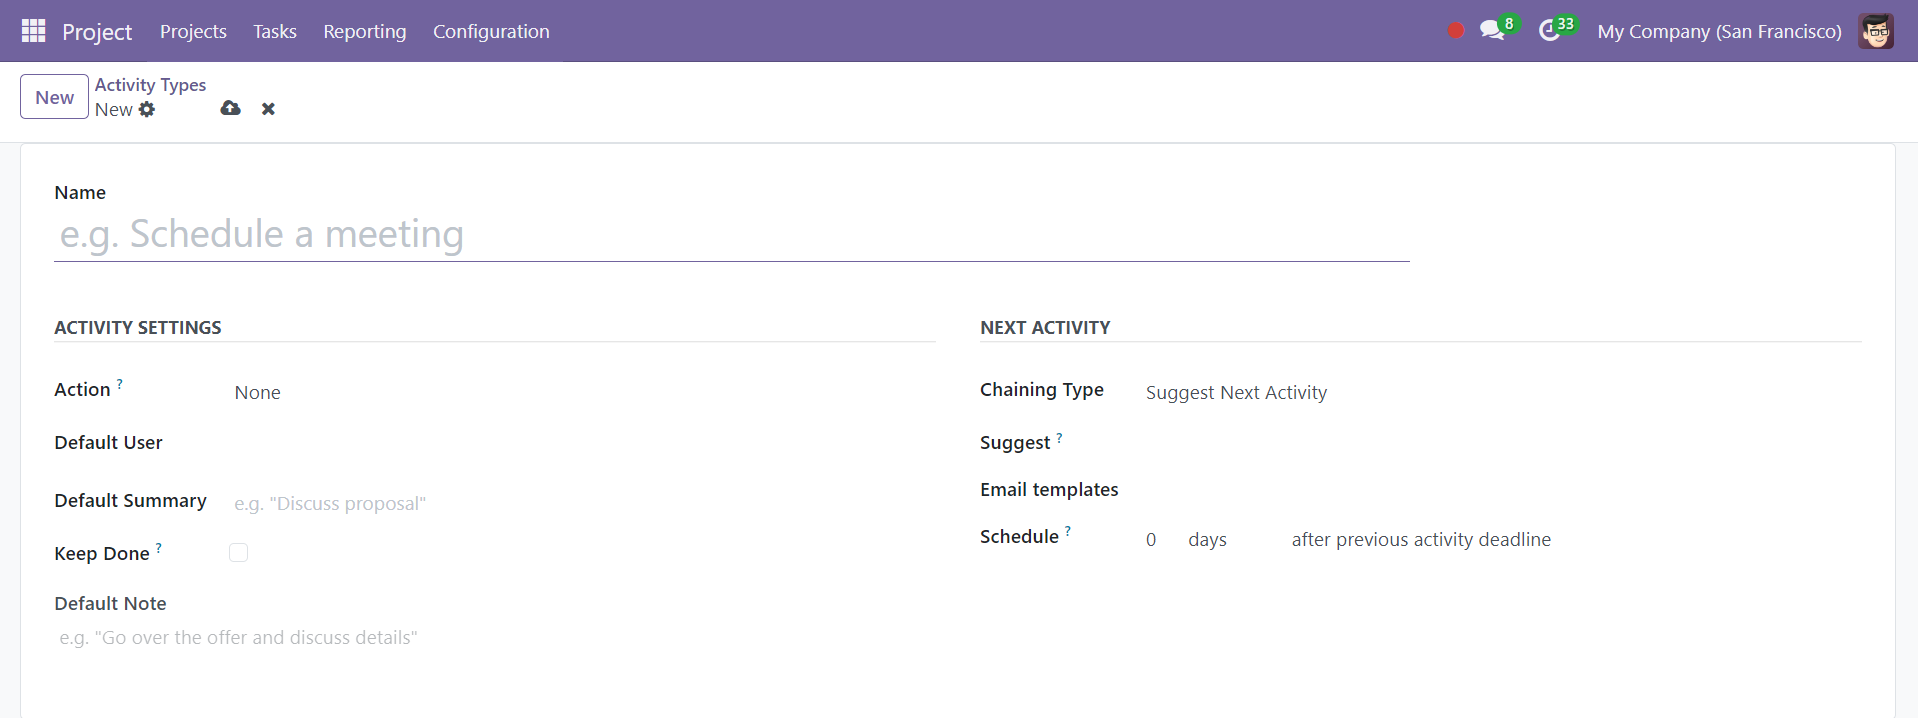
The Chaining Type option allows you to set triggers for the next activity within the Next Activity section. If chaining is enabled, the next activity is automatically scheduled when the current one is completed. You can also make recommendations for the next activity and choose an email template or set a scheduling window if needed. Once all the required details are filled in, click the Save button to finalize and schedule the activity. This feature helps streamline project workflows by ensuring that activities are properly planned and executed in sequence, making project management more efficient in Odoo 18.
Activity Plans
In Odoo 18, you can streamline task management by creating Activity Plans, which outline a sequence of activities to help complete work efficiently. To add a new activity plan, navigate to the Configuration menu and select Activity Plans. Here, you can see a list of existing plans, or to create a new one, simply click the New button.
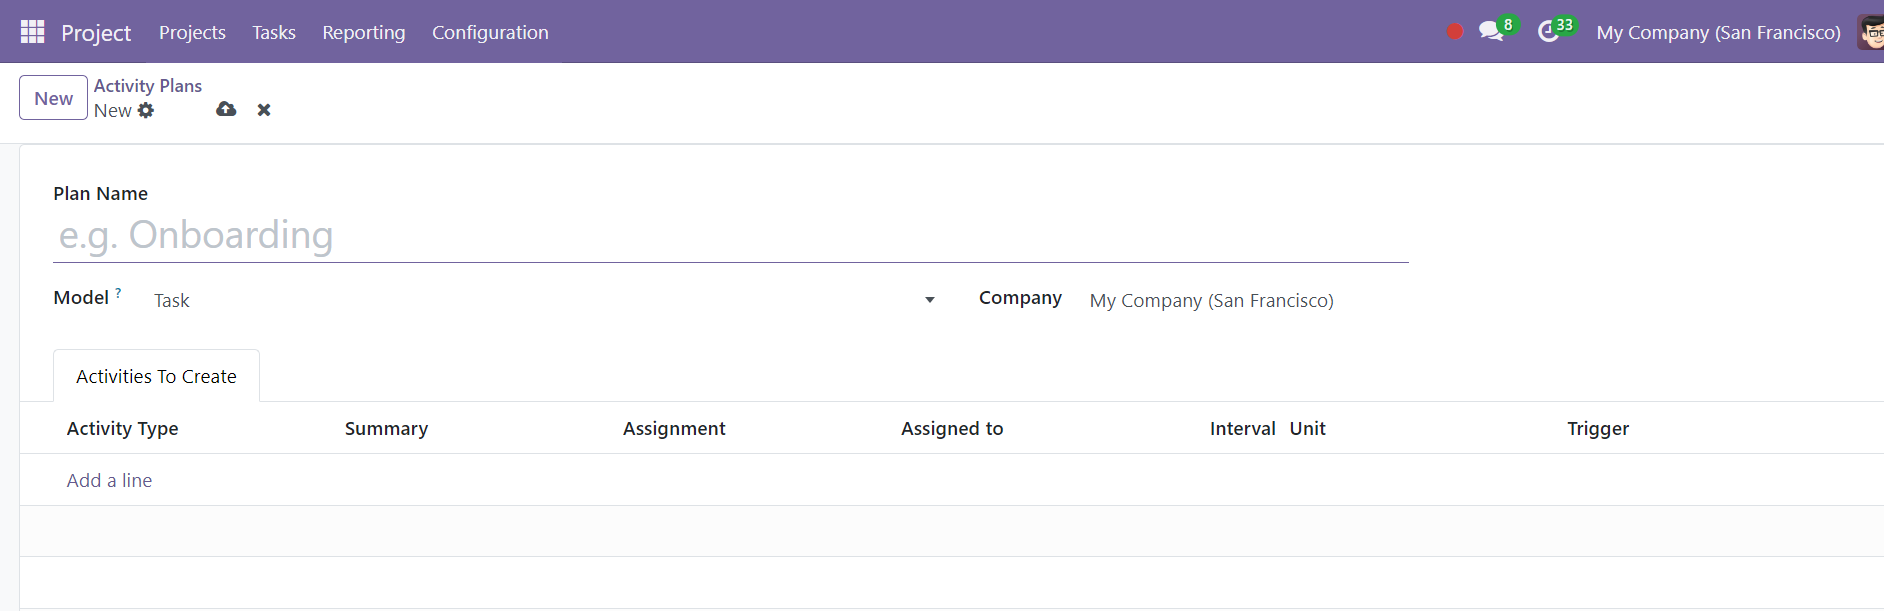
Begin by naming the activity plan and specifying the related company. After that, head to the Activities to Create tab, where you can add the required Activity Types using the Add a line tool. This allows you to include various predefined activities that will be scheduled as part of the plan. These activity plans help automate workflows by ensuring that key steps are planned and tracked in the project management process.