With the help of the live chat plugin, you can engage with website users and have direct conversations, which enhances the rapport between customers and employees. The live chat module provides you with new leads that you can convert into opportunities. When a customer visits the website, a dialogue box—also referred to as a chat box—appeals at the bottom to assist the sales team in striking up a discussion. Using the live chat tool, you can respond to all of the client's inquiries and provide them with prompt rhythmic support. We will review the features of the live chat under this model.
The home screen of the live chat module can be seen in the screenshot below.
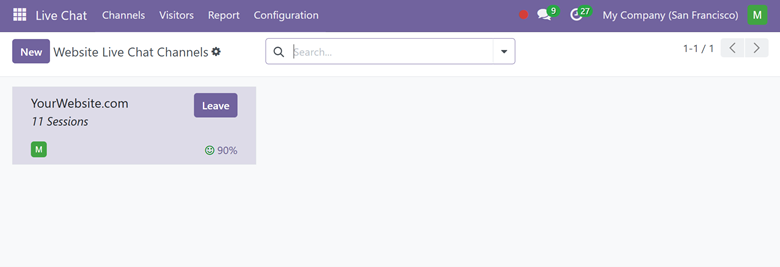
The previous conversation was on the live chat page, as seen in the screenshot. Users can use the group by, favorites, and filters as needed. Also, make suitable use of the search tab. The new feature can also be used to build a similar live chat channel. Selecting the New option will bring up the creation page seen in the image below.
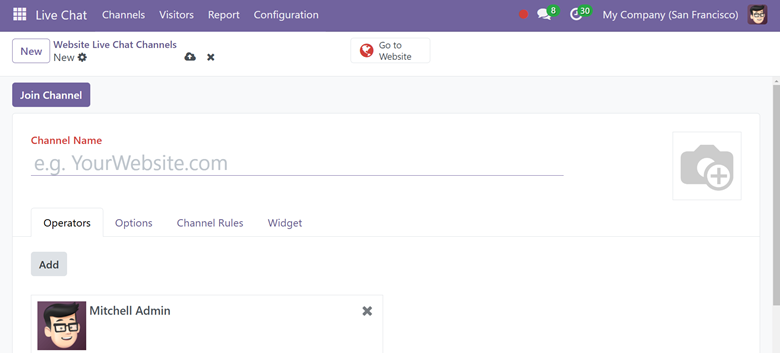
Here, select the required operator from the list that is supplied, and add more operators by selecting the New icon.
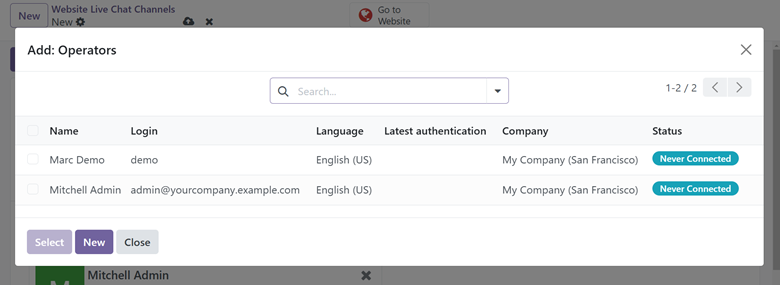
The page where additional operators can be established is shown in the screenshot below.
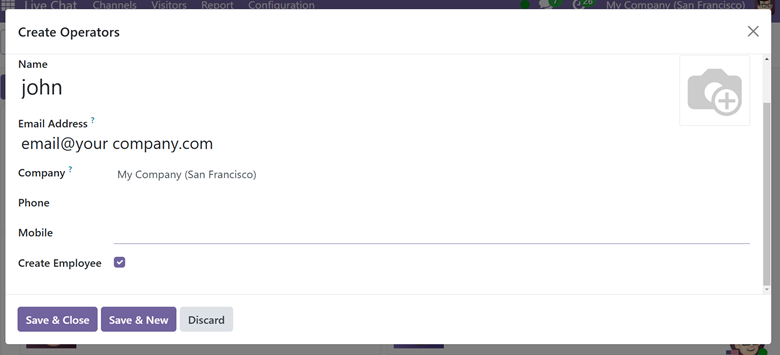
You must enter the operator's name at the top of the creation page, followed by the name of the business, phone number, email address, and mobile number, in that sequence. Additionally, the generate employ option is now active. After all of the data has been entered, choose the save and close icon to save the newly created operator.
The following tab is called Options, and it will appear as shown in the screenshot below. The field ‘Notification Text’ option on this page lets you change the default text that appears in the live chat support icon. By choosing the "Live Chat Button Color" option under that, you may see the live chat backdrop's default color.

By choosing the welcome message option, you can customize a greeting for users who enter the live chat window that will show up when a conversation begins. Now, you can use the chat field's placeholder option to customize the text that appears when users are prompted to initiate a chat. The default background color of the channel header will be provided by the channel header color option.
The Channel Rules page is where you may configure the different live chat rules. By doing this, you can maintain contact solely with the countries that have been specified. If the company's sales team is experiencing difficulties comprehending website visitors from a certain country in their native tongue, the chat box may be hidden for them. With the help of the "add a line" option, many operations can be carried out for a certain URL and per country, as seen in the screenshot below.

On selecting the add a line option, you will obtain a page, as seen in the image below.
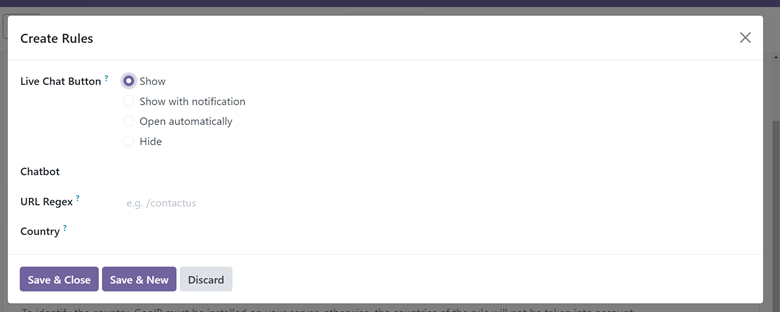
This rule creation page features four options for the live chat button: Show, Show with notification, Open automatically, and Hide.
Show: Make the page's chat button visible.
Show with notification: shows the chat button together with a text bubble that floats next to it.
Open Automatically: After a predetermined period of time (defined in the Open automatically timer field that appears when this option is chosen), the button is displayed and the chat window is automatically opened.
Hide: conceals the page's chat button.
The URL rejections option can be used to supply regular expressions mentioning the websites that are covered by this rule. In the country field, you can indicate which nation should enforce the regulations. After filling out every field, you can utilize the save icon.
Operators can change their Online conversation Name before engaging in a live conversation. In the live chat interaction, this is the name that site visitors see.
Click on the user avatar in the upper-right corner of any database page to change the Online Chat Name. To access the profile page, choose My Profile from the drop-down menu. Find the Online Chat Name area on the Preferences tab's right side, then type your preferred name.
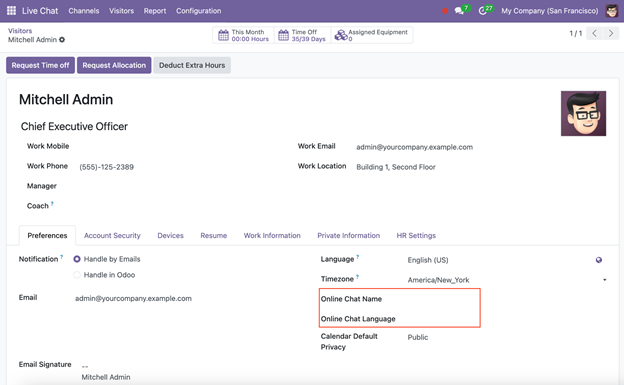
When a user doesn't choose their online chat name, the name that appears is the one that appears on their profile page.
To use the channel as a communication tool with those visitors, you need to link it to the website. To do that, go to the Website > Configuration > Settings, Under Email & marketing, Add the live chat channel, and save changes.
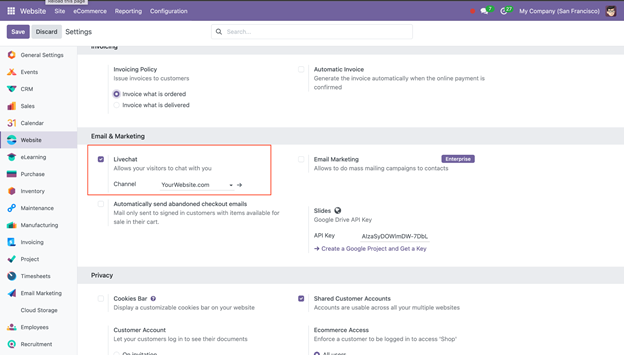
Thus once the visitors land on the website, they are allowed to use live chat to communicate with operators.
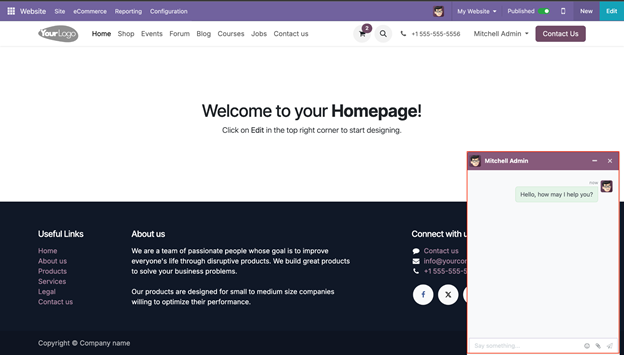
Visitors can chat with the operator and get the details of the service they wanted or they can raise their issues to solve. At the end of the conversation, customers can rate the level of service they received from the live chat operator at the conclusion of a live chat session. Customers give ratings as soon as the conversation is over. This makes it possible for operators to get performance feedback right away. Customers can also leave any last remarks they may have before exiting the chat window.
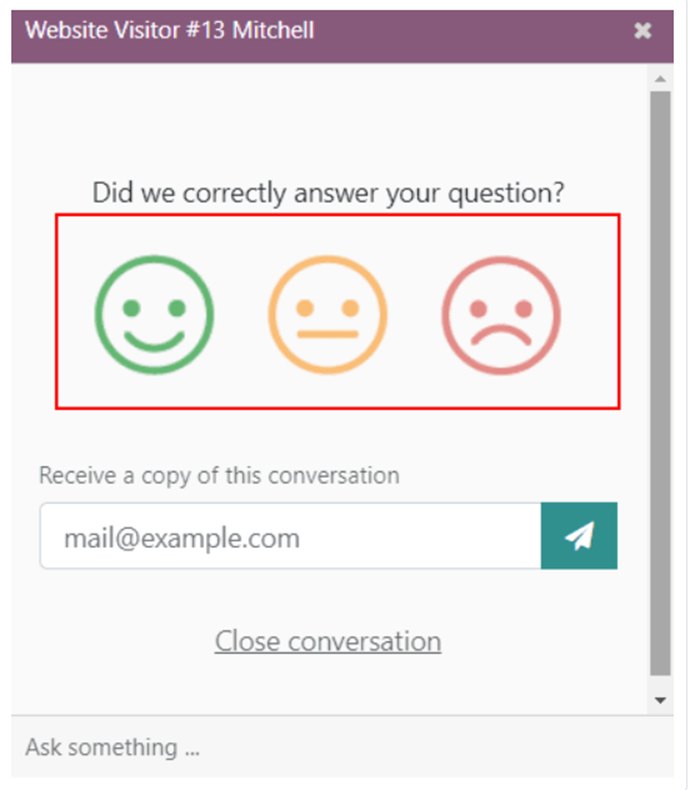
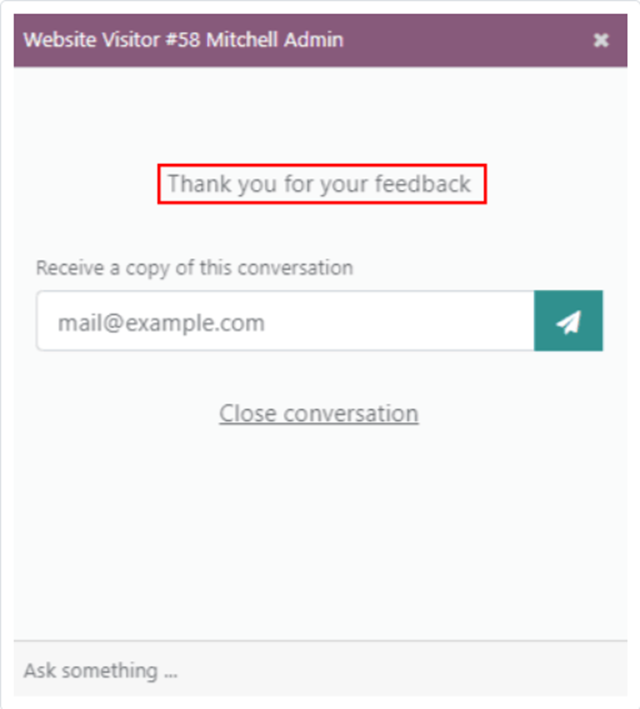
The consumer is sent a thank-you message and a link to a Close Conversation if they choose the Satisfied (smile) indicator.
A text box will show up whether the consumer chooses the Satisfied or Okay (neutral) or Dissatisfied (frown) icons. Customers can explain their reasoning for selecting this rating by adding comments in this text box. The live chat operator will receive both this message and the rating icon. The rating page must be manually added to the website after it has been published.
Go to this page on the website and change the channel's unpublished status to publish in order to publish it.
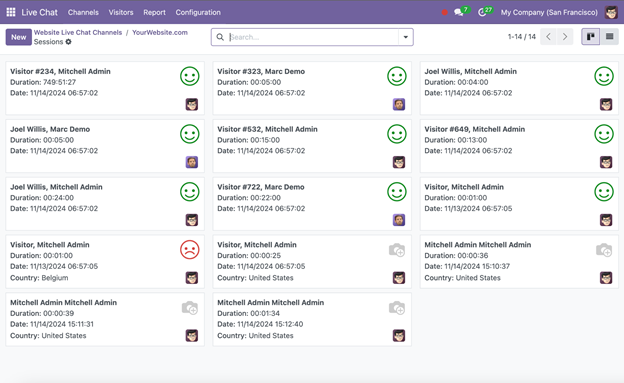
The live chat conversations are stored in the back end as sessions. Operators can check it if required.
Opening the smart button session opens conversations with different visitors, the conversation duration, date and time of conversation, visitor country, and rating marked from the Kanban view.
Live chat conversations can also be viewed by navigating to the Discuss app. New conversations appear in bold under the LIVECHAT heading, located along the left panel.
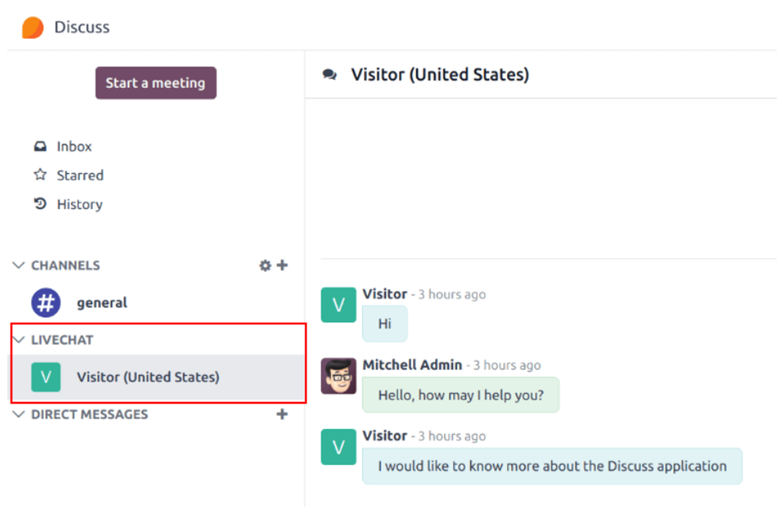
To choose a chat, click on it in the left side. This starts the discussion. An operator can engage in the conversation from this perspective just like they would in the standard chat window.
Because the live chat and discuss modules are linked, all of those conversations can be seen as direct messages in the discuss module.