Vendor Bill
Vendor bills may be issued in order to get details regarding the payment made to a vendor following a transaction. Once a purchase order is confirmed in Odoo 18, you may create vendor invoices right from the buy order form view. Each of these vendor bills will appear in the Vendors menu under the Bills option of the Invoicing module.
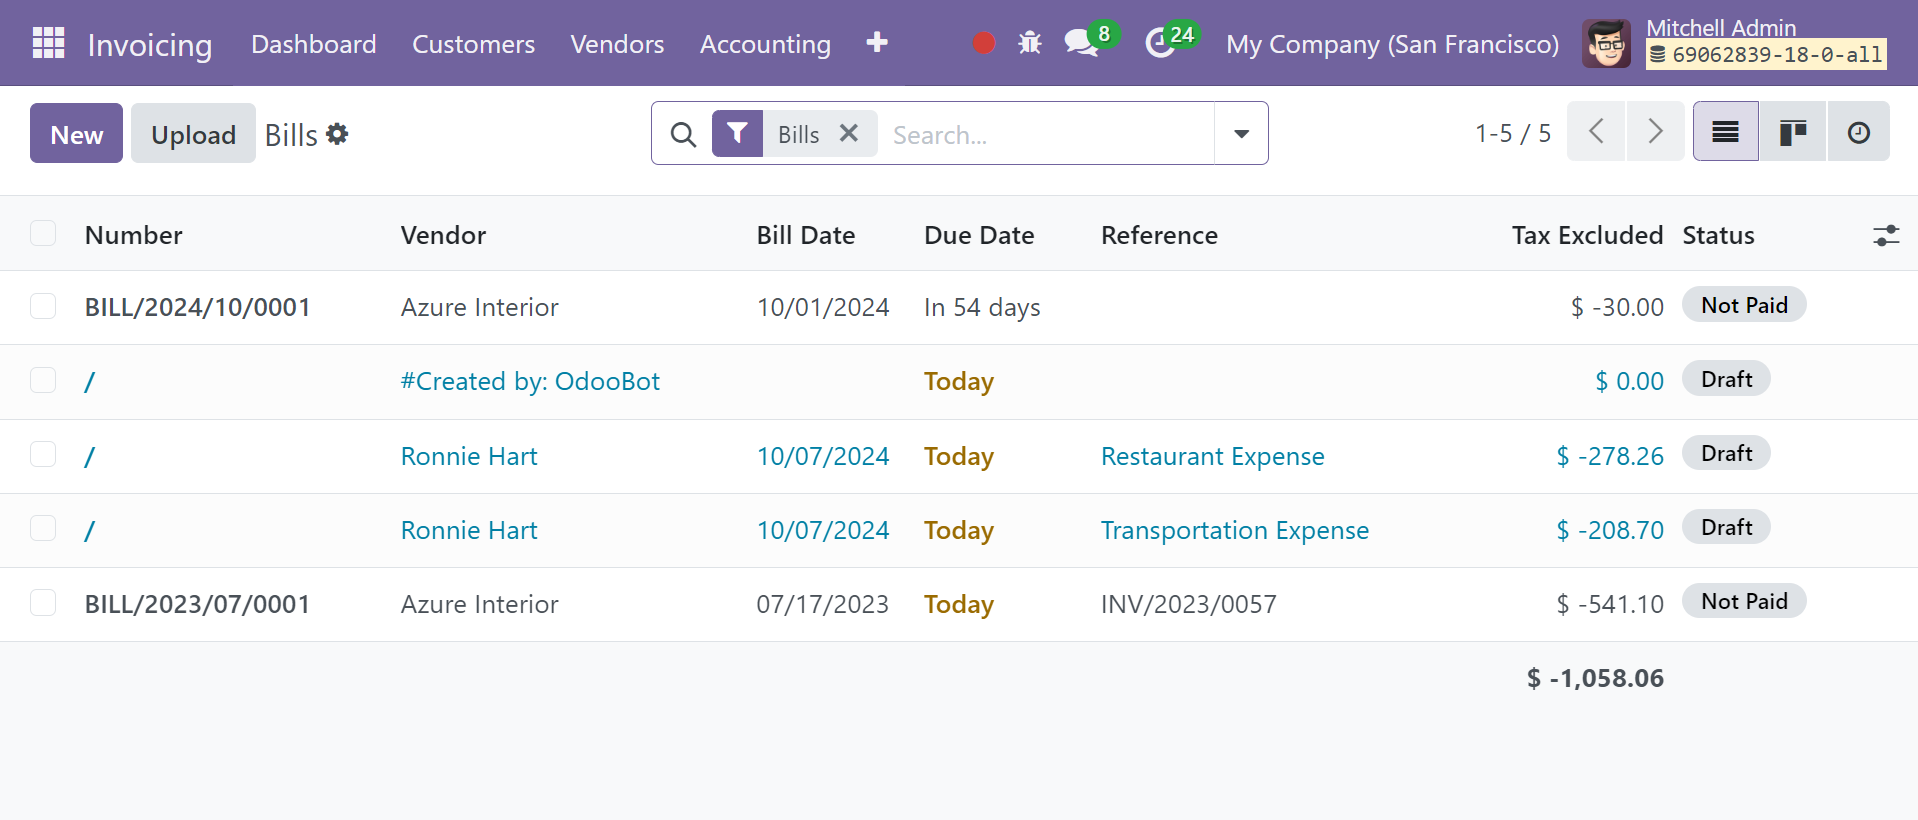
This is the list view of the vendor bills. Number, vendor, bill date, due date, reference, activity, amount exempt from taxes, total amount in currency, payment status, and status are among the details shown. Click the Kanban view icon to display the vendor bills in a Kanban manner.
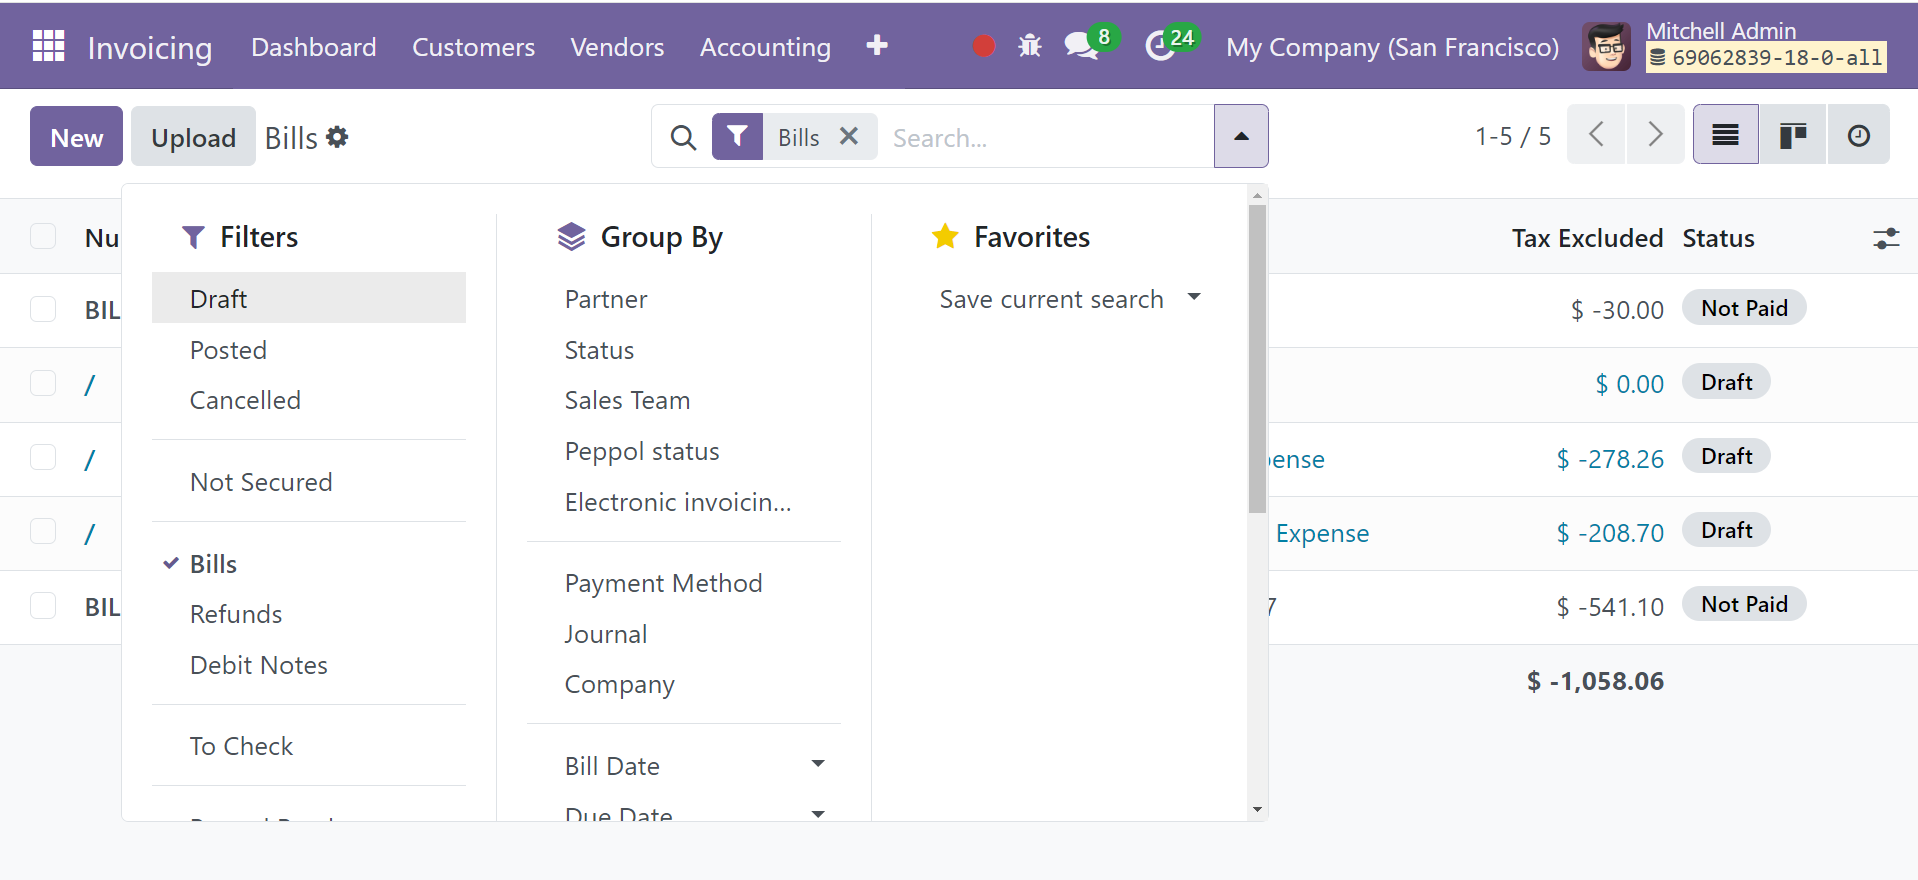
Under the Filters option, you can see the default filters: Draft, Posted, Canceled, To Check, Unpaid, Paid, Overdue, Invoice Date, Accounting Date, Due Date, and Electronic Invoicing Processing. Partner, Status, Sales Team, Electronic Invoicing State, Preferred Payment Method, Invoice Date, and Due Date are among the Group By filters available on this platform. The Filters and Group By sections offer customization options for the sorting options.
Click the New button in the Odoo 18 Invoicing module to begin producing a new vendor bill. Click the Upload button to upload a vendor bill from your system.
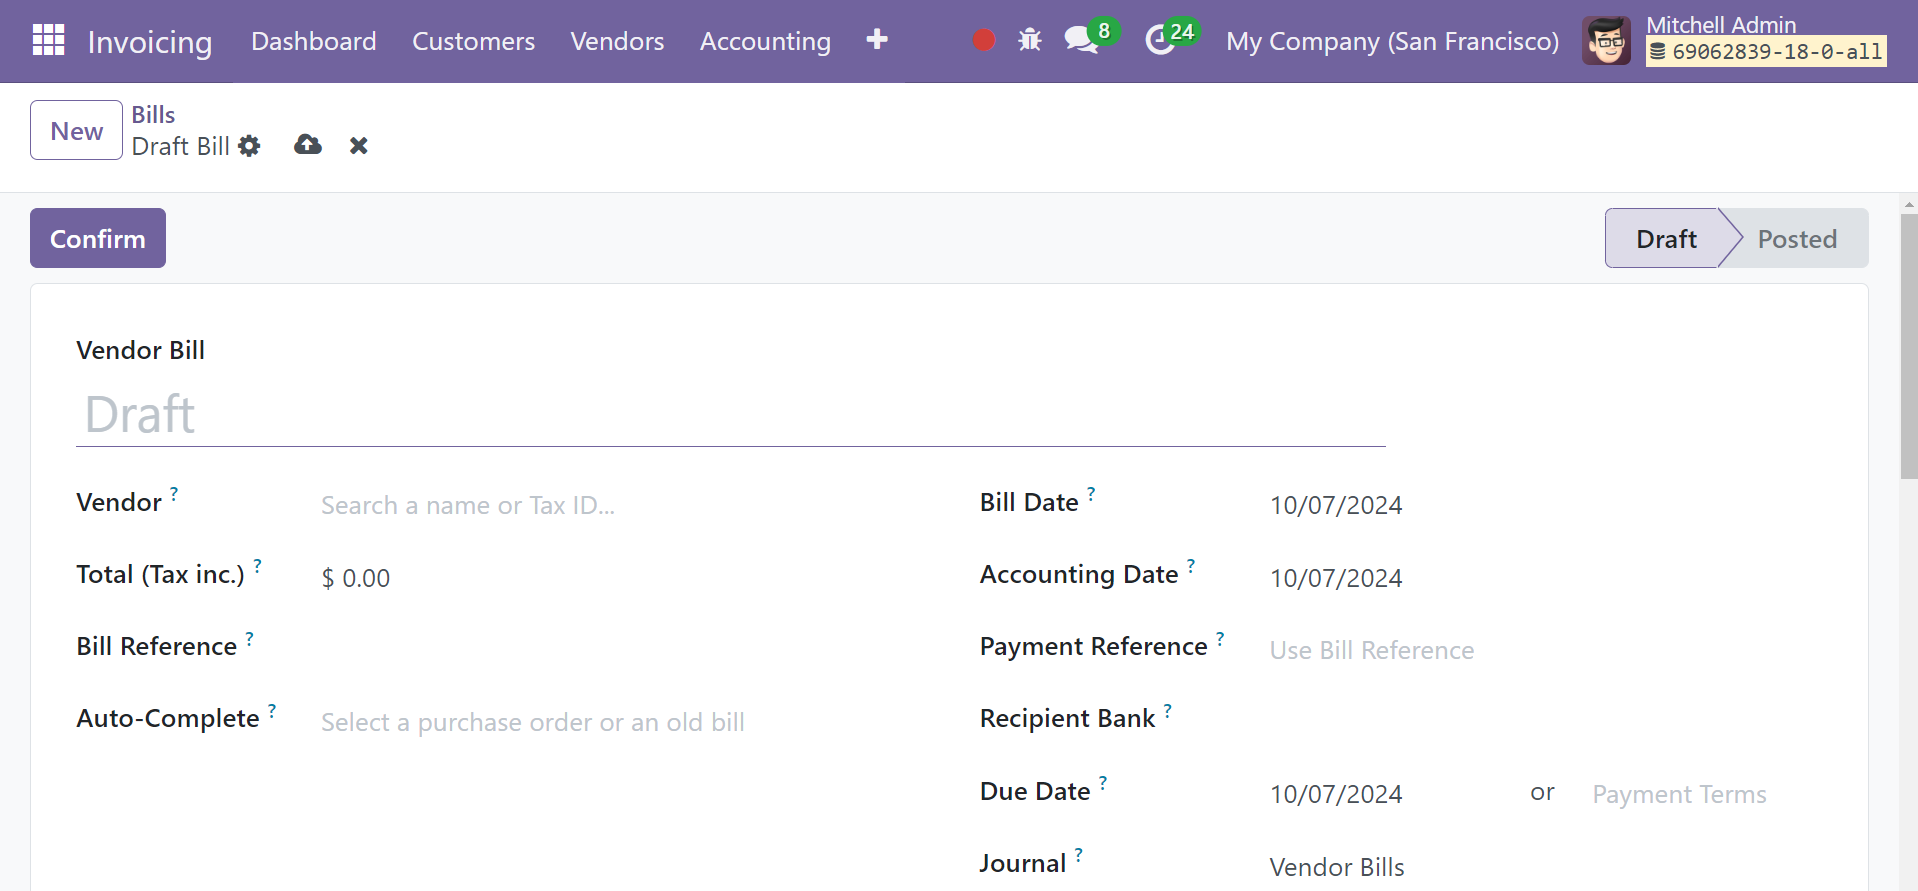
This is the vendor bill creation window's form view. We're going to draft the vendor a bill. The vendor's name is selectable using the dropdown menu. In the Bill Reference box, you can include any references the bill may have. If you are creating this bill using an earlier Odoo 18 purchase order, you can specify that in the Auto-Complete column. By doing this, Odoo will automatically fill in the required fields using the data from the purchase order. To have this vendor bill generated, enter the appropriate date in the Bill Date field.
The Accounting Date, which is displayed in the form view, indicates the date that the accounting data for this particular bill was added to the record. In the appropriate fields, you can enter the Payment Reference, Due Date, Journal, and Payment Terms.
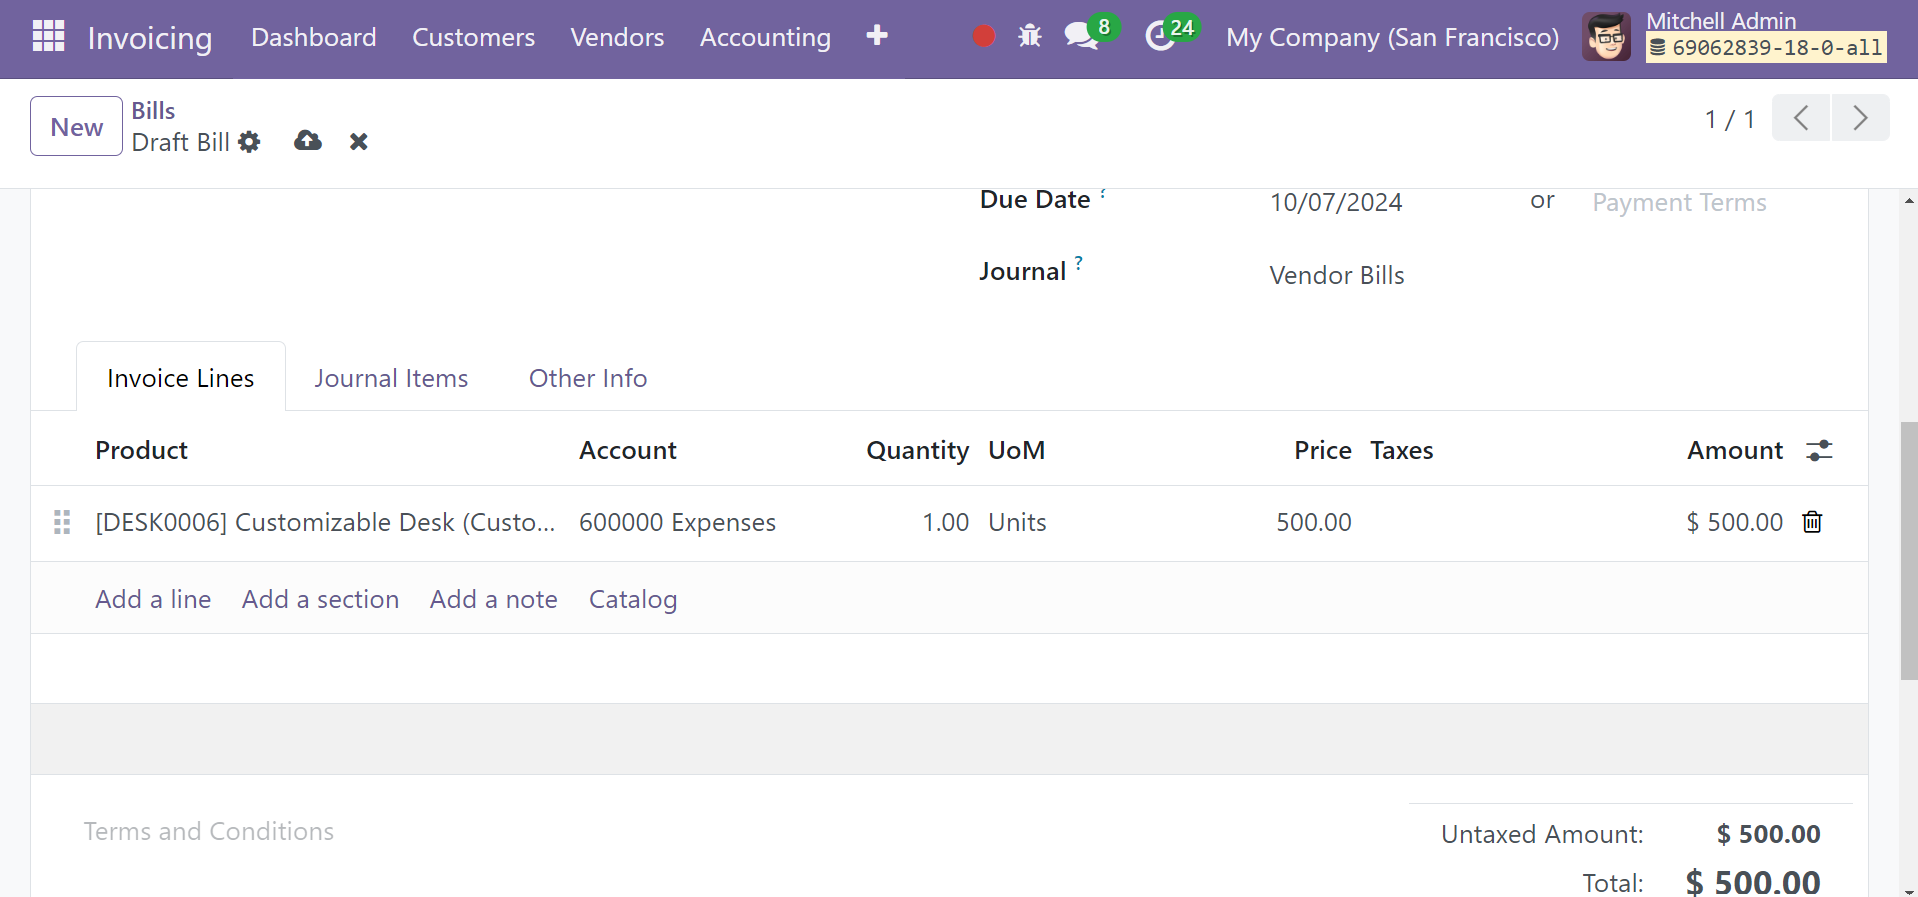
Using the Invoice Lines, you can add things that you purchased from the appropriate vendor. Use the Add a Line button to add items one at a time. This tab will show the following: Product, Account, Quantity, UoM, Price, Taxes, and Subtotal. You can add sections to the invoice line by clicking the Add a Section button. Use the make a Note button to make comments beneath the invoice line.
The Journal Items tab will display matched journal items based on the product you mentioned in the invoice line. This will be based on the journal entries you made for your products when you created them in Odoo 18.

As seen in the above figure, the Account, Label, Debit, Credit, and Tax Grids will be displayed for the Journal Items. You can add extra journal entries to the vendor bill by clicking the Add a Line button.
You can add accounting details using the Other Info tab for this particular vendor bill.
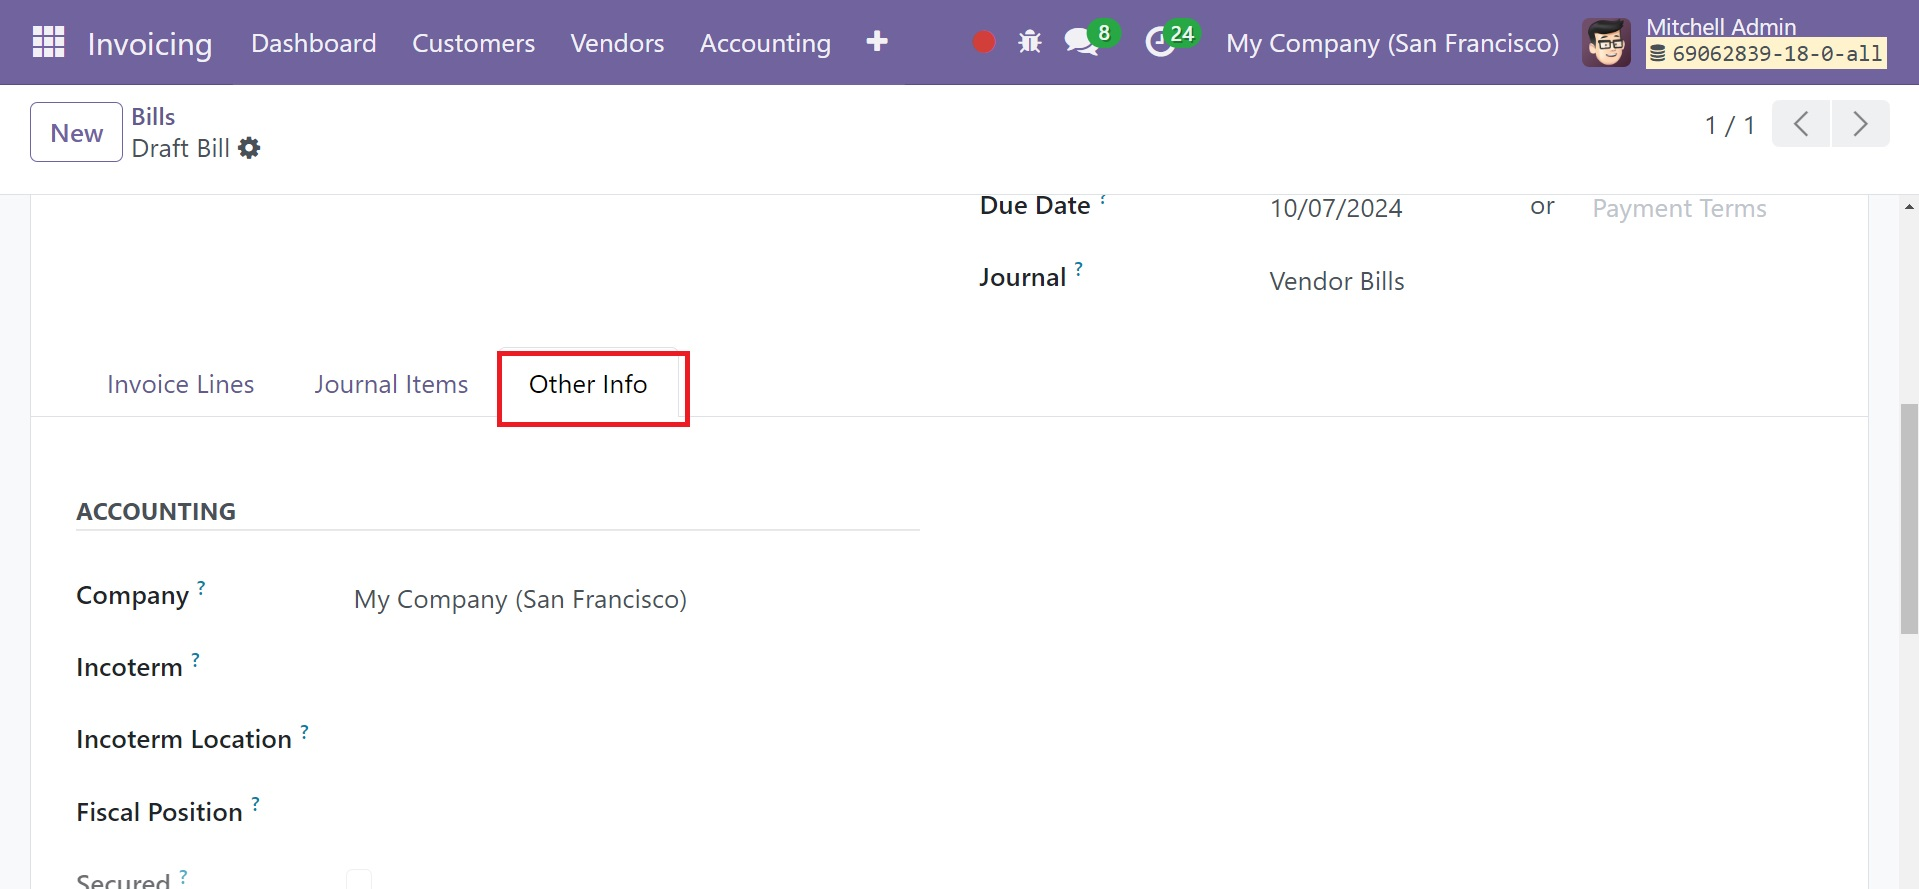
The name of the company may be found here. The Fiscal Positions and Incoterm are available for reference in the pertinent fields. To have the entry posted automatically on the designated date in the vendor bill, check the Post Automatically option. Using the To Check option, you can confirm the data entered in the vendor bill.
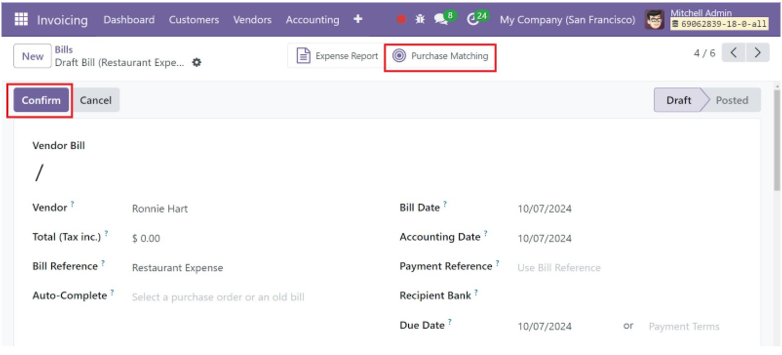
Click the Confirm button to verify the modified vendor bill. The Purchase Matching smart button is a key feature that appears on the Vendor Bill (Invoice) form and provides a quick link to relevant purchase orders and receipts for matching purposes. To record payment later, follow the same procedures as discussed in the section on customer bills.
Cutoff Journal
The term "cutoff date" refers to the point at which business transactions that need to be recorded for the upcoming reporting period cease to occur, as indicated by the expiration of a bill, invoice, or agreement. Occasionally, the accounts added in Odoo 18 cannot record invoices and payments that are not approved or fully matched. In these situations, the business needs to confirm at the conclusion of each accounting period whether the obligation or expense has been incurred.
Let's examine the Cut-Off feature using an example in Odoo 18. Let's say a customer paid 75% of the total amount shown on the invoice. Using the Cut-Off option included in the bill, as seen below, you may make the appropriate adjustments to the journal entries.
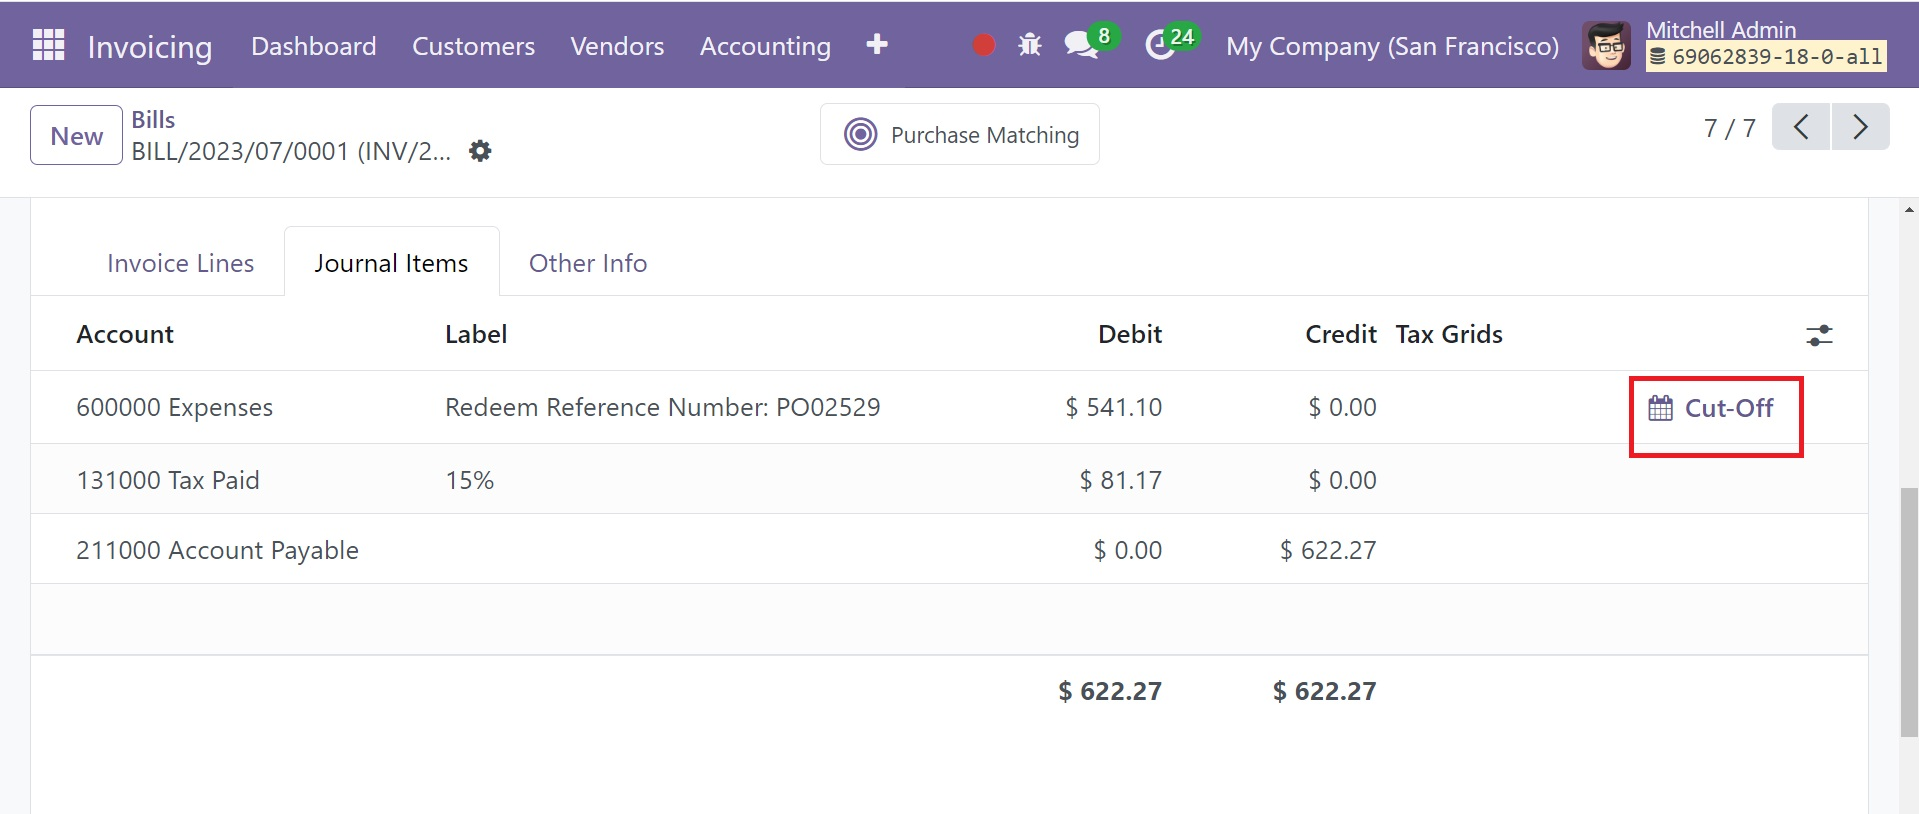
As mentioned earlier, the customer only contributed 75% of the total amount. The leftover amount will be recorded in the company's loss account. You can record this in the loss account by using the Cut-Off option.
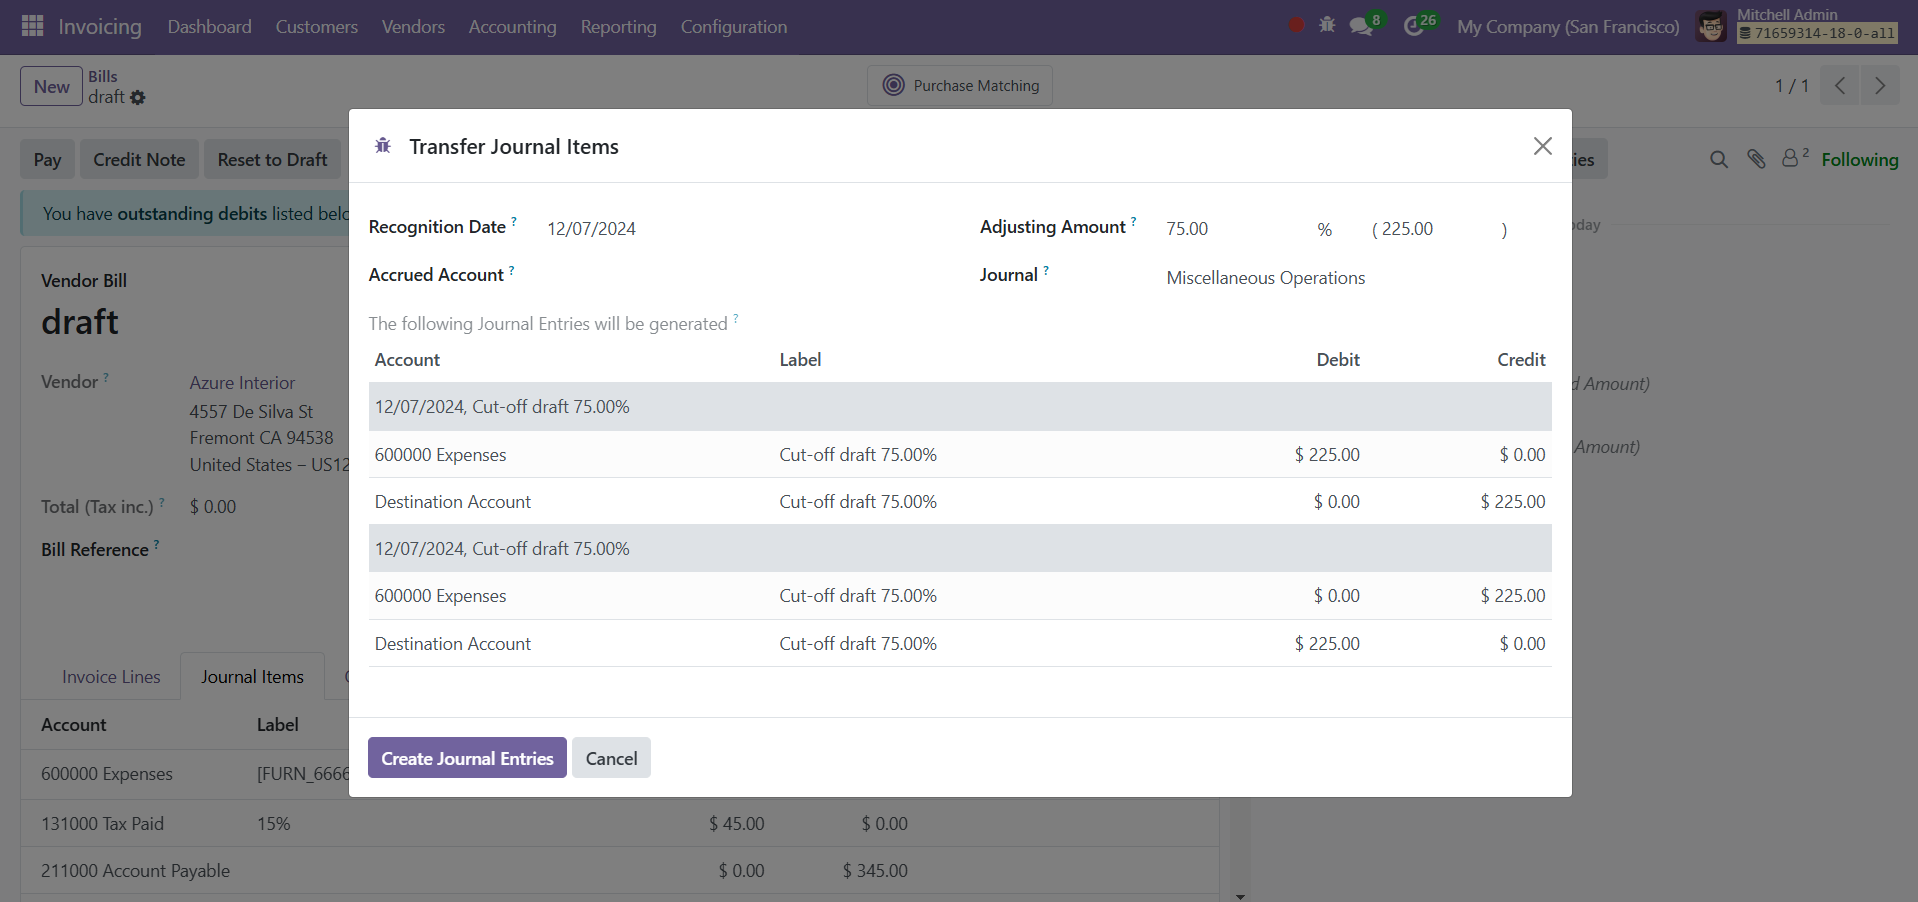
You'll be able to edit the journal entry in this pop-up window. The column labeled "Adjusting Amount" may provide information on the last 25%. These forms of adjustment entries, which show the liabilities and expenses, must be made in your company's financial statements at the end of the accounting period. We make use of the Cut-Off feature to make adjustment entries. Following the mention of the Adjustment Amount, Accrued Account, and Journal, you can click the Create Journal Entries button.
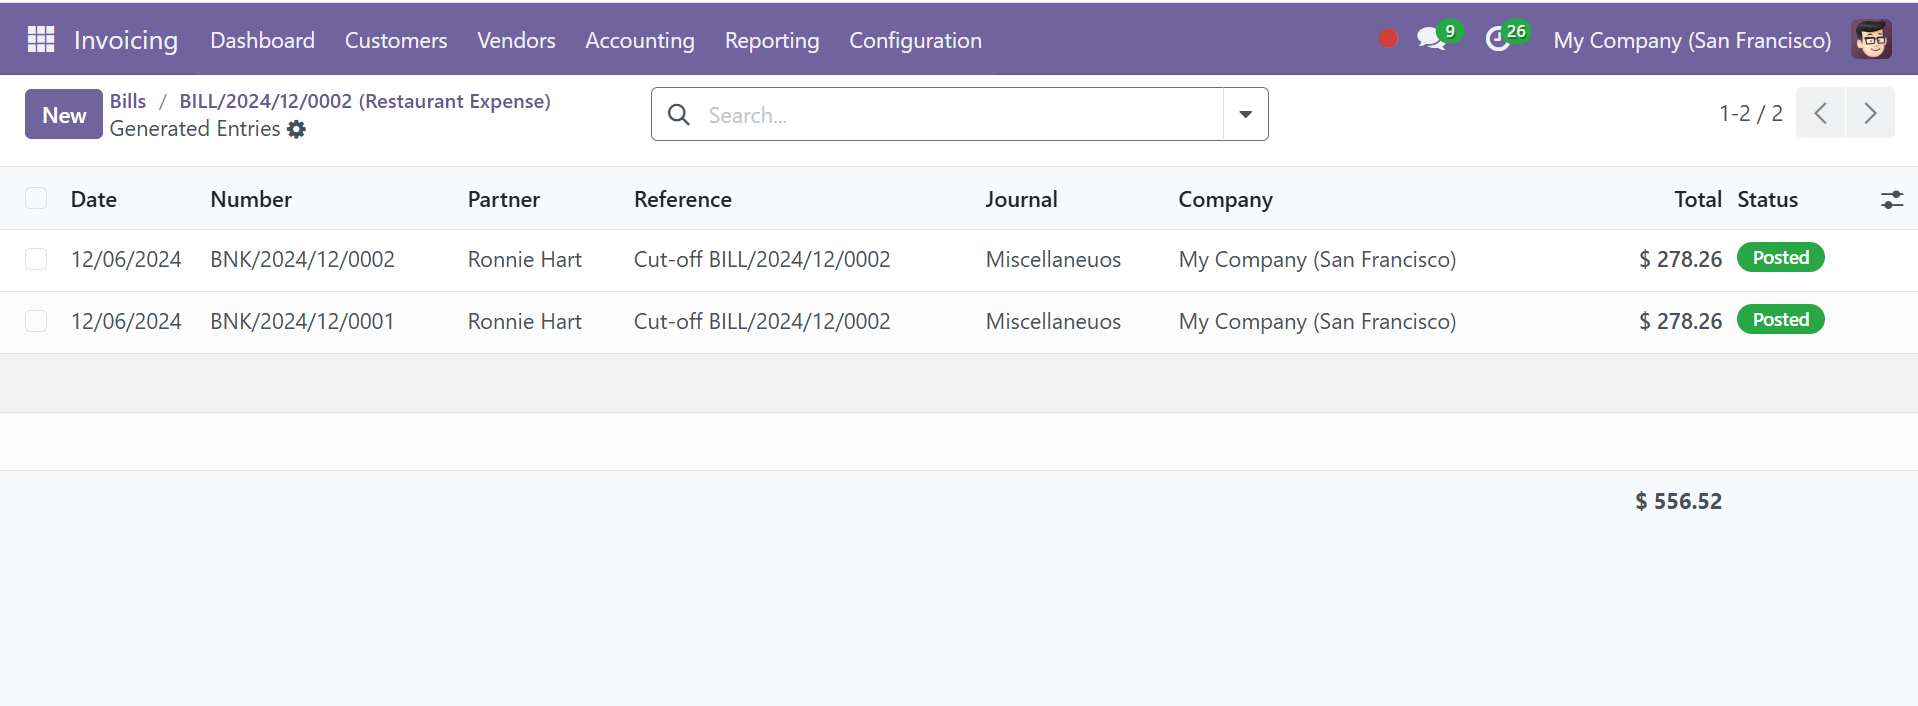
The created entries are shown in the screenshot above.
Employee Expense
The invoicing function helps you monitor and manage employee spending more effectively. This platform is similar to the Expense Management Module in Odoo 18. Once freshly produced costs are established, you can submit them for approval to the appropriate management. The Vendors menu has an Employee Expenses option that, when selected, will bring you to a platform, as shown in the figure below.
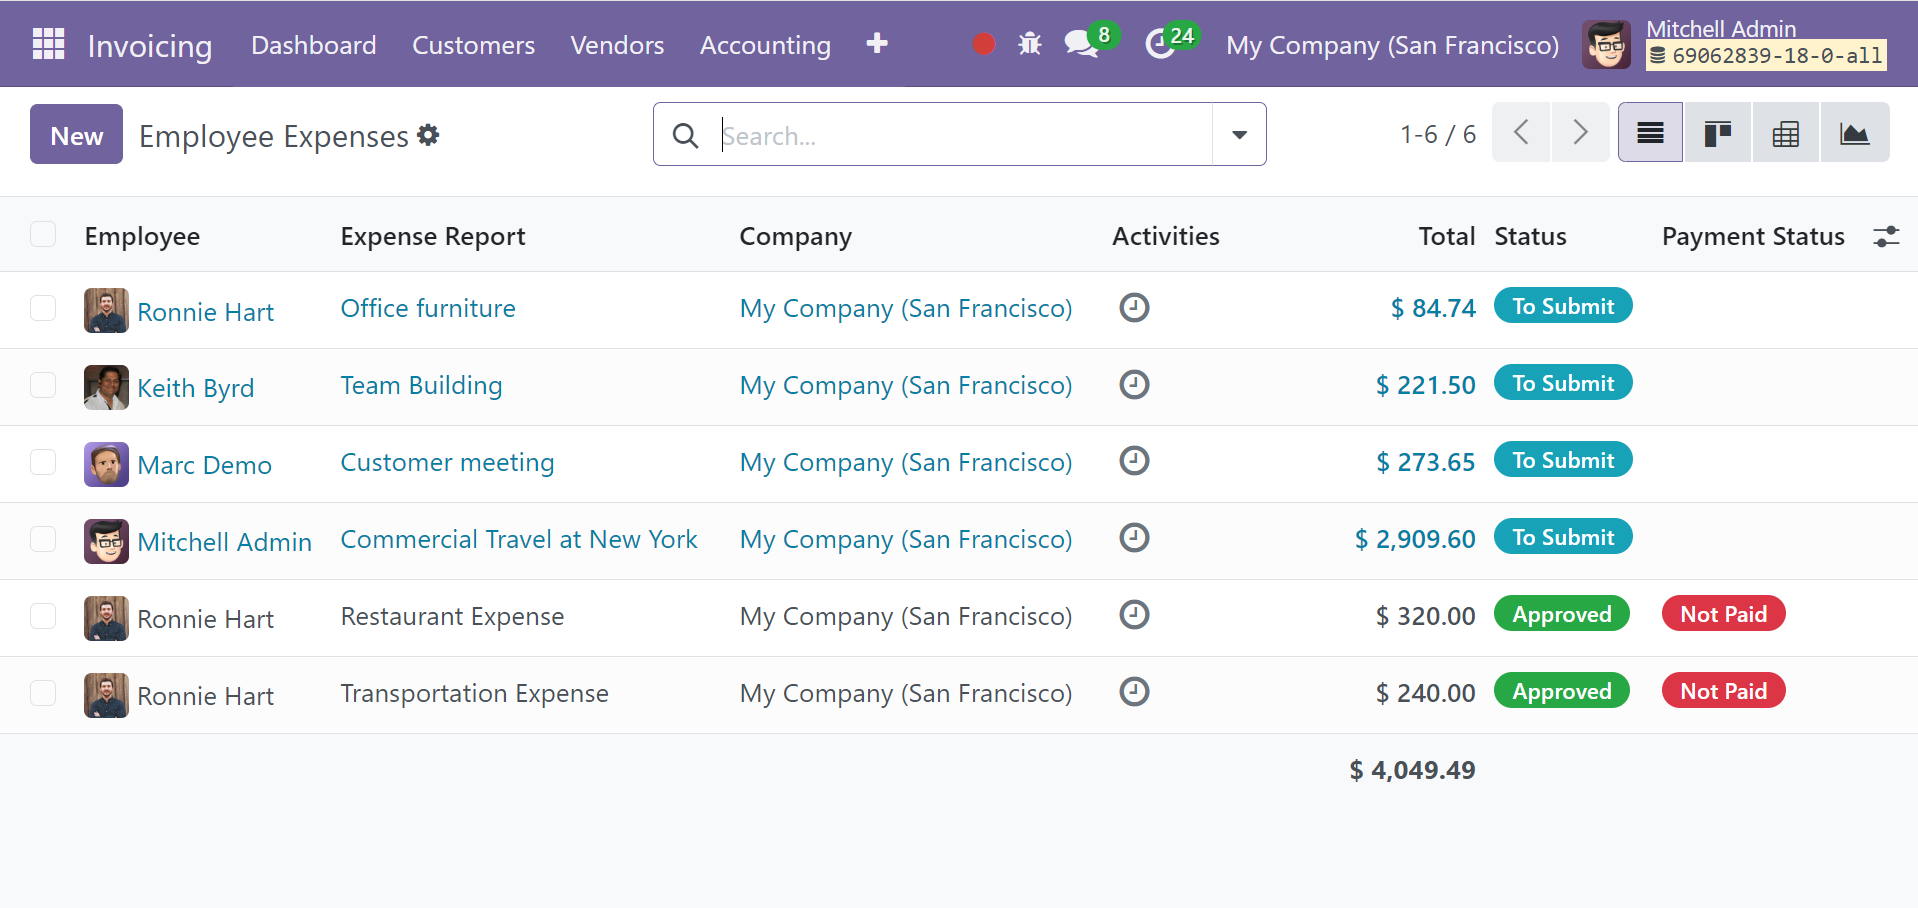
The list view on this platform shows the following: Employee, Expense report, firm, activities, total amount, status, and payment status. It is possible to change the platform's view to include graph, pivot, and Kanban views.
The spending can be filtered based on Date, Former Employees, My Team, and My Reports. Employee, Department, Company, Date, and Status are available grouping choices on this platform. The Scan option allows you to scan the expense reports. Click the New button to add a new expense.
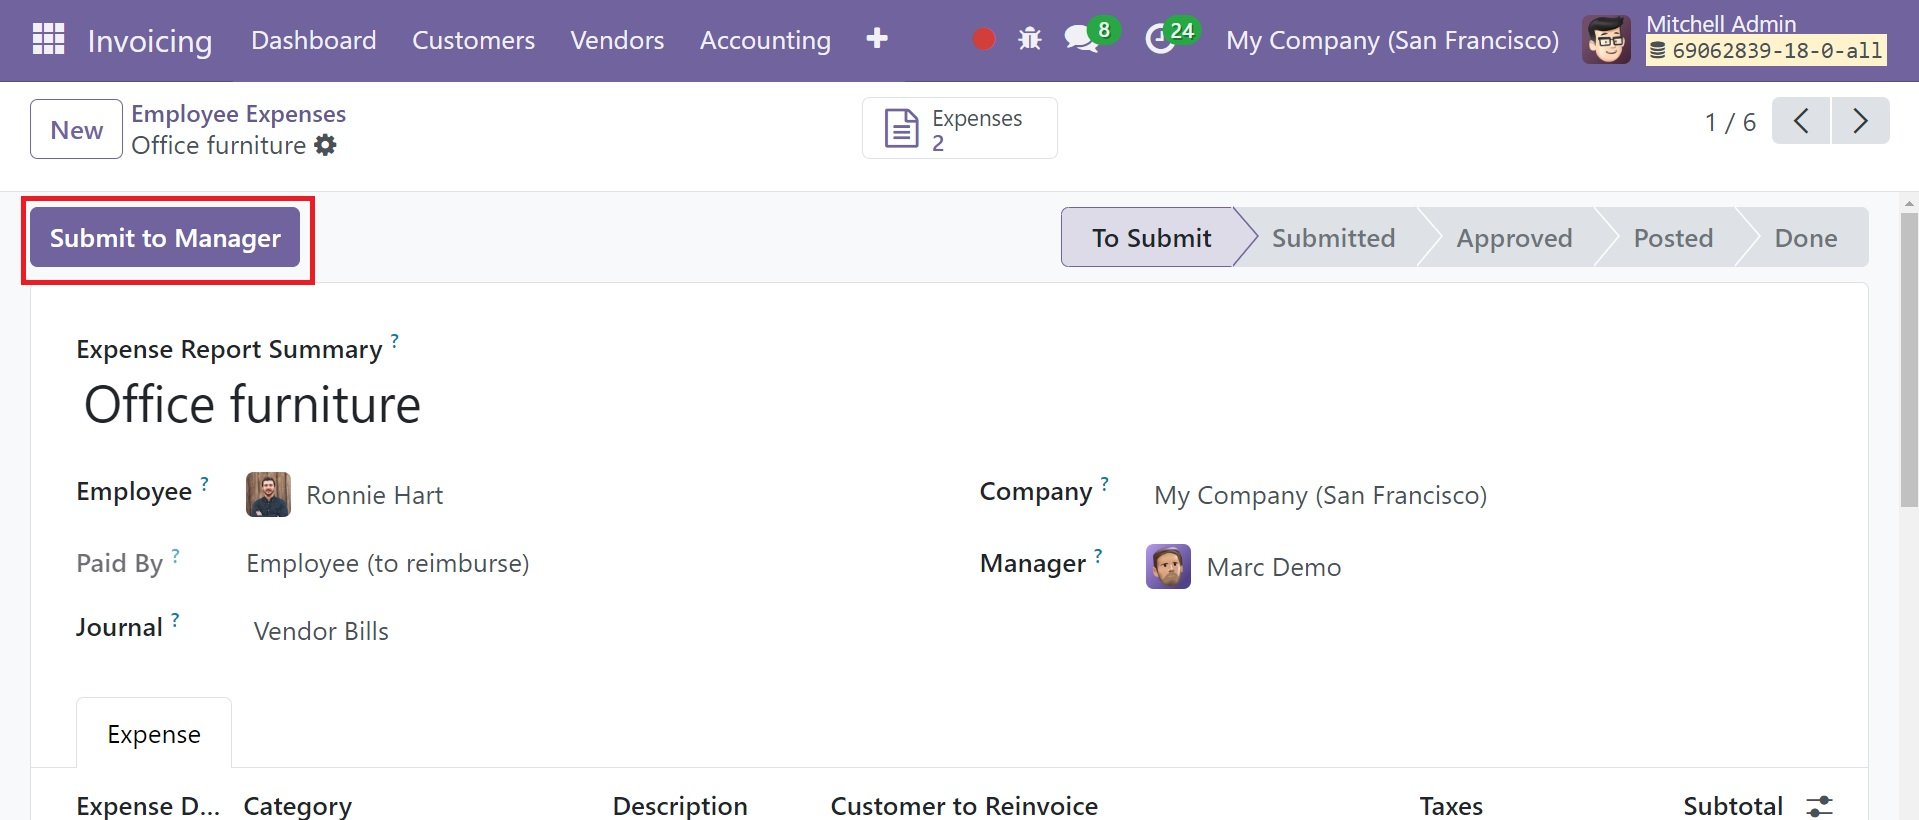
In the appropriate fields, enter the name of the business, the manager, the employee, and the summary of the expense report. Details on the expense are available under the 'Expense' page. By selecting the Submit to Manager button, you can forward this newly created report to the relevant management.
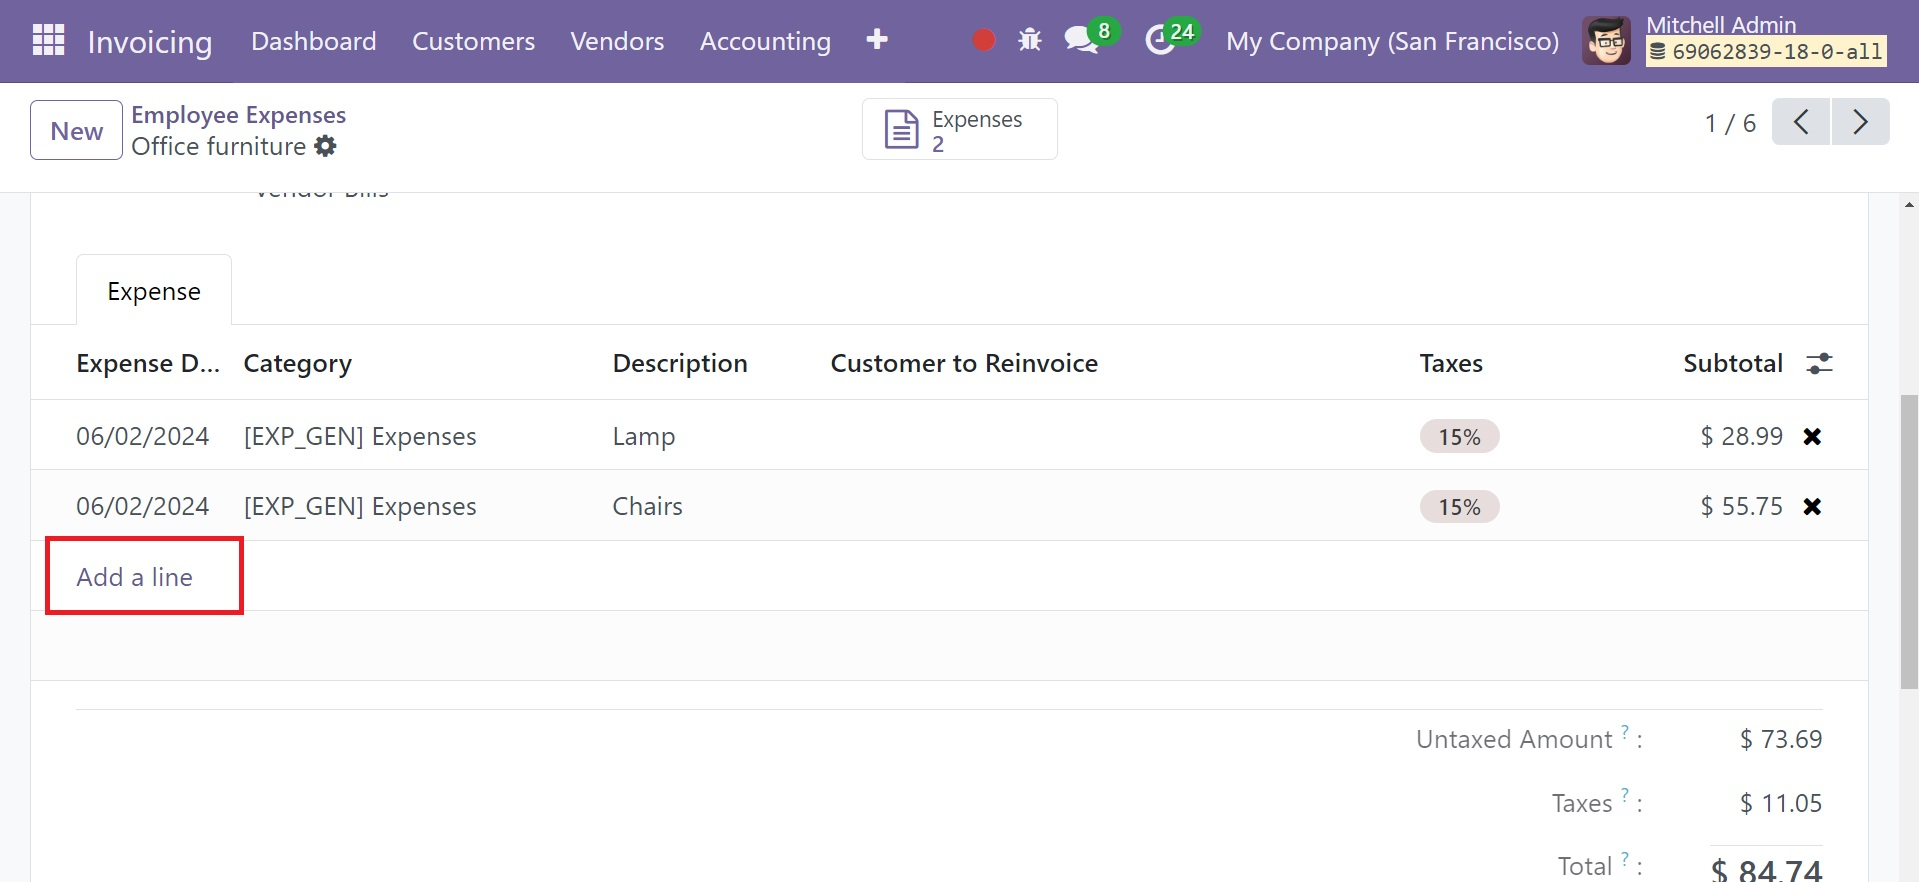
Using the 'Add a Line' button located under the Expense page, you may input details about the Expense Date, Category, Description, Customer to Re Invoice, Analytic, Taxes, Total in Currency, and Total. The expense reports produced by the expense module can be chosen in this field. After adding the necessary data, the spending report becomes accessible.
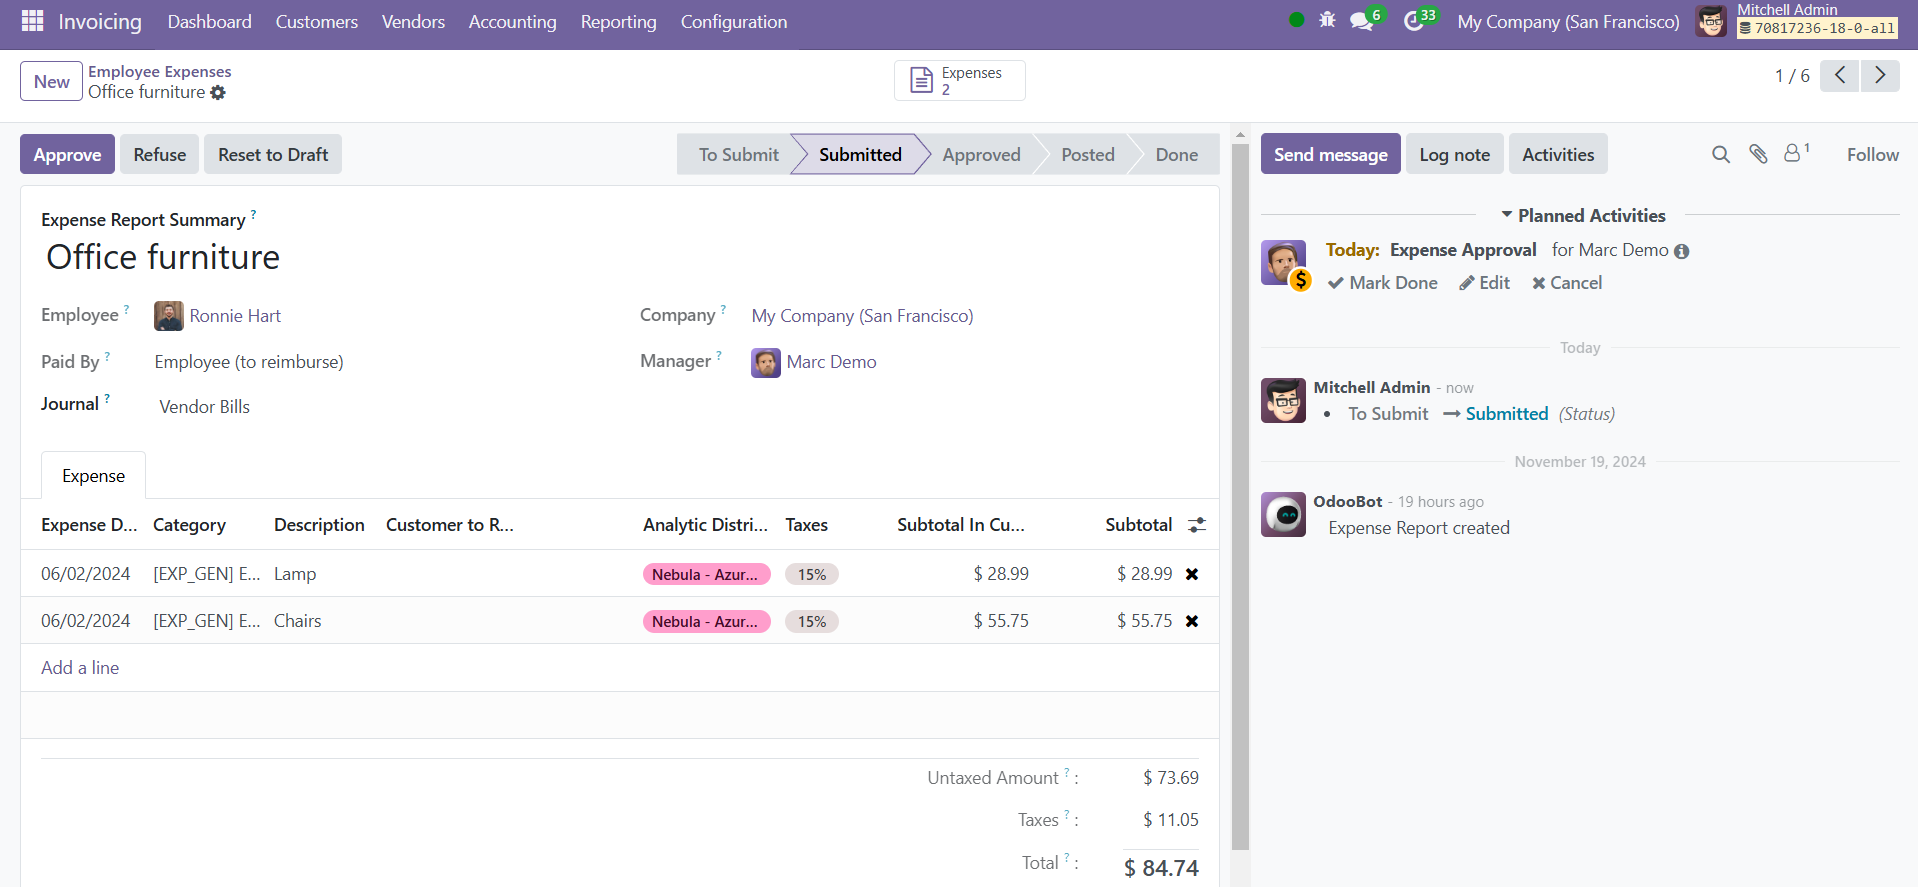
When you press this button, the manager will receive the report. The concerned management can now supervise the report. They can take the appropriate action by selecting the Accept or Refuse buttons that will show up on the screen.
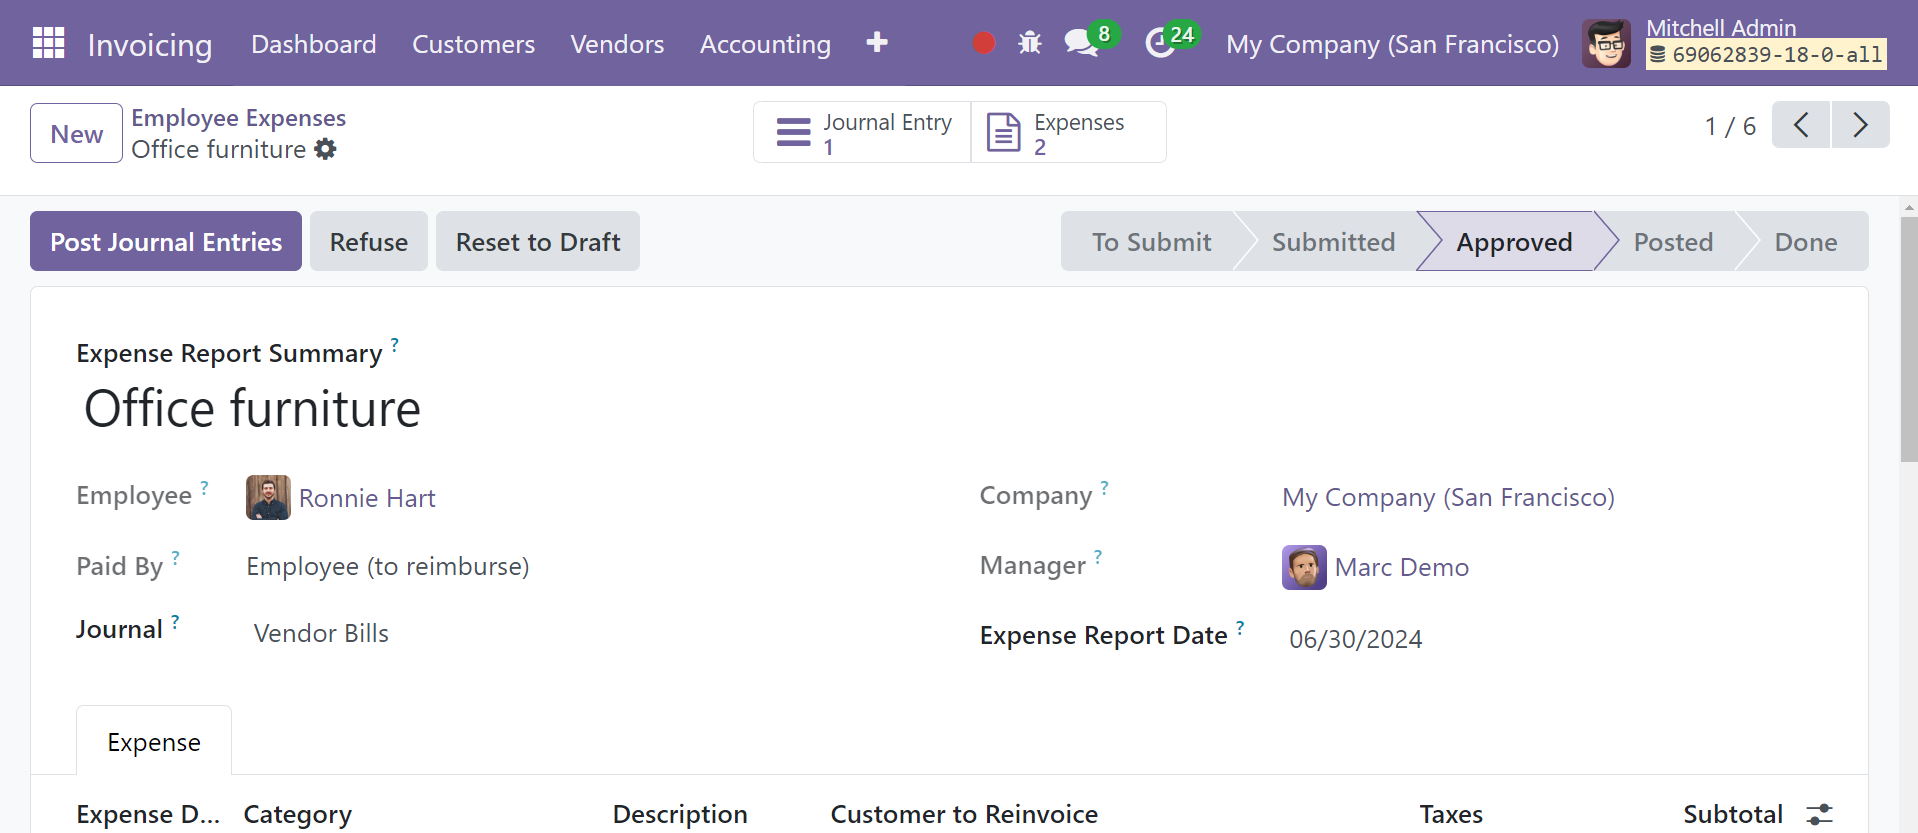
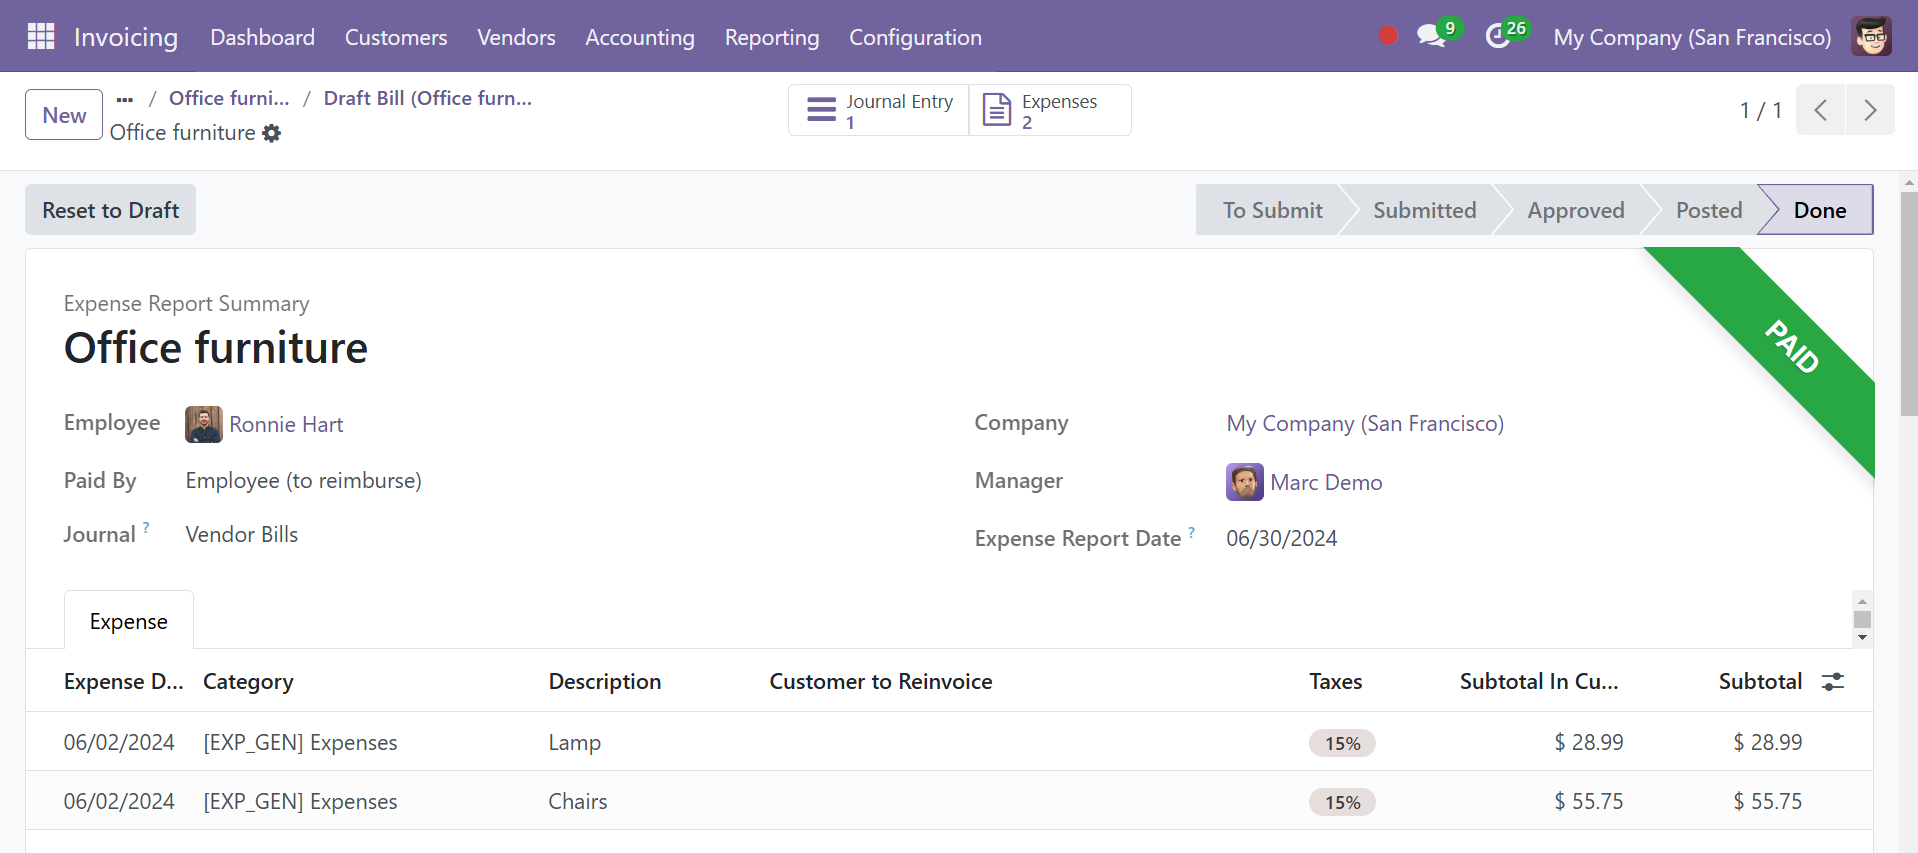
You can "Post Journal Entries" to publish journal entries for this particular report after the expense report has been approved.
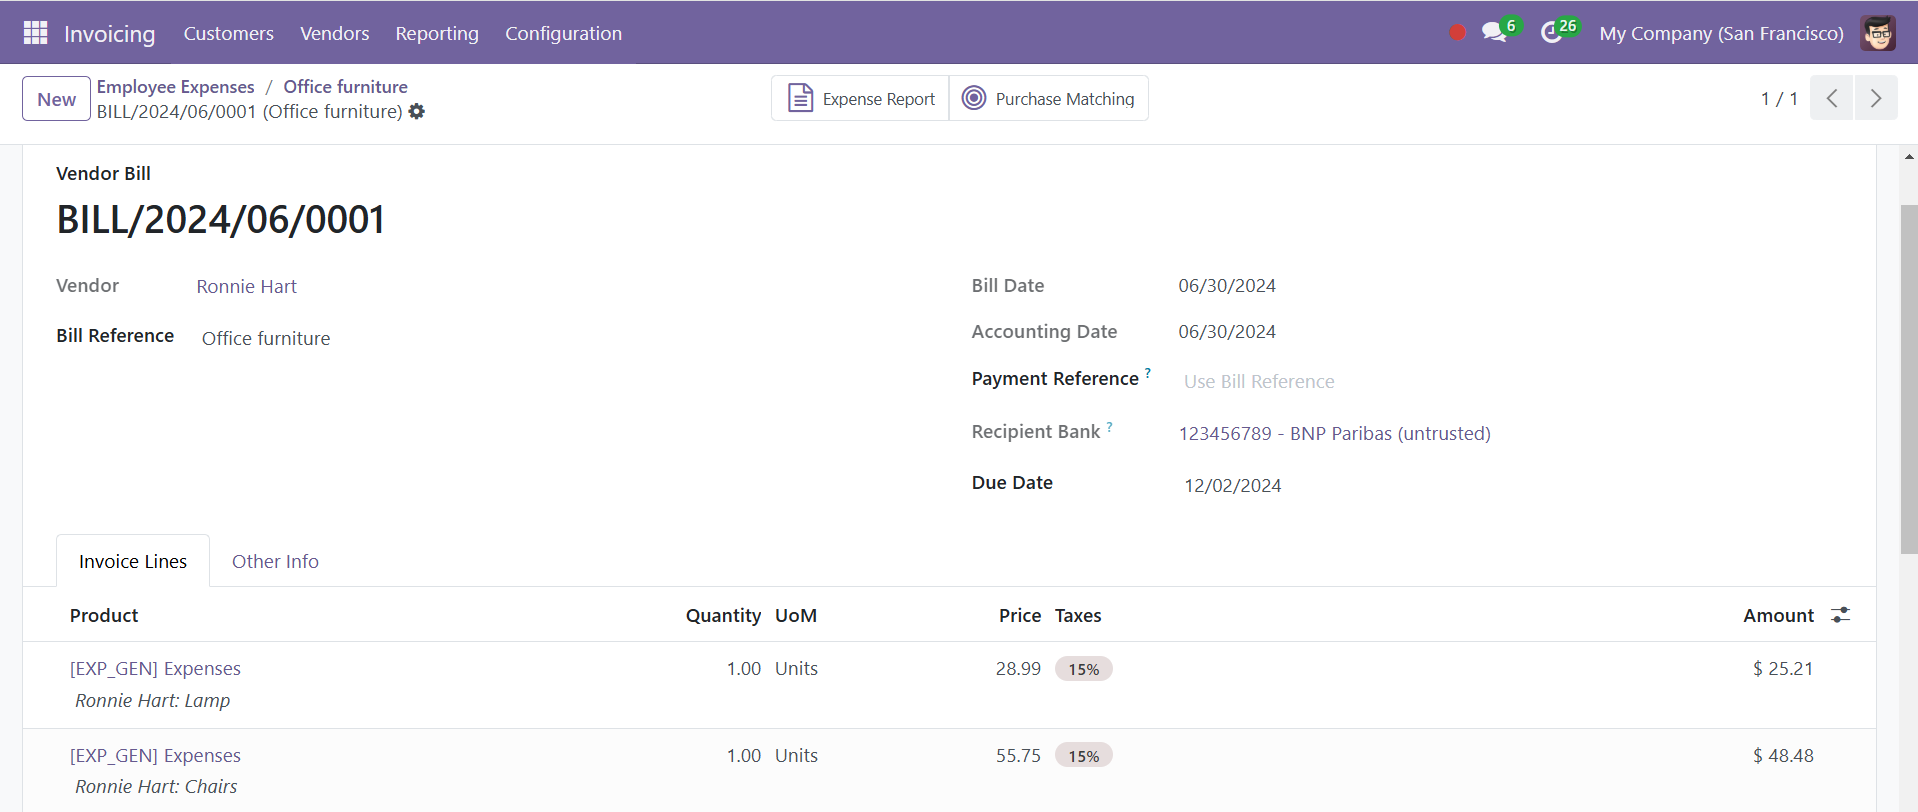
To view journal entries, click the Journal Entry smart button, which is shown below.
By selecting the Pay button, you can register payment for this expense.
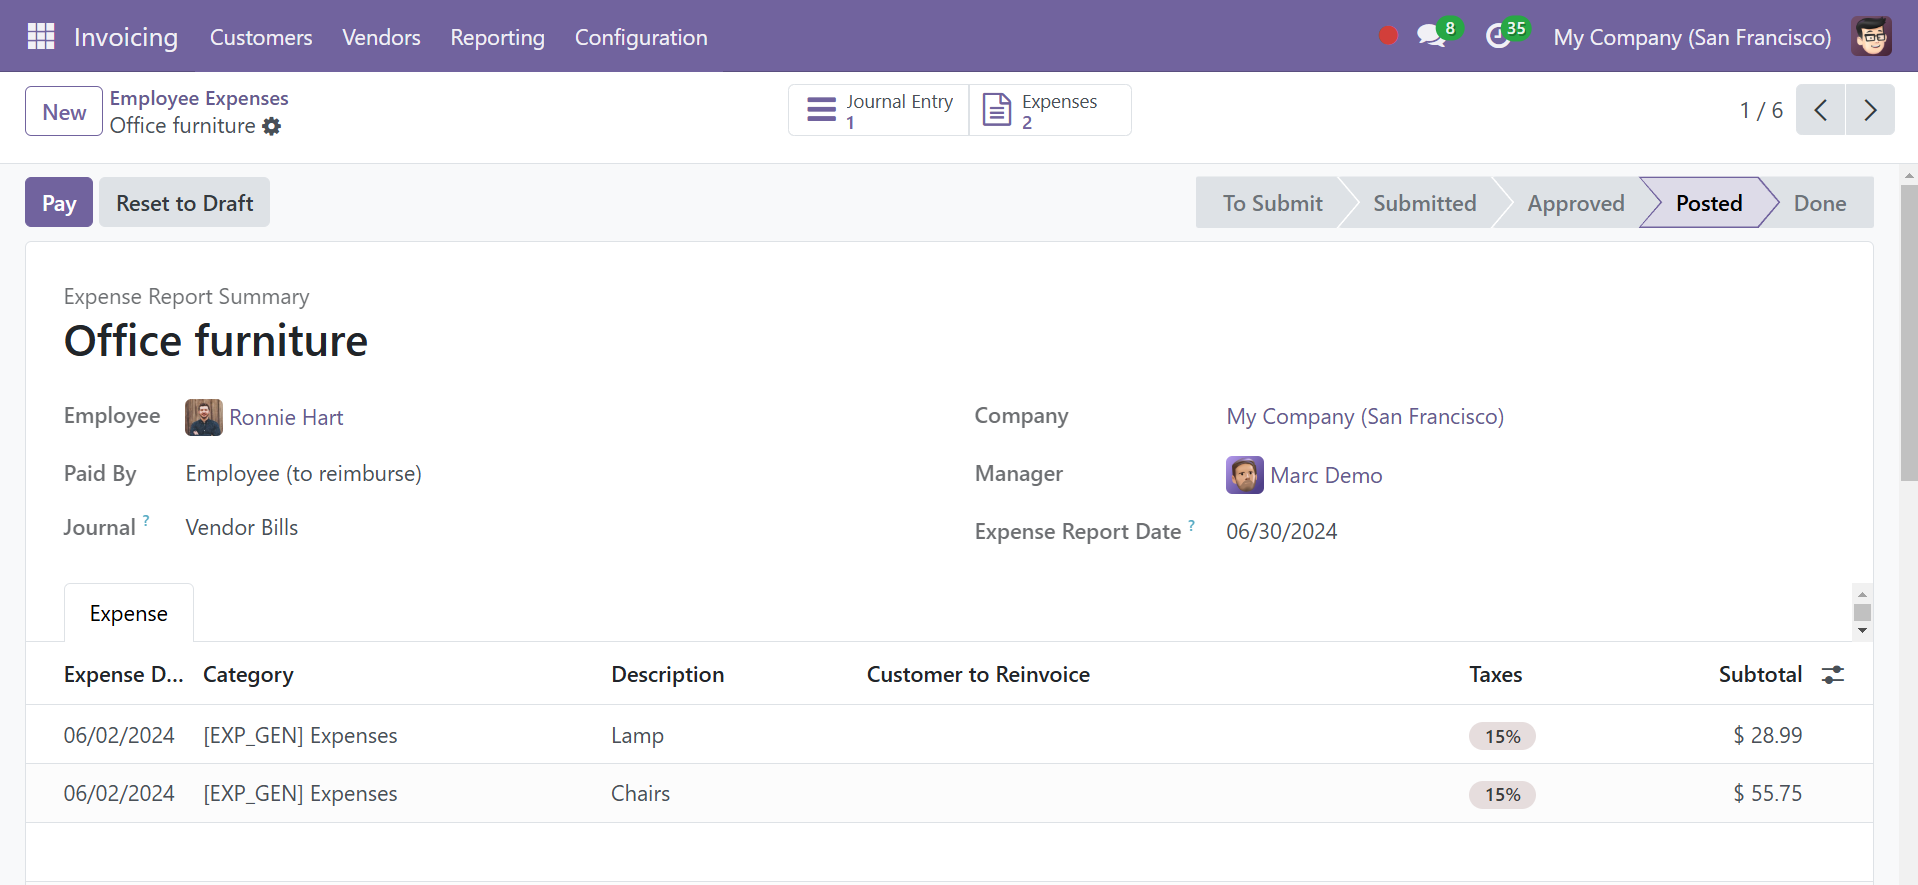
The money will then be transferred into the worker's account and the expense report will be marked as PAID.
Products
Under the vendor’s menu, you have the option of products, as shown in the screenshot below.
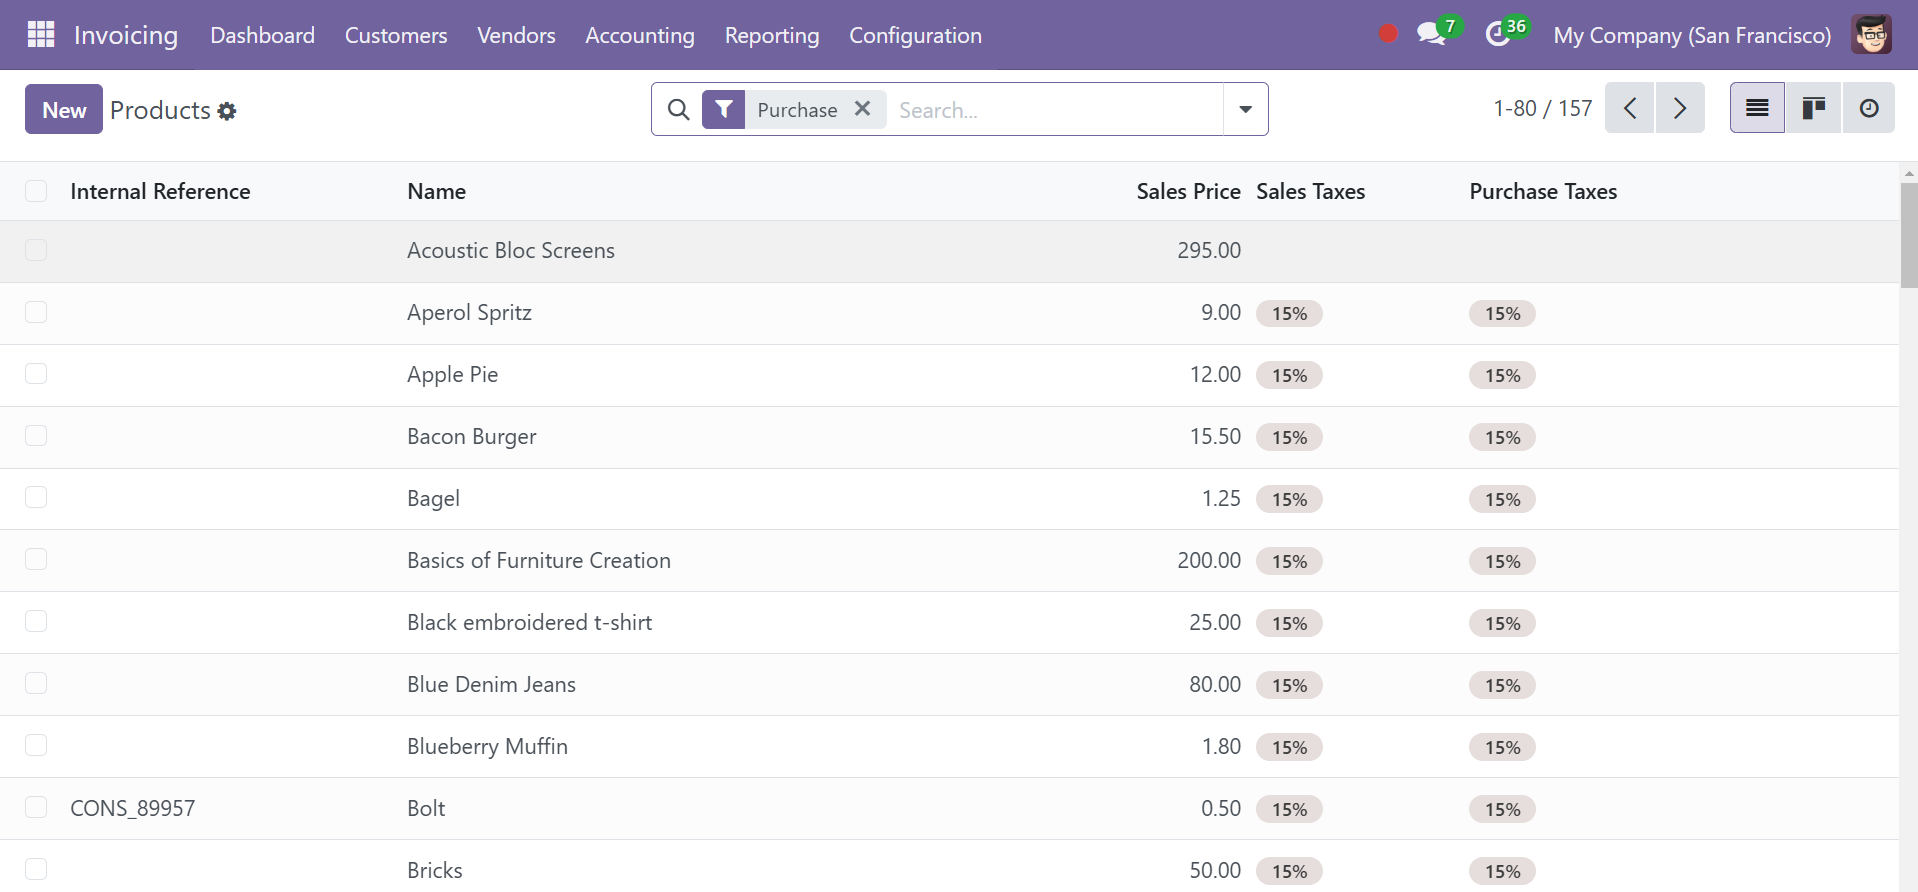
Here, you have the details, such as name of the product, sales price, sales taxes, and purchase taxes, respectively.
To create a new one, you have the New option and the creation page will be, as in the image below.
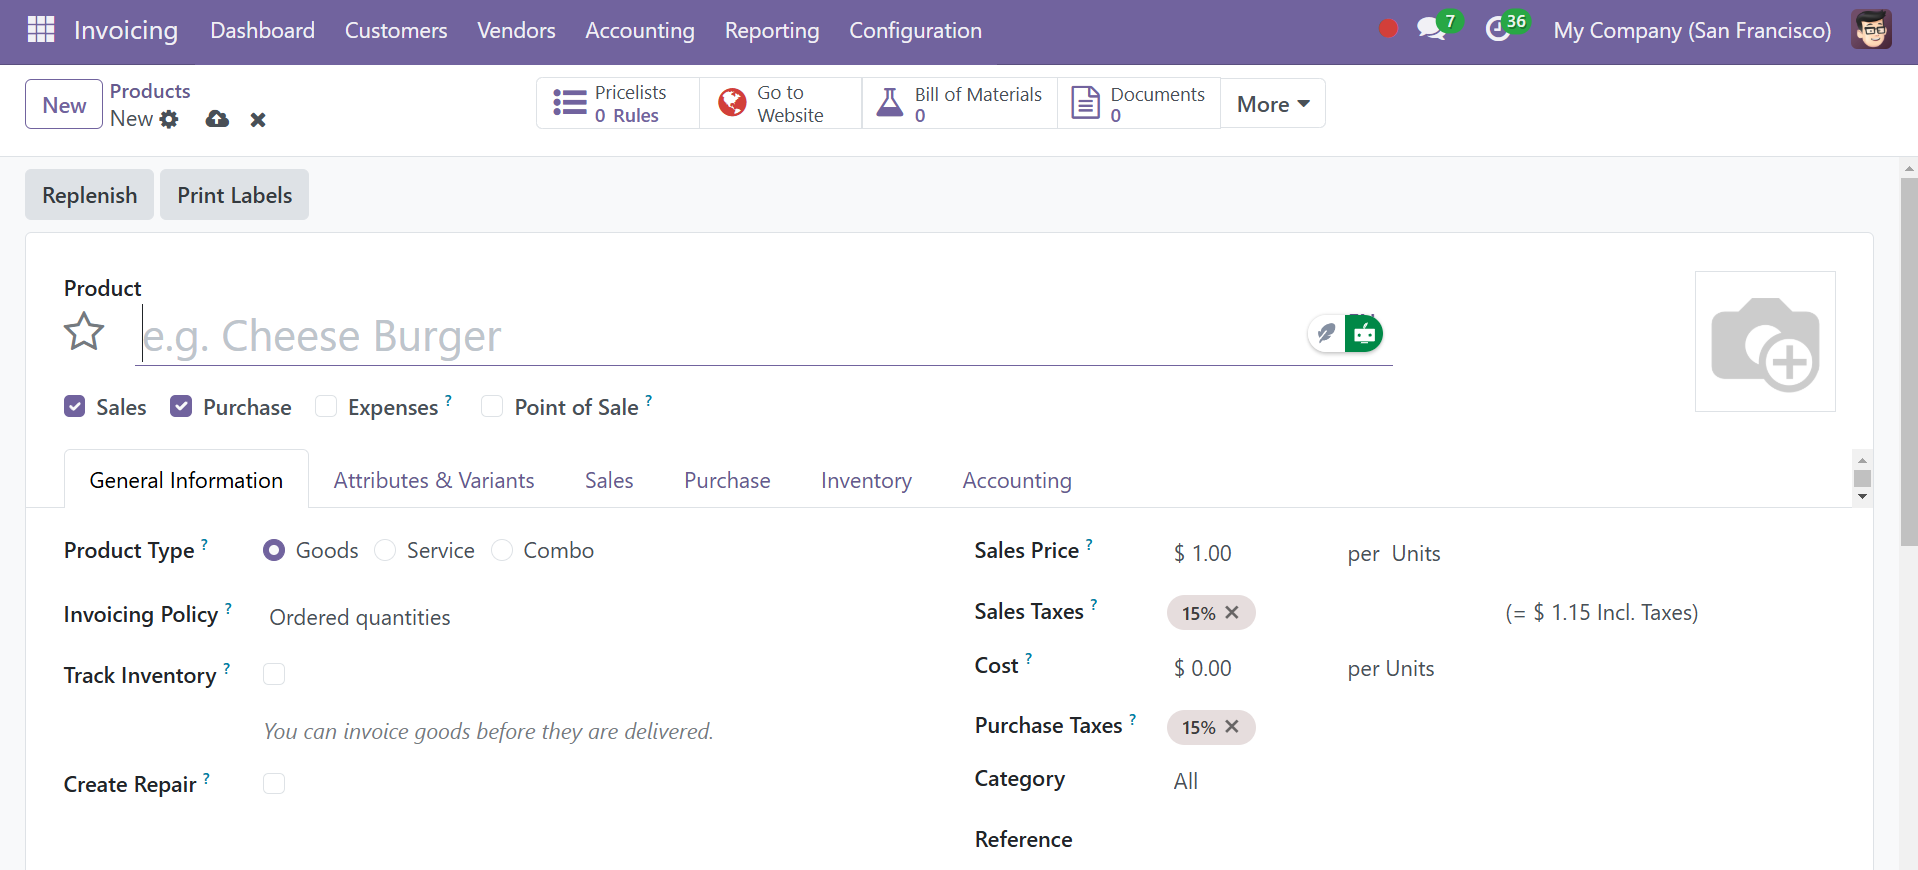
Here, below the accounting tab, you have the options, such as income account, expense account, and price difference accounts, respectively.
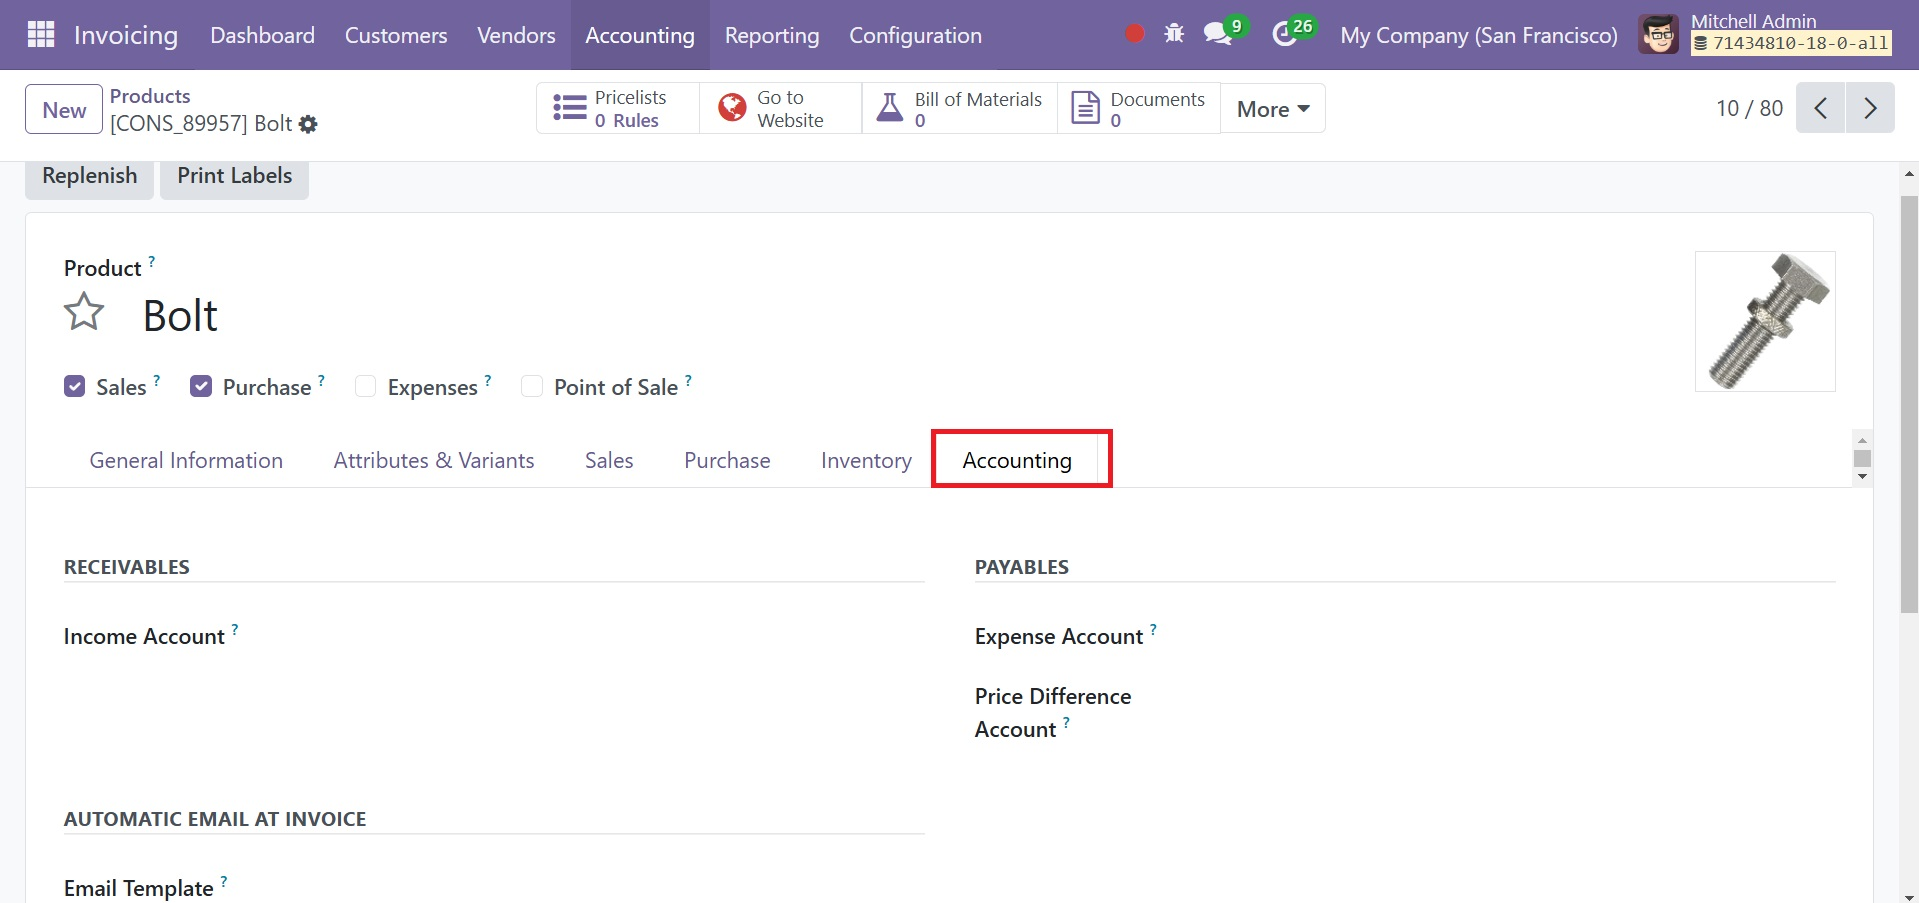
The Accounting tab of the product description window allows you to define the Accounting information pertaining to the product. The drop-down box allows you to choose one of the receivable aspects, such as the Income Account, in this case. The Expense Account can be defined for the Payable aspects in the same way. The price difference accounts will be used to value the price difference between purchase price and accounting cost. It is possible to link a product-specific email template that would be sent after invoice creation on the Accounting tab of the product page. That is, using the email template option in the Automatic Email At Invoice.
Vendors
The menu will list every vendor for the specified operations along with some basic details about each of them. There is also a list-style version of the menu that contains a list of all the vendors.
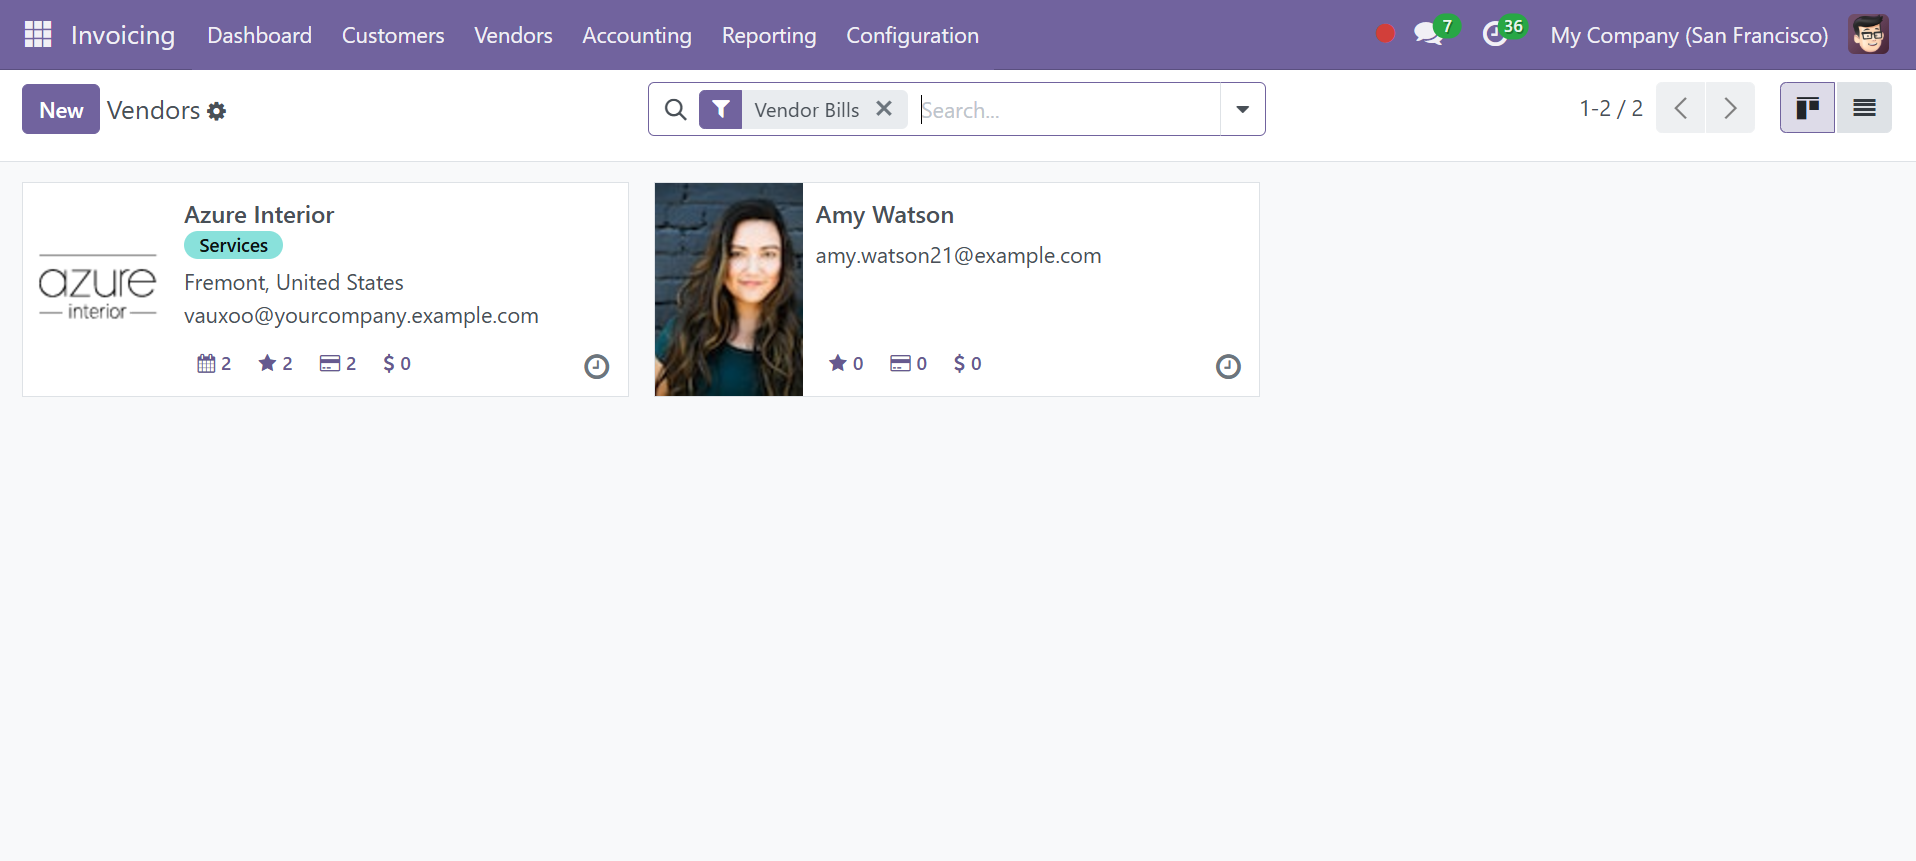
To help you sort and exclude the important suppliers from the long list, you may construct your own filtering and grouping choices, which are accessible by default.
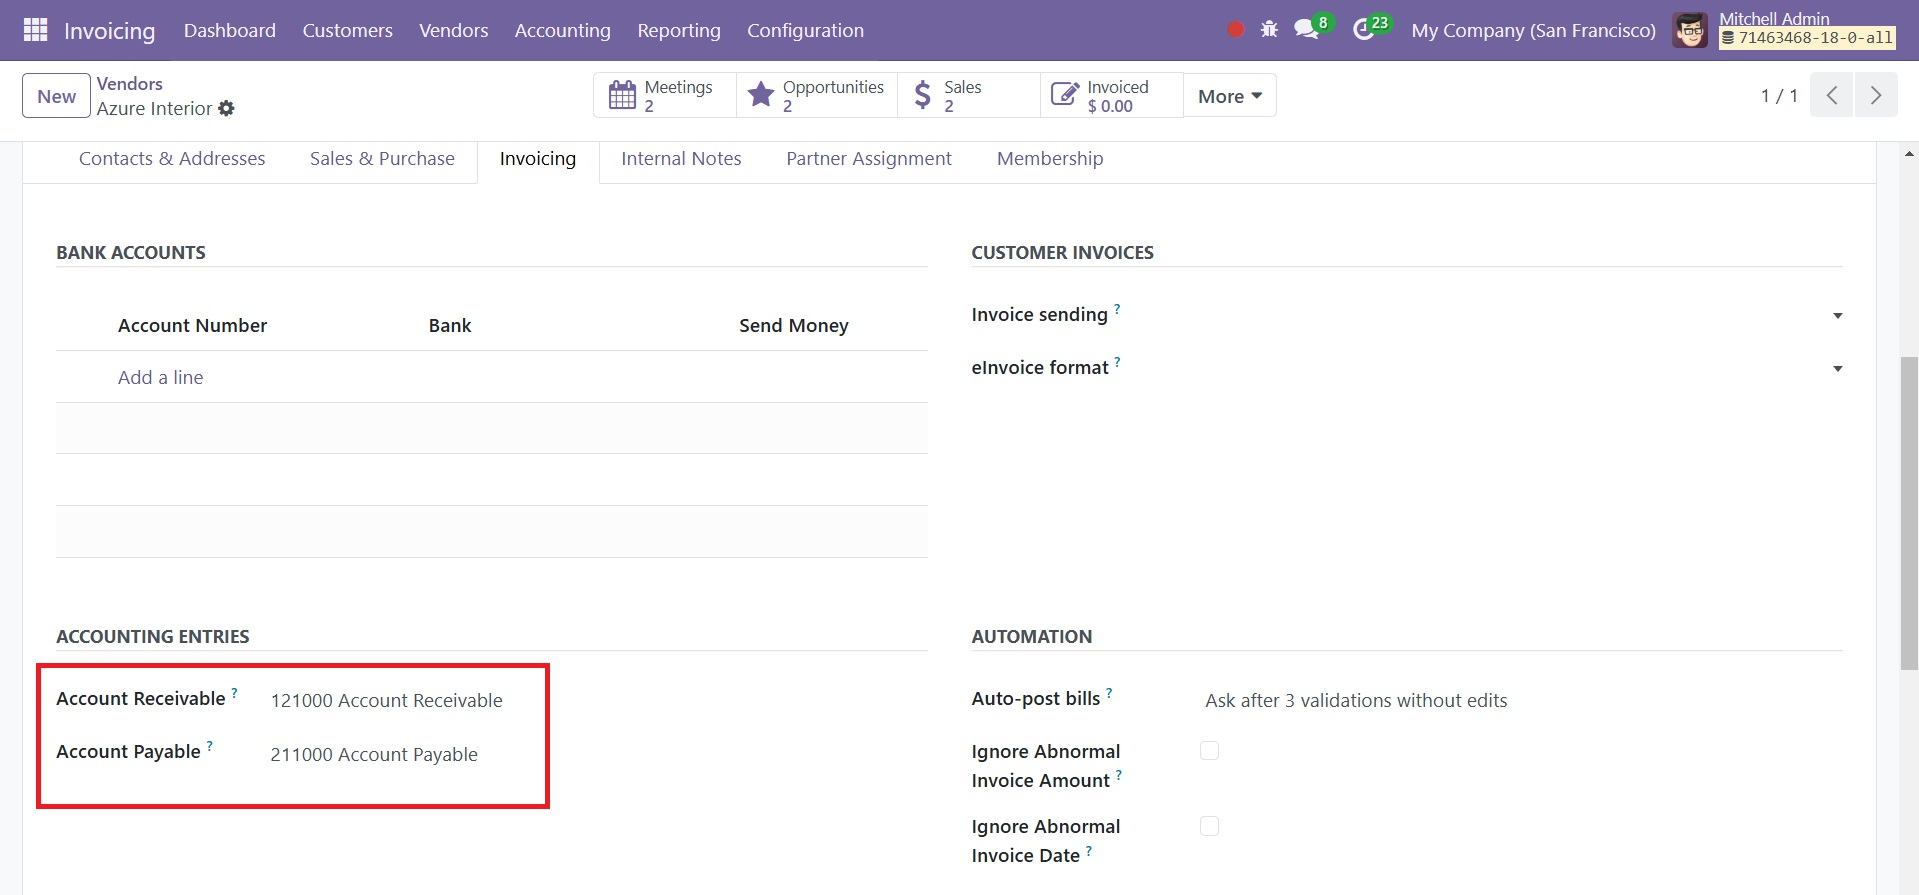
Here, Below the Accounting tab, you can see the default payable and receivable accounts set inside the Accounting Entries section, as depicted in the screenshot above. A payable account is an item that a business purchases on credit and that must be repaid quickly. It falls under current liabilities and is seen as a liability for a person or business. Conversely, an account receivable is a customer's debt for items that have already been utilized or supplied by the business.