Products
The Odoo 18 Inventory module is an excellent location to organize and modify product-related data. Using the items tab, you can add new items and their variations to the module. You can also alter or delete these records if needed. Select 'Products' from the drop-down menu on the Products tab.
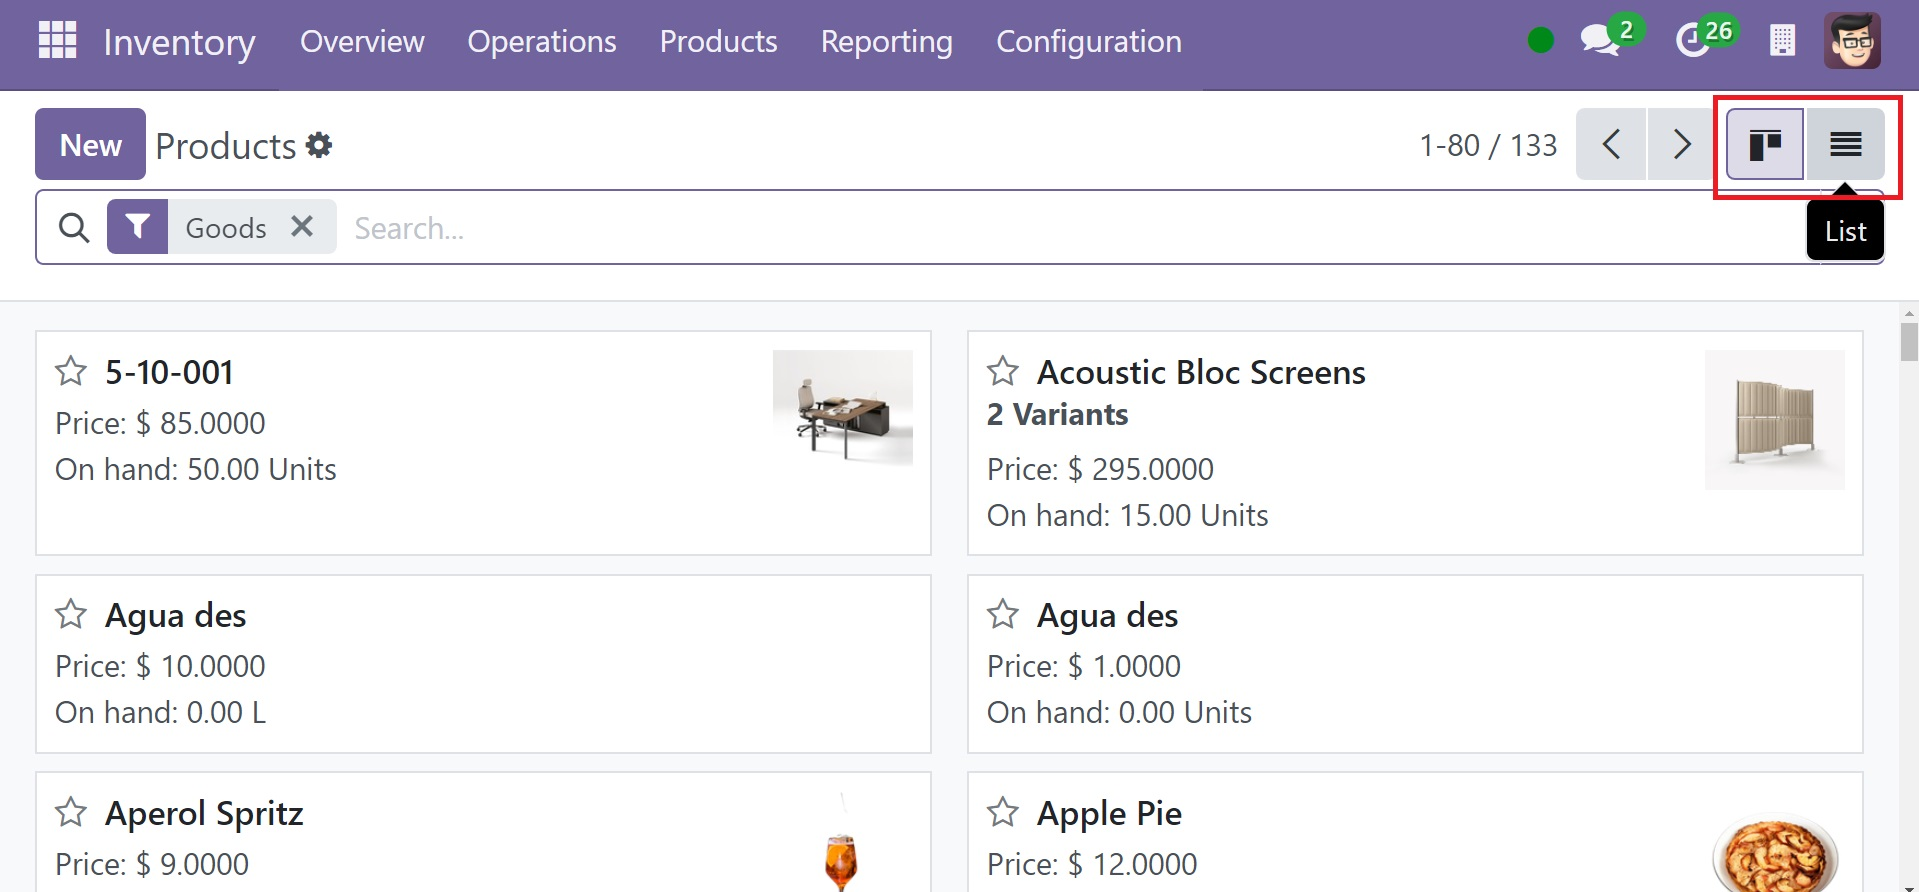
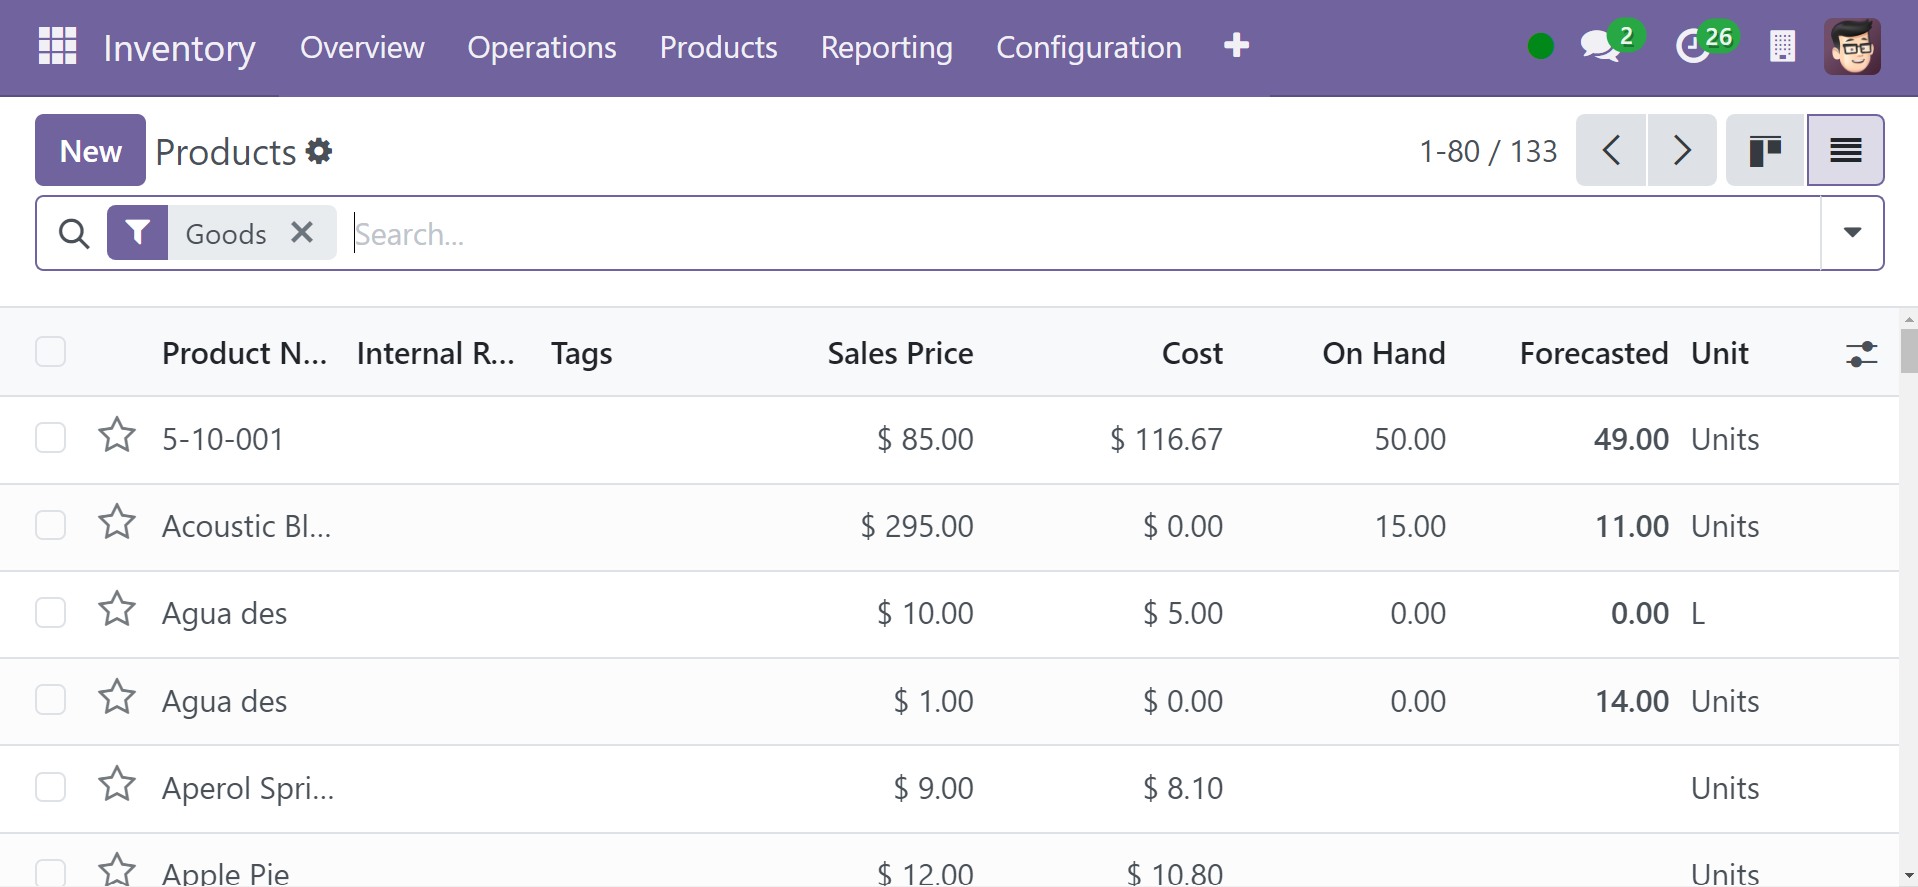
By default, all of the products set in the module will be displayed in the Kanban view in the Products window. Using the list view icon located in the upper right corner of the window, you can change the display to a list view.
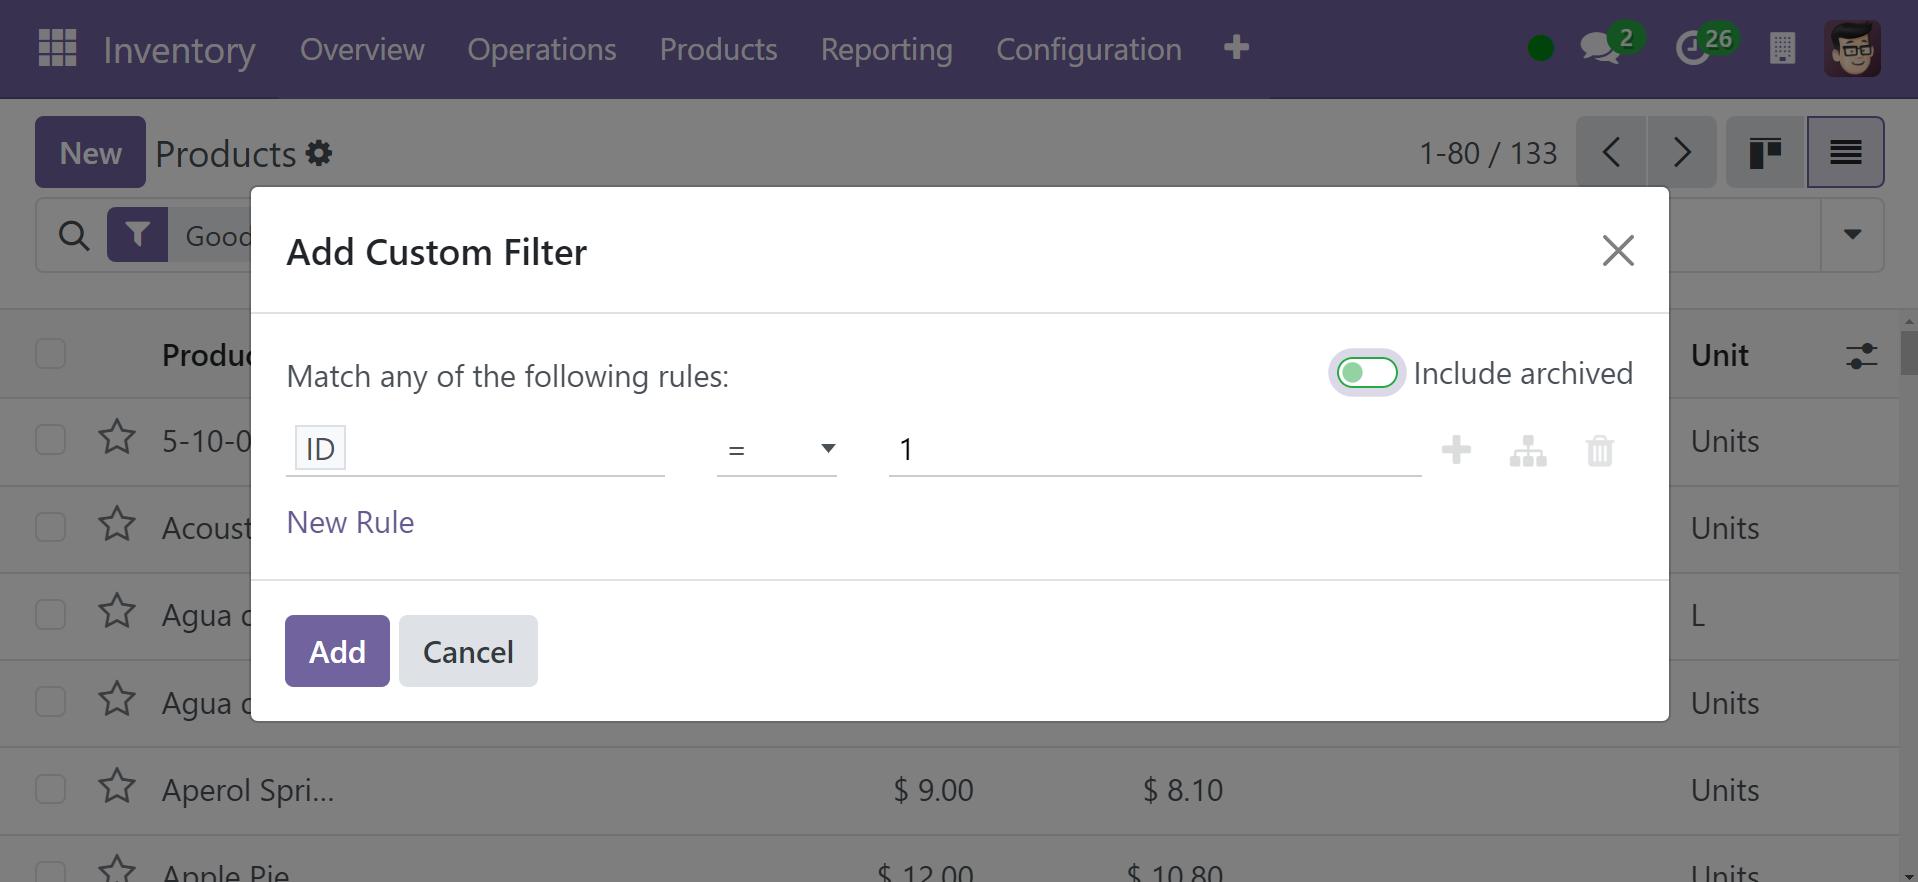
This module's Filters and Group By options let you utilize certain product records to divide and examine them. Products, Services, Publishable, POS-Available, Purchasable, Sold, Purchasable, Subcontracted, Expenseable, Available Products, Negative Forecasted Quantity, Favorites, Warnings, Archived, and Add are among the options. You can apply the preferred filter from the "Filters" dropdown list using the Custom Filter. If you want to apply custom filters, select the required parameters from the two dropdown boxes and enter the condition in the third box. Finally, click Add.
The 'Group By' feature allows you to organize the records into predefined groups. From Product Type, Product Category, POS Product Category, and Add Custom Group, choose the relevant group. Select the appropriate group from the drop-down menu and click "Apply" to add a custom group. You can save your preferred filters in the Favourites section to save having to apply them again. Choose from options like "Save current search," "Import Records," and "Add to my dashboard" in this section's dropdown list.
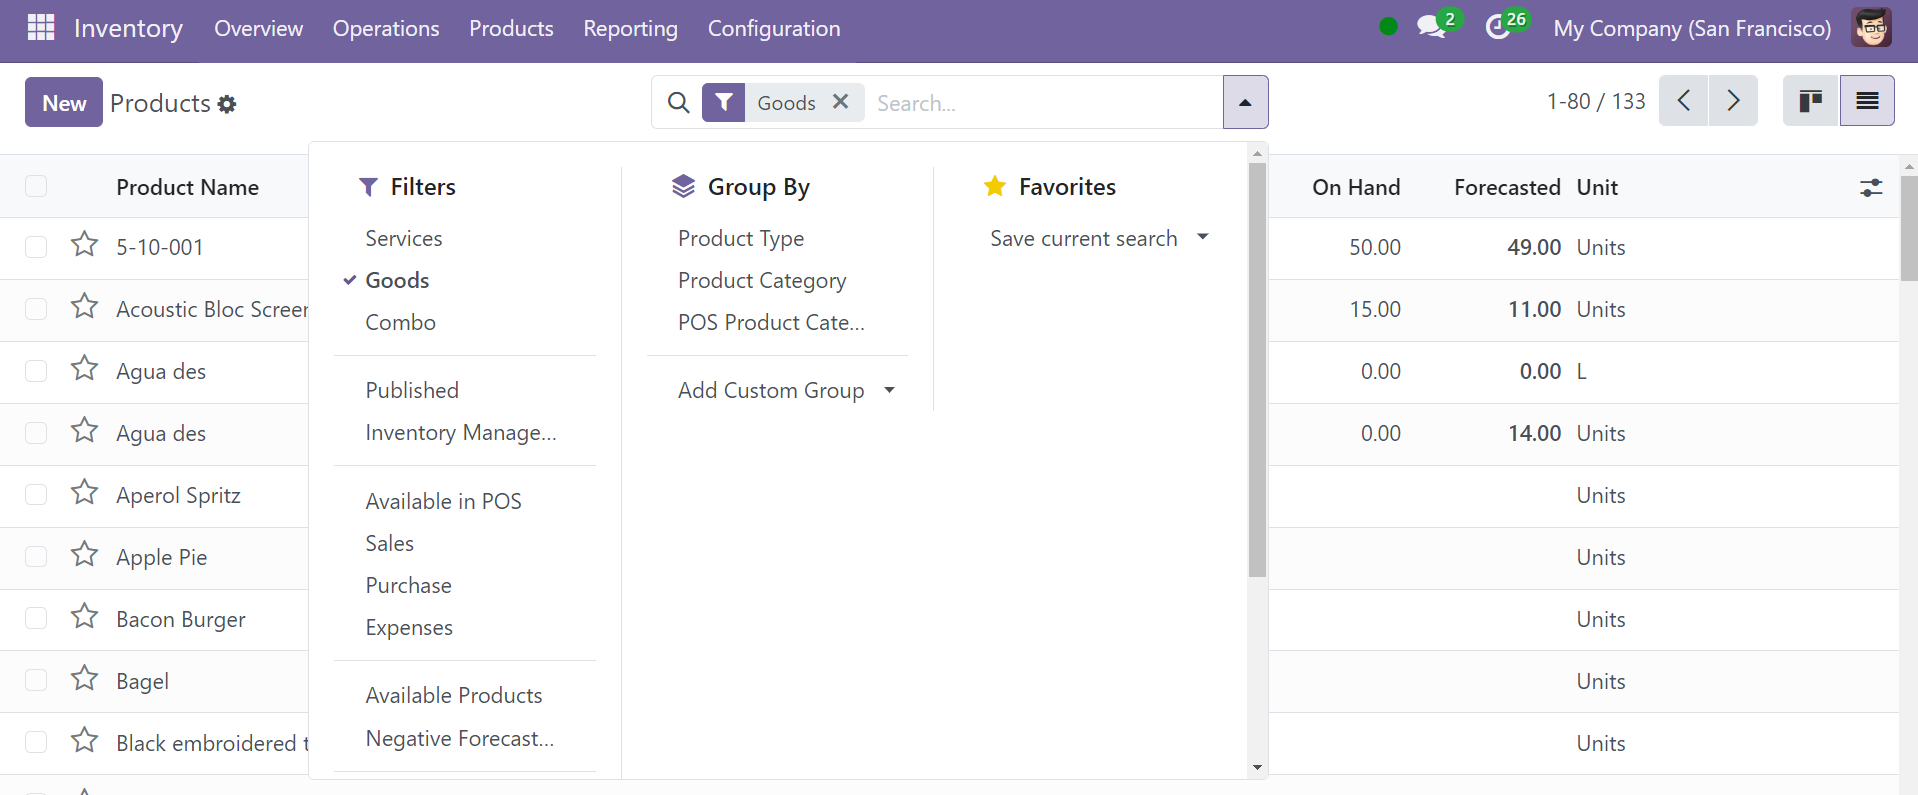
You can name the criteria you have applied in a subheading under "Save current search". If you check the "Use by default" option, only those products will be shown by default in the Products window. To share this filter with other users, click "Share with all users." To make these changes effective, click "Save."
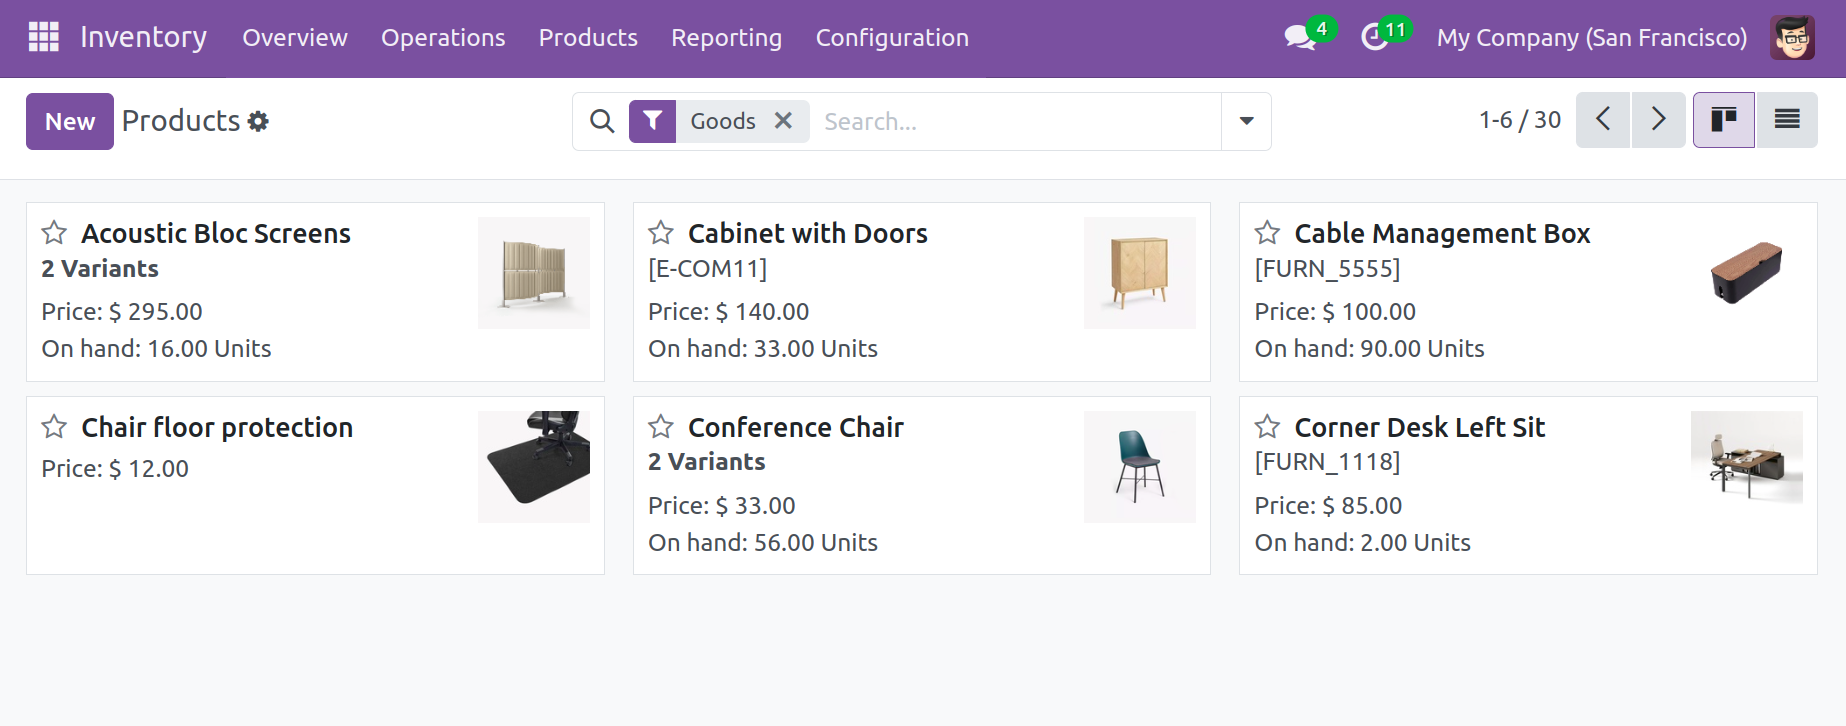
The preview will show the name, picture, and price of each product. Click on a product's preview to see a detailed description of that particular item. In Odoo 18, you may edit a specific record right from its form view, thus there's no need for a separate alter button. The most recent version is improved with the addition of this capability.
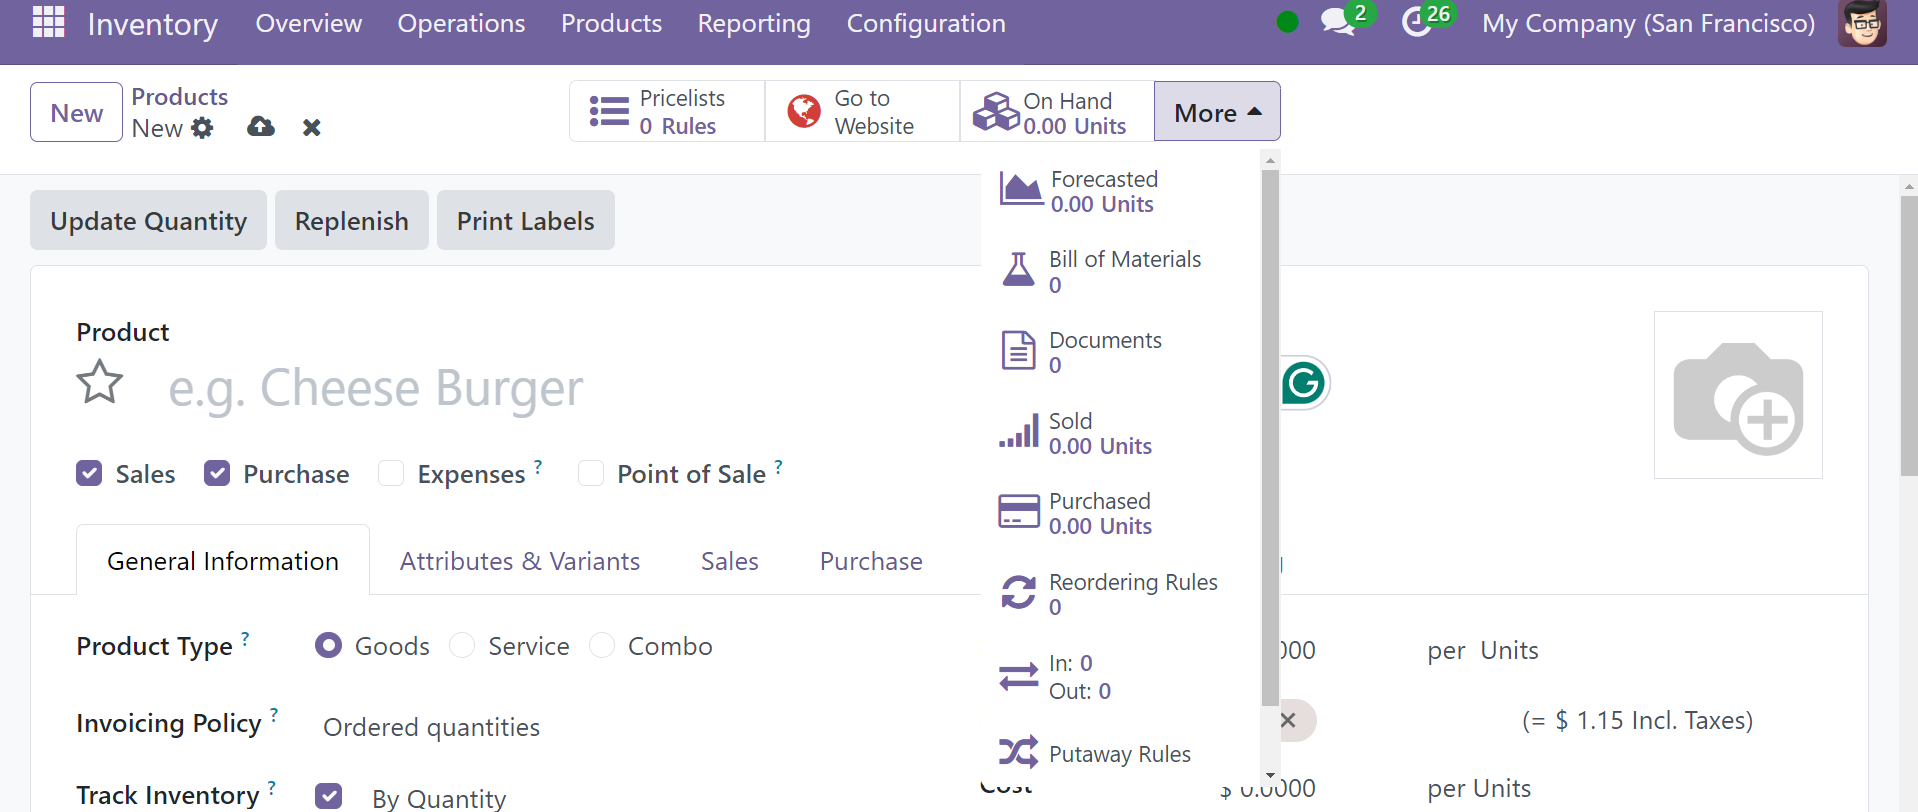
This window allows you to monitor and manage the following sections: Go to Website, on hand, forecasted unit, bill of materials, documents, sold units, purchased units, reordering rules, in, out, putaway rules, and storage capacities. Moreover, you'll notice that the form view's right form view now has the New button. This functionality is among Odoo 18's most recent enhancements. To perform additional actions, you can choose "Action".
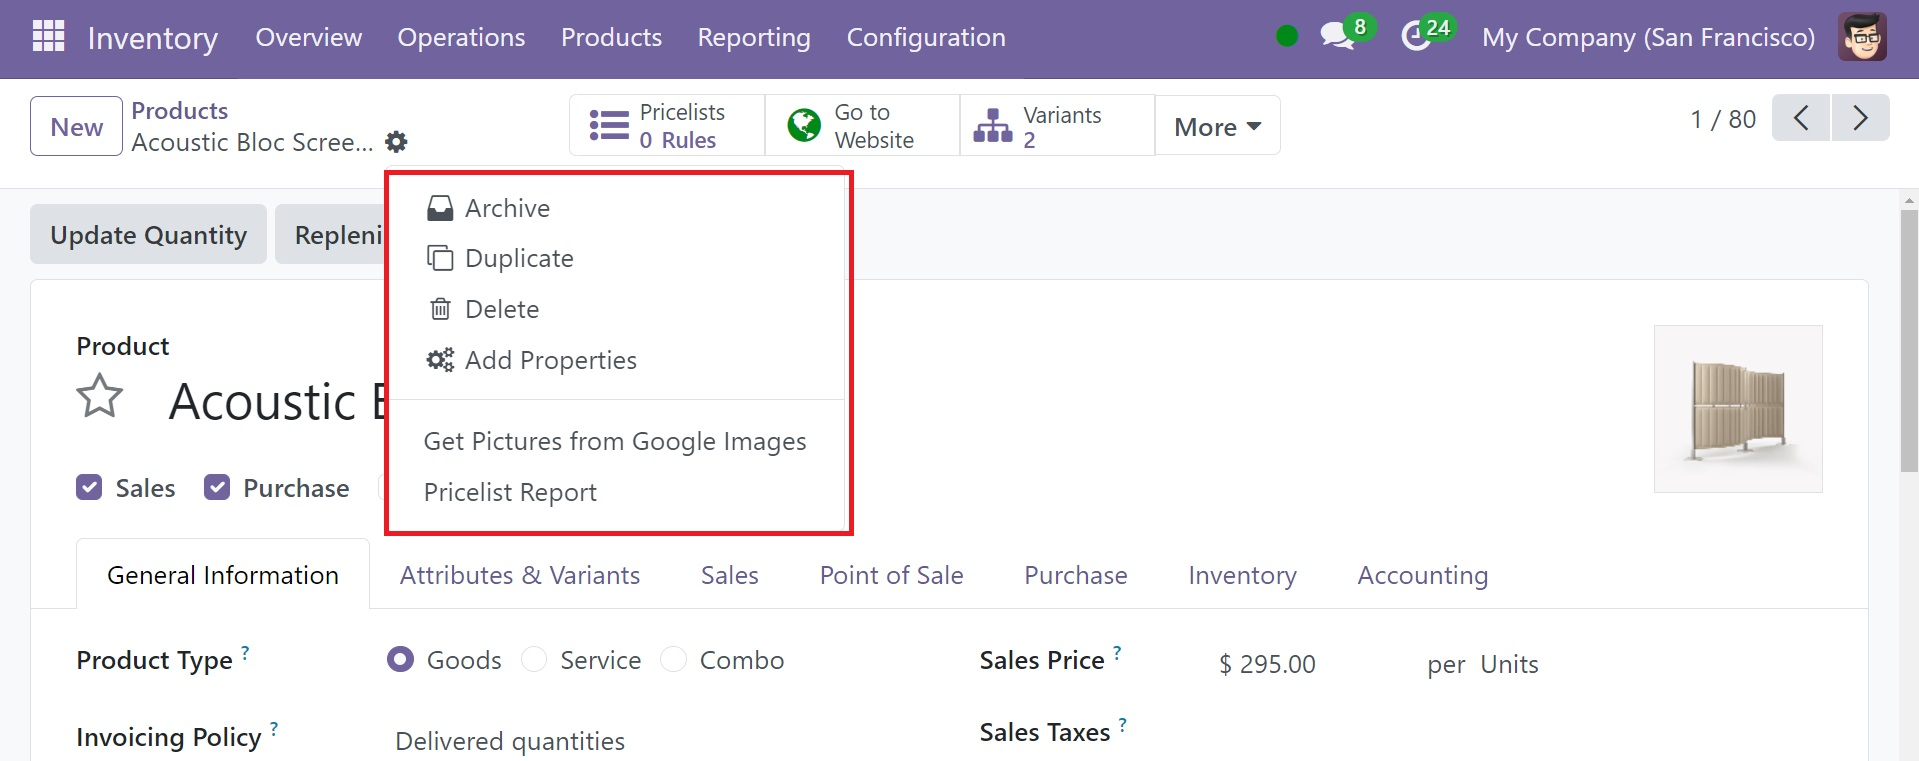
You can use Google Images for image retrieval, generate a pricelist report, and duplicate, delete, and archive files based on your preferences.
To add and configure a new product into the framework, select New. To add the product's attributes, a window with sections for general information, attributes and variants, sales, purchases, and inventory will open. You may add a product to your favorites by clicking the star icon next to its name.
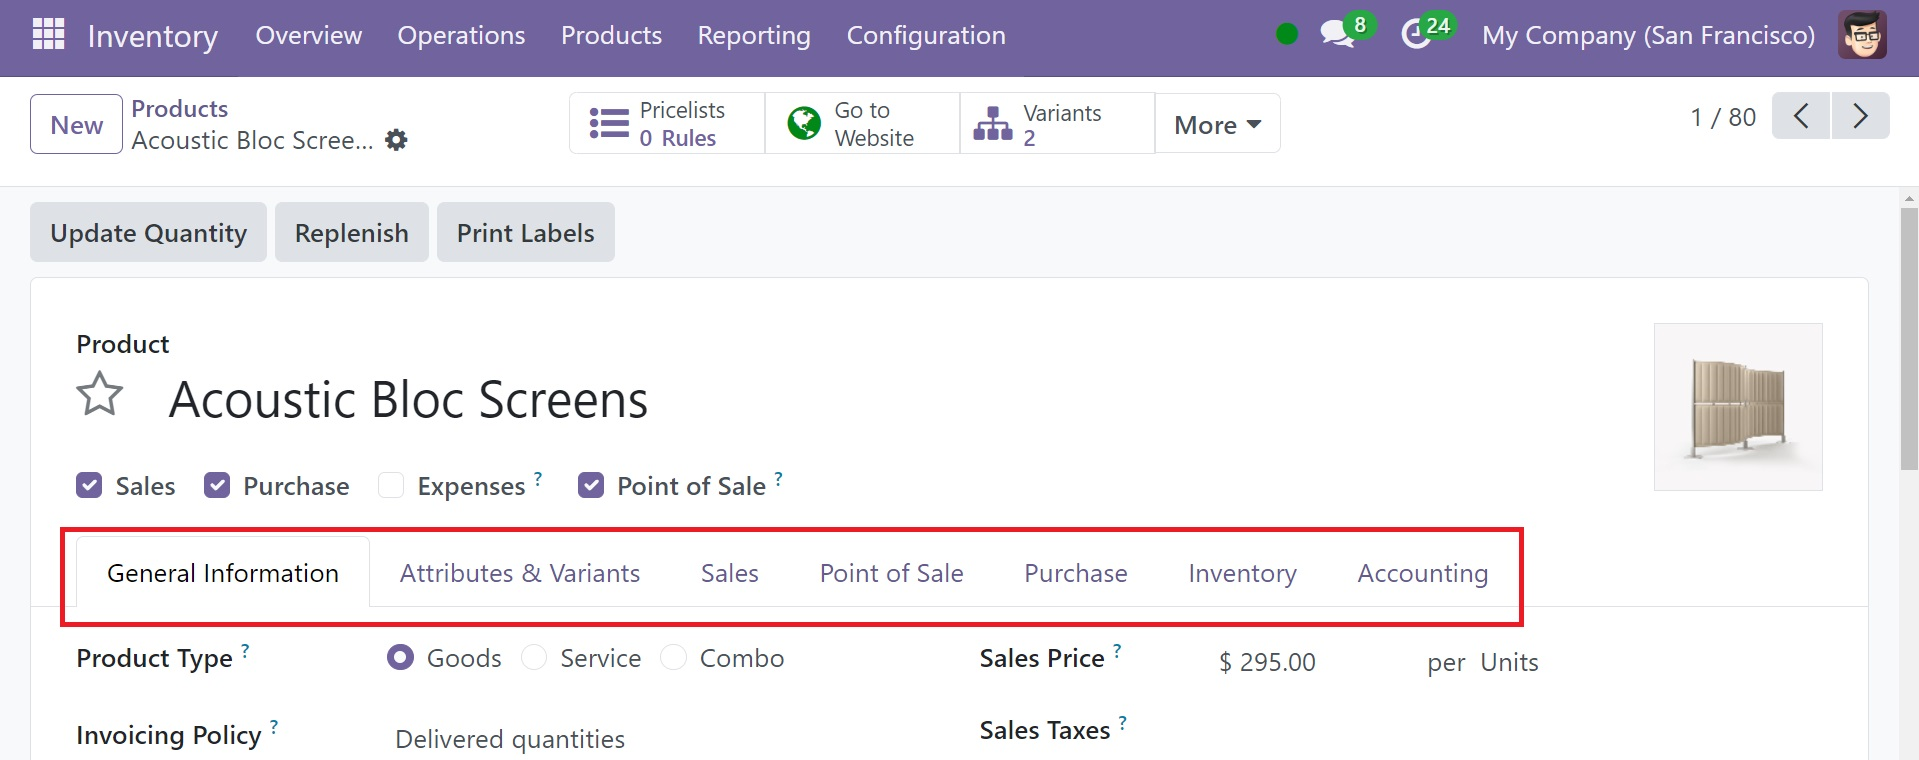
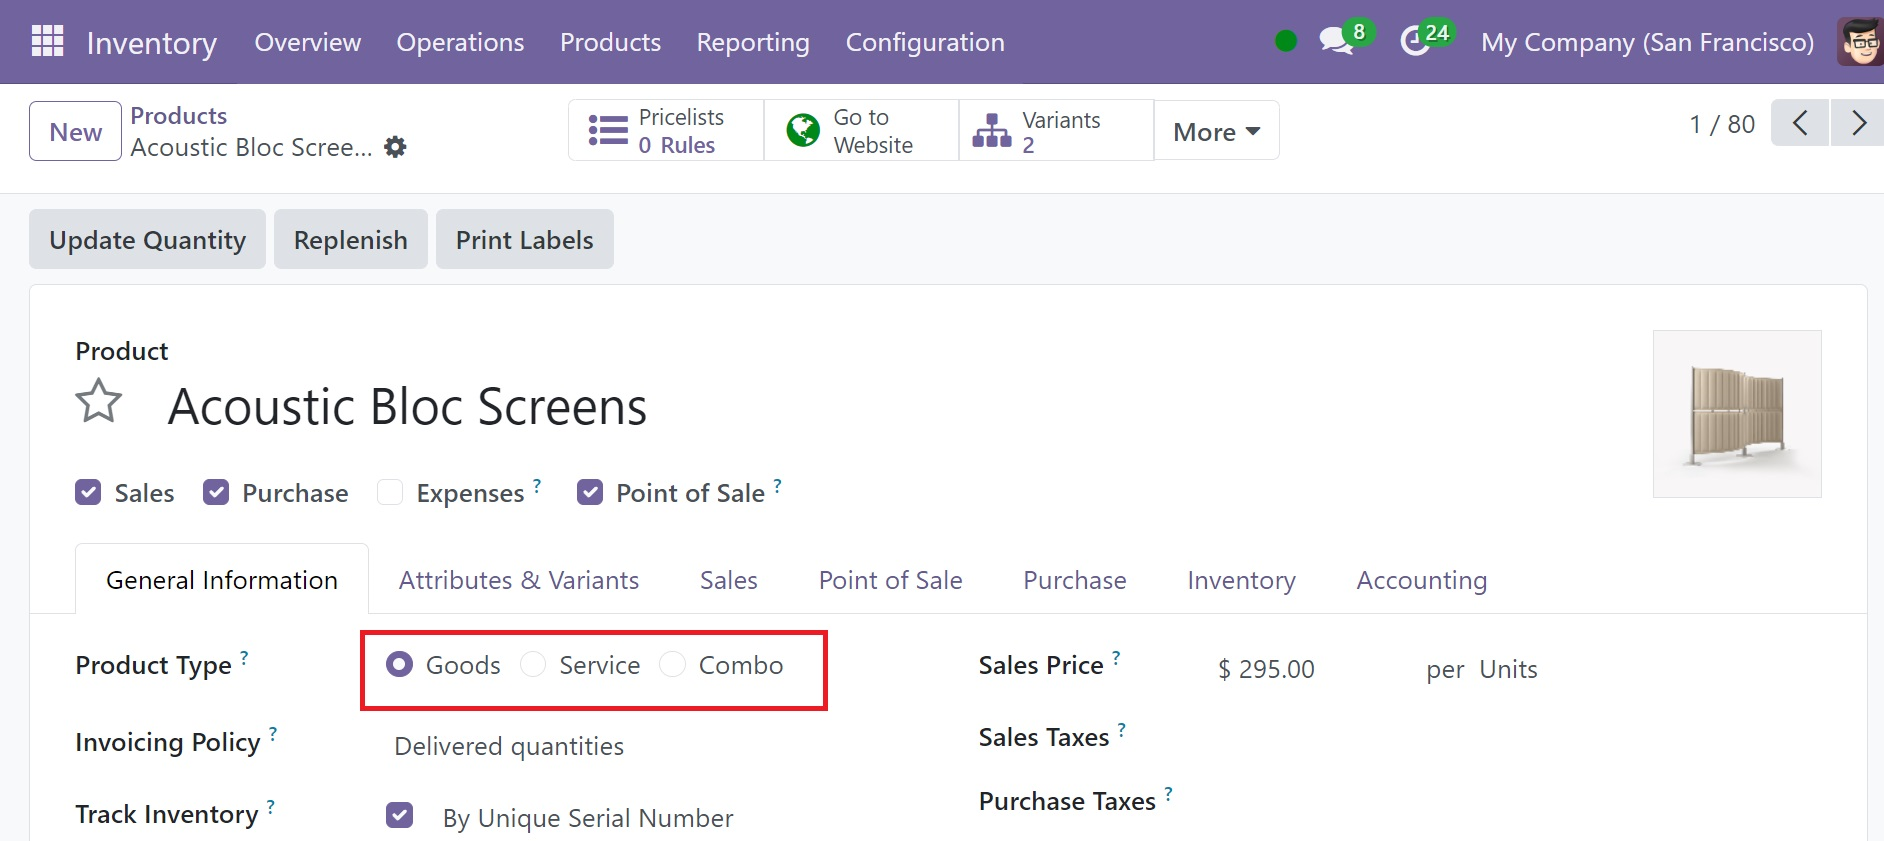
You can upload an image by clicking on the image button, and in the Product Name field, you can write the name of your product. In addition, you can choose the boxes from the options—such as Can Be Sold, Can Be Purchased, and Can Be Expensed—that match your goods. You can choose the Product Type by using the General Information tab. A dropdown list containing options like goods, services, and combo will appear.
Goods are physical, material objects, such as a house or a hamburger for which stock might need to be handled or sometimes not.
Service: an immaterial, intangible good or service (e.g., a haircut, a repair, call center support)
Combo: any combination of products and services (for example, a new car, which is a good, plus an oil change, which is a service).
Under the Invoicing Policy area, you can choose whether to create invoices based on ordered amounts or delivered numbers. Sales will create invoices for the requested products and later option defines sales will issue invoices for the delivered products if sales confirm the order for quotation. The following are assignable: Unit of Measure, Sales Price, Customer Taxes, Cost, Product Category, Internal Reference, Products, Barcode, Product Tags, and Company Name.
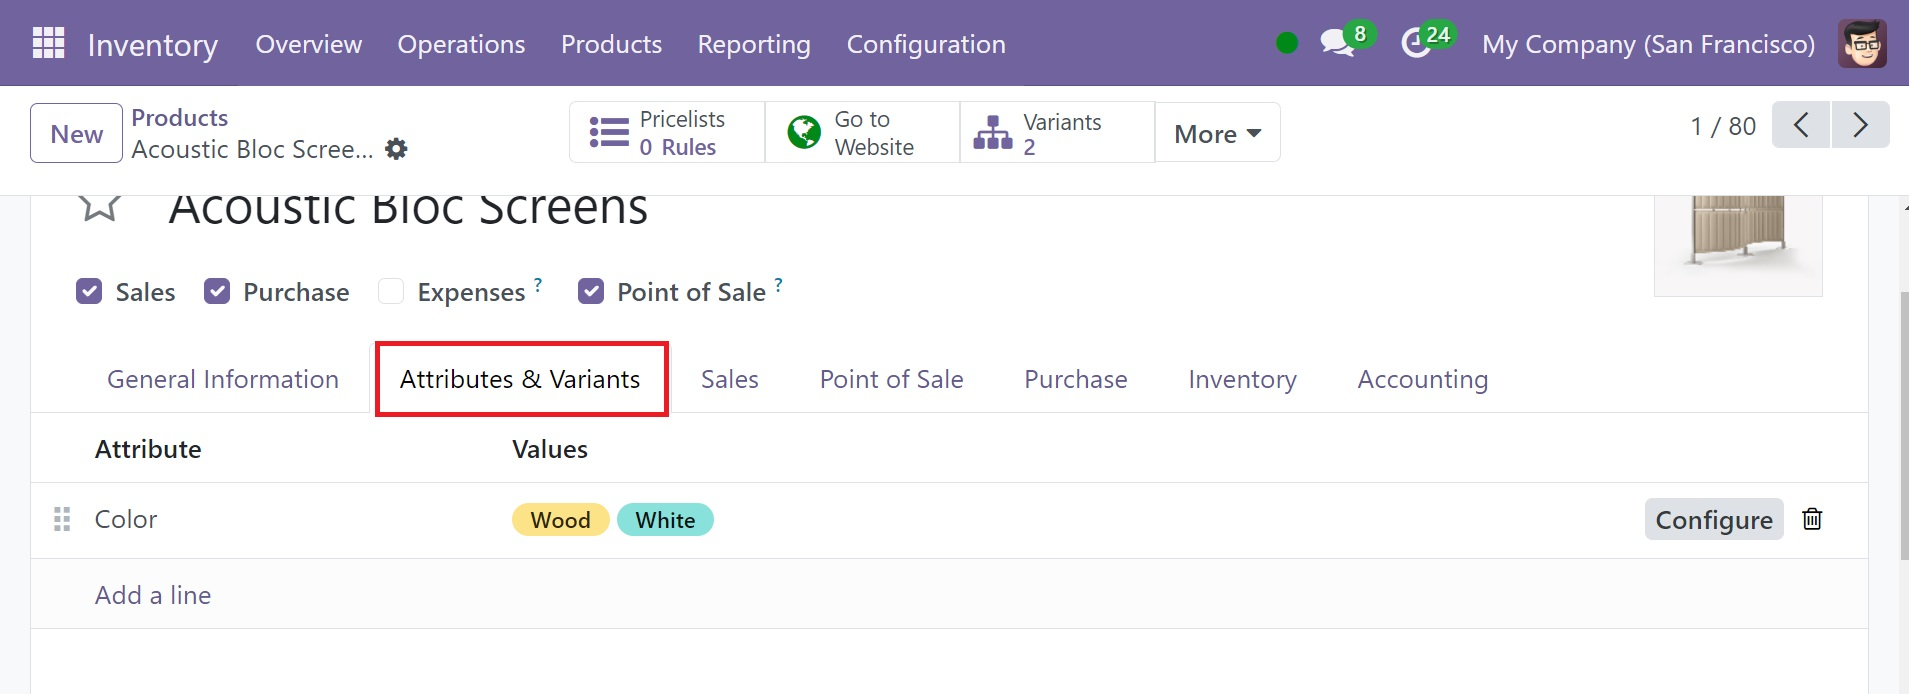
Using the Attributes & Variants page, you can configure the product's variants to the record. To enter the versions and the relevant properties, select "Add a Line."
You may set up the product's sales-related information under the Sales tab.
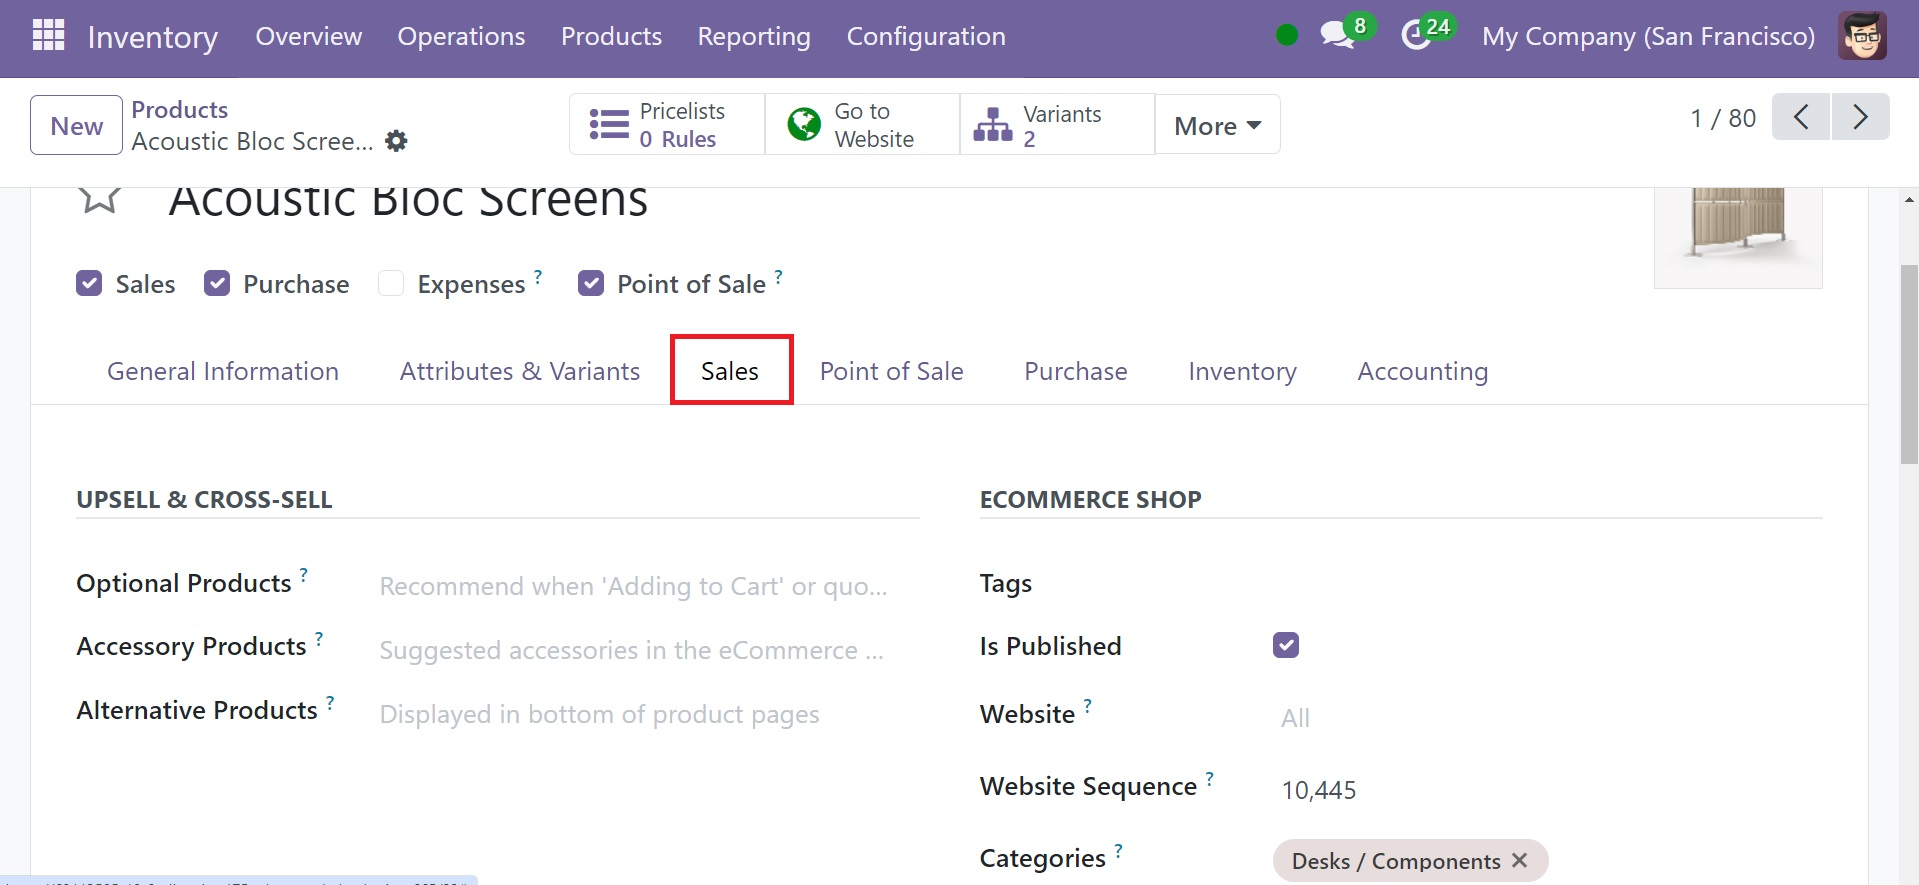
In the Optional Products section, you can include any additional products you would like to offer in addition to the original product. The system will recommend this item to a consumer when they add the main product to their cart. If you generate a new quotation using the parent product, this recommendation will also appear. Under the "Accessory Products" area, you may add the products you want to appear when a customer reviews their cart before paying. There are alternatives to the main product listed in the Alternative Products section.
To add this product to your eCommerce store, simply provide the website's name in the space provided. You can add eCommerce product categories to the Categories box to facilitate product filtering. Even if the product isn't in stock, you can still sell it online by using the Continue Selling option. To see the quantity available on the eCommerce page, activate the Show Available Quantity option. You can enter a message in the designated space to let people know that the product is out of stock. Turn on the Available in POS option to make the product available in your POS session.
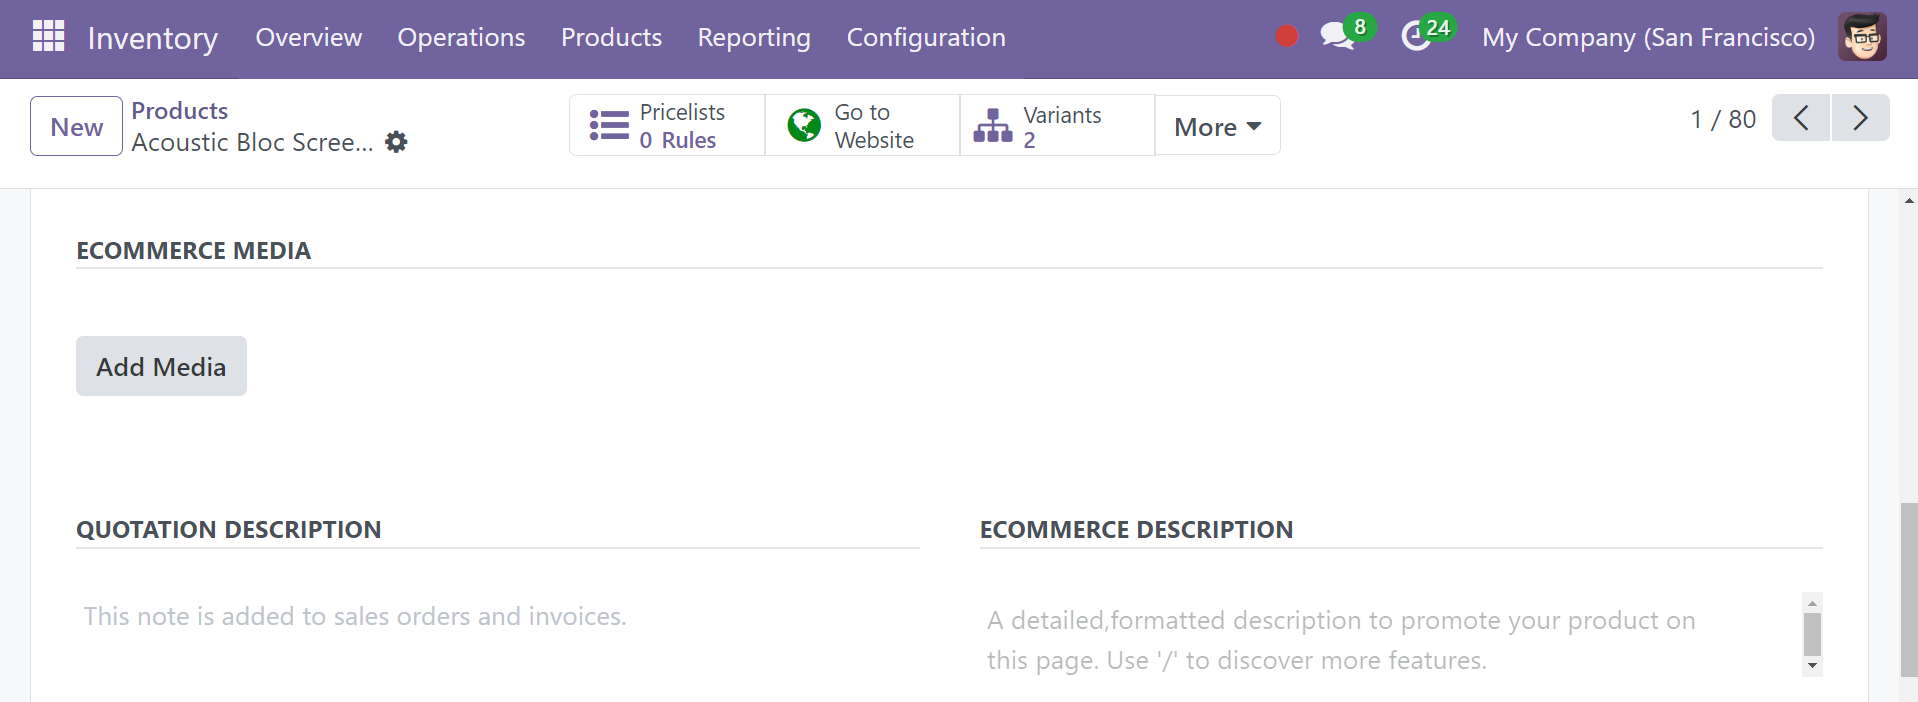
Any more media can be added to the Extra Commerce Media session. A sales remark that you enter in the Sales Description field will appear on the product invoice and sales order.
To add details about purchases, use the Purchase tab. It is possible to add the names of individual vendors by using the Add a Line button.
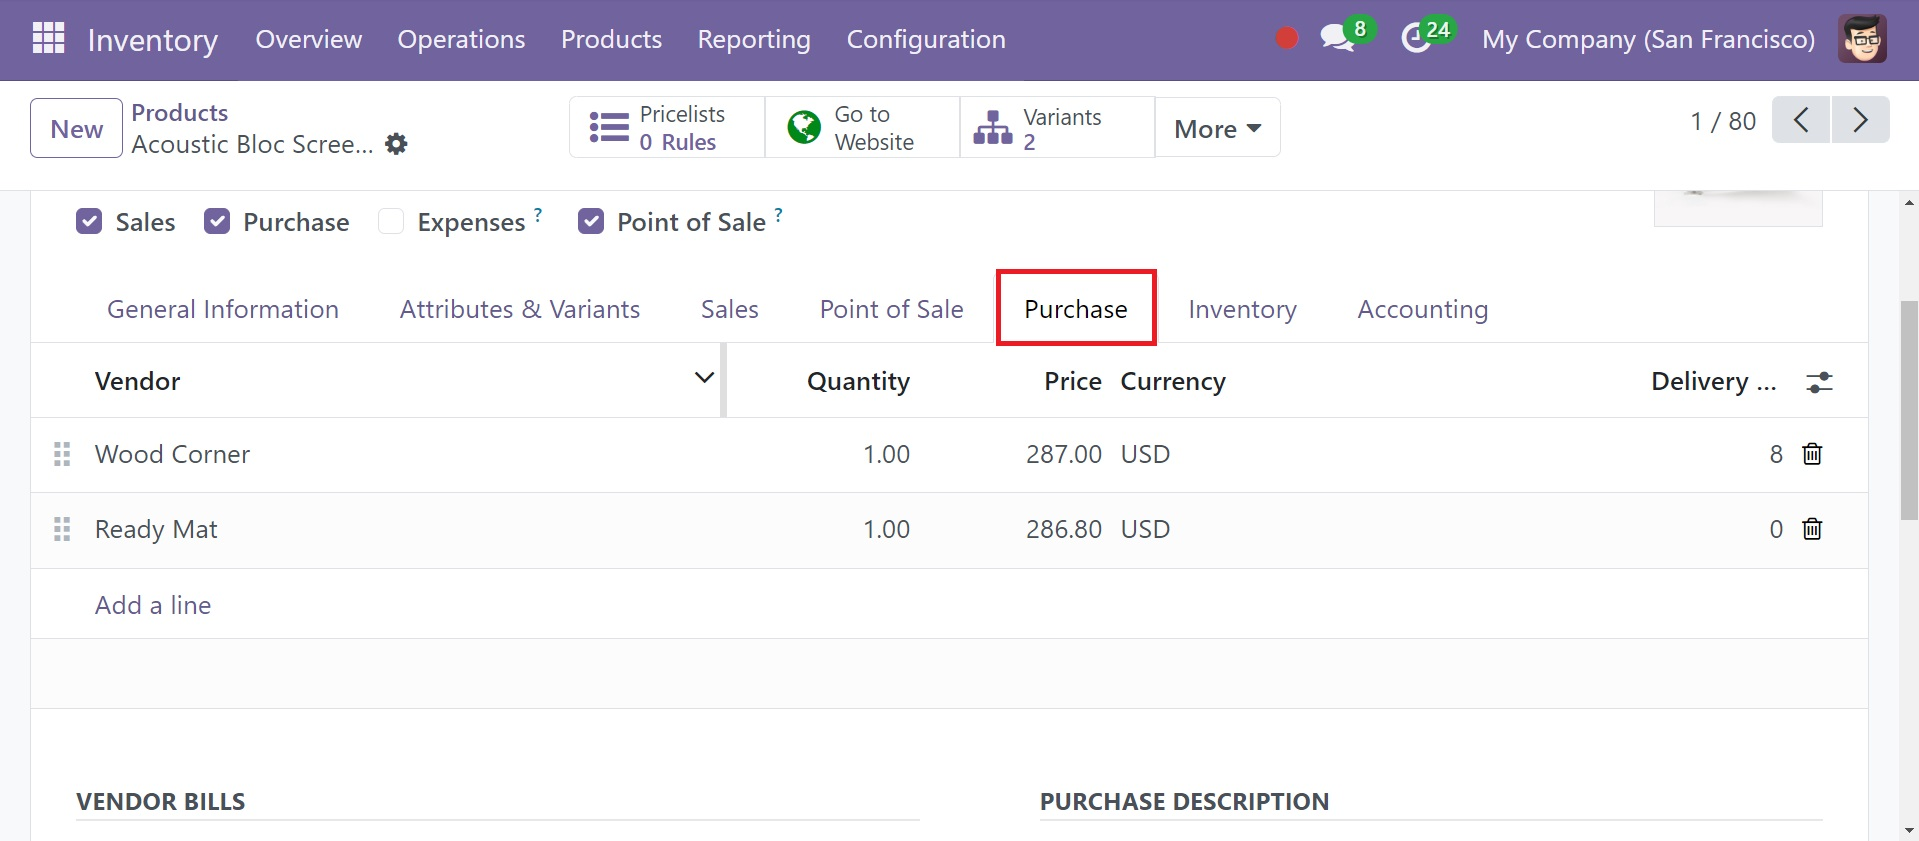
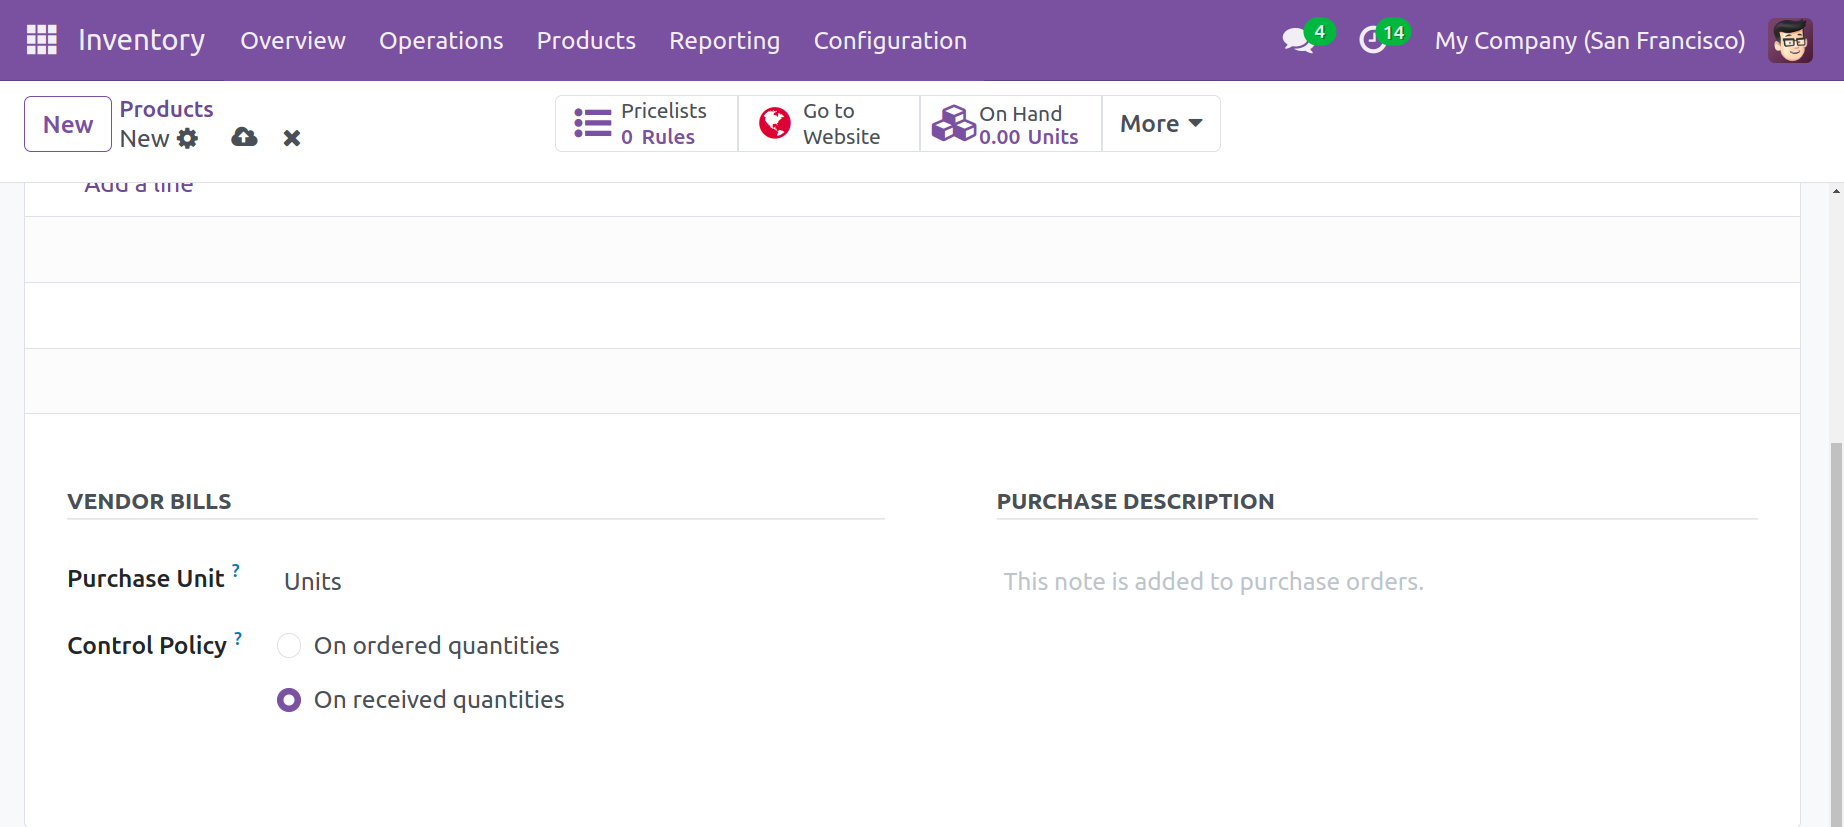
For a given product, you can add many vendors and compare their prices here. You can choose the default tax that was imposed when you purchased this product by using the Vendor Taxes field. For vendor bills, the Control Policy can be configured depending on ordered or received quantities. Purchase orders for this product will display any remarks you give in the Purchase Description area.
The Inventory tab provides an opportunity for you to specify a product's Routes of Operation. The route may be set up as Buy, Manufacture, Dropship Subcontractor on Order, Resupply Subcontractor on Order, or Dropship.
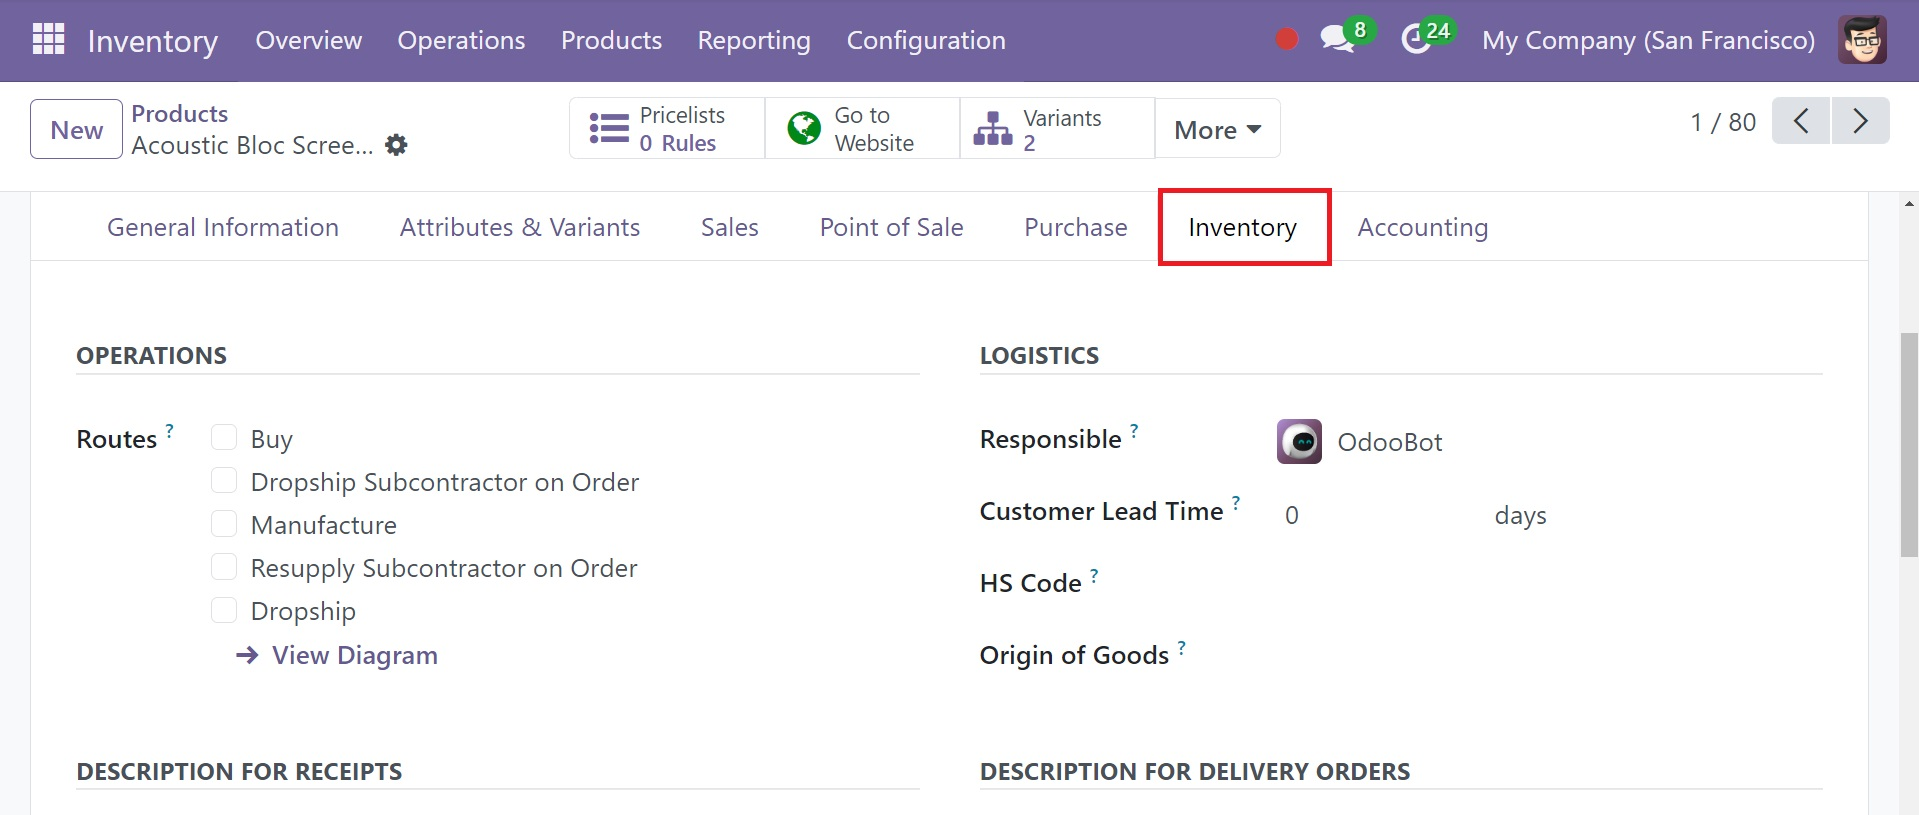
You can choose a person to manage the product's logistics operations in the Responsible section. In the corresponding fields, you can enter Weight, Volume, Days to Prepare Manufacturing Order, Customer Lead Time, HS Code, and Origin of Goods. The average time required to produce the product is shown by the Manufacturing Lead Time. The average number of days from the date of the sales order confirmation to the delivery date is known as the customer lead time.
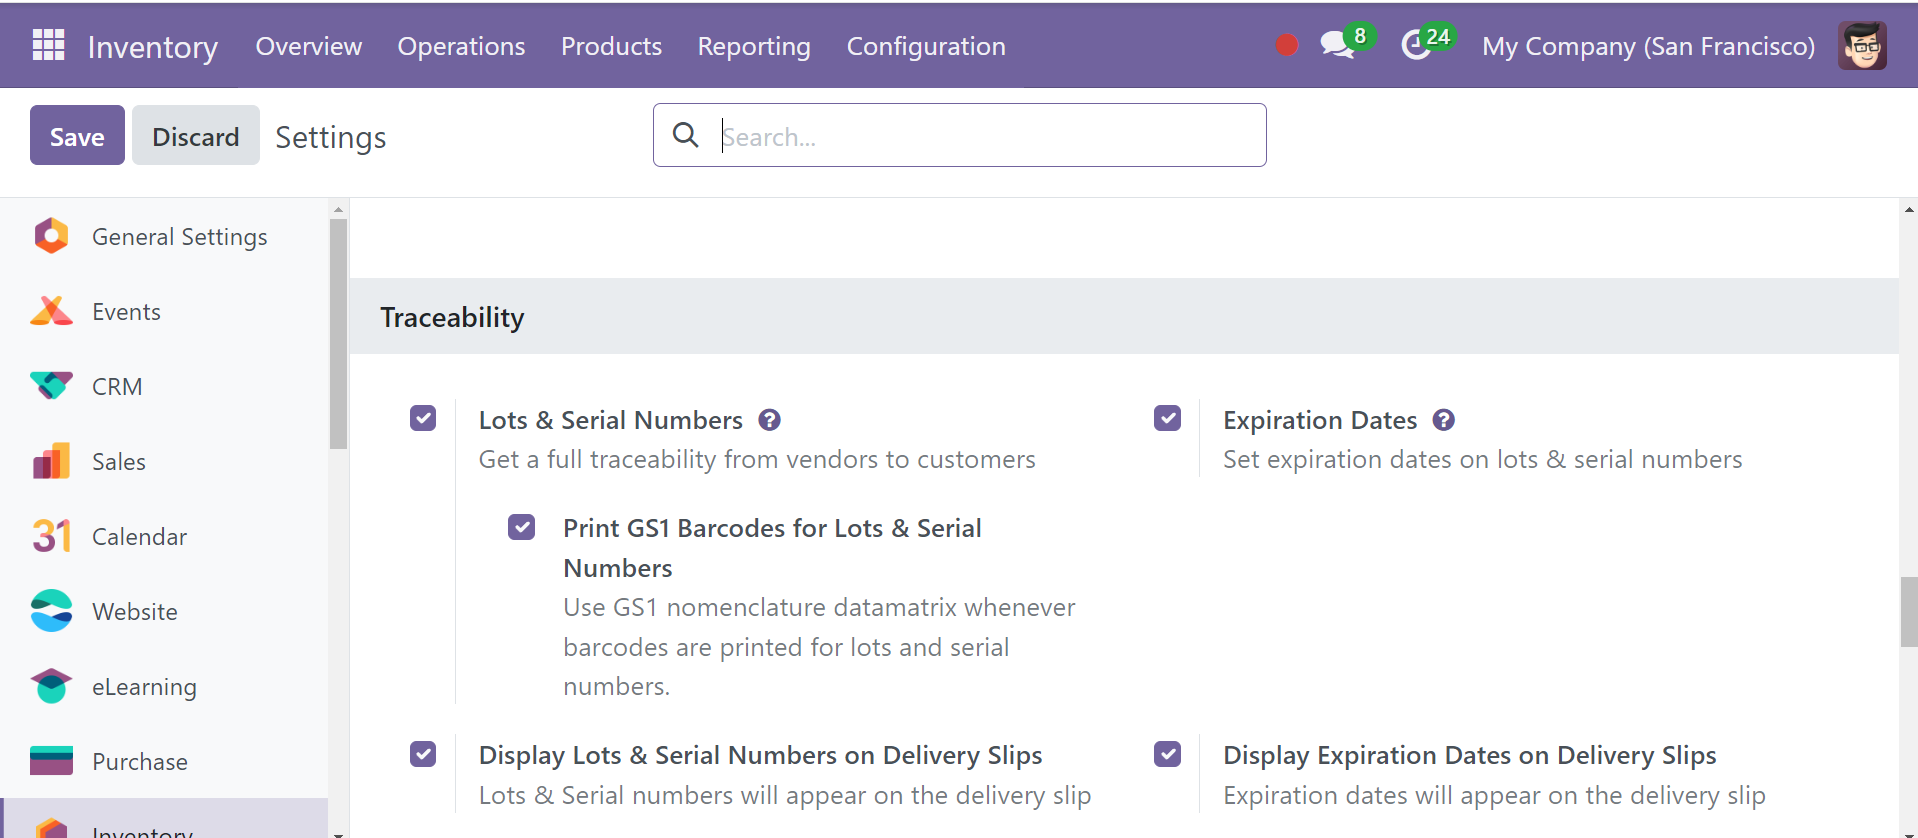
In the Traceability box, you can choose how to trace the products in your warehouses. Products can be traced using Quantity, Unique serial numbers or Lots. It is also possible to disable tracking by selecting the No Tracking option.
The Product Packagings option, which can be used to define the type of packaging for products, can be activated from the Settings menu of the module.

Once this option is enabled, the Inventory tab of the product form view will show a special section where you can specify the product's packing type.
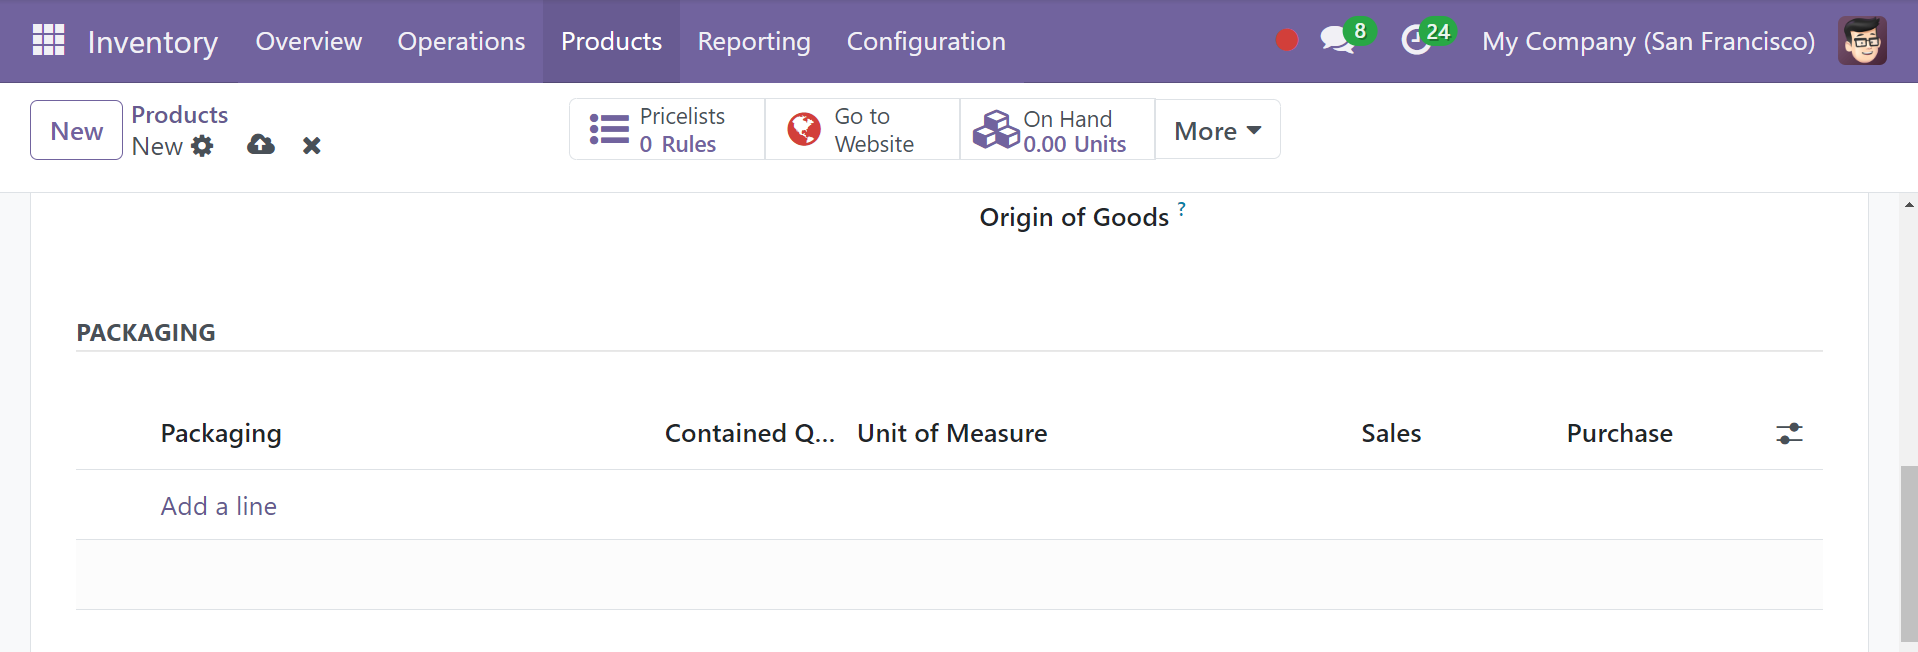
Here, you can include the product's packaging by selecting the Add a Line option. From the list of possibilities, select the suitable Package Type. In order to create a packaging type, there is packaging type option in Inventory module's Configuration menu, as seen in the picture below. This platform allows you to set up several kinds of packages for delivery operations.
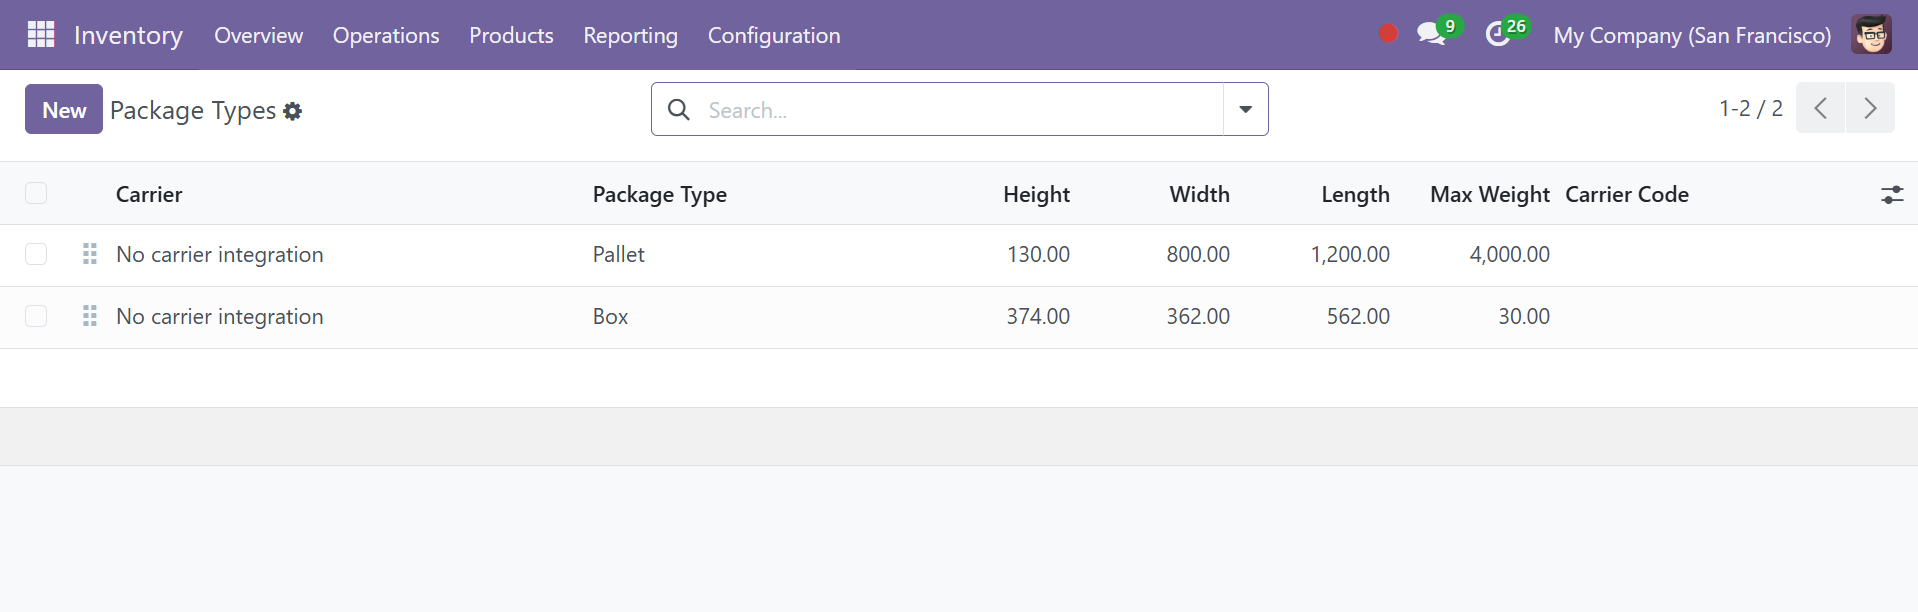
You can observe all predefined package types in this window along with the details of the Carrier, Package Type, Height, Width, Length, Max Weight, and Carrier Code, respectively. Using the New icon, it is easy to create a new type.
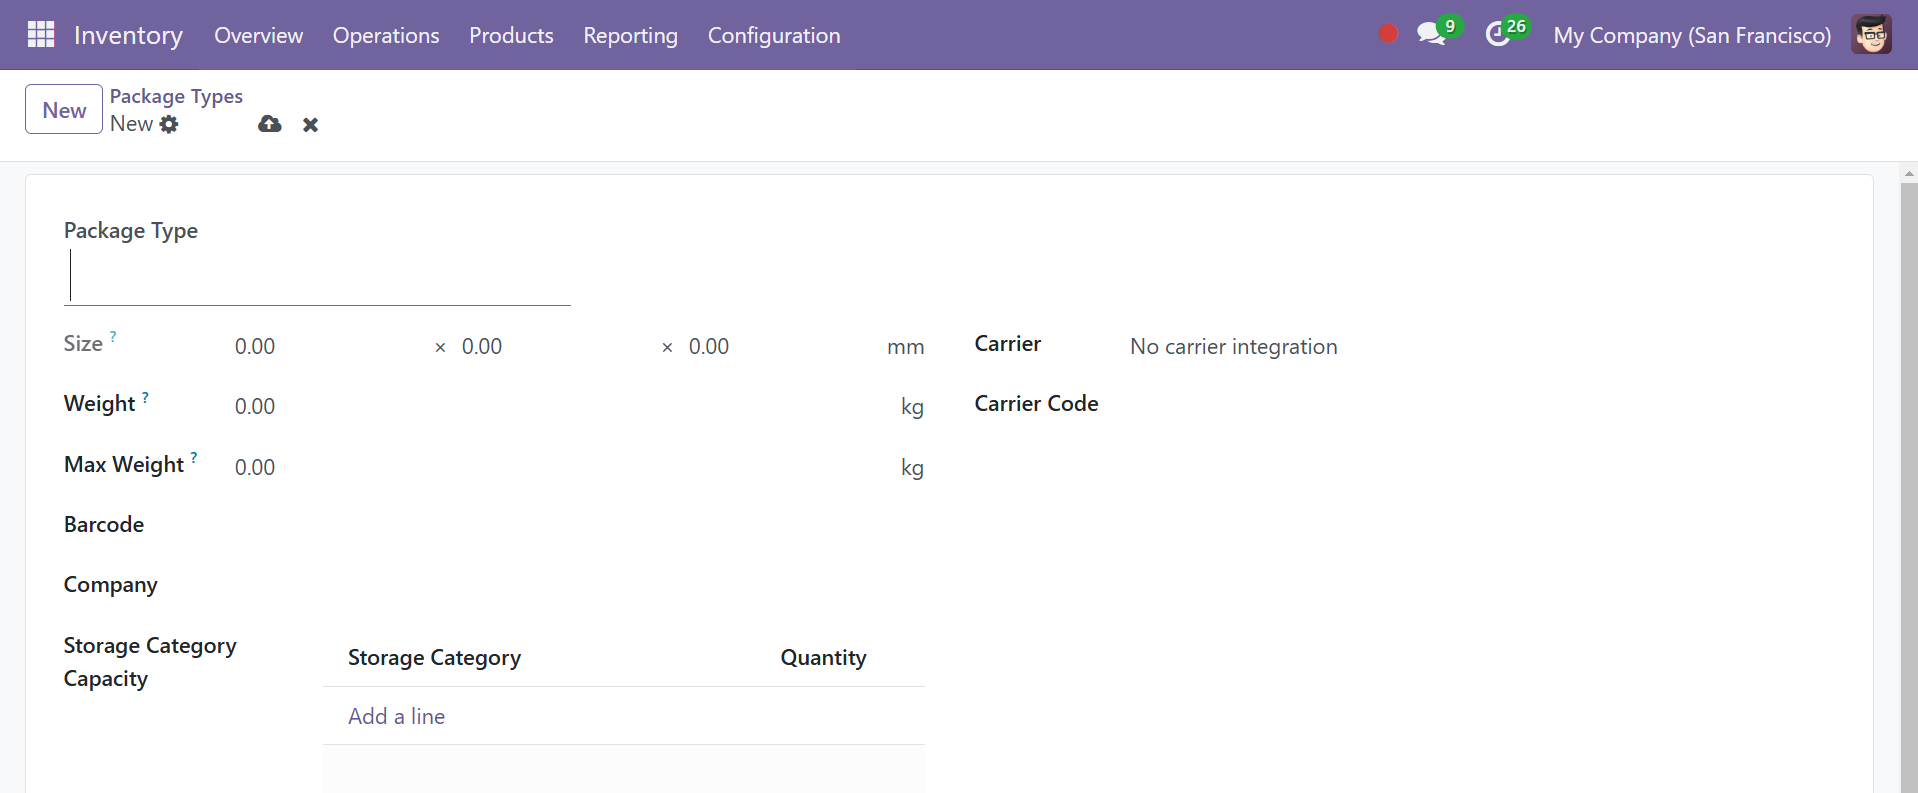
You can enter a suitable package title in the Package Type area. Next, enter the package type's size in the designated field. You can enter the package's total weight in the Weight area. The Max Weight option allows you to choose the maximum weight that can be shipped with this package type. You can enter the barcode that is used to identify the package in the Barcode areas. You can add the carrier and carrier code used for this product after specifying your company.
Indicate how much of the product is in the packaging in the area provided ‘Contained Quantity’. If you want to use these packagings in the sales and buy orders, you can enable the corresponding fields.
In addition, there will be designated fields where you may enter descriptions for delivery orders, receipts, and internal transfers. Provide any information that is required in the pertinent sessions.
The Accounting tab allows you to discuss the product's accounting data. You can enter an Income Account and an Expense Account in the Receivables and Payables area to track the input and outflow of cash.
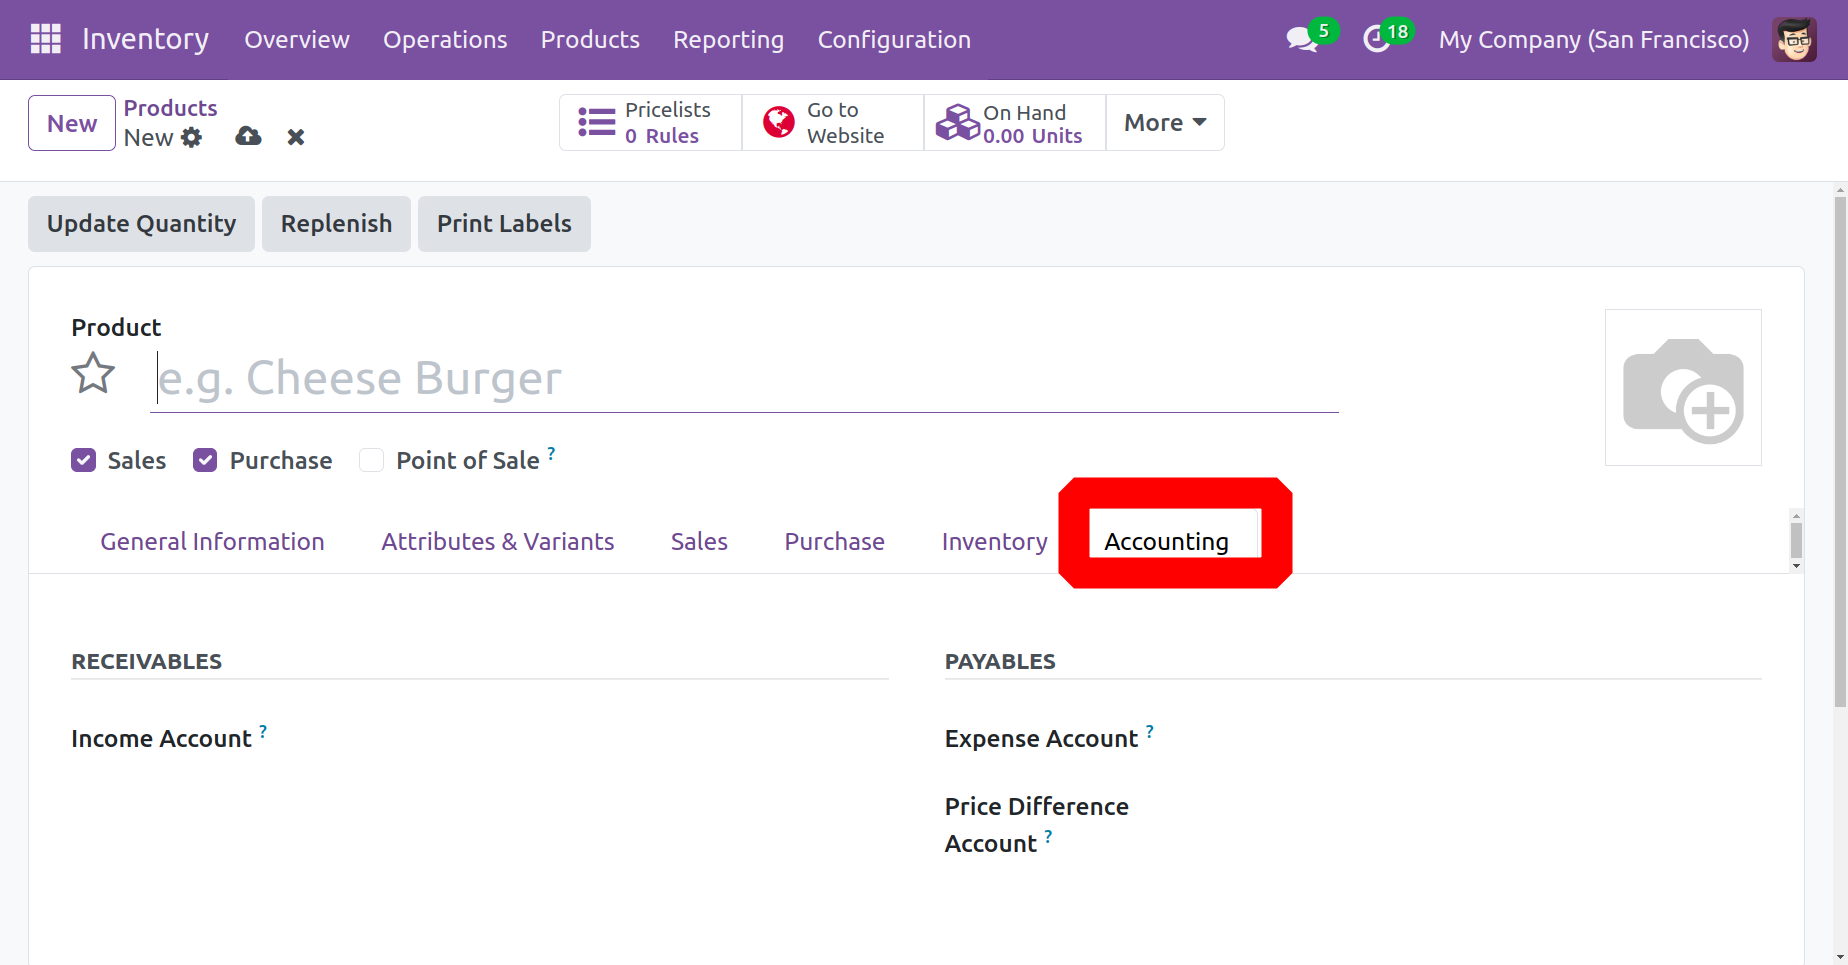
When a vendor bill is confirmed, the price difference between the purchase price and the vendor bill is entered into the Price Difference Account for automated inventory valuation. You can configure an email to be sent automatically to the invoice by entering an email template in the box provided.
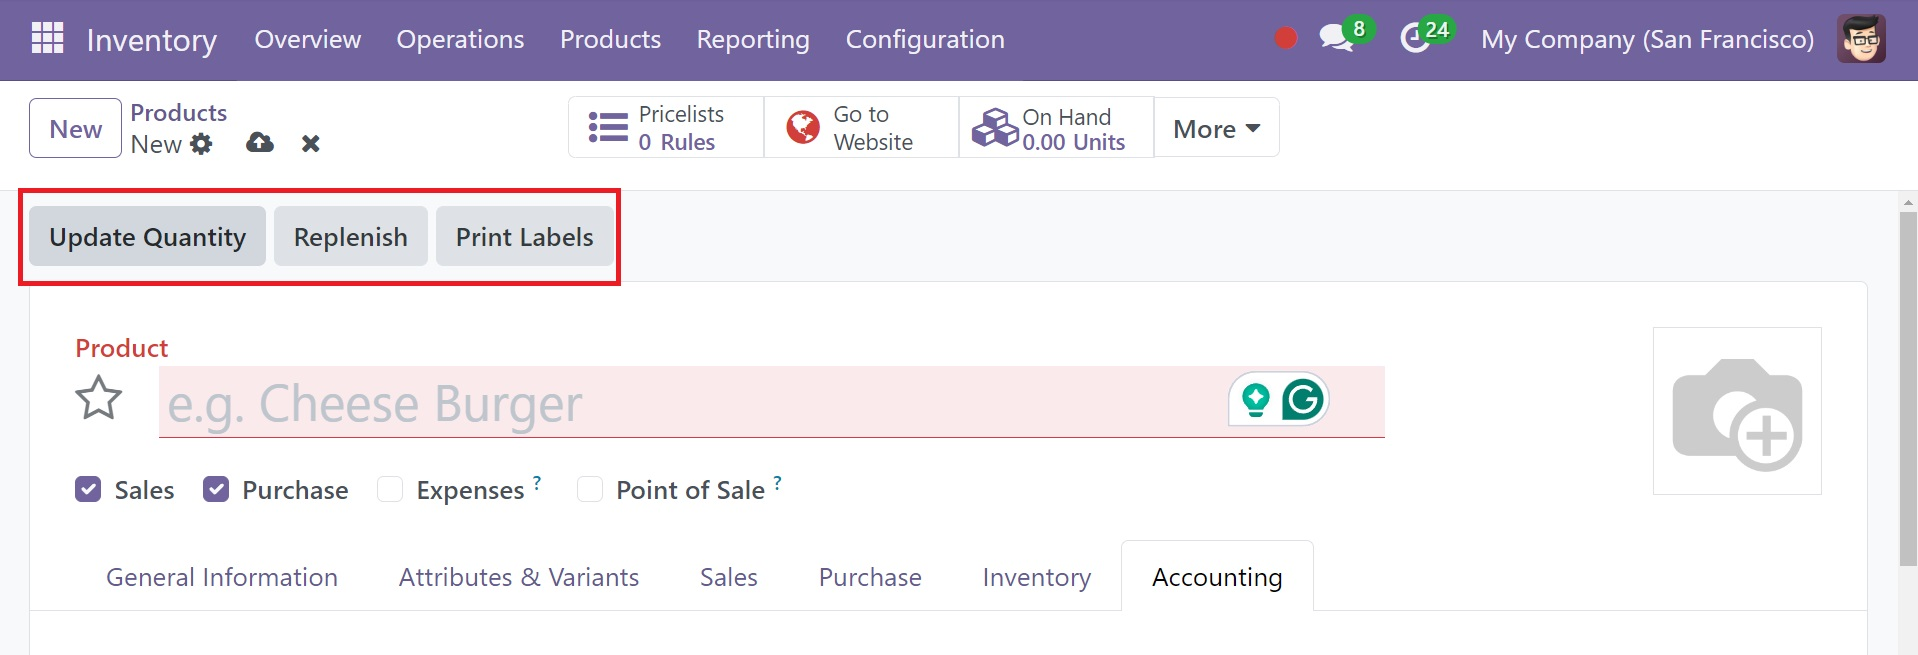
After the product setup is finished, you may print labels, automatically update the inventory, and replace the product's stock by using the Print Labels, Update Quantity, and Replace buttons.
Clicking the Print Label button will cause a pop-up window to appear, as shown below.
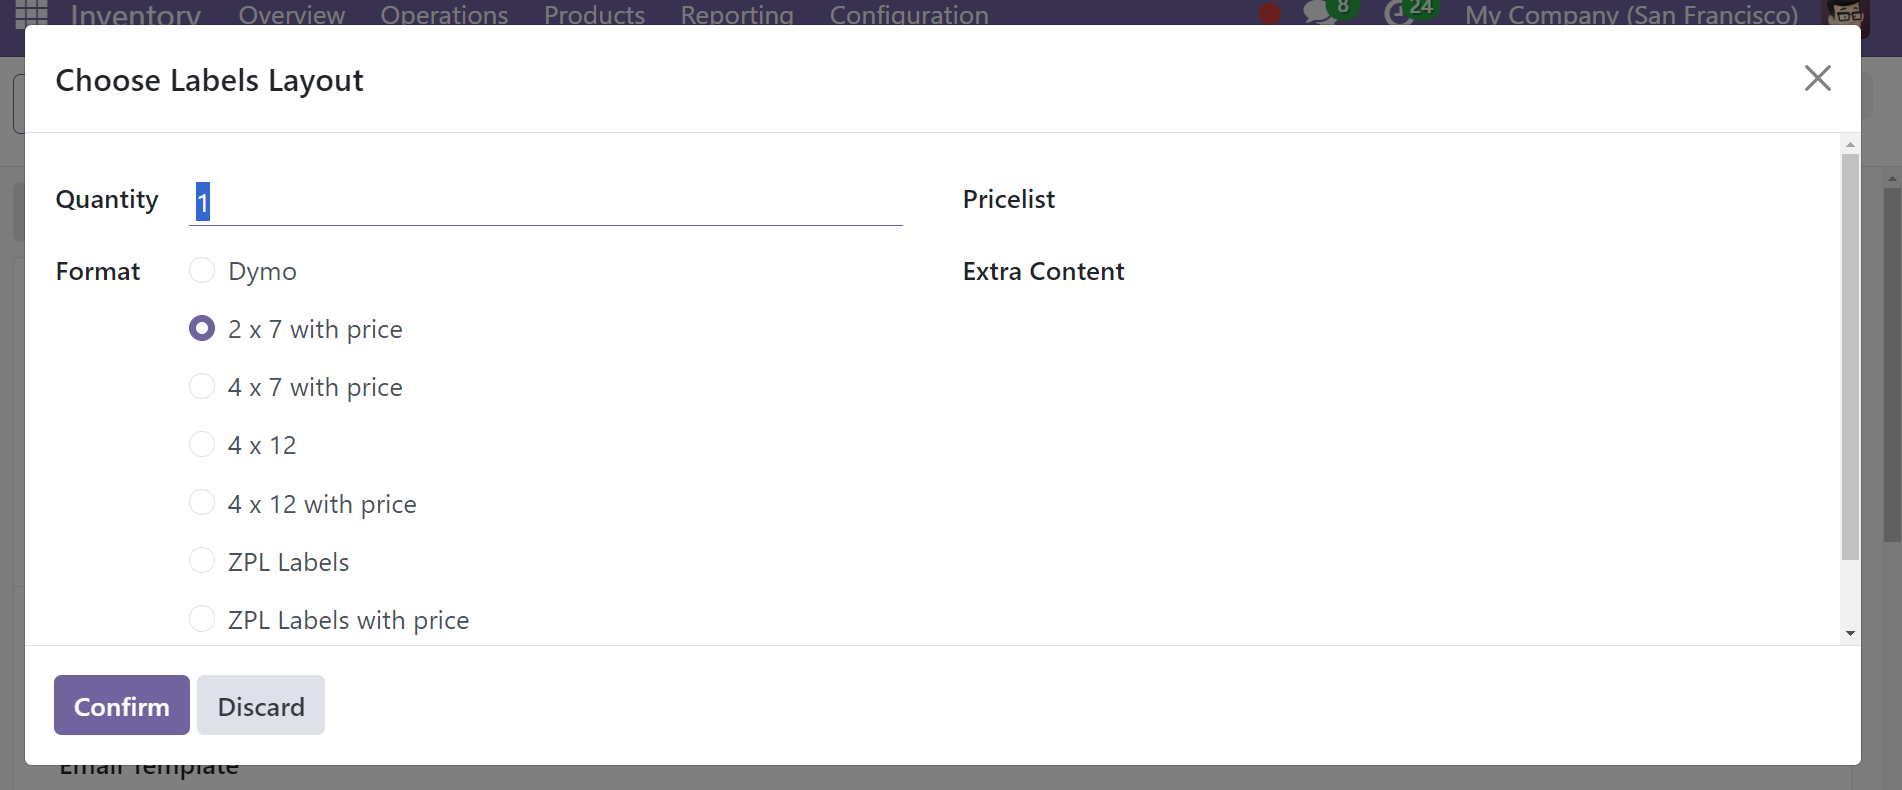
Here, you can indicate how many labels in total are required. In the Extra Content box, you can designate extra content that will appear on the label when printouts are made.
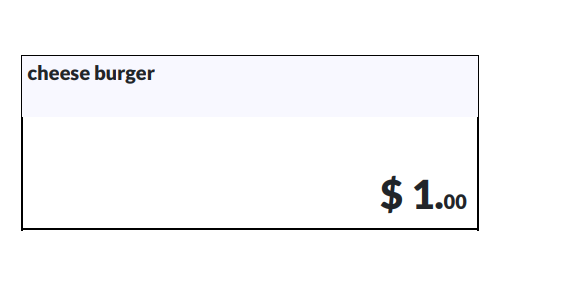
The screenshot up top shows an illustration of a label similar to this one. It is applicable to product packaging.
The Preferred Route states that all products can be replenished straight from the product form by using the "Replenish” button, as in the above screenshot. On selecting the option, you have the pop-up window, as in the image below.
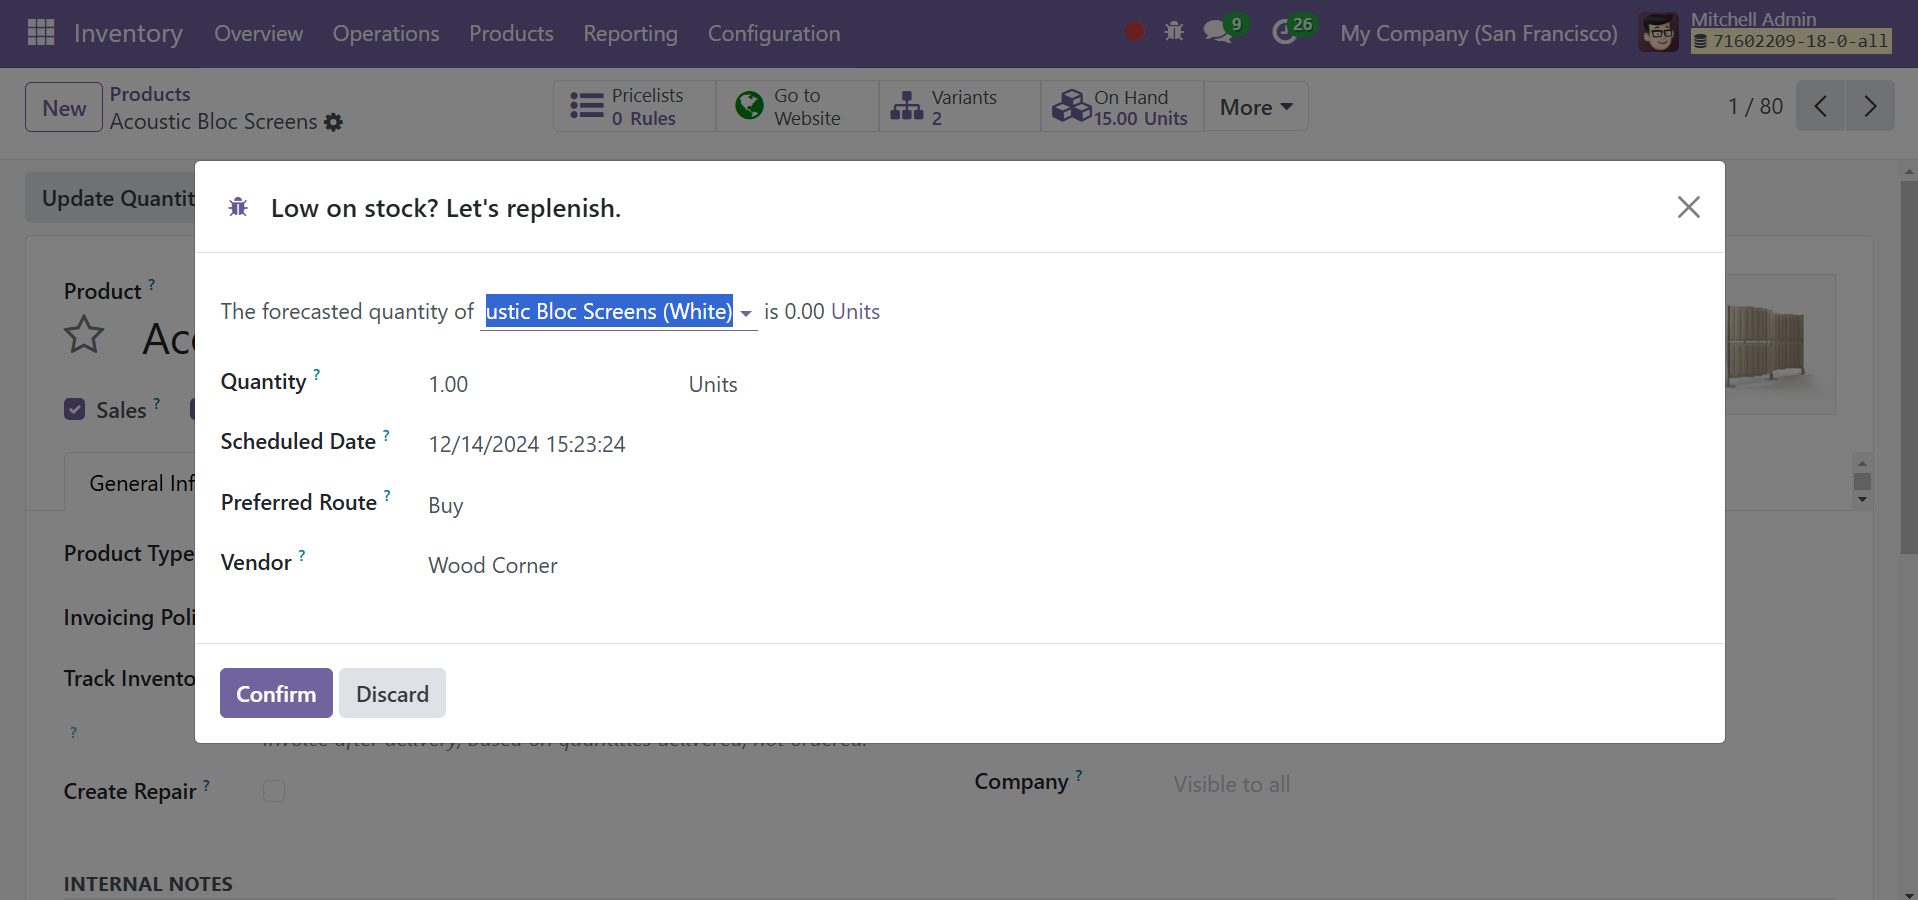
Here, you can mention the quantity, scheduled date, preferred route, and the vendor, respectively. Finally, go to the Confirm button. Thus an replenishment will be generated for the product through the preferred route from the vendor.
Product Variants and Attributes
You may boost sales by providing your customers with a variety of product variations. This will be a profitable sales strategy for you. You can add more than one variation of a product to the Inventory module, as we covered in the Sales and Purchase modules. Navigating to the Settings menu of the module will allow you to see the Variants options under the Products section.
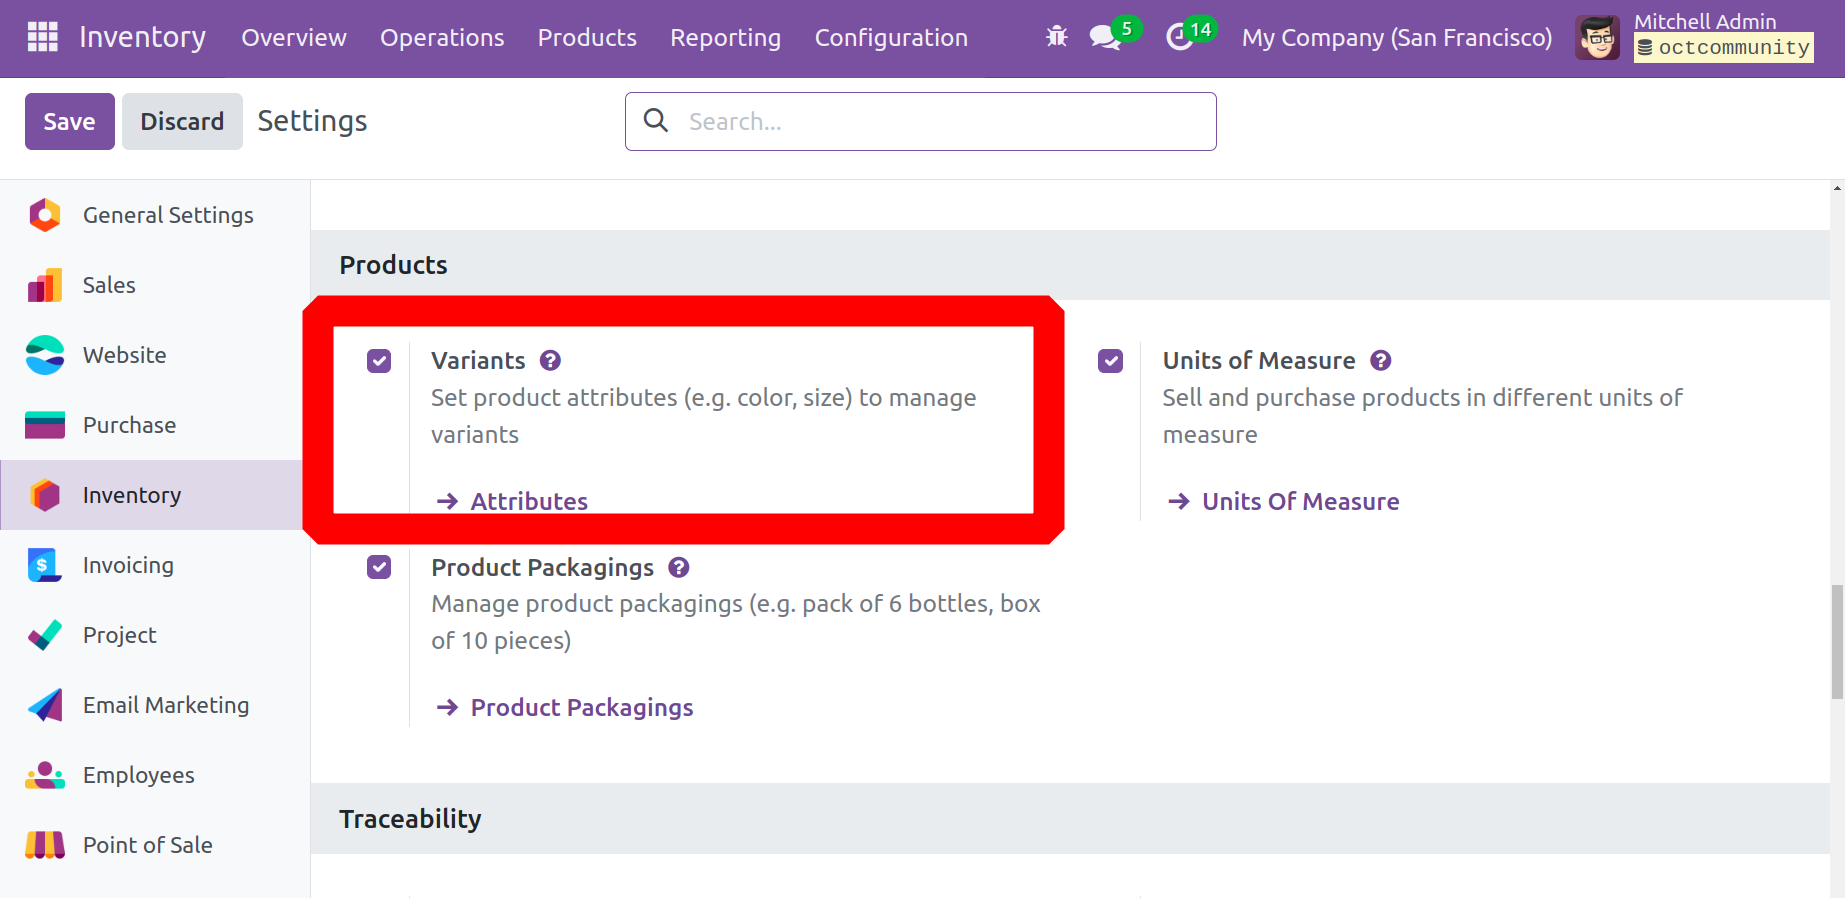
As shown in the above screenshot, open the Products section, choose Variants, and save the settings. The Product Variants option is now available for selection from the Products menu. There is no configuration difference between the product configuration and the product variant.

As shown in the above screenshot, open the Products section, choose Variants, and save the settings. The Product Variants option is now available for selection from the Products menu. There is no configuration difference between the product configuration and the product variant.
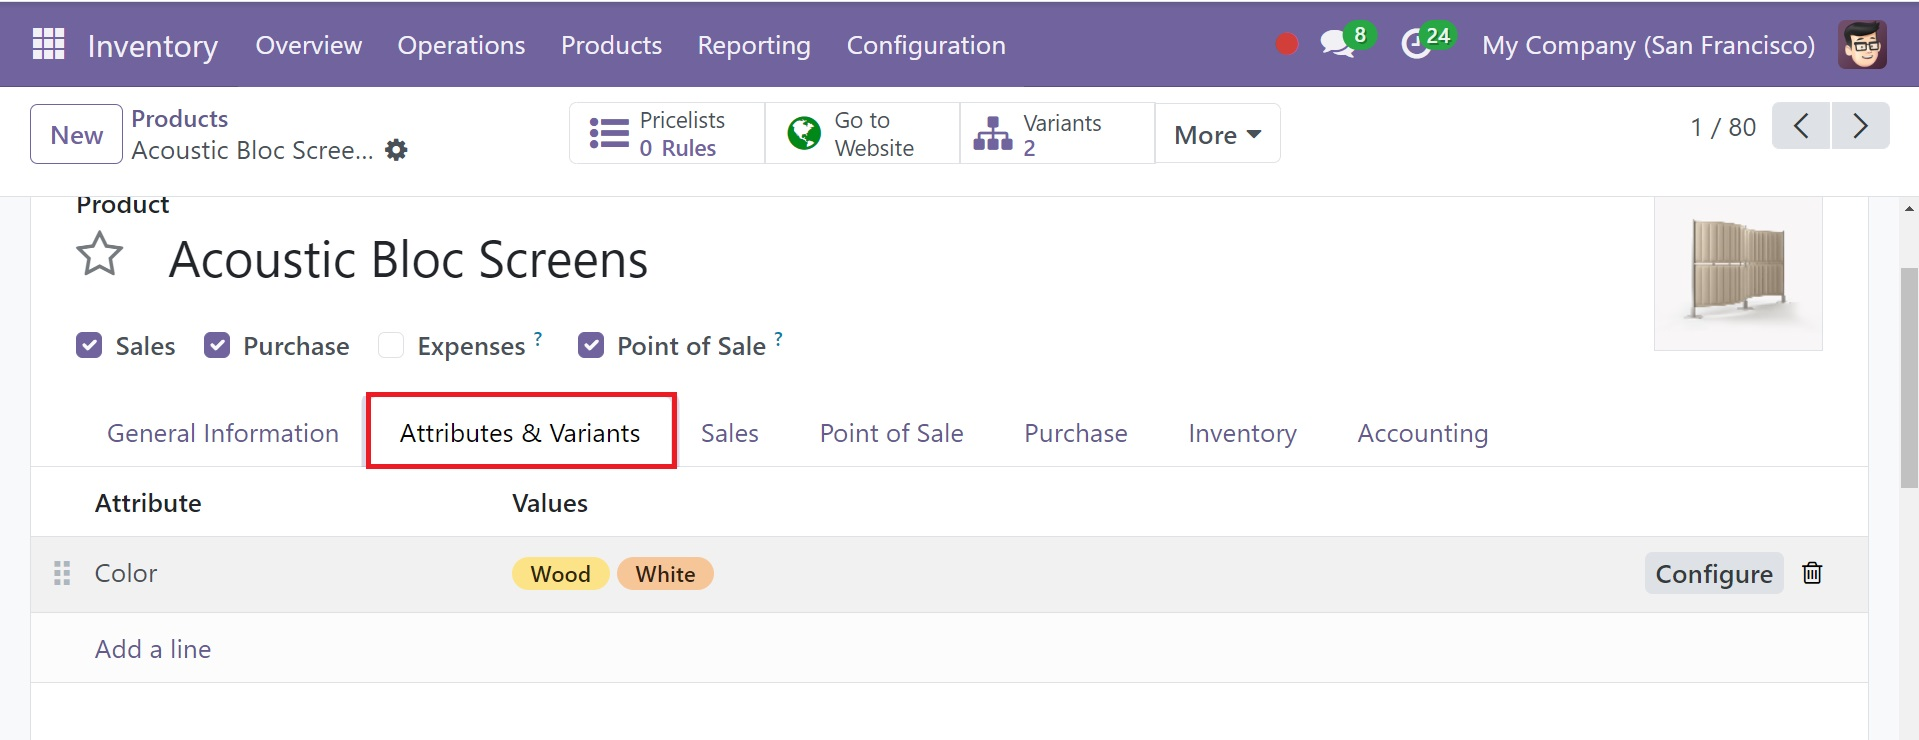
Using the Configure button, you may provide the variant's properties, matching values and Extra prices in the designated fields.
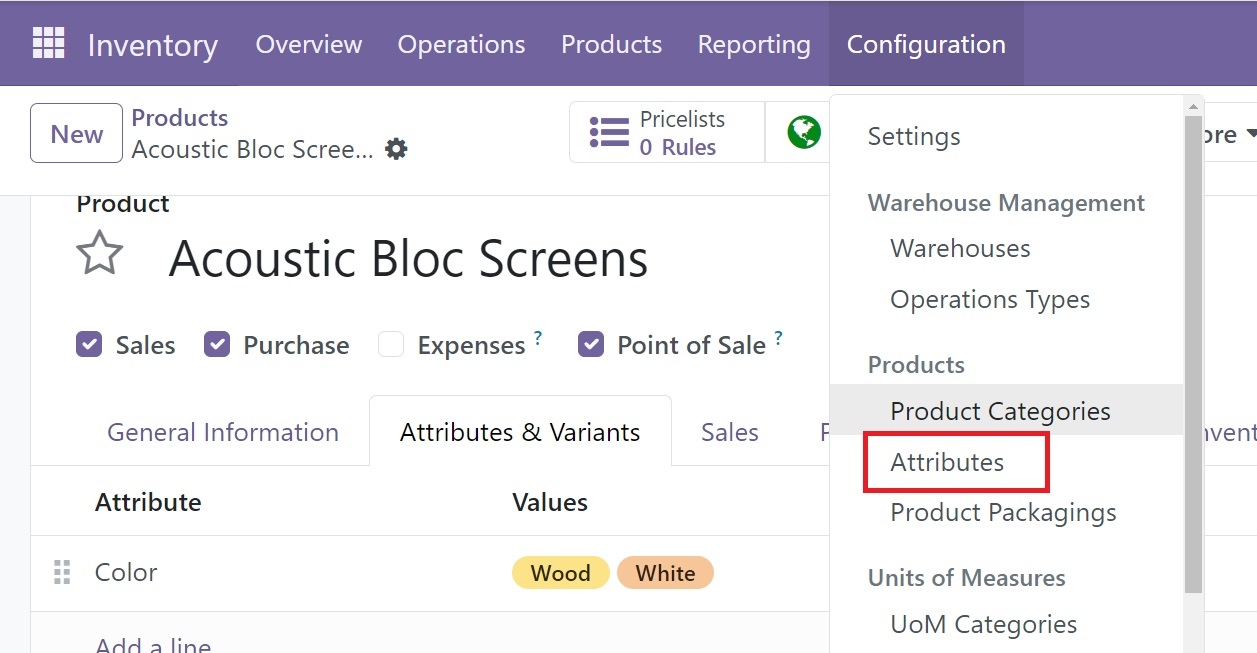
The Configuration menu's Product Attributes option can be used to set up different attributes for a certain product version. When you select this option, a new window will appear, similar to the picture below, allowing you to view previously established attributes.
The list view displays information about the following: attribute, category, display type, variants creation mode, and eCommerce filter visibility. Use the New button to add a new attribute to the product.
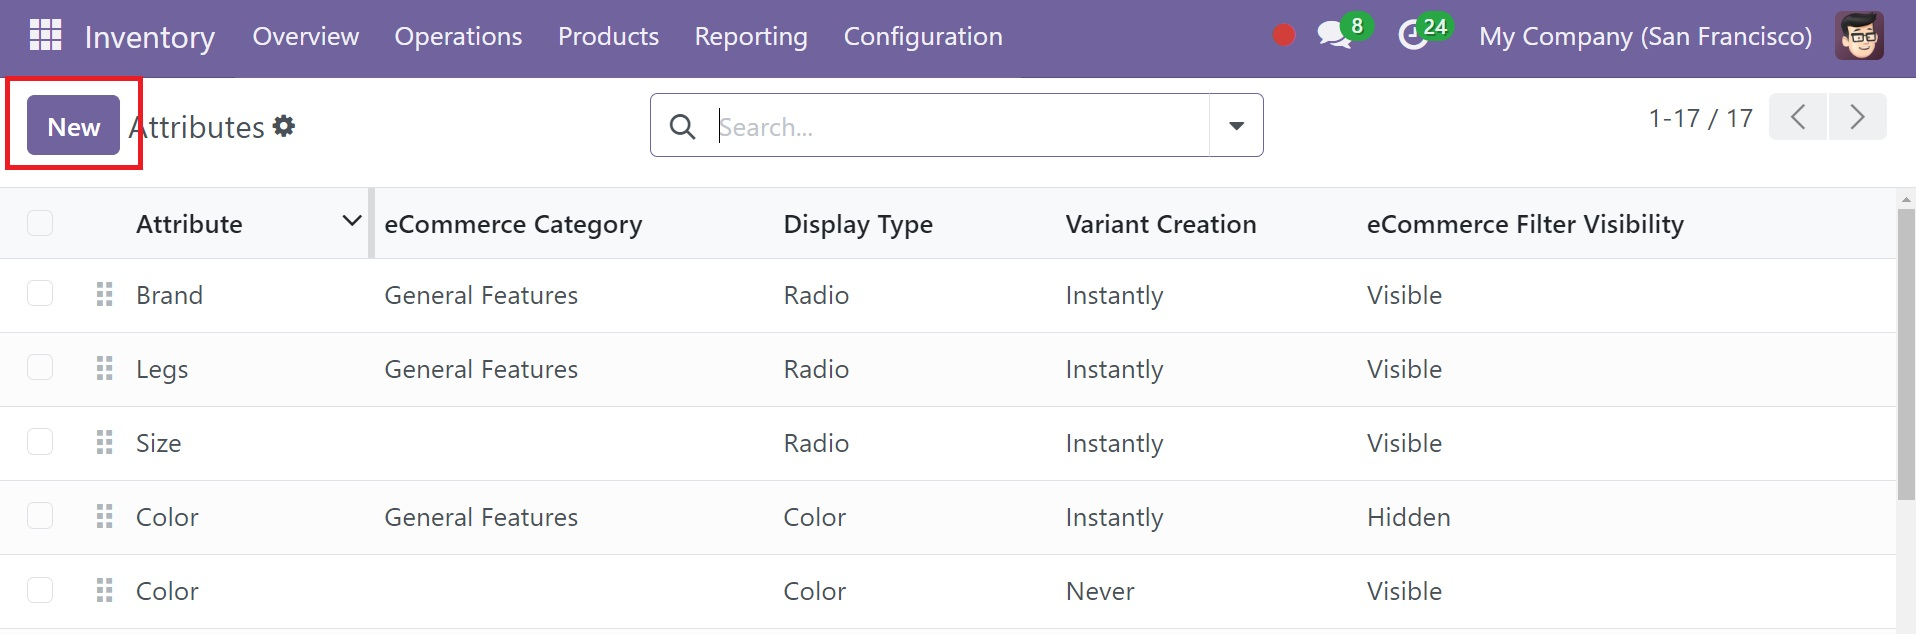
Give the attribute a suitable name in the Attribute Name field. By declaring Category, you can group related attributes together under one area of the eCommerce comparison page. You can select an appropriate Display Type that will be used in the Product Configurator window from the available options, which are Radio, Pills, Select, Color, and Multi-checkbox (option).
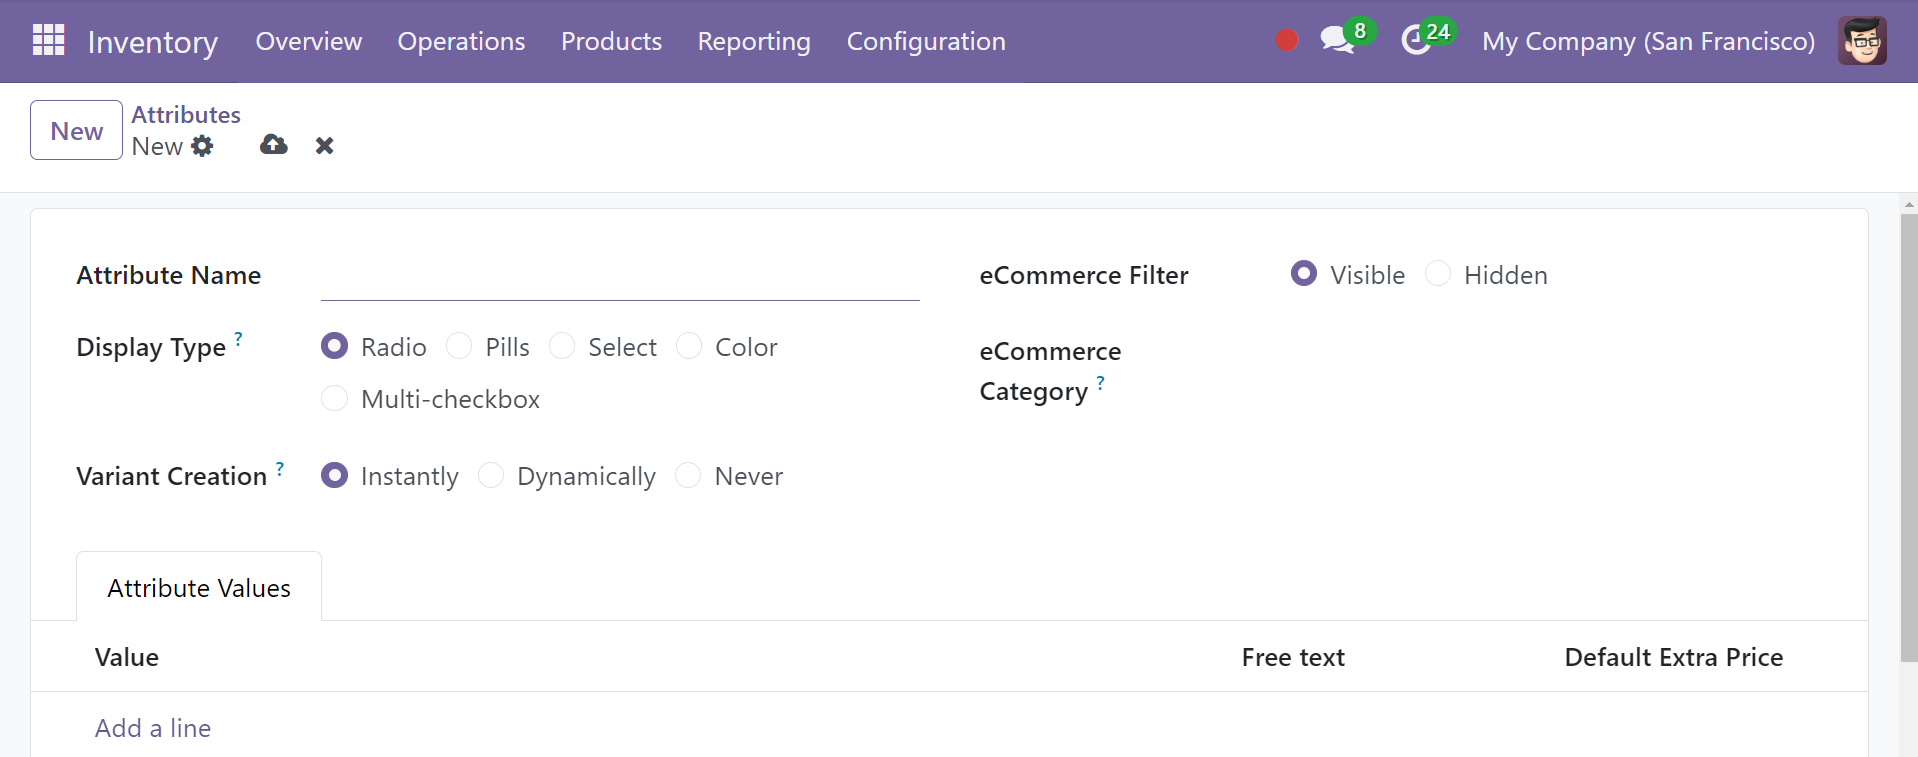
To define the procedures used to produce variations, use Odoo's Variant Creation Mode field. The options that are available are;
● Instantly: You can use this option to generate every potential variant as you add attributes and their values during the product configuration process.
● Dynamically: If this option is selected, the variant won't be created until the sales order has been applied with the appropriate variables and characteristics.
● Never: If you wish to avoid creating any versions for the attributes, you can select the Never option.
To make this attribute available as a filter on the eCommerce page, select the available option from the eCommerce Filter Visibility box. If the Hidden option is used, this attribute won't be seen in the list of filters. You can now add values within the Attribute Values tab by using the Add a Line button. You can also see an option of free text, which helps you to customize values, as in the screenshot below.

After configuration, you can use this property to goods in the form view. Clicking the Products smart button will display products that have this particular attribute.
Odoo 18 introduced a new feature inside the attribute. If the user updated the created Attribute with a new value, now it's easy to add the newly created attribute value to the product. If the user added a new attribute value there shows a +Add products icon near the newly added value as shown in the below screenshot.
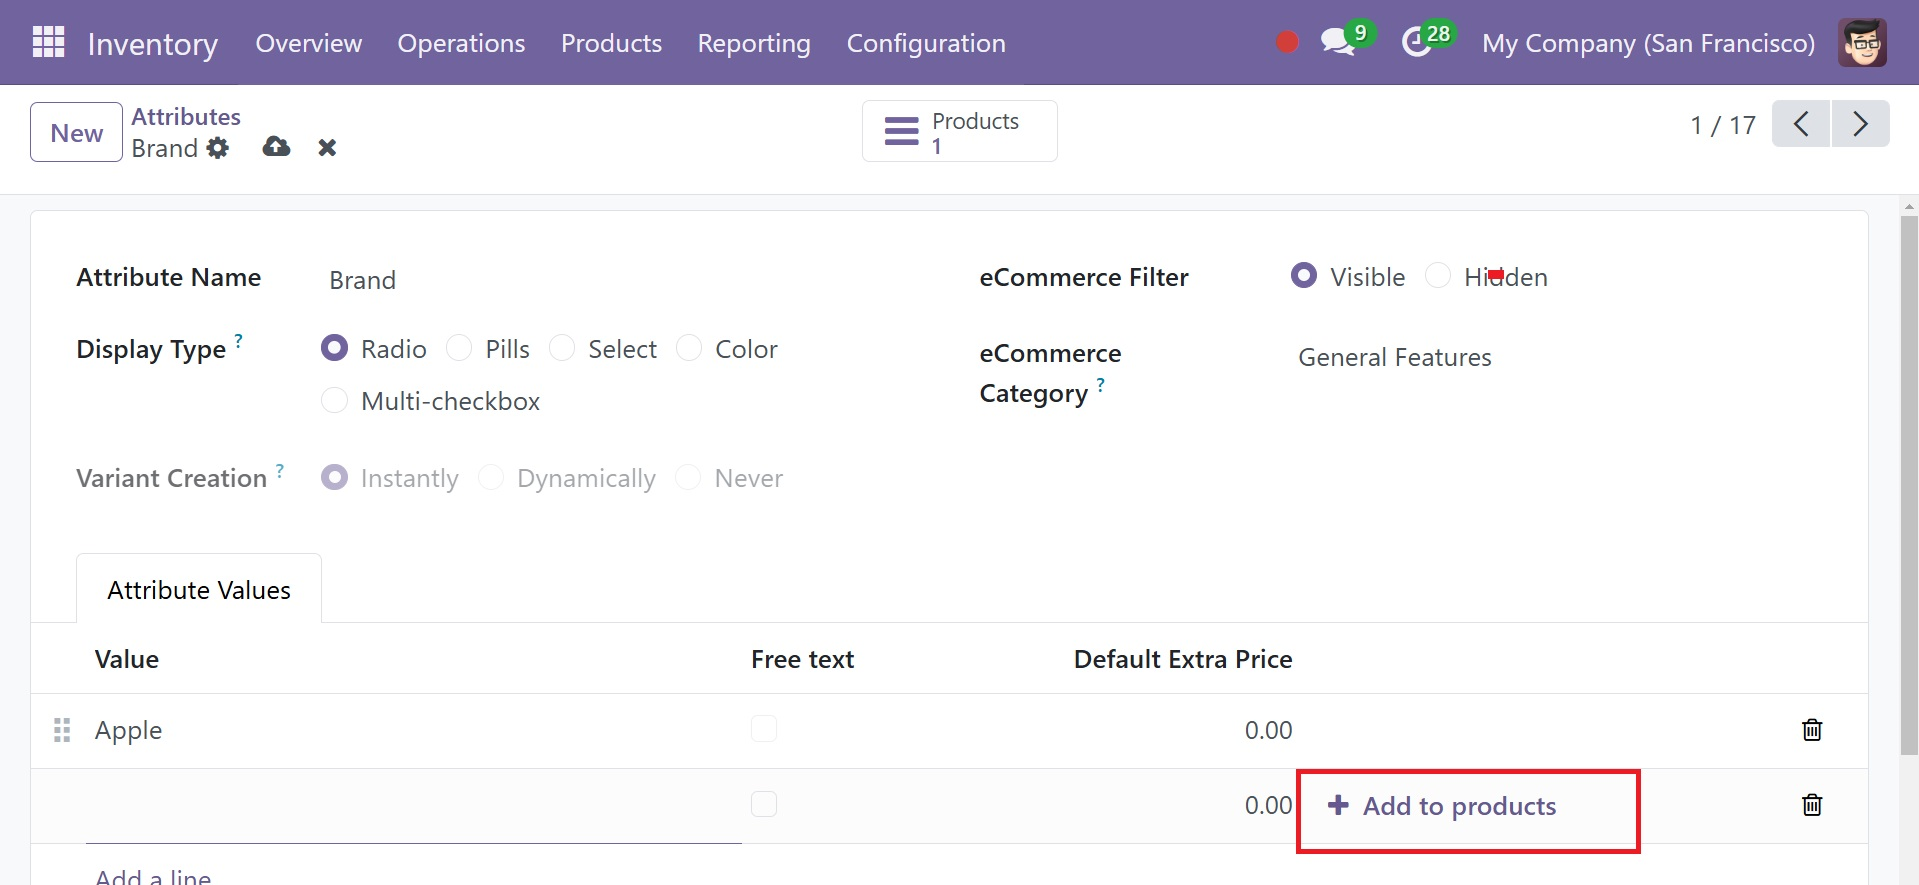
While clicking on the + Add to products users can easily assign the newly added values to all products from the Attributes itself. The option helps you to add values to the products.
UoM Categories
It is occasionally required to handle products in various units of measurement. For instance, a company may purchase goods from a nation that employs the metric system and resell them in a nation that utilizes the imperial system. The company would then have to convert the units.
When a company purchases goods from a supplier in bulk and then sells them individually, that is another example of unit conversion.
For a single product, Odoo can be configured to use several units of measure (UoM).
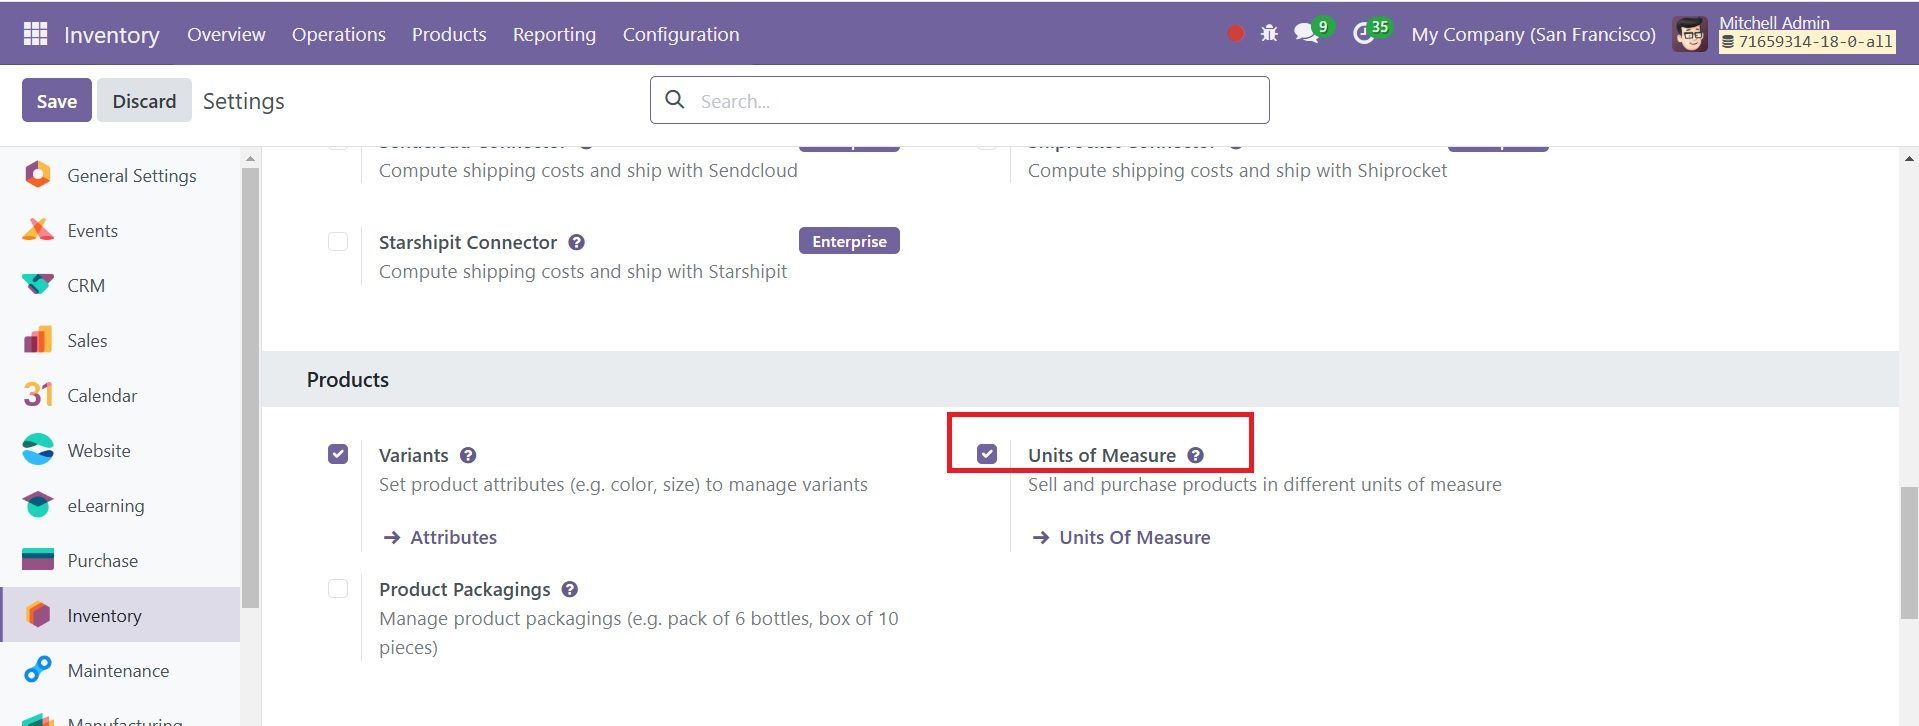
To use different units of measure in Odoo, first go to Inventory app ‣ Configuration ‣ Settings, and under the Products section, activate the Units of Measure setting. Then, click Save.
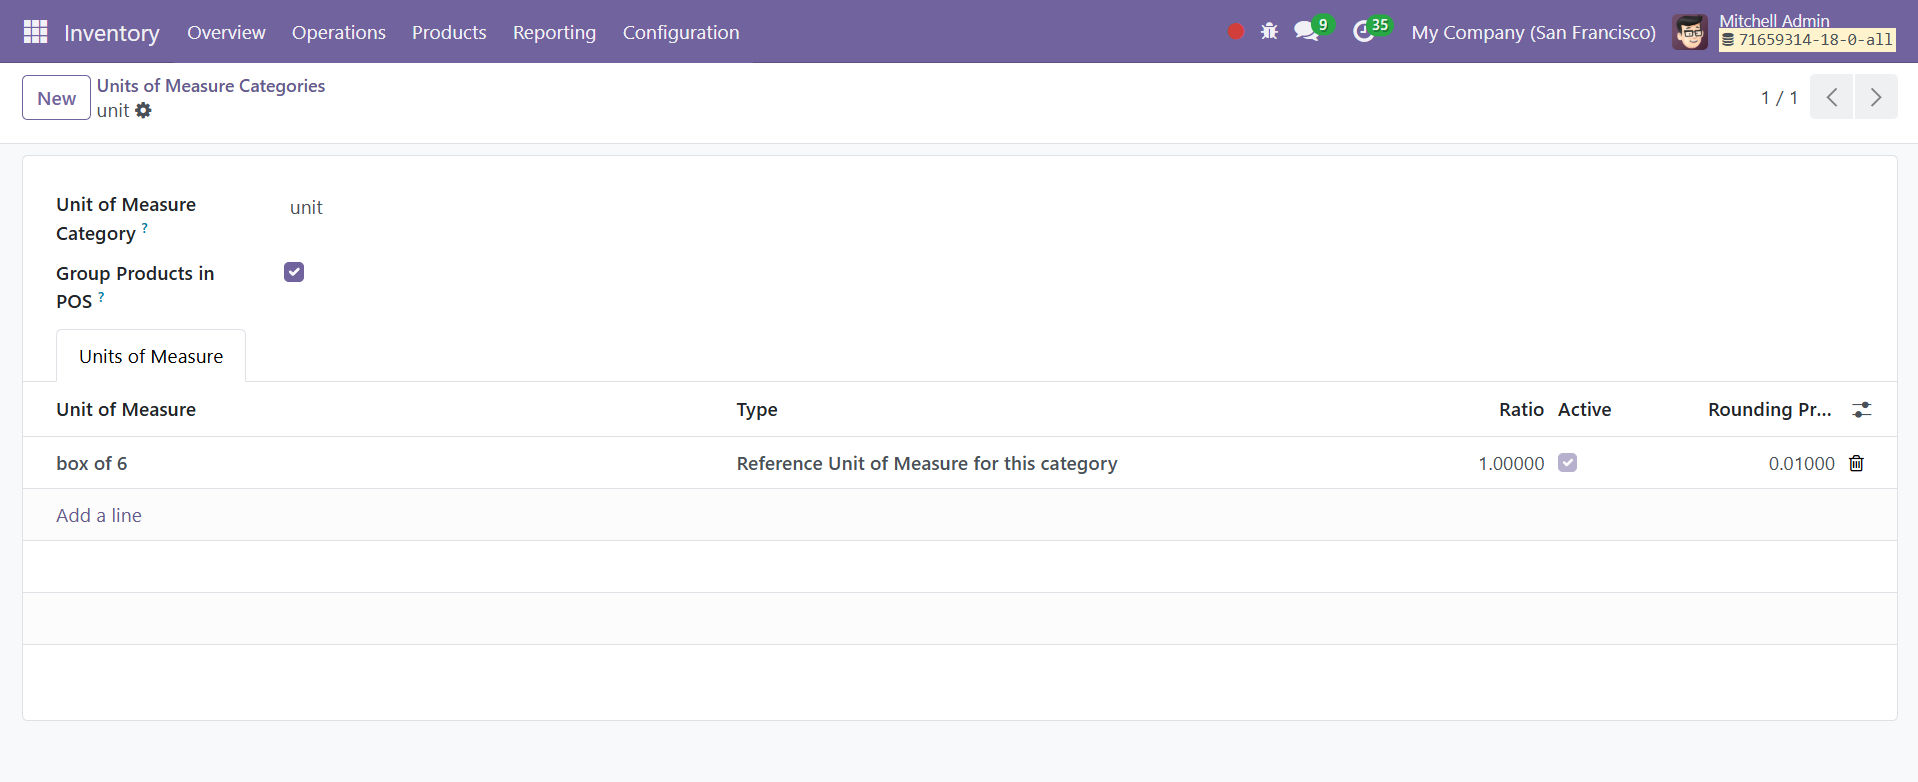
After enabling the Units of Measure setting, view the default units of measure categories in Inventory app ‣ Configuration ‣ UoM Categories. The category is important for unit conversion; Odoo can convert a product’s units from one unit to another only if both units belong to the same category.
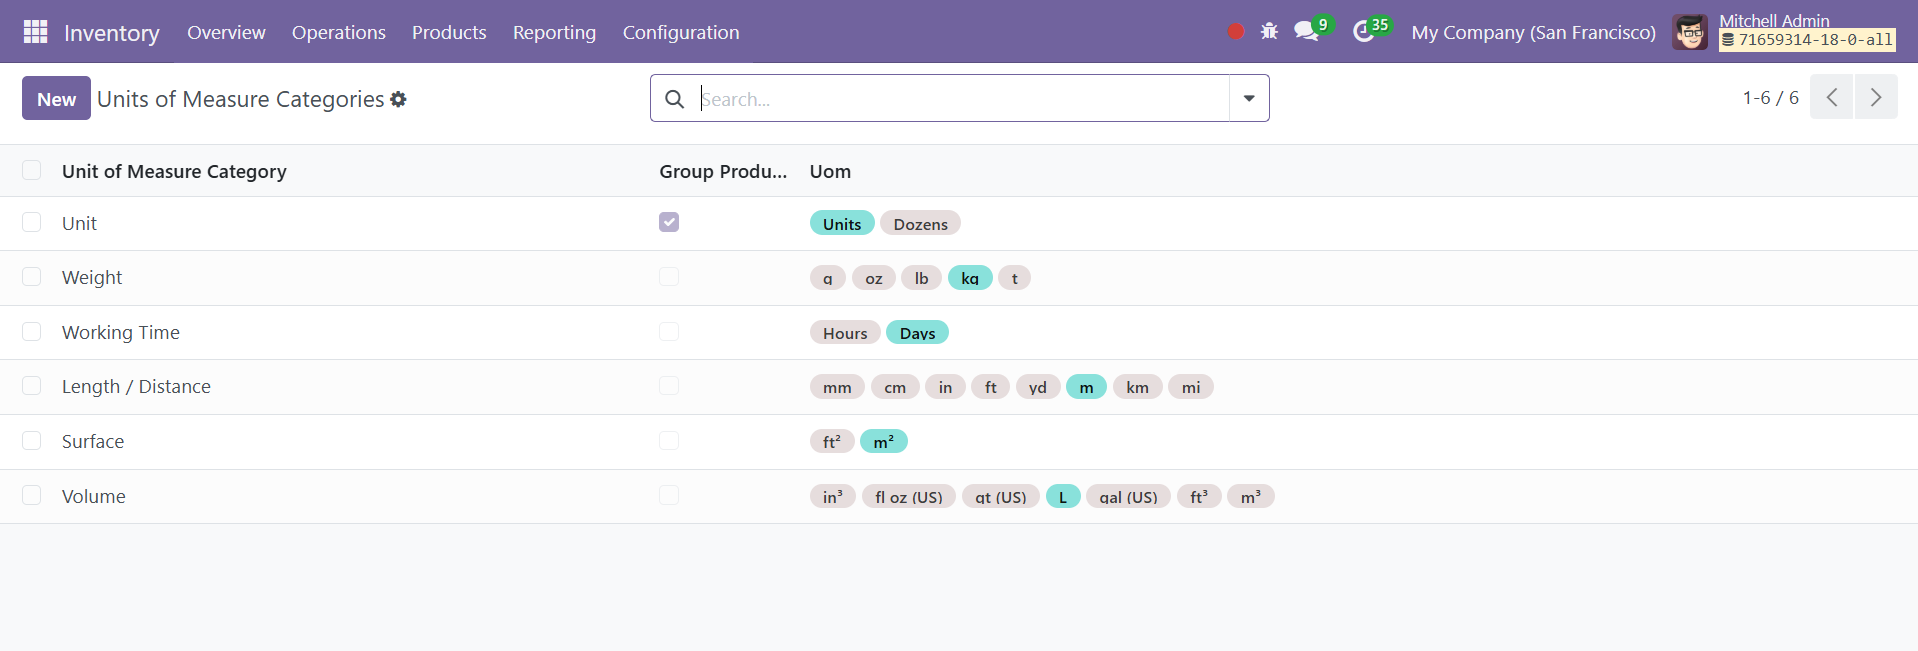
Each units of measure category has a reference unit. The reference unit is highlighted in blue in the Uom column of the Units of Measure Categories page. Odoo uses the reference unit as a base for any new units.
To create a new unit, first select the correct category from the Units of Measure Categories page. For example, to sell a product in a box of six units, click the Unit category line. Then, on the category page that appears, click Add a line in the Units of Measure tab. Then, in the Unit of Measure field, title the new unit, then in the Type field, select the appropriate size reference, such as Bigger than the reference Unit of Measure.