Configuration
Warehouse Management
In terms of a company's inventory control, warehouse management is one of the most crucial duties that needs to be properly planned and handled. The efficient operation of stock management and product transportation depends on warehouse management. The excellent inventory management program Odoo 18 offers a sophisticated platform for managing the operations related to your company's warehouses with ease. Multiple warehouses will be simultaneously monitored and managed by this software.
The Inventory module's Configuration menu's Warehouse Management tab allows you to manage warehouses, locations, routes, rules, operation types, storage categories, and putaway rules.
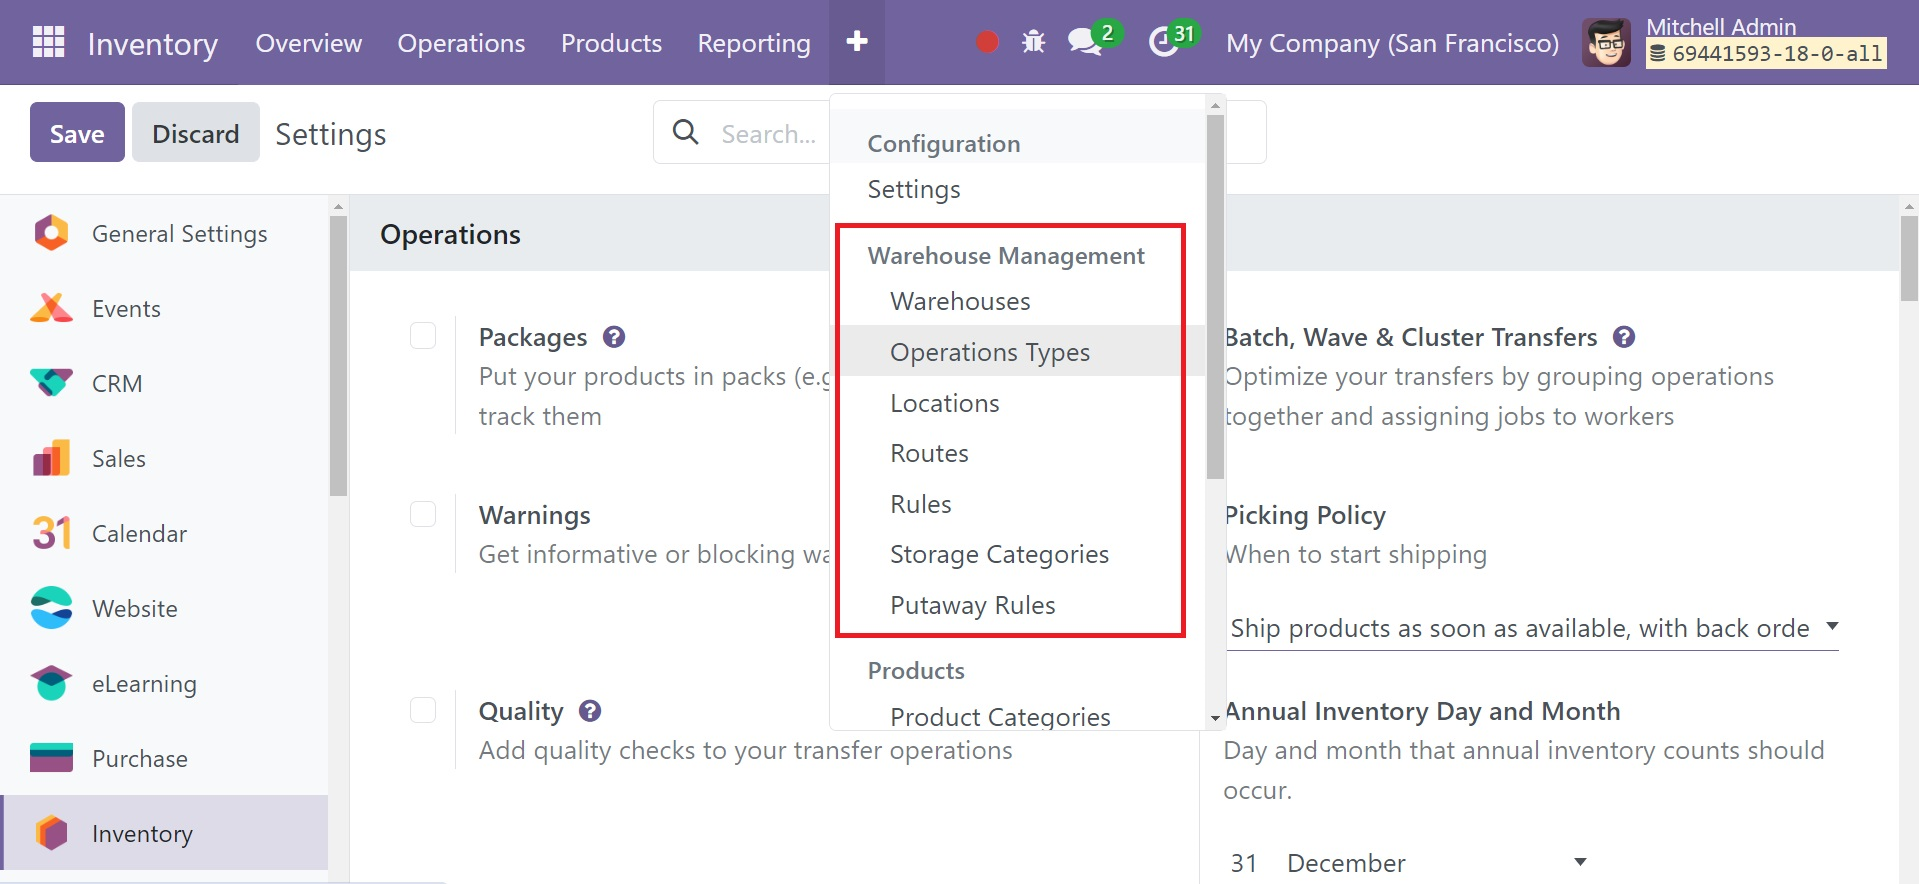
With the help of these alternatives, you may carry out a number of tasks that will simplify warehouse administration. You can make a list of the warehouses that your business owns by choosing the Warehouses option from the Configuration menu.
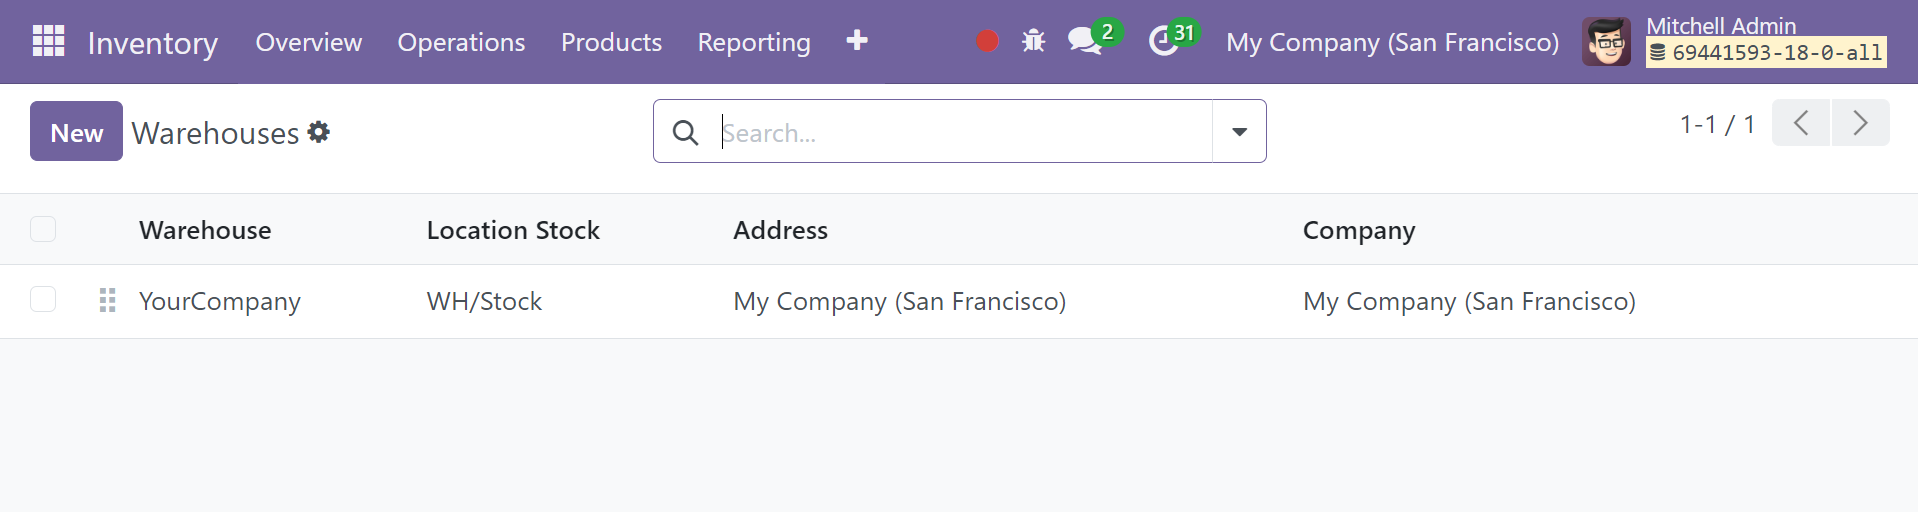
When you select the Warehouse option, the warehouses are shown in a list view like the one in the image above. The list shows the names of the company, address, stock, warehouse, and location stock. Use the New button to create a new warehouse for your company.
In the warehouse form view, you can enter the warehouse's name, short name, company, and location in the appropriate areas. Details about shipments and resupplies can be specified on the Warehouse Configuration tab.

Use the Incoming Shipments field to indicate the incoming path to be followed when shipping the product to this particular warehouse. By choosing the one-step option, users can deliver items directly to the warehouse. Under the two-step option, the product will be received first to an input section and then moved to the relevant stock. The three stages are receiving the items, checking their quality, and stocking them in the proper locations.
The Outgoing Shipments will specify the default outgoing route for an outgoing shipment. There is only one step in the first option: the products are delivered directly from the warehouse. Delivering the items once after they are sent in output section is the second option. In the third option, you have to package the goods, ship them, and finally deliver them.
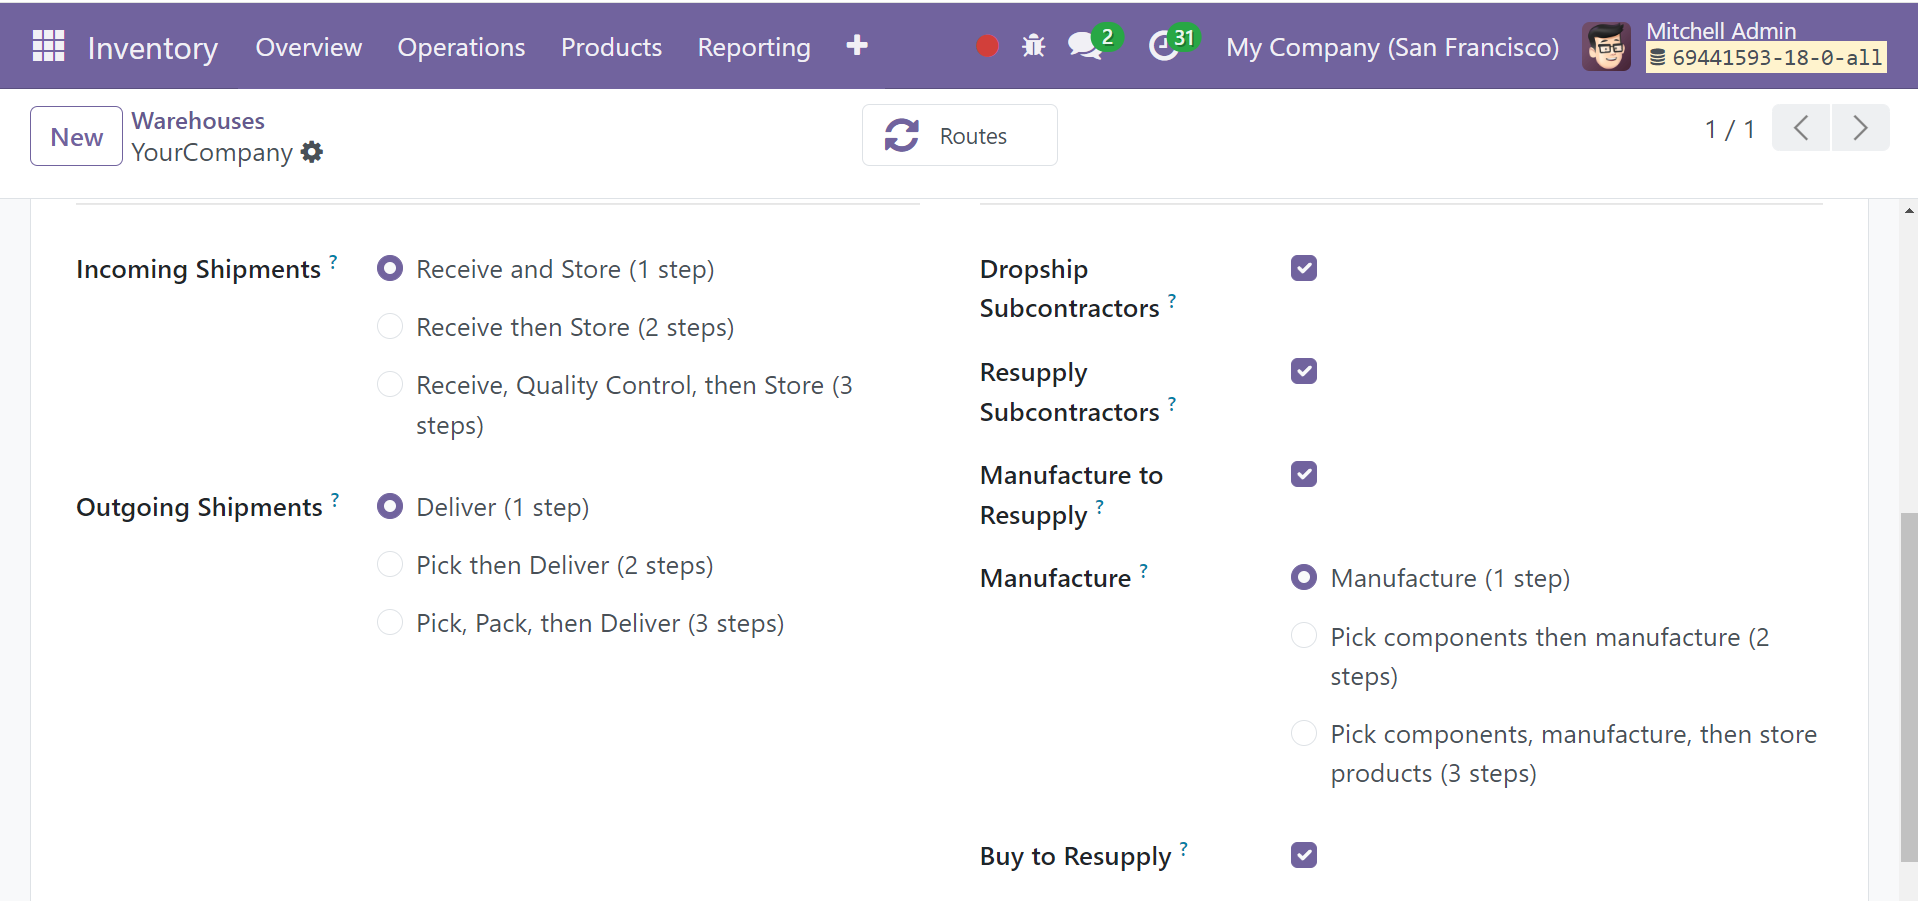
You can enable the Dropship Subcontractor function from the Resupply menu to dropship components to subcontractors. If necessary, you can use the Replenish Subcontractor feature to restock the subcontractors with components. When raw materials are needed, warehouses make it easy to restock them. The create restock option allows you to create a product in the warehouse for restocking when stock runs low.
In the Manufacture area, you have three choices for defining the steps in the manufacturing process. The first option allows you to create the product directly. After unloading the components from the stock to the input point, the second option necessitates moving to the production area for manufacturing. After choosing the parts and having them created, you can use the third technique to keep the products in the warehouse. Raw materials can be bought to be restocked and kept in the warehouse by activating the Buy to Resuppldeby option.
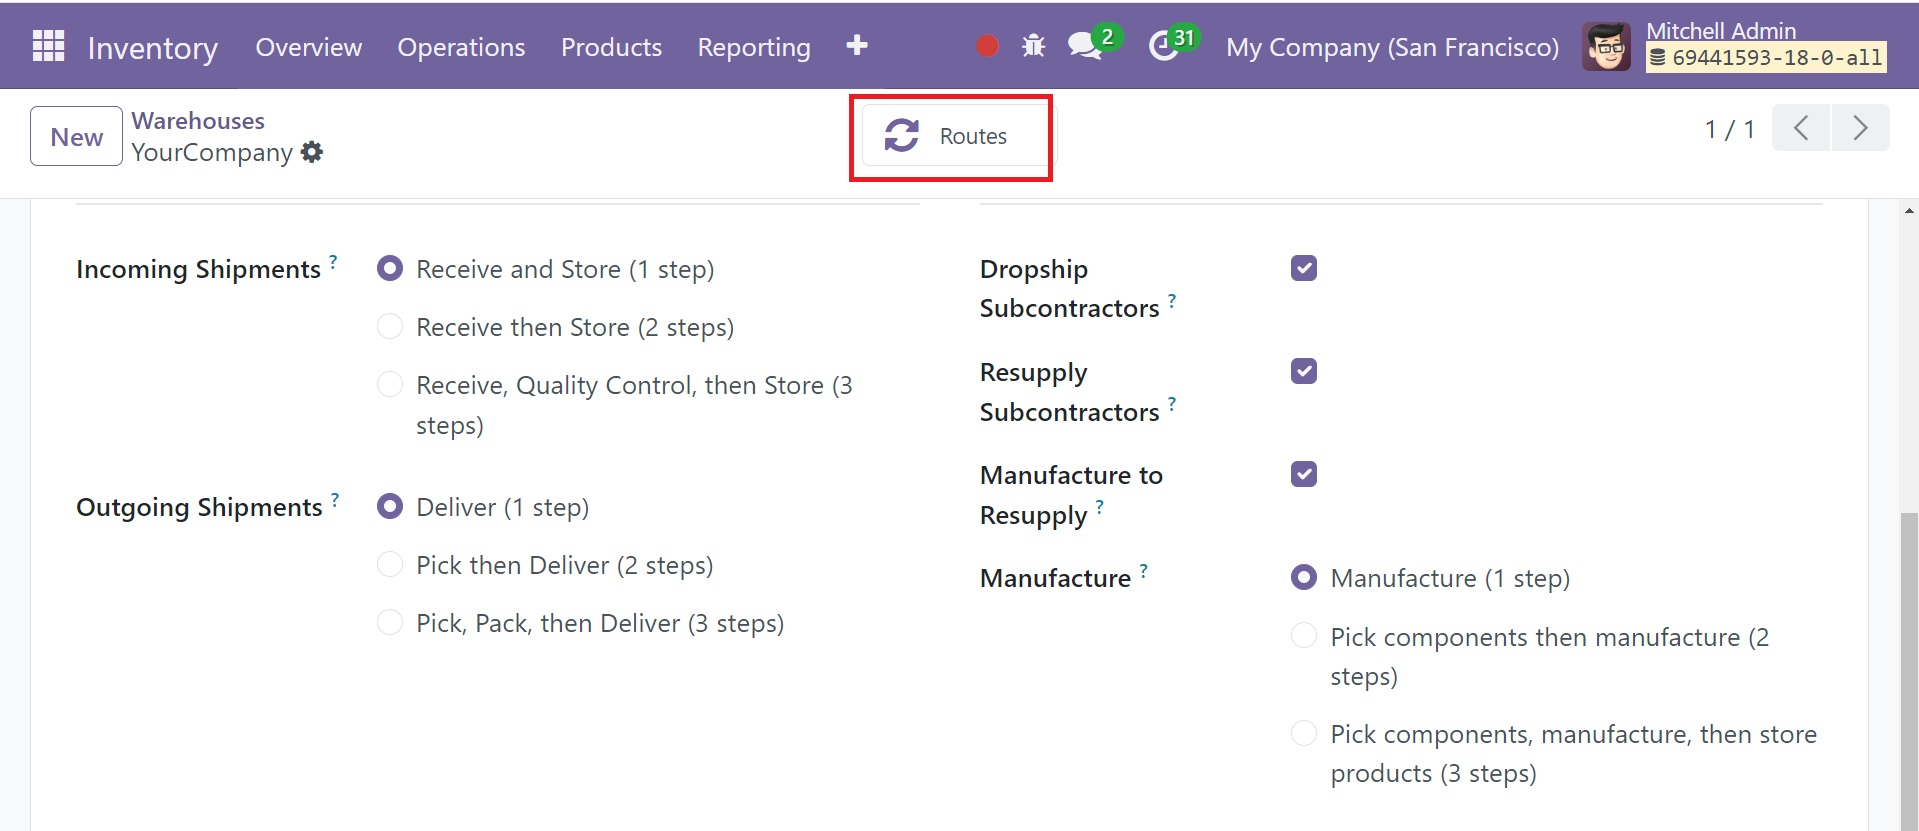
To receive information on the routes utilized by this warehouse for operations, utilize the Routes smart button that is accessible on the page.
Operation Types
With the aid of operations types, you may set up several methods for moving inventories between locations. From the drop-down menu on the Configuration tab, choose "Operations Types."
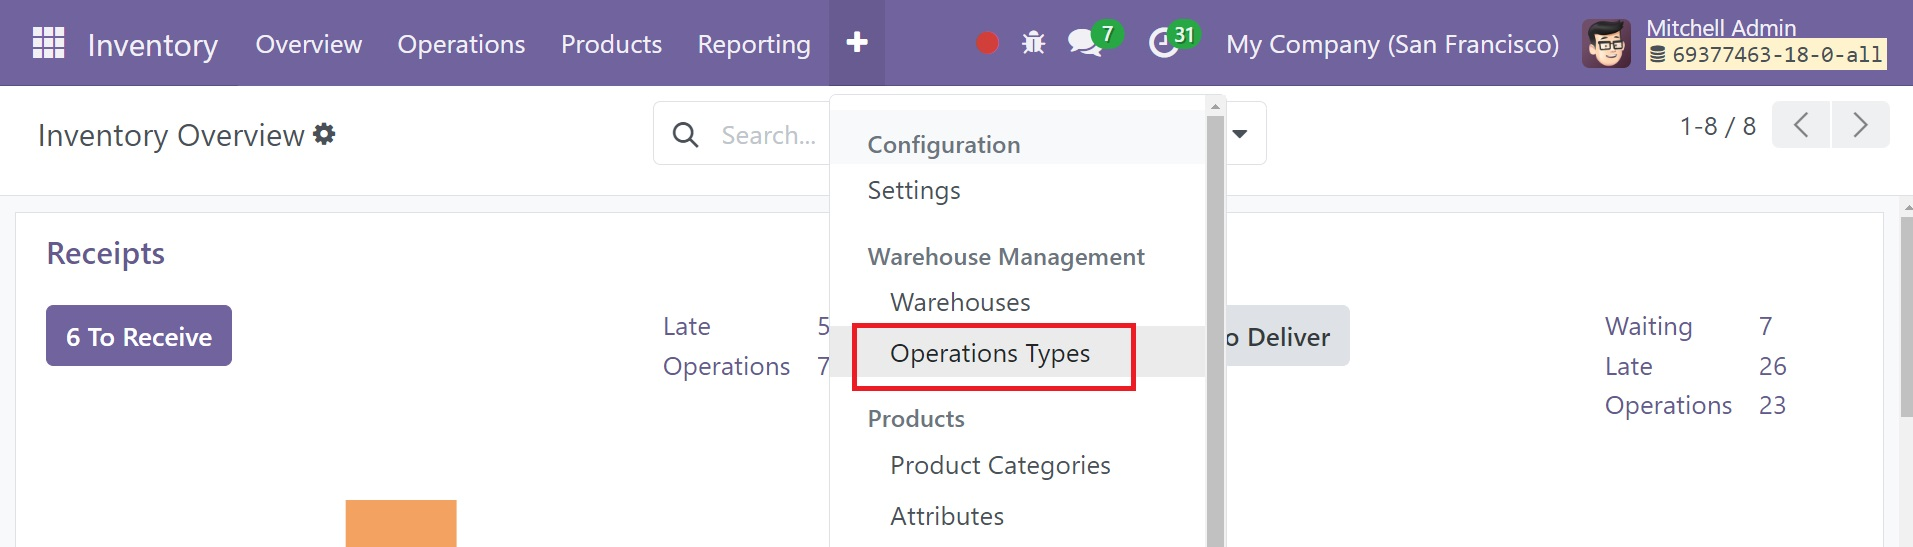
This page shows all of the operation types available in the Inventory module. Odoo's operations types let you set up rules for your route, which are generated for your warehouse automatically and generally don't require any changes. Click on a single record to update it.
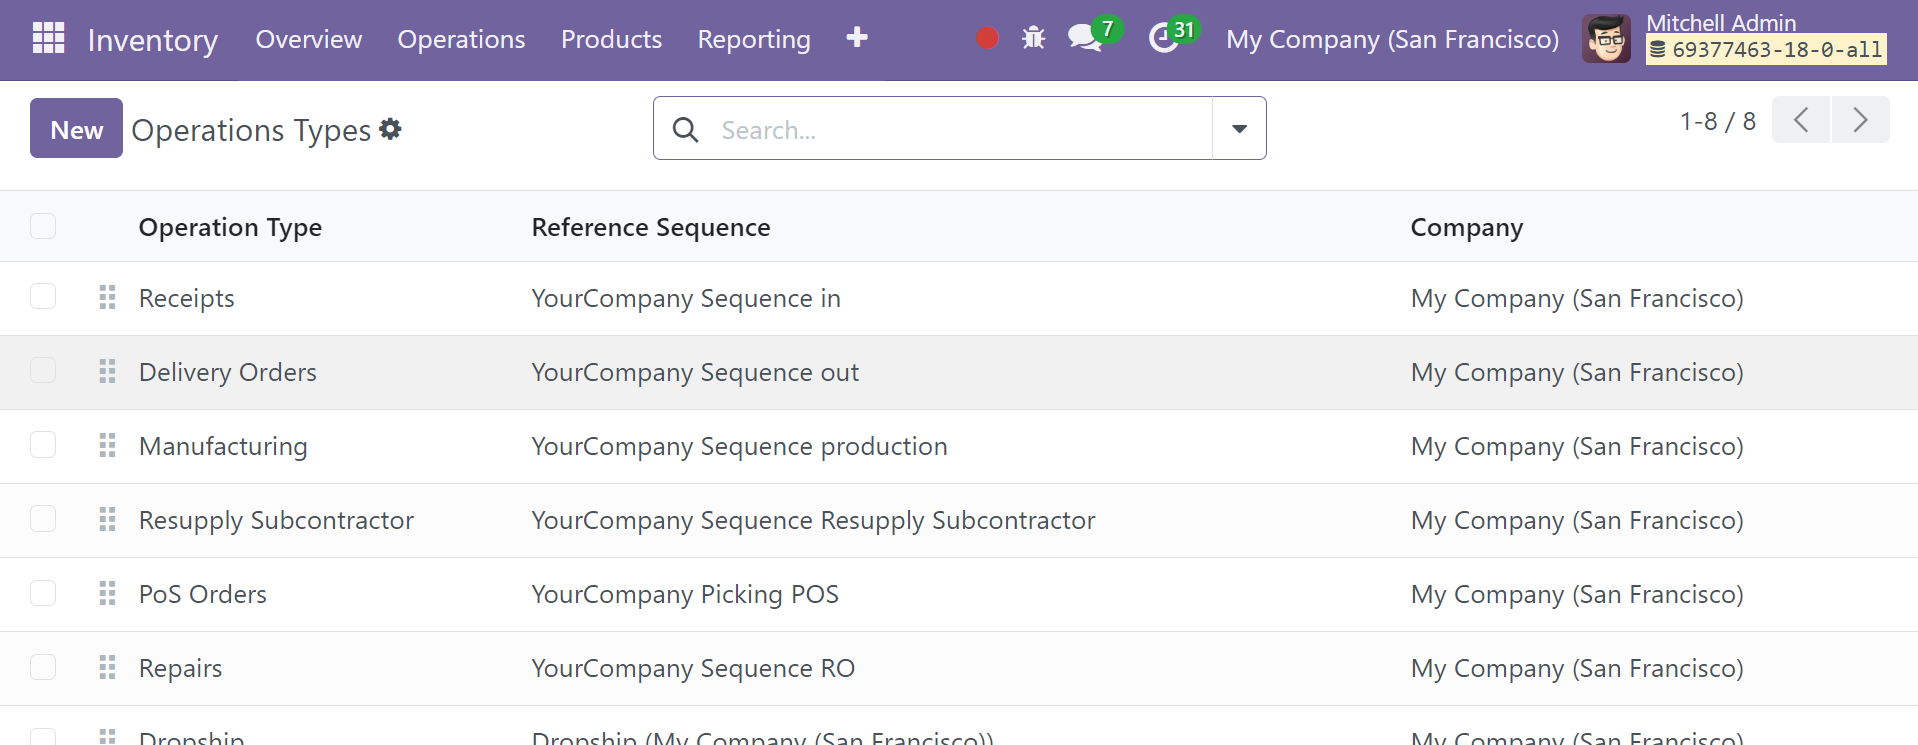
Click the New button to create a new operation type. You will see the window that opens when you choose "New."
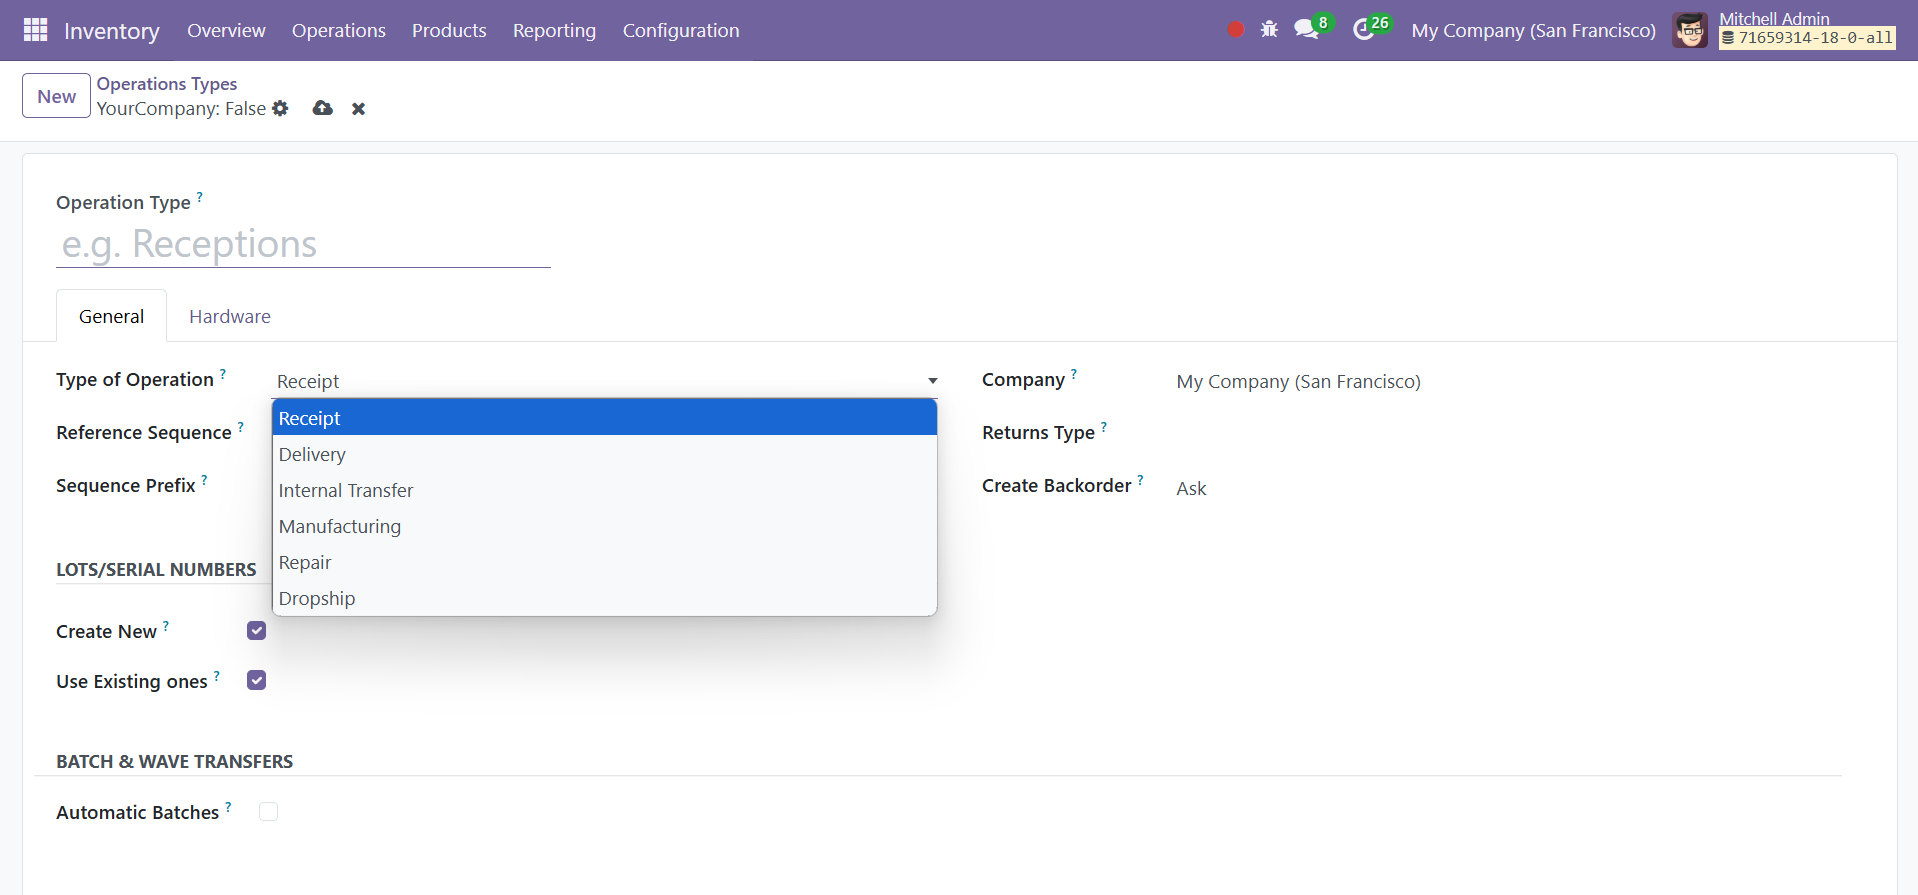
Give the operation type a name in the appropriate box. The "Type of Operation" dropdown list shows four options: Manufacturing, Internal Transfer, receipt, delivery, repair, and dropship.
Receipt: Product receipts from suppliers and customer returns are all recorded using this operation type in the warehouse.
Delivery: This kind of operation is used to document the delivery of goods from the warehouse to a client and a return to a supplier.
Internal Transfer: Product transfer within the same warehouse or across warehouses is accomplished with this type of operation.
Manufacturing: In order to manufacture final goods from raw materials, a production order is created using this technique.
Repair: In the unlikely event that a product is returned after delivery to repair, this category enables us to generate repair orders.
Dropship: One kind of dropship enables vendors to transport goods straight from suppliers to clients.
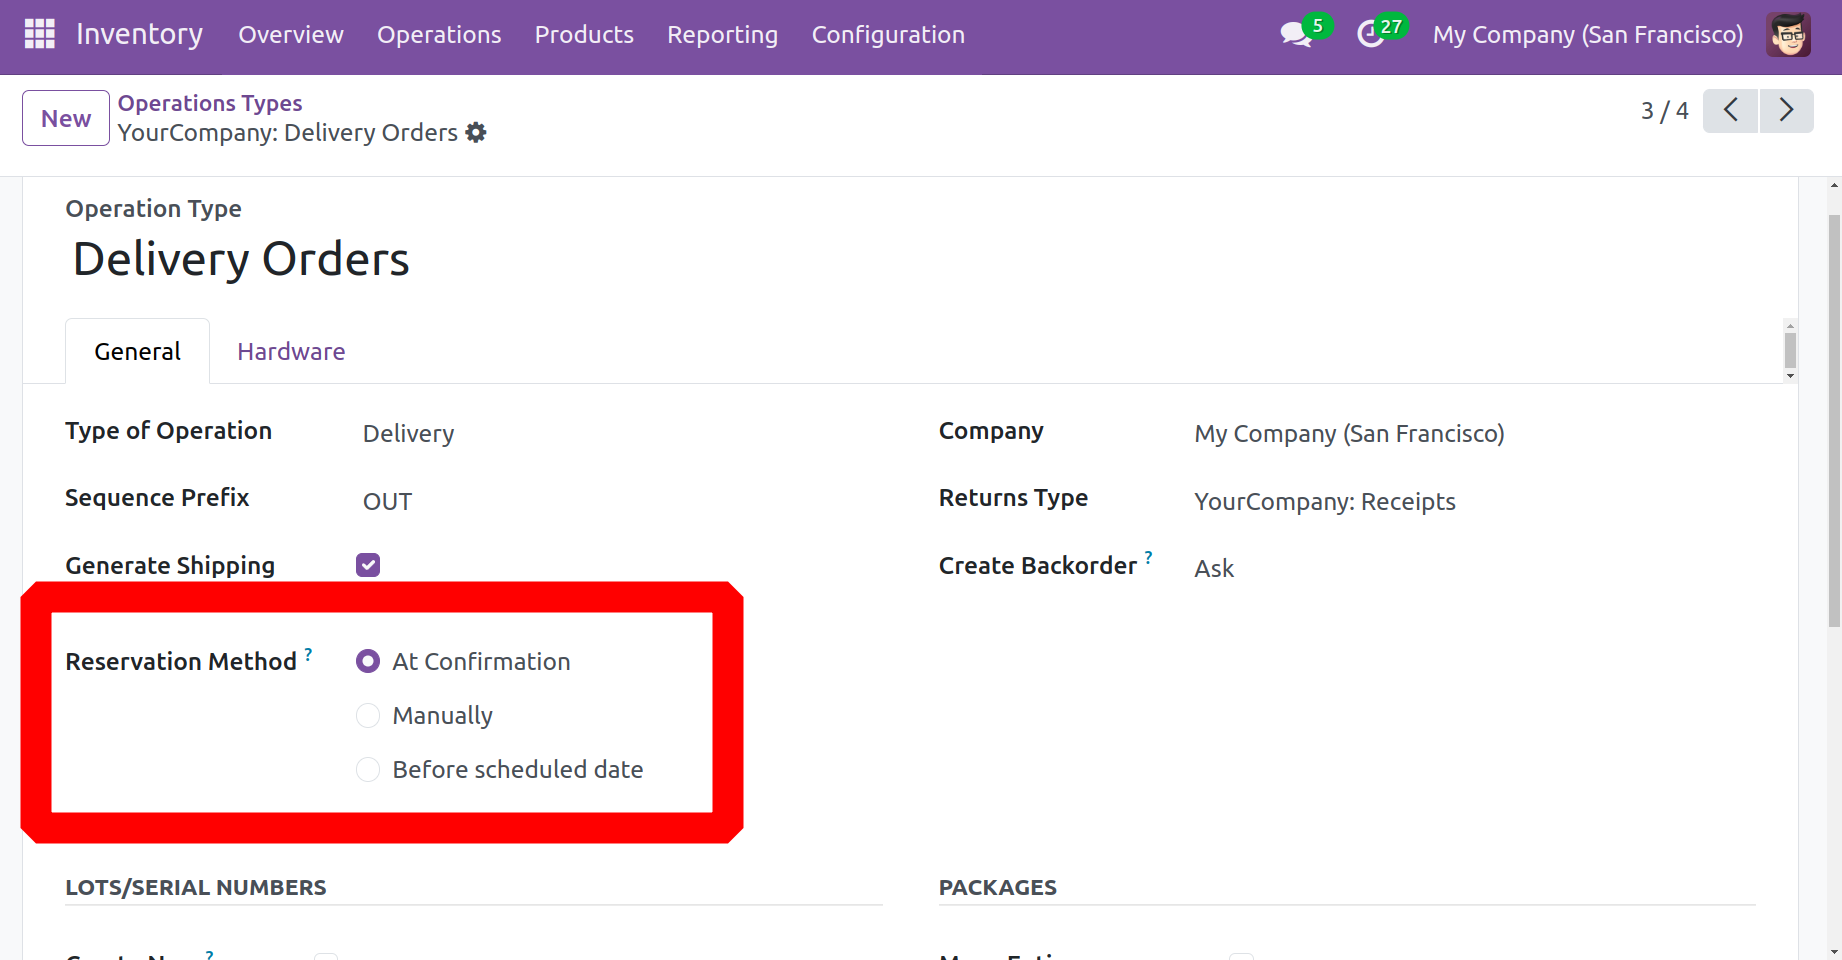
Select the right Type of Operation from the list of possibilities. Depending on the Operation Type you select, the fields will change. Put Sequence Prefix in the appropriate field. The Reservation Method parameter will specify how products are reserved in transfers of this particular operation type. Product reservations can be made manually, upon confirmation, or in advance of the planned date. You will notice an additional field where you can enter the date if the reservation is made prior to the planned date. The name of your business will show up automatically in the Company section.
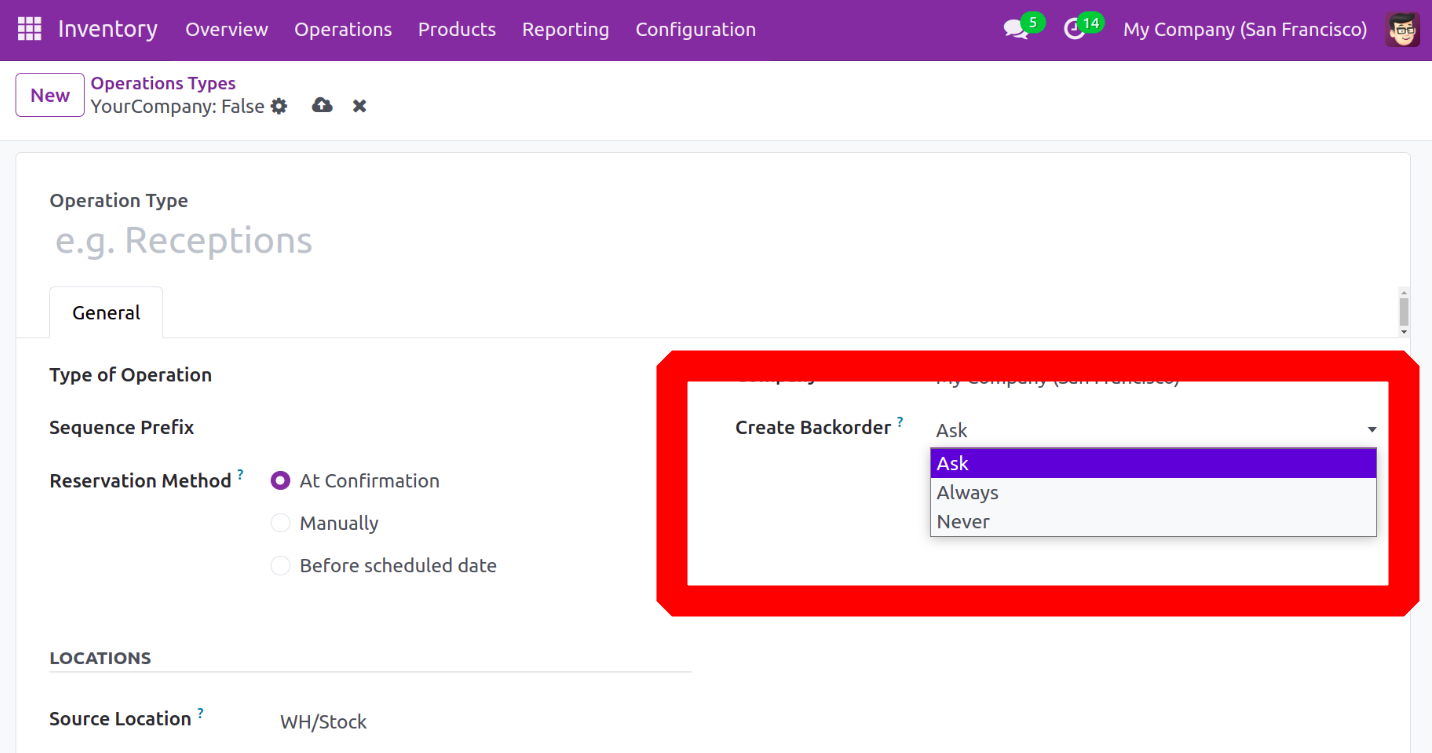
The Create Backorder box allows you to specify how backorders should be created while a transfer is being validated. A backorder in Odoo is an order for products or services that cannot be delivered right away because of limited inventory or other issues
When users select the Ask option, they are asked if they want to make a backorder for the remaining items. The Always option will create backorders automatically for the remaining products. The remaining items will be canceled if the Create Backorder as Never option is selected.
For the products of this operation type, set the Default Source and Default Destination Locations in the Location section.
Indicate if specific operation types (such as shipping or receiving items) should have the option to generate new serial numbers or utilize the current ones enabled. Stated differently, this configuration enables the tracking of serial numbers on delivery orders and warehouse receipts. Choose the relevant operation type (such as manufacturing, delivery orders, or receipts) from the Operations Types page.
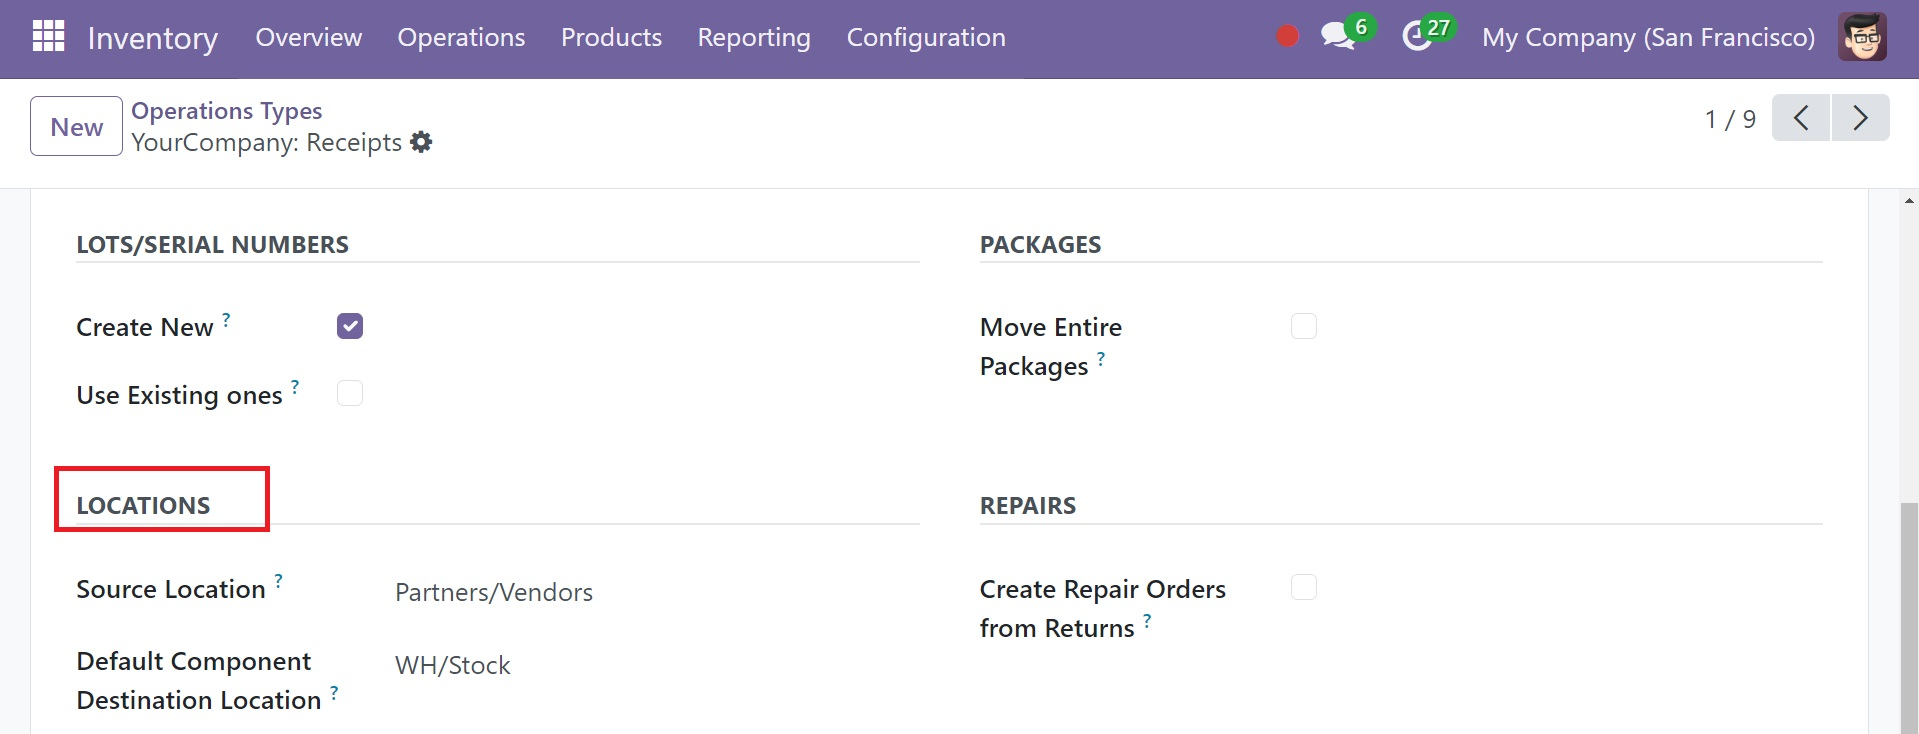
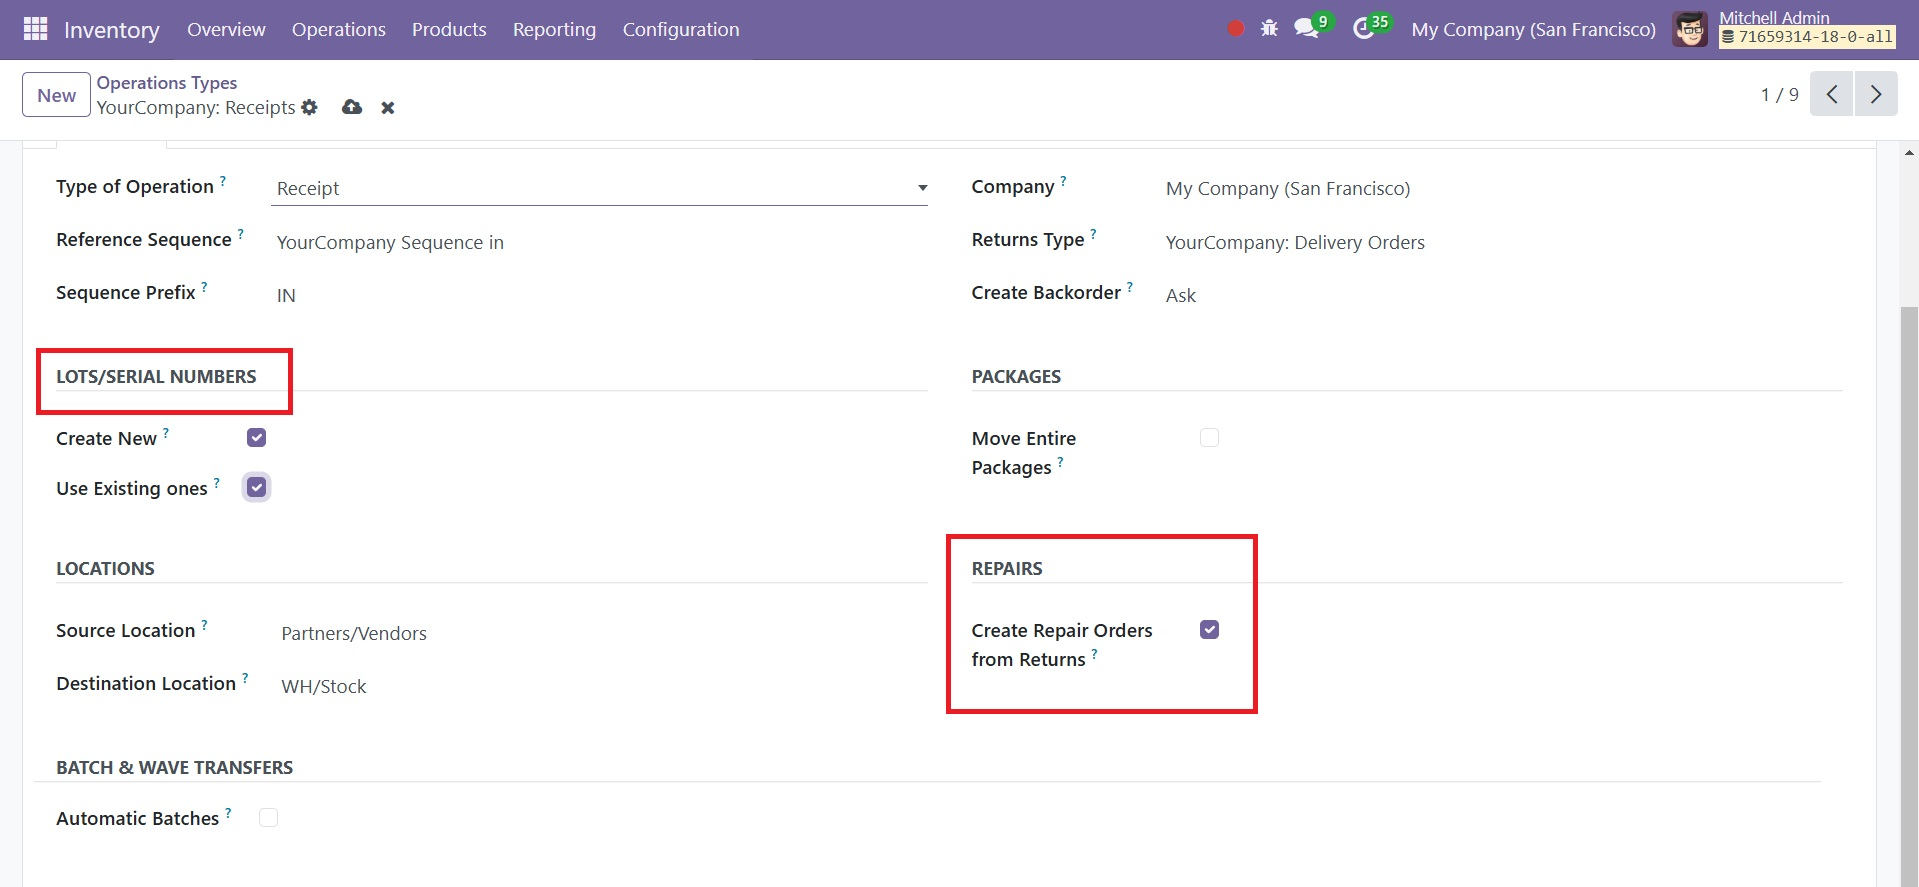
Then, under the Lots/Serial Numbers part of the operation type's setup page, choose the Create New option. Here, you can utilize a Create New option and Use Existing One, as in the screenshot below. By selecting the "Create New" or "Use Existing Ones" options, Odoo enables the production of new lots or serial numbers for product transfers as well as the use of existing lots or serial numbers for product transfers.
The "Reservation Method," is shown in the delivery. Which can be carried out manually, upon confirmation, or before the scheduled date, establishes how commodities in transfers of this operation type should be retained. Next, enter the "Company," "Type of Returns," and "Default returns location." In the "Create Backorder" column, users can choose the "Ask" option to place a backorder for unsold products. If you select Never, Odoo will automatically create a backorder for the remaining items or cancel them.
Under the Repairs option, By selecting the "Create Repair Orders from Return" option, we may activate the functionality that allows us to create repair orders in circumstance that a product is returned after delivery.
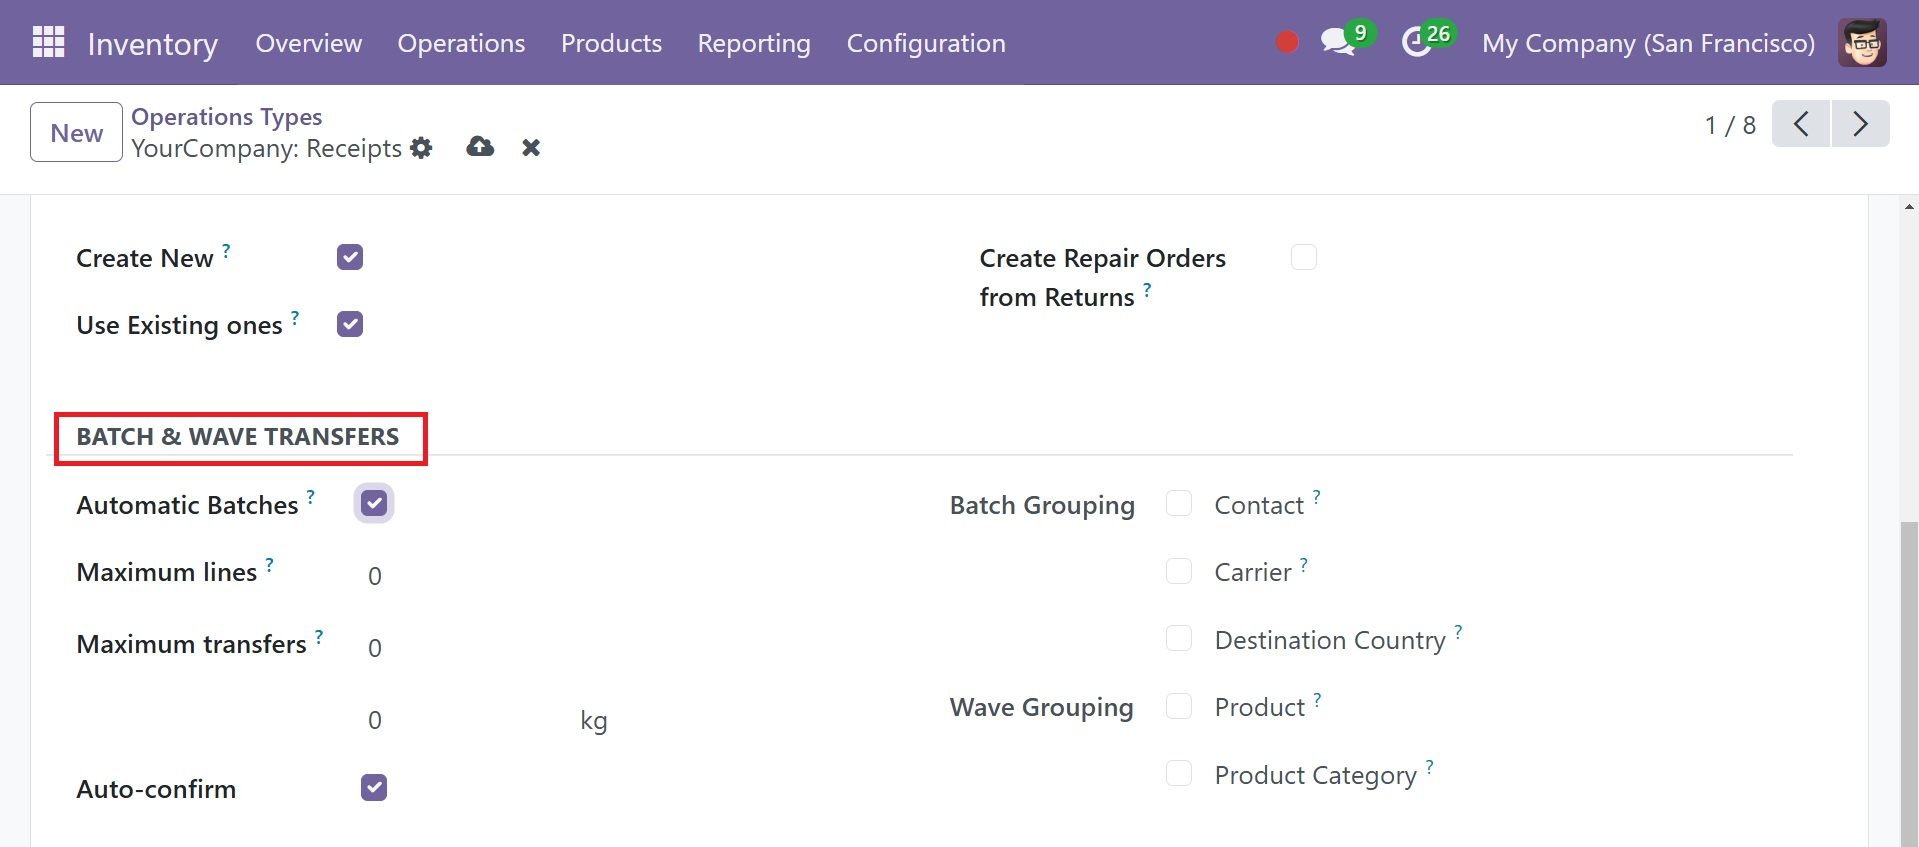
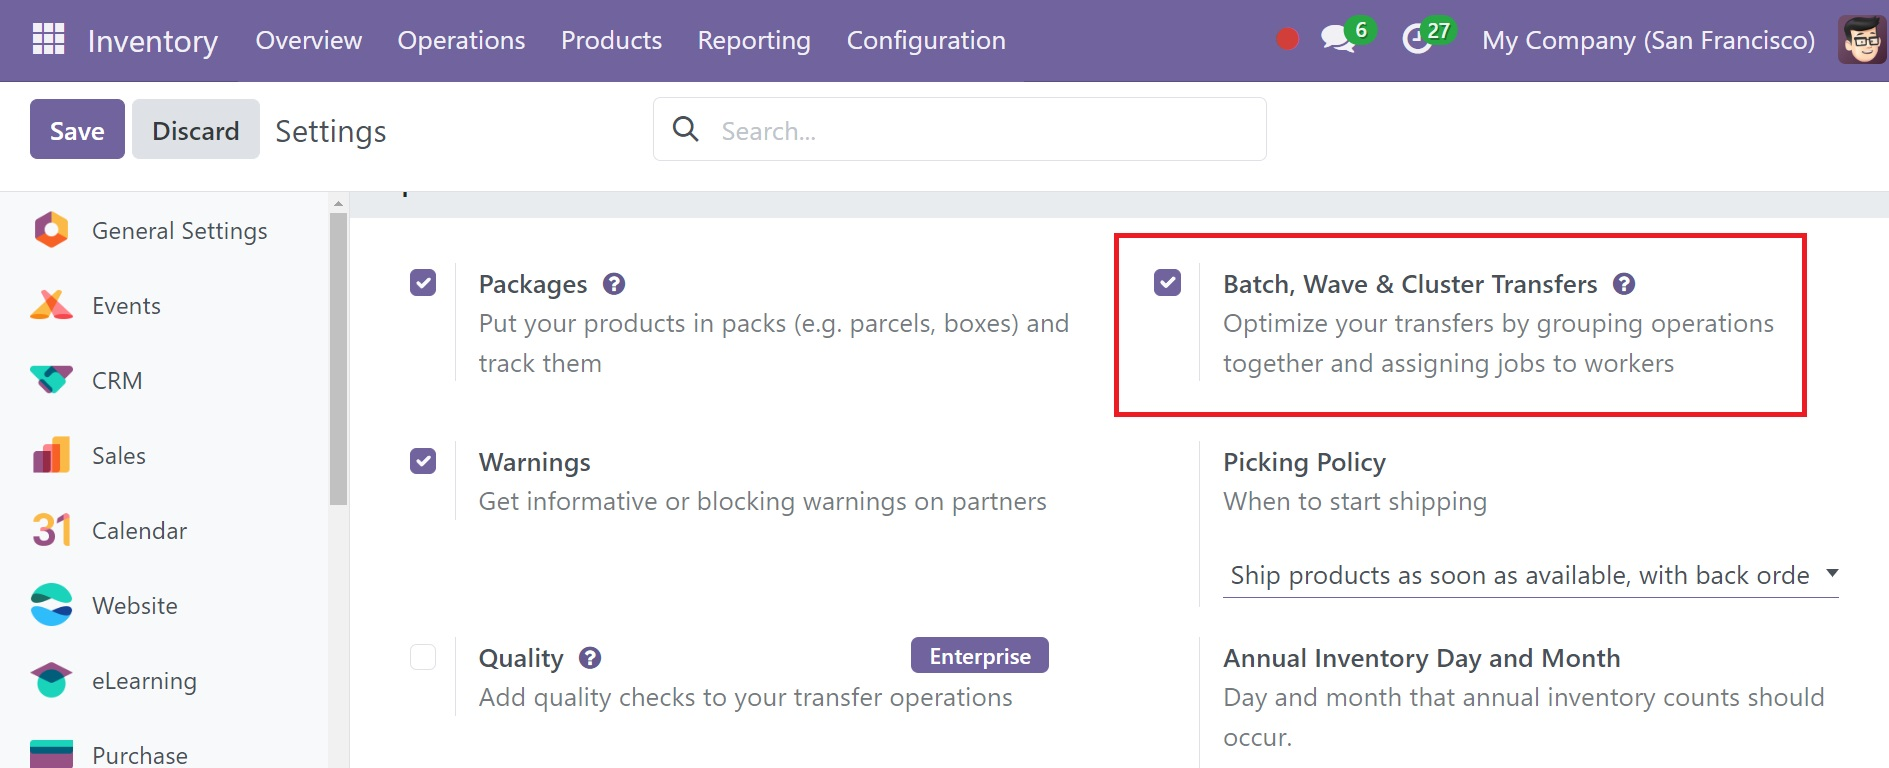
Below that, there is a Batch and Wave Transfers option, as in the screenshot below.
To get this option inside the Operation Types first need to enable the Batch,Wave & Cluster Transfer from the Settings as shown in the below screenshot.
We can activate the "Automatic Batches" option to create product batches. Users can also configure the "Maximum lines per batch" and "Maximum transfers per batch" with Odoo's assistance.
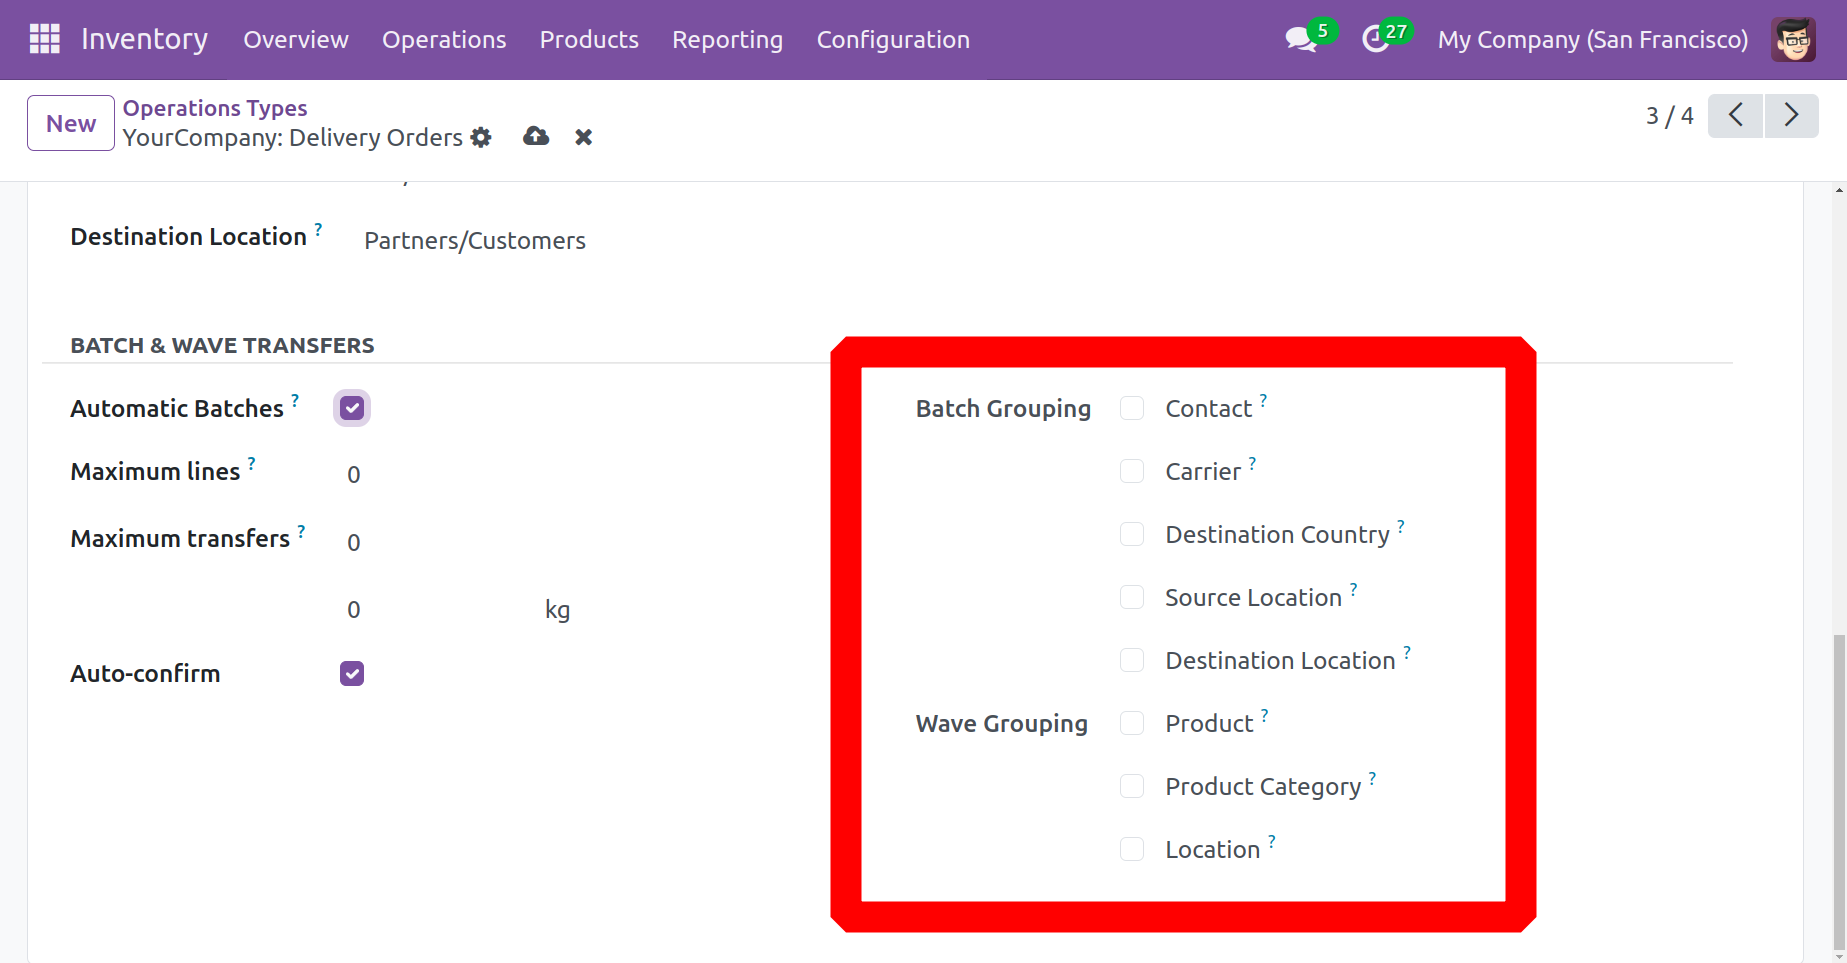
The maximum number of lines per batch to carry out the batch transfer process and the maximum transfers that may be made for this particular batch are both specified with the aid of these fields. By turning on the "Auto-confirm" button, you can also have the transfer confirmed automatically.
Users can create a batch grouping on the basis of Contact, Carrier, Destination Country, Source location, and Destination Location. Wave grouping is possible on the basis of Product, Product Category, and Location. Save the data once the form has been filled out. Your Odoo Inventory database will now store the updated Operation Type.
Locations
The Odoo Inventory module's places platform allows users to configure the places inside the warehouses where products are intended to be placed. This platform allows you to place your stocks in different areas of the same warehouse. To activate this feature, go to the Settings menu of the module and, as shown below, choose the Storage Locations option from the Warehouse tab.
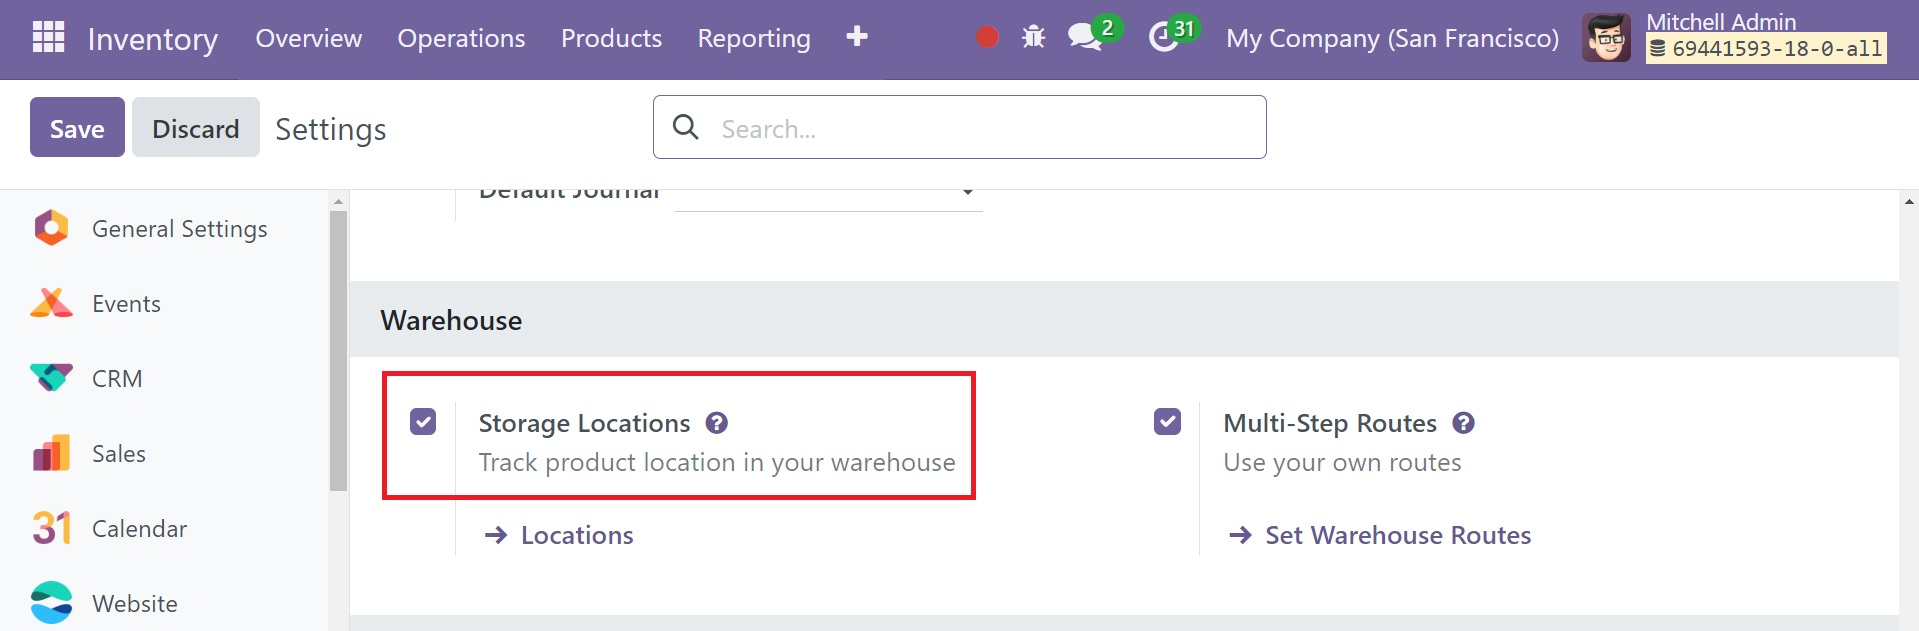
As soon as you enable this option, the Configuration menu's corresponding submenu will display.
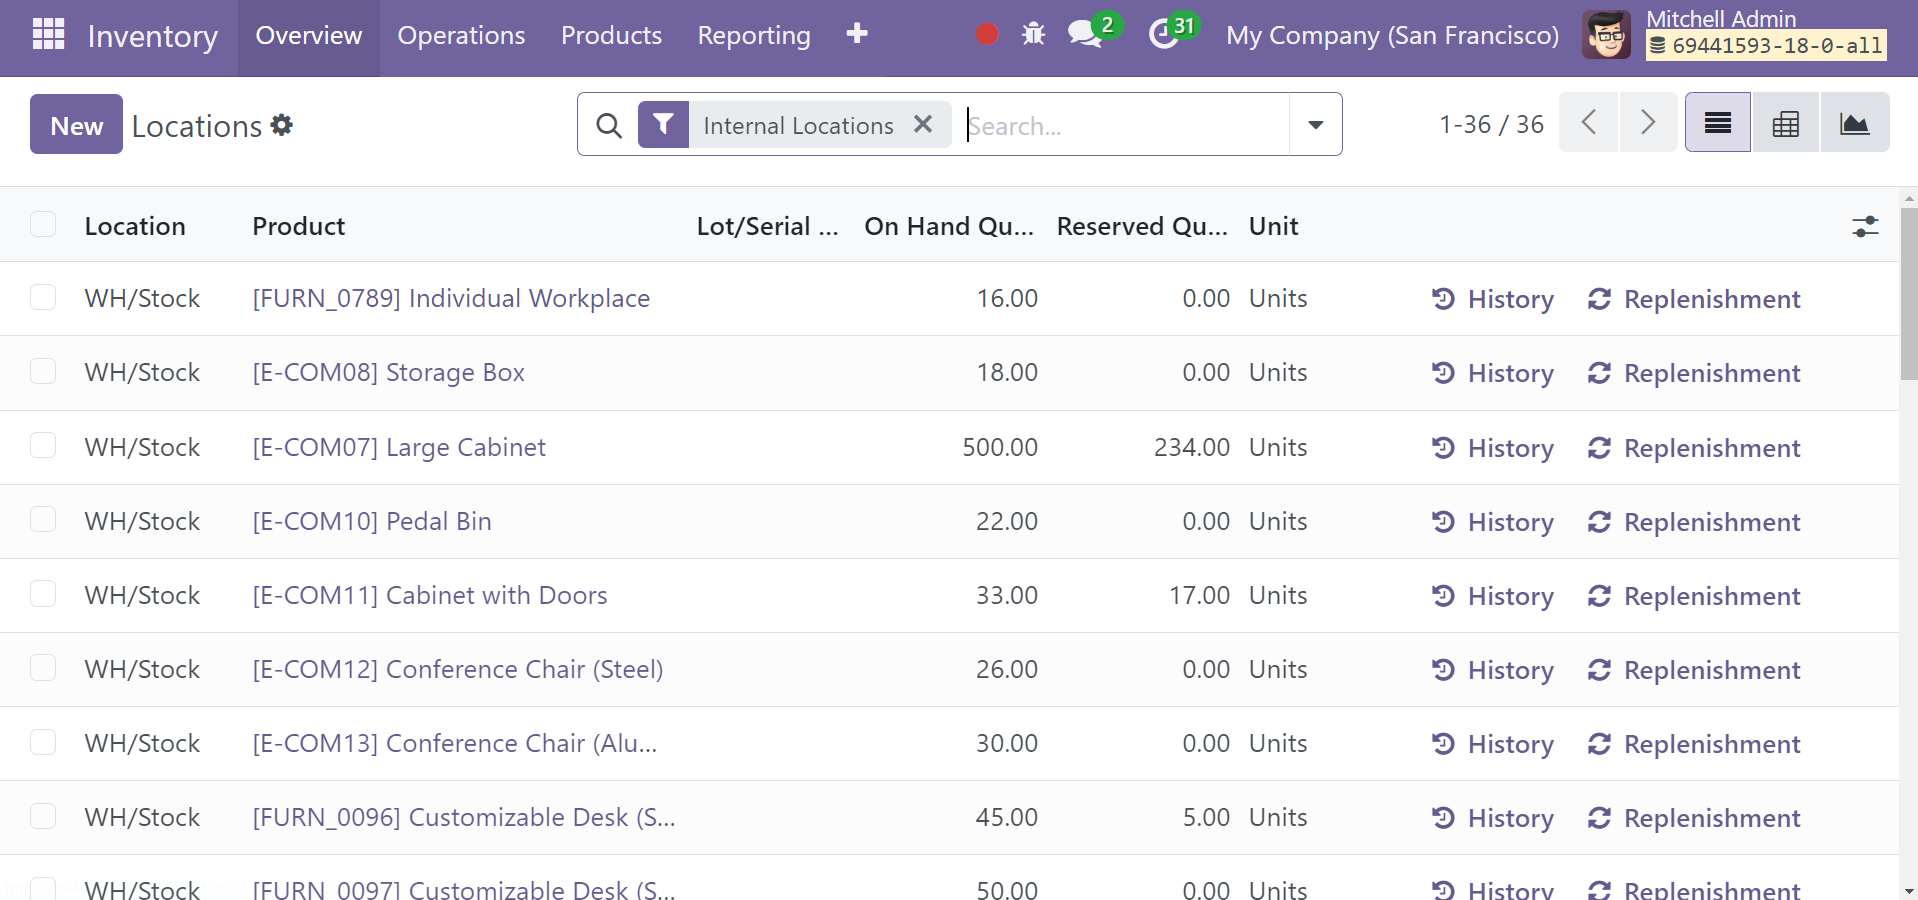
As can be seen in the above image, the list view shows details about the Location, Location Type, Storage Category, and Company. Use the New button in the Inventory section to create a new location.
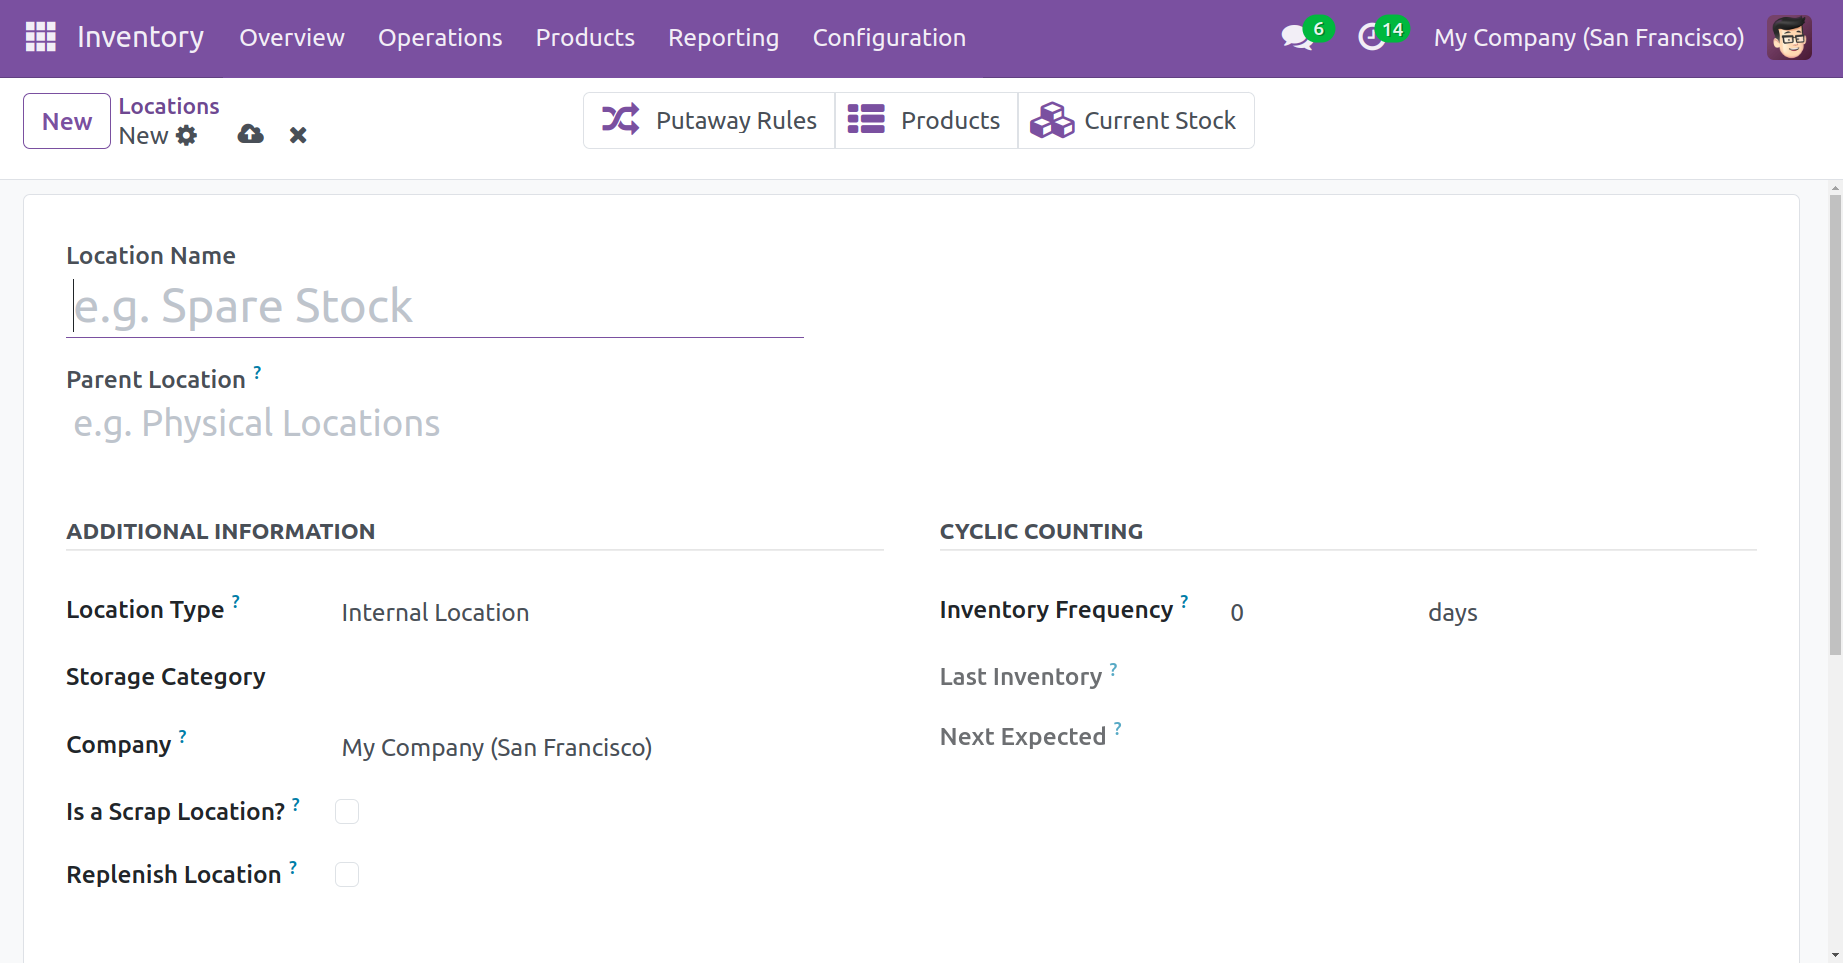
The form view of the new location creation window looks like this. In the Location Name field, name the location, and in the Parent Location field, enter the location. On the Additional Information page, you can select the site type that is most suited for this site. A list of the potential location types is shown below.
● Vendor location: This kind of location is where goods that are bought straight from suppliers are found.
● View: This virtual place can be used to organize your warehouse in a hierarchical manner, even if it is unable to hold items directly.
● Internal Locations: The internal locations of your warehouse are the actual, accessible areas.
● Customer Location: This is another virtual location where items believed to be delivered to customers are believed to arrive.
● Inventory Loss: This virtual location mirrors inventory procedures to maintain stock levels and for scrapping.
● Production: Production procedures are conducted at this virtual counterpart site. Components taken to this location can be used to create finished goods.
● Transit site: In intercompany or inter-warehouse activities, the Transit Location functions as a counterpart location.
Enter the location's Storage Category and Company in the appropriate fields. By checking the "Is a Scrap Location" option, you can designate this area as a storage area for scrap and broken products. If you want to store returned items at this location, you can activate the Is a Return Location option. Select the Replenish Location option in order to refill all quantities at this exact location.
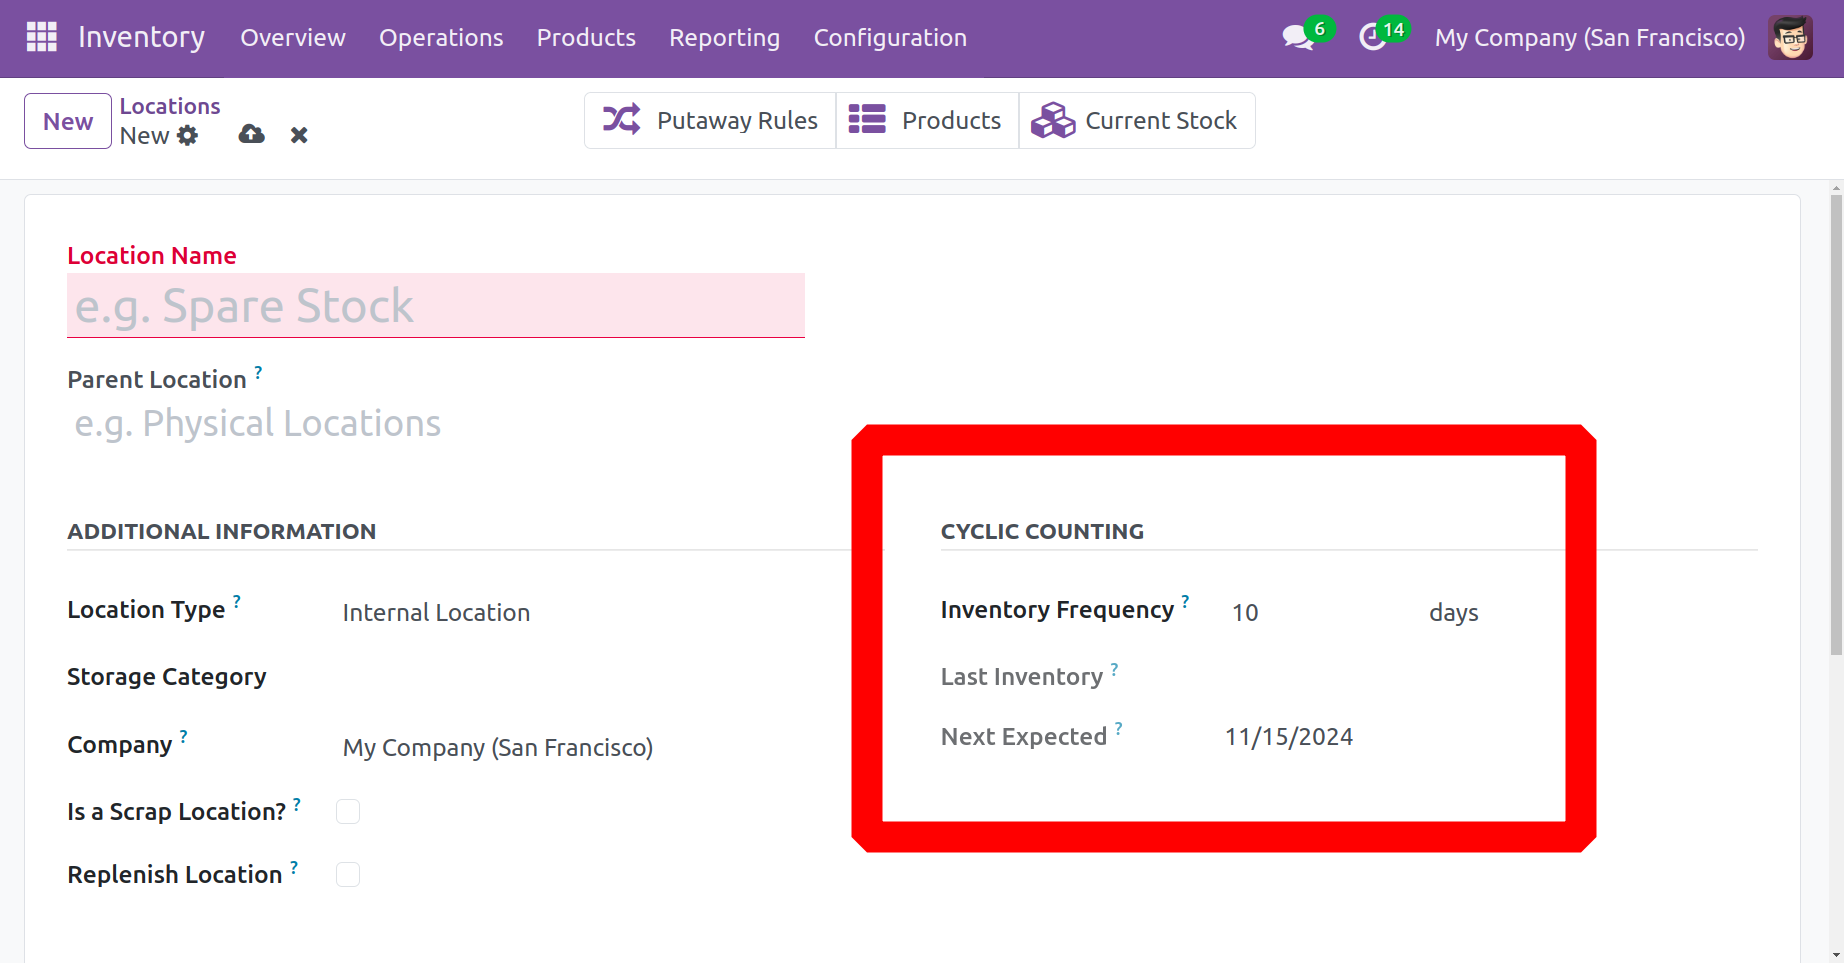
On the Cyclic Counting tab, you can change the Inventory Frequency. If the difference is more than zero, the inventory count date for the products stored here will be automatically set at the designated frequency. The date of the most recent inventory at this location will be shown in the Last Effective Inventory column. The date of the next scheduled inventory based on the cyclic schedule will be shown in the Next Expected Inventory field.
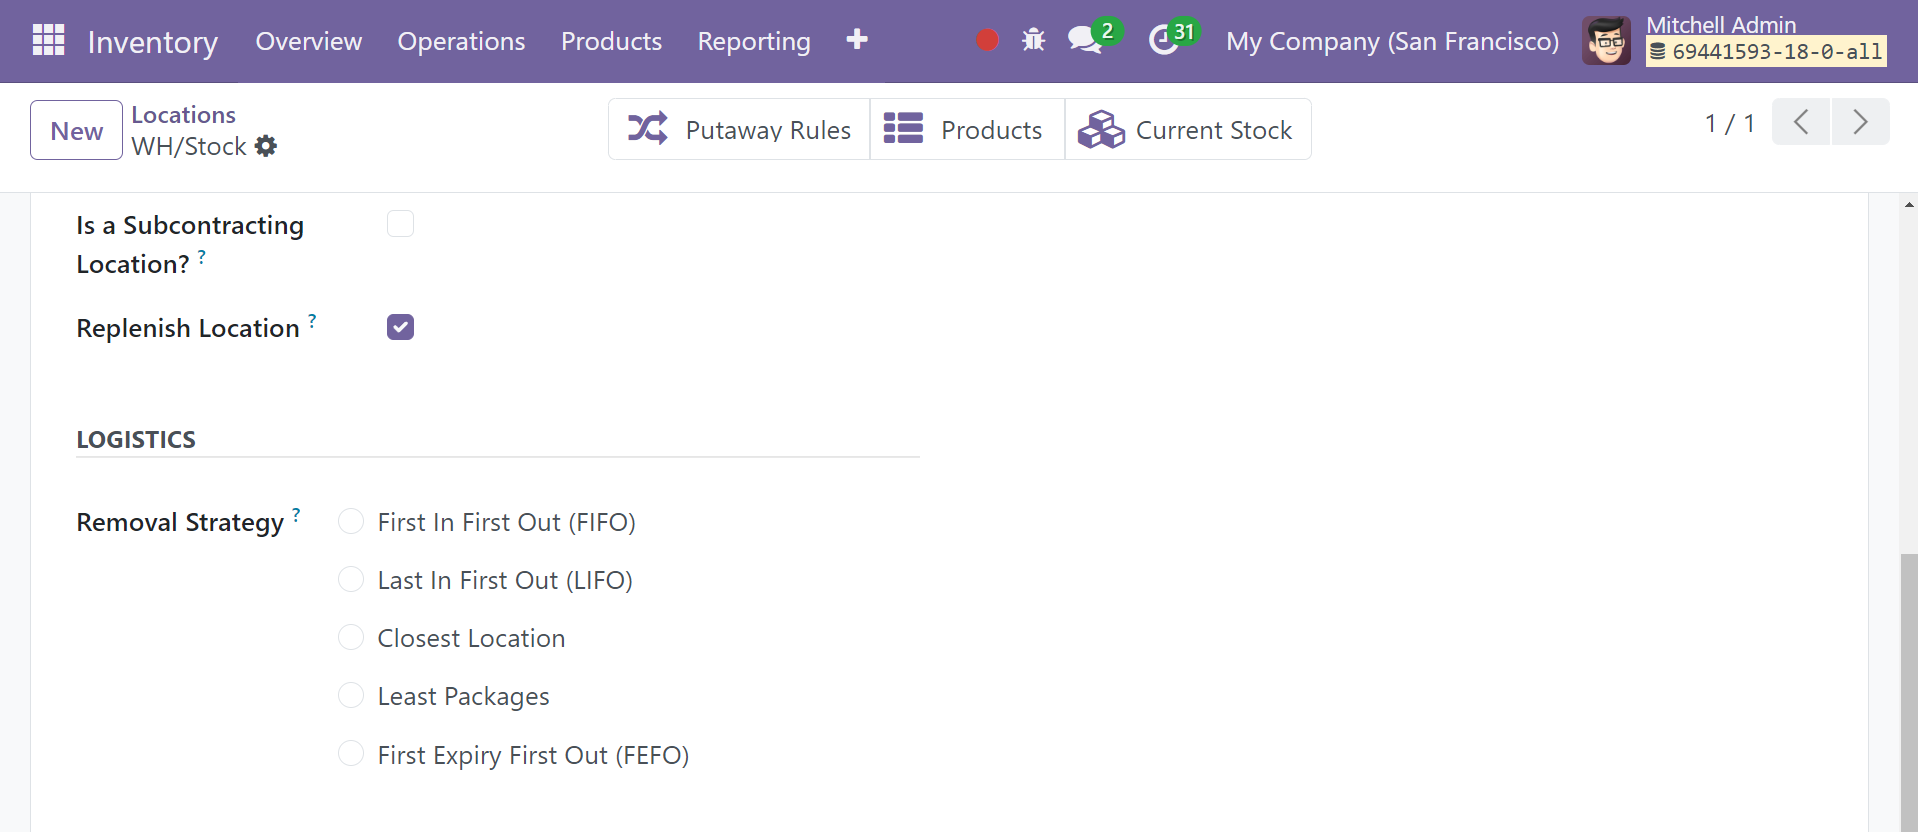
The Removal Strategy for this place is defined under the Logistics tab. It will outline the normal process for recommending the exact site for this facility's product pickup, lot, etc. A fallback is used at the product category level, where this strategy can be enforced, in the event that no parent locations are supplied here. The available removal methods include
● FIFO: The products or lots that are first stocked will be the first to be taken out.
● LIFO: Products or lots that are last stocked will be taken first.
● FEFO: First to be eliminated are the goods or lots that are closest to their removal date.
● Closest Location: The products and lots closest to the target location will be eliminated first.
● Least Packaging: Items might be affixed to packaging. As a result, the small package will be removed from stock first.
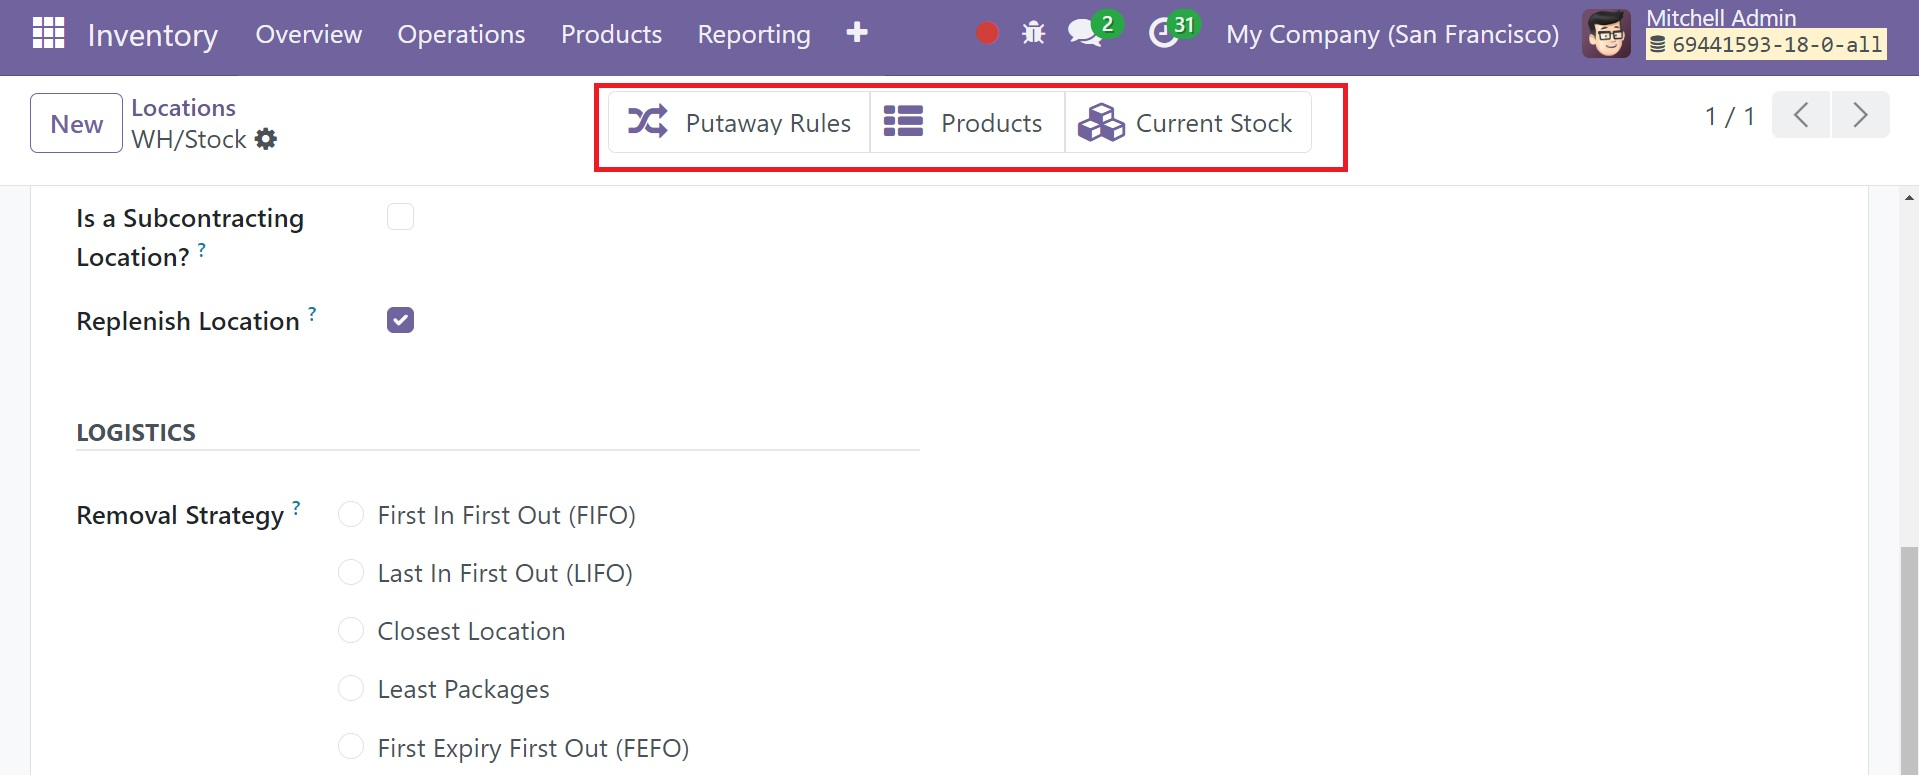
The location pane's smart buttons will show the Putaway Rules, items, and current stocks for this location.
Rules and Routes
They need to have routes specified in order to provide precise tracking of each product movement. The routes will outline the procedures for every inventory movement that occurs inside a company. It is feasible to set precise rules for inventory movements based on the needs of your business. The product motions can be built up in several ways using these rules. This is how a business manages effective inventory control.
The Odoo18 Inventory module provides specialized platforms for setting up the proper routes and regulations. Before establishing routes, it is imperative to set up appropriate work locations and warehouses because these features collectively allow Odoo 18 to provide superior inventory movement management. To begin, select the Warehouse tab, then select the Multi-Step Routes option from the Setting menu.
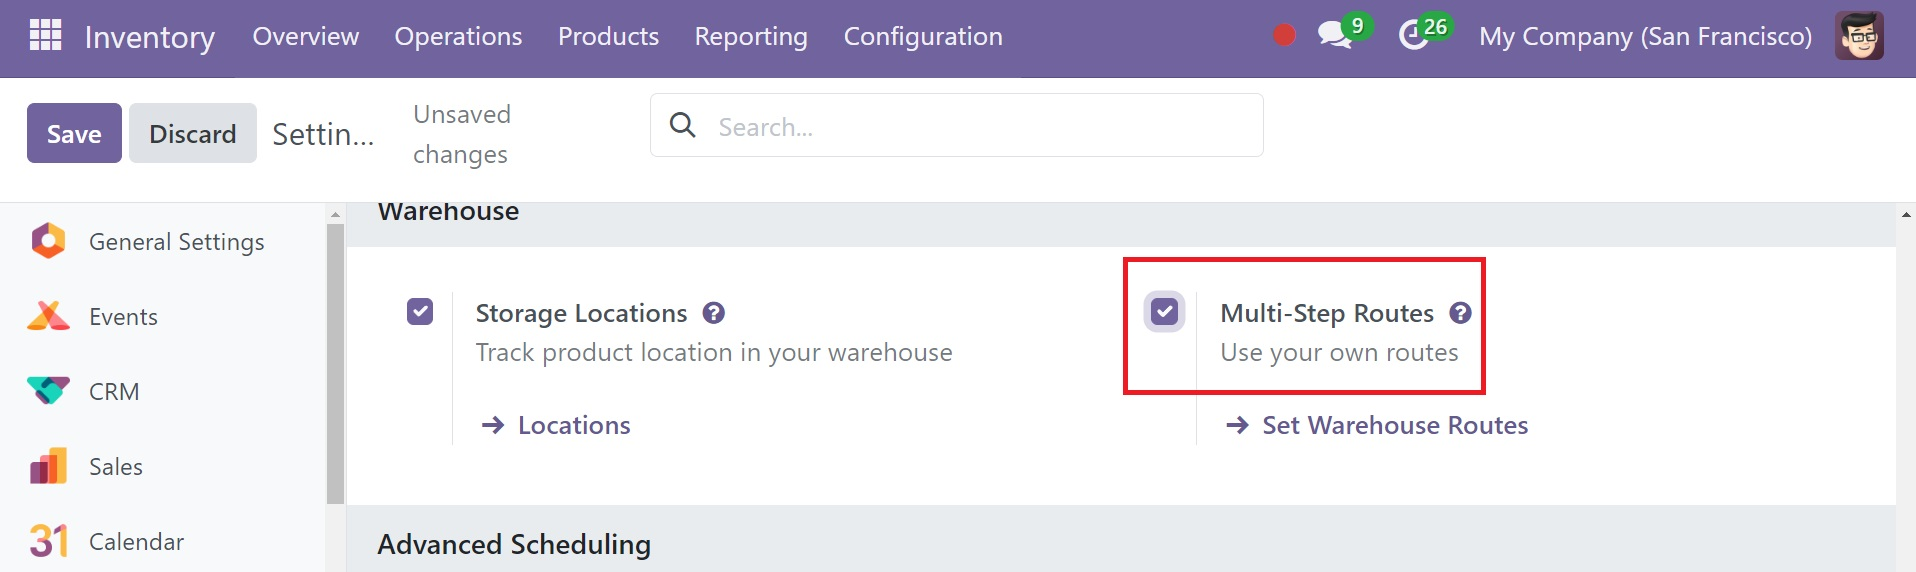
The Routes option will show up in the Configuration menu as soon as you enable this feature. Before creating new routes, let's establish new guidelines for product movement and routes from the Configuration menu.
From the Configuration menu, select the Rules option under the Warehouse Management tab. This will open a new window where you can see the pre-configured list of different rules for the Inventory module.
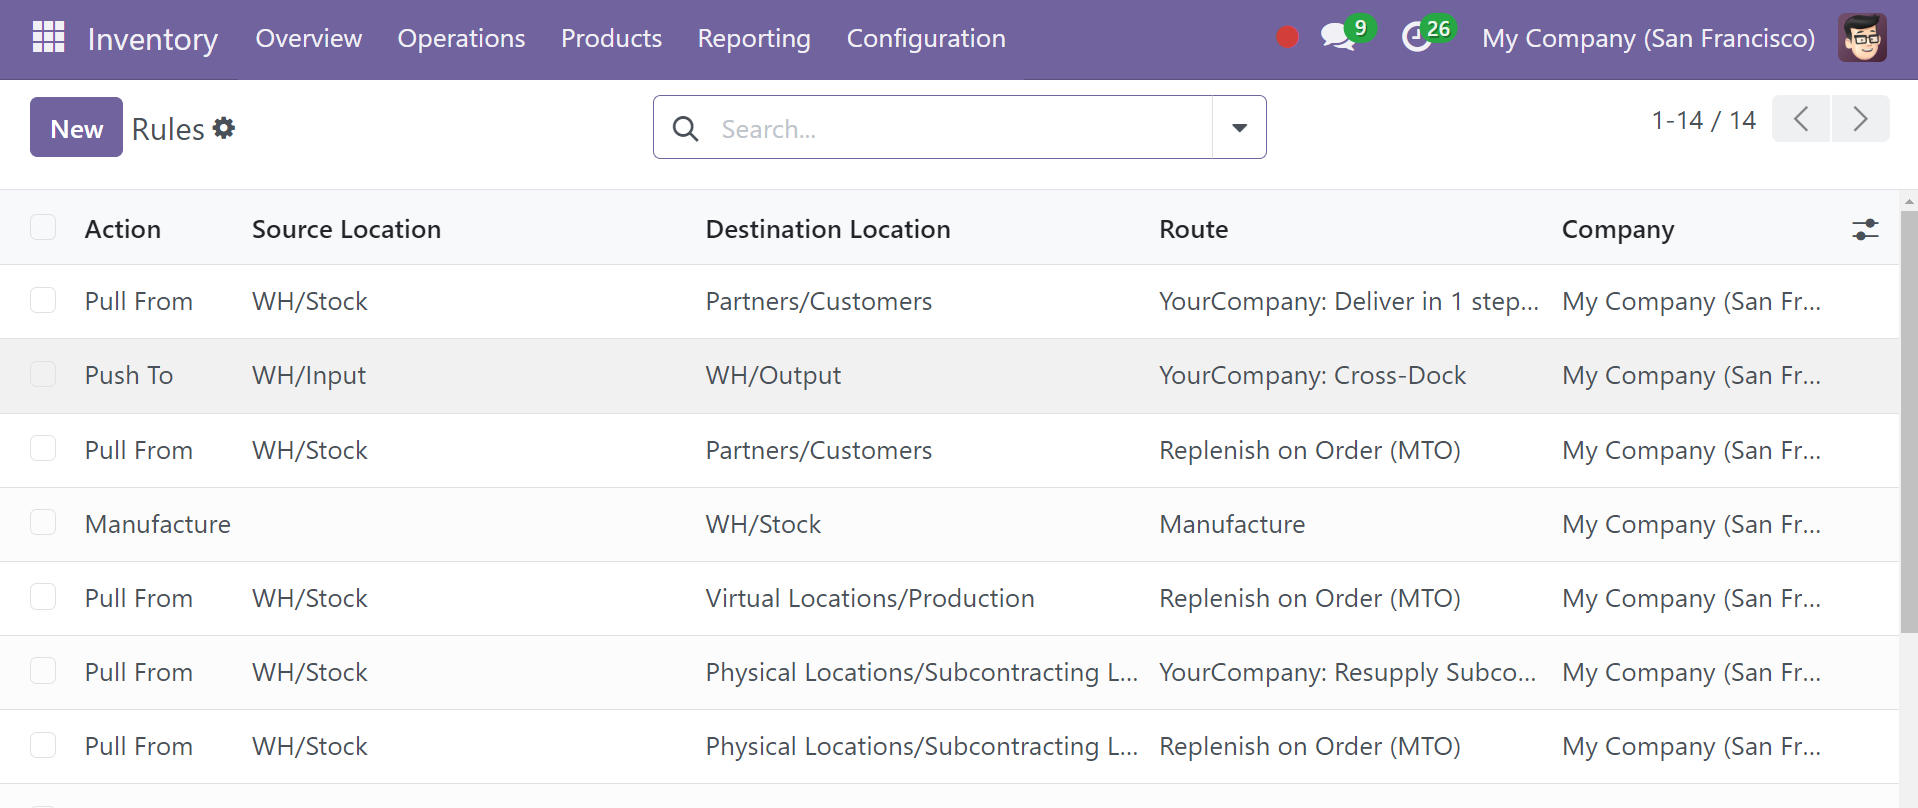
The list preview shows the specifics of each Rule, such as the Action, Source Location, Destination Location, Route, and Company. You can use the GroupBy settings and the default and adjustable Filters to facilitate searching. Click the New button to add a rule to the Inventory module.
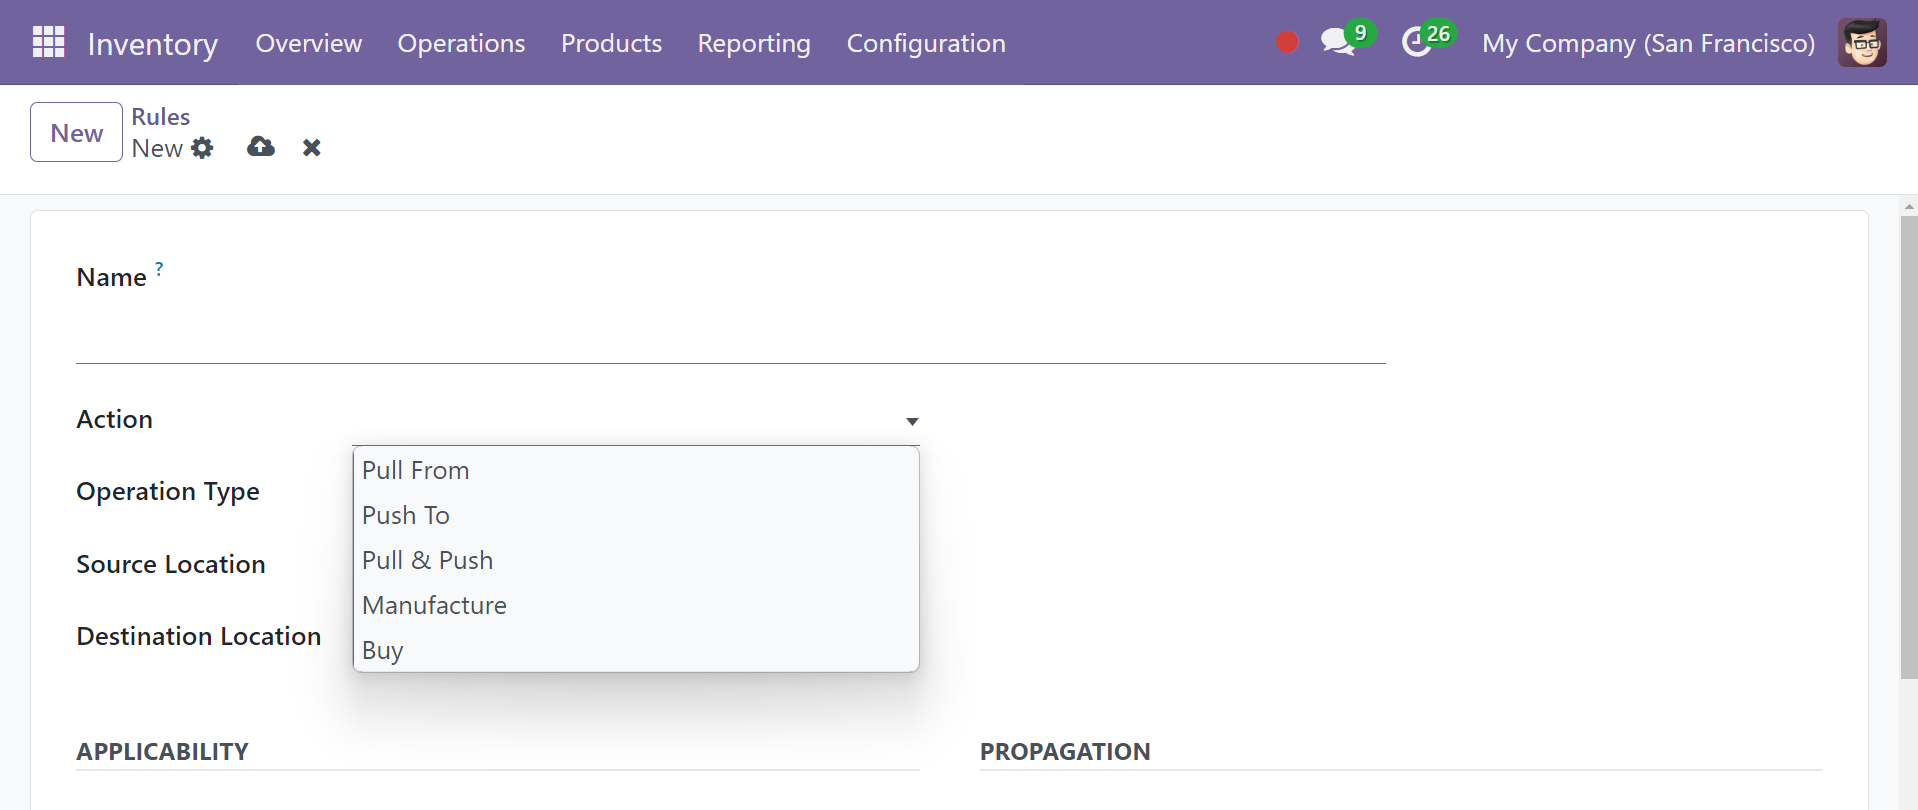
Give the new rule a suitable title in the Name field. You can specify the action for this particular rule in the designated section. You can select the suitable activation from the drop-down menu shown in the screenshot. The options available are,
● Pull From : When goods are needed at the destination, this operation can be set up to happen. It could originate from a sales order or a manufacturing order. When a product is requested at the destination, Odoo 18 will generate a picking operation type from the source location to meet the need.
● Push To: You can move a product to a new location with this rule. Once items reach the source location, use this action to move them to a new place. In this case, Odoo 18 will create a picking operation type to deliver them to the destination.
● Push & Pull: This move works in the two situations that were discussed above. When products are needed at the destination, a pick is made from the source site. At the source location, product specifications must be fulfilled. After the source location satisfies its requirements, the products will be pushed to the destination location to suit its needs.
● Manufacture: This function enables you to directly generate manufacturing orders to satisfy the specifications of the source site.
● Buy: When products are needed at the destination, Odoo will use this action to generate a request for quotation.
In the relevant areas, you can enter the Operation Type, Source Location, and Destination Location. On the Applicability tab, select the Route and Company to which this particular rule applies.
Now let us look at how to establish Routes. To create new routes for inventory transfers, navigate to the Configuration menu and select the Routes option. This will open the list of previously configured Routes in the Inventory module.
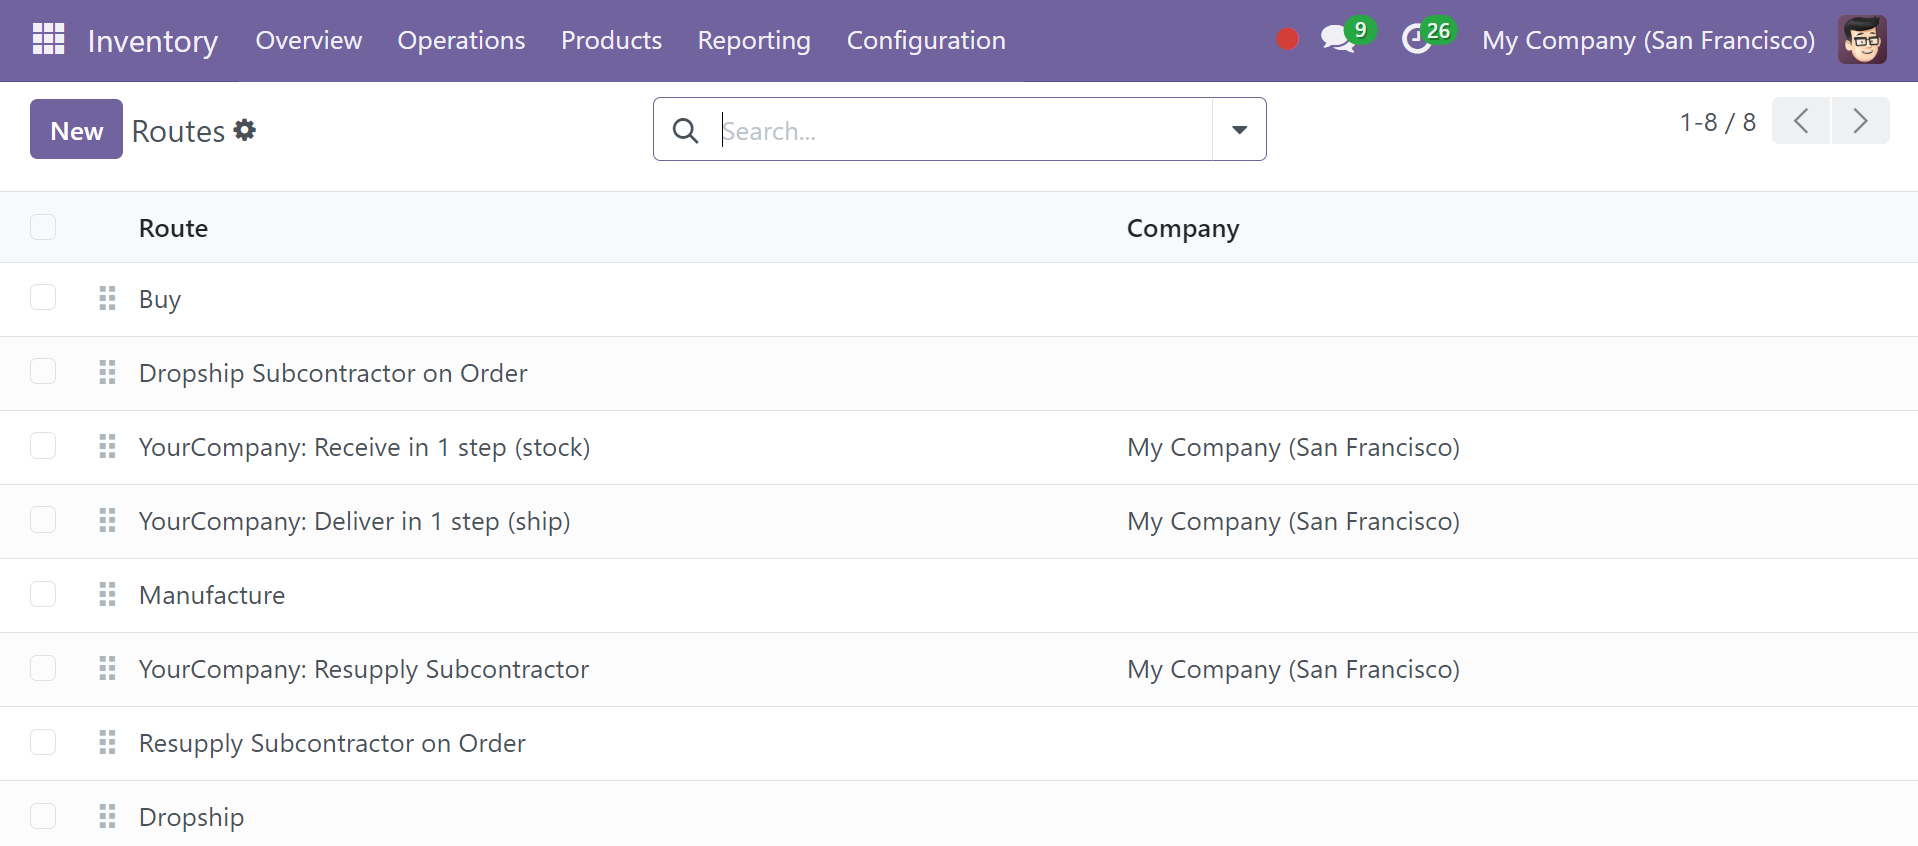
The New button allows you to create a new inventory route.
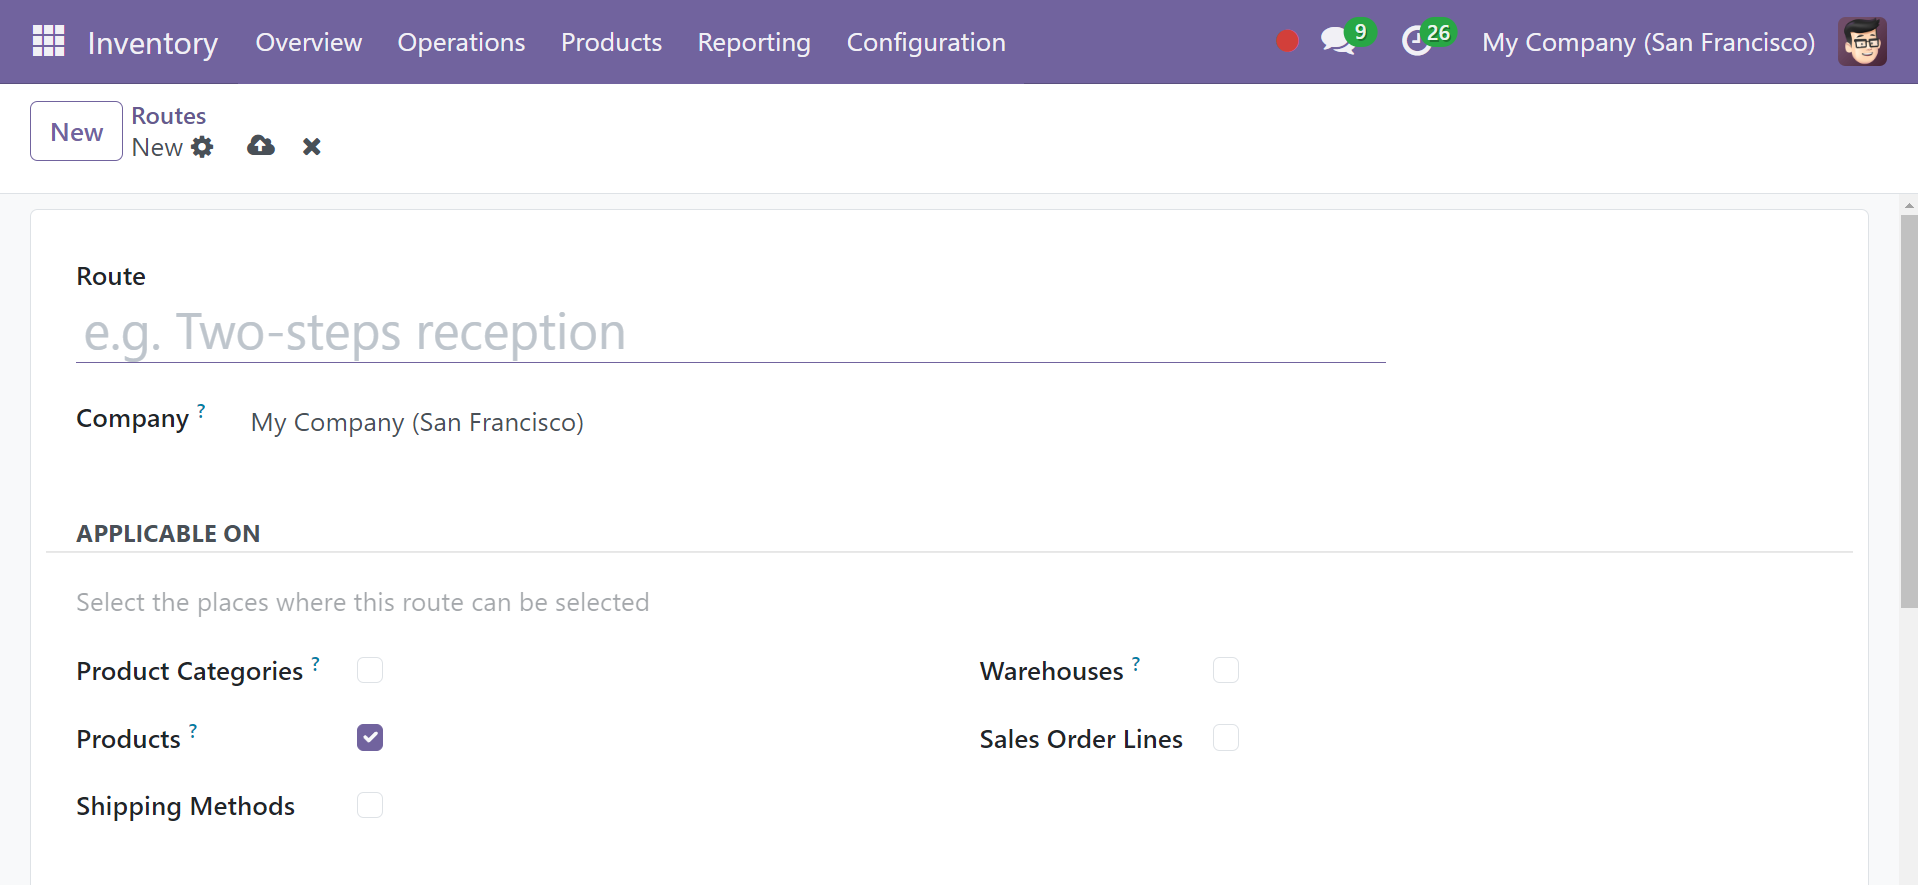
Enter the inventory route's name in the Route field. The name of the company will appear in the appropriate field. In the Applicable area, please select the sites where you would like to use this route. Examples of it include products, product categories, packaging, warehouses, and sales order lines.
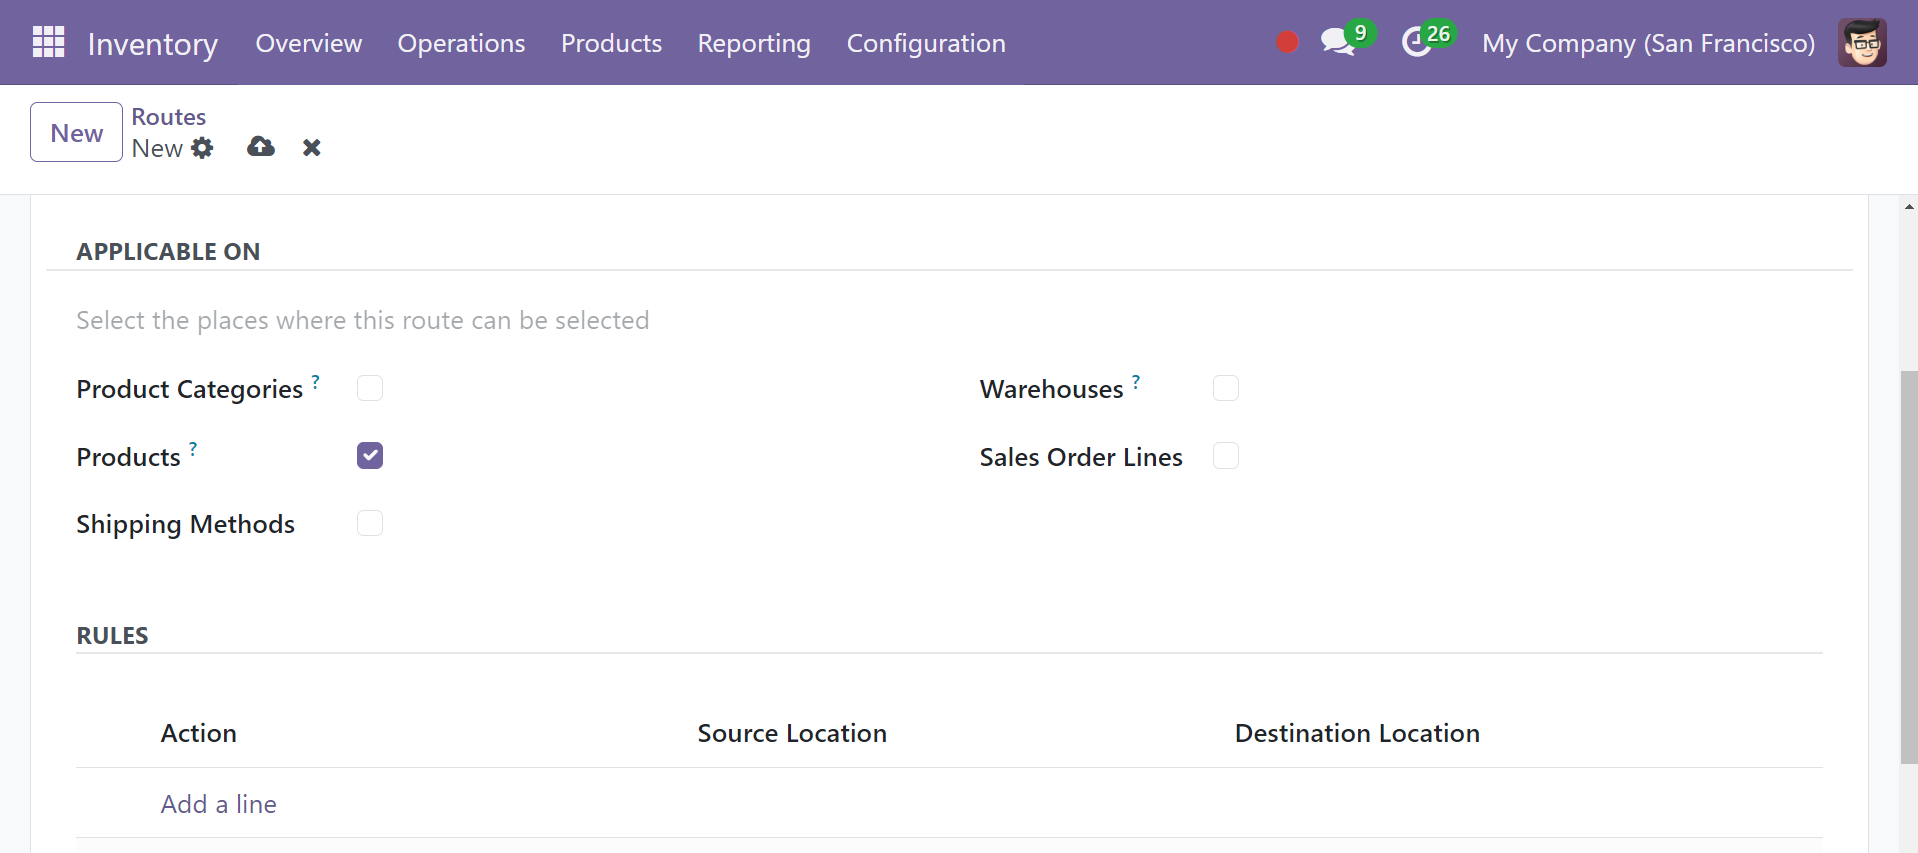
In the Rules tab, mention the regulations unique to this operating route. The path of operation for the products in your inventory can be specified while configuring the details in the Odoo product configurator.
You can configure the product's operating routes using the Routes option, which is found under the Inventory tab in the product form view.
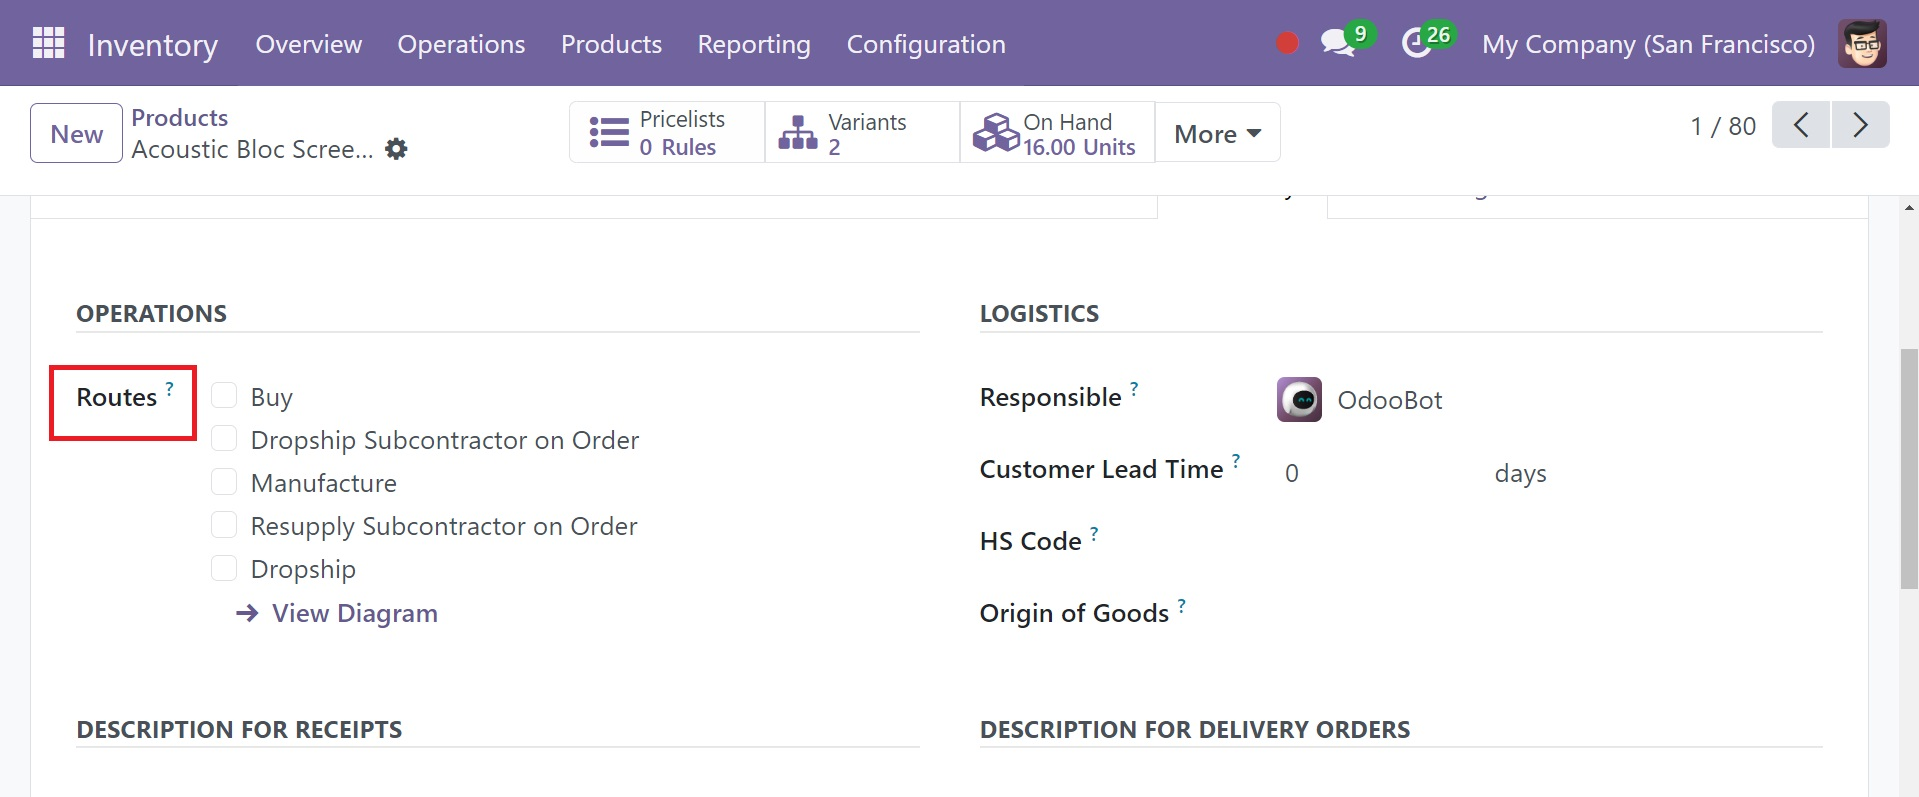
You can configure a product's route based on the module you installed in your Odoo 18 database. It can be purchased, produced, restocked on demand, etc., depending on the path you choose.
Storage Categories
The best approach to micromanage storage locations and ensure "Putaway Rules" execute properly is to use the Inventory module's Storage Categories function. In the following section, we will discuss the "Putaway Rules" operation in further detail.
A popup containing a preview of each of the manually chosen and pre-configured categories will appear on selecting the option of storage categories.
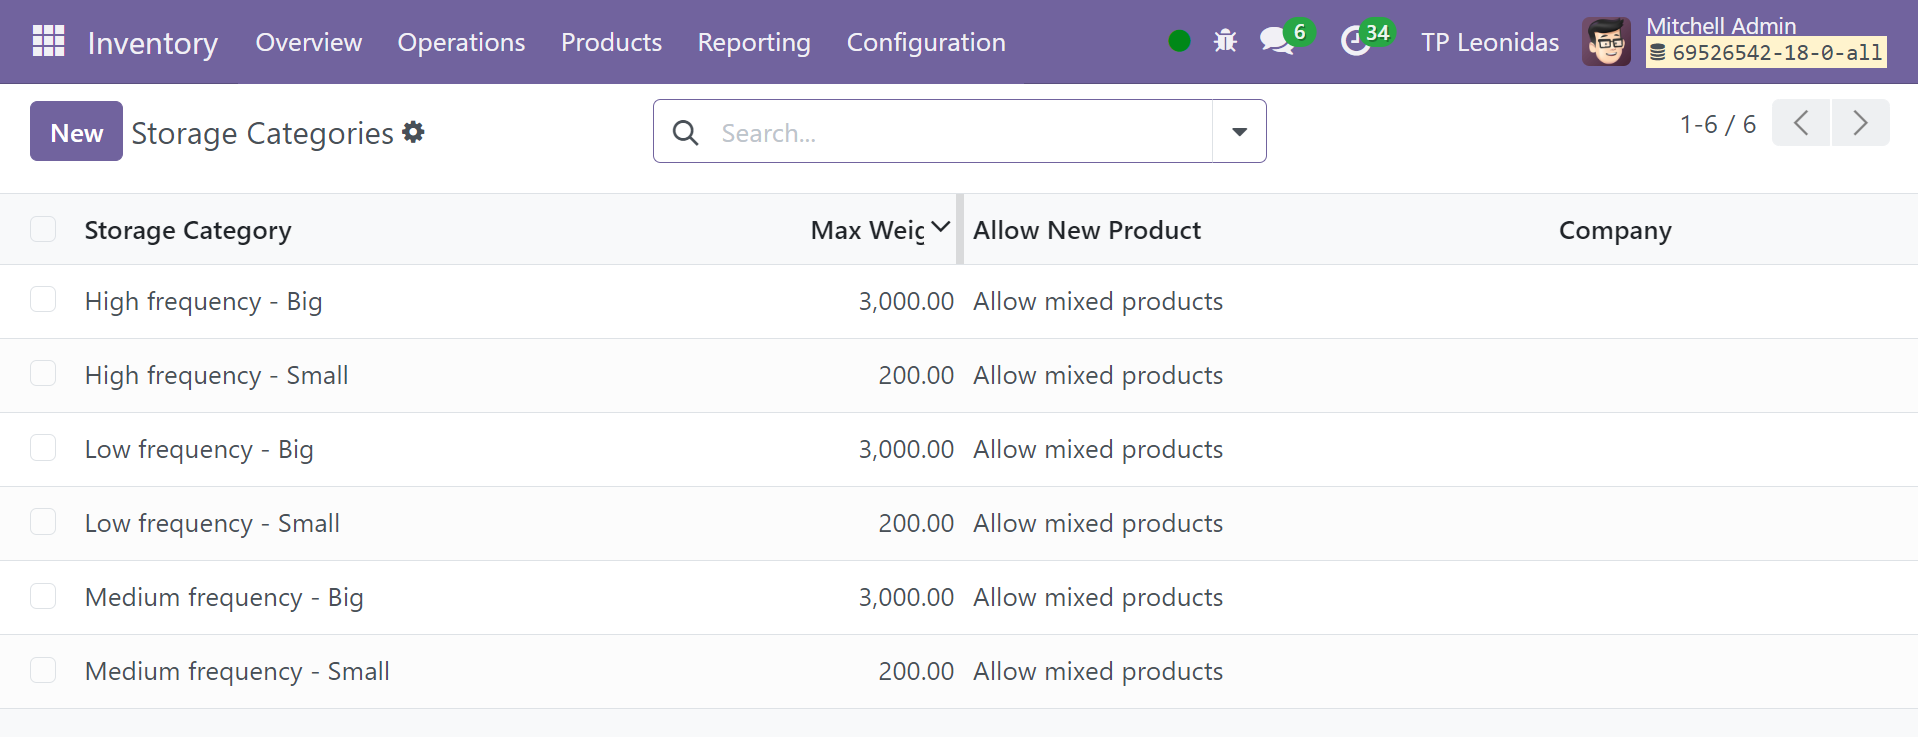
Click the New button to add a new storage category to the existing set of settings.
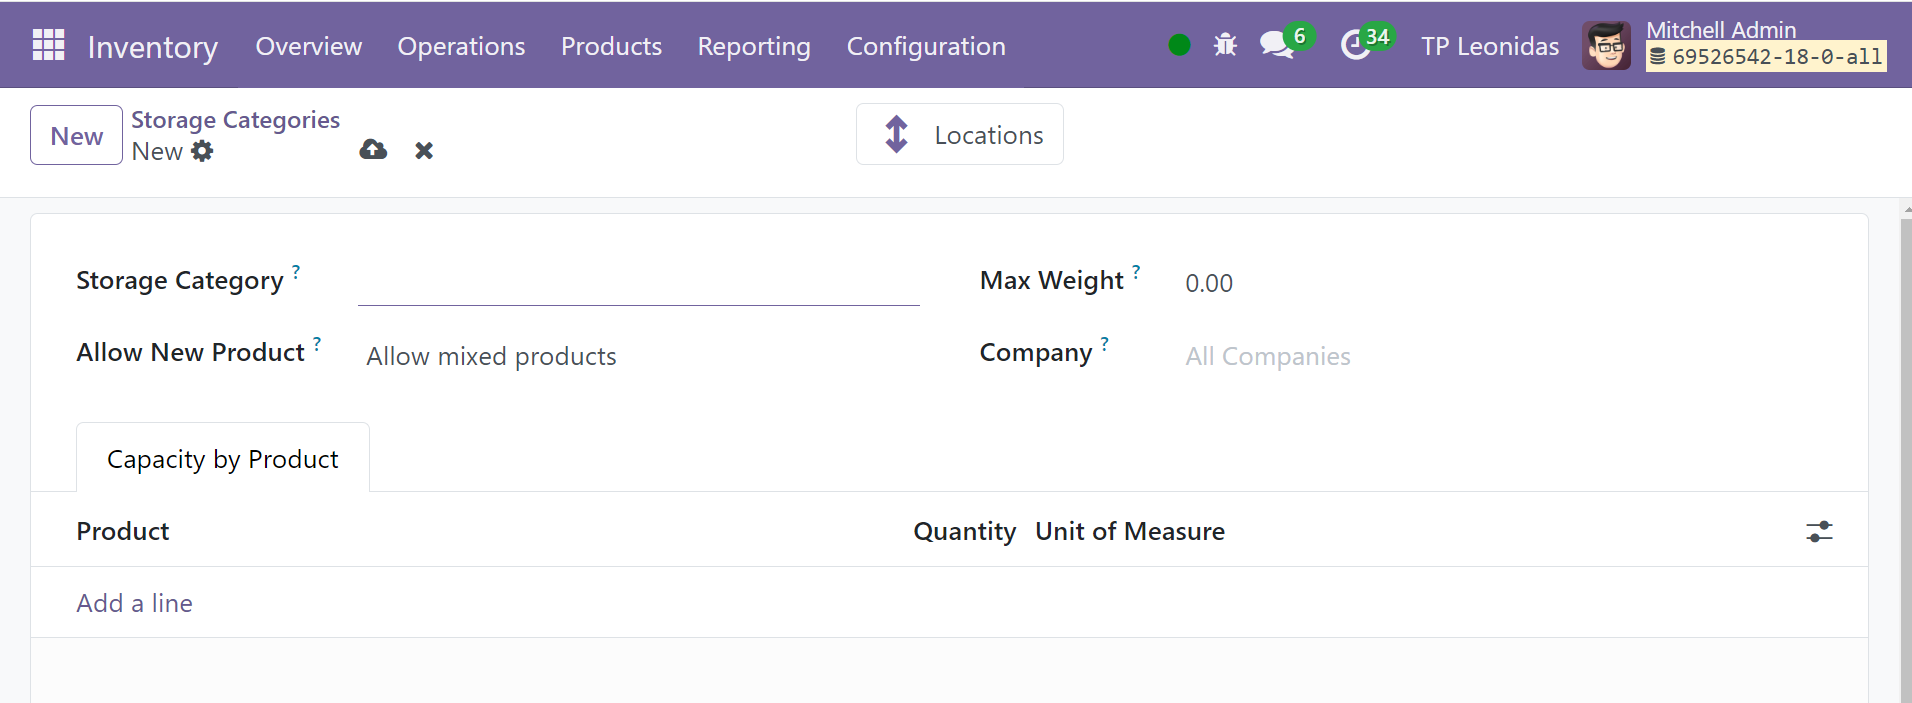
Name the new record in the Storage Category column. You can select one of the three "Allow New Product" choices to indicate whether you want to allow a new product: "If the location is empty," "If all products are the same," or "Allow mixed products." Complete the Company and Max Weight fields. Under "Capacity by Package," you can select characteristics such as Quantity and Package Type.
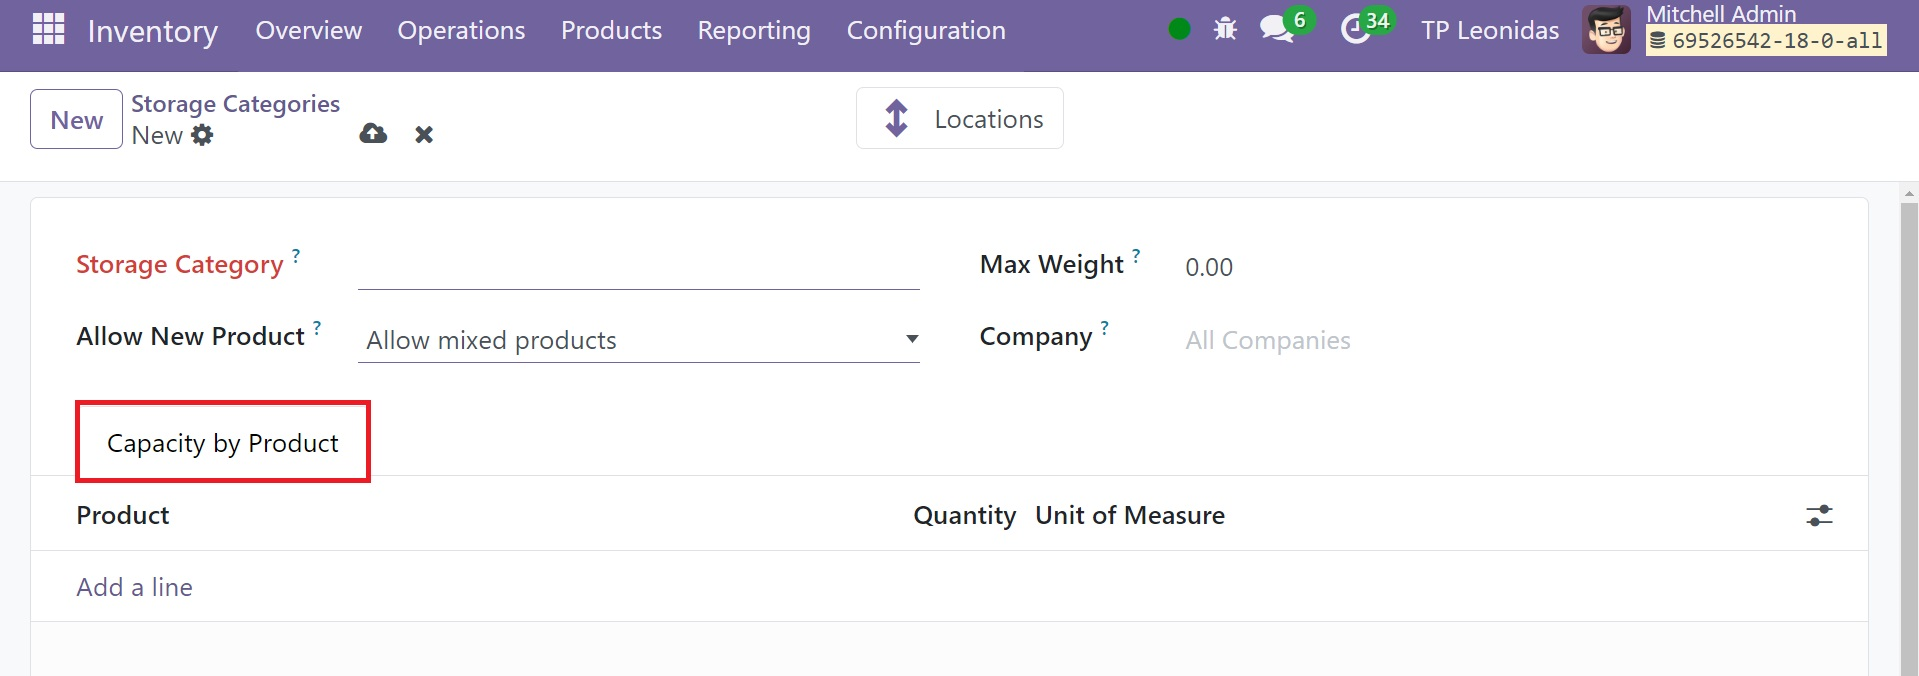
The Capacity by Product section allows you to specify a product, its quantity, and its unit of measurement. Storage locations can also be specified using these types.
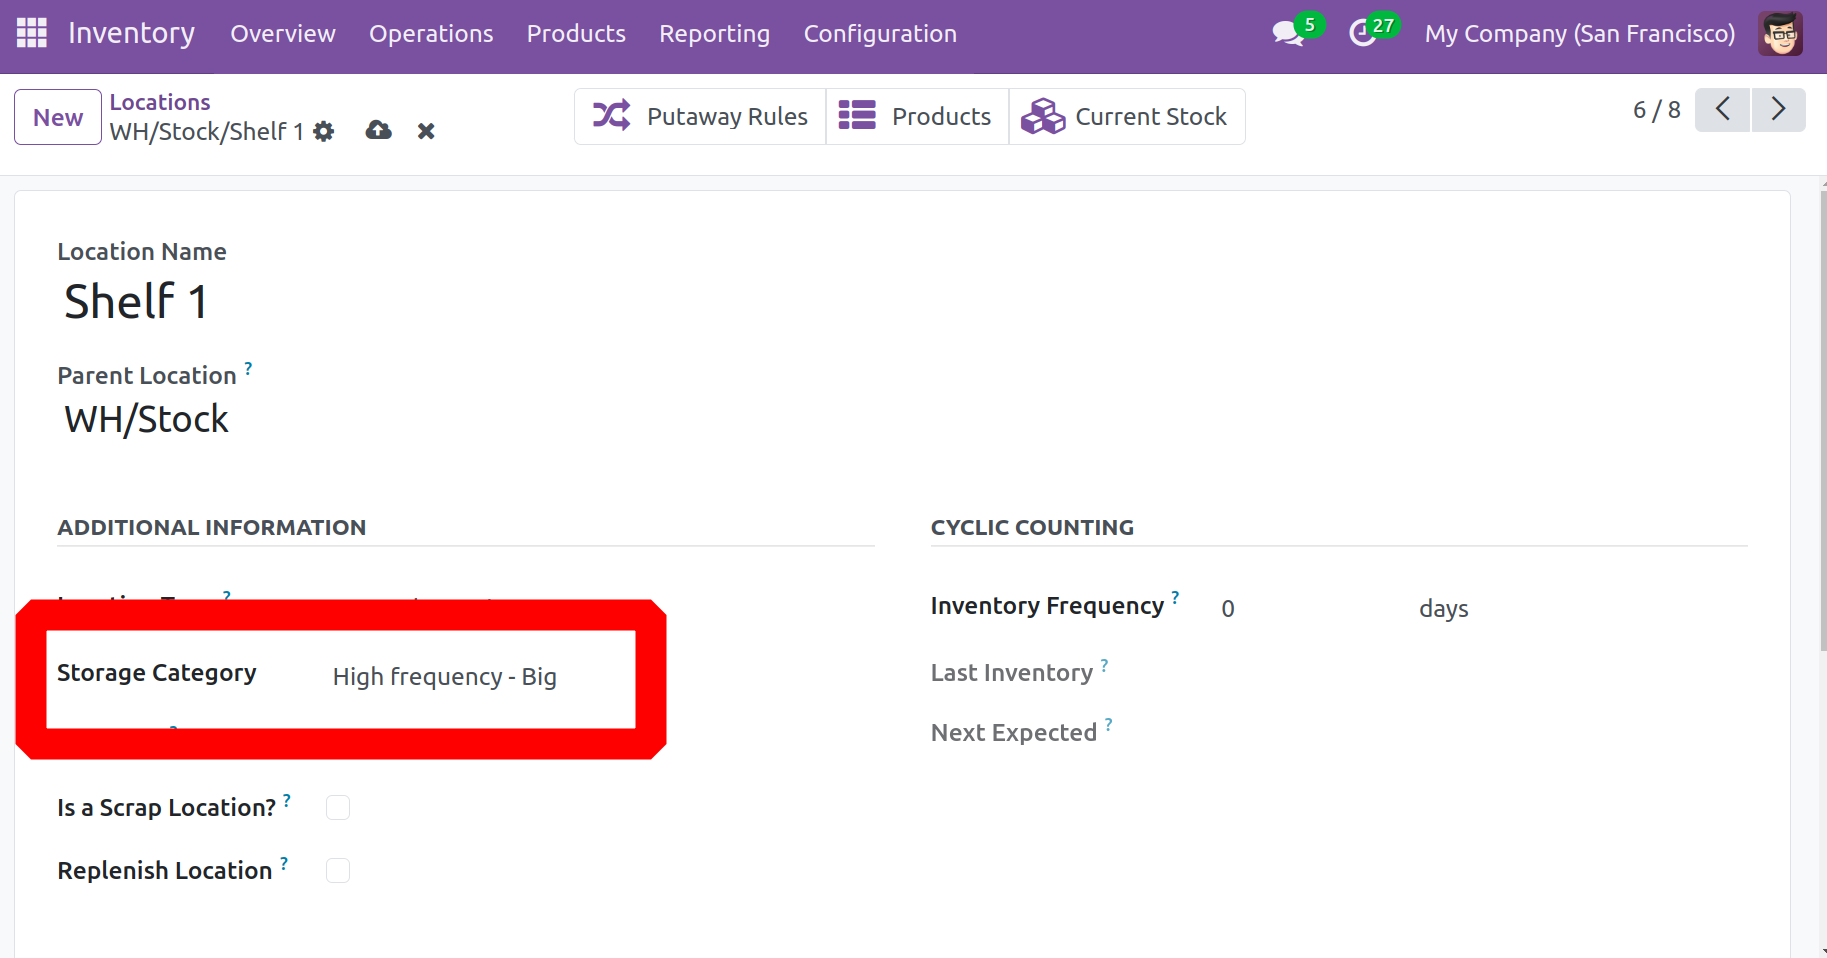
Assign the storage category to a location after it has been created. Navigate to the chosen place by selecting it under Inventory app ‣ Configuration ‣ Locations. Next, in the Storage Category area, pick the newly formed category.
Putaway Rules
Putaway Rules guarantee that the company maintains its stock in the right places. Given that a product's physical and/or chemical composition determines how it should be stored, selecting the ideal location for storage is crucial. Products won't be mistakenly kept in your inventory thanks to this feature. Using the putaway rules, you can relocate goods from the receiving locations to the best location within the warehouse. Select Configuration. To utilize this feature, use Putaway Rules.
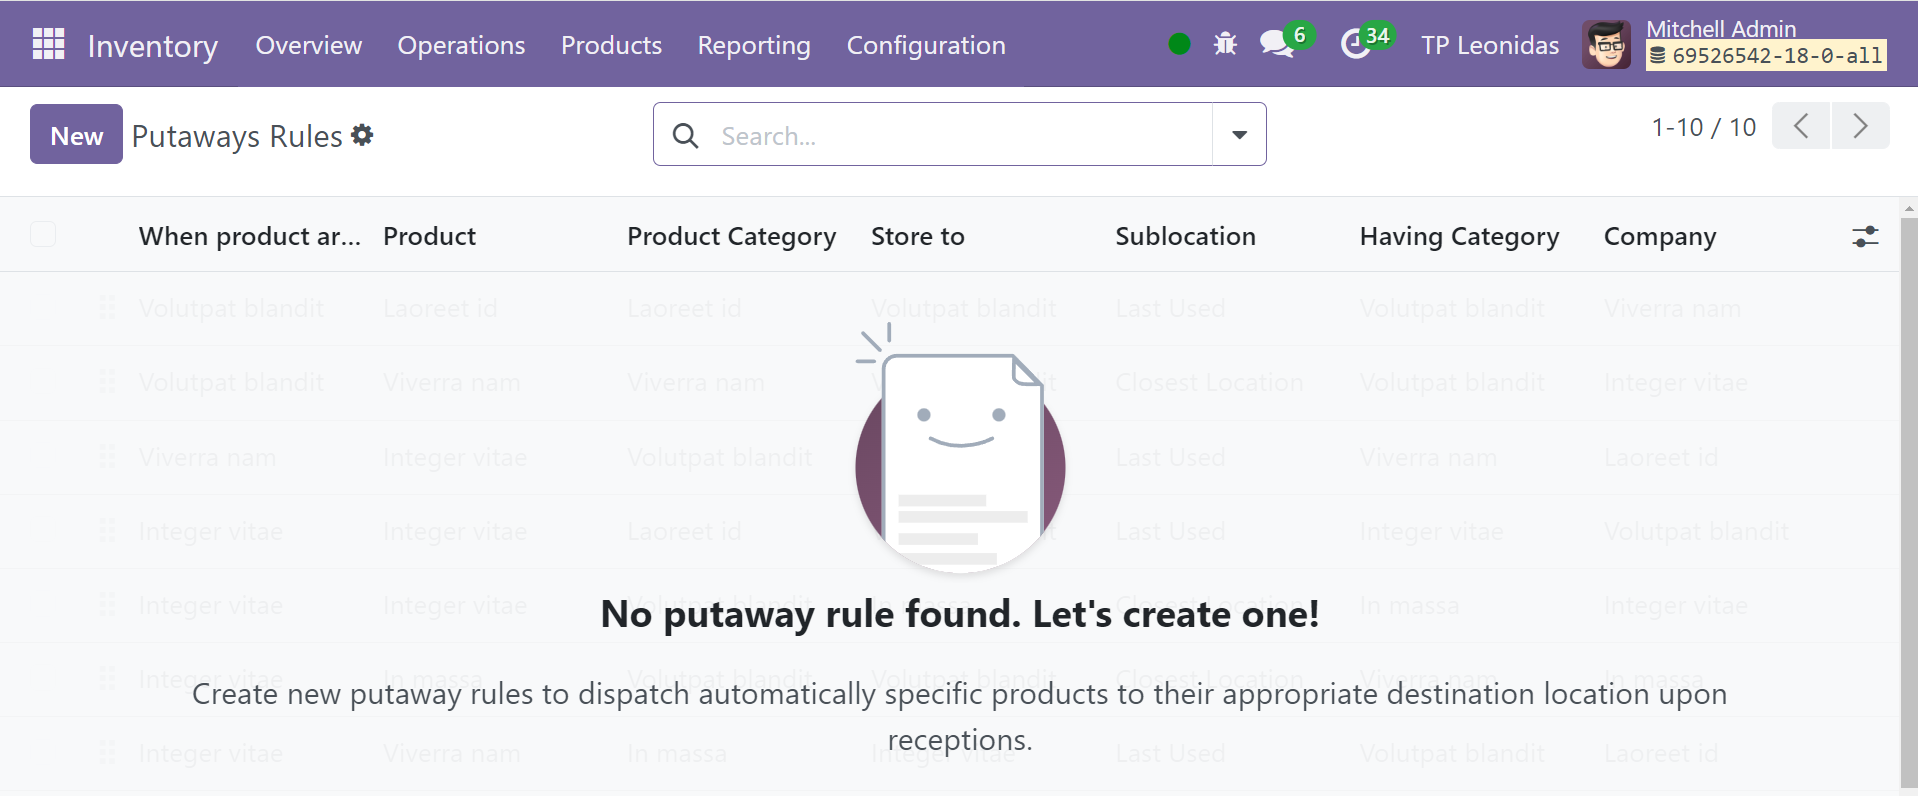
Along with the list of putaway rules that were added to the module, this window also contains the following fields: When Product Arrives in, Product, Product Category, Package Type, Store to Sublocation, Having Category, and Company.
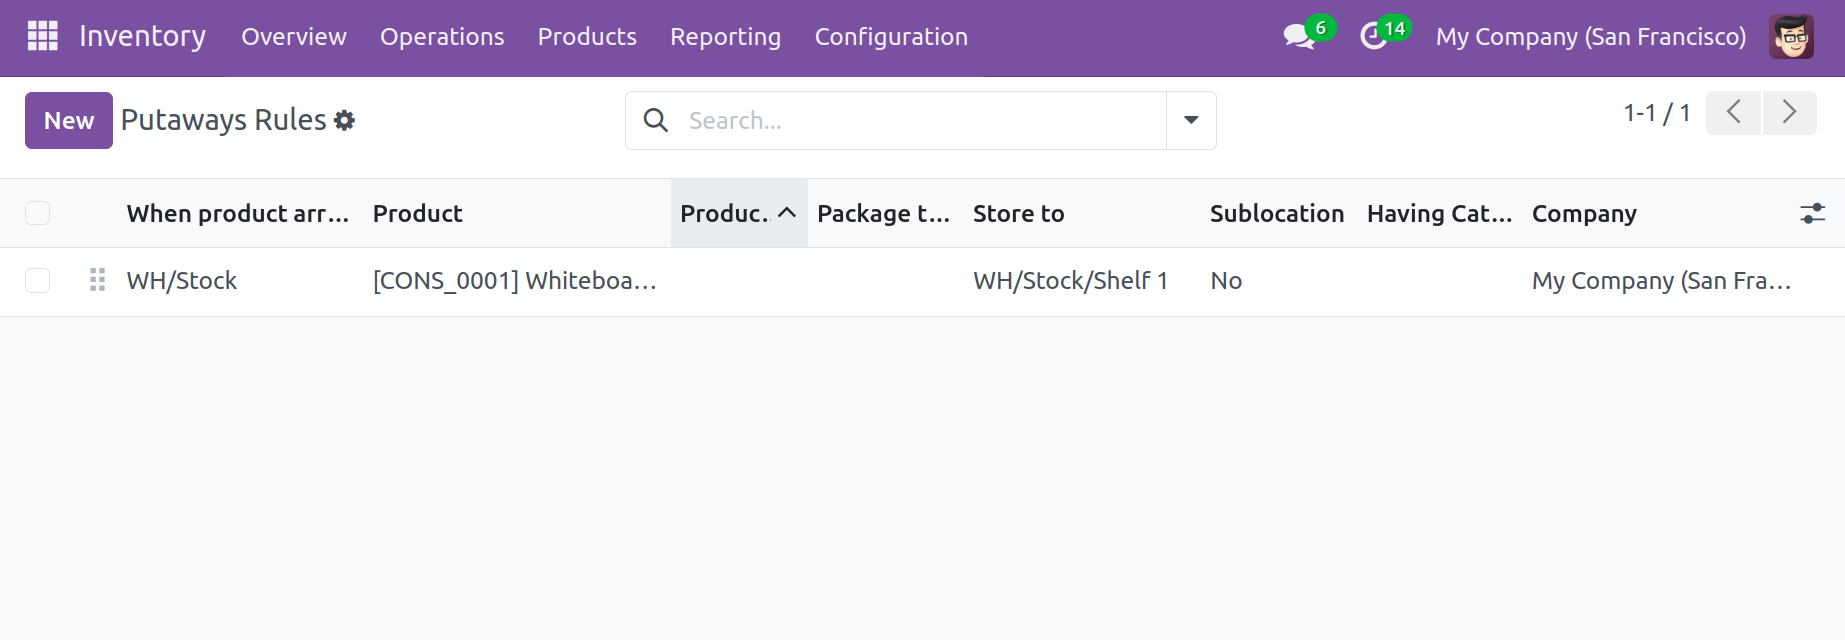
Once the product arrives at the address specified in the "When Product Arrives in" section, the system will move it to the address specified in "Store to Sublocation." Click the New button to add a new putaway rule to the existing records set. You can enter the pertinent data in the domain that appears beneath the preview's last line.
Putaway Rules are useful for setting up storage locations in this module.