In Odoo 18, you can manage email addresses that should be prohibited from receiving further communications through the Blacklisted Email Addresses feature. This functionality is accessible through the Configuration menu, where you can maintain and manage the list of blacklisted email addresses to prevent unwanted recipients from receiving future mailings.

On the Blacklisted Email Addresses page, you will find a list of email addresses that have already been blacklisted. To add a new email address to the blacklist, simply click the New icon.
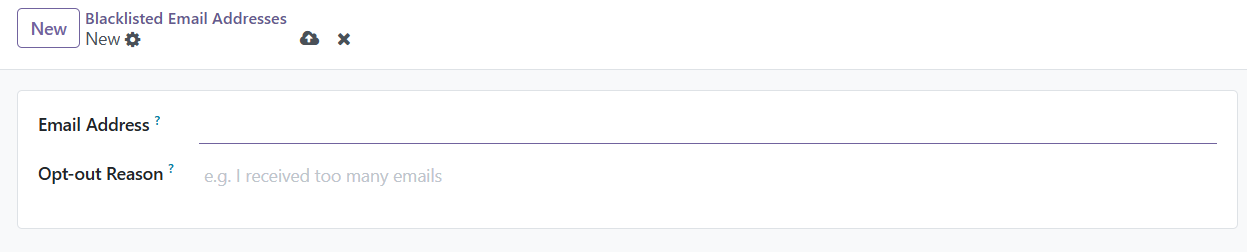
This will open a creation page where you can input the specific email address you want to block. Once the email is added, Odoo will immediately prevent that email address from receiving any future emails sent through your campaigns. In the Opt-out Reason tab, mention the reason for blacklisting.
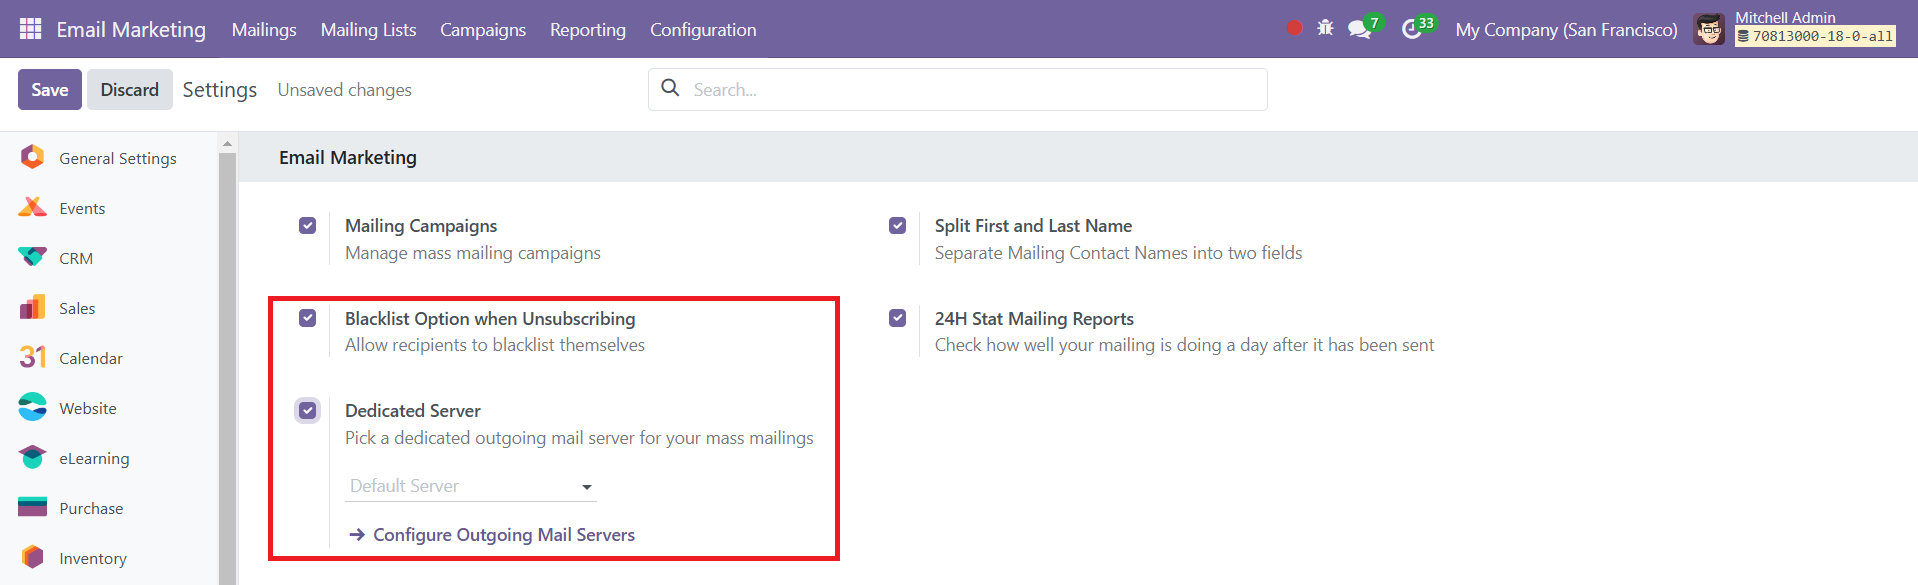
Moreover, when recipients choose to unsubscribe from your mailing list, they will have the option to manage their blacklist via the unsubscription page. This ensures that unsubscribed individuals can easily opt out of receiving further emails, providing a streamlined way to handle blacklisting directly from the recipient's perspective.
Additionally, the Dedicated Server option is available, which allows you to configure a specific server for the mailing list if required. This option can be useful for improving deliverability or managing high-volume mailings, ensuring that your communications are effectively sent without being blocked or marked as spam.
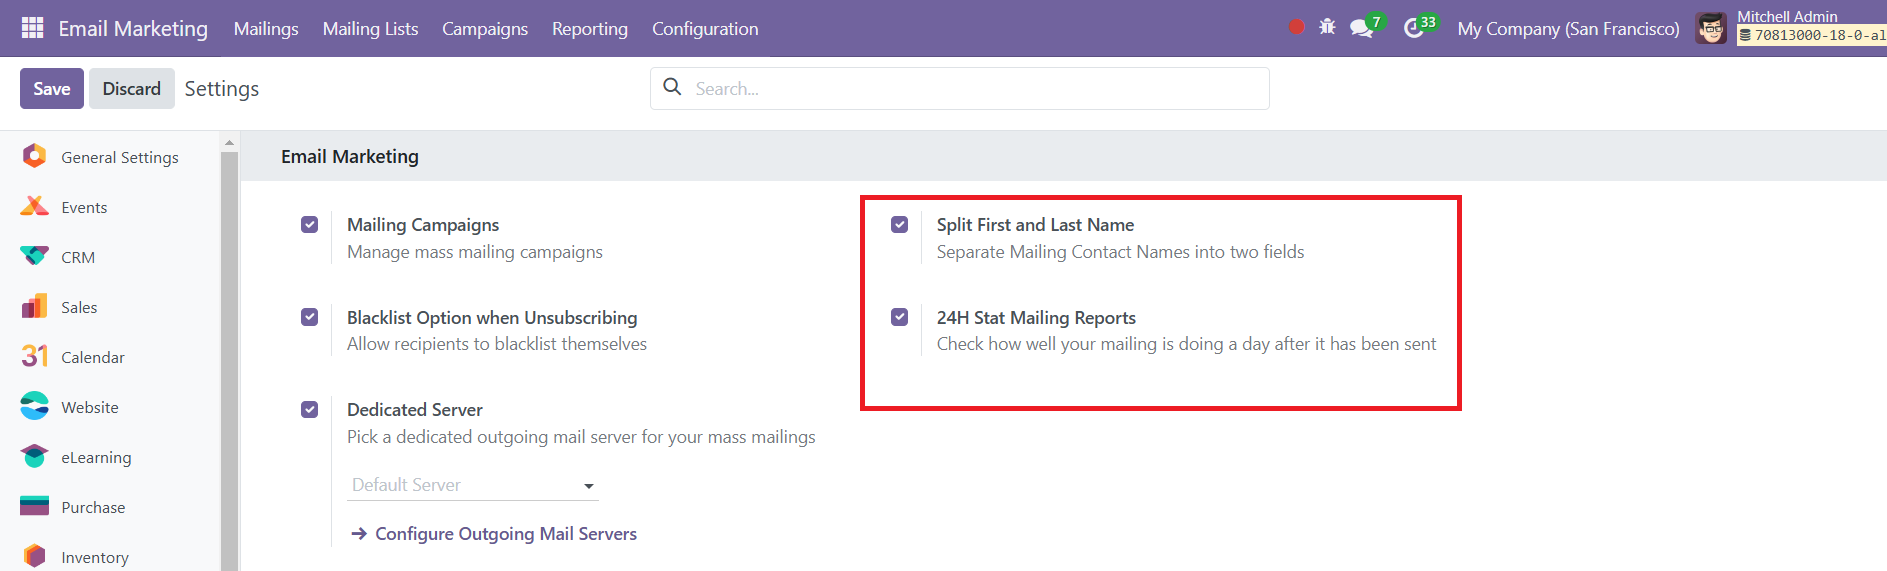
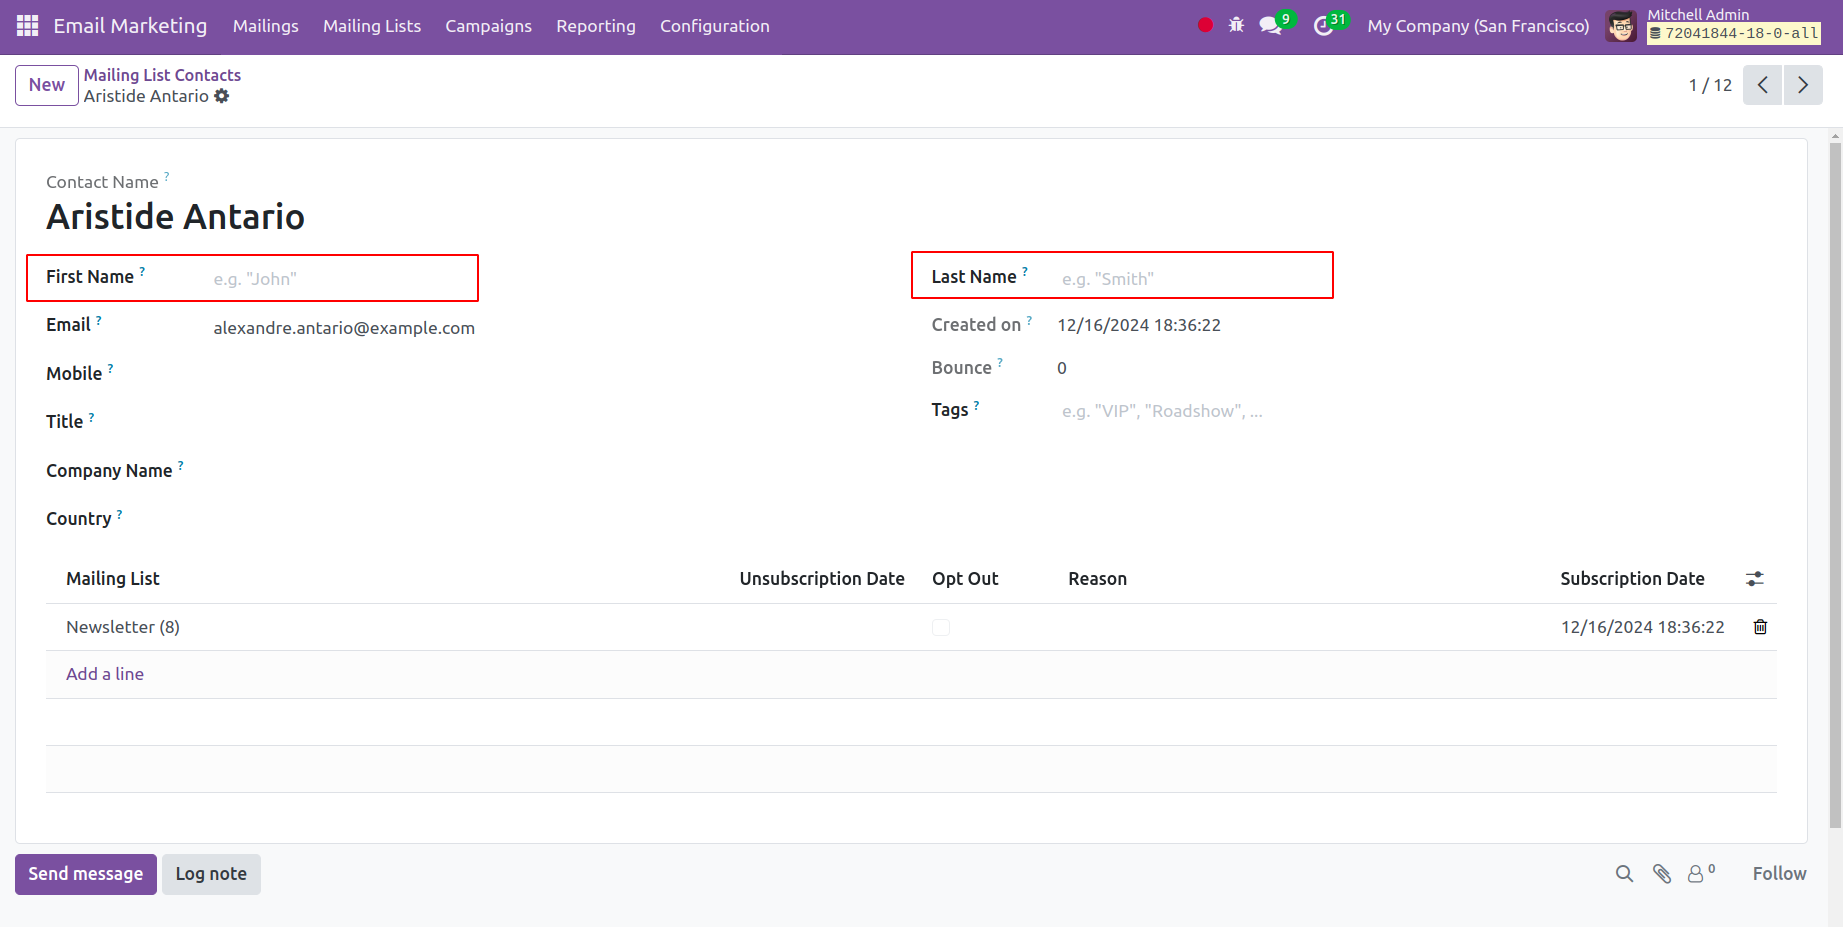
In Odoo 18, you can split the contact names into First Name and Last Name fields for better organization and to ensure that emails or communications are personalized more efficiently by activating the Split First and Last Name feature from the Settings menu.
The 24H Stat Mailing Reports feature in Odoo's Email Marketing module allows users to monitor the performance of a mailing campaign 24 hours after it has been sent.