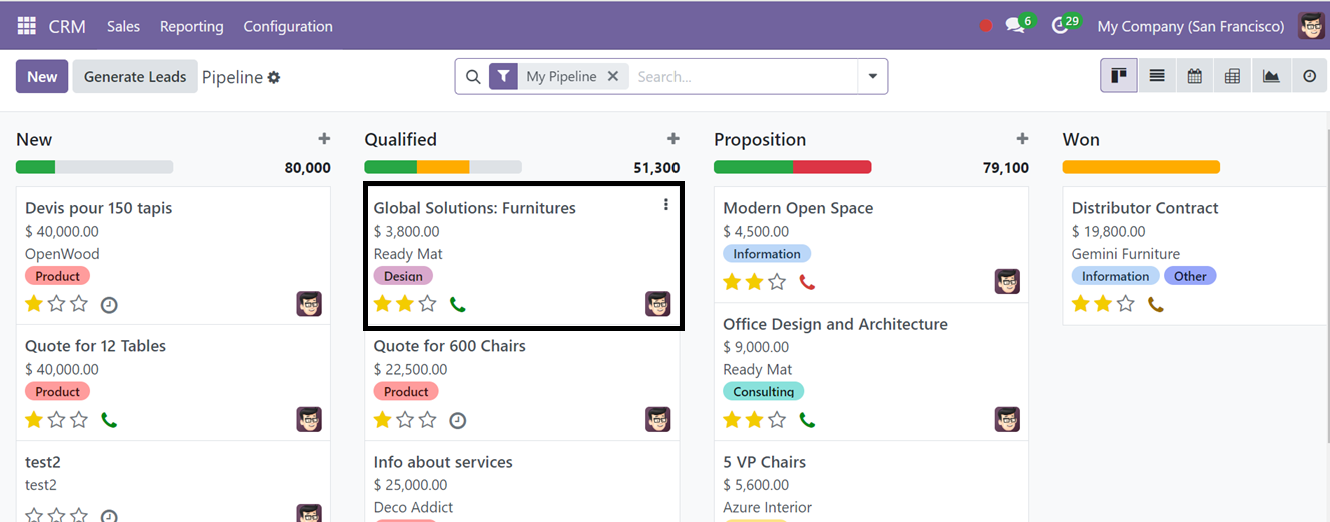
The Odoo 18 CRM module's main dashboard, which can be found under the Sales menu, is the My Pipeline option. Similar to previous Odoo versions, the dashboard has a revamped color interface that lets users alter the platform's presentation to Kanban, List, Calendar, Pivot, Graph, Map, and Activity. Leads produced via different pathways are shown in the My Pipeline window, as shown in the screenshot below.
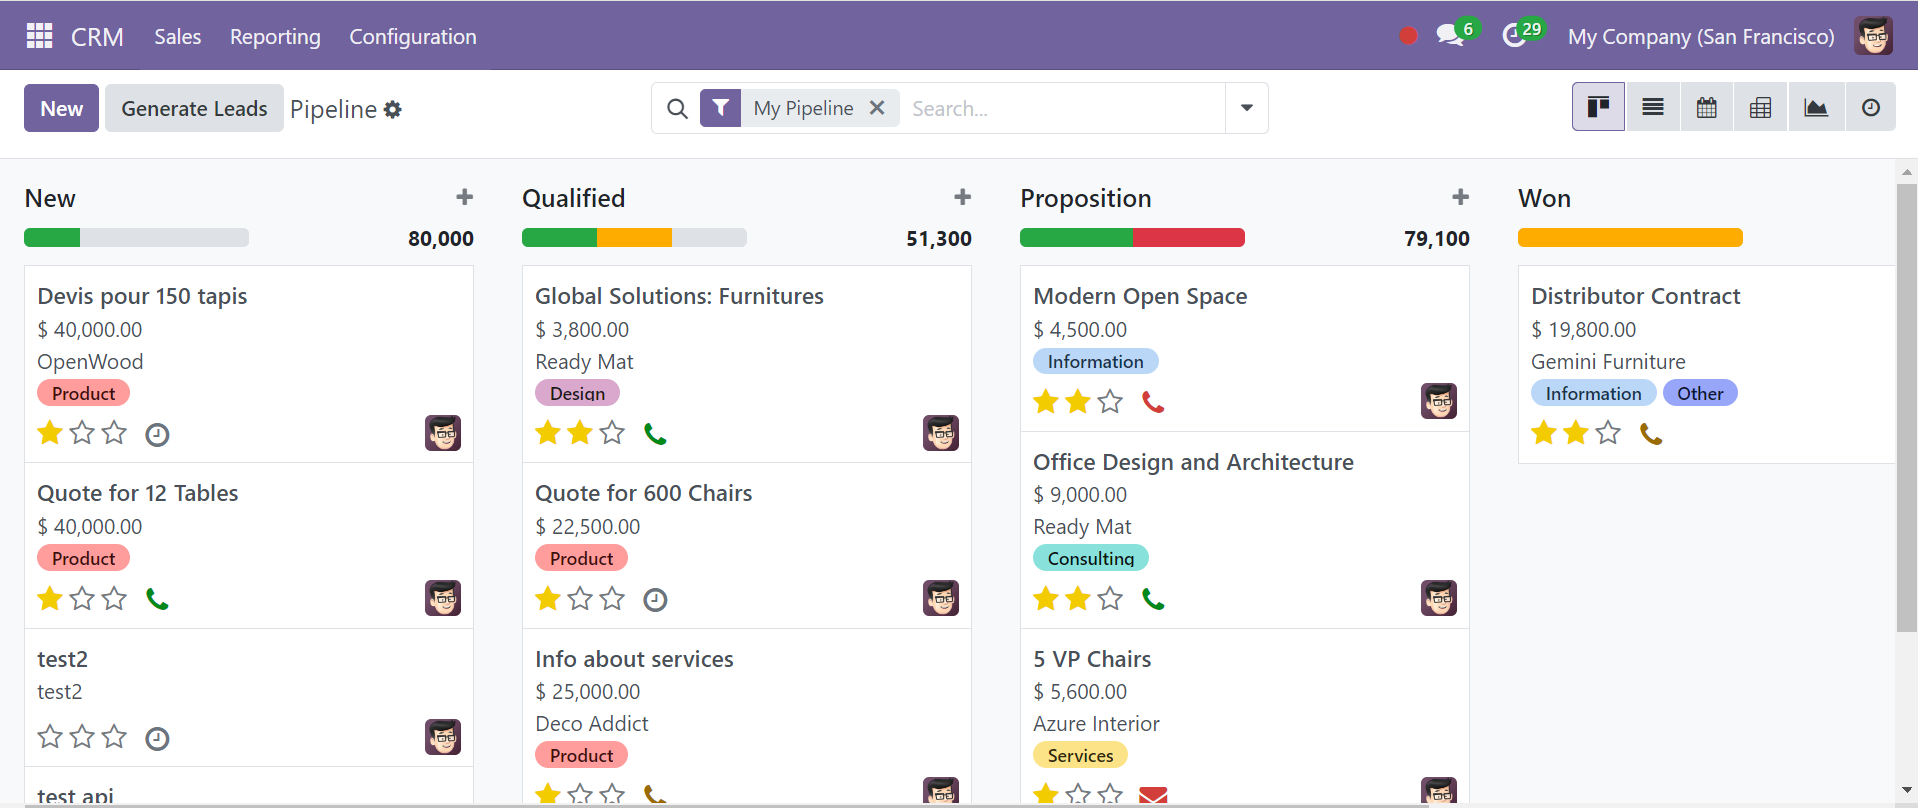
Records in the CRM pipeline are arranged according to their operational progress in the Kanban view. The order of the leads allows for a rapid overview of each lead's development.
Leads may be assigned to many stages in accordance with business requirements. Phases including New, Qualified, Proposal, and Won are included in the CRM module. While qualified leads from new leads advance to the Qualified stage, fresh leads are shown under the fresh stage. The lead can proceed to the 'Won' stage once the consumer provides confirmation.
With a new field for the stage name, the ‘+Stage’ button makes it easy to quickly generate the stages that the lead needs.
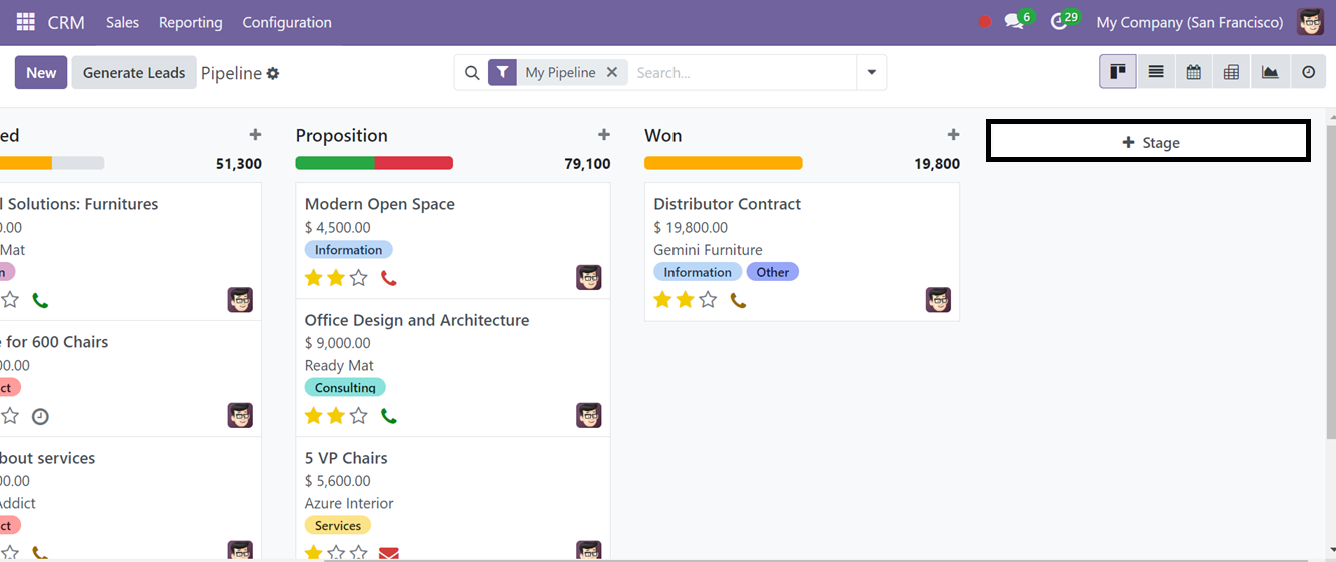
The ‘+Stage’ button will open a new editing field where we can add the new stage name and press the ‘Add’ button.
Now, your new stage is added to the dashboard, and you can add various stages according to your project requirements using the same method.
Managing the Pipeline Stages
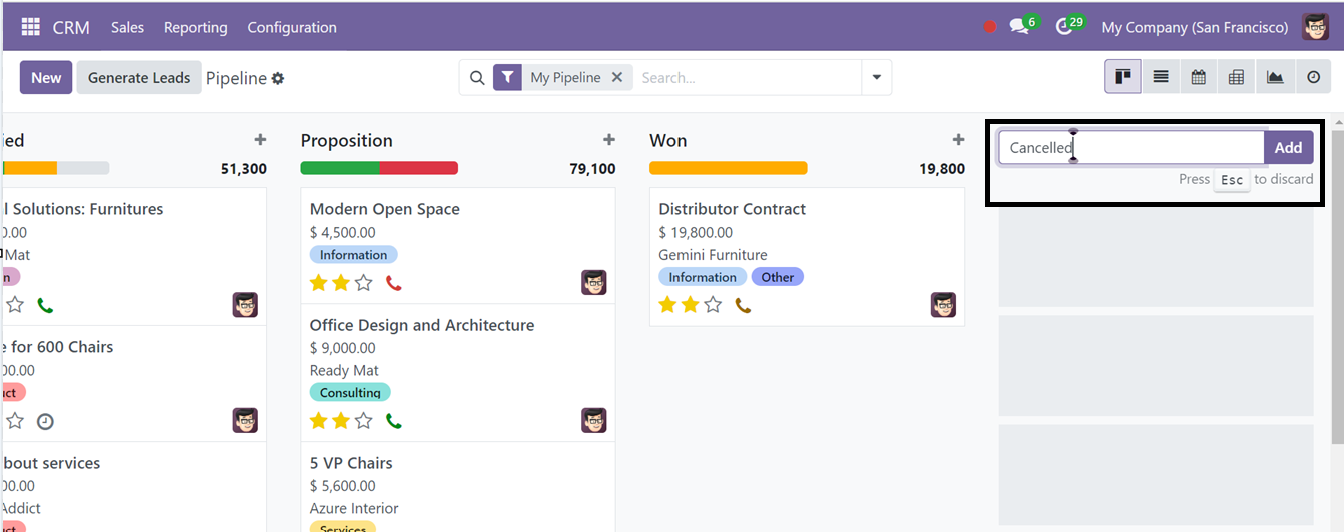
To modify the available stages in Odoo CRM, click the Settings icon next to its title. You can fold, edit, automate, and delete the stages by selecting the required options as shown below.
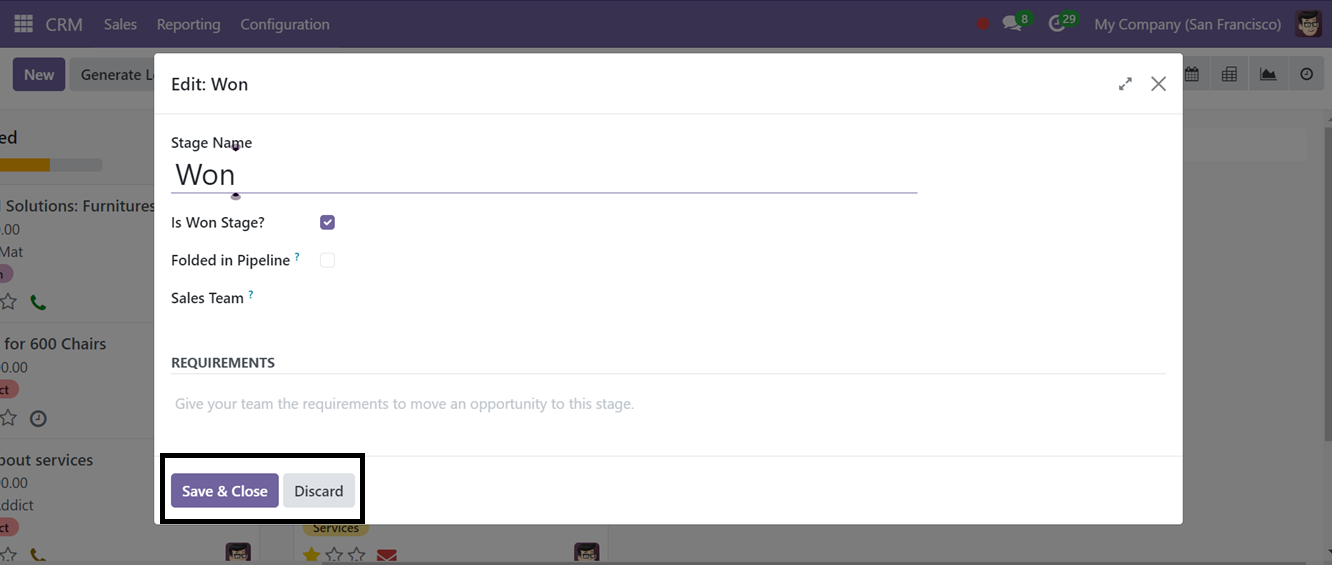
The edit button opens a pop-up box where we can edit or alter the Stage Name, Won Stage, Folded in Pipeline, Sales Team, and REQUIREMENTS, as illustrated in the screenshot below.
After editing the stage details, save the data. Then, we can check the automation feature by pressing the ‘Automation’ option. This will open a new dashboard window of all the automation created earlier.

To create a new automation rule, click the New button. Then, a new form view will be opened. You can edit the Automation rule name in the first blank field below.
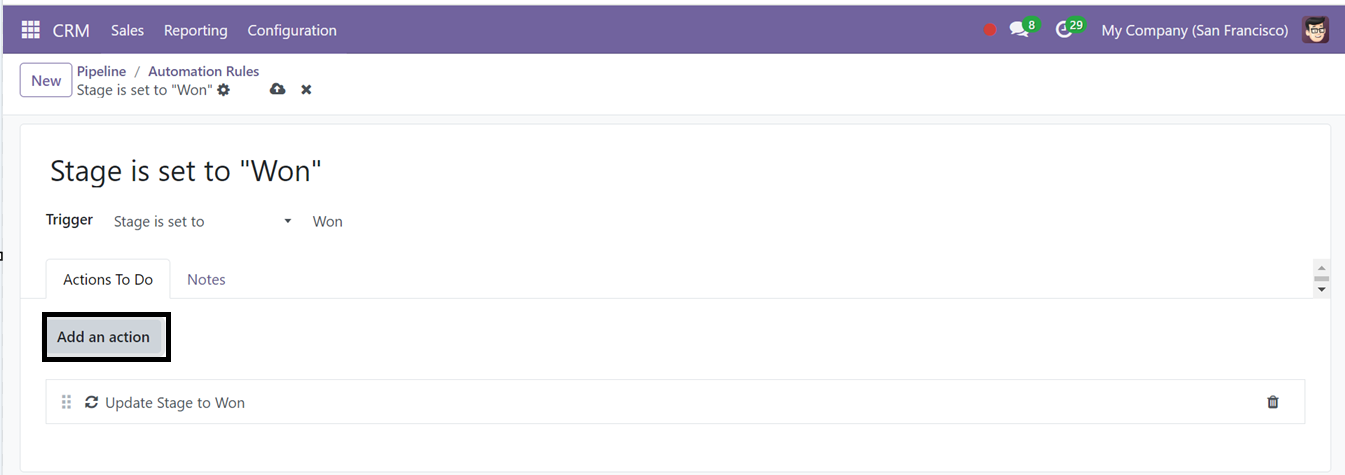
Then, you can set the automation triggers in the Trigger field. You can also add actions to execute the trigger functions with the use of the ‘Add an action’ button provided in the ‘Action To Do’ tab area. Pressing this button will open a new pop-up window that can be used to set different types of actions, their related triggers, and other filters, as illustrated in the screenshot below.
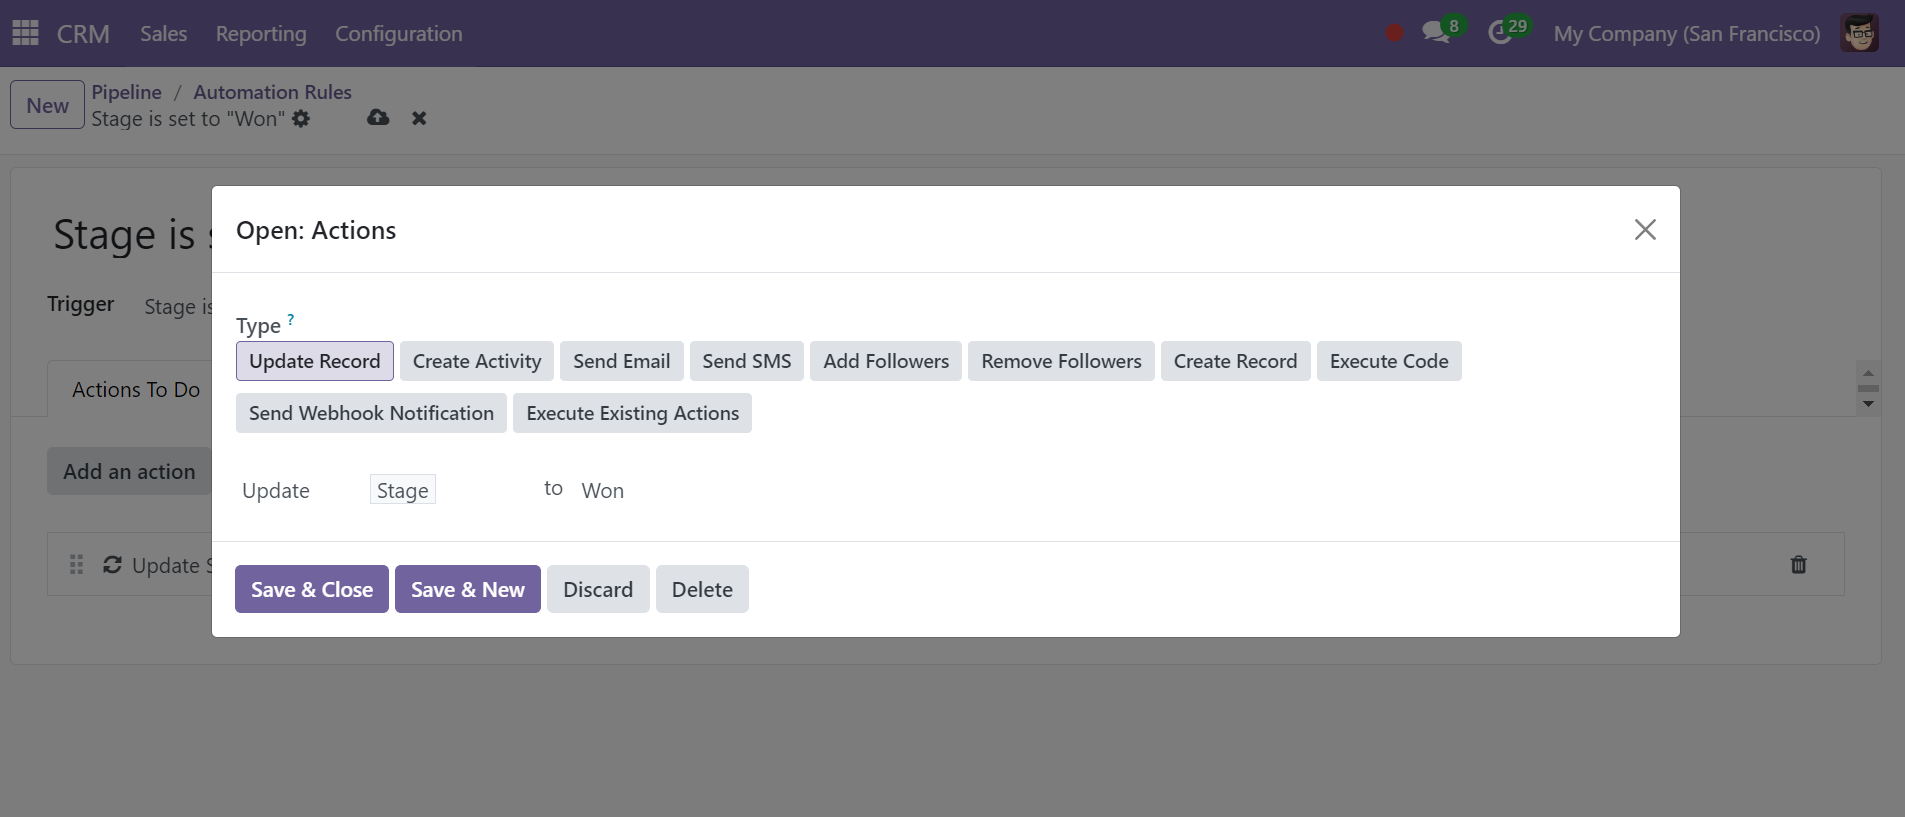
Select an action type from various options, such as updating records, creating activities, sending emails, adding and removing followers, creating records, executing code, sending webhook notifications, and executing completed actions.
In the next section, you can add permitted groups and specify the action you wish to do for this action (e.g., Compute or Update).Next, in the corresponding fields, as shown in the picture above, indicate which field you want to update and what stage you want to put in the field that was previously indicated. To delete any particular stage, you can choose the ‘Delete’ option from the settings icon. Immediately, the stage will be deleted. Finally, the ‘Fold’ button can be used to fold the stage in the Kanban view.
My Pipeline Menu
In Odoo 18 CRM, creating a quotation is simple and can be done from the My Pipeline window. Go to the Sales tab, click My Pipeline, and select the opportunity you want to quote.
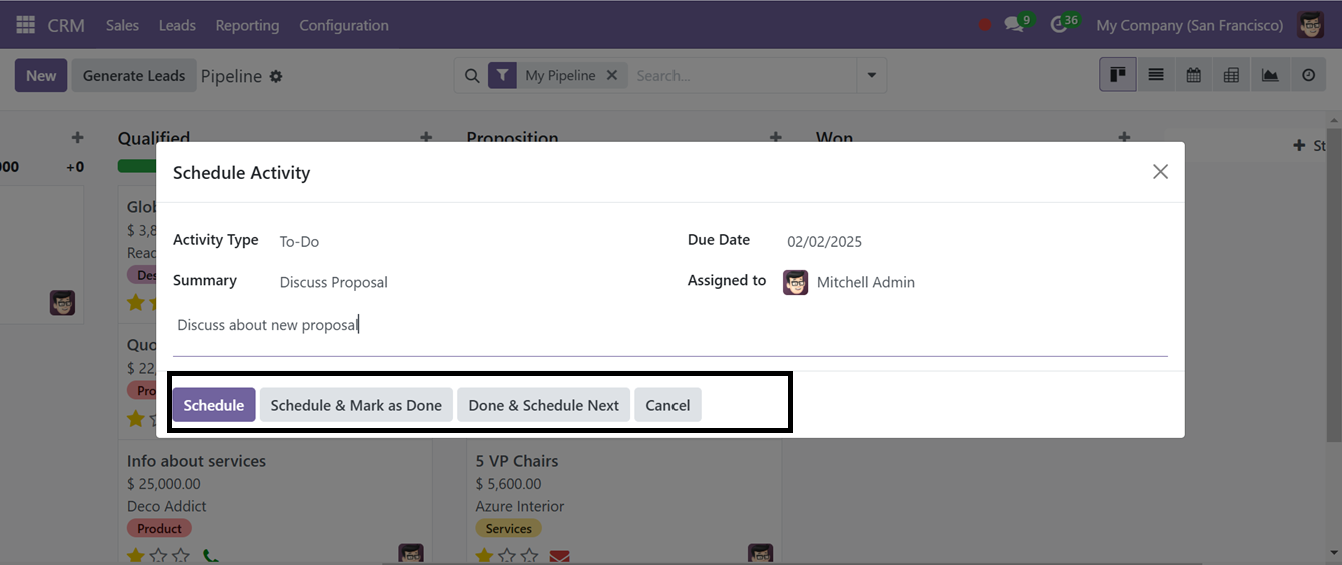
Effectively planning business tasks helps you manage time and duties more efficiently. In the Pipeline window, you can schedule activities or organize events with clients. If no activities are scheduled, a clock icon will appear in the Kanban view. Depending on the type of activity (phone, email, etc.), the icon will change. Click the icon to open a dialogue box and choose Schedule an Activity.

A pop-up window will appear where you can mention the Activity Type, and Summary, Set a due date, and Assign a responsible person. You can also add a note before clicking Schedule.
Then, you can open the opportunity kanban card to view its configuration form. If the opportunity meets the requirements, click Won to mark it as ready for a quote.
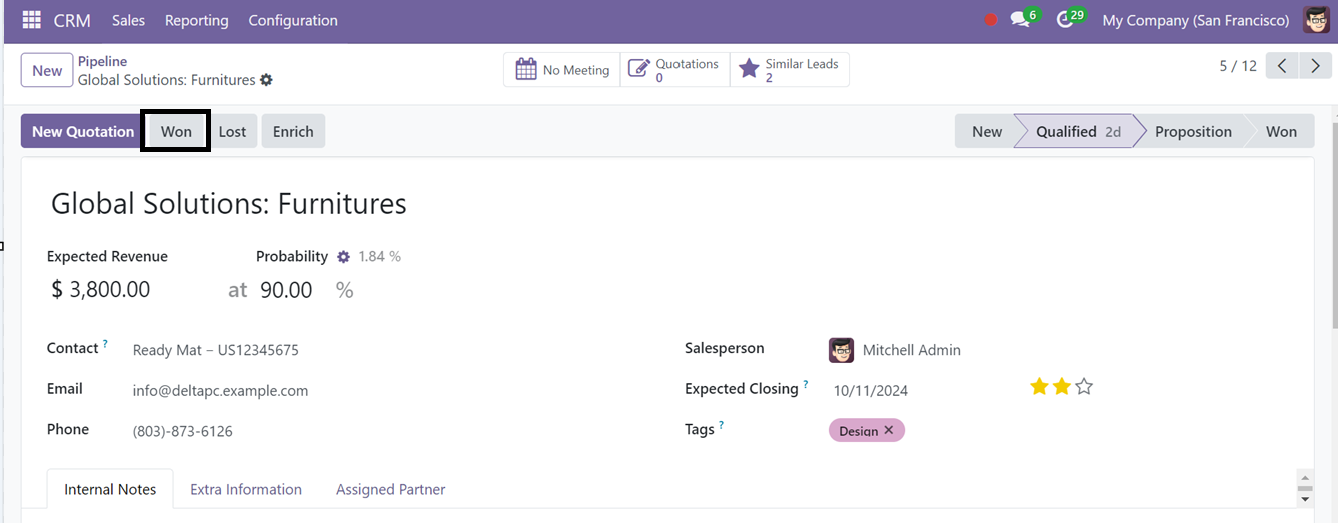
To make it a quotation, proceed by clicking on the New Quotation button, and a form view window will appear, as shown below.
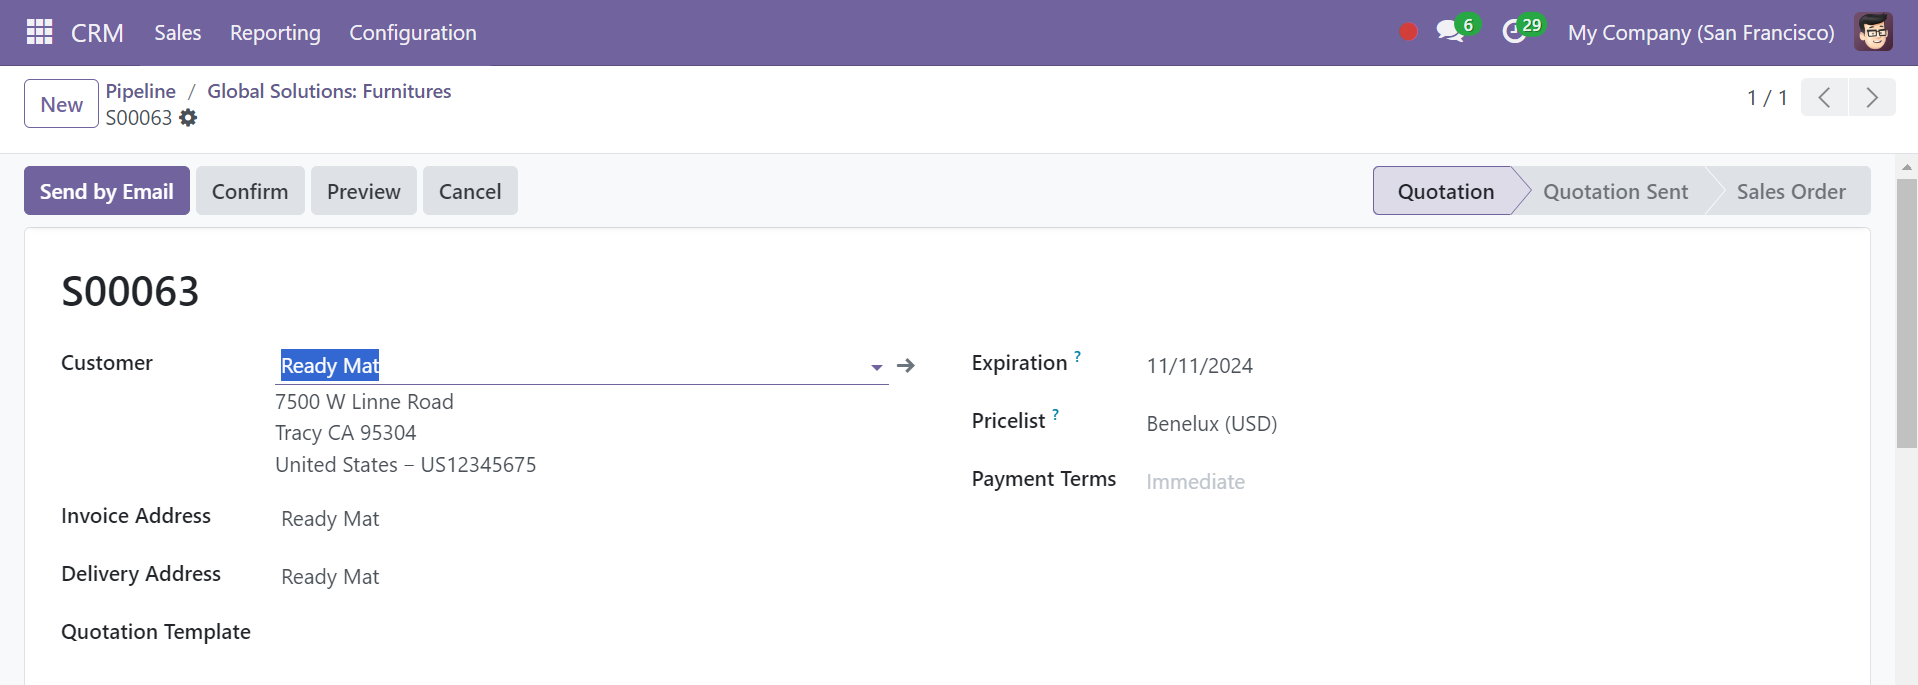

Here, you can edit the details for the new quotation, including the Customer, Quotation Templates, Payment Terms, etc. The Delivery Address, Payment Terms, and Pricelists can also be adjusted.
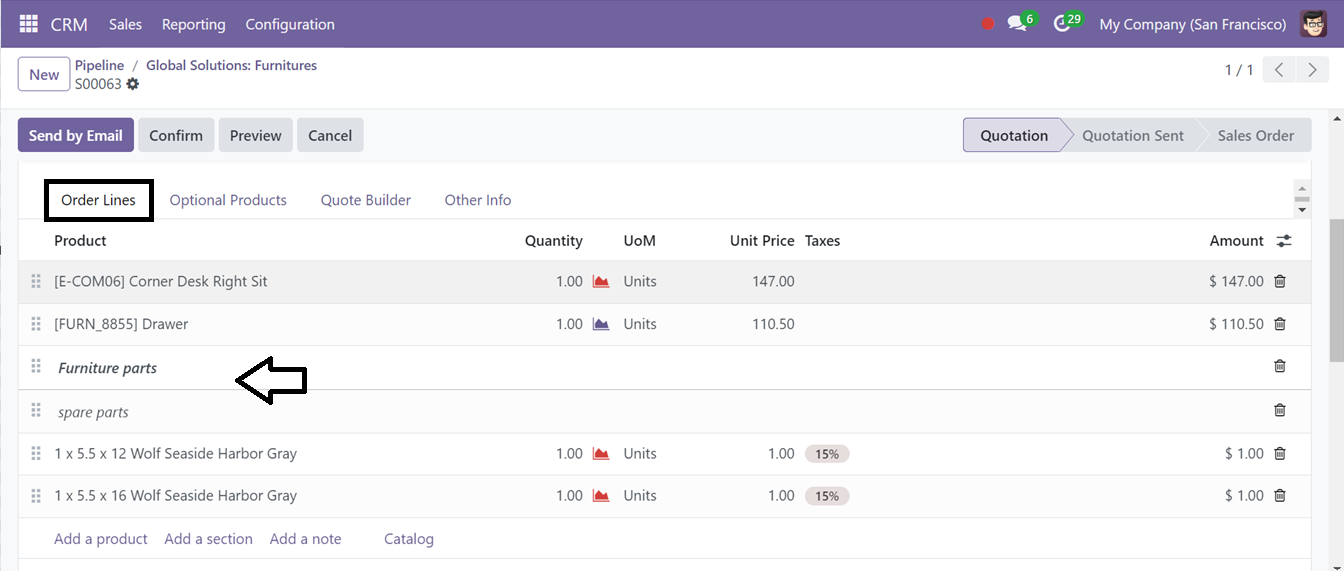
Order Lines Tab: you can select the quotation products from the Order Lines tab by clicking on the ‘Add a product ’ button. You can create more sections for the products and notes regarding them using the ‘Add a section’ and ‘Add a note’ buttons, respectively.
The Catalog button will help you to quickly navigate to the product catalog and choose the product according to your requirements.
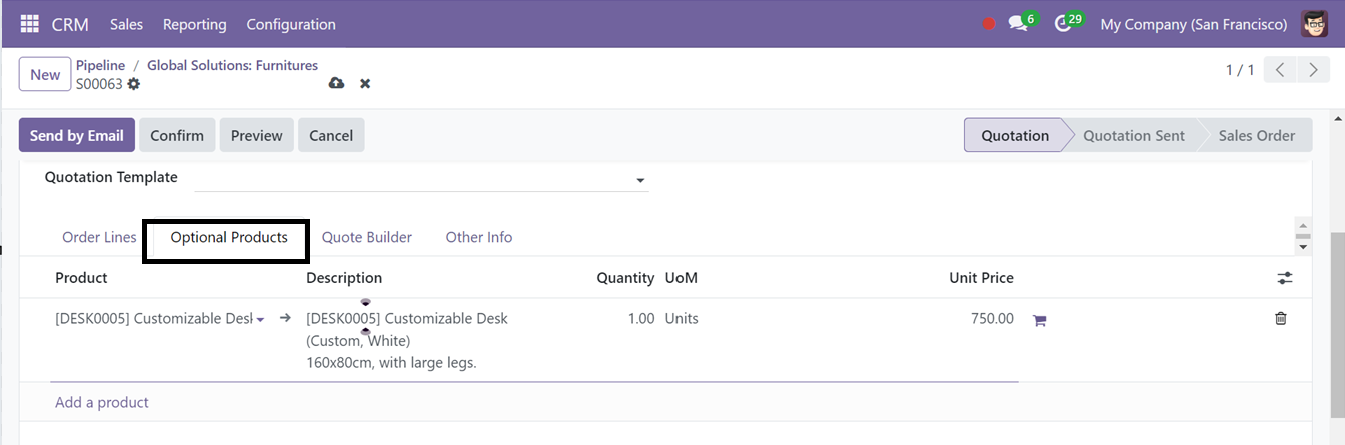
Optional Products Tab: After adding the products, you can utilize the Optional Products tab to add more products. These Optional products are extra goods or services that are recommended during a sale to increase the value of the transaction by recommending related or complementary goods.
You can add these products by using the ‘Add a product’ button as shown below.
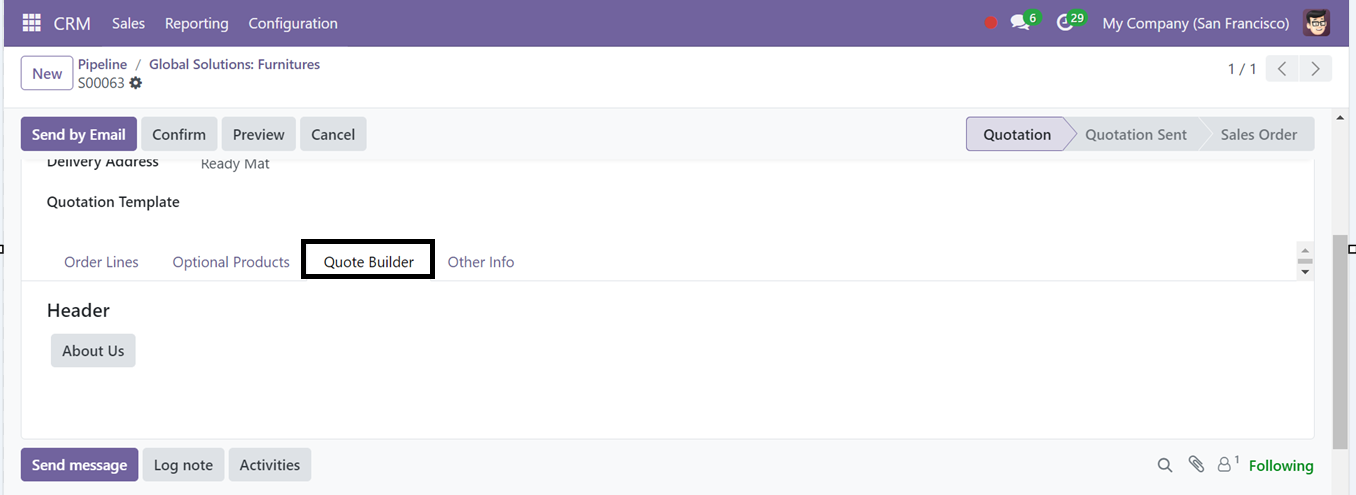
Quote Builder Tab: The Quote Builder tab in Odoo CRM streamlines sales teams' process of creating professional quotations, connecting the CRM pipeline with sales and invoicing workflow.
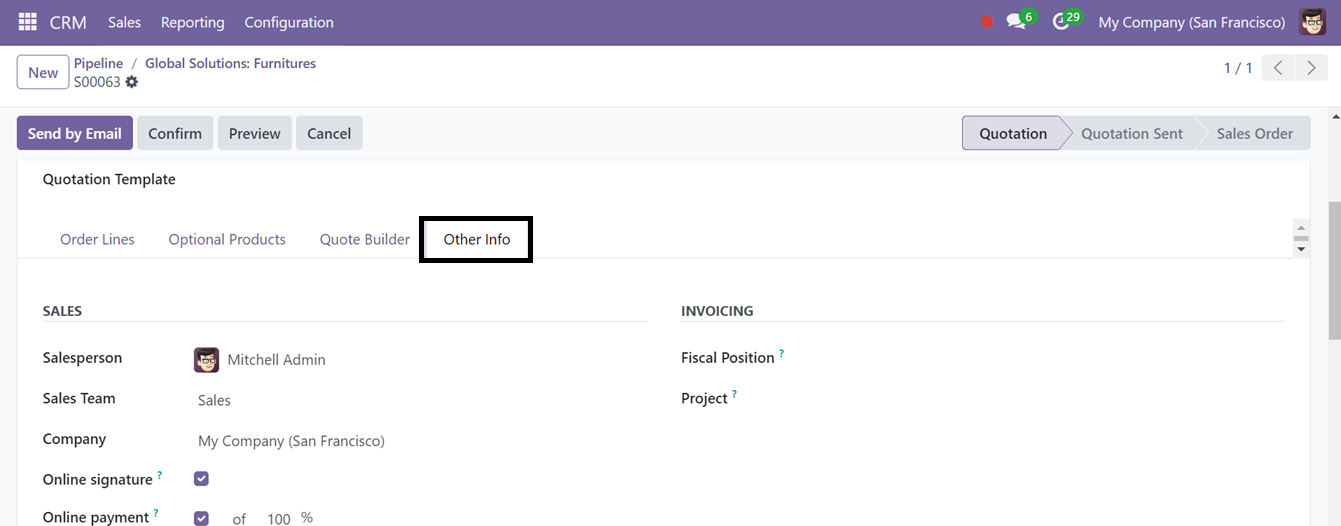
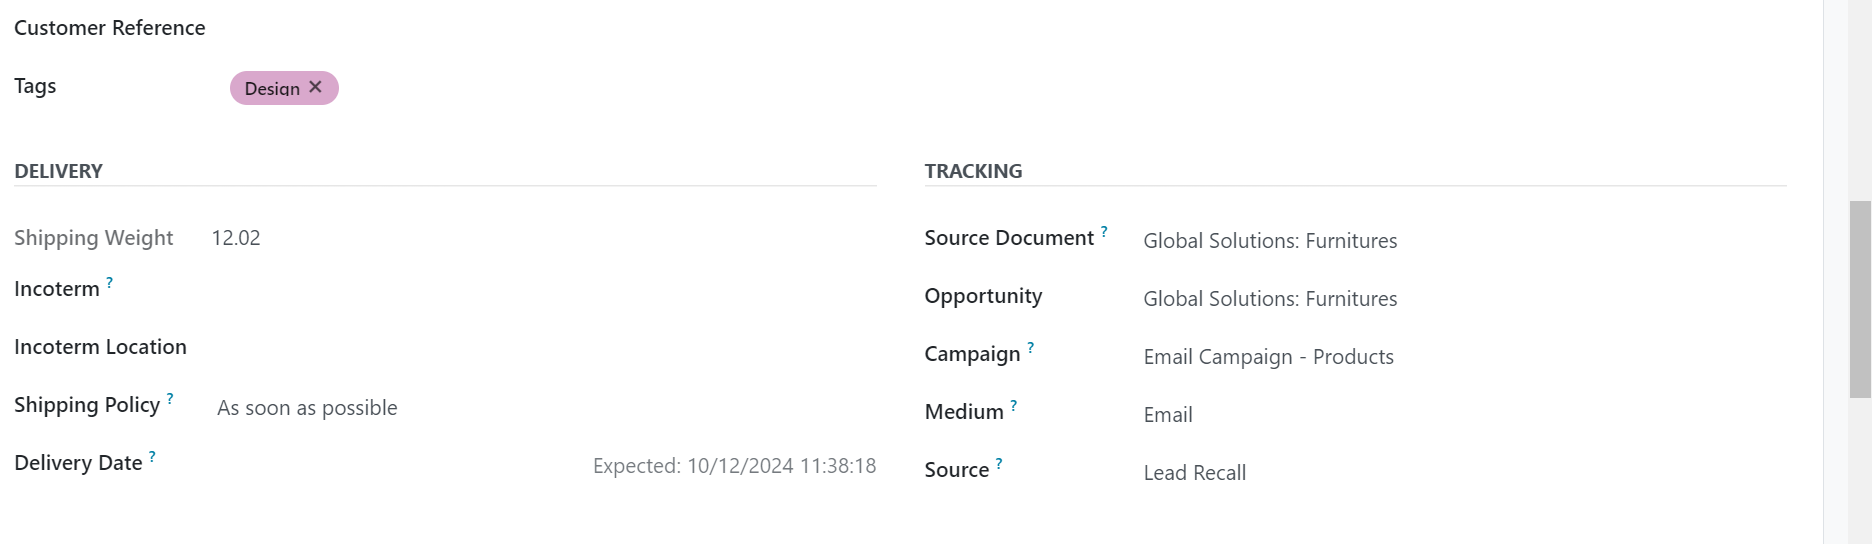
Other Info Tab: This tab can be used to configure the essential data about the SALES, INVOICING, DELIVERY, and TRACKING, as illustrated in the screenshot below.
After making your customization, click Confirm and enter the customer's details in the next window.

The form will generate some smart button options that can be used to track the project that this specific quotation is related to, the tasks that are included in the quotation, and the specifics of the products' delivery, using the Projects, Tasks, and Delivery smart buttons, respectively. You can also create invoices, send emails, and preview the invoice of the quotations using the Create Invoice, Send by Email, and Preview buttons.
My Activities Menu
The ‘My Activity” section under the Sales menu is a useful tool for tracking and analyzing sales-related activities. It provides a list view of client actions, including Opportunity names, Contact details, Email addresses, Phone numbers, Companies, Activities, Deadlines, Expected revenue, and Stages.
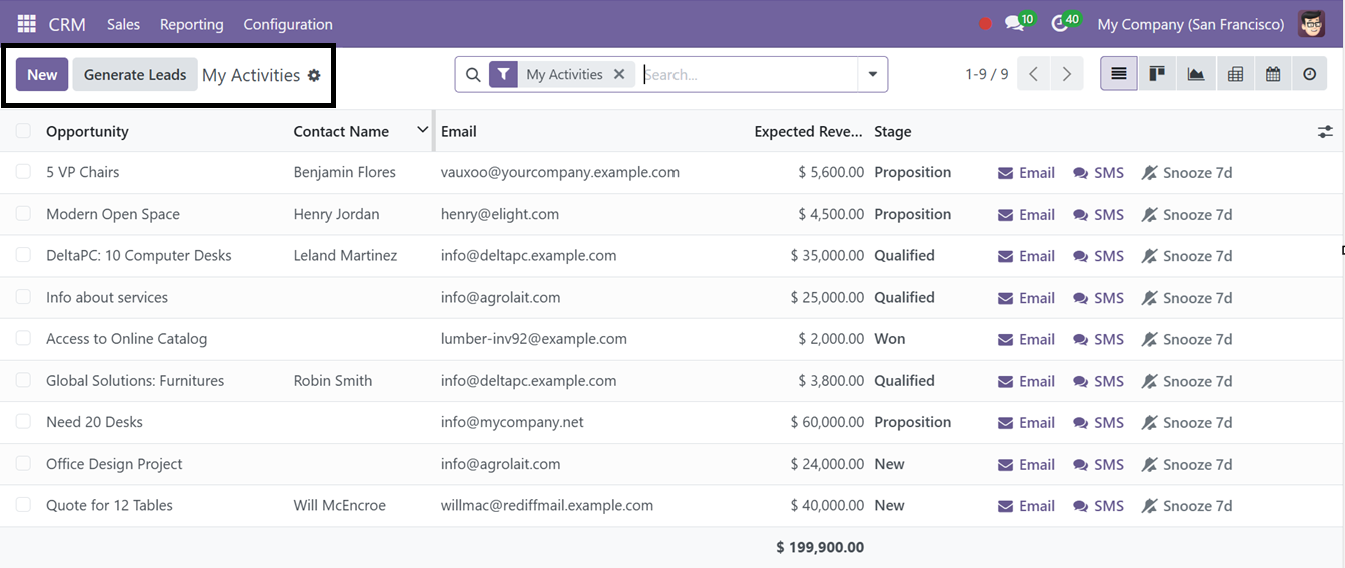
Select the desired activity column in the window and you can send emails and SMS using the Email and SMS buttons, snooze an activity for 7 days using the Snooze button, and click the ‘New’ button to generate a new opportunity. This will open a new Pipeline configuration window.
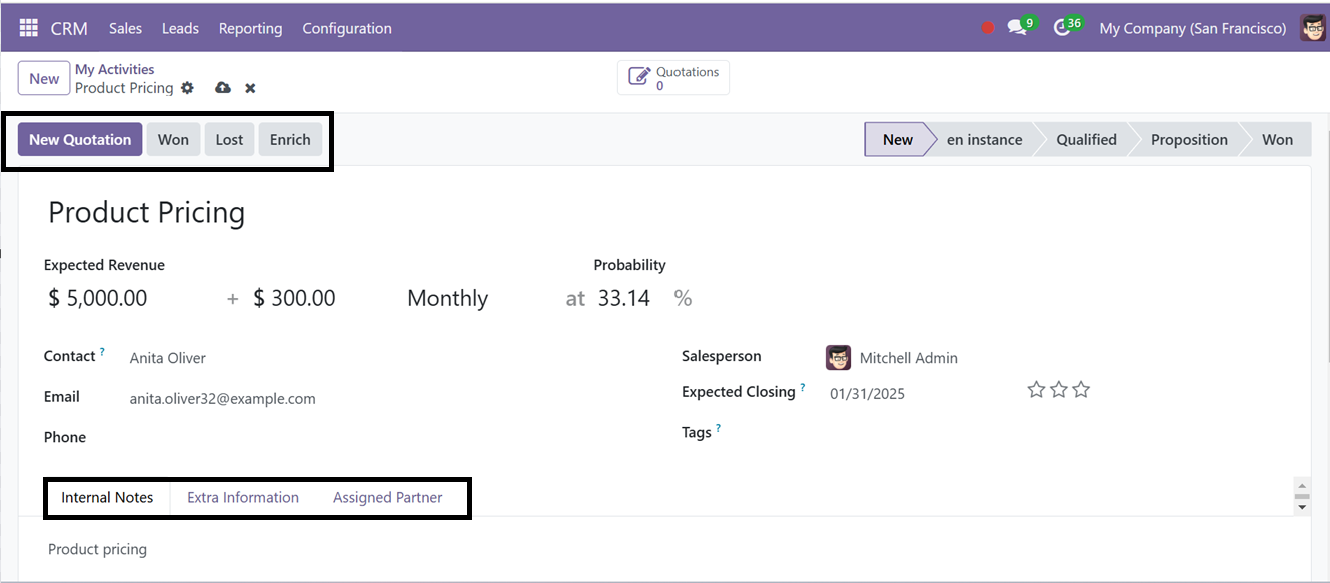
This form view is the same as the Pipeline creation form. So, you can create a new Pipeline activity and create it as a new quotation using the same procedure.
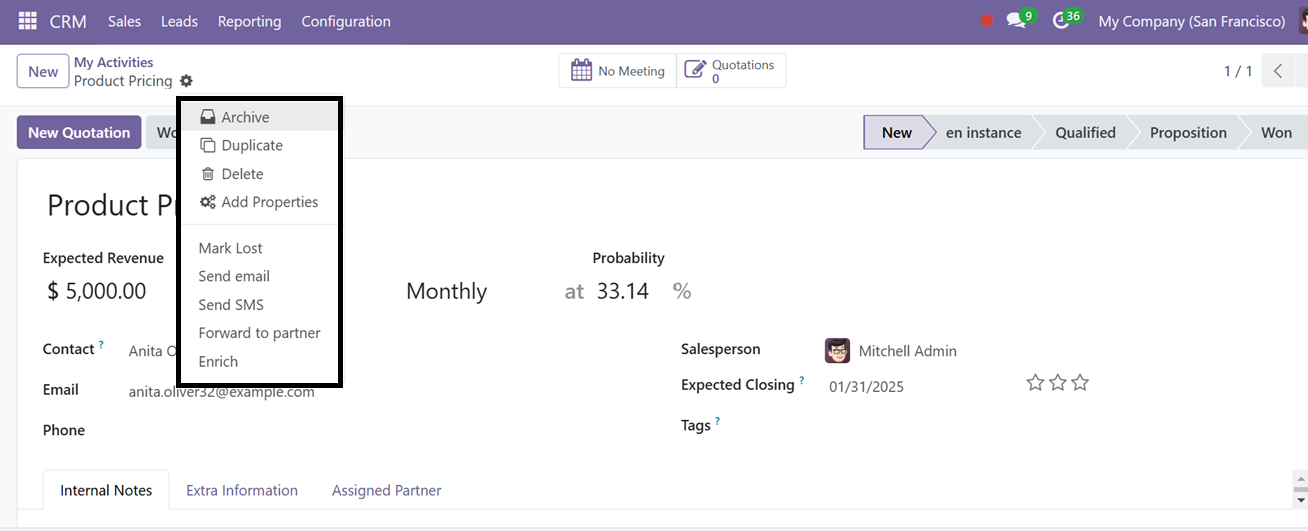
The ‘Action’ button placed on the upper left corner of the configuration form can be used to Archive, Duplicate, and Delete the form data. Then, you can mark the pipeline as a lost opportunity, Send an Email, or SMS, Forward it to the Partner, and Enrich the opportunity using the Mark Lost, Send Email, Send SMS, Forward to partner, and Enrich buttons respectively.
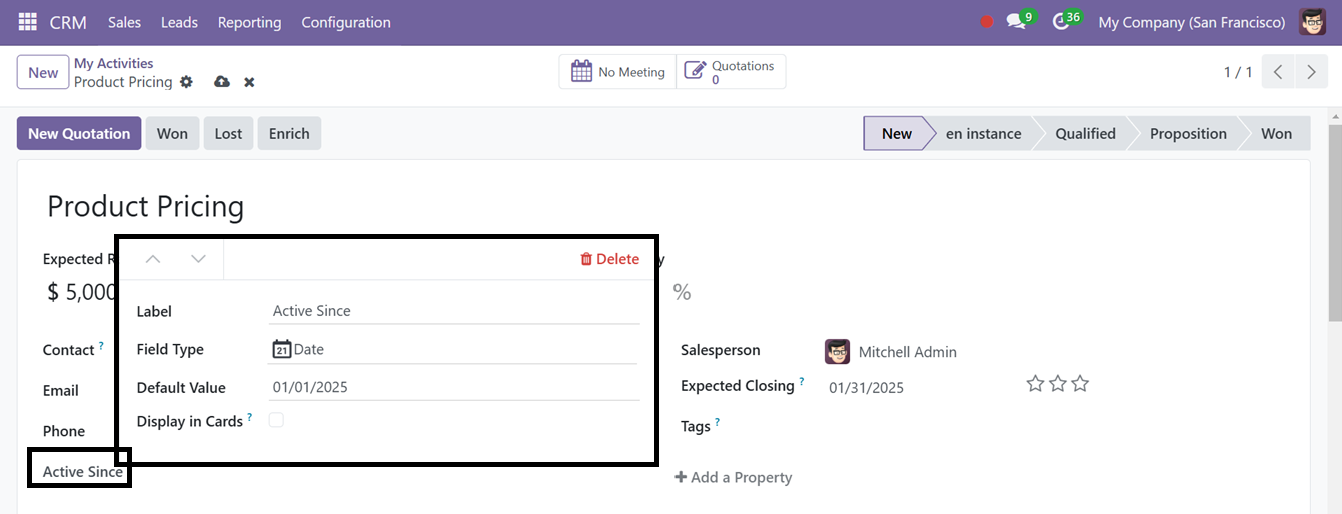
The ‘Add Properties’ button of the ‘Actions’ button can be used to create or add new form fields with various editing properties as per your requirements. Clicking this button will create a new field that can be customized according to the requirements of your job post. Enter the name of the field in the 'Label' section, then select the 'Field Type', such as Text, Tag, Line, Column, Checkbox, Date, Decimal Value, etc.
Next, specify whether the field should have a Default State and select the 'Display in Cards' option if applicable. Finally, save the newly created field.
Using the ‘Add Properties’ feature, you can customize your Odoo CRM form fields as per your business needs.
My Quotations Menu
You can access all your quotations by selecting My Quotations from the Sales tab. This window will show details such as Quotation Number, Creation Date, Customer, Website, Salesperson, Total, and Status.
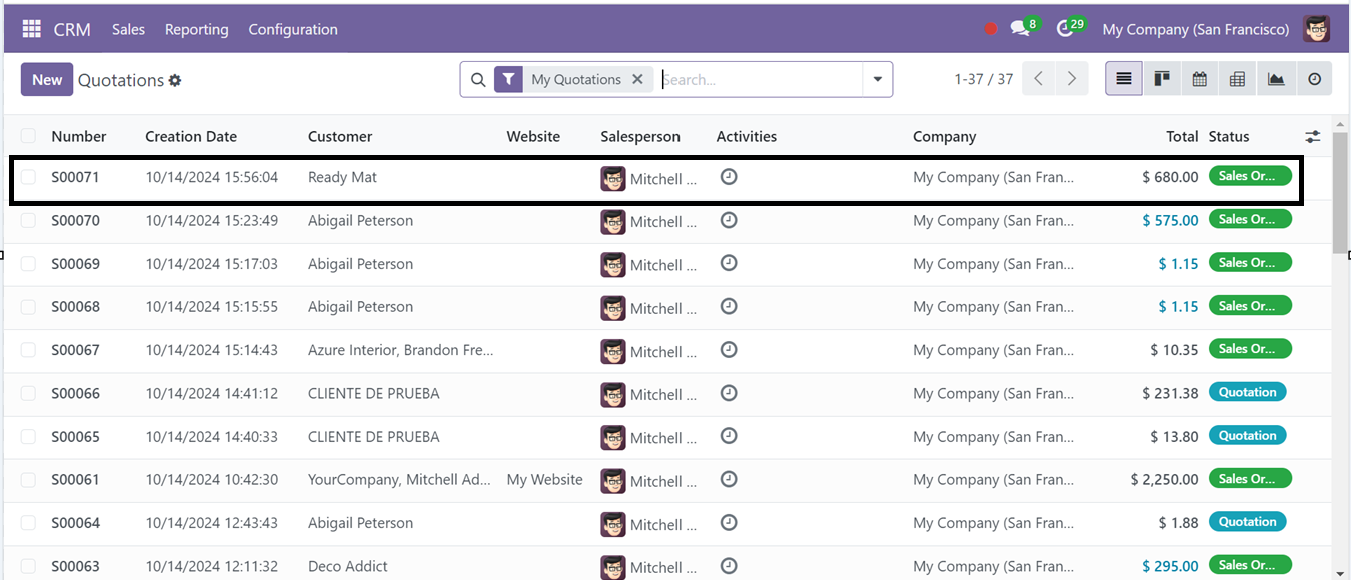
You can switch between List, Kanban, Calendar, Pivot, and Graph views for better organization. Use Filters and Group By options to find specific records, and save your preferred filters using Favorites for easier access in the future. To manage tasks related to the quotation, click the Activity button.
Using the Activity icon provided on each quotation column, you can schedule tasks by clicking on it. You can also create direct quotations from this tab using the ‘New’ button.
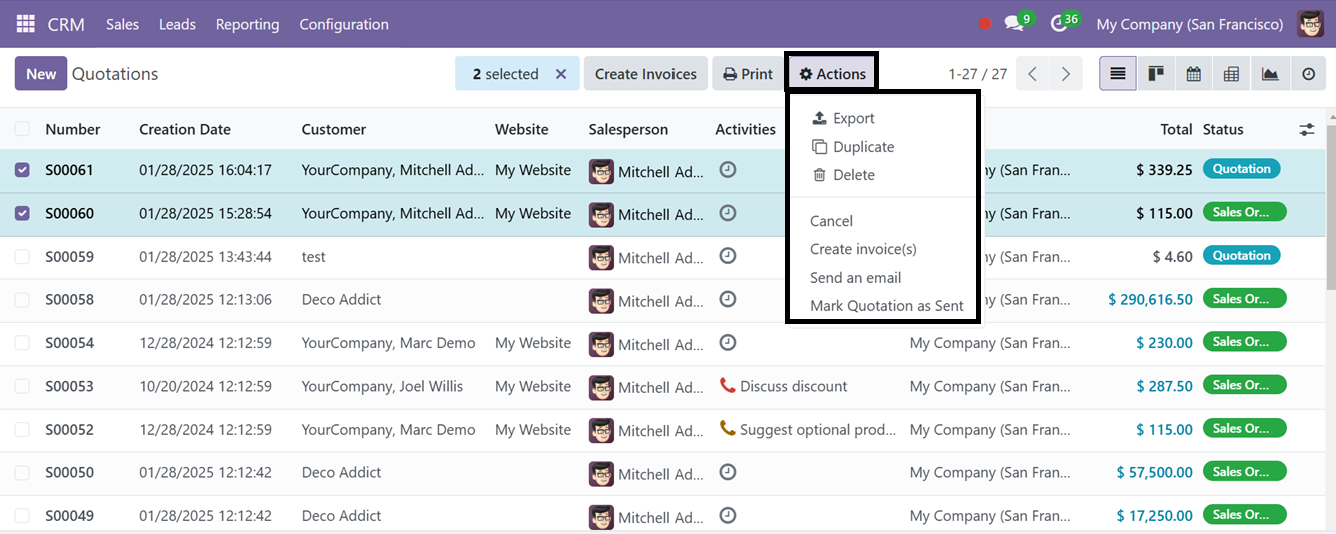
After selecting a quotation, you can use the 'Actions' button to perform various actions, such as Export, Duplicate, Delete, or Cancel the quotation directly from the dashboard without opening the configuration form view.
The 'Create Invoice(s)' button allows you to generate an invoice directly from the dashboard. Additionally, the 'Send an Email' and 'Mark Quotation as Sent' buttons enable you to email the quotation and mark it as sent, respectively.
Teams Menu
To access the sales team dashboard in Odoo 18 CRM, navigate to the 'Teams' option from the dropdown menu under the Sales Menu. This dashboard provides a comprehensive overview of the sales team's pipeline and activities, enabling you to monitor sales dynamics effectively.
To review or modify specific content, simply click on the corresponding title. Selecting 'Pipeline' will open the pipeline view for a particular team, allowing you to manage opportunities within that group. Interactive areas such as Sessions Running, Open Opportunities, Quotations, Orders to Invoice, and Abandoned Carts to Recover enable quick access to the relevant information.

The dashboard offers detailed sales analysis information about each Team, including the number of leads, quotations, opportunities, and orders awaiting invoicing. Each section features a clear graphical representation of new opportunities categorized by designated timeframes. For further analysis, click the three-dot menu located in the upper-right corner of each preview to explore more about the Sales Team regarding various categories such as View, New, and Reporting and Configuration.
You can manage Leads, Opportunities, Sales Orders, and Invoices quickly from this three-dotted menu of each Team card. Additionally, new opportunities or quotations can be created directly from these windows, and get the Reporting analysis of each of these sales specifics using the tools available within the Odoo 18 CRM module. Also, you can configure various settings options regarding the particular team using the ‘Configuration’ button. This streamlined approach simplifies managing the sales process and enhances team productivity.
To create a new Sales team, you can go to the ‘Sales Team’ section of the ‘Configuration’ Menu.
Customers Menu
The CRM module allows you to store and manage all customer information, including contact details. To access these stored contacts, navigate to the Sales menu and select Customers. Here, the customer details are displayed in this window using the Kanban view. To view or modify a specific record, simply click on it. Additionally, you can switch to the List view by selecting its respective icon located in the upper-right corner of the window.
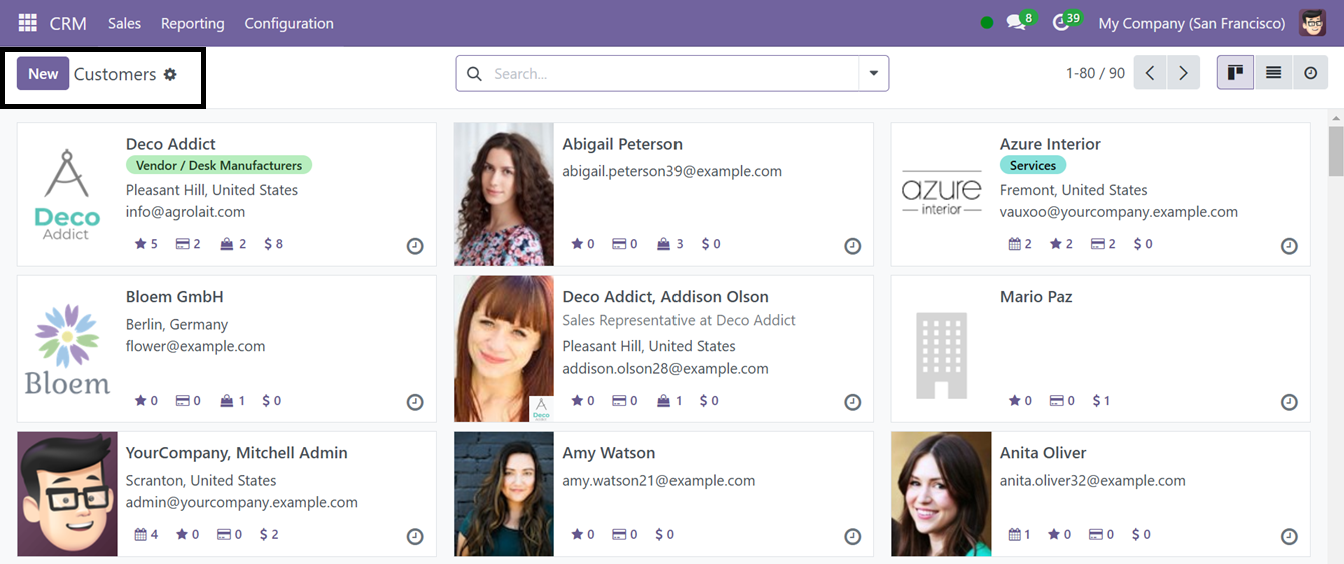
The Kanban view of each customer card shows a quick overview of their Name, Address, and Contact along with the total number of Opportunities, Purchases, Shopping carts, and Sales Orders related to the customer. Using the ‘Activity’ icon, you can schedule any activity with the customer.
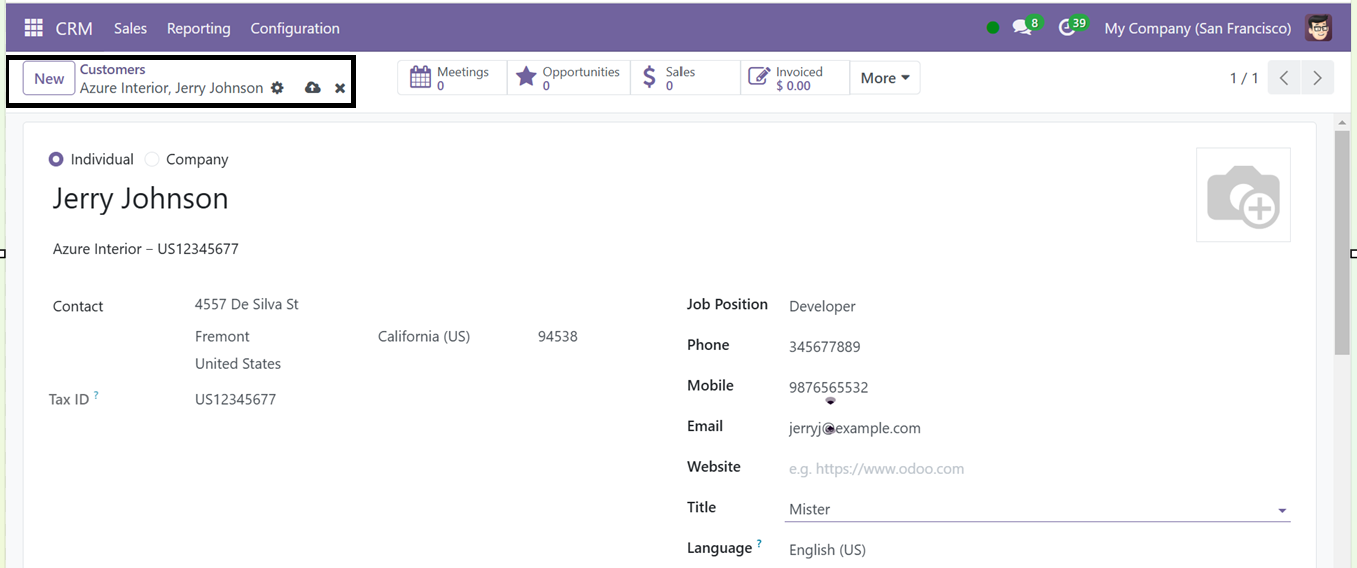
To create a new customer record, click on the ‘New’ button and mention whether it is an Individual or Company. Then, edit the basic customer details including the Name, Company, Contact Address, Job Position, Phone, Email, Title, Languag,e etc, as illustrated in the screenshot below.

In the 'Contacts & Addresses' tab, click the 'Add' button to enter the customer's contact details individually, particularly when multiple addresses are available. The 'Add’ button will open a new pop-up window, where you can choose the address type whether it is a Contact, Invoice Address, Delivery Address, or Other Address.
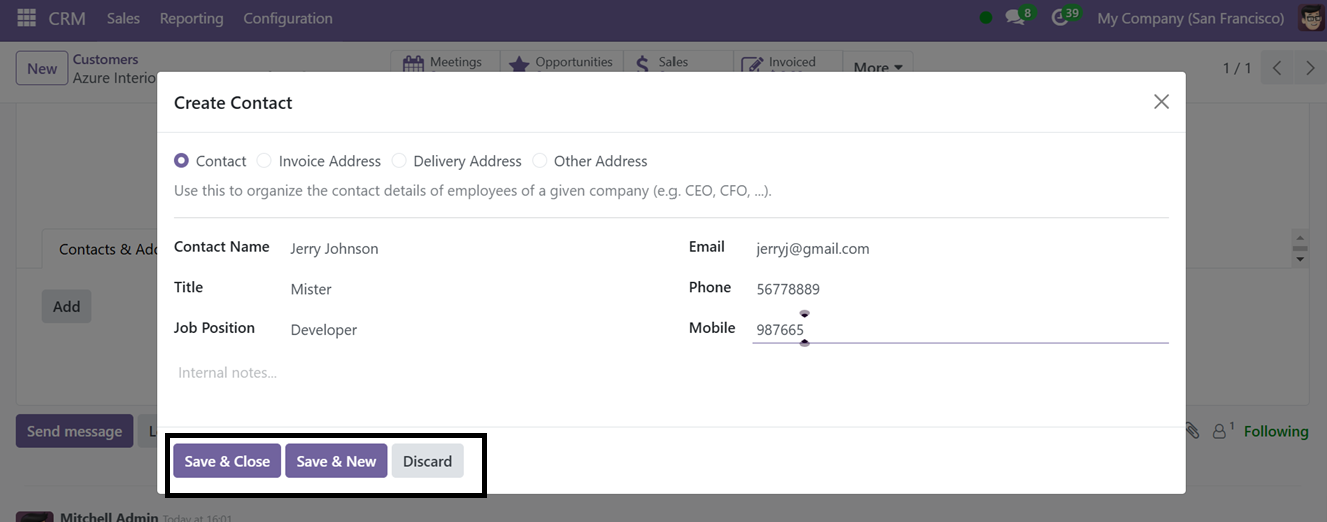
Then, edit the Contact Name, Title, Email, Phone, and other relevant information and save the address. Using this method, you can save multiple addresses of a particular customer.
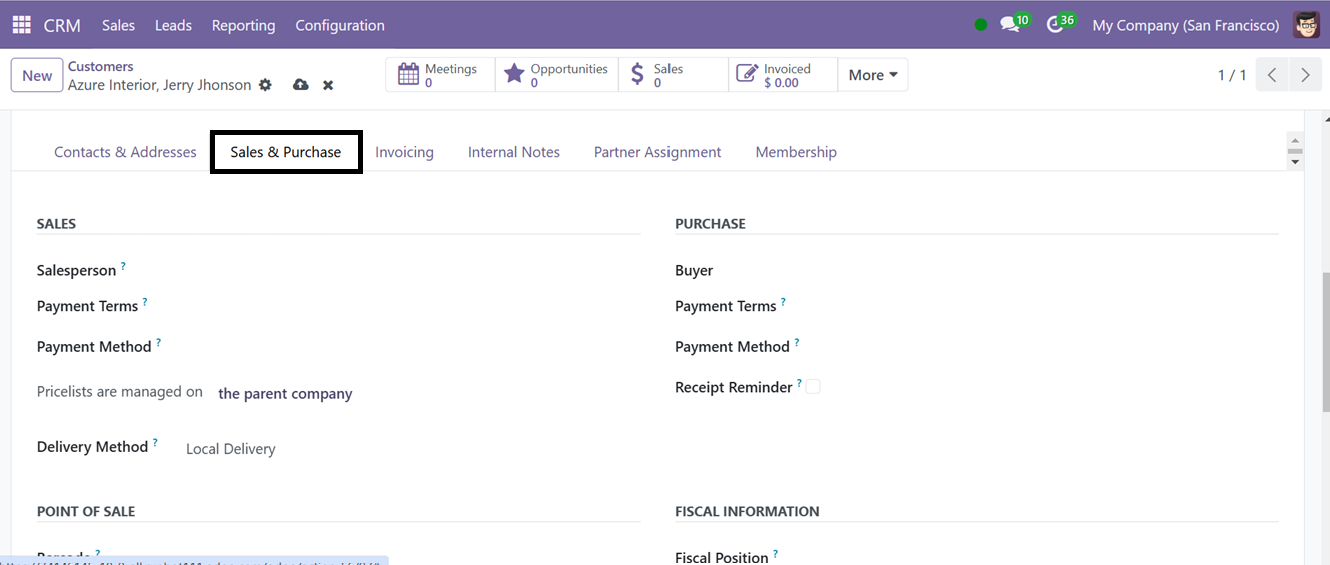
Under the ‘Sales & Purchases’ tab, you can configure the customer sales and purchase specifics including Salesperson, Payment Terms, Payment Methods, Buyer, FiscalPosition, Barcodes, etc in the SALES, PURCHASE, POINT OF SALE, FISCAL INFORMATION tab sections.
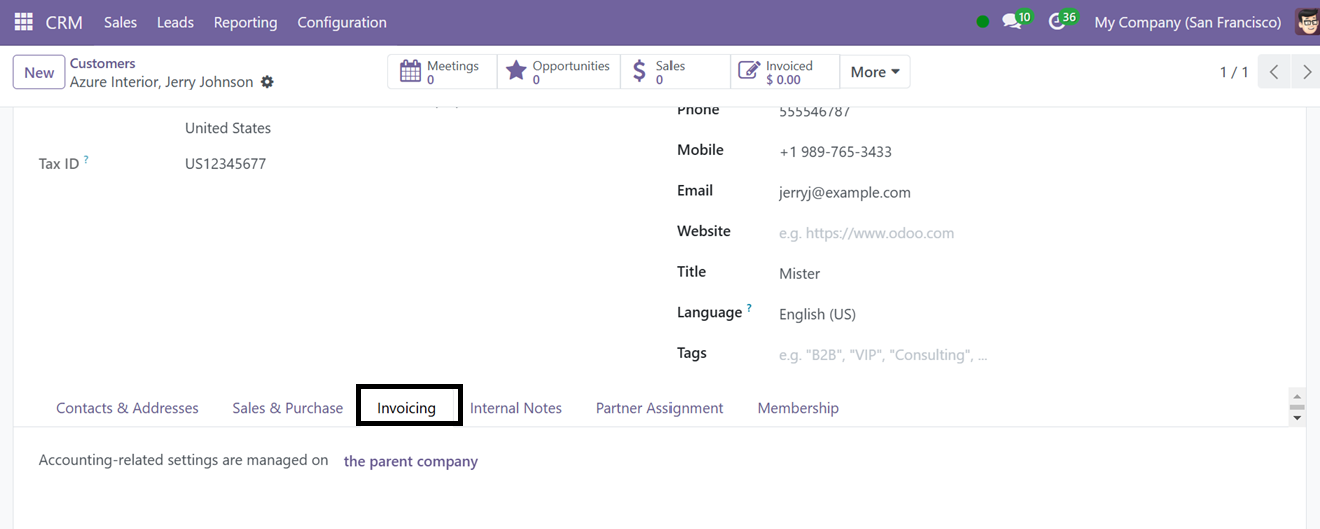
The ‘Invoicing’ tab can be used for invoice and accounting-related settings.
The ‘Internal Notes’ tab can be used to provide any information regarding the customer.

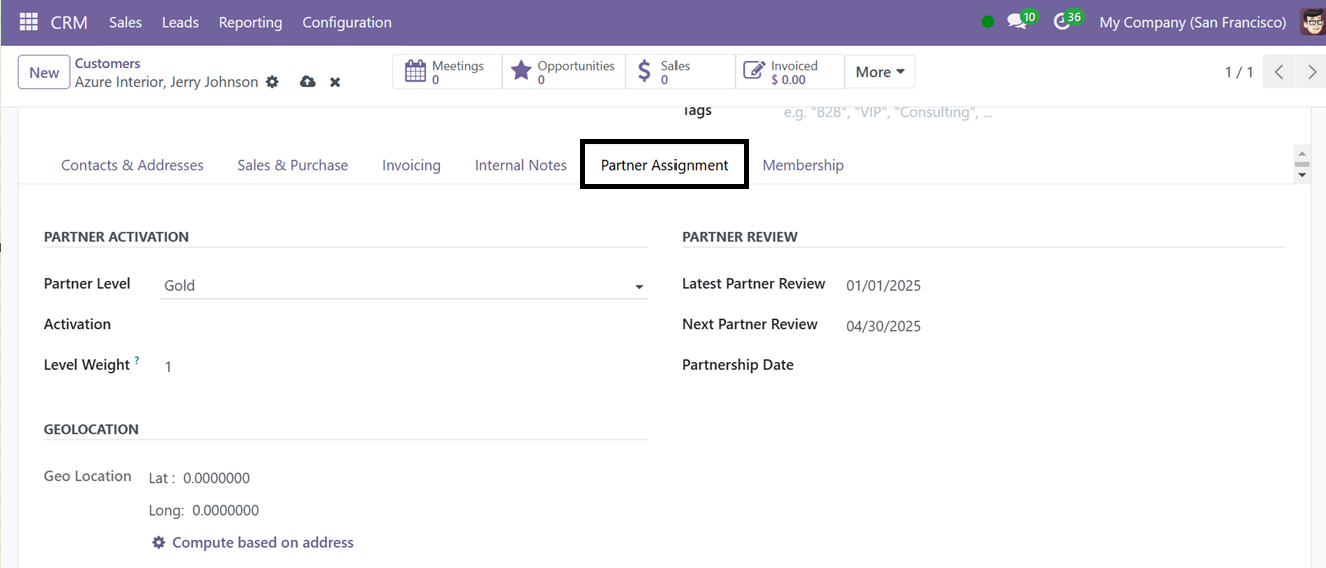
By utilizing the ‘Partner Assignment’ tab, you can configure the partnership details and Geolocation of the customer.
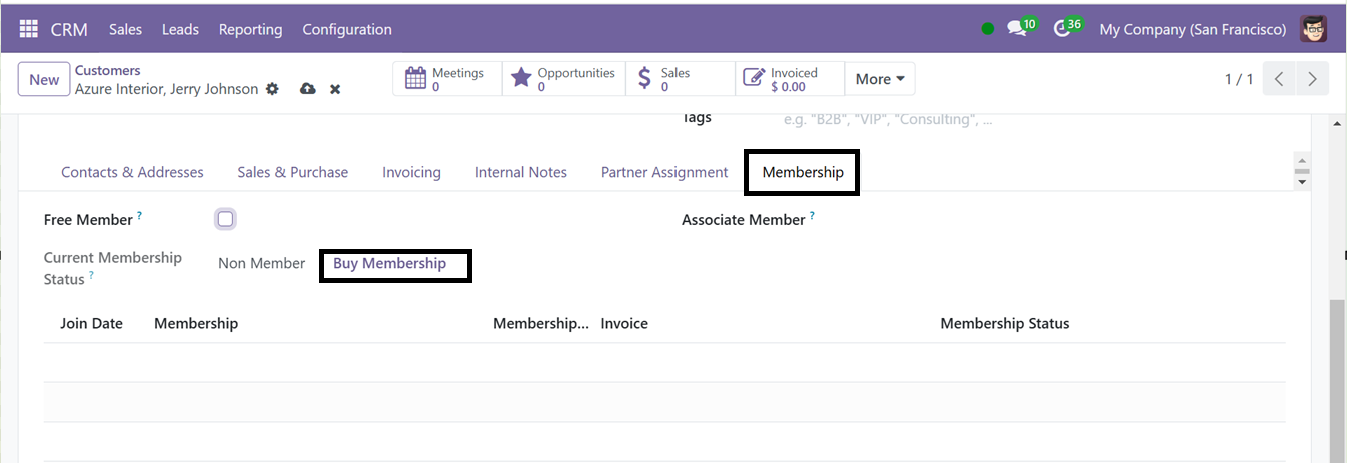
Finally, the ‘Membership’ tab can be used to manage the customer membership specifics including Free Membership, Associate Membership, Current Status, Joining Date etc. To add a new membership, click on the ‘Buy Membership’ button.
After saving all these details, the new customer data will be added to your CRM customer database and you can utilize the data for creating various Sales, Quotations, Leads, etc.