The Configuration Menu of the CRM module can be used to tune in various settings options. These settings can enhance functionality related to the CRM and Lead Generation tabs provided under the Settings window. These include:
● Recurring Revenues: Enable this to define recurring plans and revenues for opportunities.
● Multi Teams: Allows assigning a salesperson to multiple sales teams simultaneously.
● Predictive Lead Scoring: Estimates the probability of closing leads based on factors like stage, email, and phone quality.
● Rule-Based Assignment: Automatically assign leads to salespeople based on predefined rules.
● Lead Generation: Enables features like Lead Enrichment, Lead Mining, and Visits to Leads to enhance lead management
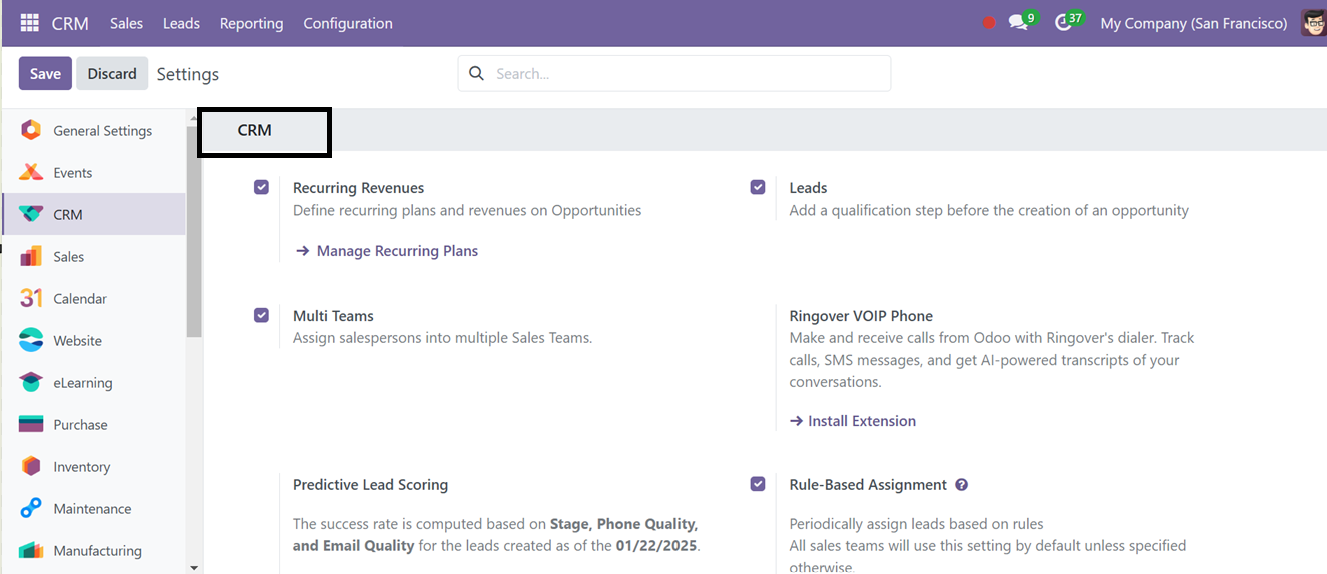


These settings options streamline sales processes and boost CRM efficiency.
Recurring Plans
With predetermined pricing, payment cycles, and renewals, recurring plans in Odoo CRM assist companies in automating and managing subscription-based sales, guaranteeing consistent income and client retention.
After activating the "Recurring Plans" feature in the Settings window, users can access the "Manage Recurring Plans" link to add and manage available plan options. The list of existing plans is displayed, as shown in the screenshot below.
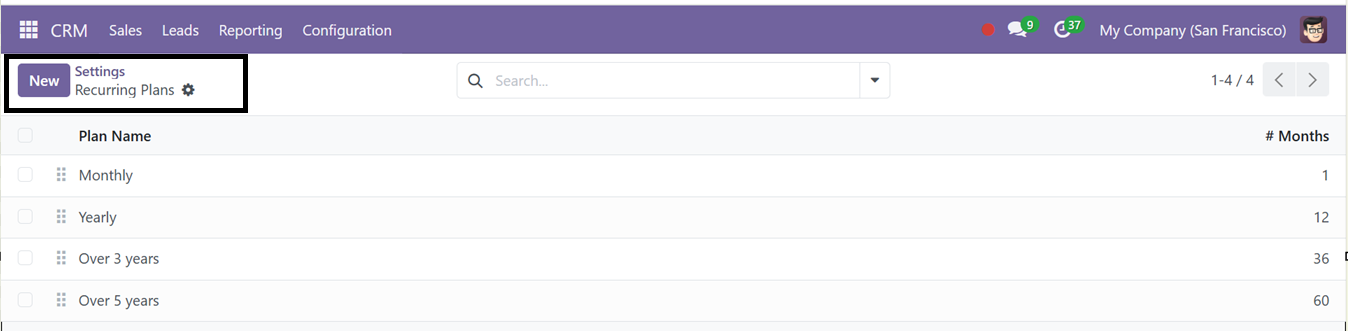
Click the "New" button to create a plan, then enter the Plan Name and specify the duration in Months in the editing field before saving the data.
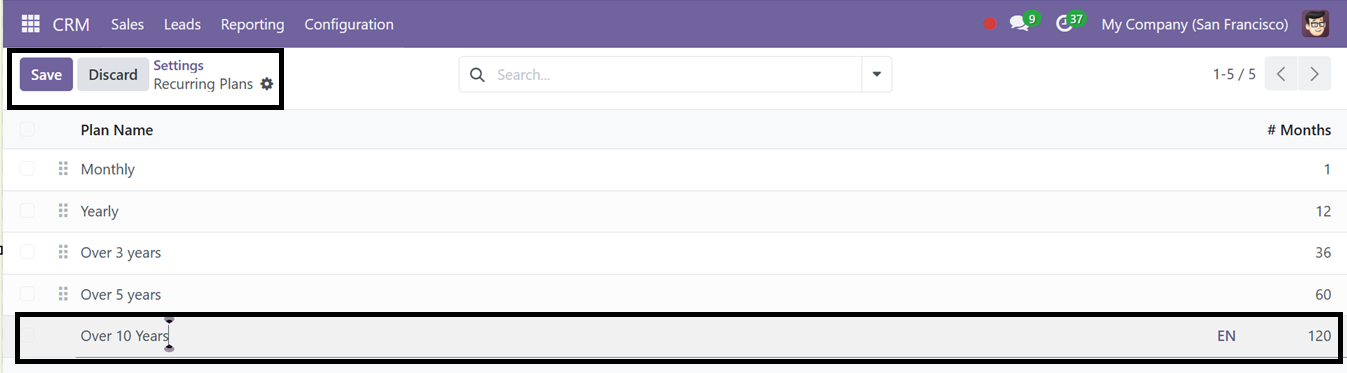
You can utilize this newly created recurring plan for creating quotations and pipelines as per the requirements.
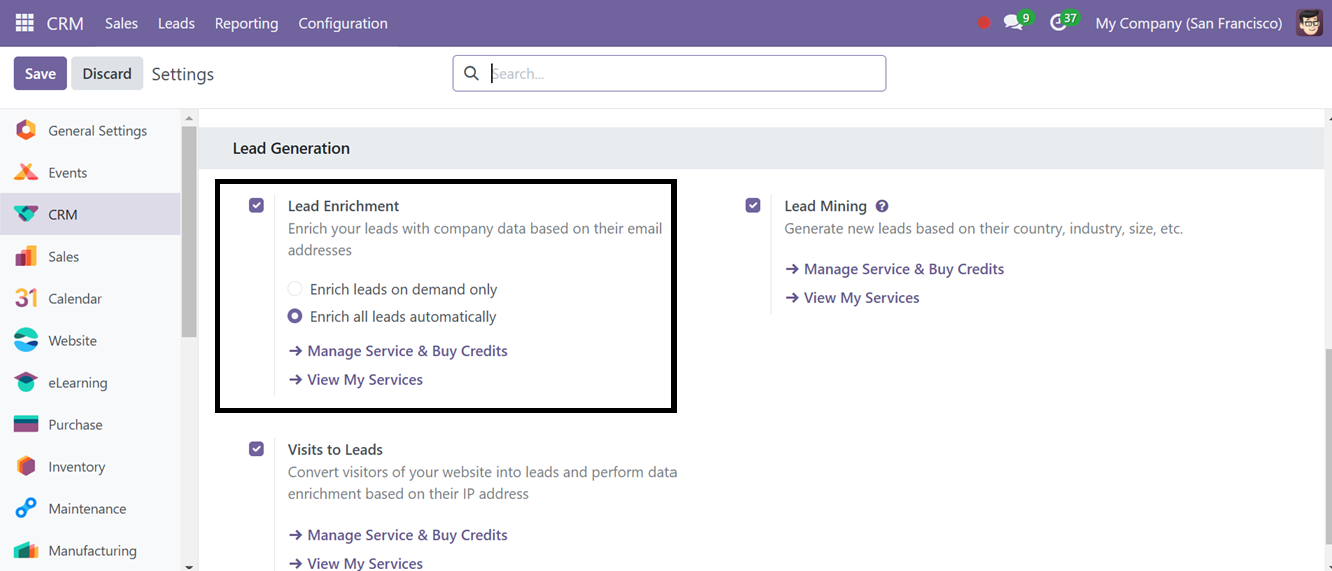
Lead Enrichment
The Lead Enrichment feature in Odoo 18 CRM allows you to gather customer contact details using just their email address. By entering an email ID, you can create a new lead and use lead enrichment tools to pull contact information from external sources. To enable this feature, go to Settings under the Configuration tab. In the Lead Generation section, activate Lead Enrichment. You can choose between two options: Enrich all leads automatically or Enrich leads on-demand only. Once selected, click Save.
Next, go to My Pipeline in the Sales menu. Here, you can create a new pipeline using a customer's email address. After entering all the information and clicking Add, you can view the pipeline details. Then, go to the form view of the pipeline.
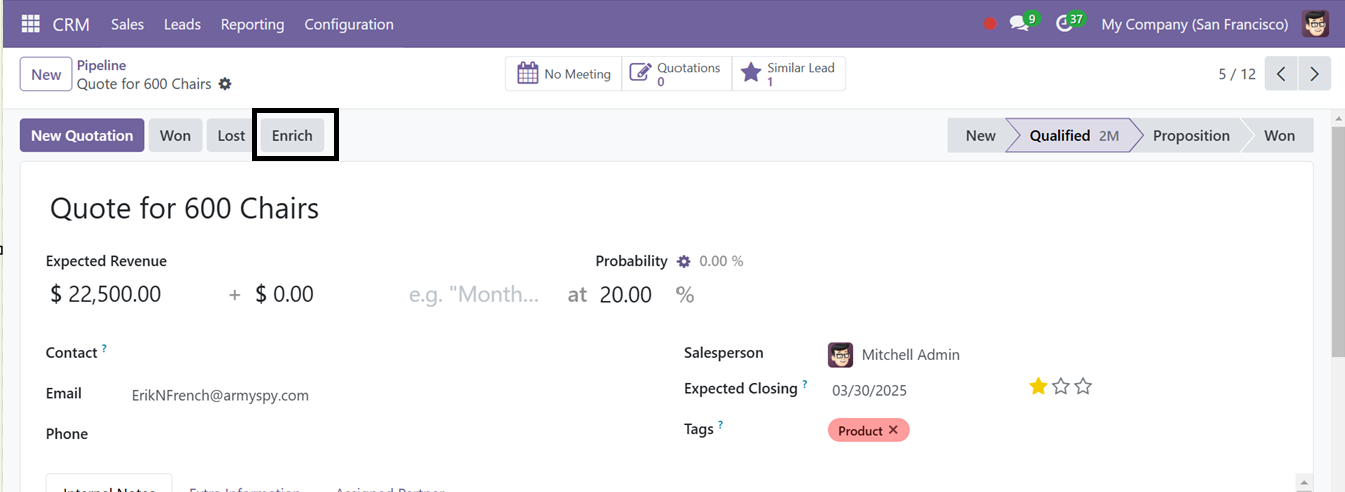
Here, you can simply use the Enrich button for the lead enrichment for automatically retrieving and saving the customer's contact information for future use.
Lead Mining
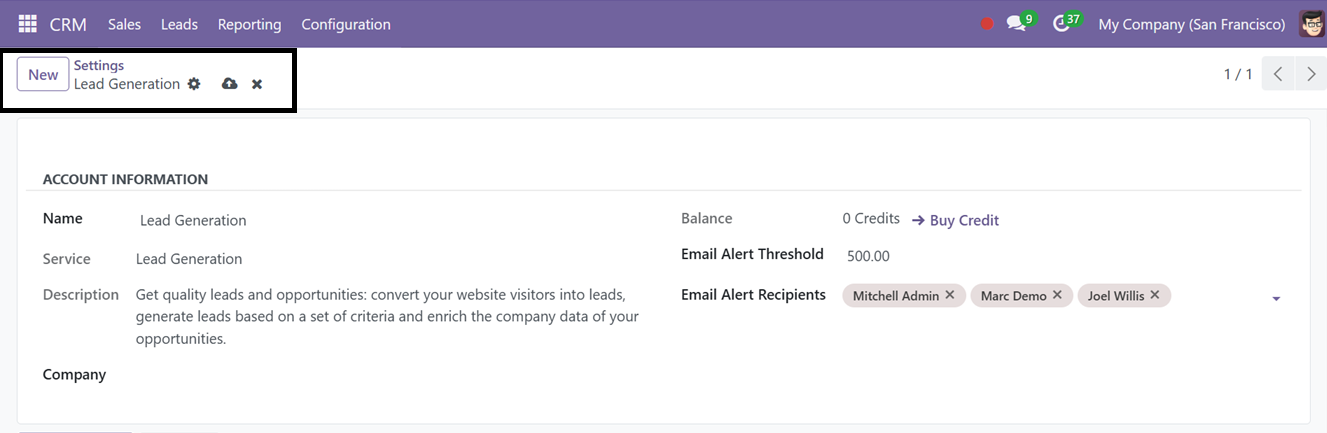
The Lead Mining feature helps generate new leads based on attributes such as country, company size, and industry. To activate this feature, go to Settings under the Configuration tab and enable Lead Mining. The "Manage Services & Buy Credits" link in Odoo CRM allows users to manage lead mining services and purchase credits for generating leads.
After clicking on the link, you will be led to an Lead Generation Settings window, where you can set an Email alert Threshold and Email Alert Recipients and proceed with the ‘Buy Credit’ link.
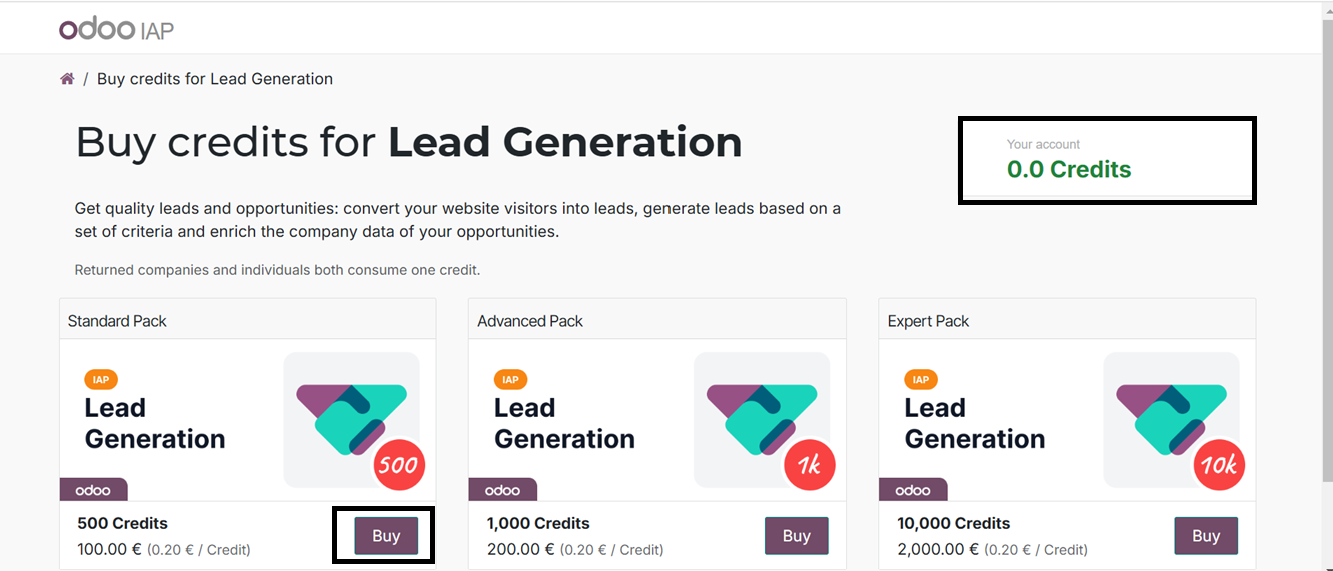
Then, you will reach an Odoo website interface where you can buy credits for Lead generation by choosing a required plan and clicking on the ‘Buy’ button as illustrated in the screenshot below.
Once you buy enough credits, navigate to My Pipeline under the Sales tab and click Generate Leads. In the window that appears, specify the number of leads you want to generate.
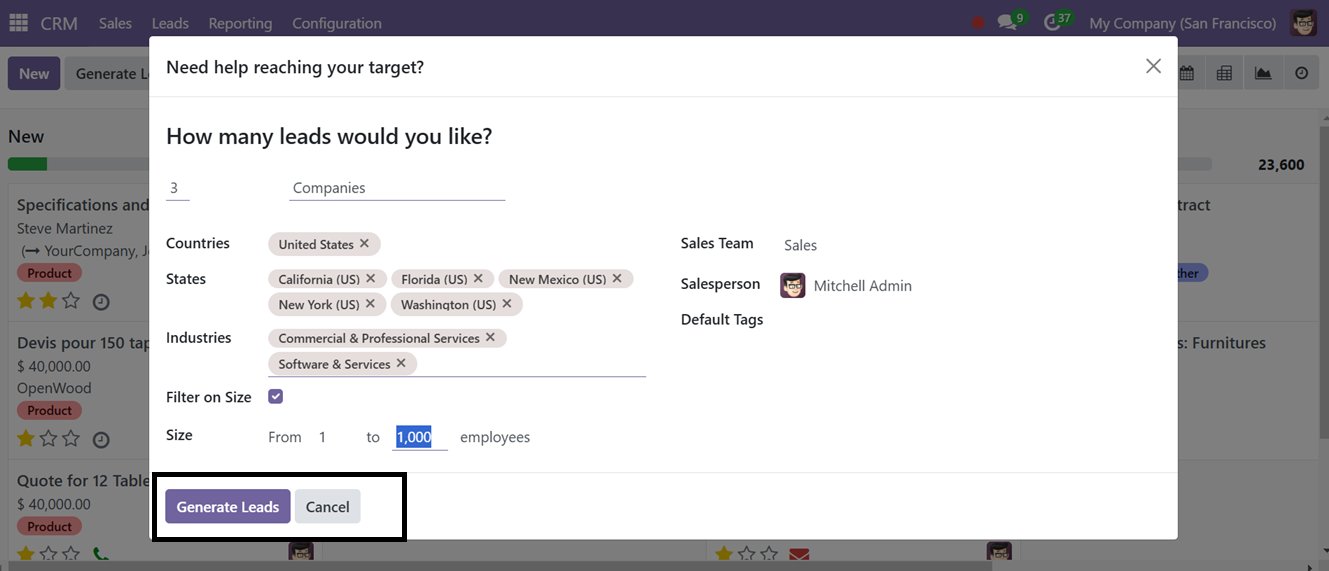
You can choose between Companies or Companies and their Contacts and fill in details like Countries, States, Sales Teams, and salespeople. Optionally, use the Filter on Size to narrow the range of staff counts. After entering all necessary information, click Generate Leads.
Multi Teams Feature
By enabling the "Multi Teams" feature, salespeople can be assigned to multiple sales teams. To activate this feature in Odoo 18 CRM, follow the steps below. Once enabled, you can access this option under Sales Teams when creating a new team.

With the "Multi Teams" feature enabled, you can add multiple team members to a specific team using the "Add" button within the "Members" tab. This functionality allows a salesperson to be assigned to multiple teams, providing greater flexibility in team collaboration. For instance, you can create a new Sales Team, assign multiple salespeople to it, and also include the same salesperson in multiple sales teams as needed.
Rule-Based Assignment
The ‘Rule-Based Assignment’ Settings feature allows you to distribute leads to salespeople automatically, based on predefined criteria.
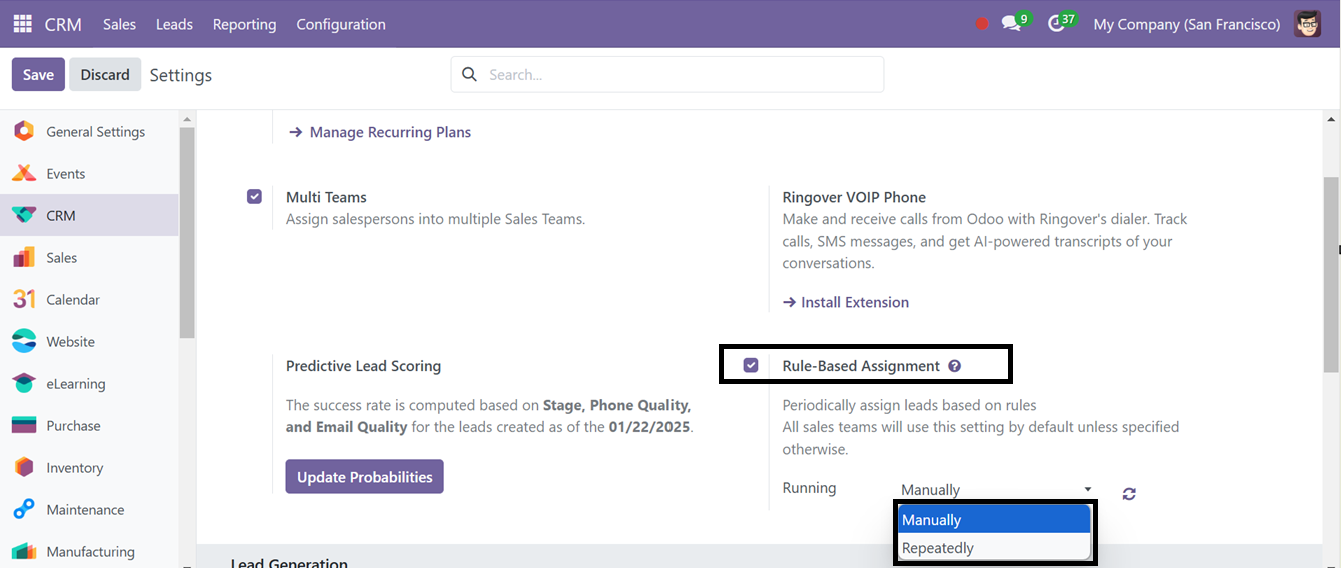
The "Running" dropdown menu offers two options: Manually and Repeatedly. Choosing the Manual option allows users to assign leads by clicking an action button in the Sales Teams form view. The ‘Repeatedly’ option enables automated lead distribution by scheduling assignments at specified time intervals between cron jobs.
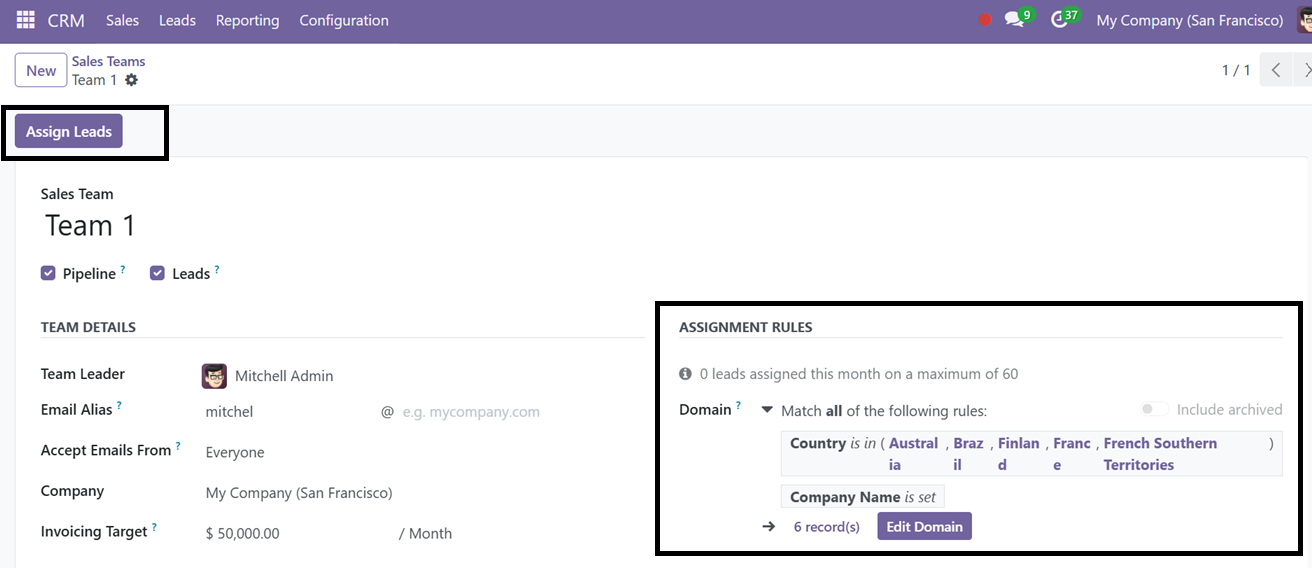
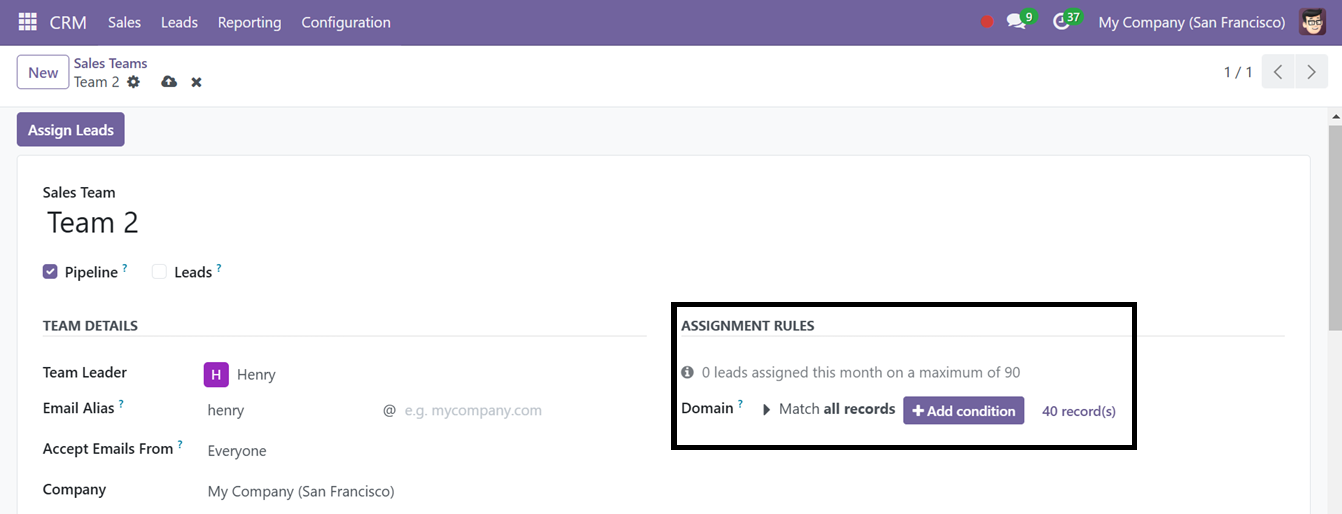
For instance, if the cron job (A scheduled task that automatically executes predefined actions at specified intervals) runs daily, leads will be processed and assigned the following day. Additionally, a new section titled "Assignment Rules" will appear in the Sales Teams configuration form view, allowing users to configure distribution settings efficiently, as illustrated in the screenshot below.
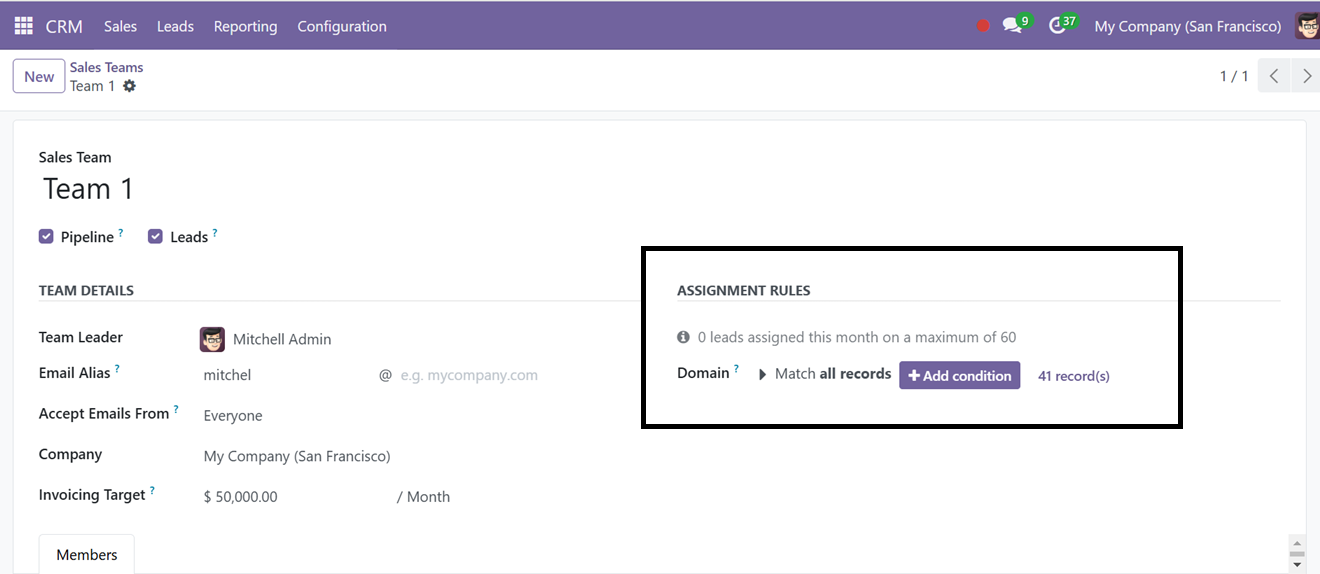
To define assignment rules, click on "+Add condition” and then you can see an ‘Edit Domain’ button. Clicking on the button will open a pop-up window, as shown below.
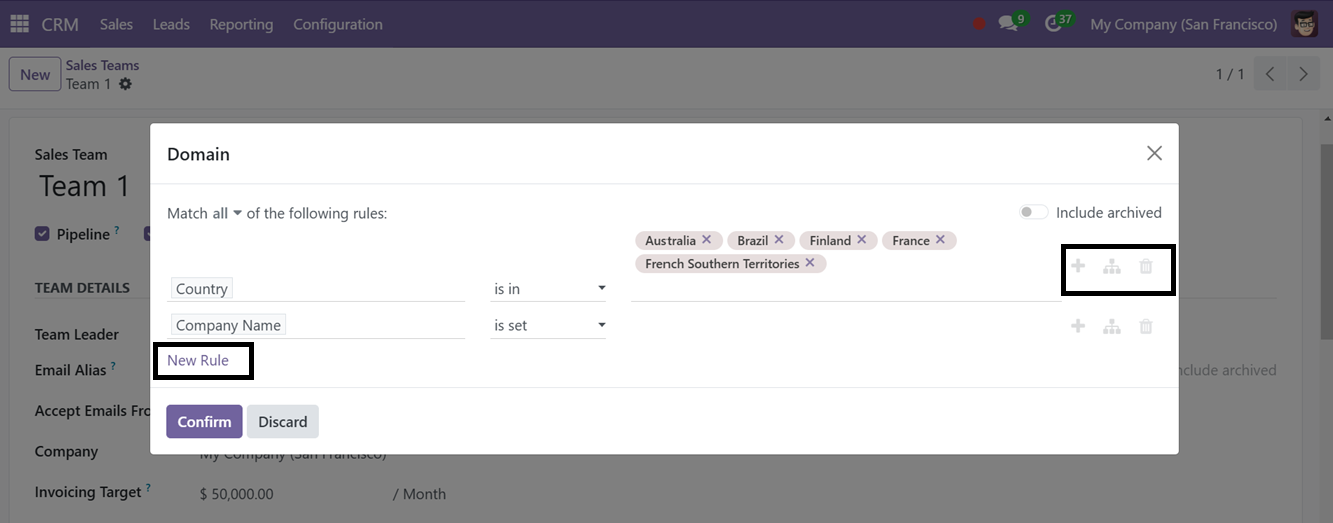
In this window, you can apply specific conditions for lead assignment. For instance, the condition "Country is in” filter will ensure that this sales team receives leads from the mentioned countries.
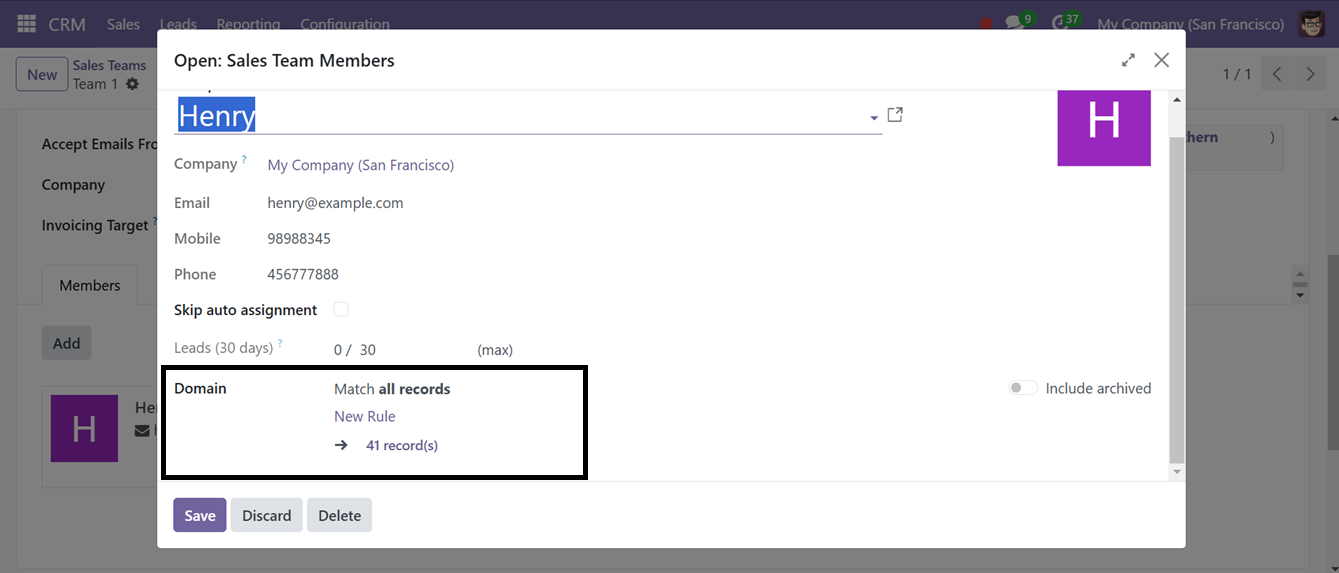
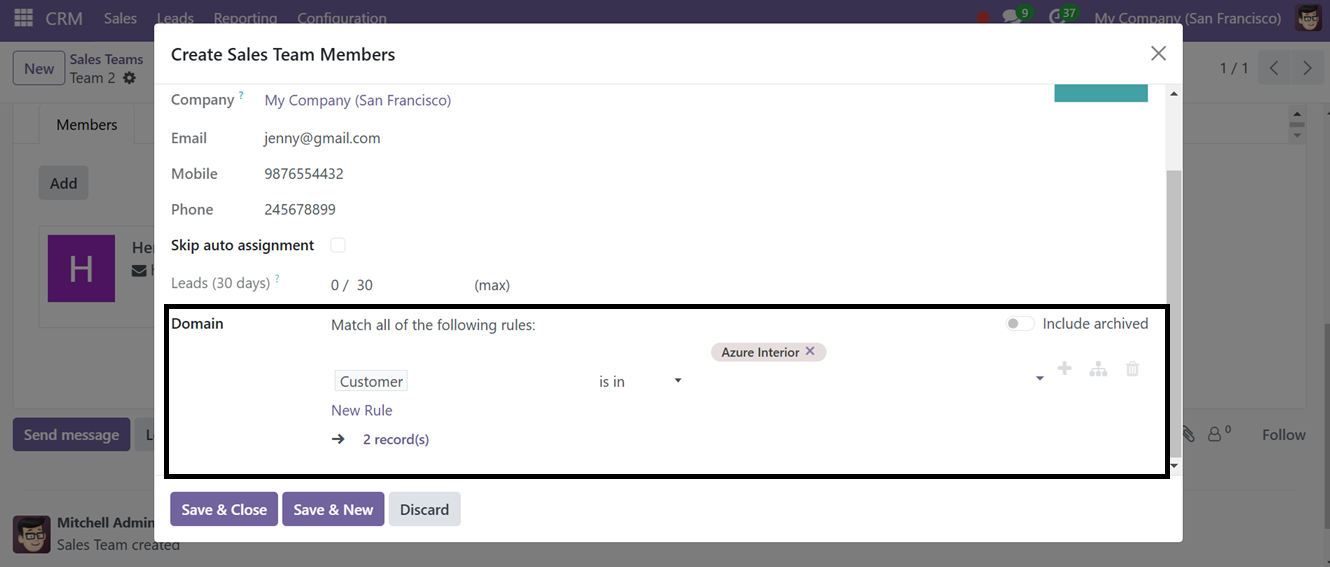
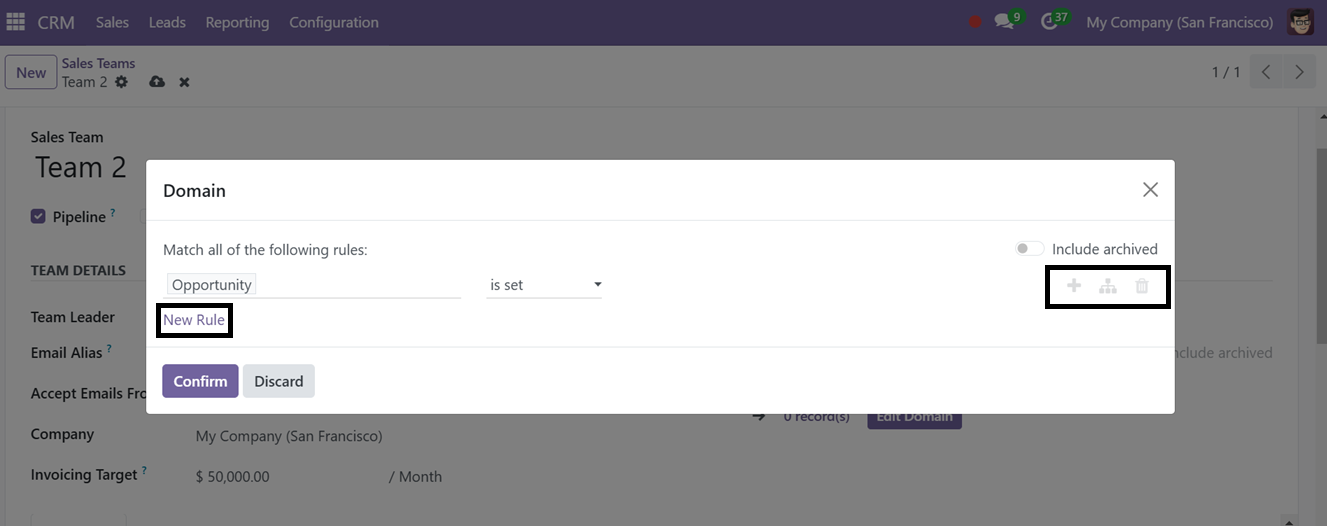
You can also define individual rules for each salesperson. When you click "Add" under the Members tab, a pop-up window will appear where you can set a custom domain for each team member, as depicted in the screenshot below.
To add a filter to the domain, click on the "New Rule" button. This allows team members to receive distinct leads based on their specific domain criteria. To assign leads to the team, simply click the "Assign Leads" button.
Predictive Lead Scoring
The ‘Predictive Lead Scoring’ feature helps optimize lead management by calculating the probability of a lead being closed. The score is based on factors such as phone quality, stage, and email quality. By clicking on the "Update Probabilities" button, a pop-up window will appear where you can add additional criteria for lead scoring beyond the default settings.
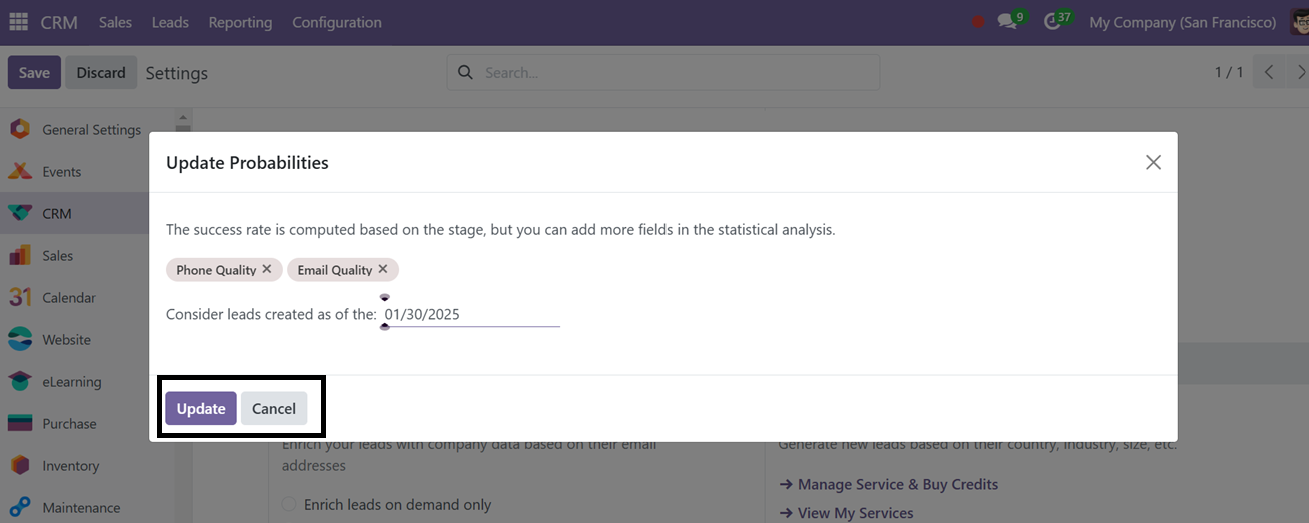
Once you've adjusted the criteria, click the ‘Update' button. So, after this operation, Odoo will recalculate lead scores using updated data, ensuring accurate probabilities to help sales teams prioritize leads and improve conversion rates.
Sales Team
Odoo 18 CRM allows sales teams to be managed through the "Teams" option under the Sales menu. These teams are crucial for managing leads, opportunities, and CRM processes. Each team has its own tab, including Open opportunities, Quotations, Expected Revenue, and Orders to Invoice. New leads, opportunities, and quotes can be created, and advanced reports are available for each team's performance.
Sales teams can be configured and managed through the Sales Teams settings section of the Configuration menu, where you can add new teams and members. Customer records are also tracked from various sources, including leads.
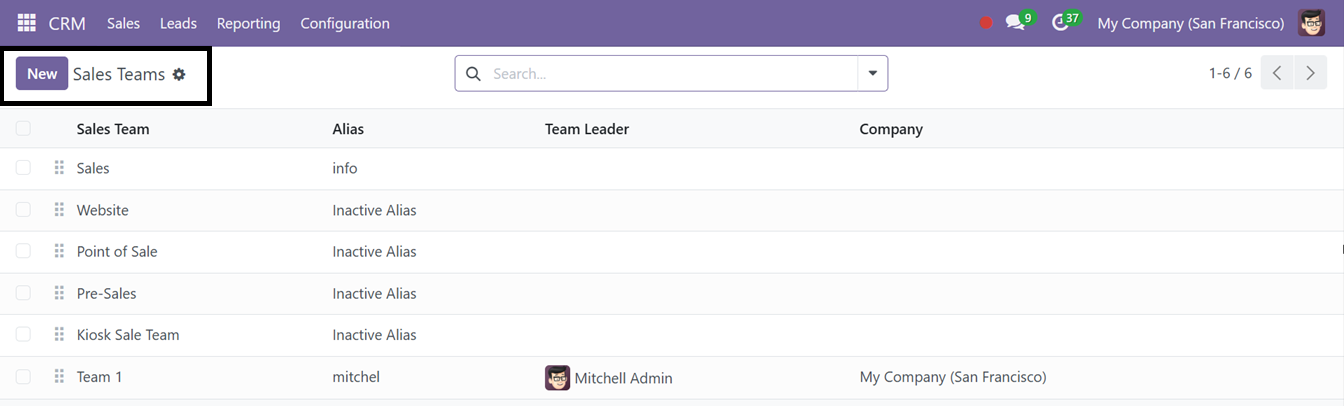
Utilize the ‘New ’ button to create new Sales Teams and edit the required details about the new team in the team configuration form as illustrated below.
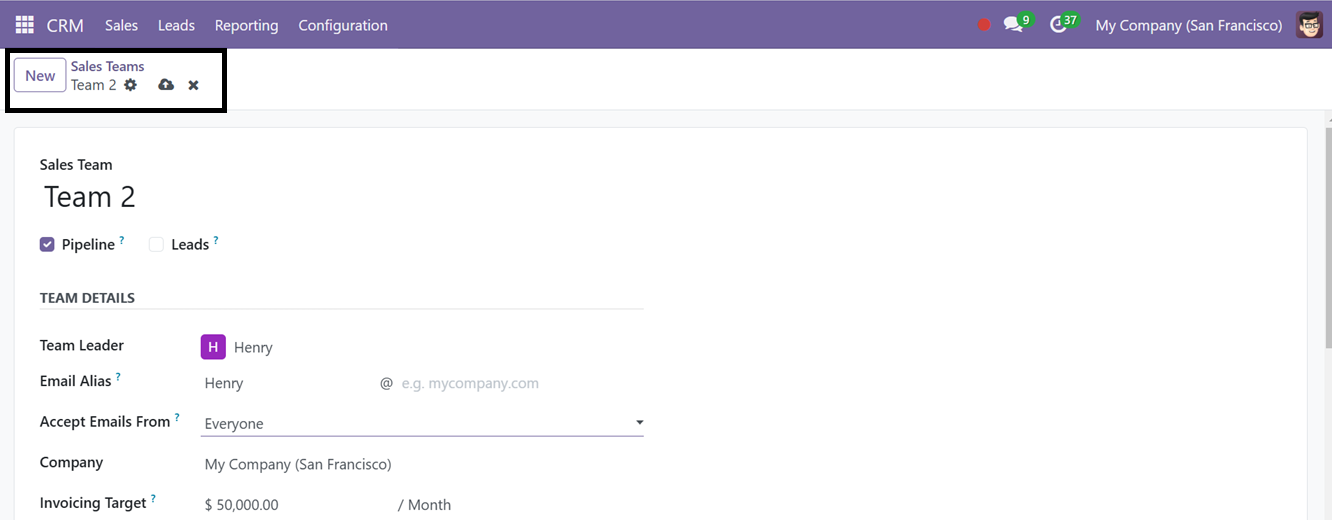

Inside the form, edit the team name under the ‘Sales Team’ field. Then, activate the ‘Pipeline’ option to manage the presales process with opportunities and enable the ‘Leads’ option to filter and qualify incoming requests as leads. Then, edit the team details in the ‘TEAM DETAILS’ section of the form including the Team Leader, Email Alias, Company, and Invoicing Target per month or year.
Next, team members can be added individually by selecting the "Add" button within the "Members" tab section. Clicking on the ‘Add’ button will display a pop-up window, where you can choose the Salesperson. After choosing the salesperson, the other details regarding the person including their Company, Email, Phone etc.
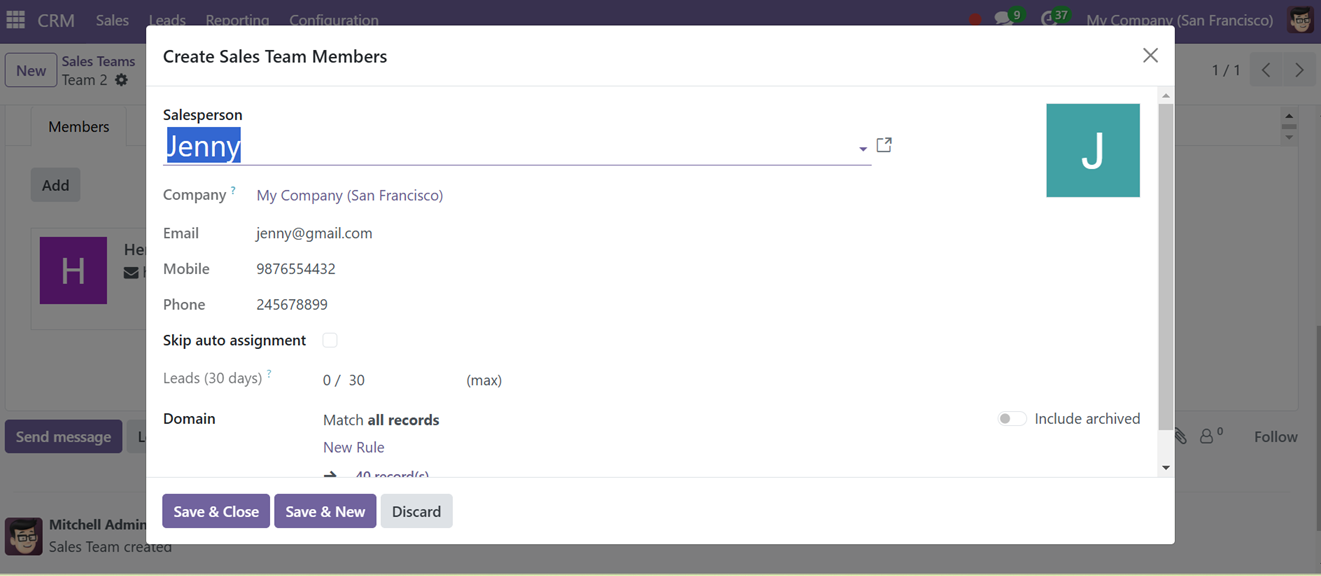
Enabling the "Skip Auto Assignment" option will prevent the automatic assignment of this salesperson to a team. Then, you can create a new assignment rule for this sales person using the ‘New Rule’ button.
After editing all the team member specifics, save the data and you will get an ‘ASSIGNMENT RULES’ field inside the Team configuration form. In this section, users can define rules or conditions for assigning members to the team based on predefined criteria. So, click on the “+Add condition” button to proceed.
The ‘Add condition’ button will generate an ‘Edit Domain’ button, that can be used to edit the rule in a Domain editing window as illustrated in the screenshot below.
Rules can be added as per specific requirements. By utilizing the "Add New Rule" and "Add Branch" icons located on the right side of the window, users can create new rules and establish branched conditions, allowing for more complex and structured team assignments.
Finally, save the domains using the ‘Confirm’ button and save the Sales Team details from the main form. Using the ‘Assign Leads’ button, you can assign the leads to the sales team by confirming the operation.
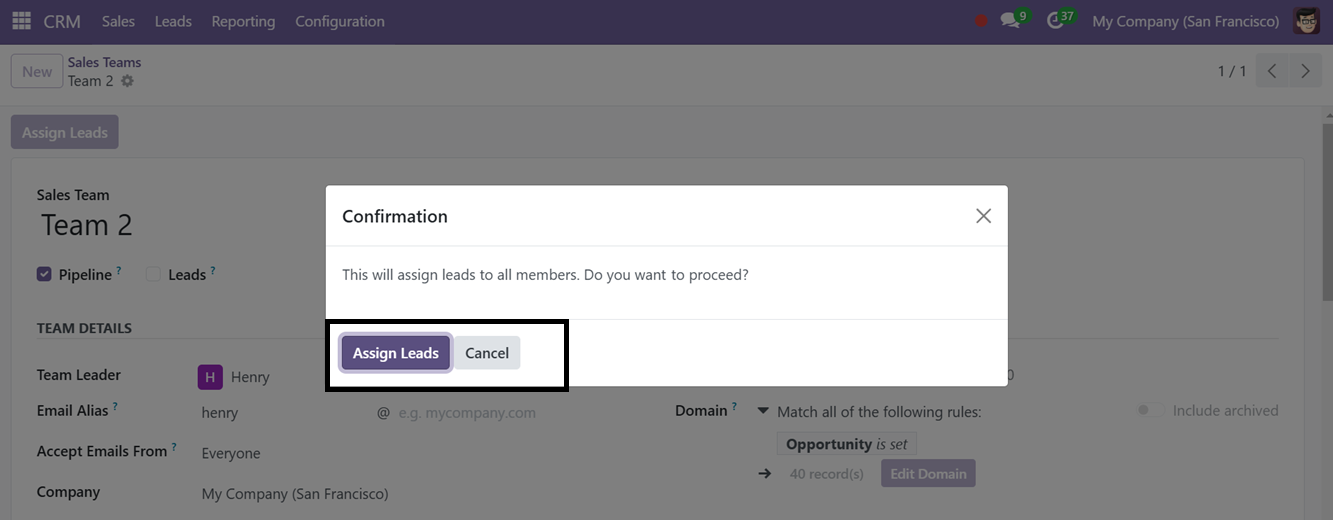
Confirming the lead assignment, you will get a notification regarding the assigned Leads as shown below.

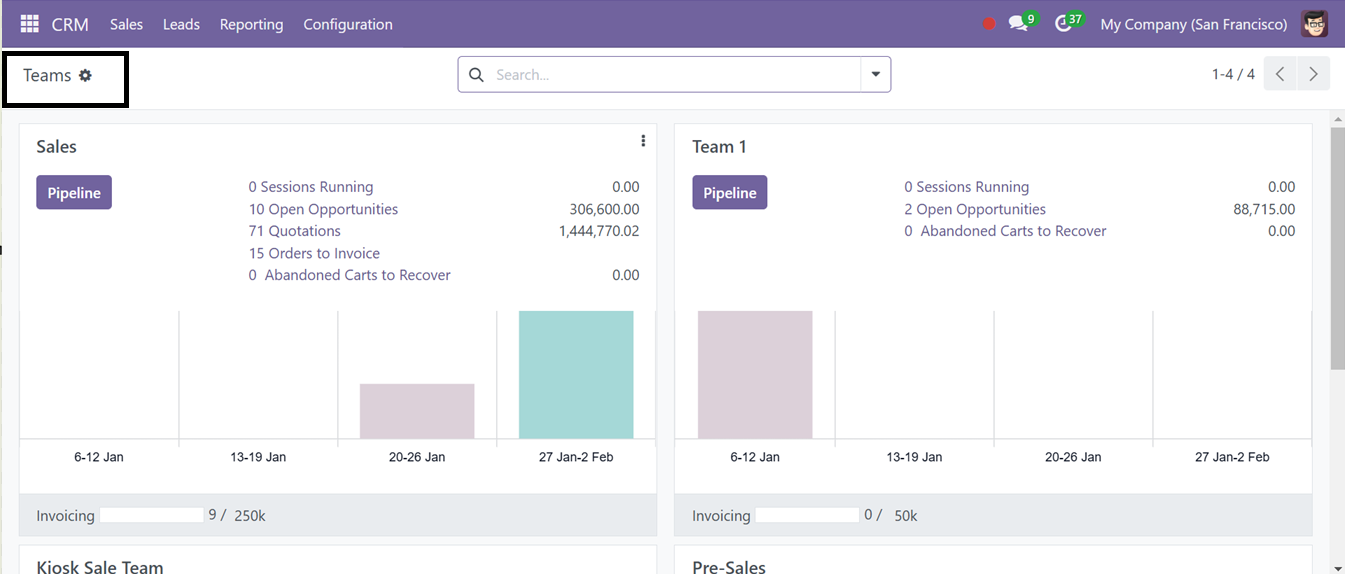
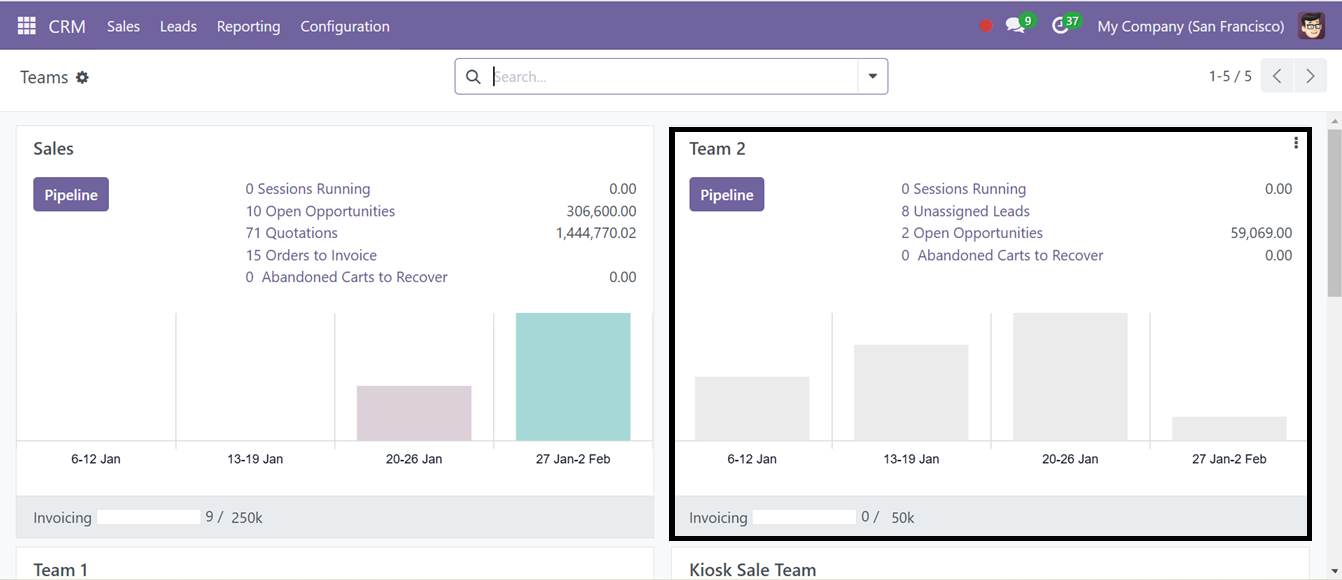
Finally, users can view team details, including Assigned and Unassigned Leads, Open Opportunities, Running Sessions, and other relevant information, within the "Teams" dashboard under the "Sales" menu, as illustrated in the screenshot below.
Activity Types
In Odoo 18, the "Activity Types" feature allows you to schedule and manage various activities with customers, helping maintain regular contact. This feature is available across many sales and customer-related modules. You can configure different activity types through the "Activity Types" option in the Configuration menu
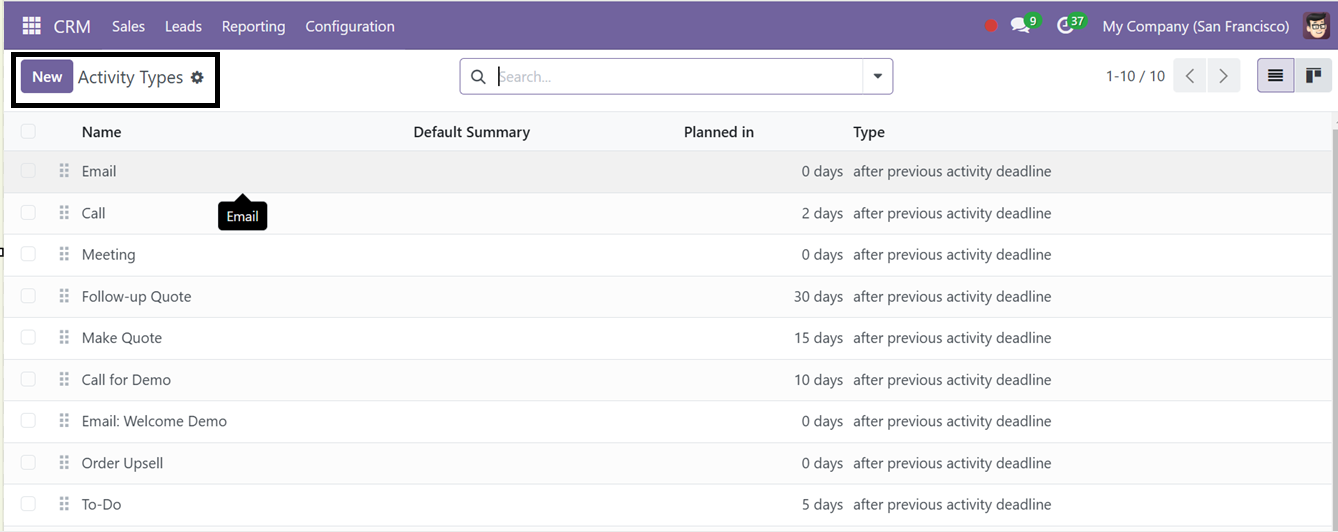
To create a new activity type, click the "New" button, name the activity, select an action (e.g., call, meeting, reminder), and assign a model and default user. You can set up a default summary, icon, and notes for the activity. Additionally, you can configure "NEXT ACTIVITY" options to suggest or trigger follow-up activities after completing the current one, with options for scheduling and email templates.
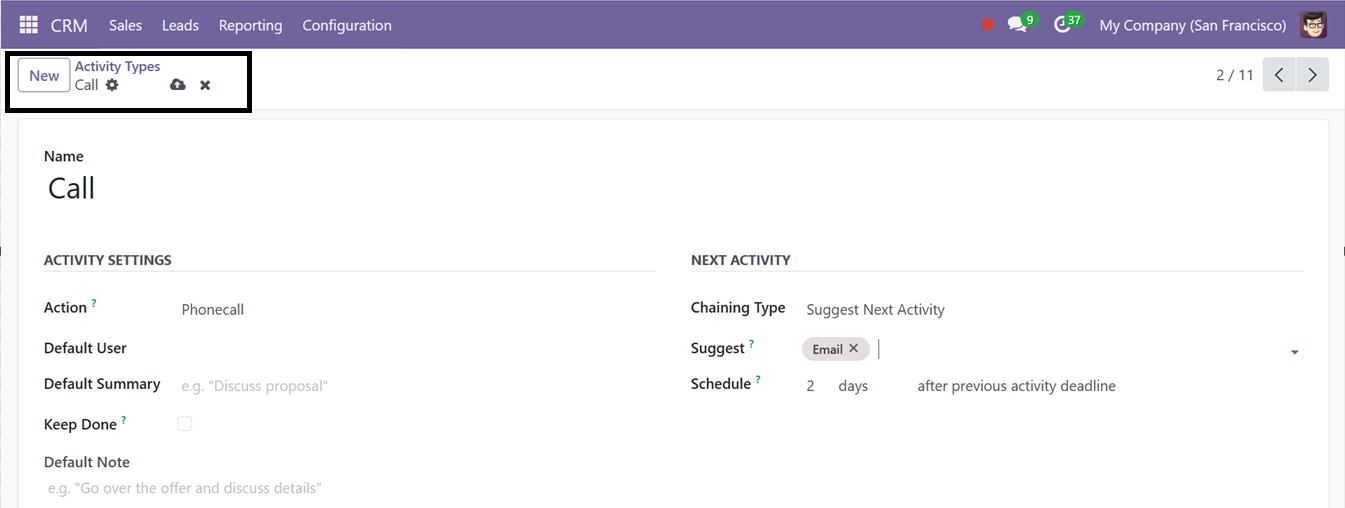
Once the activity type configuration is completed, save the data for future use.
Activity Plans
The ‘Activity Plans’ feature in the Odoo CRM Module automates and organizes follow-up activities for leads and opportunities. It allows users to define predefined tasks like calls, meetings, emails, or custom activities, ensuring a consistent approach to lead nurturing and customer engagement.
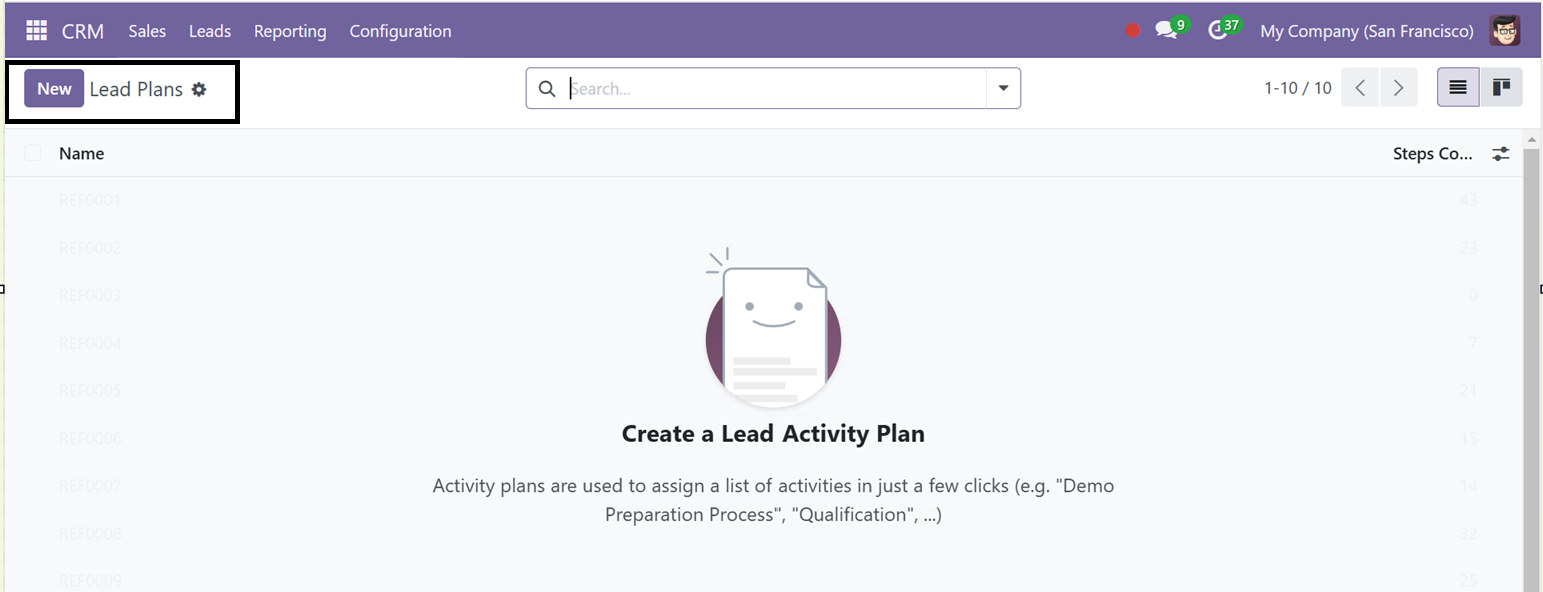
Click on the ‘New’ button to create a new Activity Plan and edit the Plan Name. Then, you can mention the Model and Company.
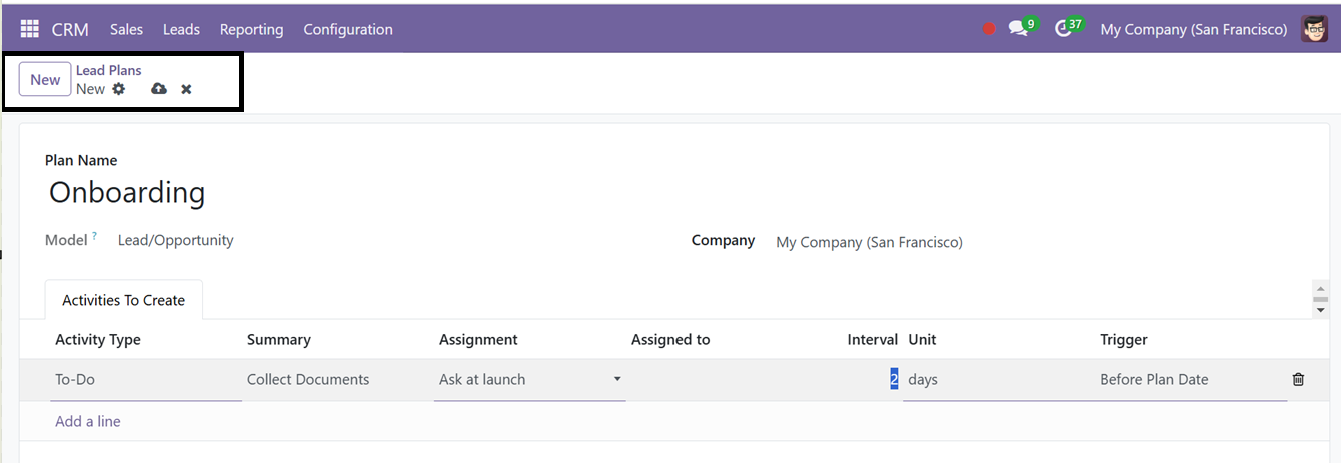
Inside the ‘Activities To Create’ tab section, you can choose the Activity Type, Summary, Assignment, Interval Unit and Trigger for this activity. You can add multiple activities using the same method. Finally, save the activity plan for the future requirement.
This feature streamlines sales workflow, improves productivity, and maintains better customer relationships, standardizing processes, reducing manual task management, and enhancing sales pipeline efficiency.
Tags
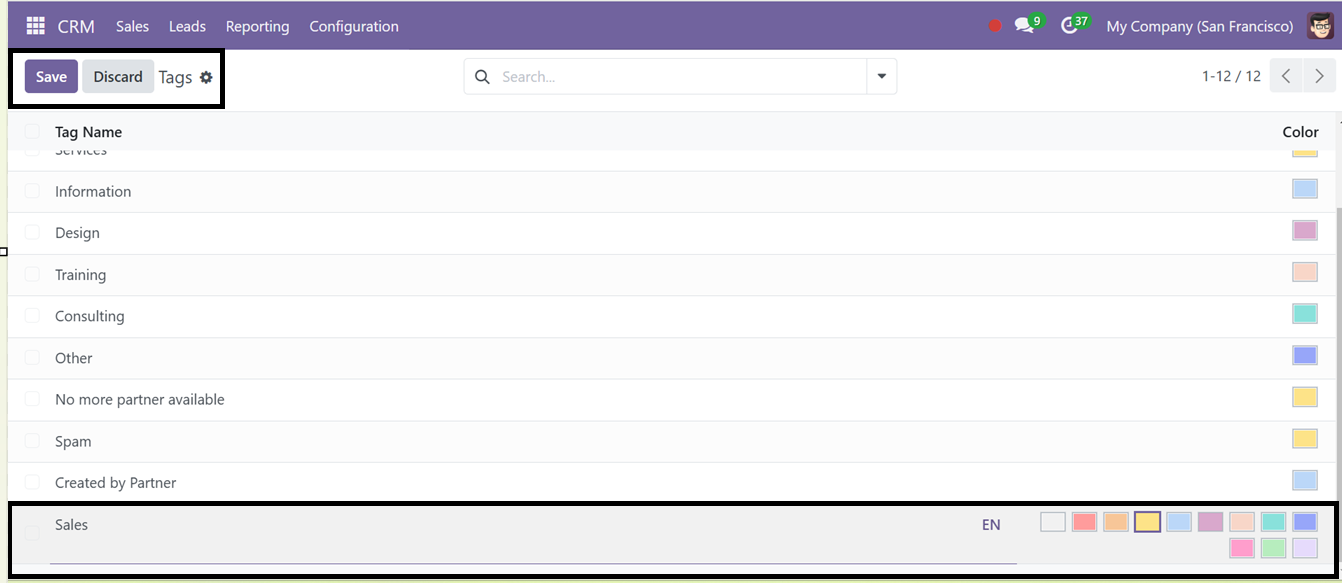
In Odoo, ‘Tags’ offer a flexible method for categorizing, organizing, and filtering leads and opportunities based on industry, priority, or source, enhancing management and tracking. The ‘Tags’ settings window shows the preconfigured tags list along with their highlighted colors available in your Odoo CRM database.
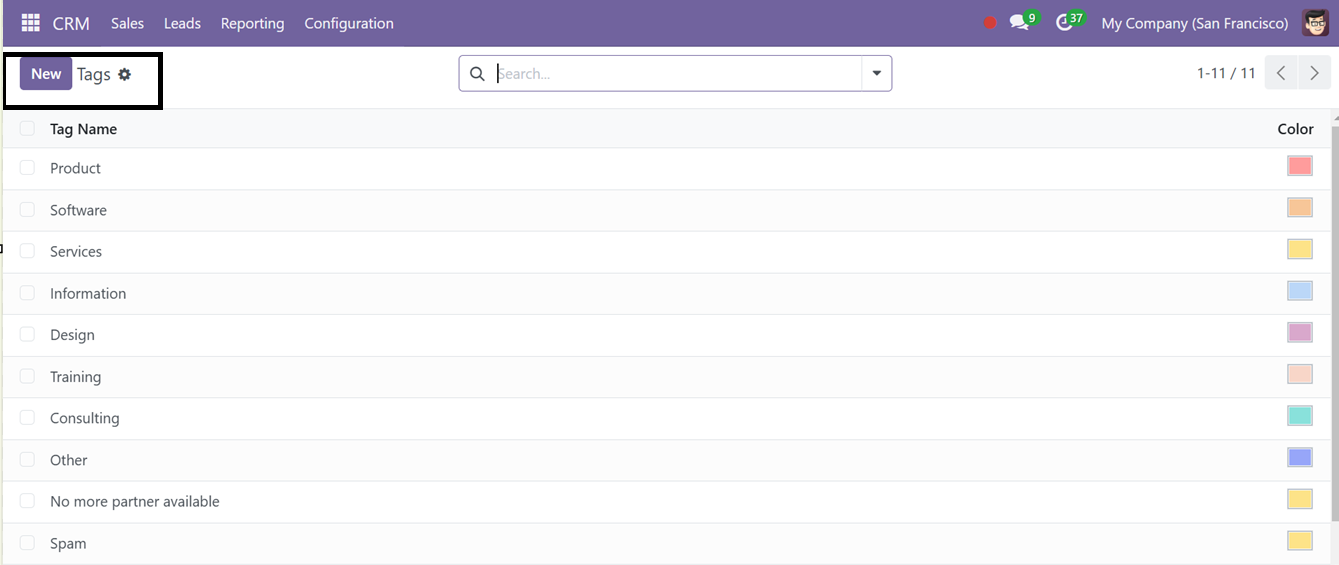
To create a new tag, click on the ‘New’ button, enter the desired Tag Name, select a preferred Color from the editing field, and save the changes by clicking the ‘Save’ icon, as demonstrated in the screenshot below.
Lost Reason
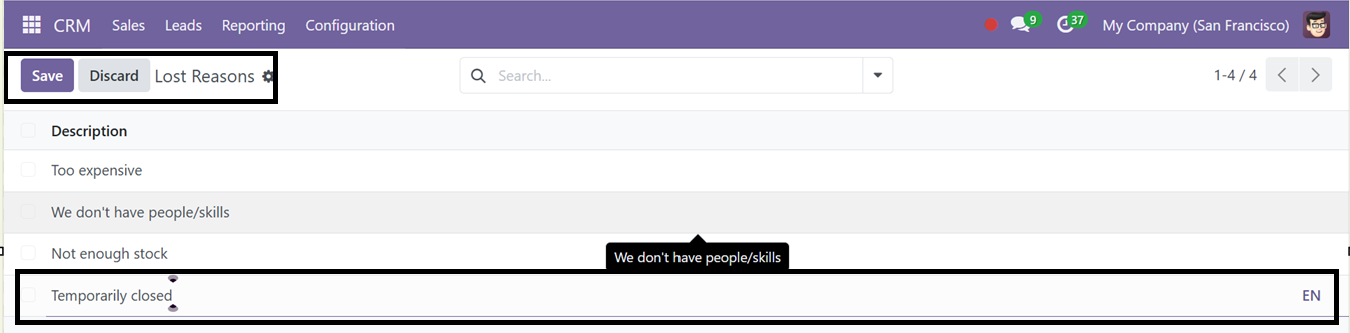
In Odoo 18 CRM, you can track reasons for losing leads or opportunities and recover them later if needed. To configure lost reasons, go to the "Lost Reasons" option under the Configuration menu. You can easily add new lost reasons by clicking the "New" button and editing the reason.
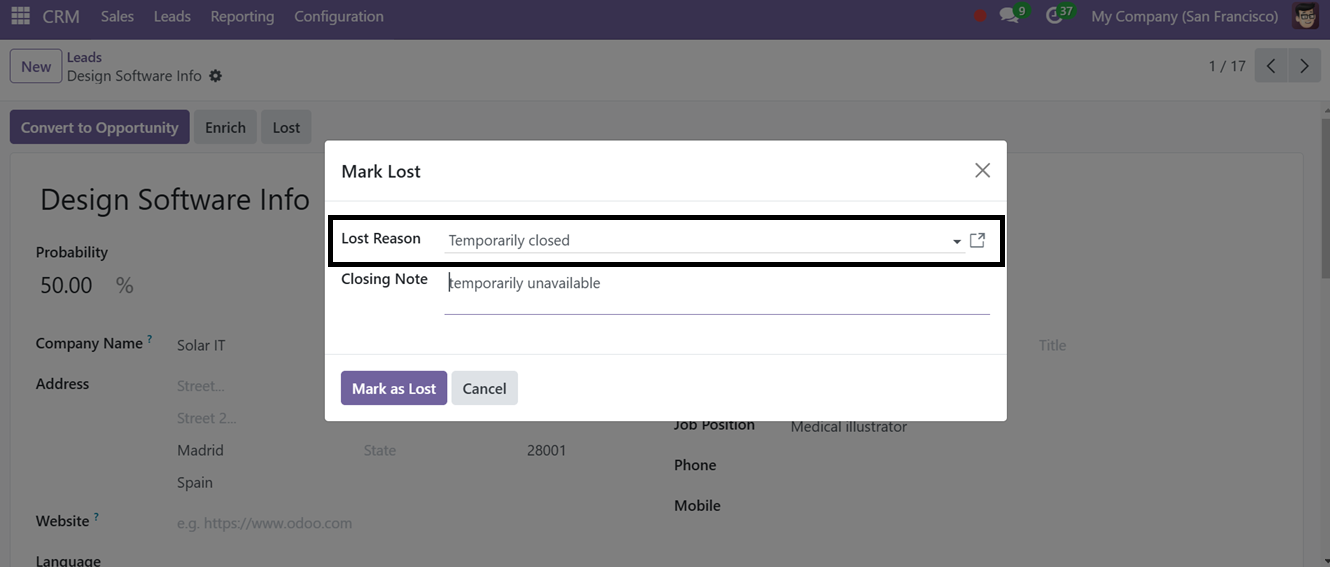
When marking an opportunity as lost, select the "Lost" button, choose a reason from the drop-down list, and confirm the lost reason as you can see from the screenshot below.
If needed, you can restore the lost opportunity by clicking the "Restore" button from the lead’s configuration form to reopen the chance for business.
Partner Levels
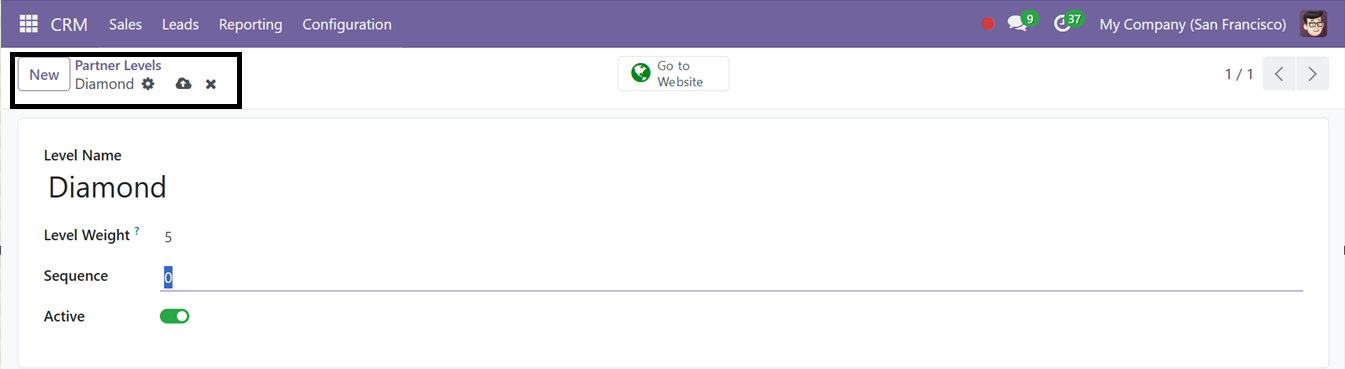
In Odoo 18, resellers can be managed efficiently, allowing the sharing of leads and opportunities with them. The "Resellers" tab on the website provides a comprehensive list of resellers. Partner levels can be assigned using the "Partner Levels" option in the Configuration menu, where new levels can be created by specifying a name, level weight, and commission plan.
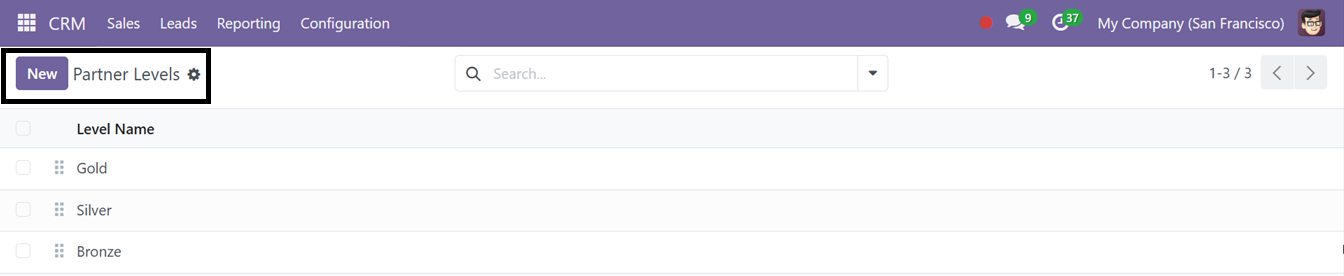
You can create new Partner Levels by opening a new form and editing the relevant details including the Level name, Level Weight, Sequence and Active status, as illustrated in the screenshot below.
Partner Activation
Set up partner activation methods in the "Partner Activations" option under the Resellers tab. Simply name the activation method to track partner activity.
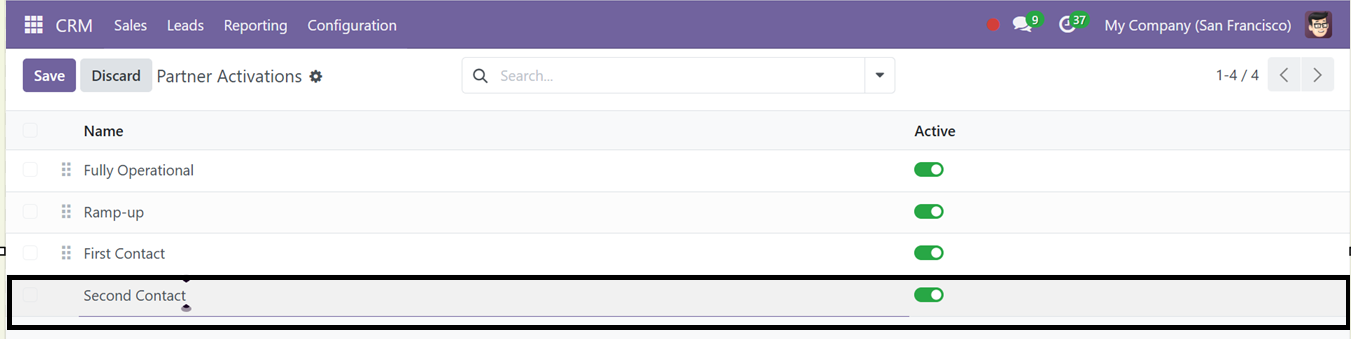
A new Partner Activation method can be created by entering the Partner Activation Name in the designated editing field and saving the changes.
Visits to Lead Rules
In Odoo 18 CRM, users can convert website visits into leads through the "Visits to Leads Rules" platform, found in the Lead Generation tab under the Configuration menu. To enable this feature, activate "Visits to Leads" in the settings. This integrates with Odoo's Website module, so ensure it is installed.
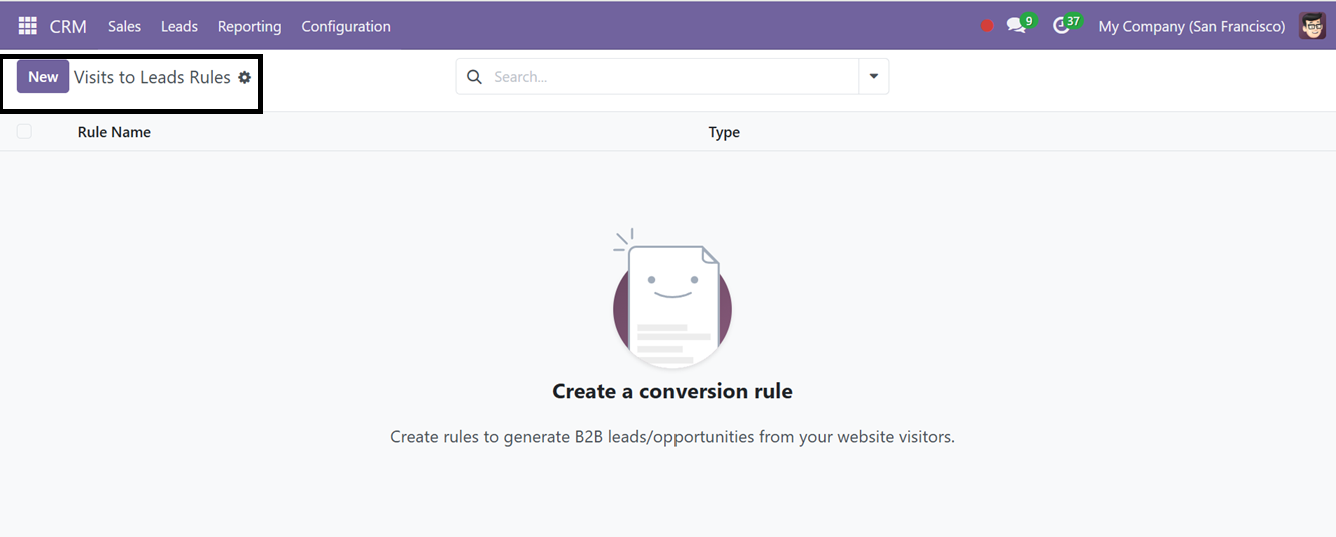
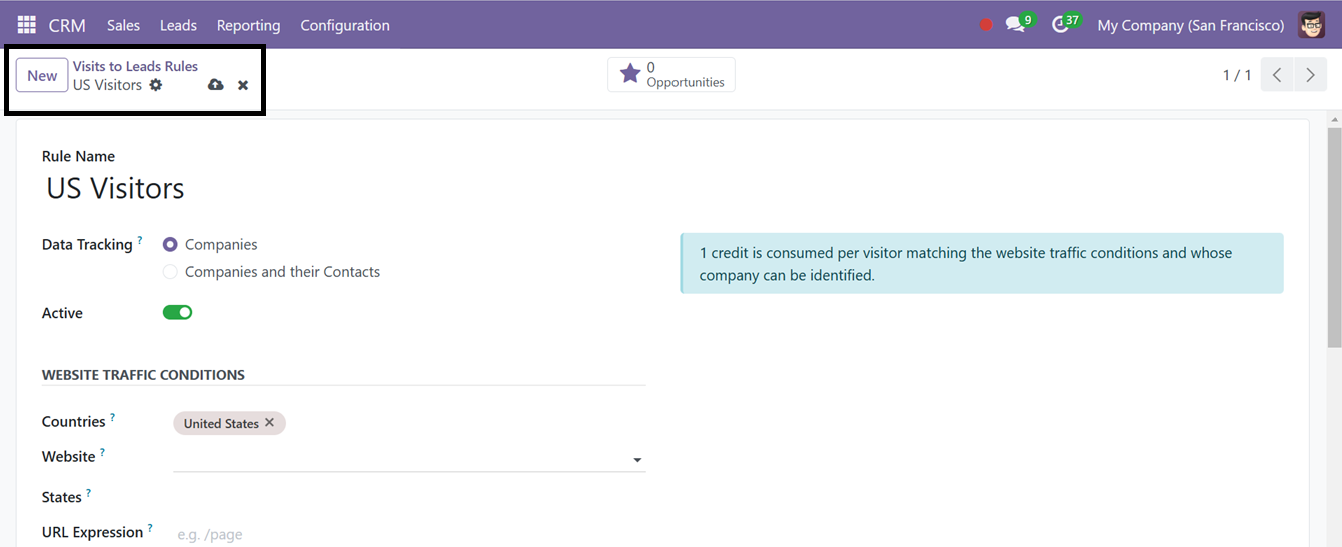
You can create rules to convert visitors into leads based on their IP address. By clicking the "New" button, set rule details like Rule Name, Data Tracking target (companies or contacts), and WEBSITE TRAFFIC CONDITIONS(Countries, Websites, States, URL Expressions).
Under the ‘OPPORTUNITY GENERATION CONDITIONS’ tab, you can also filter by industry or company size and assign leads to sales teams or salespeople. Save the rule to start converting visits into leads.

Then, in the ‘OPPORTUNITY DATA’ tab, you can mention the opportunity Type, Suffix, Sales Team, salesperson, Tags and Priority as per the requirement and save the form data. Based on the Visit-to-Lead rules, this rule will be applied to website visitors, generating leads that align with the specified criteria.
Lead Mining Requests
In the Odoo 18 CRM Module, the Lead Mining Requests settings section enables businesses to Manage all the lead mining requests coming under your company. The dashboard window displays pre-configured or incoming lead mining requests received by your company along with their Request Number, Number of Leads, Target, Countries, Industries, and Status, as illustrated in the screenshot below.

This interface facilitates the efficient management and organization of these requests while also allowing users to create new lead-mining requests directly from the designated dashboard.
Businesses can boost client interactions, increase revenue, and streamline operations with the help of the Odoo 18 CRM module. With its application features, it delivers data insights, automates workflows, and incorporates cutting-edge lead management solutions. It keeps businesses competitive with its user-friendly layout, adaptable functionality, and smooth interaction with other Odoo apps.