Sales Quotations
The process of creating sales orders in a business begins with sales quotations. In order
to offer the consumer an accurate sense of the goods, a sales quotation will include all
pertinent details. You may take into consideration a sales quotation as the contract
between the vendor and the buyer. It will provide both parties with clarification
regarding the cost of the goods included in the sales operation. With the help of the
Odoo 17 ERP system, you can quickly produce and send a quotation to a customer, allowing
them to learn the precise price information for the goods and services given by your
business prior to concluding any sales agreements. If the consumer is pleased with your
company's offers, the sales quotation can later be transformed into a successful sales
order.
Under the Orders menu, you may find the option to create and manage quotations in the
Sales module. You can access the list of sales quotations that have already been
configured by selecting this option, as seen in the image below.
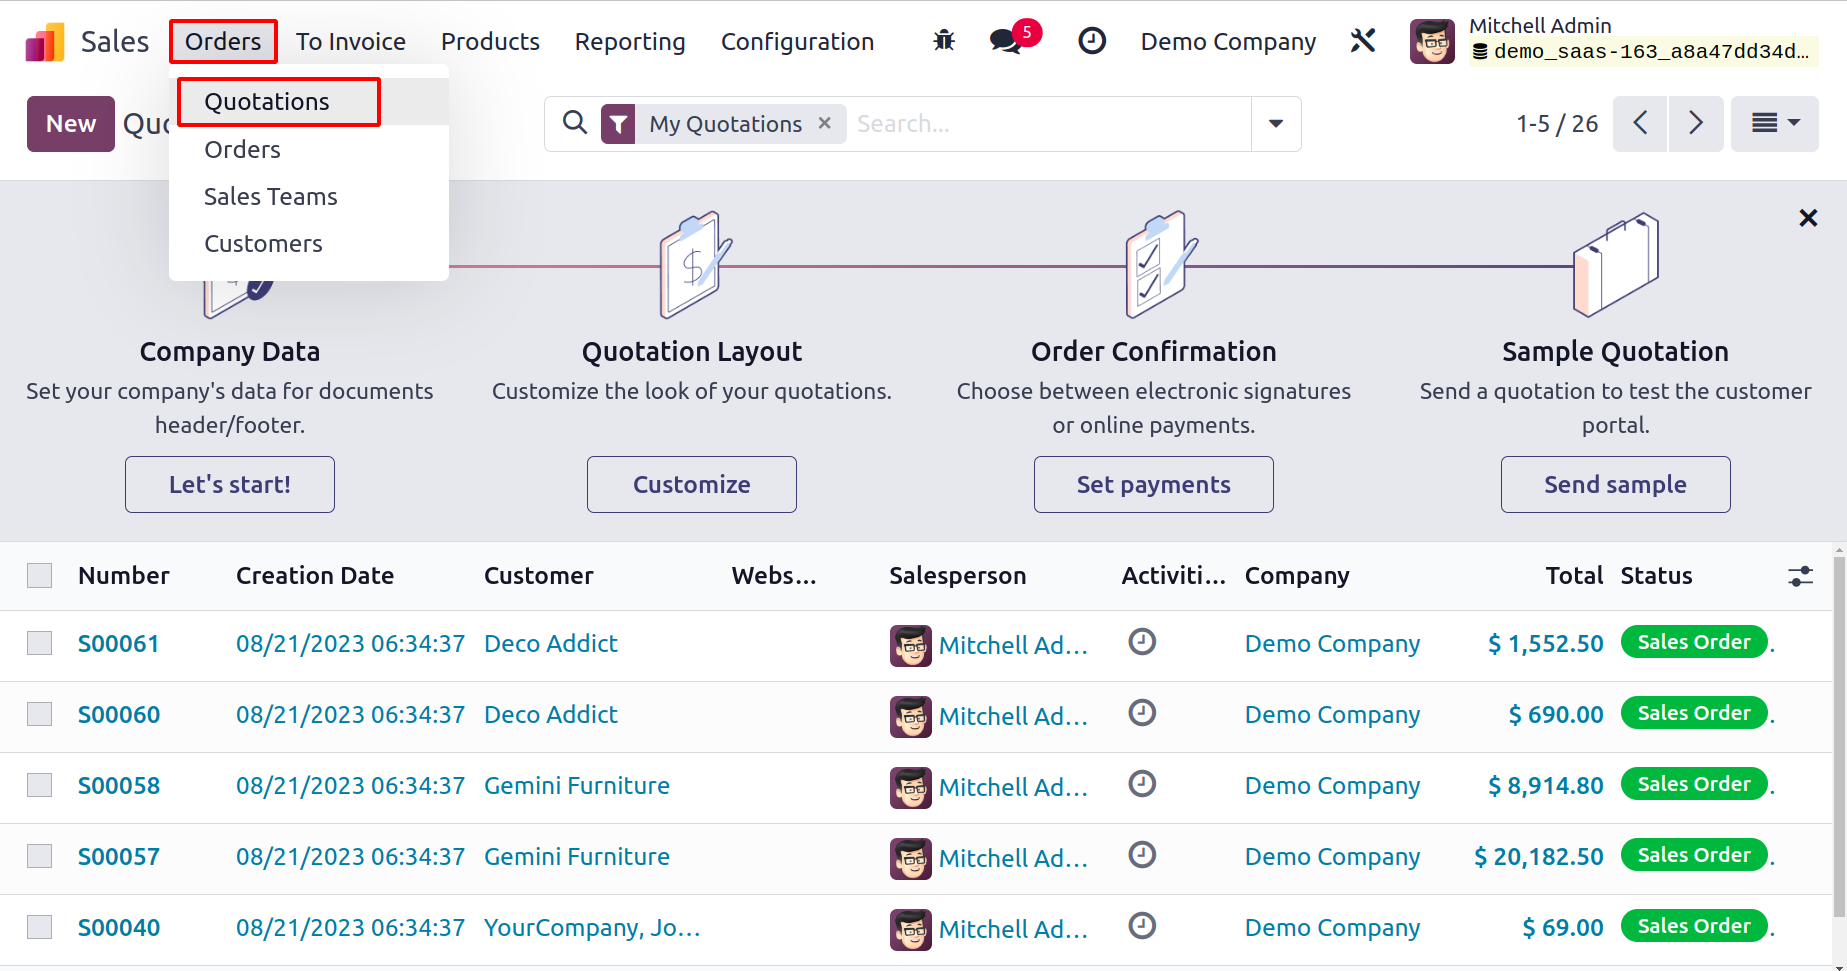
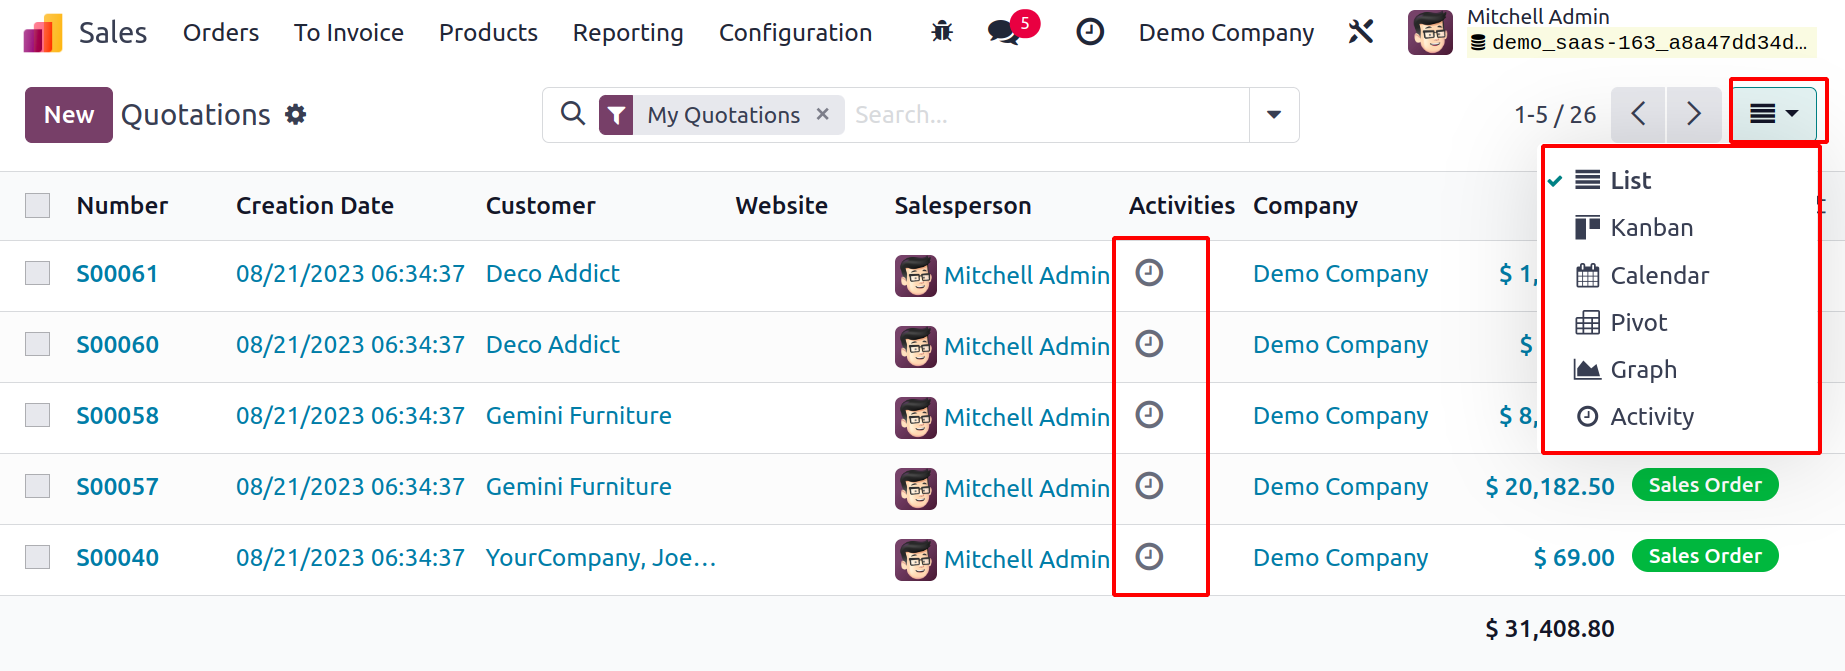
Each quotation's preview comprises the number, date of creation, customer, salesperson,
activities, business, total, and status information. You can arrange multiple activities
with the relevant consumers by using the tiny clock icon located on the Activities
field. Odoo 17 also offers Kanban, Calendar, Pivot, Graph, and Activity views for this
platform in addition to the list view.
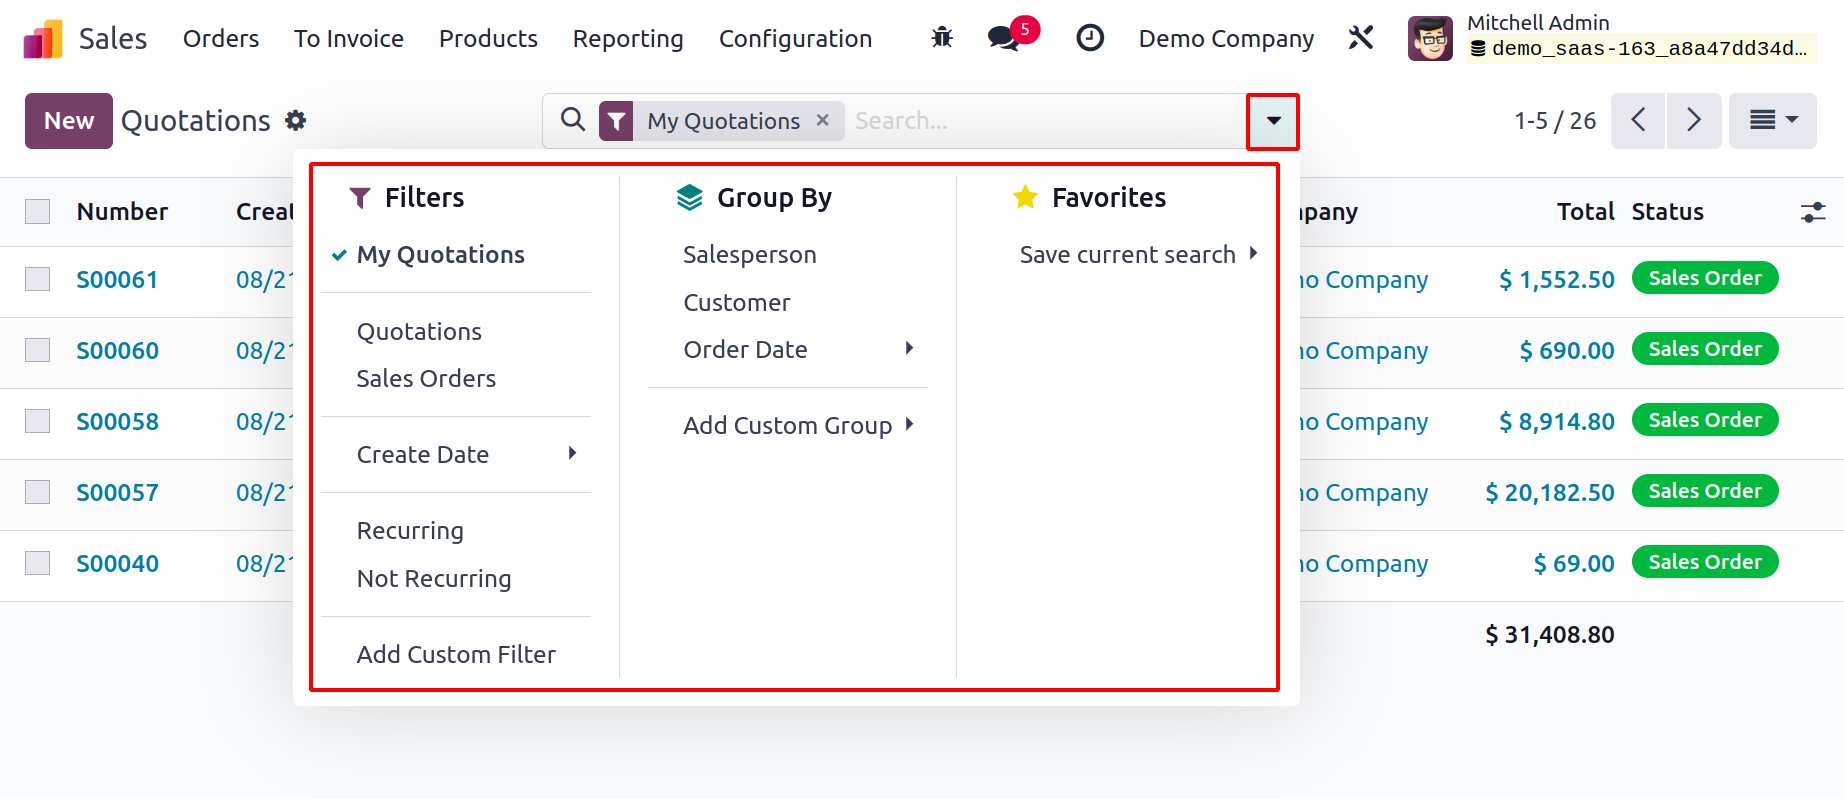
You can filter and organize the quotations according to your needs by using the
customizable and default sorting options.
Let's examine the process of creating a fresh sales quotation. Clicking the New button
will take you to a new quotation creation window, as seen below, where you can do this.
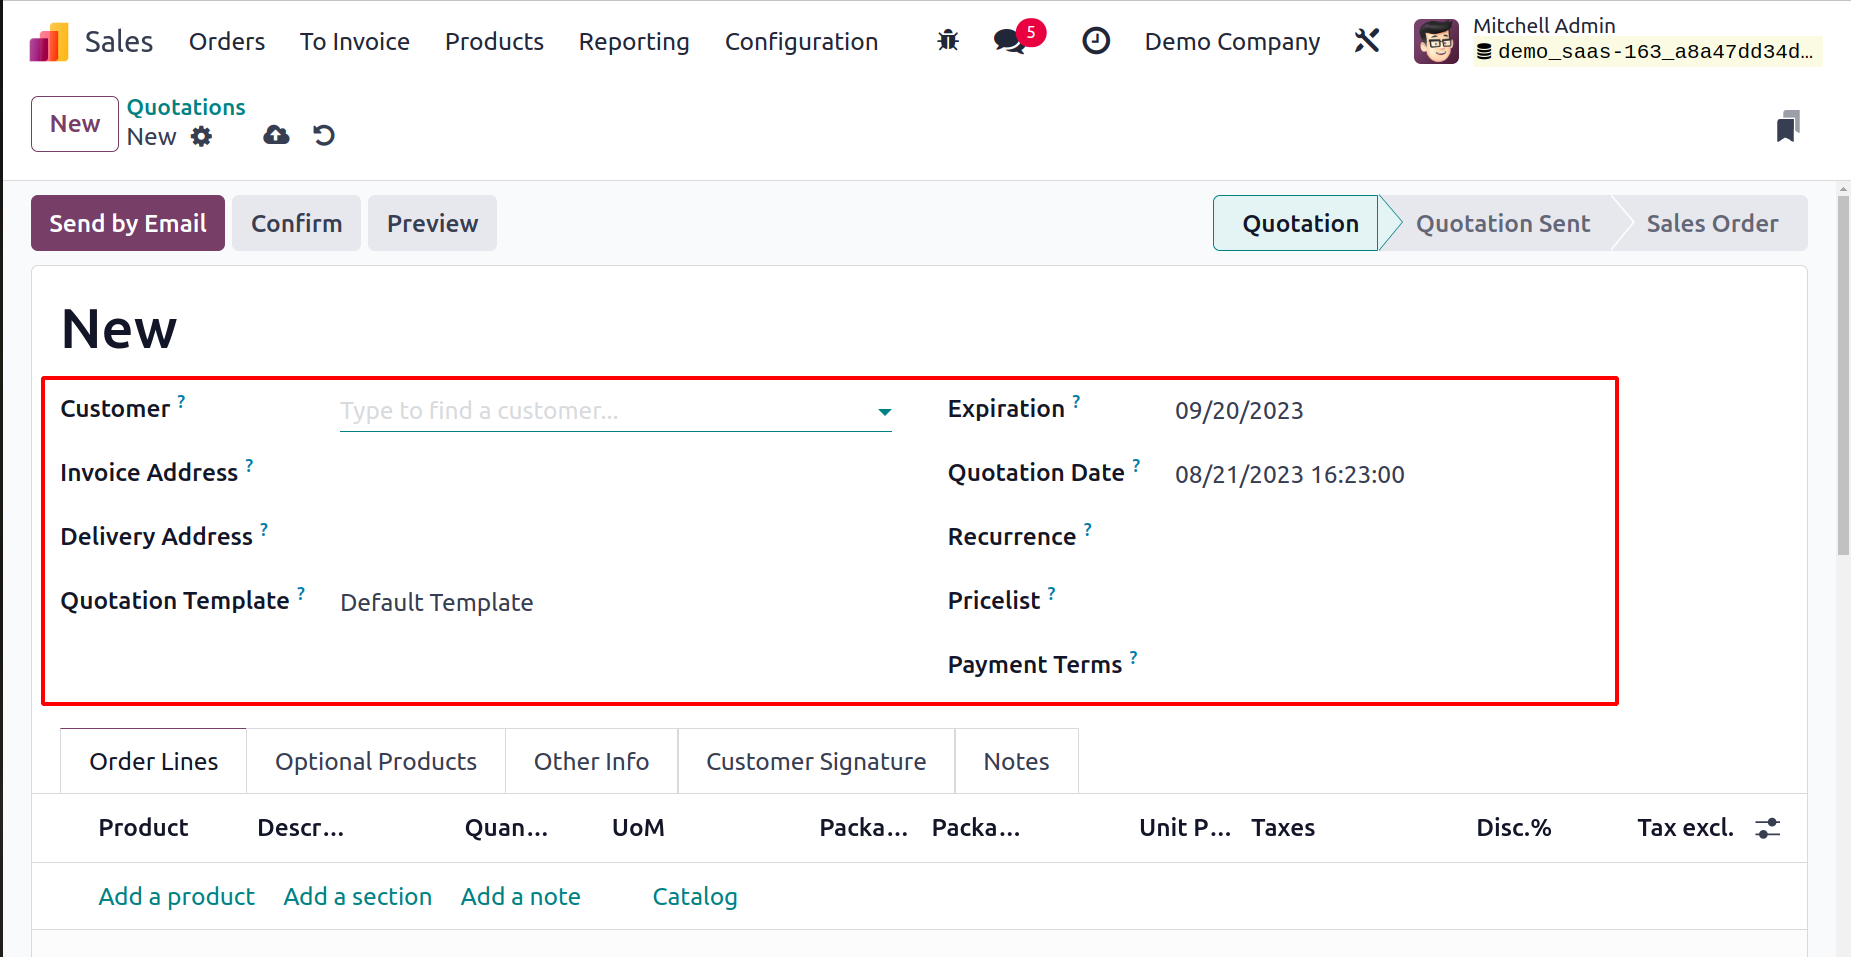
To add the Customer's name to the quotation, choose from the list provided. The Invoice
Address, Delivery Address, pricelist, and Payment Terms will automatically populate in
the appropriate fields after you choose an already established client here based on the
information you provided when
creating the customer. In the appropriate fields, also include the Referrer, the
Quotation Template, and the Expiration Date of the Quotation. The Quotation Date field
contains the quotation's creation date.
You can now add the products you want to offer your customer under the Order Line. You
can enter the Product, Description, Quantity, UoM, Unit Price, Taxes, Discount, and
SubTotal using the Add a Line button. Depending on the needs of the customer, you may
add as many products to this section.
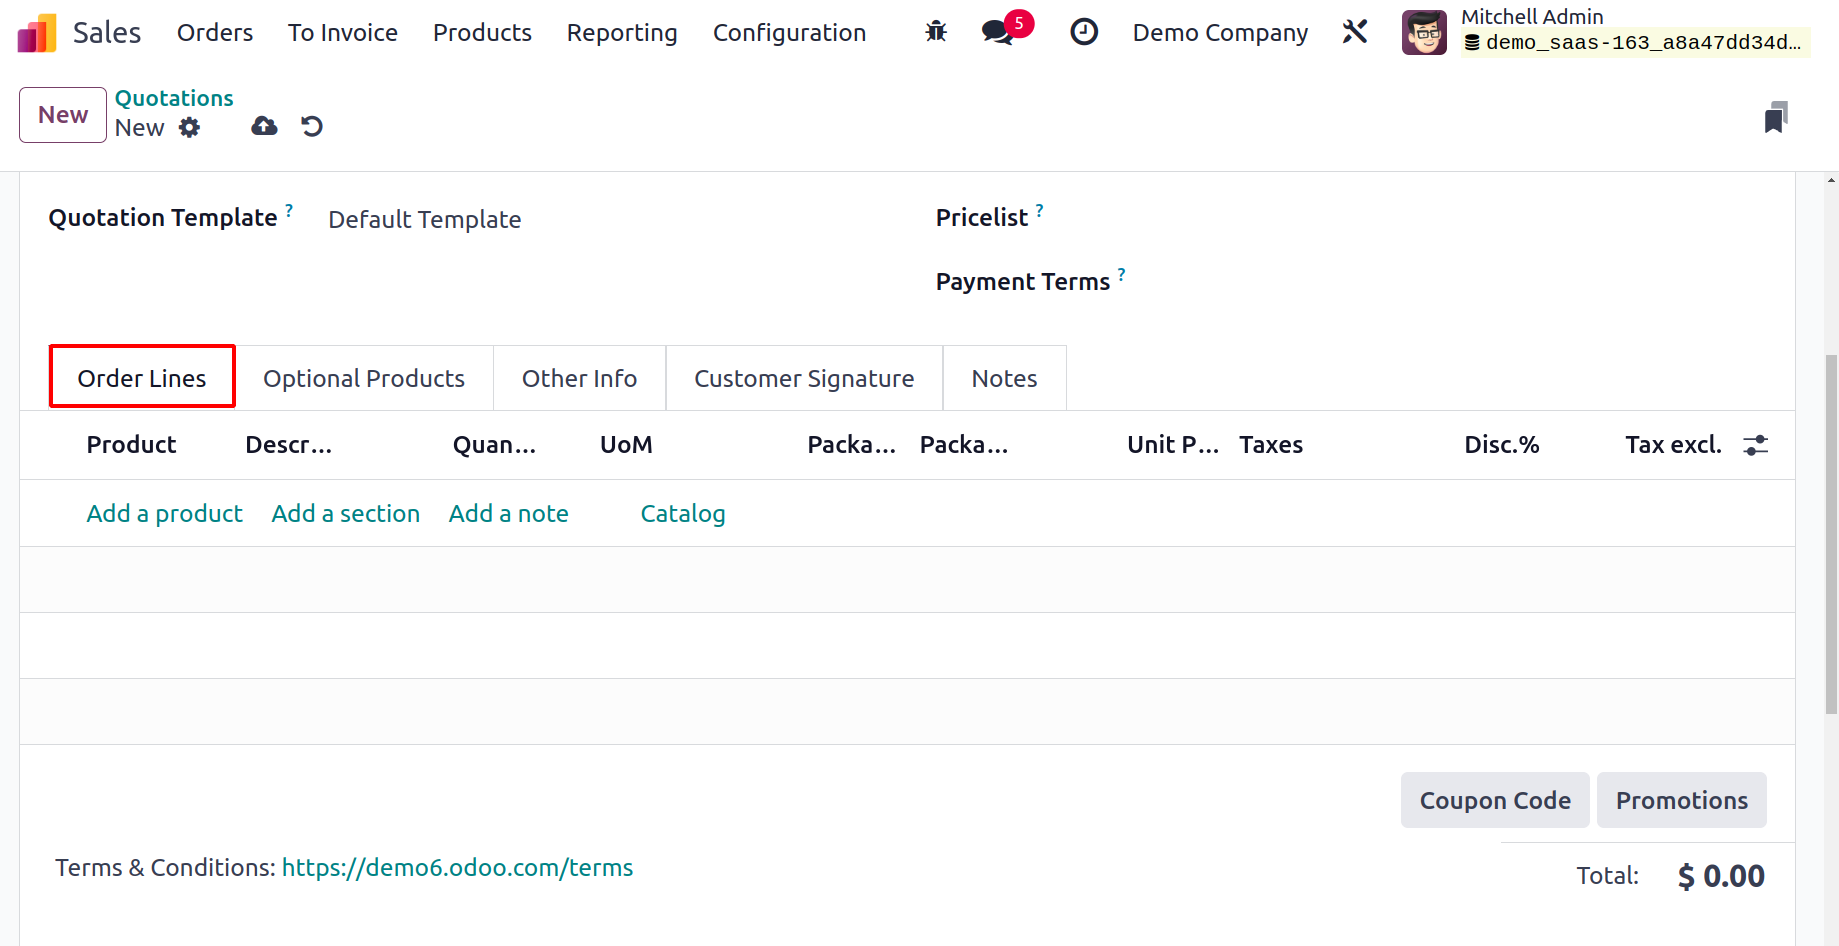
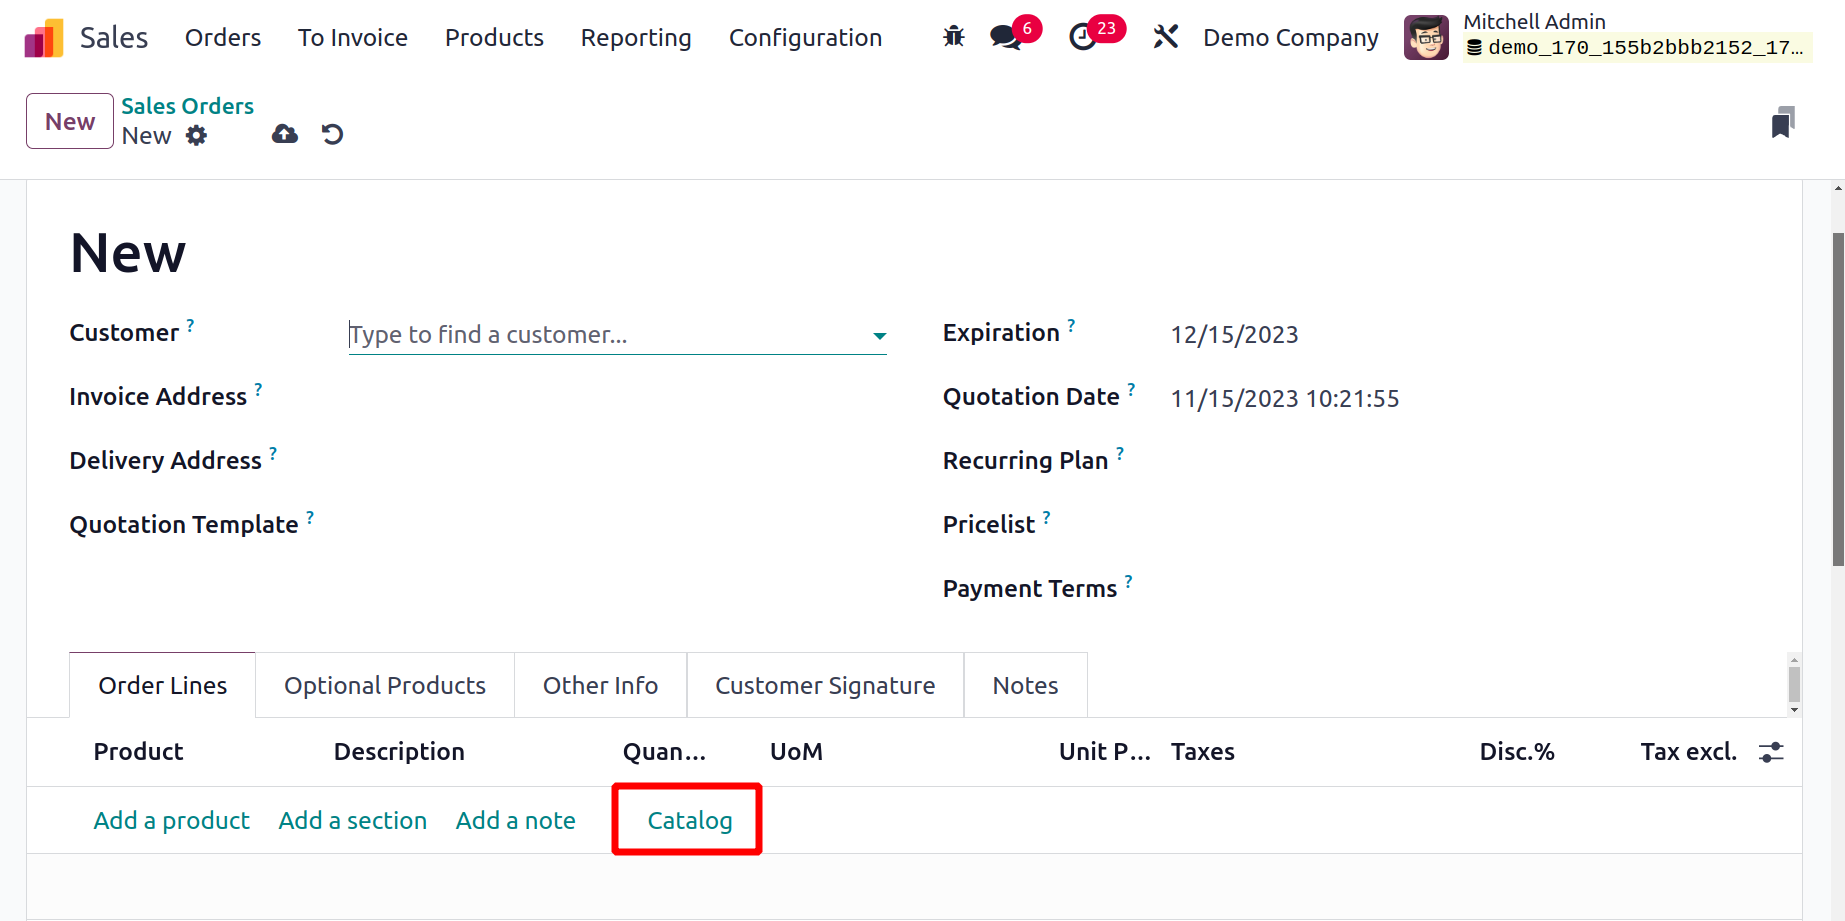
A new feature that was added to the Orderline is the Catalog. As seen below, clicking on
the Catalog takes you to a different page.
Every product that is included in every category is listed on the PRODUCT CATEGORY page.
All of the product categories and attributes are displayed on the left.
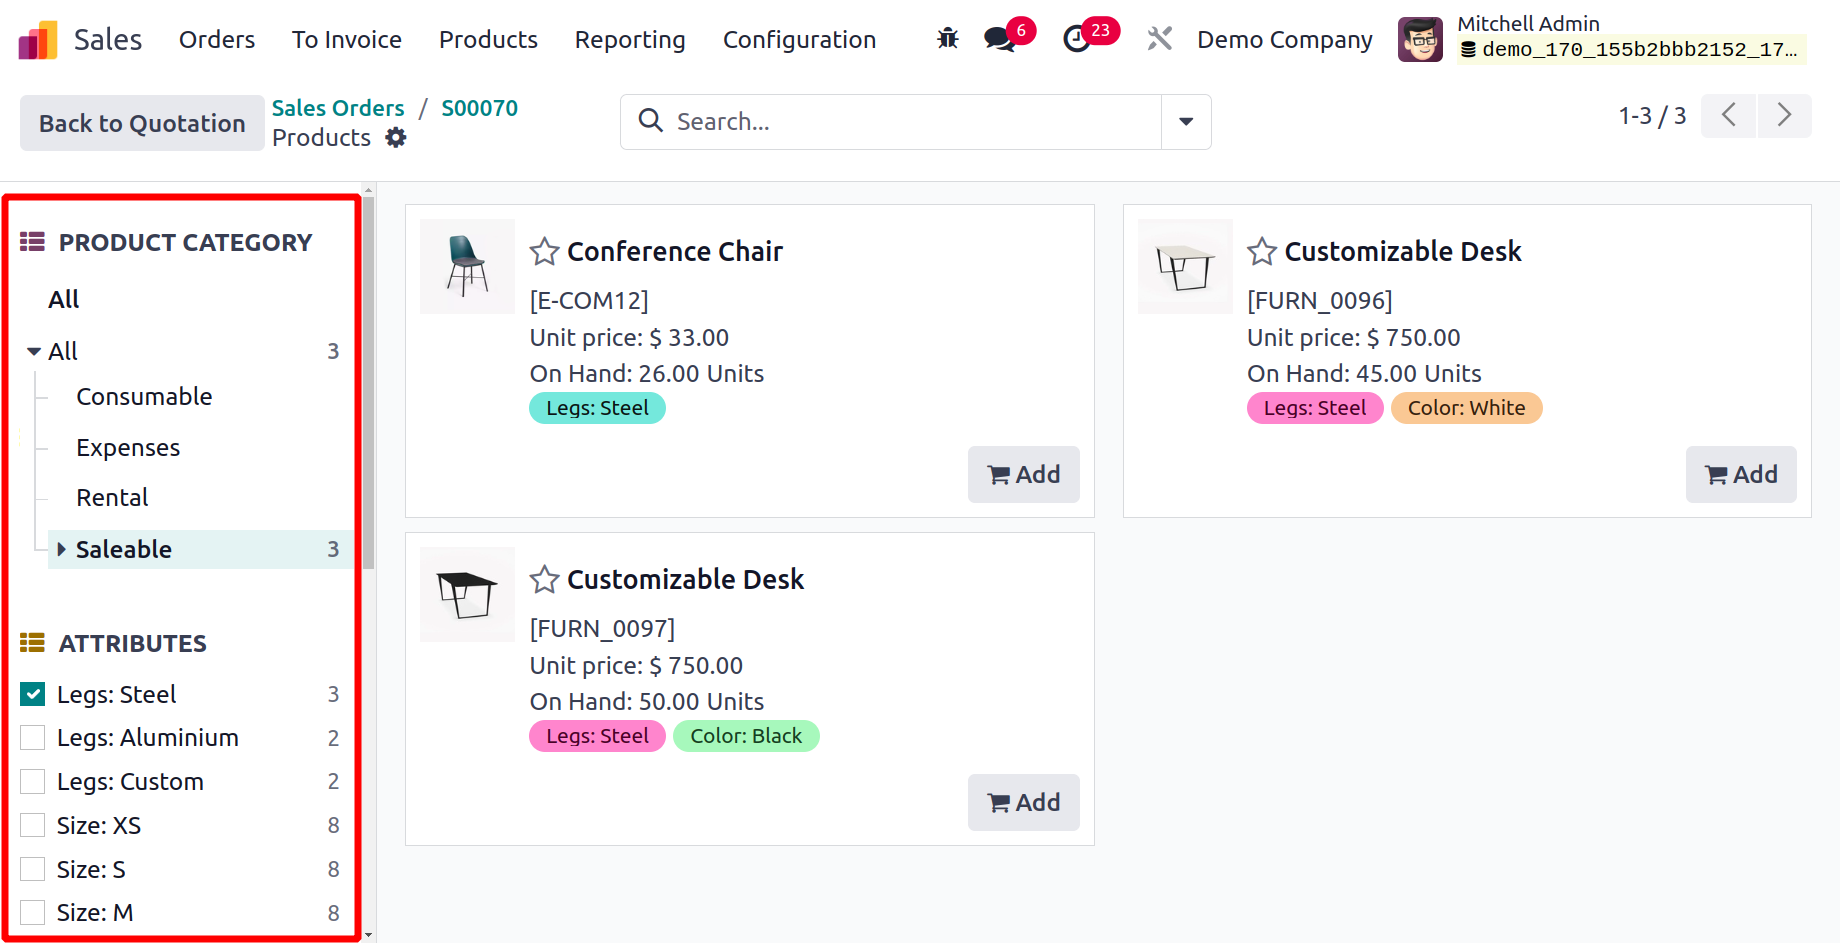
Thus, the customer can select products from many categories with various features with
ease by using these.
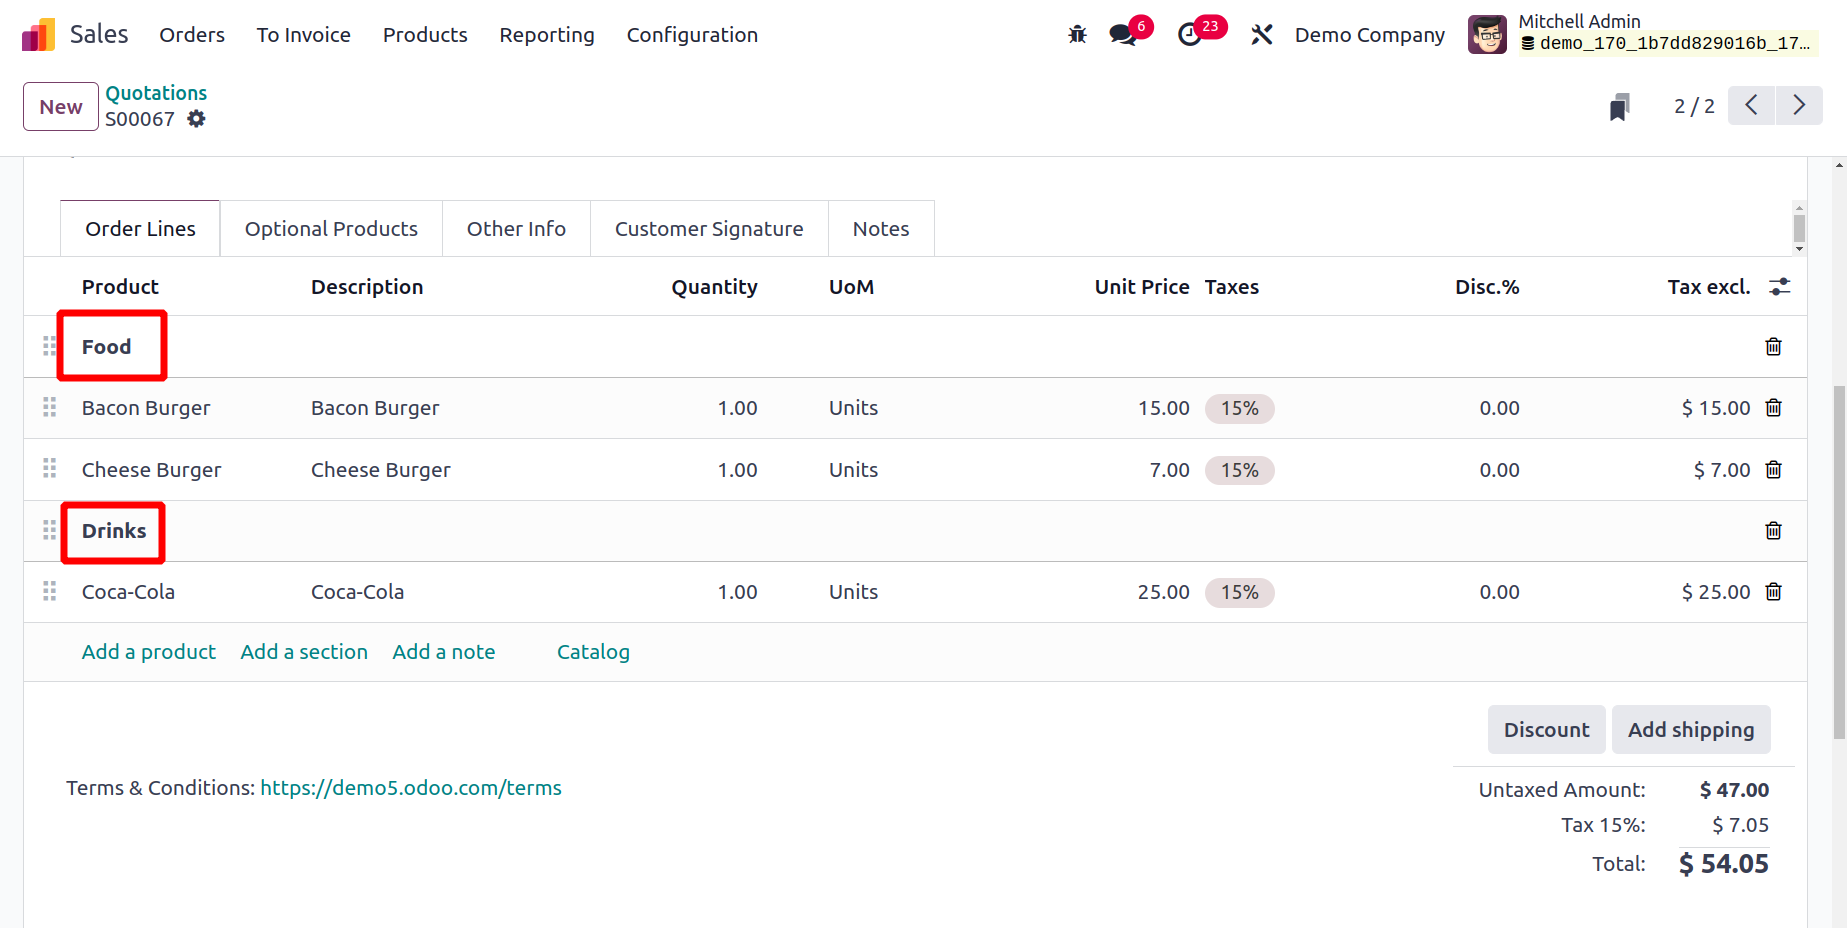
The Add Section button allows to separate all the products added to the sale order as
different sections. While clicking on the Add Section, a section opens on the order
lines, and from there, the user can add the section name as shown in the screenshot
below.
Following the addition of products, you will see the order's total in the Order Line, as
shown in the illustration below.
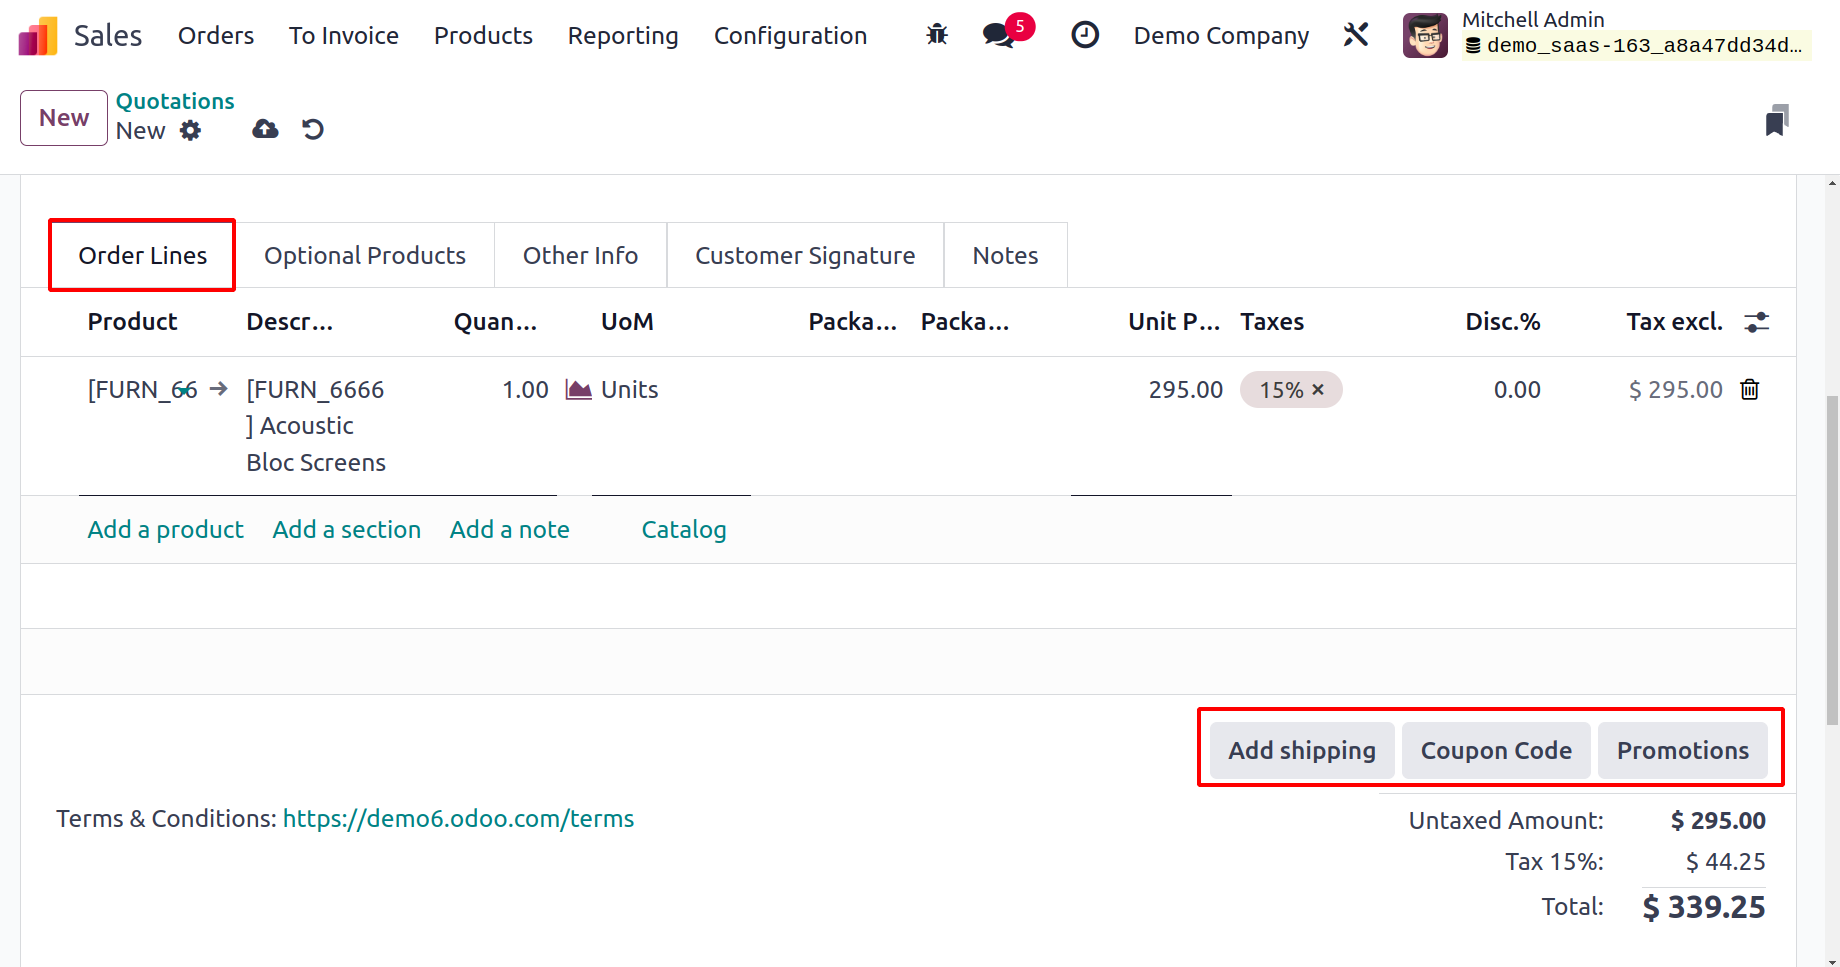
Use the applicable options provided in the Order Line tab if the customer has any Coupon
Codes or Promotions. You may set up a shipment method for this sale with the use of the
Add Shipment button. You may add sections and notes to your quotation by selecting Add a
Section and Add a Note from the same menu.
Businesses may provide customers with additional products as a part of their
cross-selling techniques. In such circumstances, the Optional Products section is where
you would mention those other products.

You can include information about sales, deliveries, tracking, invoices, and payments in
the quotation by using the Other Information tab.
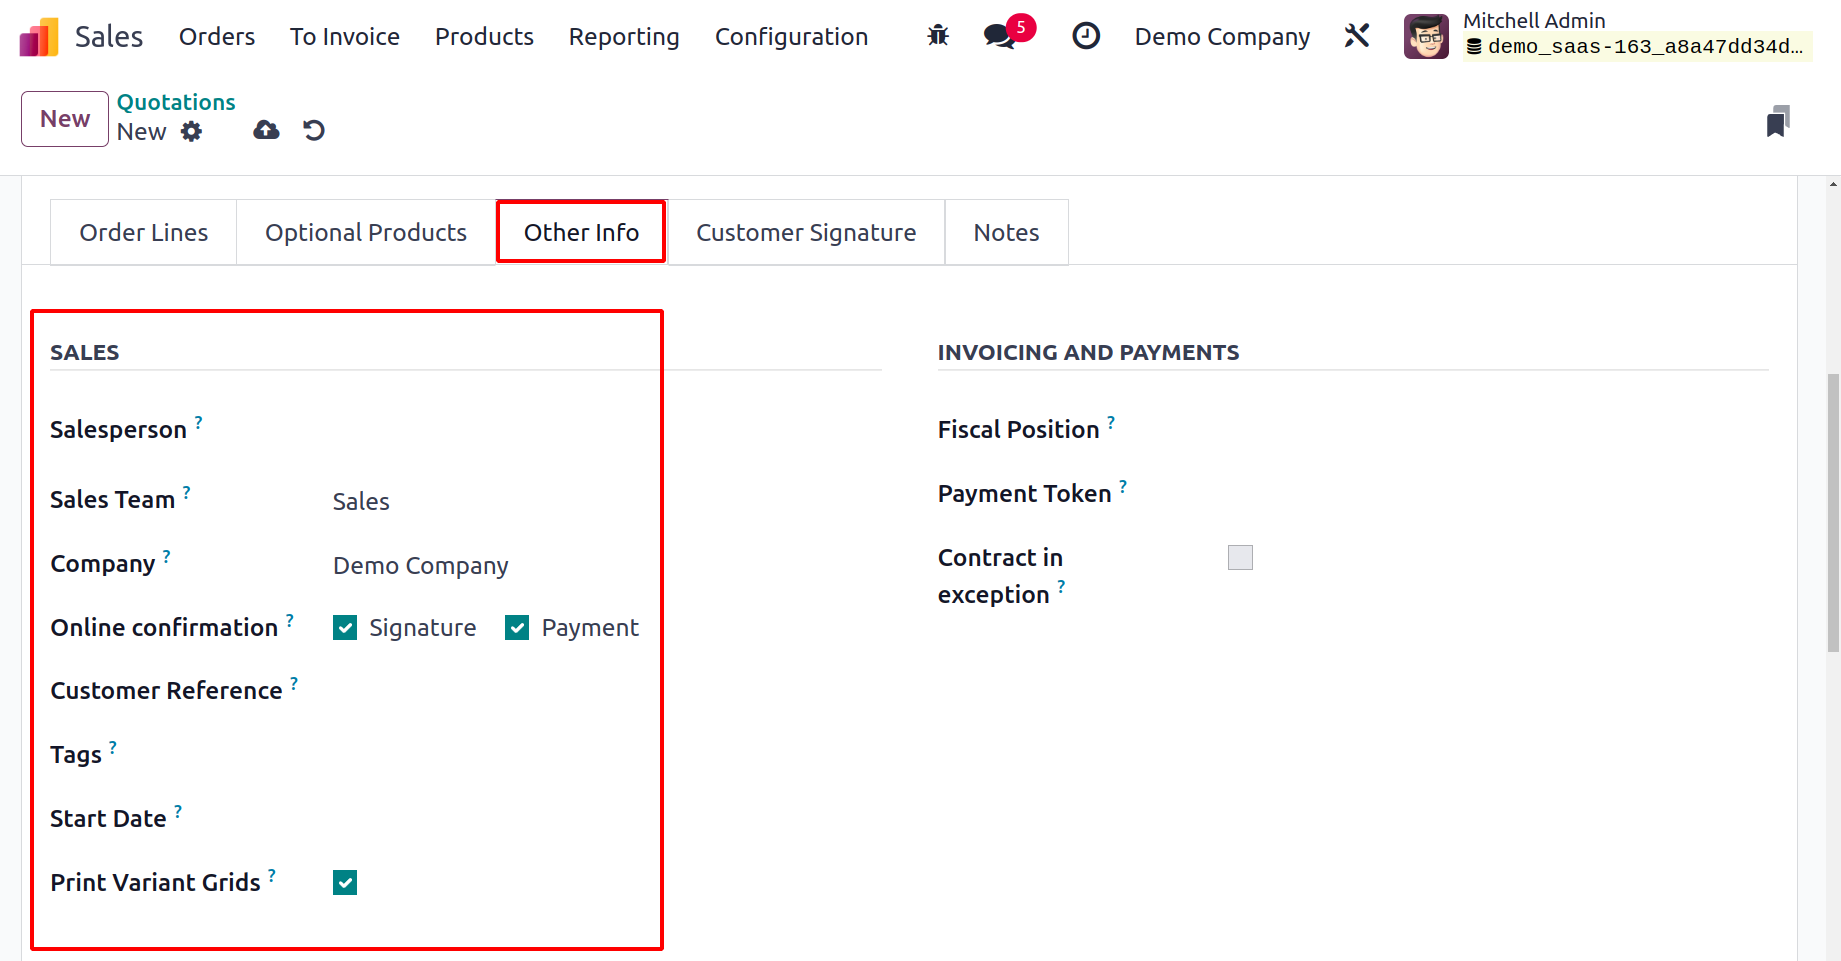
You can designate a worker as the Salesperson in the Sales section, and they will be in
charge of overseeing the sales activities associated with this quotation. The
appropriate fields will display the names of the Sales Team and Company. You can turn on
the Online Signature feature if you wish to let your consumer sign the sales order
online. The customer can use online payment options to pay for the order by clicking the
Online Payment button. If you want to print variant grids, fill in the Customer
Reference and appropriate Tags in the fields provided, then turn on Print Variant Grids.
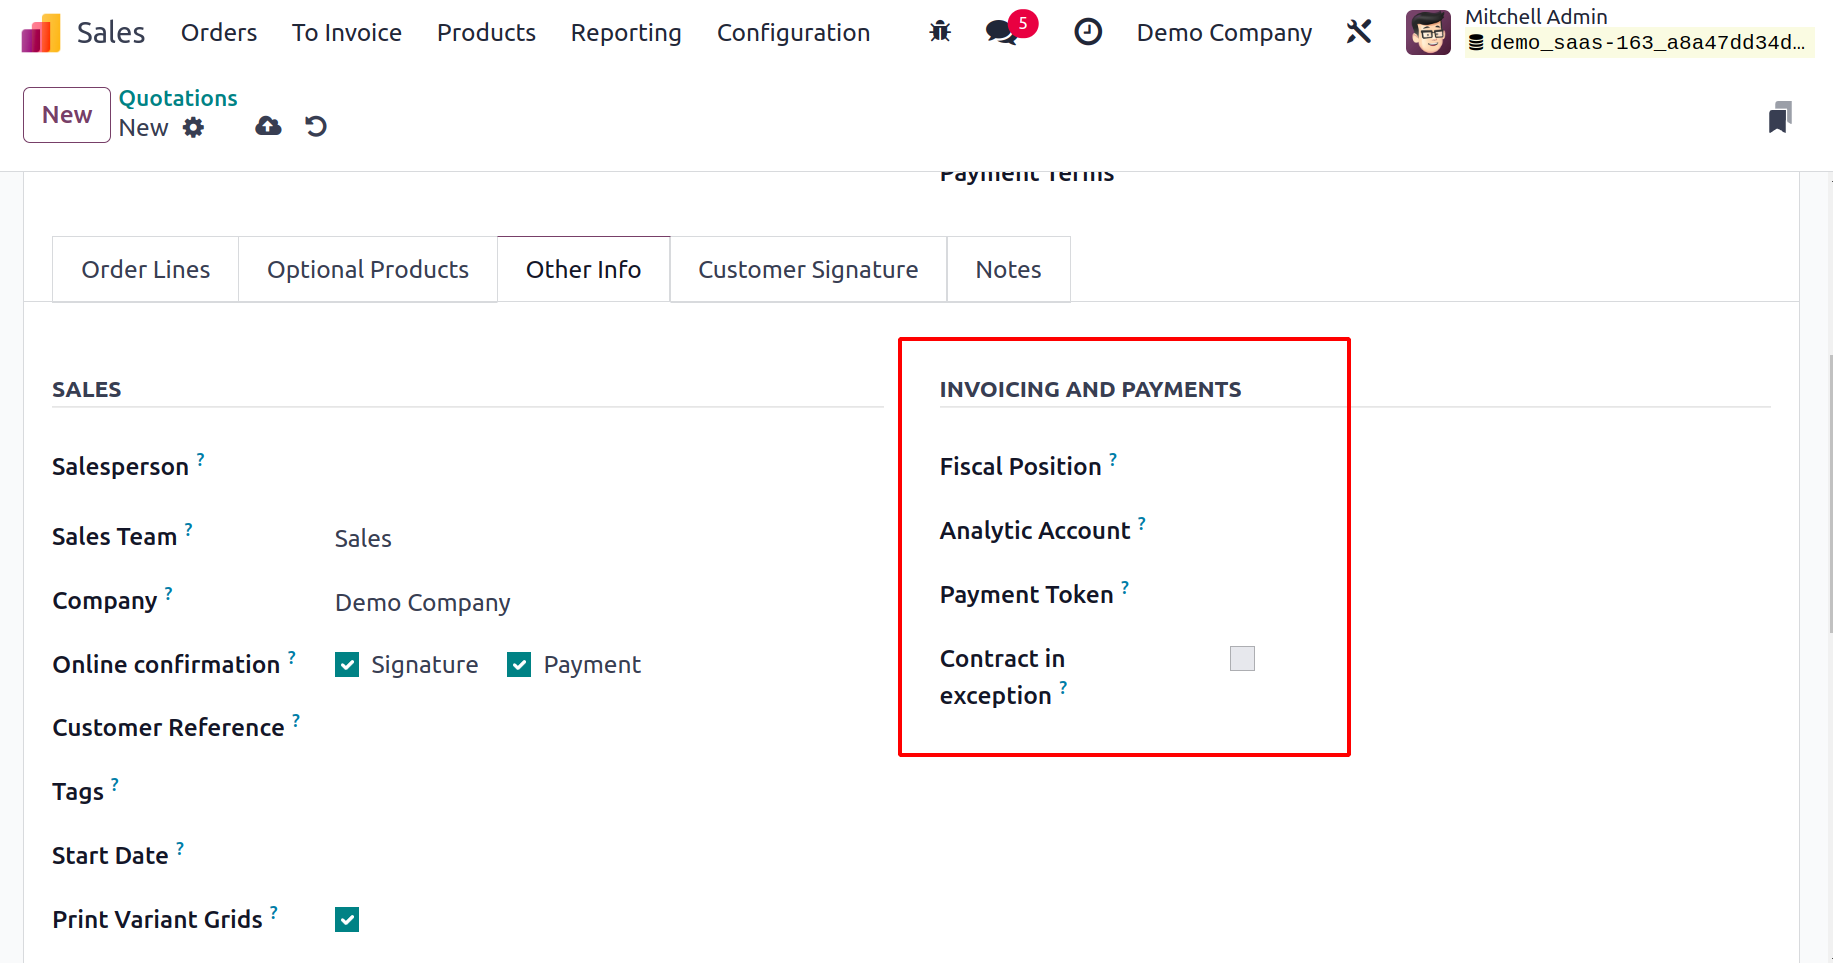
You may make reference to the Fiscal Position in the Invoicing and Payments section.
Taxes and accounts are modified for a specific client or set of sales orders/invoices
using fiscal positions. You can define the Analytic Account, Account Tags, and Payment
Token associated with this quotation in the corresponding area, and if necessary, you
can activate the Contract in Exception option.
Depending on your company's policies, you can choose the Shipping Policy under the
Shipping Policy as Soon as Possible or When All Products Are Ready. If you ship every
item at once, the delivery order will be set up according to the product with the
longest lead time. The delivery date guaranteed to the customer can be mentioned in the
Delivery Date column.
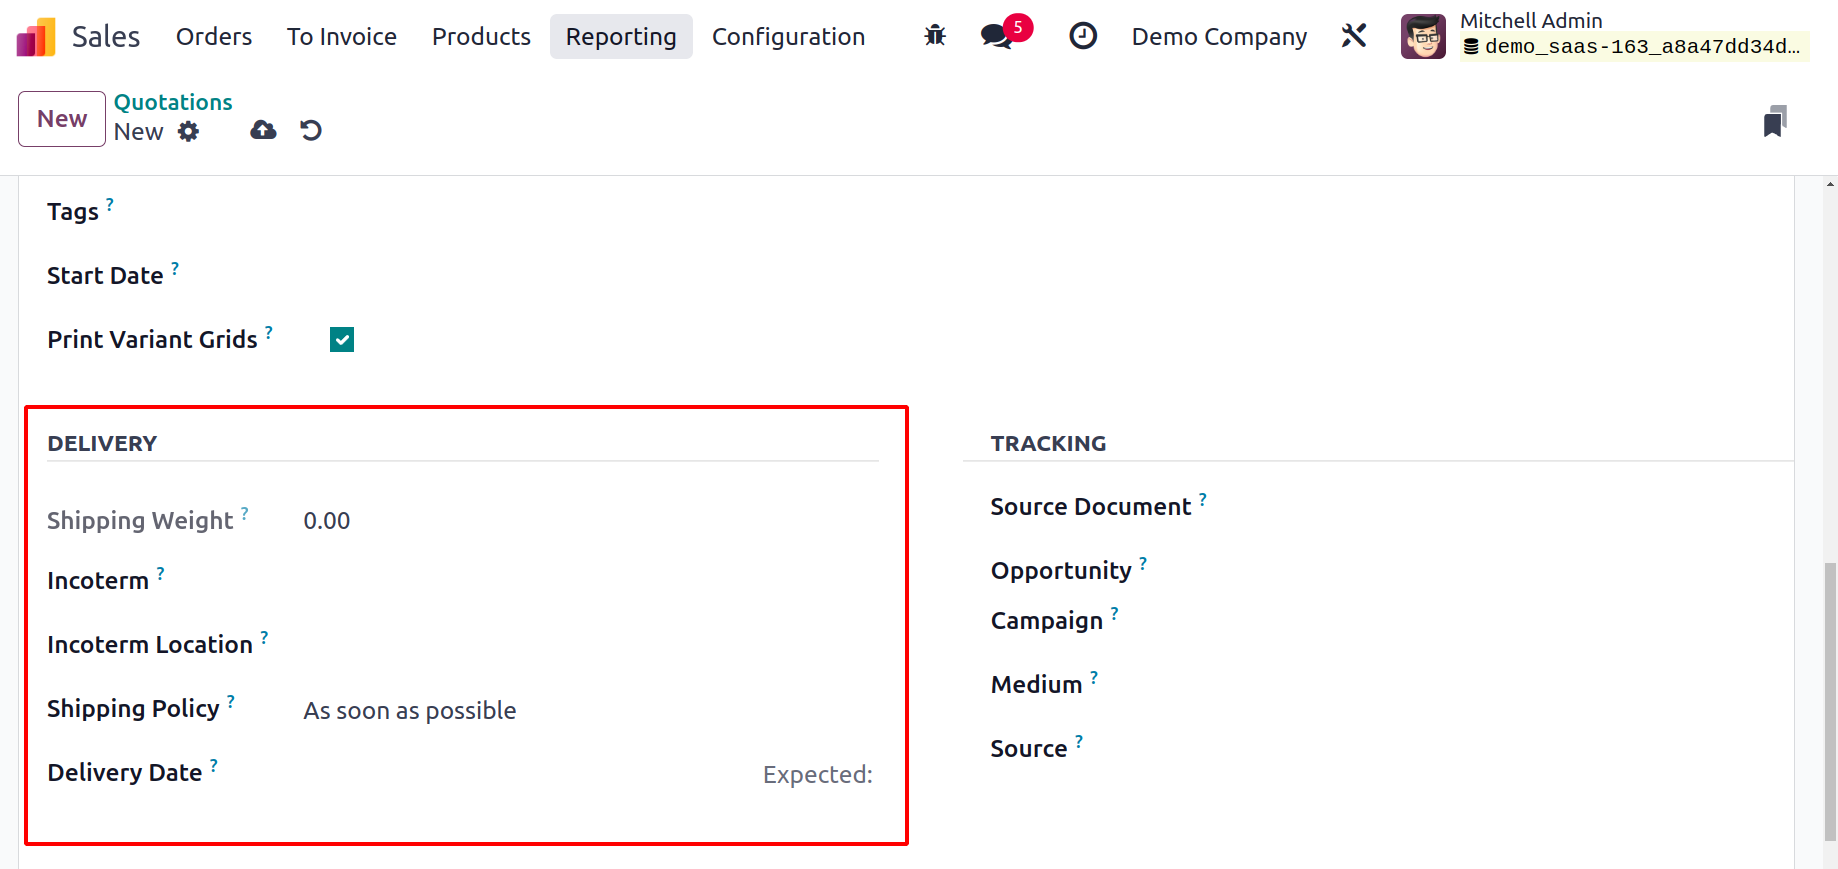
If chosen, this date will be used to automatically arrange the delivery order rather than
the product lead time. The quotation's estimated delivery date is indicated here, close
to the Delivery Date box.
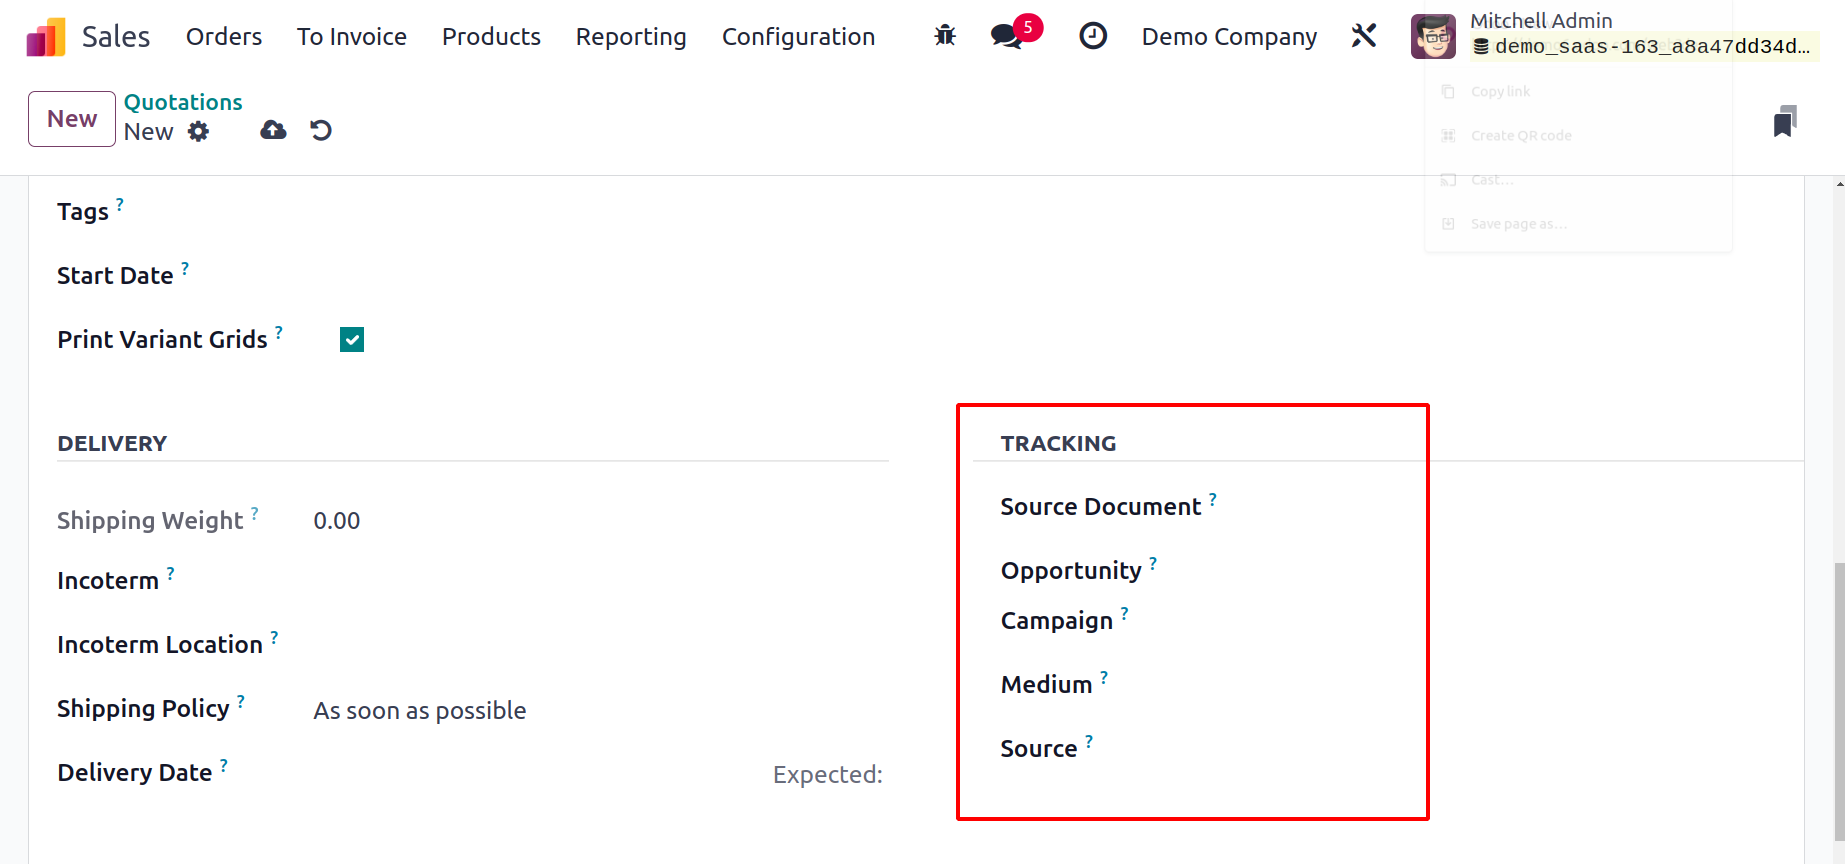
You can enter the Source Document, Opportunity, Campaign, Medium, and Source in the
respective fields provided in the Tracking section to enable successful Tracking
operations.
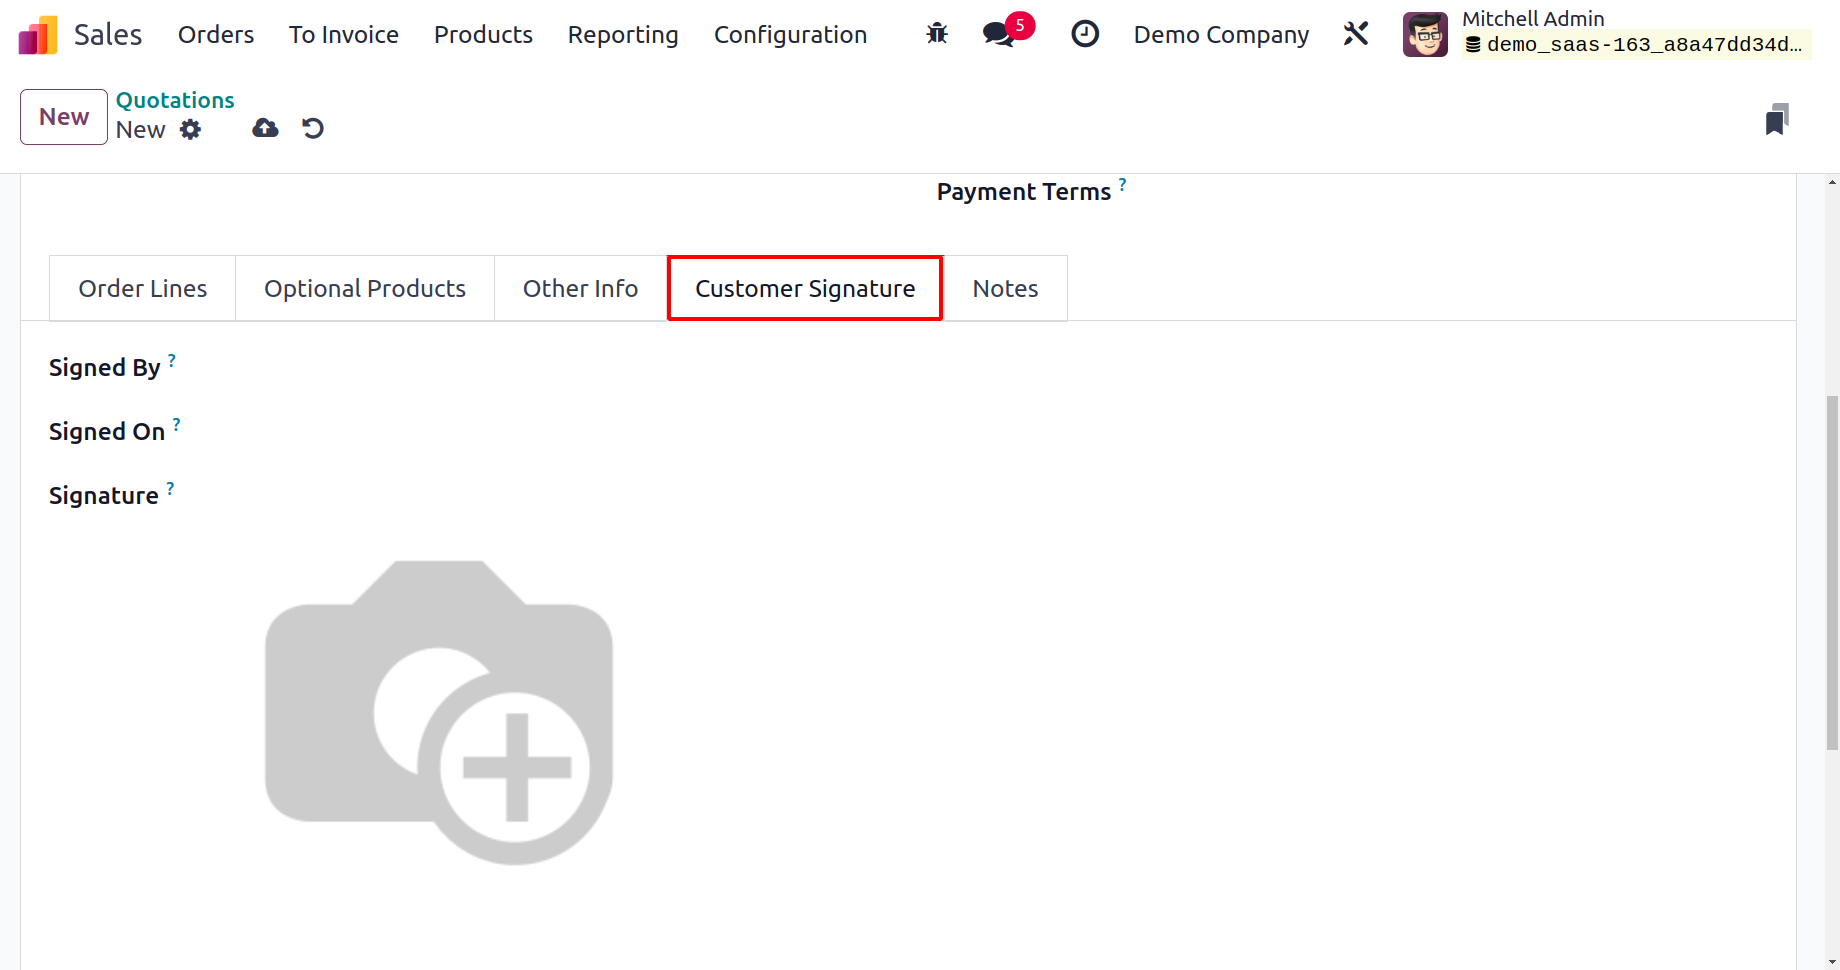
Odoo 17 will add a new tab to the quotation window, as shown below, to capture the
details of the customer signature whenever you activate the Online Signature option from
the Other Information page and allow the customer to sign the quotation online.
This tab will display information about the signature, such as Signed By, Signed On, and
Signature, after the consumer signs the quotation.
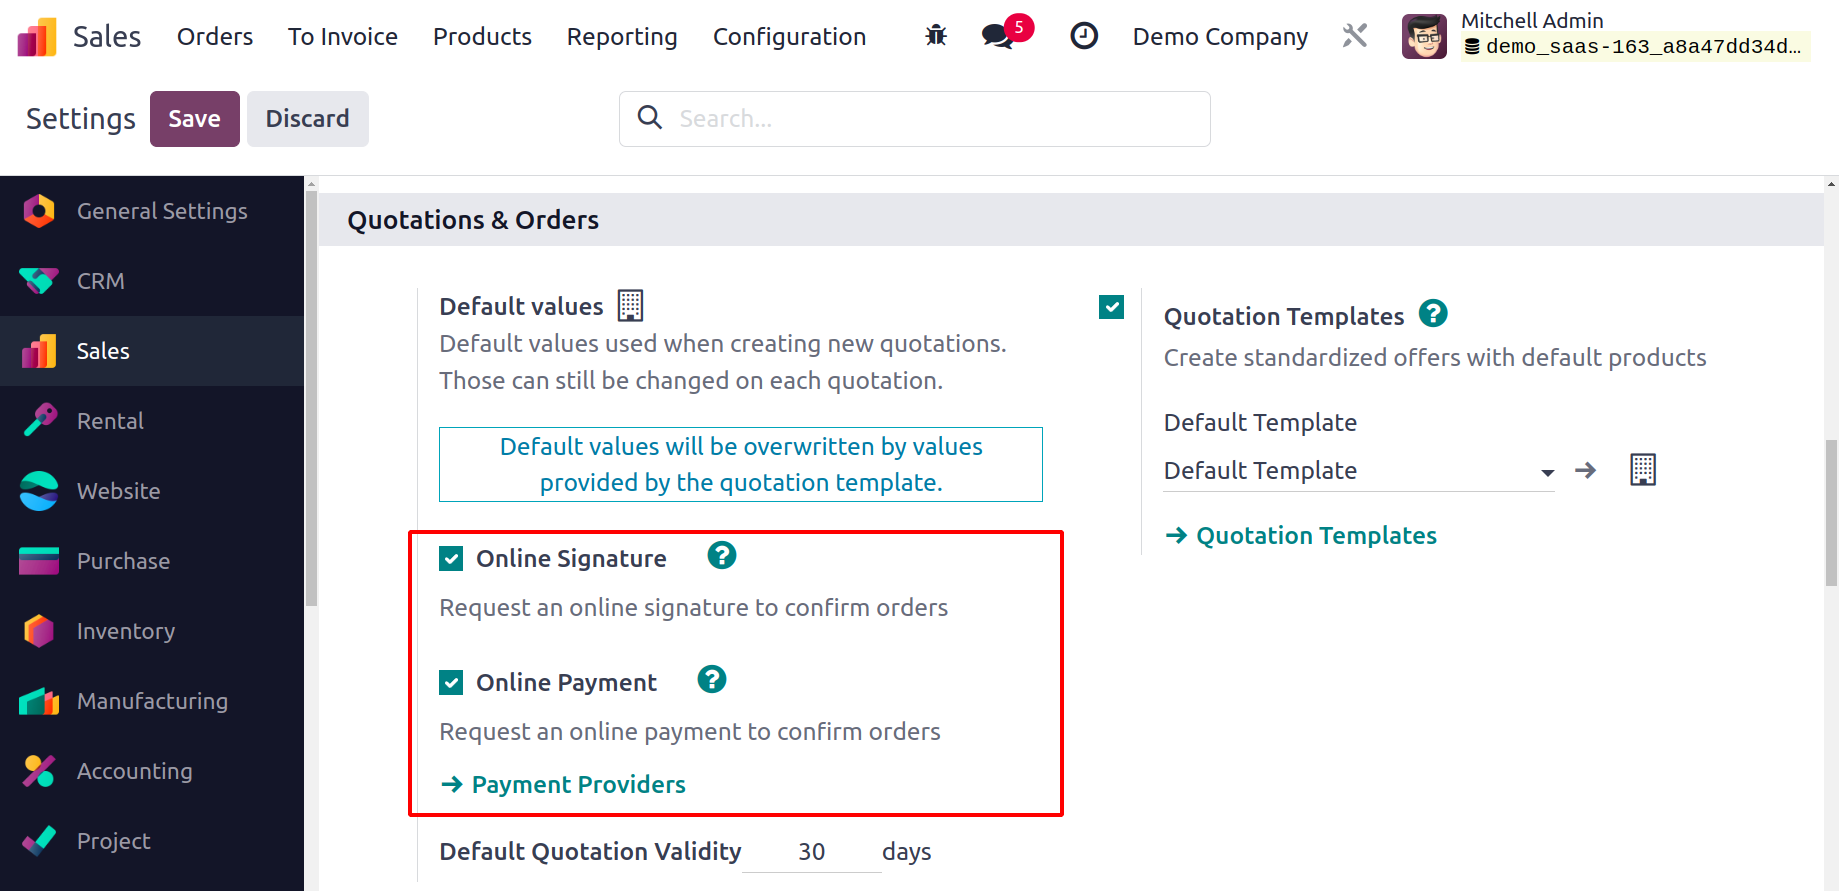
You can go to the Settings menu of the Sales module and turn on the Online Signature
option to make the feature available for all sales orders.
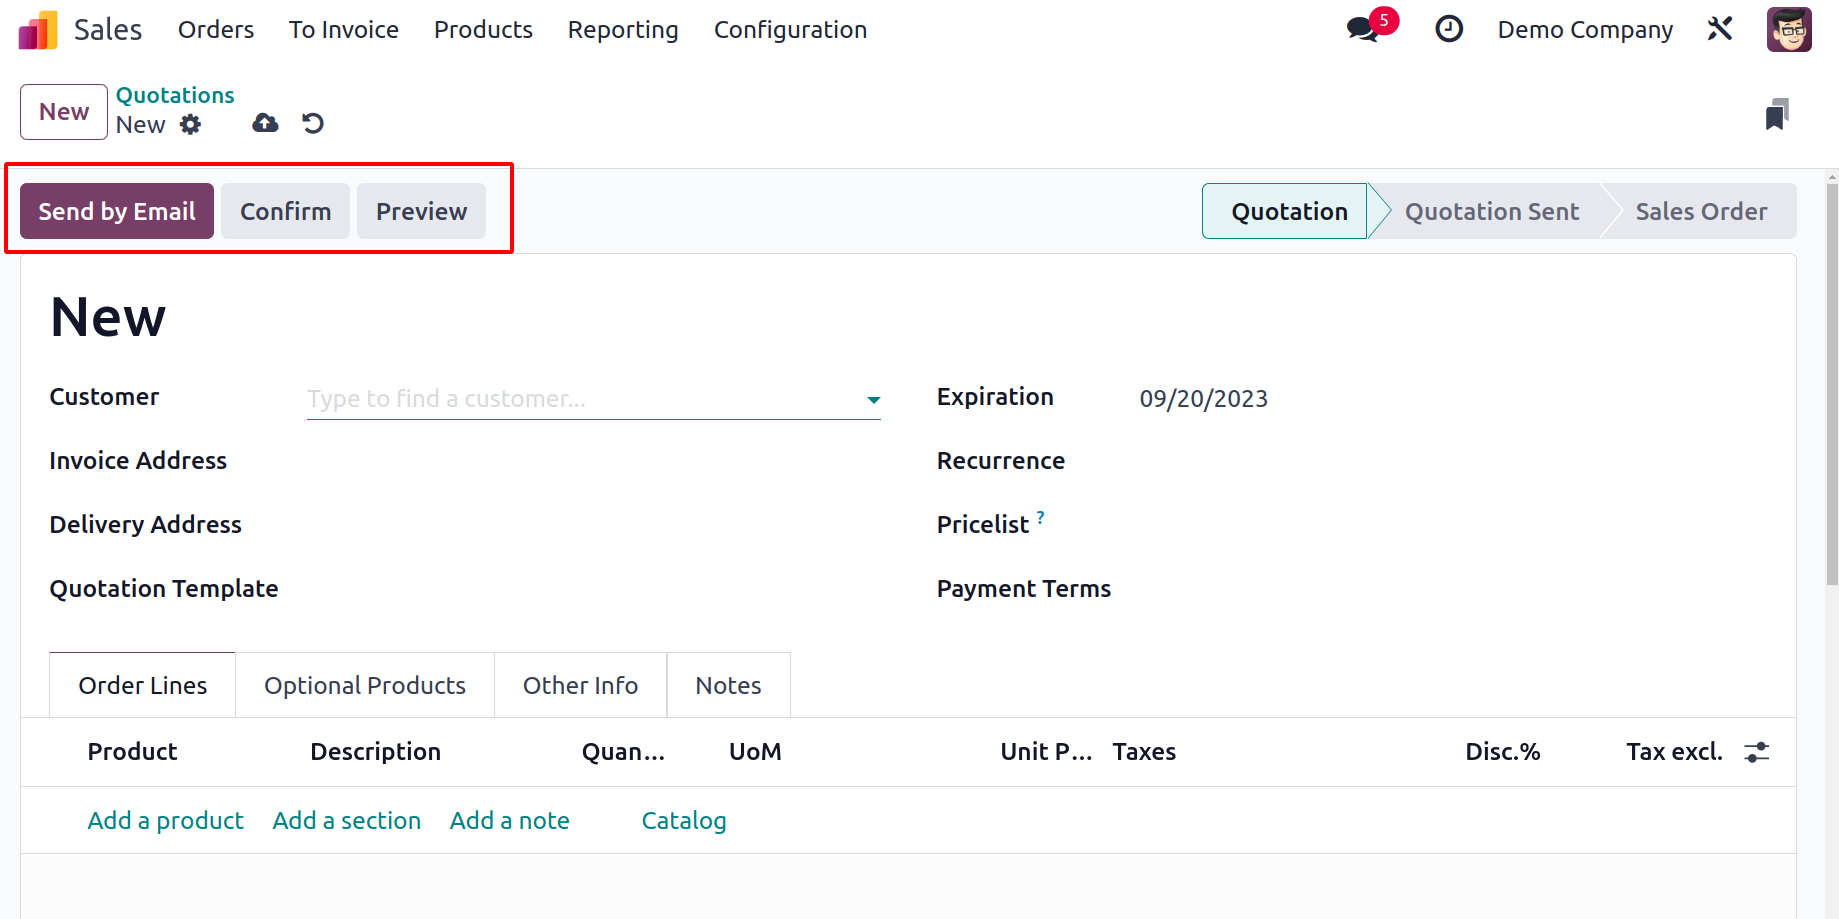
The sales quotation is now complete, and you can submit it to the appropriate customer.
The quotation is sent to the client through email using the Send By Email option. By
selecting the Confirm button, which will turn this sales quotation into a sales order,
you can finalize the sale if the customer is happy with the quotation. You can cancel
the newly made quotation with the help of the Cancel button. To view the customer
preview of the quotation, click on the Preview button.
As seen in the image below, Odoo 17 will instantly create an email with the quotation
attached when you click the Send By Email button.
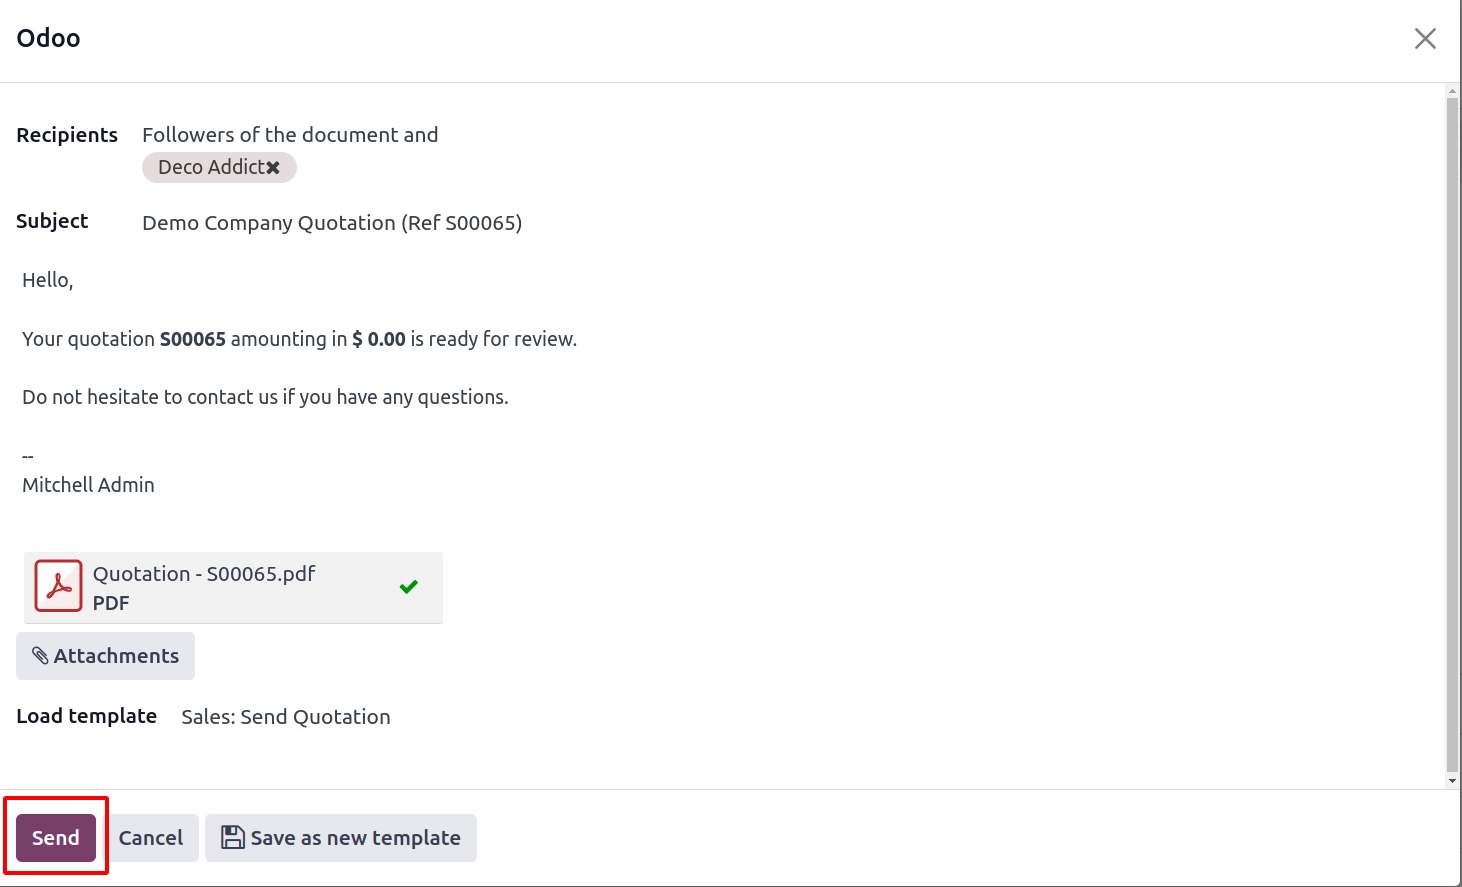
The recipient's name can be mentioned in the field provided. You have the option to
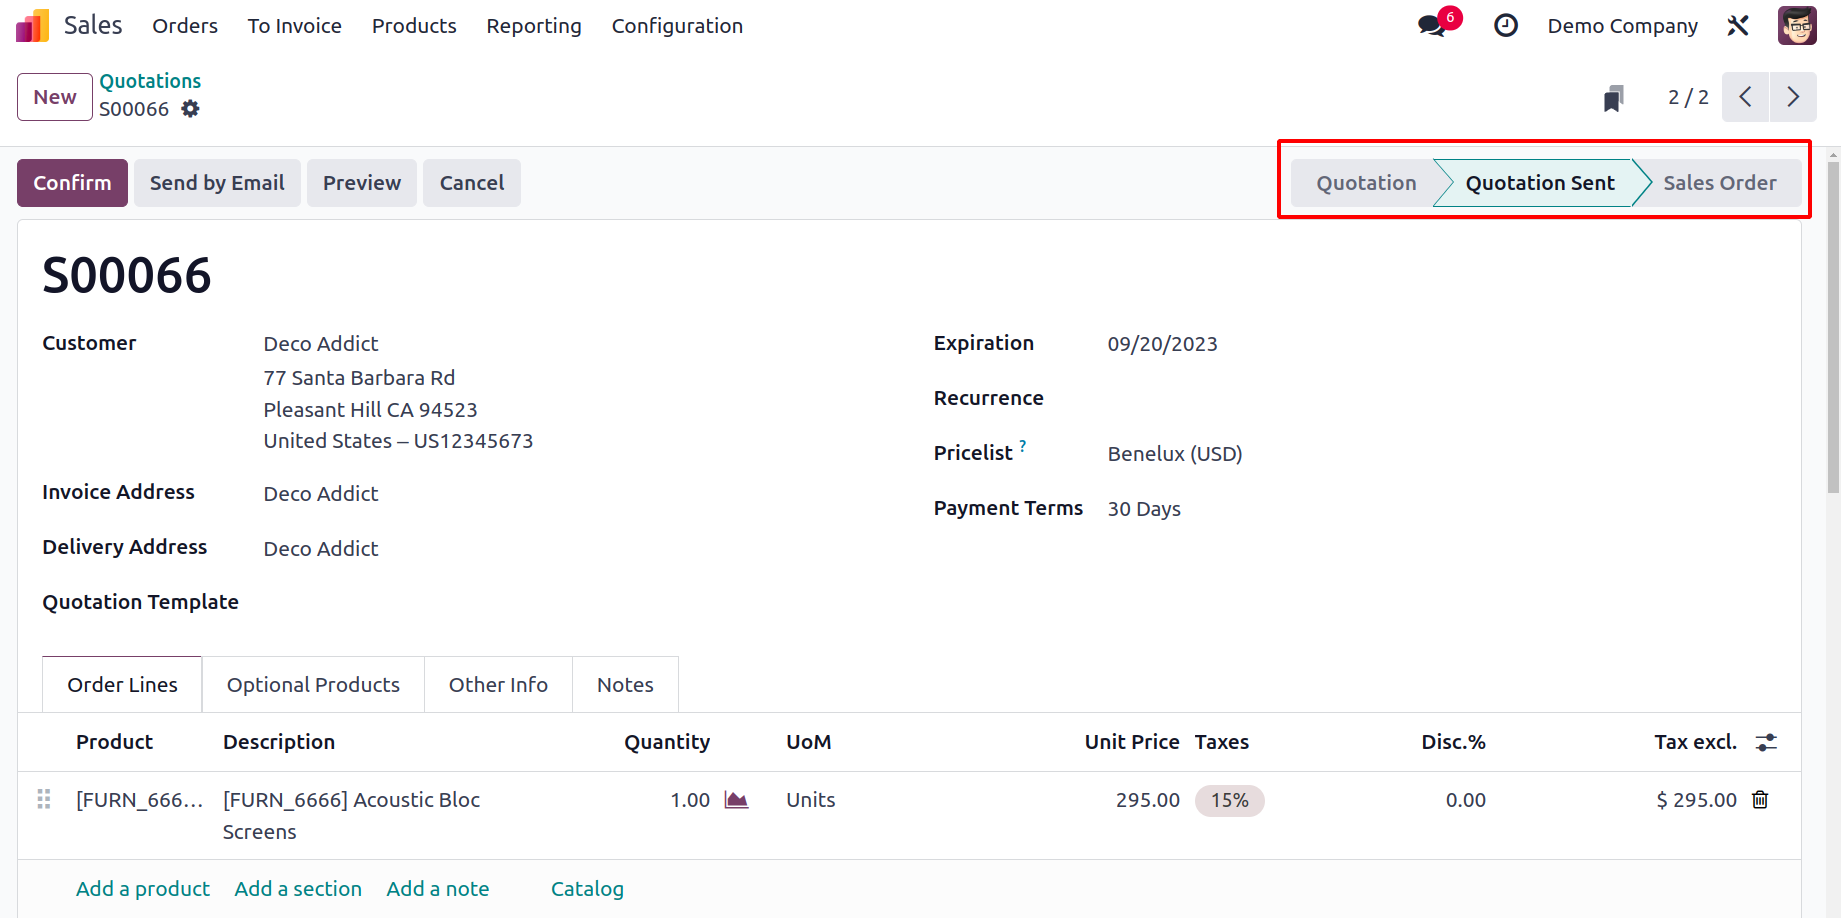
modify the email's subject as needed. Click the Send button to finish. As shown in the
figure below, the status of the quotation will be changed to "Quotation Sent."
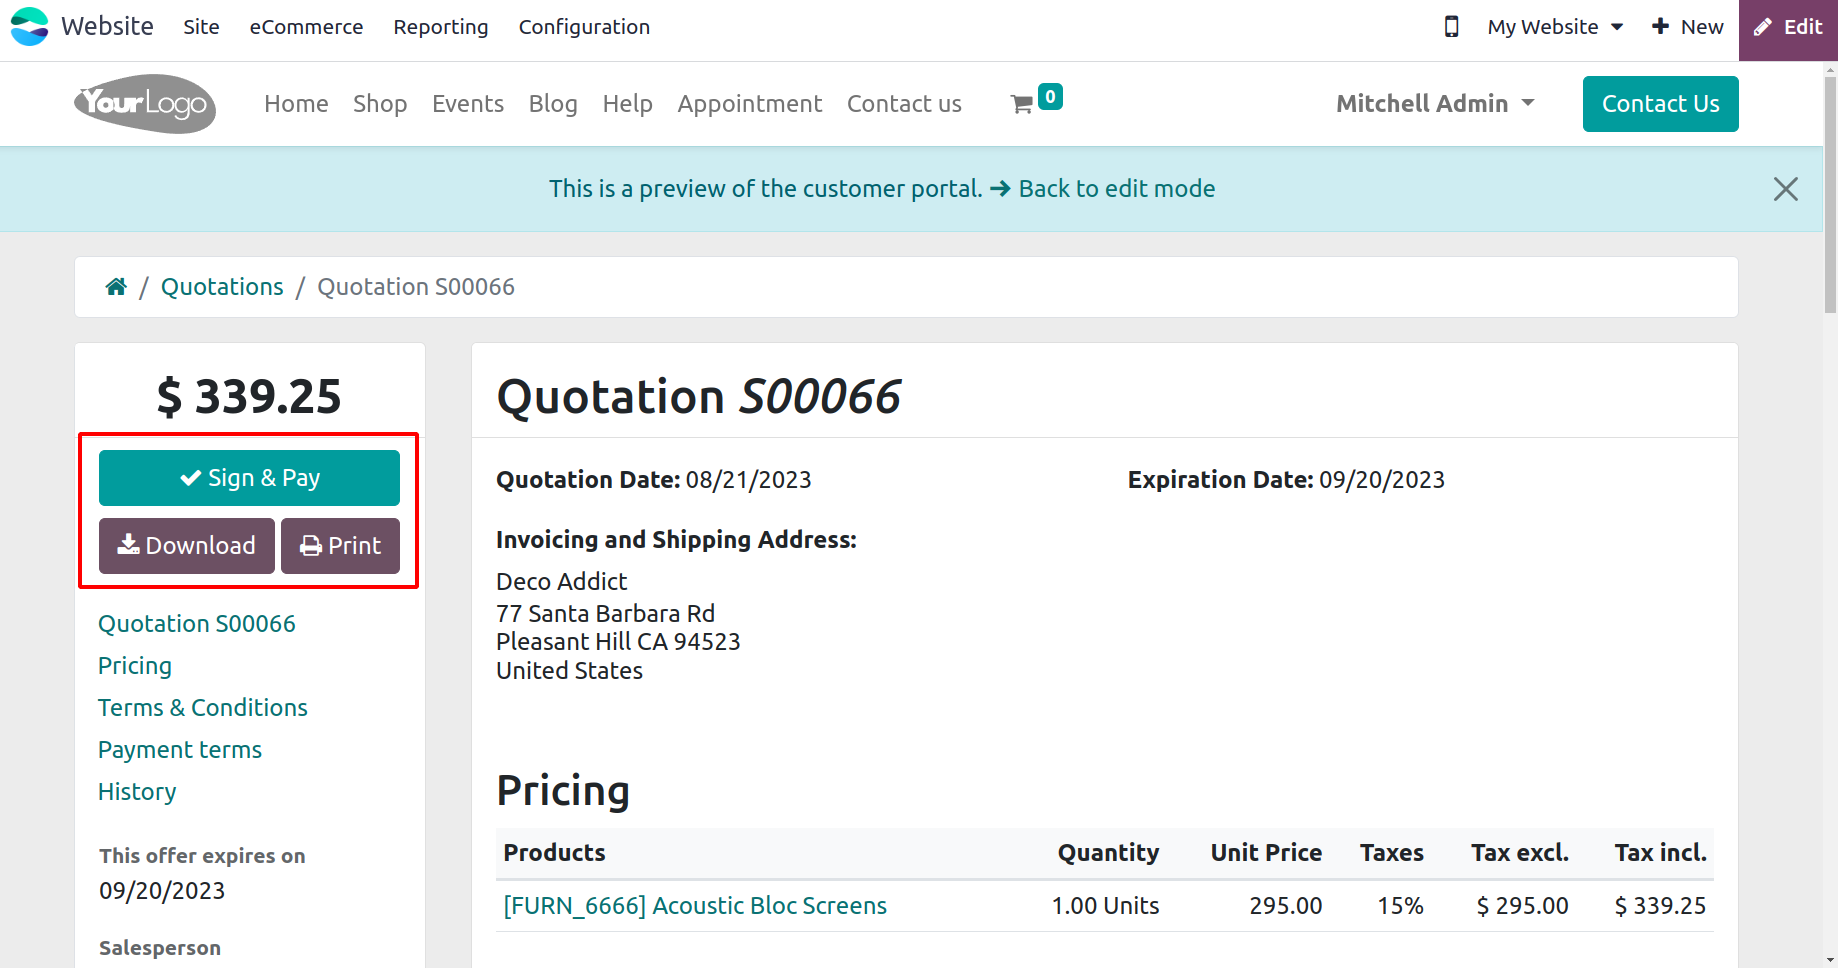
You can view the quotation on the web by clicking the Customer Preview option. This is a
glimpse of the customer portal, where the client can easily check and confirm the
quotation. The concerned customer can easily sign and submit an electronic payment for
the quotation by using the Sign & Pay button. You can download and print the quotation
using the Download and Print buttons, respectively.
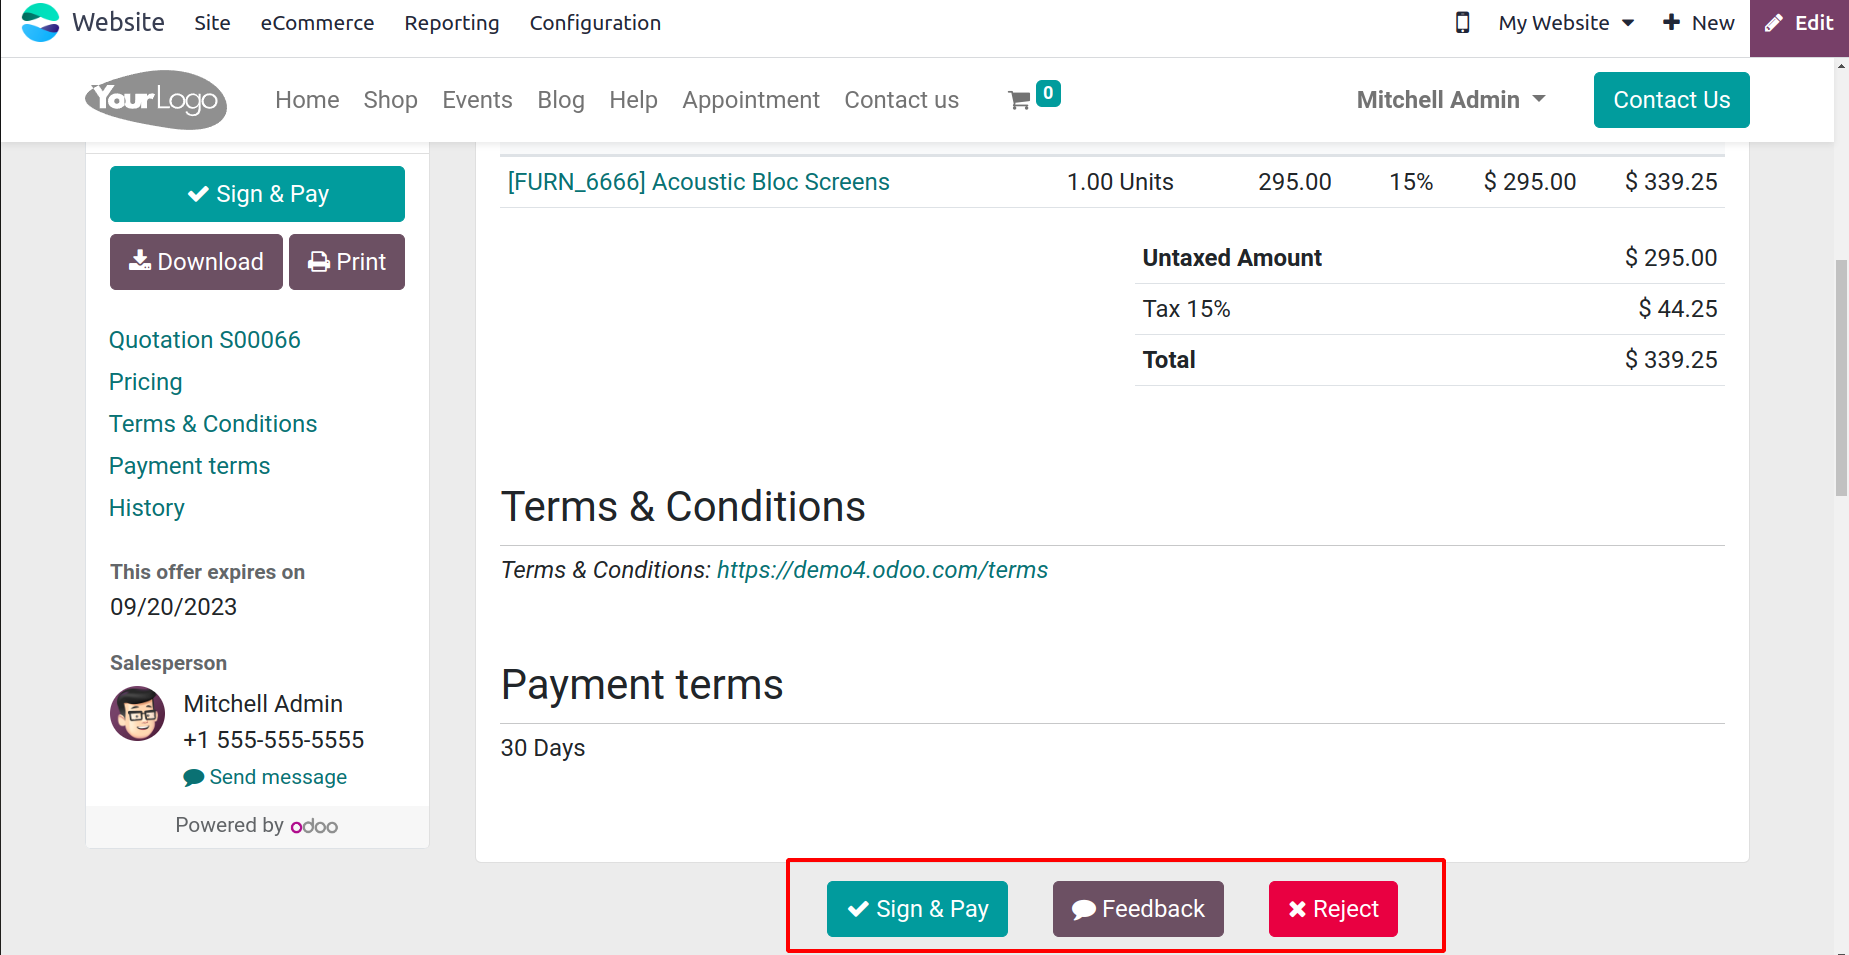
The customer can send feedback with the help of the Feedback button. If the consumer
decides they do not want to proceed with this sales transaction, they can use the Reject
option to reject the quotation.
Let's now talk about what happens to a quotation when the customer accepts it.