Sale Order
The quotation will be instantly transformed into a sales order once the customer accepts
it. By selecting the Sign & Pay button from the customer site, the customer can Confirm
the quote.
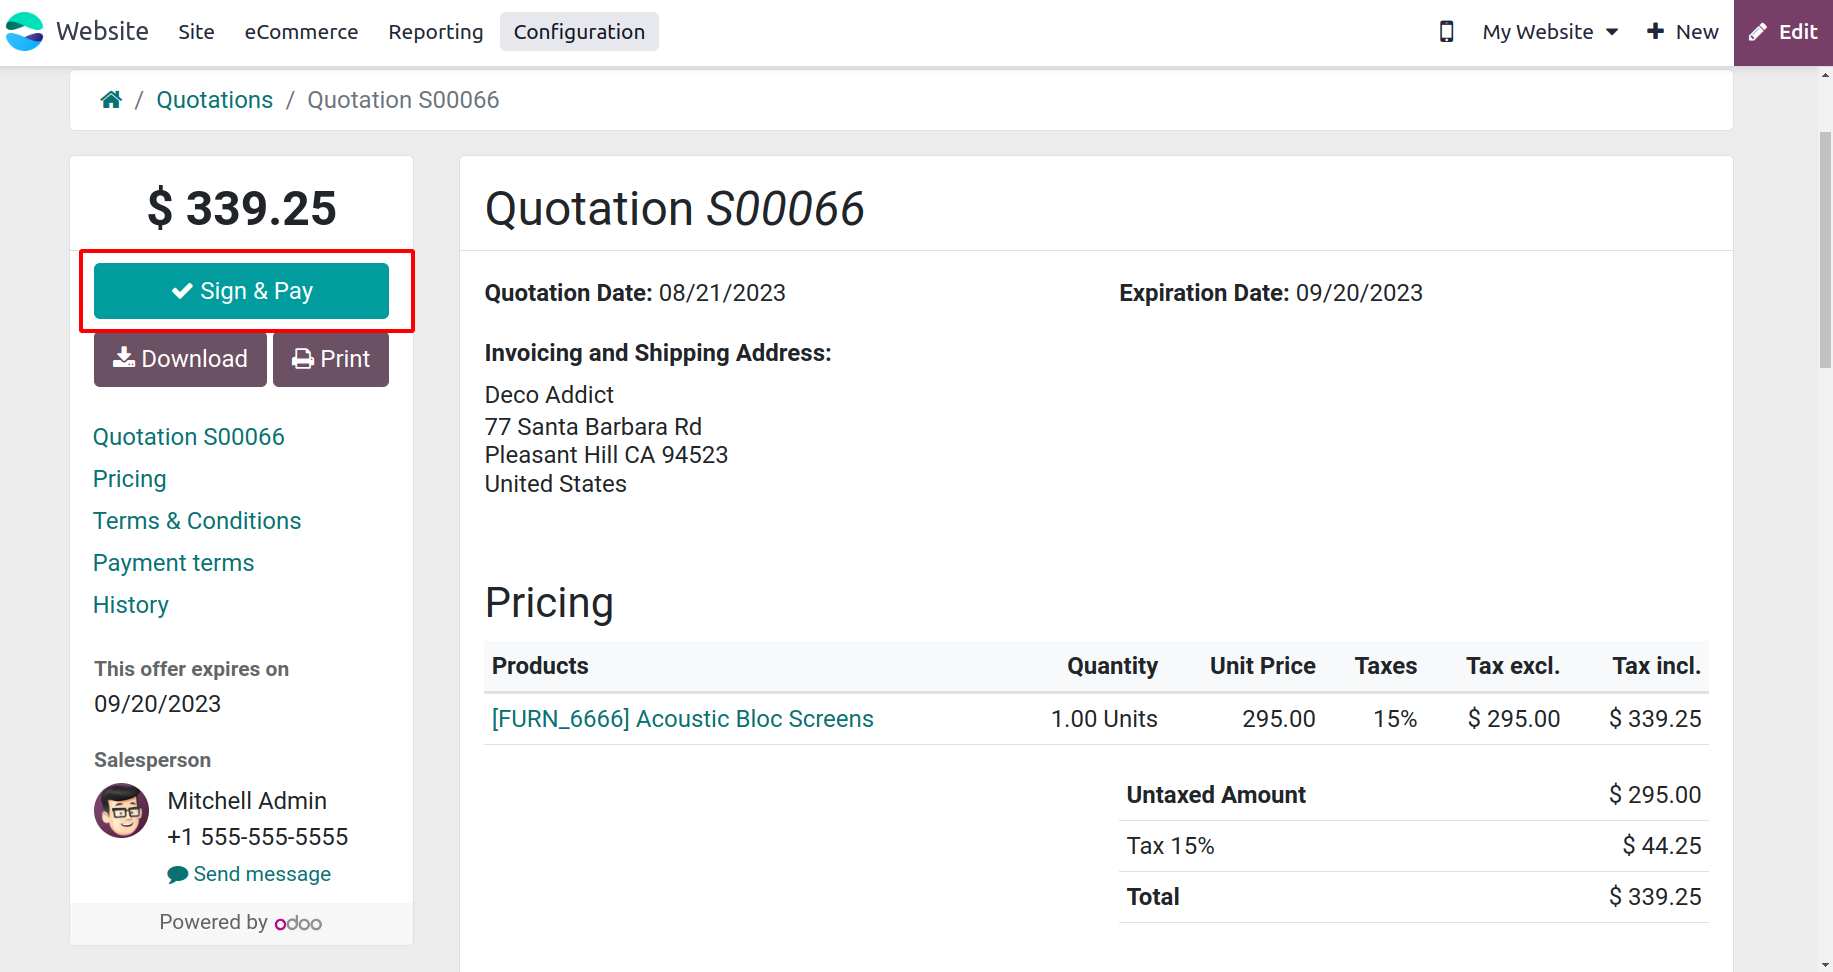
To accept the quotation and sign, a pop-up window will open as seen in the screenshot
below.
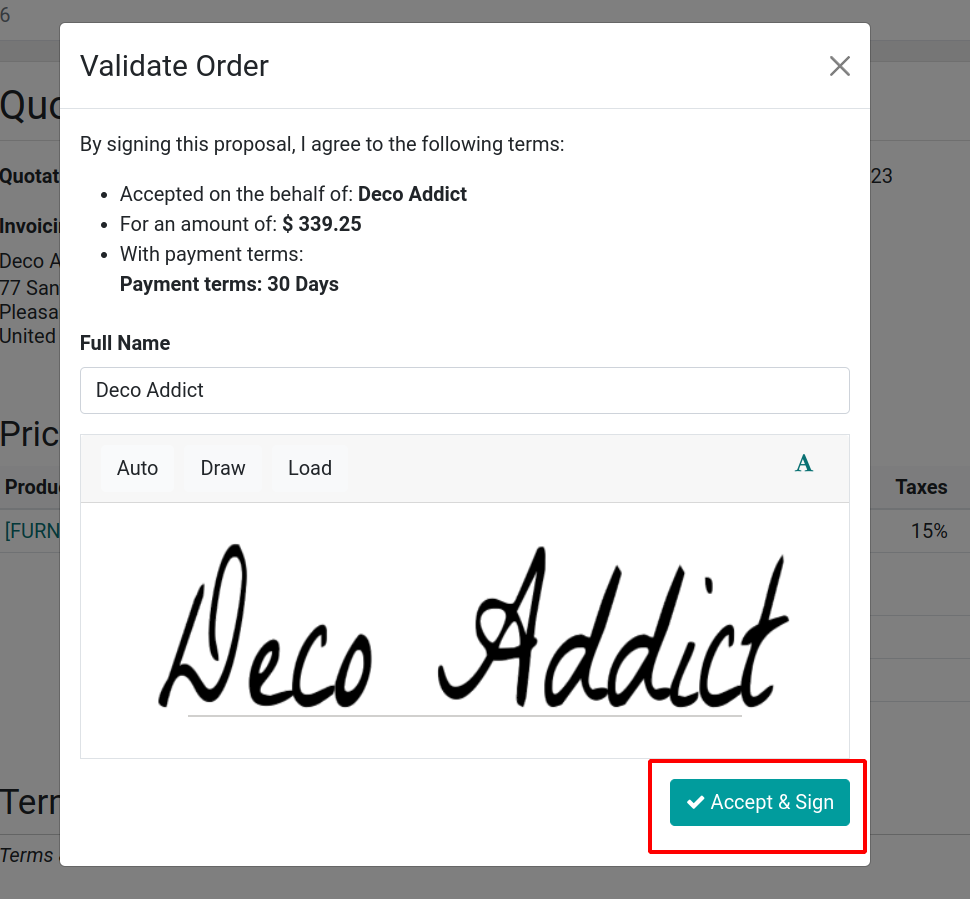
To finish the payment process, the consumer can click the Accept & Sign option. When you
examine the sales quotation in the backend, you'll notice that
the Customer Signature tab has the customer's signature information submitted
automatically.
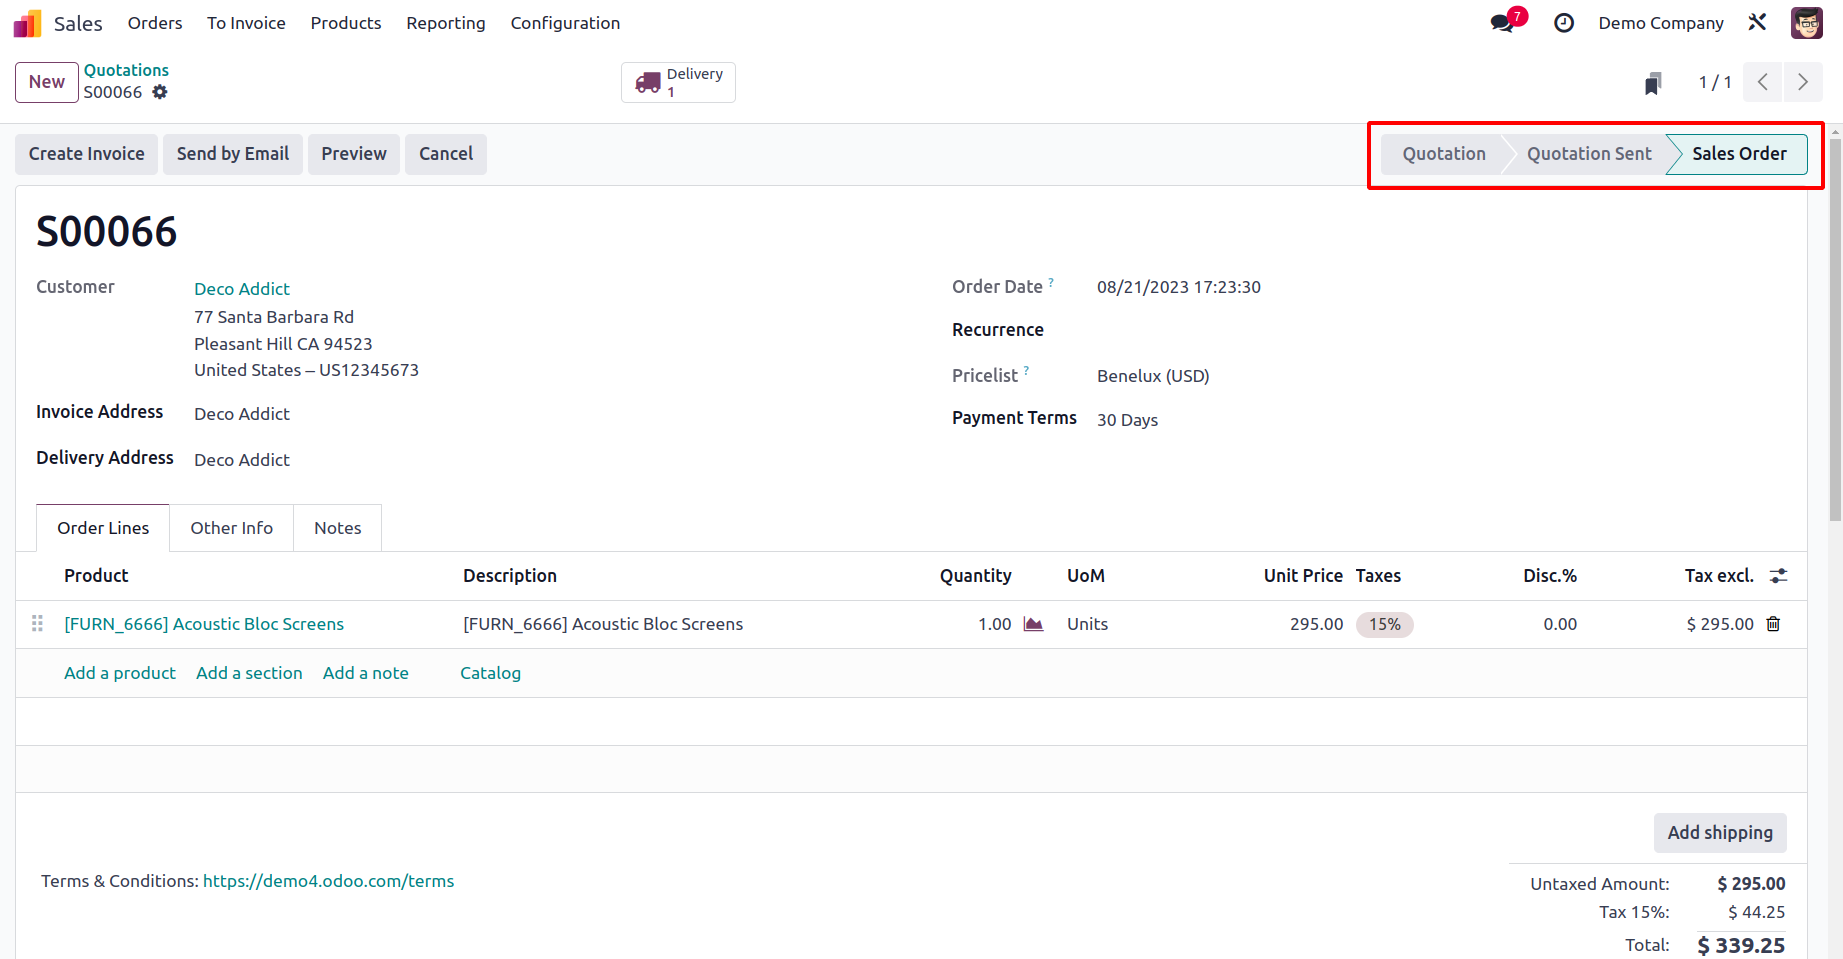
You can now select the Confirm button. The status of the quotation will change to Sales
Order after you click the CONFIRM button, as seen in the figure below.
You will have a unique platform in the Odoo17 Sales module under the Orders menu to
manage all of these sales orders.
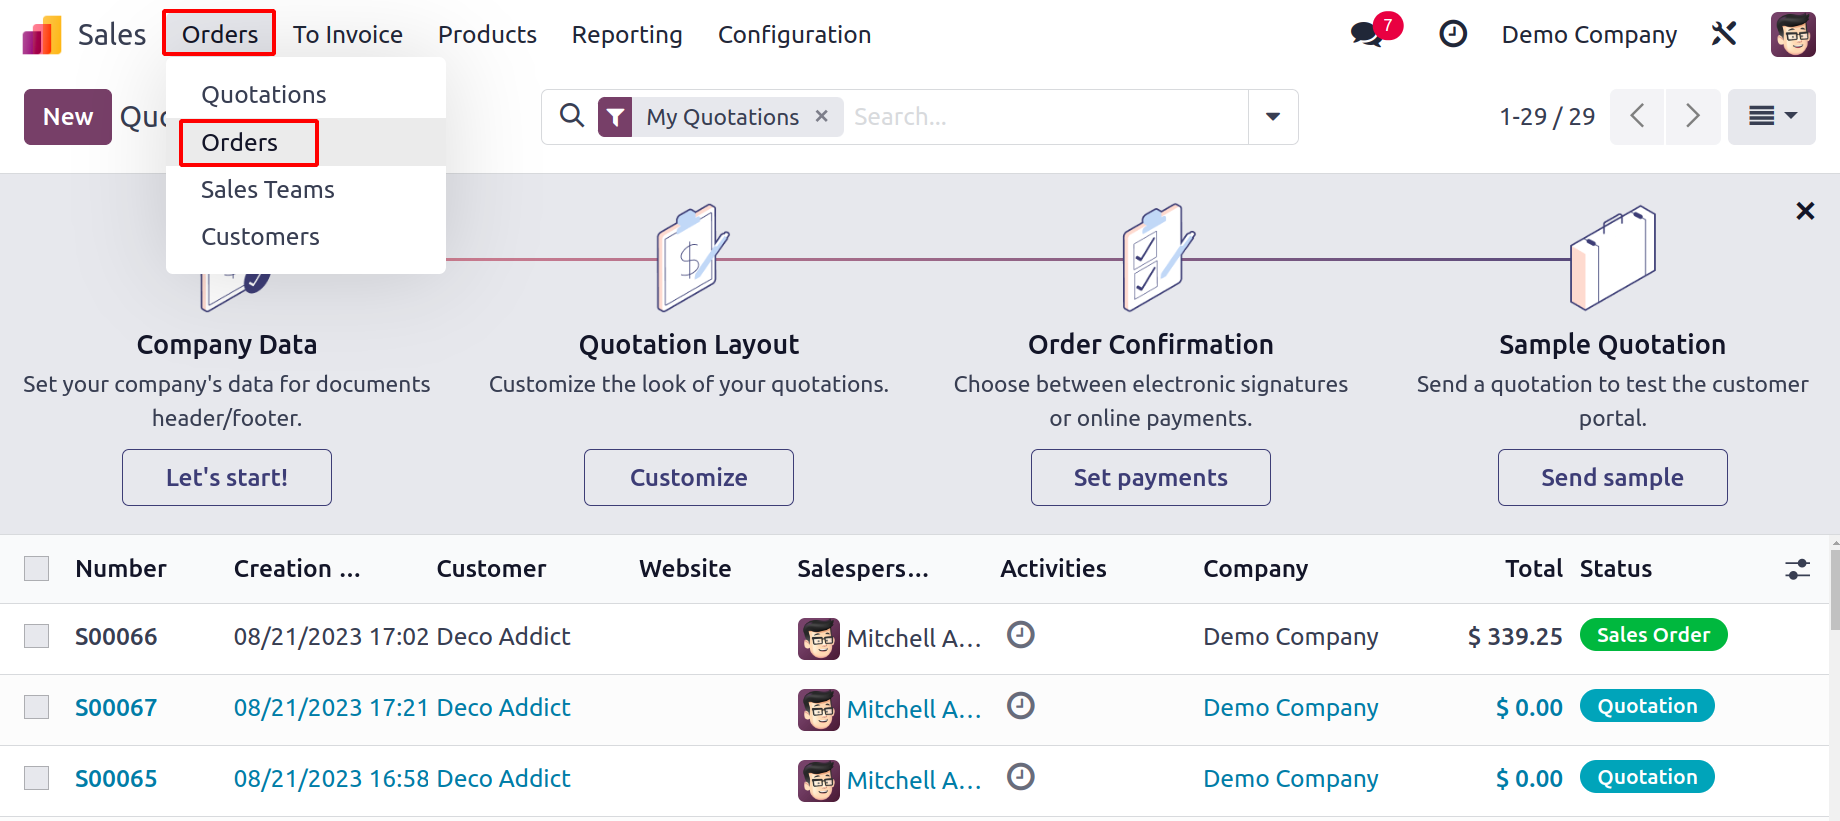
The details of the Sales Order Number, Order Date, Website, Customer, Salesperson,
Activities, Company, Total, and Invoice Status will be displayed in this platform's list
view. For this platform, Odoo supports List, Kanban, Calendar, Pivot, Graph, and
Activity views. With default and programmable choices, the Filters and Group By options
will assist you in streamlining your search operations.
Odoo 17 brought some additional functionality to sales orders. Let's examine those
modifications now.
A list of sales orders is displayed; in Odoo 17, shift + Down Arrow can be used to select
multiple sales orders.
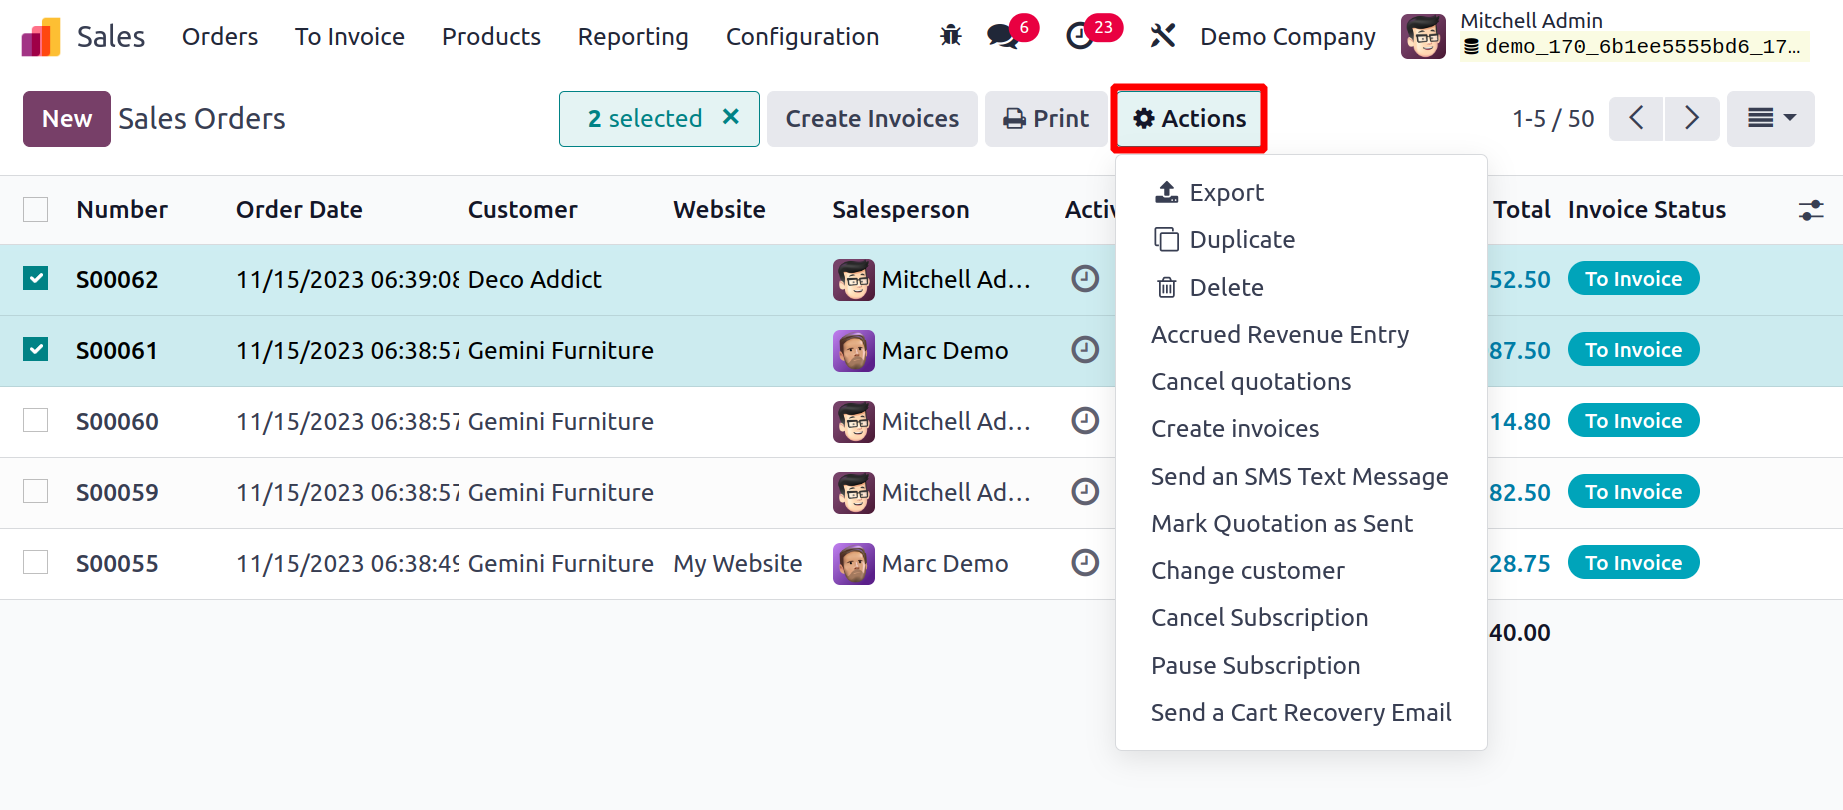
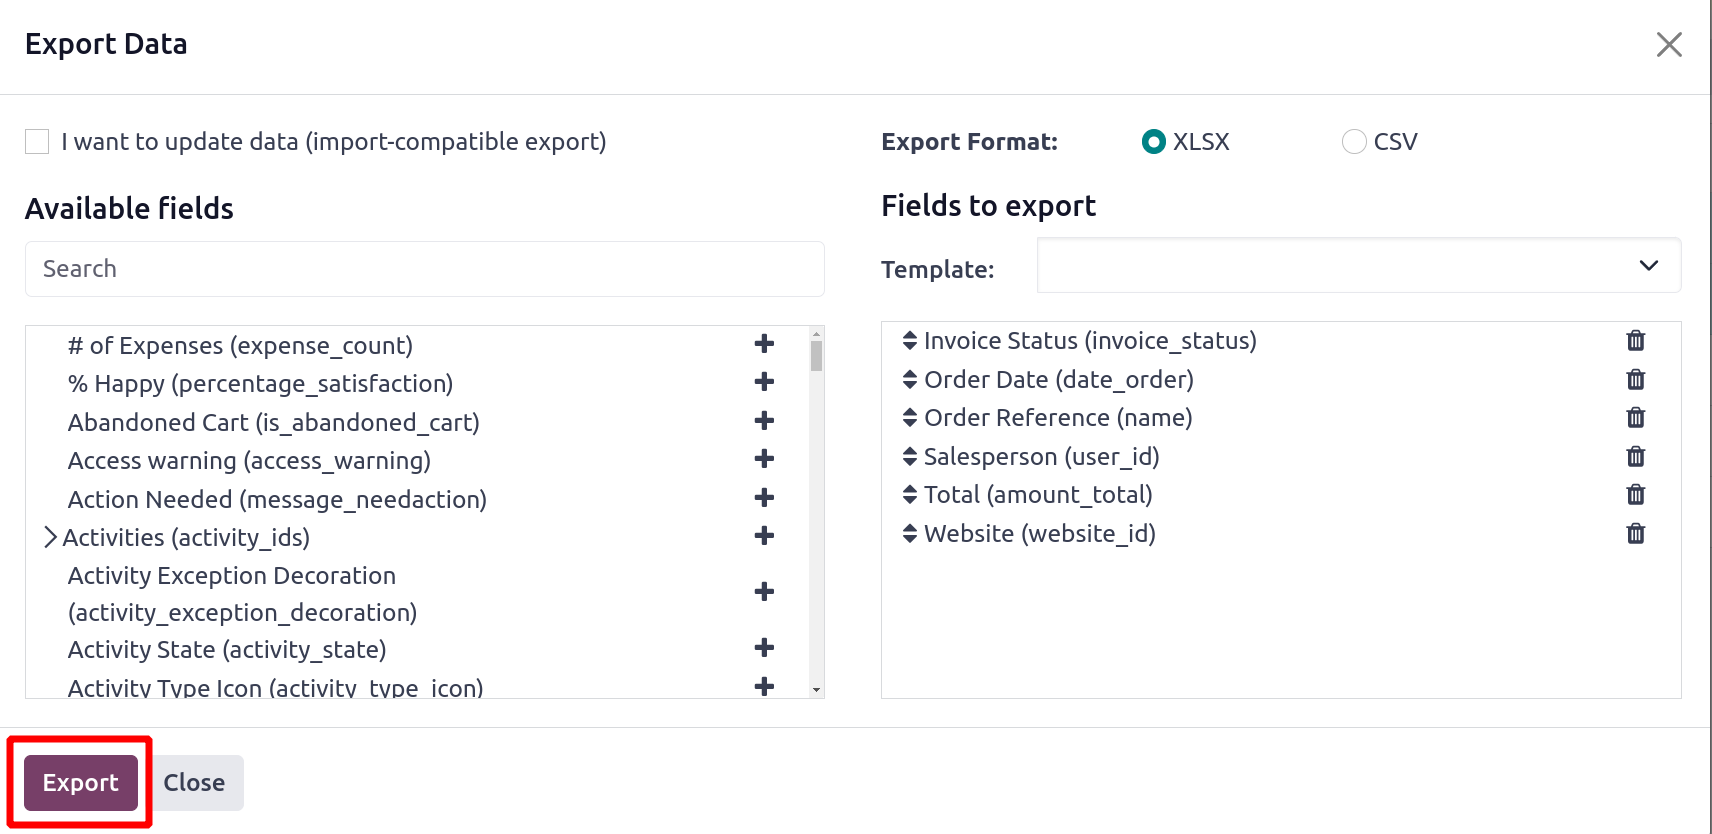
The Action button now displays more functions. Export is the first option available on
the Action button. This allows the sale orders to be exported in CSV or XLSX format for
use in the system. Fields can be selected by users for exporting. The widow's right side
displays the selected fields. Next, select the Export option.
This option allows you to cancel the specified selling orders with only one click when
you click the Cancel Quotation. A confirmation message will show up if the Cancel
Quotation option is selected. Next, click the Cancel Quotation button that is located on
the popup window. The chosen quotes then advance to the Cancel phase.

You can make a new invoice in draught format by selecting the Create Invoice option.
Order Count is the total number of chosen sales orders. Choose Consolidated Billing if
you want to create a single invoice for all orders associated with the same clients and
billing address for a subscription order. Next, select the button labeled "Create Draft
Invoice."

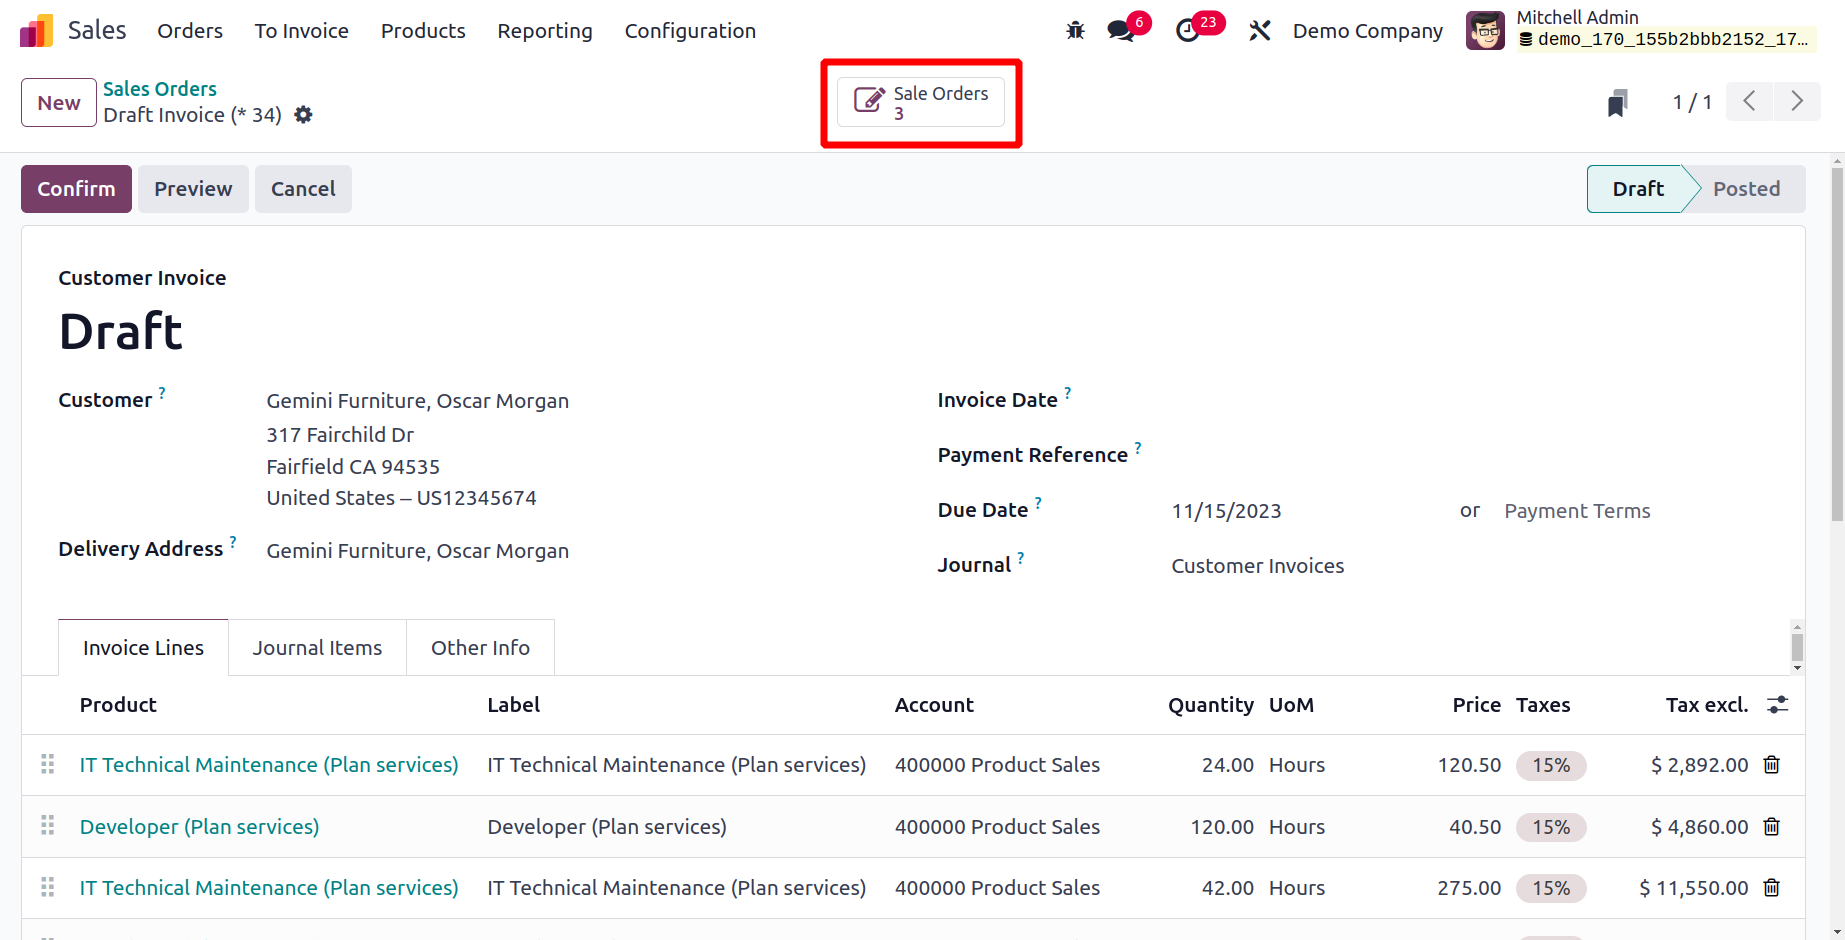
When the draft invoice opens, every product listed in every one of the chosen sales
orders is included in one document. All of the specified sales
orders are displayed on the Sale Orders smart tab.
This is possible only for subscription orders.
You can send the customer SMS text messages by using the Send an SMS text message option.
You can add a message to send using the popup box.

Changing the customer from the sale order is possible with the Change Customer option.
You can add a new customer,
an invoice address, and a delivery address in the popup window before clicking the
Submit button.

Let's now examine how to produce invoices from the verified sales orders.