Discount, Loyalty, and Gift Card
In Odoo 17, you can discover a single platform to set up Discounts, Gift Cards, eWallets,
and Loyalty under the Product menu in place of the Promotion and Coupon Programmes found
in previous versions. From the Sales module's Settings menu, you can turn on this
option.
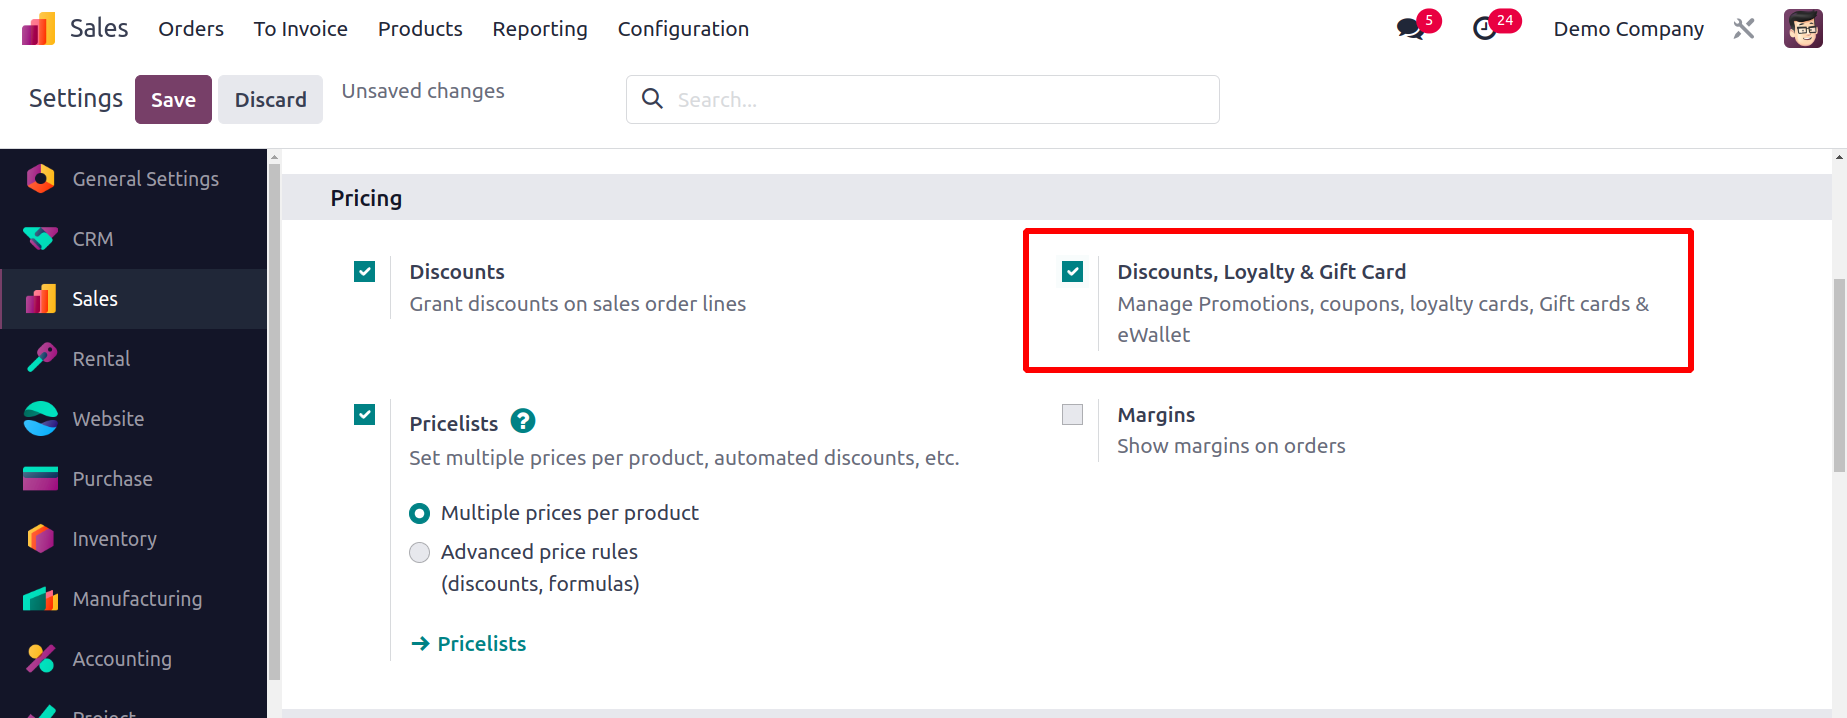
The Discount, Loyalty, & Gift Card function, which is highlighted in the screenshot, can
be activated under the Pricing page. These characteristics are utilized to draw clients
and increase sales. You may access the different tools to manage Discount & Loyalty and
Gift Cards & eWallet from the Products menu.
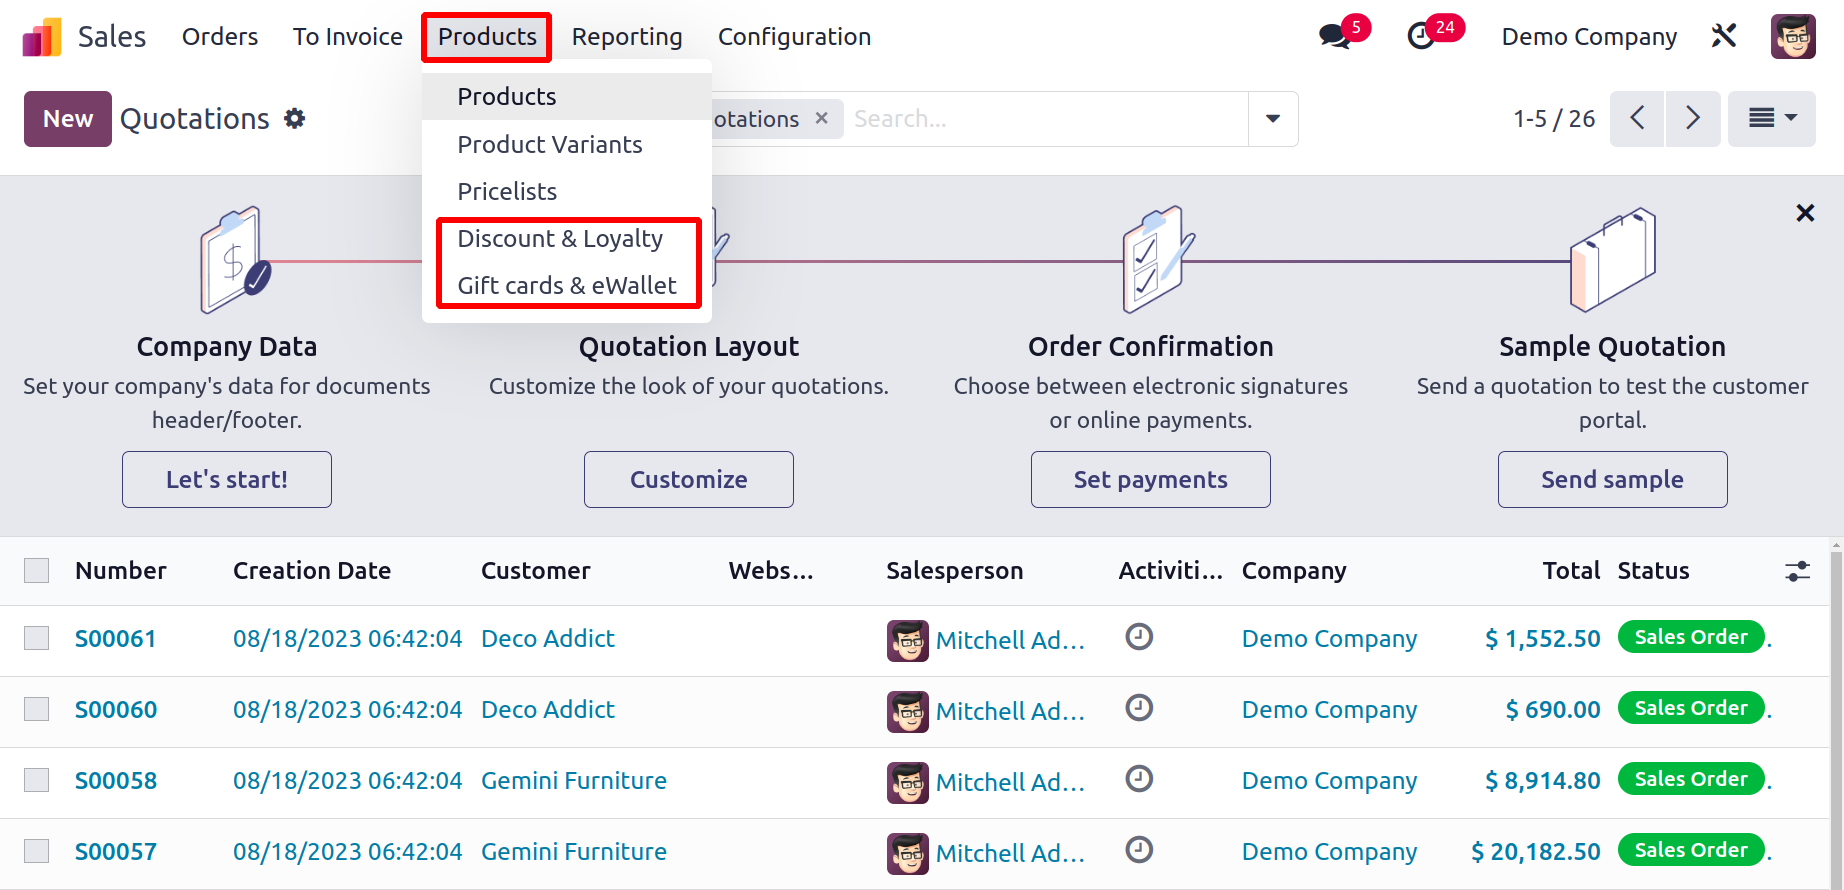
Discount & Loyalty
Let's start by examining the Discount & Loyalty option.
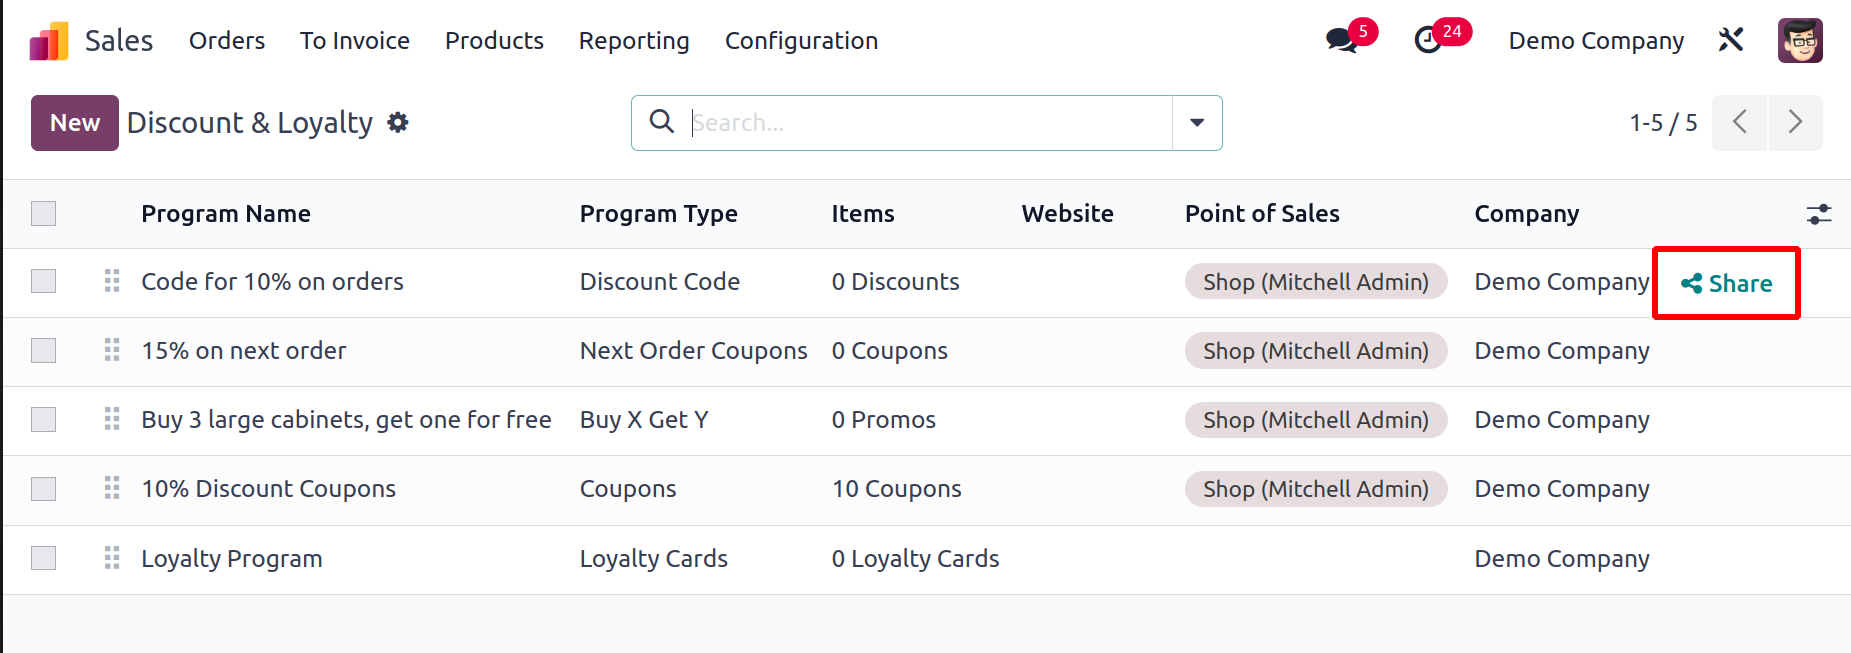
The program name, program type, items, website, POS configuration, and company
information are all included in the list preview. You will also receive a Share button
that enables you to post the discount on a certain website. As soon as you click the
Share button, as shown below, a wizard will pop up.
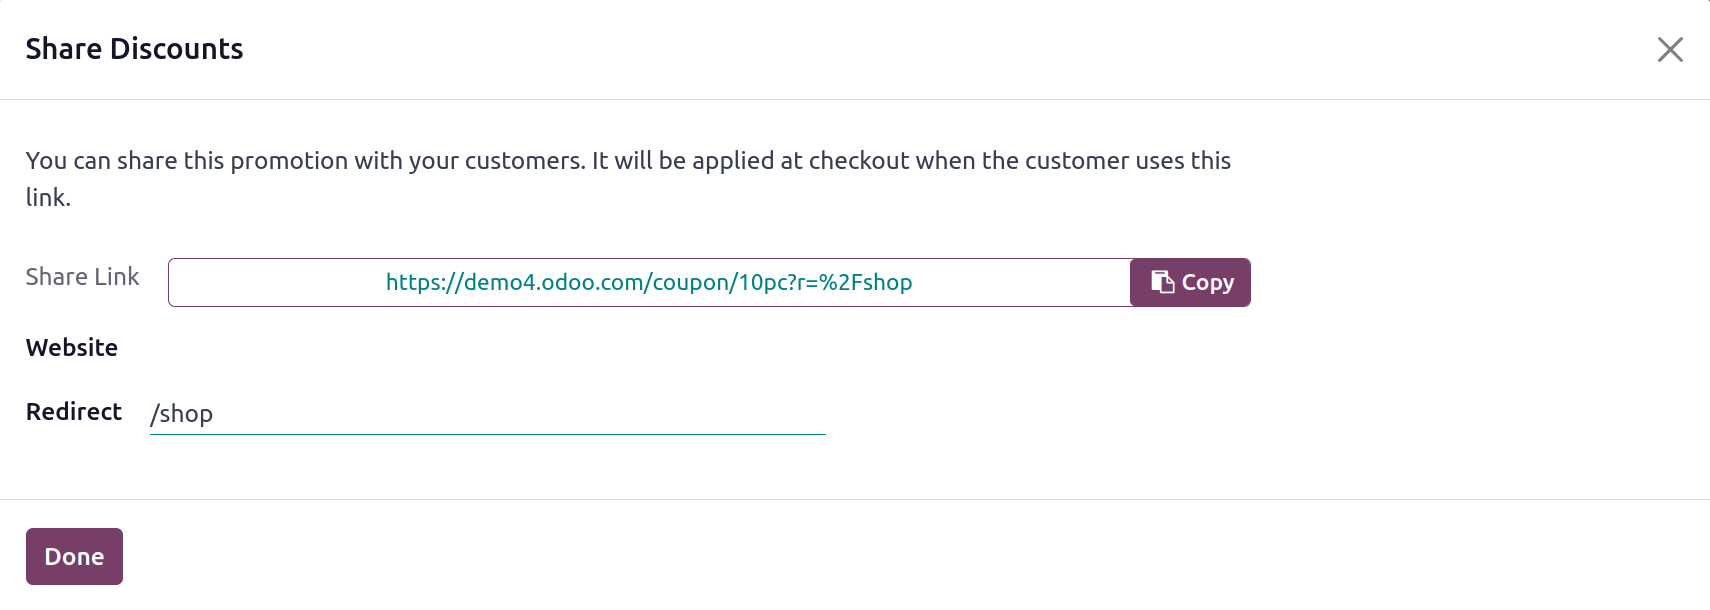
In this pop-up window, you can specify the Website and Redirect, then press the Done
button.
Let's use the New button to start a new program now. You can make new offers for your
consumers in a new window by clicking the make button to increase sales. You will
receive a special spot to mention the name of the Program, as you can see in the
screenshot below. The Program Name section allows you to give the program a suitable
name. The Program Type can then be chosen.
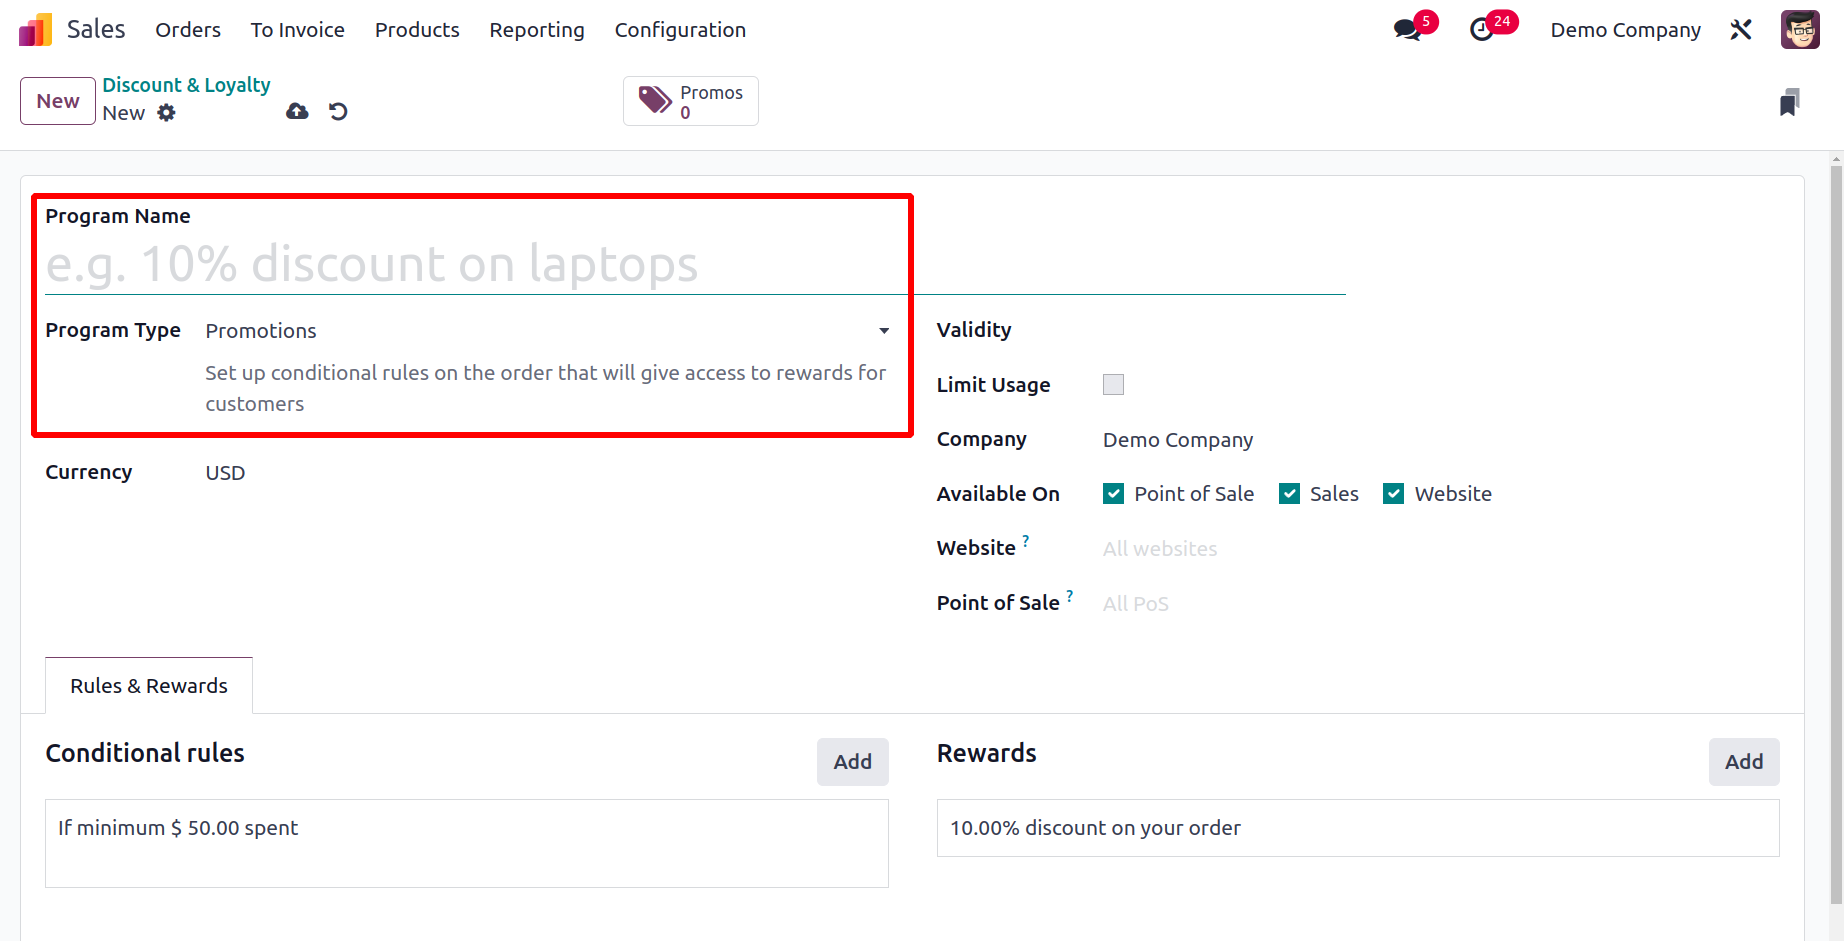
Create coupons, loyalty cards, promotions, discount codes, buy X get Y coupons, and next
order coupons all from one location with Odoo 17. All of these program types were made
in essentially the same way. So, let's pick a type of program and go over its design in
detail.
Here, we chose the Programme Type of Promotions. You can enter the Company, Points Unit,
Currency, and Website in the corresponding fields. You can provide an expiration date
for the promotion program in the Validity area.
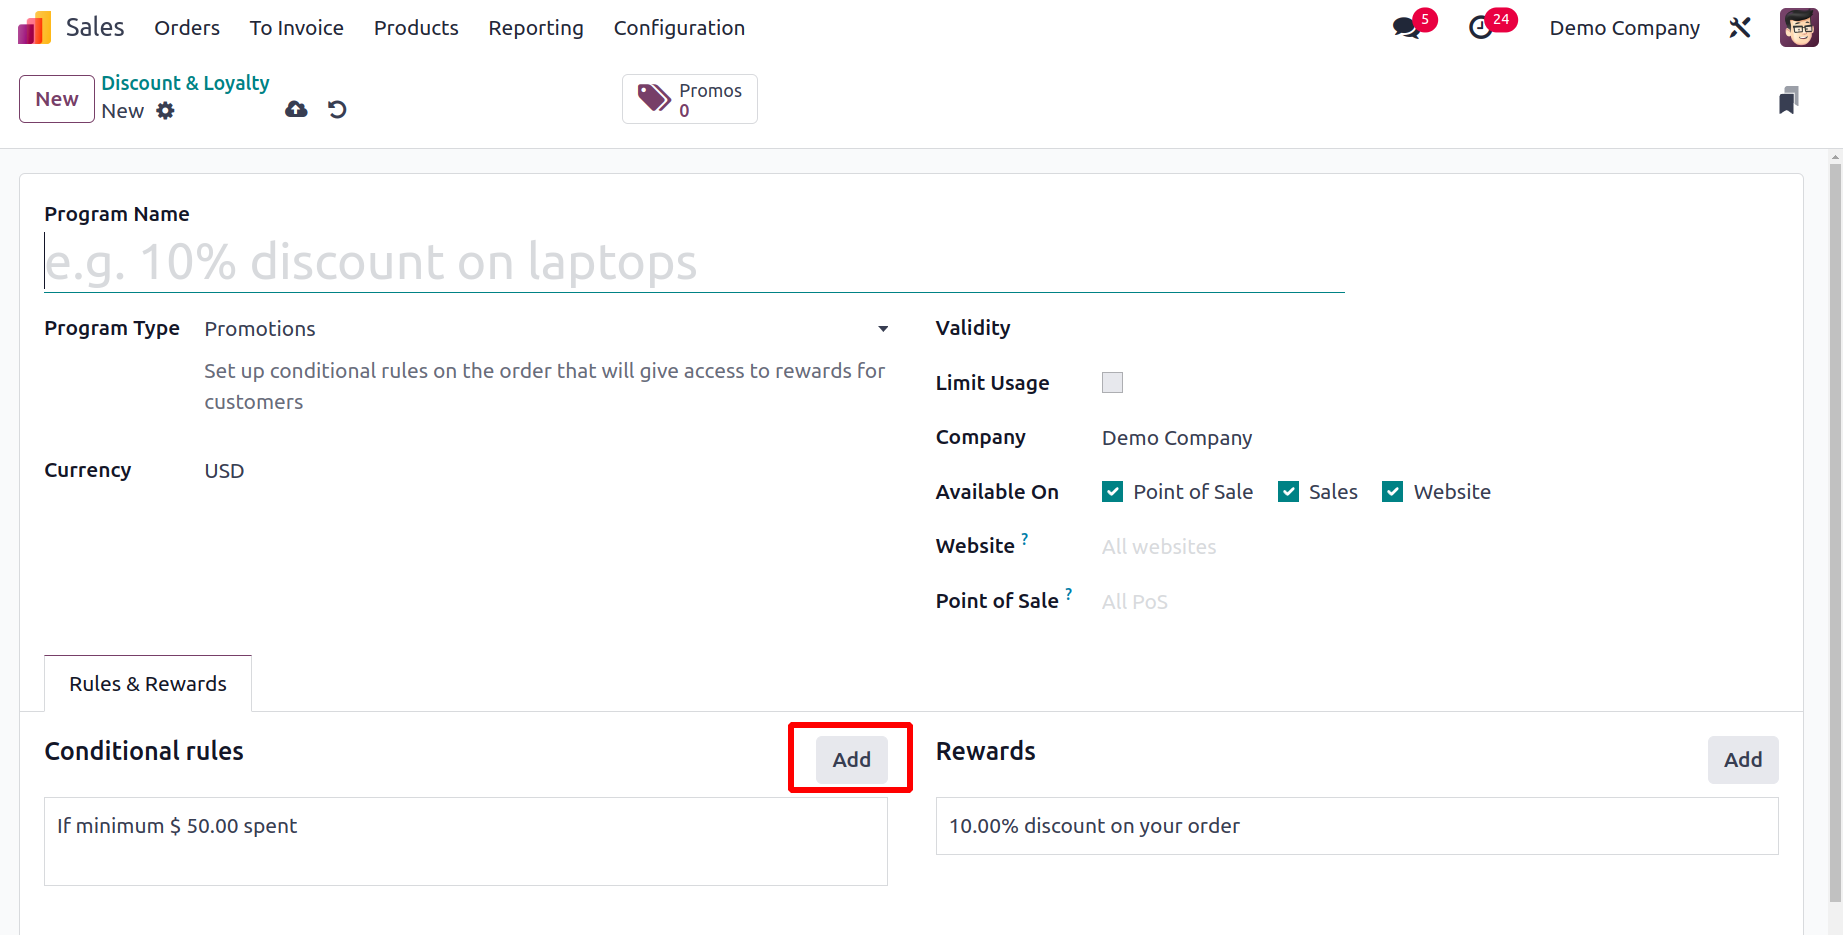
You can use the Add button on the Rules & Rewards tab to add appropriate rules and
awards.
Use the ADD button located in the right-hand corner of the Rules tab to create
conditional rules. To establish rules, a new pop-up window will emerge, as displayed
below.
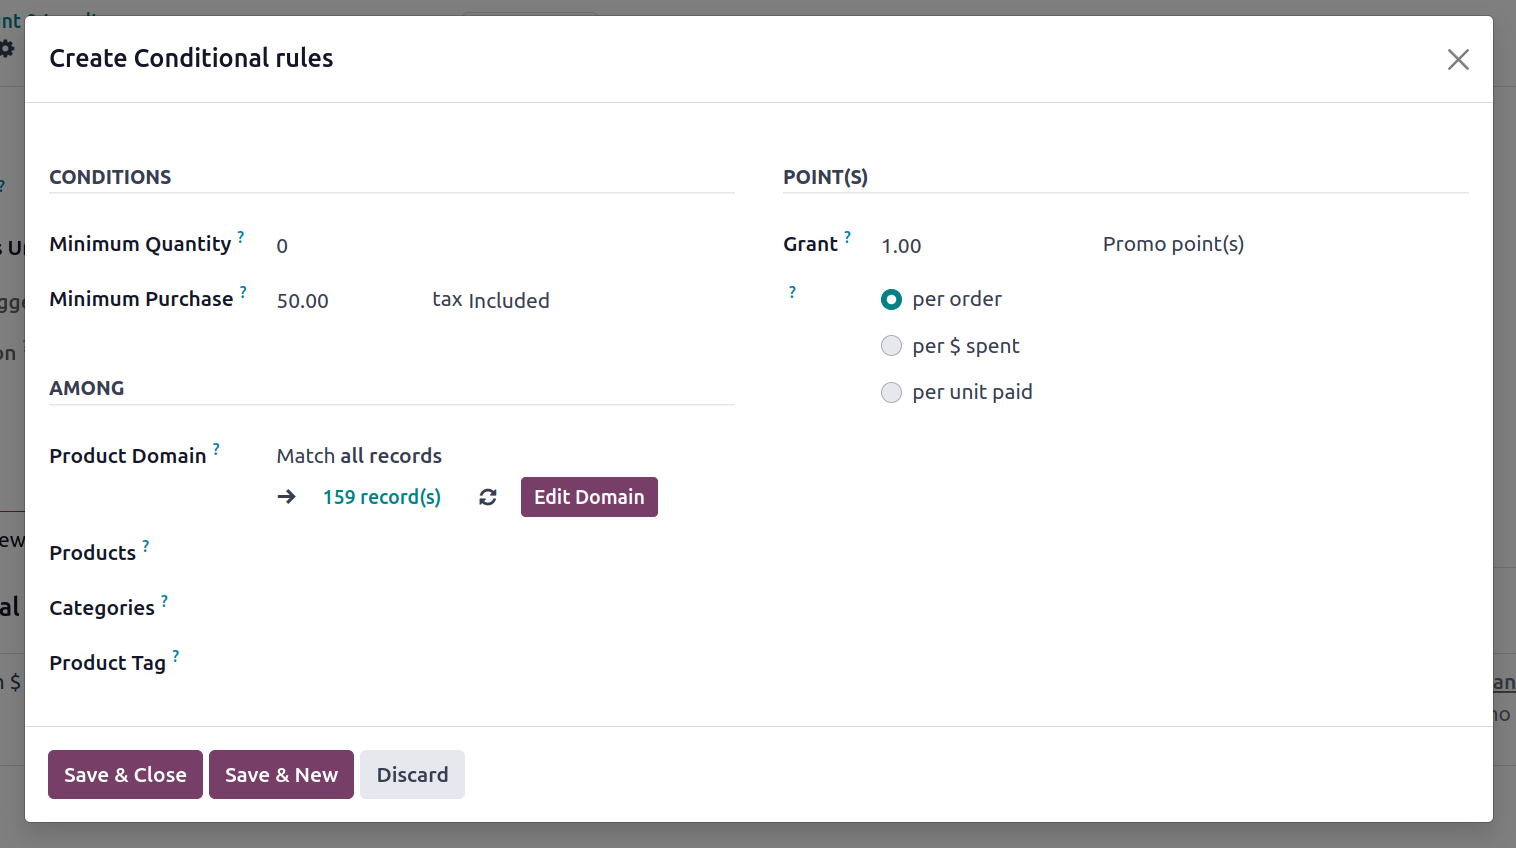
You can specify the Minimum Quantity and Minimum Purchase amount to be eligible for this
promotion programme on the Conditions page. You can name certain Products, Categories,
and Product Tags in the corresponding areas if you wish to provide this promotion for
those items only. You can specify the promo points in the Grant field under the Points
tab. On the basis of the order,
amount spent, or unit paid, it may be awarded. You can use the Save button after
configuring the new rule.
You can include Rewards in the promotion program by using the Add button.
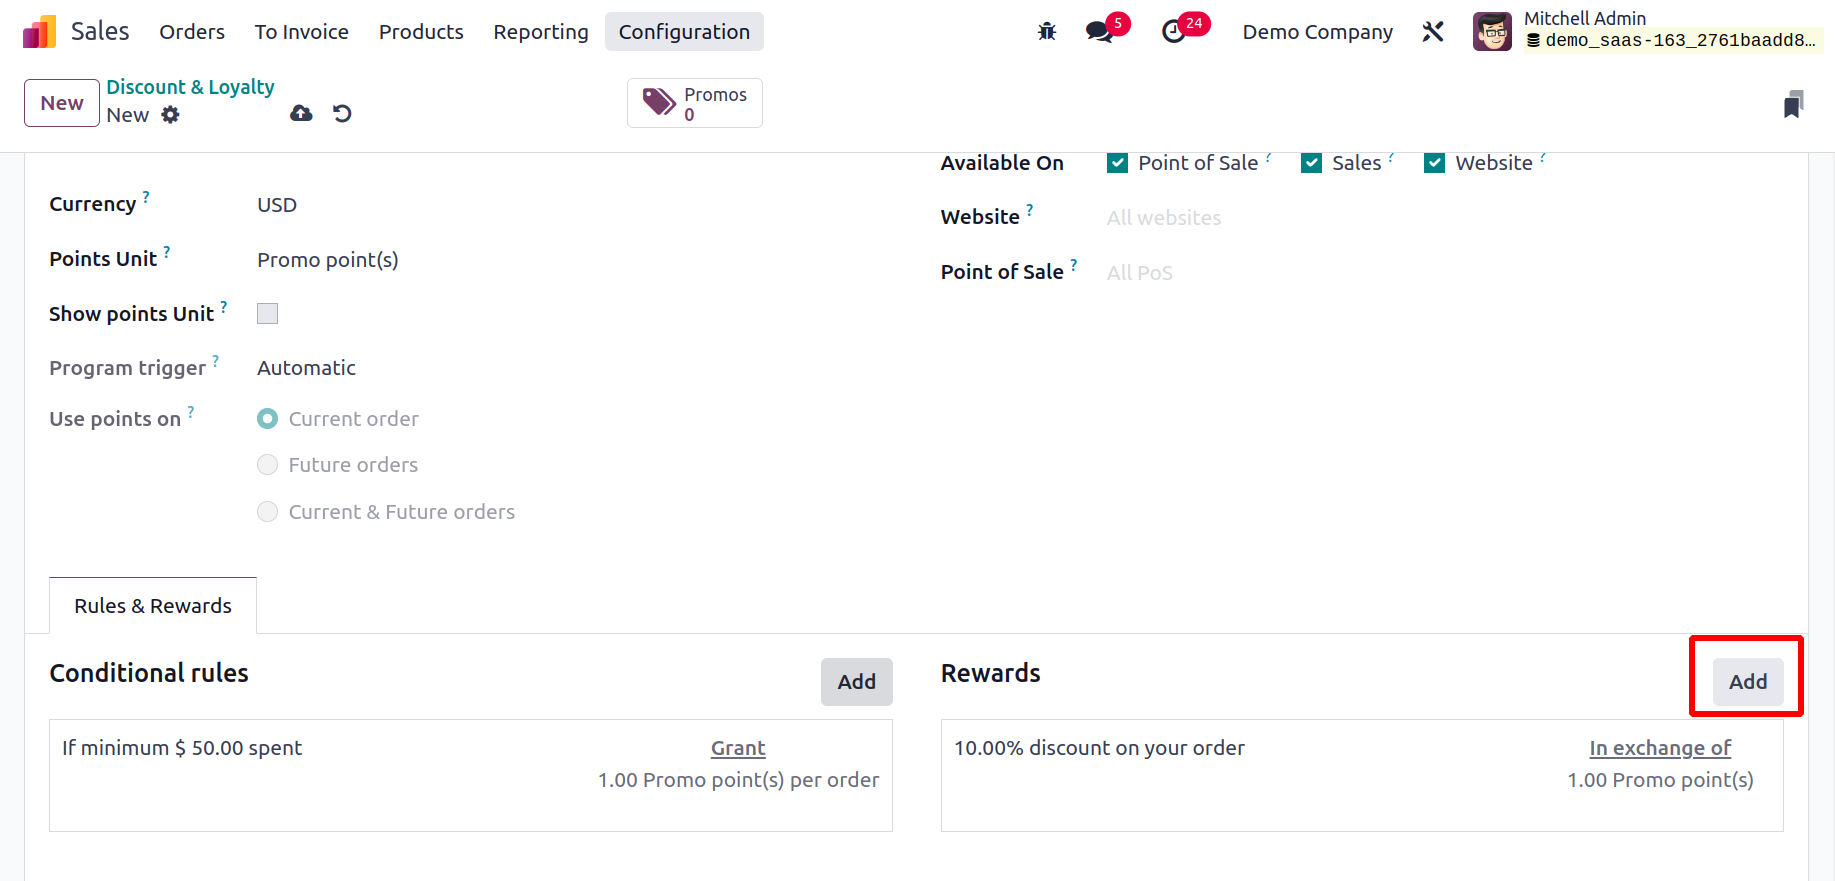
The screen will show a pop, as shown below. There, you can choose between a discount, a
free item, or free shipping as your reward kind. You can use the Discount option if you
wish to offer your customer a discount.
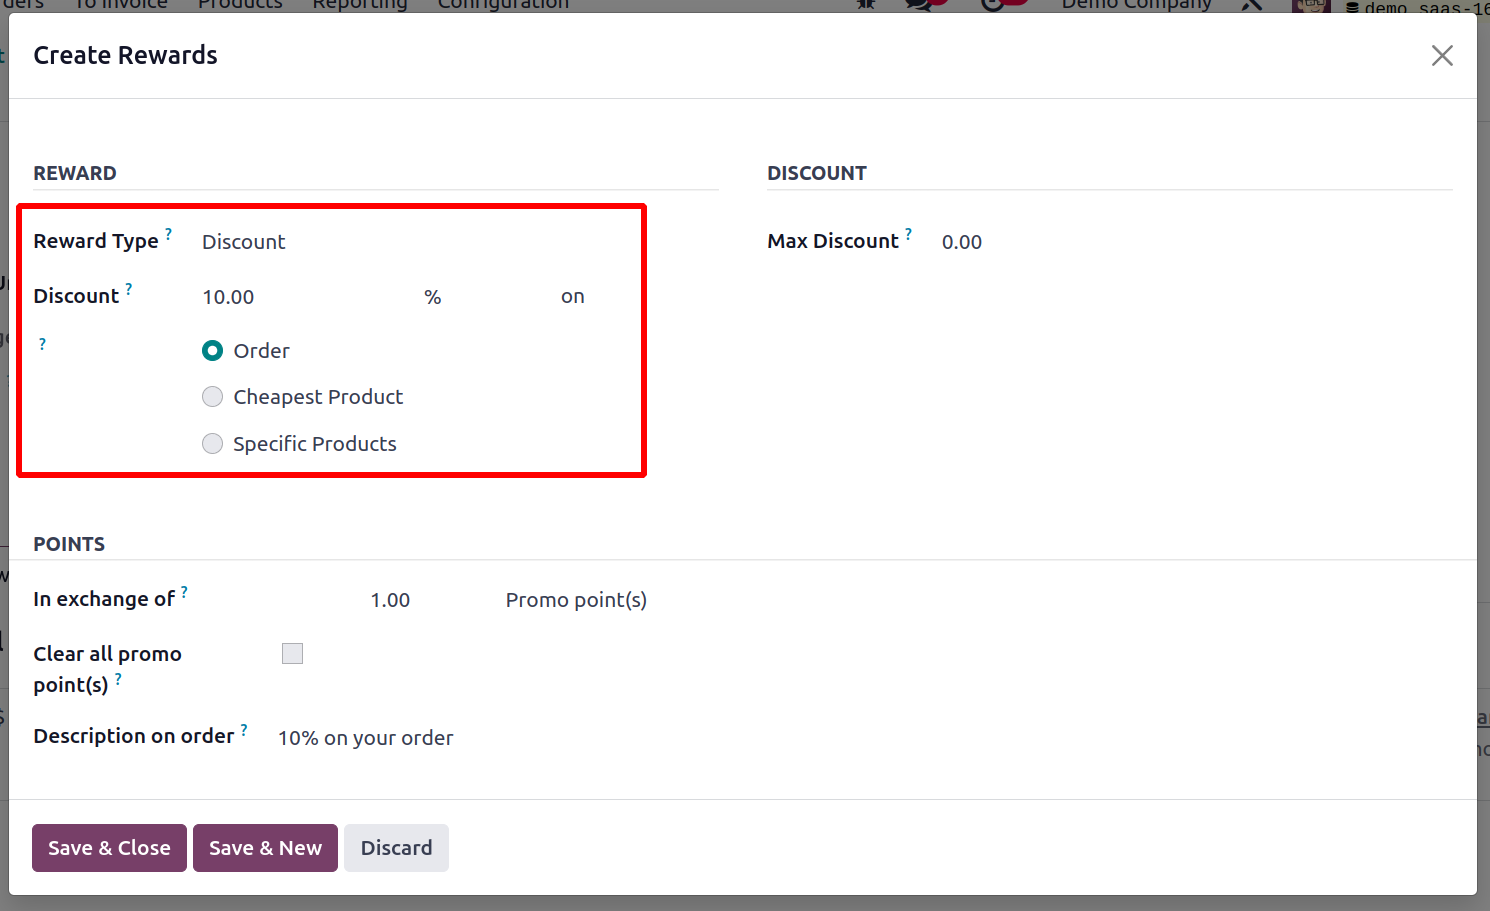
The percentage of the discount that you want to give your customer can then be specified.
By choosing the appropriate option, you can provide a discount on the Order, Cheapest
Product, or Specific Product. You can define the Maximum Discount offered as a reward
under the Discount tab.
In Odoo 17, it is possible to reward users with complementary goods. You can choose "Free
Product" as the reward type for this. As soon as you choose this option, you will see
some extra fields where you may enter the information for the free item.
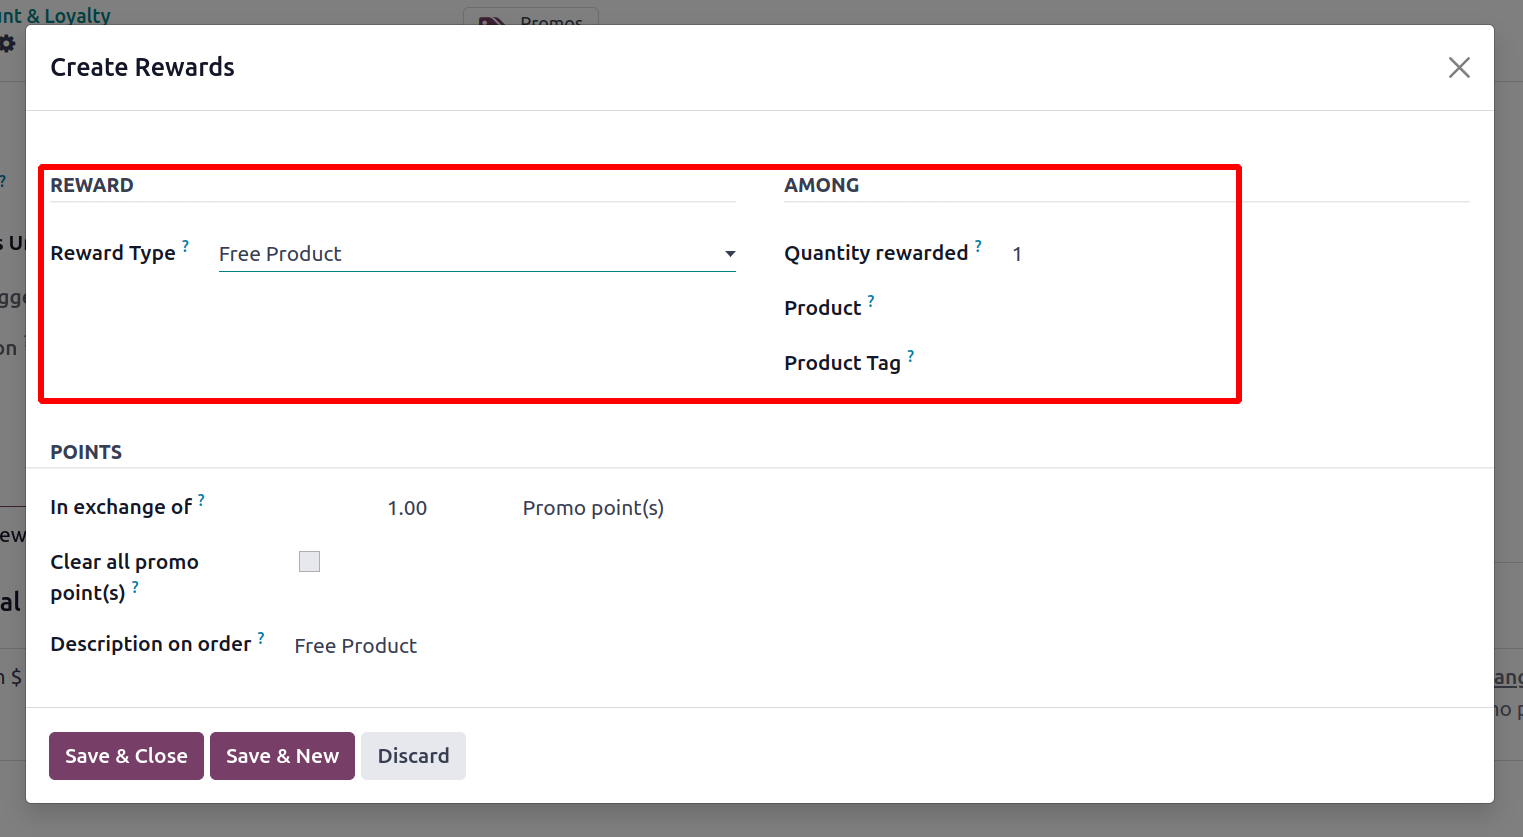
The Quantity Rewarded field can be used to specify how much of the free product will be
given out. You can describe the prize product in the Product area and add the relevant
tags in the Product Tag box.
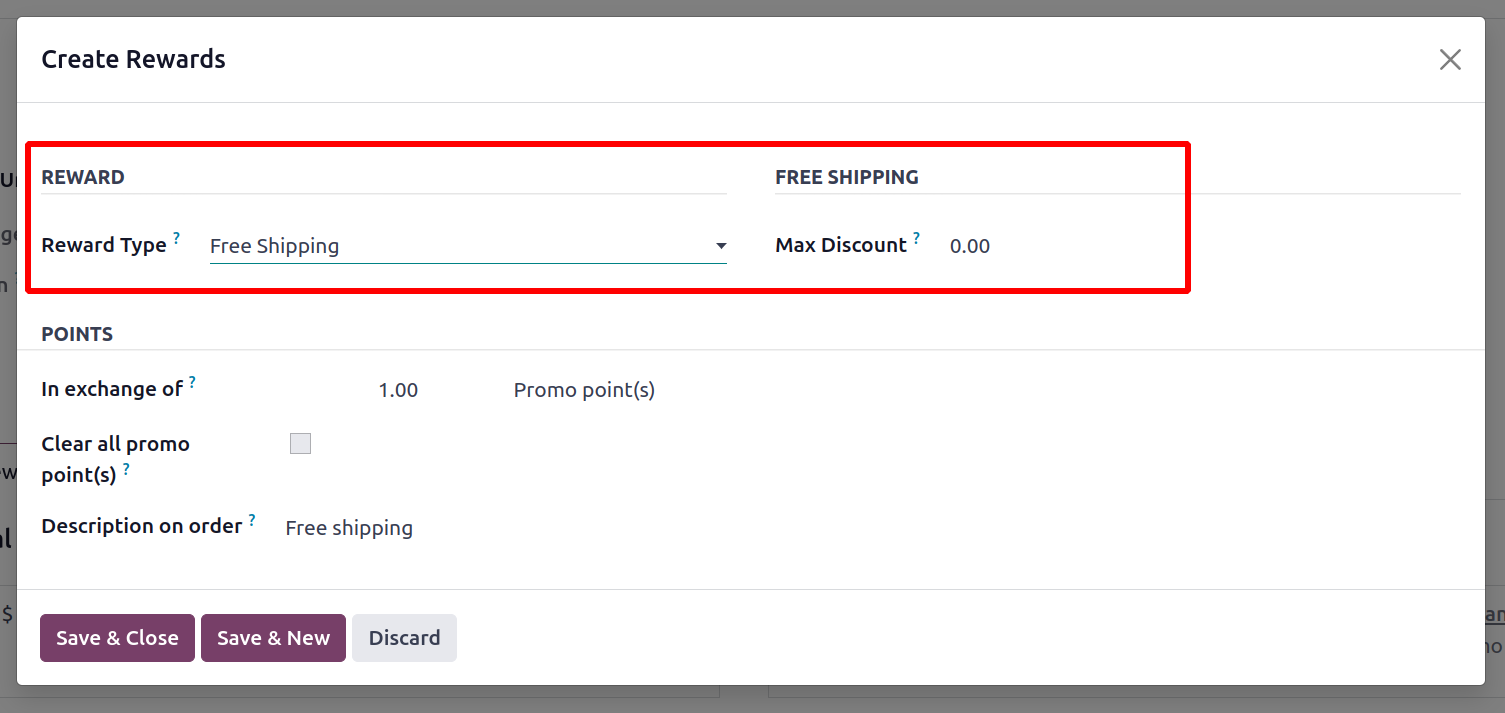
You can define the maximum discount for free delivery in the event that free shipping is
offered as a reward.
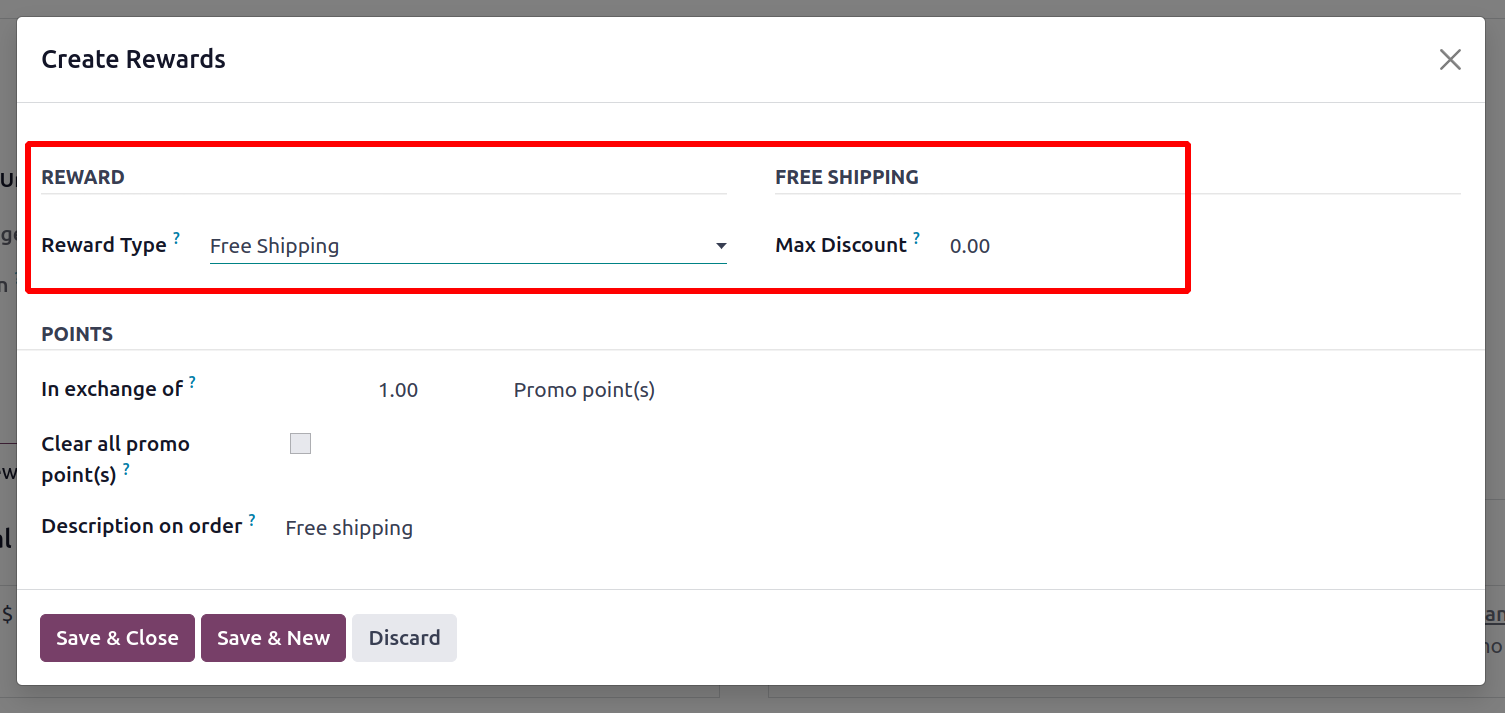
Mention the Promo Points under the Points tab and, if necessary, turn on the Clear all
Promo Points option. The Points tab will also have access to the Order Description. To
save the new award, use the Save option.
In Odoo 17, we construct promotion programs in the same manner.
Gift Card and e-wallet
In Odoo 17, a new function is available: a dedicated menu for managing gift cards and
eWallets. You may access the eWallet's functionalities in the new Odoo 17 Sales module.
The platform displays a list of gift cards and eWallets together with information about
the Program Name, Program Type, Name, Website, PoS Configuration, and Company, as seen
in the image below.
Odoo 17 will direct you to a new setup window, as seen below when you click the New
button.
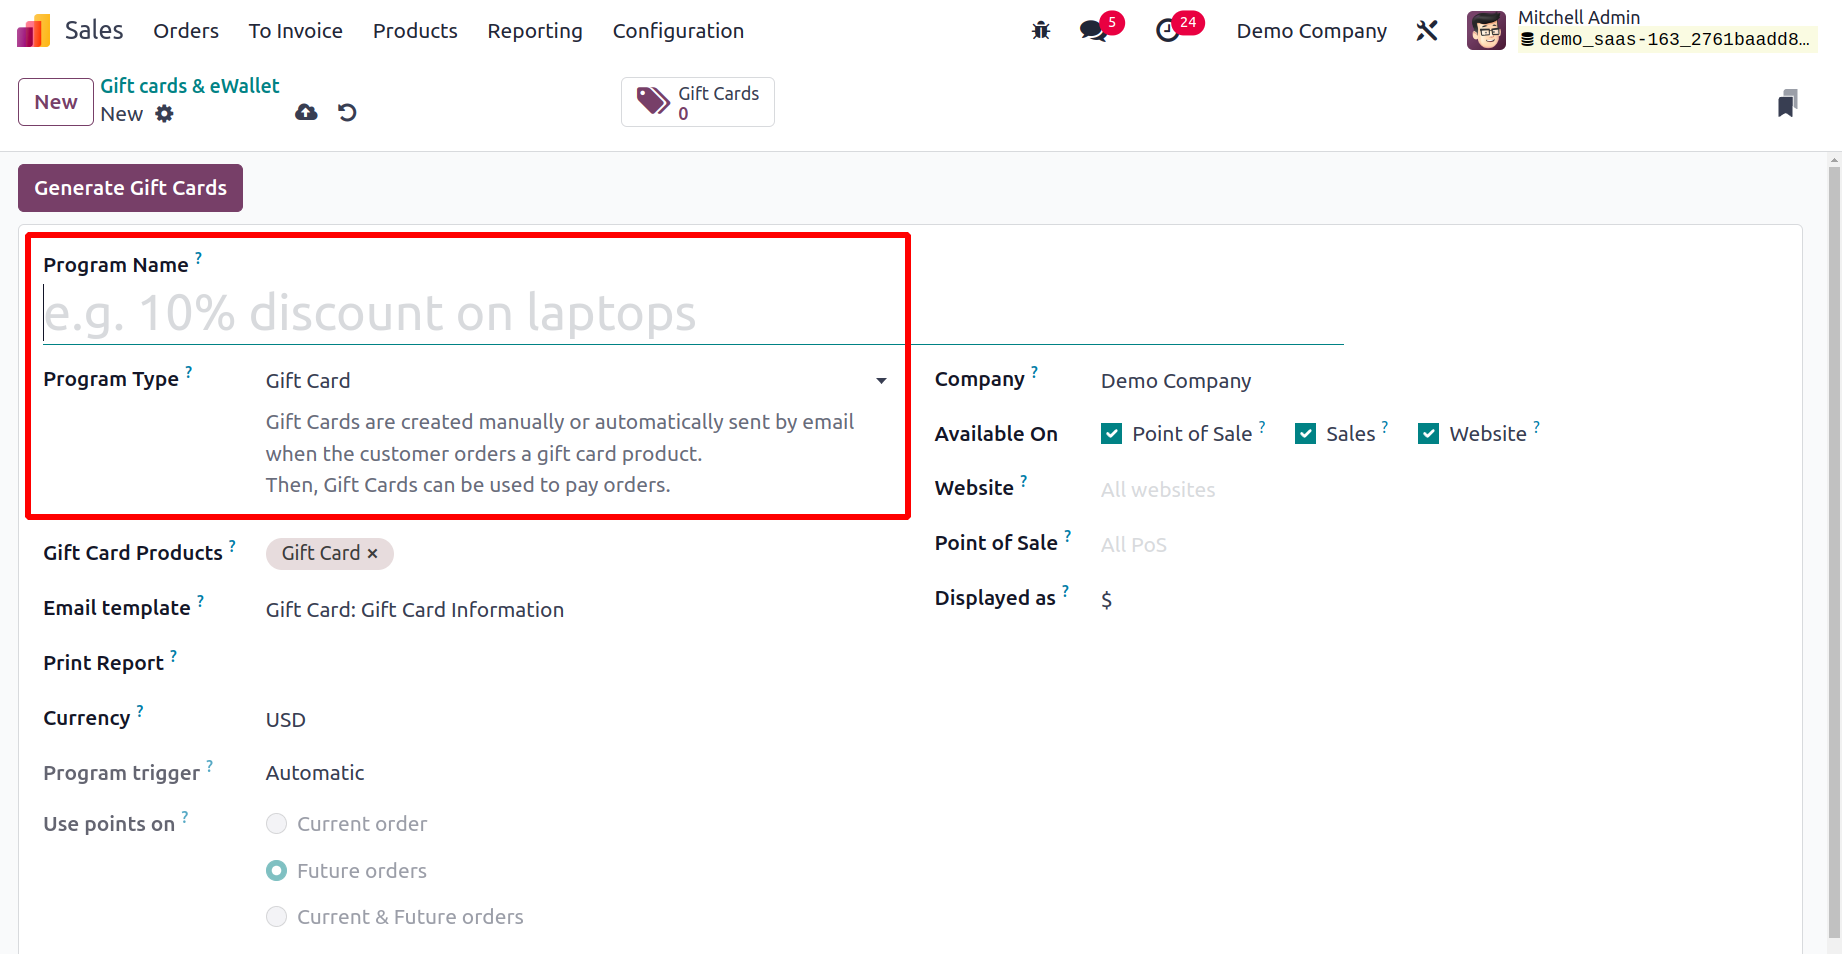
You can enter a program name in the corresponding field here. You can specify the sort of
program you want to establish in the Program sort area. It might be an eWallet or a gift
card. Let's first examine the development of gift cards.
When a consumer orders a gift card product, gift cards are either manually manufactured
or automatically generated and given via email. Orders can be paid for with the Gift
Cards.

You can add a product in the Gift Card Products field after choosing the Gift Card
program type, which will consider as the gift card product added to the sales order
line. You can provide an email template for this gift card in the Email template section
to be used when notifying the customer when they are eligible for the reward. To print
the created gift cards from PoS, select the option shown in the Print Report. The
relevant area allows you to specify the currency that will be utilized for this gift
card's transactions. By turning on the corresponding fields after mentioning the
company, you can make this gift card available at the point of sale, during sales, and
online. On this platform, you will find additional options where you can mention the
relevant point of sale and website. In the Displayed as field, you can provide the name
of the point gateway.
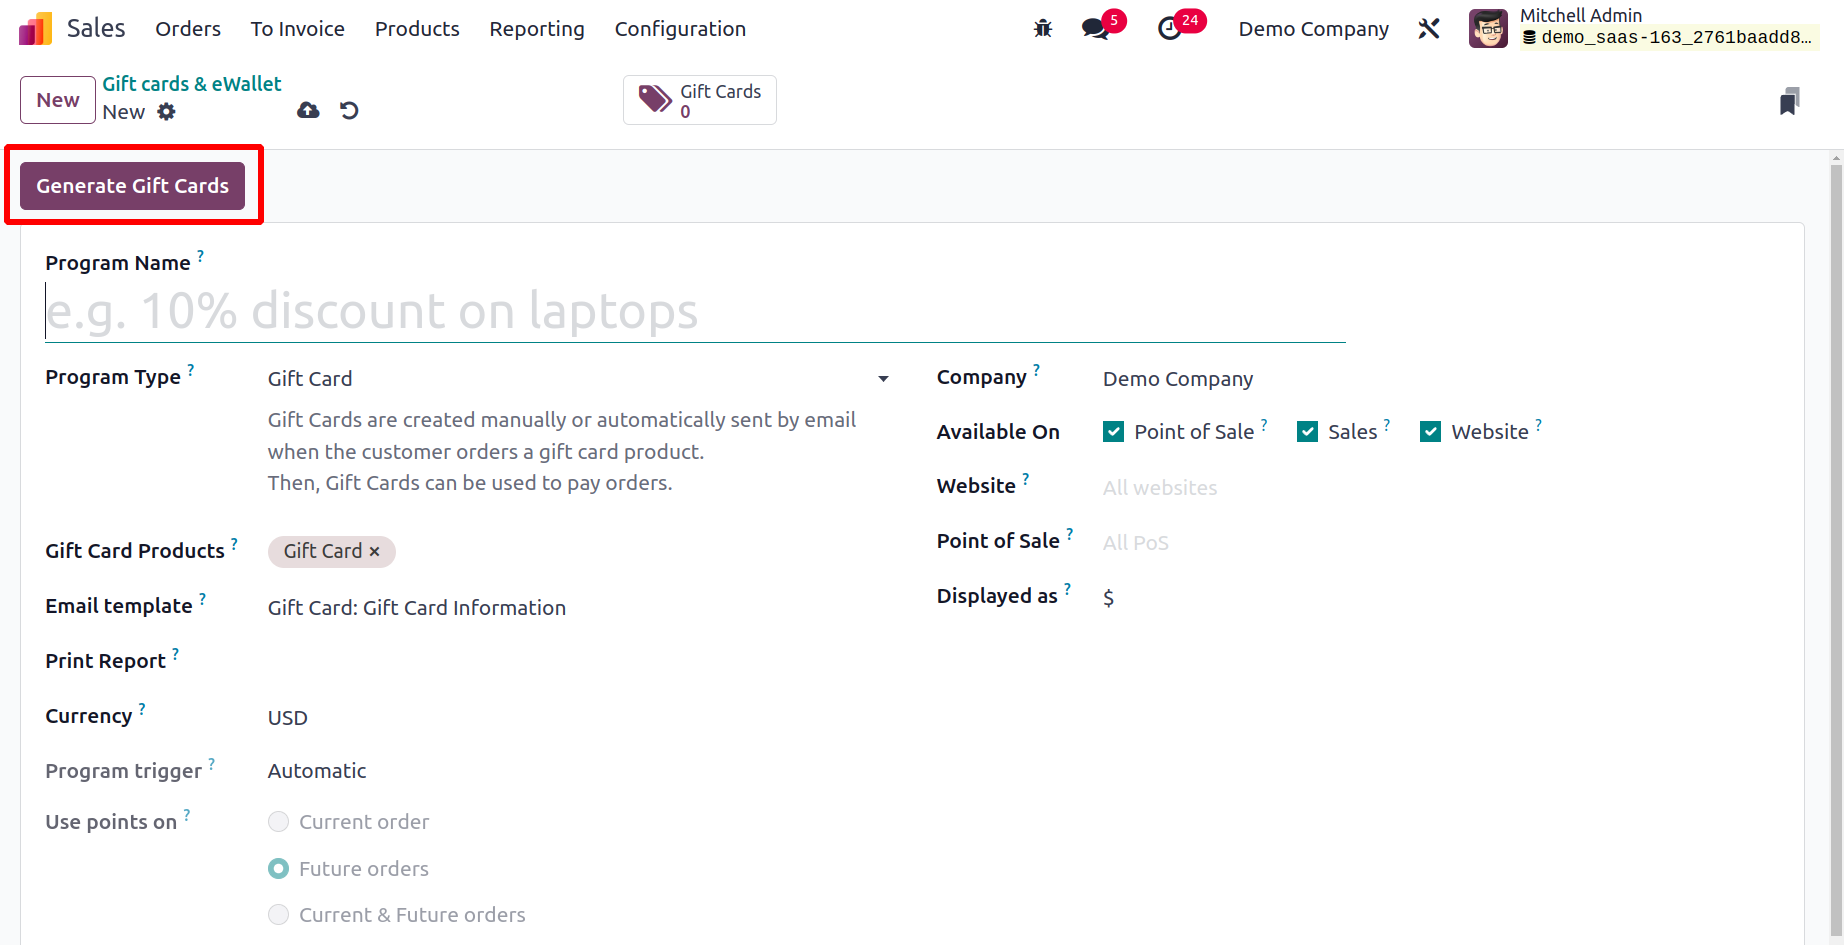
You can utilize the Generate Gift Cards button, which is marked in the screenshot above,
after creating the new gift cards. You can provide any extra information needed for the
creation of the gift card in the pop-up window that will display.
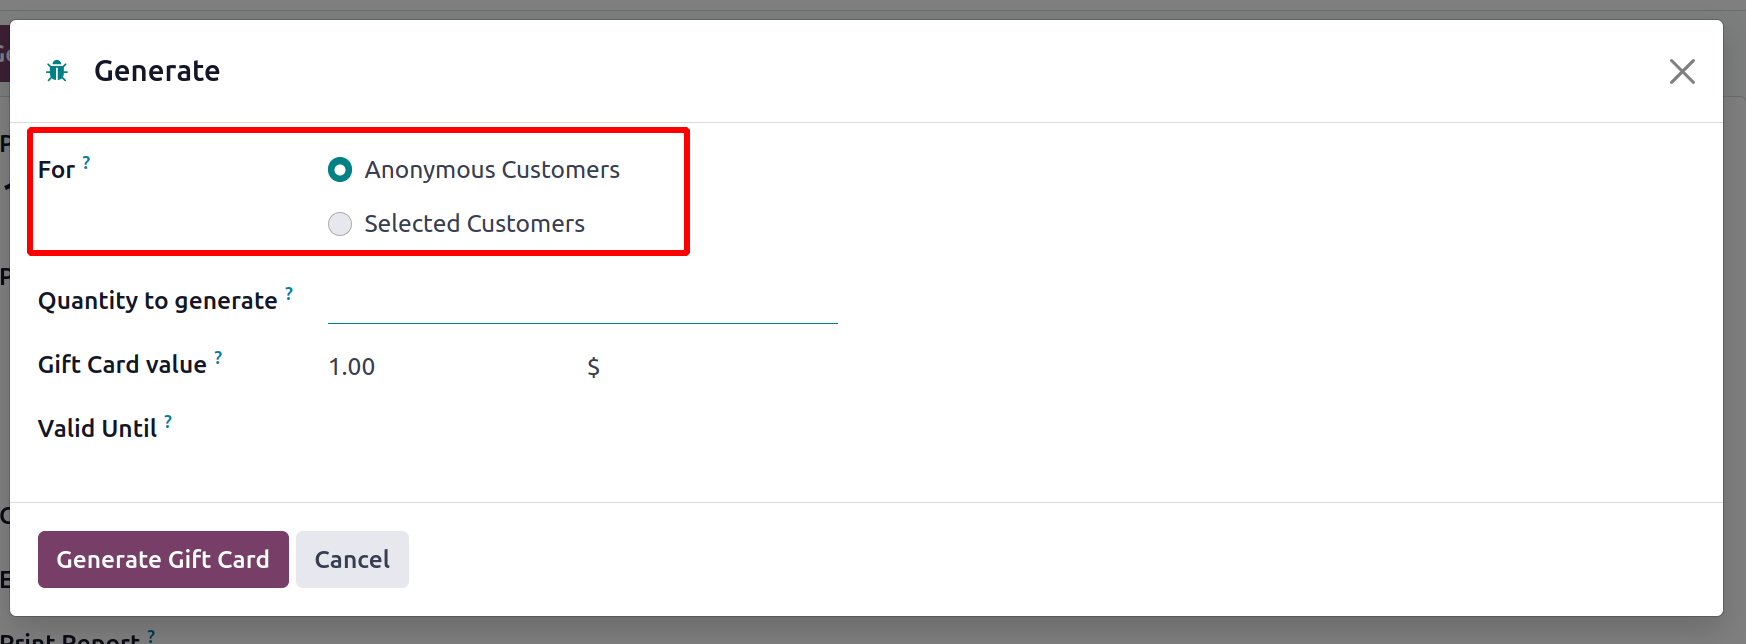
Depending on the choice you make in the For section, gift cards can be generated for
both Selected Customers and Anonymous Customers by hitting on the ‘Generate Gift Card’
button. Odoo 17 will provide additional fields to indicate the Customers and Customer
Tags in the event that you wish to make gift cards for Selected Customers. The Quantity
to Create area allows you to enter the total number of gift cards you want to create.
Additionally, in the Gift Card Value area, please state the points given to the
customers. These freshly generated gift cards' validity will be specified by the Valid
Until field.
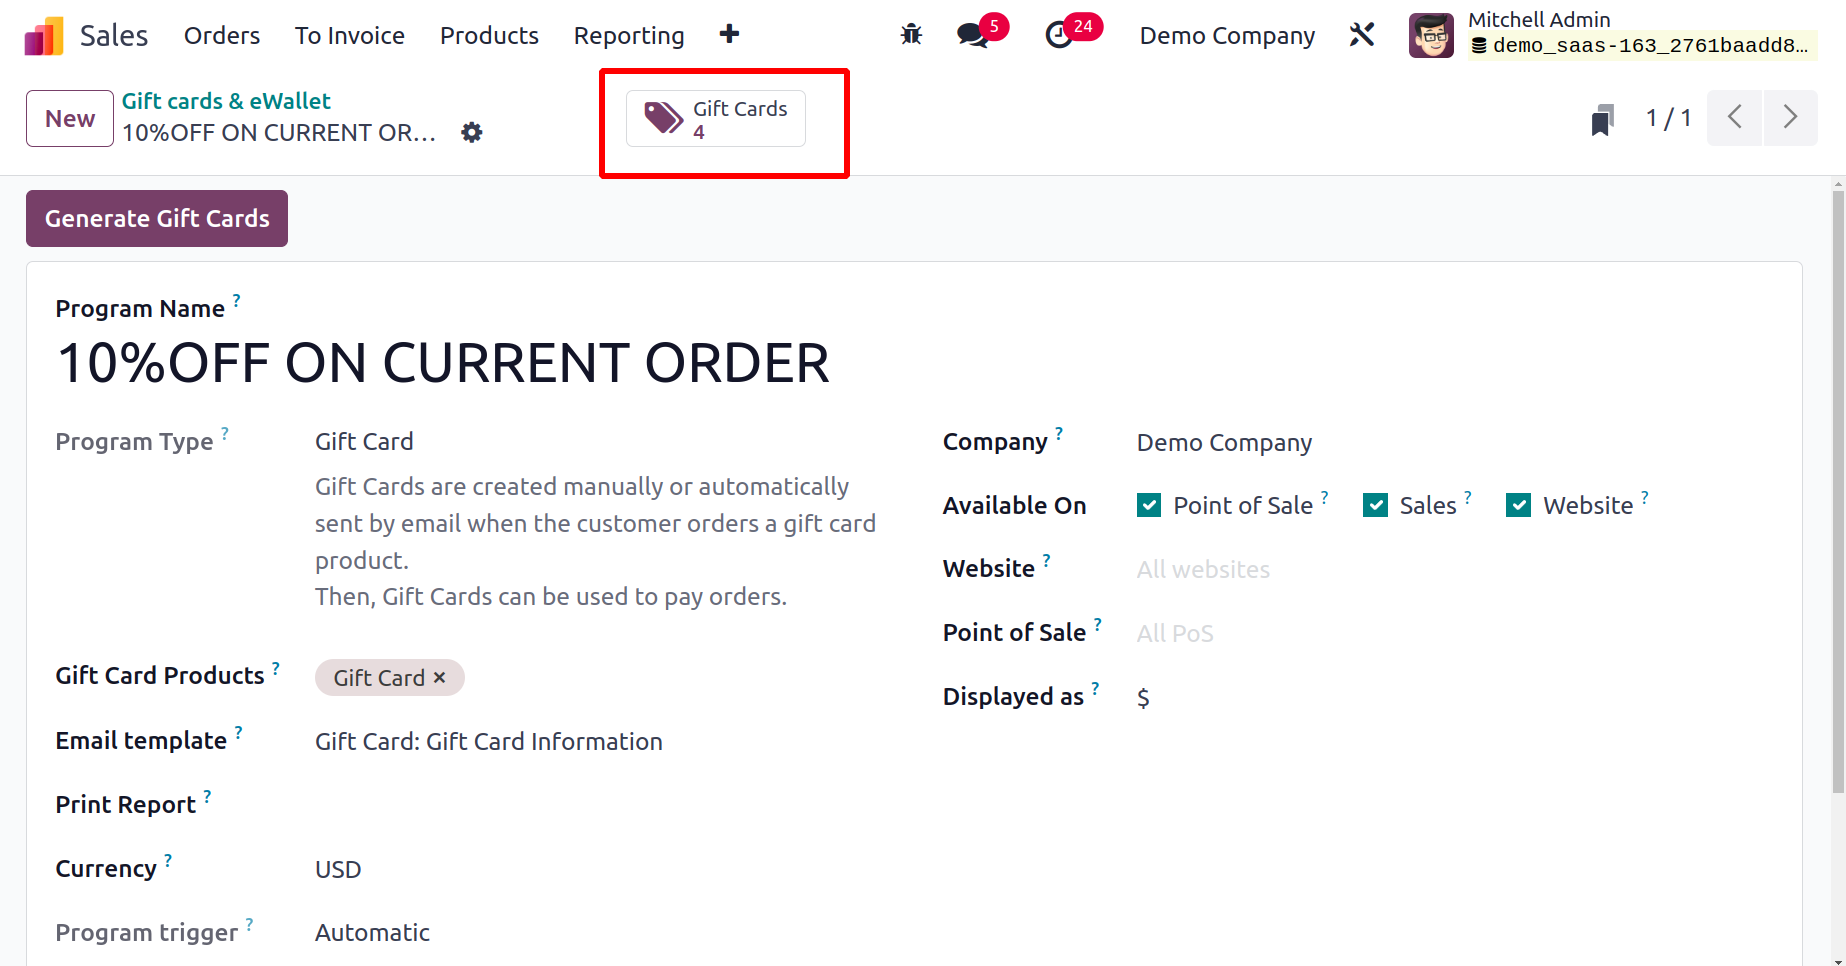
The necessary number of gift cards will then be generated when you click the Generate
Gift Card button. Using the smart button that is there on
the screen—which is underlined in the image below—you can observe them.
You can see a list of all produced gift cards on the screen by clicking this button. The
Code, Balance, Expiration Date, Program, and Partner information are displayed.
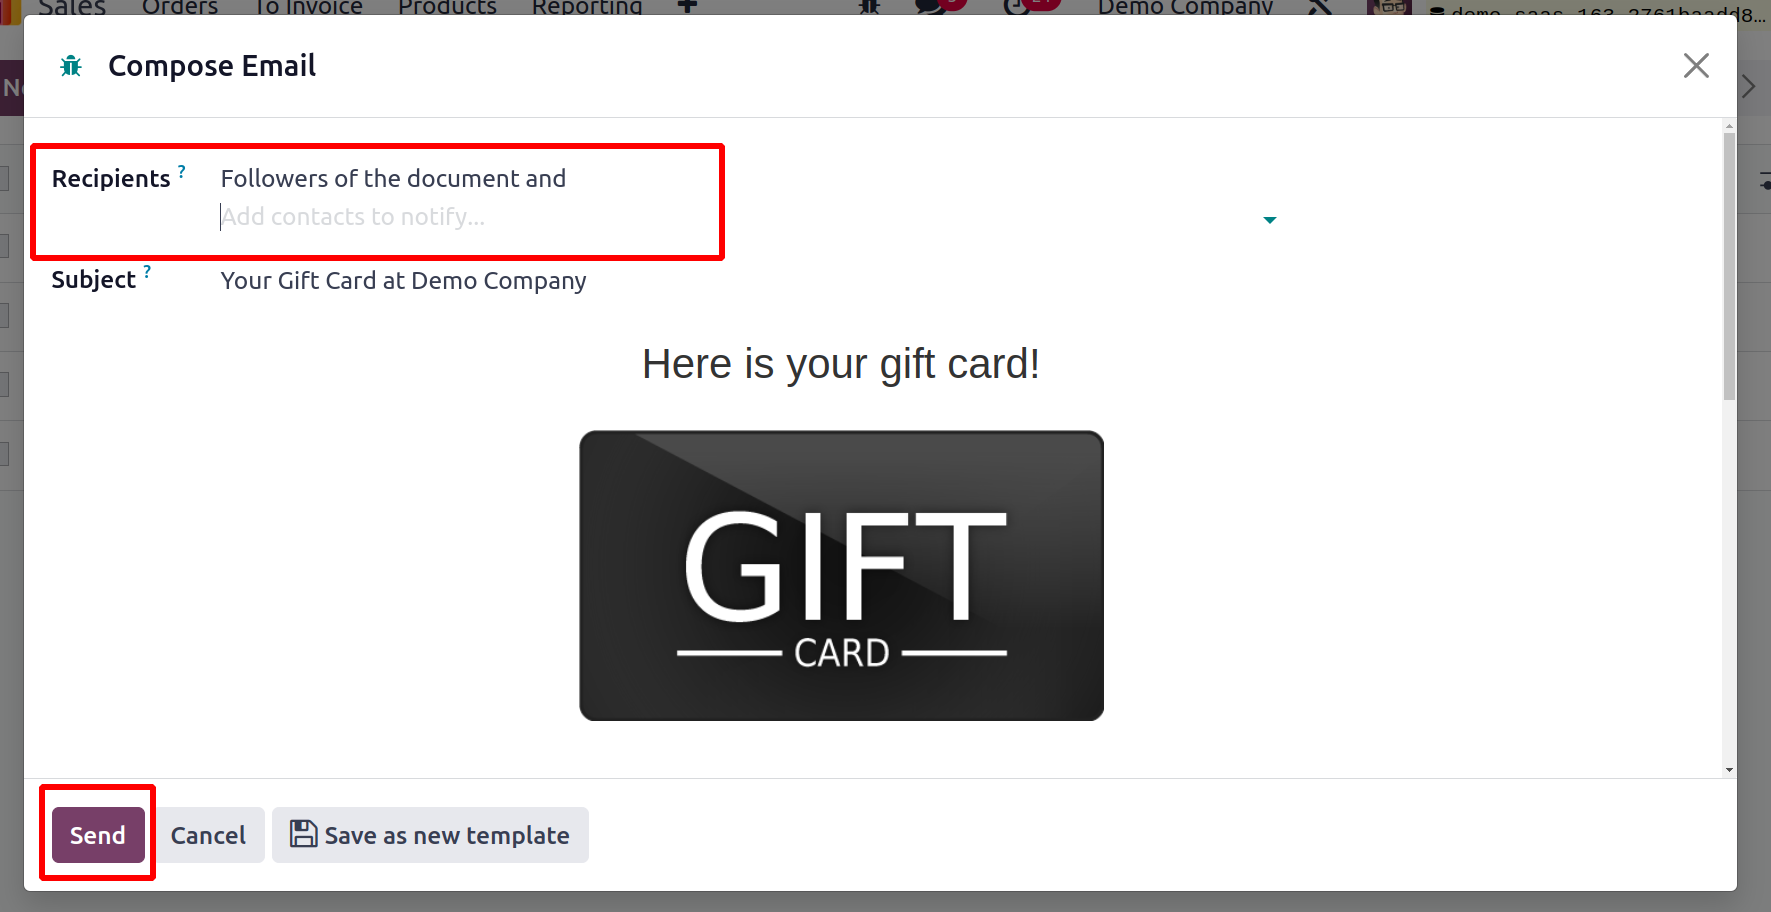
You can mail the gift card to particular consumers by clicking the Send button. You can
use the mail button to mail the gift card after entering the recipients' names in the
Recipients field here.

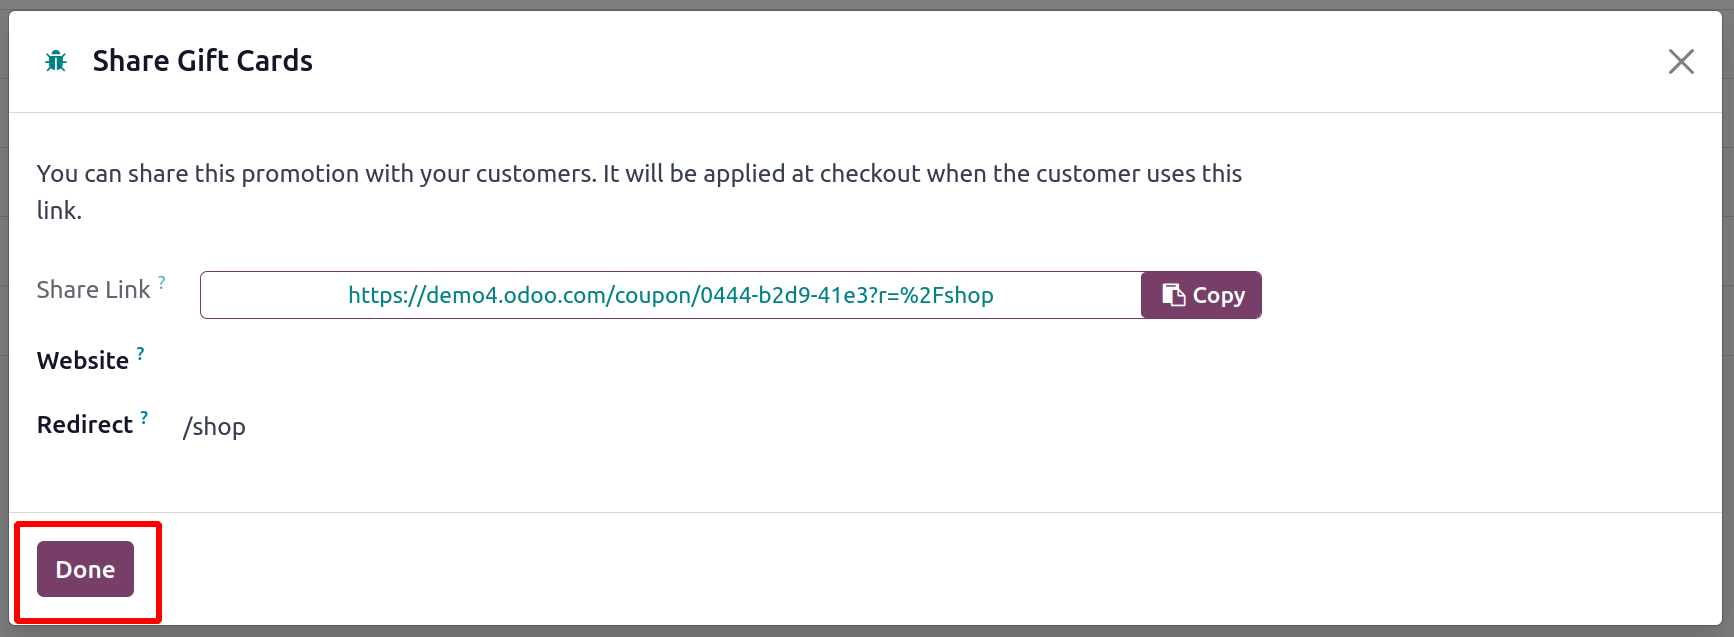
When you click the Share option, a pop-up window will appear from which you may copy the
gift card's link and share it on other social
media platforms. By entering the Website ID in the designated field, the gift card may
also be shared on the website.
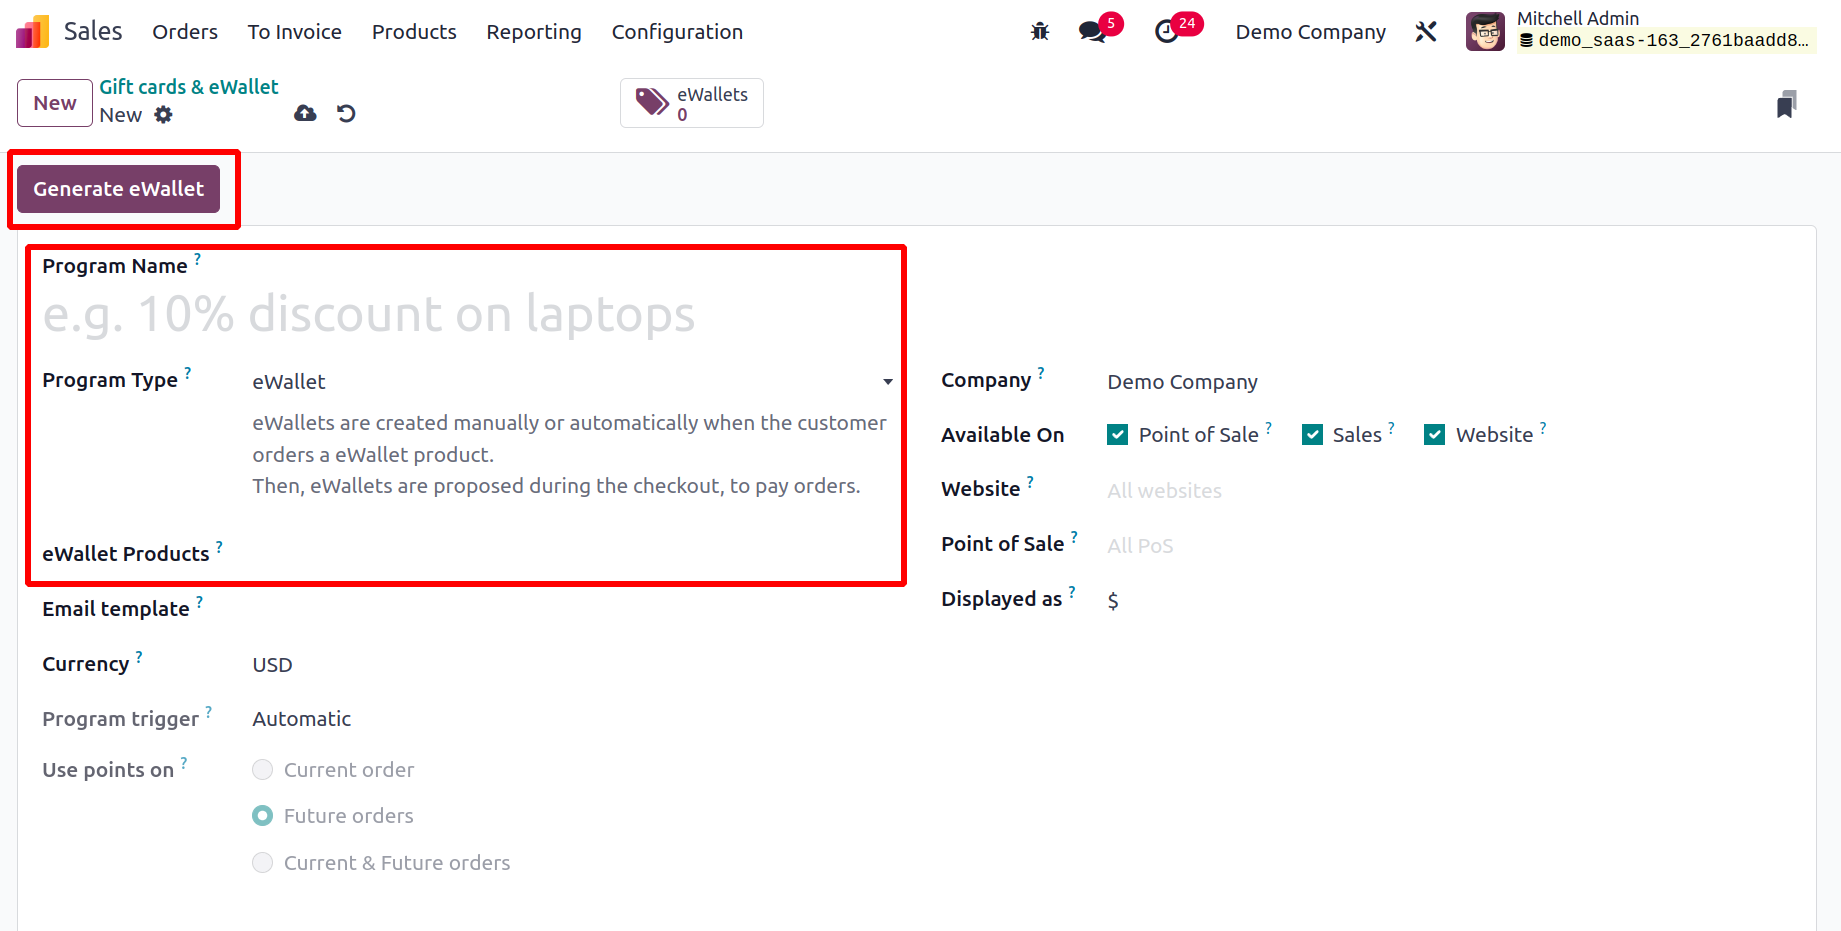
By using a similar process to the one we used to create gift cards, it is simple to
create eWallets. You can choose the eWallet option while filling out the Program Type
section. When a consumer orders an eWallet product, the eWallets are either manually
produced or created automatically.
eWallets are suggested as a payment method for orders at checkout.
You can activate product IDs in the eWallet Products field. By clicking the Generate
eWallet button, you can
create the necessary number of eWallets.
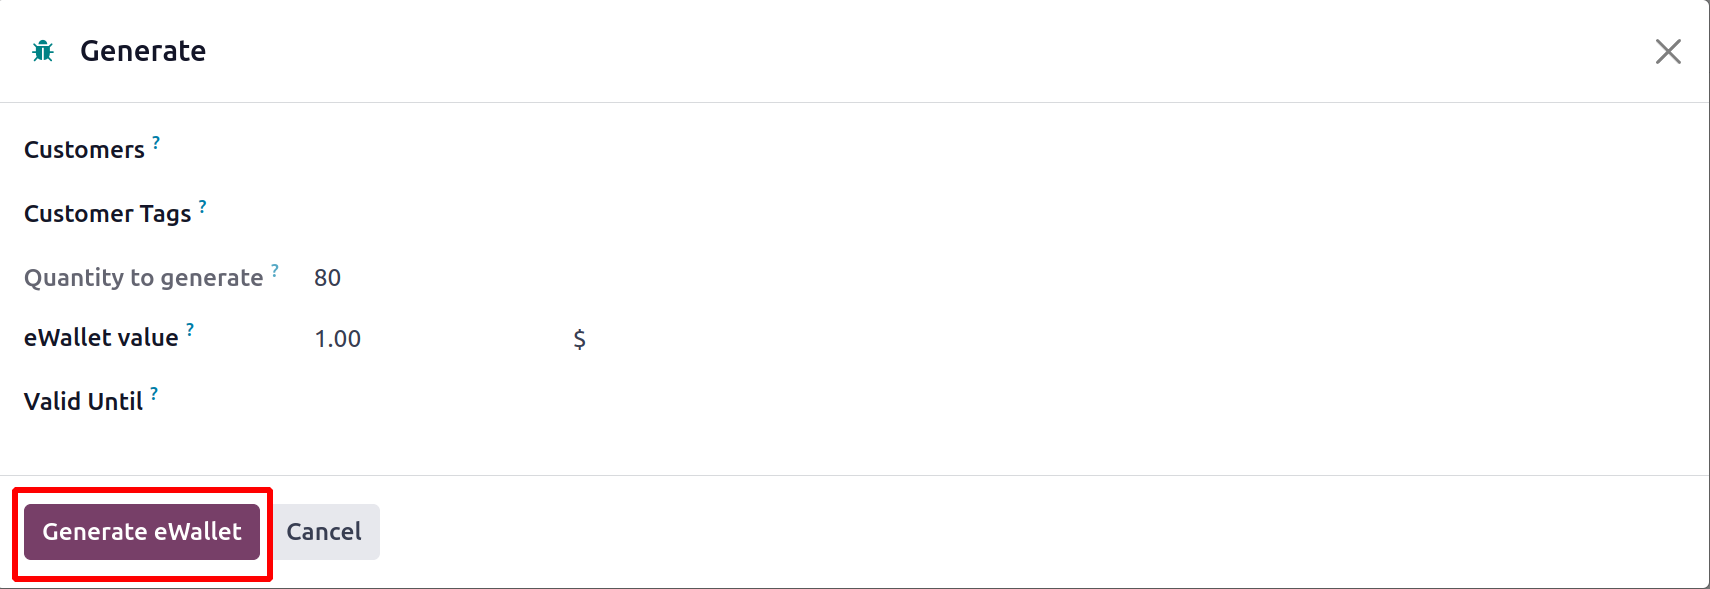
You can enter the Customers, Customer Tags, Quantity to create, eWallet Value, and
Validity in the appropriate fields of a new wizard that will appear.
To create the needed number of eWallets, click the Generate Ewallet button.
The list of all newly formed Ewallets will be displayed on the screen's smart button
EWallets.
In accordance with your company's policies, you can email them to qualified clients and
use the share link to distribute them across various platforms.
We'll now talk about setting up new customers in the Odoo 17 Sales module.