Customers
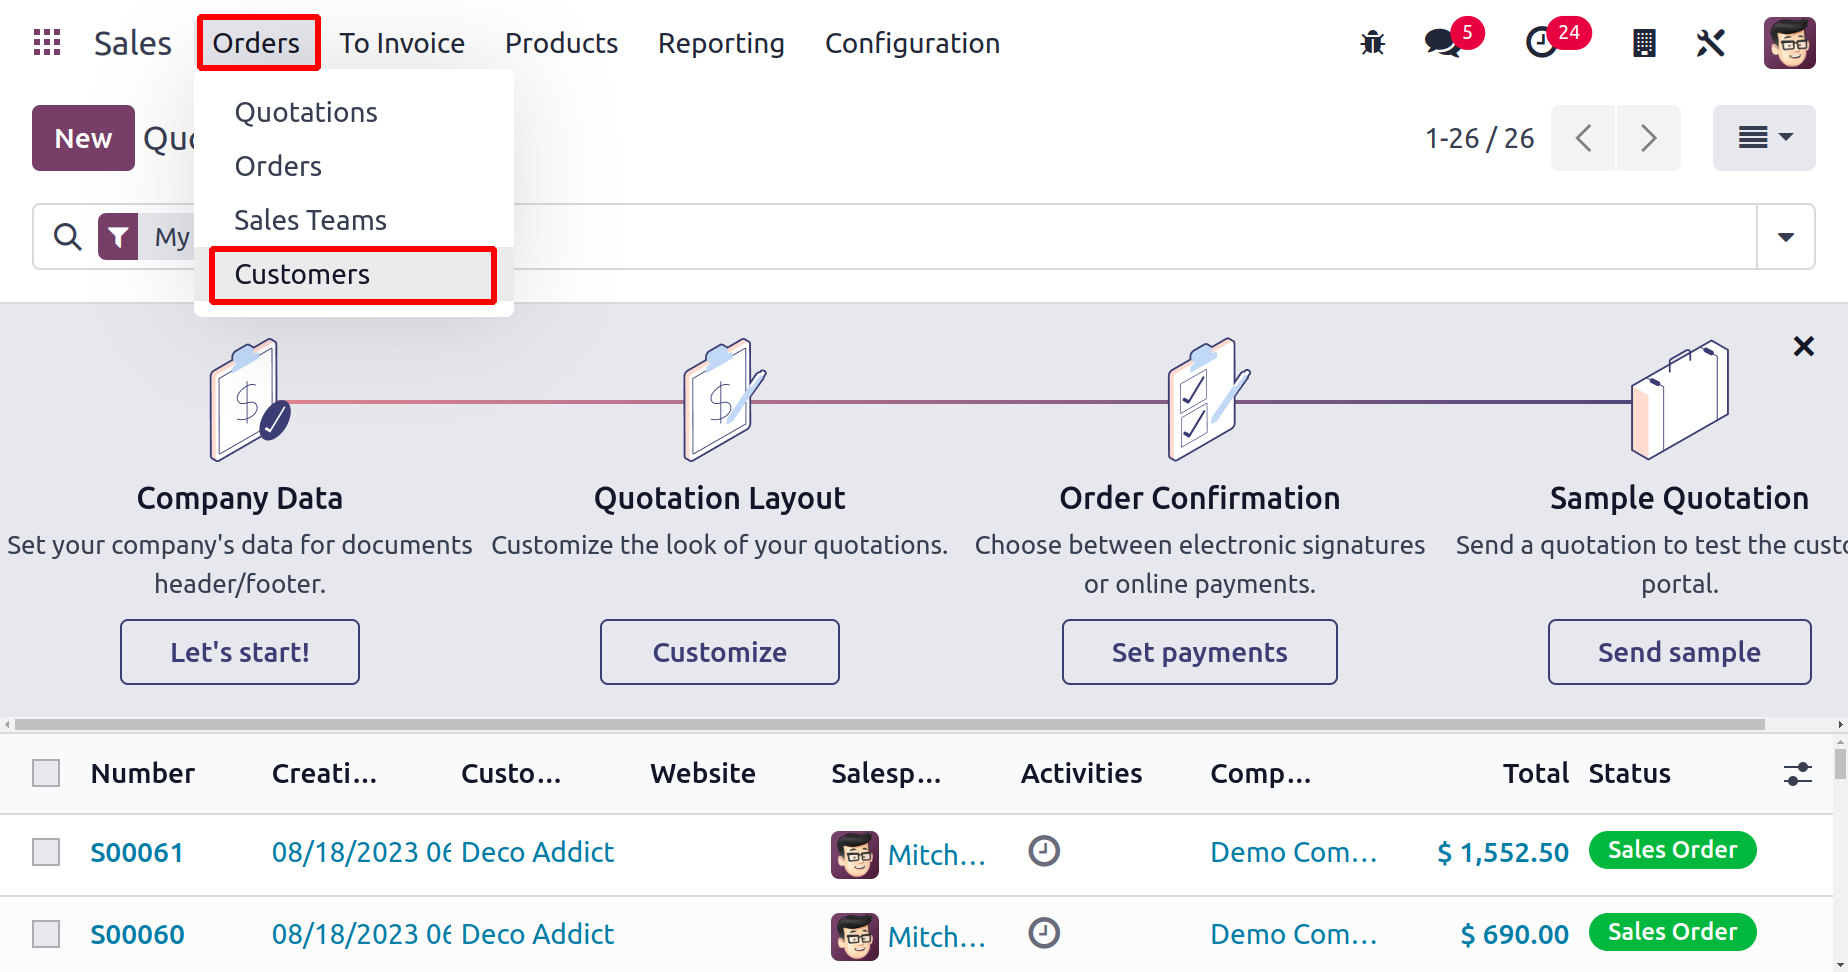
To build and manage the records of the customers of your business, you will receive a
distinct platform in the Odoo 17 Sales module. The Customers platform is located under
the Orders menu, as illustrated below.
The window displayed below is depicted in a Kanban format but can easily be changed to a
list view depending on your needs.
You may quickly locate the needed data from the client records kept in your database by
using the configurable Filters and Group By options.
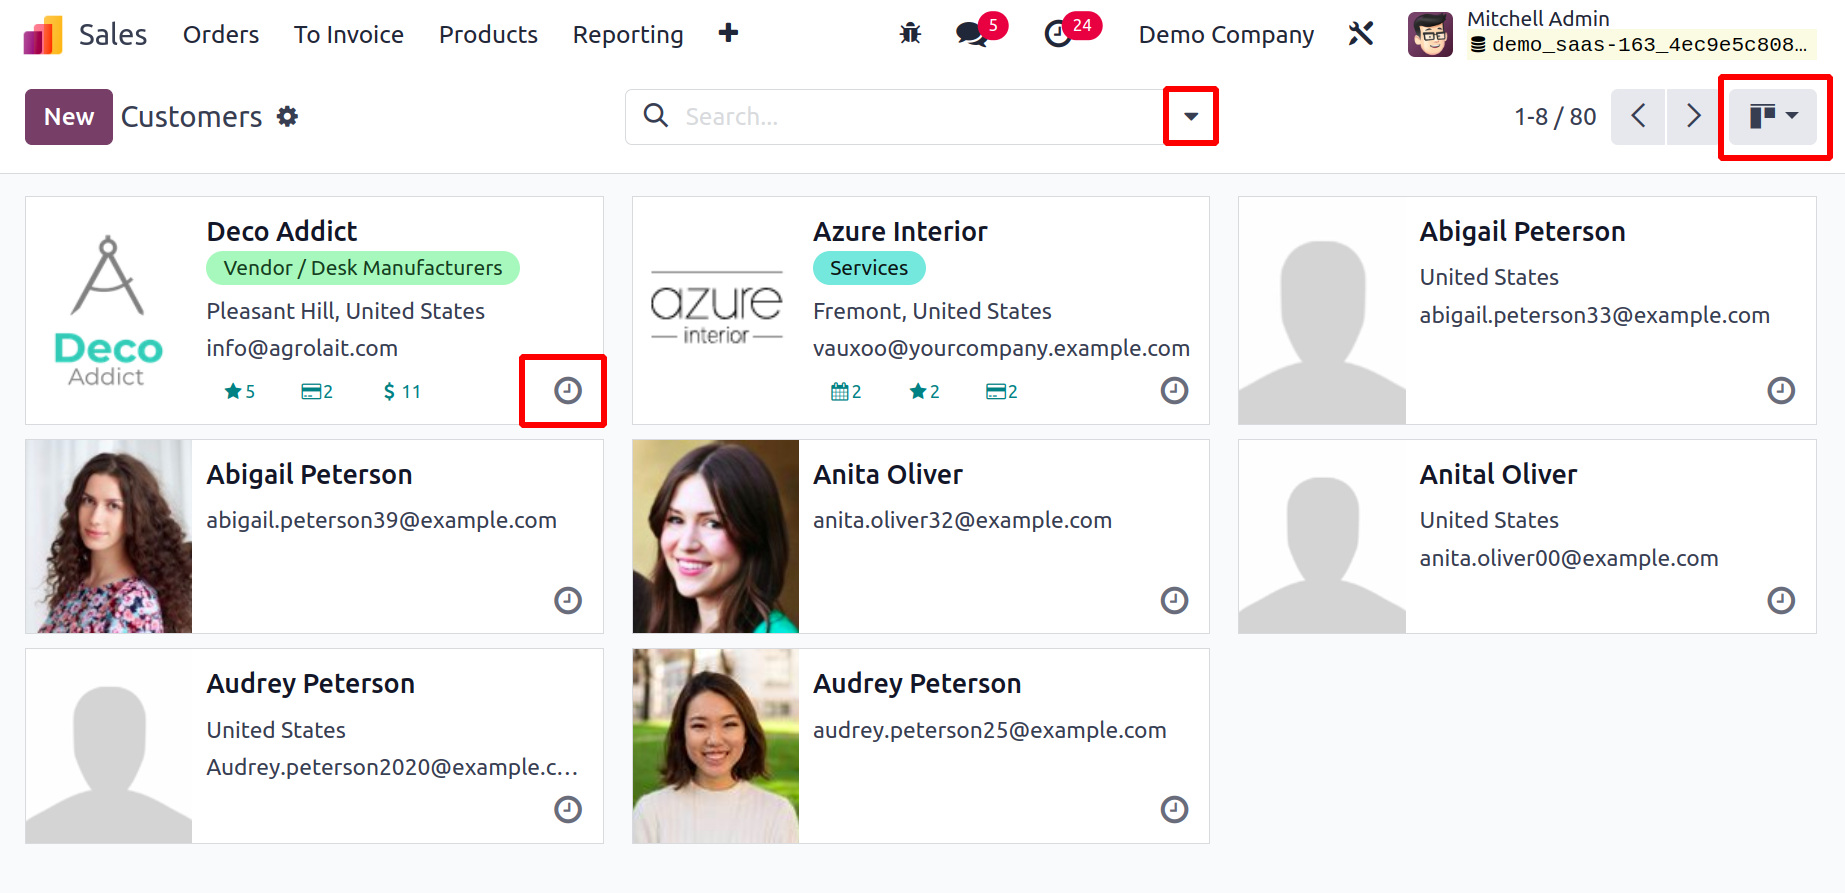
You may easily arrange different activities with each customer by using the tiny clock
indicator that is provided in the right corner of their profile. Additionally, the
Kanban view of the client window has received some new changes. The quantity of
scheduled activities, favorites added, transactions made, and sales made by each
consumer are listed on their profile. When you click on one of these icons, you will be
sent immediately to the associated window where you can control it.
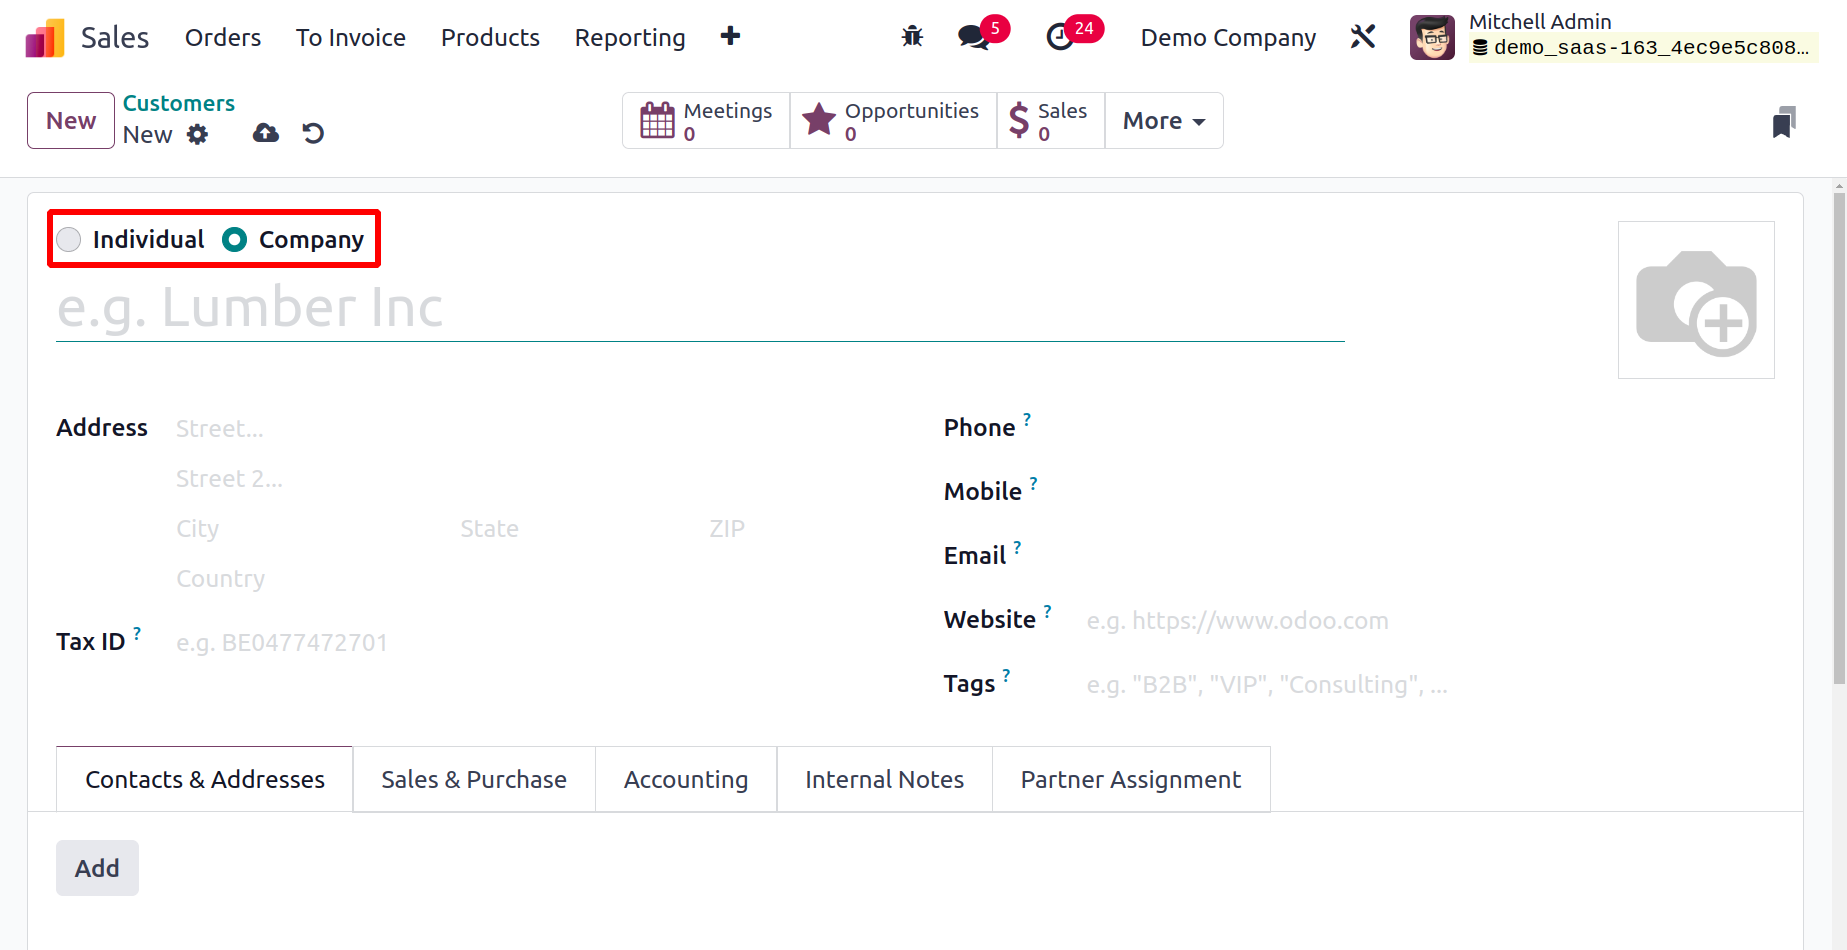
With the help of the New button, you may now configure a new customer. You can set up a
new customer profile with the name of a person or business. The customer's name may be
mentioned in the designated area. After that, you can set up the client's necessary
information, including address, tax identification number, phone, mobile, email,
website, language, and tags.
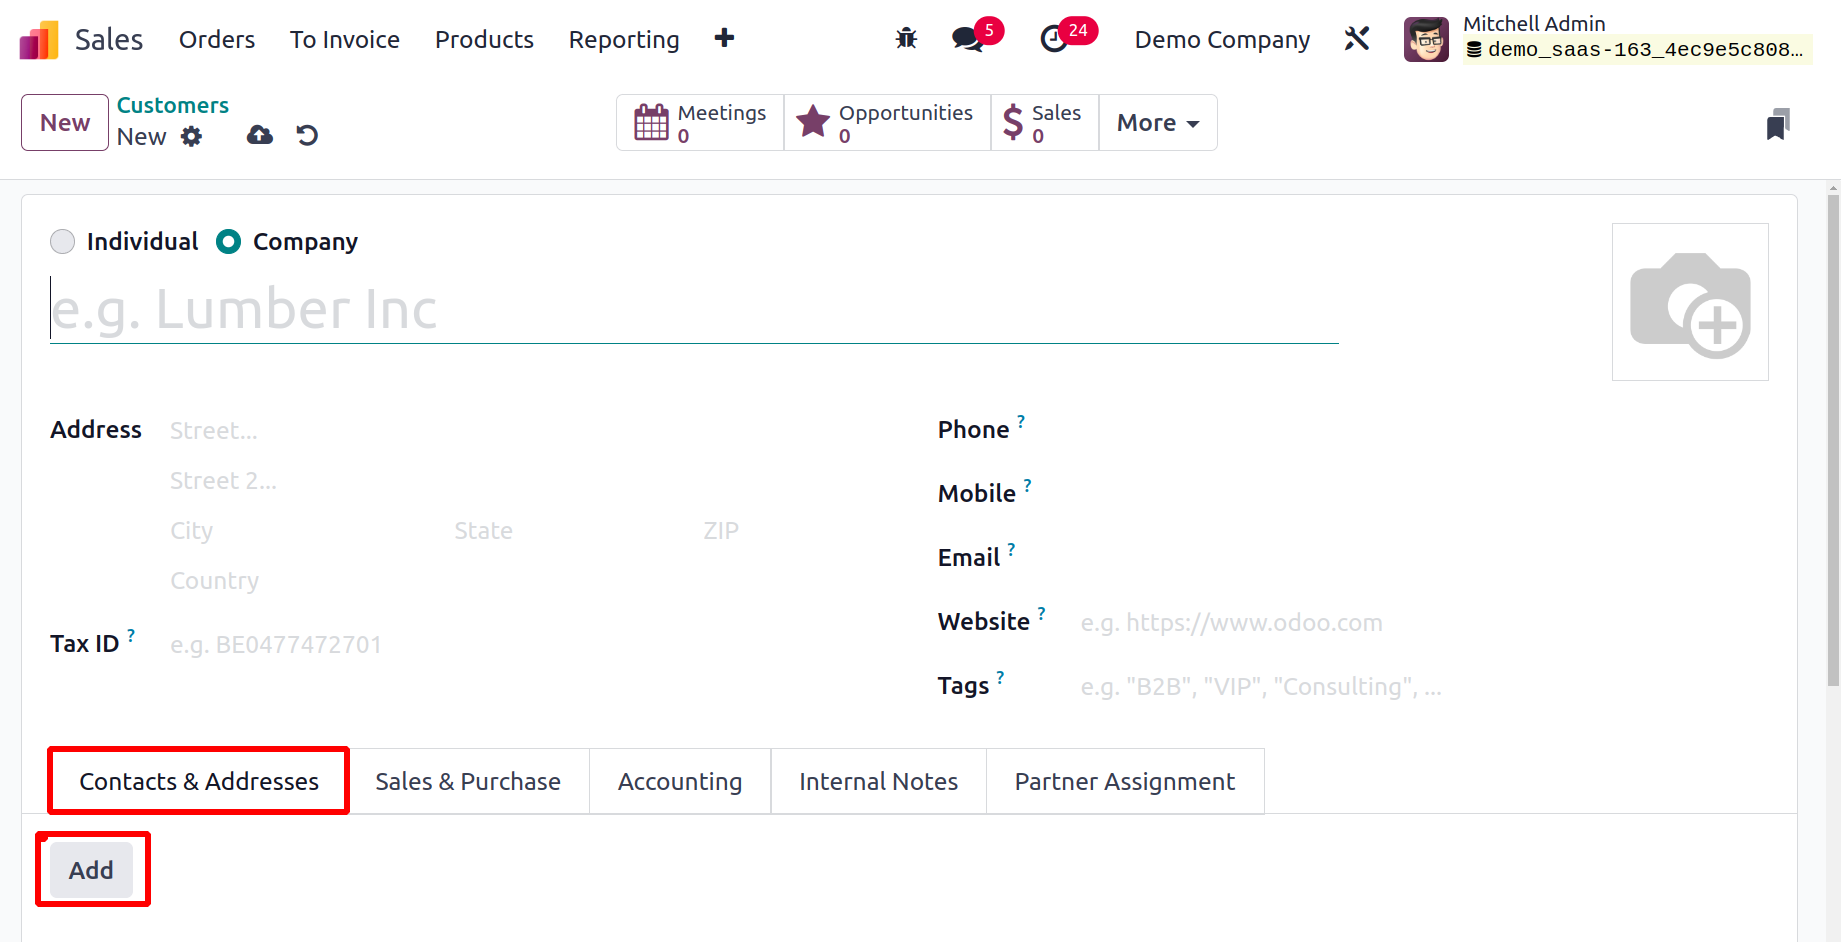
You can add the customer's contact information by clicking the Add button under the
Contacts & Addresses tab.
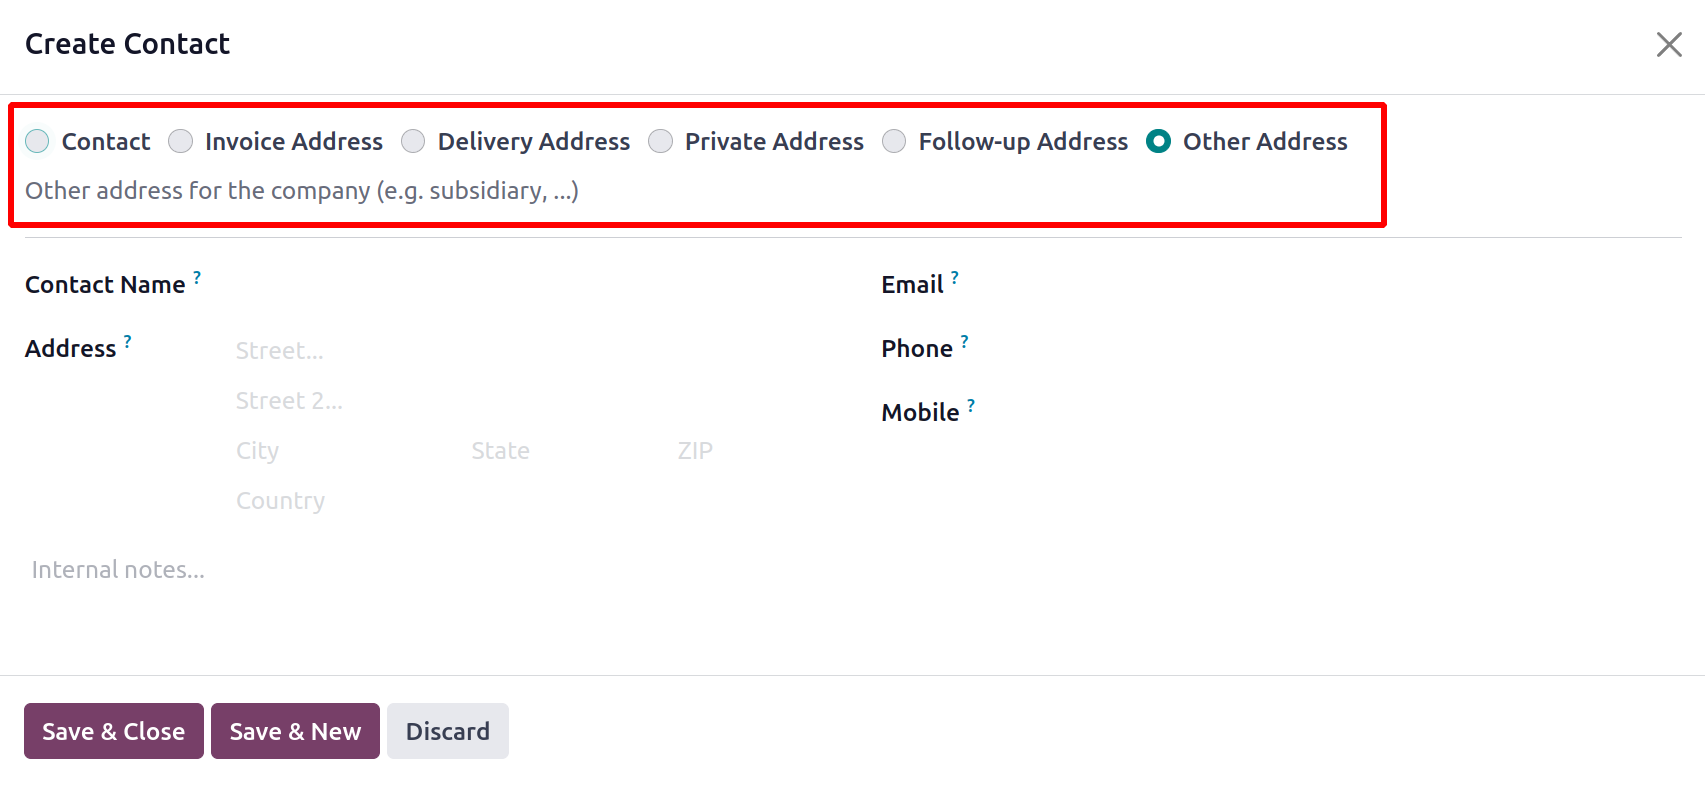
Depending on the option you choose, you can specify the contact information as Invoice
Address, Delivery Address, Private Address, Other Address, and Follow Up Address.
The Invoice Address in Odoo is the address to which invoices are delivered and is usually
linked to a vendor or client for billing purposes.
The Delivery Address in Odoo is the precise place to which products or services are to be
delivered. It is usually associated with a vendor or client for shipping purposes.
A Private Address in Odoo is a unique or personal address linked to a contact, frequently
utilized for social or non-business communications.
As an additional contact point, temporary address, or supplementary business site, the
"Other Address" in Odoo usually refers to a different place linked to a contact or
entity.
A "Follow Up Address" in Odoo is a special address or point of contact assigned to
follow-up messages or activities pertaining to a certain record.
You can enter the contact's name, address, email, phone number, and mobile number in the
appropriate areas after choosing the appropriate option.
Under the Sales & Purchase tab, the specifics necessary for the sales and
purchase-related operations with the customer can be defined.
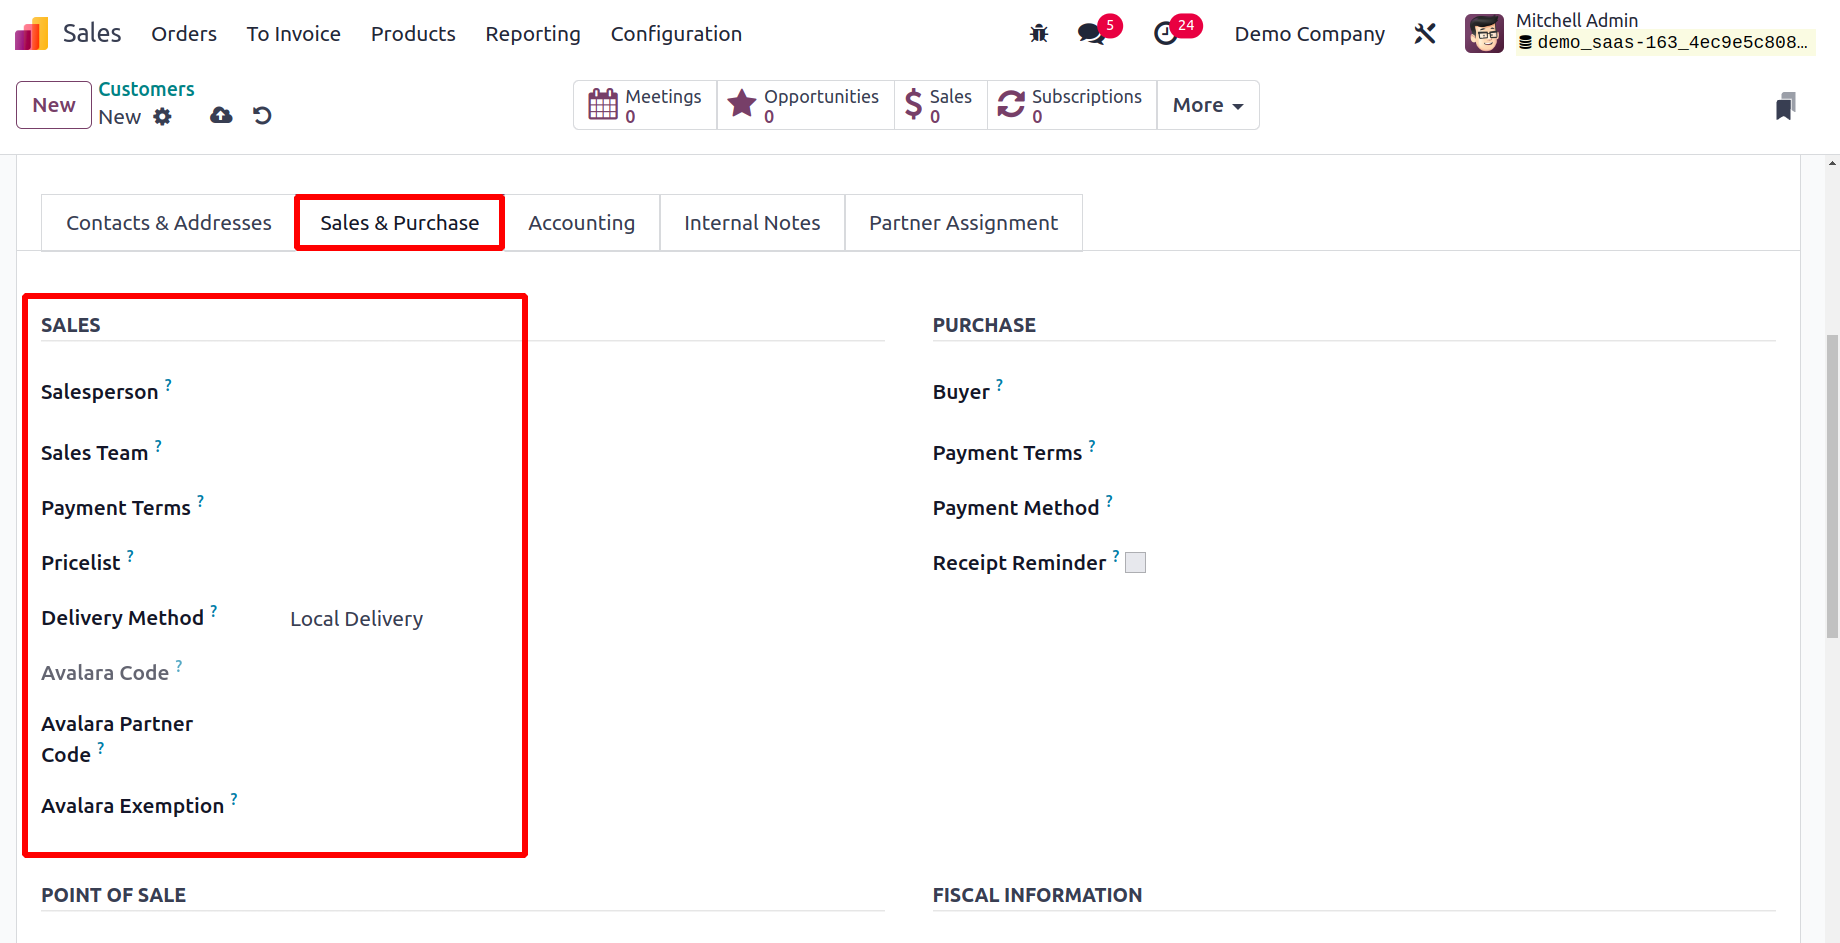
You can designate a Salesperson and Sales Team in the appropriate sections under the
Sales tab to handle the sales activities associated with this customer. When a payment
period is mentioned, it will be utilized on client invoices and sales orders rather than
the standard one. In the Implemented By field, you can provide the allocated partner ID.
For this customer, you can define a unique Price List in the designated field that will
be used for sales in place of the default one. An Avalara Code that can be used for
cross-referencing in the Avalara port will be given to the customer. In the appropriate
boxes, mention the Avalara Partner Code and Avalara Exemption. The Delivery Method
option allows you to specify the default delivery method to be used in this customer's
sales orders.
You can choose the customer's preferred Payment Terms under the Purchase tab, and those
terms will be applied to vendor bills and purchase orders rather than the default ones.
When you mention the 1099 Box, the vendor's journal entries will be added to the box you
chose on the 1099 report. You can provide the preferred mode of payment for this client
in the Payment
Mode section. In order to register payments in bulk, this is used to filter vendor bills
by desired payment method.
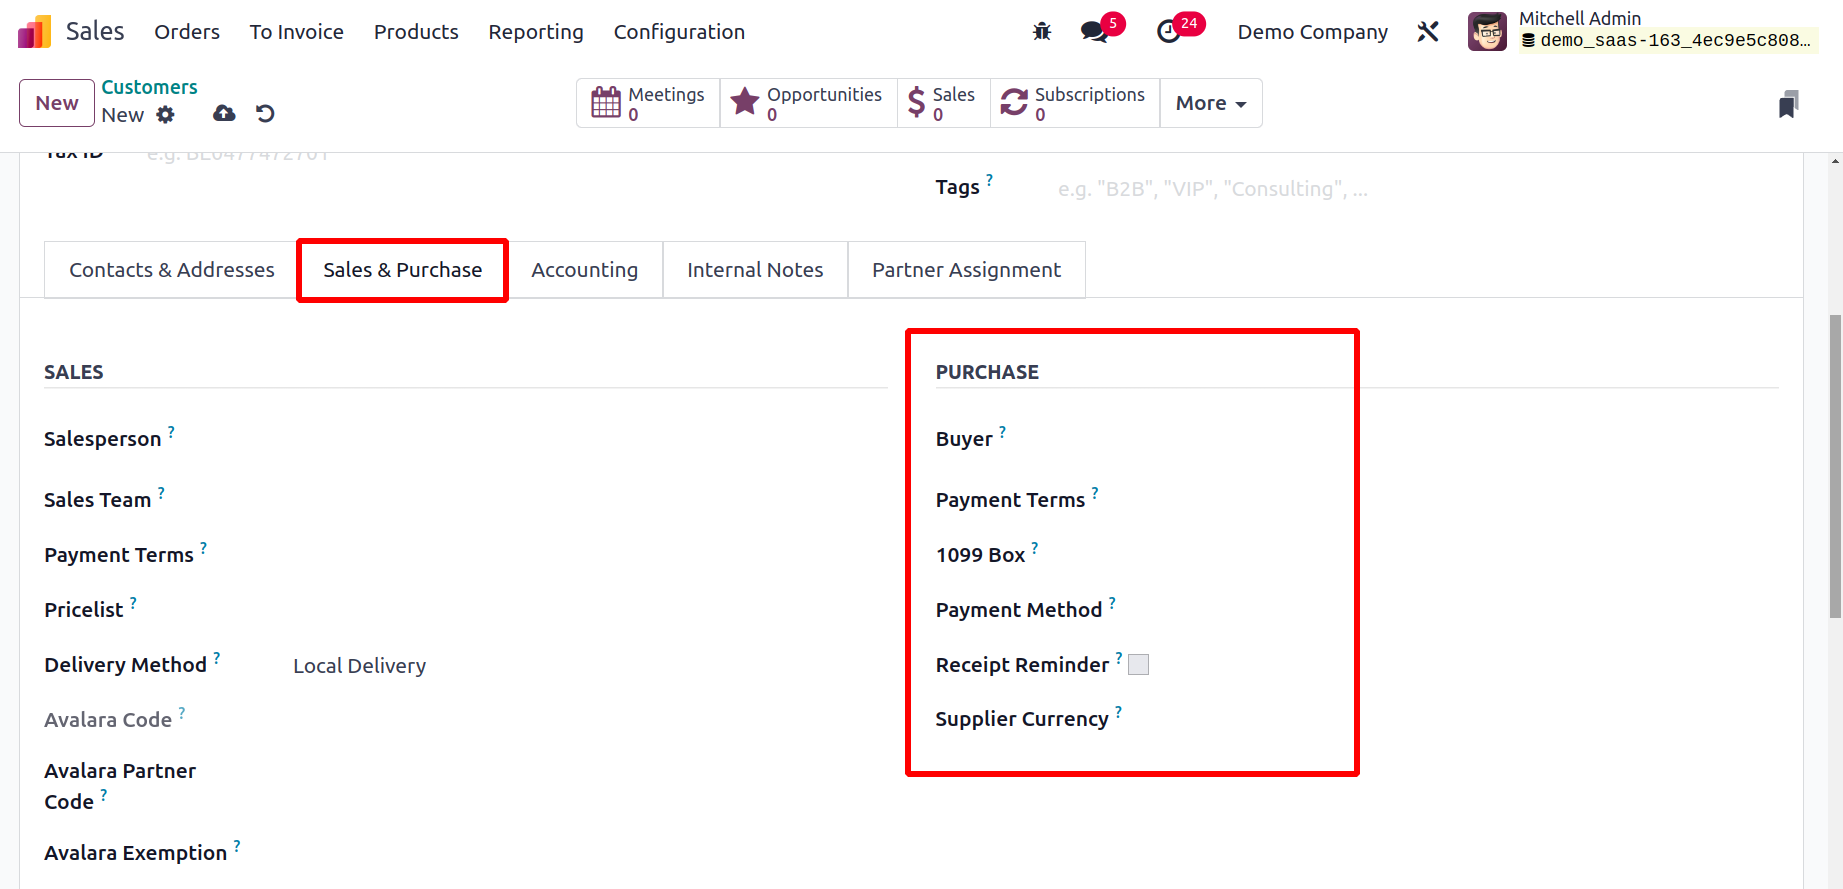
By turning on the receipt reminder, Odoo 17 will automatically send the customer a
confirmation email a few days prior to the anticipated receipt date, asking them to
confirm the precise date. For
purchases from the current partner, the currency specified in the Supplier Currency
column will be applied.
For the customer's identification at the point of sale, you can specify a Barcode. Under
the Fiscal Information field, the customer's Fiscal Position can be specified. The taxes
and accounts utilized for this interaction are determined by the financial situation.
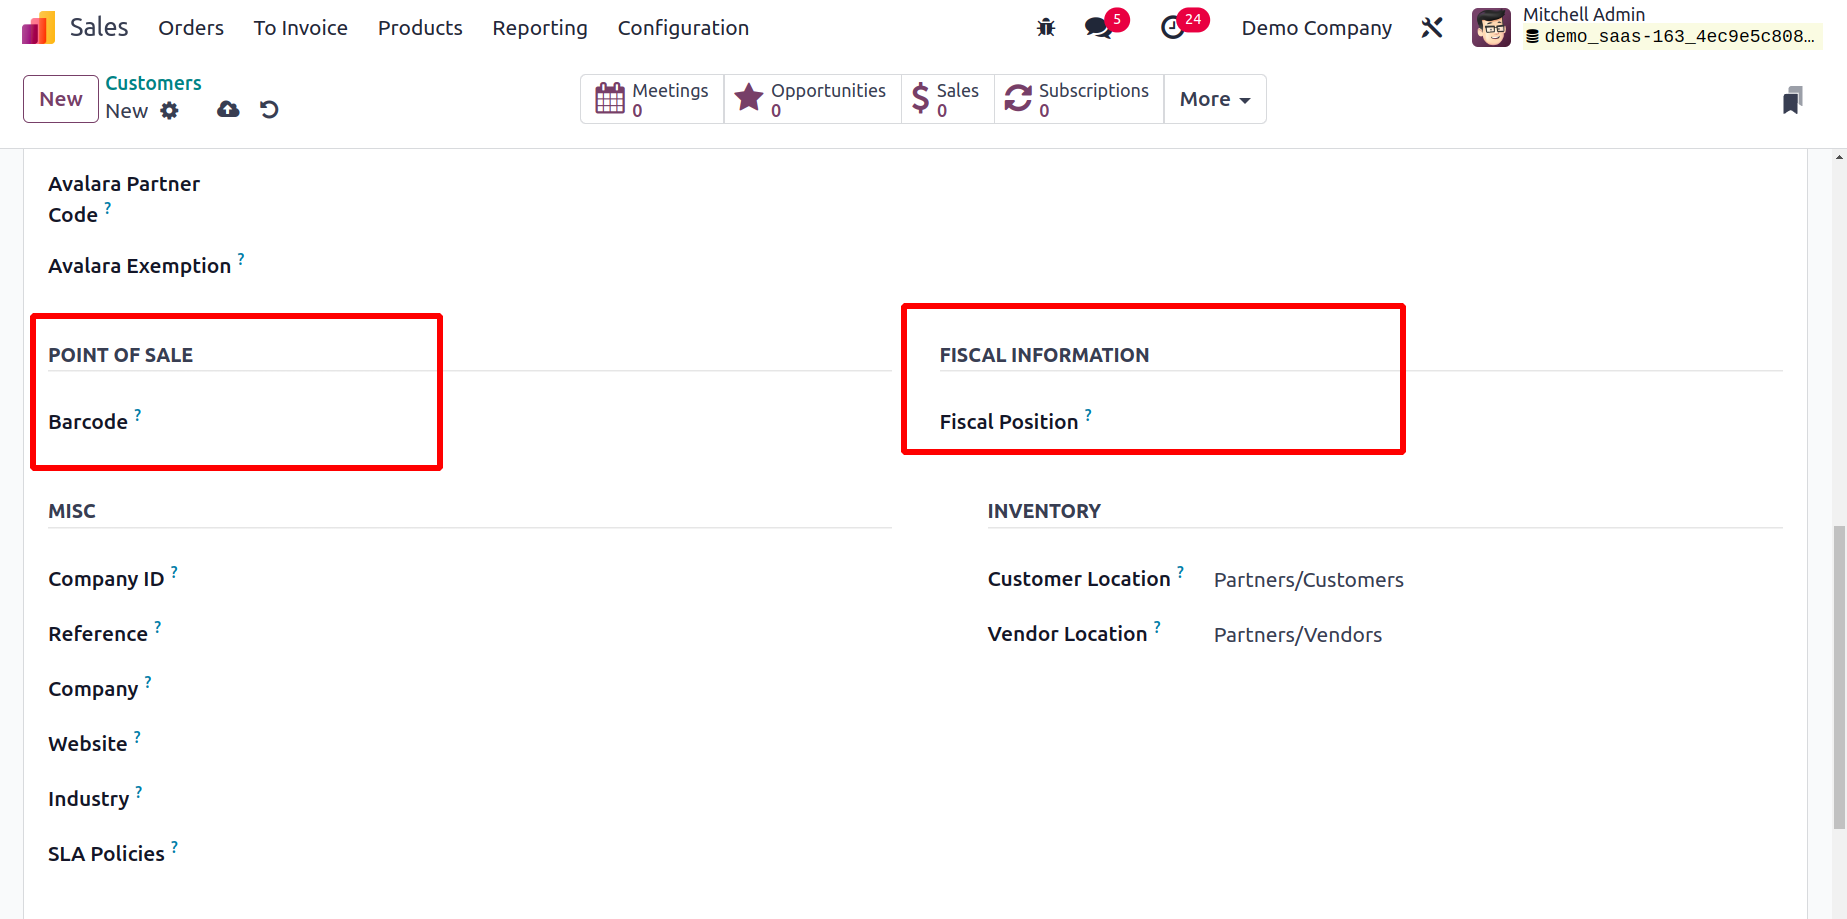
You can enter the relevant information in the applicable fields under the Miscellaneous
tab for the Company ID, Reference, Company, Website, Website Tags, Industry, and SLA
Policies.
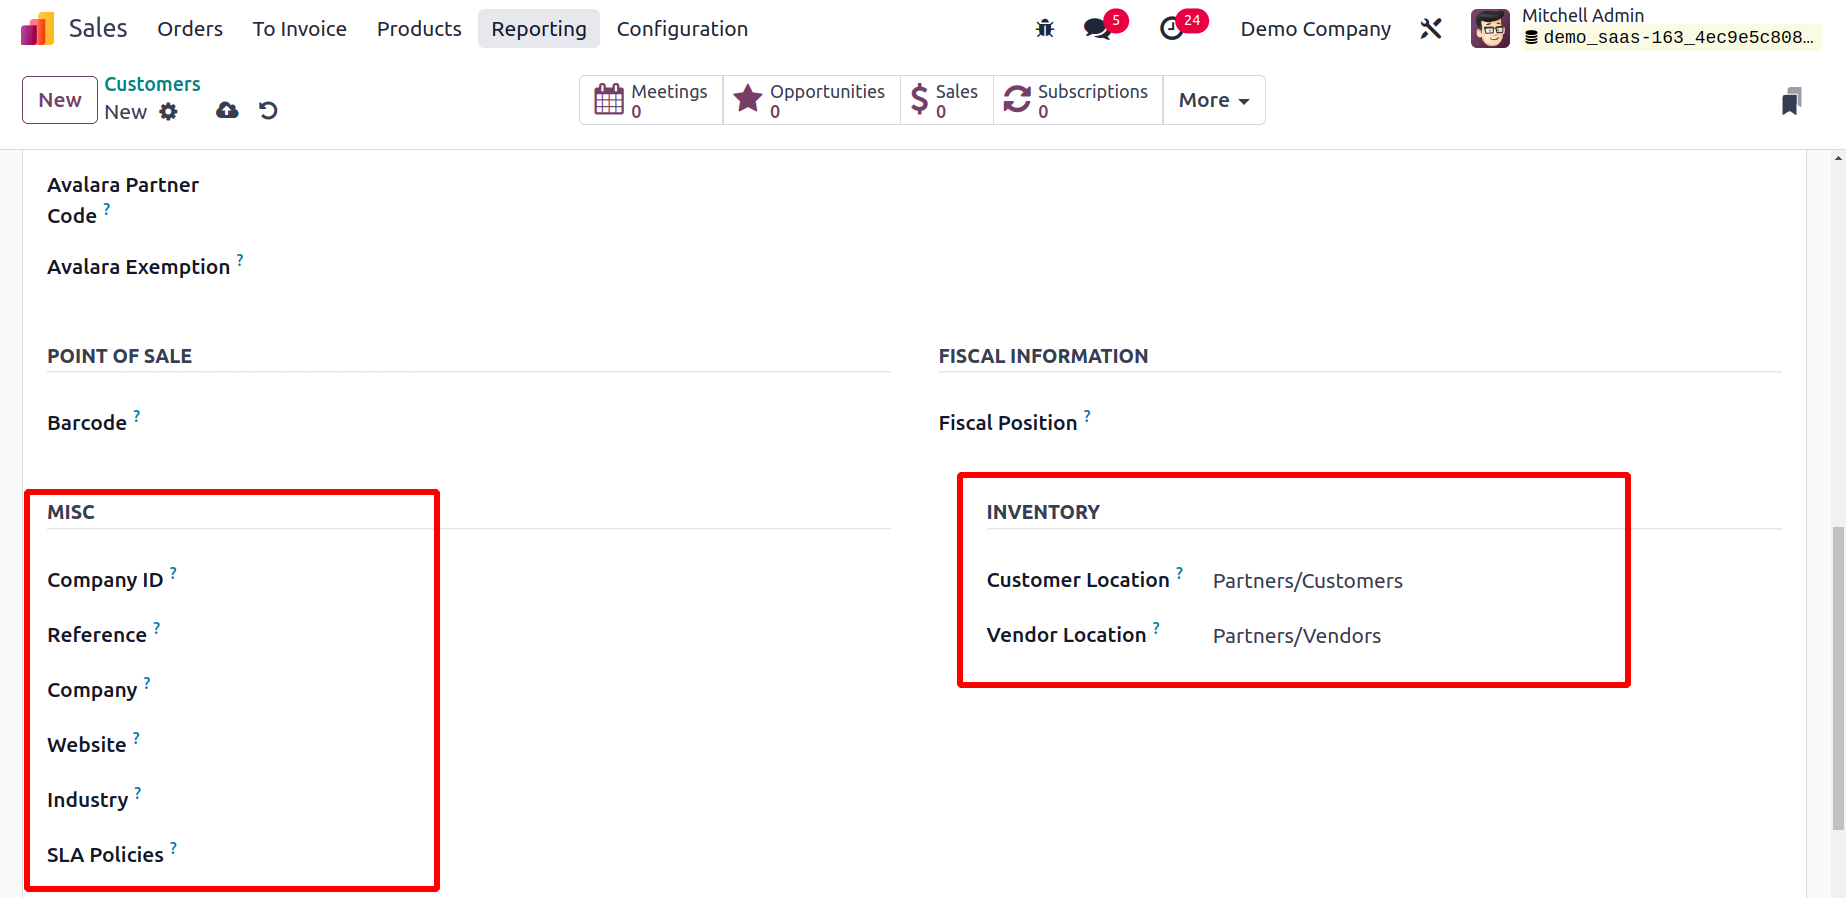
You can enter the Customer Location in the designated field under Inventory. When
shipping products to this contact, the destination is this stock location. The Vendor
Location allows the user to choose the stock
location that will be utilized as a source for receiving products from this contact.
Under the Accounting tab, the customer's accounting information can be defined.
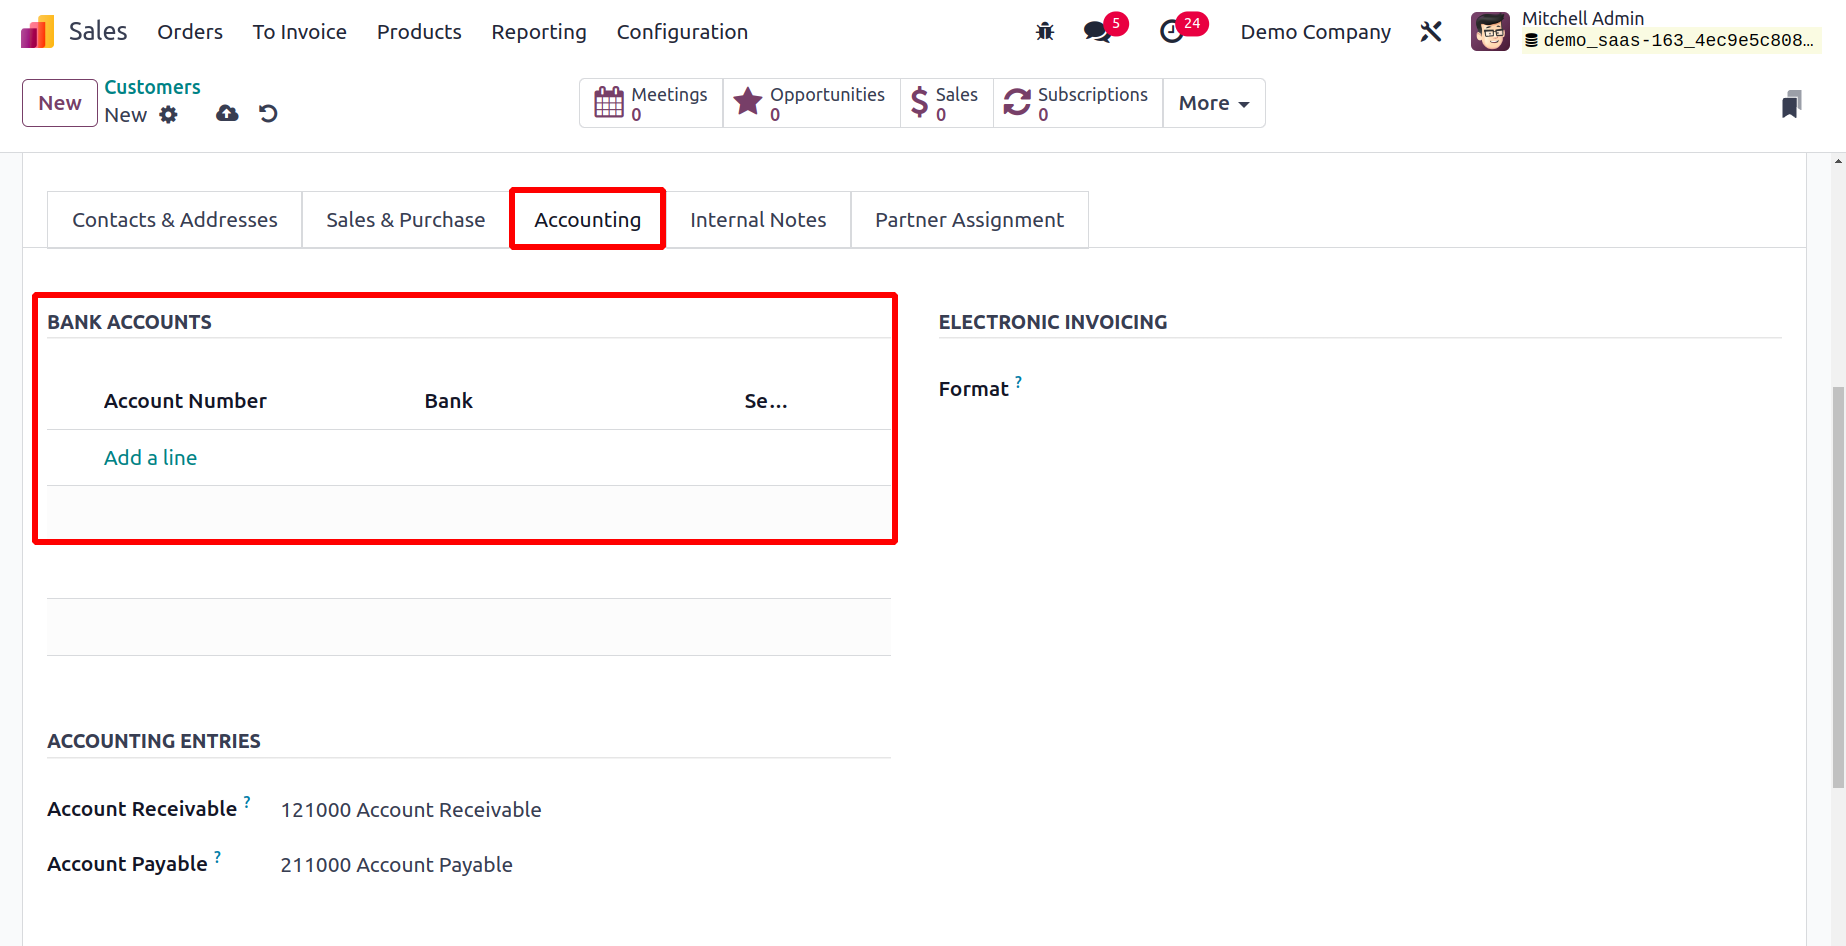
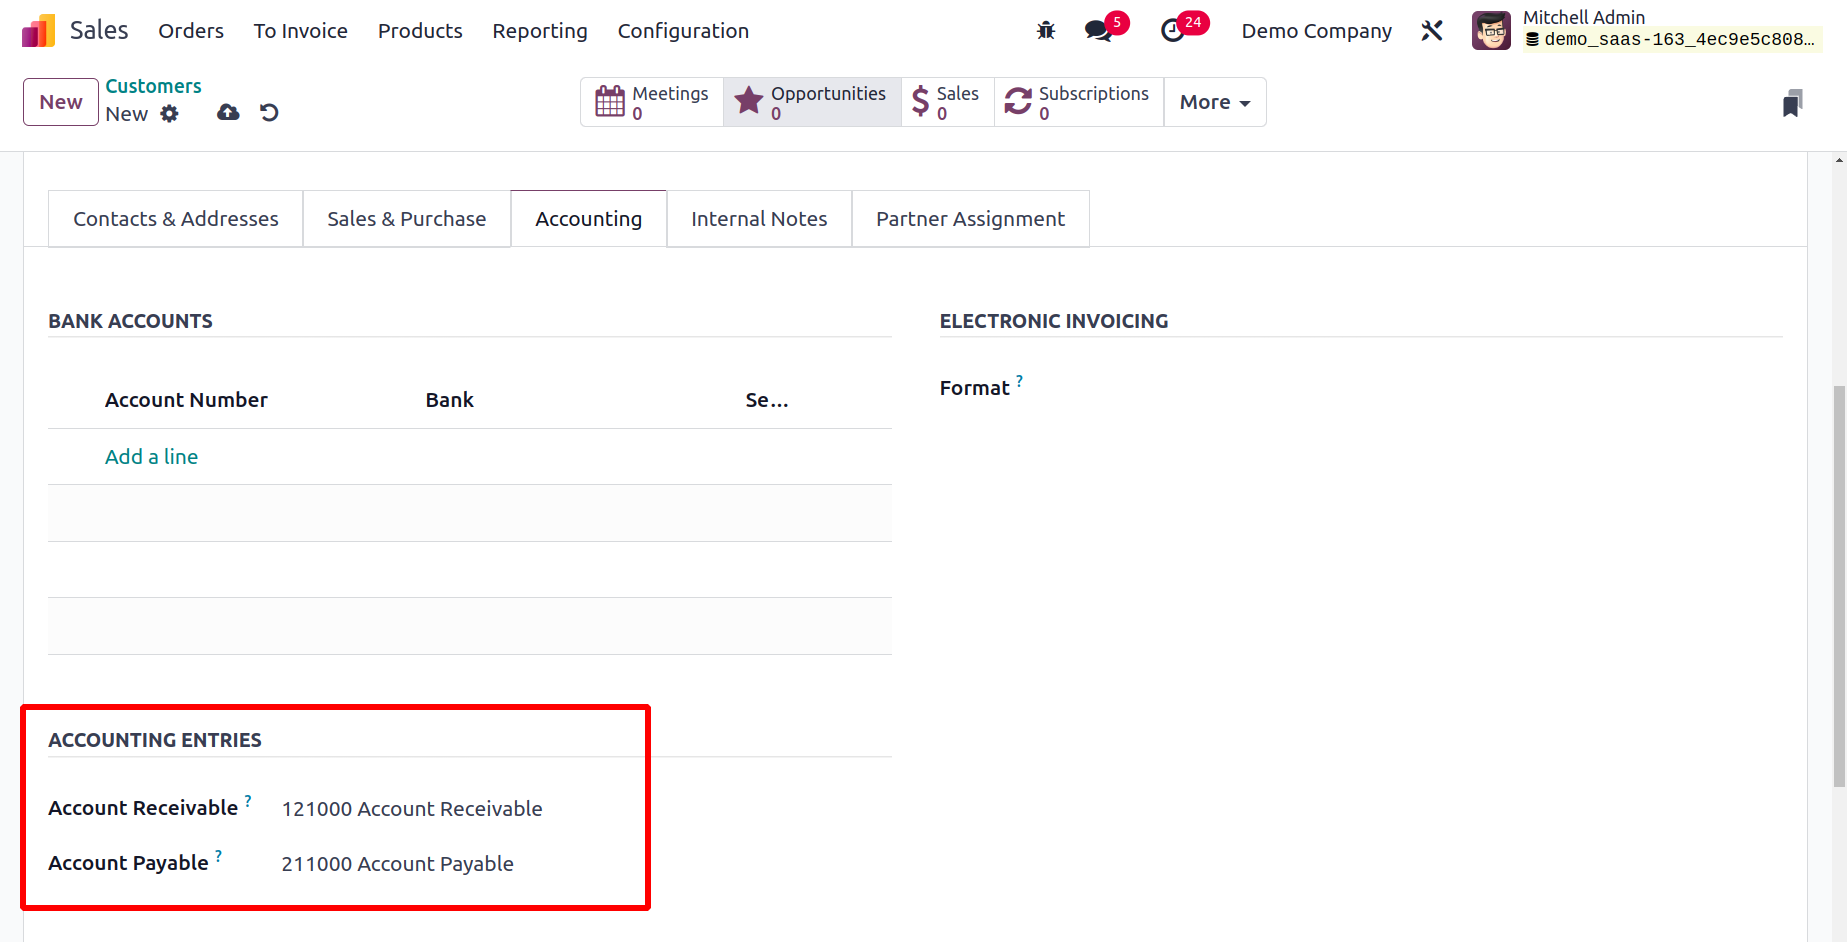
You can list each of the customer's bank accounts along with the account number using the
Add a Line button. Under the Accounting Entries field, the Account Receivable and
Account Payable can be specified.
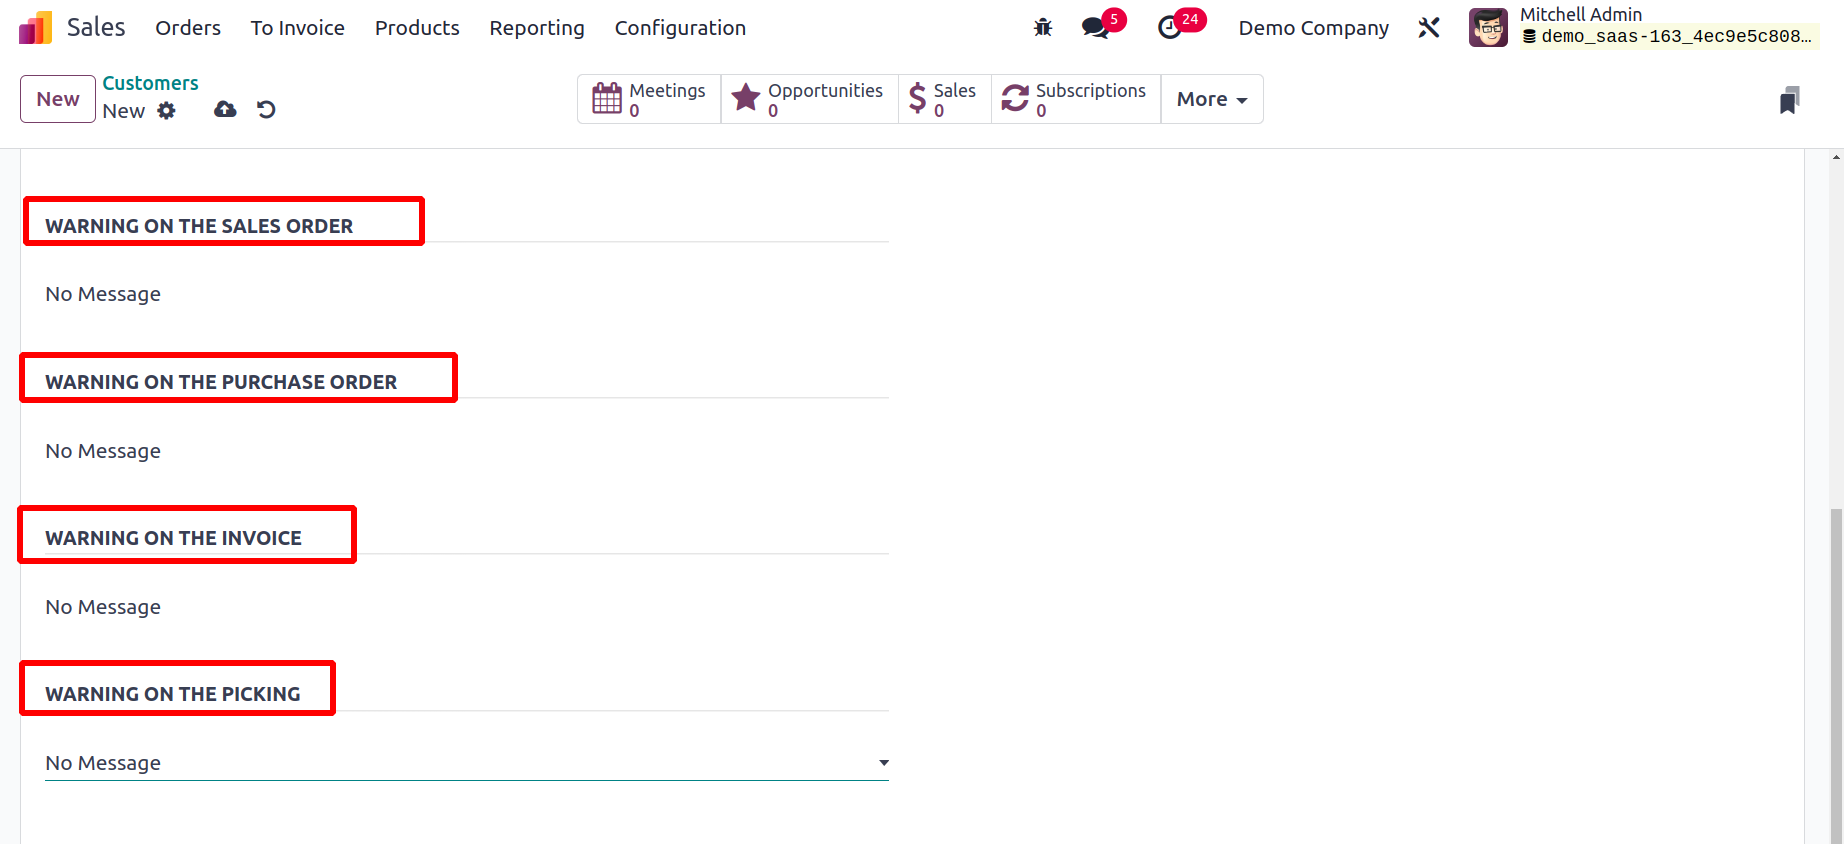
Additional customer-related remarks can be added using the Internal Notes tab. You can
activate the Sales Warning feature from the Settings menu of the Sales module if you
want to produce
warning messages for the transactions made with this customer. You can use this
functionality to get customer order warnings.
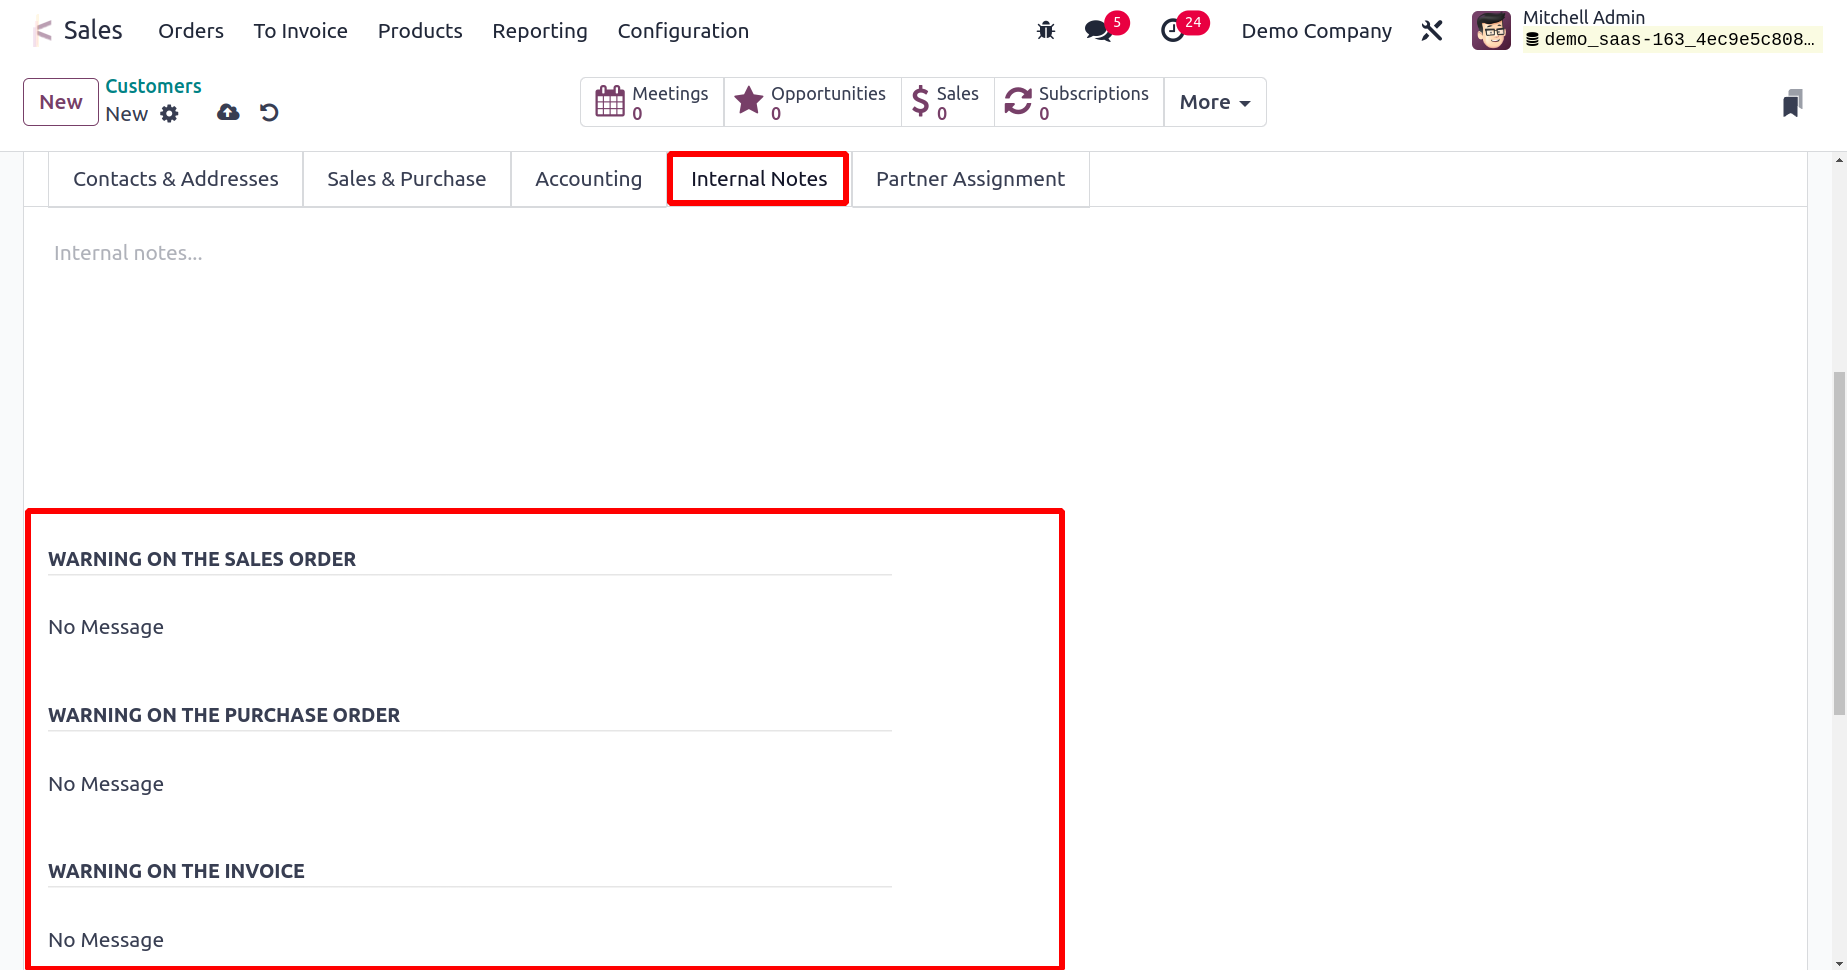
You can examine the Internal Notes tab in the Customer setup window once you've enabled
this option. You can produce warnings for this customer's sales orders, purchase orders,
invoices, and picking, as seen in the image below.
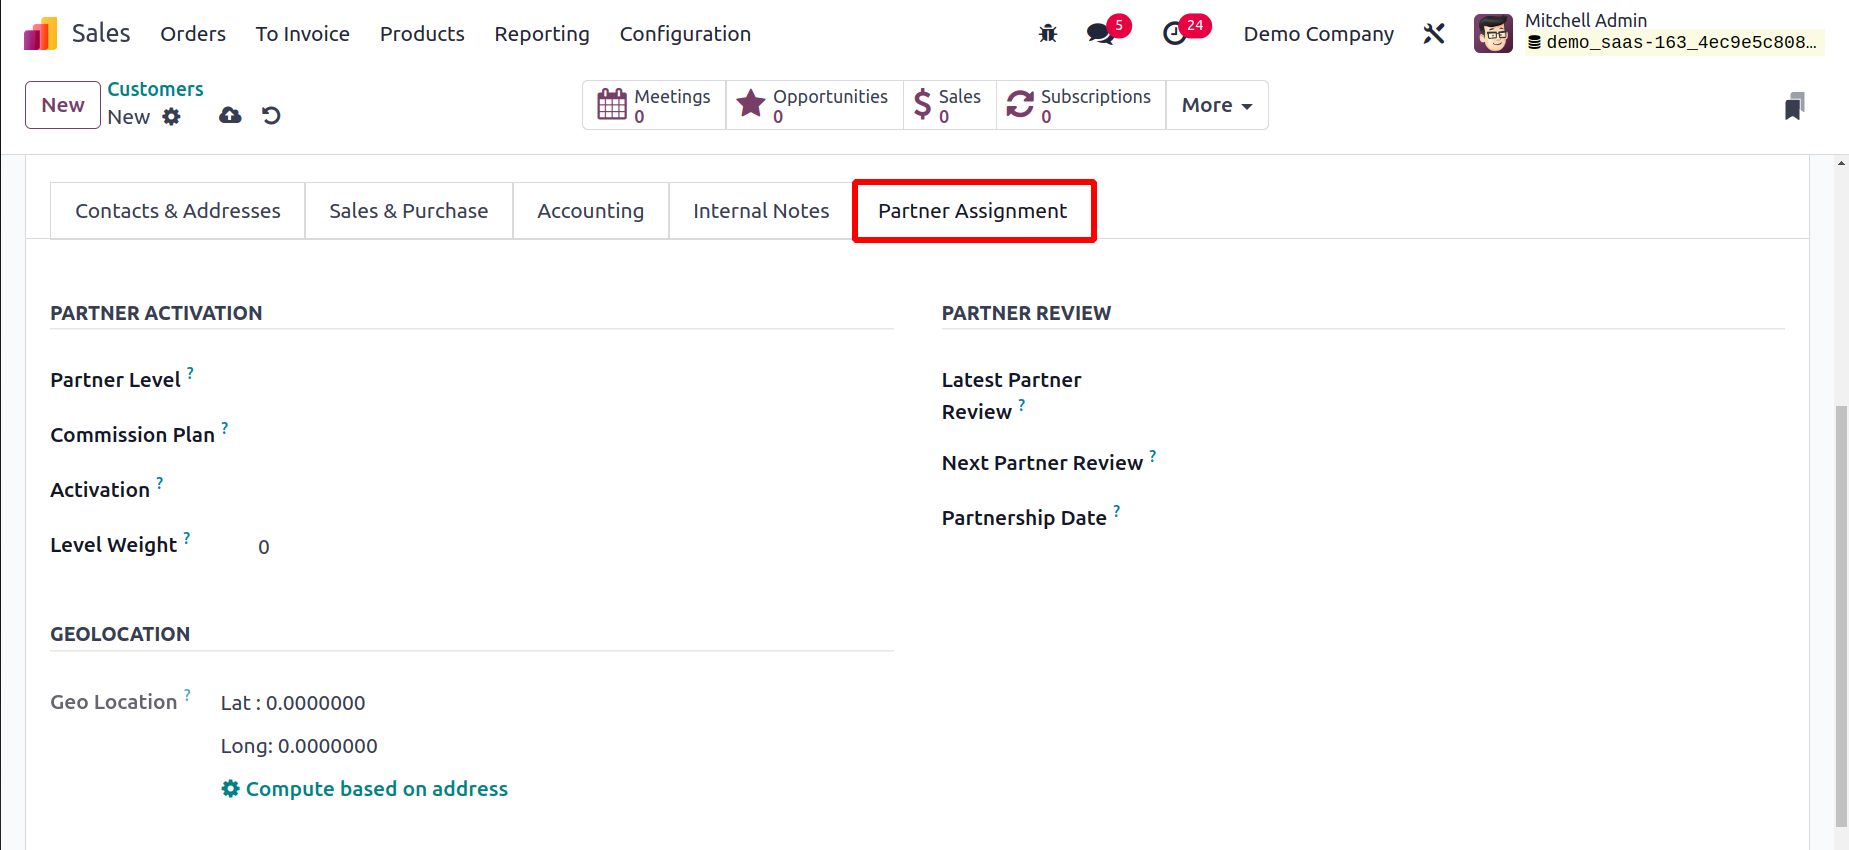
You can thank the Partner Activation, Partner Review, and Geolocation details using the
Partner Assignment tab. You can indicate the Partner Level, Commission Plan, Activation,
and Level Weight under the Partner Activation box.
The Latest Partner Review, Next Partner Review, and Partnership Date can all be entered
in the Partner Review box.
The customer's membership information can be added using the Membership tab. You can turn
on the Free Member option if you wish to offer the customer a free membership.
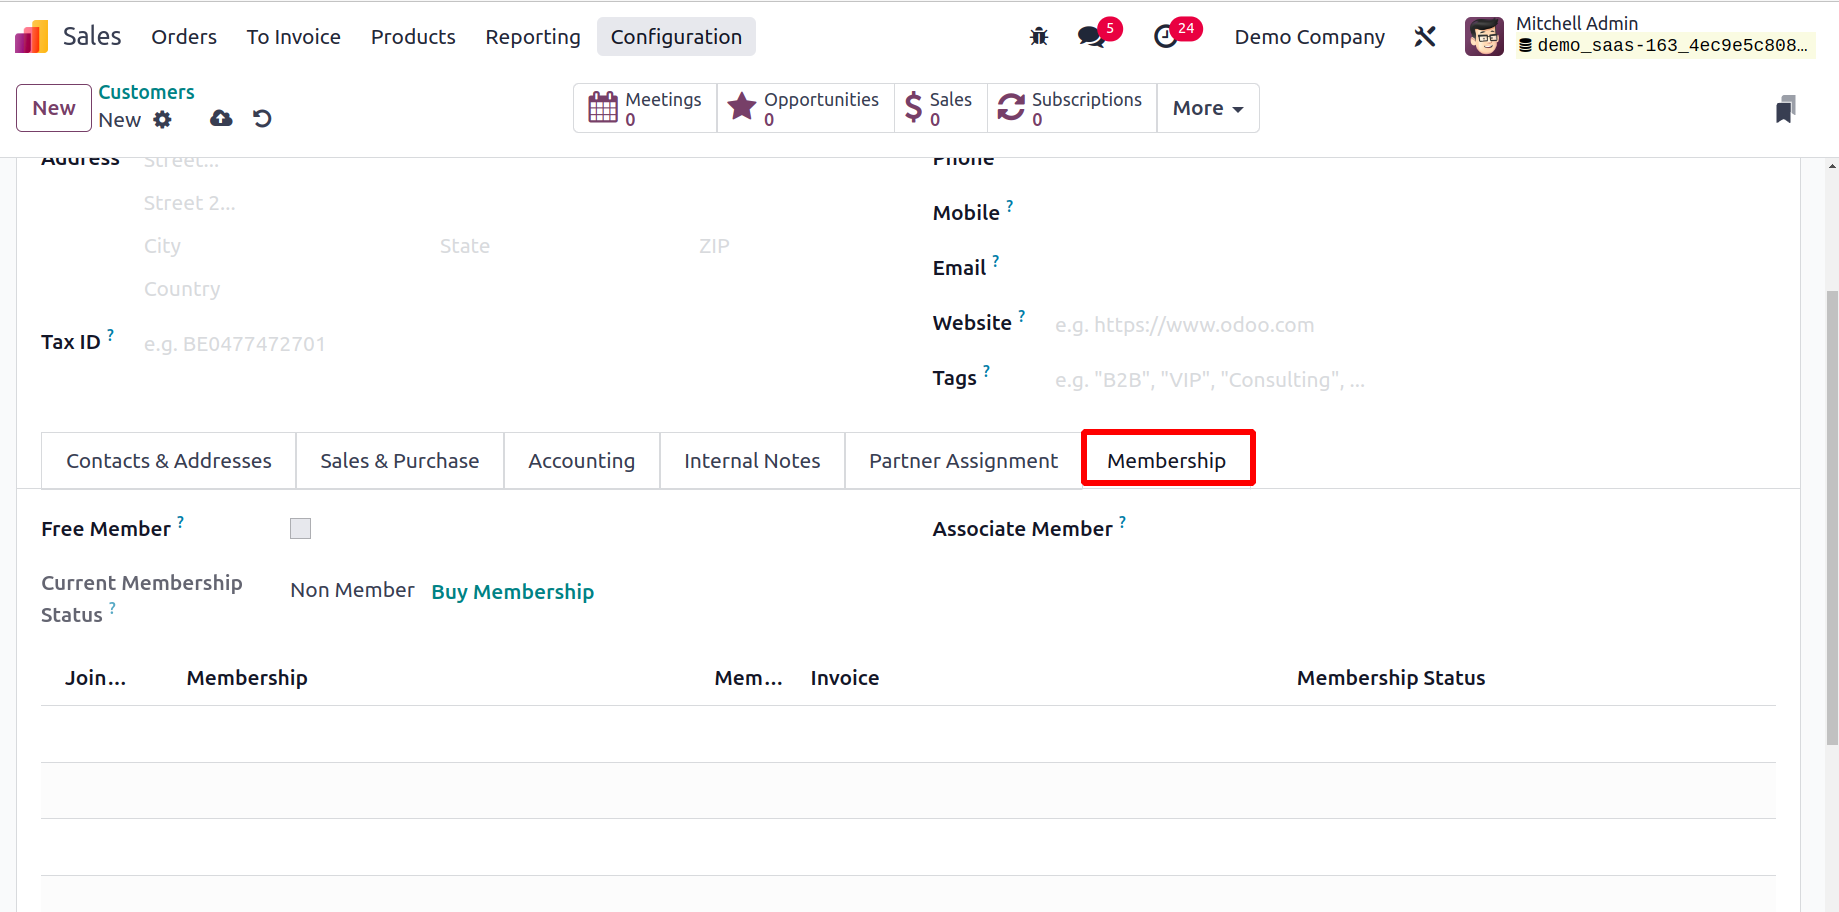
The Associate Member box allows you to designate a member with whom you want to link the
customer's membership. This tab displays the customer's current membership status. You
can quickly purchase a membership by clicking the Buy Membership button. This option
also allows you to view the Join Date, Membership, Membership Price, Invoice, and
Membership Status.
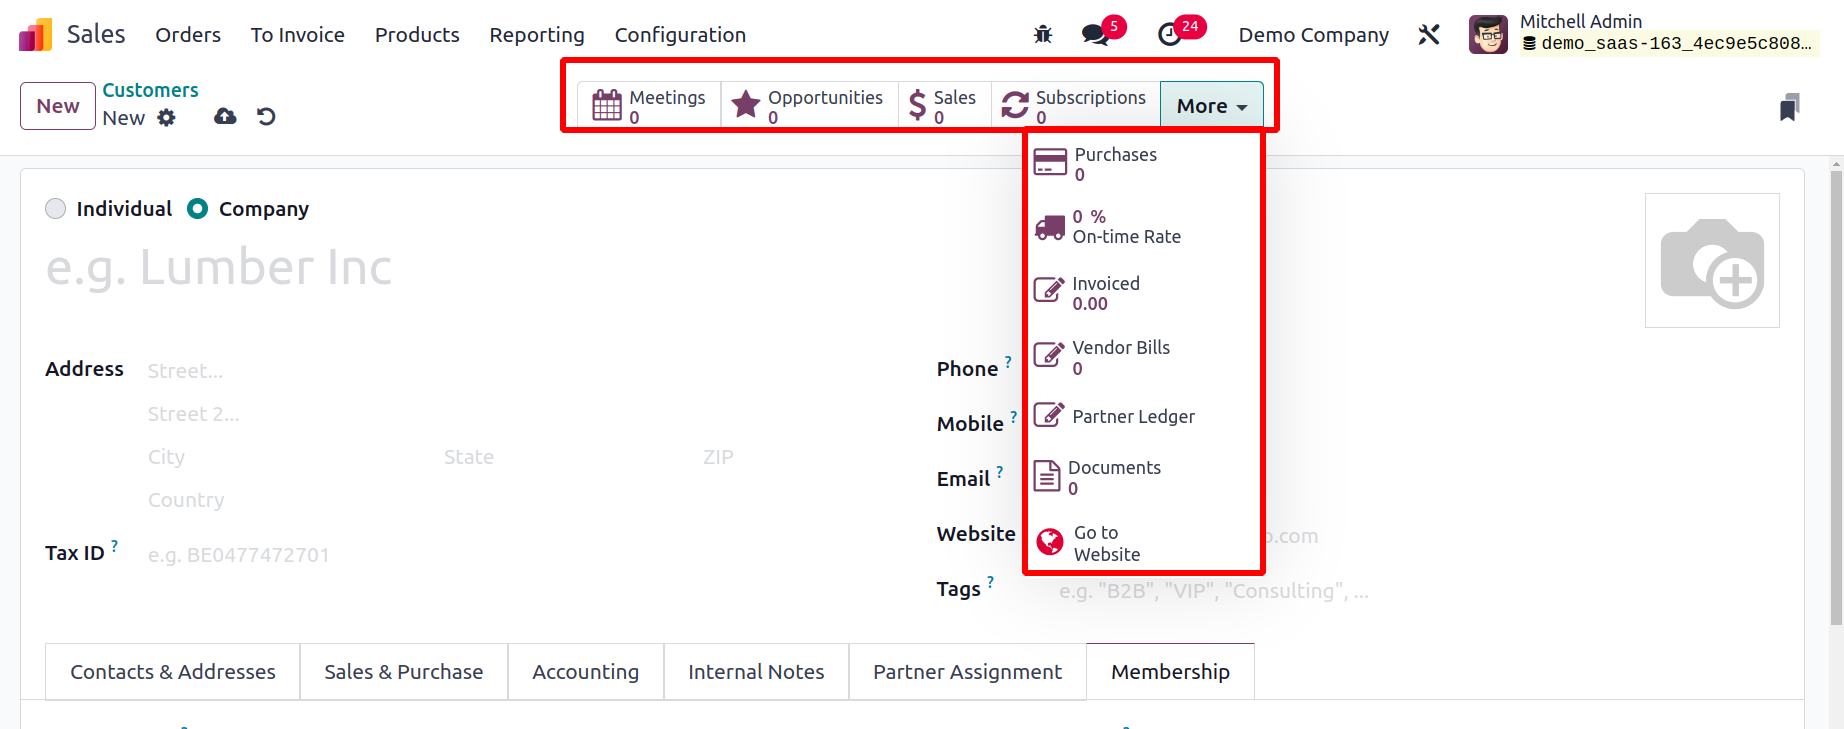
You will see smart buttons on the screen to control each of the operations done with the
customer based on those operations. You can access the smart buttons for the customer
Joel Willis's meetings, opportunities, sales, subscriptions, tasks, purchases, on-time
rate, due, invoiced amount, vendor bills, partner ledger, saved payment tokens,
certifications, signature, documents, direct debit requirements, and courses information
here.
Let's now talk about the management of the sales team management in the Odoo 17 Sales
module.