Repair
To ensure flawless performance, the Odoo 17 Repair module can be coupled with the Manufacturing and Maintenance modules. To manage the repairing of the items in your inventory, you can expand the features of this module by adding the Inventory module. The best option for managing repair services for products covered by a warranty is this module. The Odoo 17 Repair module's repair orders can be used to fix products that are partially or totally broken. It is one of the most straightforward and effective modules offered by Odoo 17.
You will see the list view of all repair orders created in the Repair module when you open it, as shown below.

The Repair Reference, Scheduled Date, Product to Repair, Customer, Delivery Address, Warranty Expiration, Sale Order, Company, and Status will all be displayed in the list view. There are many colors that indicate the repair orders' status. Each repair order includes a star icon that can be used to indicate the request's importance.
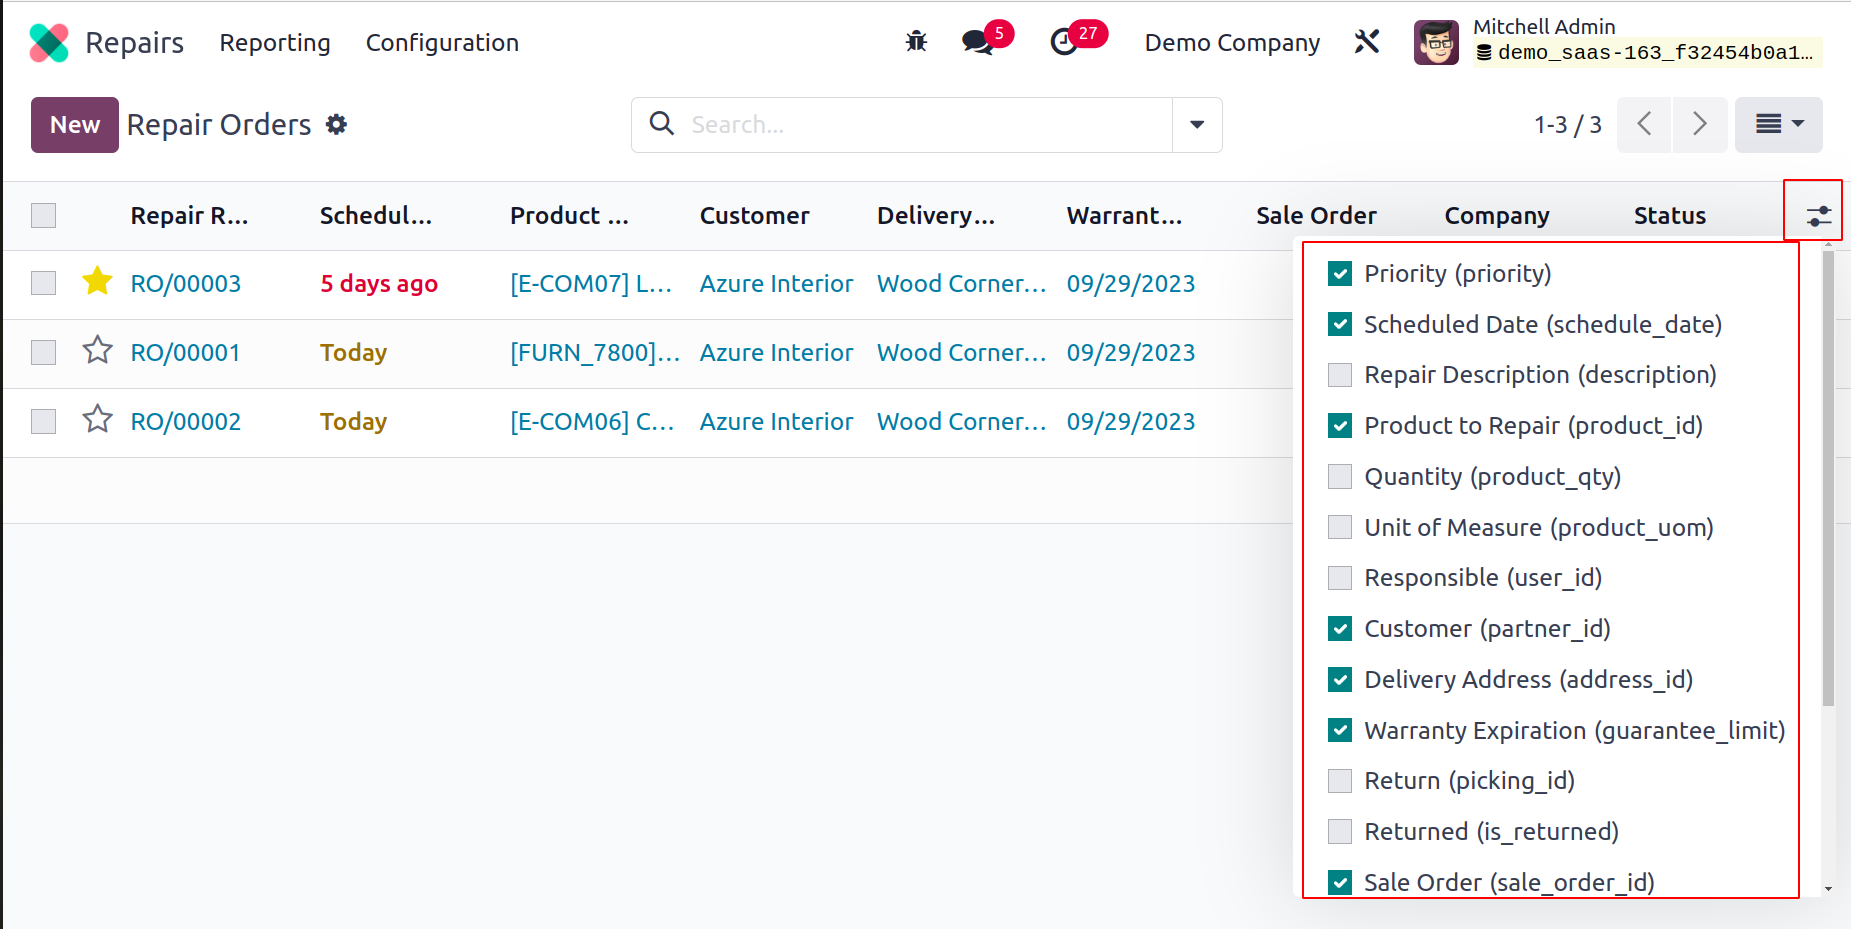
To add new fields to the list view, utilize the icon located in the top right corner of the list view. The necessary fields can be selected from the list and activated. You can use the Add Custom Field tool to create custom fields for the list view.
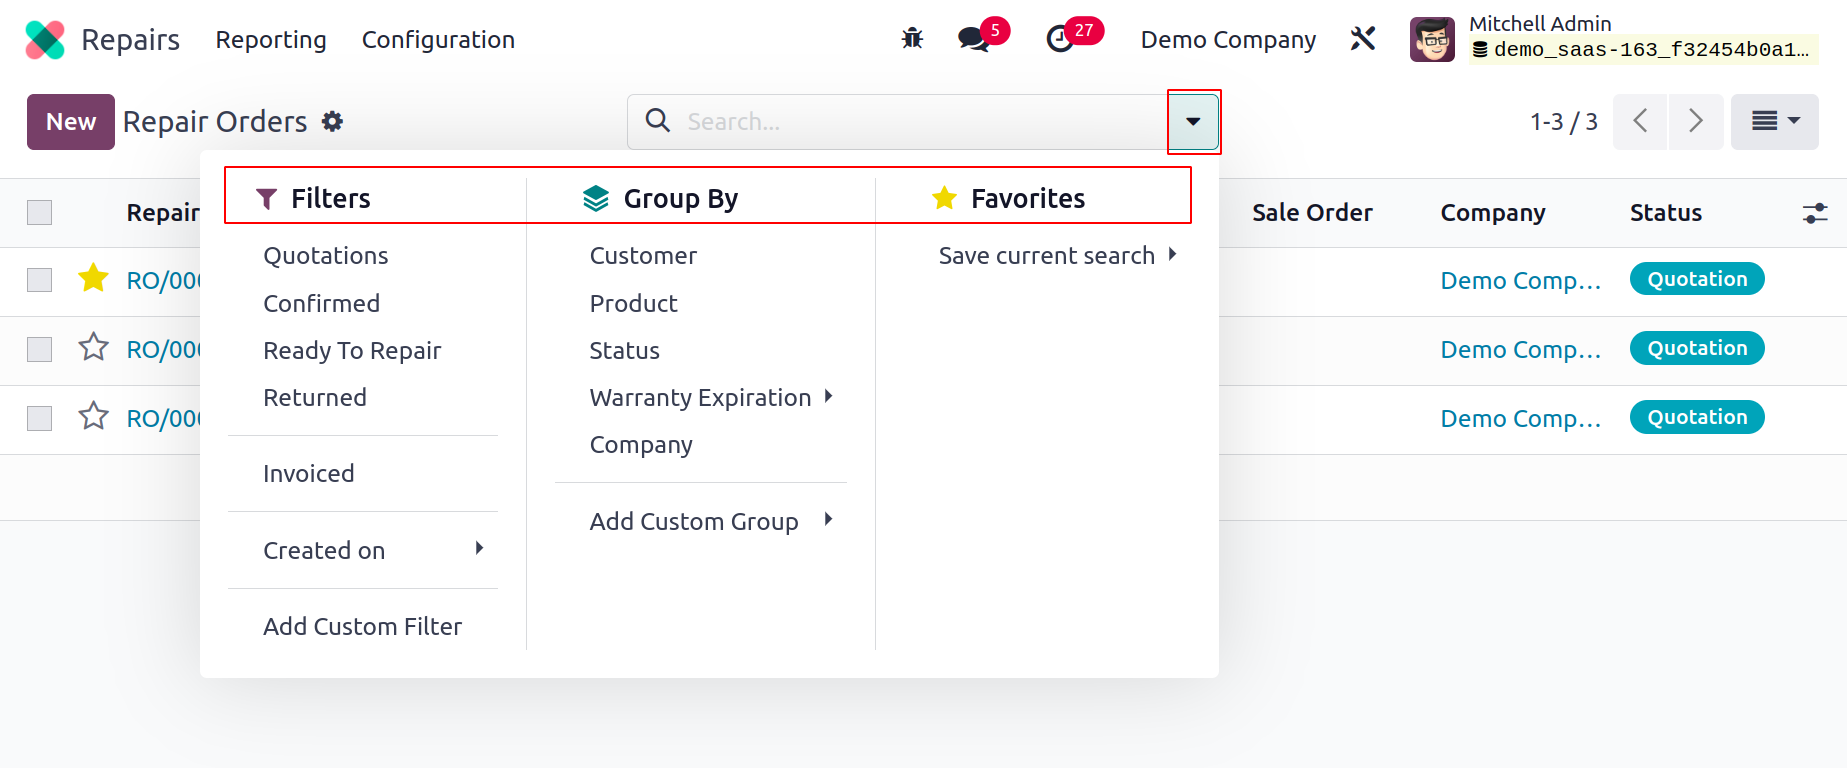
Quotations, Confirmed, Ready to Repair, Returned, Invoiced, and Created On are the platform's default filters. Create unique filters for repair requests using the Add Custom Filter feature. With the aid of the Group By feature, you may group the repair orders according to Customer, Product, Status, Warranty Expiration, and Company. By clicking on them, you can edit the repair orders that have already been created.
Click the New button to start a fresh repair request. A new form view will be displayed as seen below.
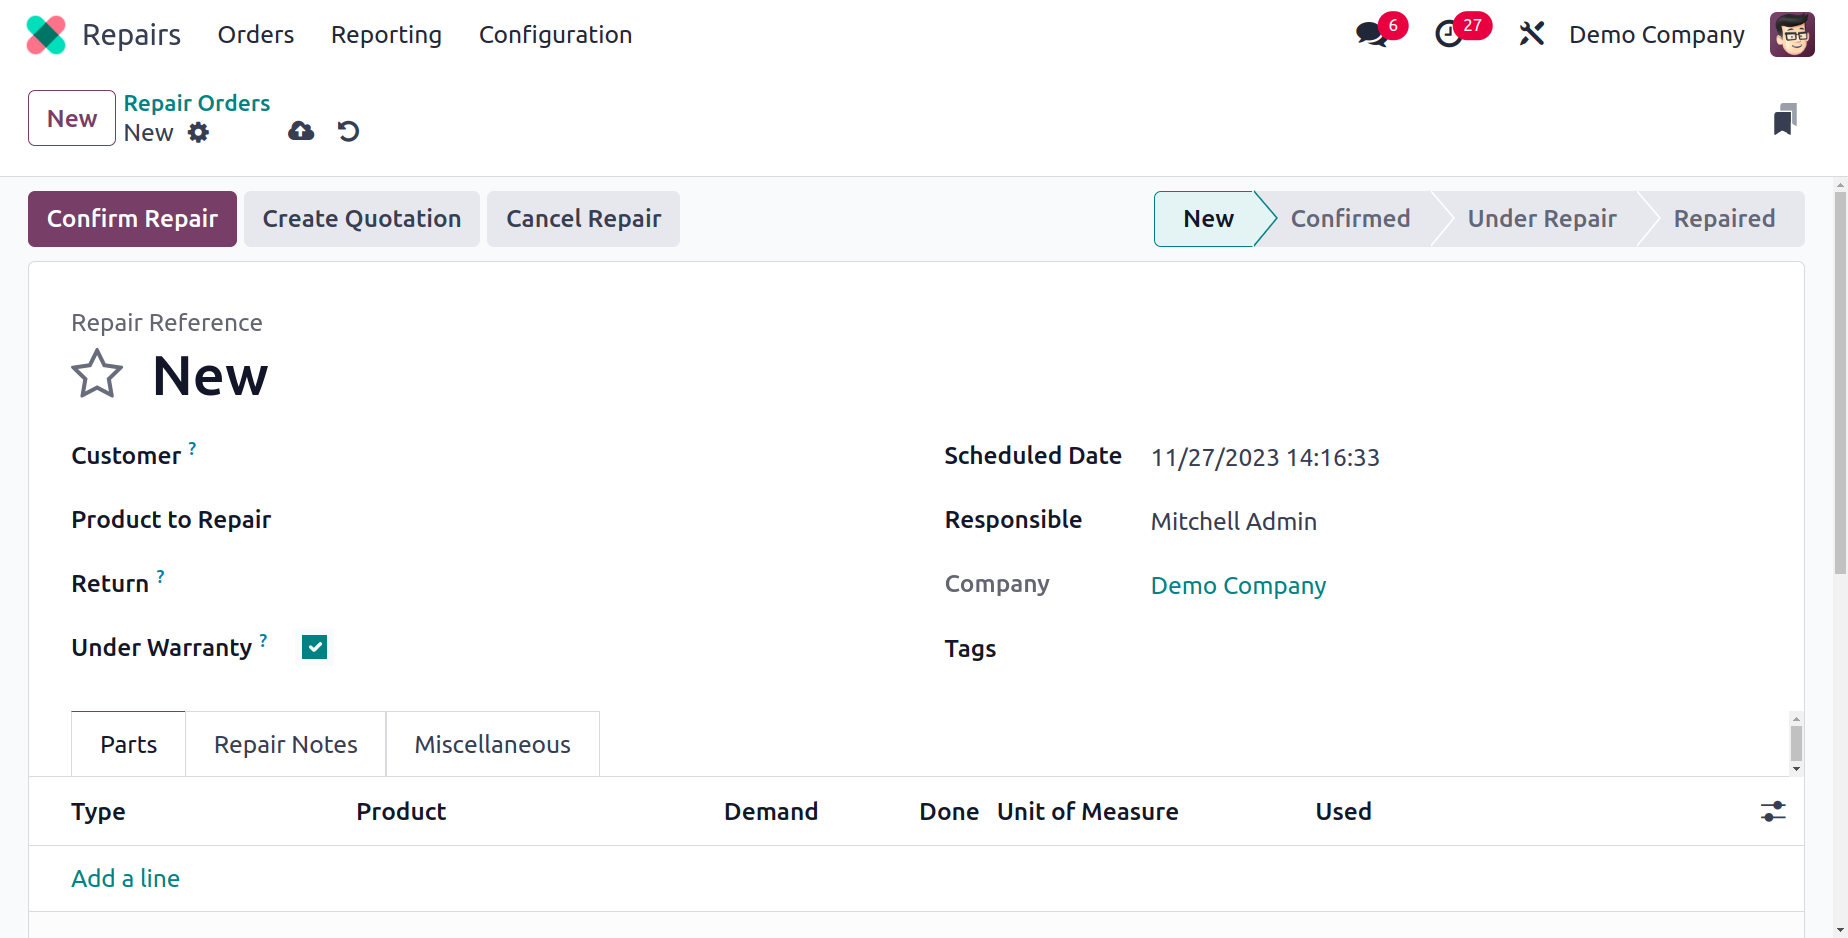
The Customer section is where you can enter the customer name who requested the repair request. You can specify the item you want to repair in the Product to Repair field. Additionally, fill out the Product Quantity section with the product's amount. To deliver the repaired item, provide the customer's information and the delivery address in the appropriate boxes. You can indicate in the Return order column if the item being repaired is one that was returned. Set a date for the product's repair on the Scheduled Date. Put a worker in the Responsible field who is in charge of the fixing process. A new field labeled "Under Warranty" will have all merchandise moved from the repair order sold at zero price if it is checked. Add Tags and the Company's name to the fields provided. You can prioritize the repair order by using the star icon that is provided next to the Repair Reference.
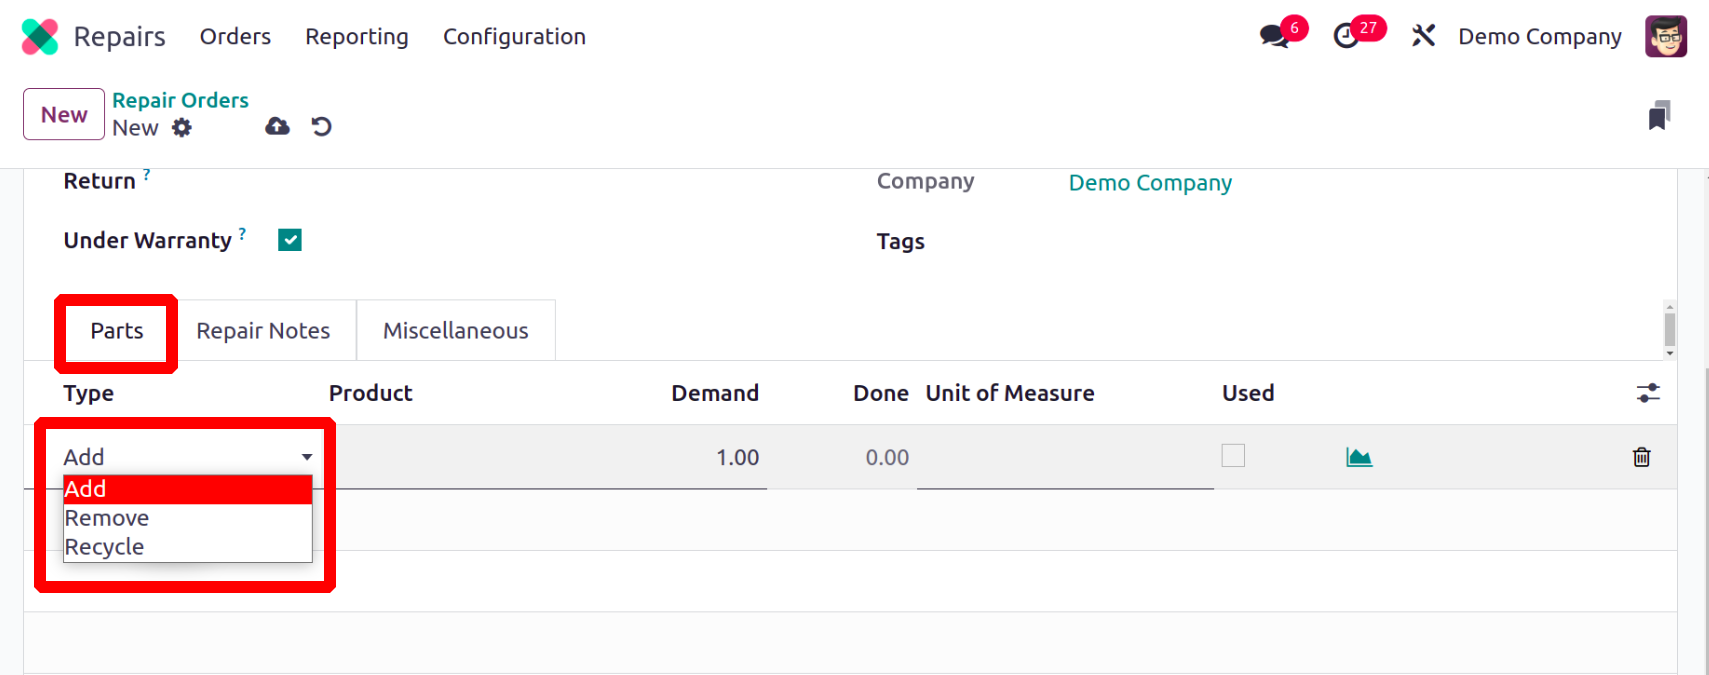
To identify the specifics of the product that needs repair, use the Parts tab. Here, we discuss the components that had to be changed or added in order to fix the product. For a list of the part's specifics, use the Add a Line button. Either Add or Remove is an option for the Type. Recycle is the newly added type here. Details for the Product, Demand quantity etc can be entered in the respective fields.
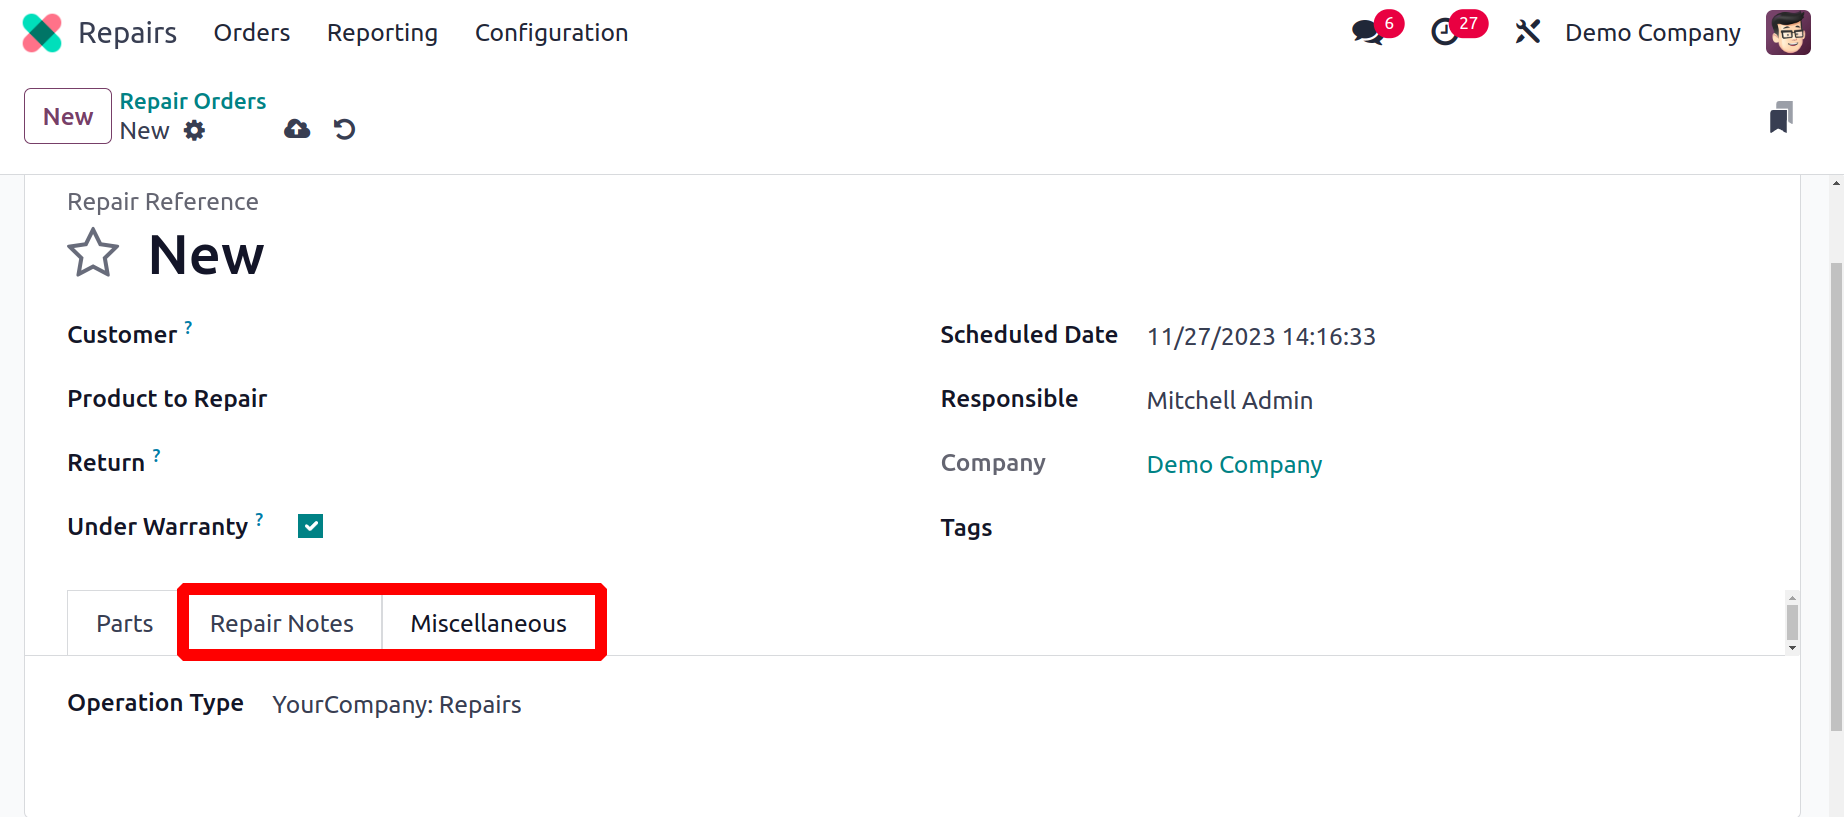
You can enter internal notes about the repair order in this field, which is designated for repair notes. To specify the Operation Type, use the Miscellaneous tab.
Once all required fields have been filled out, the repair order will appear as shown below.
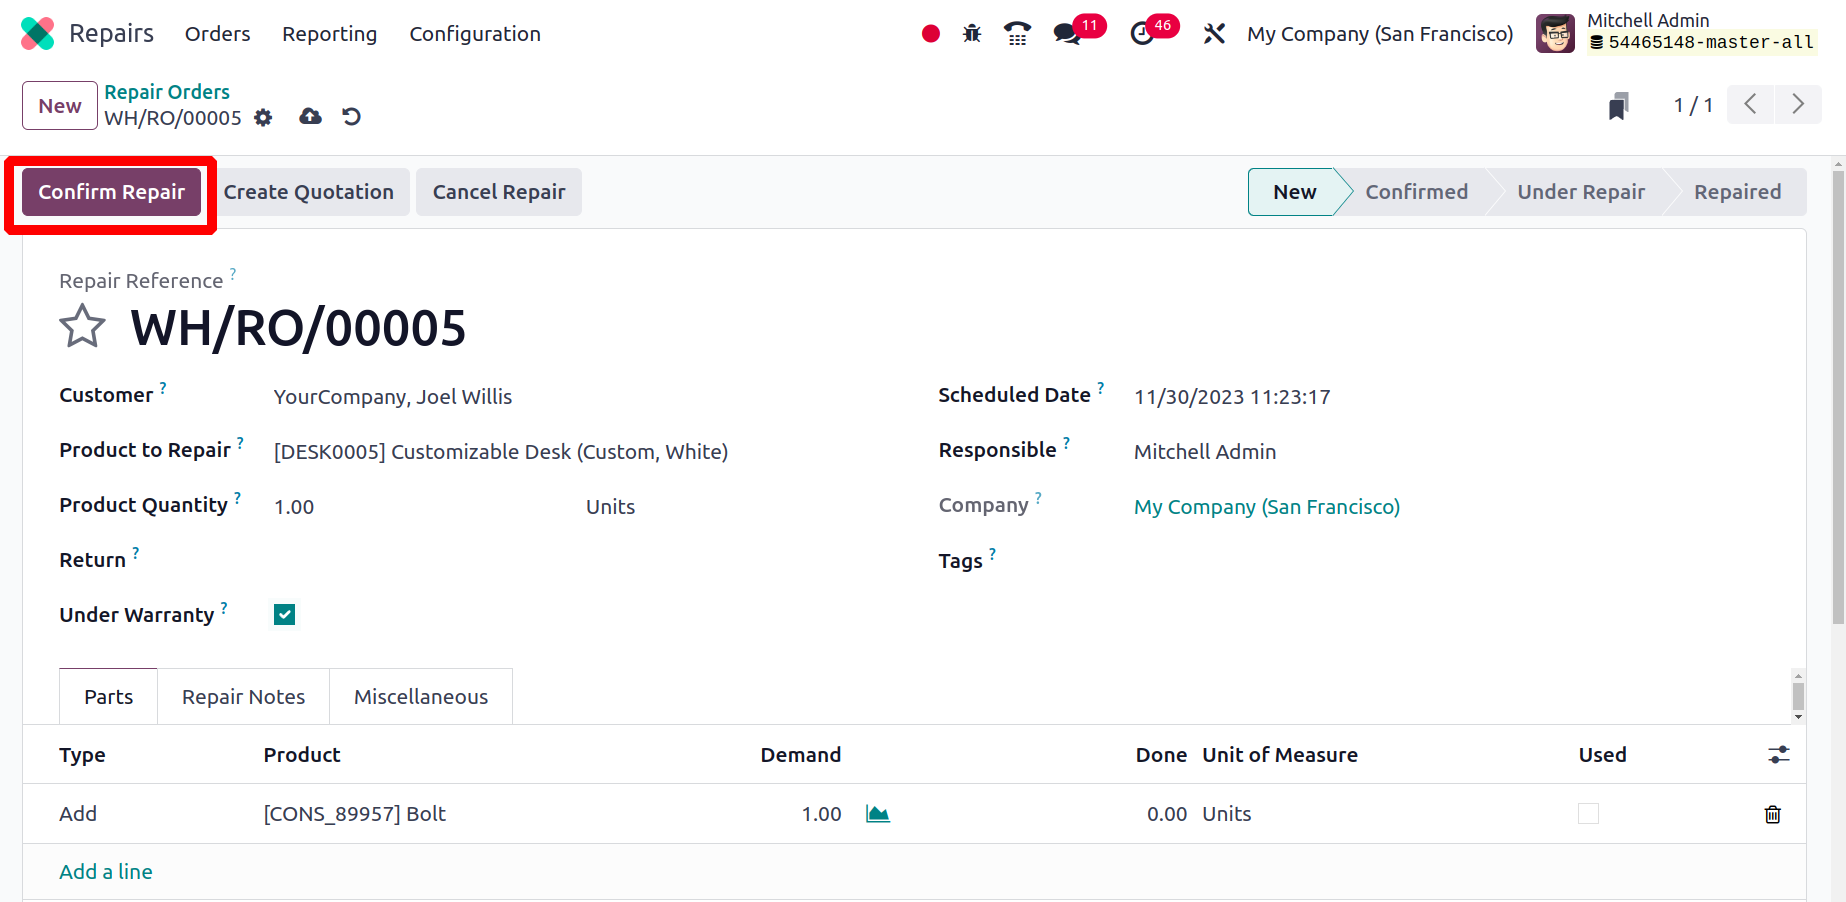
You can validate the order by clicking the Confirm Repair button. Create Quotation option allows you to create a quotation from the repair order. Use the Cancel Repair option if you want to cancel the order. We are confirming the order at this point.
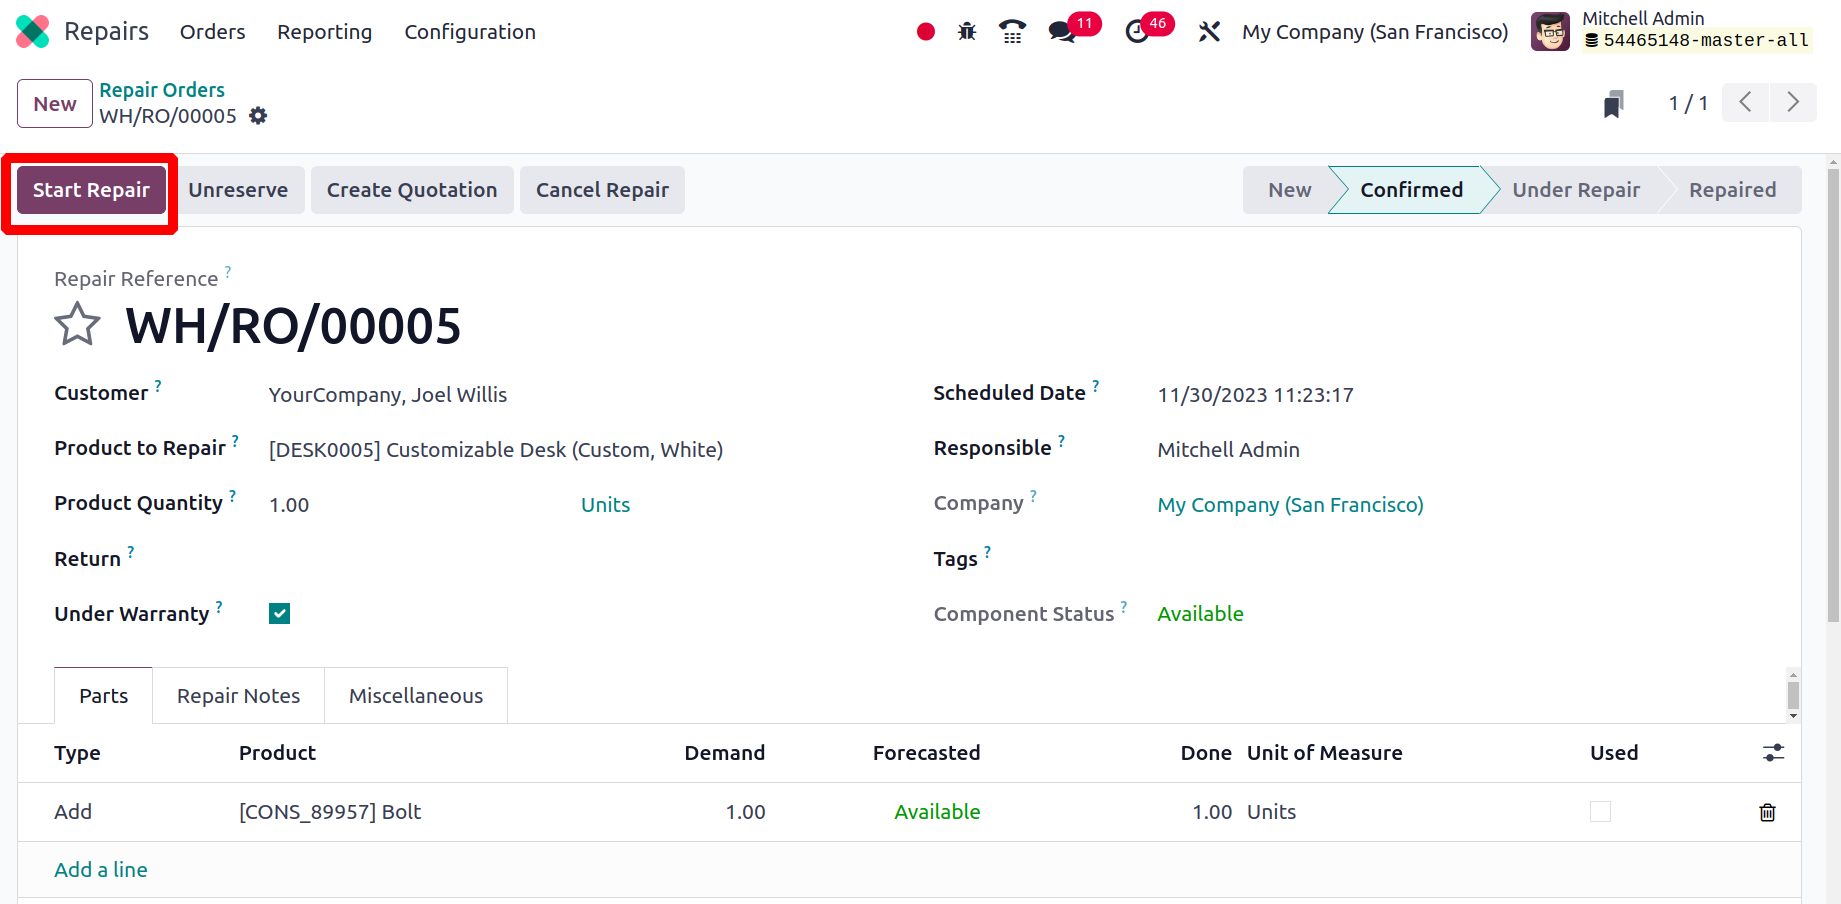
The order has been verified, as indicated by the status of verified in the screenshot above. Click the Start Repair button to begin the repair.
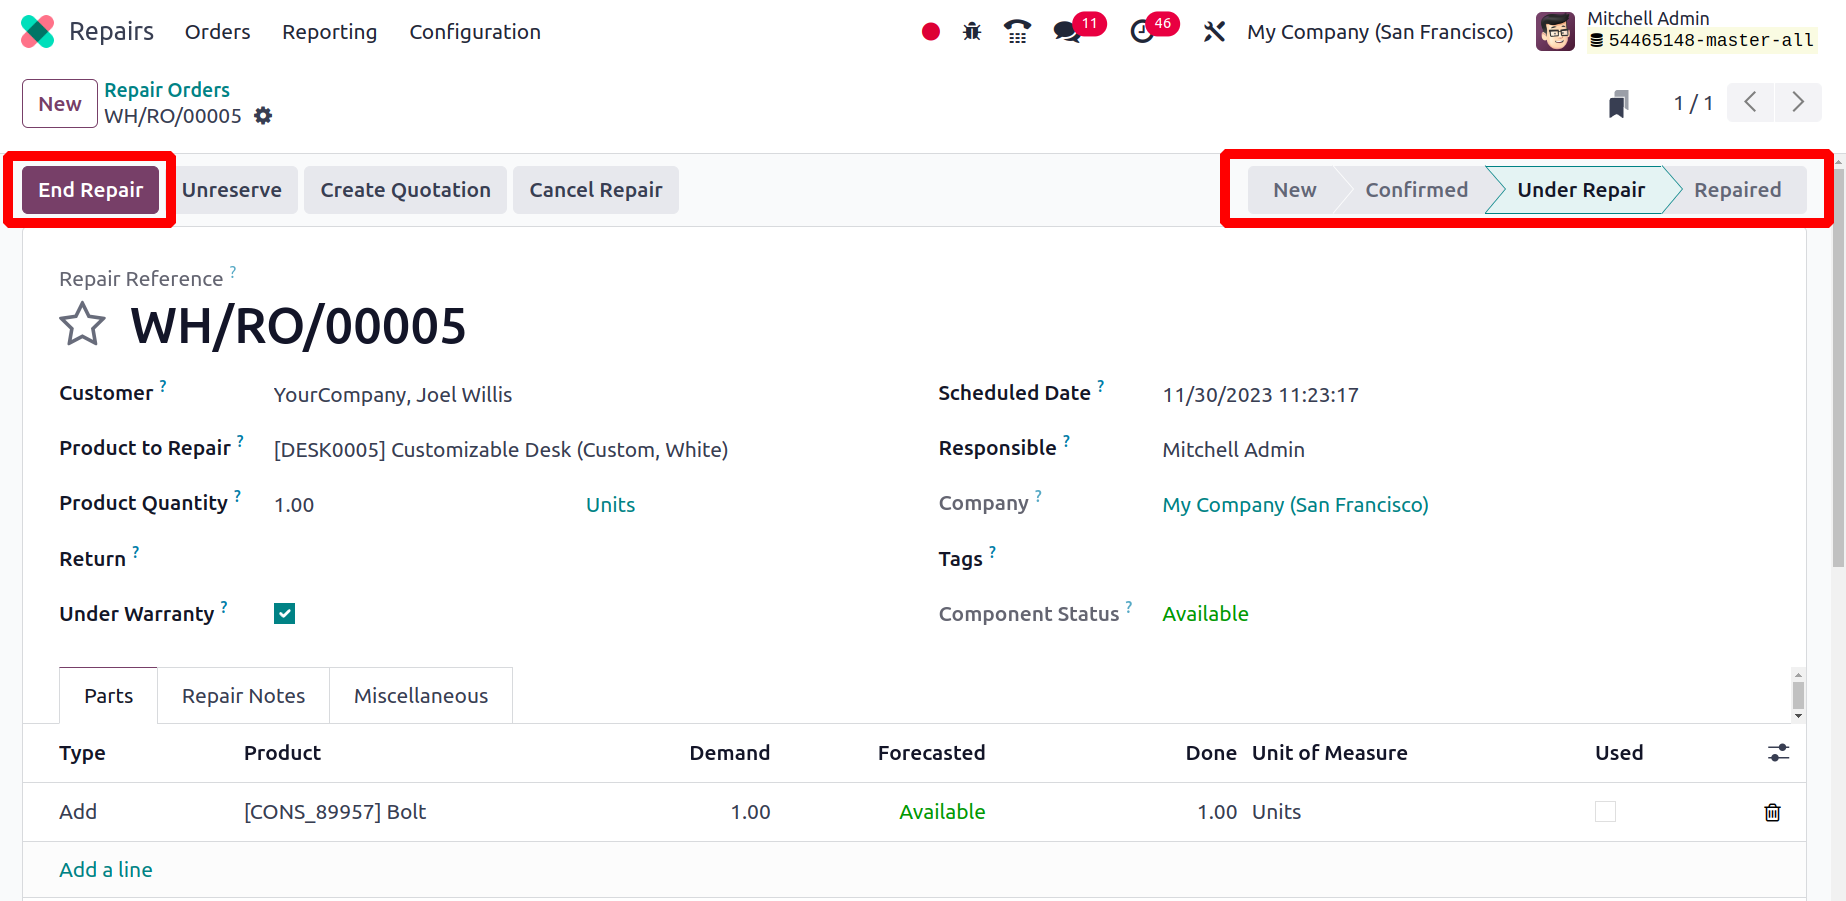
The status of the order can be shown as Under Repair while repairs are being made. Clicking the End Repair button will end the repair process.
There is a smart tab Product Moves, by opening that smart tab, the product movement after repair will be shown. Information about the Date, Reference, Product, Lot/Serial Number, From, To, Quantity, Unit, and Status are included in this. Information about the Date, Reference, Product, Lot/Serial Number, From, To, Quantity, Unit, and Status are included in this.

The repair is now completed. The users can generate a fresh quotation from the repair order by clicking the Create Quotation button.
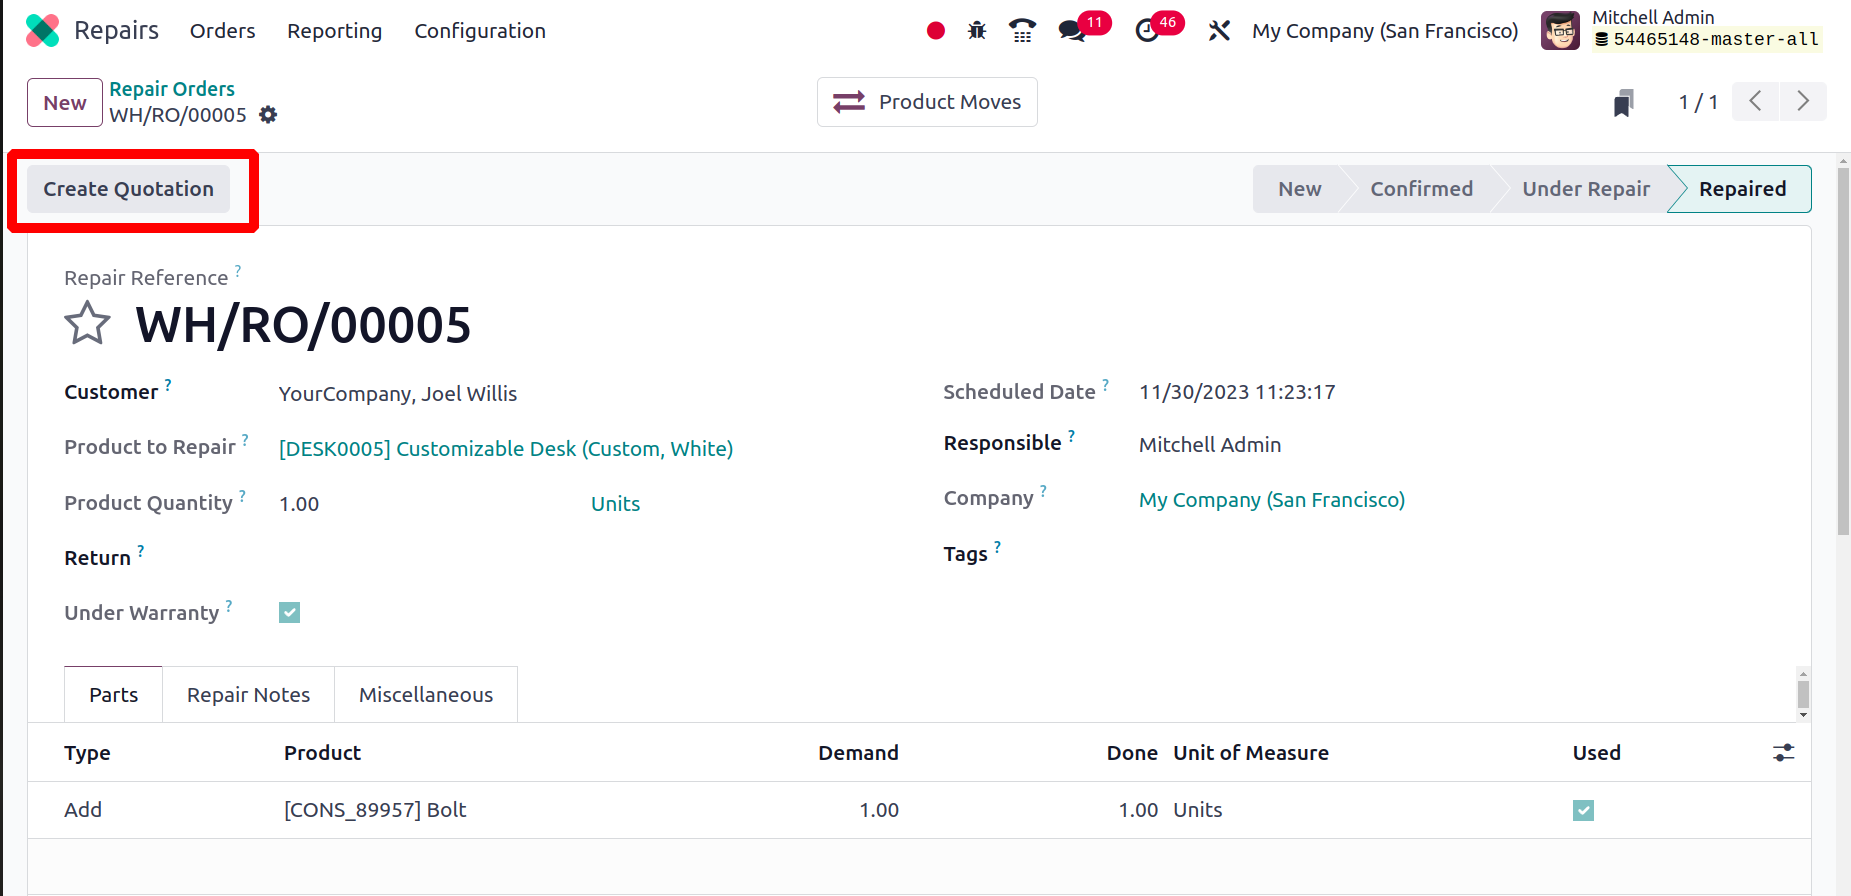
Because the Under Warranty field on the Repair order is enabled, the quotation order indicates that the product price is $0.
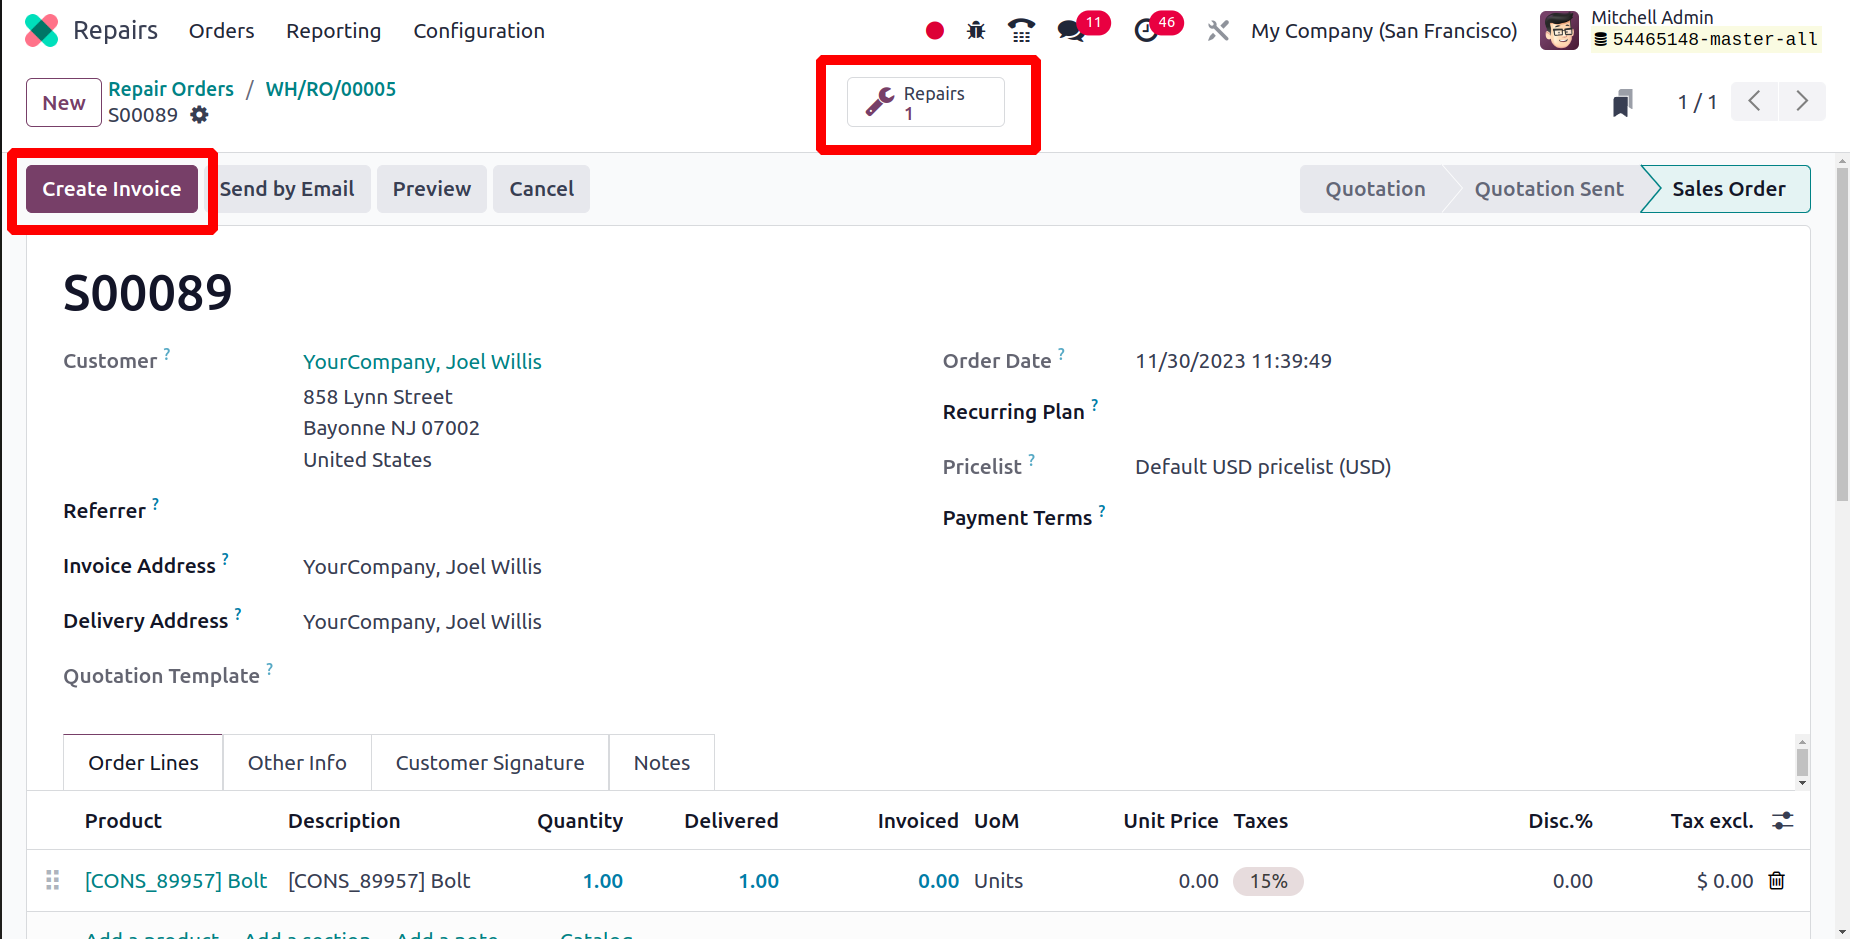
As a result, now that the repair is finished, users can generate the invoice from the Quotation. To do this, select Create Invoice from the menu.
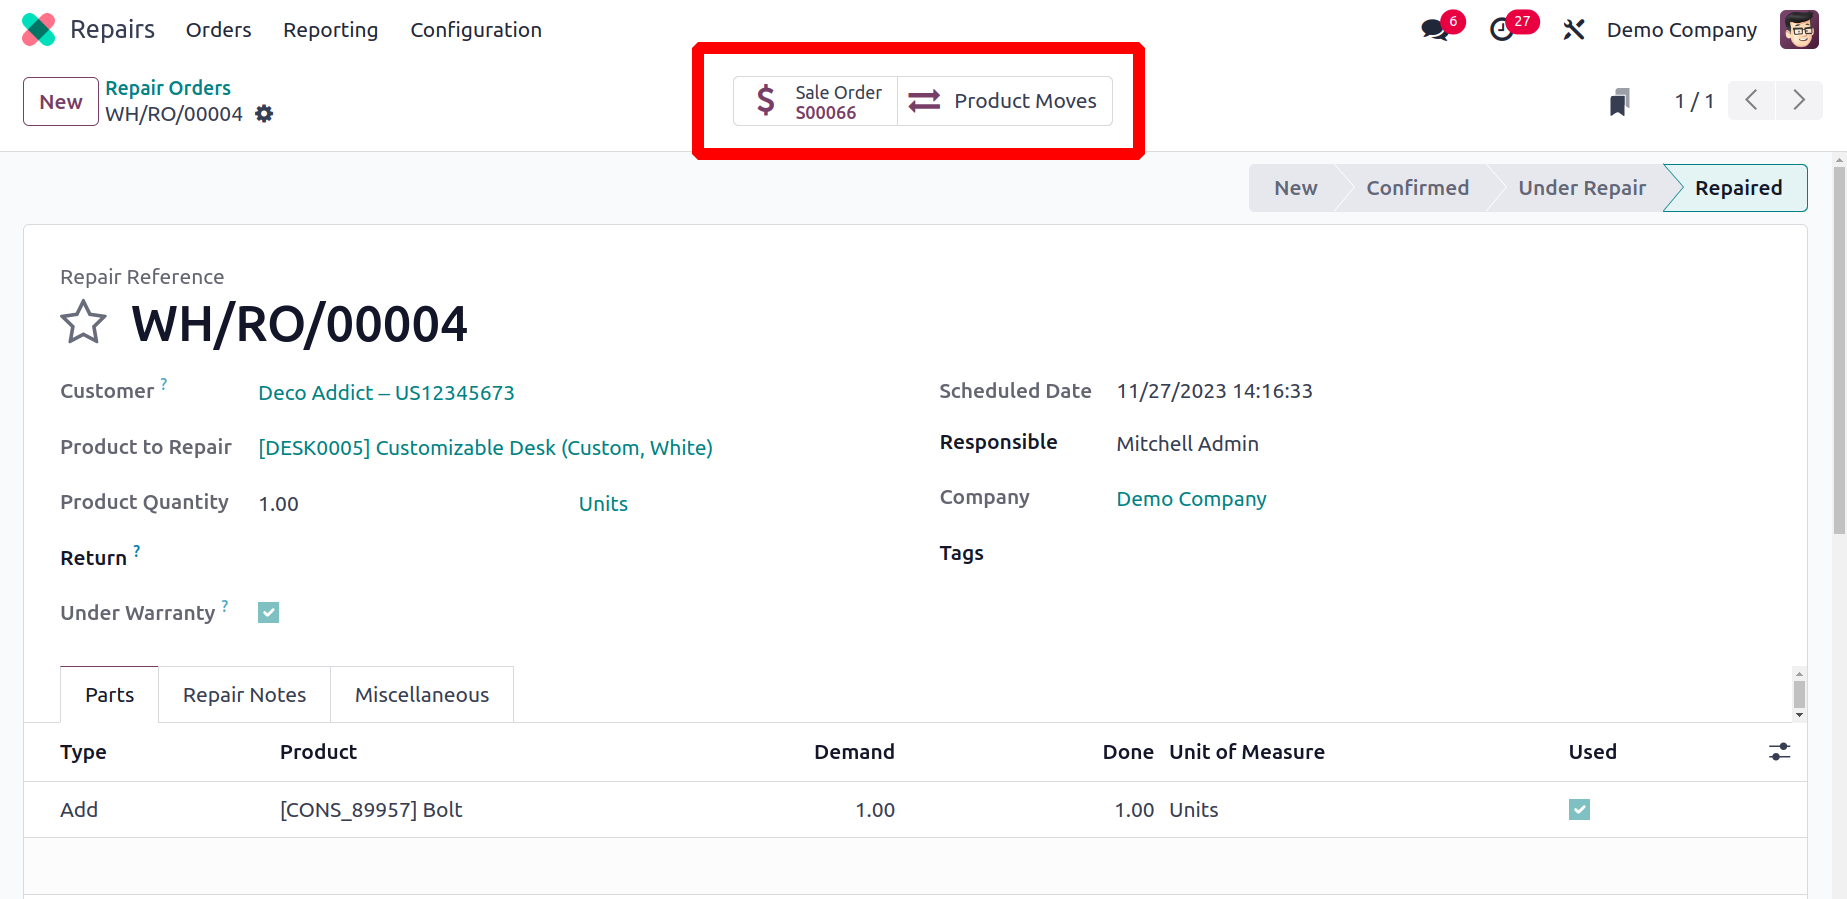
The Sales Order for the repair will be displayed on the screen by a smart button that will emerge.
Repair Orders Tags
The Repair Orders Tags option can be found under the Configuration menu of the Repair module and is used to establish tags for the repair orders. The portal will display tags for repair requests that are already available.
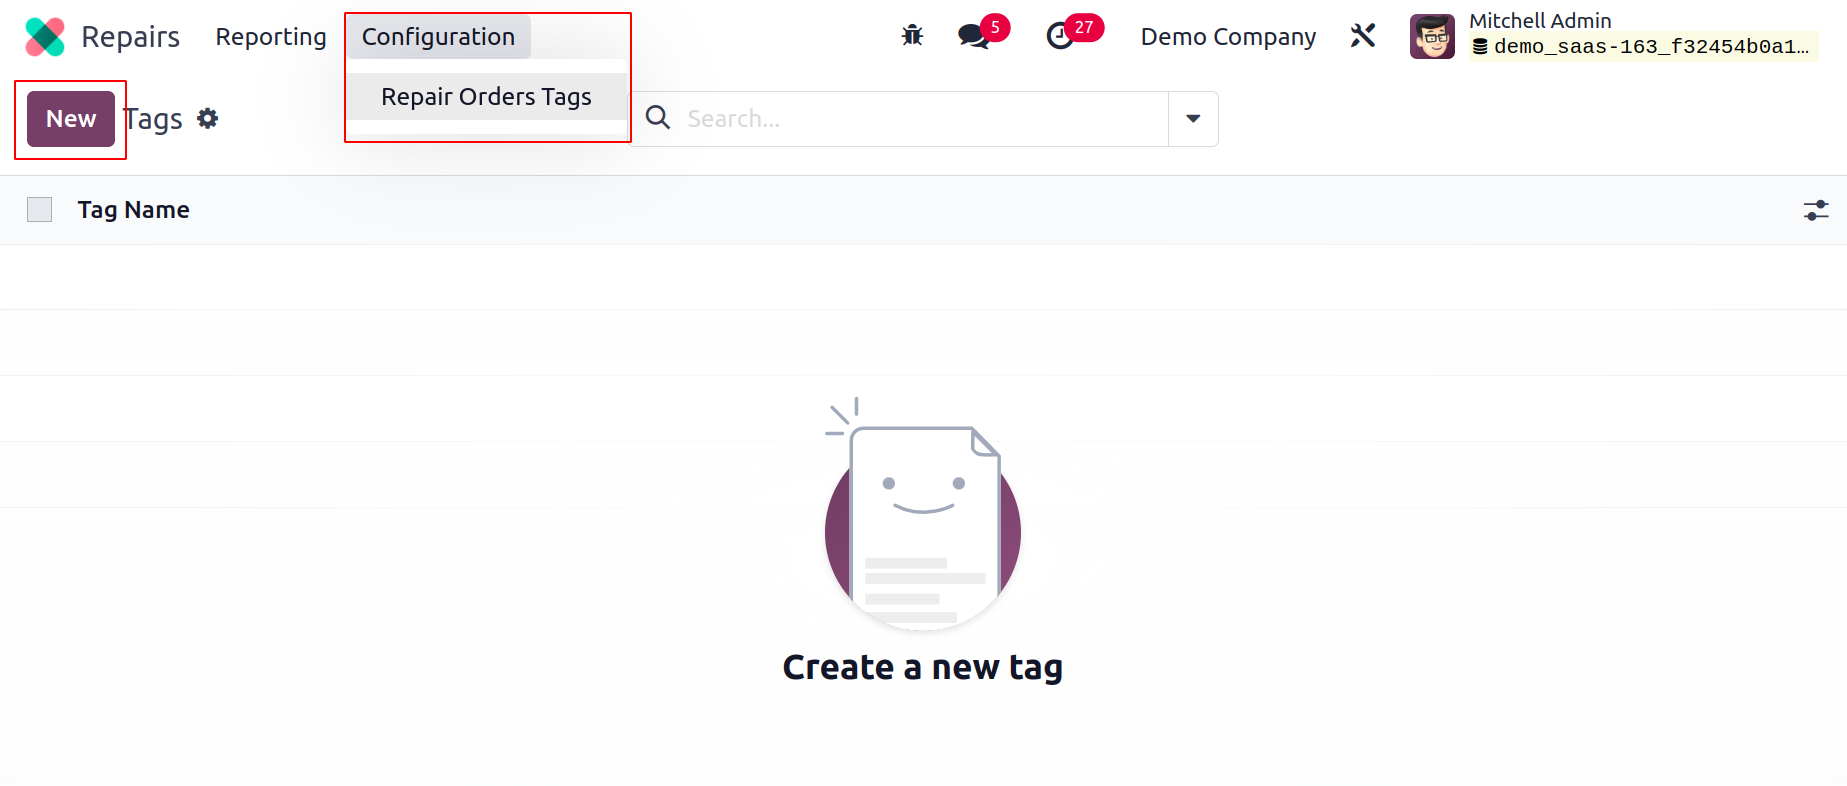
Clicking the New button will allow you to add a new tag. The new button, which can be found below the list of available tags, when clicked, creates a new line.

The tag's name may be mentioned here. From this platform, you can quickly create as many new tags as you like.
So the product repairing process can be easily handled by this Repair module.