Recruitment
Recruitment Management
An effective recruitment strategy is the main responsibility of the human resources
department of an organization. This is the first step in the success of an organization.
Whether your firm staffing applies to an organization will be determined by how
effectively the selection process and recruitment management are managed. It enhances
your company's business productivity. The Odoo 17 Recruitment module can help you
determine the ideal hires for your business. The Odoo 17 application is where you must
install the Recruitment application.
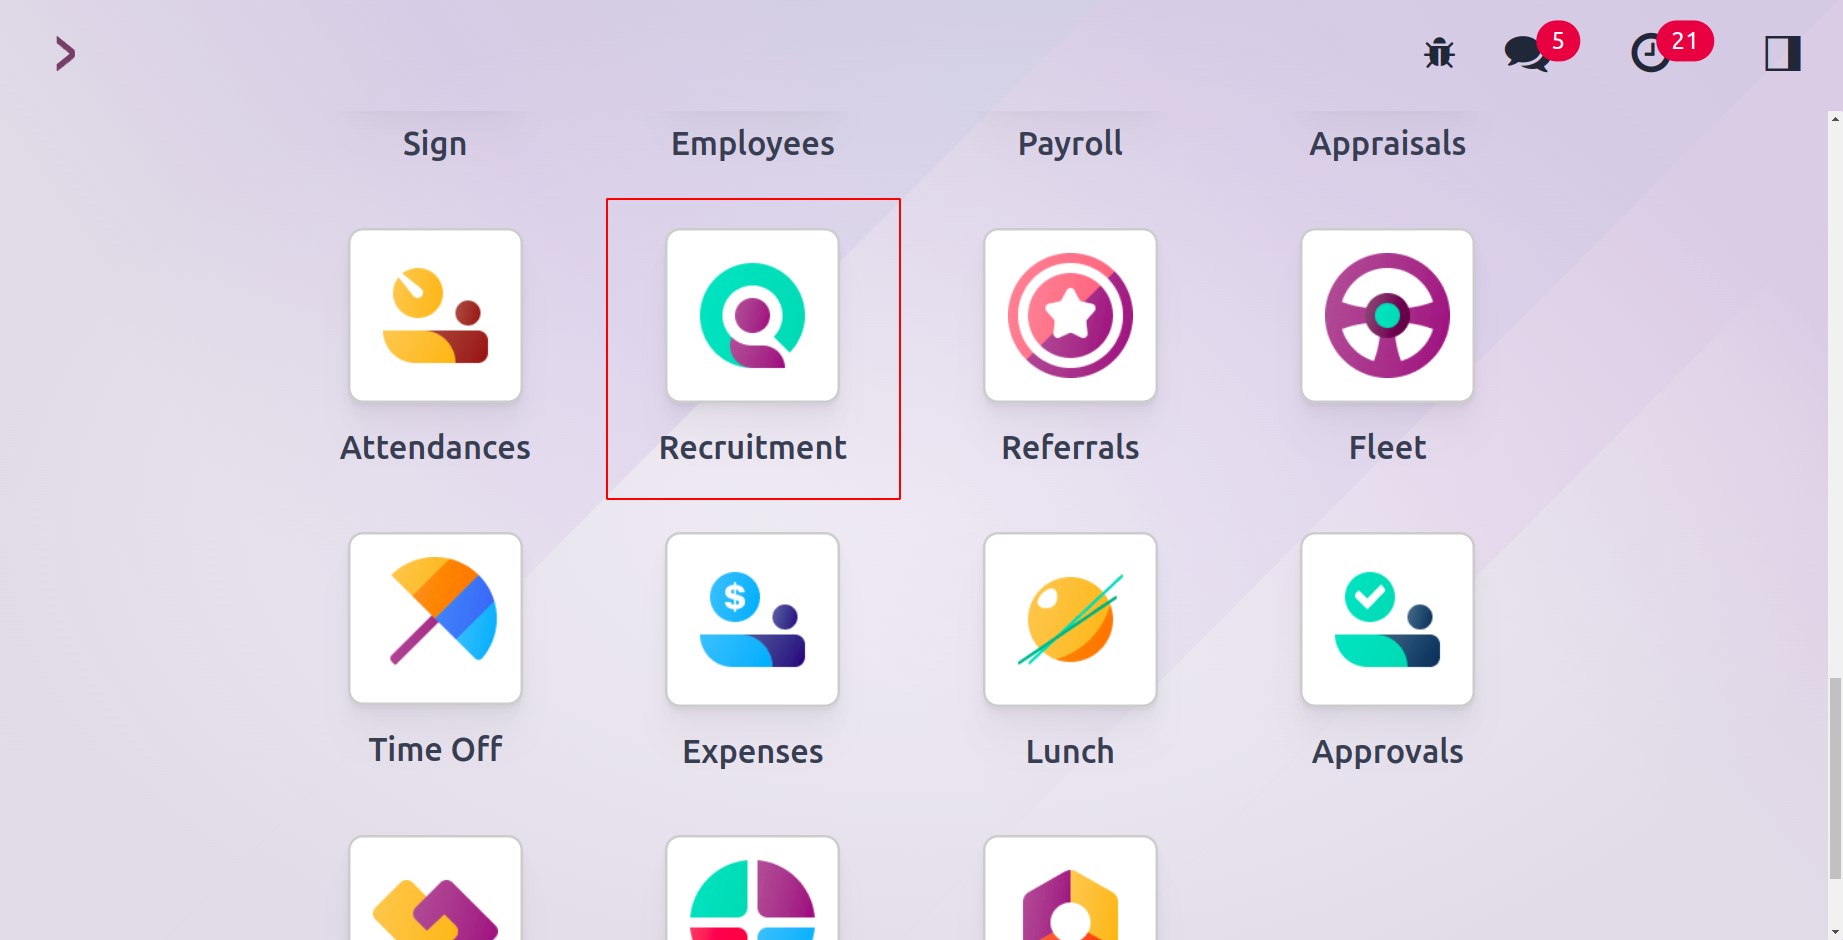
You will see the dashboard window for the Odoo 17 Recruitment module after selecting it.
The user can view a list of all open positions in the Job Positions pane. The user can
view the specifics of each job post in the Kanban view, including the department,
whether it has been published or not, the number of applicants, any late activity, the
firm name, and other information.
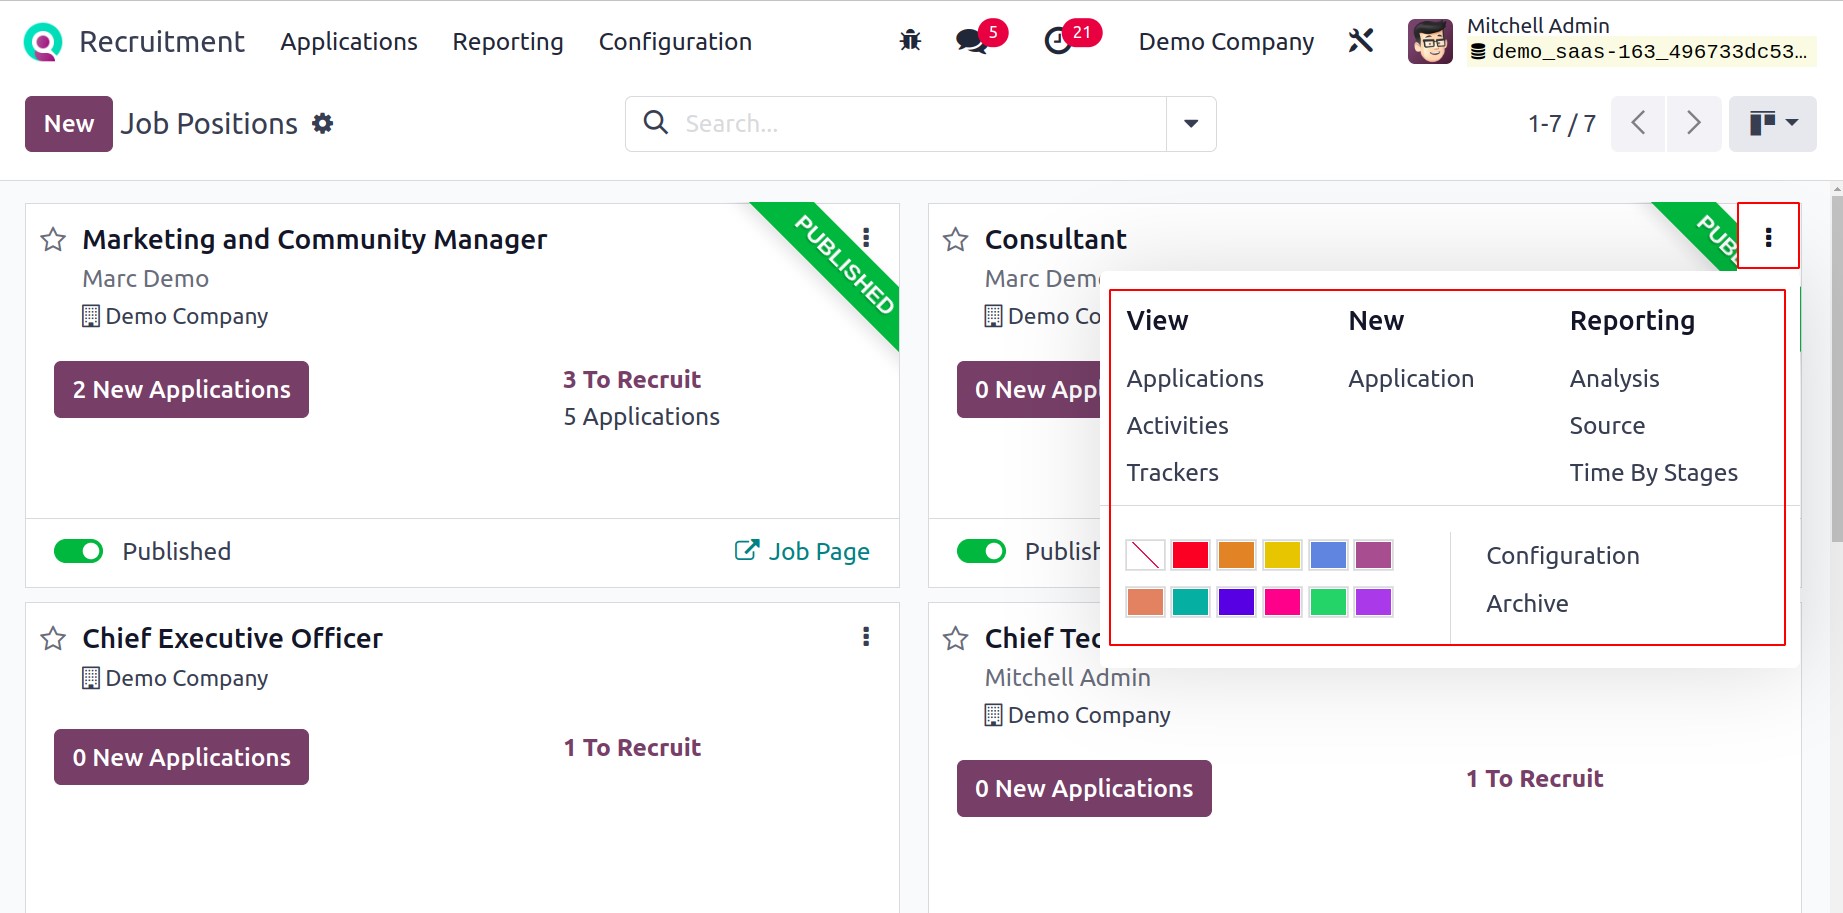
By selecting the three dots at the right end, you may browse applications, interviews,
trackers, activities, and review reports. Additionally, a number of sorting options are
visible under Group By, Filters, and Favourites. Job openings can be filtered based on
favorites, published messages, archived communications, unread messages, and custom
filters.
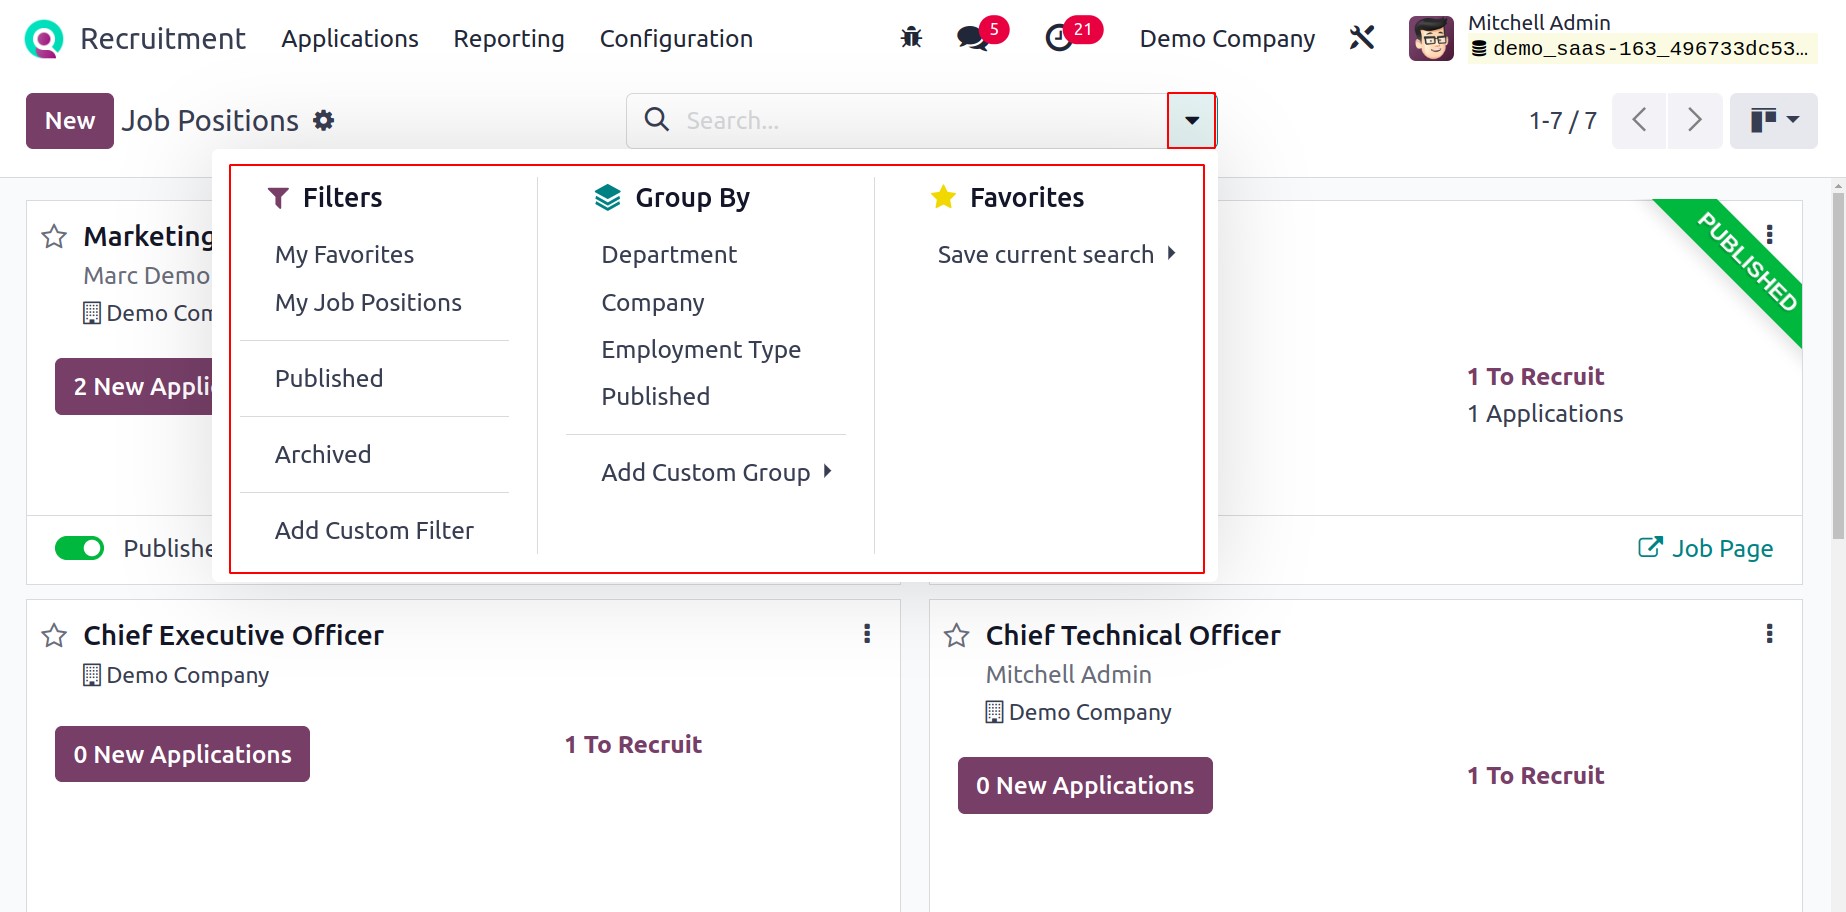
You can sort job openings by business, published, department, and employment type, and
add a custom group beneath the Group By area. You can import records, put links or views
into articles, preserve a current search, and add items to my dashboard inside the
Favourites area. Select the New icon in the Job Positions box to define a
new employment position.

Before use, a new window opens when the New icon is clicked. Enter the job role's
name in the Job Position area of the Create a Job Position dialogue. After submitting
your application for the job, click the Create button in the pop-up box.
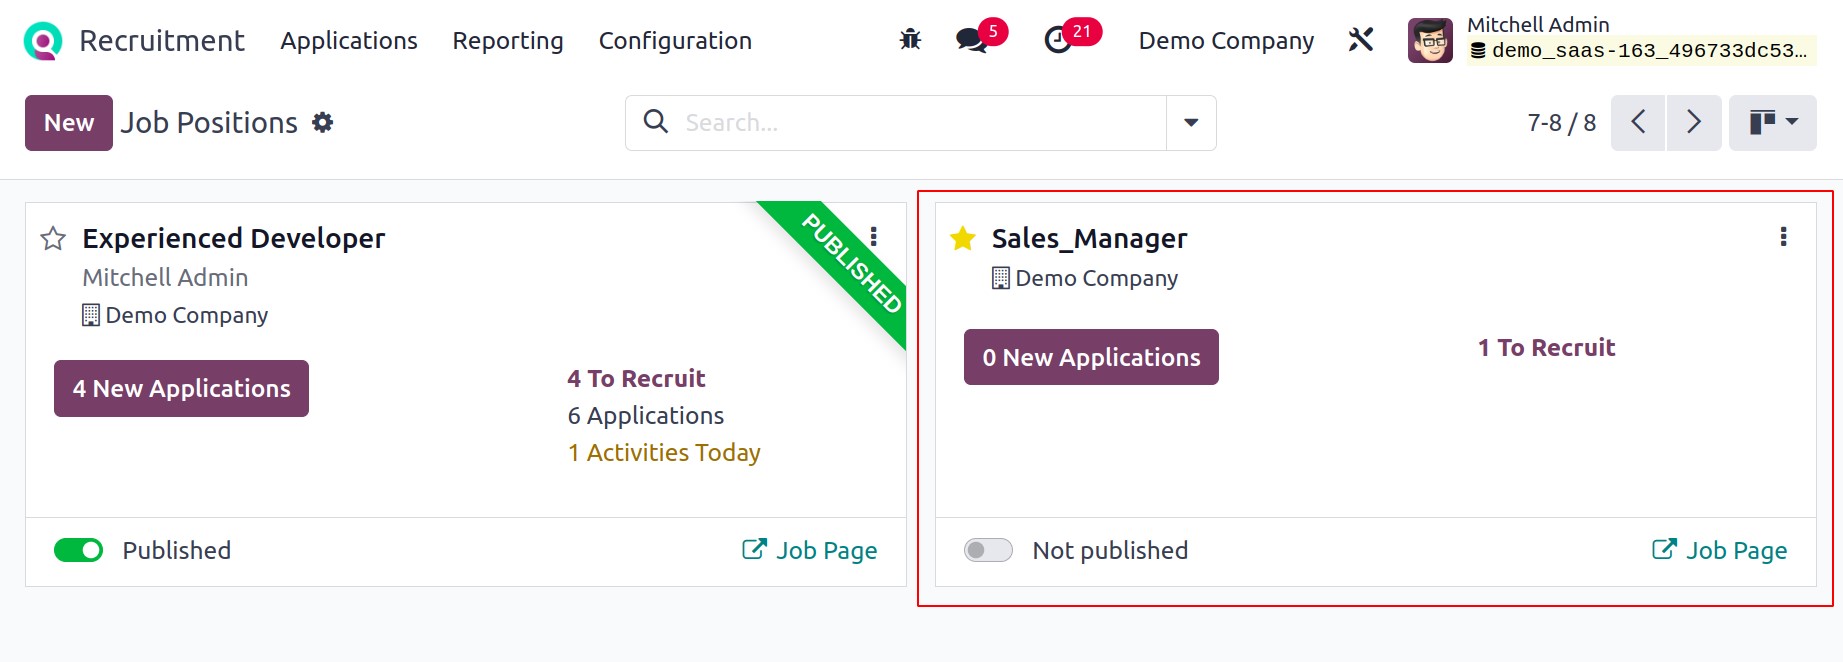
The newly created job post is accessible to users in the Job Positions pane. As a
Sales_Manger, creating new job posts is now simple.
You may easily post a job here and discover how many new applicants there are. When you
click on the NEW APPLICATIONS icon, you will be sent to the job position window.
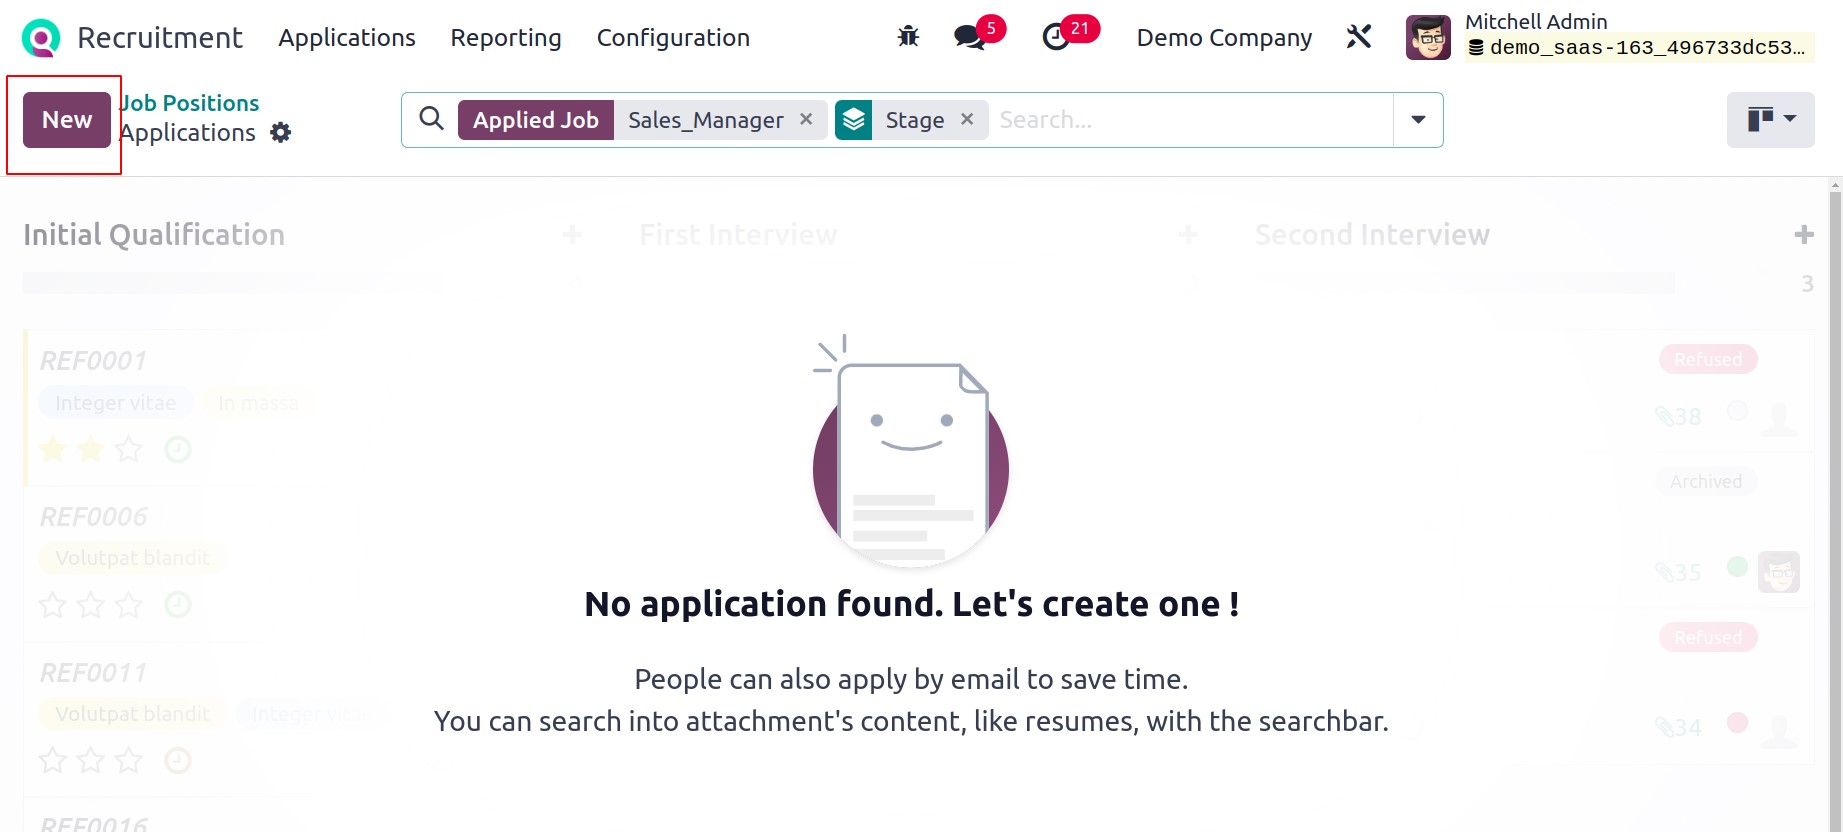
Press the New icon in the Applications box to define a new application.
In the open window, you can get recruitment details about a job posting. Put the name of
your organization and the department in charge of a certain employment sector underneath
the Recruitment section.
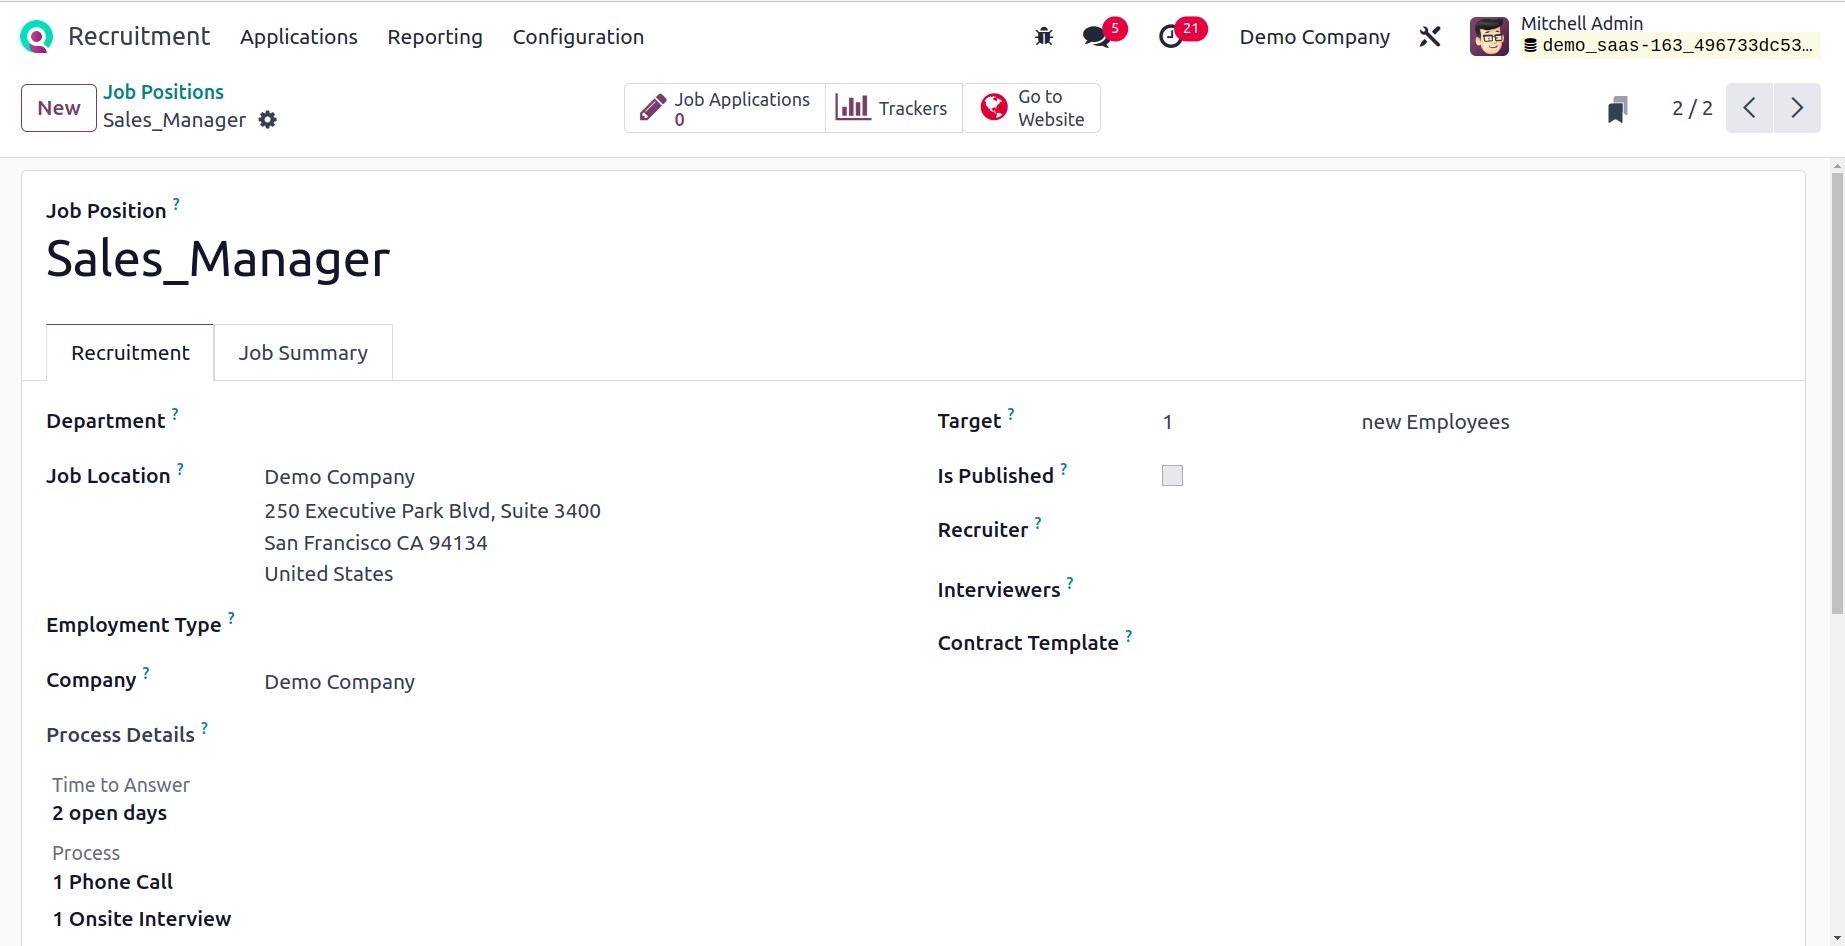
The Job Location option lets you see the address of a worker. Within the Job
Position option, you can specify the employment category as permanent,
replacement, temporary, and more. Add the number of workers you anticipate hiring from
the Target field.
If the employment opportunity is to be published on the website, users can enable the
Is published option. Next, fill out the Recruiter section with the name of the
individual doing the hiring. Mention the panel of interviewers who will be conducting
the hiring process as well. A form for an applicant must be selected from the Interview
Form option in addition to these.
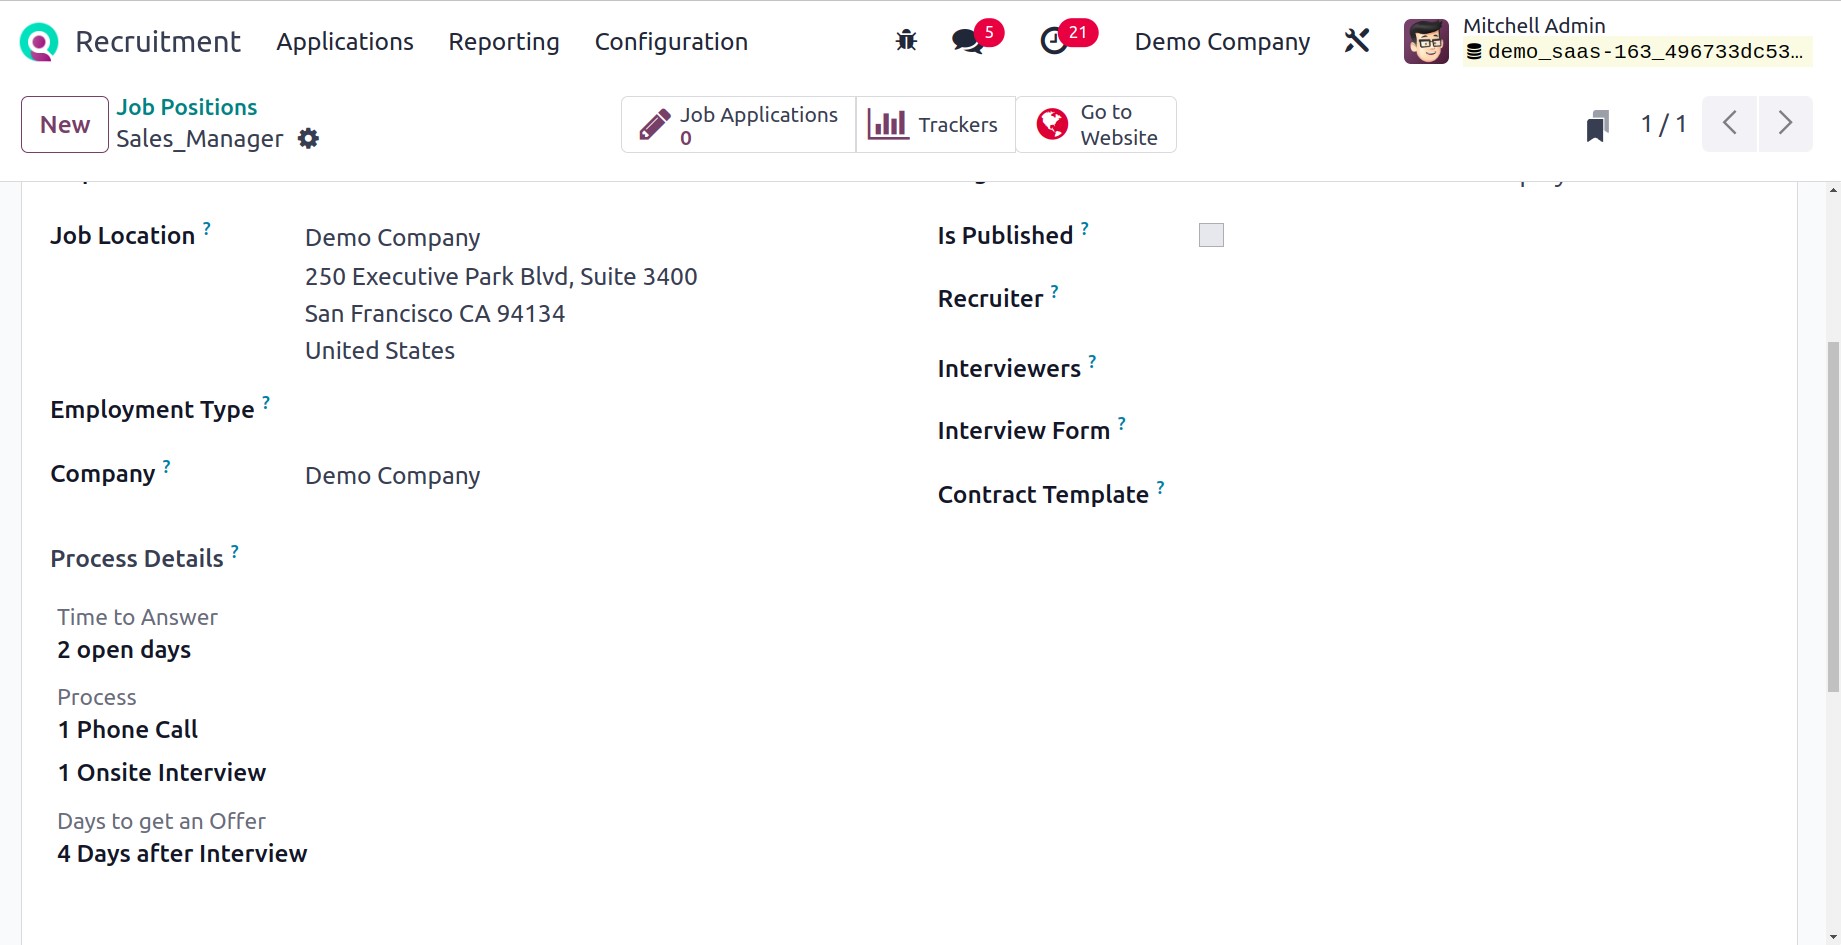
After choosing the form, go to the Contract Template option and select the
default template for the job posting. After that, you can choose the website for
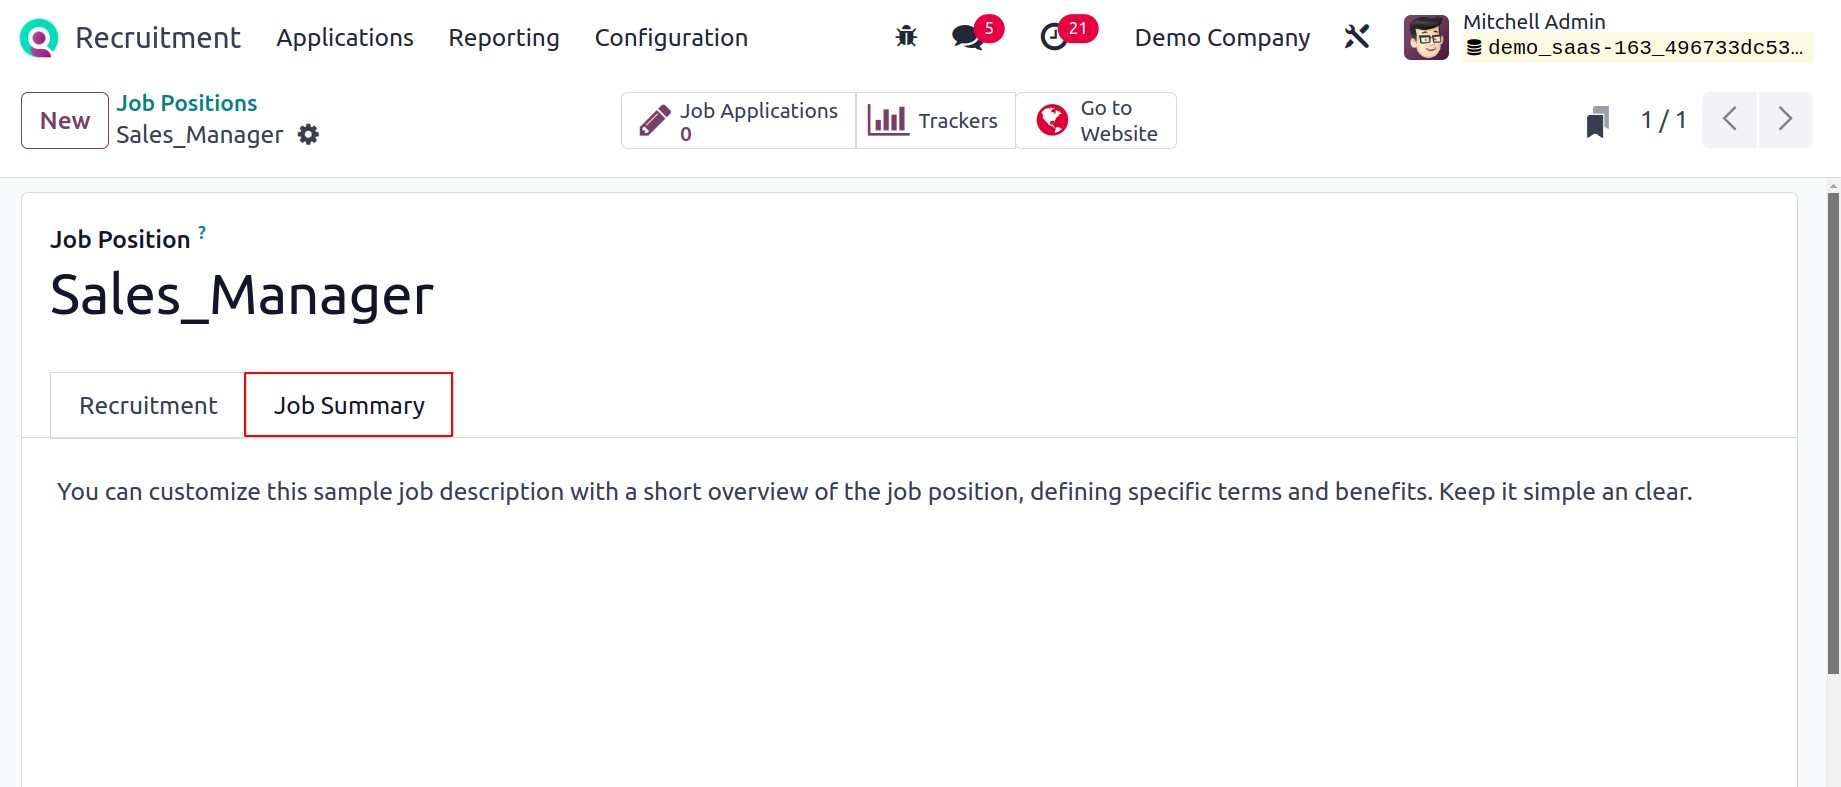
your job posting. You can add in-depth job descriptions underneath the Job
Summary tab.
Additionally, a number of intelligent options are accessible at the top of the Job
Position pane. The Job Applications smart button allows you to check the total
number of jobs. Additionally, the Documents smart menu allows you to view the
complete list of files. It is simple to track each job posting after selecting the
Trackers smart menu. Finally, by selecting the Go To Website smart button, you
may post the job position.
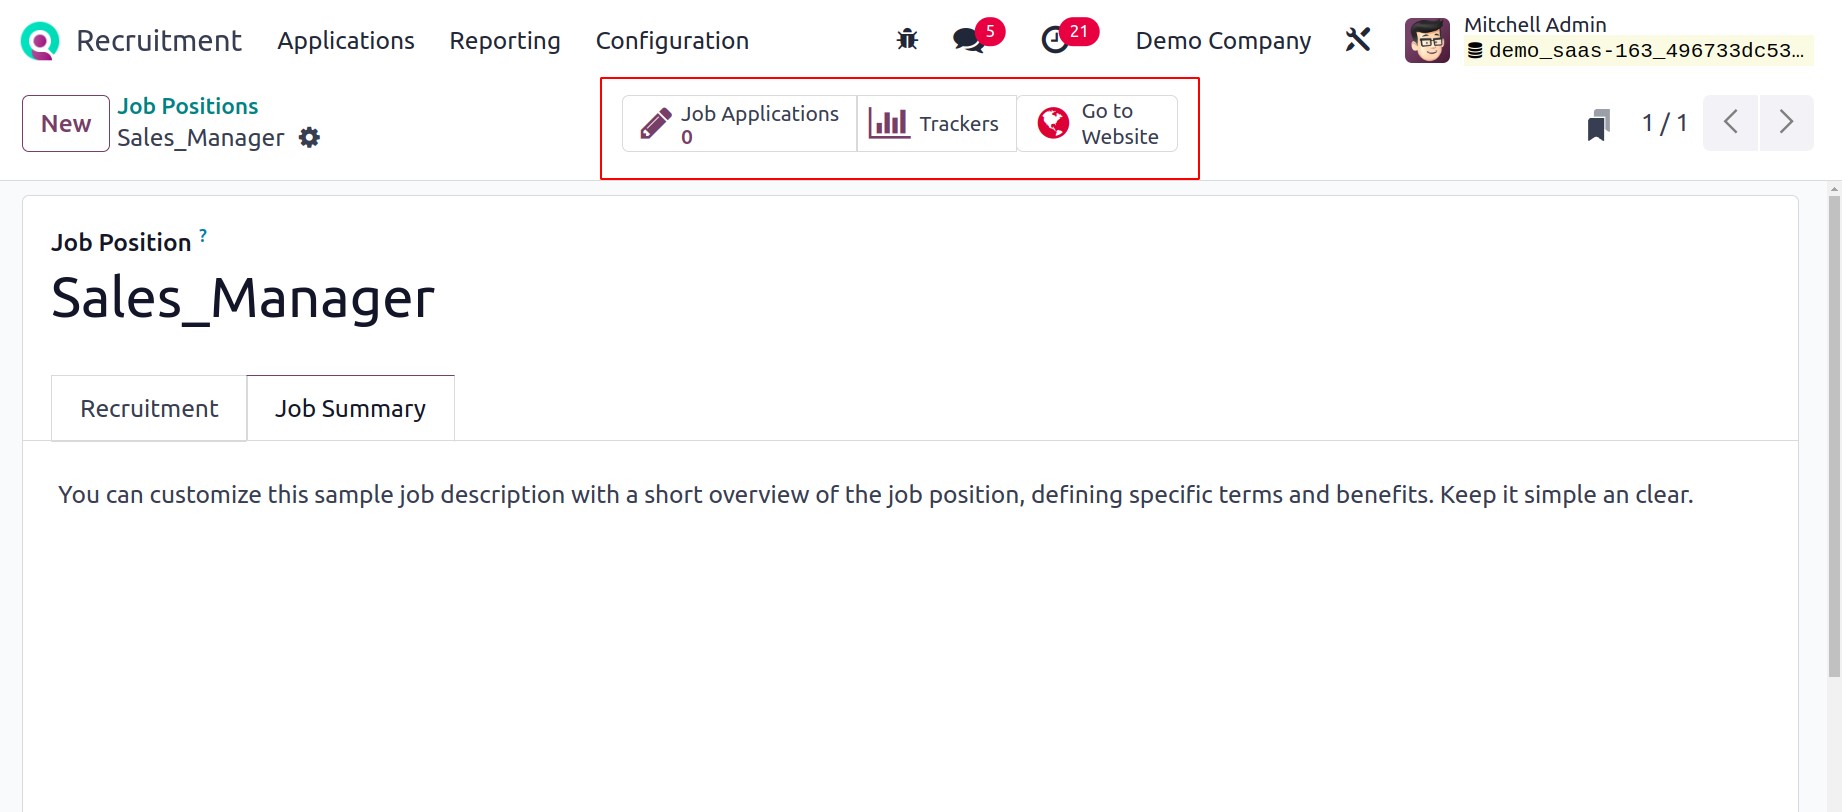
After selecting the Go To Website smart symbol, the user is presented with the
website page. Change the unpublished option to public to publish the job role.
Candidates can view the job post's description on the website.
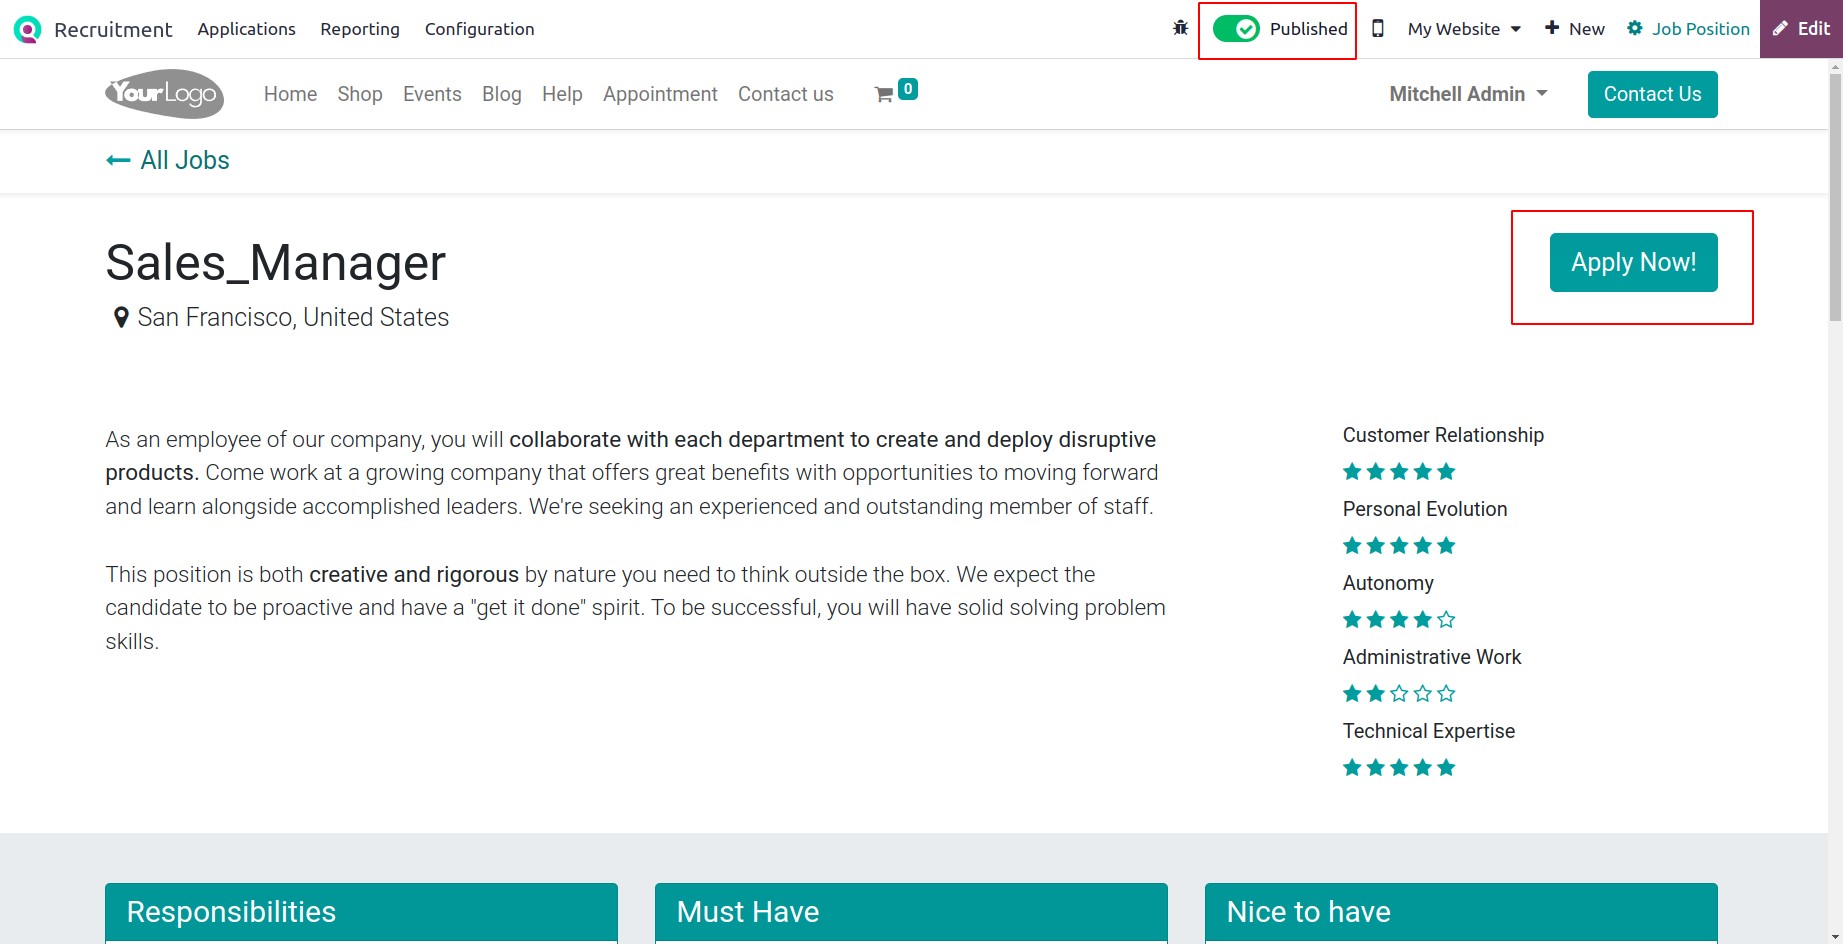
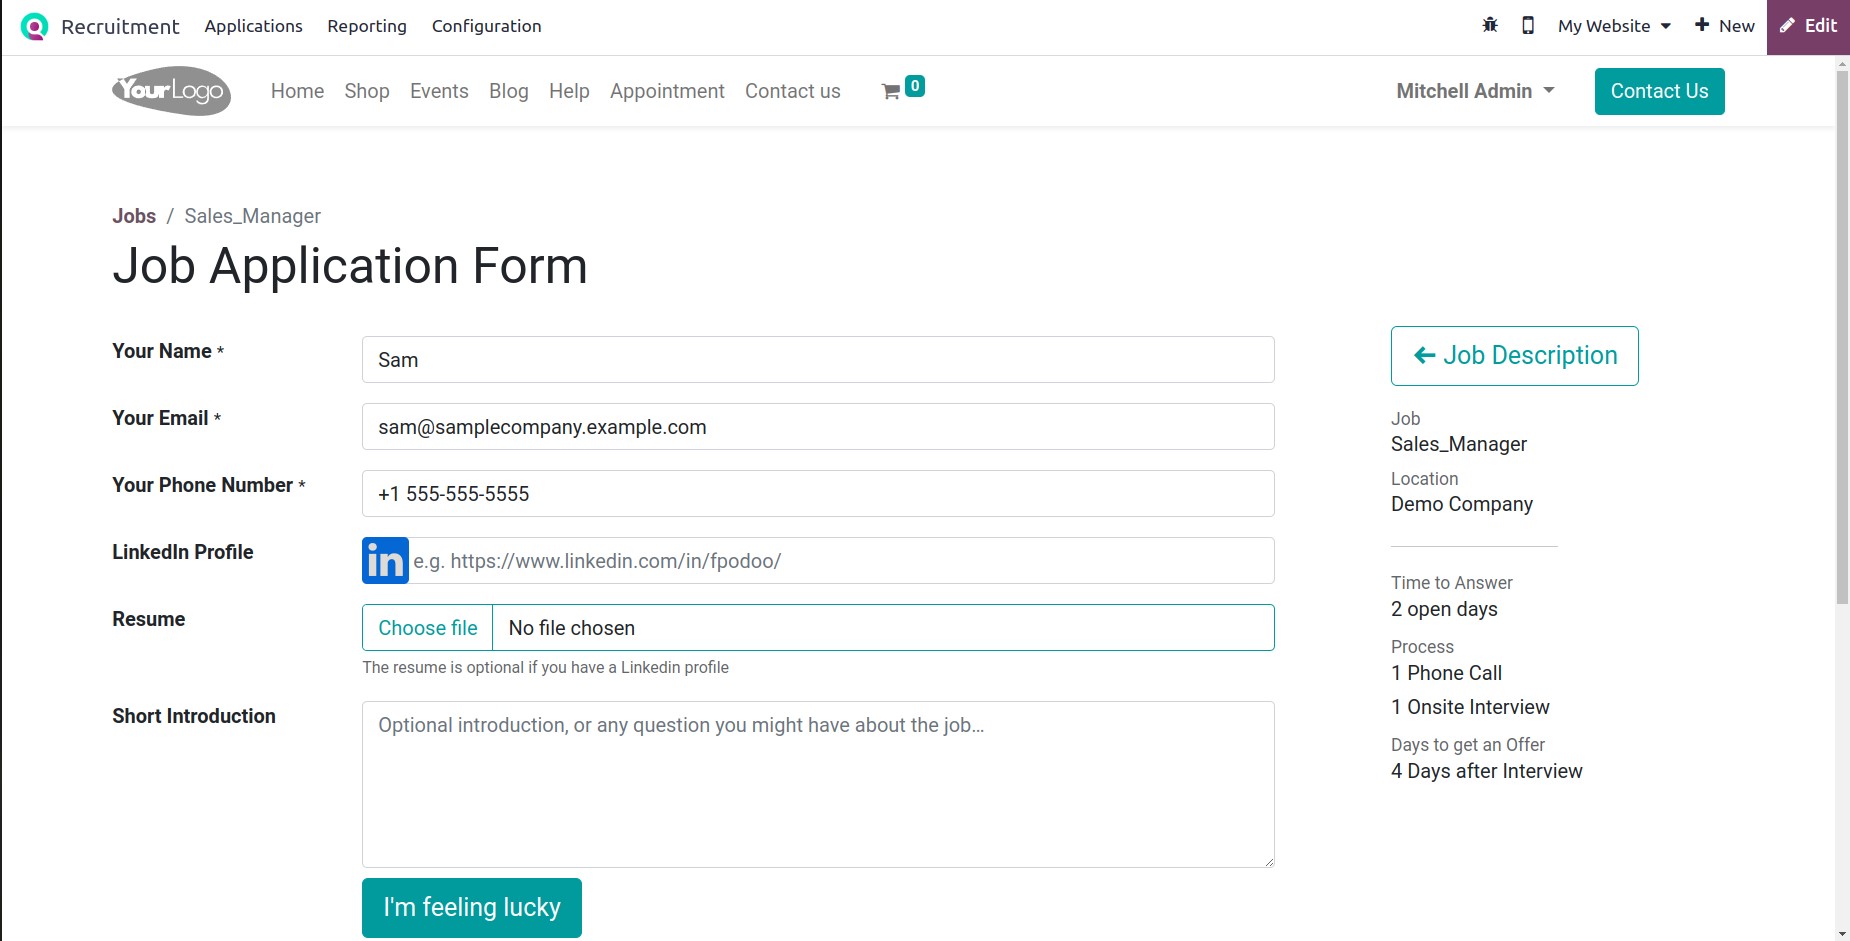
Visitors to the website can apply for the position by using the Apply Now option.
An application form for jobs opens whenever the applicant clicks the Apply Now symbol.
You must include information about the position, such as your name, email address, phone
number, CV, introduction, and more.
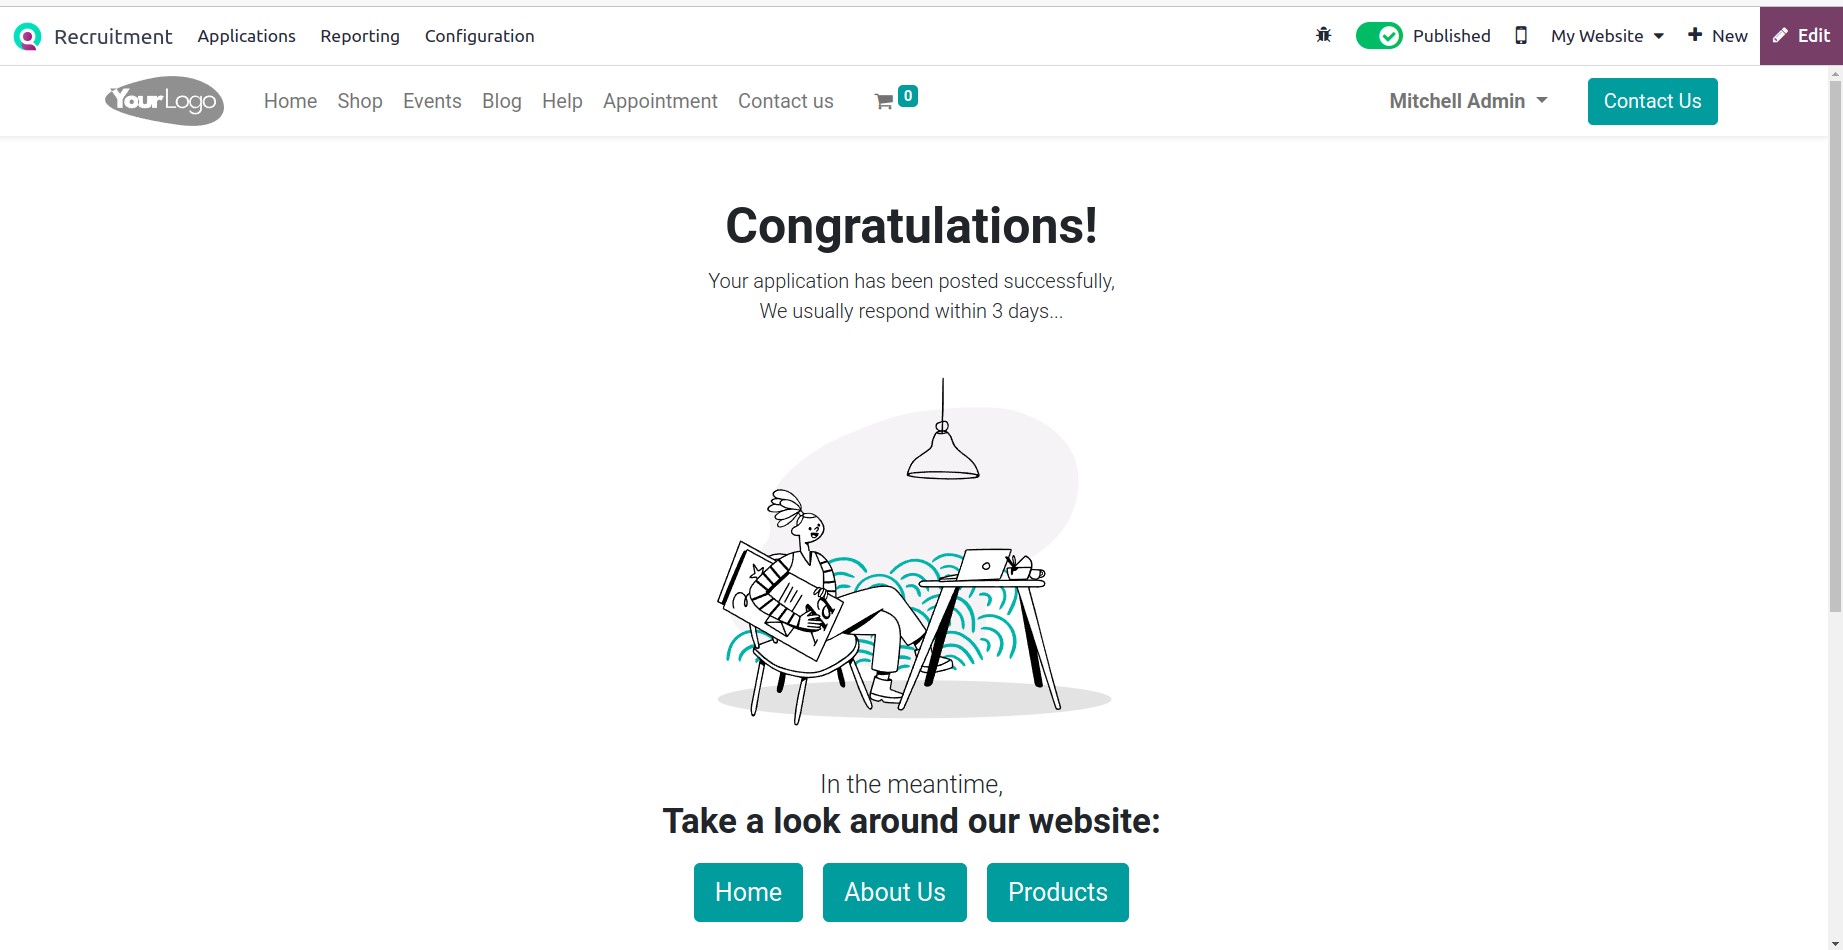
Once the person submits the application form, a confirmation window appears for you.
Visit the Job Positions window in Odoo 17 Recruitment at this time. You can see that the
job posting is live and that there is one new application that can be seen for the
particular job role.

As a result, using Odoo 17 Recruitment to create a job posting and publish it on the
corporate website is simple.
Applications
A job application is a form with candidate information submitted for a position within
an organization. Following the publication of a job vacancy on a website or any other
platform, every company receives a number of resumes. You can access each job
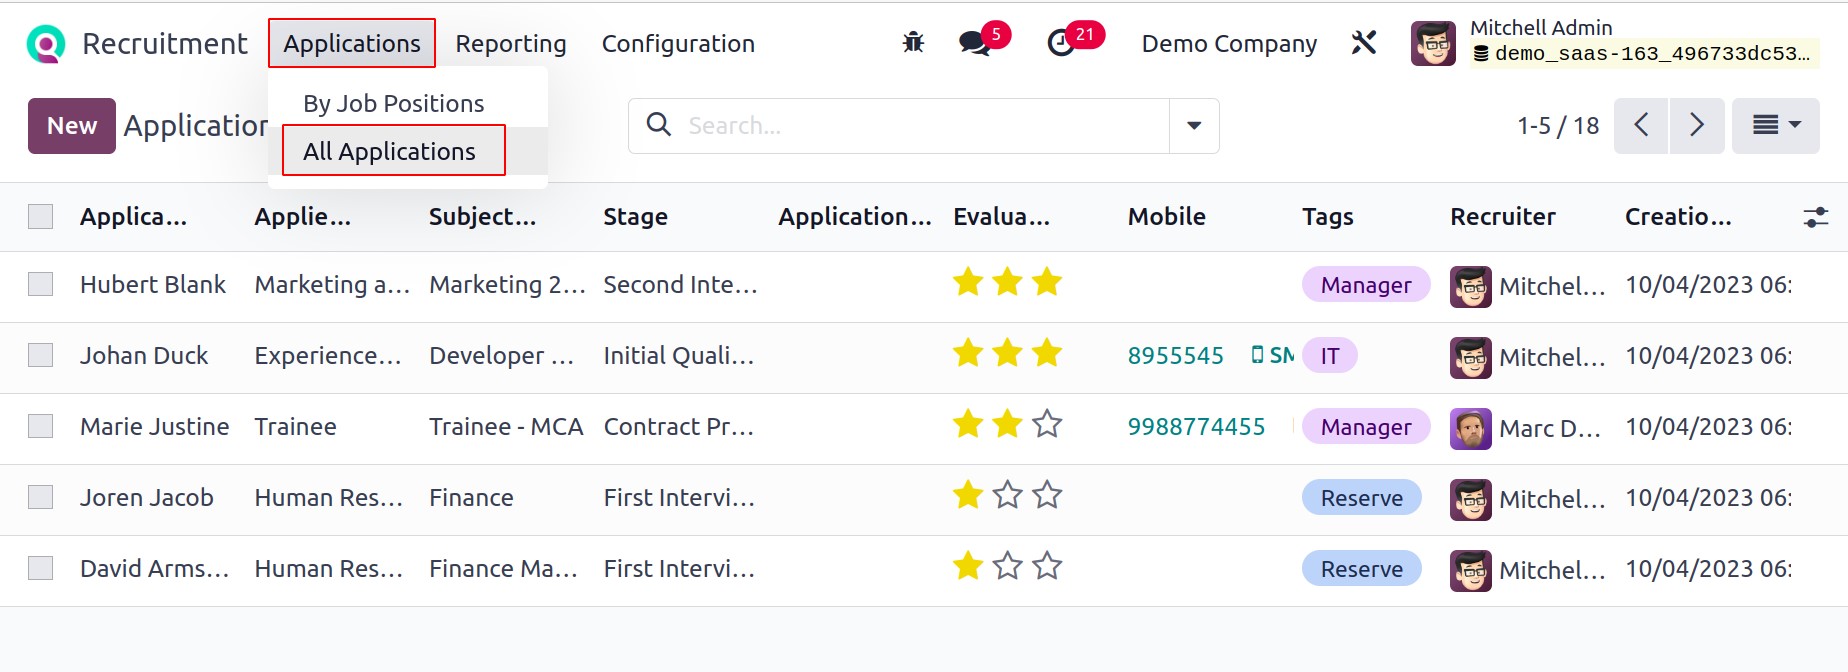
applicant's information separately. When you select the All Applications menu
item from the Applications tab, a list of all applications will appear. A general
concept of each application's information, such as the applicant's name, stage, tags,
recruiter, applied job, subject, etc., is provided via the List view of the applications
window. If you need to create a new application, select the New icon.
Add the email subject for the application and the job title of an applicant to the open
screen's Applicants Name field. Next, provide the applicant's email address in the Email
area. Additionally, you must enter the candidate's mobile number under the Phone option.
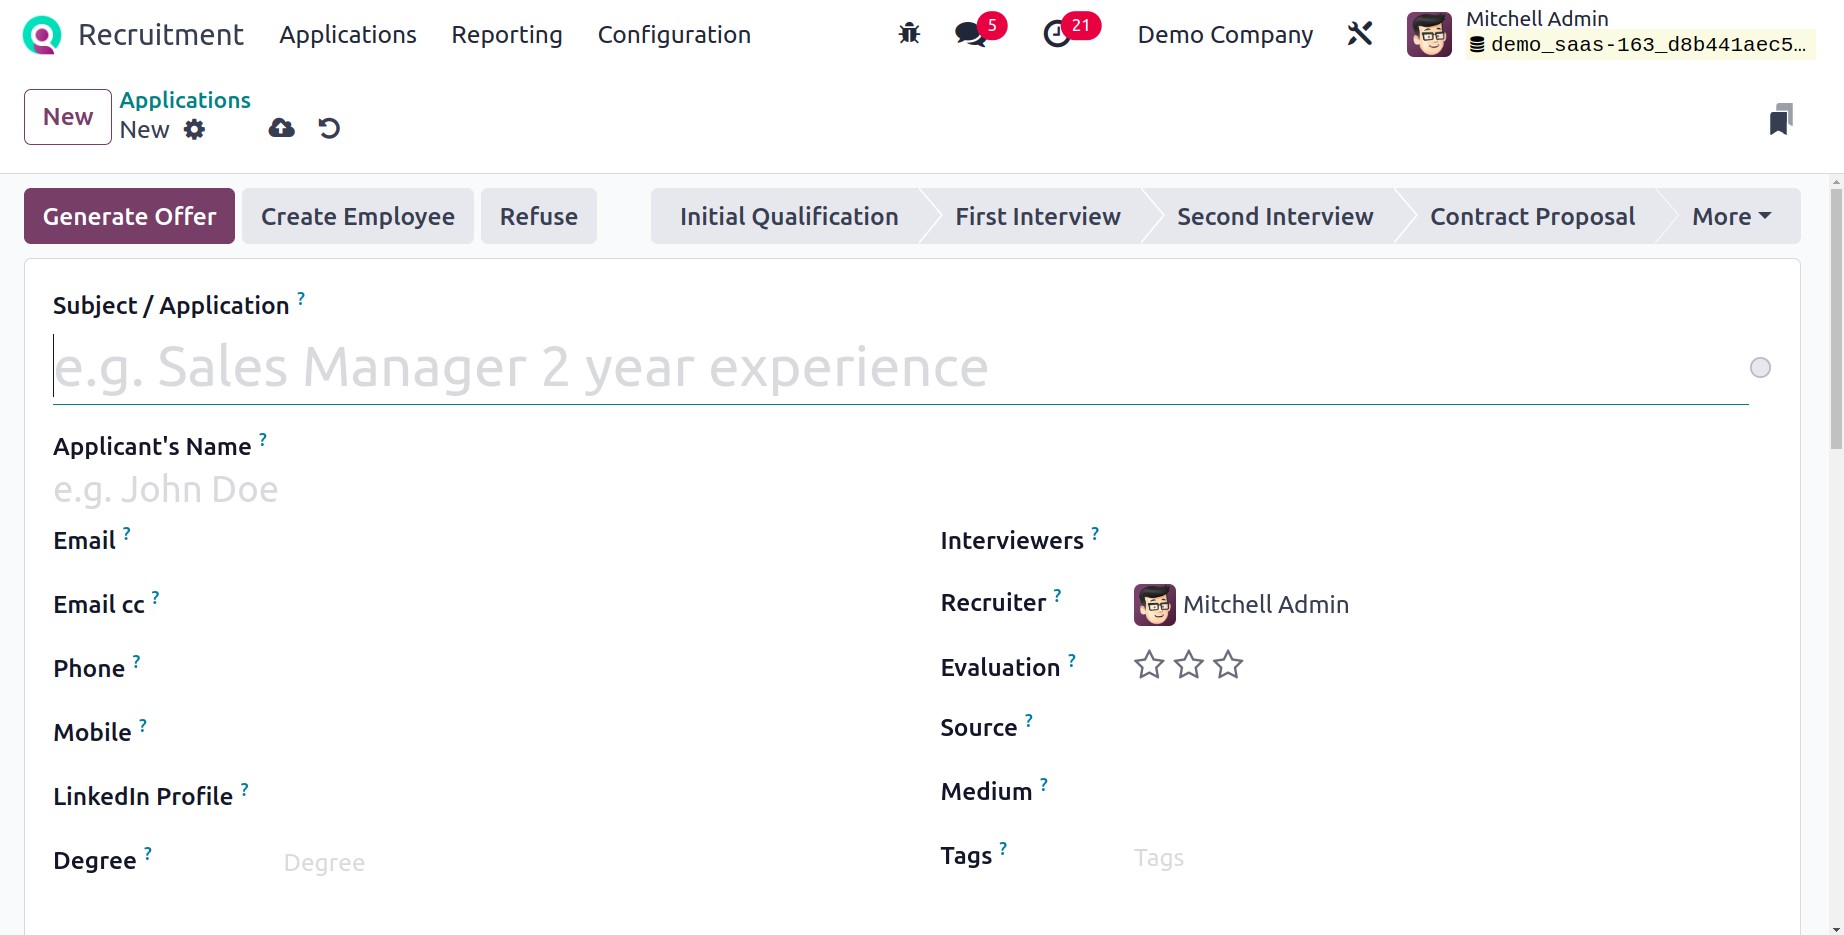
Apply to become a bachelor, master, or higher in the degree selection. Include your
LinkedIn profile's id in the Linkedin Profile section as well. Additionally, you
can type in the pertinent tags and interviewers' names for the application. Make
sure you include the recruiter's name for each applicant who is applying for a specific
position. In the Appreciation area, you can rate a candidate's degree of appreciation as
good, very good, or exceptional by picking the star icon. Enter the dispatch mechanism
in the Medium area and the link source of the application in the Source option.
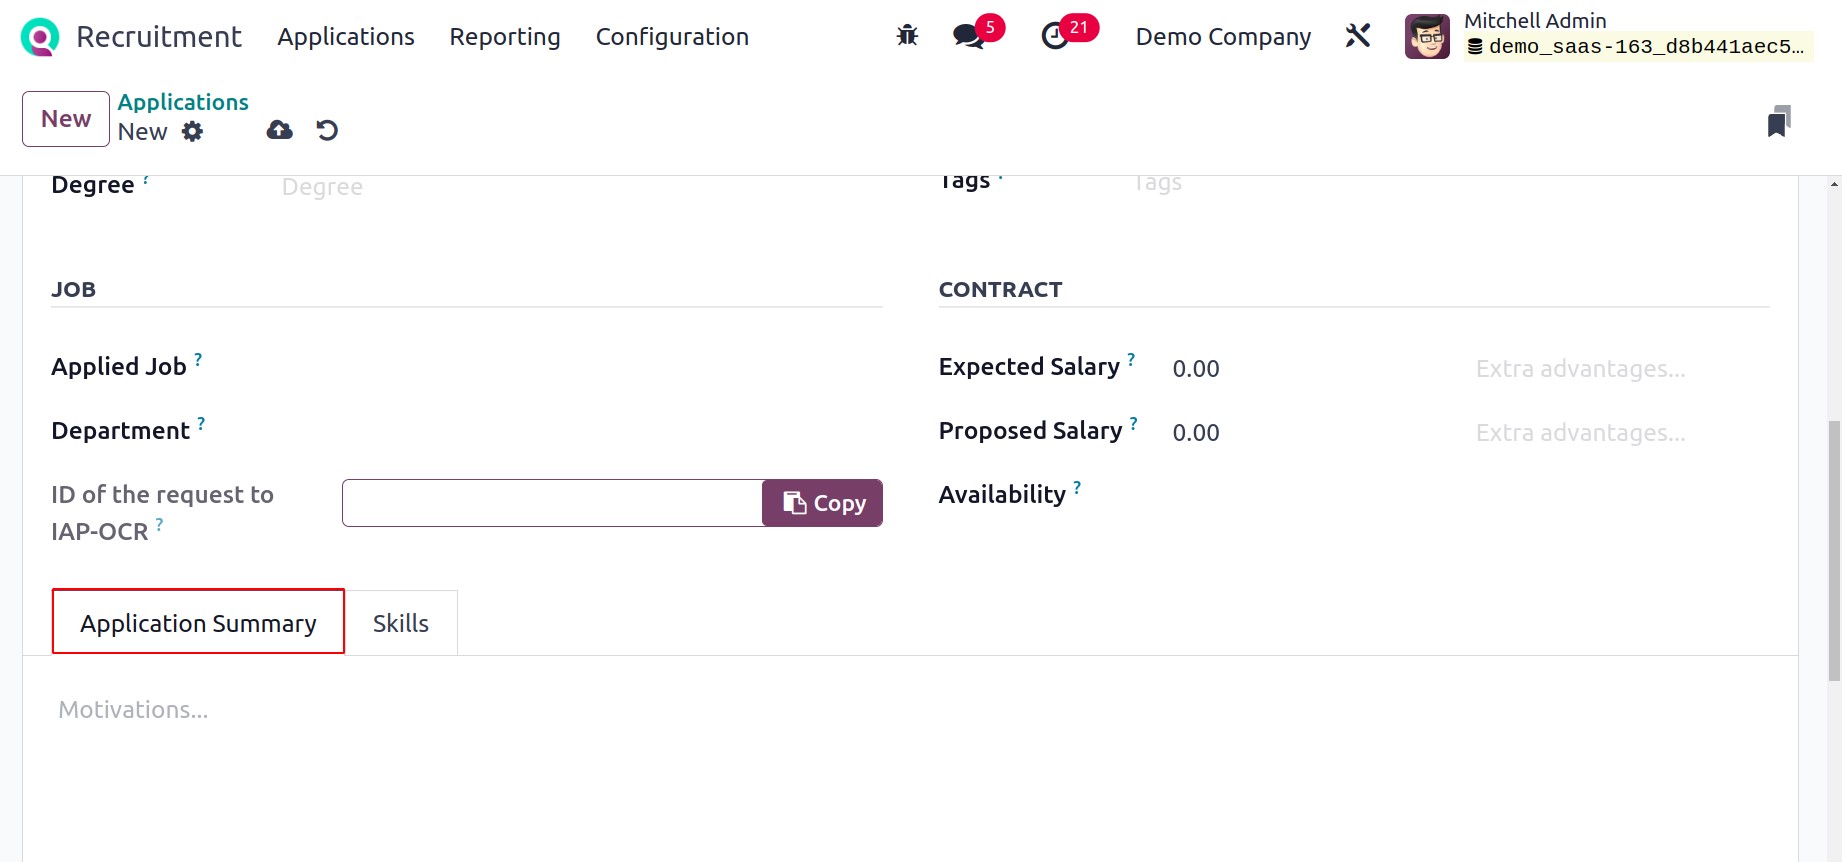
You can choose the job the candidate applied for and the job department below the
Job section. Later, select the Company option and your company name. The user can
provide the applicant's expected salary in the Expected Salary field and
the employer's proposed compensation in the Proposed Salary option in the
Contract section.
Under the Application Summary page, users can customize an application's
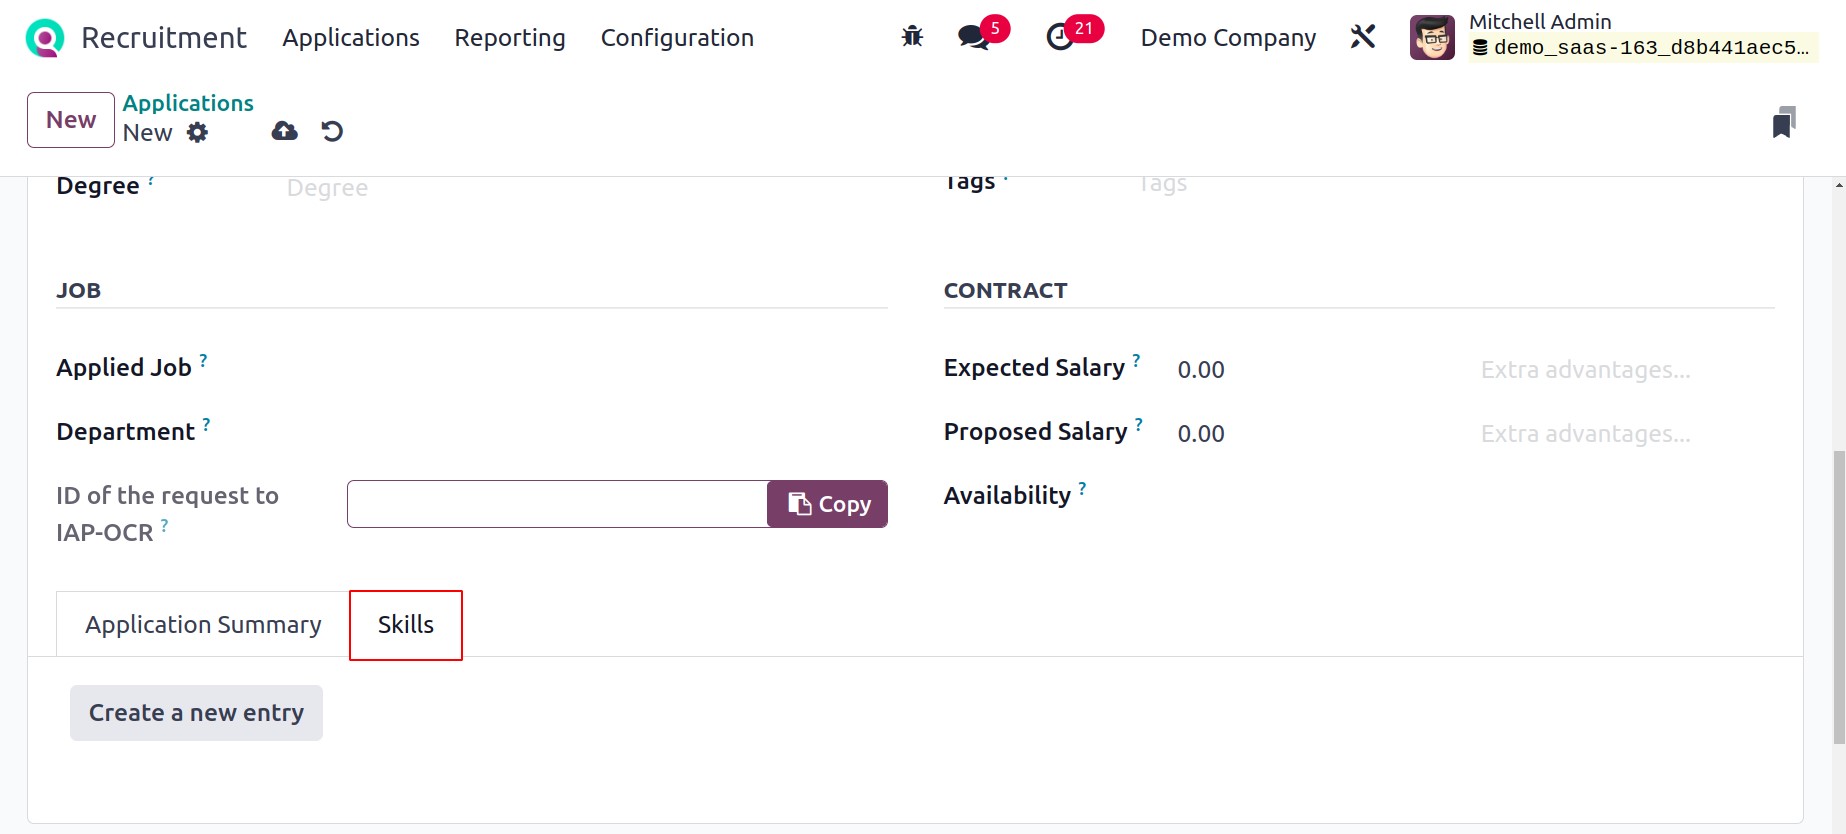
description. Additionally, by selecting the Create a new entry icon, the
applicant's relevant talents can be added within the Skills tab.
This information is manually saved in the Odoo 17 Recruitment. Depending on how well an
employee is doing in the application, you can alter the stages. Initial qualification,
contract proposal, second interview, etc. are the steps that are categorized.
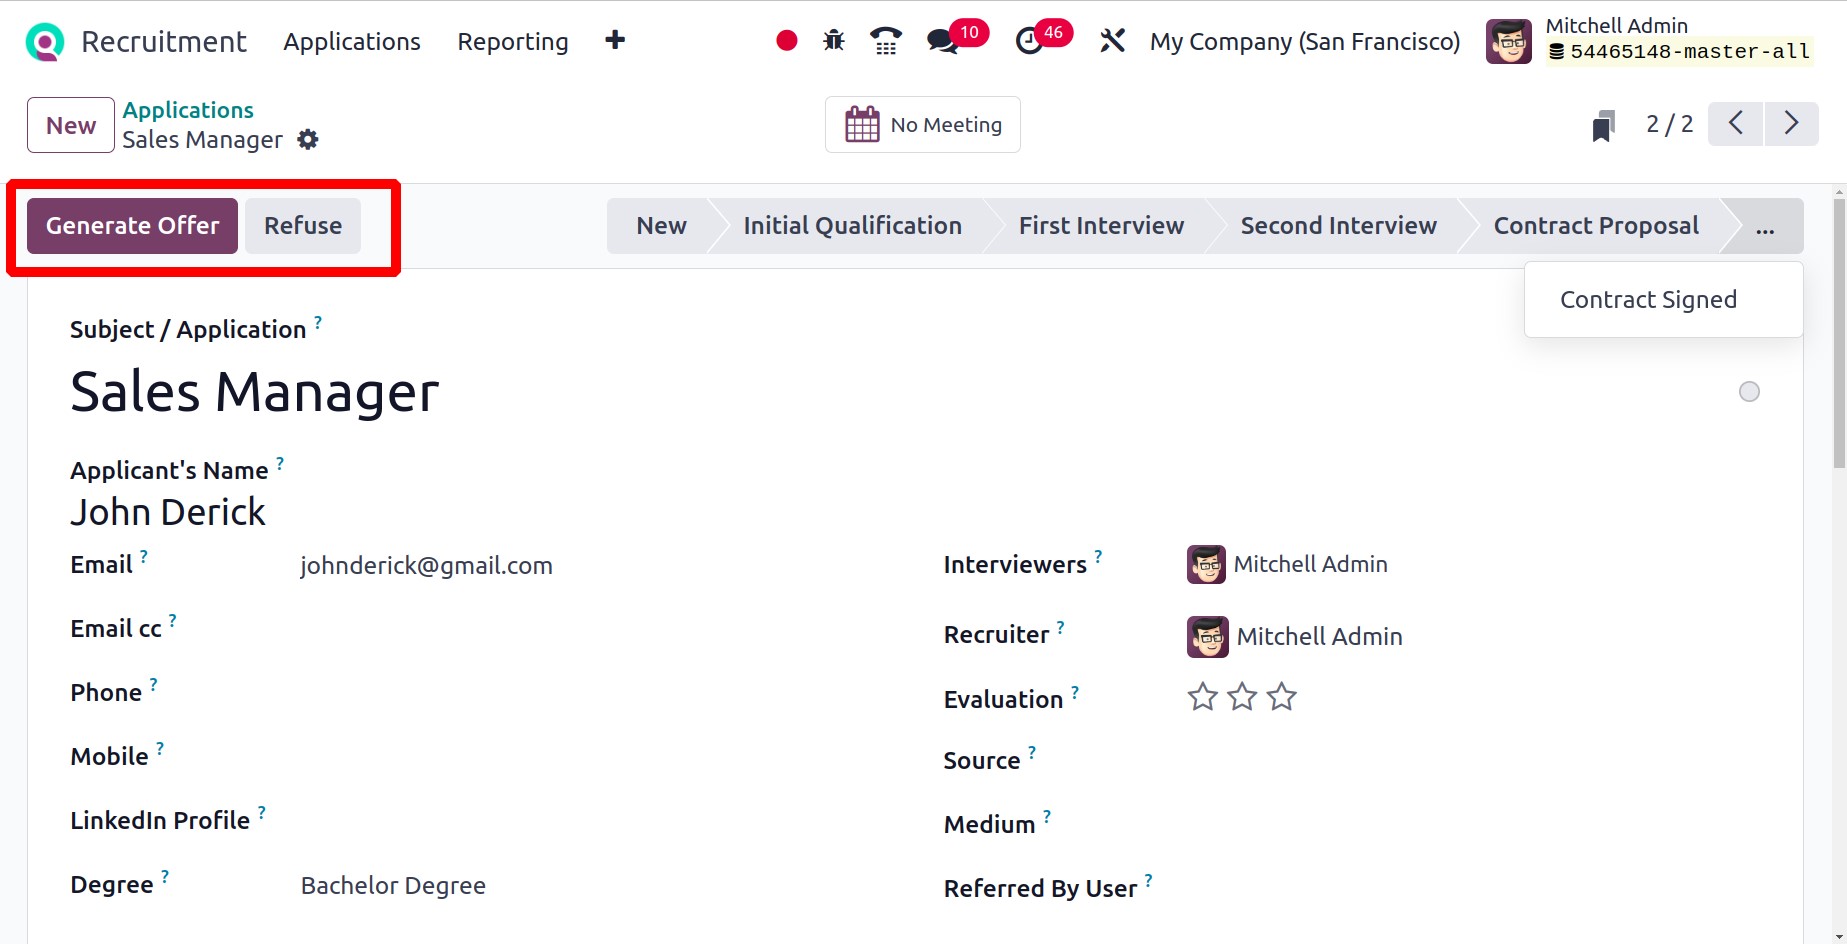
You can schedule a meeting with the applicant after clicking the Meeting smart
button. Offer can be sent to applicant by selecting the Generate Offer button in
the Applications form once the applicant's processes are complete.
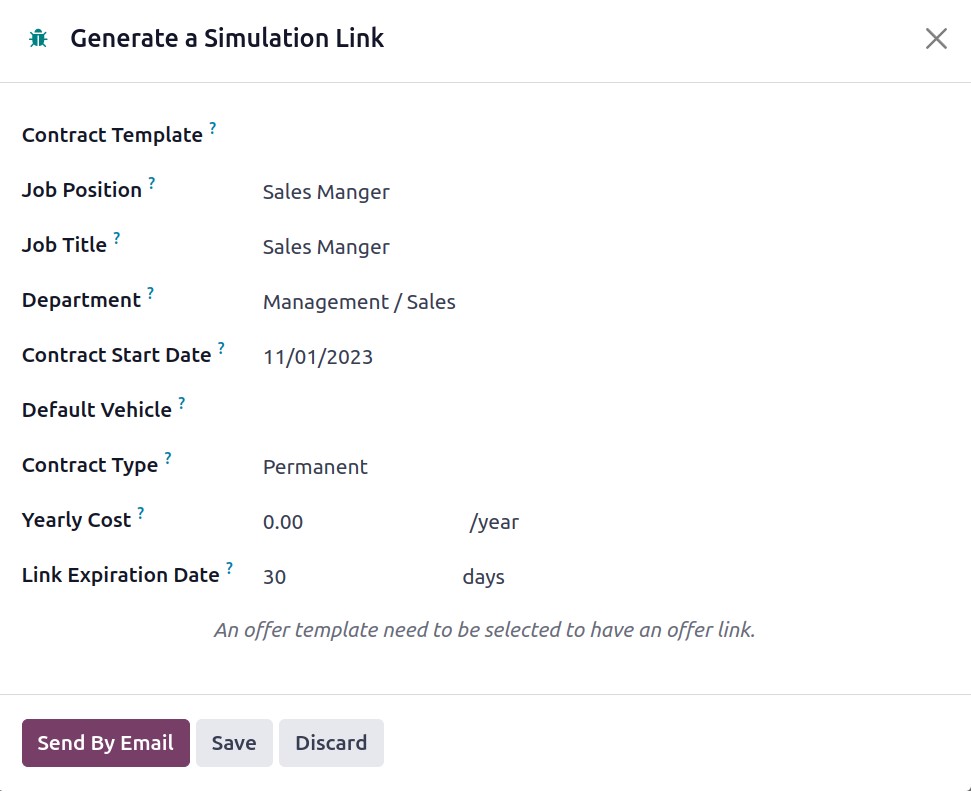
Users can create a simulated link by clicking the Generate Offer button. Include
information such as the contract template, job title, department, contract type,
contract start date, annual cost, and link expiration date. Next, select Send By
Email.
Now that the offer letter has been sent, the offers smart tab will appear as seen below.
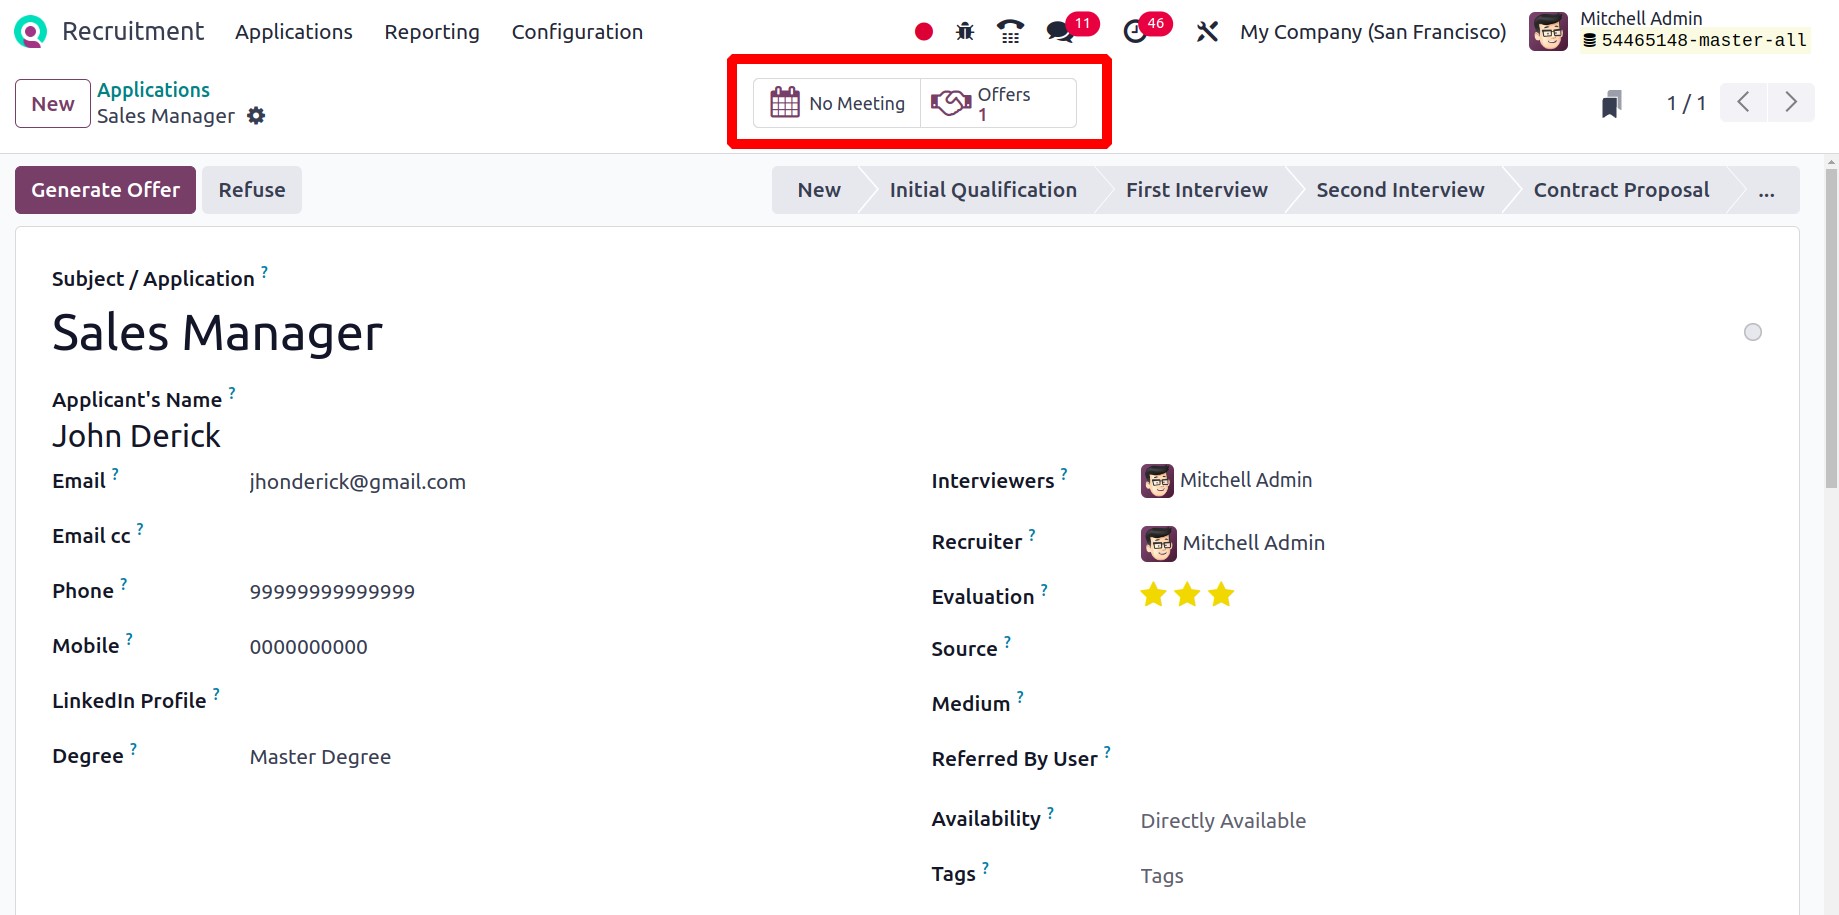
The user can view a comprehensive summary of all sent offers using the Offers smart
button. There are various stages of the offer letter: In Progress, Partially Signed,
Fully Signed, Expired.
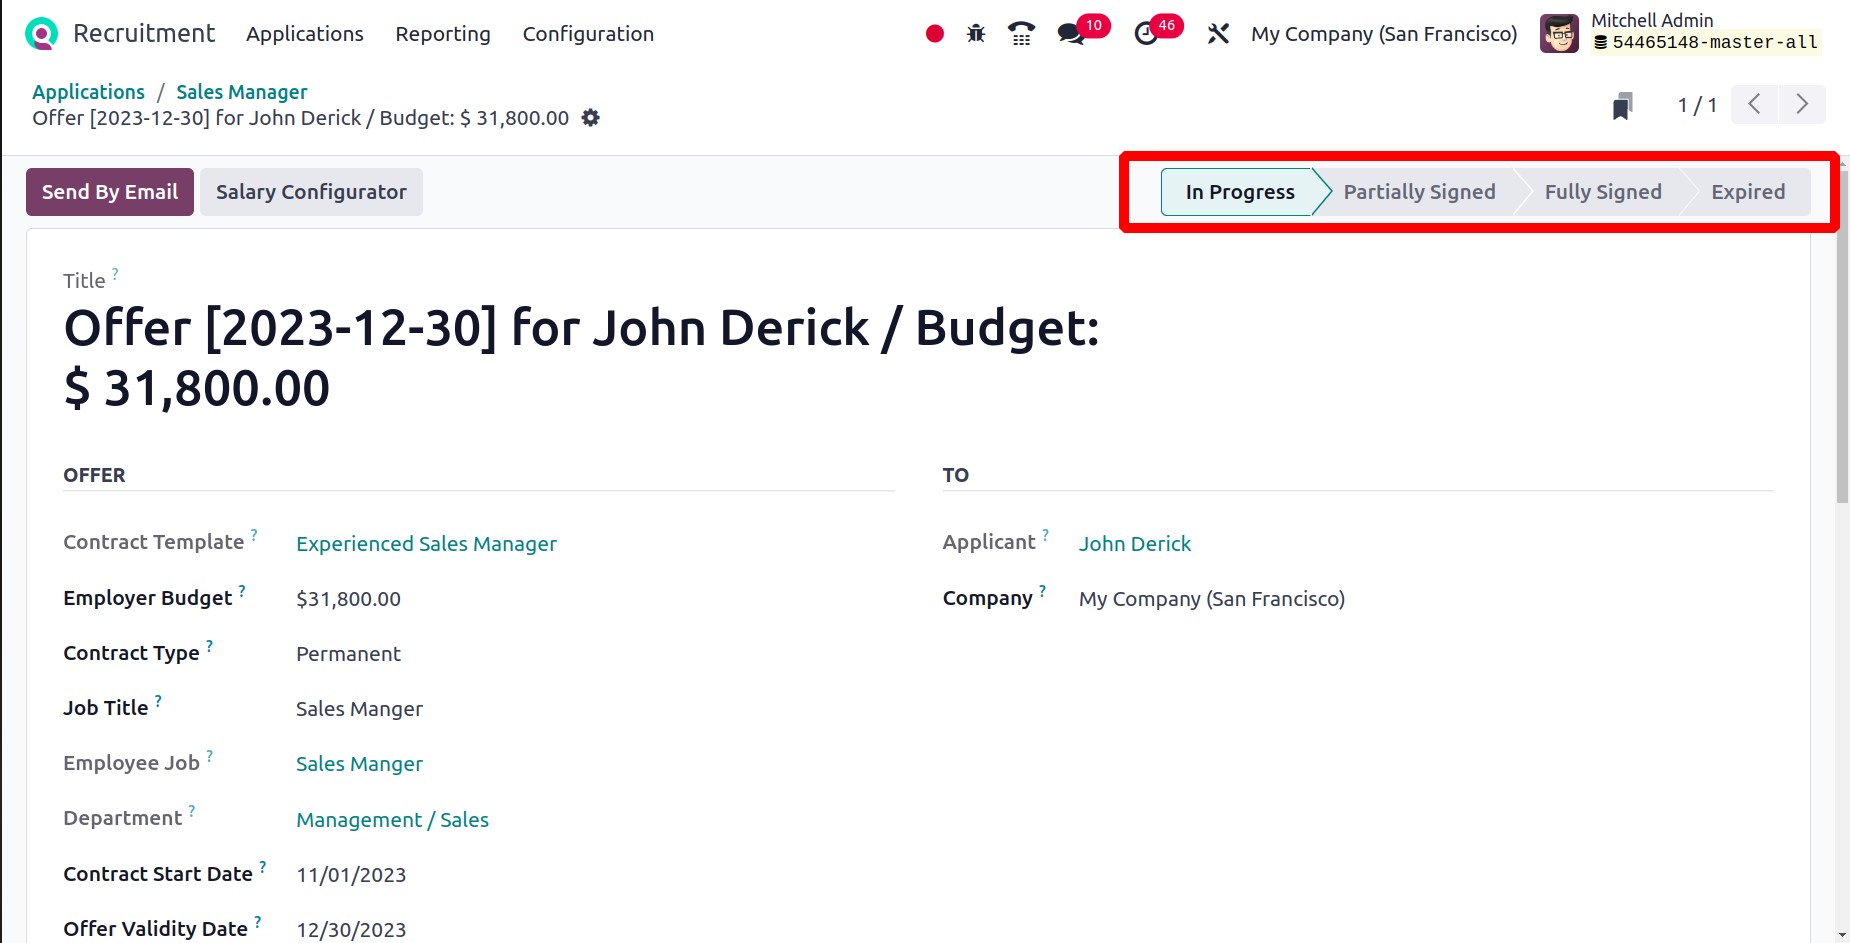
The offer is currently in the ‘In progress’ stage, upon the applicant's signature, it
will move to the Partially Signed stage. Only once the HR Responsible has signed the
offer will it advance to the Fully Signed stage. The offer will go to the Expired stage
if it expires.
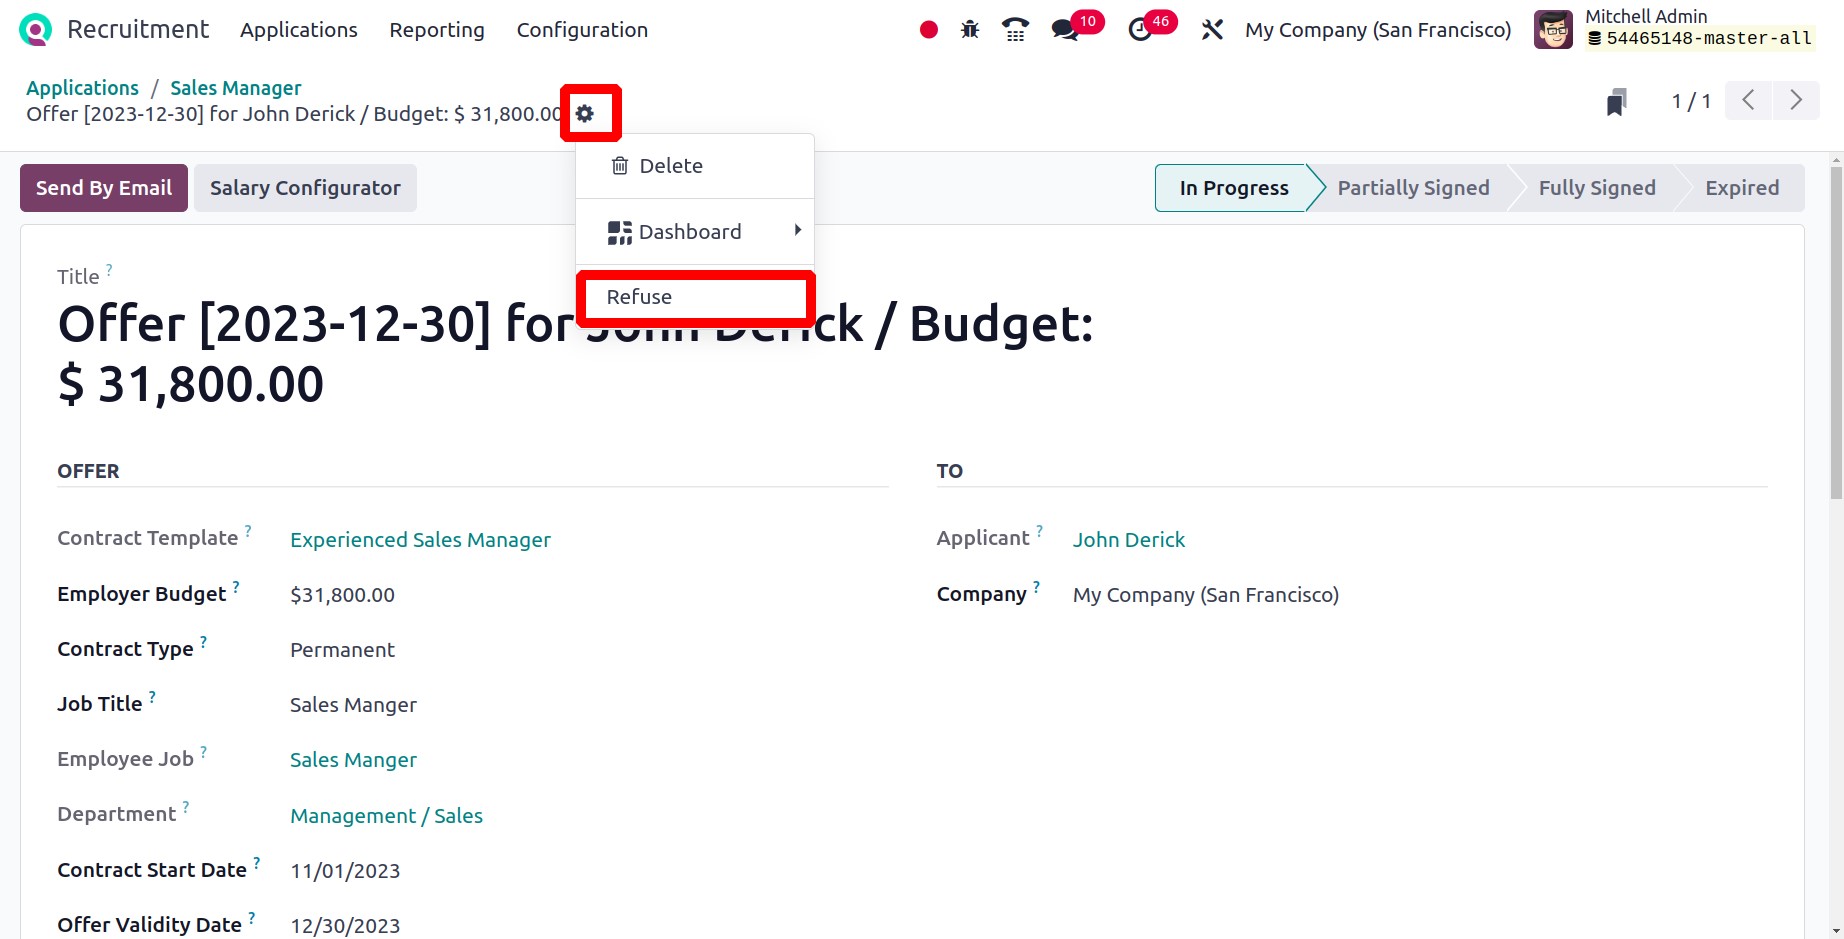
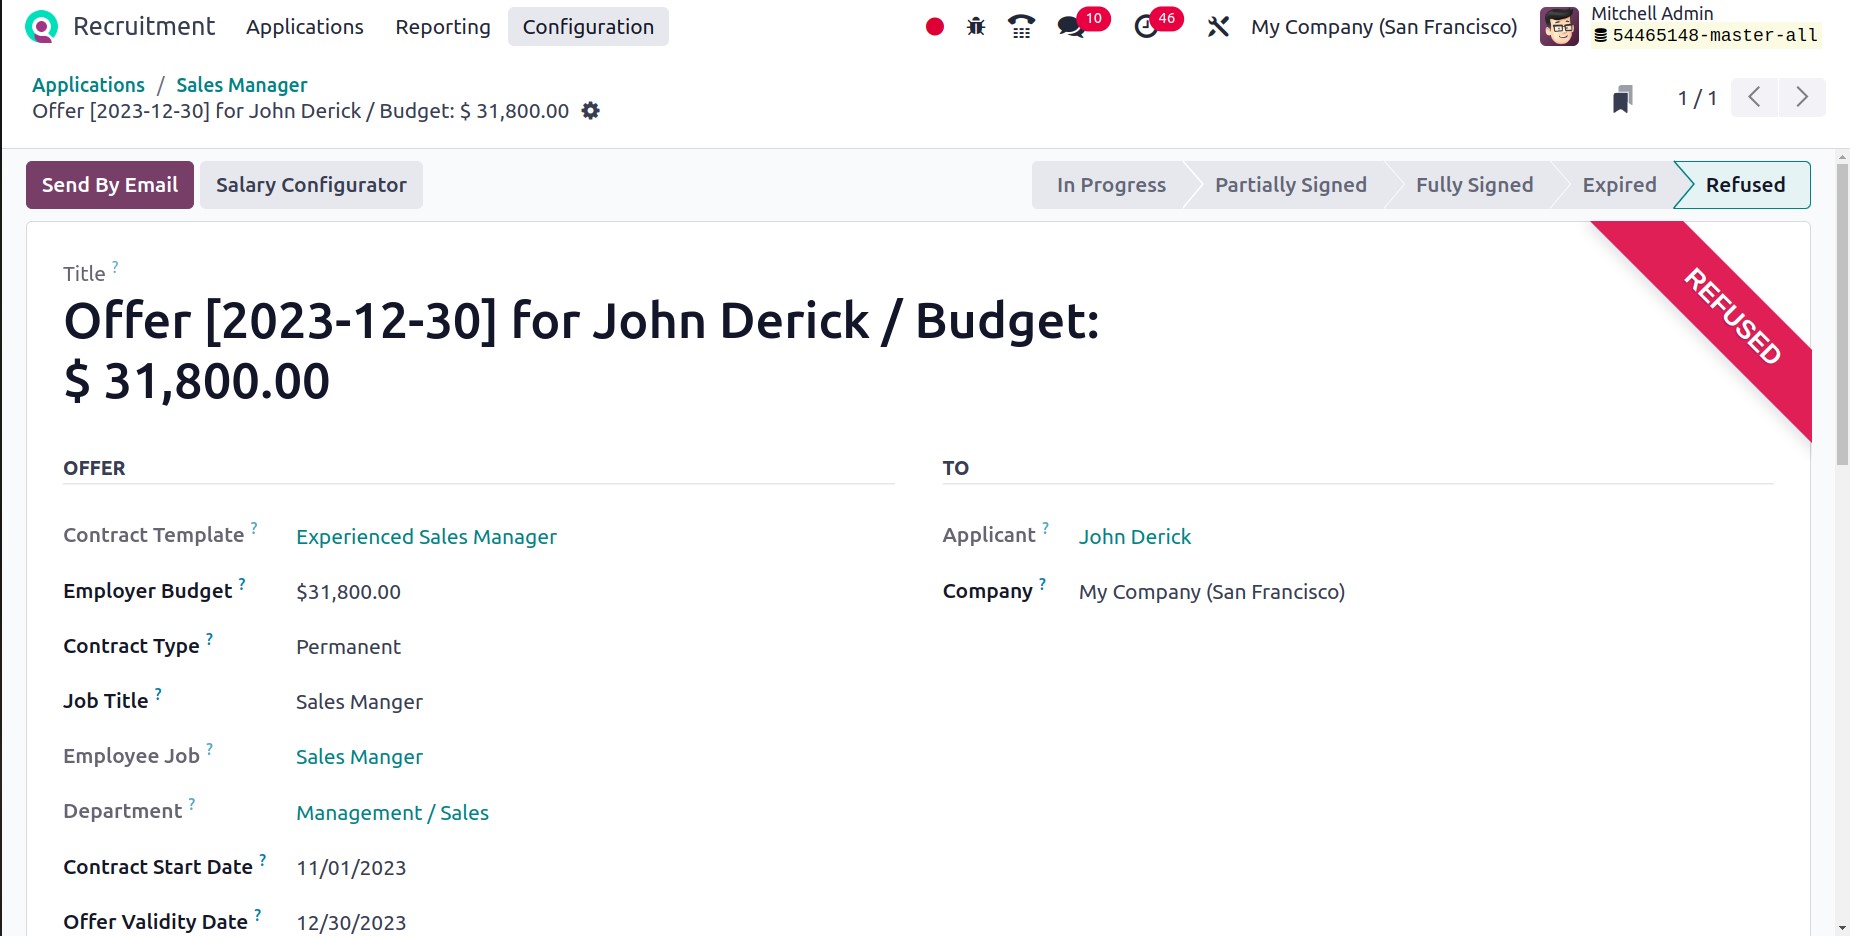
Subsequently, the Action button displays the Refuse menu. If you reject
the offer, click on it. Next, the stage will shift to Refused, and a ribbon
marked "REFUSED" will be placed on the offer.
As a result, creating new applications for your business in Odoo17 is simple.
Offers
Offers from Odoo 17 are a new option in the Application menu. From there, you may view
every Offer that has been generated. There will be a list of the Employer Budget, State,
Offer Validity Date, and Title in order for users to quickly and easily comprehend all
of the generated offers' details on a single page.

Configurations
The Configuration tab of Odoo17 Recruitment allows us to configure apps, job
roles, activities, and workers. Select the options menu from the Configuration
tab to configure additional options in the Recruitment module.
Settings
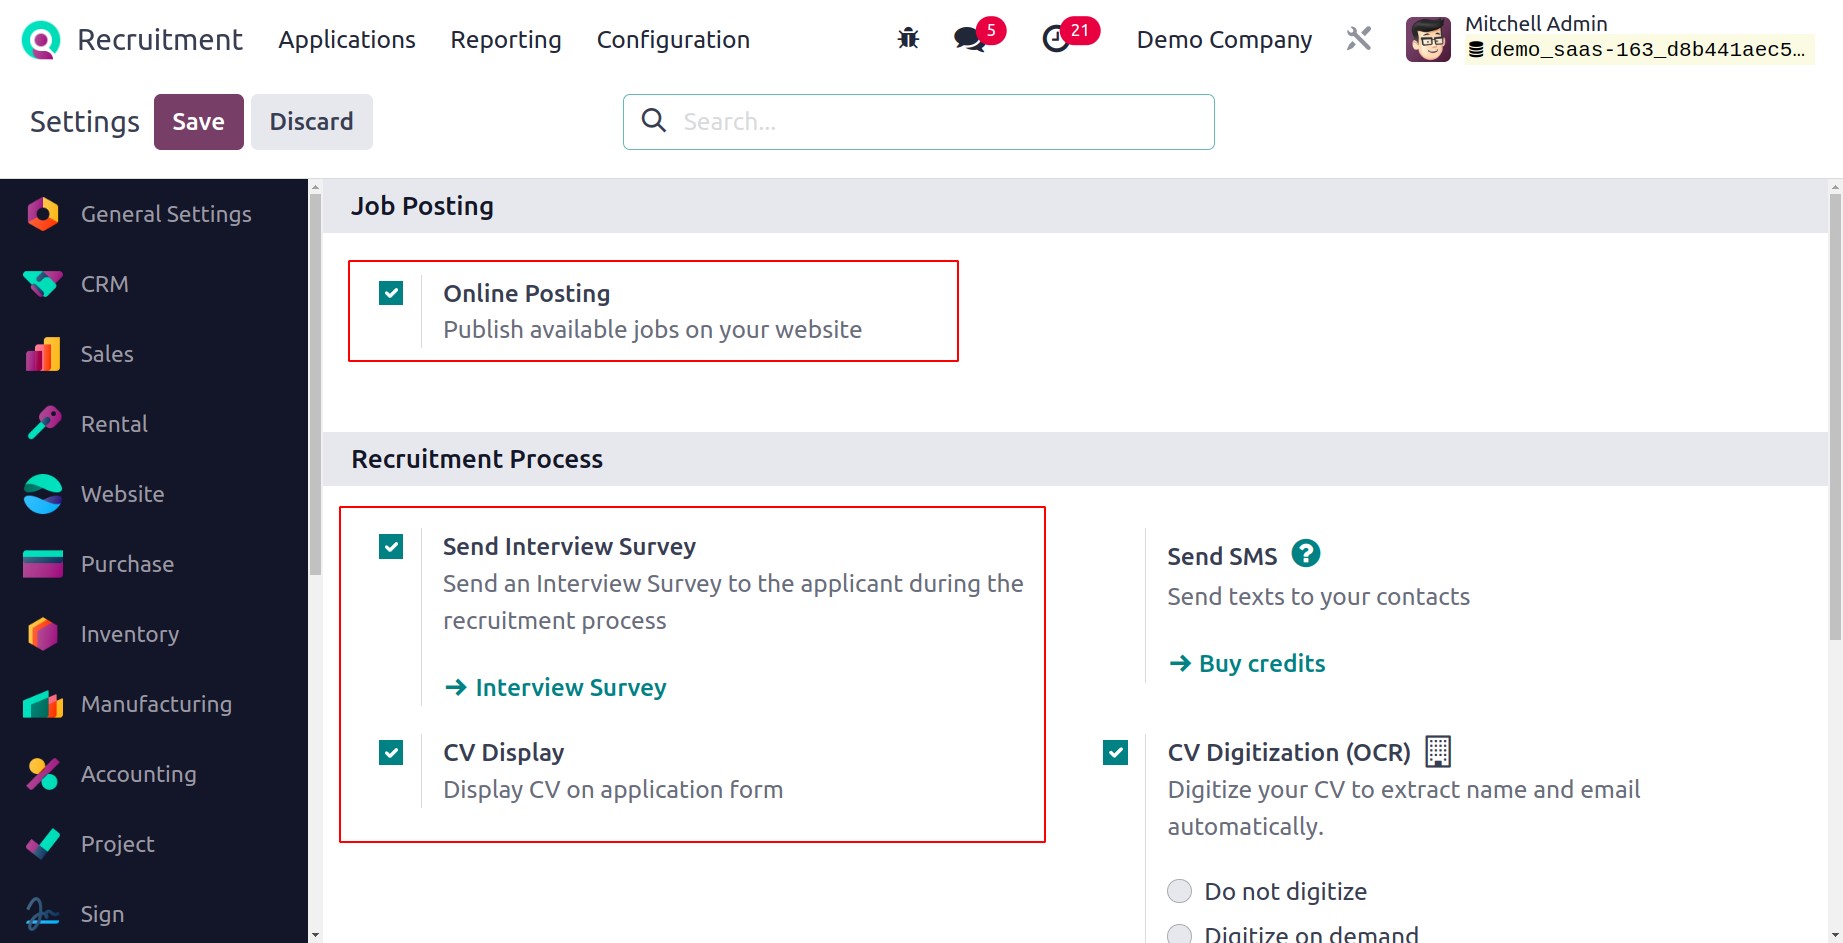
From the Settings section, you can control the recruitment process and job
posting preferences. You can publish open positions on the website by turning on the
Online Posting option in the Job Posting section. After selecting the Send
Interview Survey option under the Recruitment Process, you can send the
interview survey to the candidate. Users can also check the CV Display box to
display their resumes on the application form.
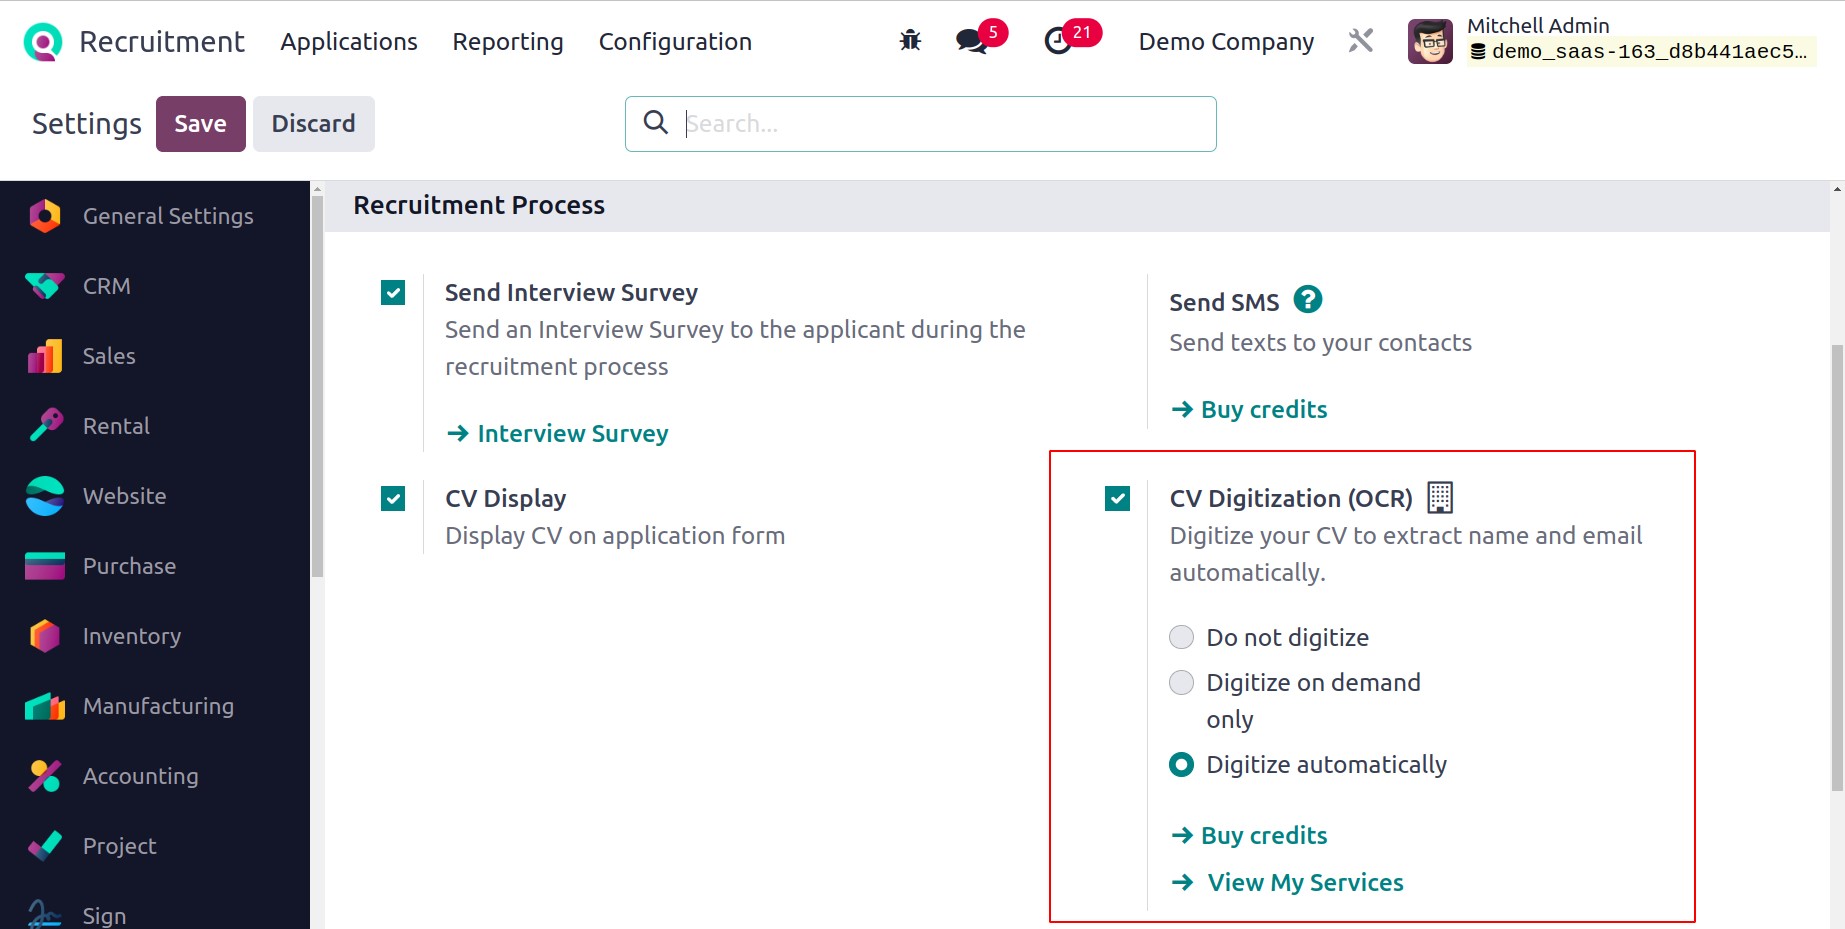
You must allow the CV Digitization (OCR) option for email and CV digitization in
order for names to be automatically extracted. You can control the digitization of CVs
using the options Digitize on demand, Don't digitize, and Digitise automatically. If any
of the choices in the Settings box are selected, you must click the Save icon.
Stages
When a job application is received, there are a number of steps the applicant must go
through before becoming an employee. Thus, the steps option allows for the configuration
of such steps. As a result, the Configuration menu's Job Position section
now has the Stages option.
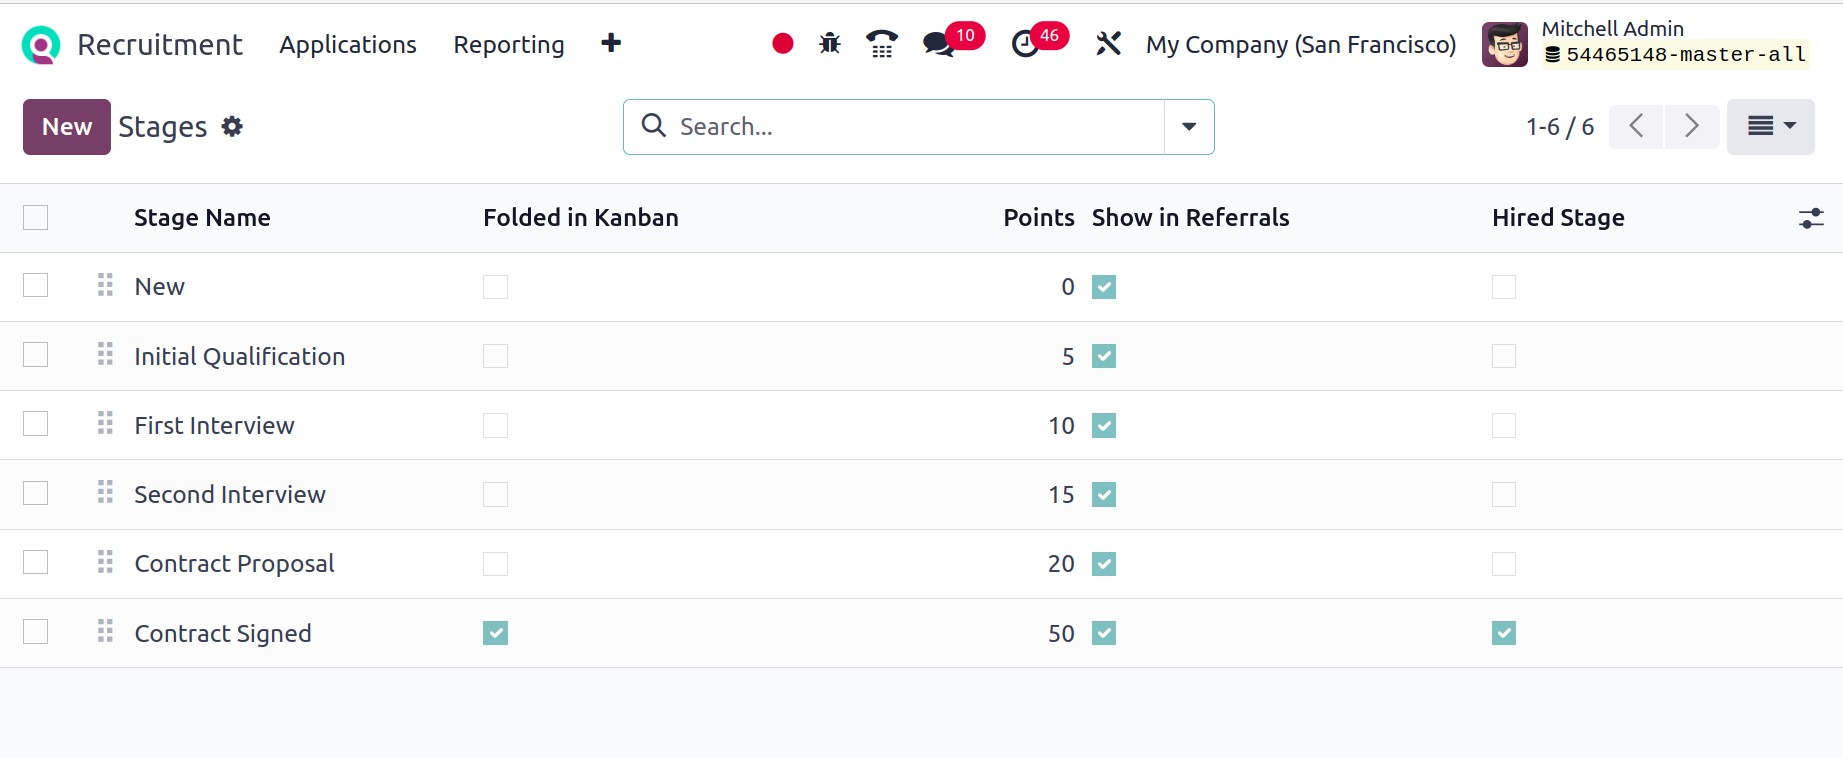
There is a picture of the configured stages. The stage name, Hired stage, Folded in
Kanban view Points, and Show in Referrals. To set up the new stage, click the New
button.
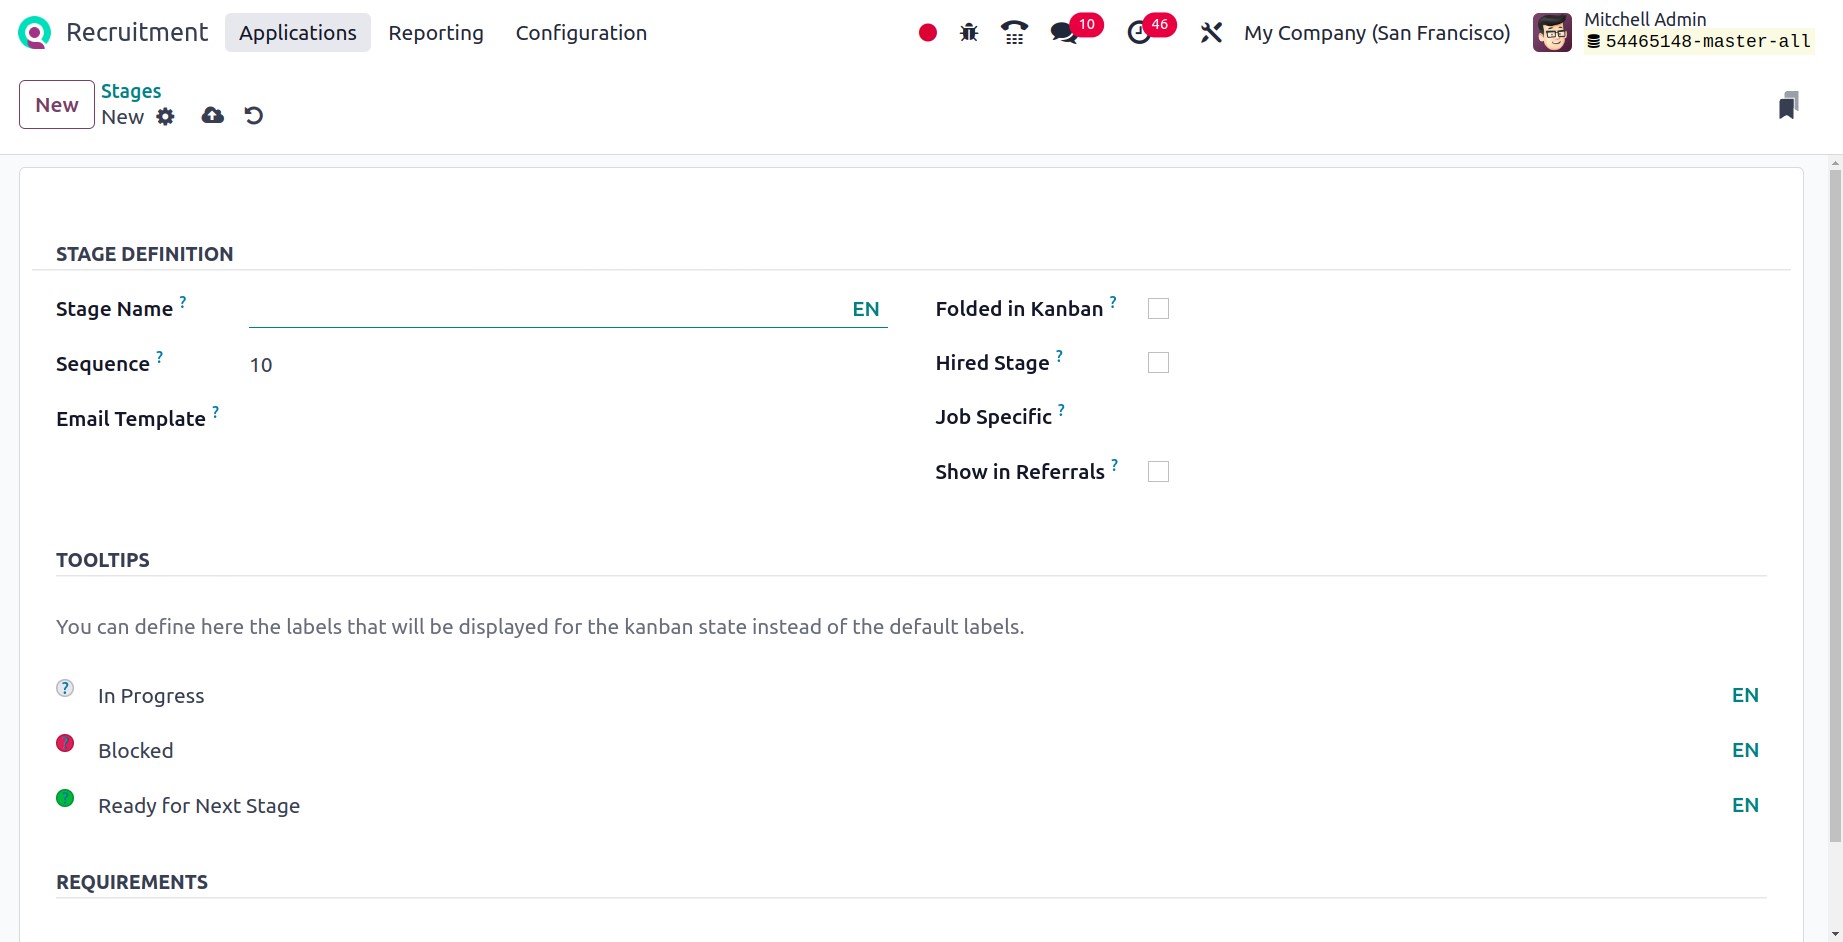
Thus, the screenshot below will display the form view. Include the sequence number and
the stage name. When an application is set to the stage, if an email template has been
configured, a message is placed on the applicant using the template. When there are no
records in a stage to display, the stage is folded in the Kanban view if the Folded
in Kanban checkbox is checked. The Hired Stage is used to ascertain an
applicant's hire date when it is checked.
This stage is used by the specific job when a job position is added inside the Job
Specific field. If a job position is listed here, other jobs won't use this
stage. The "Referral" app makes use of the Show in Referrals option. If the box
is checked, the employee receives points and the stage appears on the Referrals Dash
Board in the Referrals.
Employment Types
Each business offers many sorts of work, such as full-time, temporary, and part-time.
Within the Job Positions section of Configuration, users can customize the
employment categories. The user can see the list of pre-configured employment types in
the window that is currently active. All job categories' names, including Replacement,
Interim, Permanent, and others, are visible to users. As shown in the screenshot below,
select the New symbol to create a new employment type.
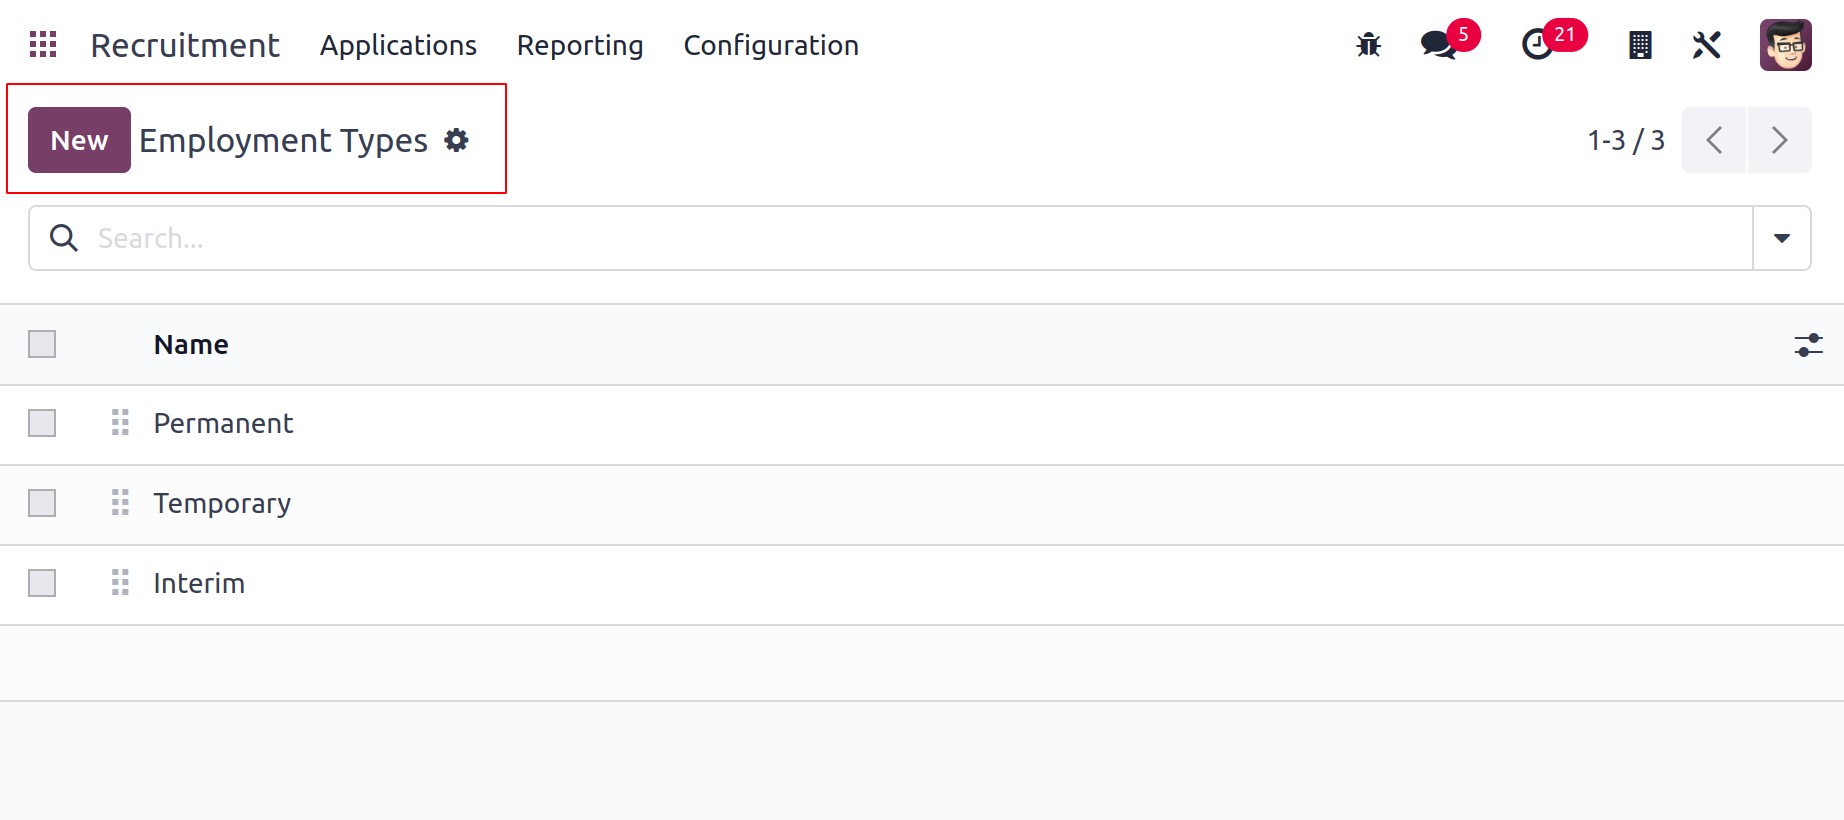
After clicking the New button, a new area appears in front of the user. Place the
name of the employment type there, and then click the Save icon.
Sources
A candidate may obtain information about available positions from various sources.
Therefore, the applicant will indicate in the job application form where they learned
about the opportunity. The Configuration option allows for the creation of such
sources. There is a list of all the created sources.
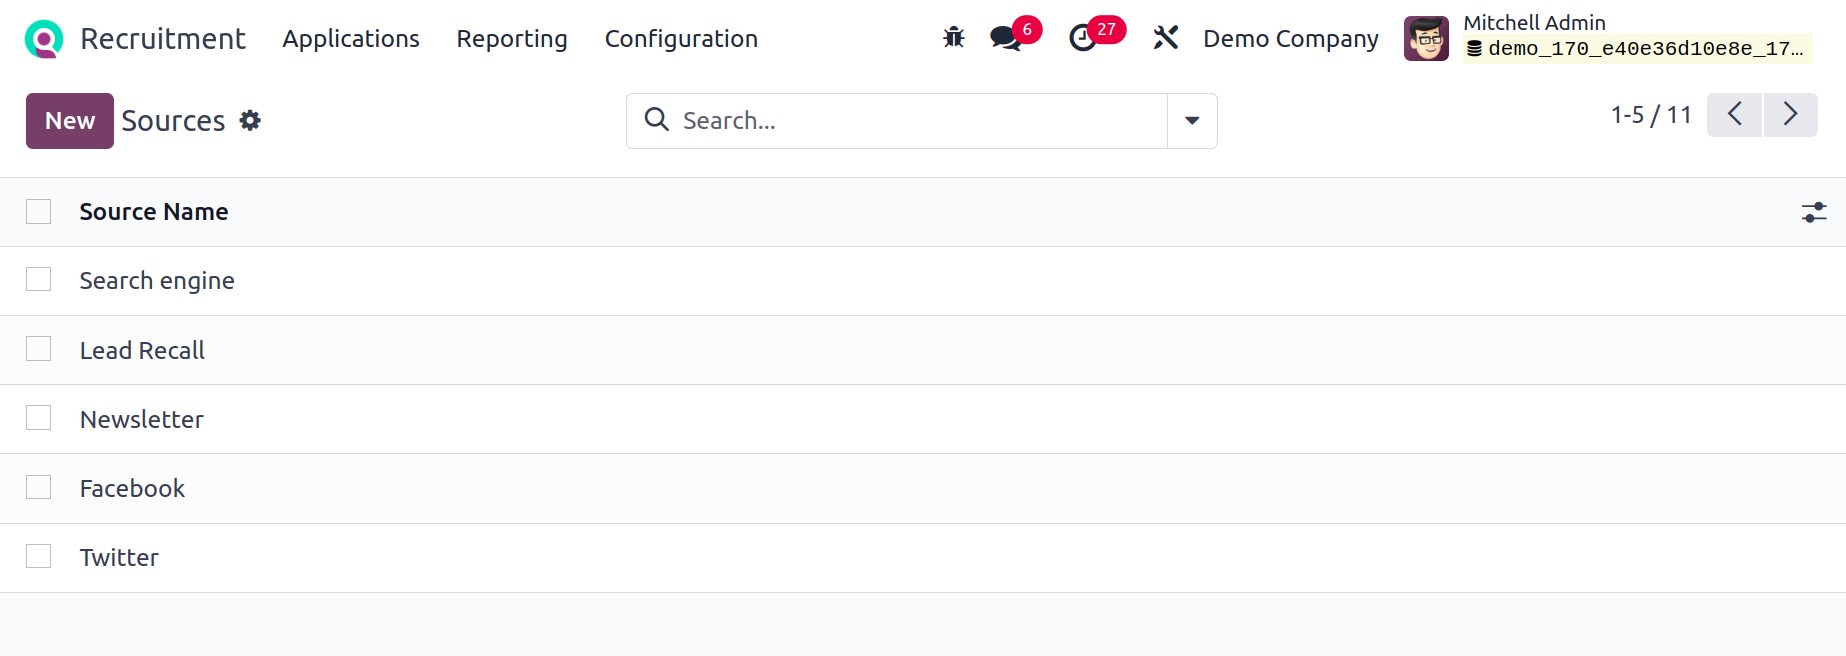
To add another, click the New button. The end of that list will then have a new
line.
Medium
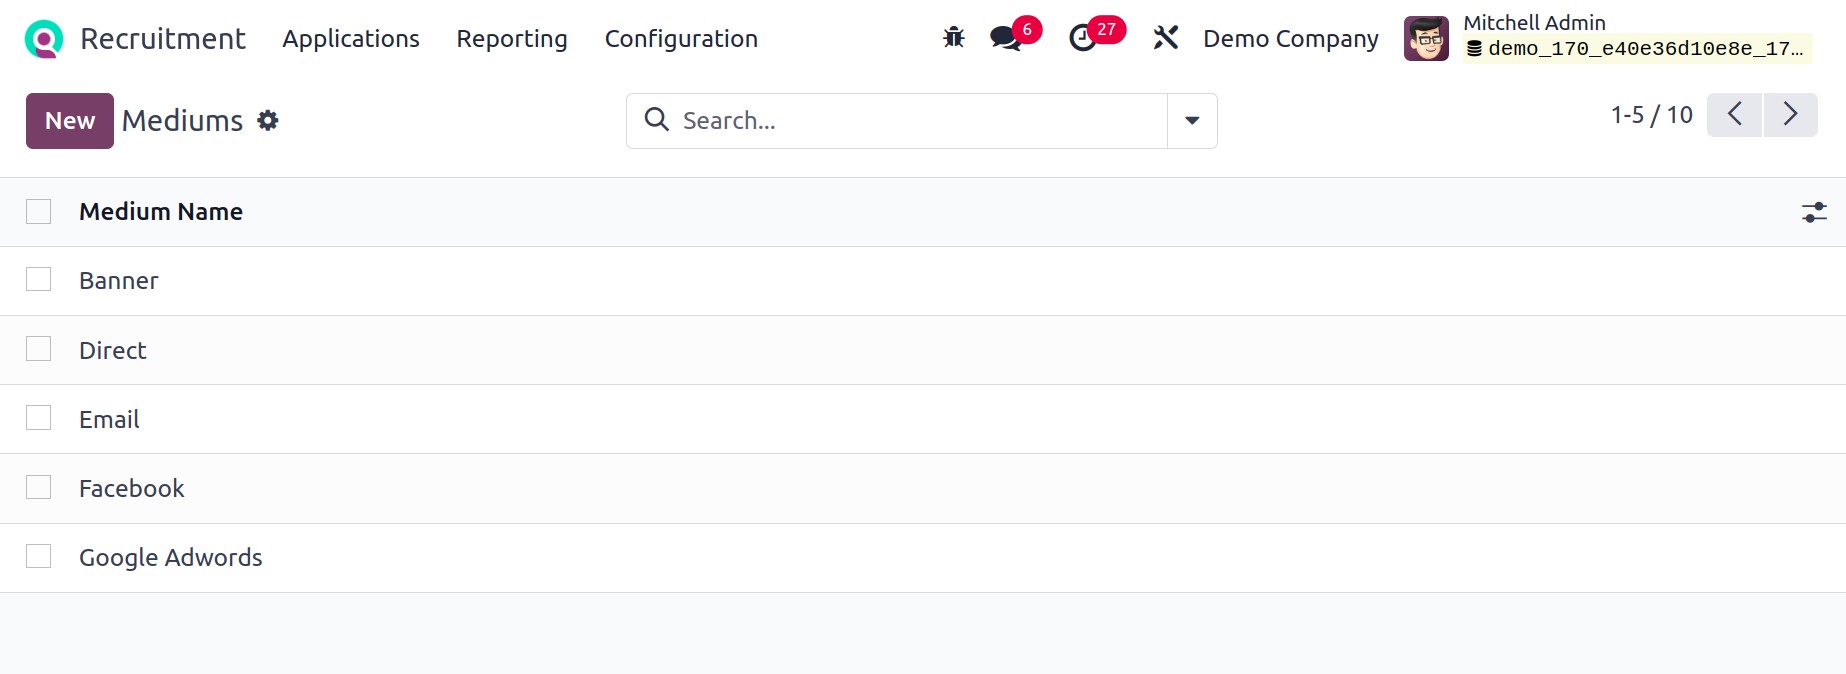
As previously stated, applications for jobs will be received via a variety of channels,
including Facebook, email, and even direct mail. The Medium option allows for the
configuration of such mediums. To include new media, click the New button.
Degree
It is possible to include the qualification degree in the application. The Degree
section allows for the configuration of such degrees. The Degree option is
included in the Configuration menu. To add another, click the New button.

Refuse Reasons
Within the Applications part of the Configuration page, you can access the
Refuse Reasons menu. The open window allows users to see the specifics of each
refusal reason, including the Email Template and Description. Selecting the New
button will allow you to create a new refusal reason.
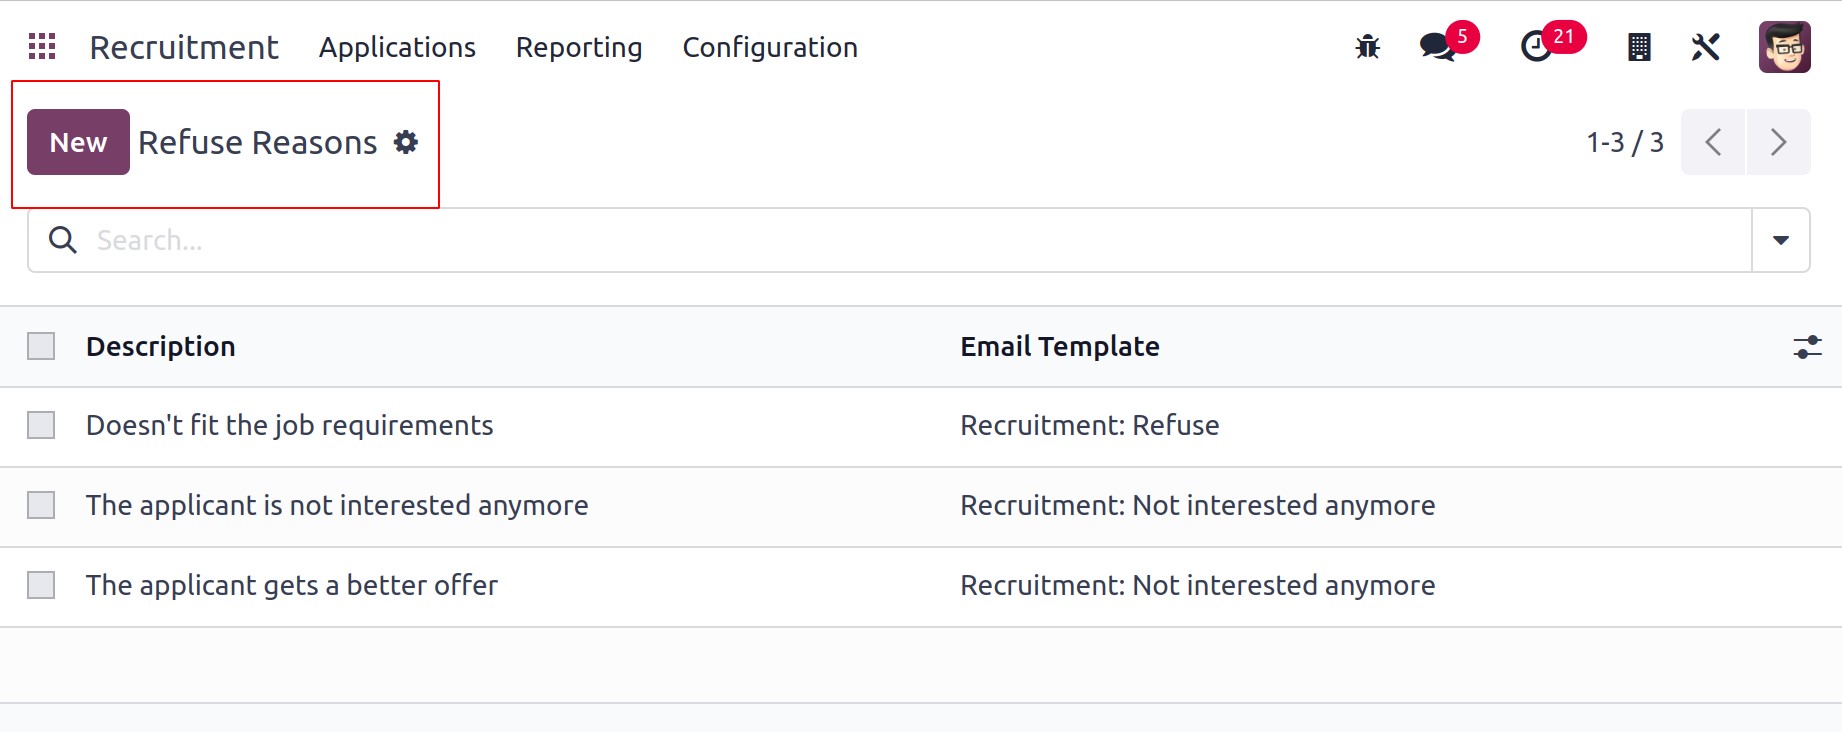
A new spot is created at the bottom of the Refuse Reasons screen after clicking the New
symbol. For your justification, you might specify the description and email template.
After applying the data of the refusal explanation, select the Save option.
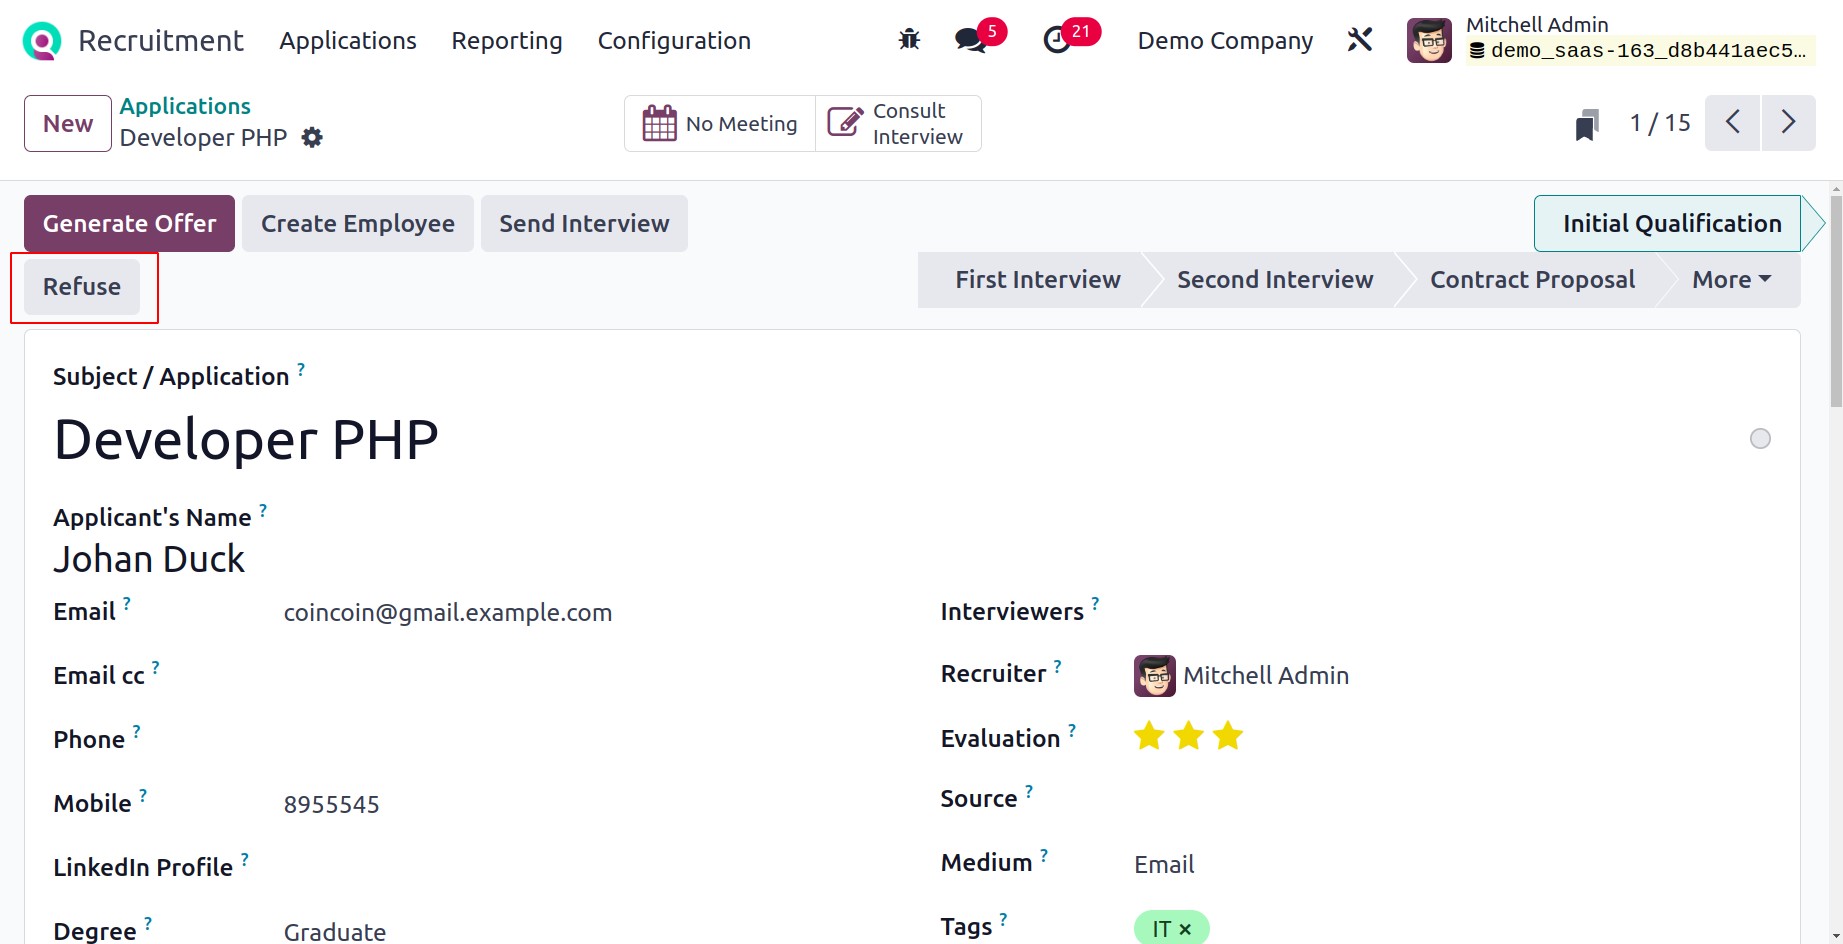
If the applicant's qualifications or performance for a particular position don't meet
your standards, you have the option of rejecting their application. To do that, you must
choose the specific application and click the Refuse button.
The user selects the reason for declining in the Refuse Reason field of a Refuse Reason
popup that opens. You can select the previously created Refuse Reason you created. Send
Email and Email Template options are automatically displayed after choosing the Refuse
Reason.
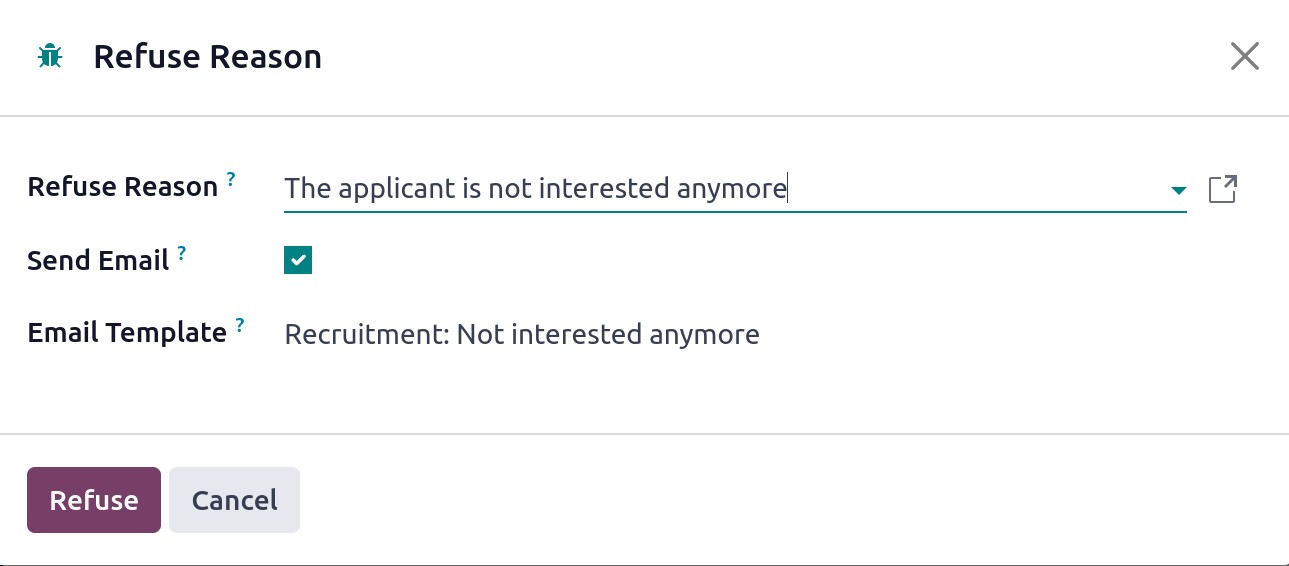
Once the Send Email field is enabled, you can send an email to an applicant explaining
the situation. The Email Template option makes it simple to select the template you want
to use for your particular email. Once you've finished, press the Refuse button.
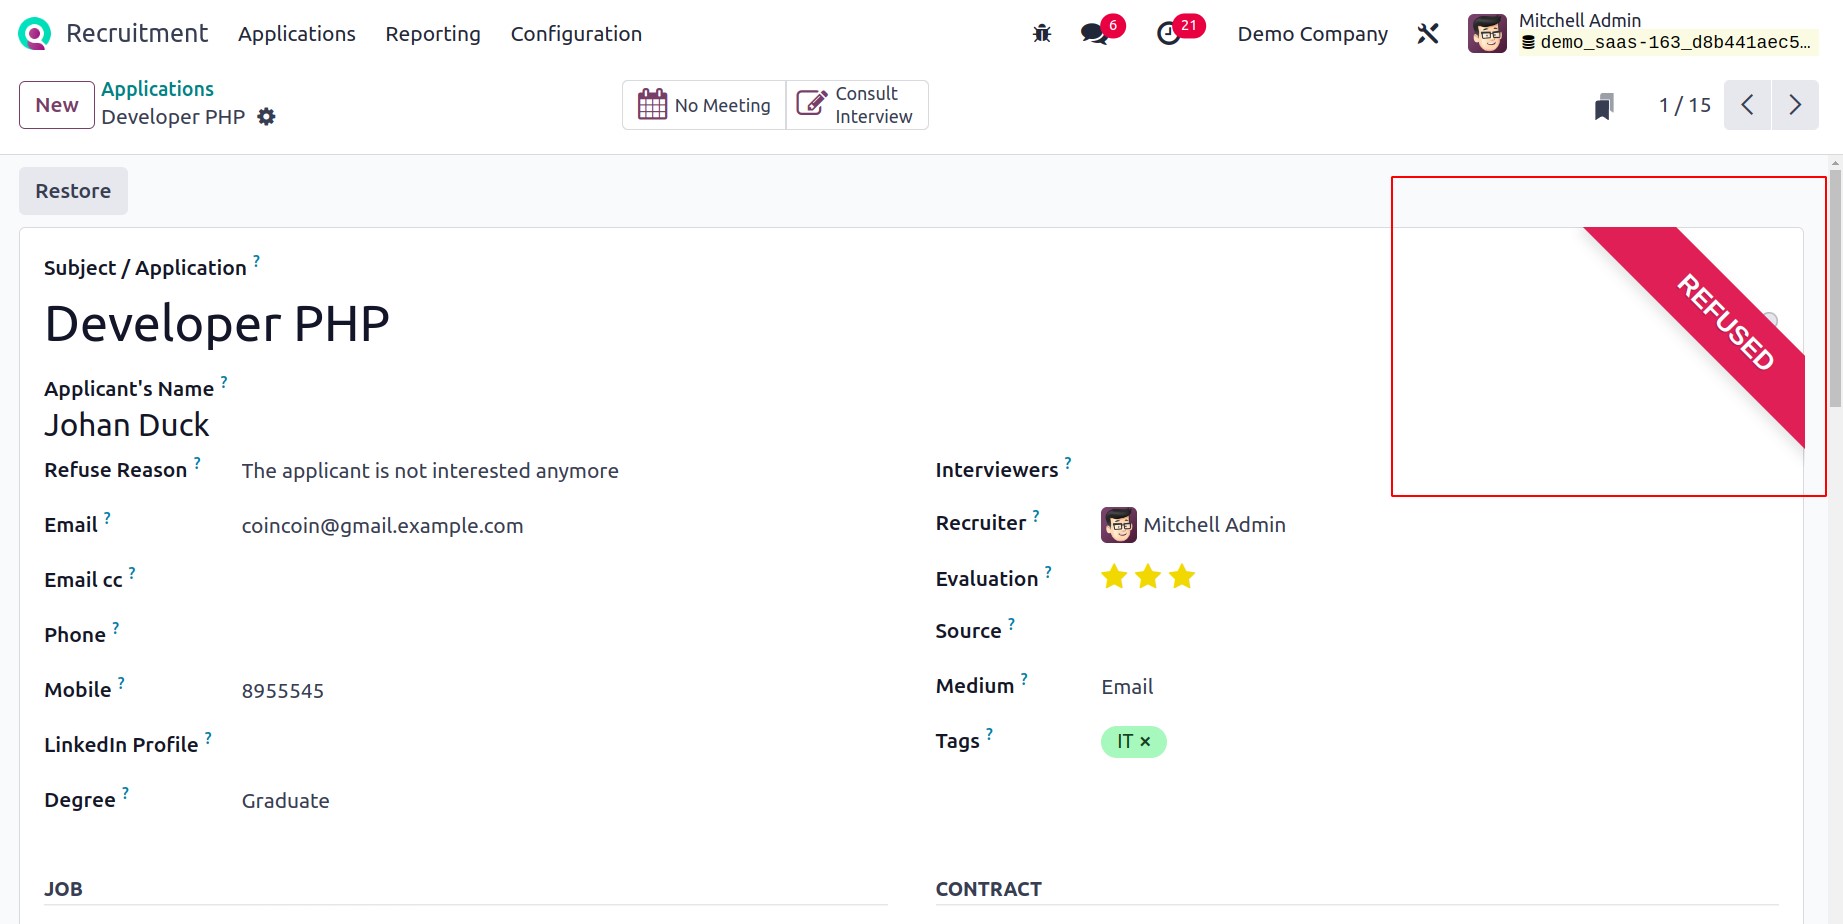
You can see a Red color REFUSED mark in the Applications window once you've submitted
the explanation. Therefore, inside the Recruitment module, it is simple to reject
applications that are required.
Tags
Tags are used for searching purposes. The New button allows you to create new tags.

Departments
The majority of businesses have various sections that handle unique services. There are
a tonne of departments for job management, depending on the size of the organization.
The Configuration tab's Employees section is where you can find the Departments menu.
The user can see each department list in the open window, including Display Name,
Employees, Company, and more. By selecting the New option, we can introduce a brand-new
division for your business.
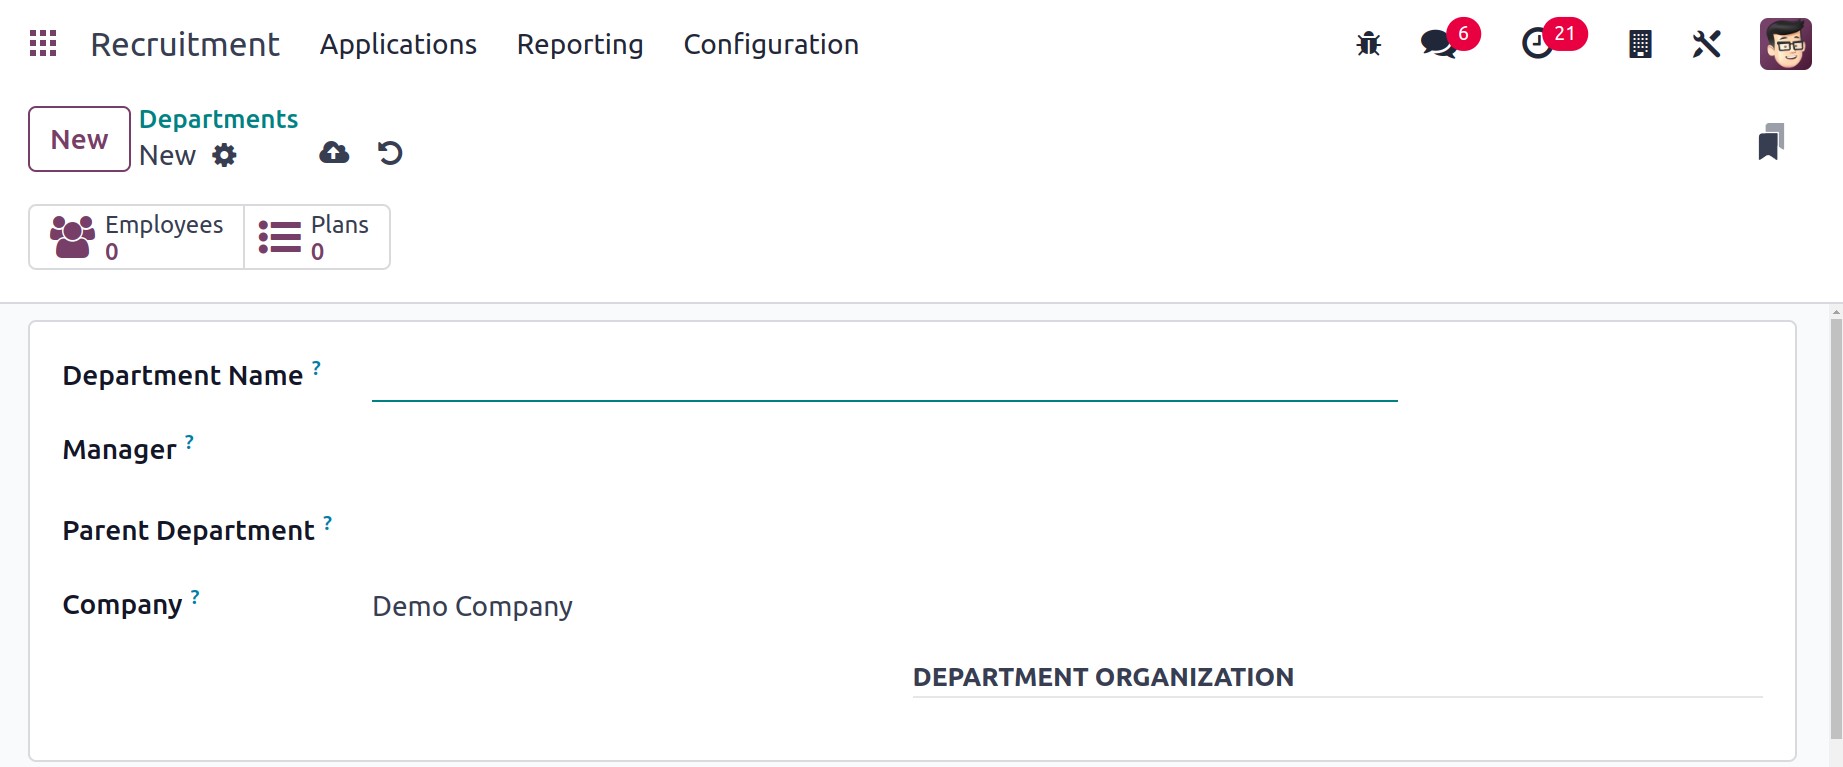
Add the name of your department's manager under the Manager option and your new
department name in the Department Name box on the open page. After assigning a parent
department, you can subcategorize different company departments.
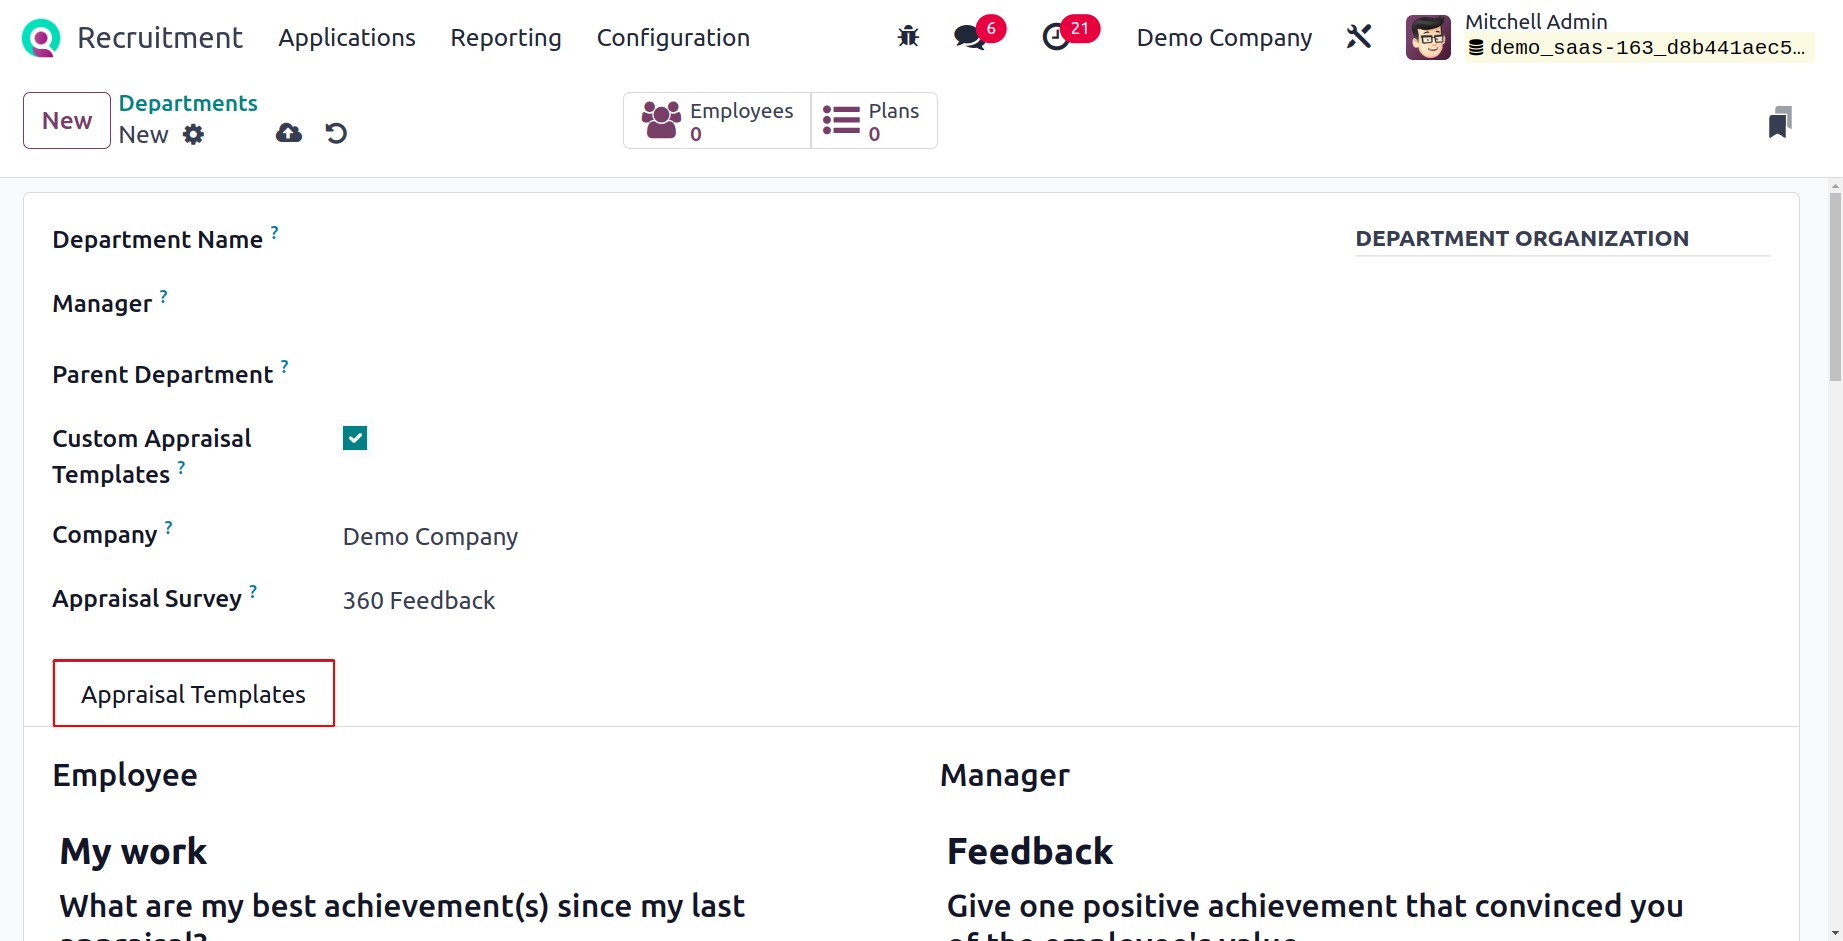
Once the Custom Appraisal Templates option is activated, you can use the default
appraisal templates. After activation, the user is presented with an Appraisal Templates
tab where they can manage the required templates. In the Company box, you can enter the
company name, and in the Appraisal Survey field, you can use the default survey form.
The Odoo17 Recruitment automatically saves every detail. Within the smart buttons
employees and Plans, you may access the list of employees as well as other
onboarding/offboarding plan information pertaining to your department.
Consequently, you may efficiently manage the departments in your company.
Skill Types
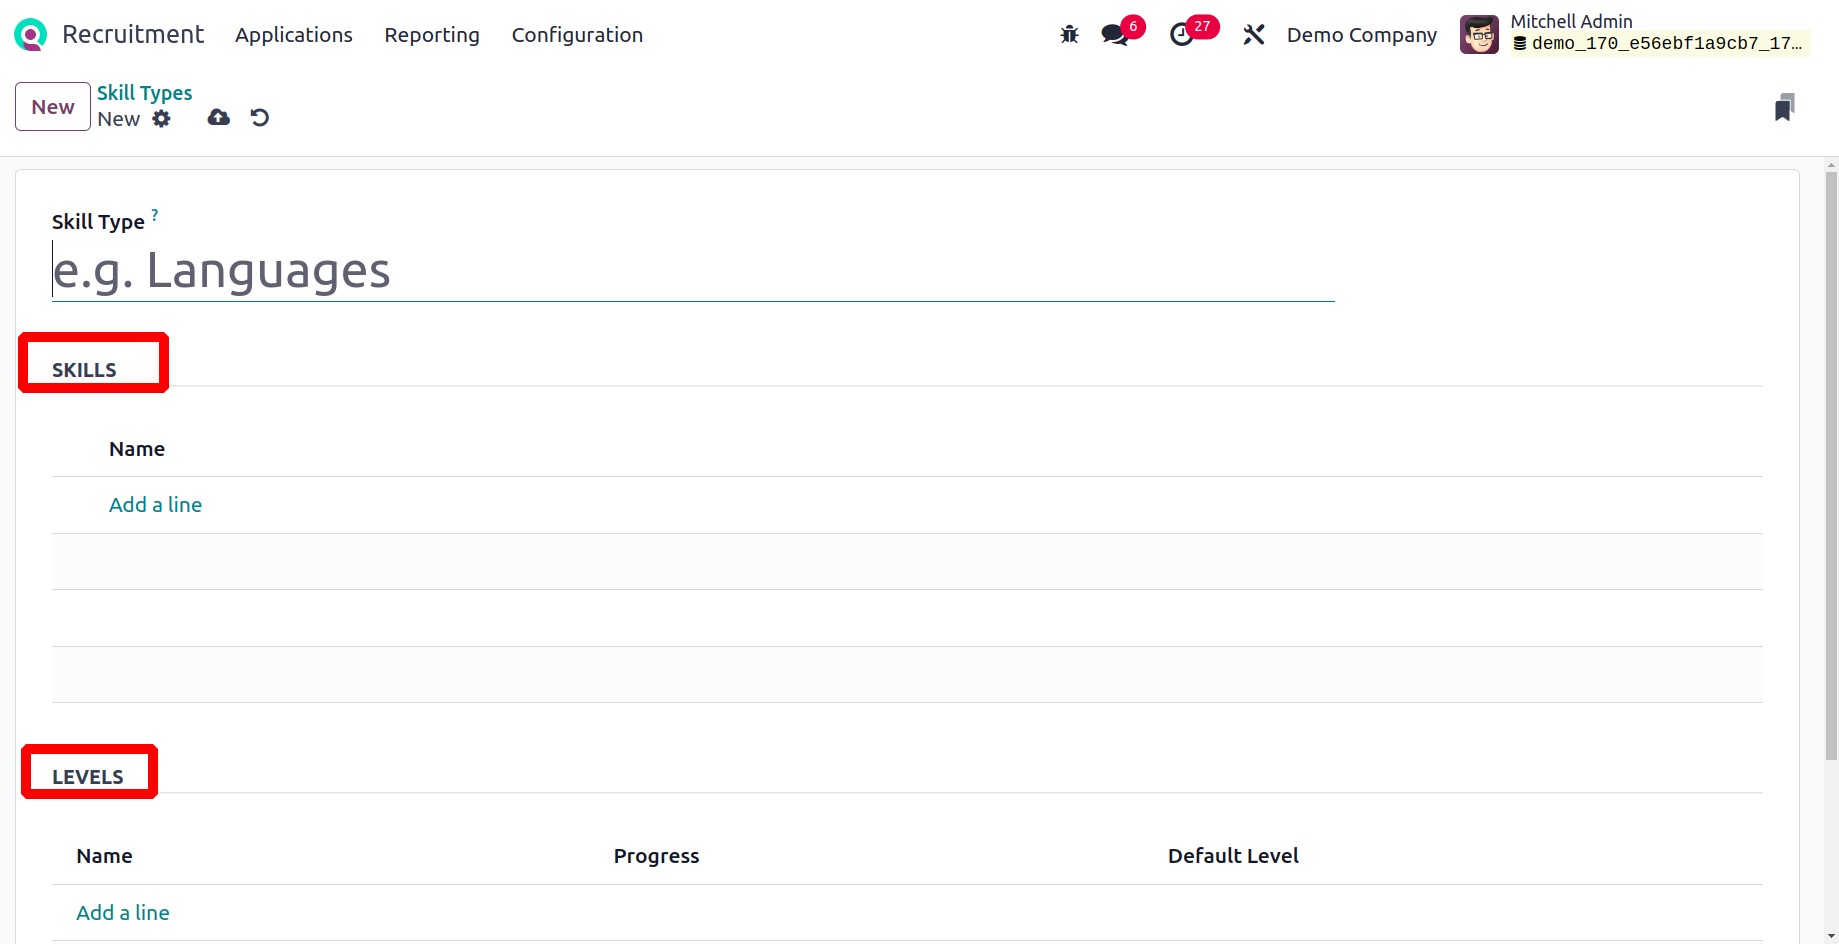
By choosing the Skill Types, employee skills in language and other areas can be
generated under Configuration. The skill and name are shown in a list.
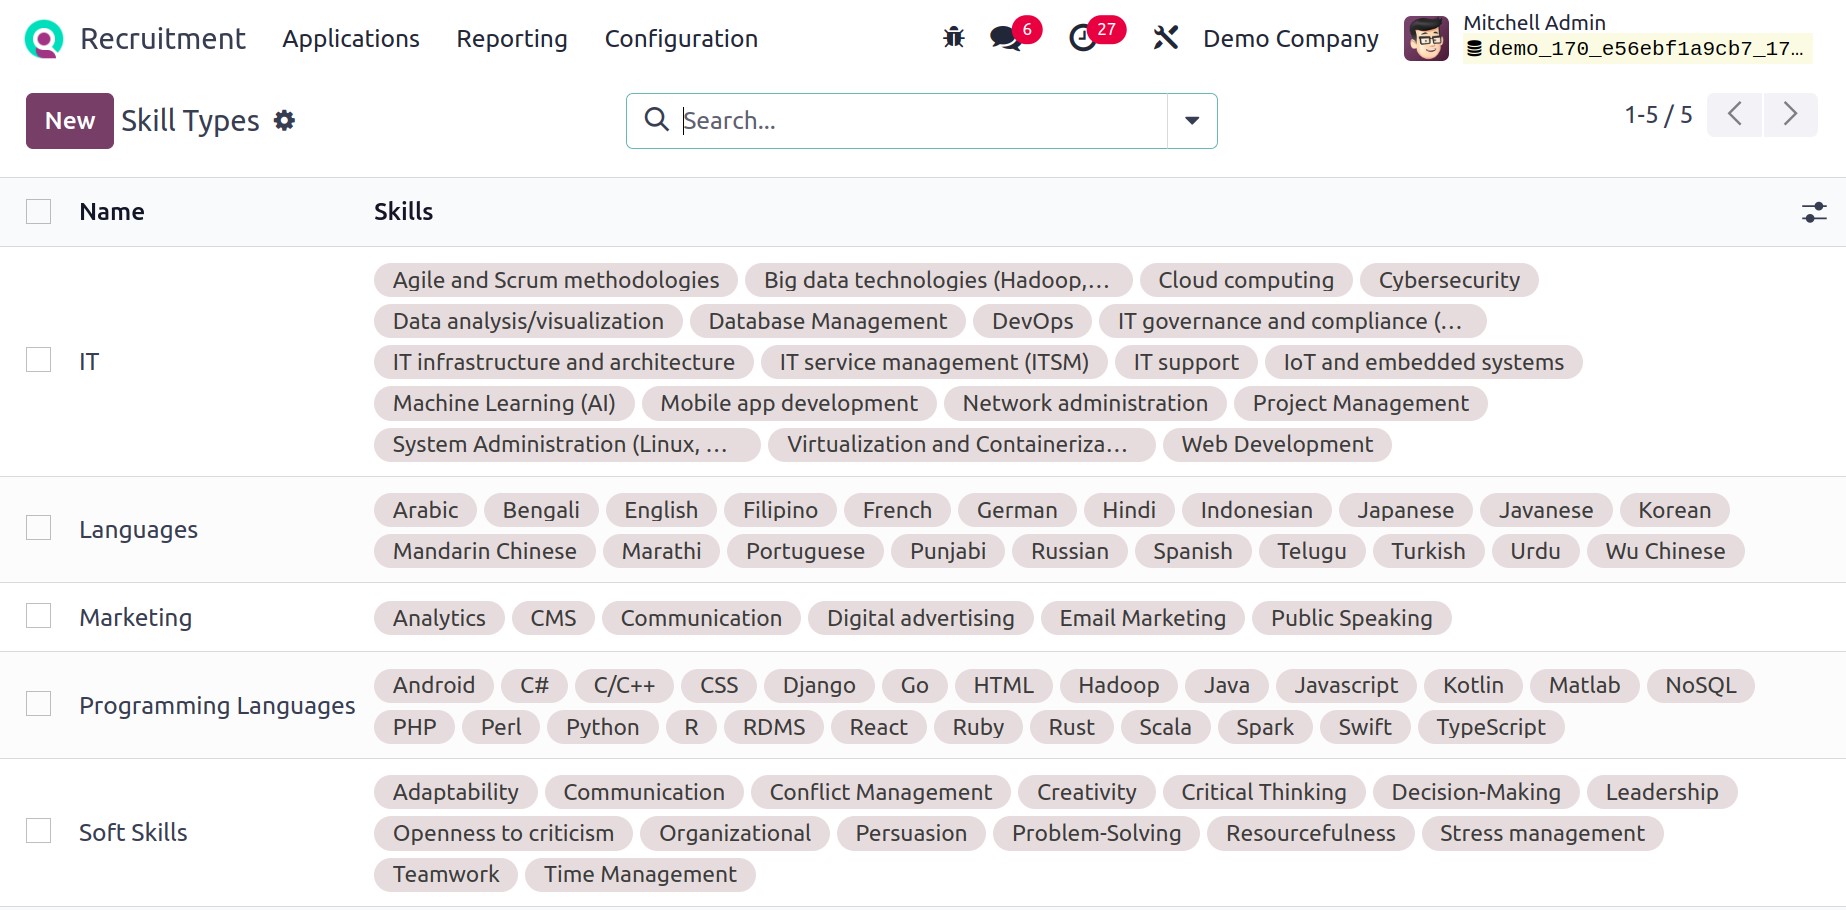
To add another, click the New button. Add the skill type, the skills under SKILL, and
lastly, under LEVEL, set the skill level.
Activity Types
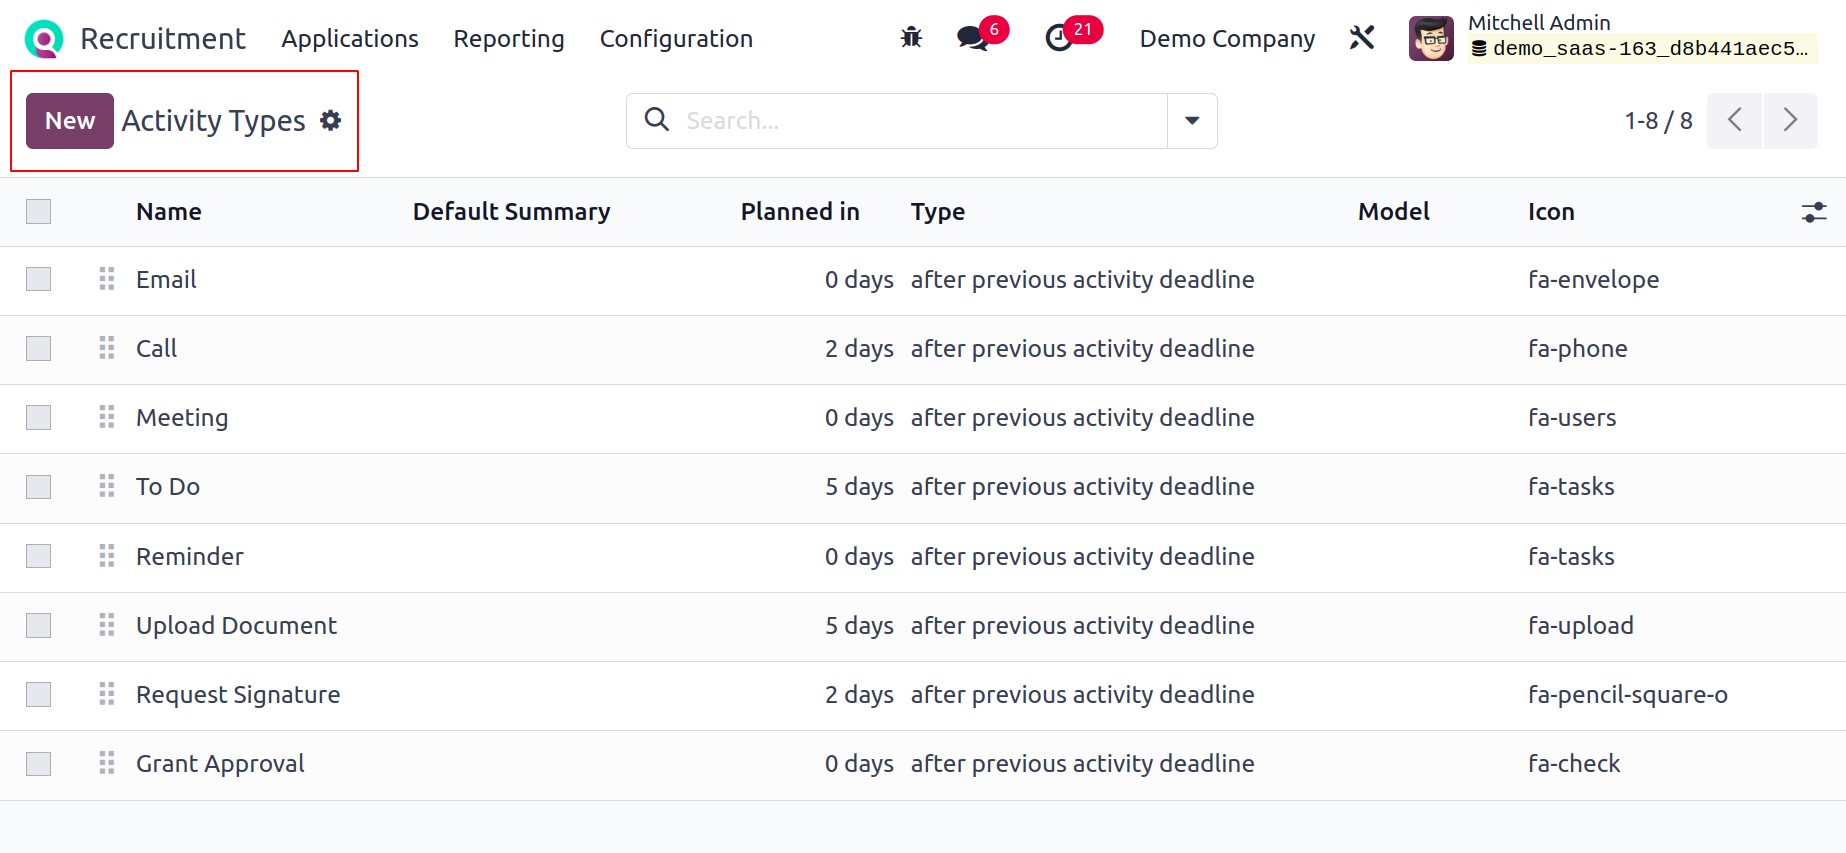
Activity kinds refer to the various categories of tasks carried out inside an
organization. A list of all created activities is available once you select the Activity
Types option in Configuration. The user can read information about each activity,
including Name, Type, Default Summary, and more, in the Activities pane. By choosing the
New icon in the Activity Types pane, you can create brand-new activities.
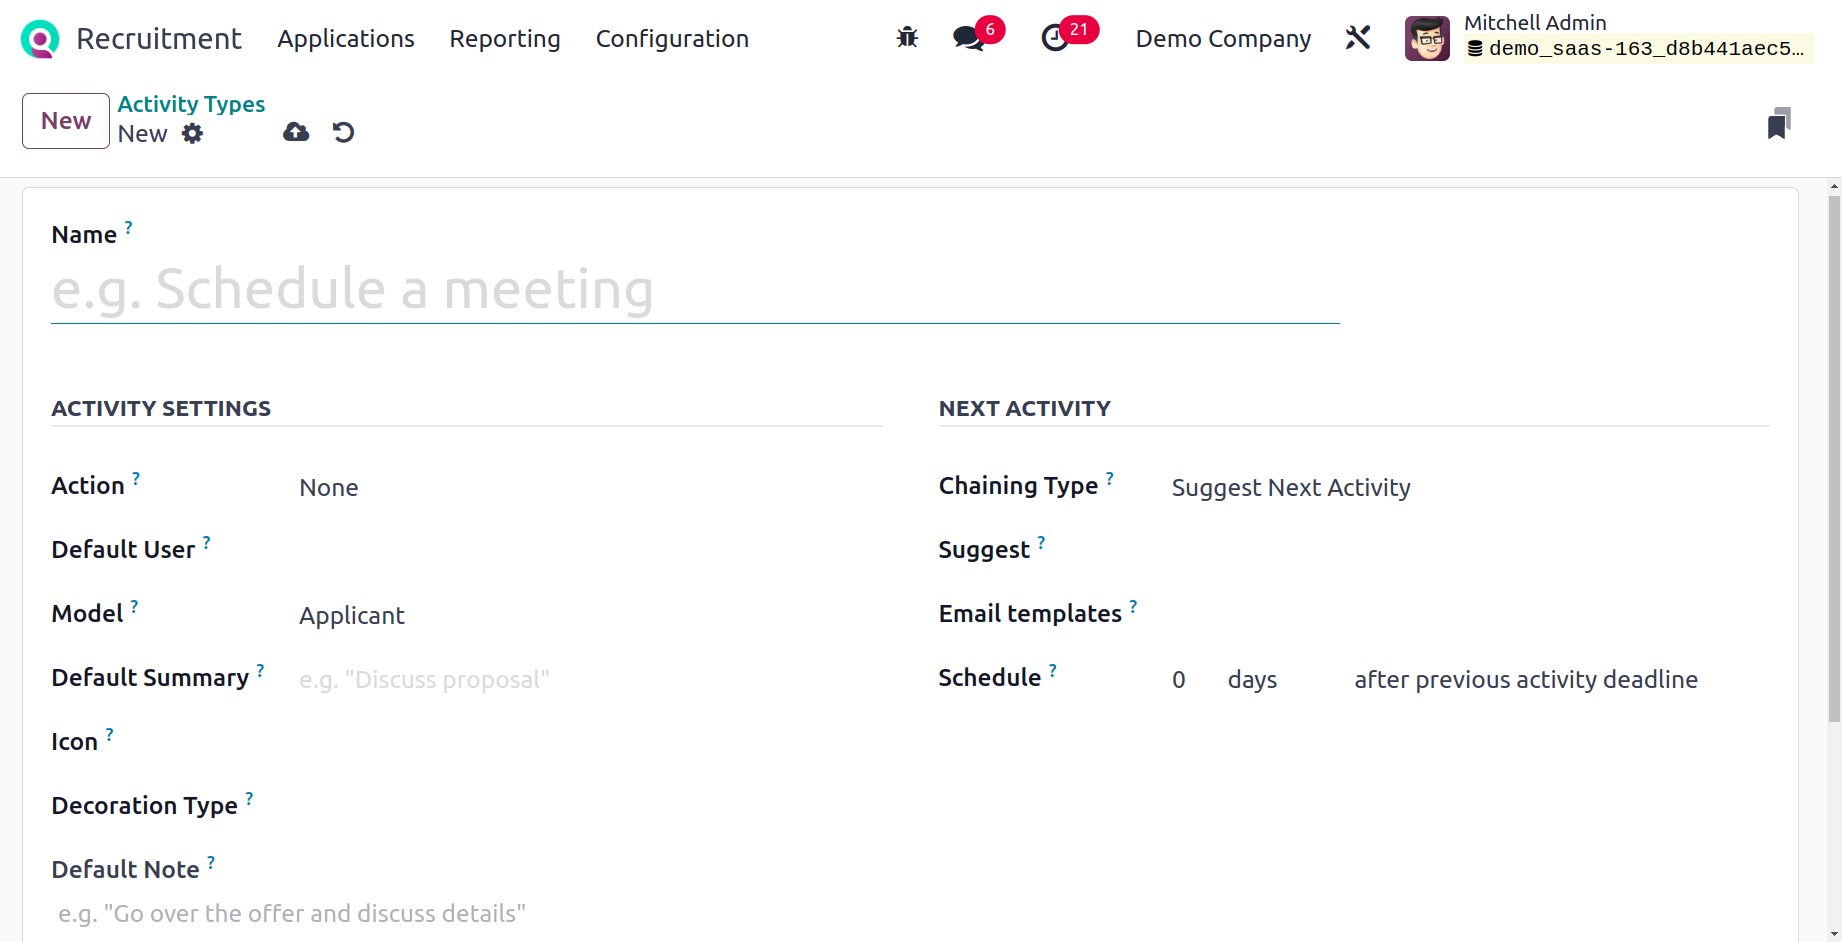
After clicking the New symbol, the user is presented with a new window. You can
customize the activity's specific settings by adding the title of the activity type to
the Name field. You can select an activity such as Meeting, Tax report, Upload document,
and more below the ACTIVITY SETTINGS. Later, you can choose a default user and fill up
the Default Summary area with an explanation of the activity type.
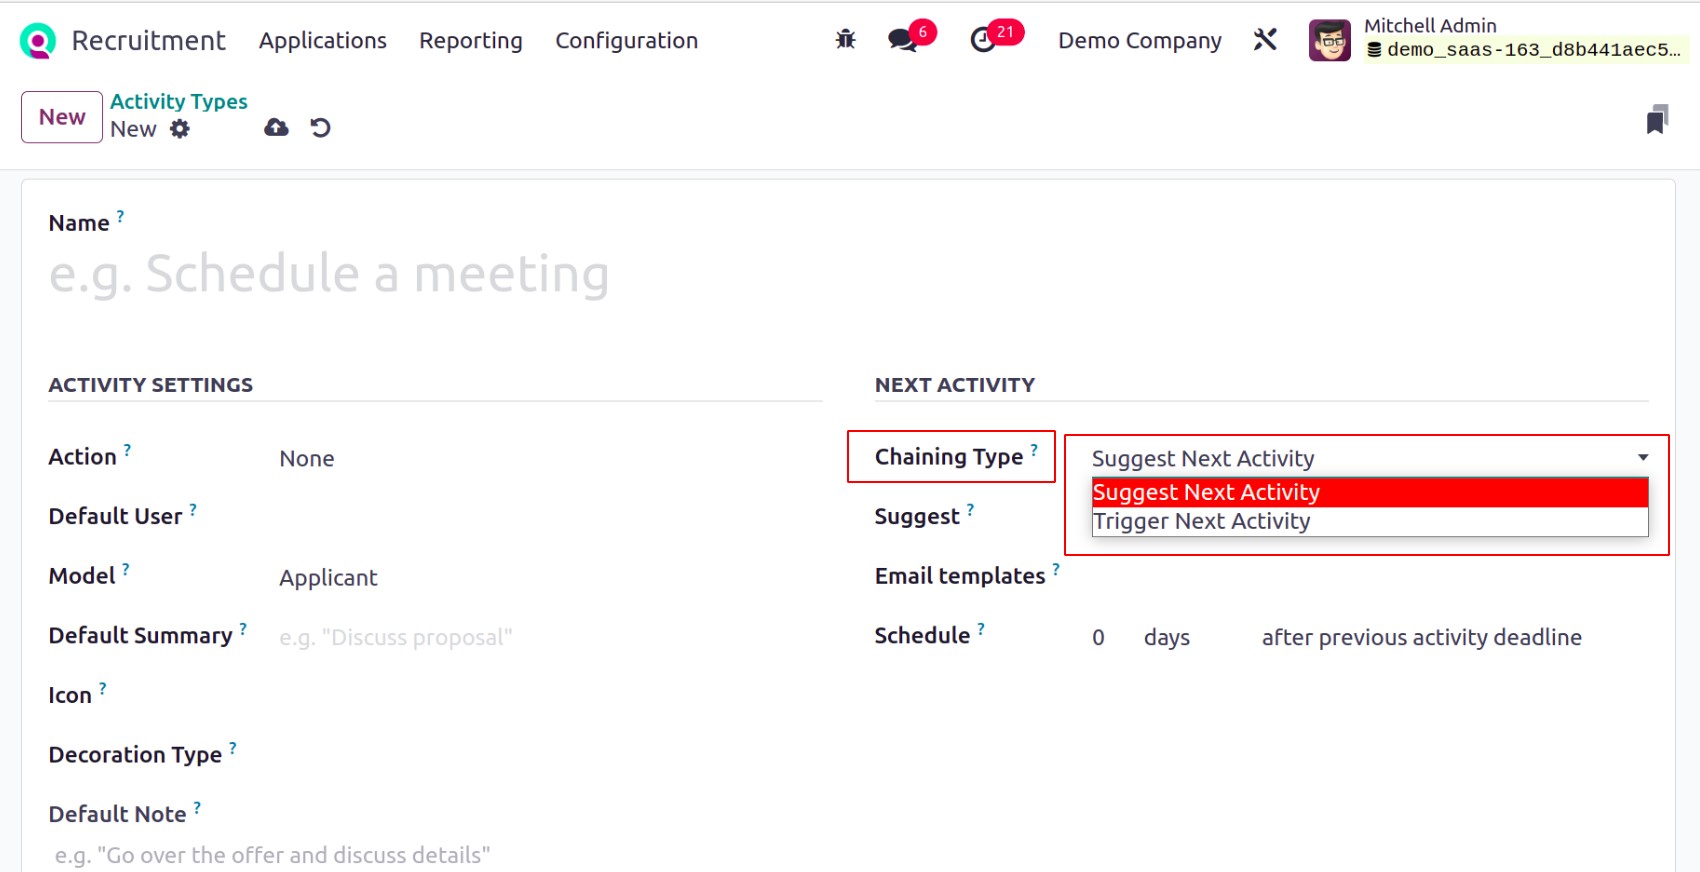
The Default Note section has further information about the action. The user can choose
the chaining type as a trigger or suggest the next activity under the NEXT ACTIVITY
section. You must add the proposal for the following activity if you choose the
suggested trigger activity option in the Chaining Type field. However, when a user
selects the option to "Trigger next activity," a Trigger field is displayed to them.
After selecting the Chaining Type, go to the Email templates section and choose a
template for the subsequent action. Additionally, you may enter the number of days after
the conclusion of the prior action in the Schedule option.
Each piece of information pertaining to Activity Types is manually saved in Odoo 17
Recruitment. Within the Odoo17 system, several actions can be scheduled for various
business functions. You may, for instance, plan tasks when you create an application for
your business. Select your application by going to the Applications window in Odoo 17
Recruitment. As shown in the screenshot below, you may reach the Activities option at
the bottom of your Application screen.
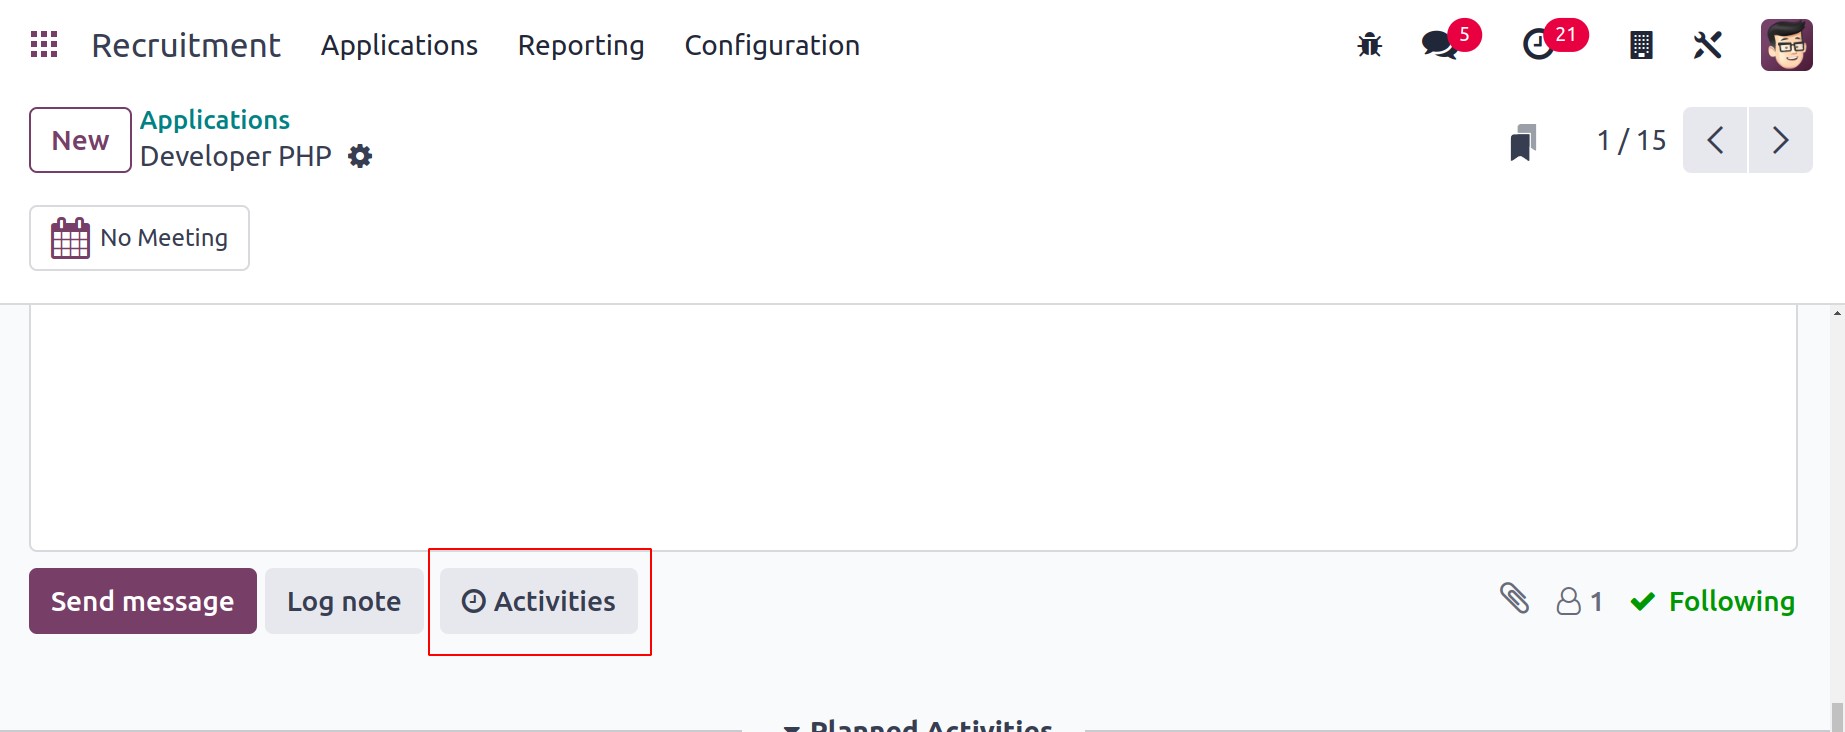
The user is presented with a new window after selecting the Activities menu. In the
Schedule Activity window, you may select the Summary and type of your newly created
activity. Additionally, add the designated individual and enter the due date for the
activity in the Due Date section.
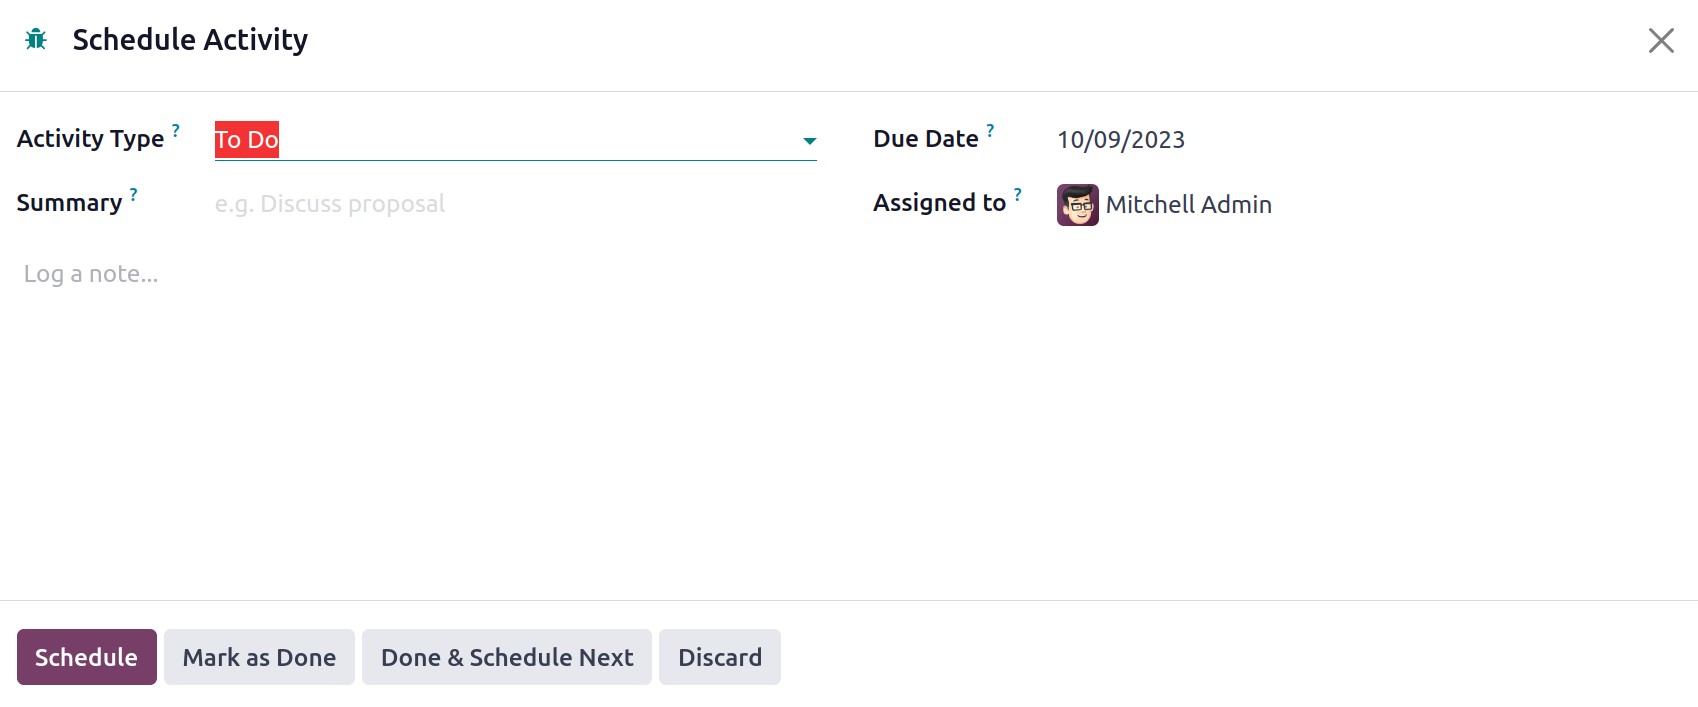
Inside the Log a note box, the user may add additional details to the scheduled action.
Click the Schedule icon after mentioning each piece of information.
Therefore, it is simple to arrange a variety of events related to job applications for
your organization.
Reporting
Creating reports on various activities and operations is one of a company's key
functions. After reviewing annual reports, a corporation can quickly create marketing
goals and comprehend business outcomes and trends. The greatest report management system
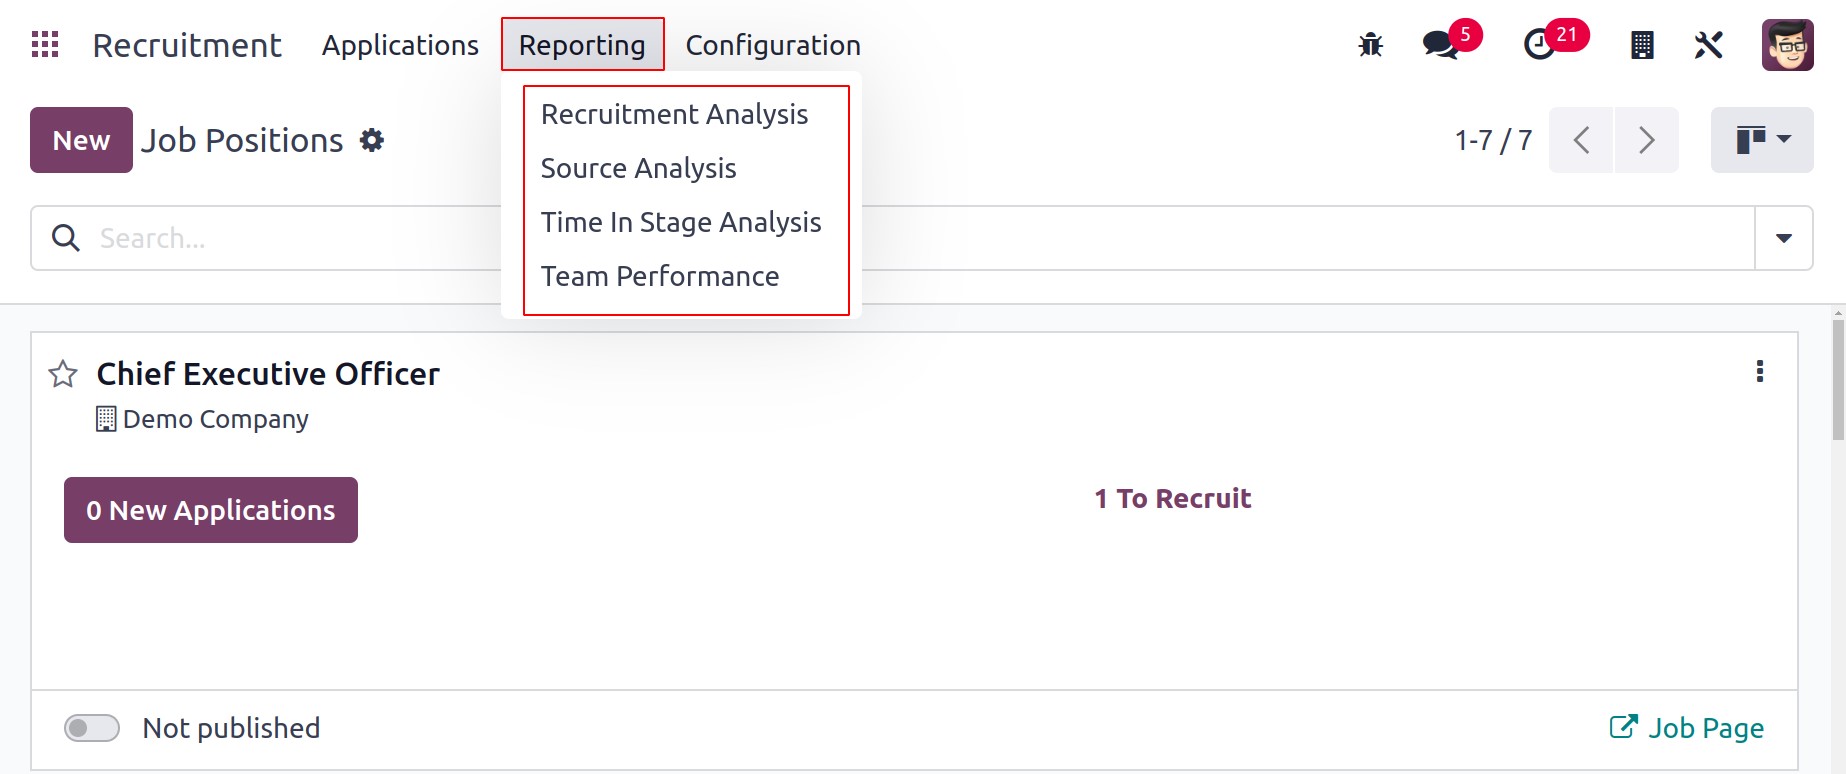
helps the business grow swiftly. We can manage Source Analysis, Team Performance,
Recruitment Analysis, and Source Analysis below the Reporting area of Odoo17
Recruitment. Let's investigate each reporting feature in turn.
Recruitment Analysis
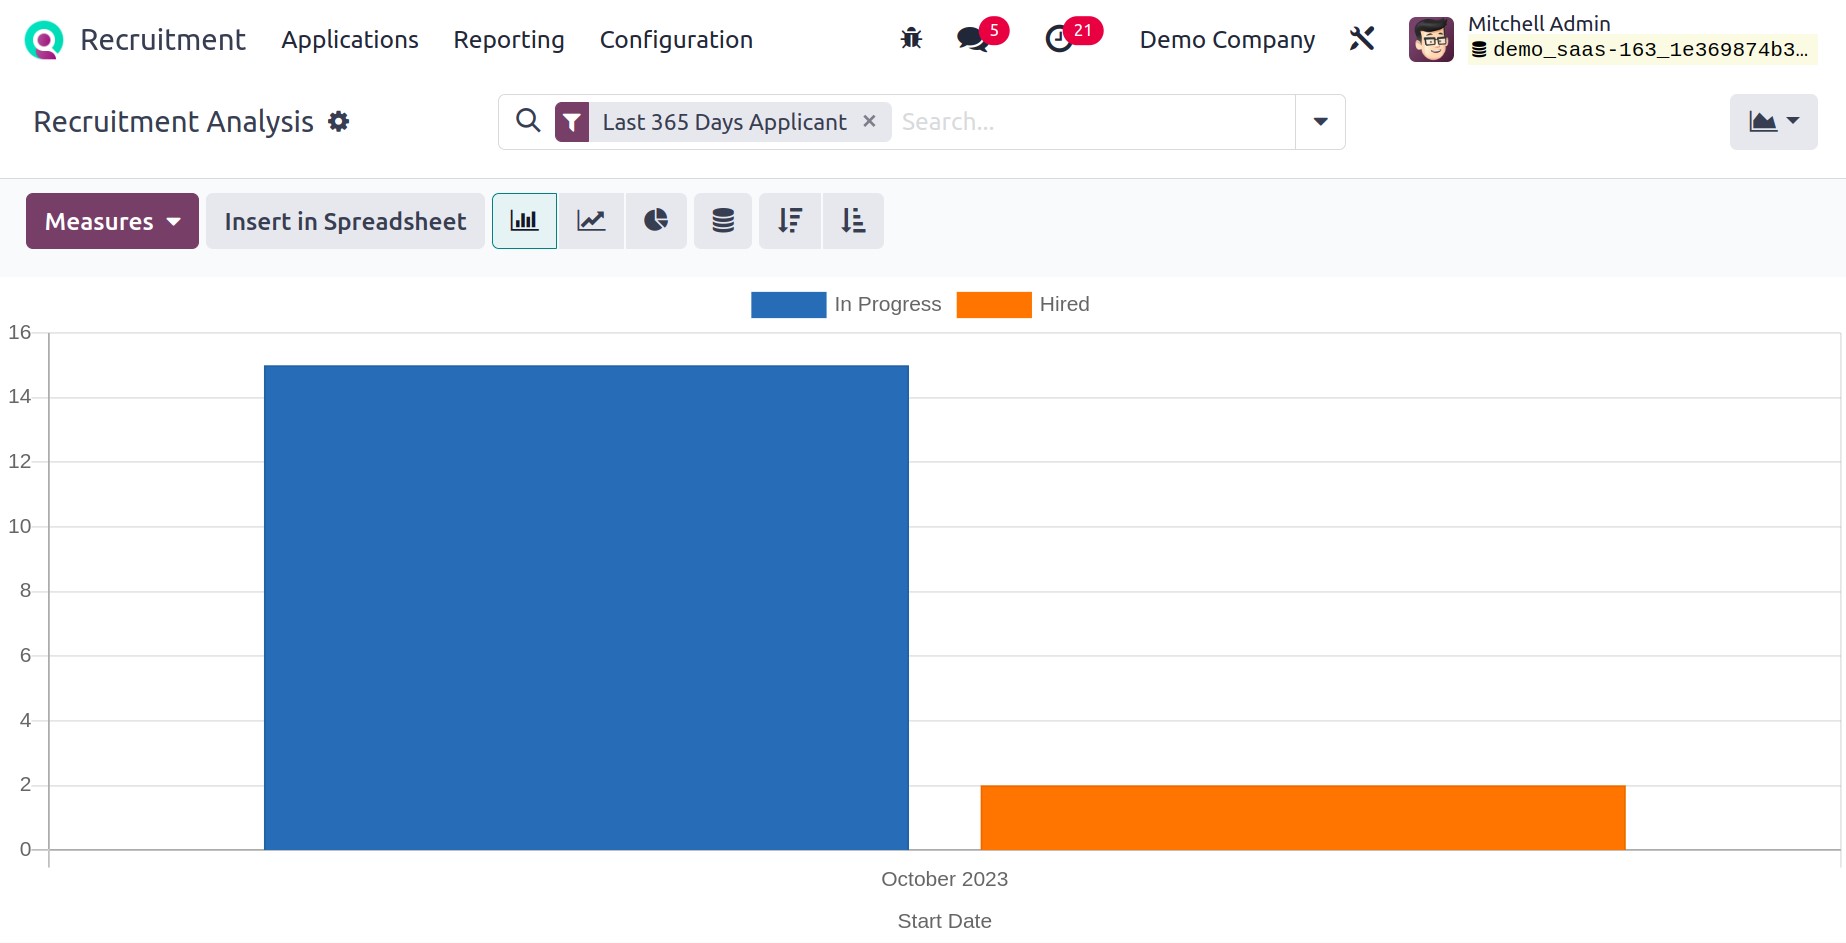
By selecting the Recruitment Analysis menu from the Reporting tab, you may assess the
hiring of candidates in a company. The X-axis of the recruitment analysis graph shows
source data, and the Y-axis shows the applicant count. In a firm recruitment report, you
may analyze the recruited and in-progress data independently. We can add several values
to the graph, such as Meetings, Hired Ratio, Process Duration, and more, by selecting
the Measures icon.
Source Analysis
Through a reporting function, users can examine the sources of each hiring procedure
inside the organization. When the user selects the Source Analysis menu from the
Reporting tab, a graphical depiction appears. The viewer can observe the application
count on the Y-axis of the Graph view, and source information is available on the
X-axis.
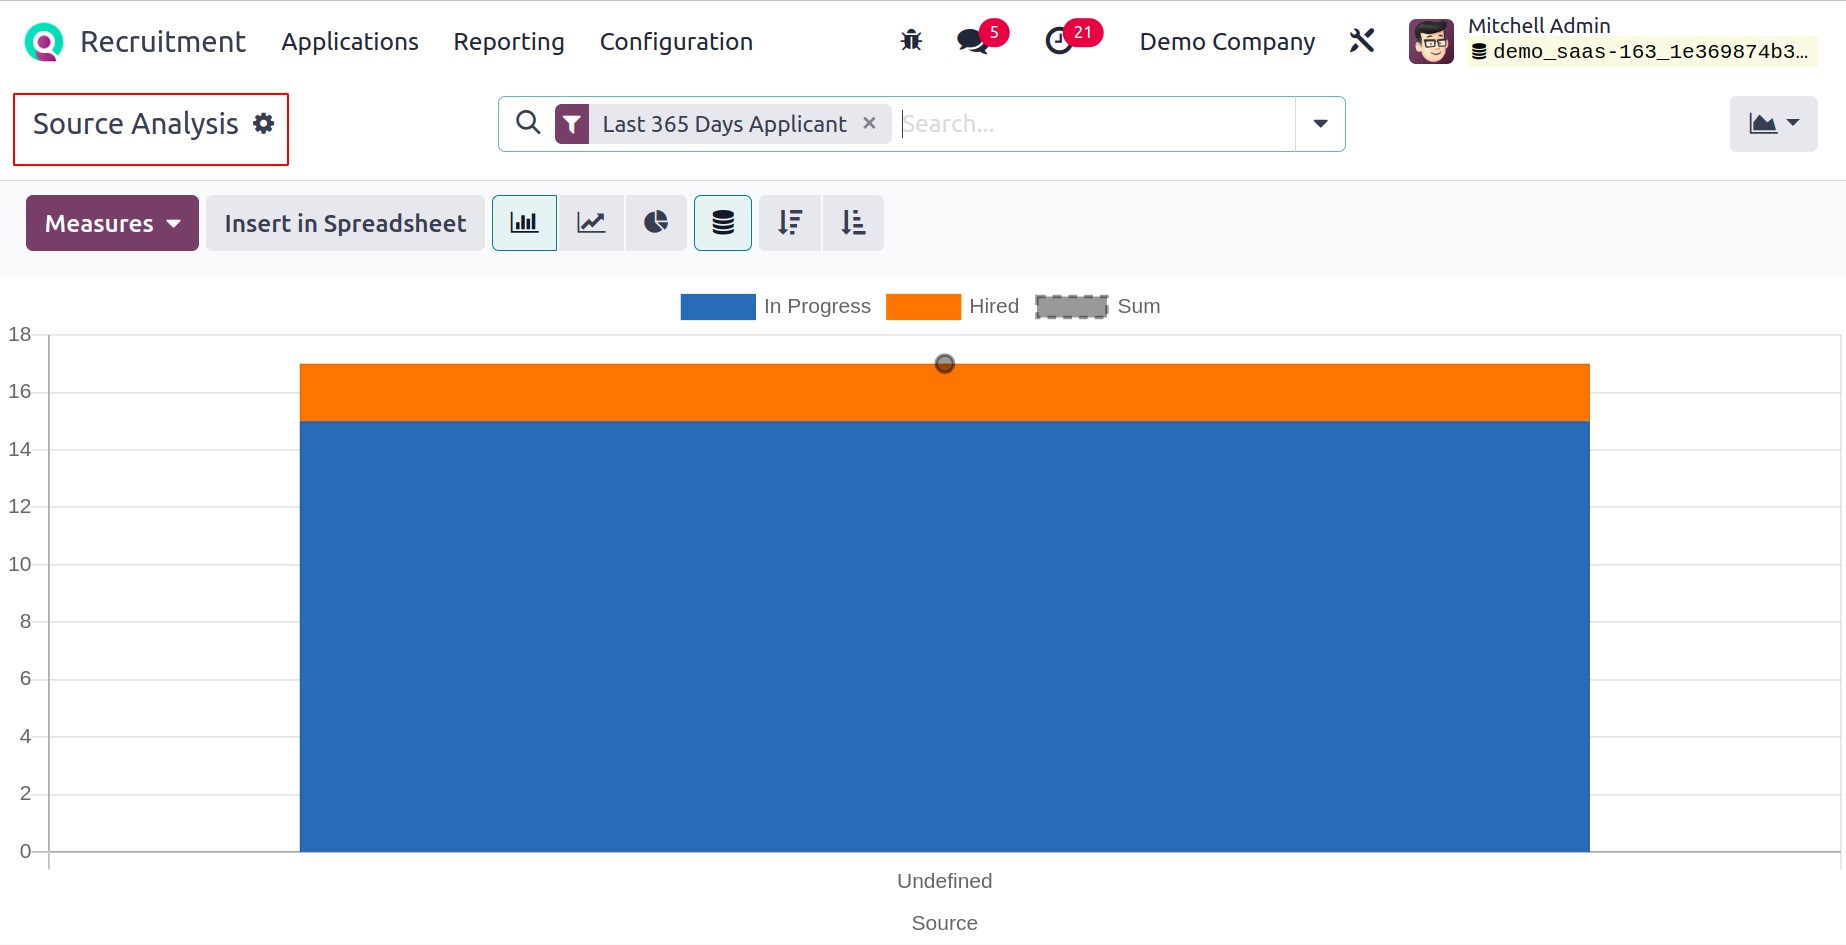
You can assess source analysis by selecting the Measures button and entering various
numbers. Graphs can also be easily viewed in pie, line, and chart formats.
Time in Stage Analysis
By selecting Time from the Stage Analysis option in Reporting, you may assess each
applicant's recruiting stage. The step Analysis window's Pivot view of time displays a
pivot table with the total counts of each step of the hiring process broken down by job
role. The Pivot table gives users access to the total days spent on each stage of the
initial qualification, second interview, contract proposal, and first interview
separately. You can apply the count of each stage to the pivot table with the help of
the Measures icon.
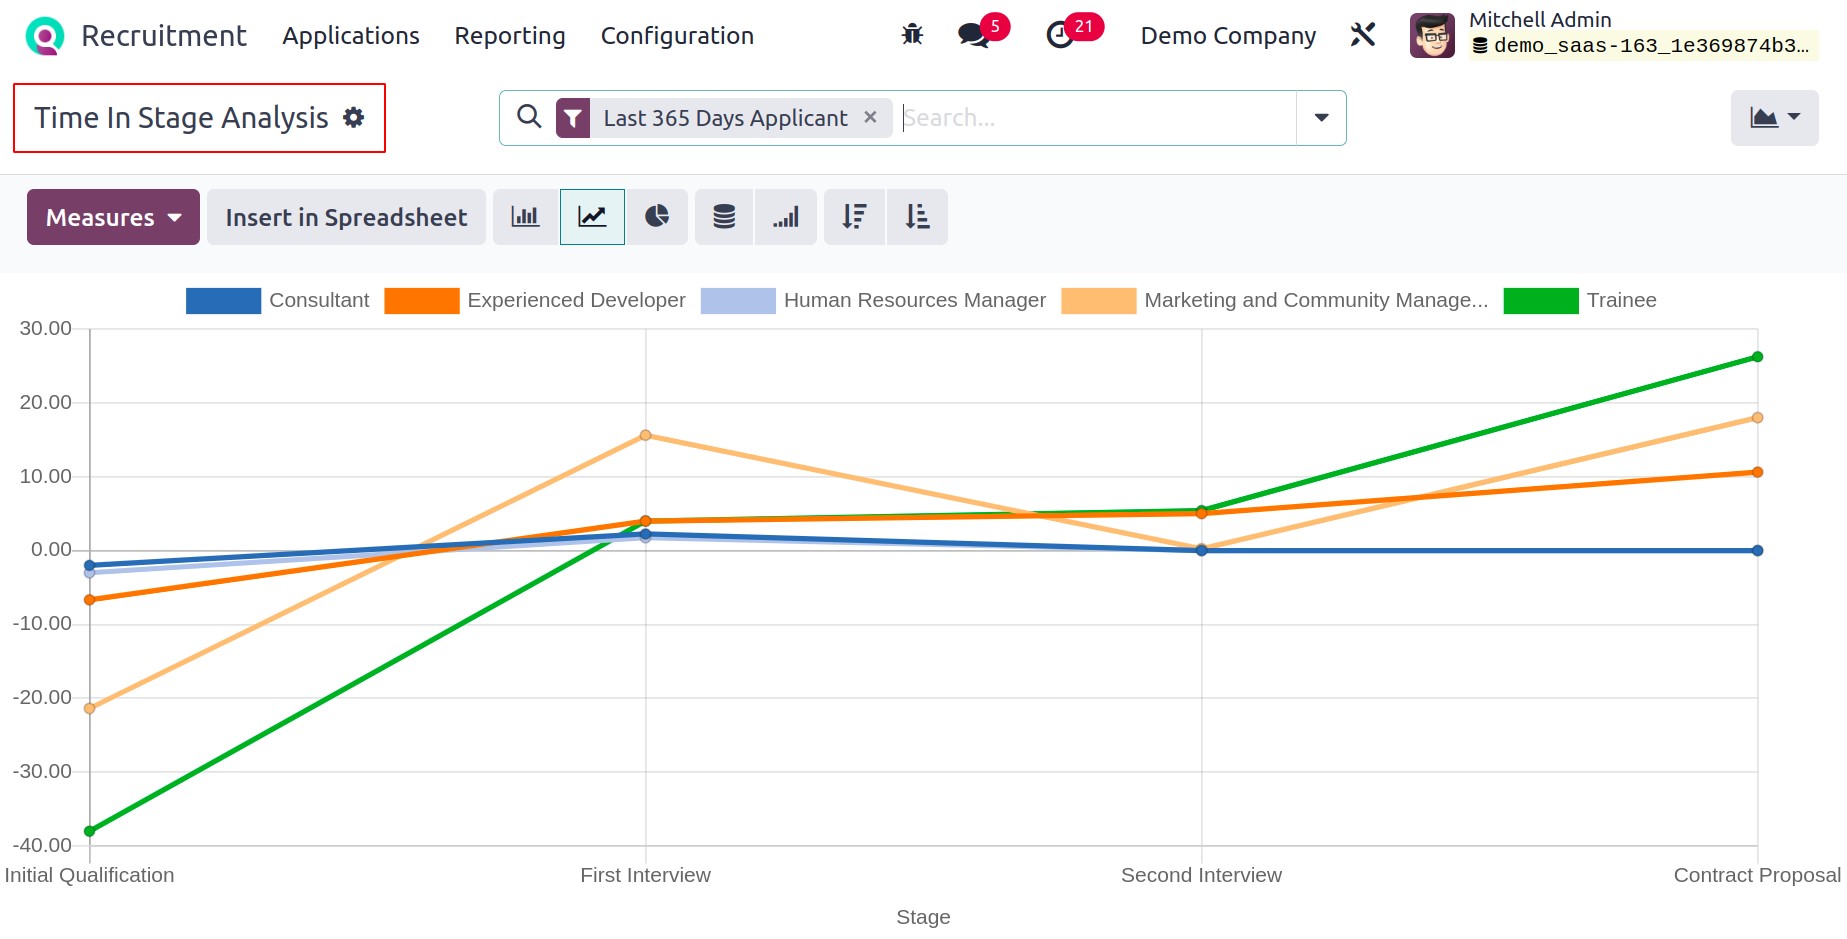
As a result, it is simple to analyze the stages of the hiring process for each job
posting.
Team Performance
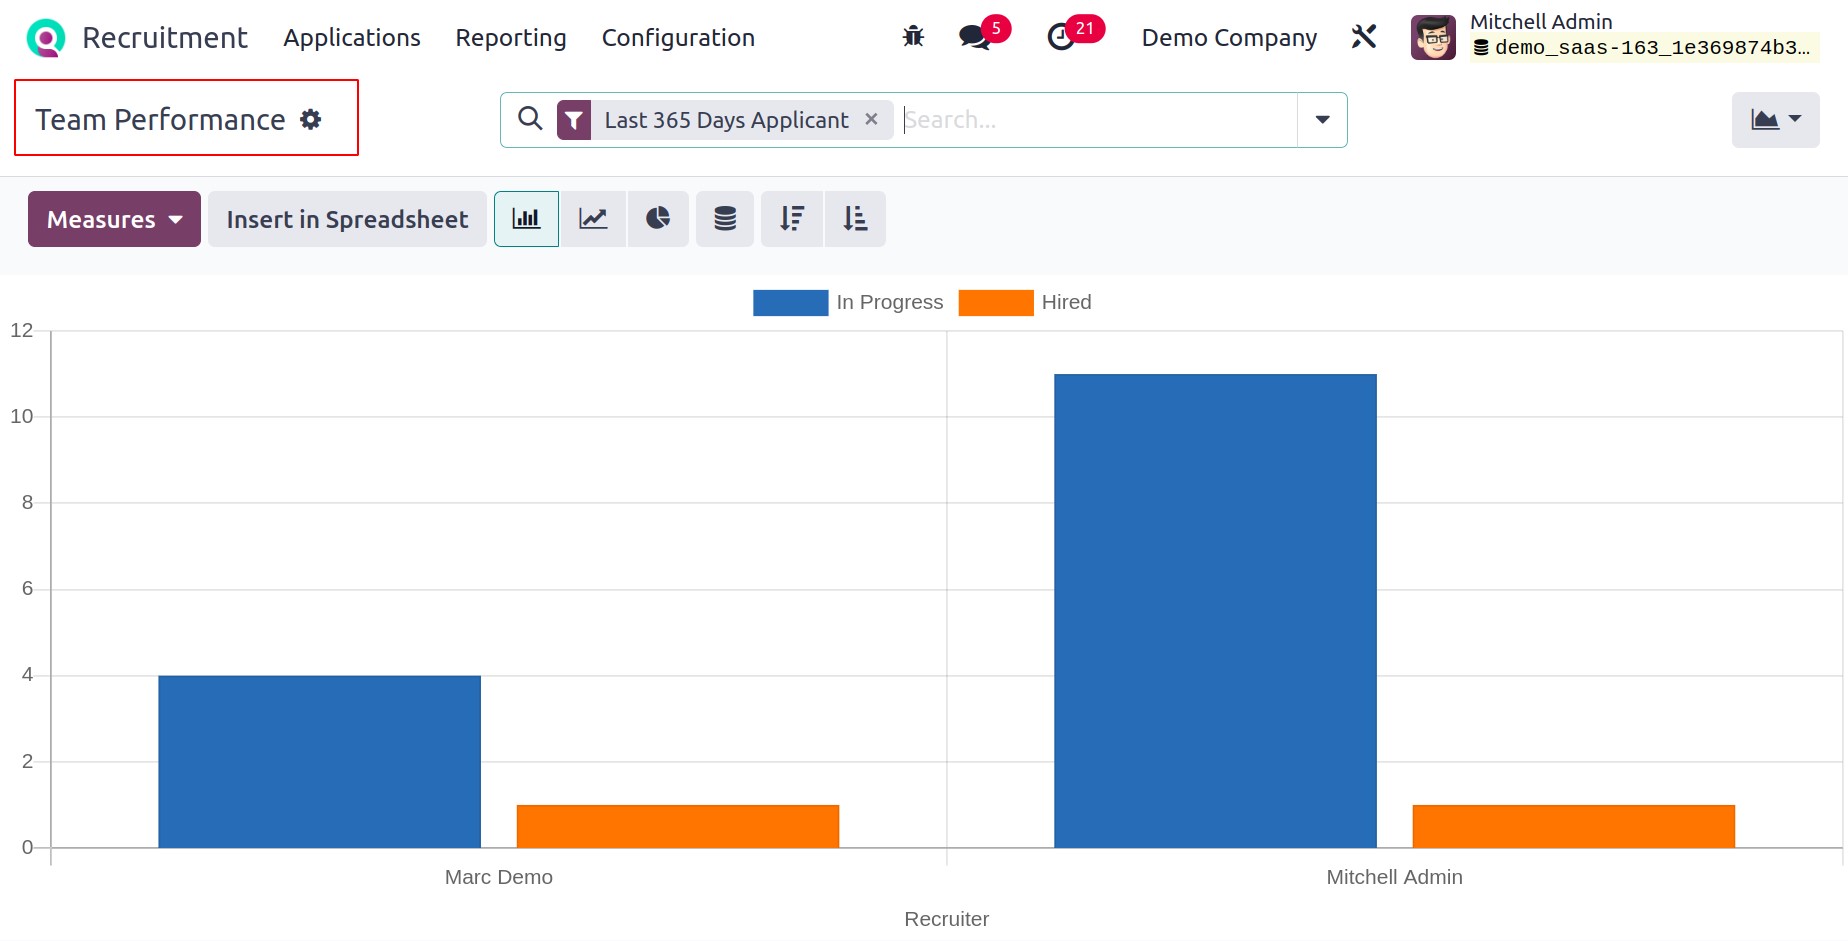
Analyzing each team's performance inside your organization enhances efficiency and
workflow. The performance of each team may be analyzed using Odoo 17's Reporting
feature. A user can get a graphic representation by choosing the Team Performance menu
in Reporting. You can see the Recruiter data on X-axis, and Y-axis denotes the Count in
the Graph view. Additionally, the recruiter's hired and ongoing information is
distinguishable by distinct colors. By selecting the Measures symbol, you may
additionally group the team's performance according to the number of applicants,
meetings, hired people, length of the process, and other factors.
Every step of the employment process, including interviews, onboarding, template
creation, and hiring administration, is made simpler by the Odoo 17 Recruitment module.
The greatest option for automating the hiring process in your company is Odoo 17 ERP
software.