Quality management is the process of supervising all tasks and
operations to maintain a target degree of quality. This
procedure entails the development of quality assurance, control,
policy, and improvement. Prior to putting a product on the
market for clients, a corporation must execute a number of
quality-checking operations for the commodity. You can configure
all of your activities on a single system thanks
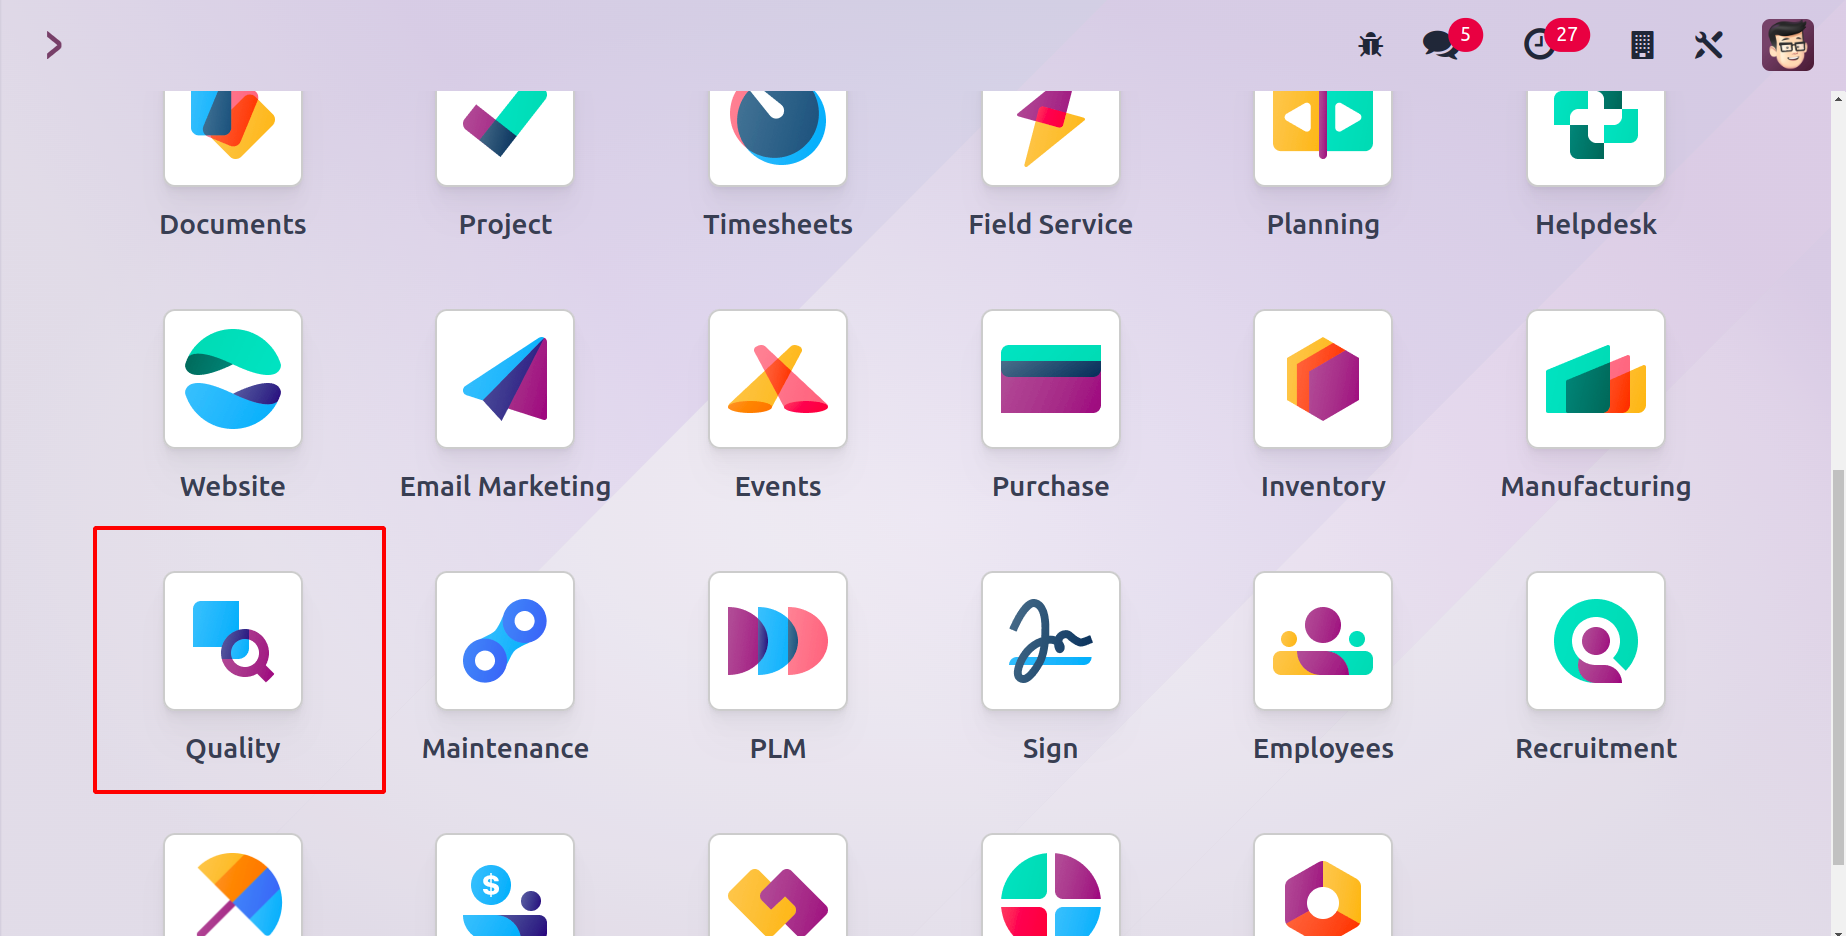
to the Odoo 17 Quality module. Installing a Quality module from
the Odoo17 Apps is the first step.
Quality Teams
Maintenance job management in a business is supported by quality teams in Odoo 17. By
assembling different teams according to your needs, you can allocate maintenance tasks.
Once various teams are created and maintenance is handled by them, the work gets
simpler. An overview of the primary quality team is visible when the Quality
module is opened. The number of ongoing quality inspections and quality alerts is shown
in the Quality Overview box.
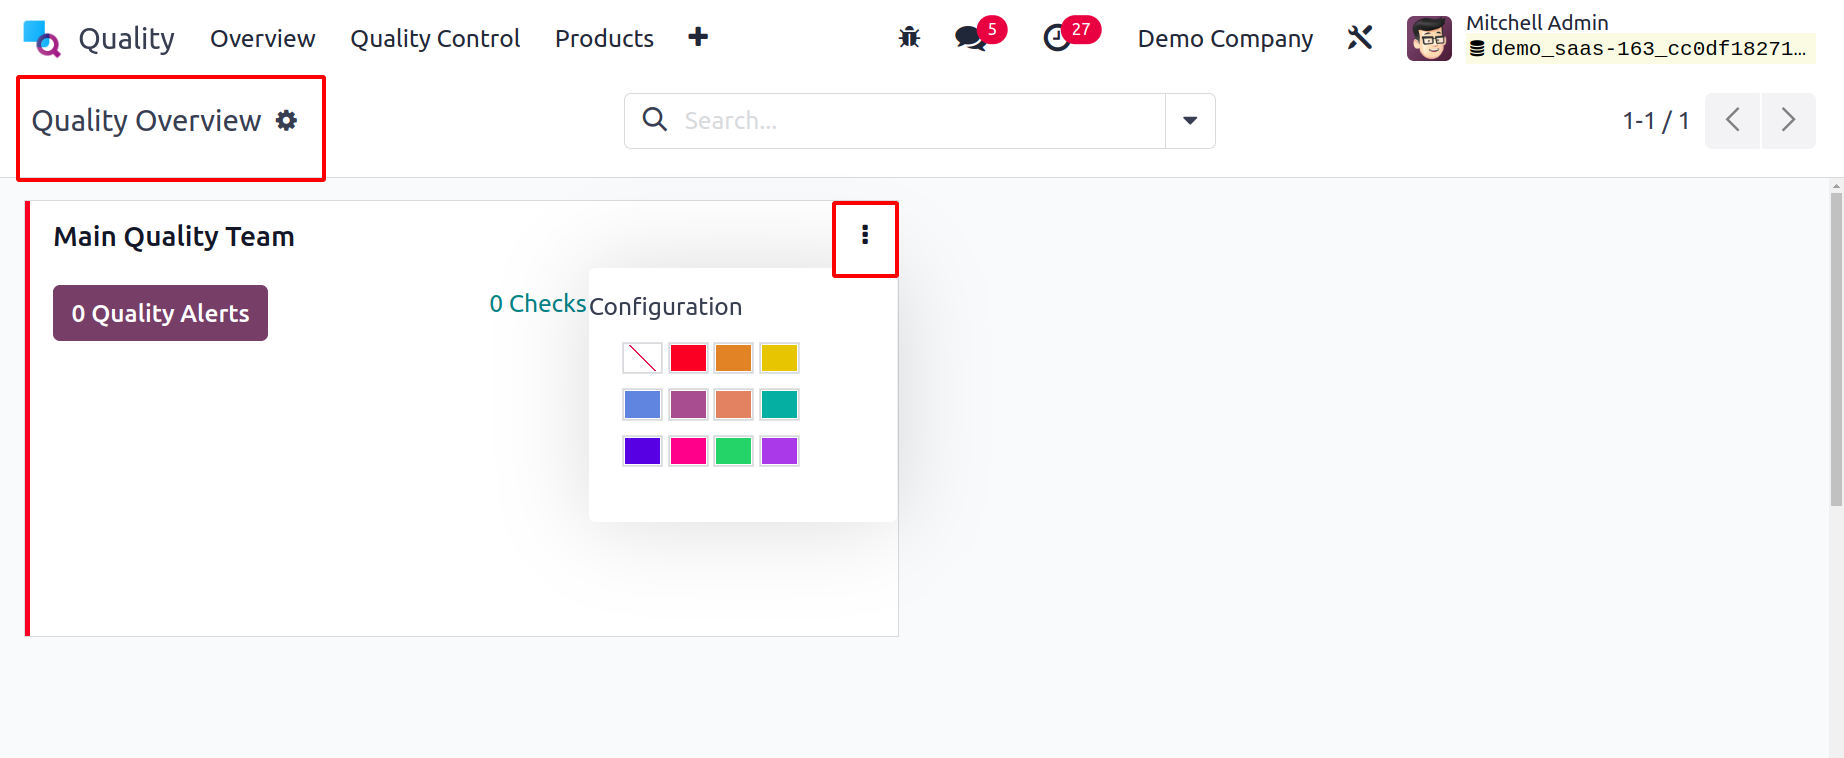
A user can access information about each quality alert by selecting the Quality Alerts
icon. The checks in progress allow you to access ongoing quality checks in a similar
manner. You can access the configuration function by selecting the three-dot symbol on
the right side of the Main Quality Team.
Within the Configuration tab, we can create Quality Teams. Once the user selects the
Quality Teams menu from Configuration, a list of all preconfigured quality teams is
displayed to them. We can see the firm information and quality team name individually in
the Quality Teams window's List view. You can select the
team straight from the list to learn more about it. To create a new team, click the New
symbol on the Quality Teams screen.

Add the name of your top-notch team to the open page's Team Name field. Subsequently, in
the Email alias area, type the backup email address that an administrator adds to the
user's primary email address. The primary email address is used for all emails sent from
the Email Alias.
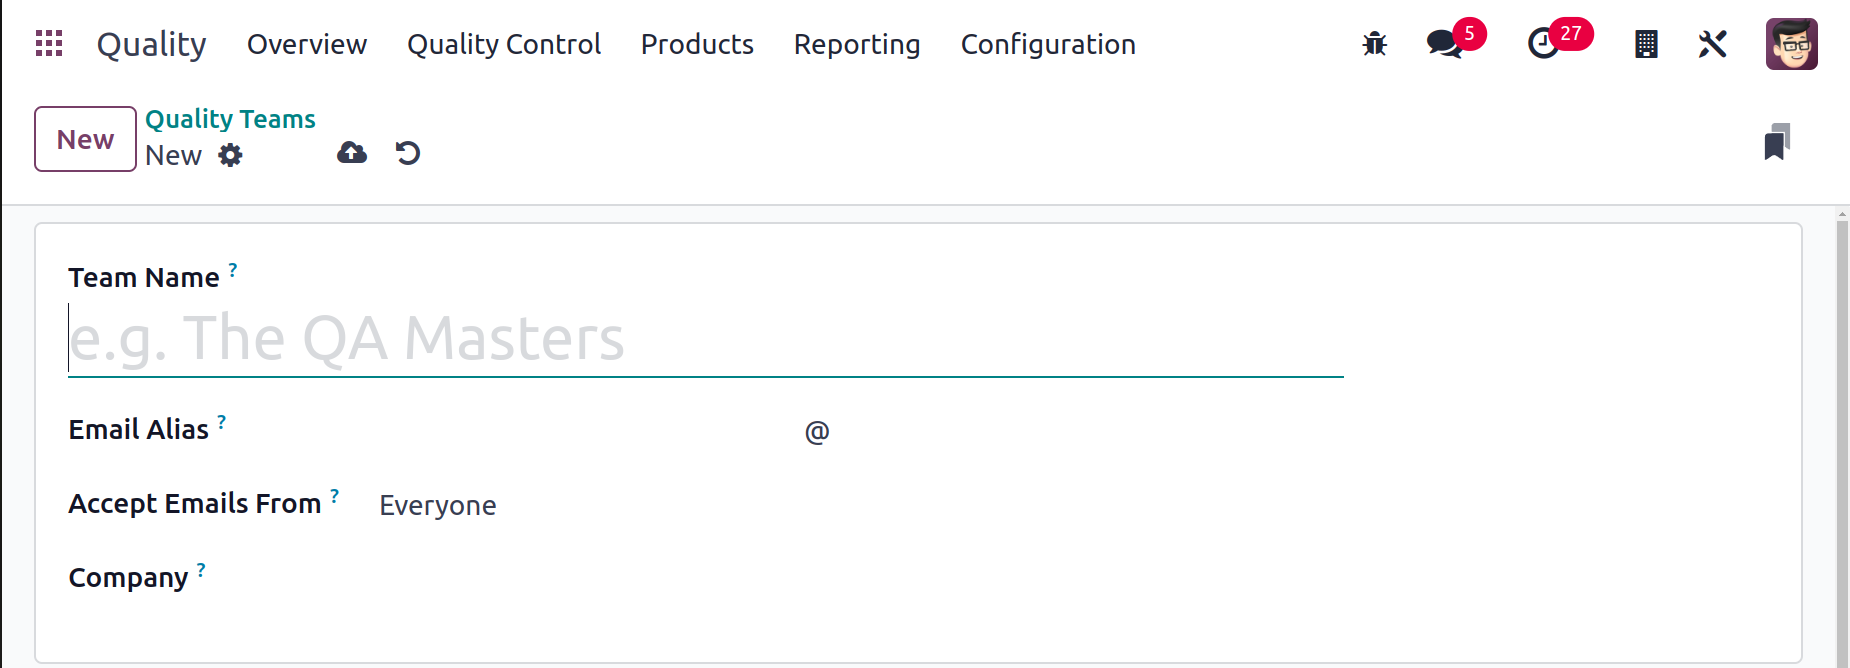
In the Accept Emails option, mention the rule that says you can post a message on a
document by using a mail gateway. You can accept communications from followers, partners
who have been verified, and employers. After deciding on email accessibility, enter the
name of your company in the Company area.
In Odoo 17, each entered detail is automatically stored. To undo any changes, choose the
Discard Changes option in the Quality Teams window. Additionally, by selecting the New
symbol at the right end of the window, you can construct a new team from within the
current one.
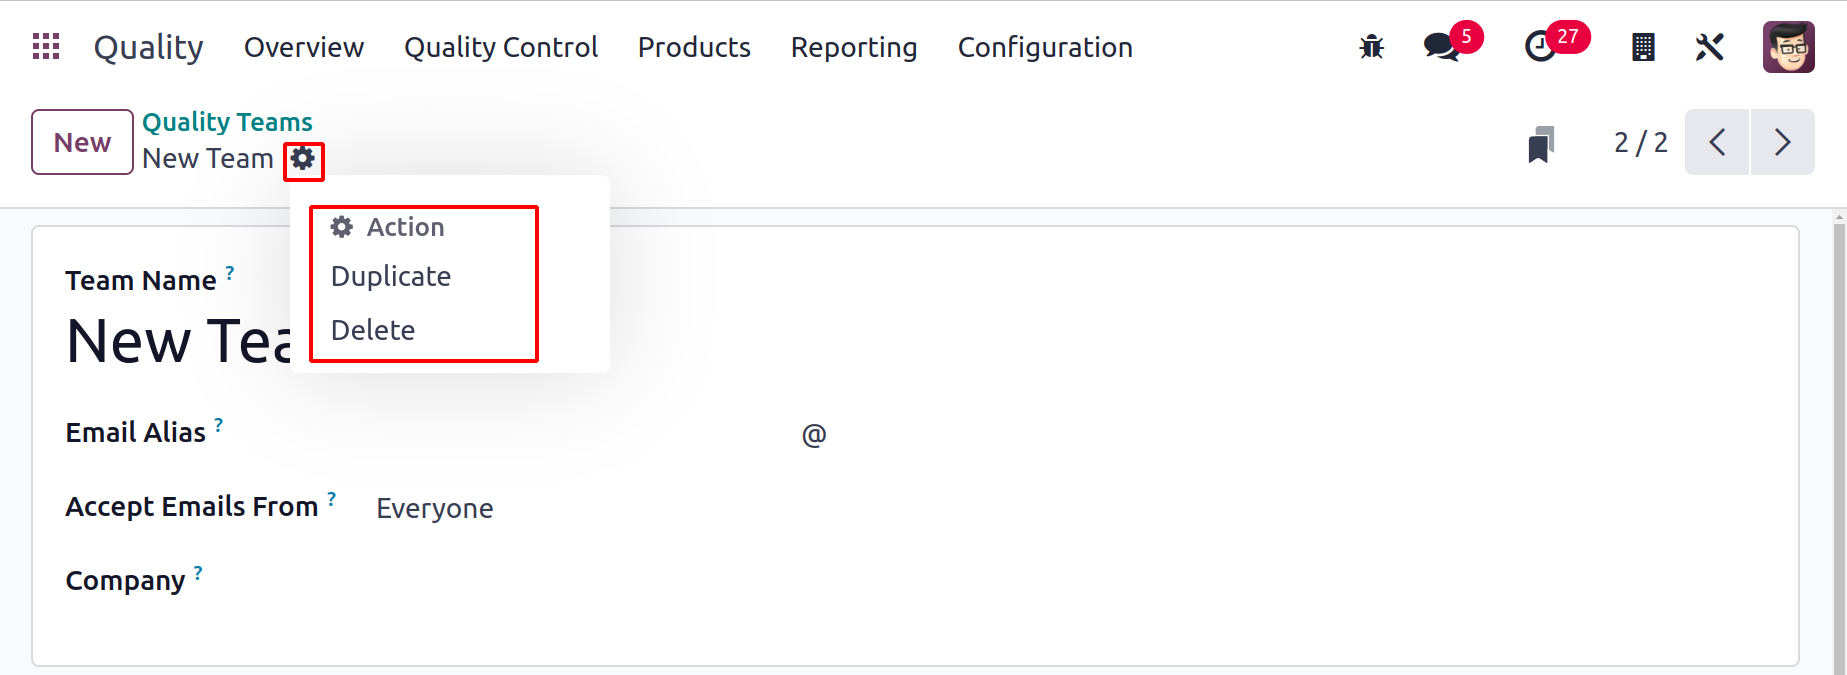
By selecting the Action option from the menu on the right end, users can delete or
duplicate the quality team. You can obtain a duplicate of your current quality team by
choosing the Duplicate option. Once you select the Delete option from the Action menu,
the newly created team can be deleted permanently.
You may access the information about your newly created team in the main Quality Teams
window after handling all the details.
Quality Alert Stages
It is possible to advance each quality alert through several phases. As a result, the
quality alert stages can readily comprehend the enhancements made to the alerts. The
Configuration menu contains the Quality Alert Stages. The phases that were constructed
are shown there. The Alert Processed stage can also be marked if the
dashview tick indicates that the stage is folded. After that, it is feasible to
designate specific teams to manage each step.
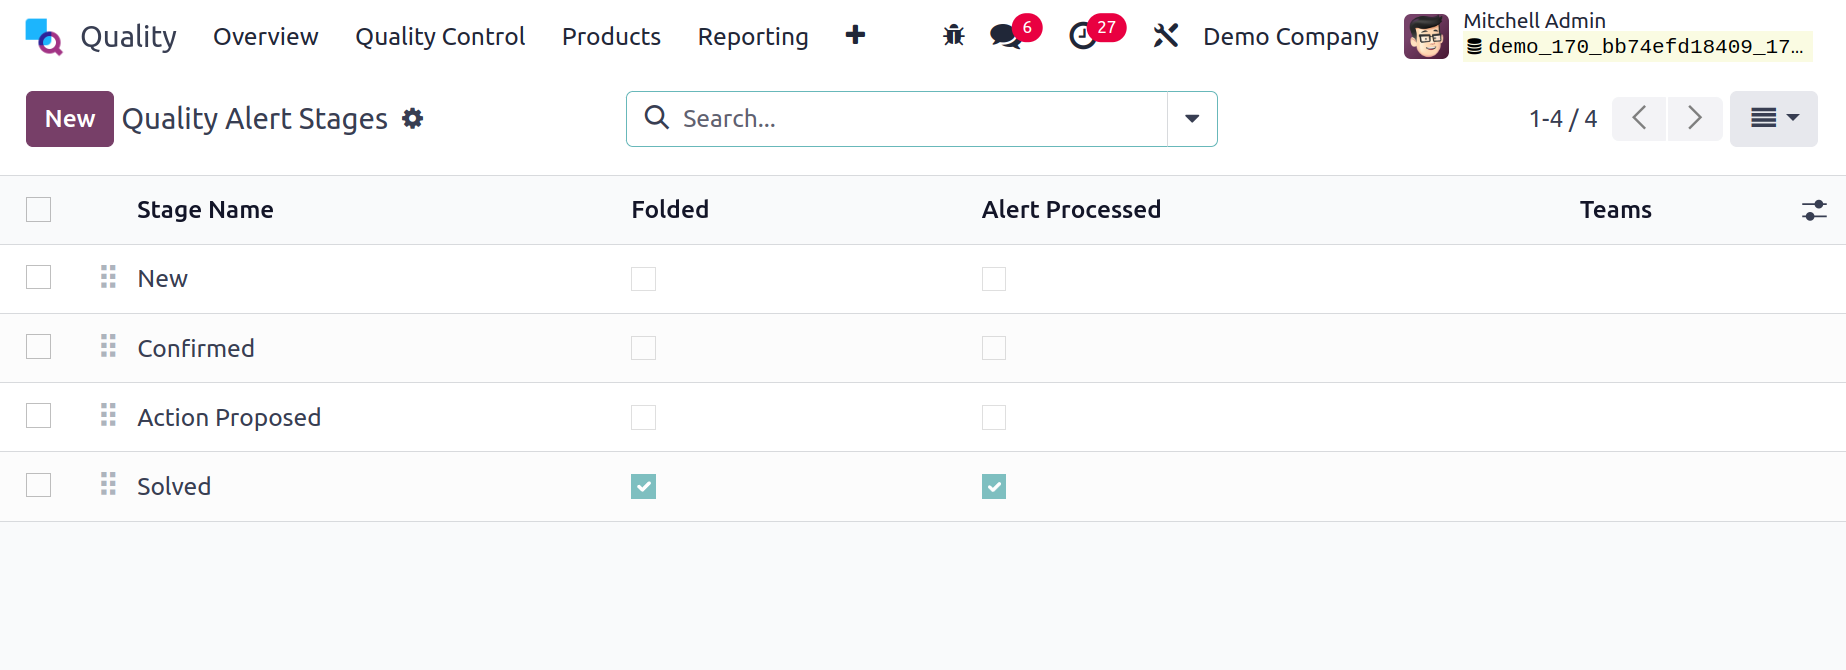
Click the New button to add a new stage. Next, a new line will be inserted beneath the
final phase.
Quality Tags
The Tags are a great way to find possibilities when searching. Therefore, these tags may
also be helpful within the Quality. In this way, the Quality Tags can be produced or
examined inside of them. so select the New button to add new tags.

Quality Control Points
Quality control points help to achieve the stages where an item needs to be checked.
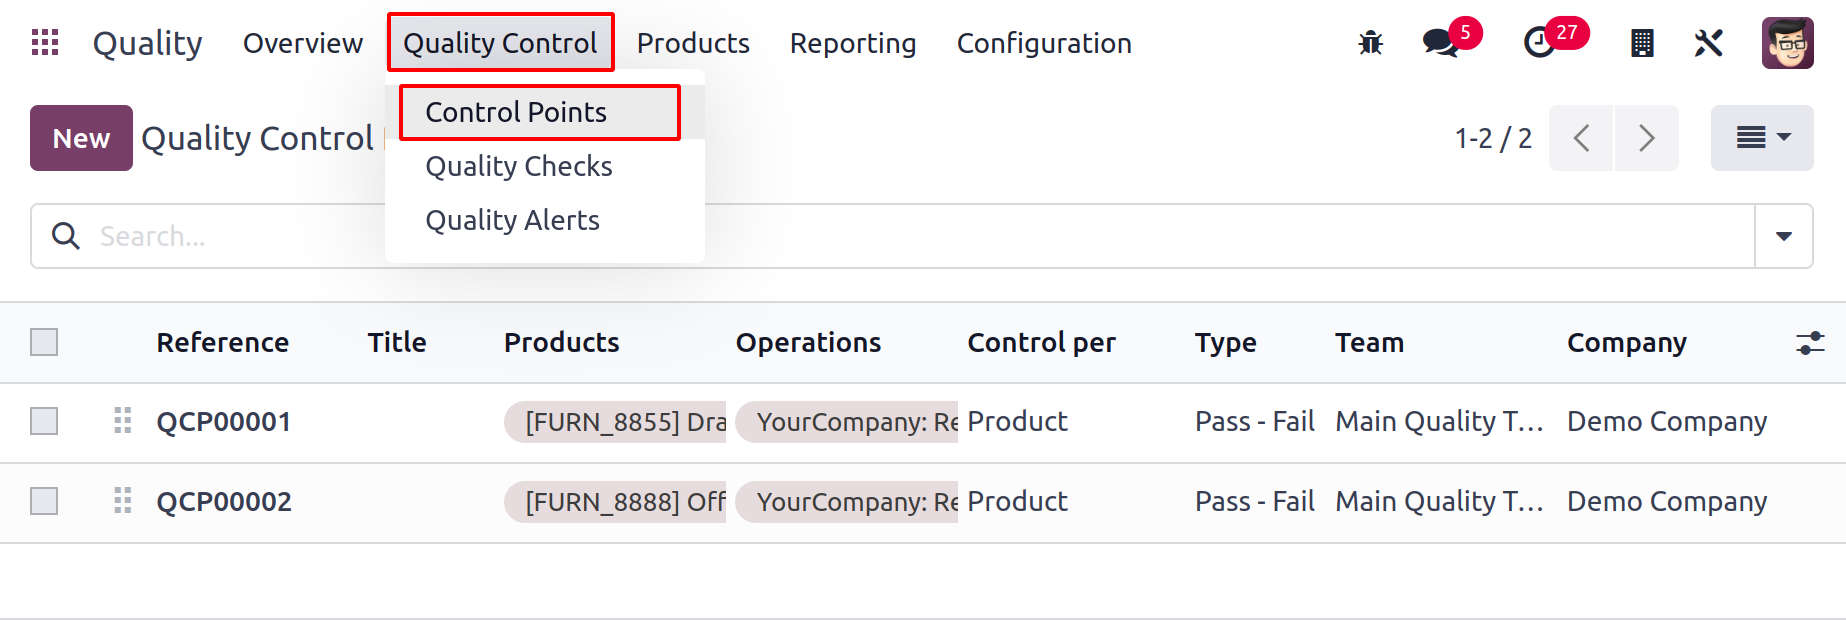
Finding the methods for evaluating a product's quality is simple. Choose the Control
Points menu from the Quality Control tab to get these criteria. Each quality control
point's specifics, including Reference, Products, Control Per, Team, Title, Company,
Type, etc., are described in the Quality Control Points window's List view. By selecting
a quality control point from the list, you will receive complete
information about that particular point. To create brand-new Quality Control Points,
click the New button.
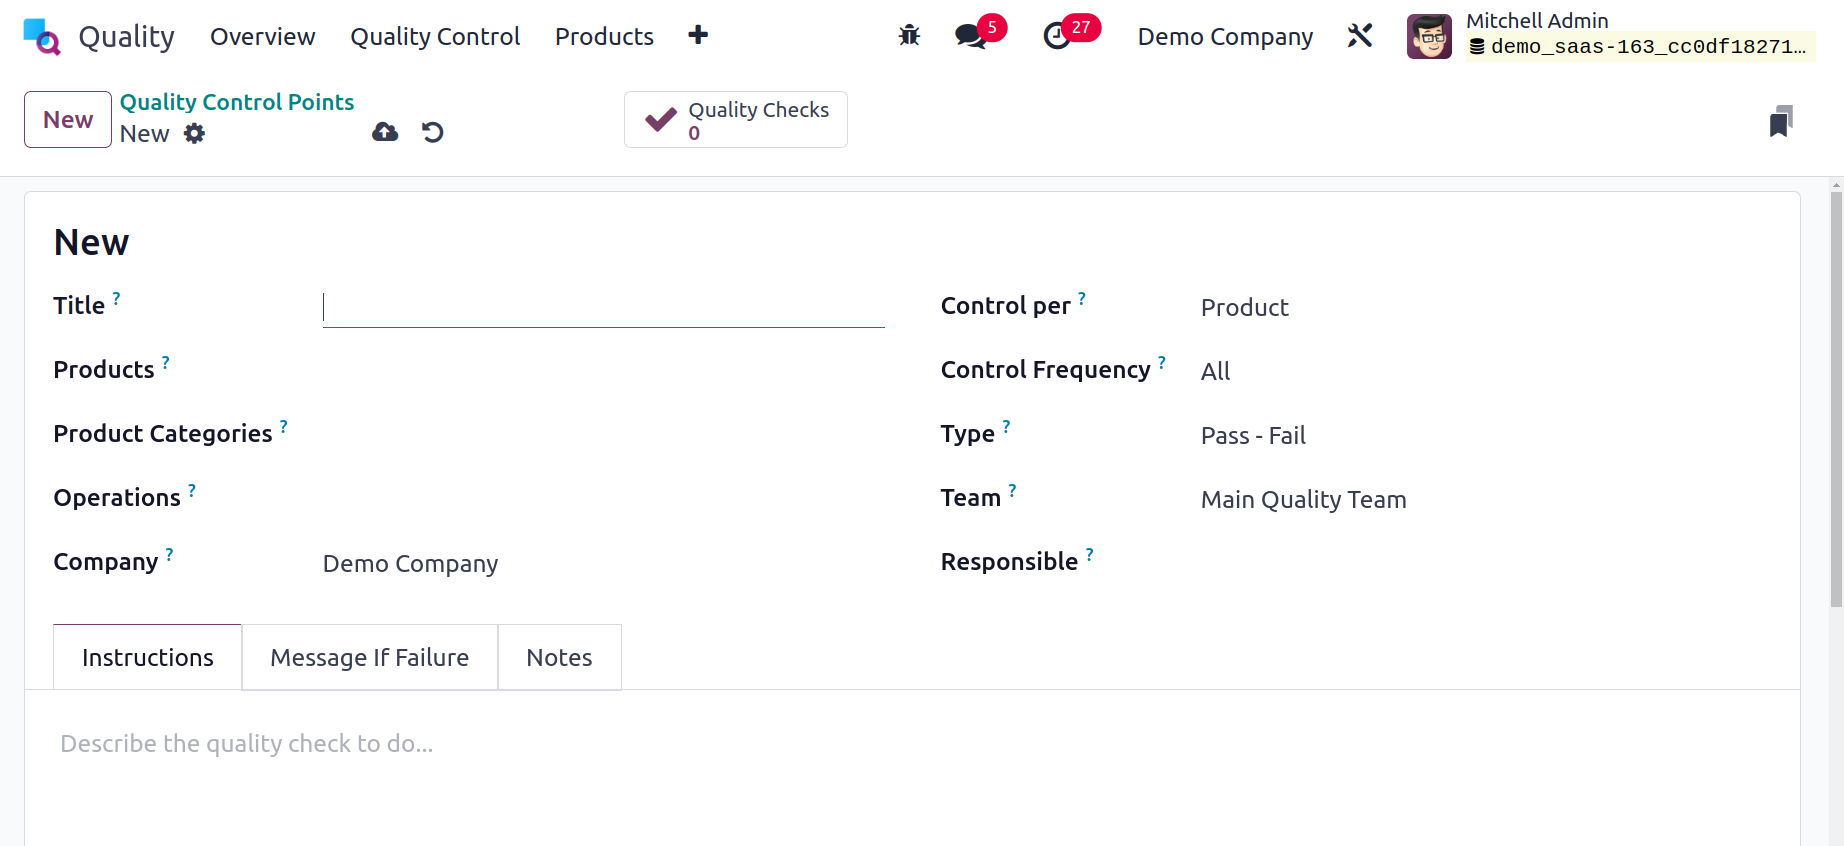
You can access a number of choices relating to the open screen. In the Title area, enter
the name that was chosen for the quality control point. The products that are applied to
the quality control point can then be selected in the Products field. Additional Quality
Control Points, things that come under the product category of your choice activate
quality points.
In the Product Categories section, users can mention the product category that applies
to certain products.
You can choose the stage at which quality is to be tested in the Operations area. Then,
in the Company section, select the company that is associated with your generating
quality control point. Additionally, you can specify the quality check request for each
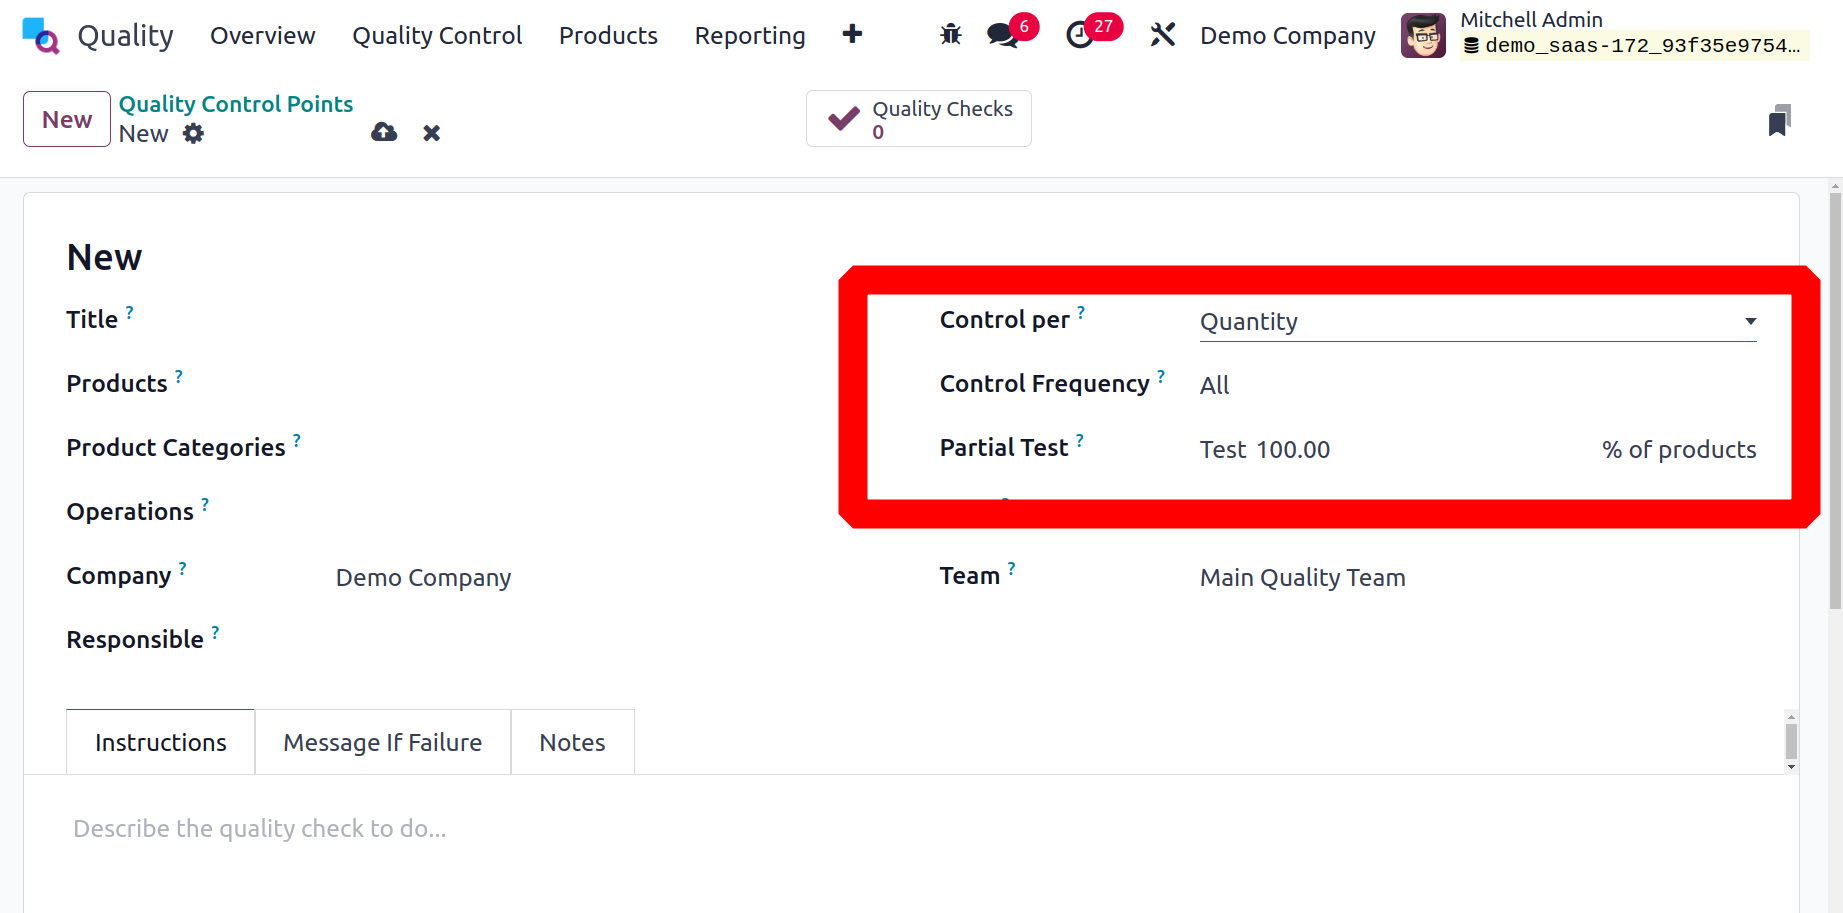
field in the Control based on the Product, Operation, and Quantity.
When you select the Operation option in the Control per field, you can ask for a quality
check at the operation level. Additionally, by selecting the Product option, you can
access the quality check based on the product. Select the Quantity option under Control
per field to ask for a quality check on the quantity of a newly registered product.
And in Odoo now it's possible to check the partial quantity of total. Inside the Partial Test field, users can define the percentage within a lot that should be tested.
The Control Frequency field allows users to specify specific intervals for quality checks.
Intervals can be obtained Periodically, All, or Randomly.
The Type option allows us to describe the quality control point category. It is
categorized as Pass-Fail, Worksheet, Take a Picture, Measure, and Instructions. You can
use the aforementioned types when conducting a quality check.
When performing a quality check, for instance, you can examine pass and fail alternatives
if you enter Pass-Fail in the Type area. As a result, you may designate if a product is
a success or a failure.
Select your team in the Team field to assess the quality control point. Also, fill out
the Responsible area with the name of the individual who oversees your quality control
point. In the Step Document option, you can choose the Custom or Specific page of the
operation sheet as the source document.
Under the Instructions tab, we may add more details about the quality control locations.
The majority of instructions will outline the necessary product quality inspections.
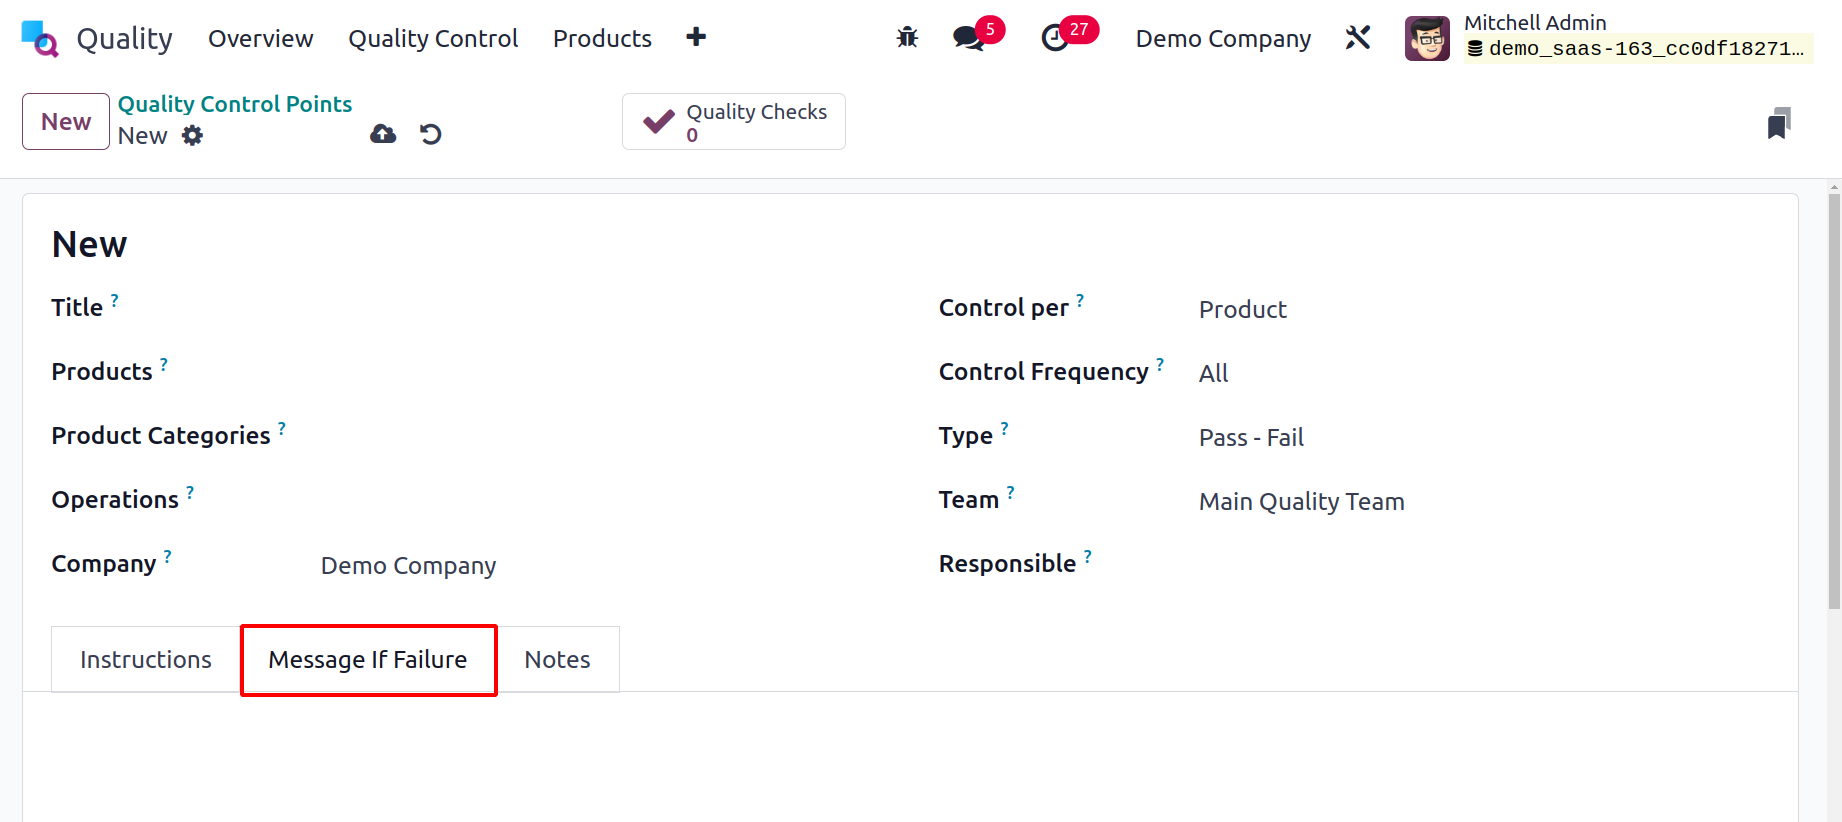
In the Message If Failure tab, you may also enter any failure message for the product.
Add the information under the Notes tab that is required to carry out the quality check
as well.
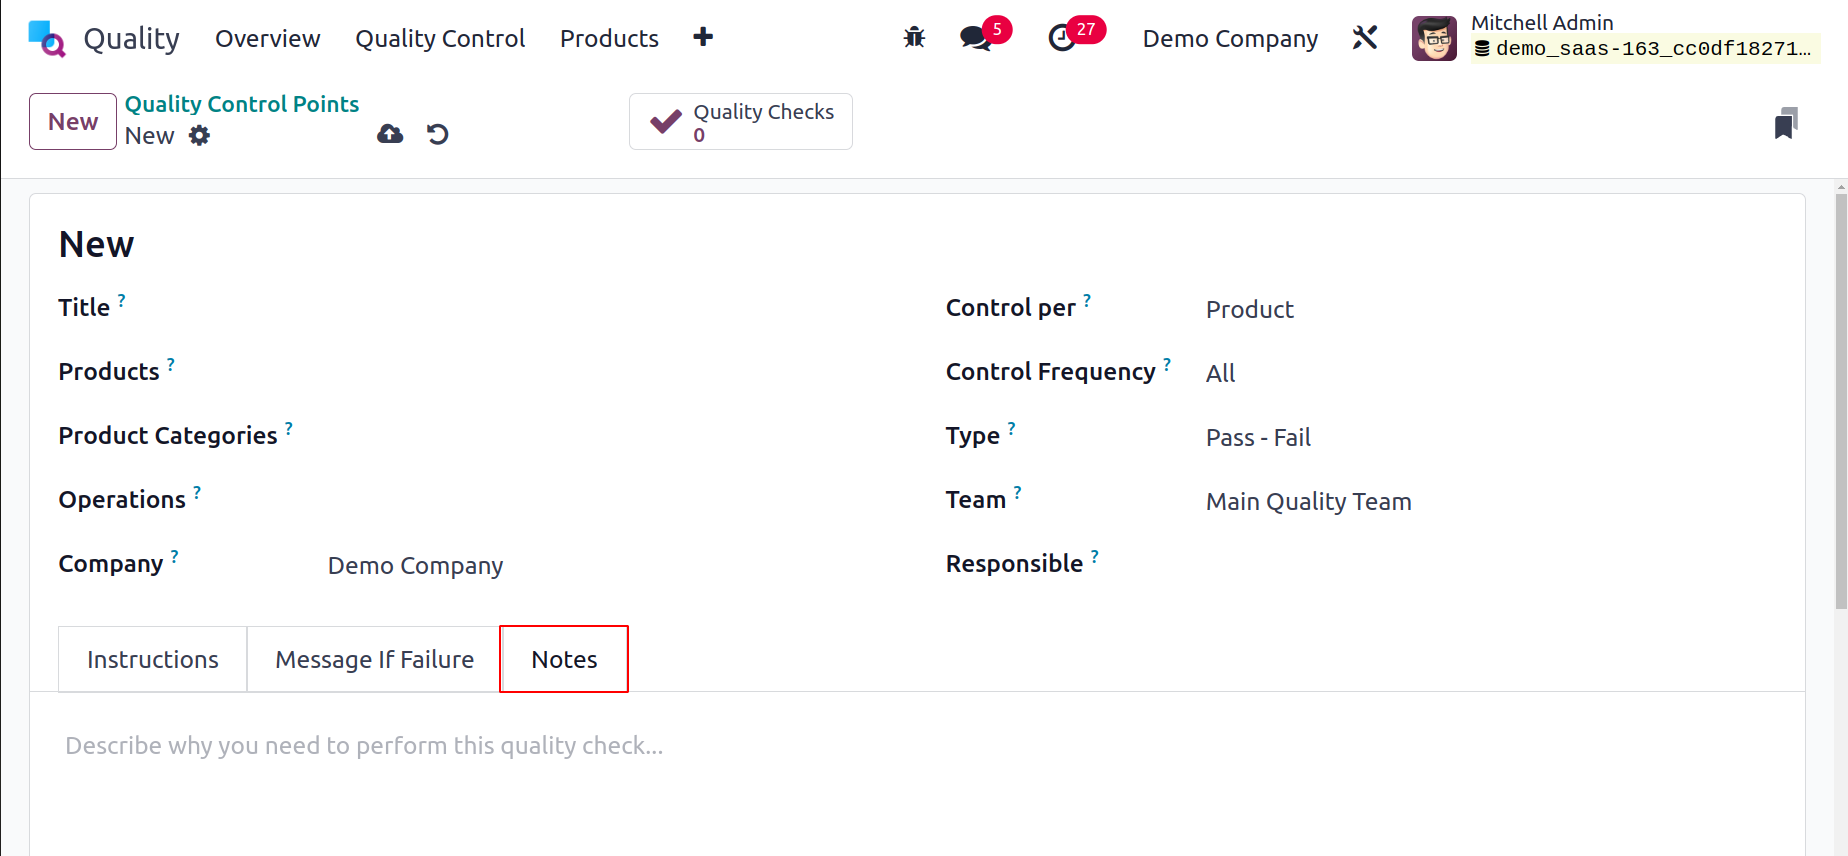
In Odoo 17 Quality, all applied data is immediately preserved. The created sample is
available to users in the Quality Control Points window.
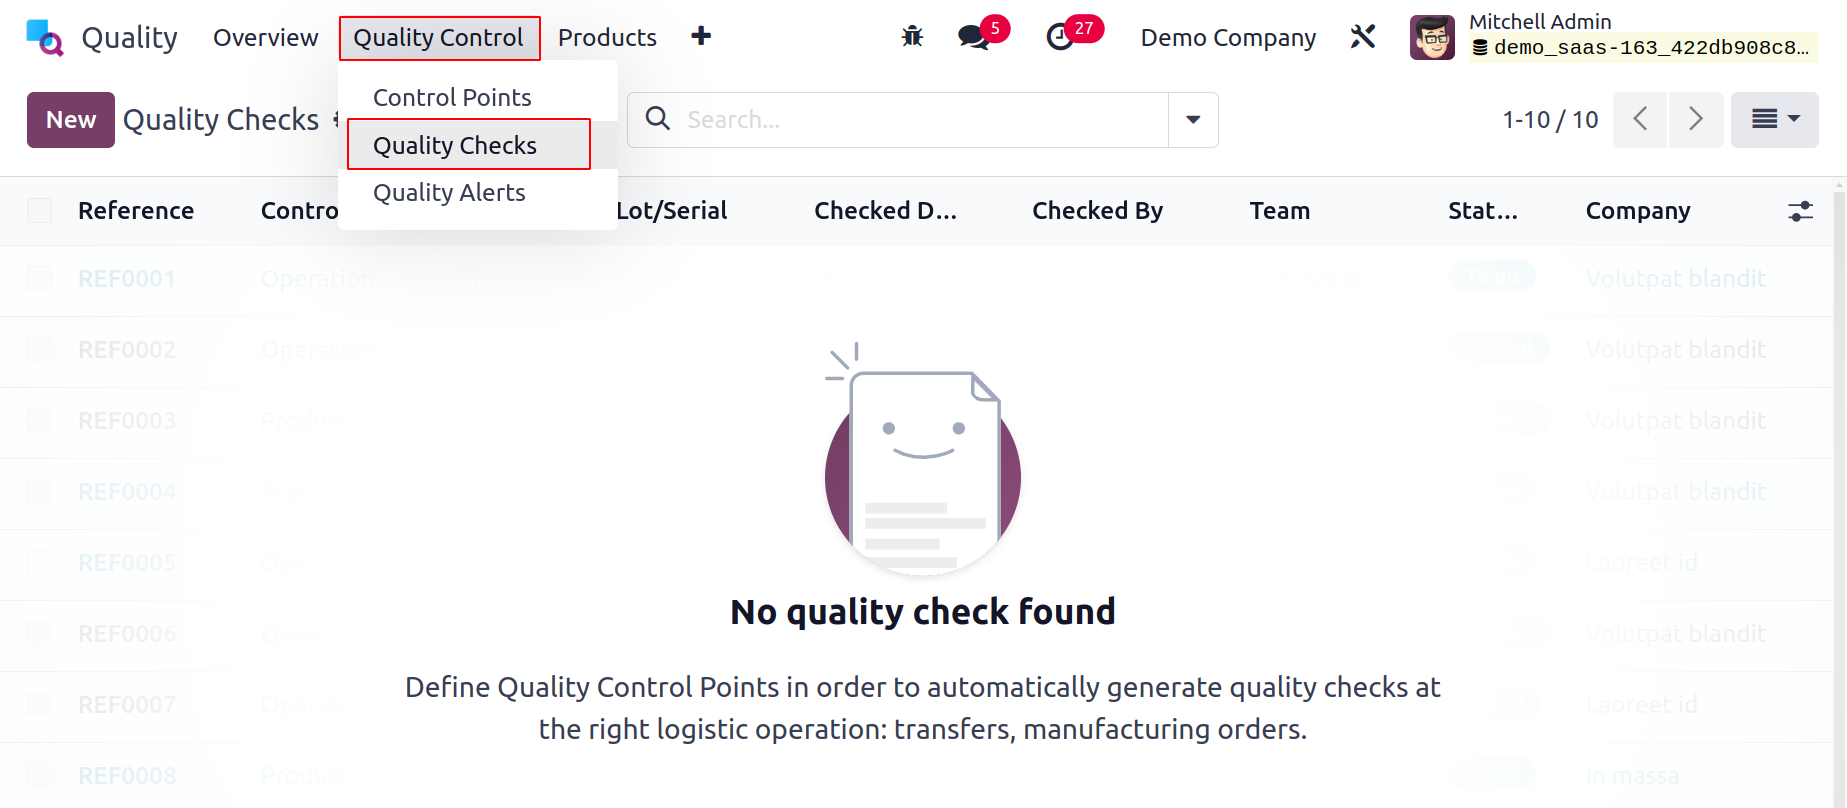
Quality Checks
Quality checks are used to discover required defects in a particular product or service.
It is automatically generated during manufacturing transfers and orders. When you choose
the Quality Checks menu from the Quality Control tab, you may get information about all
the items that must be verified in your organization. We can see in the List view that
each product's data, including Reference, Product, Team, Lot/Serial, Status, etc., needs
to be reviewed. By selecting the New button in the Quality Checks window, a new quality
check can be created quickly.
You can select the commodity that has to be checked in the Product area on the open
screen. Define the steps that each field's quality checks should take. Running quality
tests at the quantity, product, or operation level is simple. Mention the main warehouse
on the picking field afterward, where manufacturing products are handled.
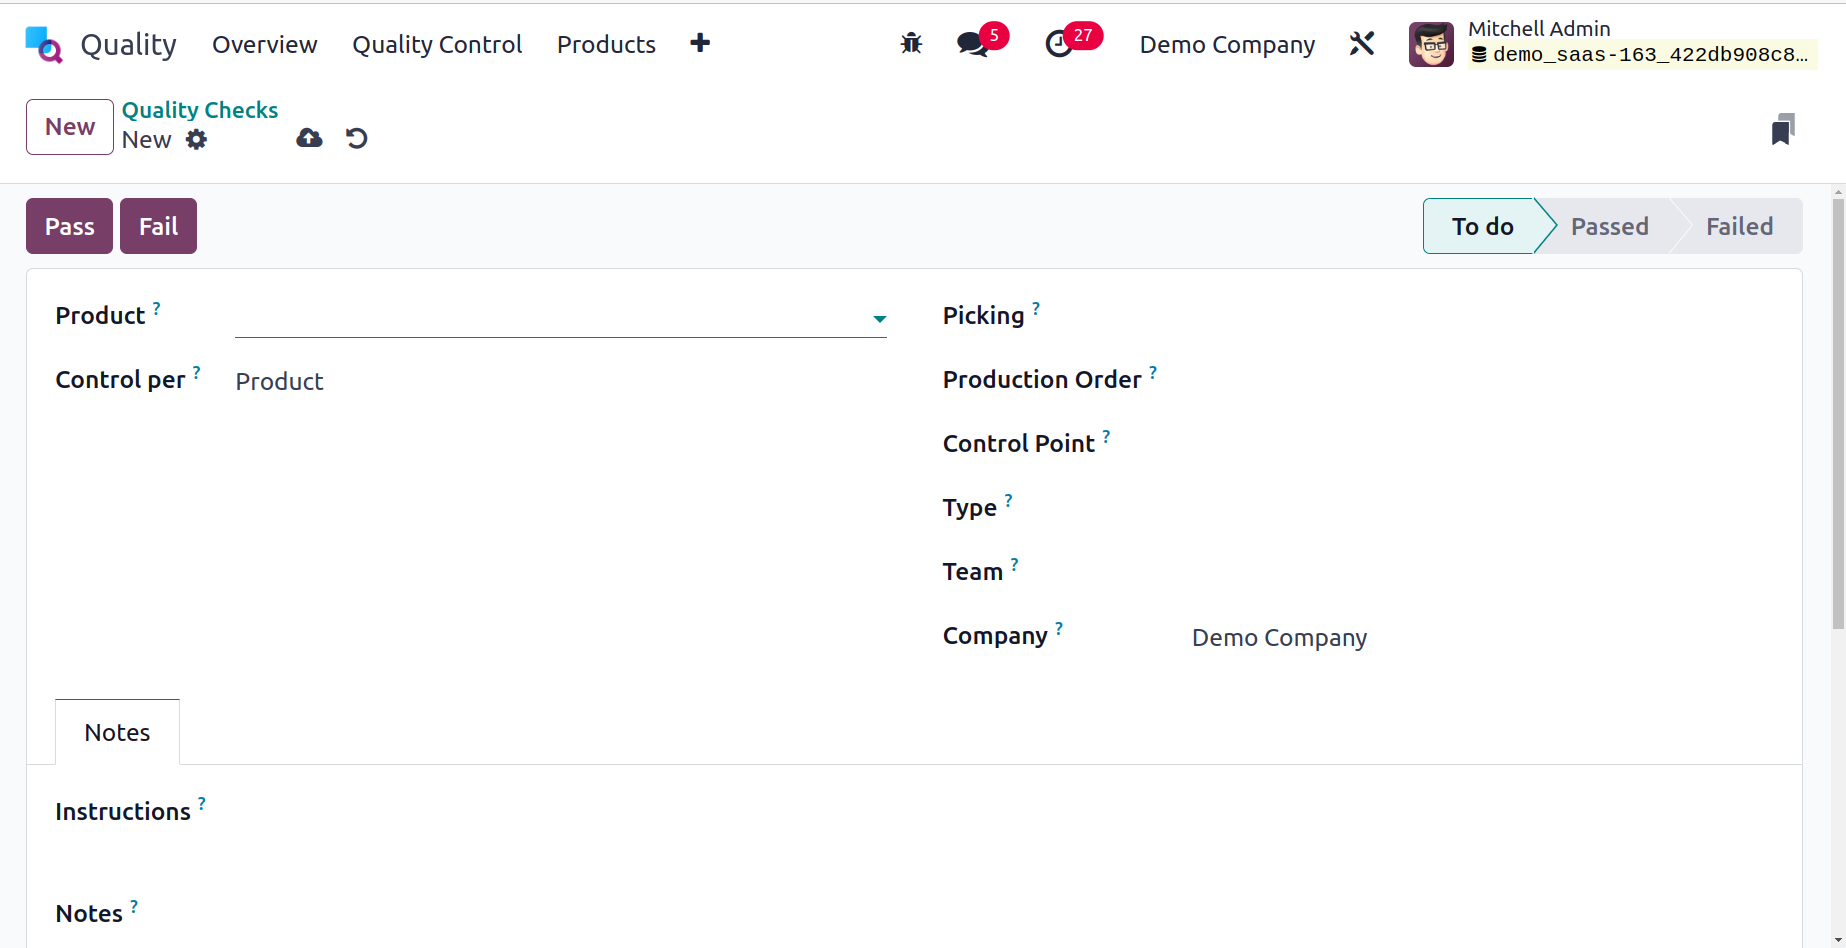
In the Production Order section, you can select the item's order number. In the Control
Point field, you can also choose the product's point id. After that, select your group
in the Type field for a quality check. Worksheets, Print Labels, Instructions, Measure,
Pass-Fail, and other types can be selected as the type. In the Team field, designate the
team to assess the product's
quality. Once the team has been selected, select the company name from the Company
field.
Under the Notes tab, users can get further details on product quality checks. Additional
comments for your quality check can be easily added in the Notes and Instructions areas
found in the Notes tab.
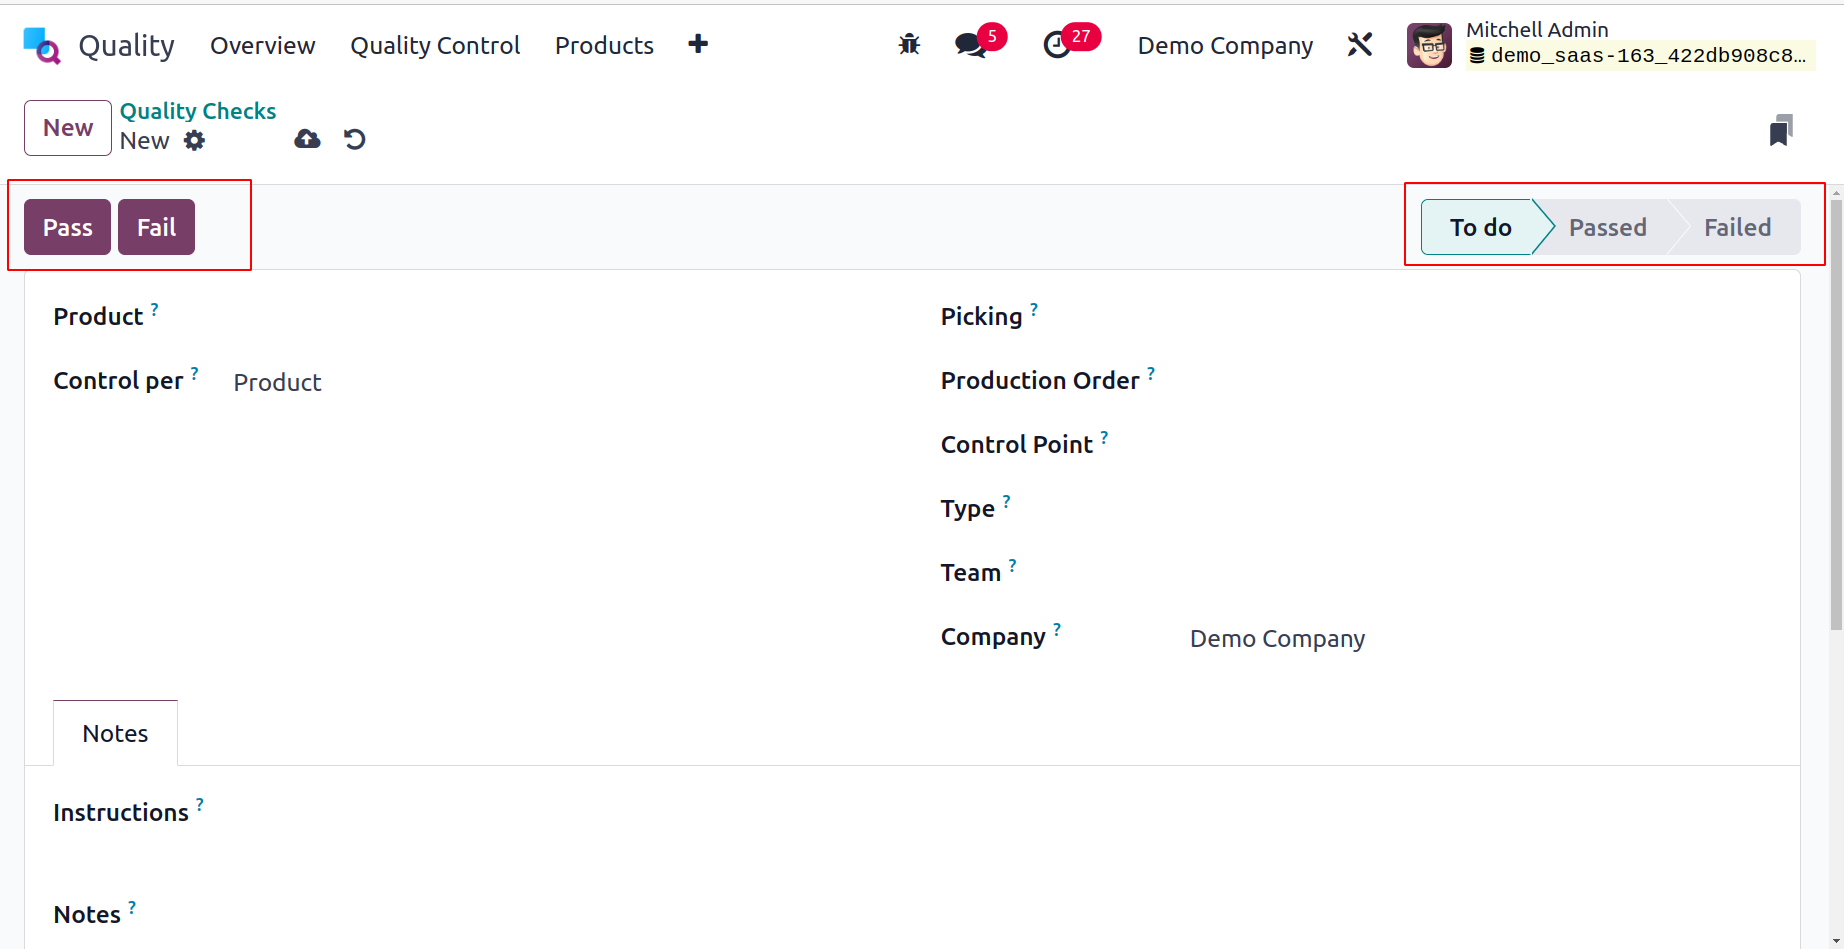
The Quality Checks window's Pass and Fail buttons let you know whether the product has
passed or failed a test. By using these buttons, users can choose the product's quality
check status. The stage becomes Passed when you click the Pass button. In contrast, the
stage can be viewed as Failed and the Fail button describes the product failure.
Quality Alerts
Instead of placing production orders, we can issue quality alerts for services and
deliveries in Odoo 17. Once quality alerts have been enabled, it is simple to remind the
accountable party to verify the product/service quality. When you select the Quality
Alerts option from the Quality Control tab, the data for quality alerts will be
available.
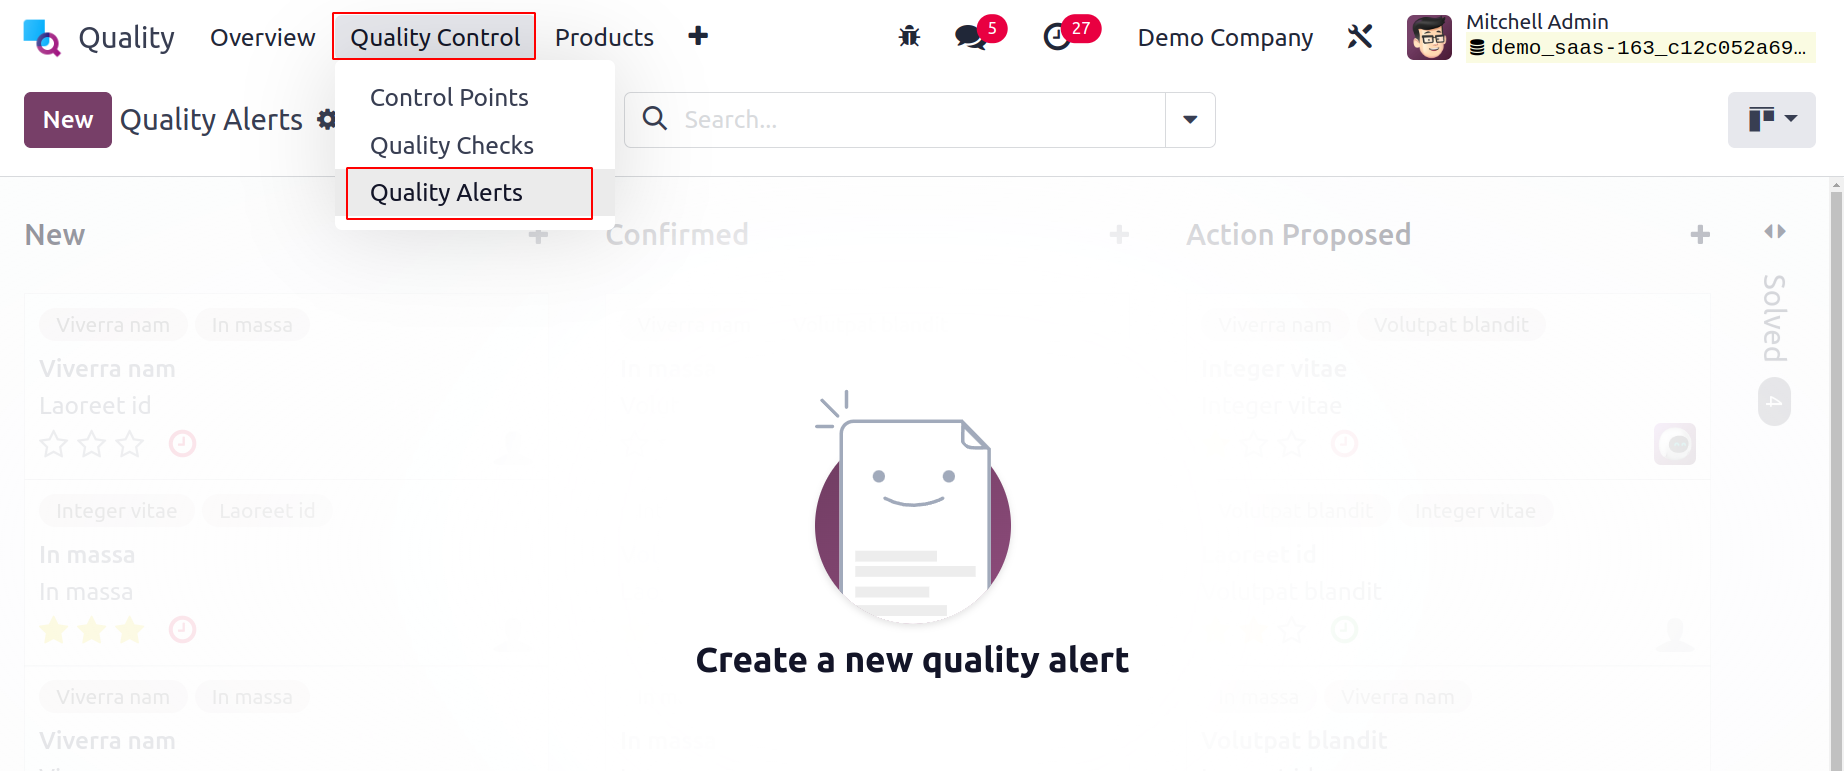
The List view displays each alert's specific information, such as Name, Work Centre,
Responsible, Date Assigned, Team, etc., separately. Click the New icon in the Quality
Alerts panel to create a new alert.
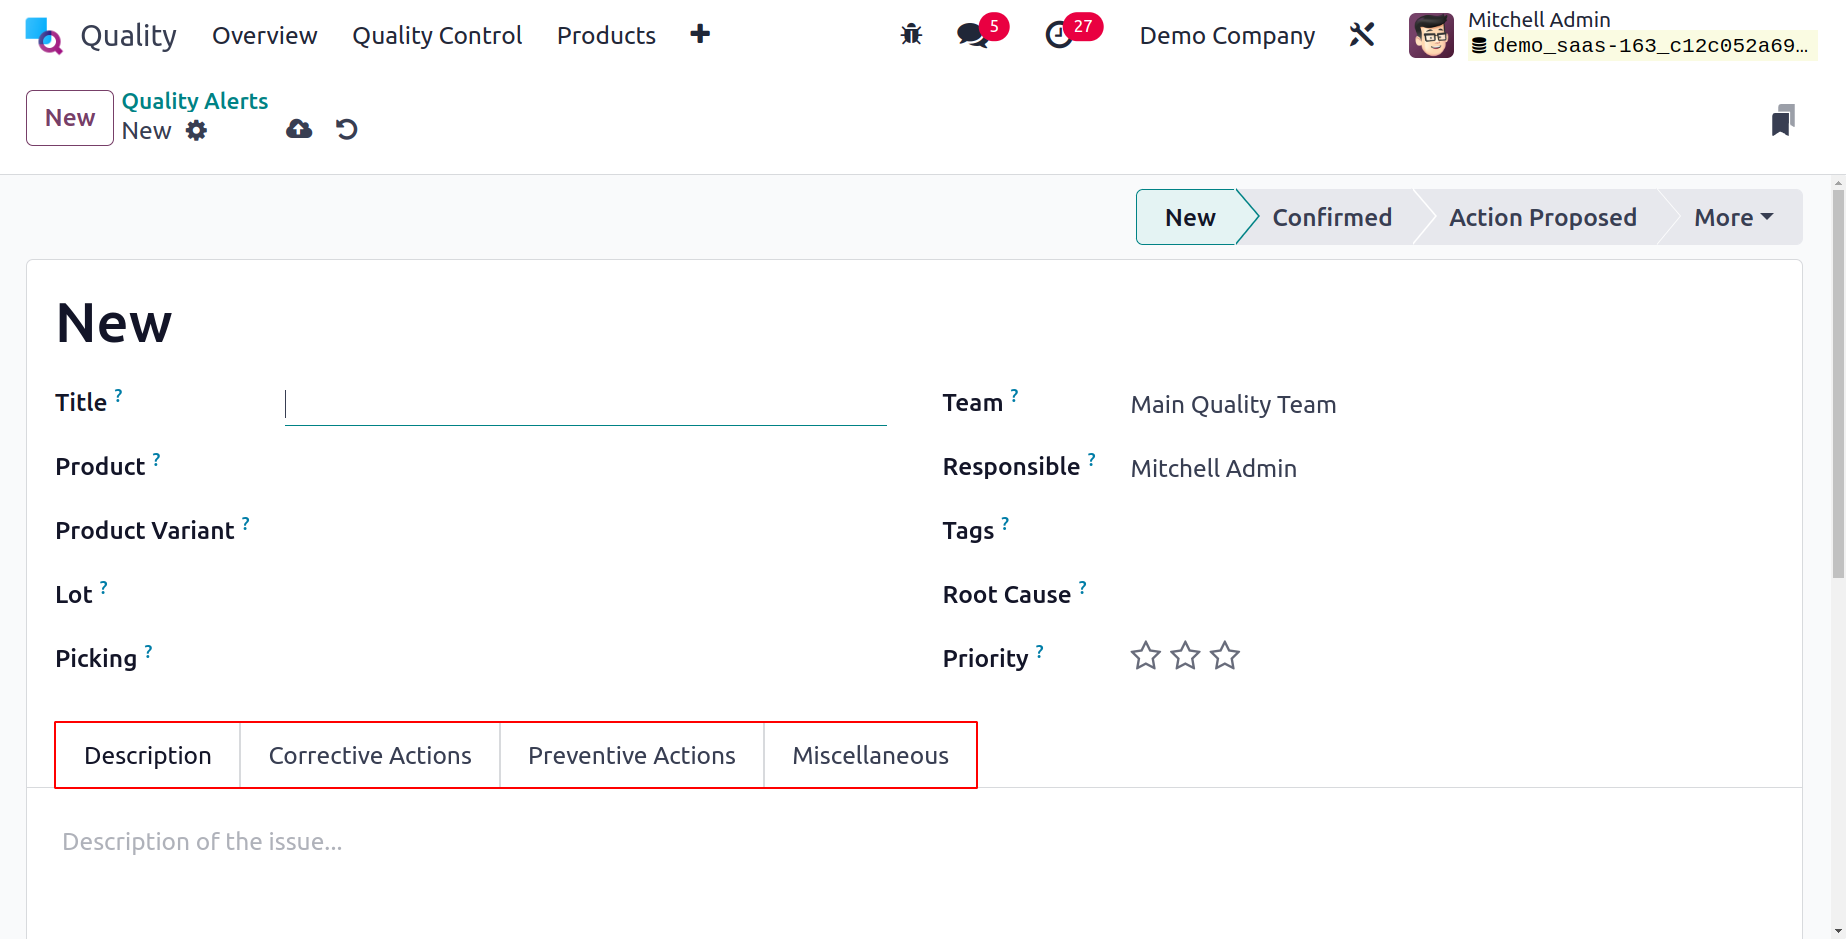
On the page that is presented,
we can insert different details. Let's look at each option's specifics in the Quality
check window individually below:
Title: In the Title section, you can include the name of the quality alert.
Product: The Product field displays a list of every item in your company. In the Product
option, select the precise product for which a quality alert is required.
Product variant: The word "variant" refers to a product variety with several sizes and
colors. In the Product variant area, choose the variant that applies to the selected
commodity.
Lot: A lot number is the unique identifier for a given item or quantity from a single
manufacturer. The user can enter the product's lot id in the Lot box.
Work Centre: A work center is the location where all production operations are conducted.
Select the work center field that corresponds to the main hub of your product or piece
of equipment.
Picking: Picking refers to the transfer number where the quality is to be ensured. To set
the quality alerts, you can specify the picking id of your goods.
Team: Assign a team to check the items' quality alerts. The Team field allows users to
mention the name of the team.
Responsible: Select the user in the Responsible area who verifies the quality inspections
of the goods/services.
Tags: A label that is added to certain products for the purpose of product
identification. In the Tag option, you can choose the essential tags for quality alerts.
Root Cause: We can include the cause of the generation of quality alerts in the Root
Cause. You can choose from a variety of options for the cause, including work center
failure, work operation failure, parts quality issue, etc.
Priority: You can choose the priority of quality alerts by selecting the star icon in the
Priority section. The primary backend team will quickly fix the previous issue.
Description: Under the Description tab, it is simple to pinpoint the source of the
problem.
Corrective Actions: On the Corrective Actions page, you can outline the steps taken to
correct product-related issues.
Preventive Actions: The measures you should take to prevent quality failure of your
commodity are described below in the Precautionary Measures tab.
Miscellaneous: The Miscellaneous tab allows you to access information about a firm, an
allocated date, a vendor, and an email address.
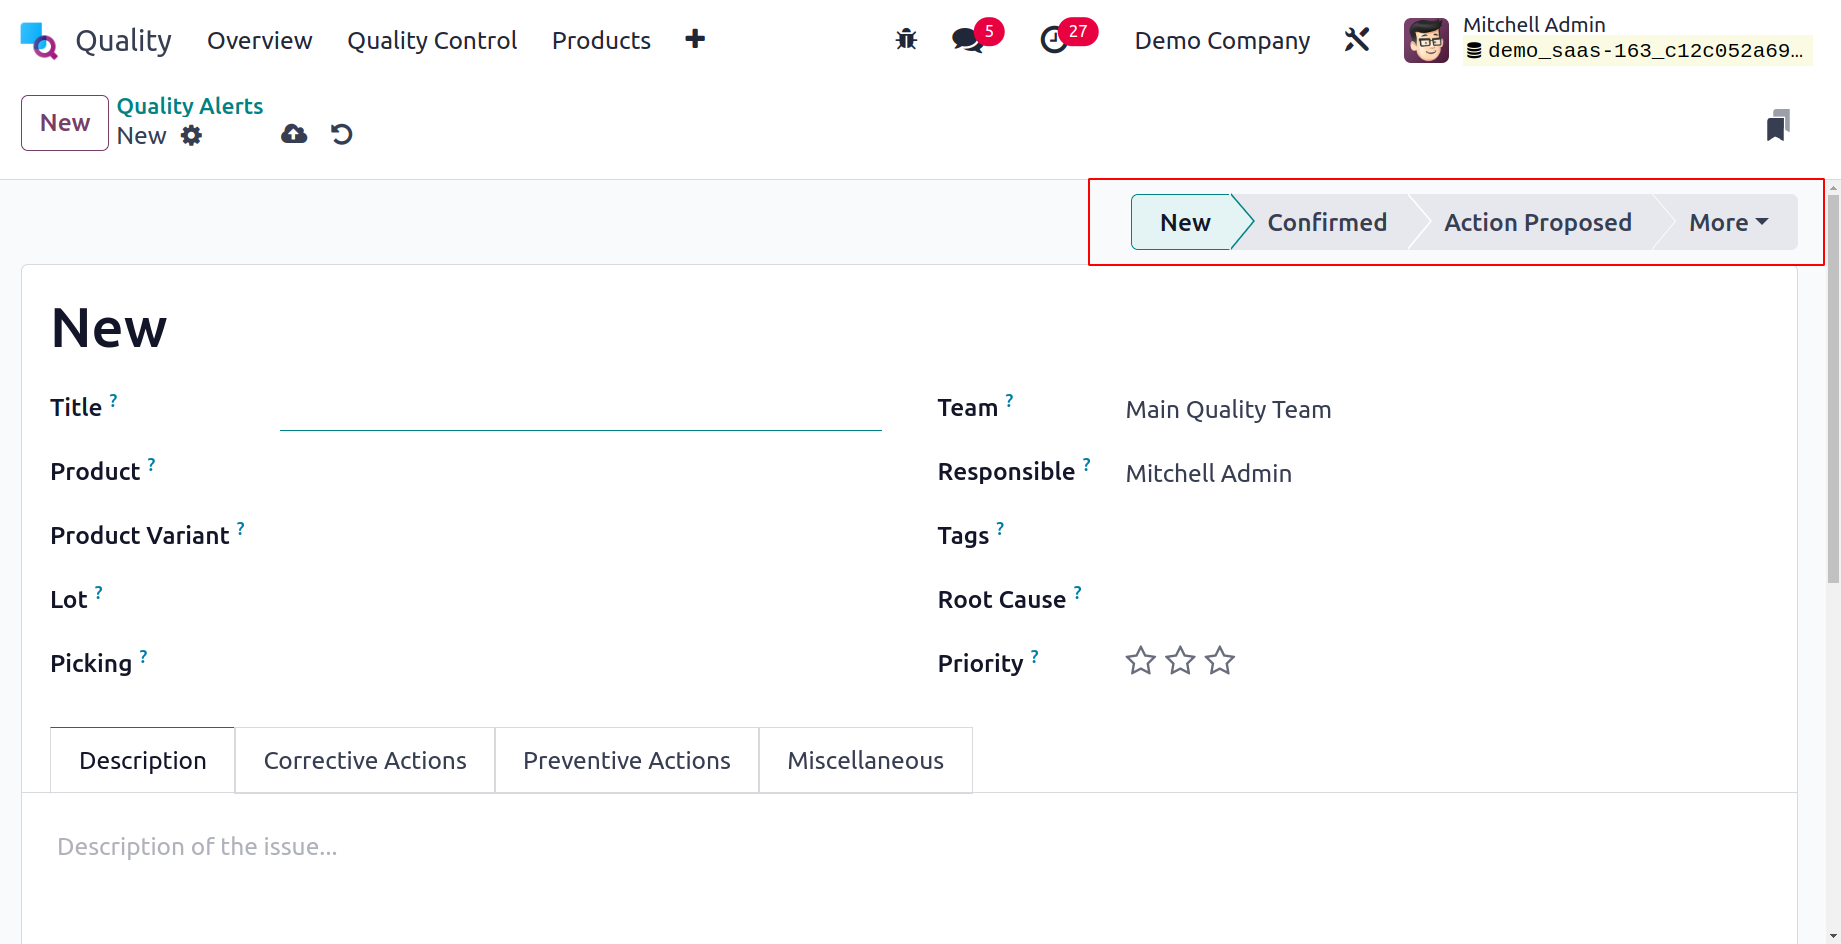
Each entered value is manually recorded in the Quality module of Odoo 17.
The Quality Alert phases include NEW, CONFIRMED, ACTION PROPOSED and others, and they
differ for each operation.
Here is an illustration of a quality alert established utilizing an Odoo 17
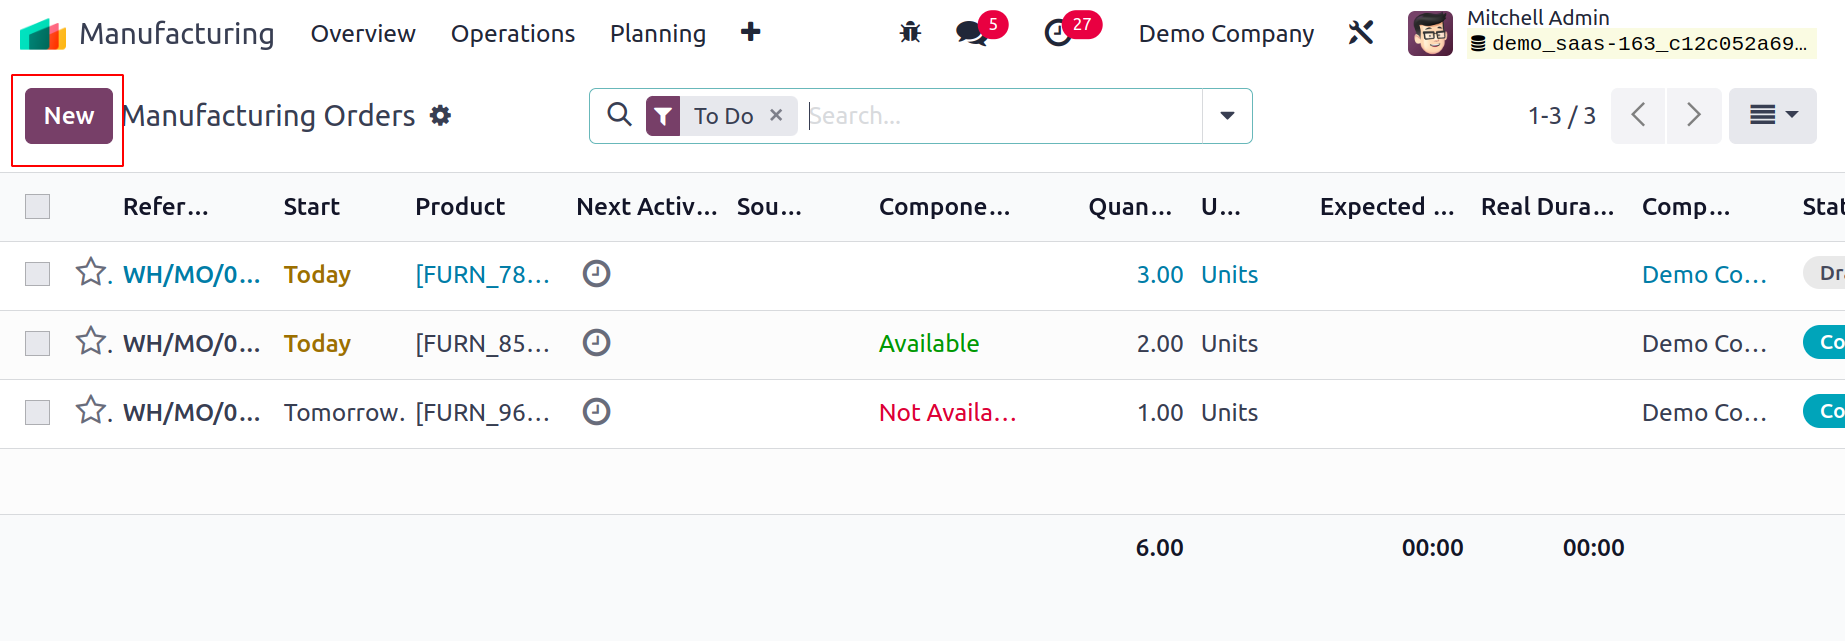
manufacturing order. Select the Operations tab's Manufacturing Orders menu. The user can
obtain a list of all created manufacturing orders, which includes information such as
Reference, Product, Component Status, Quantity, etc. To create a new order, click the
New icon on the Manufacturing Orders page.
You are presented with a new screen, and the Product choice is where you should select
your product. Select your newly constructed BoM Table after that, and the list of
necessary components will appear under the Components tab.
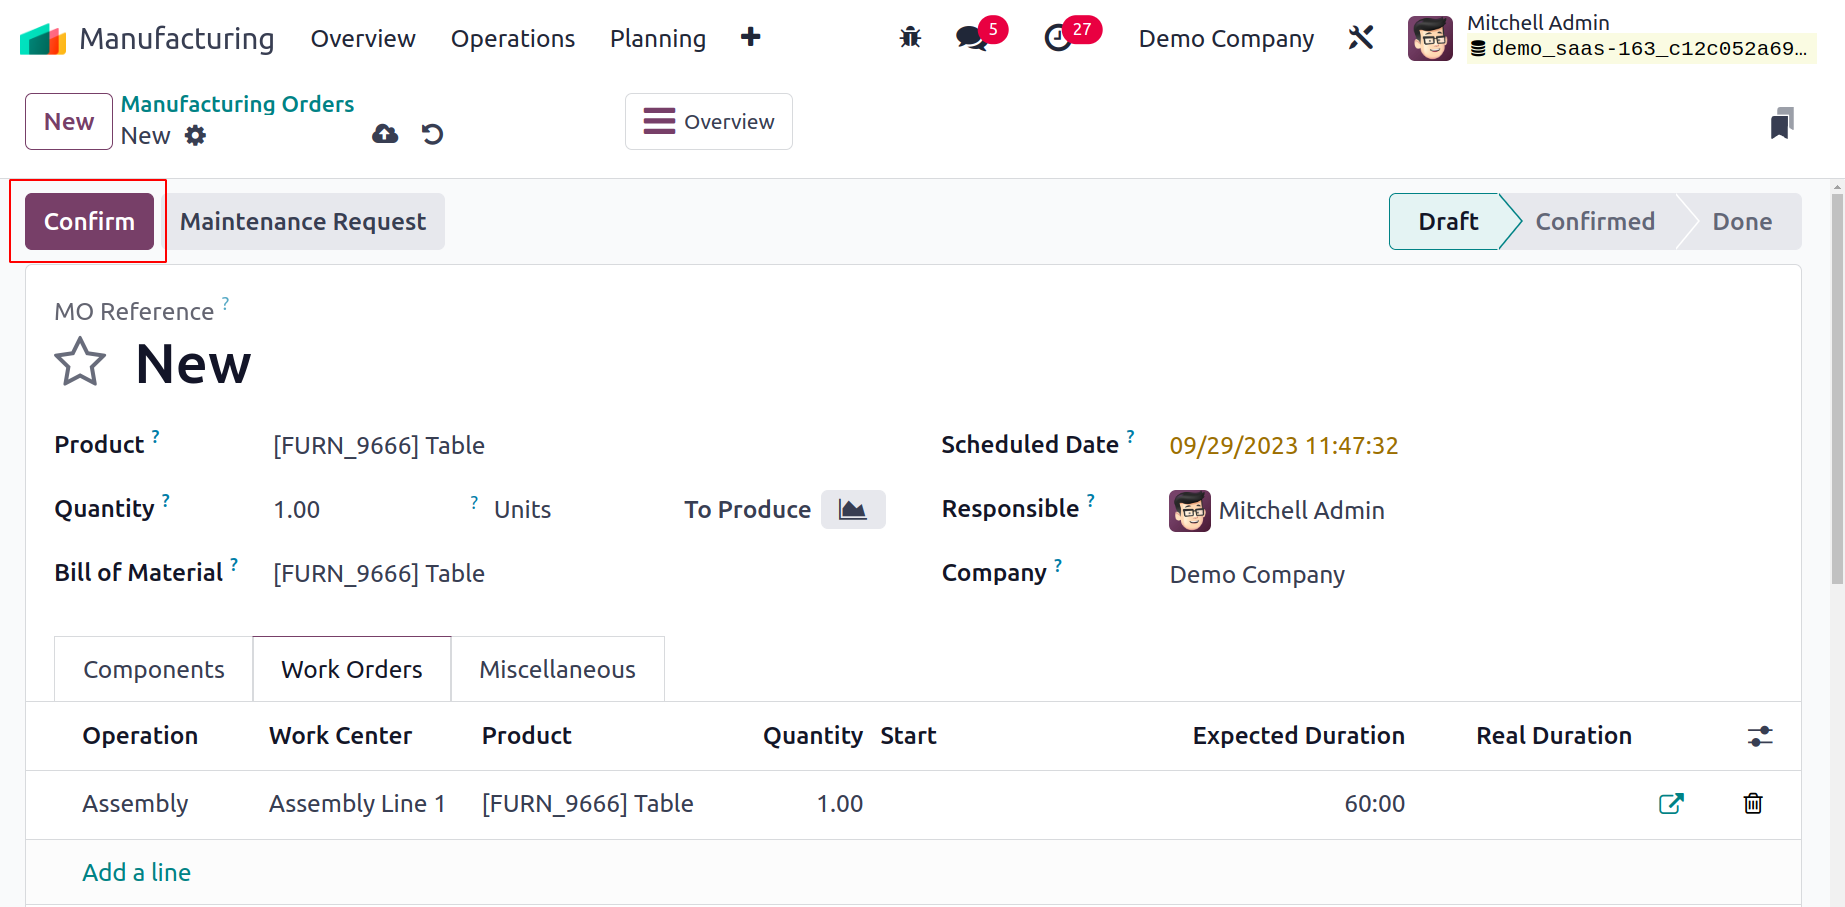
Enter the desired quantity in the Quantity area. Additionally, the Scheduled Date column
gives you access to
the manufacturing order's anticipated date. The user in charge of the manufacturing
order should then be set as the Responsible option. The details are manually saved in
Odoo 17 after managing each piece of data. After storing your data, click the Confirm
icon.
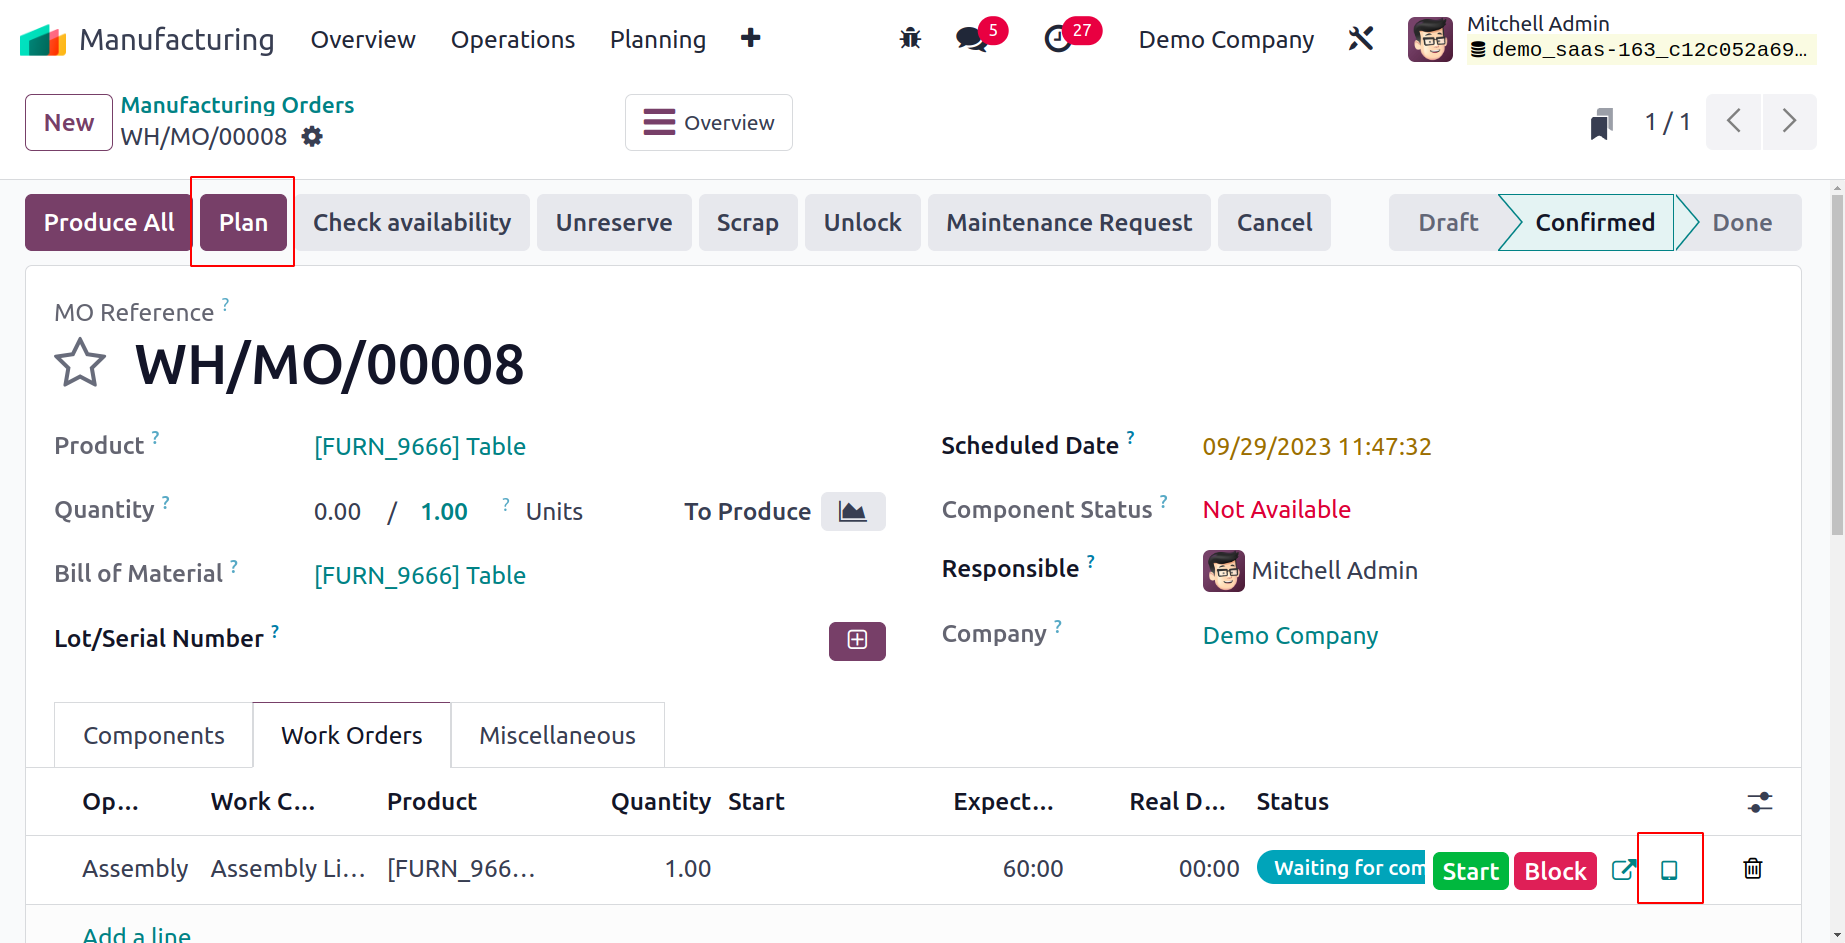
The tablet view can then be chosen from
the Work Orders tab by hitting the Plan button. Under the Work Orders tab, you can see
details about the work center.
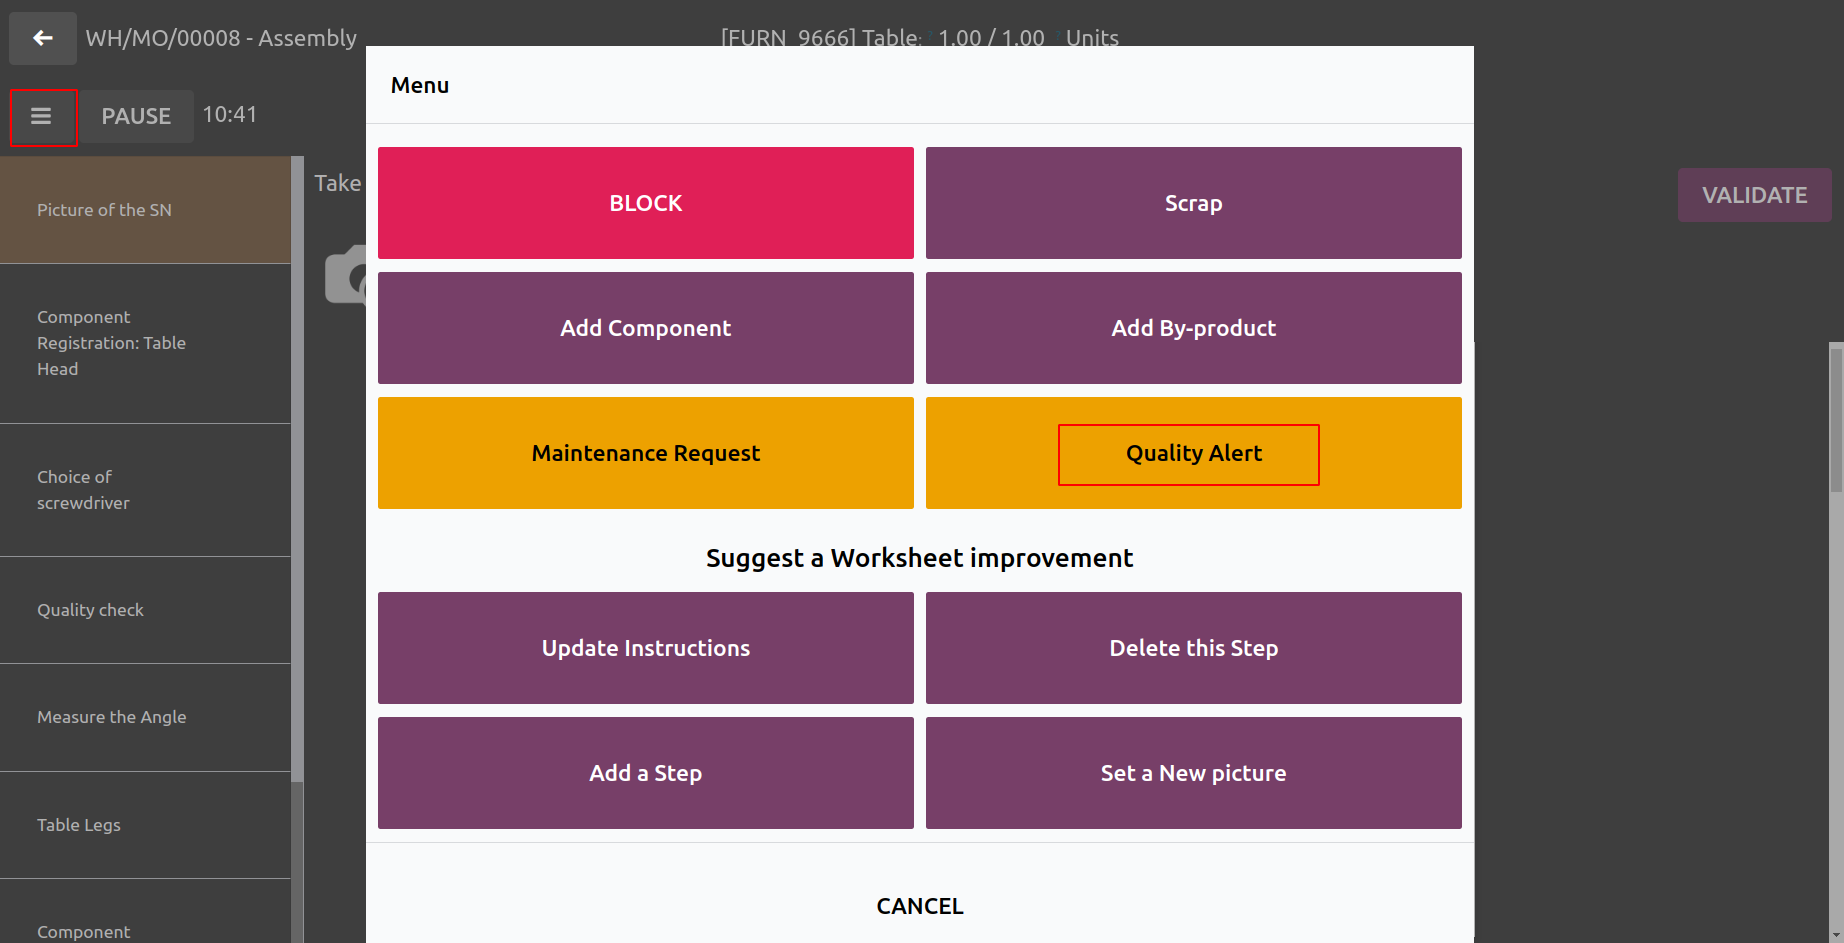
The new window contains the product information. If an employee runs into a problem, they
can establish a quality alert. The user can access options like Scrap, Add Component,
BLOCK, and more by selecting the Top Left menu in the window. Select Quality Alert from
the user-visible menu.
The user's other information is automatically updated when they enter the name of the
quality alert in the Title area. You can explain the trigger for the product quality
alert underneath the Description tab and then click the SAVE icon.
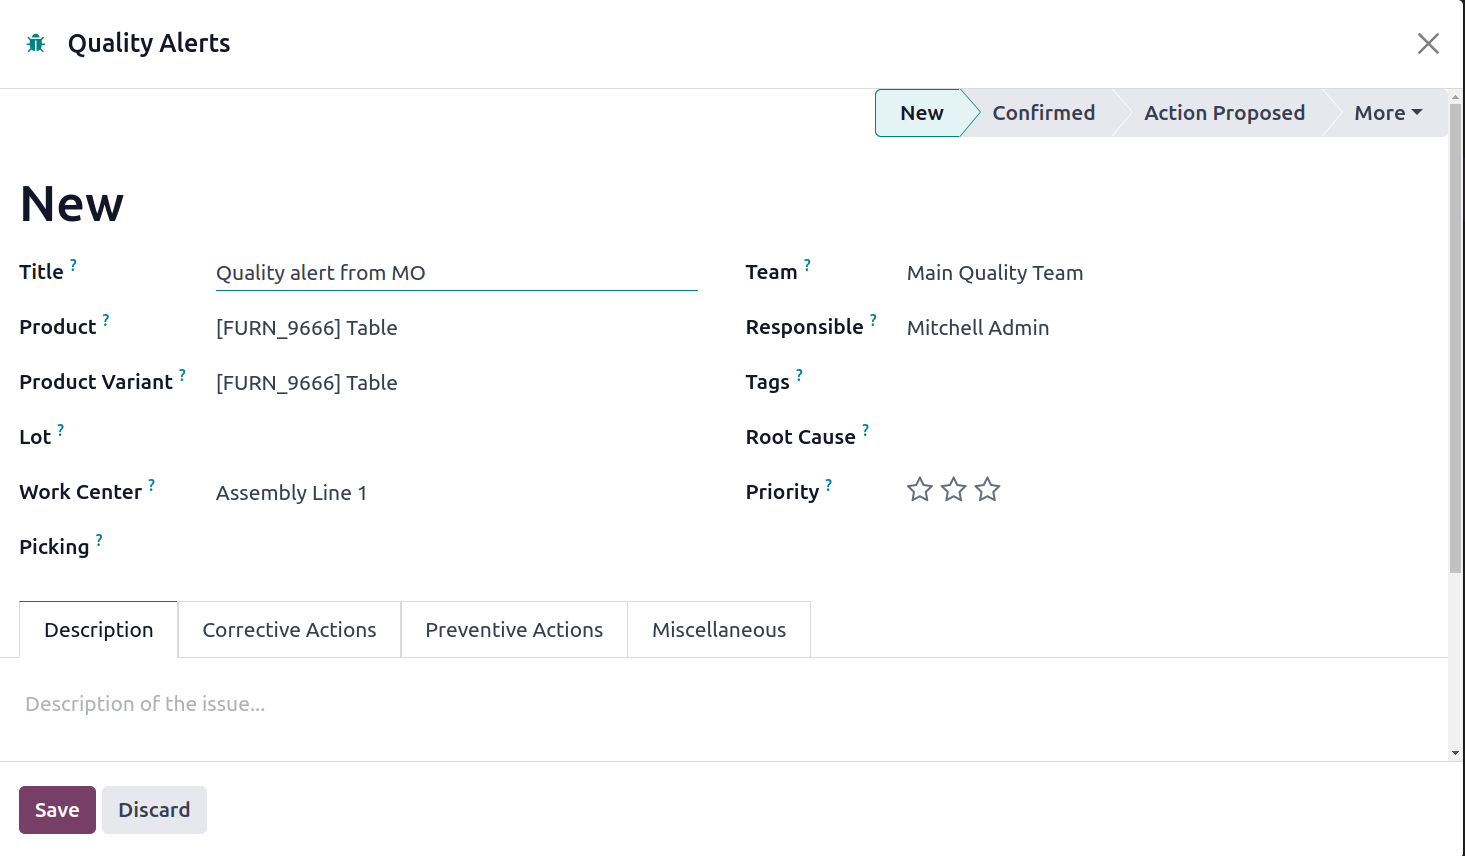
Let's look out for the Quality Alerts pane in the Odoo 17 Quality module now. Inside the
New stage, you can see the created quality alert for Table.

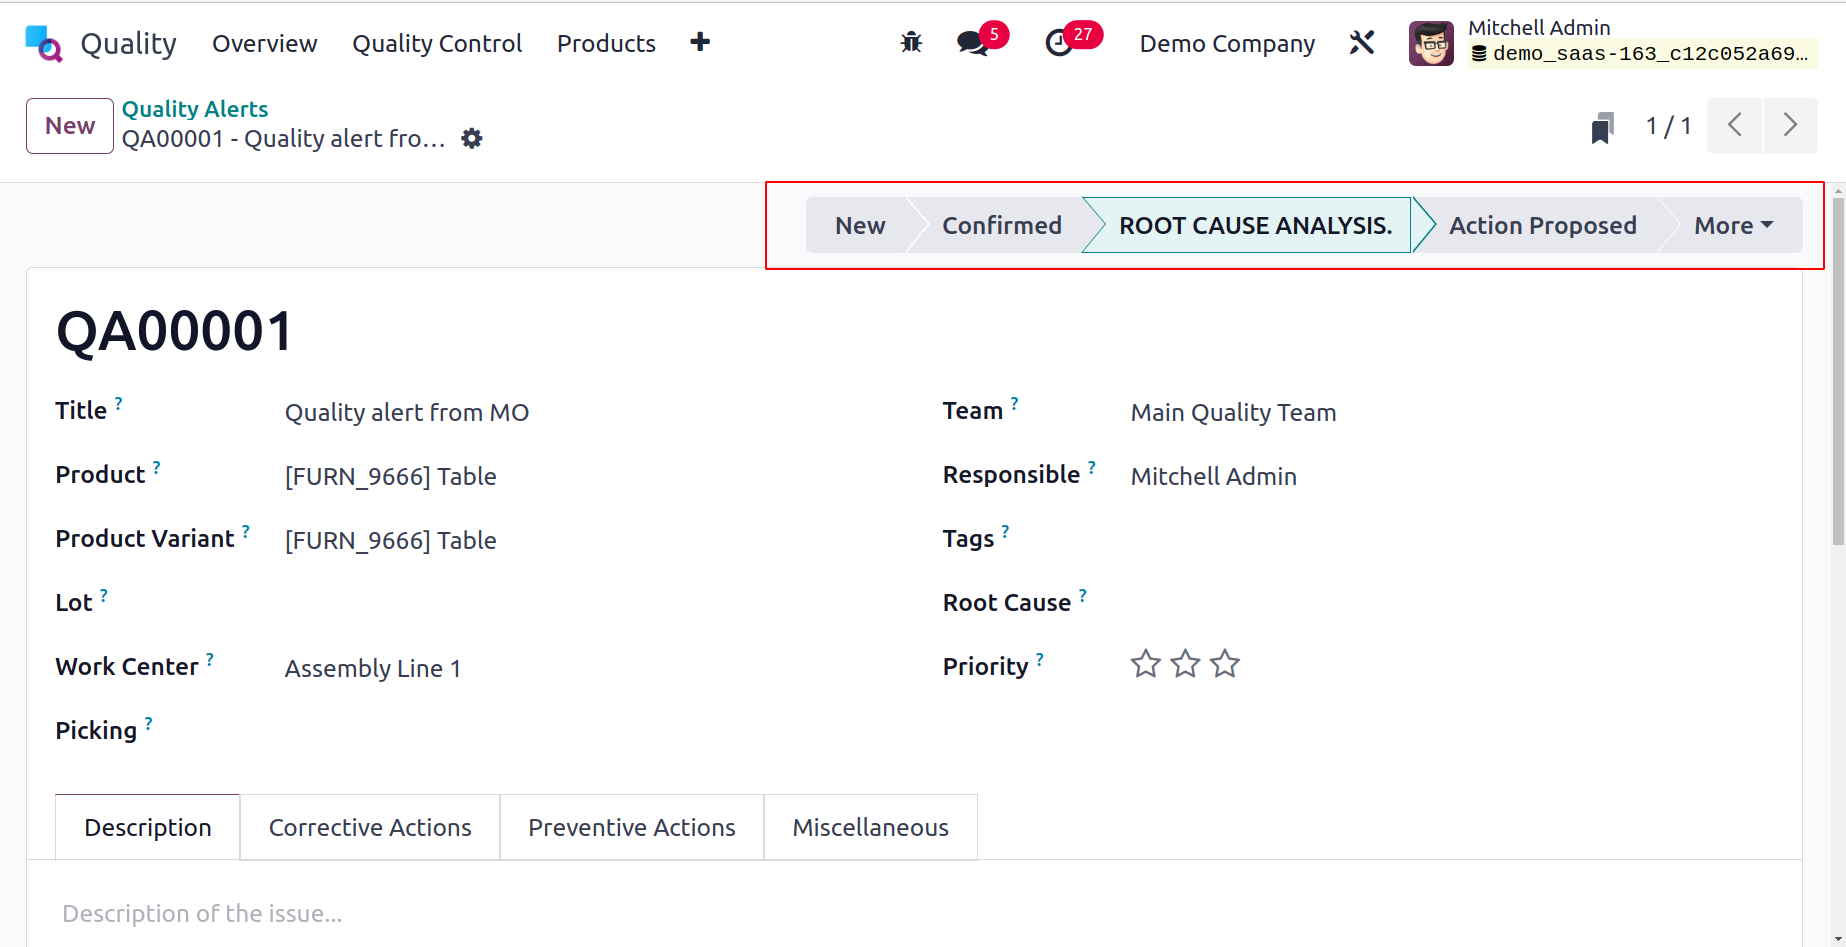
Add the tag security concern and change the quality alert stage to ROOT CAUSE ANALYSIS.
Next, in the Root Cause field, describe the cause of the product quality alert.
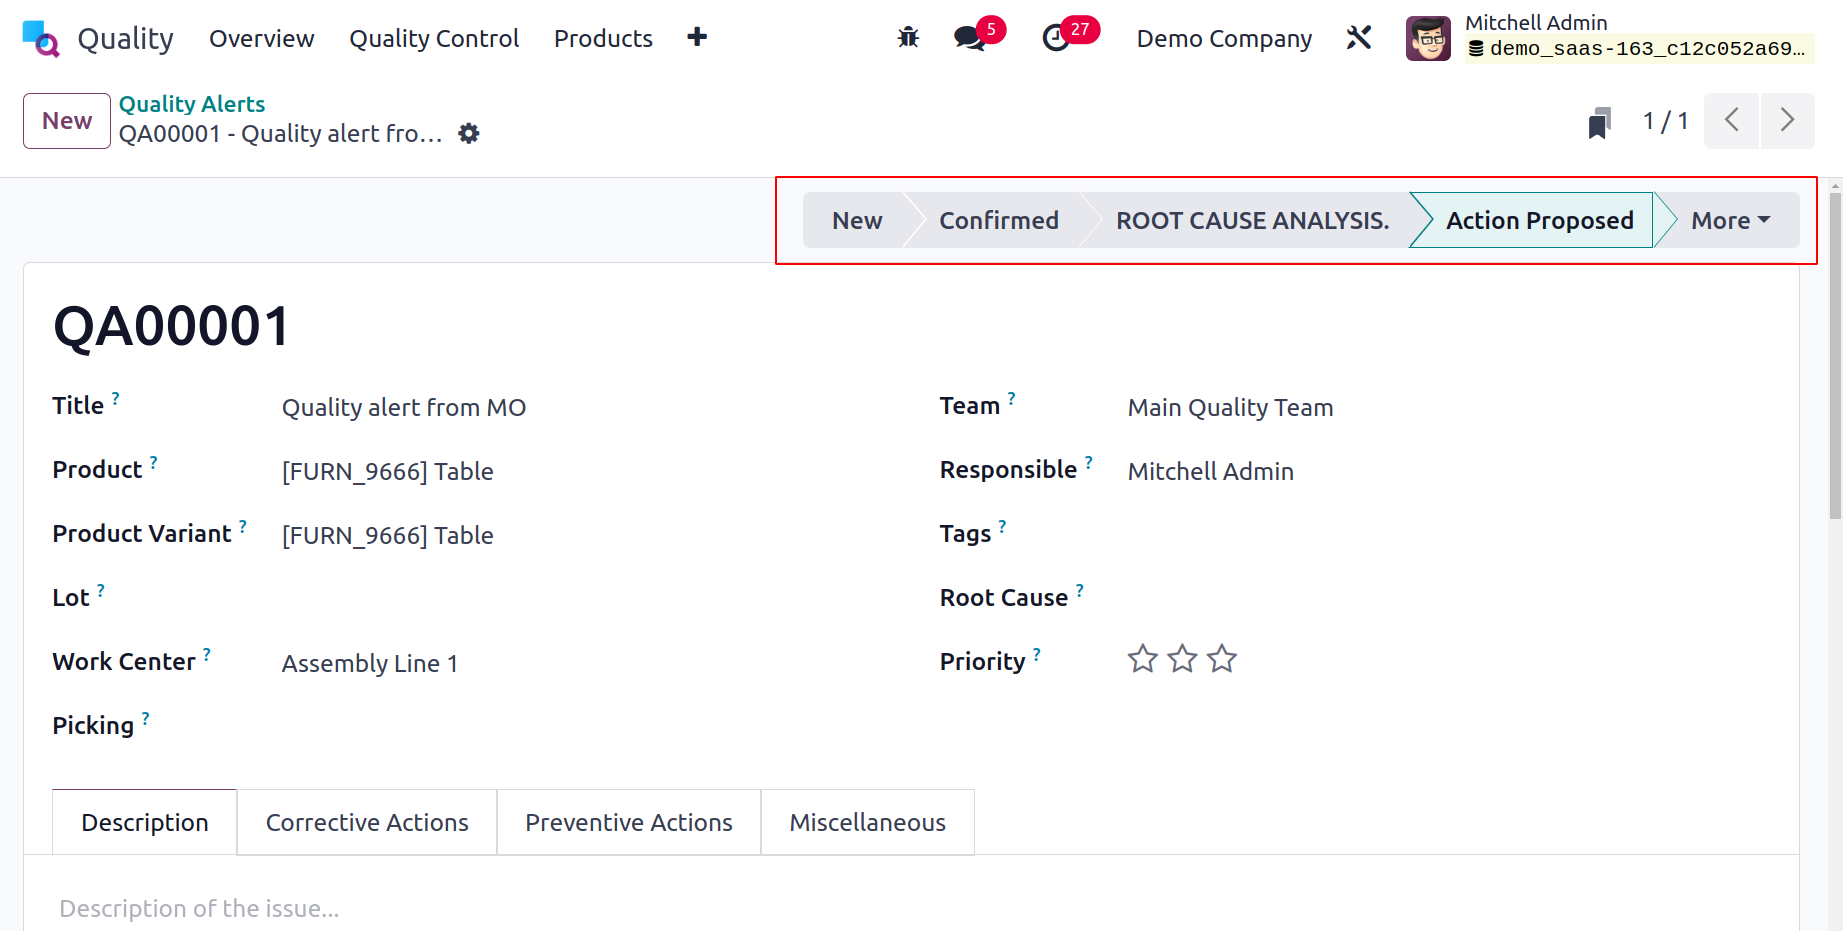
Change the stage to Action Proposed once the data has been managed.
Selecting your Manufacturing Order in the Odoo 17 Manufacturing module is the next step.
We can see that the order has one quality alert that was produced.
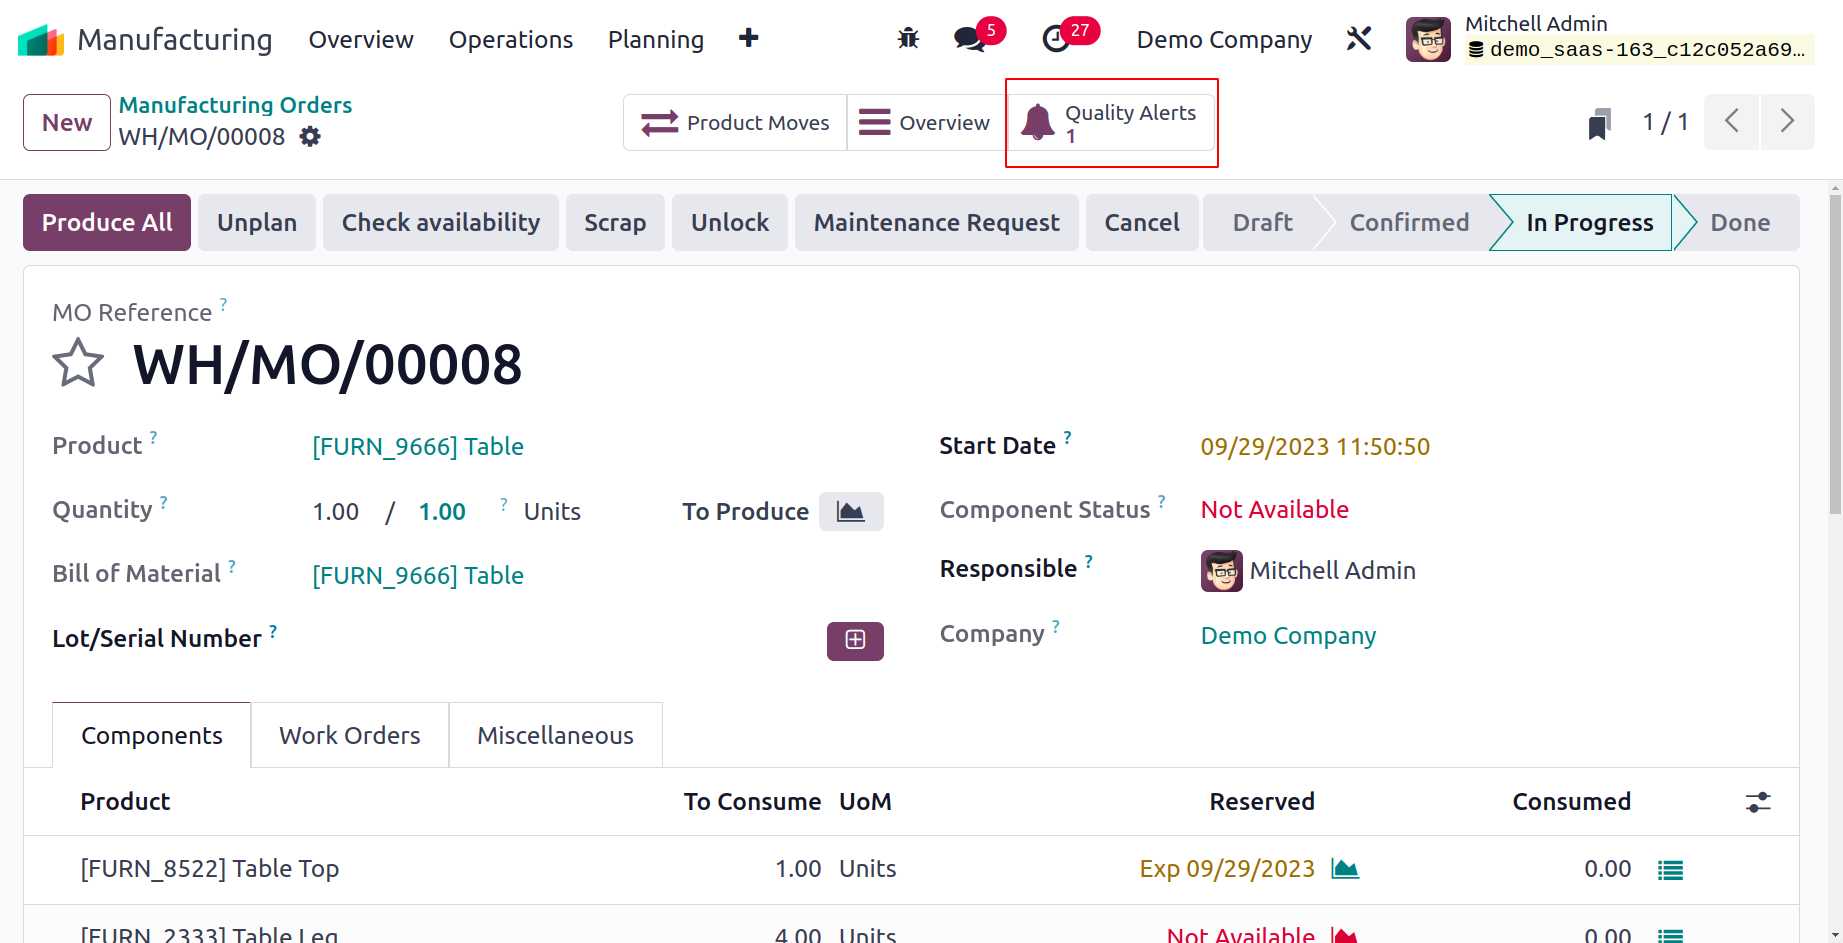
As a result, it is simple to pass the quality alert within a manufacturing order.