Request for Quotation
To have a good understanding of the items and their service, you may
send a Request for quotation to a specific supplier if you want to buy
any product from them. The Odoo 17 Purchase module is wholly reliable
for generating these requests for bids. You can use Odoo17 to ask
various vendors for quotes, which will help you choose the best service
provider for your purchase.
You will have a dedicated platform for the management of each RQF built
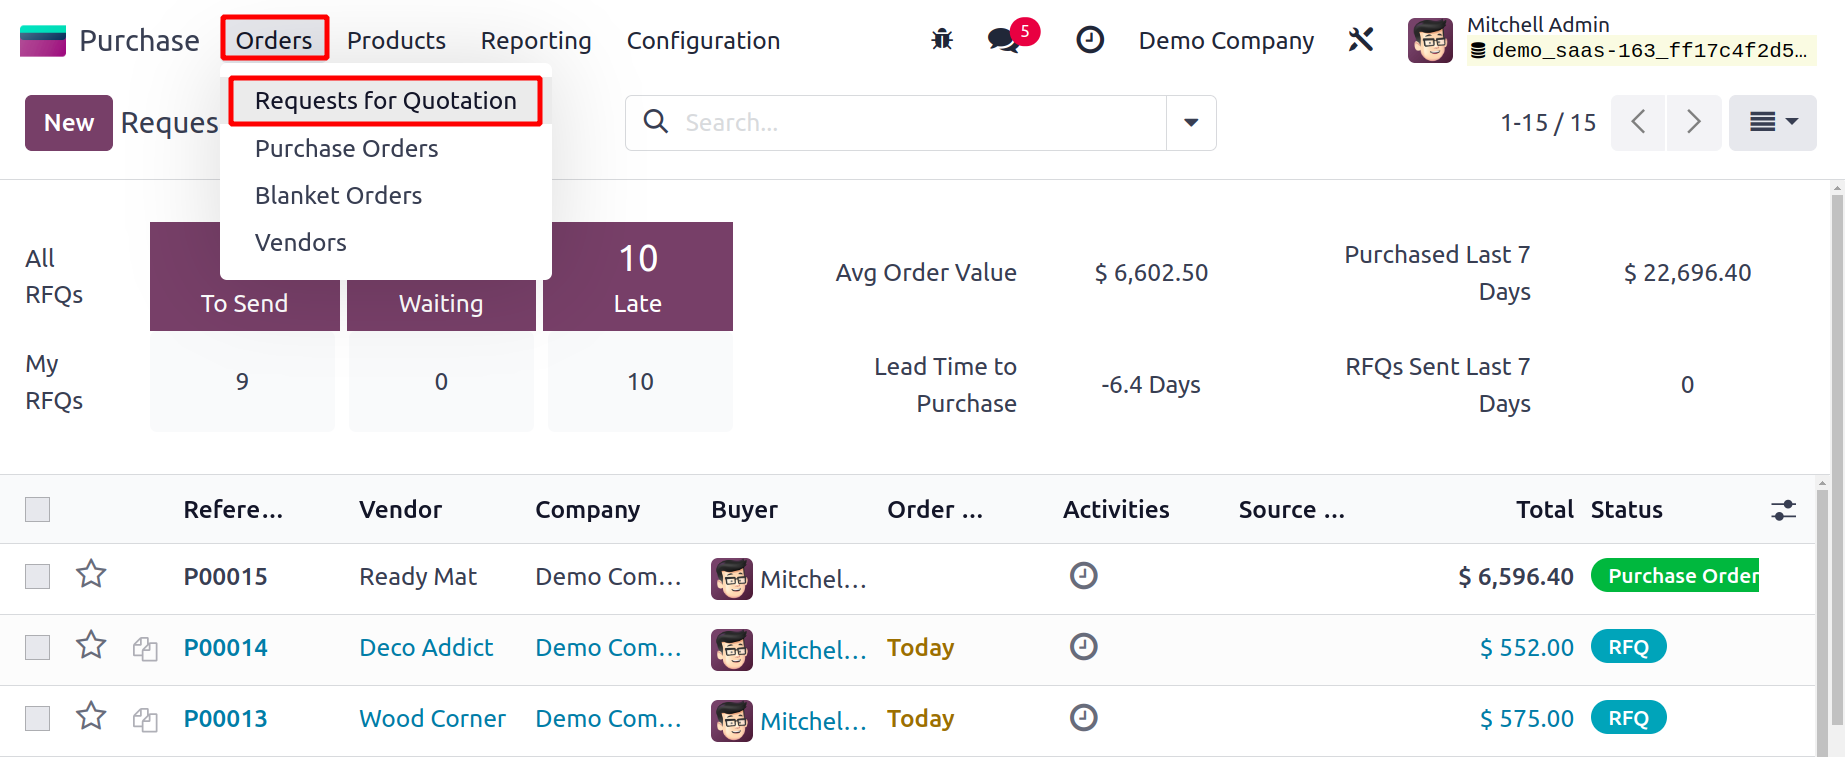
in the Odoo17 Purchase module. The Orders menu will give you access to
this platform. The graphic below demonstrates how Odoo17 will arrange
all of your RFQs so that you can quickly and orderly monitor all
operations.
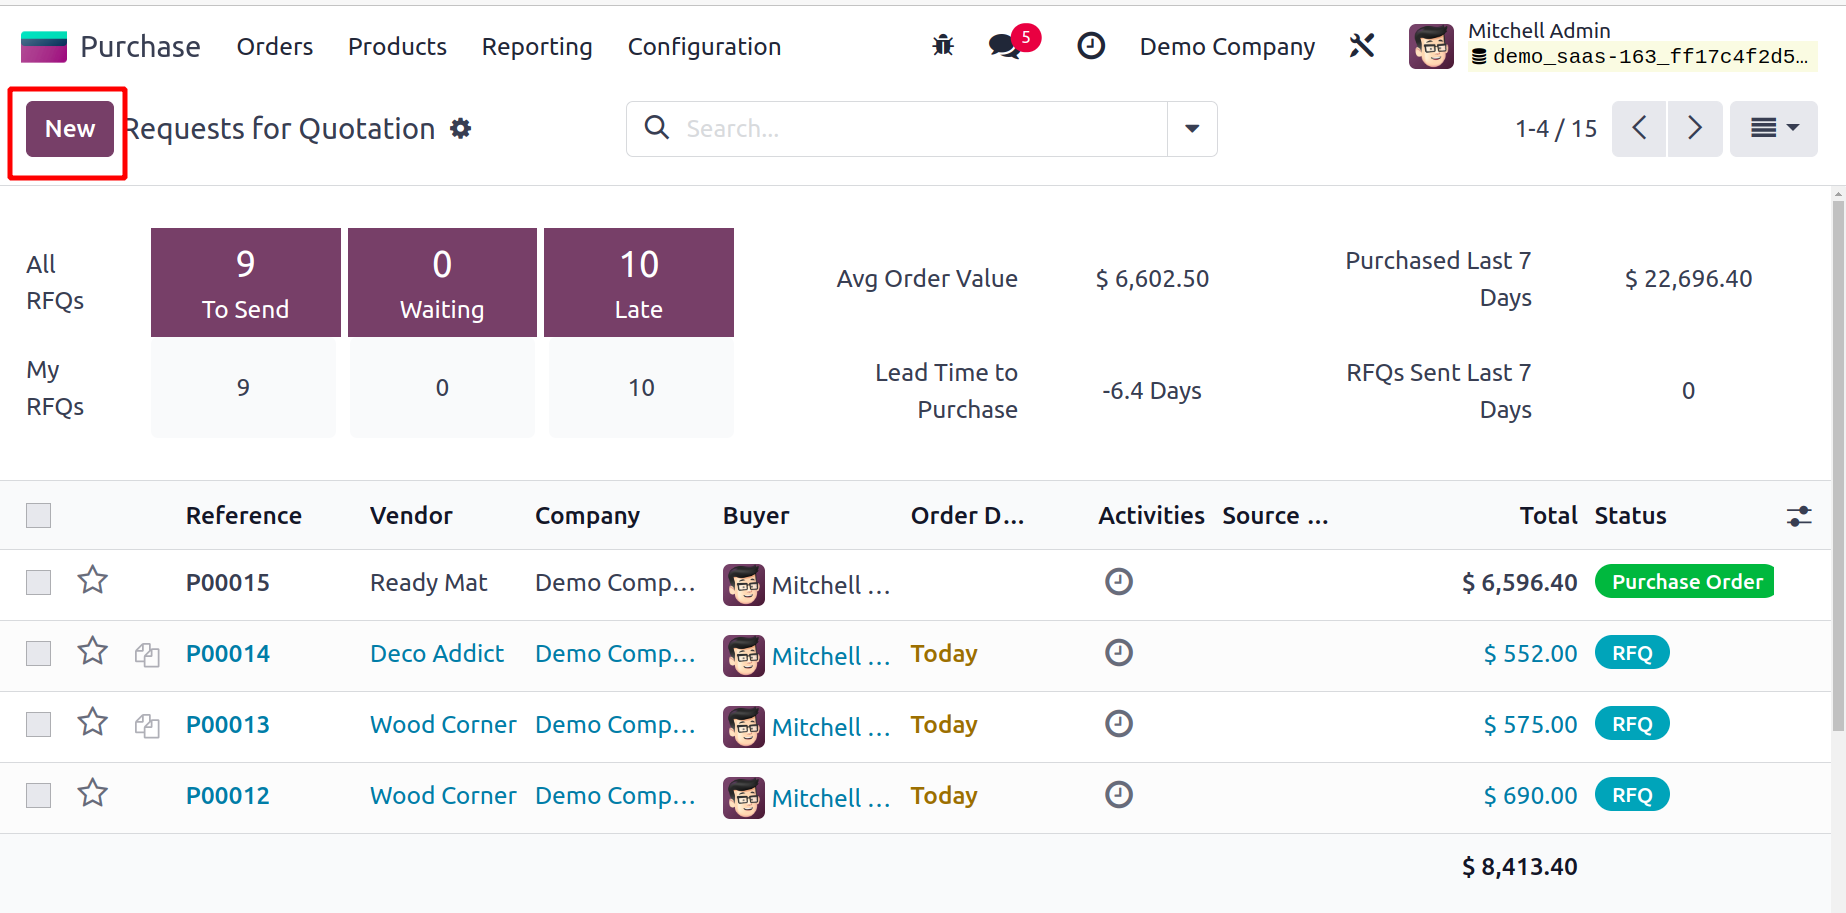
You can see a list view of the Request for Quotation in the image above
along with details about each RFQ's Reference, Vendor, Company, Buyer,
Order Deadline, Activities, Source Document, Total, and Status. The user
can switch the platform's view into the Kanban, Pivot, Graph, Calendar,
and Activity views in addition to the List view, depending on demand.
You will benefit from the Filters and Group By option's default and
custom capabilities, which will help you streamline the search process.
Using these sorting options, you may quickly find the necessary data
from the accessible RFQs.
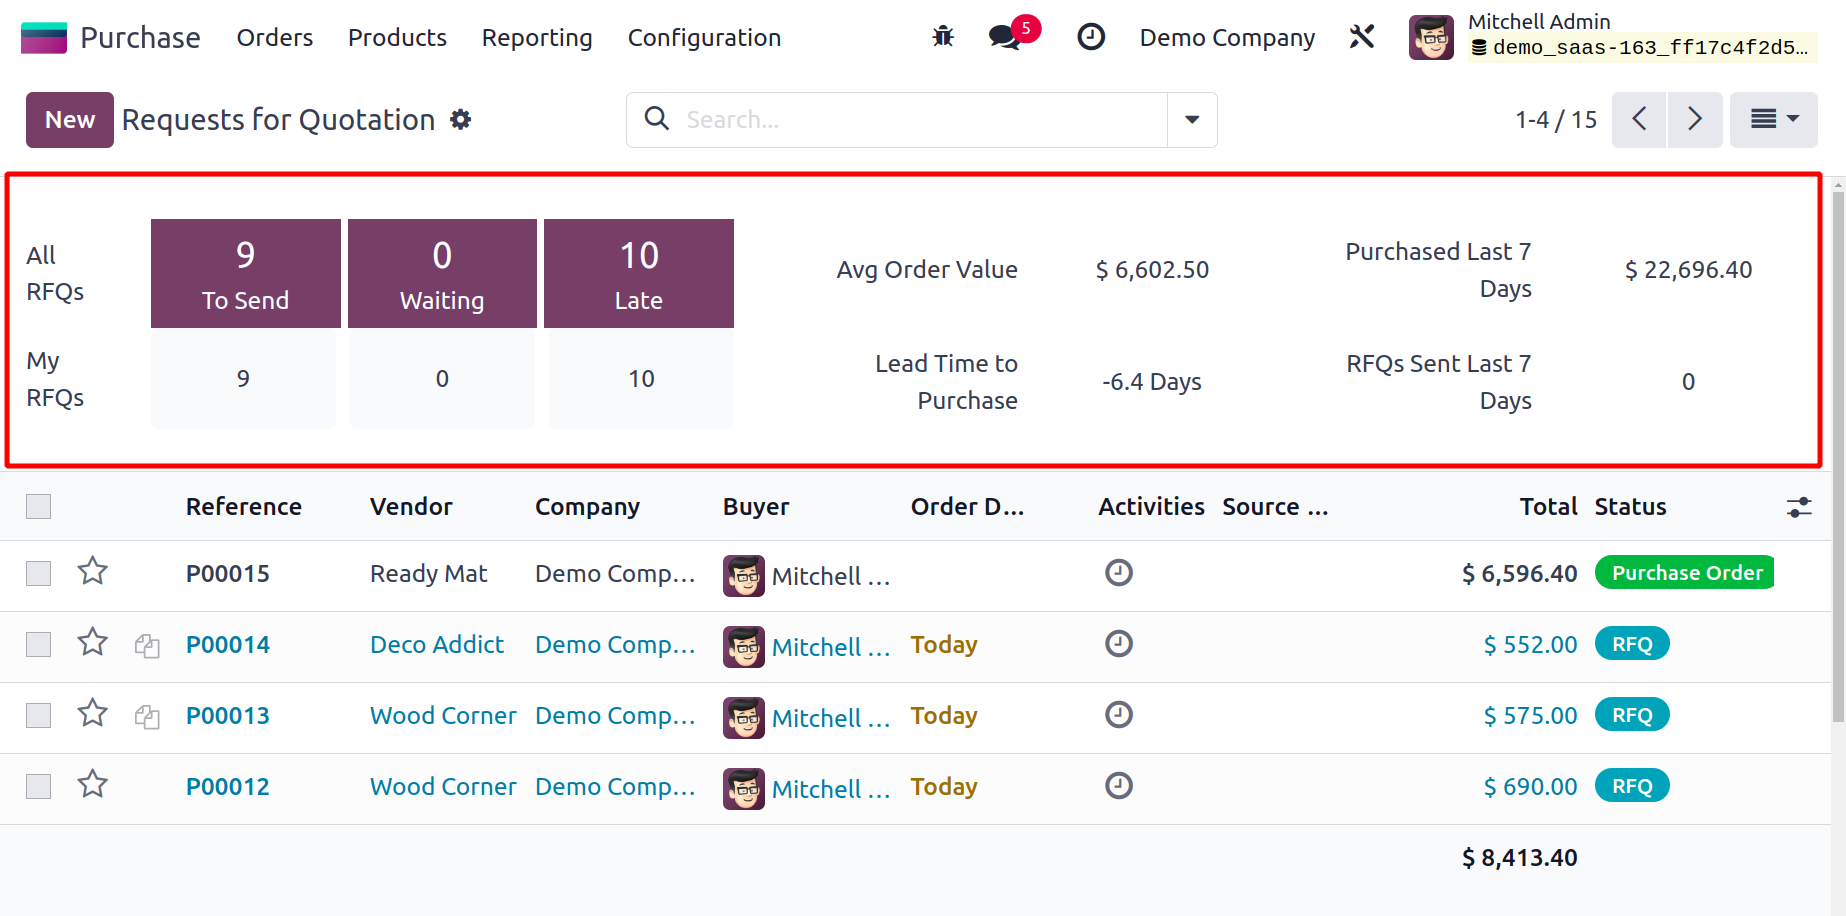
You can find the total number of All RFQs as well as My RFQs (the RFQs
that you have either produced or been assigned) in the RFQ window, as
indicated in the image above. These fields will separately display the
total number of RFQs to be sent to the appropriate vendors, RFQs
awaiting vendor confirmation, and late RFQs. You will also receive
information on the Average Order Value, Products Purchased in the Past 7
Days, Lead Time to Purchase, Total RFQs Sent in the Past 7 Days, and the
Avg.
Lead Time in Days from Order Confirmation to Purchase.
You can prioritize your RFQs by using the star icon on the list view's
left side.
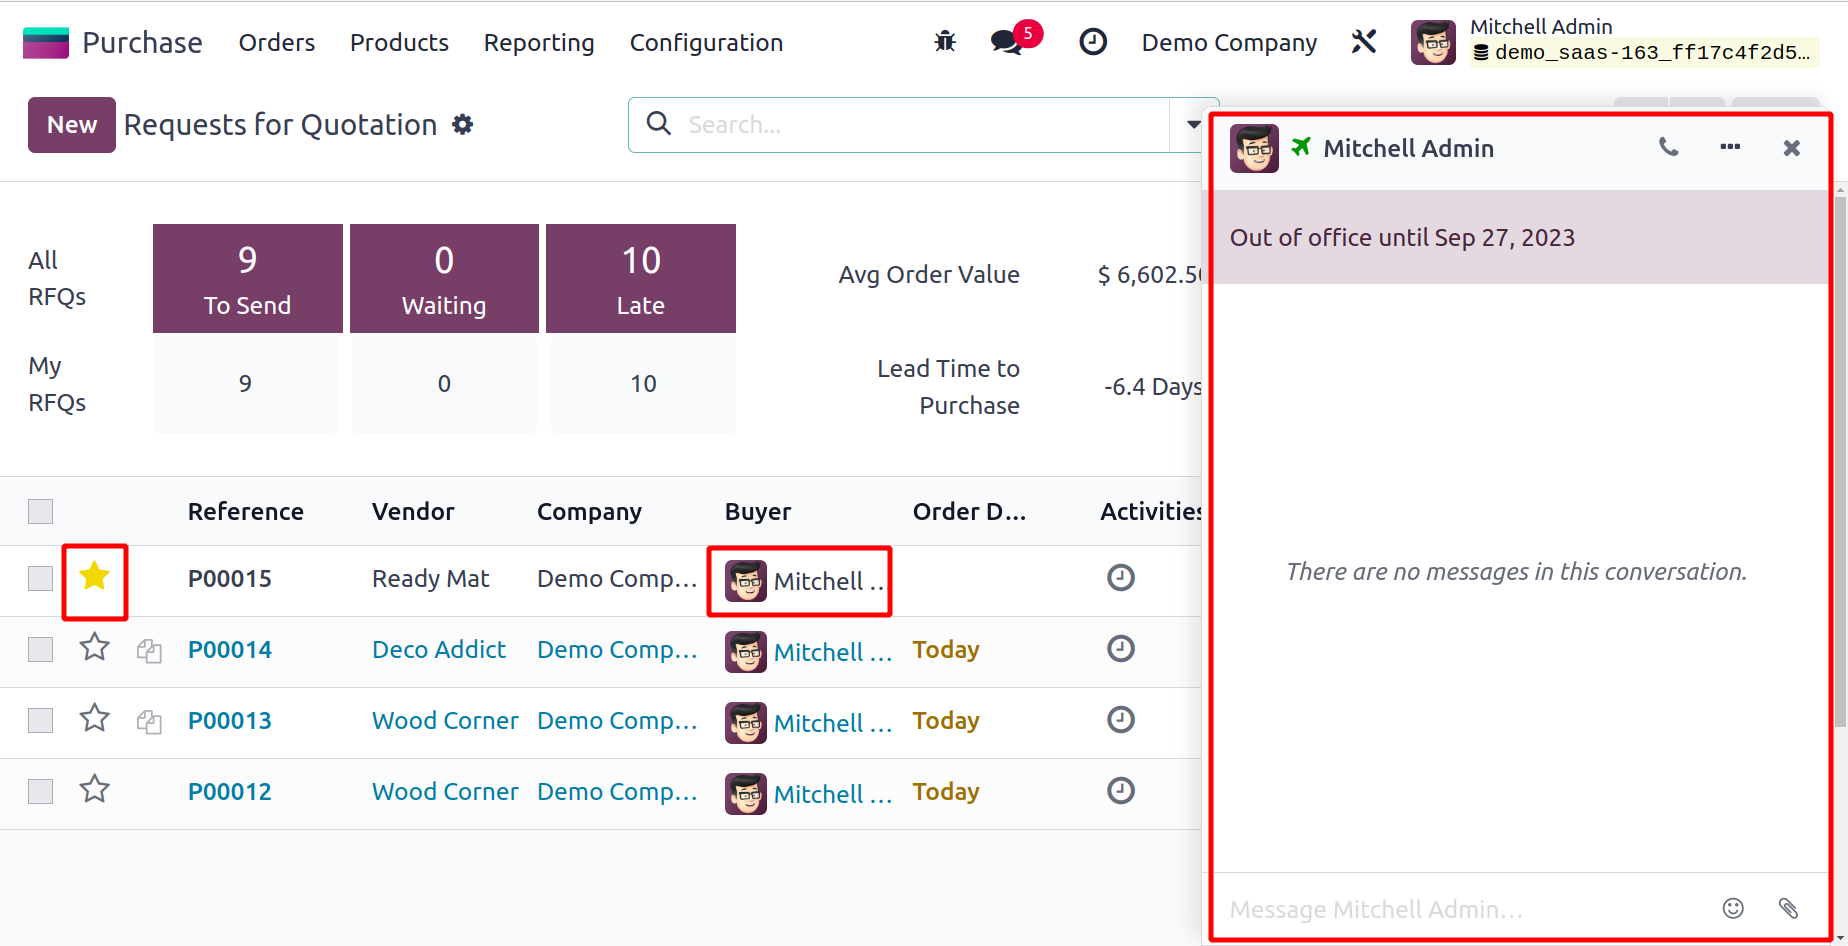
Odoo17 provides a simple method for getting in touch with the buyer right
from the RFQ preview. When you click on the buyer's name, a chat window
similar to the one in the image above will open, allowing you to
communicate with the buyer.
Let's now talk about issuing a fresh request for quotes. You can choose
the necessary RFQ from the provided list and use the Edit button to make
modifications to the ones that have already been produced. In this
section, we'll talk about setting up a fresh request for quotes. You
must click the New button to achieve that, and Odoo17 will then direct
you to a new creation window as seen below.
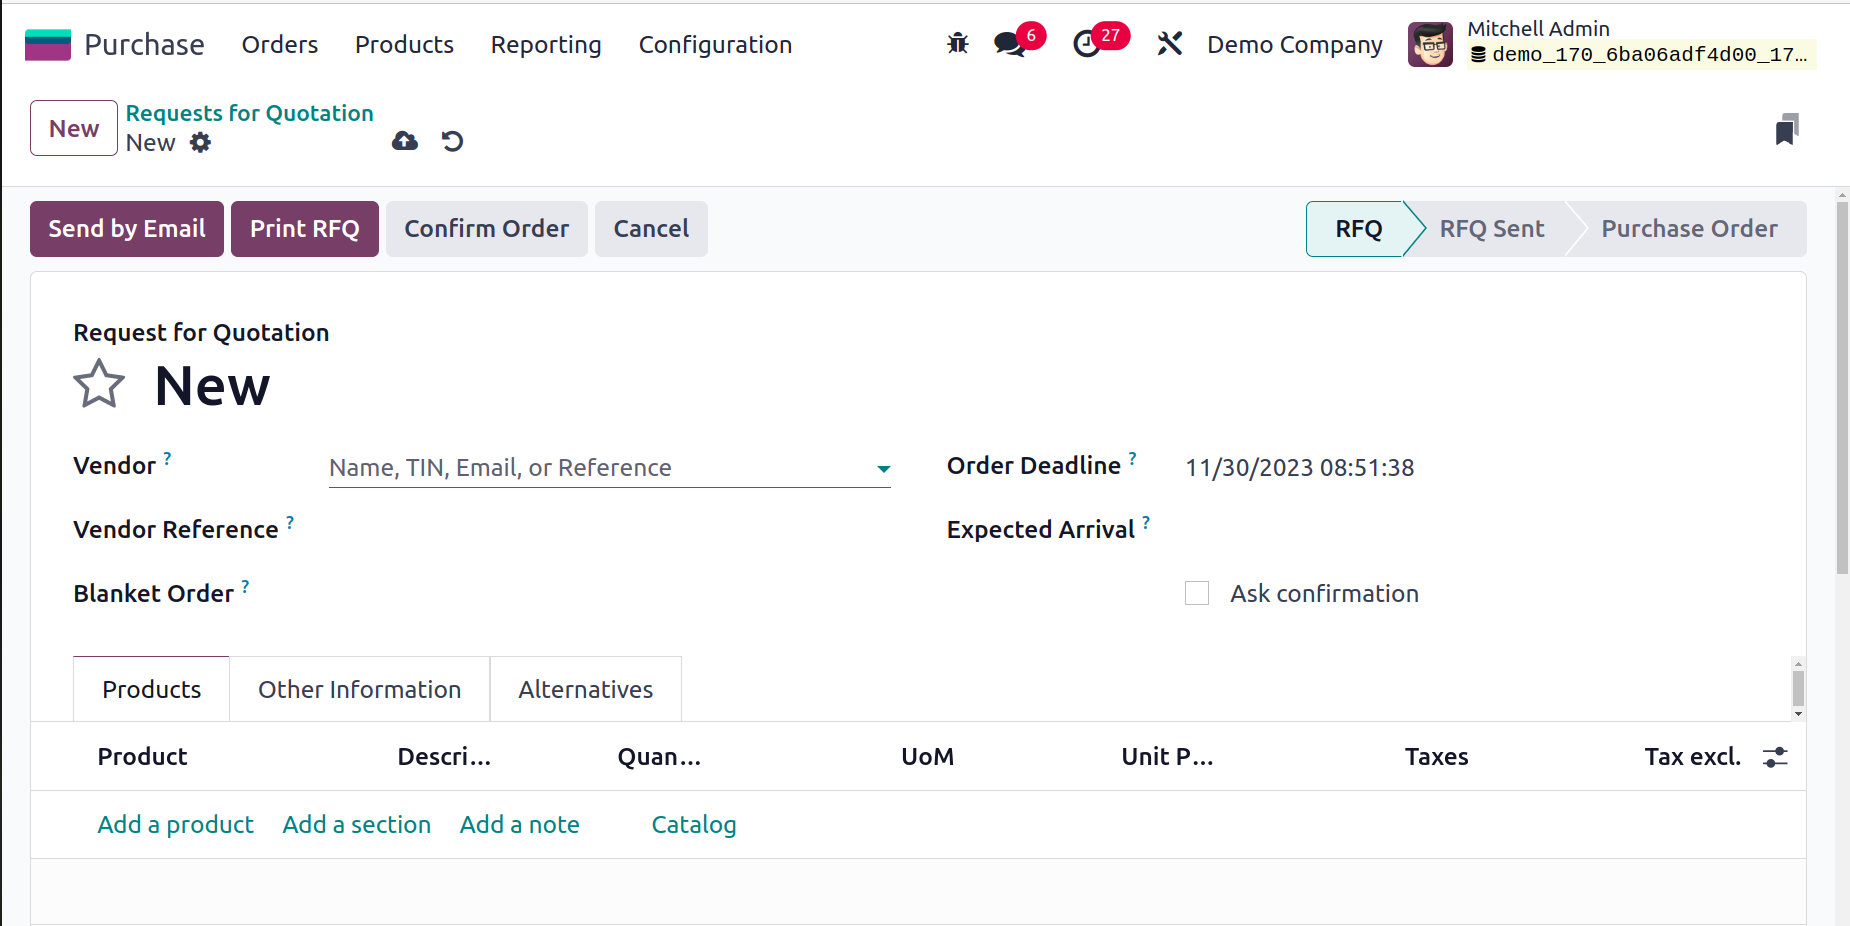
In the previous section, we previously covered vendor configuration. You
can choose an appropriate vendor here by choosing from the list of
vendors set in the Vendor field of the Purchase module. You can provide
a reference to the sales order or bid that the vendor sent in the vendor
reference section. As this reference is typically placed on the delivery
order sent by your vendor, it is used to match the products when you
receive them. You can choose a draft agreement that has been approved by
both parties in the Purchase Agreement section. You can manage and set
up purchase agreements on an additional platform in Odoo17, which we'll
cover later.
The matching field allows you to define the Currency that is appropriate
for your buying procedures. The Order Deadline column shows how long the
quotation has to be approved before it can be turned into a purchase
order. The delivery date provided by the provider is shown under
Expected Arrival. Using the Ask Confirmation option, you can request
that the seller confirm the date by automatically sending a confirmation
email. The operation type of the incoming shipment will be determined by
the stock-picking type specified in the Delivery To field.
Using the Add a Product button under the Products tab, you may specify
the products you want to buy from the specific vendor. The catalog
allows the users to easily select products, which is the same as
mentioned in the Sales module.
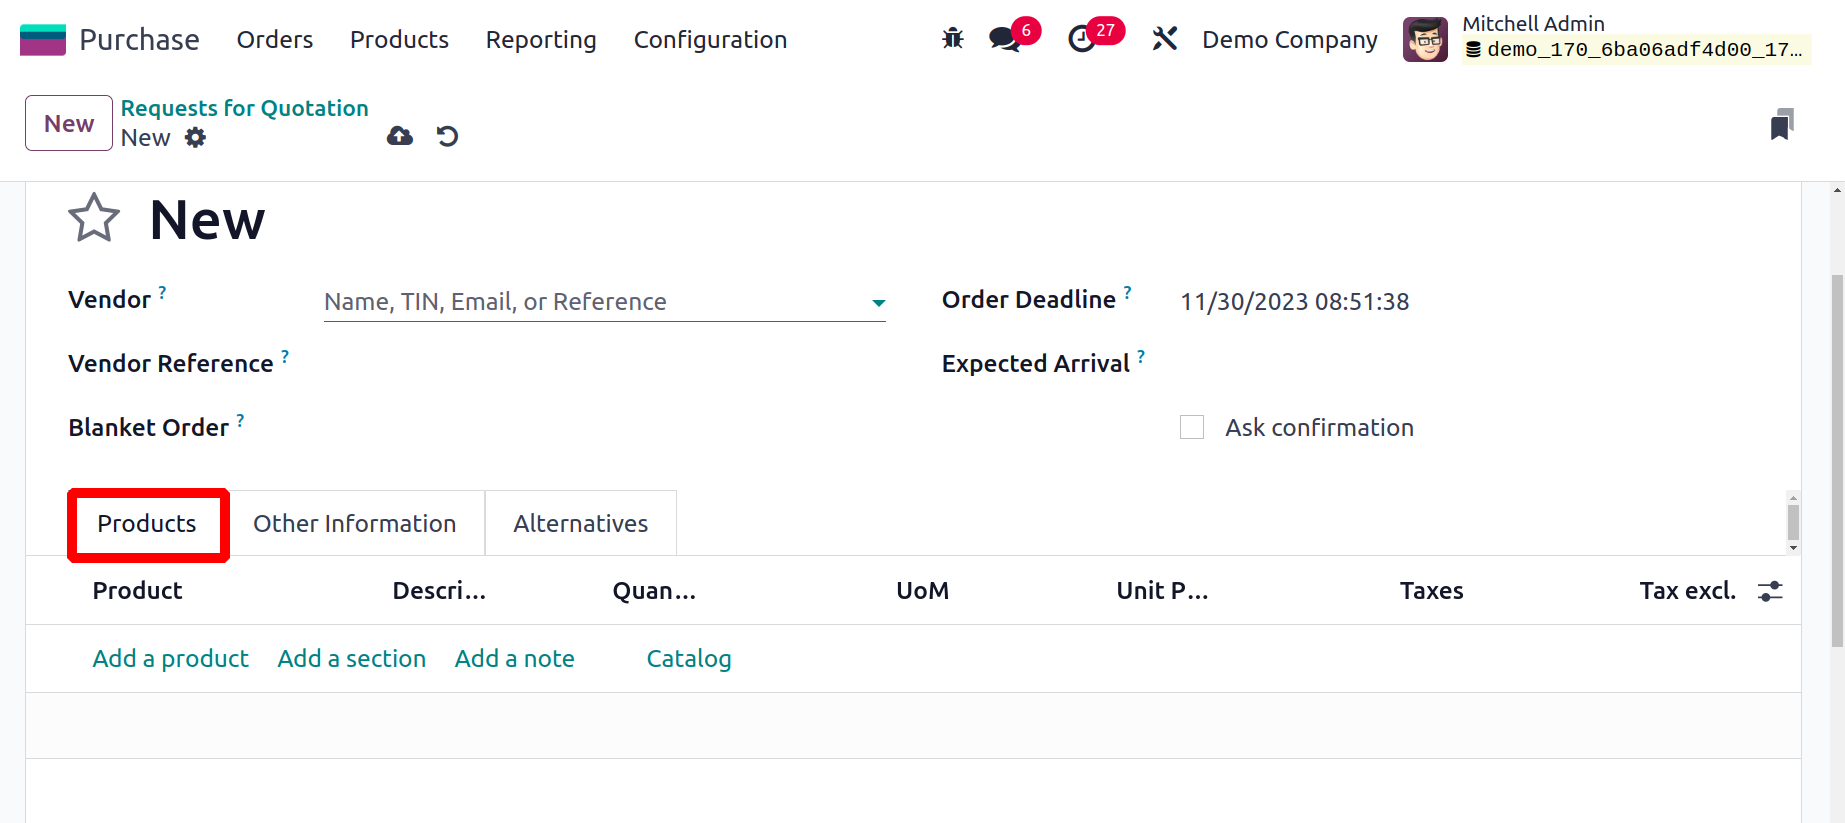
Details about the Product, Description, Quantity, UoM, Unit Price, Taxes,
and Subtotal will be included in the Product Line. The total cost of the
purchase will be displayed under the Products tab on the right side of
the screen after all items have been added. Under the Products tab,
sections and notes can be added using the Add a Section and Add a Note
buttons, respectively. The terms and conditions for this purchase will
be specified in a separate area on this tab.
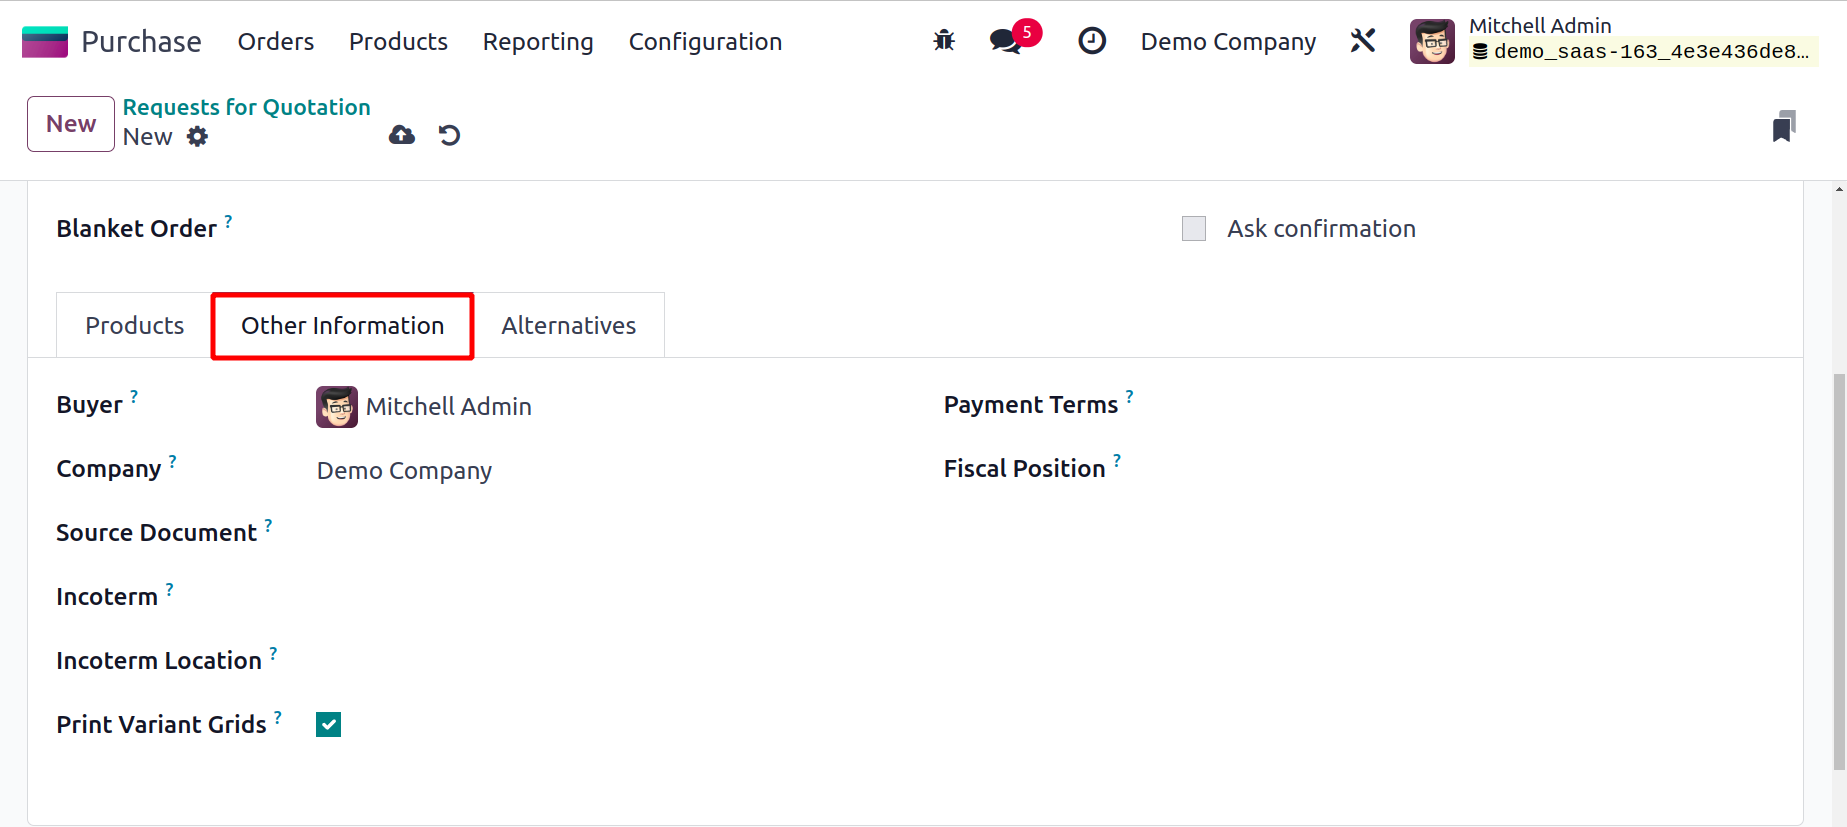
Under the Other Information tab, you may provide more information about
the quotation. Here, you can fill in the appropriate fields with the
names of the Buyer, Company, and Source Document. The adjustable product
matrix will appear on the order report if the Print Variant Grids field
is selected. You can enter both the international commercial term and
the Incoterm Location in the Incoterm field, which is a list of
predefined commercial terms used in international transactions.
According to the agreement, the Purchase form section allows you to
choose either Commission or Procurement as the form of purchase. The
related variables allow you to specify the payment
terms and fiscal positions utilized for this purchase procedure.
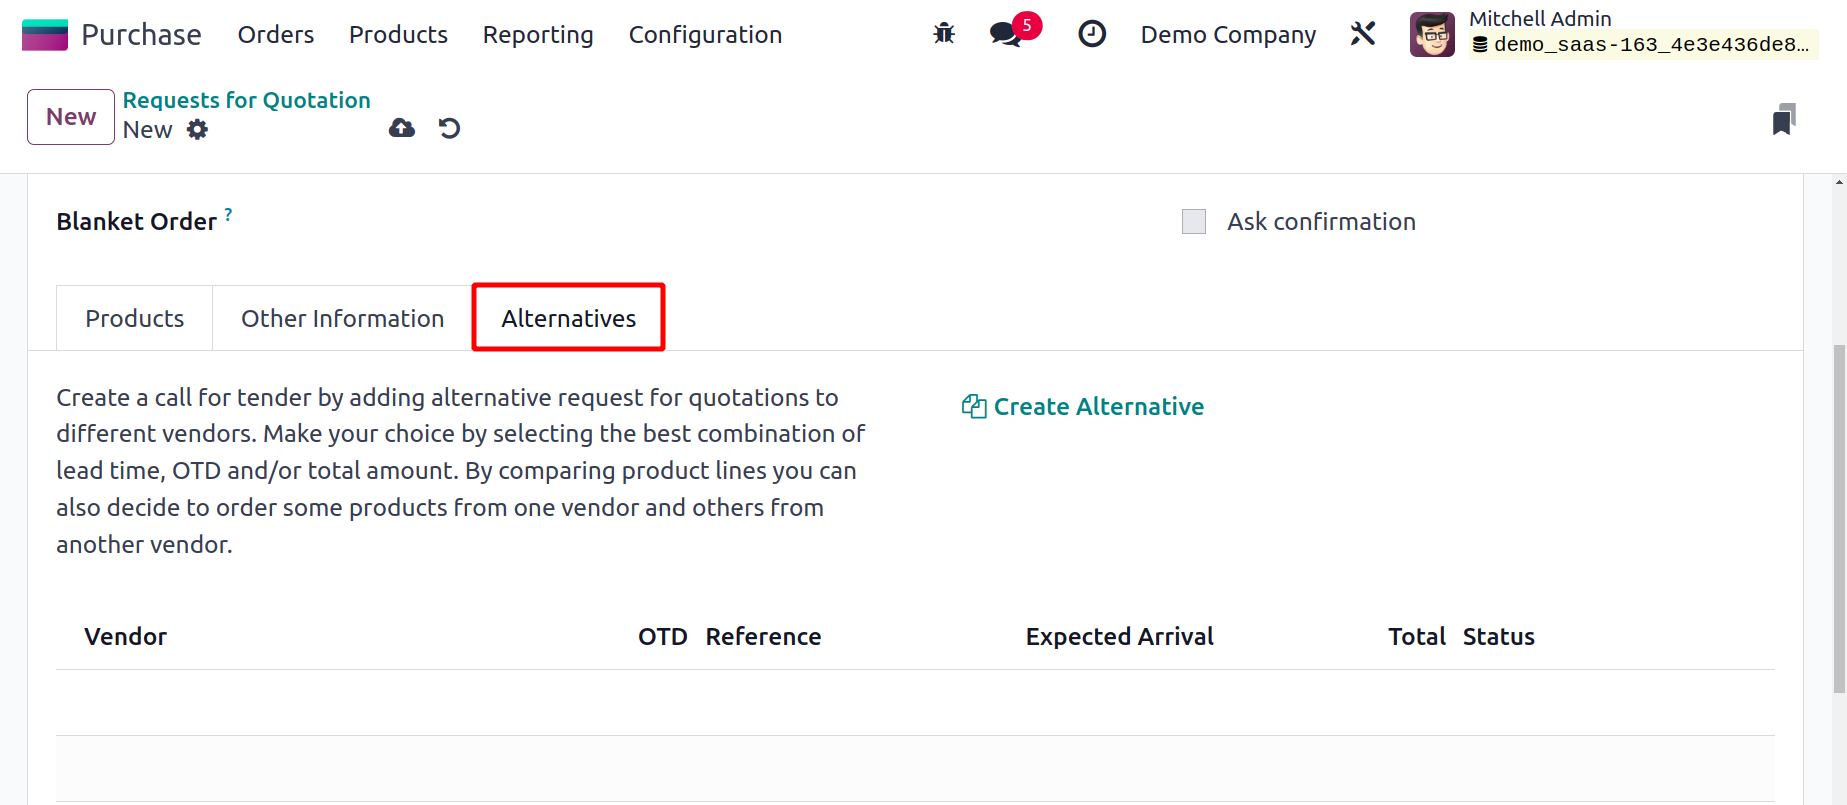
The Odoo 17 Purchase module now has a new feature called the Alternatives
tab. Here, you can add more purchase orders for the exact same goods
from various sellers. This page will assist you in creating a request
for proposals by allowing you to add alternative requests for quotes
from other vendors. The best lead time, OTD reference, and total amount
combinations can be used to make your options.
You can quickly select to order some products from one vendor and others
from another vendor by comparing the product lines of other providers.
You can open a wizard-like shown below by clicking the Create
Alternative button to generate alternatives.

In this section, you can pick a vendor for the different purchase orders. To duplicate
the product quantities from the original purchase orders, select the Copy Products
option. Click the Create Alternative button to continue. The alternative purchase orders
will be shown under the Alternatives tab as shown below, once you've finished creating
them.
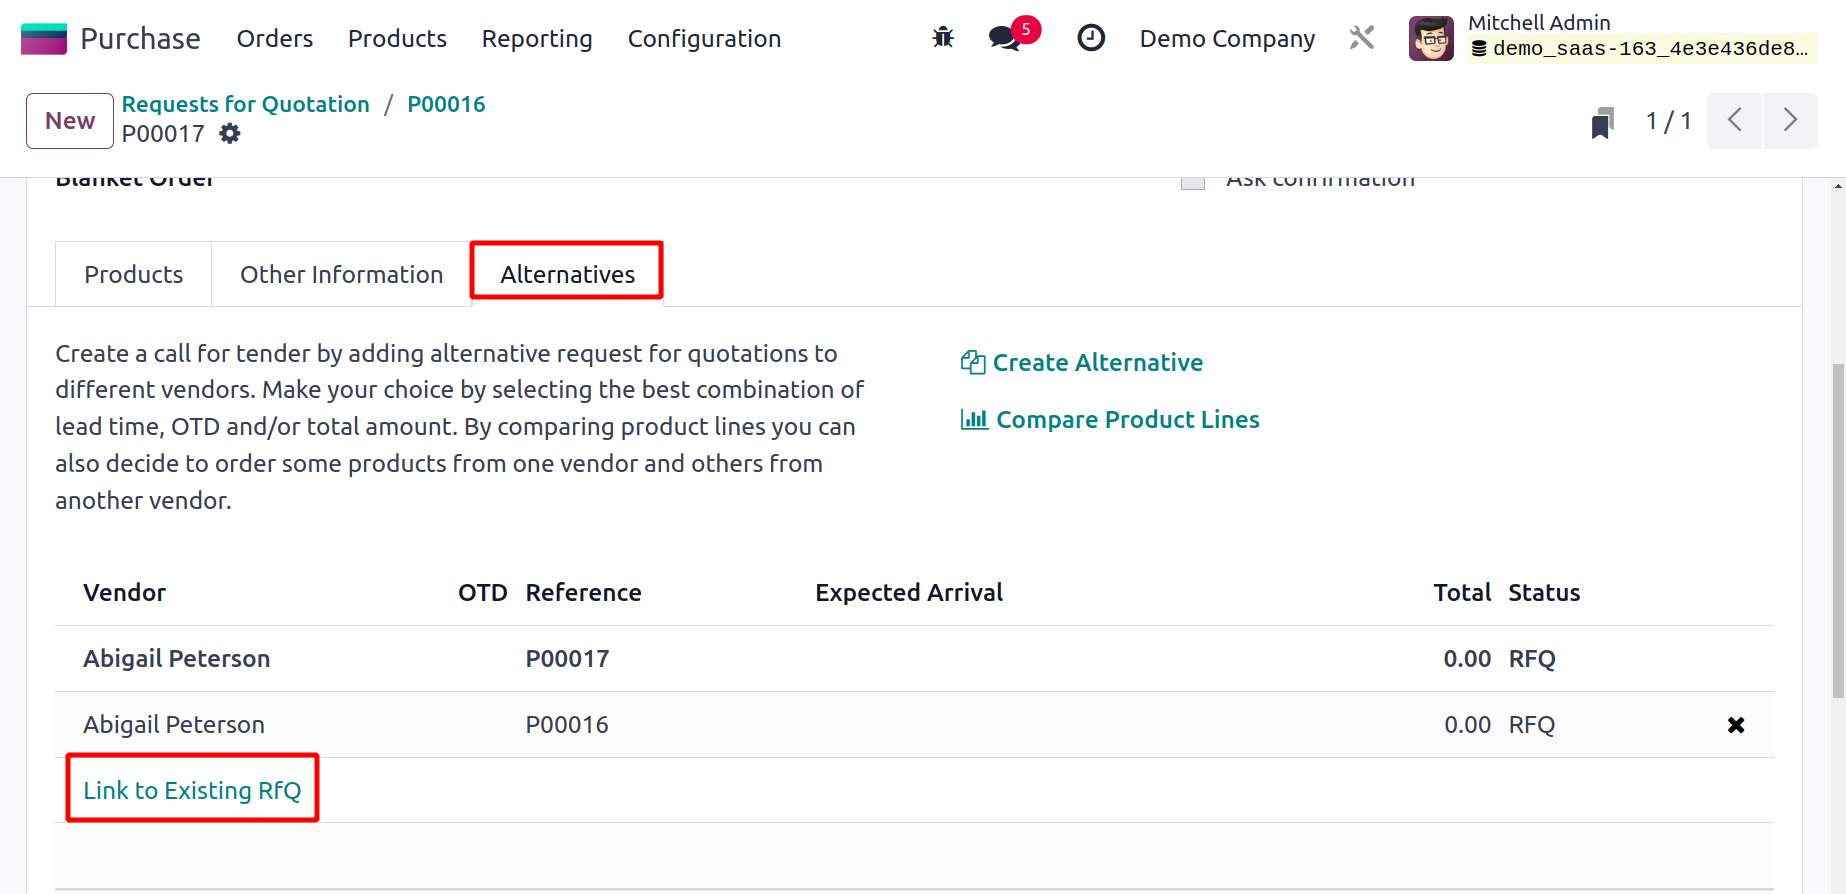
Purchase orders can be linked to alternative POs by using the Link to Existing RFQ
button. An option selection pop-up will show when you click on this button. From this
pop-up, you can choose appropriate substitutions to add to the Alternatives tab.
The Compare Product Lines button in Odoo17 enables you to compare the product line. By
clicking this button, you will be taken to a page that compares two purchase orders and
displays a list view of them together with information on the product, vendor, OTD
reference, description, anticipated arrival, quantity, unit of measurement, unit price,
total, and currency.

By selecting the Choose button, you can choose from the available options instead of
using the original purchase order. You can remove the options by using the Clear button.
When you have finished filling out all of the fields on the Request for Quotation form,
click the Save button.
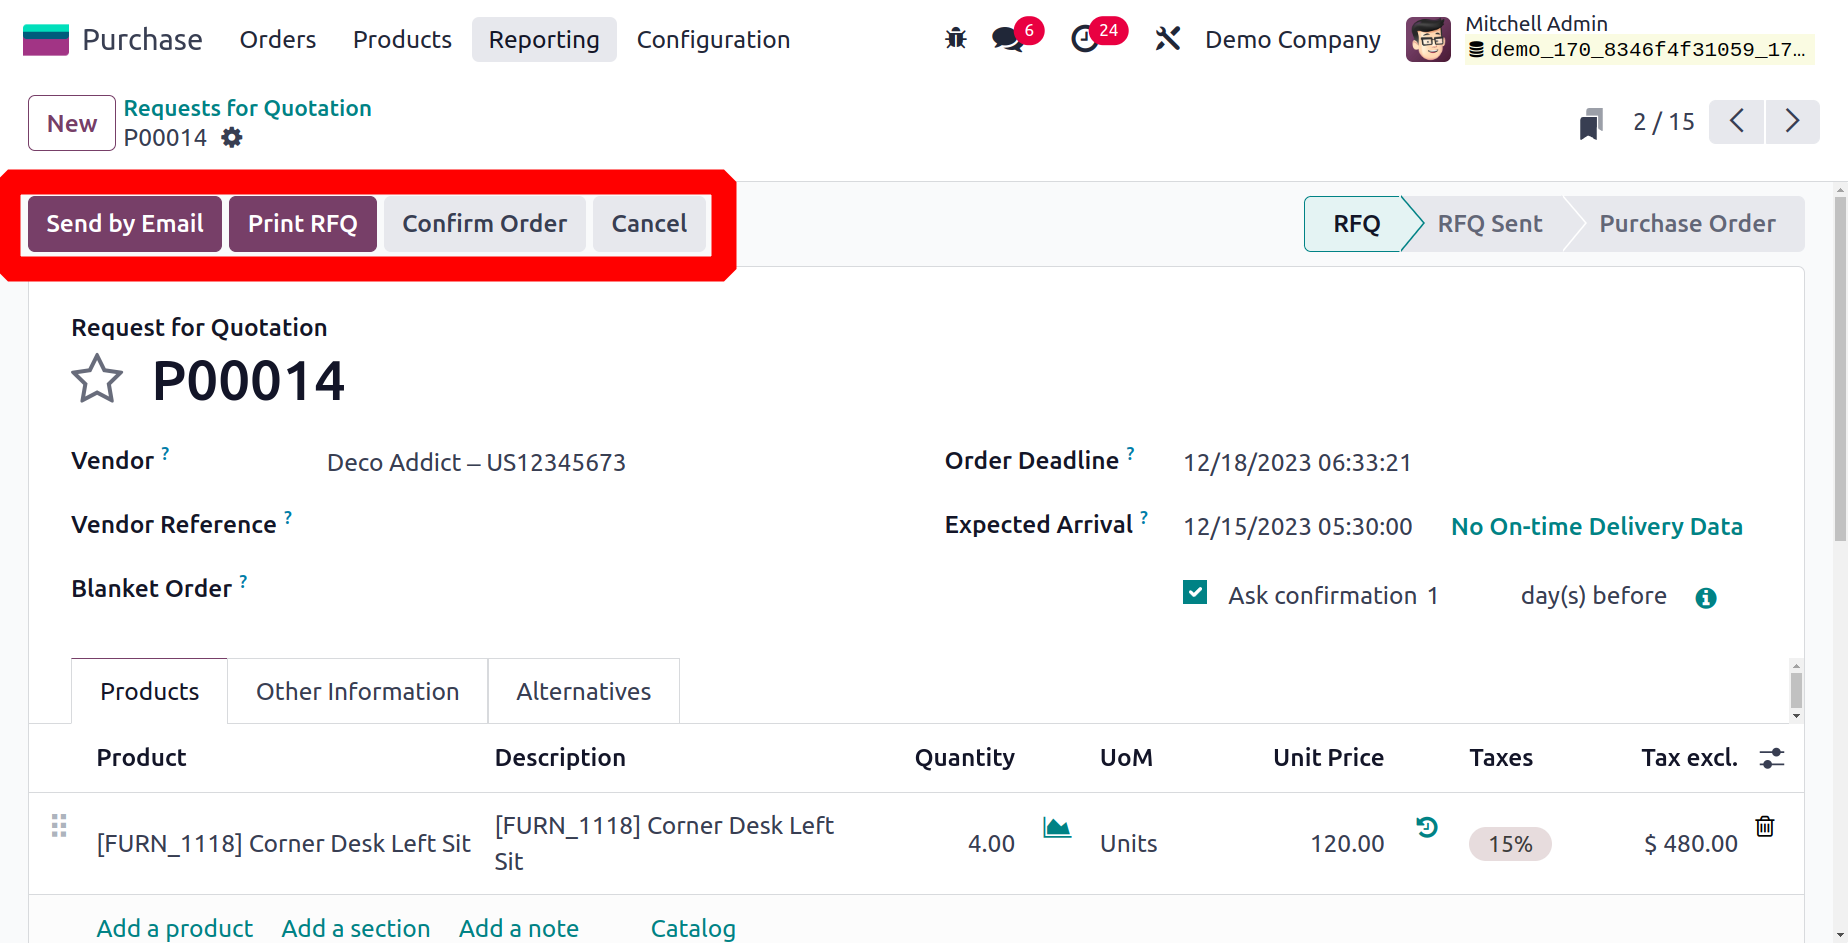
To transmit this request for a quotation to the appropriate vendor, use the Send By Email
option. As soon as you select this option, Odoo17 will create the automated email
template that is displayed below. In the Recipients section, you can enter the
recipients' names. Using the Attachments button, you can add other attachments to the
email.
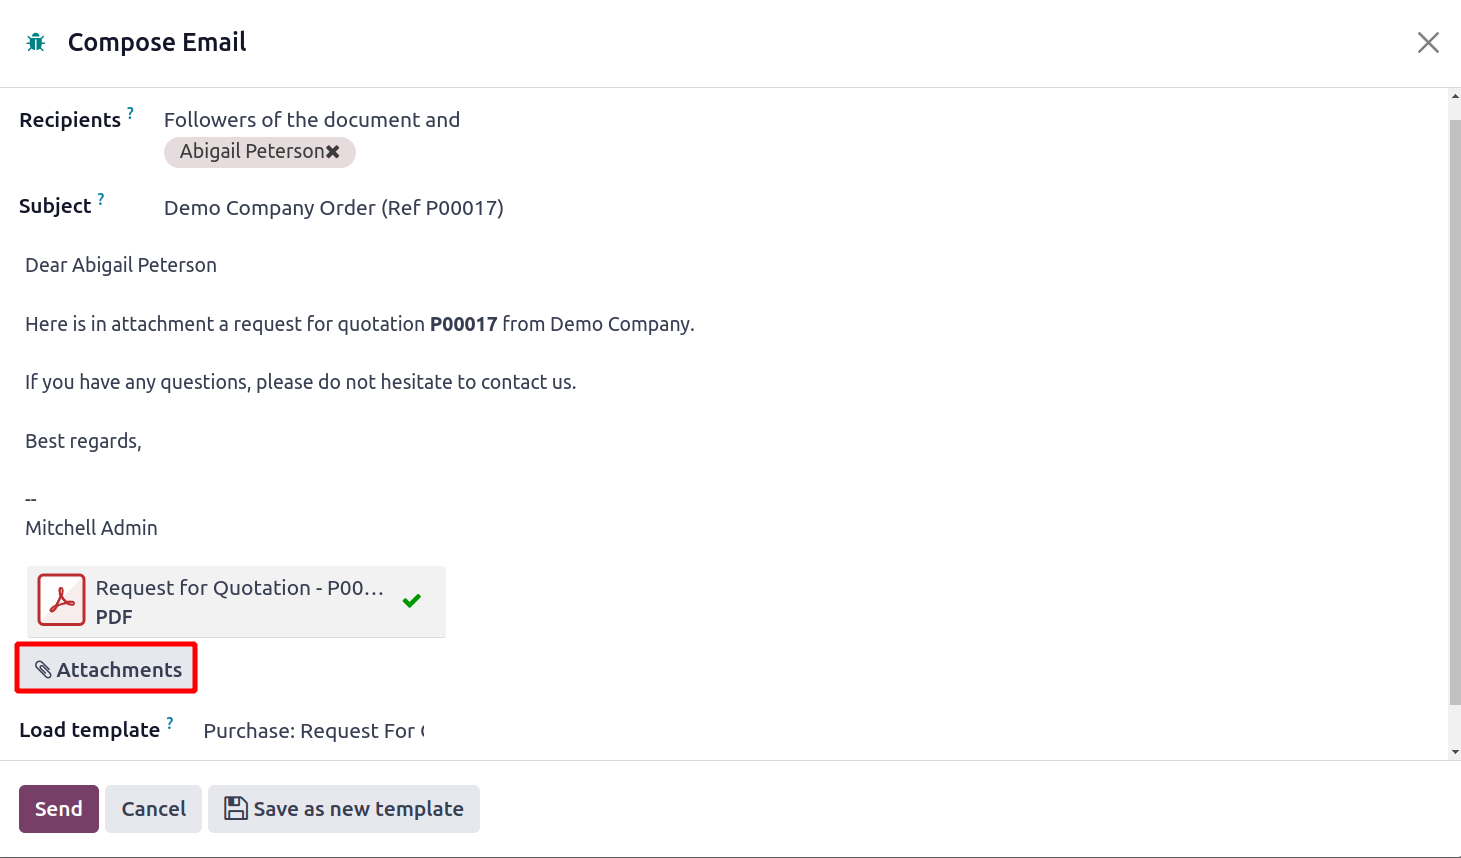
To send the email to the designated recipients, click the Send button.
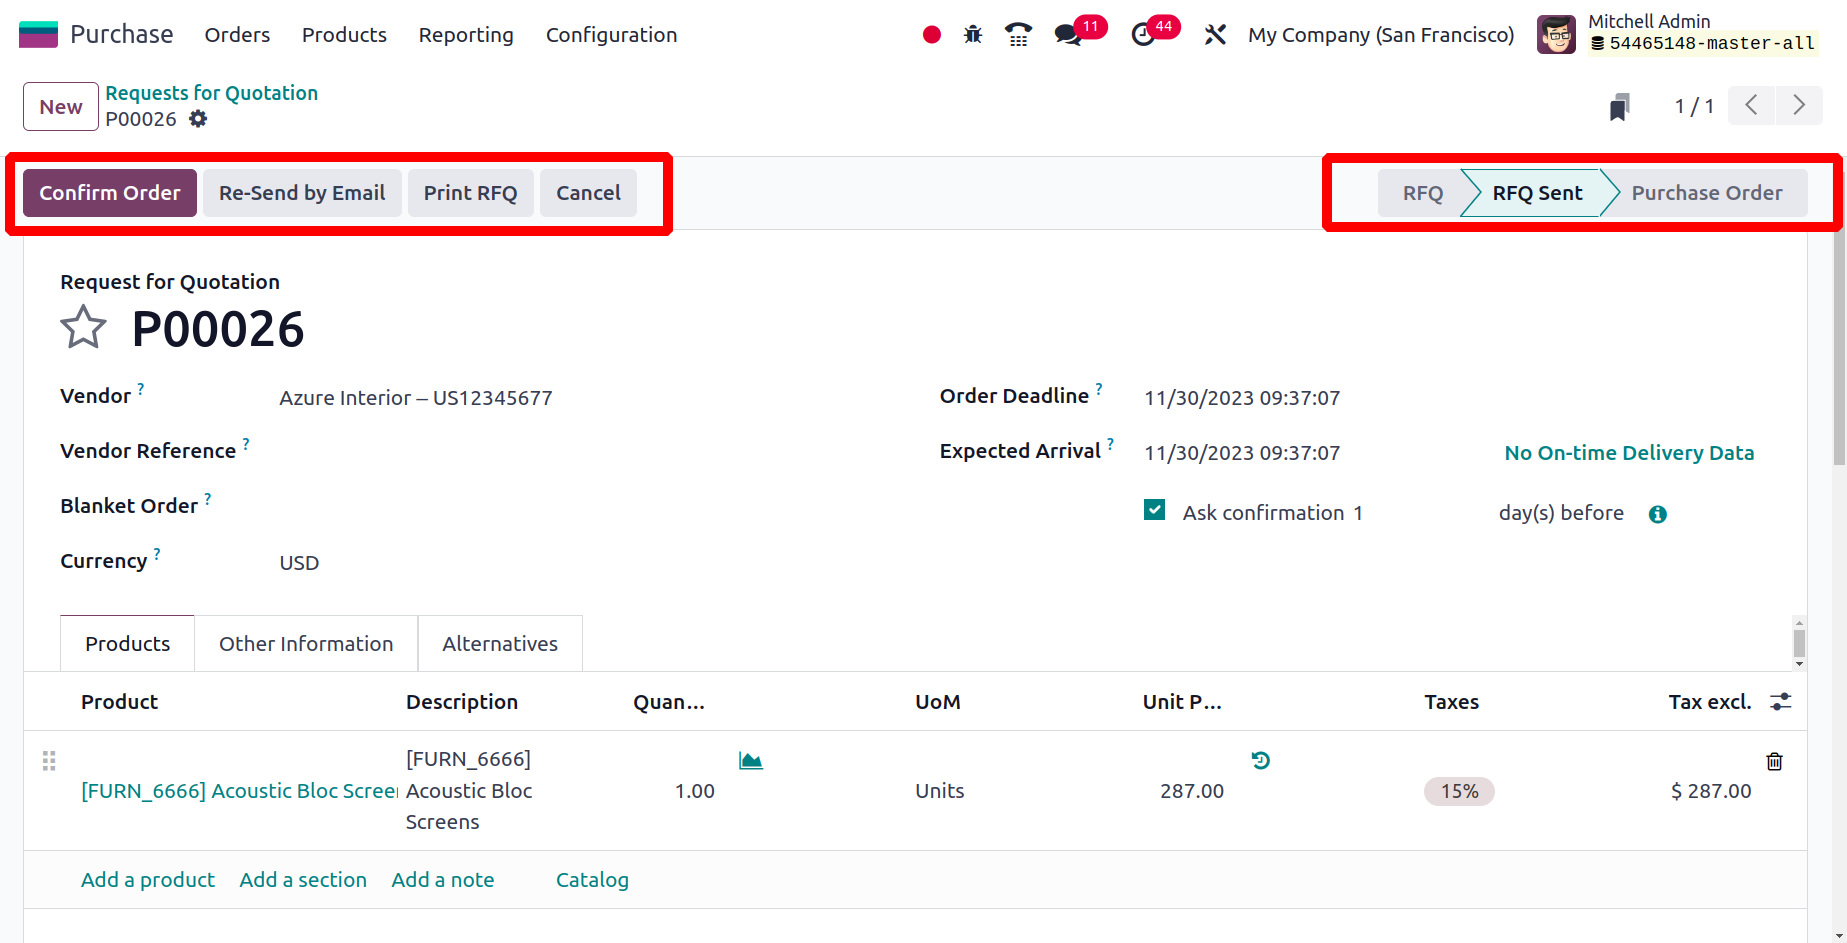
You can see the status of the RFQ and "RFQ SEND" once you've sent it to the appropriate
vendors. You are able to use the Cancel button to withdraw your request. You can print
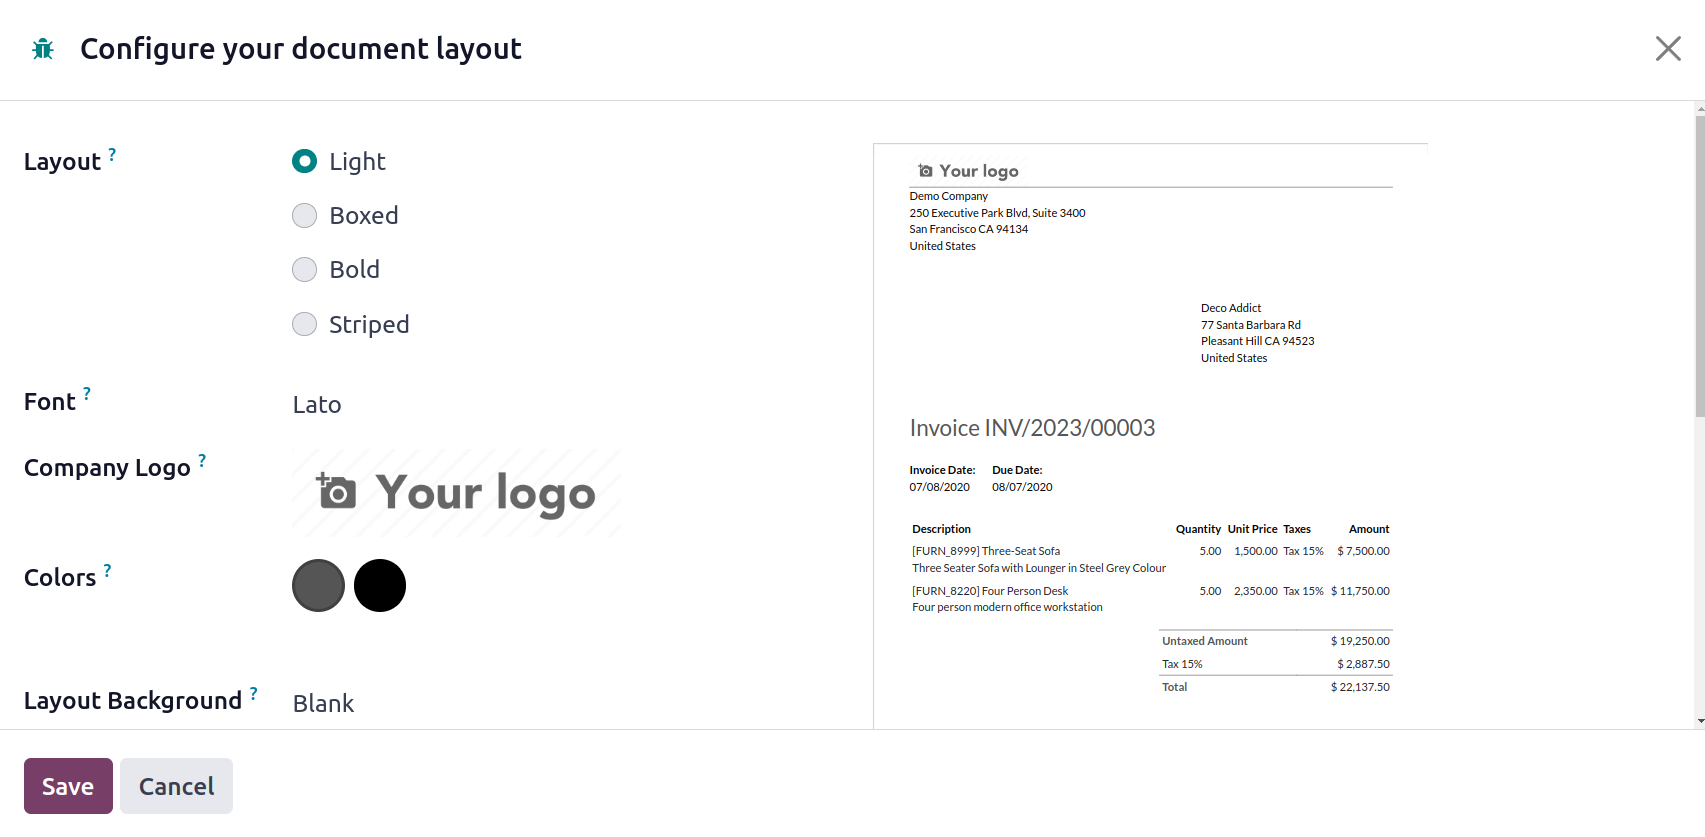
the RFQ using Odoo17 by using the Print RFQ function. A pop-up will appear for you to
customize the document's layout.
The Layout, Font, Company Logo, Colors, Layout Background, Company Tagline, Company
Details, Footer, and Paper Format options are available here. On the right side of the
wizard, you'll see a preview of the document based on the choice you made. The moment
you press the Save button, your document will print immediately.
We described how to create an RFQ in the Purchase module, and now we'll look at how to
manage a purchase order in Odoo17.