Work Orders
To produce a flawlessly finished product, several activities are included in a
production order. All of these procedures can be specified as Work Orders when
configuring a manufacturing order in the Odoo17 Manufacturing module. Operations will be
processed by these work orders at particular work centers. Activate the Work
Orders feature from the Settings menu to enable this option in the
Manufacturing module. You can design and manage different manufacturing operations using
this feature, which should be carried out at your work centers in order to build a
product.
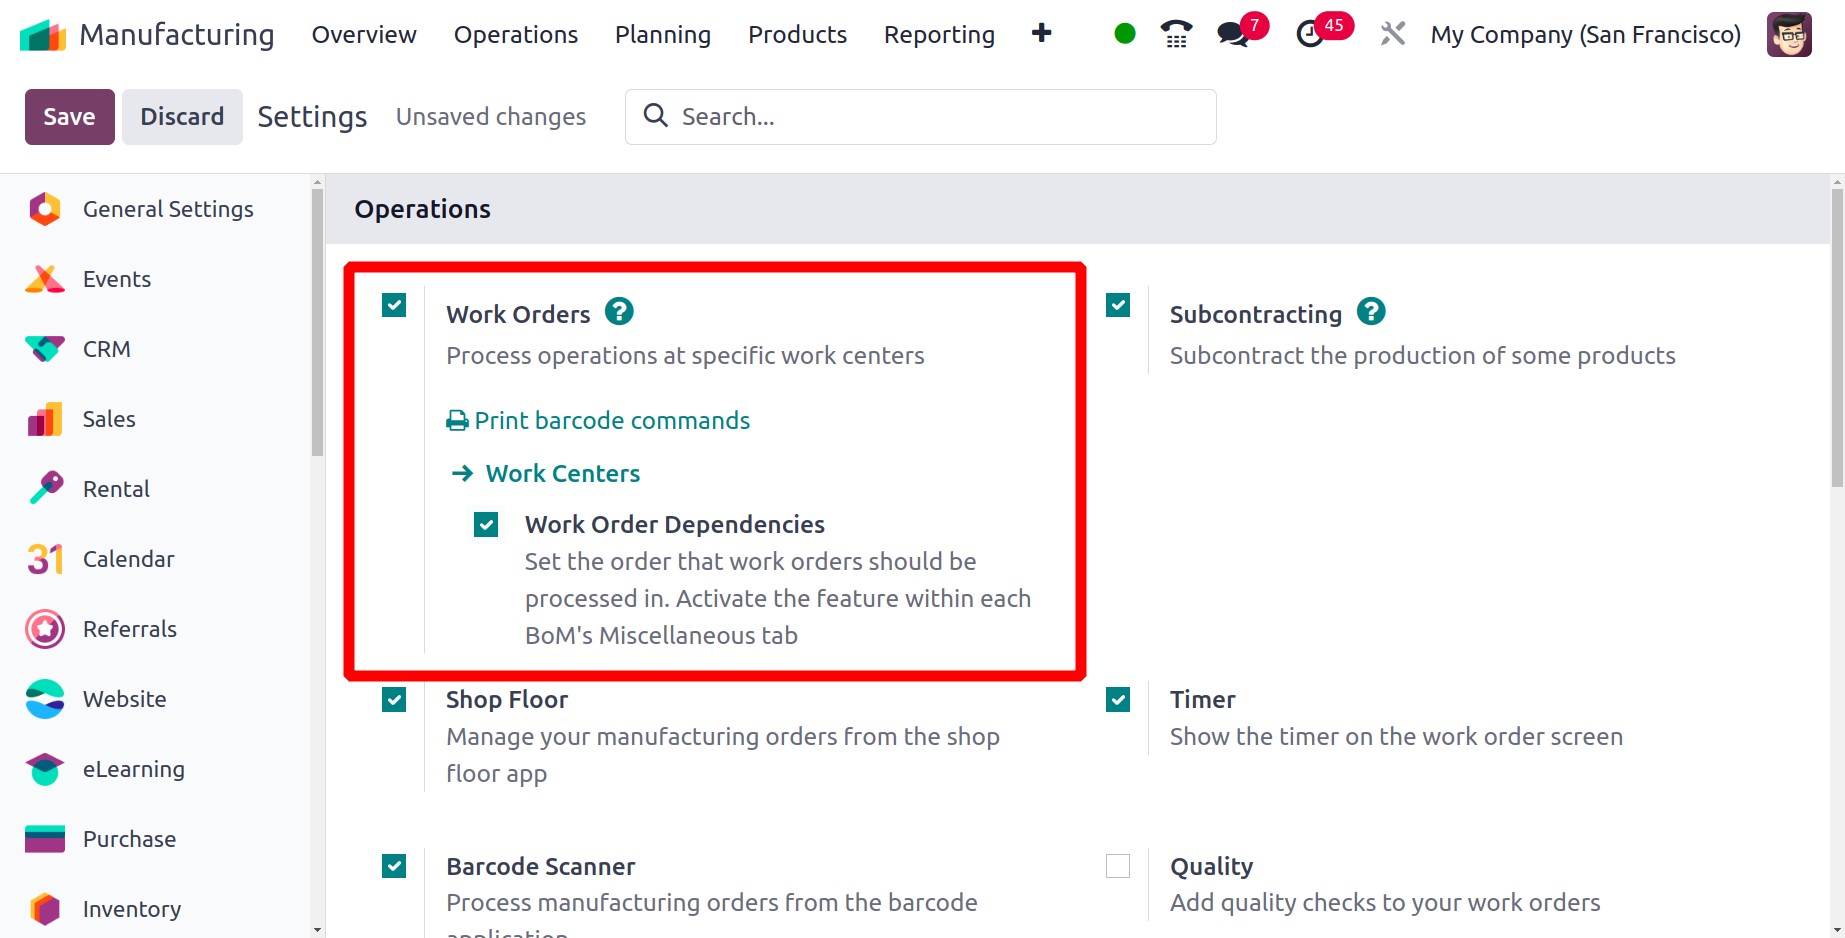
Additionally, you can turn on the Work Order Dependencies feature, which will
choose the sequence in which the set work orders will be completed.
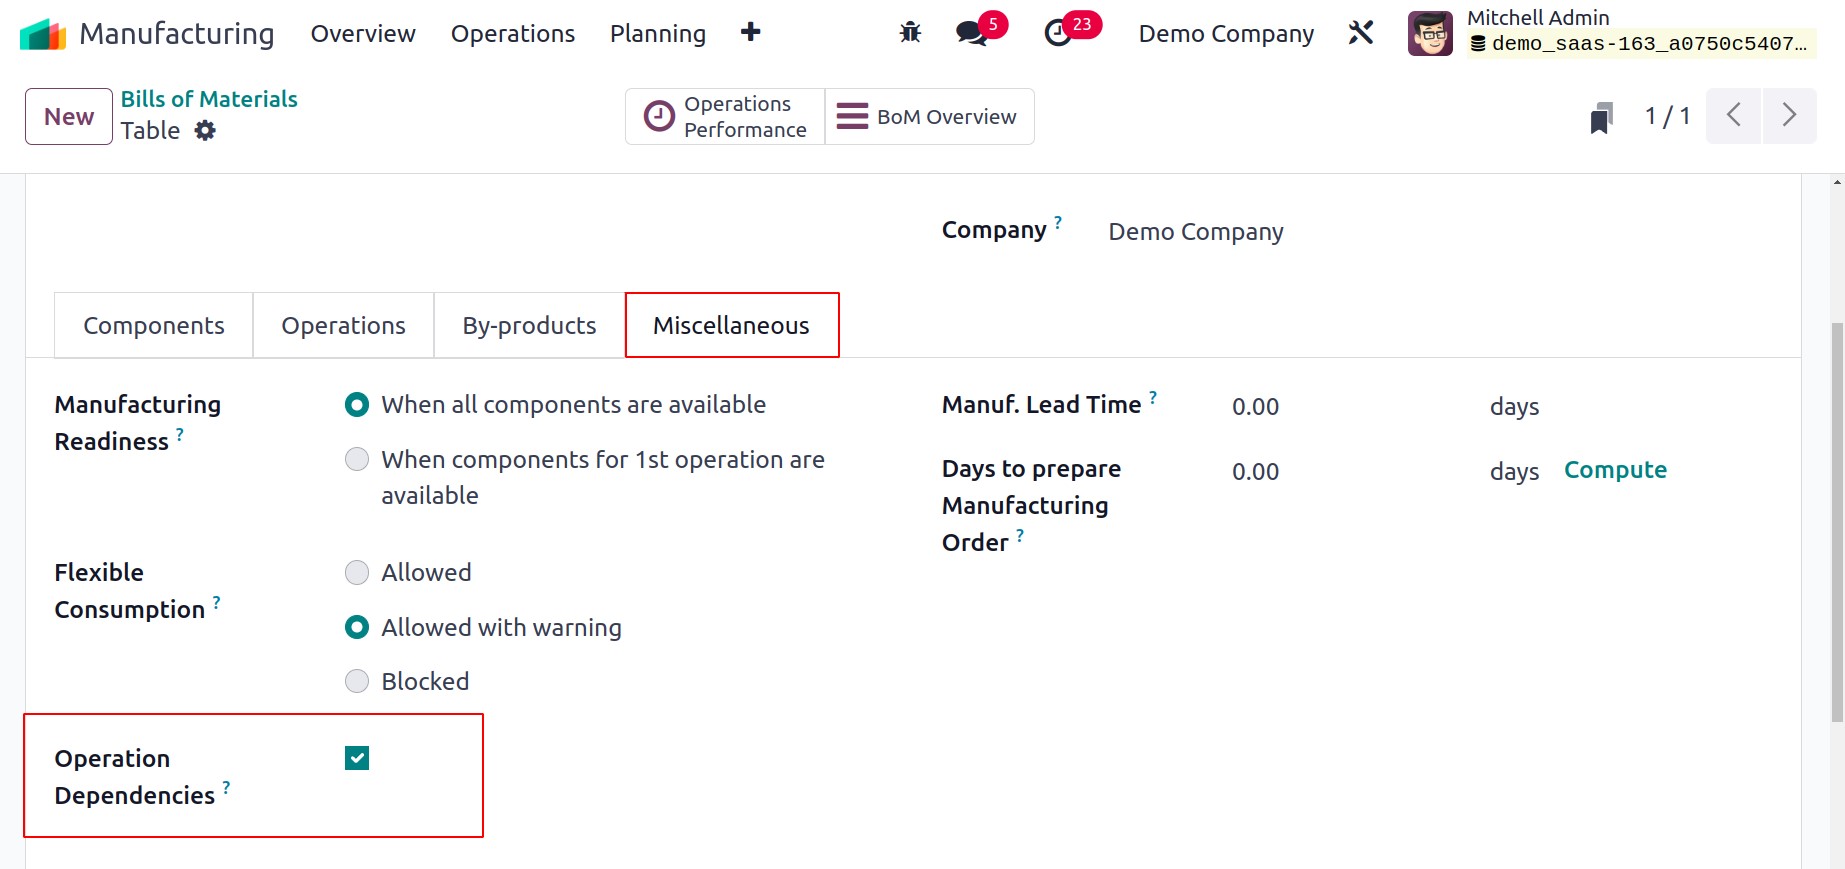
The Bill of Material can be used to establish a list of the parts needed to produce a
finished product if the manufacturing of a product involves several different
components. Setting an order for work orders to be executed in order to manufacture and
assemble the components of this bill of material is known as activating work order
dependencies. This function can be turned on in each Bill of Materials'
Miscellaneous tab.
Under the Work Orders tab of the relevant manufacturing order, any operations
pertaining to that manufacturing process can be included.
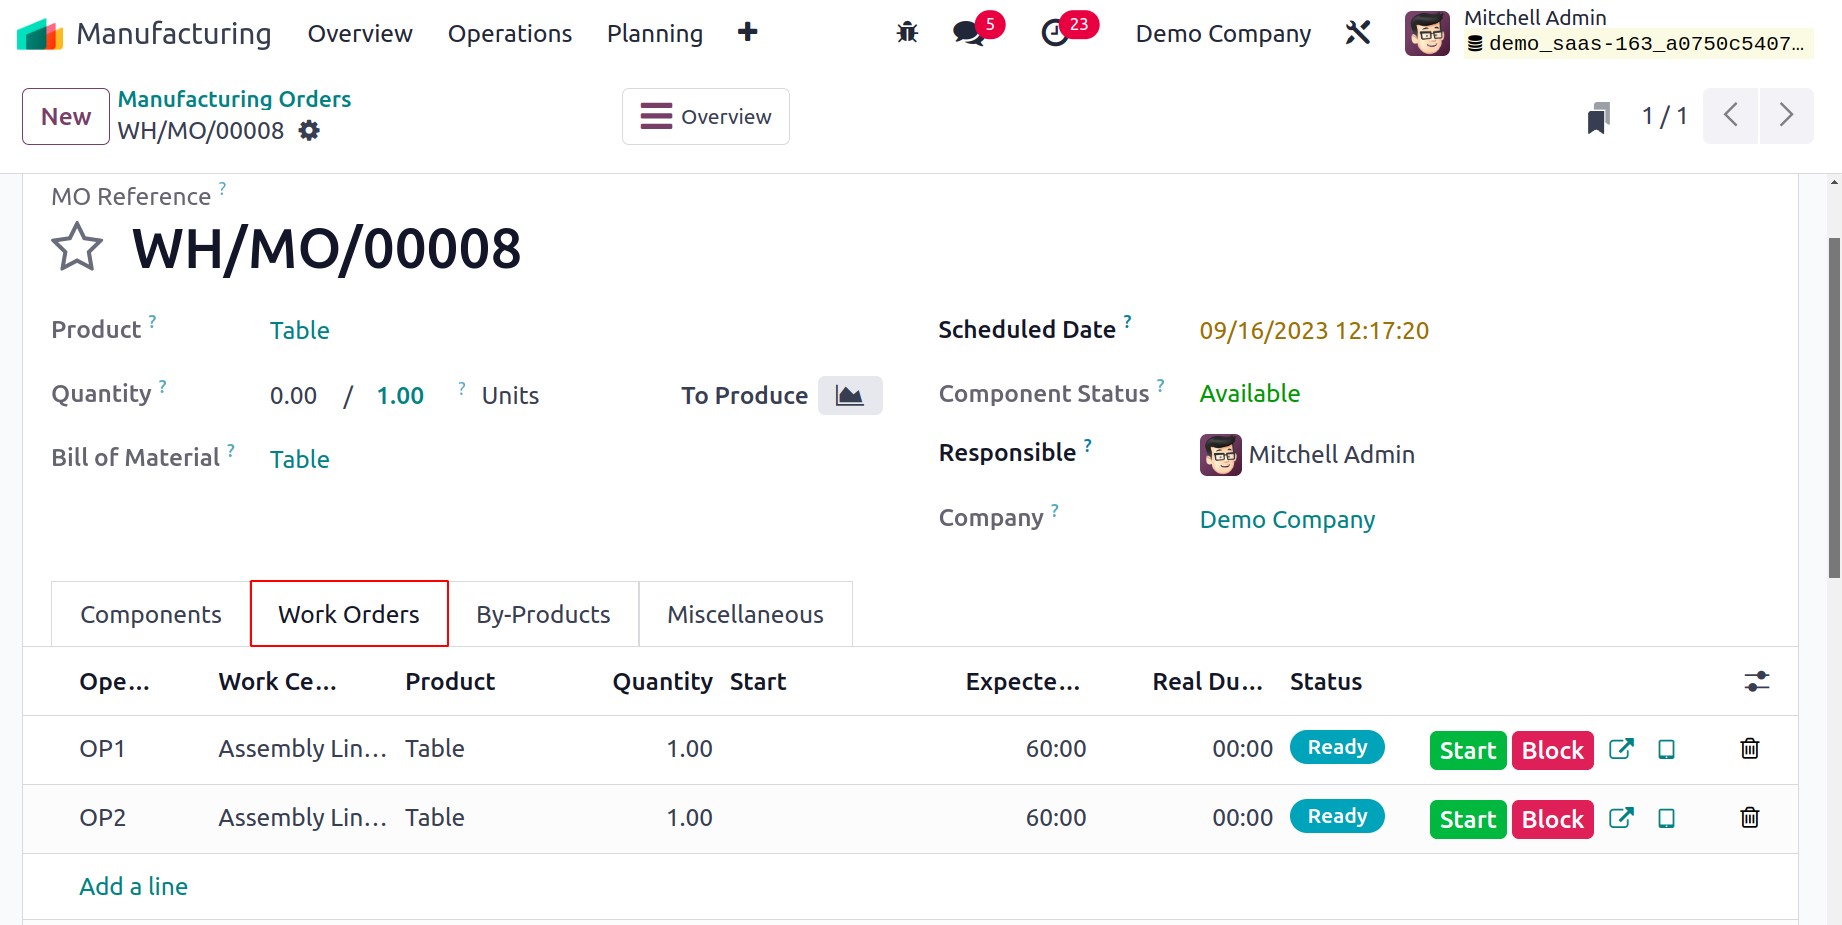
You can create a work order and enter its specifics using the Add a Line button. You can
get the relevant work order by clicking the external link that is provided in the
operation line.
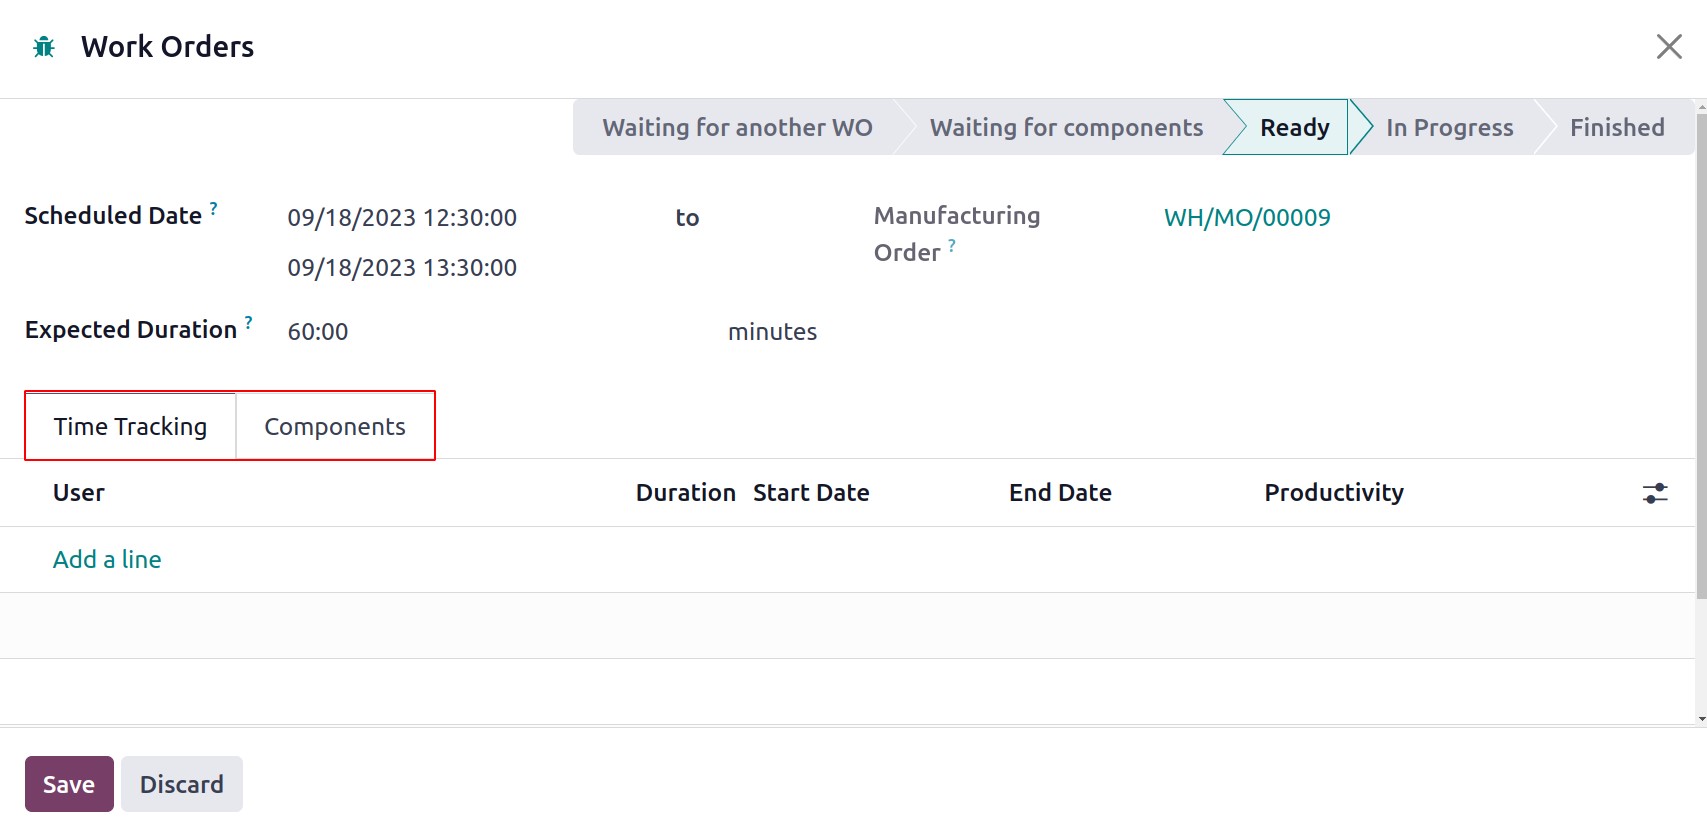
The tracked time for this work order will be displayed under the Time Tracking
tab along with information about the User, Duration, Start Date, End Date, and
Productivity. It displays the anticipated start date, manufacturing order, and length of
the project. You can see the components needed for this work order under the
Components tab.
You may find a separate platform to track all of these work orders from different
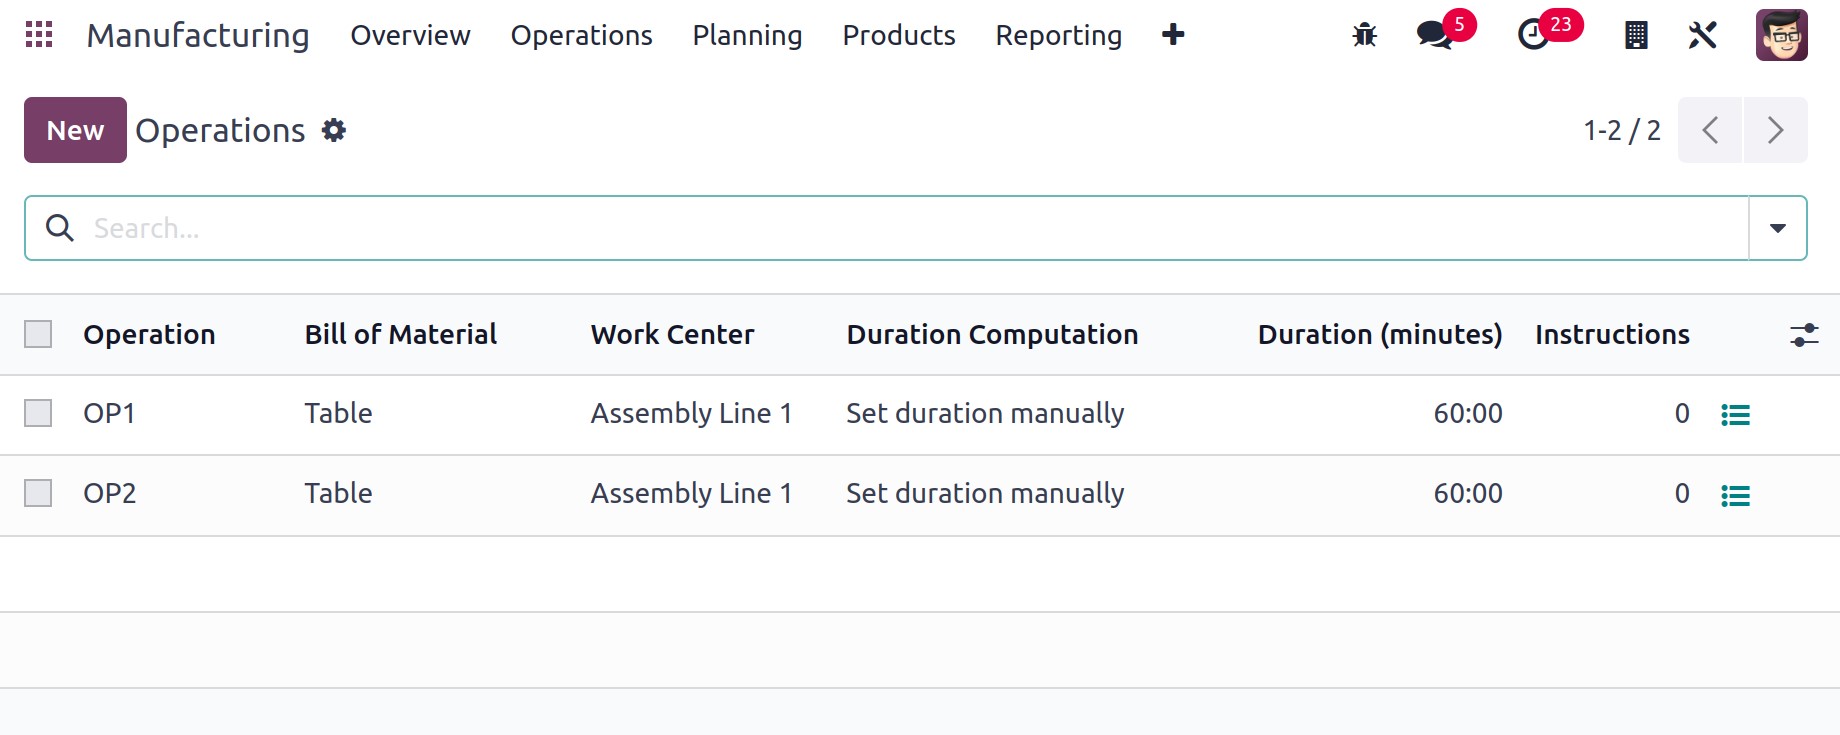
manufacturing orders under the Operations menu of the Manufacturing module.
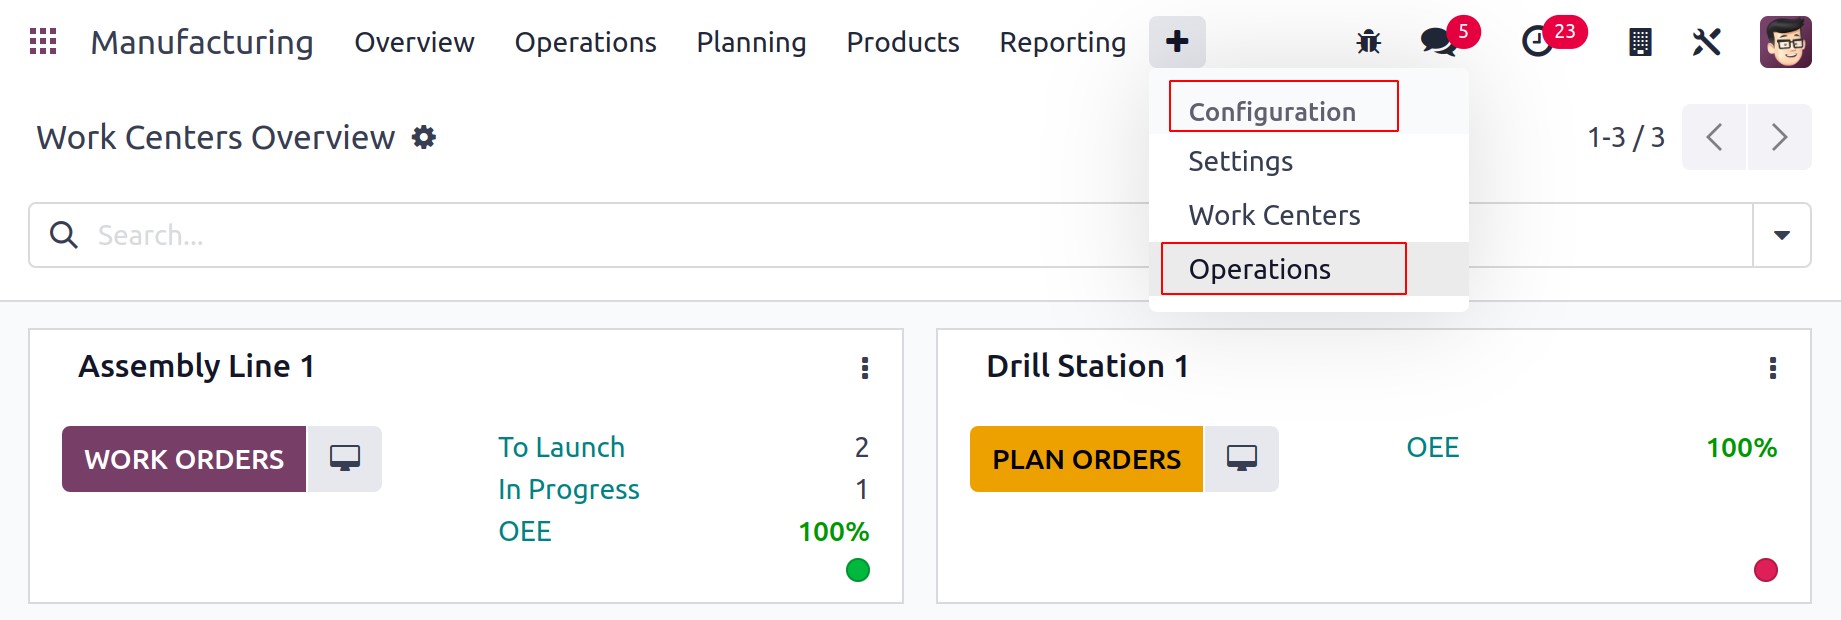
Operation, Work Centre, Manufacturing Order, Product, Quantity, Scheduled Start,
Expected Duration, Real Duration, and Status are all displayed in the list view. Kanban,
List, Pivot, Calendar, Graph, and Gantt views can all be switched between.
The default Filters are In Progress, Ready, Waiting, Pending, Draught, Finished, and
Late. Work Centre, Manufacturing Order, Status, and Scheduled Date are the default Group
By choices.

The Real Duration of the work order will begin to be recorded after you click the
Start button. You can press the Pause button to take a break. Clicking the
Done button signifies the completion of the work request. You can block the work center
with the Block button if you have specific criteria in mind. A pop-up will appear asking
you to specify the cause.
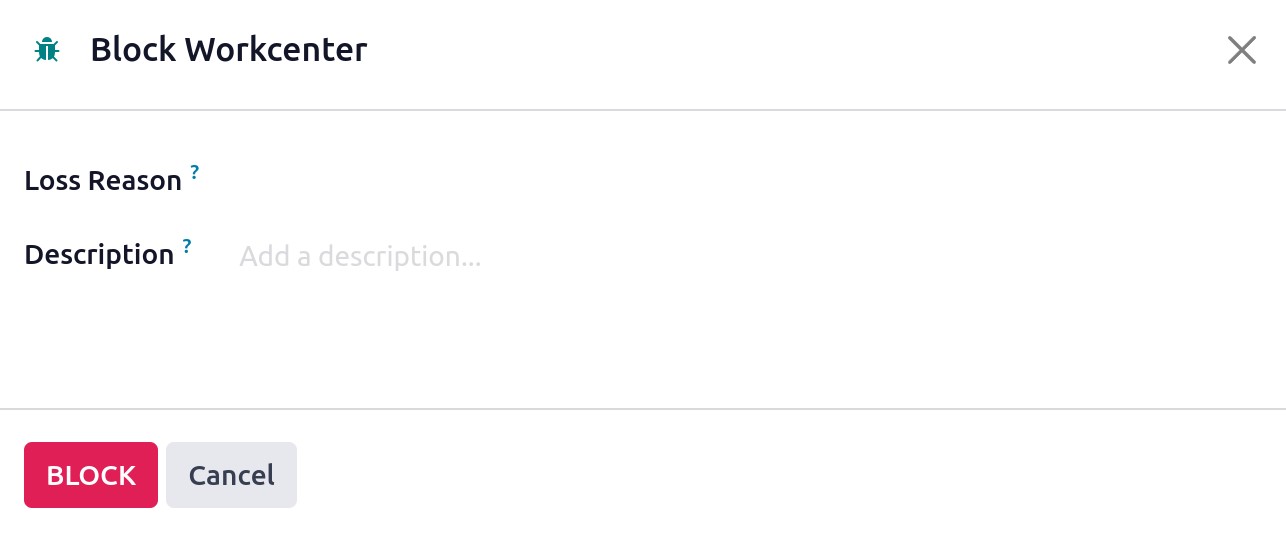
Click the Block button after providing a brief explanation for the loss reason.
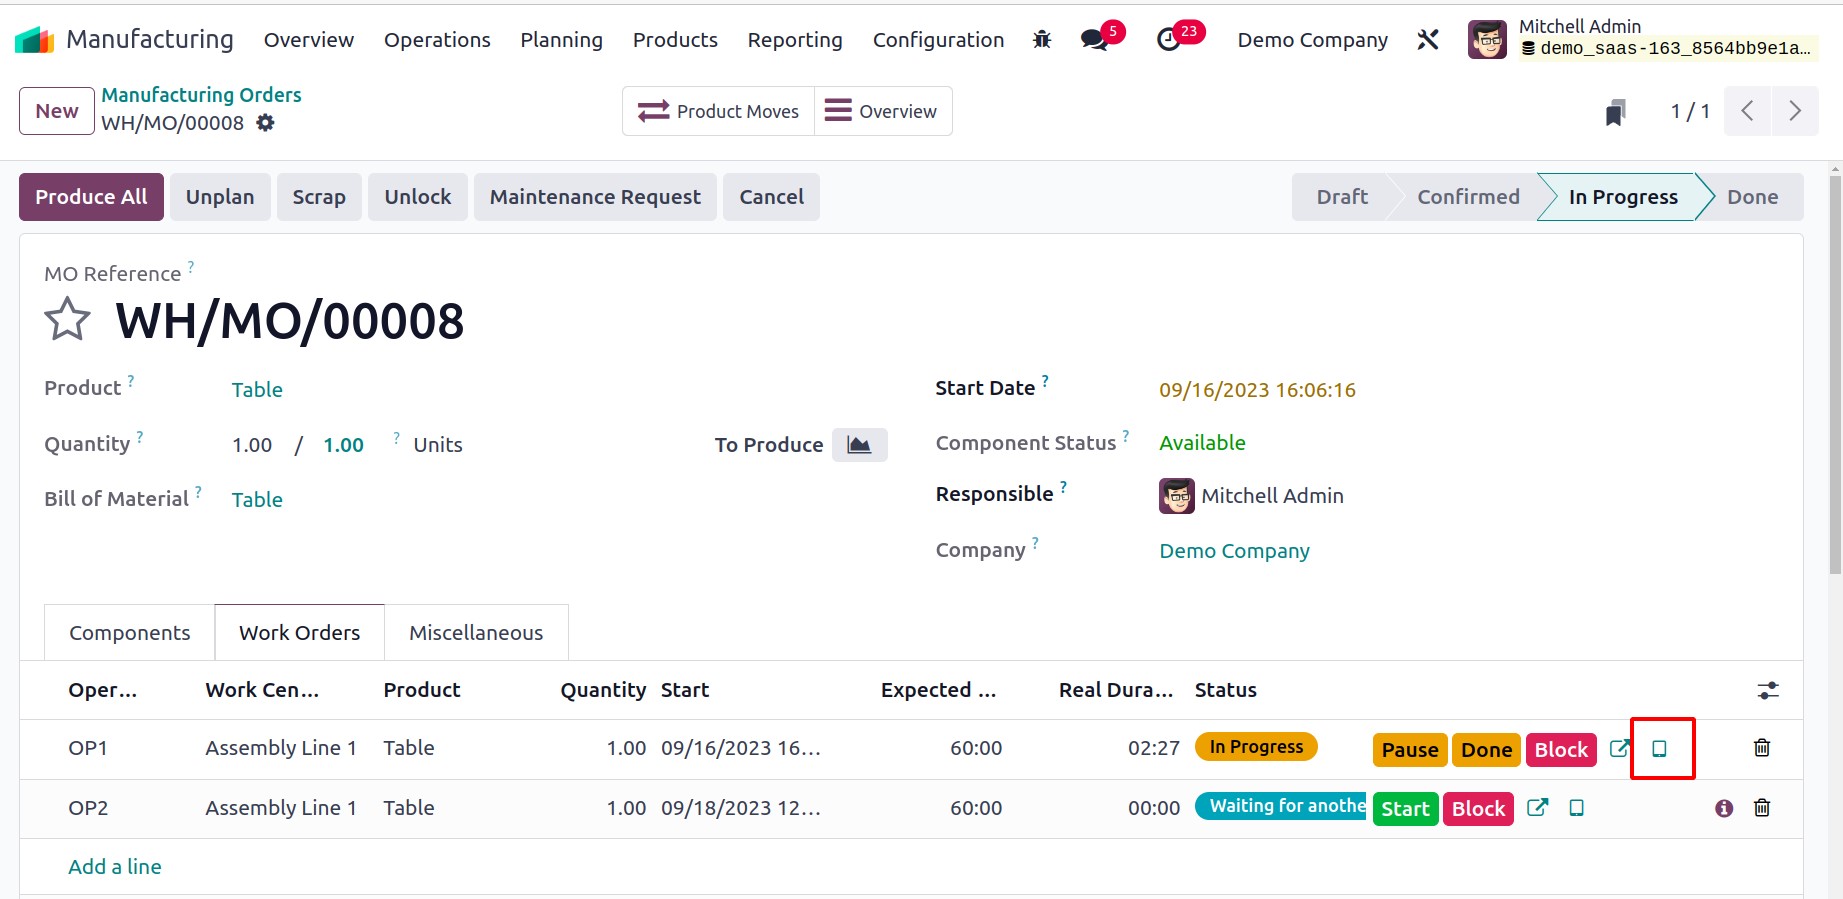
You can click on the tiny tablet icon shown in the mentioned image to see the work order
on a tablet.
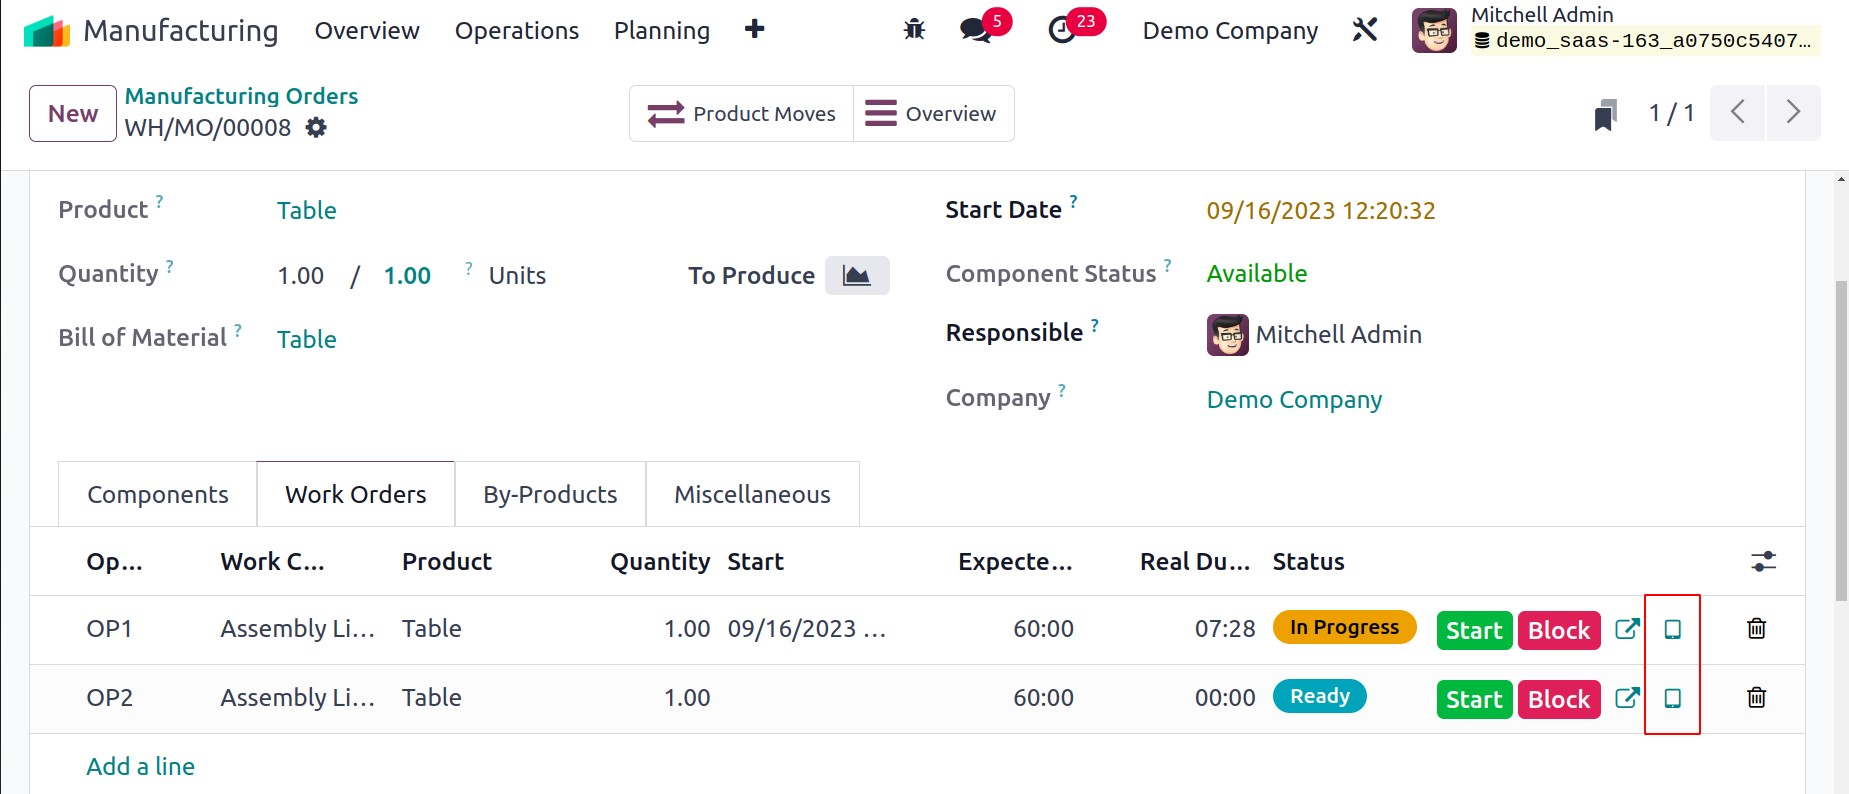
It will launch the corresponding work order's tablet view.
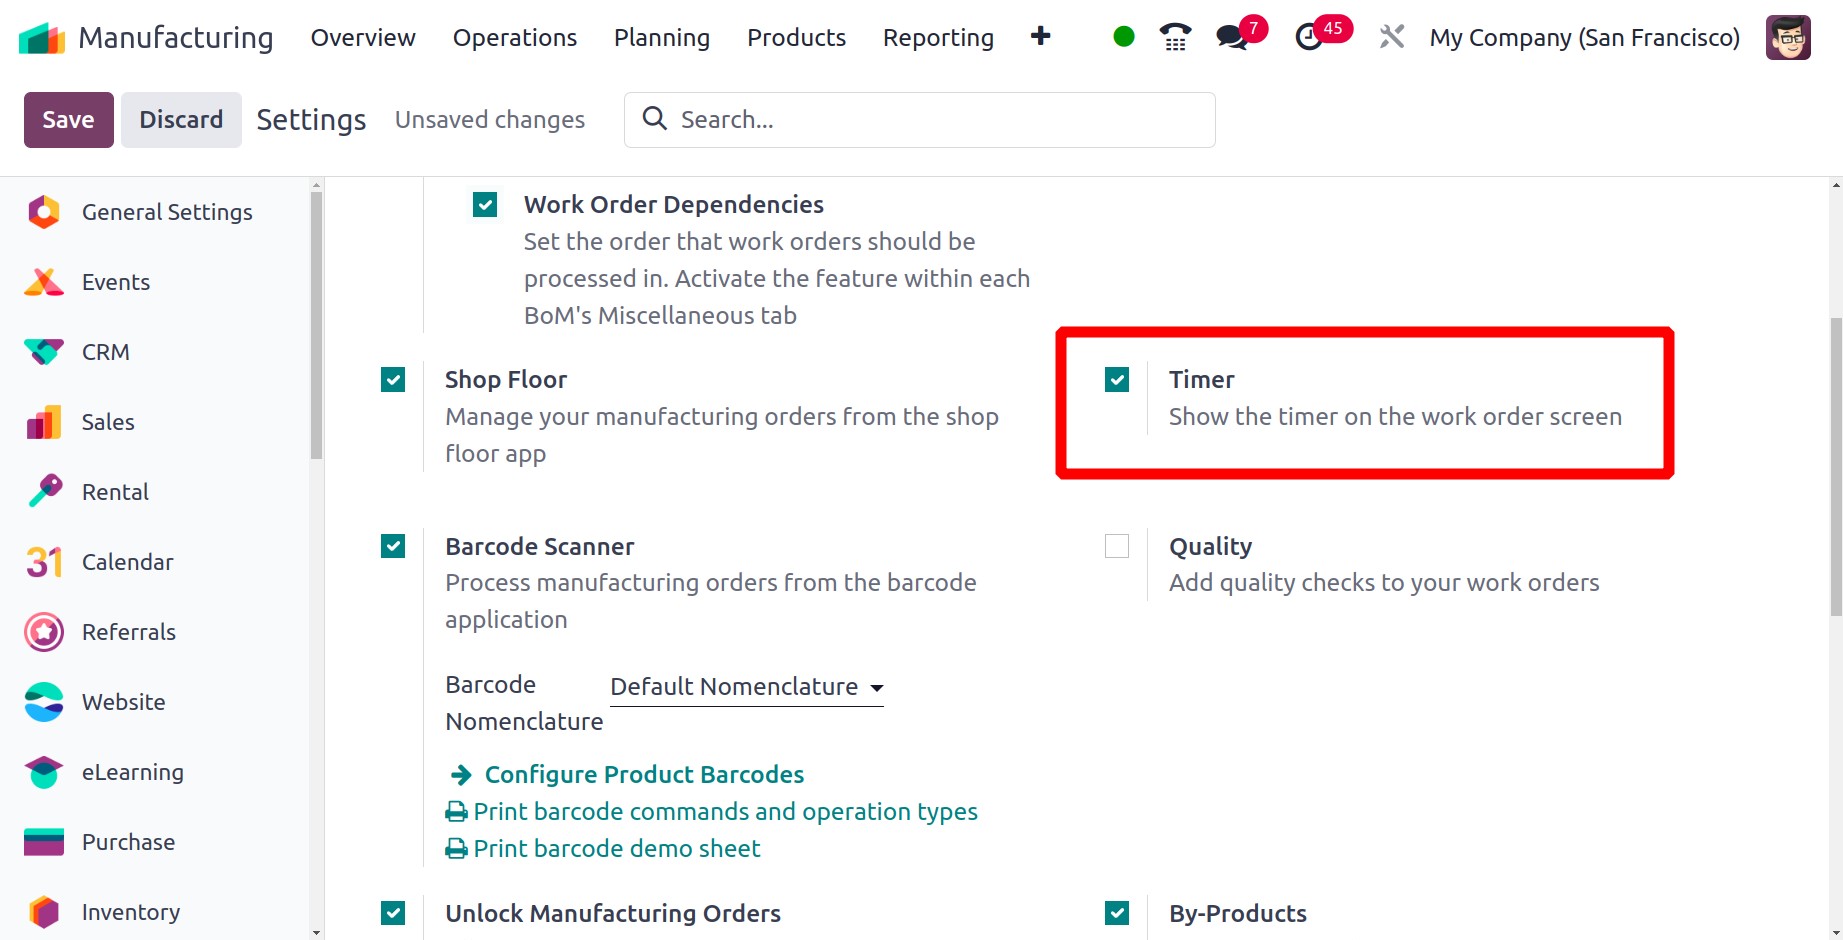
You can activate the Timer feature from the Settings menu of the module to
display the timer on the work order screen for tracking the actual duration of the
tasks.
To add quality checks to your work orders, activate the Quality Check function
from the Settings menu.
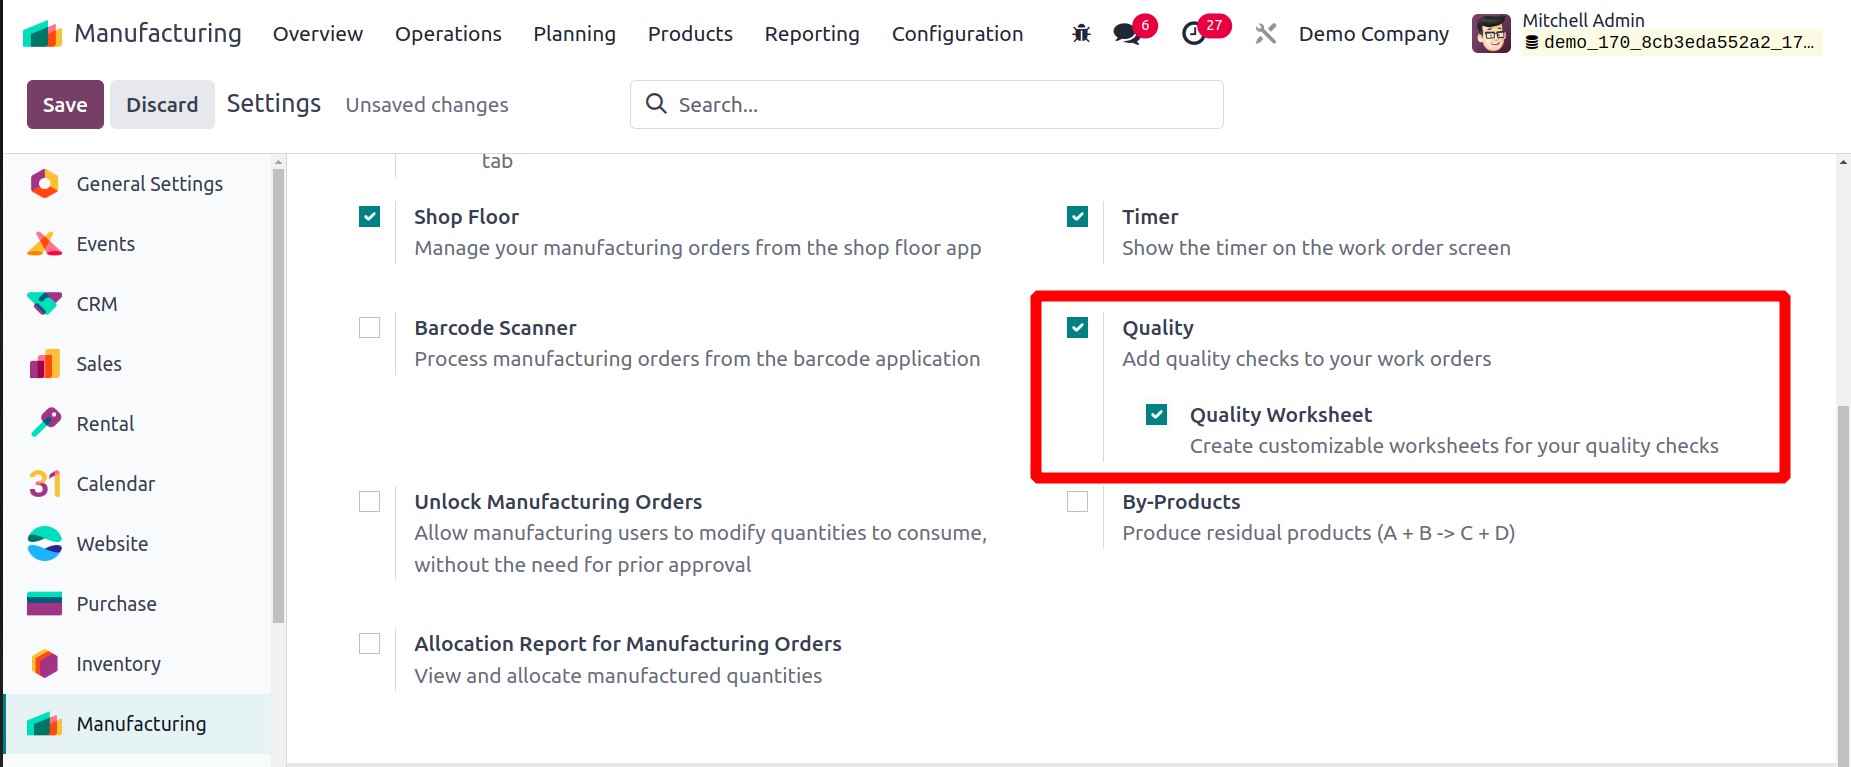
Activate the Quality Worksheet option in addition to this one so you may generate
worksheets that are tailored to your quality checks. You can examine the quality of work
orders after turning on this option.
You can conduct the quality check using the tablet view from the Work Orders tab.

For the work order, you can construct a quality sheet here. Mention the product's serial
number and then select the "Fill in Worksheet" button to add information on the
product's quality. As seen below, a pop-up window will appear as a result.
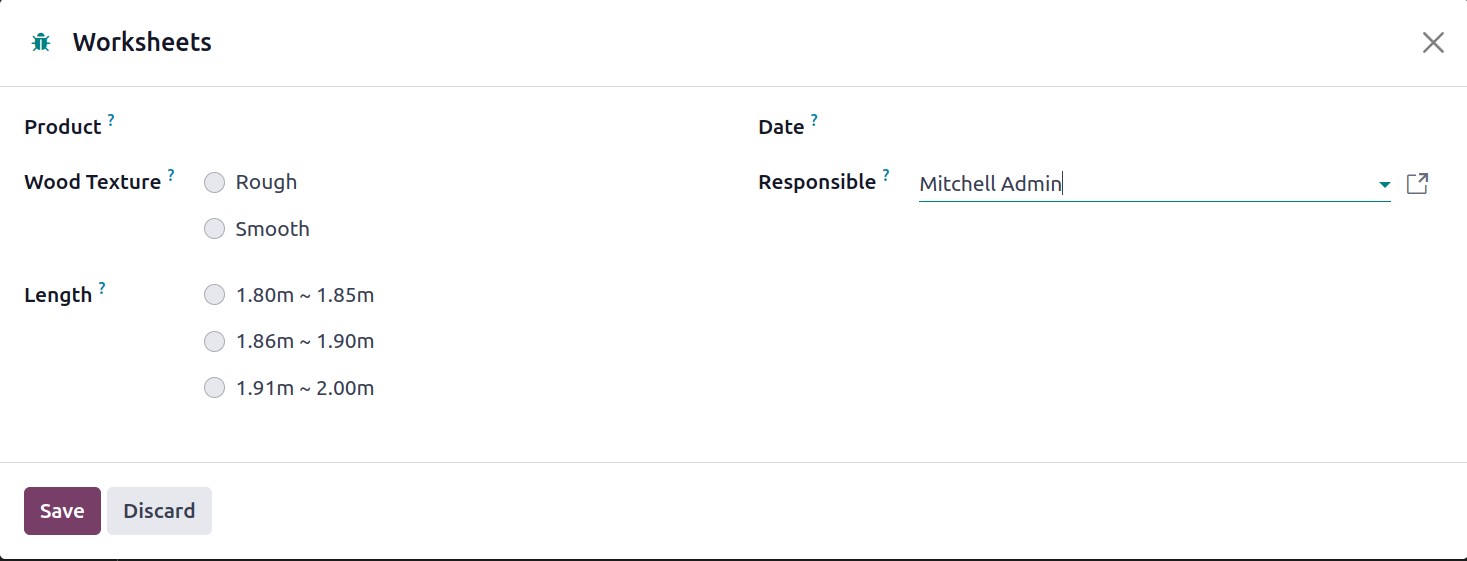
You can fill in the appropriate fields here with the Product name, Wood Texture, Length,
Date, and Responsible employee. You will receive the Summary of the quality check after
clicking the Save button.
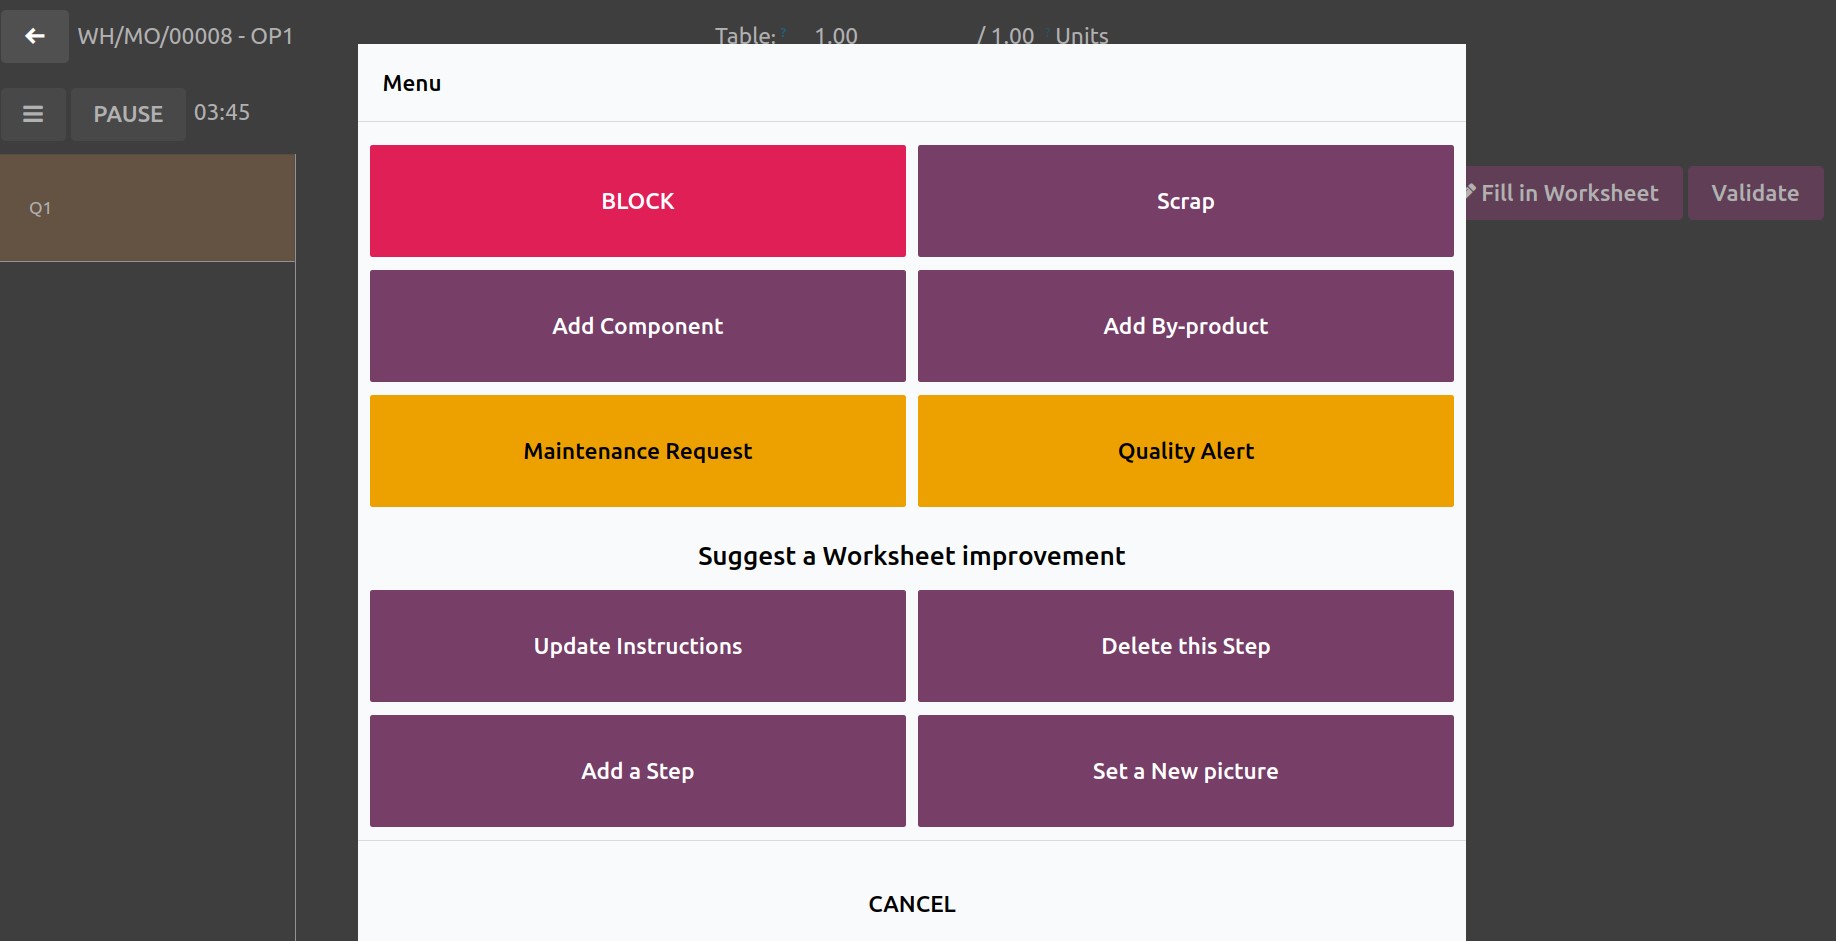
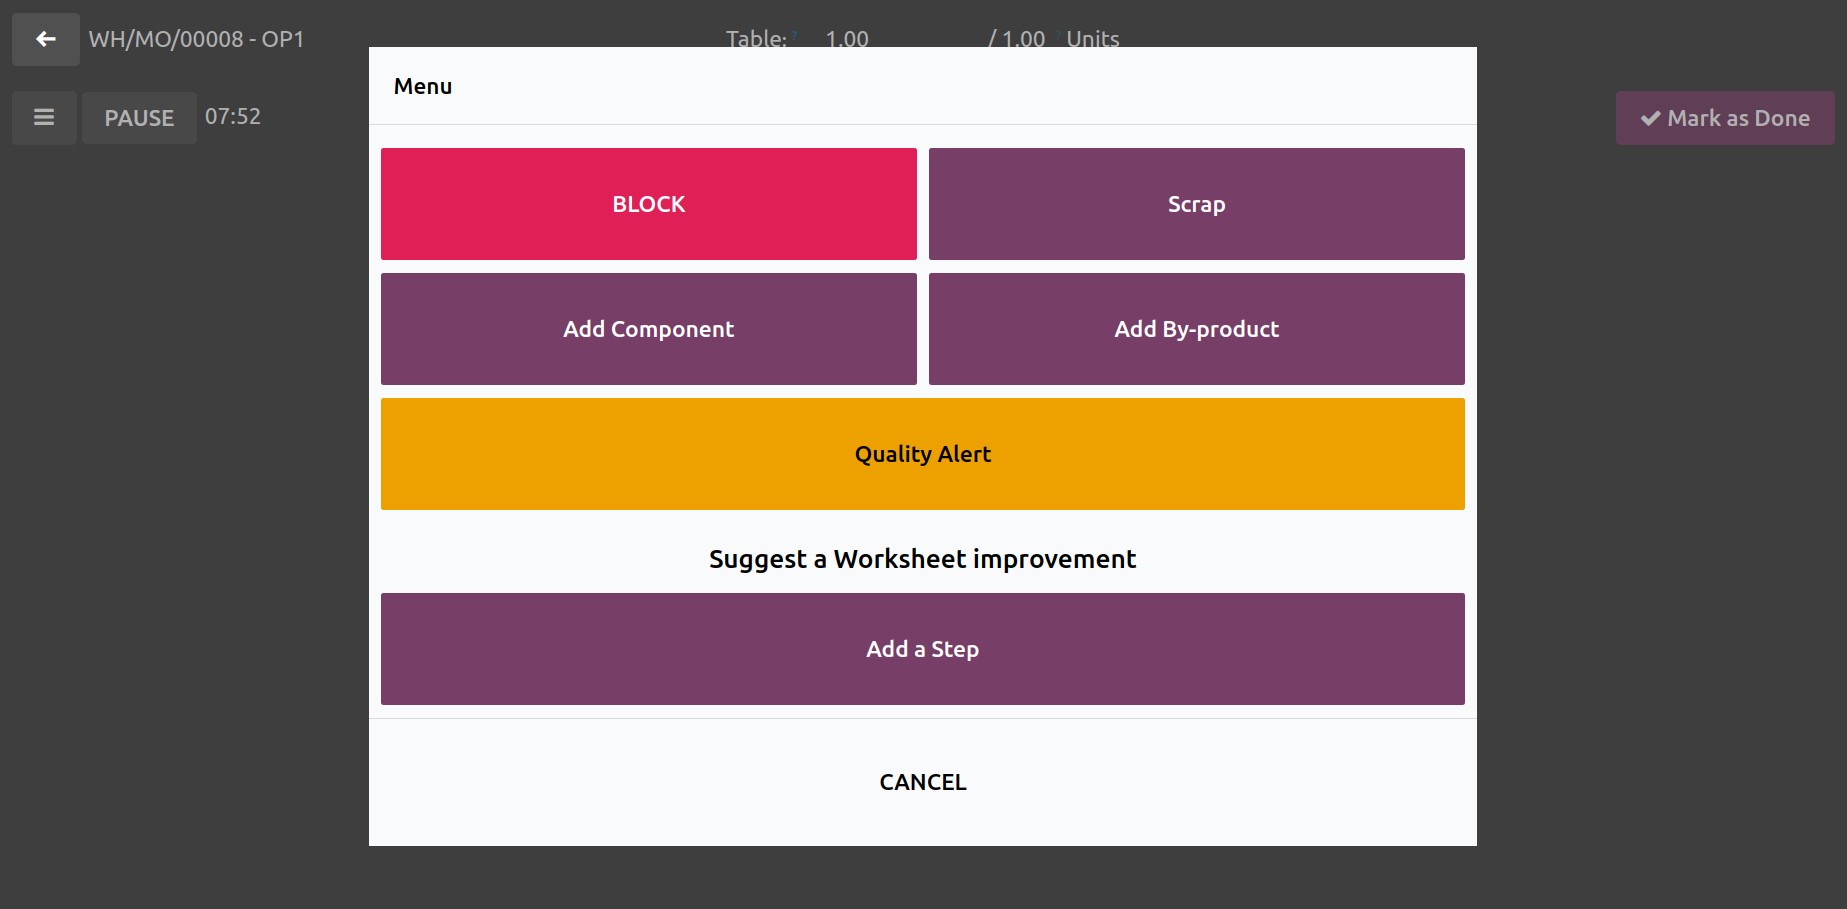
Blocking the work order, adding a product to the scrap pile, adding a component to an
operation, adding a byproduct, sending a maintenance request, and sending a quality
alert are all possibilities on this menu. Additionally, you will receive some new tools
that will make suggestions for improving the worksheet. It offers the options to Change
the Picture, Delete This Step, Add Another Step to the Operation, and Update the Work
Order's Instructions.
Shop Floor and Barcode Scanner are the two new features that Odoo 17 brought to
manufacturing.
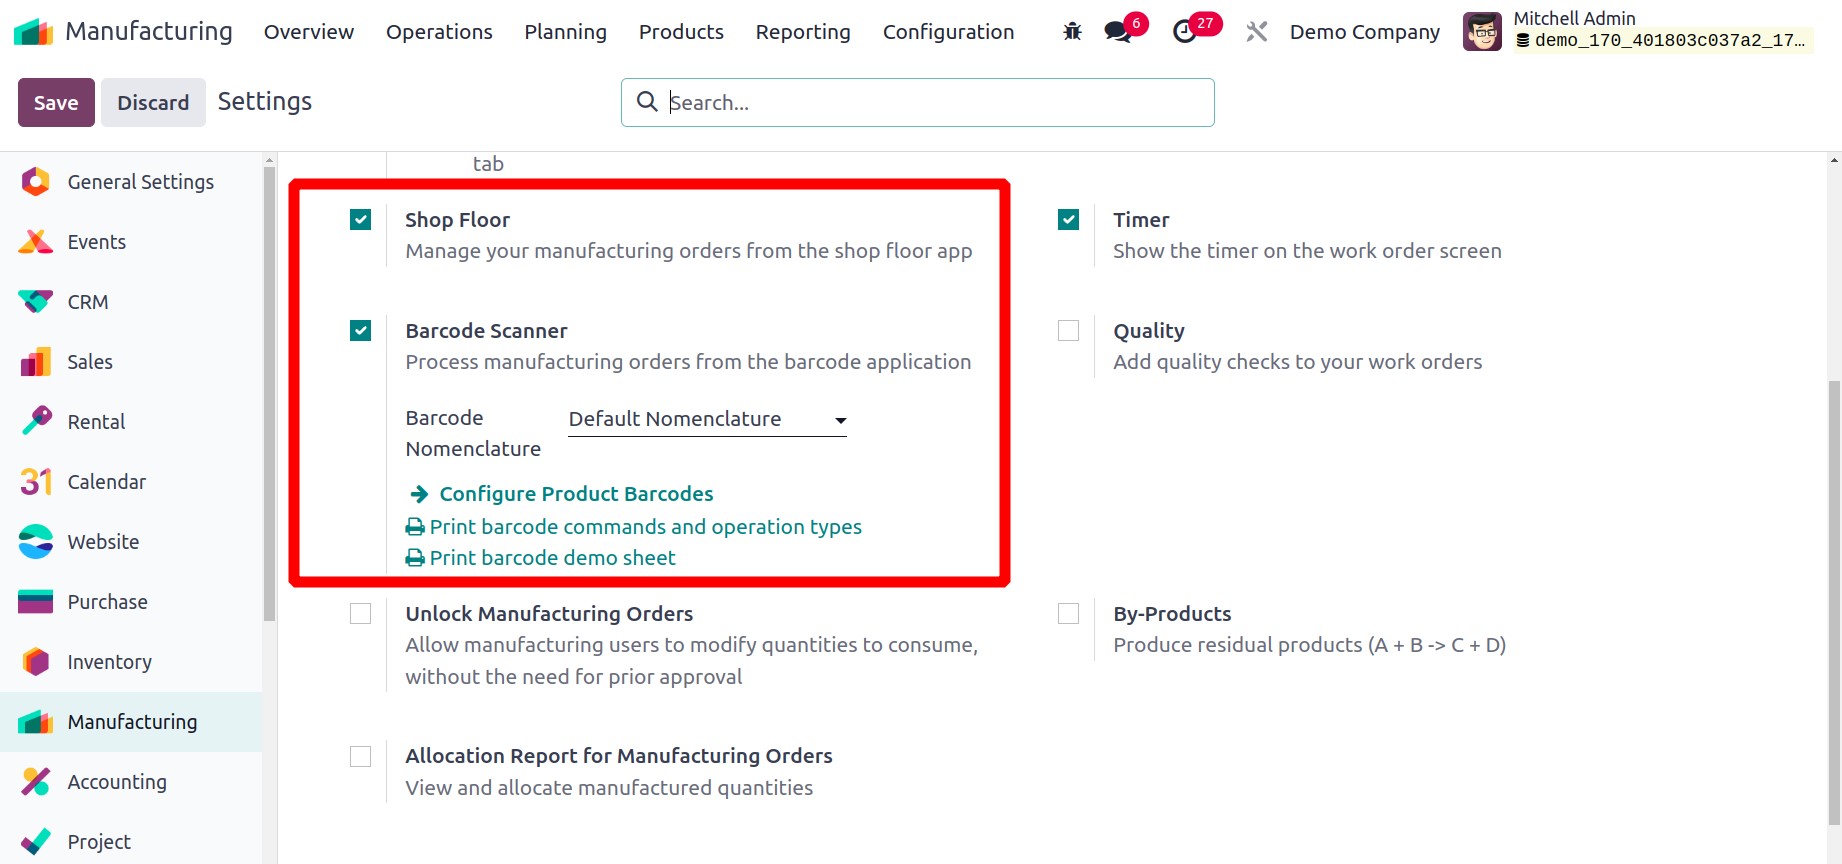
Thus, Shop Floor is a new module in Odoo 17. Users can handle all of the manufacturing
orders from the shop floor app by turning on the Shop Floor option in the
manufacturing settings. Then inside the manufacturing order, the users needed for the
production can be assigned.
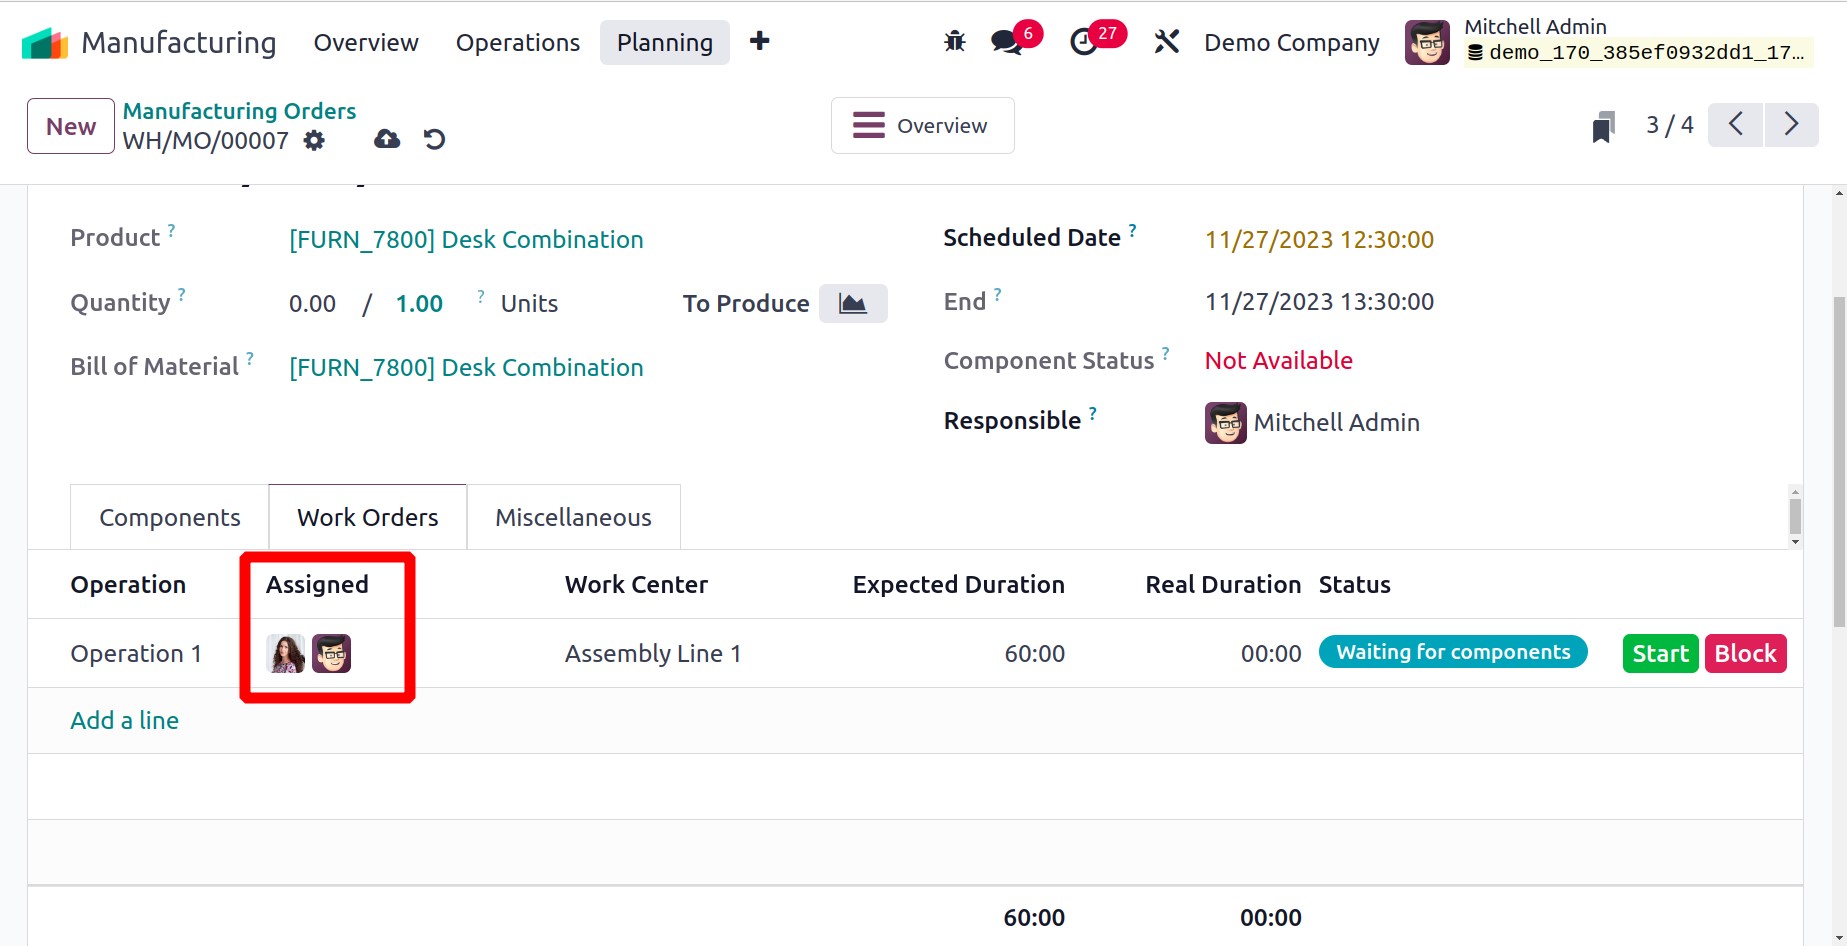
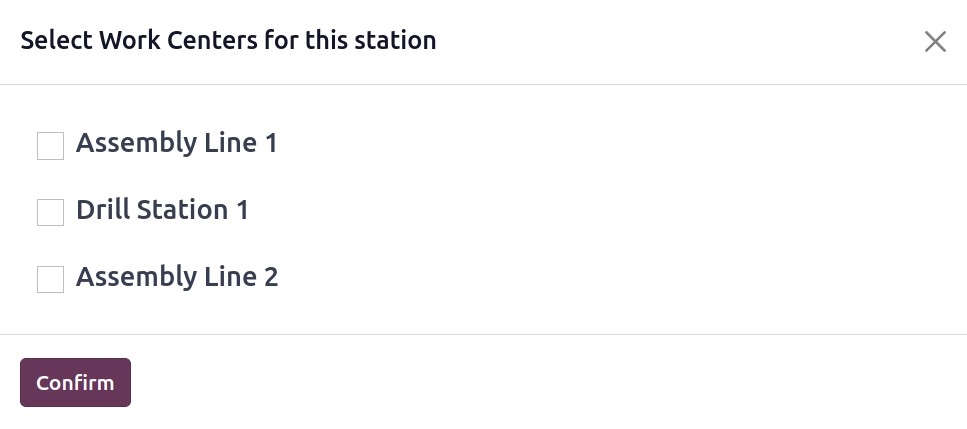
Then go to the Shop Floor app to check how this feature works. A prompt asking
the user to choose the work center for this station will show as.soon as they launch the
Shop Floor app.
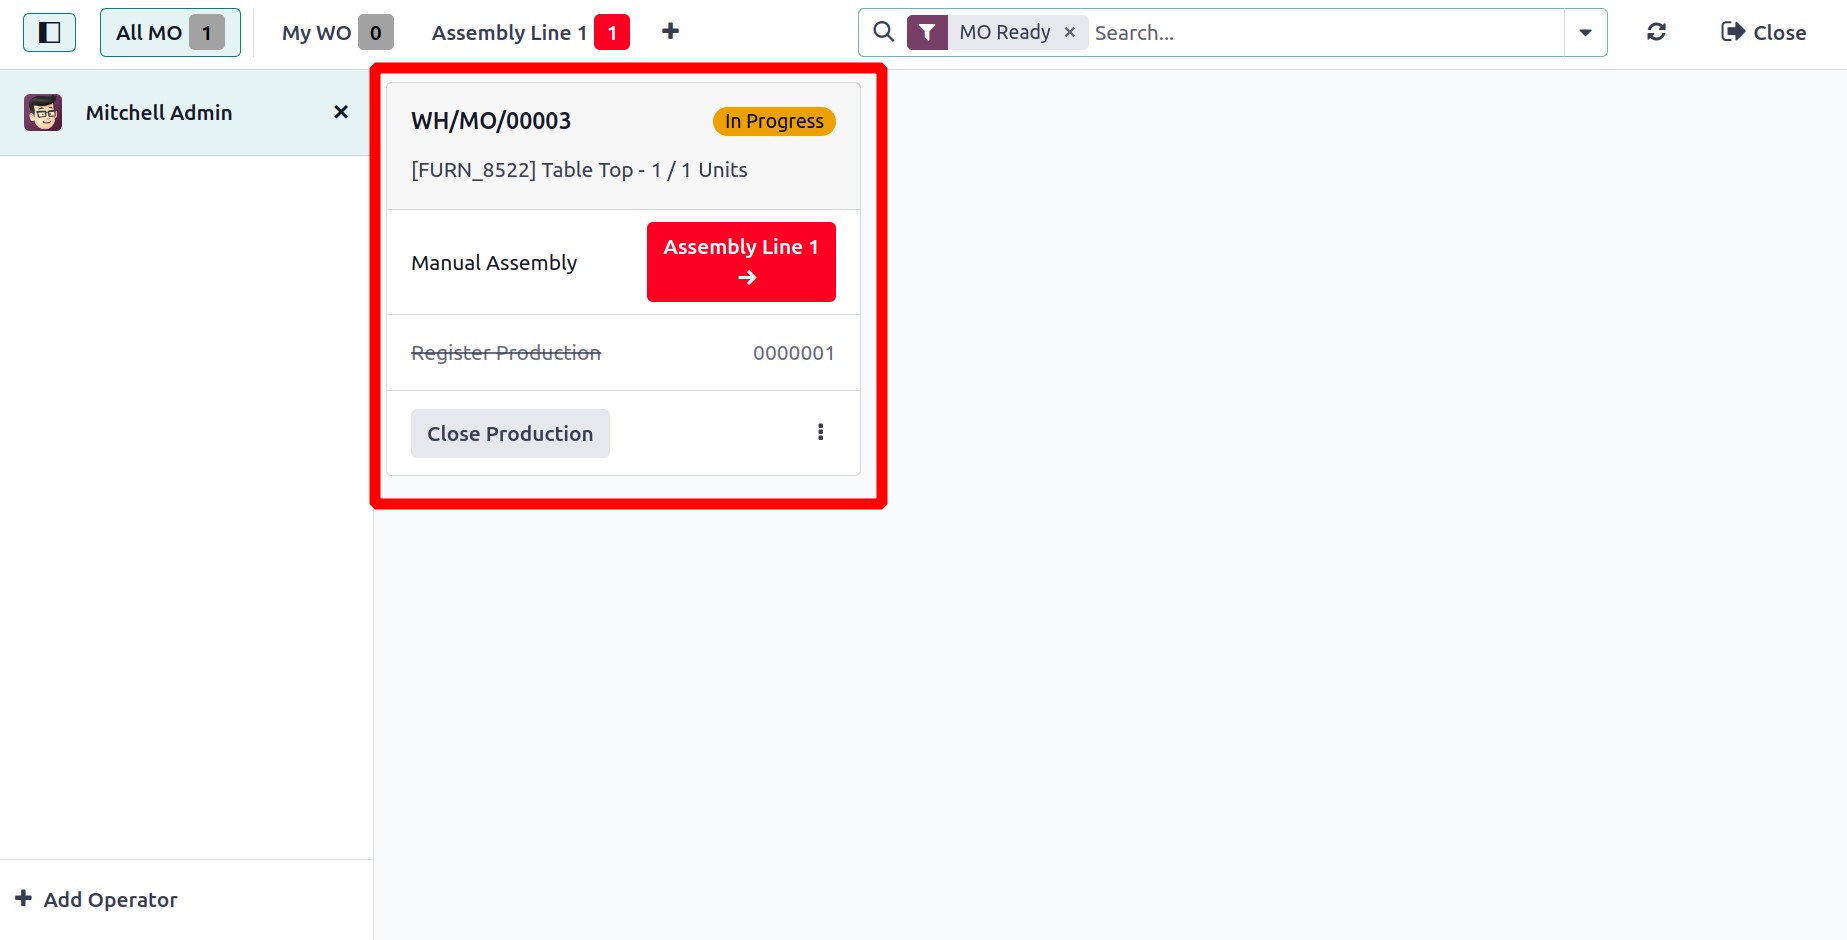
After that, the user is able to manage the production. as seen in the picture below.
Thus, select the Operations link in the Barcode module. Choose the Manufacturing
operations from the list of all operations displayed. From there, a manufacturer list is
visible. After that, consumers can utilize the barcode scanners to scan the components.
