Manufacturing Orders
To produce a flawlessly finished product, several activities are included in a
production order. All of these procedures can be specified as Work Orders when
configuring a manufacturing order in the Odoo17 Manufacturing module. In Odoo17, you may
generate production orders to accomplish this. The Manufacturing Orders option may be
found in the Manufacturing module's Operations menu. Odoo17 will open the list of
manufacturing orders produced in this module when you select this option. For this
platform, you can choose from List, Kanban, Calendar, Pivot, and Graphical views.
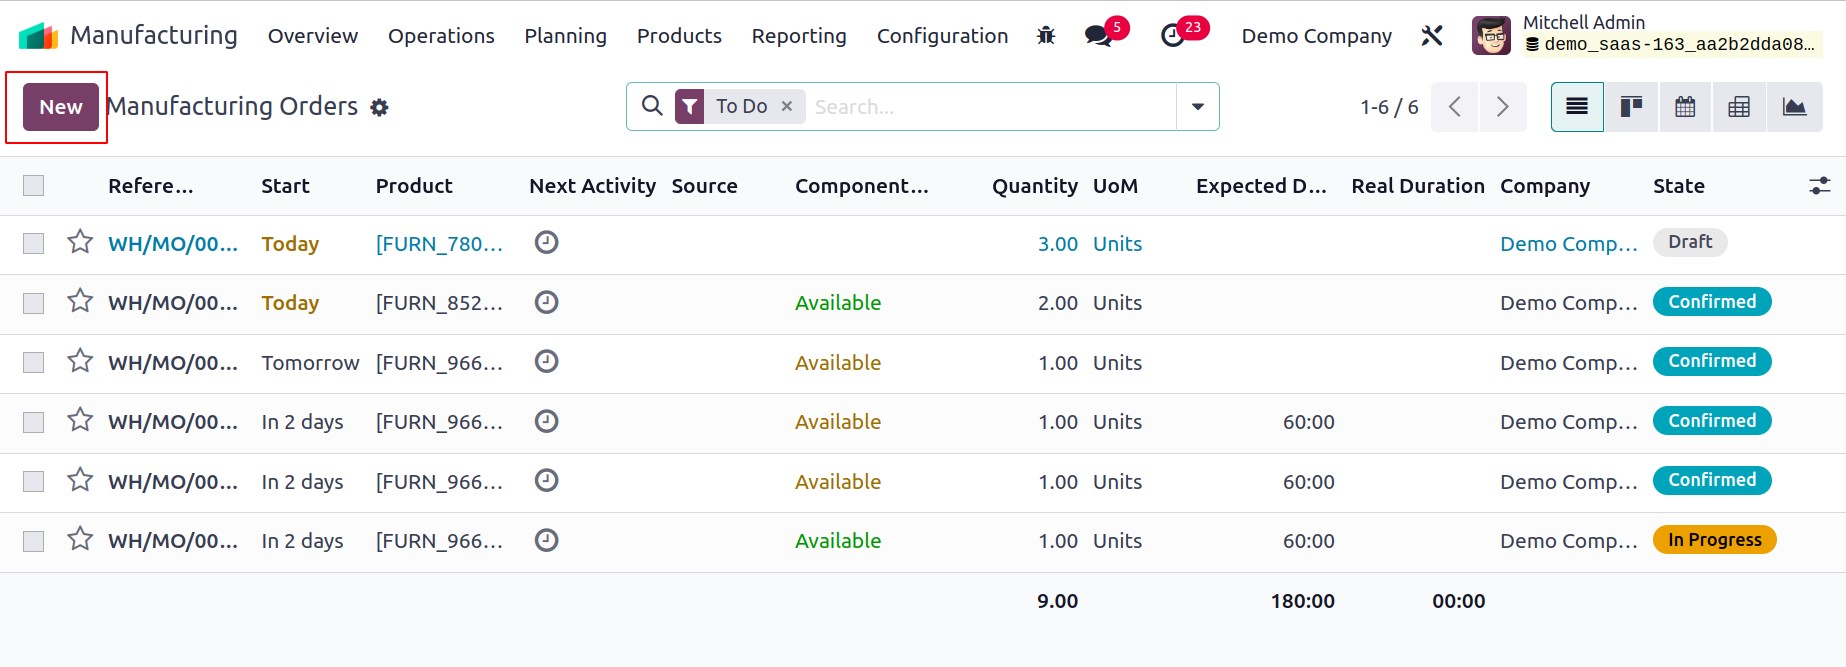
The list's preview displays information about the manufacturing orders, including the
Reference, Scheduled Date, Product, Next Activity Source, Component Status,
Quantity, UoM, Expected Duration, Real Duration, Company, and State.
Different colors will be used to represent the state.
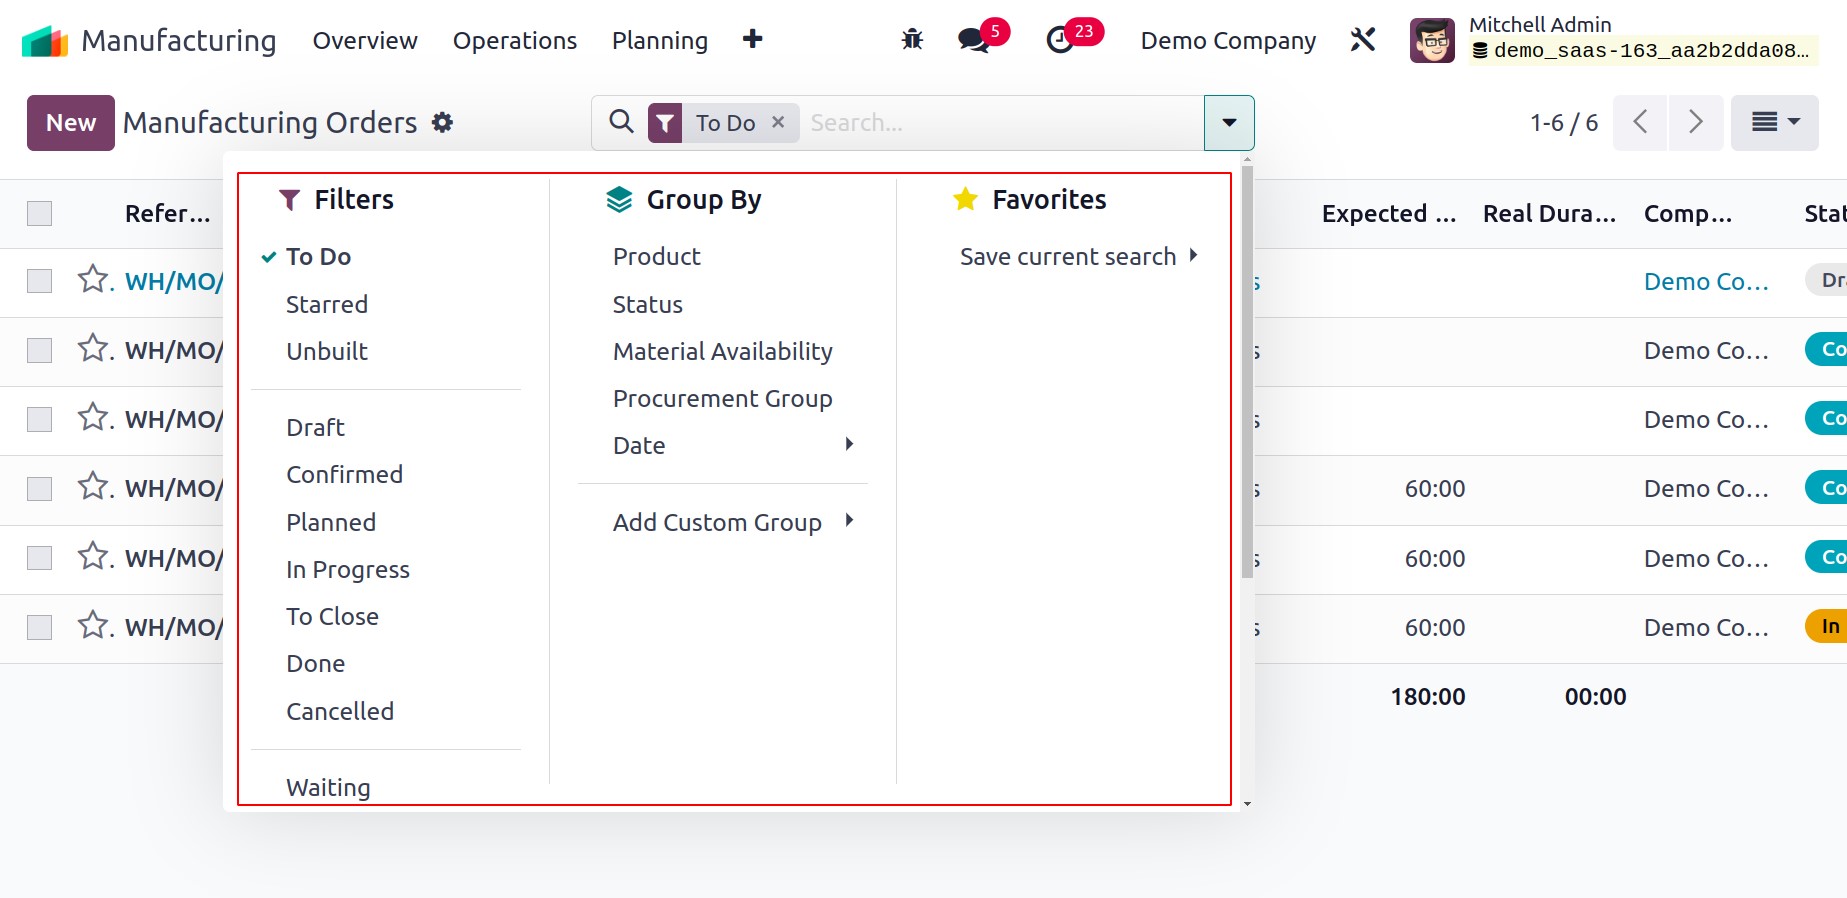
The following filters are available as default selections: To Do, Starred, Unbuilt,
Draught, Confirmed, Planned, In Progress, To Close, Done, Canceled, Waiting, Ready,
Planning Issues, Scheduled Date, and Warning. Based on Product, Status, Material
Availability, Procurement Group, and Scheduled Date, the data is segmentable. Both the
Filters and Group By choices come with the customization option.
By selecting the New button, a new production order can be created. The following
form view will then come up.
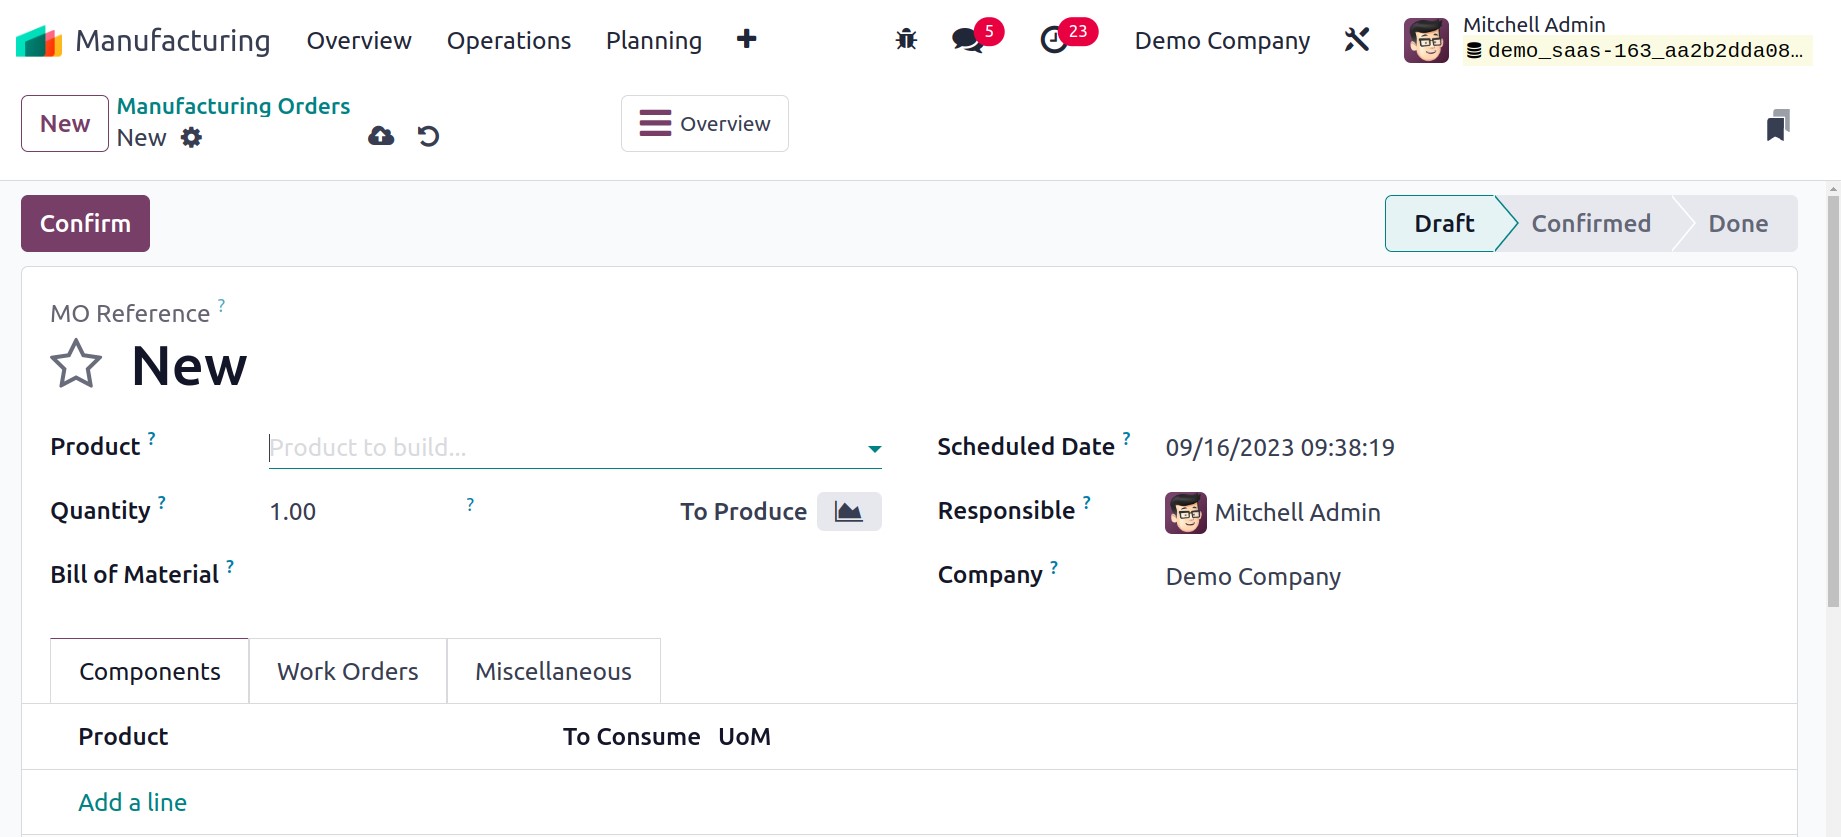
You can enter the name of the product you want to make in the Product section.
You are able to include the components needed to make a final product in the "Bill of
Materials" column. Give the quantity of the product you intend to generate in
the Quantity area. The Scheduled Date option allows you to choose the day you
intend to begin the product's production. In the Responsible field, designate the
Company and an employee who will be responsible for keeping an eye on the
progress of this manufacturing order.
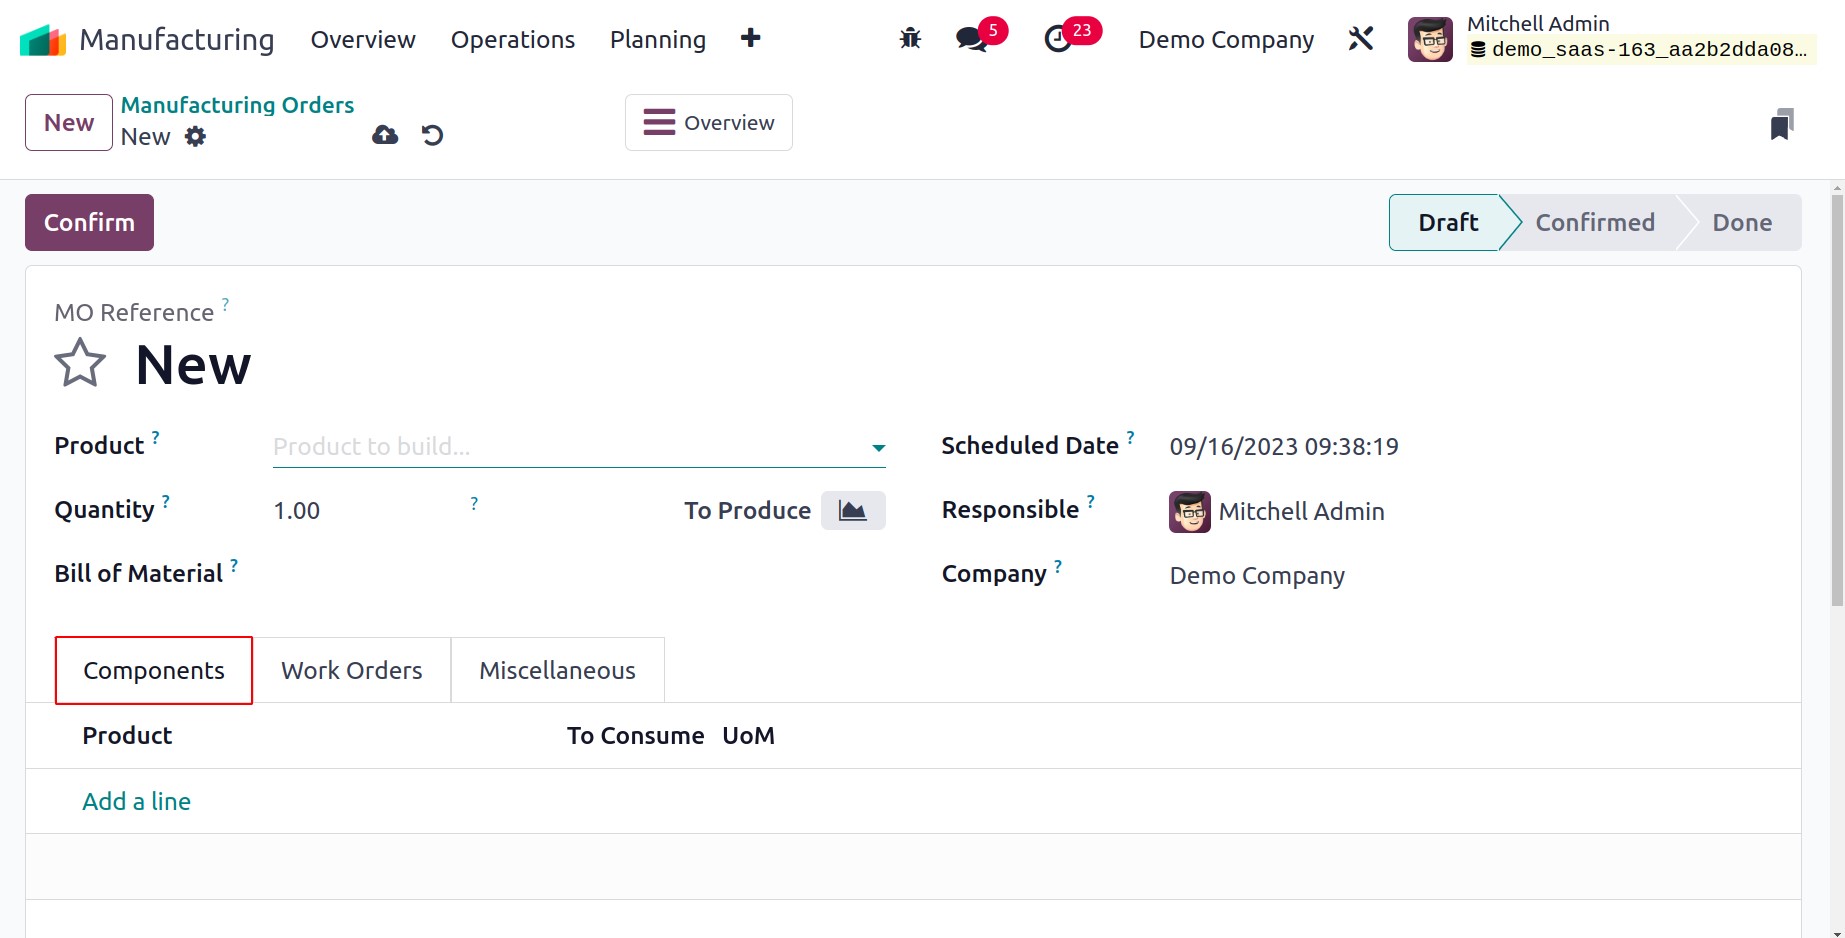
You can list each component needed to make this product one at a time in the
Components tab by using the Add a Line button. The From field will have access to
the components' locations. If you intend to outsource the manufacturing operations, then
that location will be a partner location. The number of products from an inventory
perspective will be displayed in the To Consume field. Mention the UoM of the individual
components along with this.
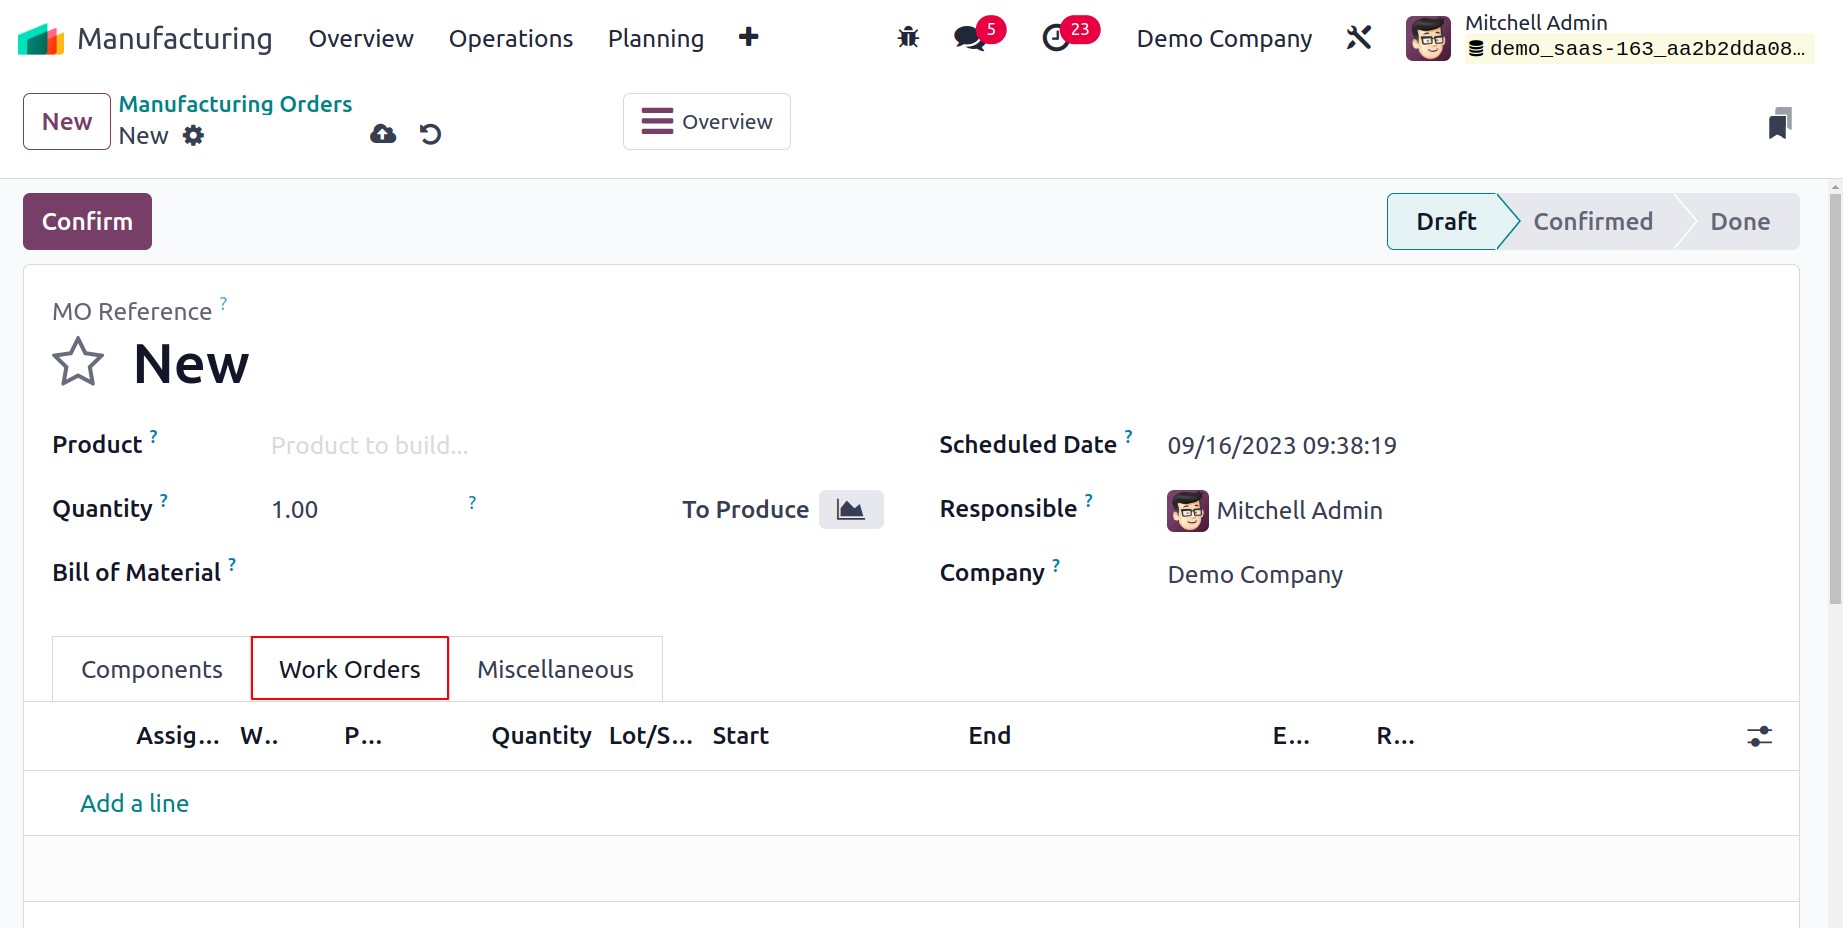
The Work Orders tab can be used to organize the production activities for each
work center. You can add the Operation, Work Centre, Product, Quantity, Scheduled
Starting Date, and Expected Duration using the Add a Line button. The Real Duration will
automatically update after you start the process and confirm the manufacturing order.
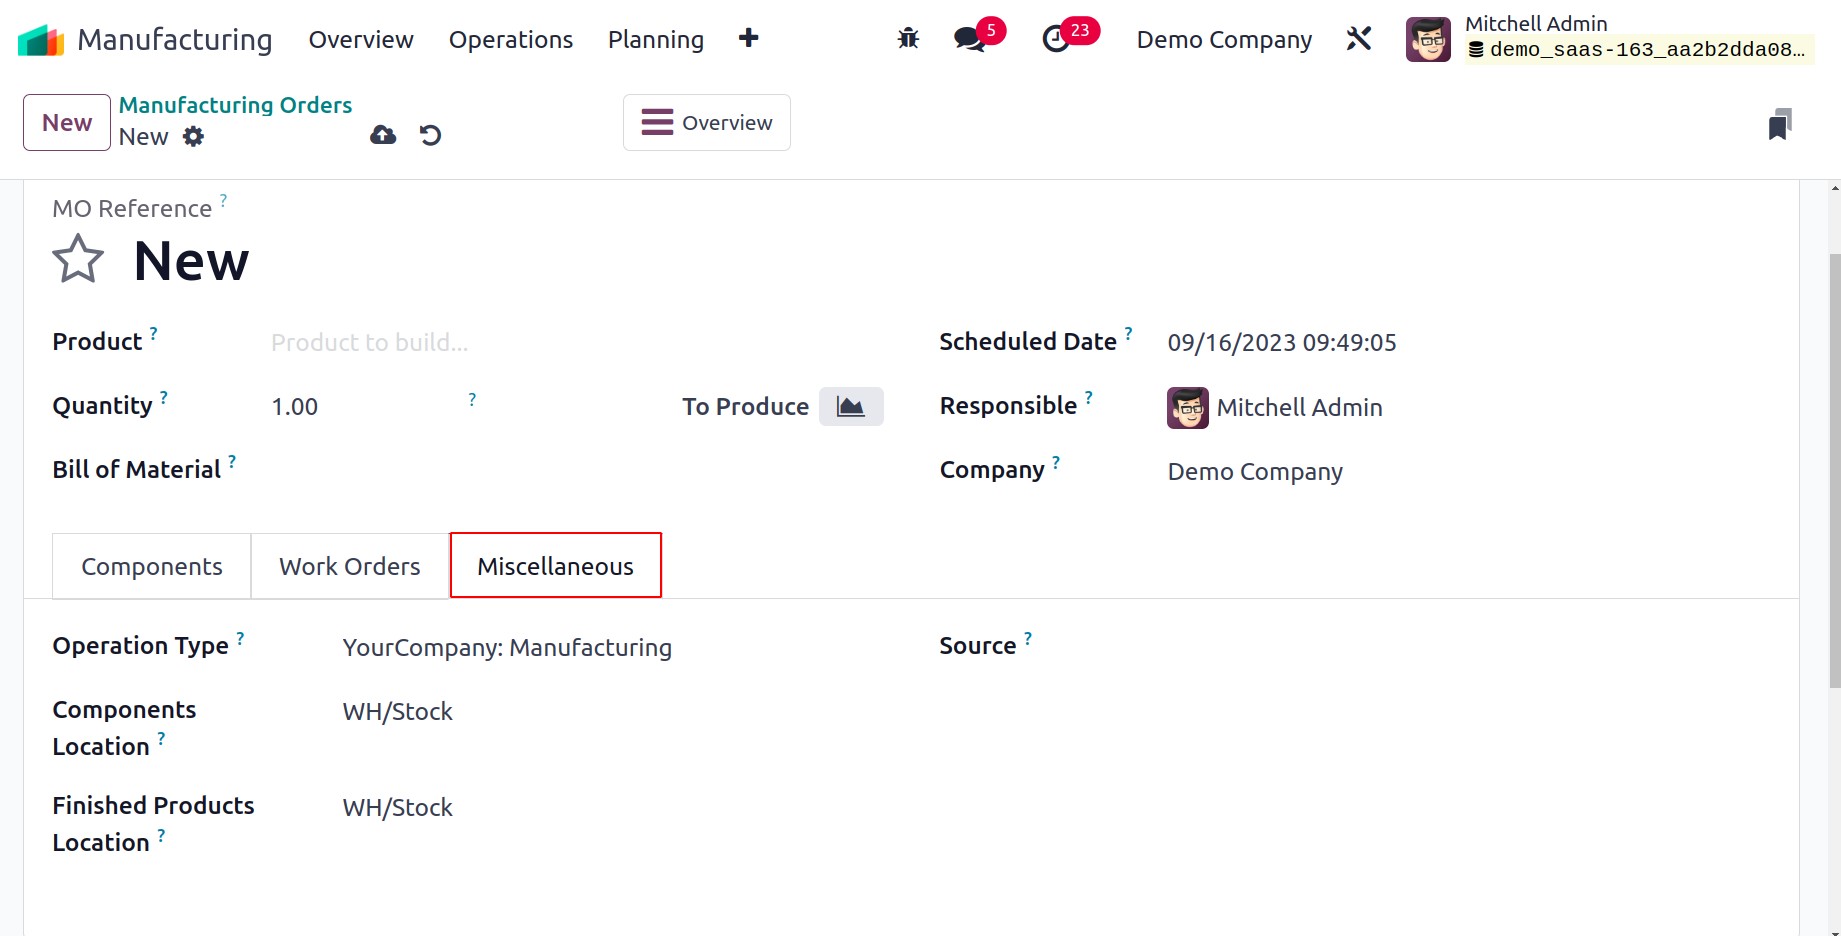
Mention the Operation Type, Components Location (where the product's components are),
Finished Product Location (where the system will store the finished product), Source
(the document's reference that produced this manufacturing order), and Analytic Account
in the Miscellaneous tab. This analytical account will contain the operations
cost and consumed items cost entries associated with this manufacturing order.
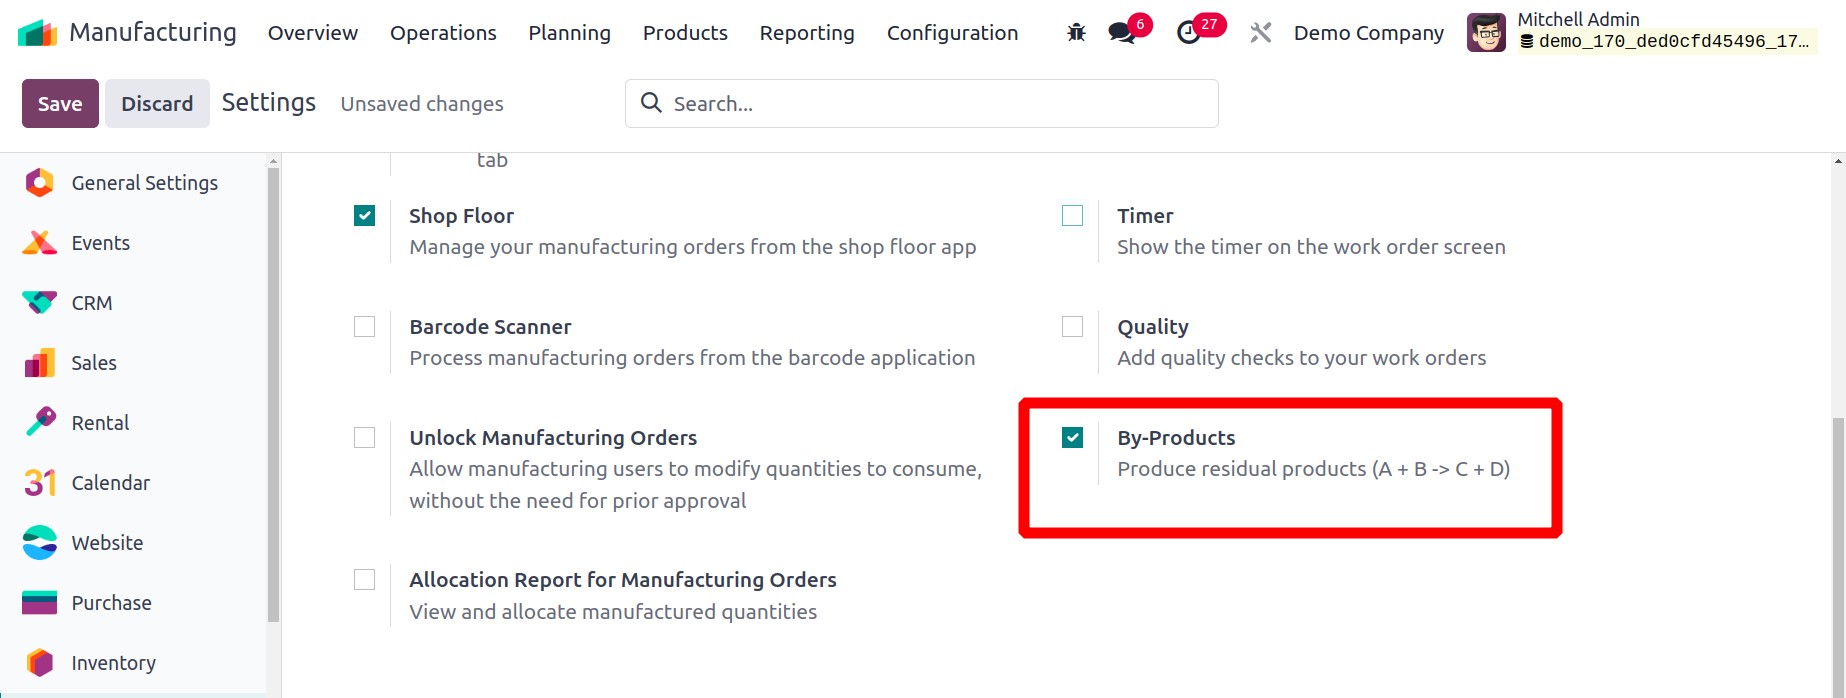
You may occasionally receive some extra products as a result of manufacture. These extra
items are regarded as byproducts. You can provide information about the By-products
while setting the production order for the primary product. Go to the Settings
menu and turn on the By-products option, as seen in the screenshot below, to
accomplish this.
You will be able to access an additional tab in the manufacturing order's form view
after you activate this feature. Using the Add a Line option, you can individually
identify each of the supplementary products that are included with the primary product
here.
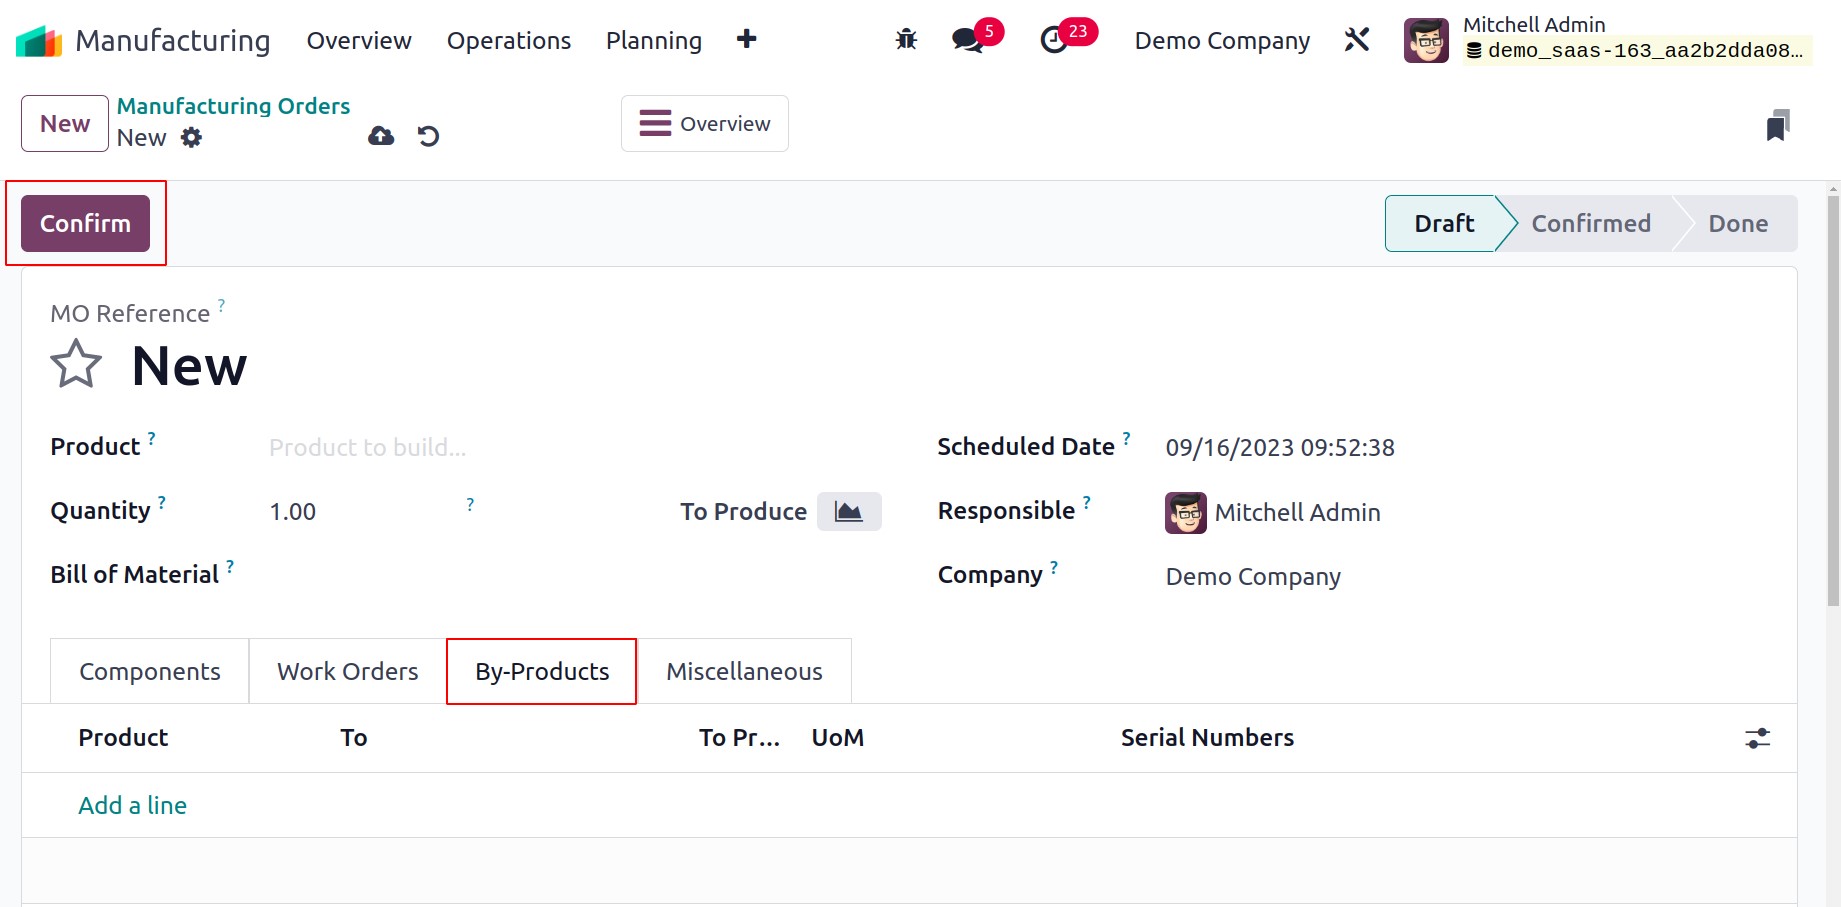
Click the Confirm button after providing all the information required for the
manufacturing order.
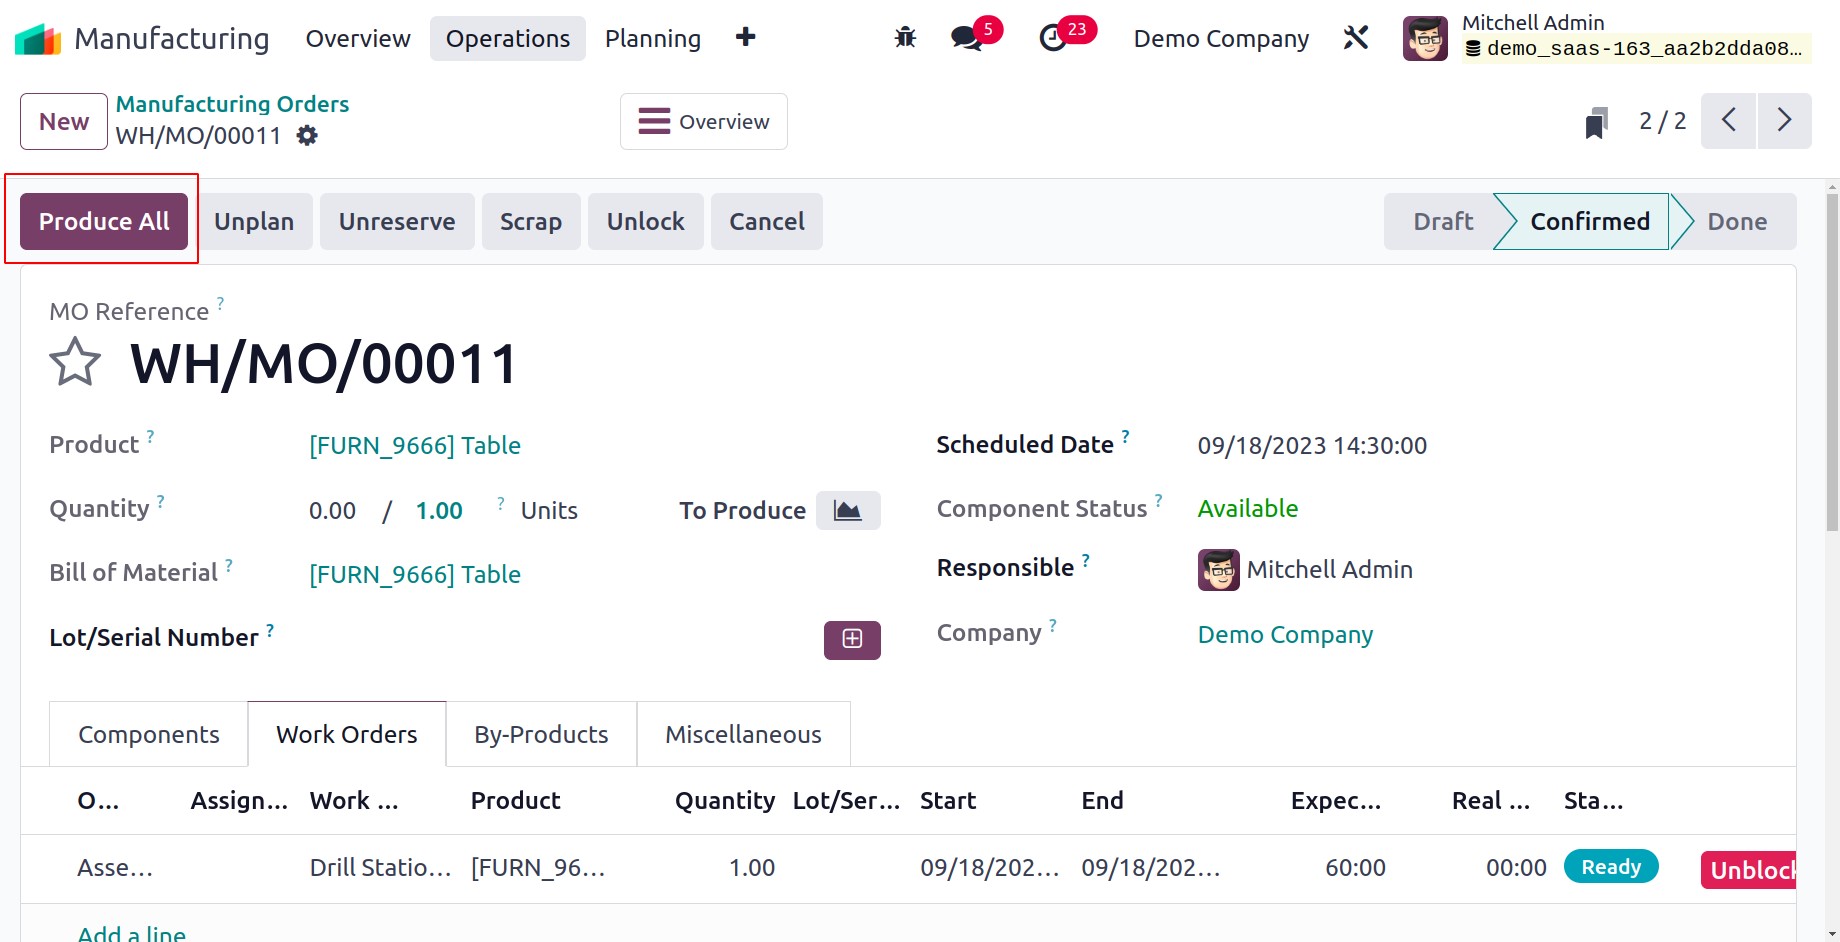
You can mark the manufacturing order as done by clicking the Plan All option
after the manufacture is finished.
By creating a Maintenance Request, you can send the created goods to maintenance
if you discover any defects. You can create a new maintenance request in a new window by
clicking this button. While describing the Maintenance module, we will go through how
Odoo17 handles maintenance requests.
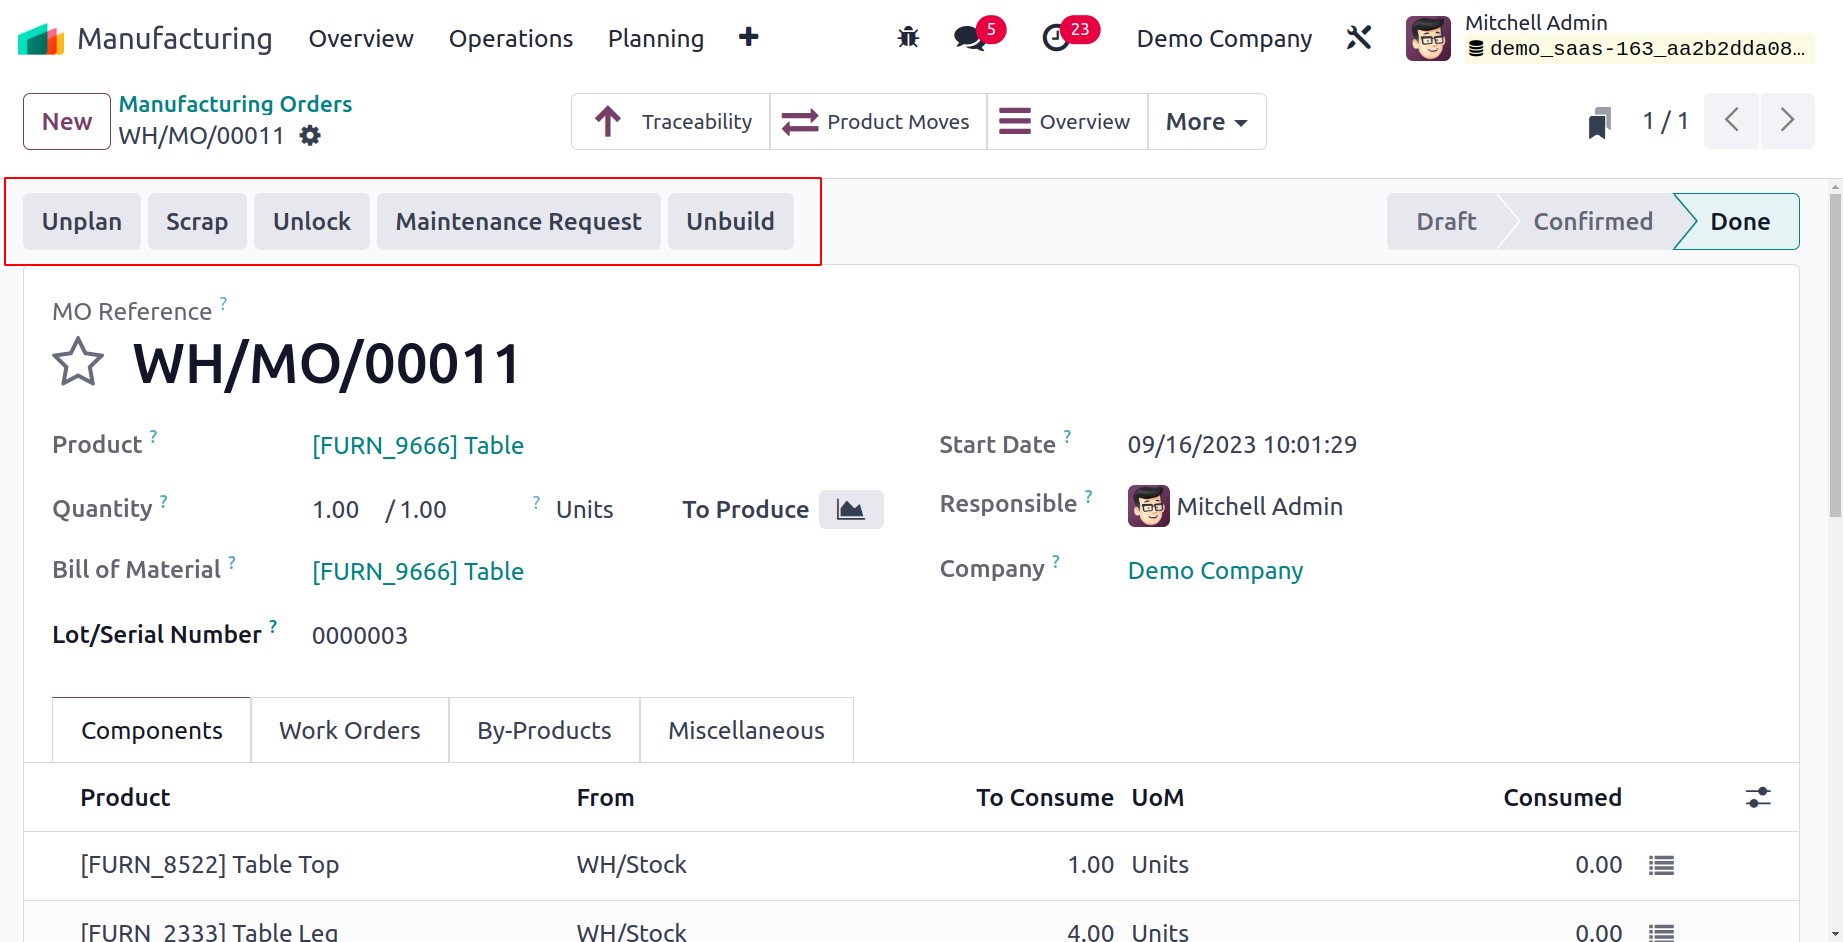
By selecting the Scrap button, you can send the product to the scrap pile if it
is wholly ruined. The product, quantity, source location, and scrap location must all be
mentioned in the pop-up box that appears. The damaged item will be transferred to the
designated scrap location once you click the Validate button.

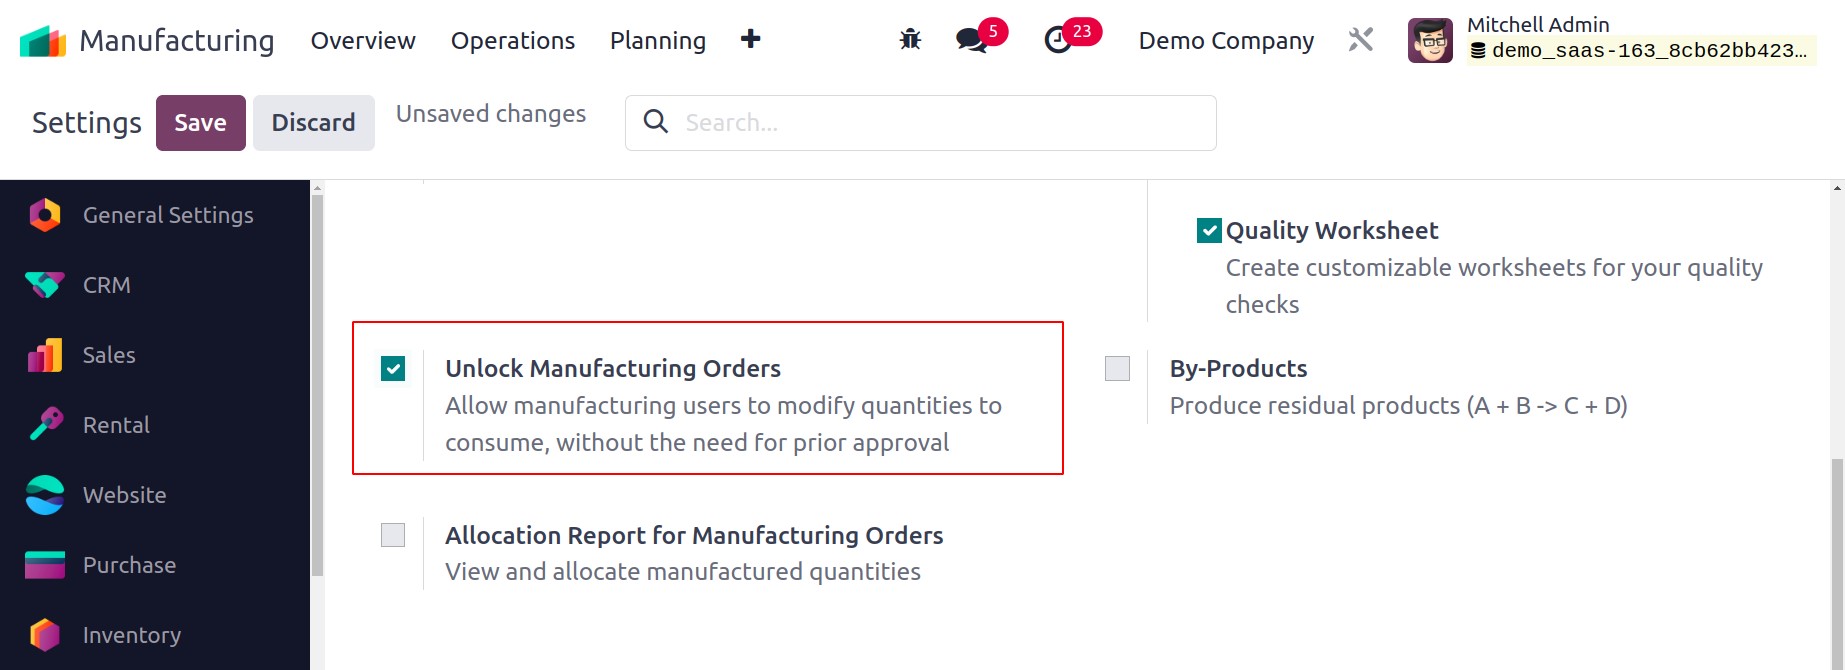
You may activate the Unlock Manufacturing Orders option in the module's
Settings menu. By turning on this option, you can alter your consumption amounts
without obtaining previous consent.
You can adjust the quantities as necessary by clicking the Unlock button. You can
unbuild the produced good and log its data by using the Unbuild button.

Here, you must include the quantity of the product to be disassembled. The Source
Location field allows you to specify the location of the product you wish to unbuild.
You'll decide where to send the components that arise from the unbuild order based on
the destination location. Select "Unbuild" from the menu.
In the manufacturing order's form view, there are sophisticated smart buttons that you
may use to track different procedures.
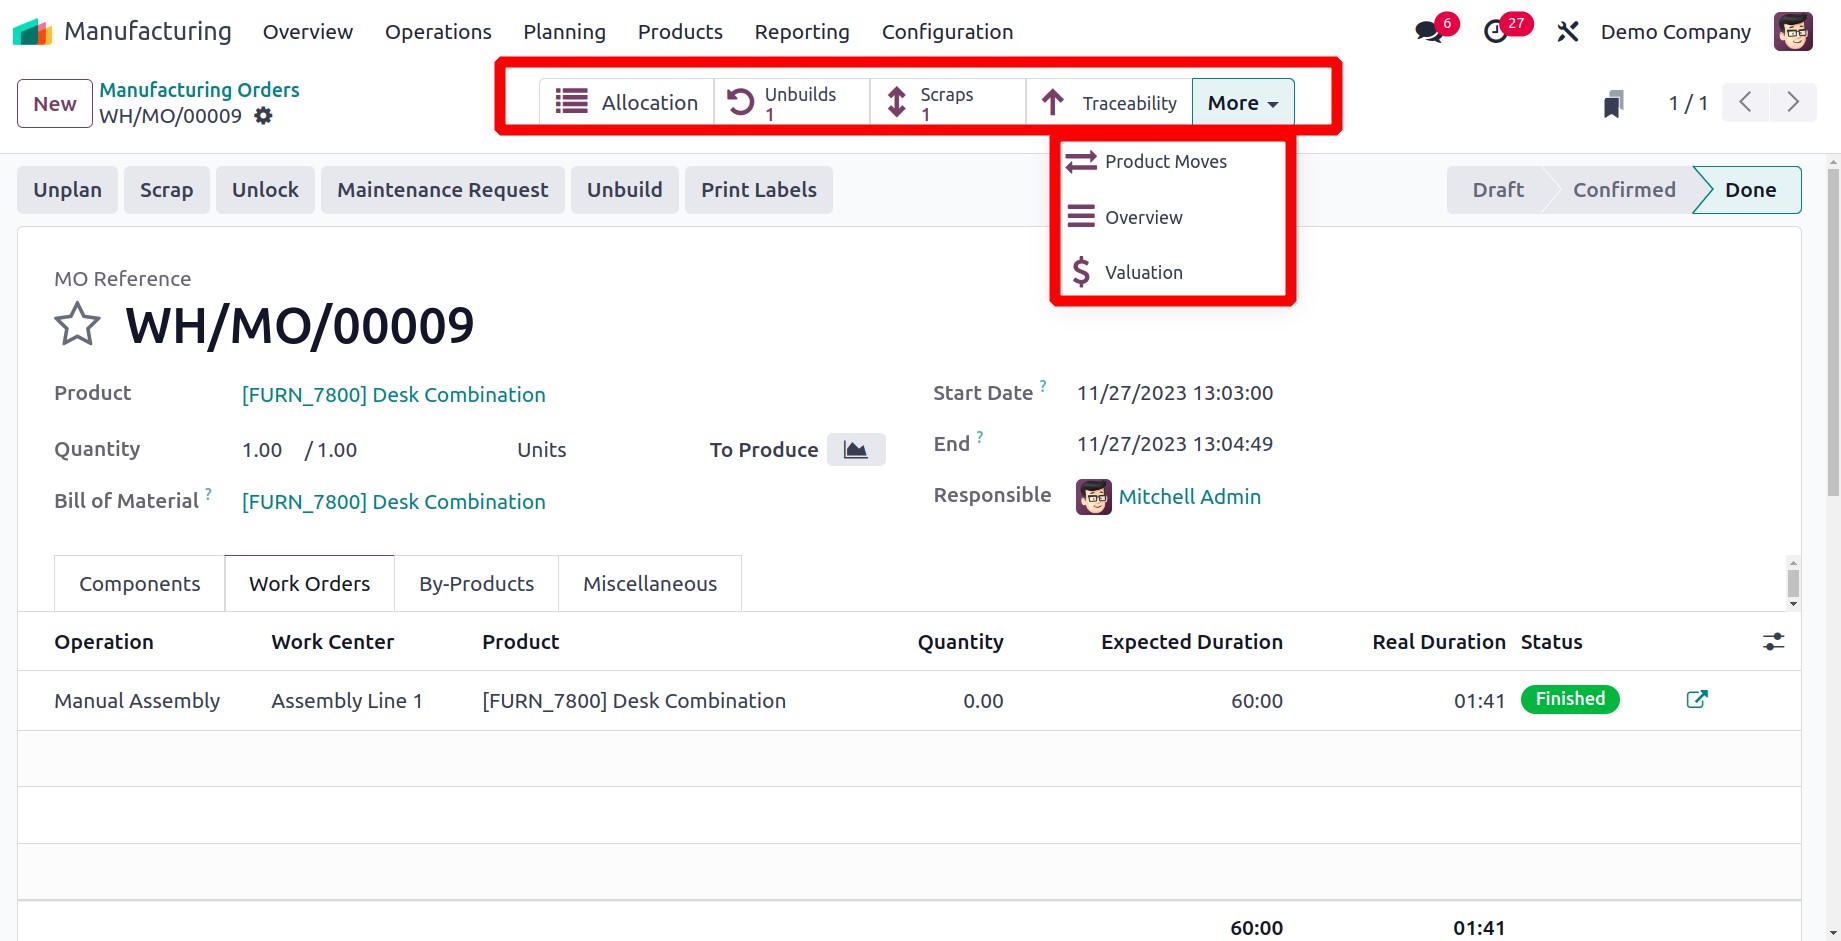
The Allocation button, when clicked, displays the product's Reception
Report. You can assign the product to orders using the Assign button.

You can activate the Allocation Report for Manufacturing Orders from the module's
Settings menu to receive the Allocation Report for the manufactured
amounts. You'll be able to see and assign manufactured goods thanks to this.

The Child MO button allows you to view the manufacturing orders for the main
product's constituent parts. Referencing, Scheduled Date, Product, Next Activity,
Source, Component Status, Quantity, UoM, Expected Duration, Real Duration, Company, and
State are all displayed.
To view the Unbuild Orders, click the Unbuilds button. The reference, product,
bill of materials, manufacturing order, lot/serial number, quantity, unit of
measurement, source location, company, and status are all displayed in the list of
unbuilt orders.

By selecting the Scrap option, you may view the orders for scrap. The pane
displays the Reference, Date, Product, Quantity, Unit of Measure, Source Location, Scrap
Location, Company, and Status, as seen in the illustration below.

Using the Traceability button, you can create a report detailing the product's
traceability. The report displays information on the product's Reference, Product, Date,
Lot/Serial, From, To, and Quantity.

The Product Moves button can be used to examine the product's inventory moves.
The window displays information about the product and its parts, including the Date,
Reference, Product, Lot/Serial Number, From, To, Quantity, Unit, and Status.

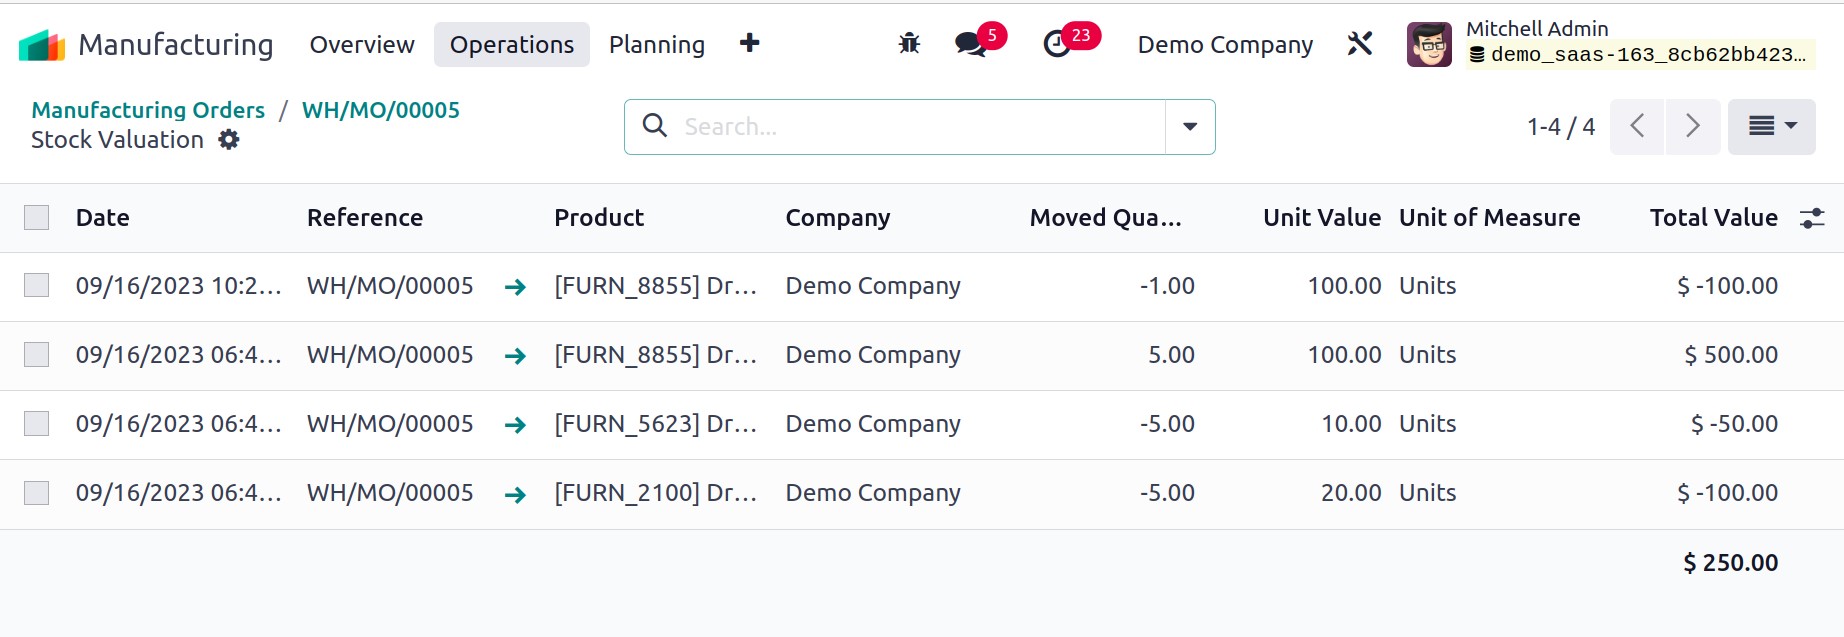
By selecting the Valuation button, you may carry out a stock value of the product
and its parts. Details about the Date, Reference, Product, Company, Moved Quantity, Unit
Value, UoM, and Total Value are provided in the Stock Valuation window.
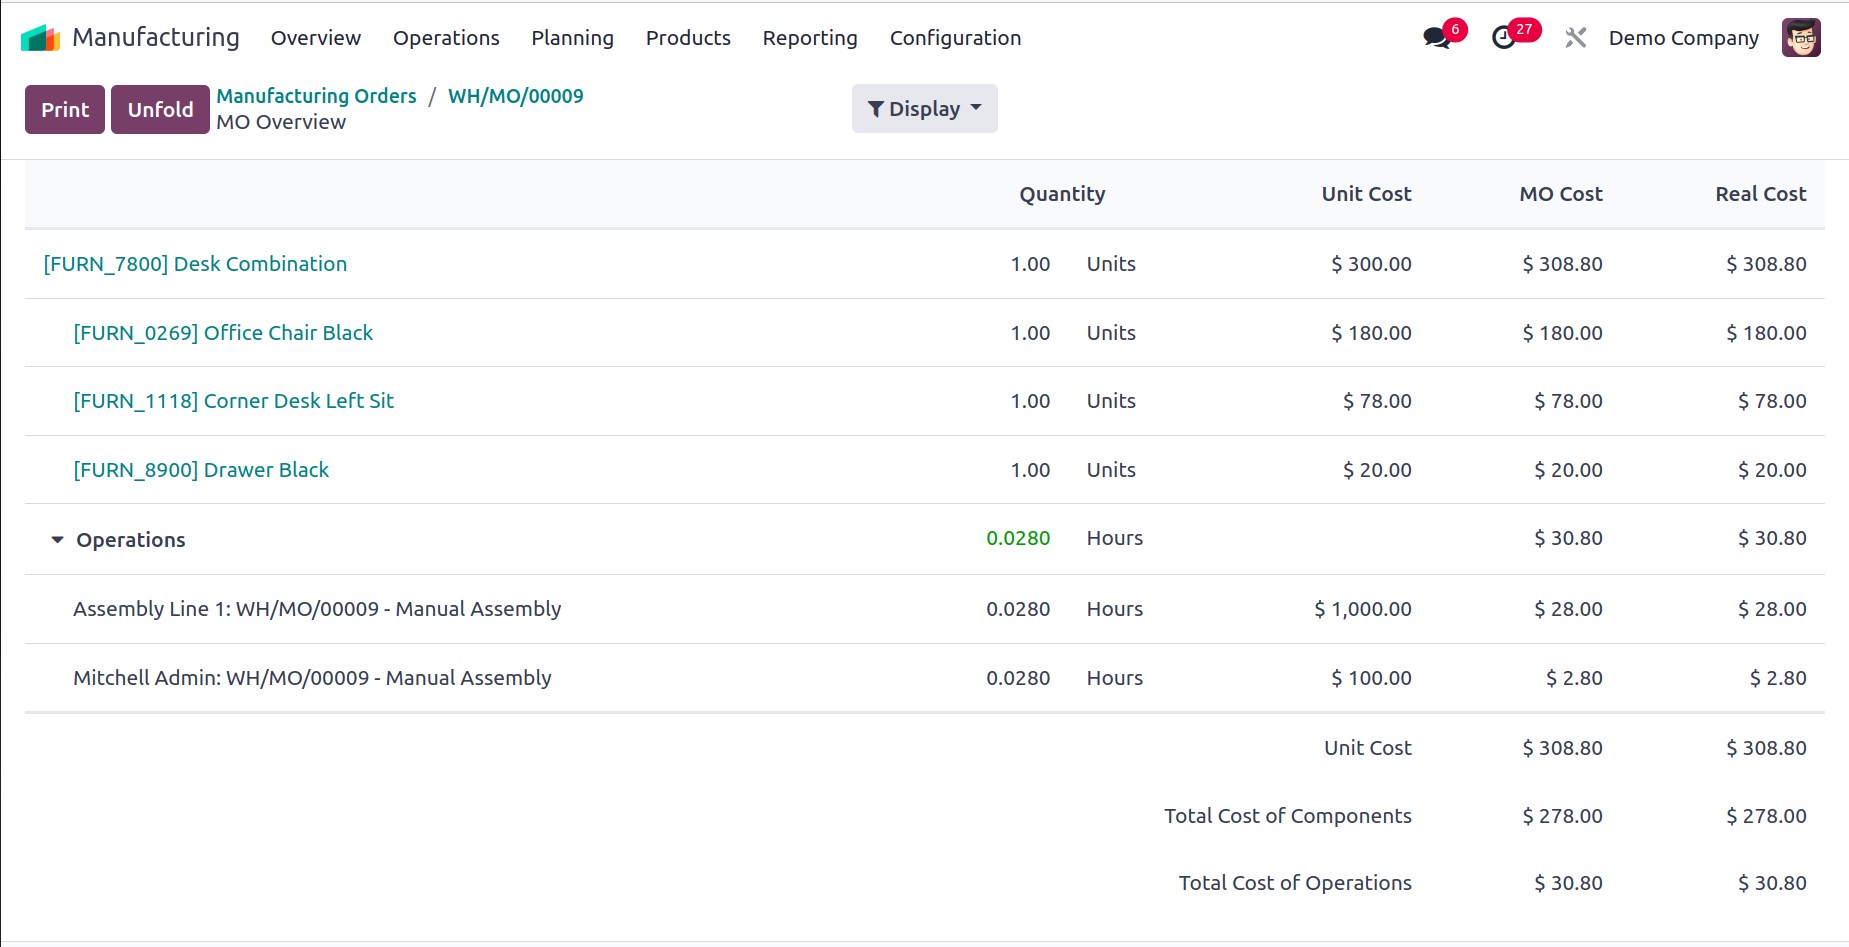
An Overview report will be produced when you click the Overview button, as
illustrated below. In this report, you may see the cost of the components and cost of
the Operations separately.
You can find the Security Lead Time function in the Manufacturing module's
Settings menu.
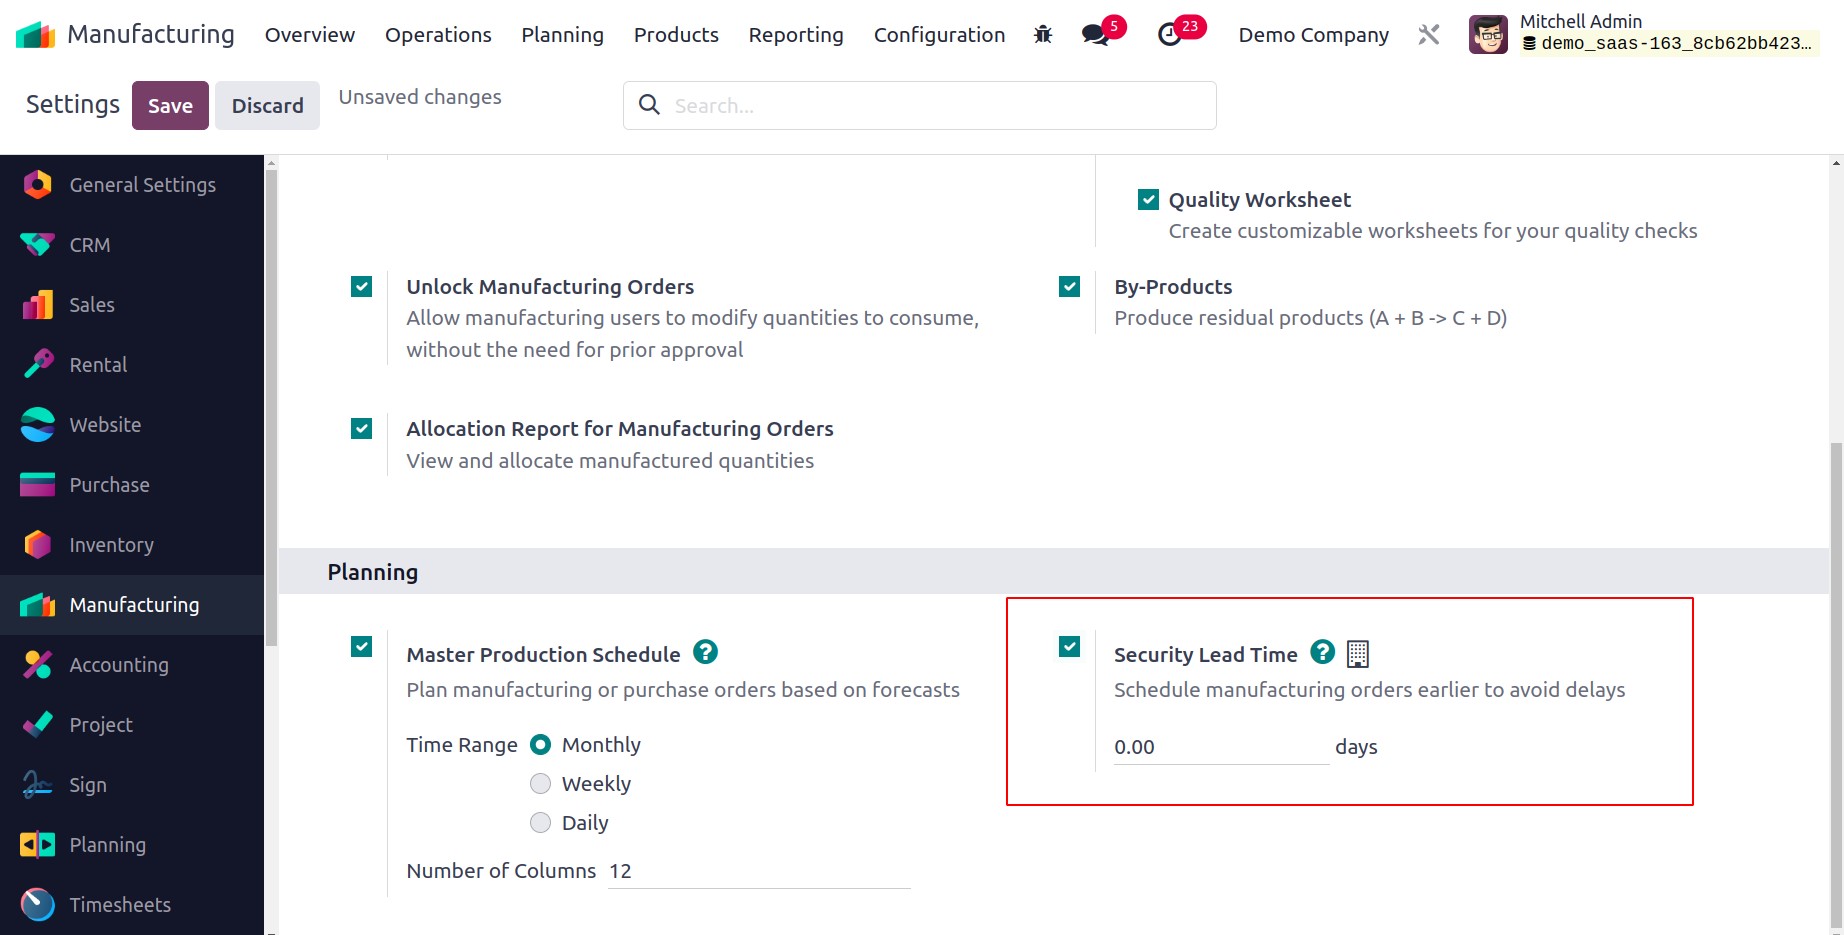
This function can be turned on to arrange production orders for a particular day in
advance. In order to avoid delays, the number of days can be specified here, and the
manufacturing deadline will be set early.