Replenishment
A vital inventory process that helps you keep a suitable amount of items in your inventory is replenishment. You need to restock the inventory in accordance with demand to guarantee a constant flow of items. The Odoo17 ERP System offers immediate assistance to a company's replenishment processes. There are two ways that replenishment can be done.
Both the product management window and the Inventory module's replenishment module can be used to restock products.
Let's start by taking a look at the product replenishment from the product management window.
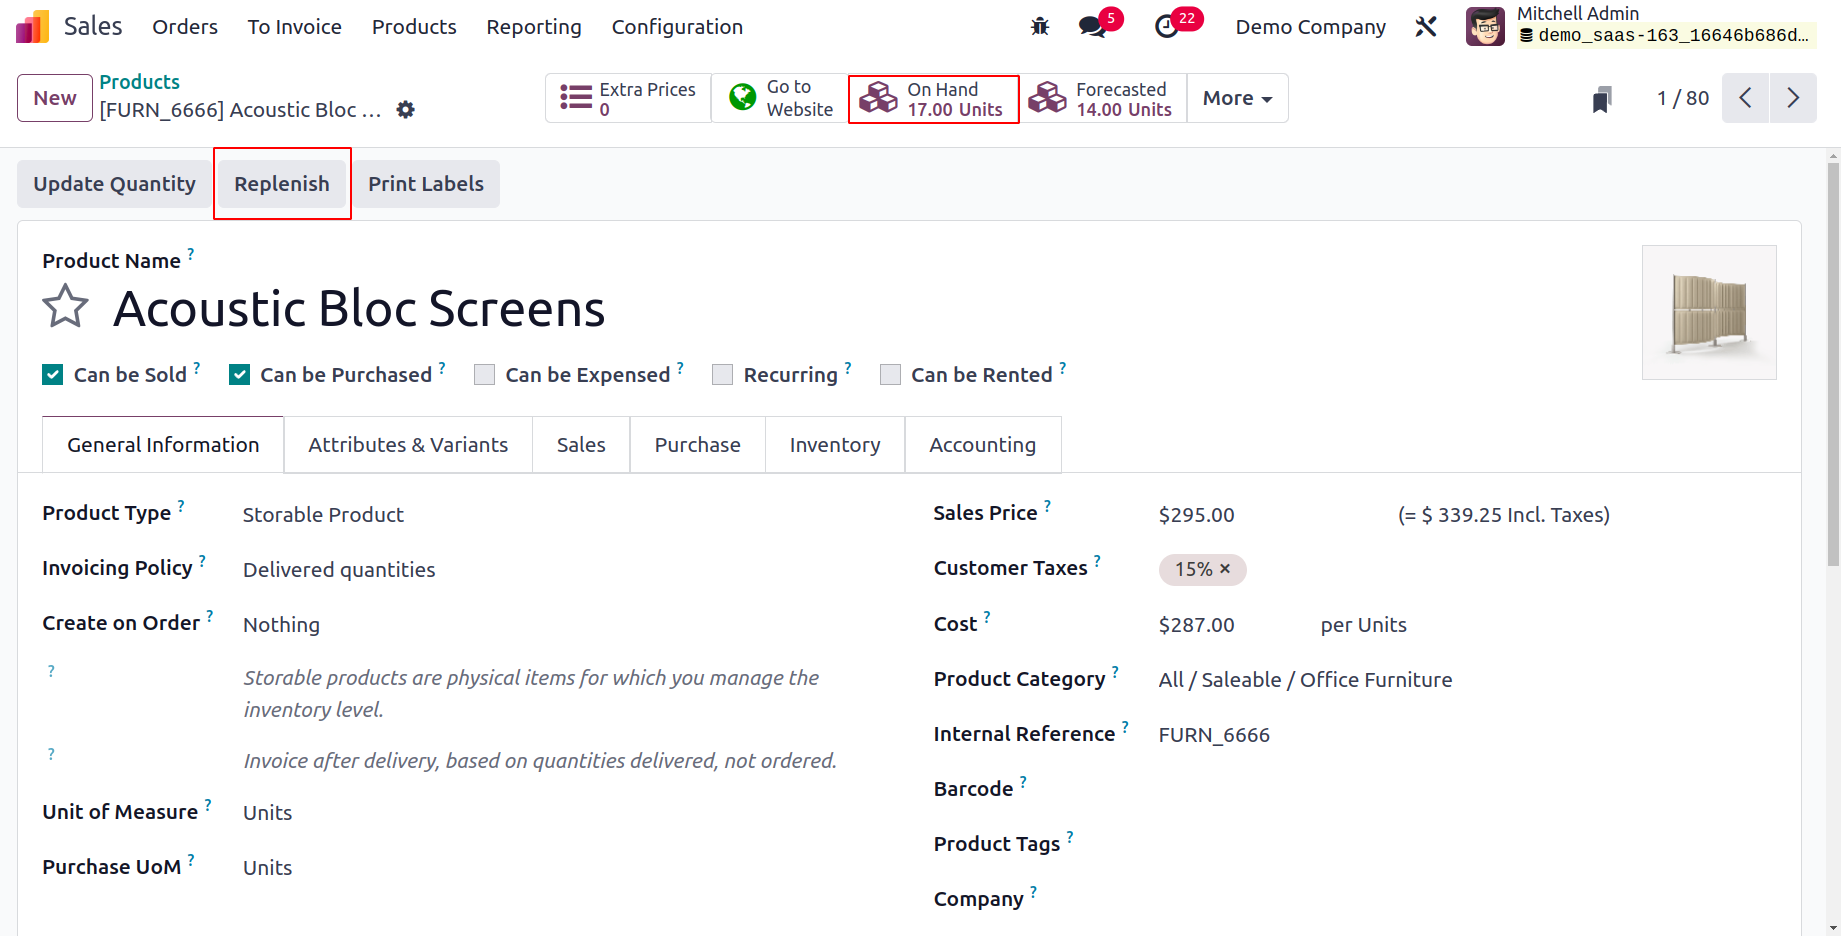
You can see that there are 17 available quantities here. By selecting the Replenish button, you can restock the product.
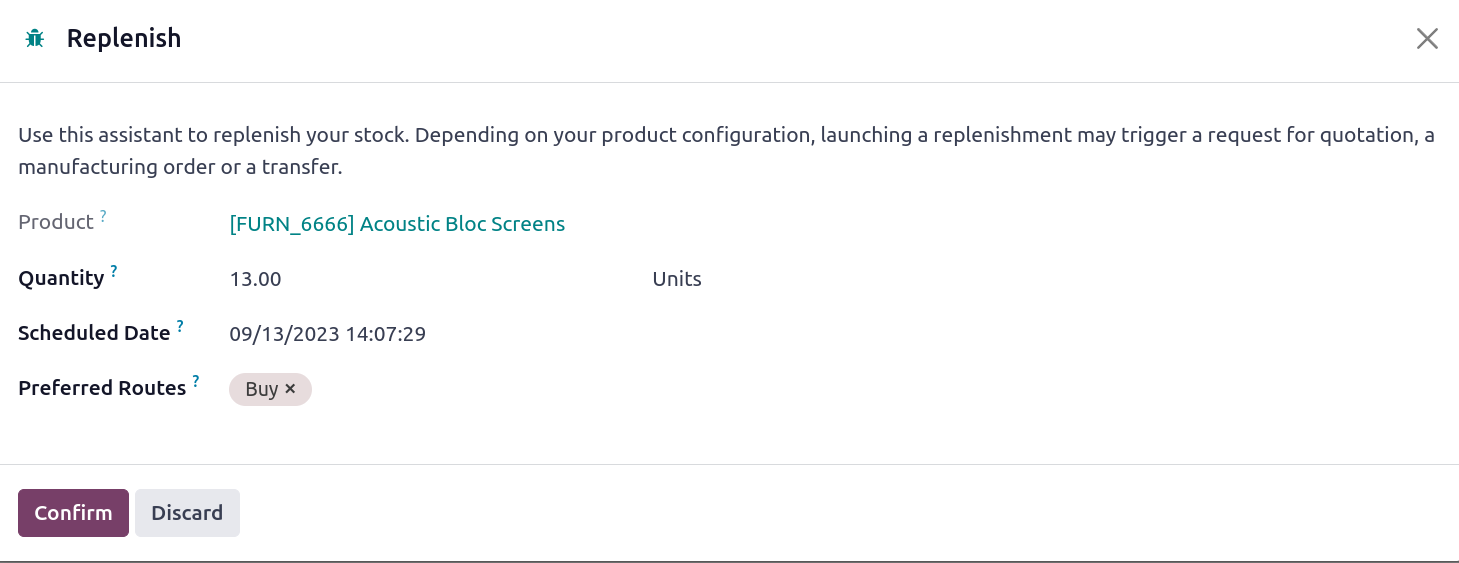
You can specify the quantity of the product you wish to replenish in the pop-up window that appears as shown above. Here, we asked for the commodity to be replenished in 13 quantities. You can choose a time for when the refill is to occur. You can also choose your favorite route for refilling. A manufacturing order, transfer, or a request for quotation for the purchase of this product will be started when you
click the Confirm button. Based on the preferred path, the replenishment action will be carried out.
Odoo17 will automatically produce a quotation for purchase based on the product settings if you have chosen Buy as the preferred route. The quotation may be verified, and the purchasing process can be finished.
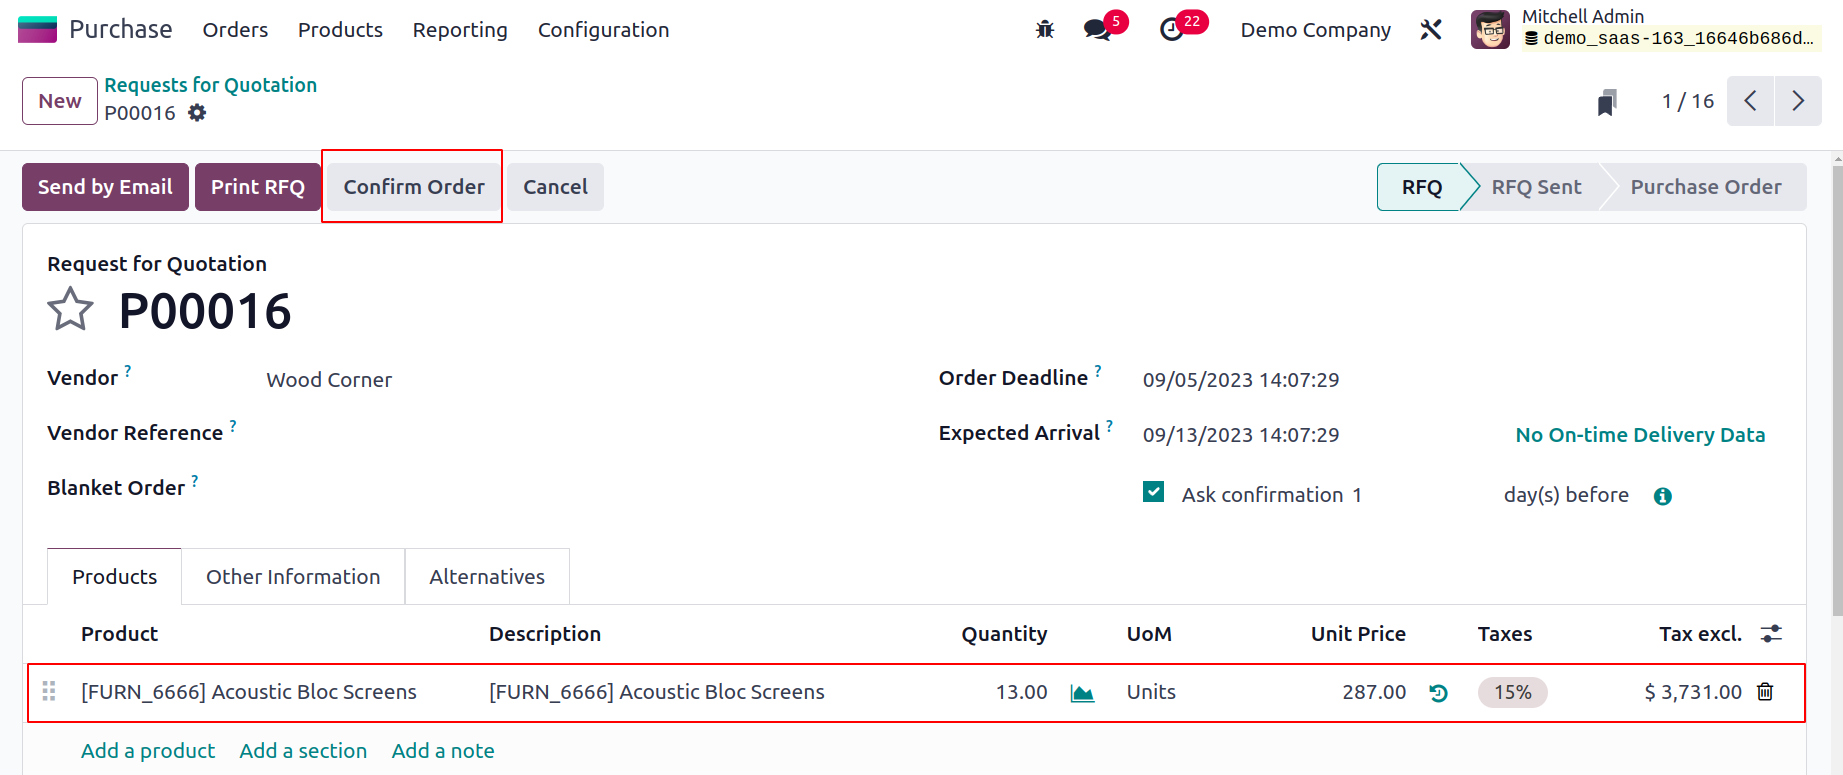
The 13 units of the product's purchase order are available in the Purchase module. You can add
the items to your inventory by selecting the Receive Products option.
You may now check the number of products that are currently in stock.
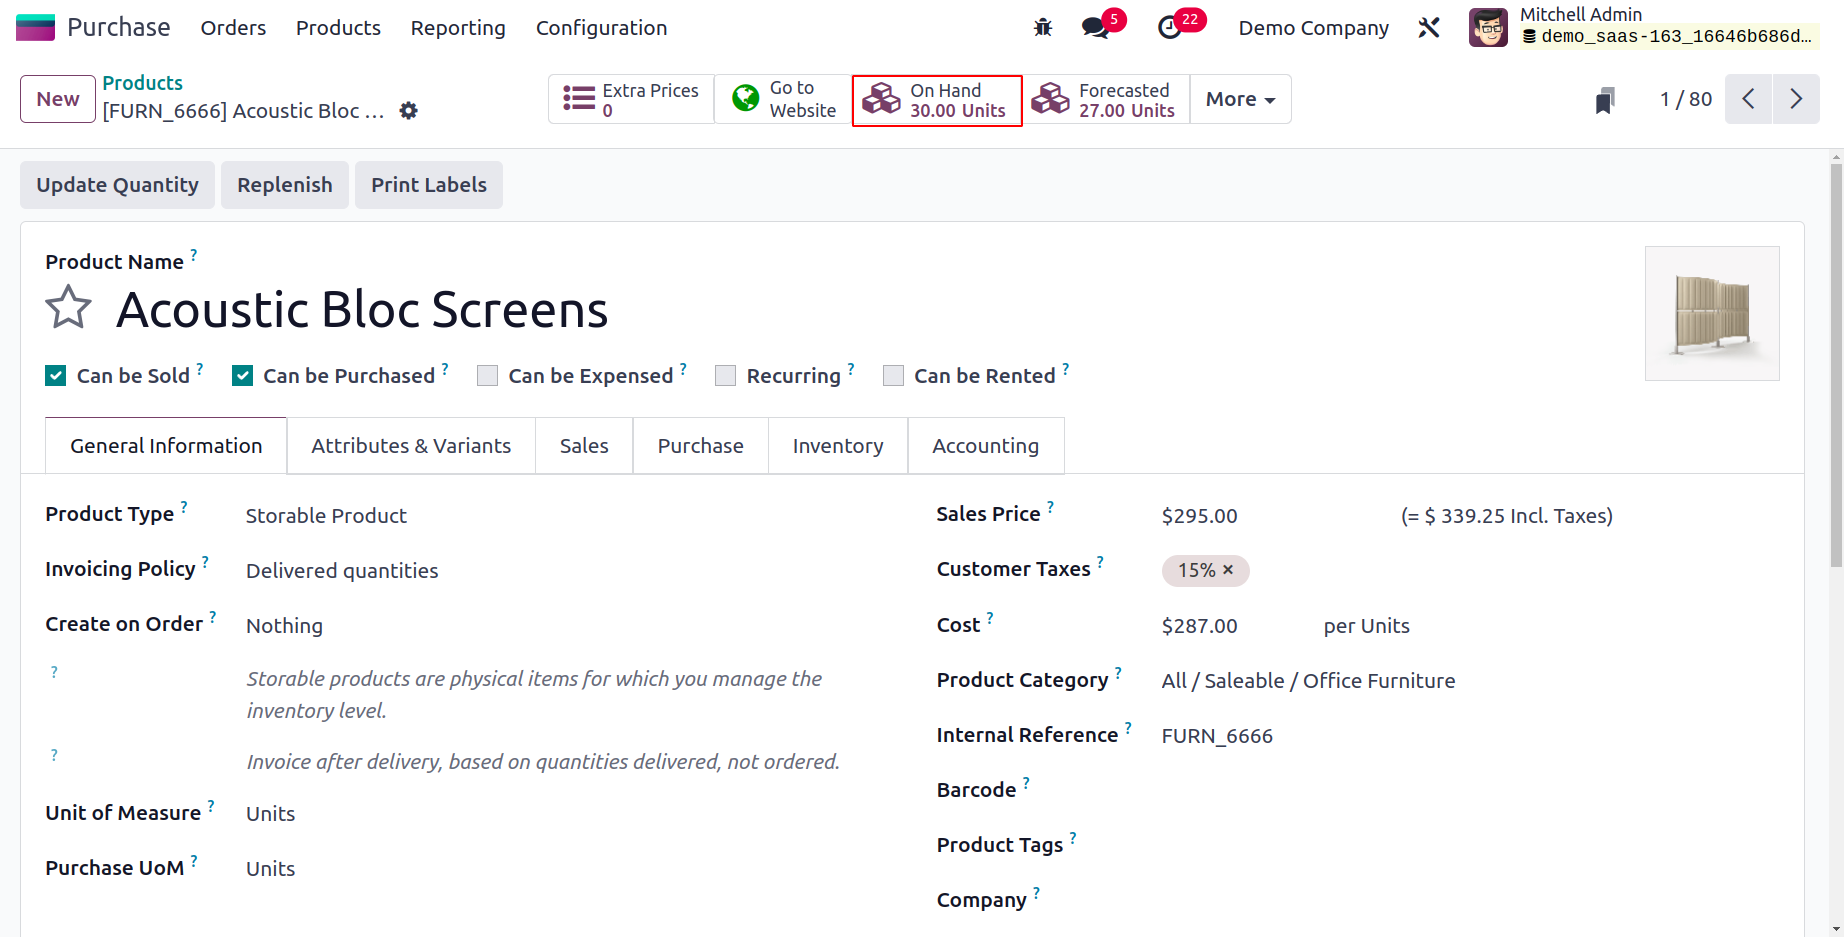
Earlier, it was 17 and now it has changed to 30 which means that 13 quantities of the product are replenished.
The Operations window in the Odoo 17 Inventory module gives you access to the Replenishment management window. There is a
list of preloaded replenishment orders on this sophisticated platform.
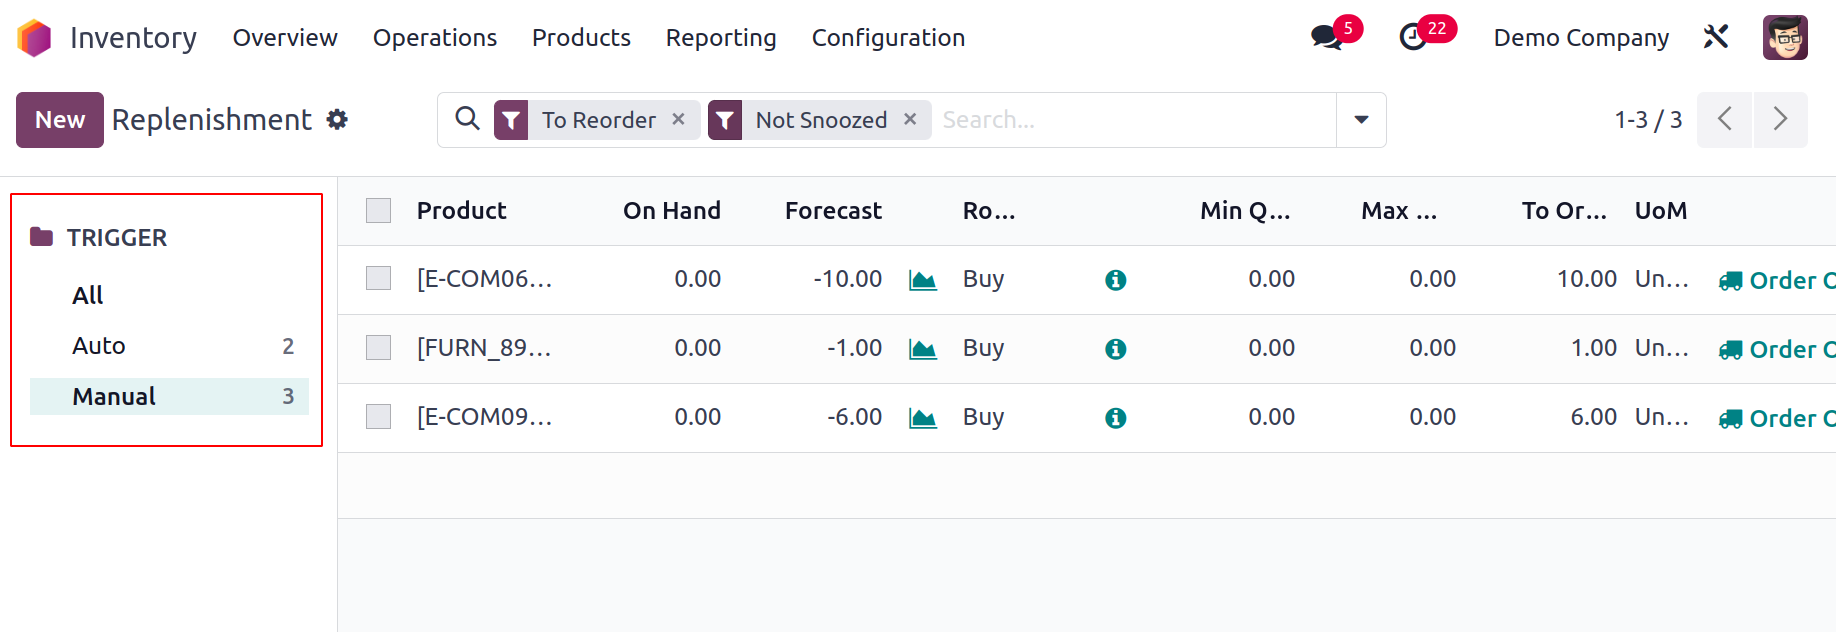
Using the search bar, you can look for individual replenishment orders. The Filters provide pre-set and
programmable options that make it simple to retrieve the needed data. With the aid of the Group By option, you may organize the orders according to their Location, Product, and Category. You will find a special sorting panel on the left side of
the window that will let you arrange the information according to Locations.
You can distinguish between all replenishment requests and manual replenishment using the Trigger option.

The names of the Products, Location, On Hand, Forecast, Preferred Route, Vendor, Minimum Quantity, Maximum Quantity, To Order, and UoM are all included in the list's preview. Using the New button, you can manually build a new refill. A new line will appear with information about the specifics of a product's refill.

The Location, On Hand, and Forecast details of the product will automatically appear on the corresponding fields when you specify the product name in the designated field. The drop-down menu that is provided allows you to choose the Preferred Route.
The minimum and maximum quantities of the product that must be replaced should then be mentioned. You will be given two options to order the product, such as Order Once and Automatic Orders, as soon as you state the To Order quantity. You can quickly create replenishment by generating a request for quotation by selecting the Order Once button. The replenishment orders will be handled automatically once the Automatic Orders button is clicked. Using the Snooze option, you can postpone the procedure for a specific amount of time.

With this option, you can postpone the procedure for 1 Day, 1 Week, 1 Month, or a Custom amount of time. On this pop-up window, a Snooze Date can also be entered.
Let's now examine the Inventory Module's Inventory Adjustment features.