Data Recycle
Odoo 17 Data Cleaning
The process of preparing or molding data in your system by removing or changing
unwanted, erroneous, duplicate, irrelevant, or poorly designed data is known as data
cleaning. The data that is being described is not necessary for your organization. For a
commercial organization to properly clean its data, data cleaning is a necessary tool. A
project can succeed or fail based on how well the data is cleaned.
It will take time to manually search for repetitions and remove useless files. Removing
unnecessary files and data efficiently requires an automated system. One great solution
to these issues is the Data Cleaning application offered by Odoo ERP. With the help of a
variety of cutting-edge tools and methods, you and your company can de-duplicate and
eliminate useless data using the Odoo system's data cleaning module. The most effective
method for getting rid of any extraneous data, documents, duplicates, and information
from your system is to use this space-saving application. This module was created by
Odoo17 to function as a great method for organizing all of the system's documents and
identifying patterns.
You may quickly identify duplicates in any kind of data, including field information,
customer contact information, customer details, and many other elements, with the use of
the data cleaning module.
The entire Odoo 17 data cleaning module will be covered in this chapter.
Your organization may ensure that the data cleaning procedure is simple by implementing
the Odoo17 Data Cleaning application. Furthermore, the module's high degree of
integration makes it possible to combine it with other modules, including Human Resource
Management, Document, Contacts, and Customer Relationship Management.
You can install the Data Cleaning module to your database and launch the module by going
to Odoo Apps. Following installation, the menu icon—highlighted in the screenshot
below—will be visible.
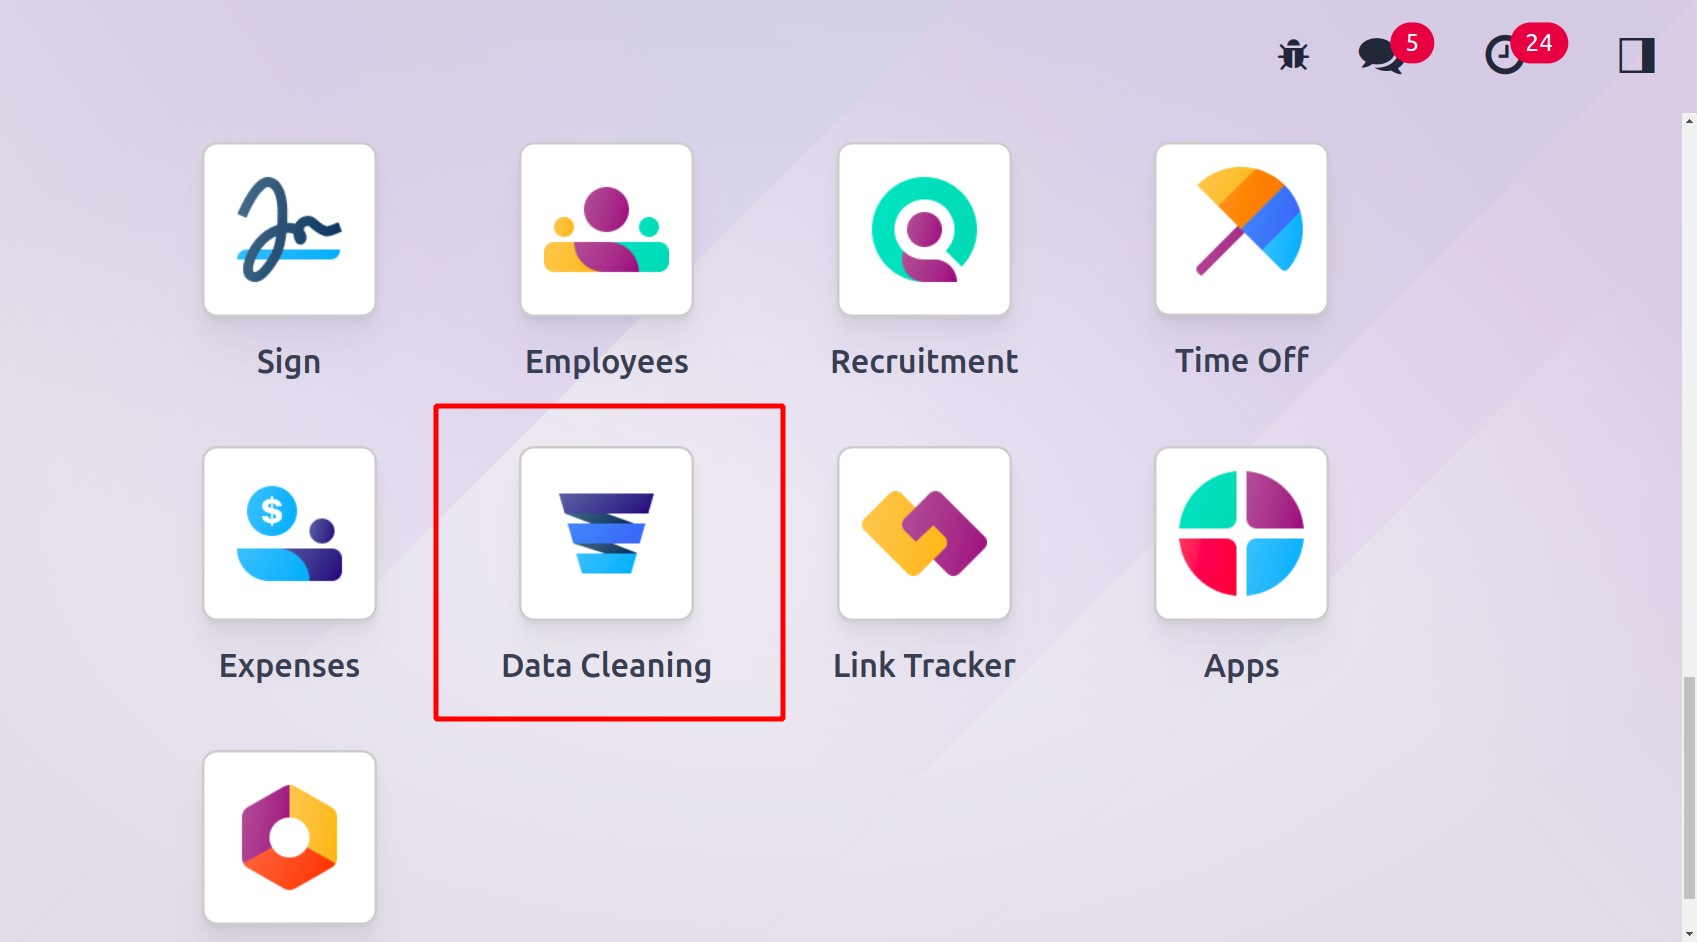
You may now access the module by clicking on the menu icon.
Below is a picture of the Data Cleaning dashboard.
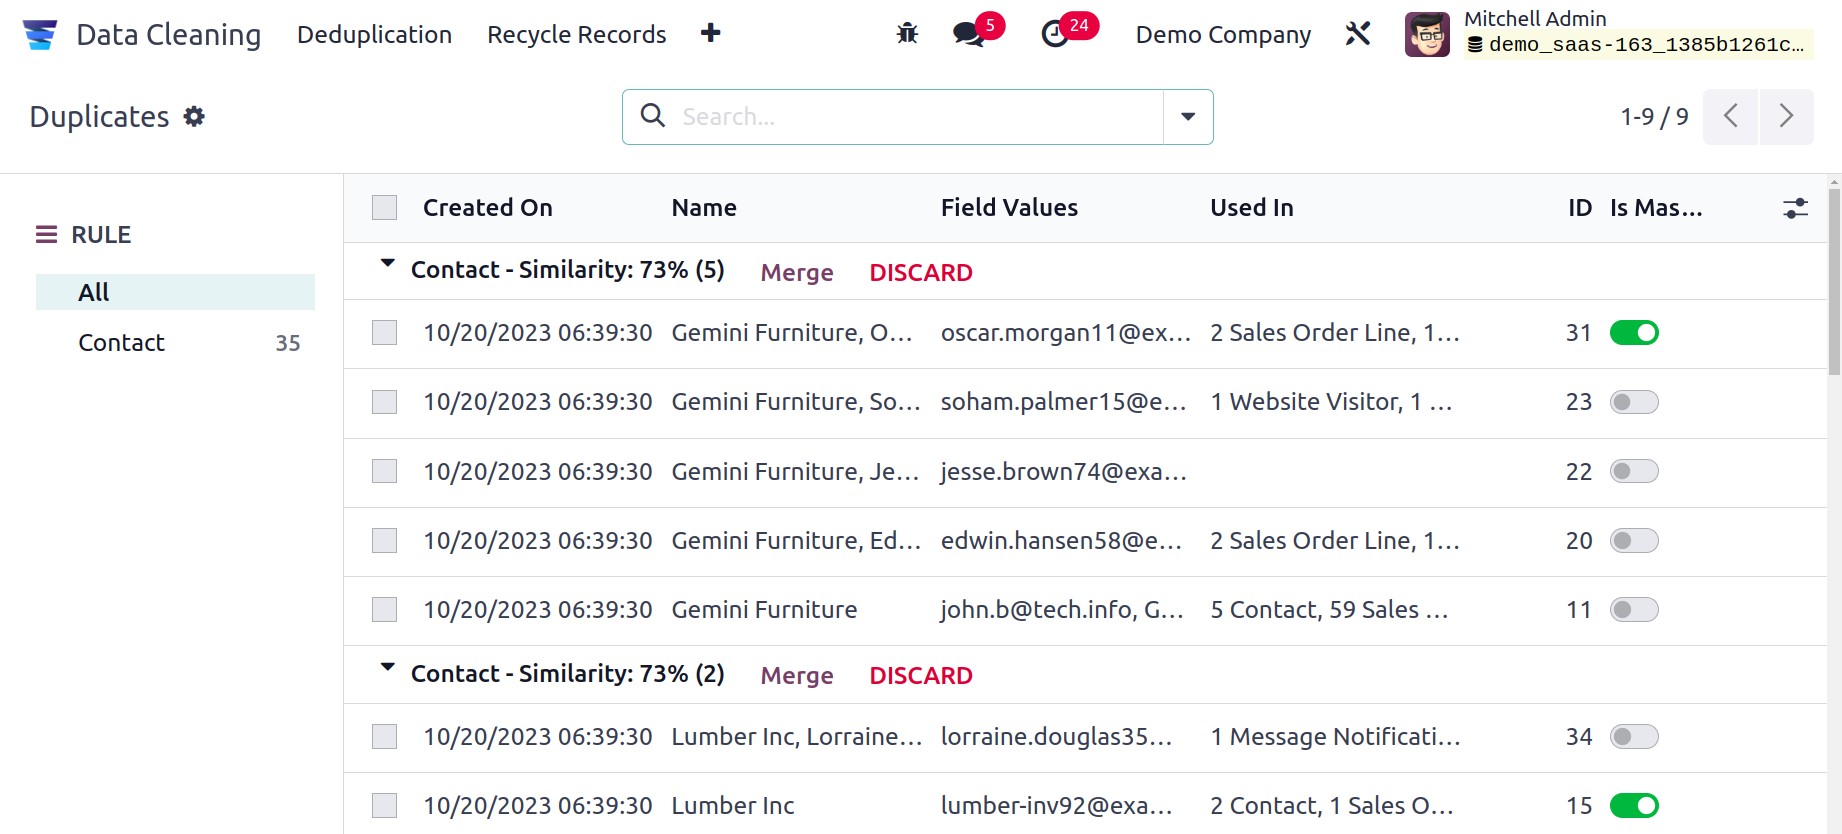
The list of duplicate papers is transparently displayed in the Dashboard window. The
Rules will be displayed on the left side of the window, and each duplicate will be
described on the right side. Odoo17 lets you specify the parameters used to discover
duplicate documents by using Rules. The configuration options allow for the setup of the
Rules. Click the Configuration tab if you wish to configure Rules. As seen in the
image below, the Configuration tab has a dropdown menu with two submenus that you can
view to configure rules.
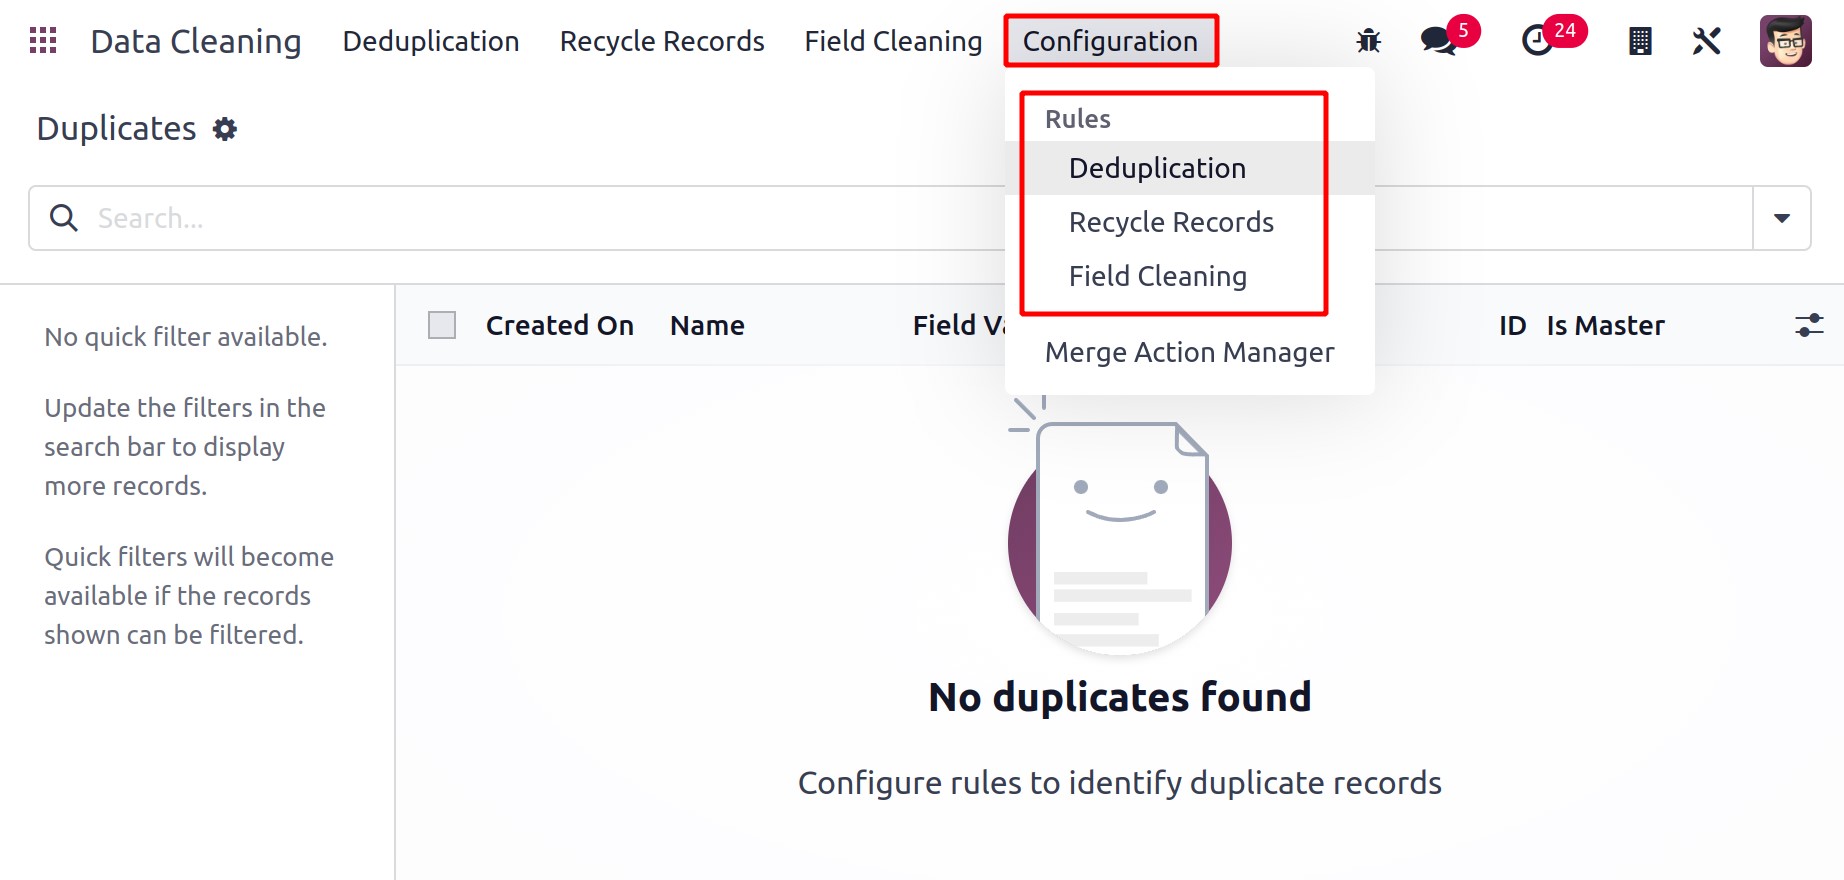
There are two methods that the module lets you set the Rules for the data cleansing.
Those are
- Deduplication
- Recycle Records
- Field Cleaning
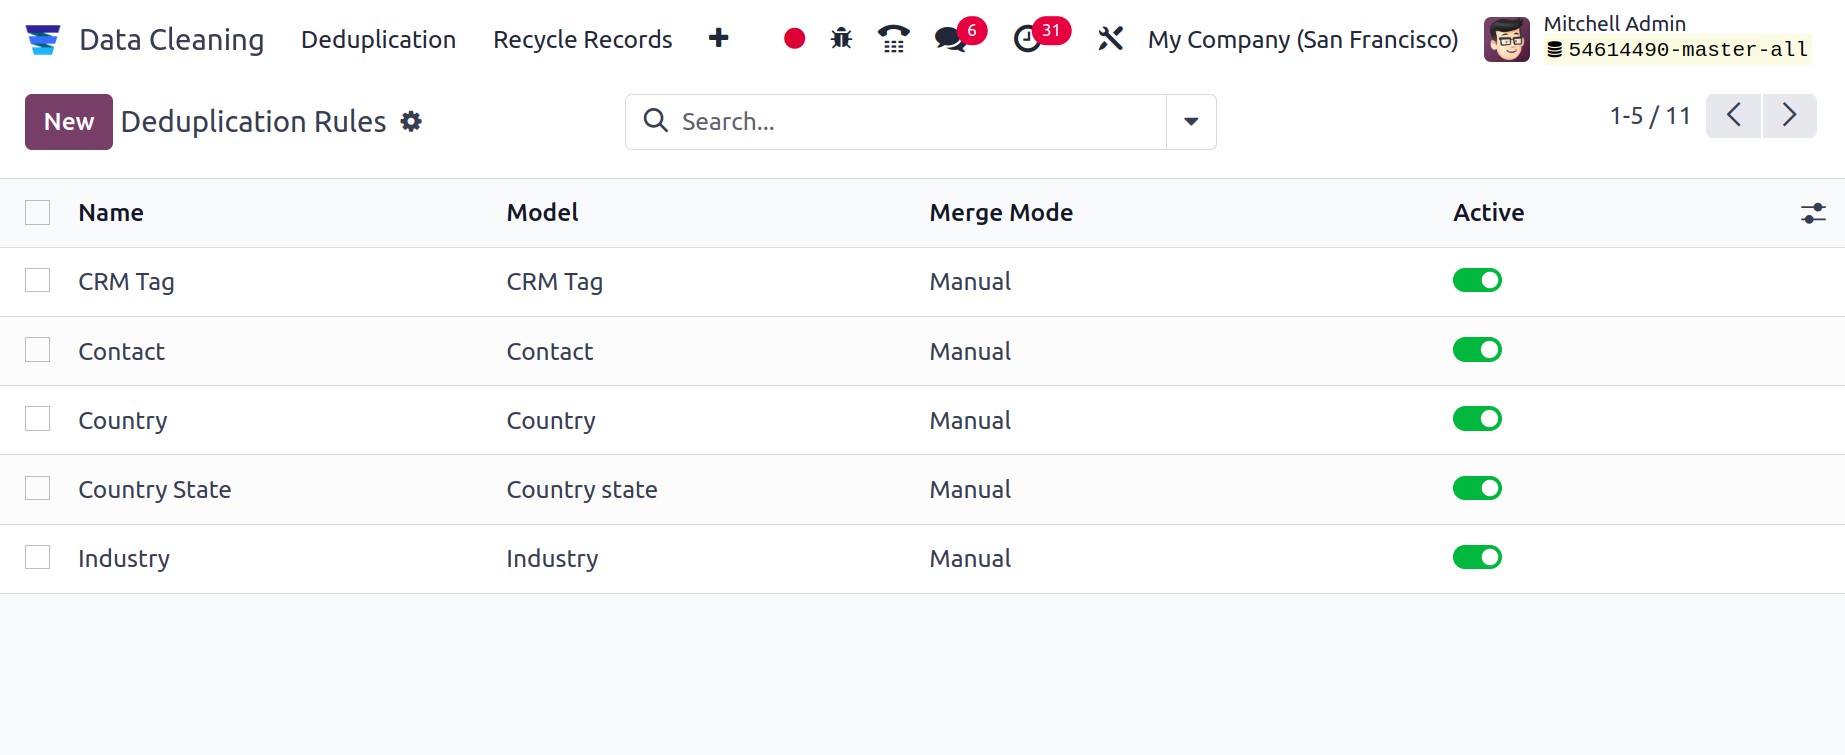
We can investigate the Deduplication Rules first. You can click on the
Deduplication menu to accomplish this. You may now view every Deduplication Rule
established in the system by navigating to the Deduplication Rules pane. The window's
screenshot is shown below.
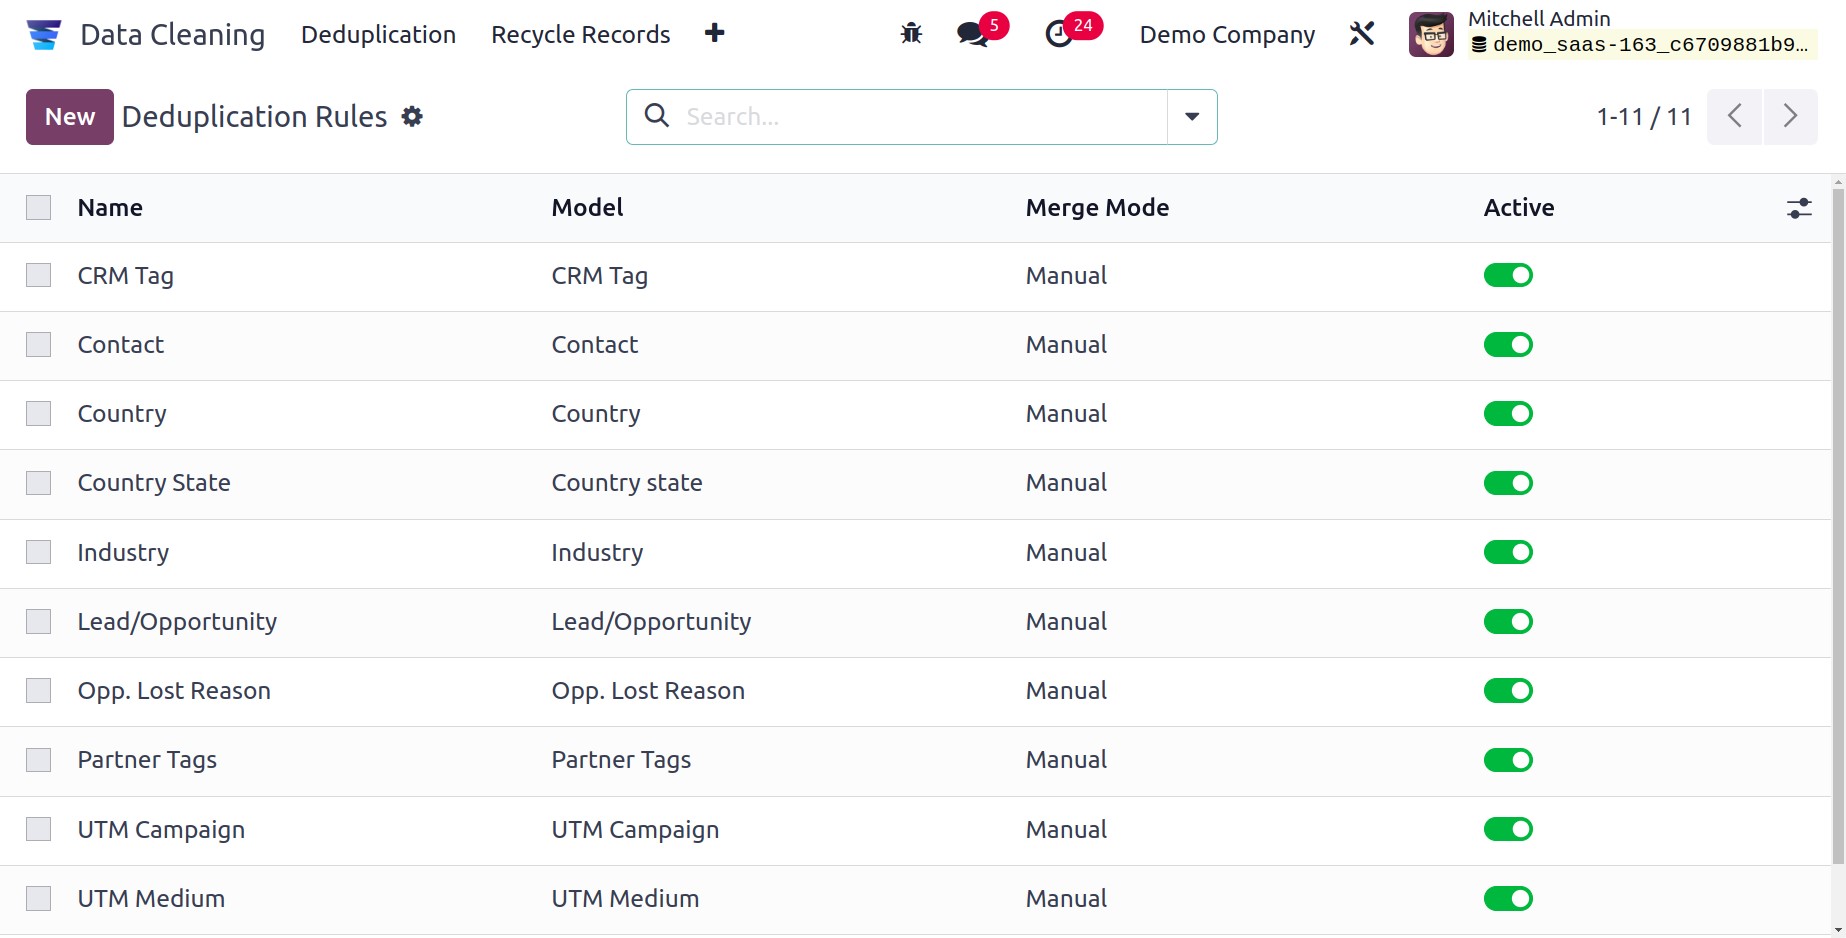
This window shows a preview of each duplicate rule and saves all the relevant data for
those rules. The Name, Model, and Active state will all be included in the preview.
Click on the rule that interests you to view it in more detail. For instance, you can
click on the details to see the details of the rule called "CRM Tag." The aforementioned
rule details will then be shown by the system as indicated below.
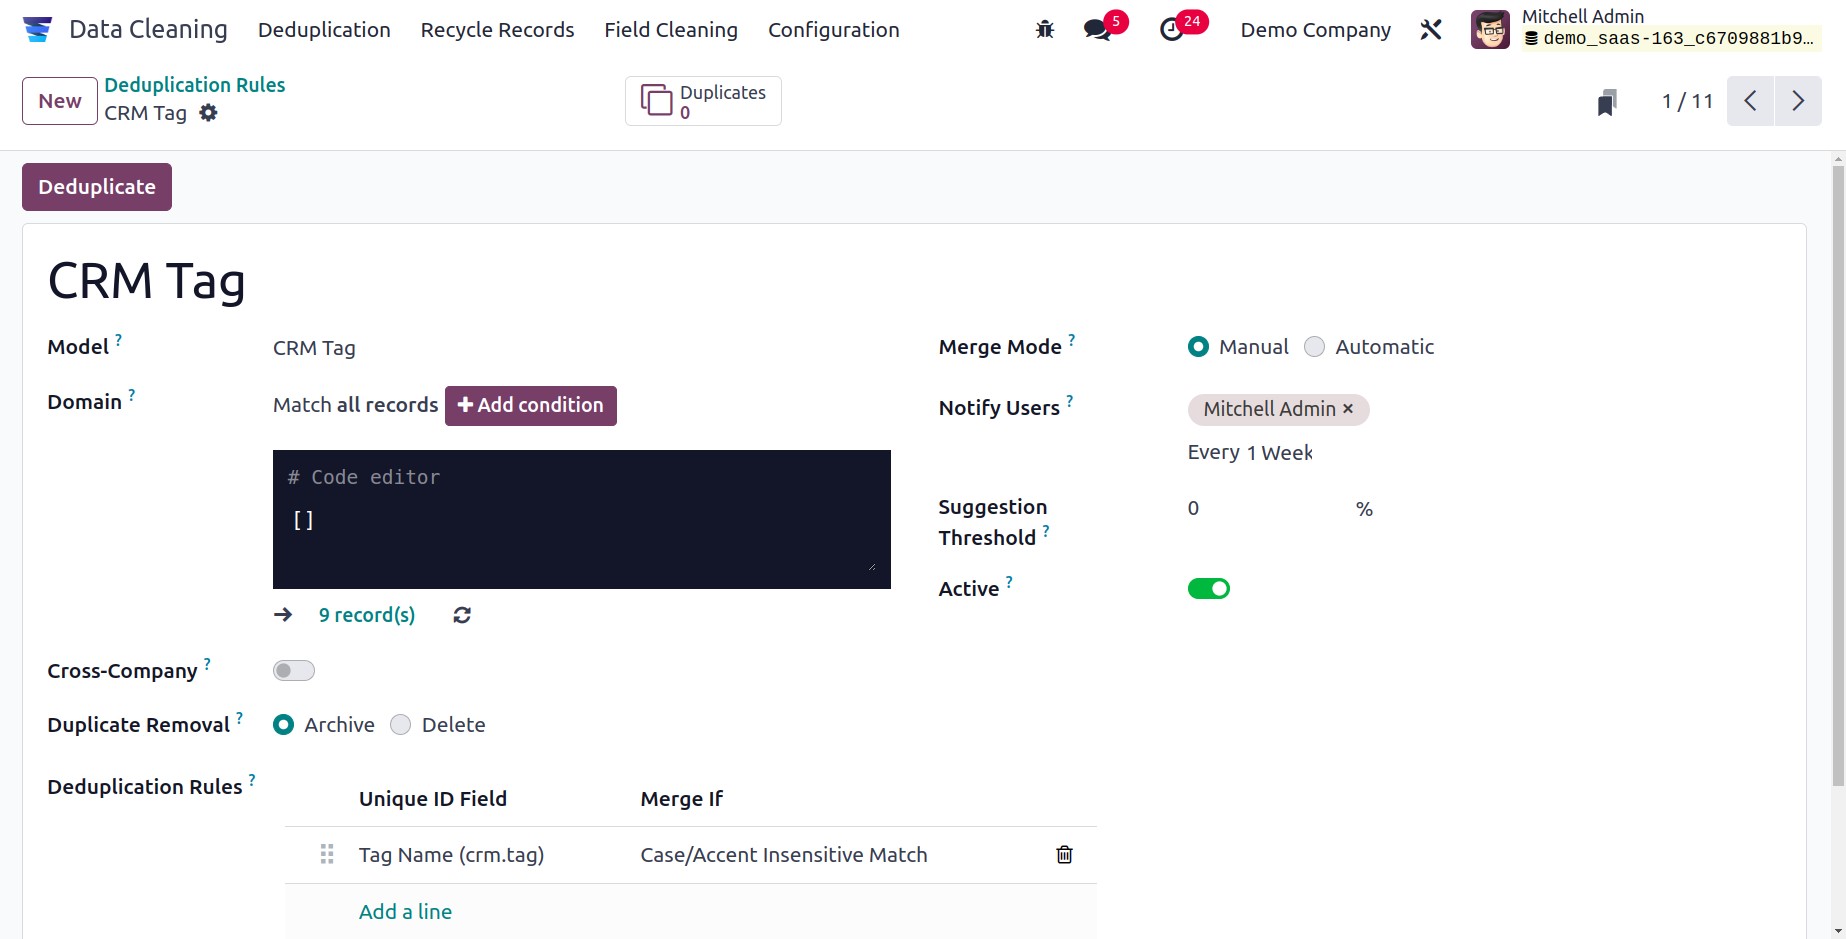
If you would like to change the details, you can use the EDIT button located here. You
may easily filter the data by applying different Filters and Group By choices in the
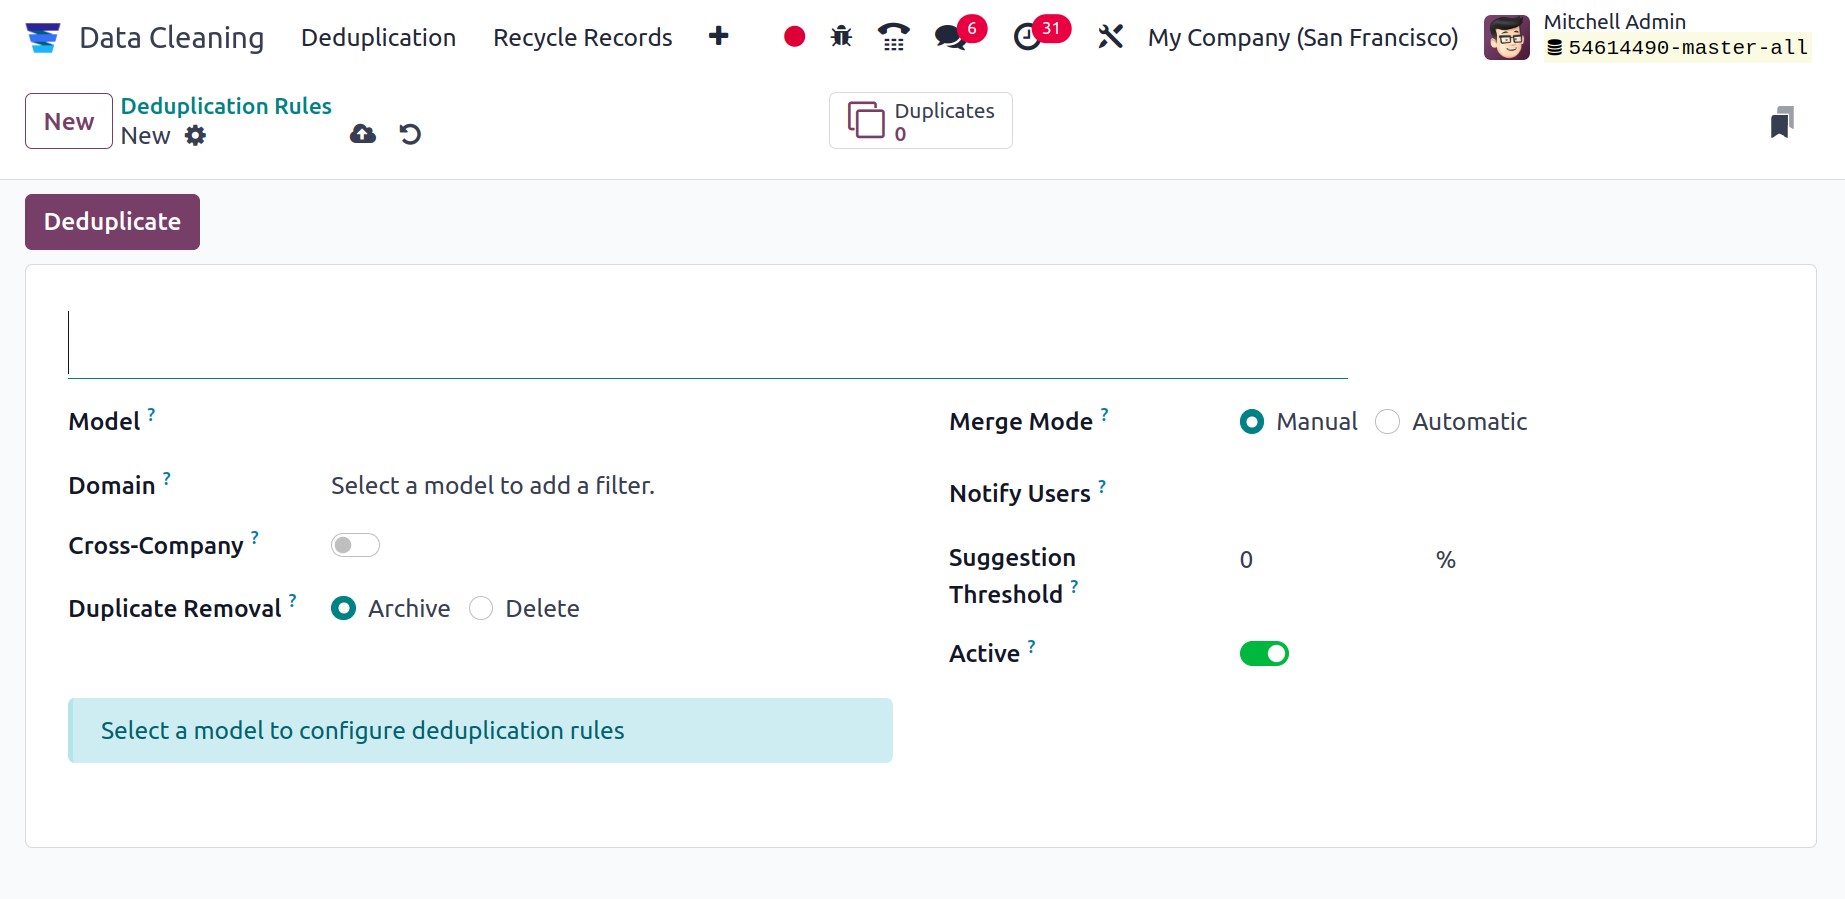
Duplication Rules window. To create new Duplication Rules, click the New button
in the upper left corner of the window. Now let's press the New button. The creation
window will appear on the screen as indicated below.
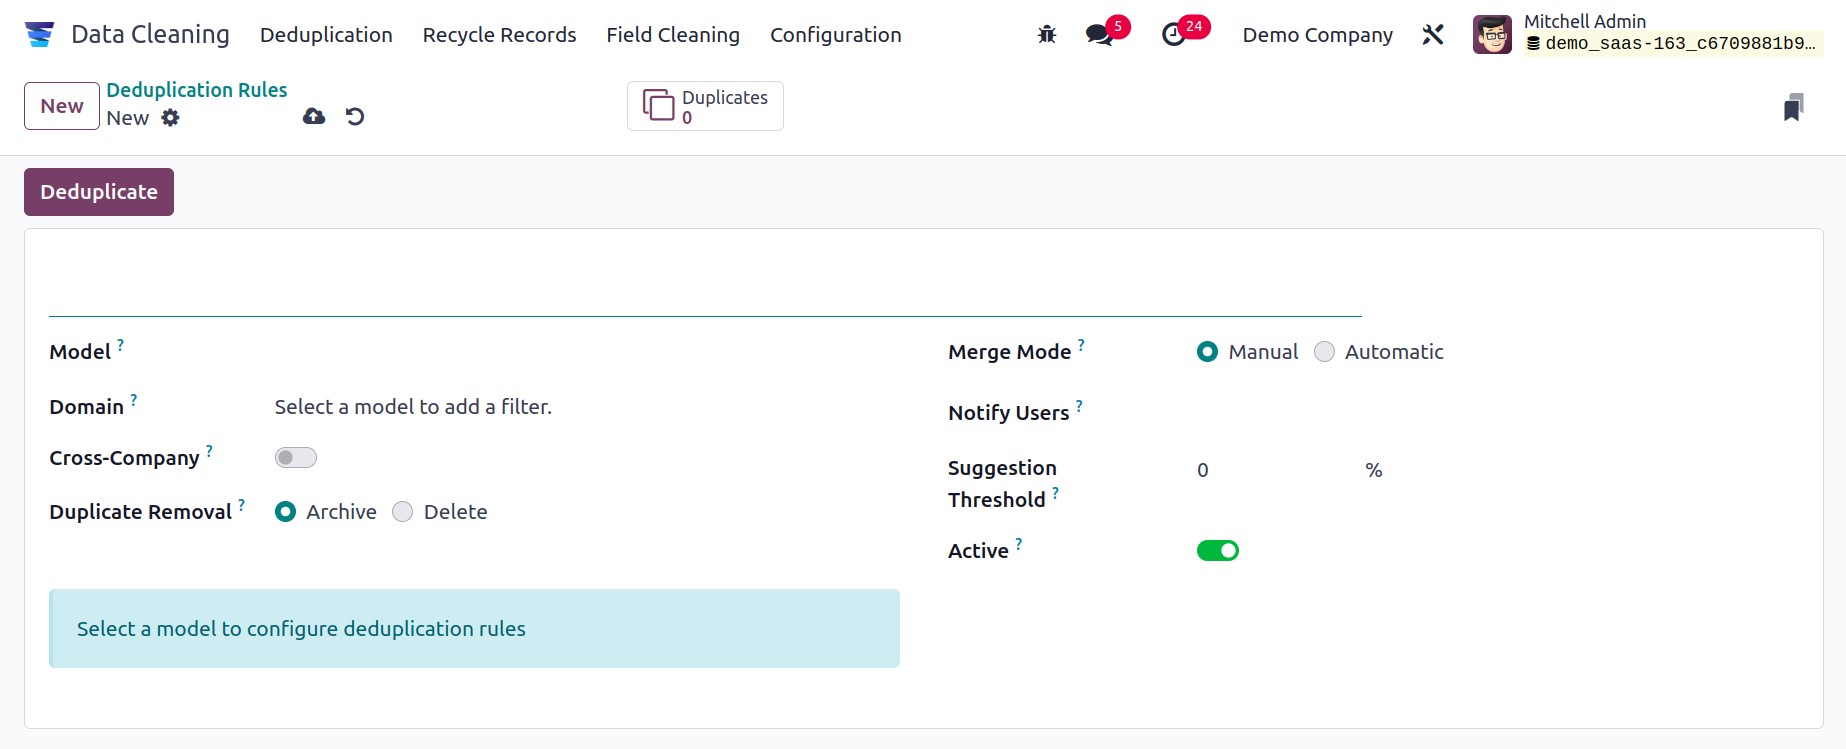
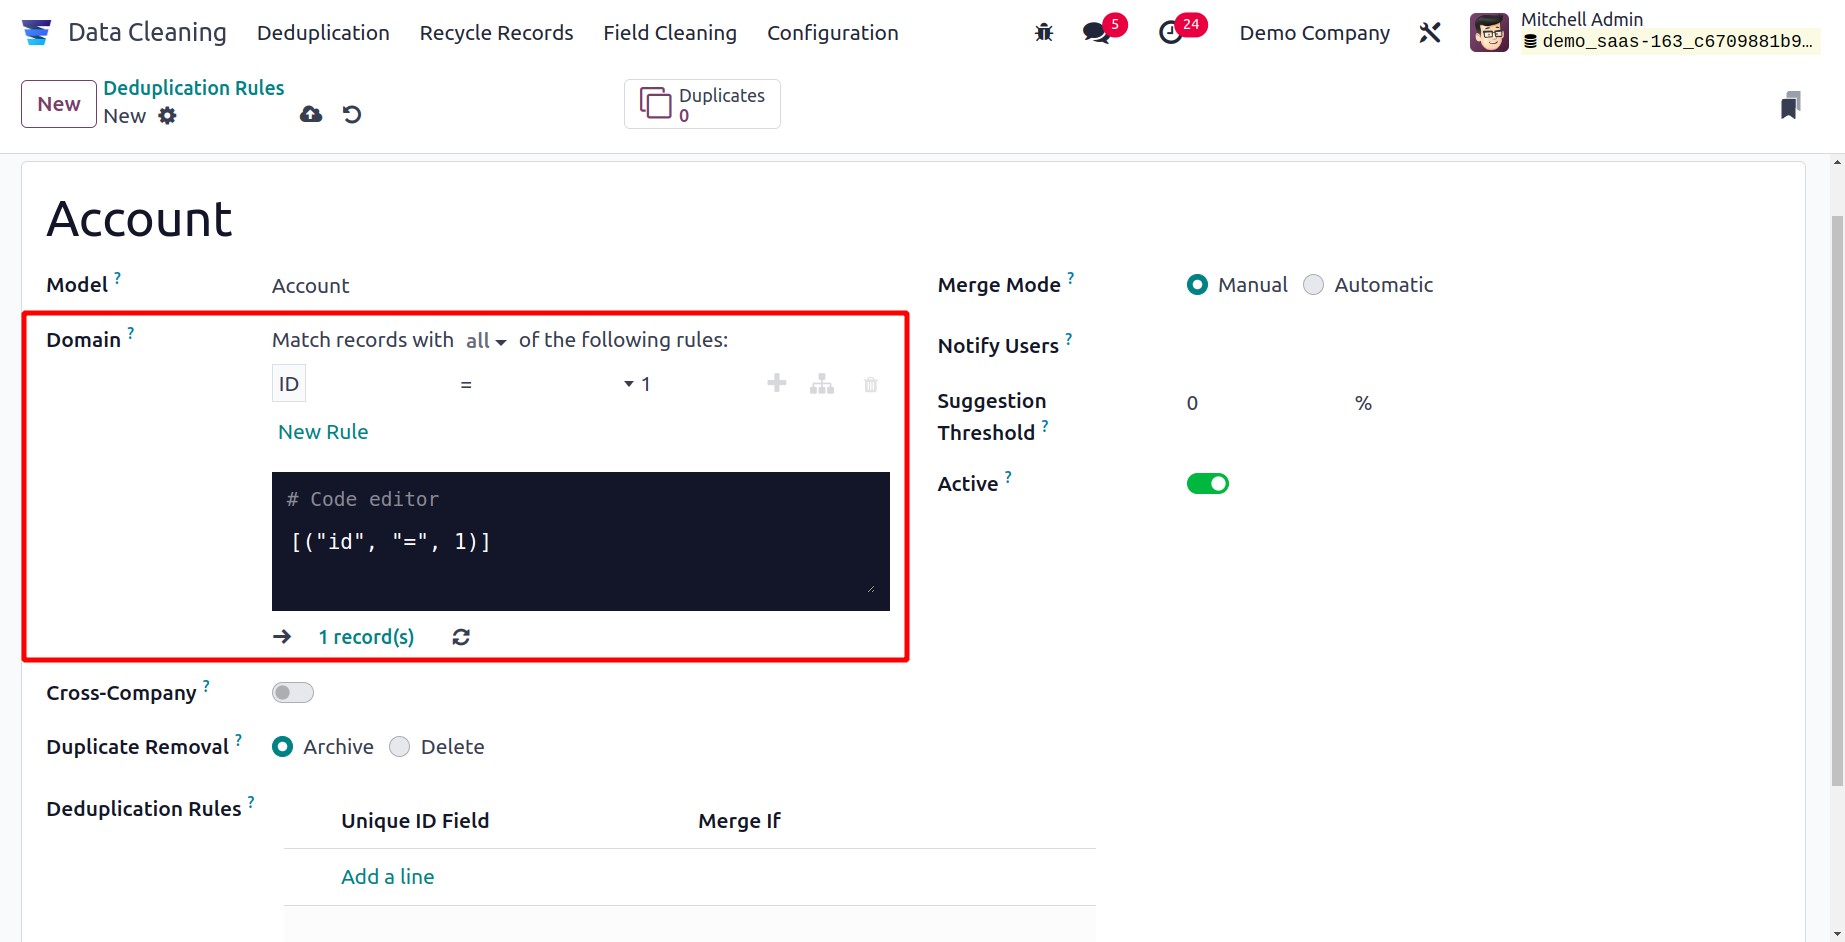
To begin with, you can enter the Name of the Duplication in the designated field. Then,
using the available drop-down menu, you can choose a Model. Once the Model has been
selected, a filter can be added. You can choose which records are suitable for the
deduplication procedure by using this filter.
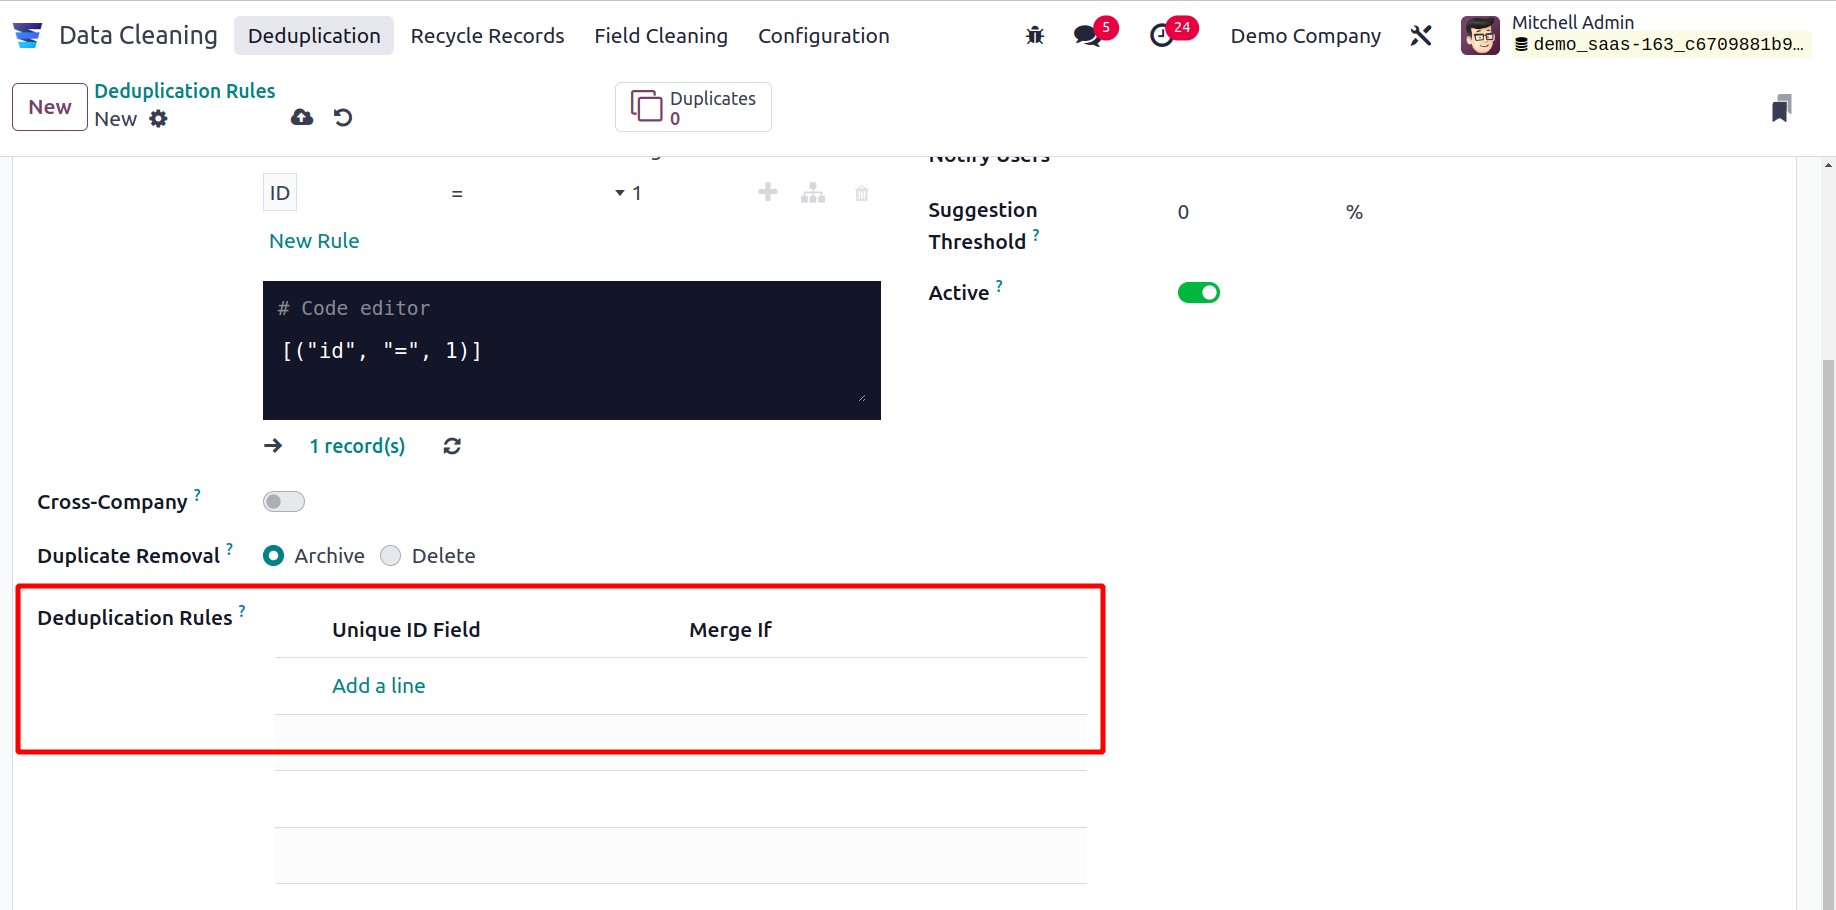
Furthermore, it is possible to activate the Cross-Company field to propose
duplication among many firms. Moreover, the Archive or Delete options for the Duplicate
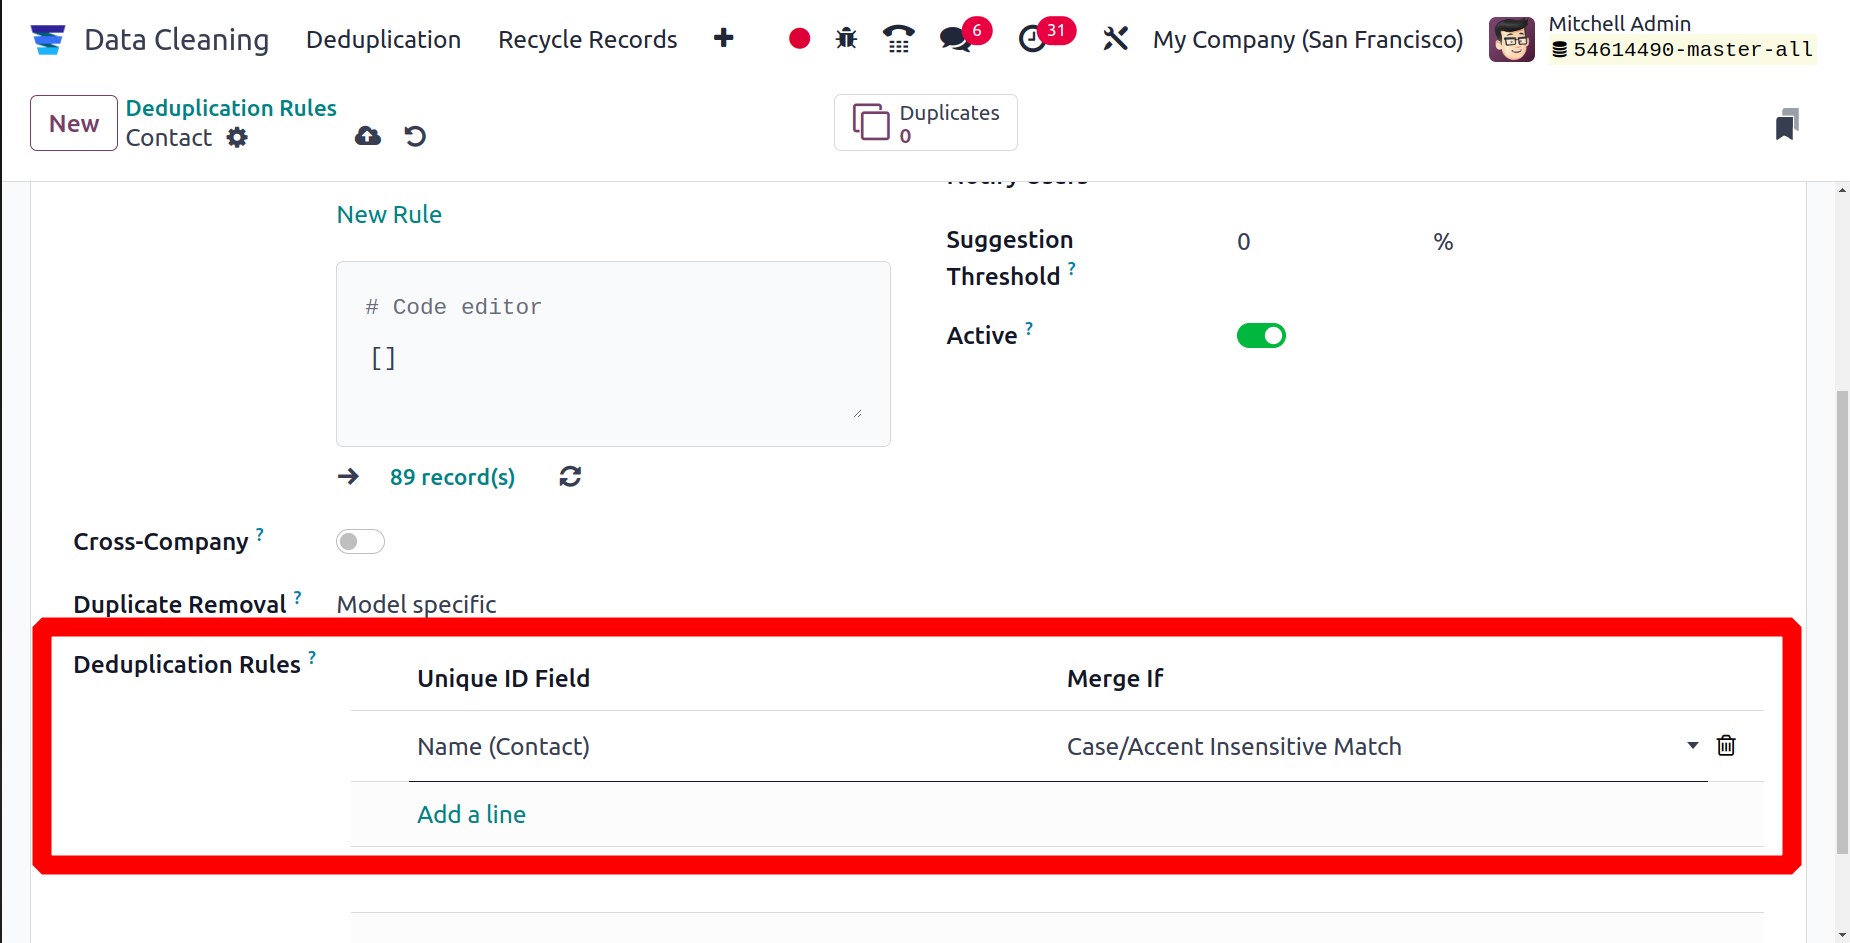
Removal approach are available. In a similar manner, the available Add a line option can
be used to define the Deduplication Rule. In the Merge If box, you can specify the
unique ID and the need for merging.
After that, you can choose the Merge Mode. Both manual and automatic document
merging are supported by the platform. You may view the list of users to notify if there
are any new records to merge by using the Notify Users field. You can also select and
assign the interval for which you want to be notified when there is deduplication by
using the Notify User box.
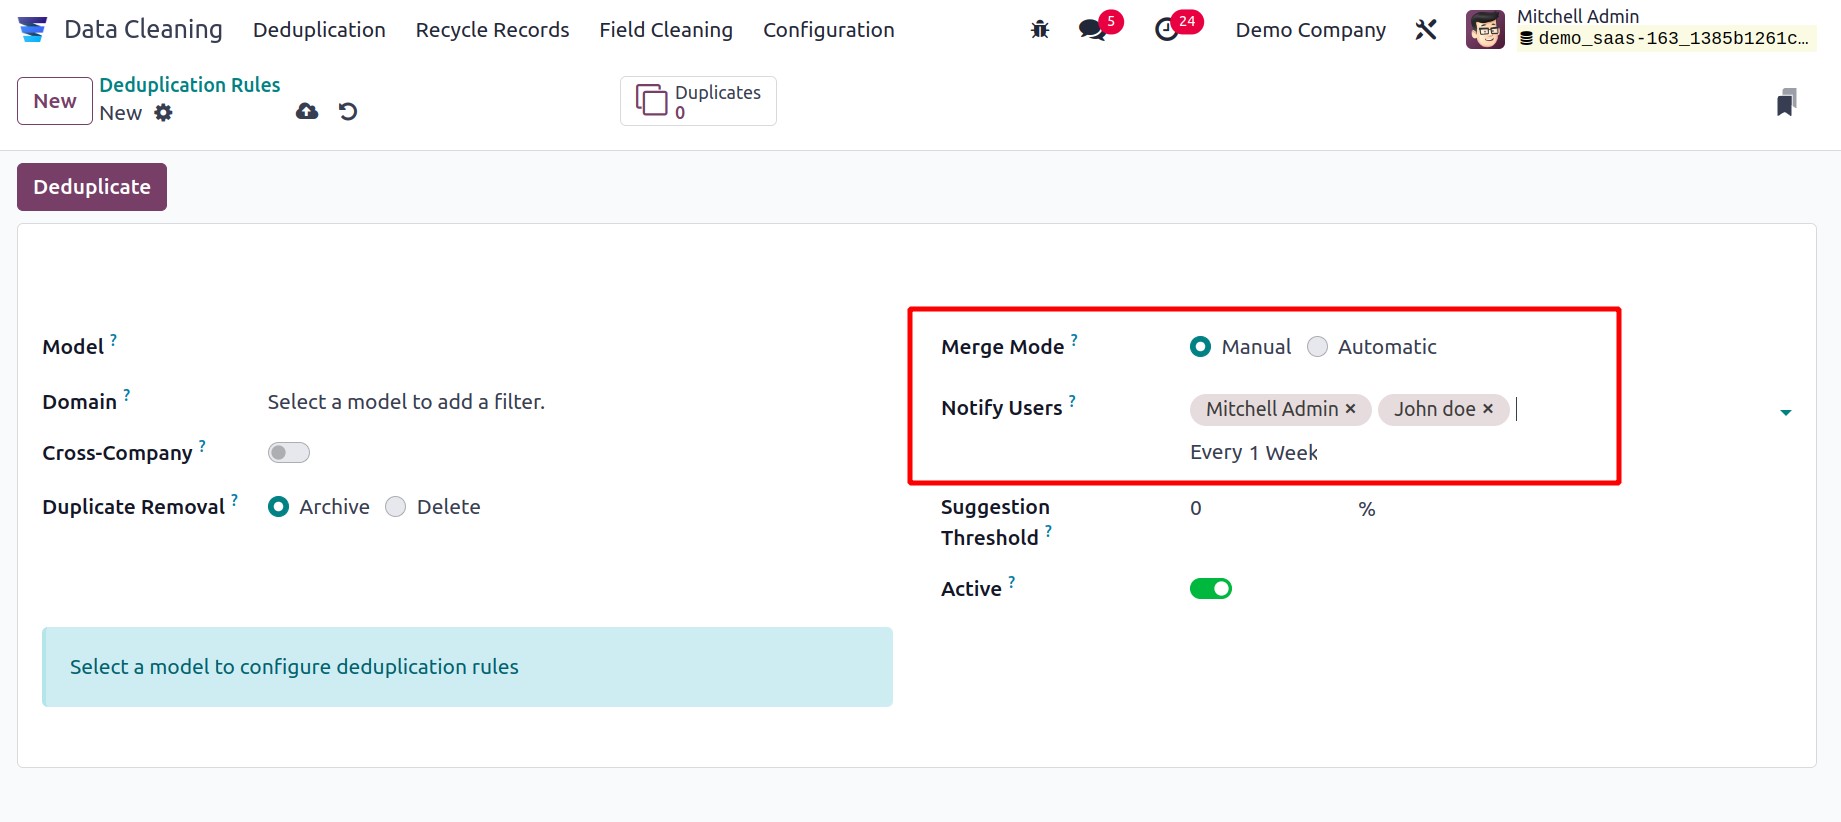
Lastly, to activate this deduplication rule, you may view the Active field. In addition
to all of these choices, you can see a smart button labeled "Duplicates" in the upper
left corner of the window, which will open the Duplicates window.
You can save the details by clicking the Save button after entering all the information
in the window.
Field Cleaning Rules
The Odoo17 Data Cleaning module offers additional options to restore or systematize your
data format in the individual data fields in addition to the ability to discover
duplicates. The Configuration tab's Field Cleaning option can be used for all of these
tasks. You can browse the module's Configuration tab in order to access the menu.
You can see the field cleaning menu by selecting the Configuration tab. To access
the module, click this menu. Below is a screenshot of the Field Cleaning Rules
window.

You can preview all of the rules that the system has already set up for cleaning the data
field in this window. Name, Model, and Active state are specified for every predefined
Field Cleaning Rule. You can pick the current data to update it and also create new data
here. You can set up customizable sorting features to effectively sort the data using
the Filters, Group By tab. Using the Search tool, you may quickly locate the information
you need. Moreover, helpful choices like save the current search, import records, add to
my dashboard, link menu in the spreadsheet, insert list in a spreadsheet, and add to
Google Spreadsheet can be found on the Favourites tab.

You can click the New button to configure a new Field Cleaning Rule. The creation
form is shown in the picture below.
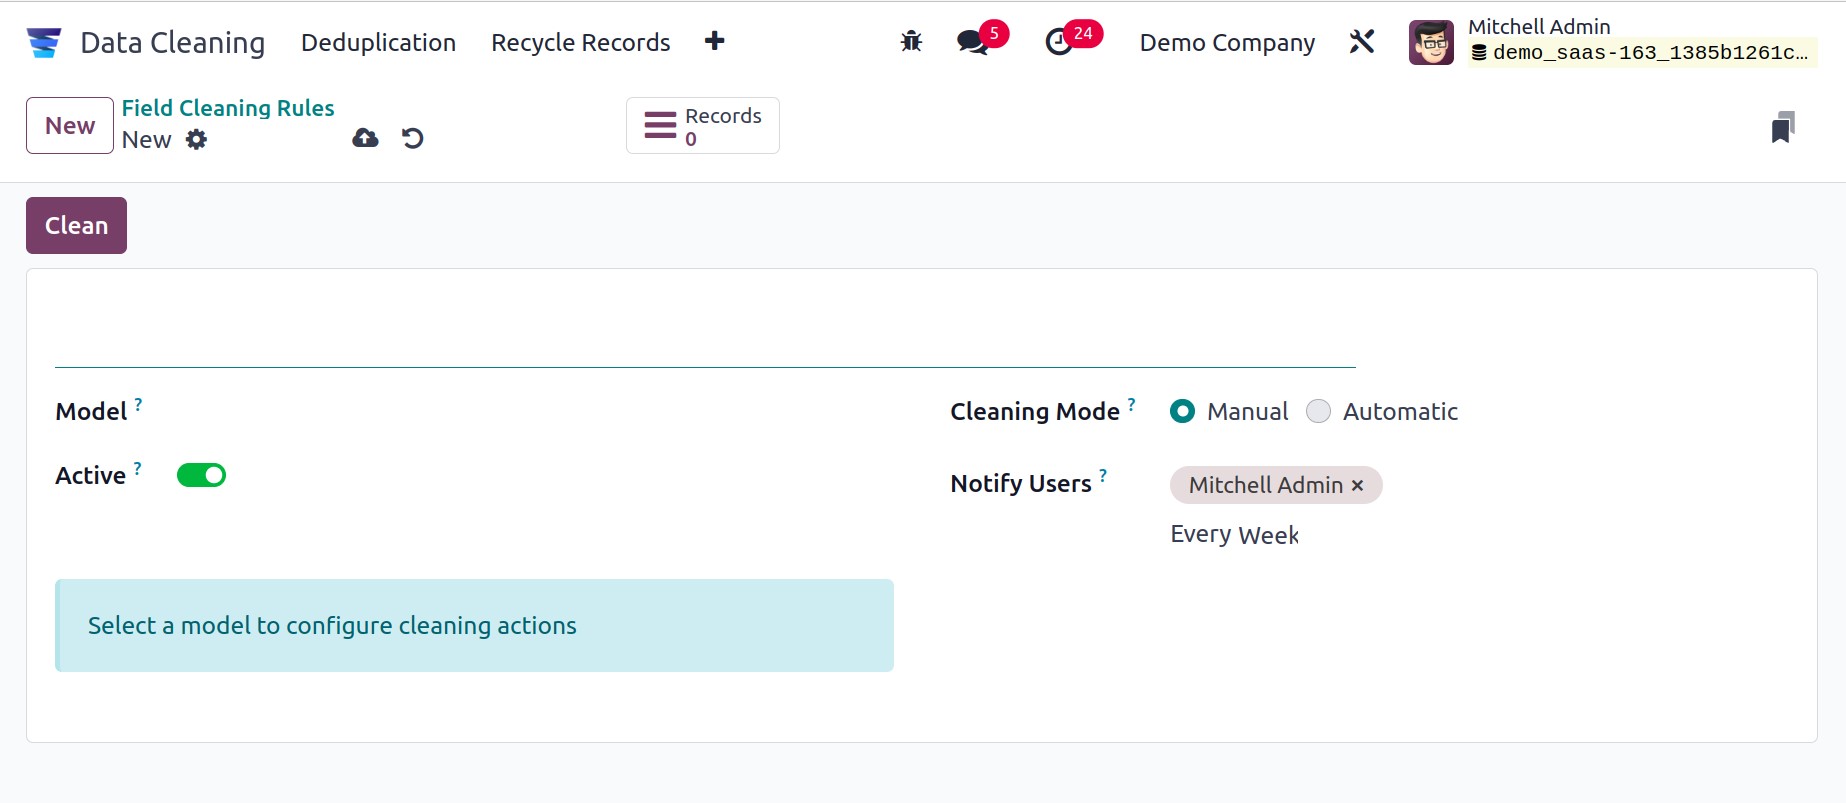
You can provide a Name for the rule in the same manner as we did with the deduplication
rule. In the Model field, you have the same option to select the data model. You
can specify the data field cleaning procedure as well. You just need to specify the rule
that should be used for the data field clean-up check if you choose the Automatic
option. You should give the users' list to them if the Manual Method is chosen as
the cleaning mode so they are aware of any new records that need to be cleaned.
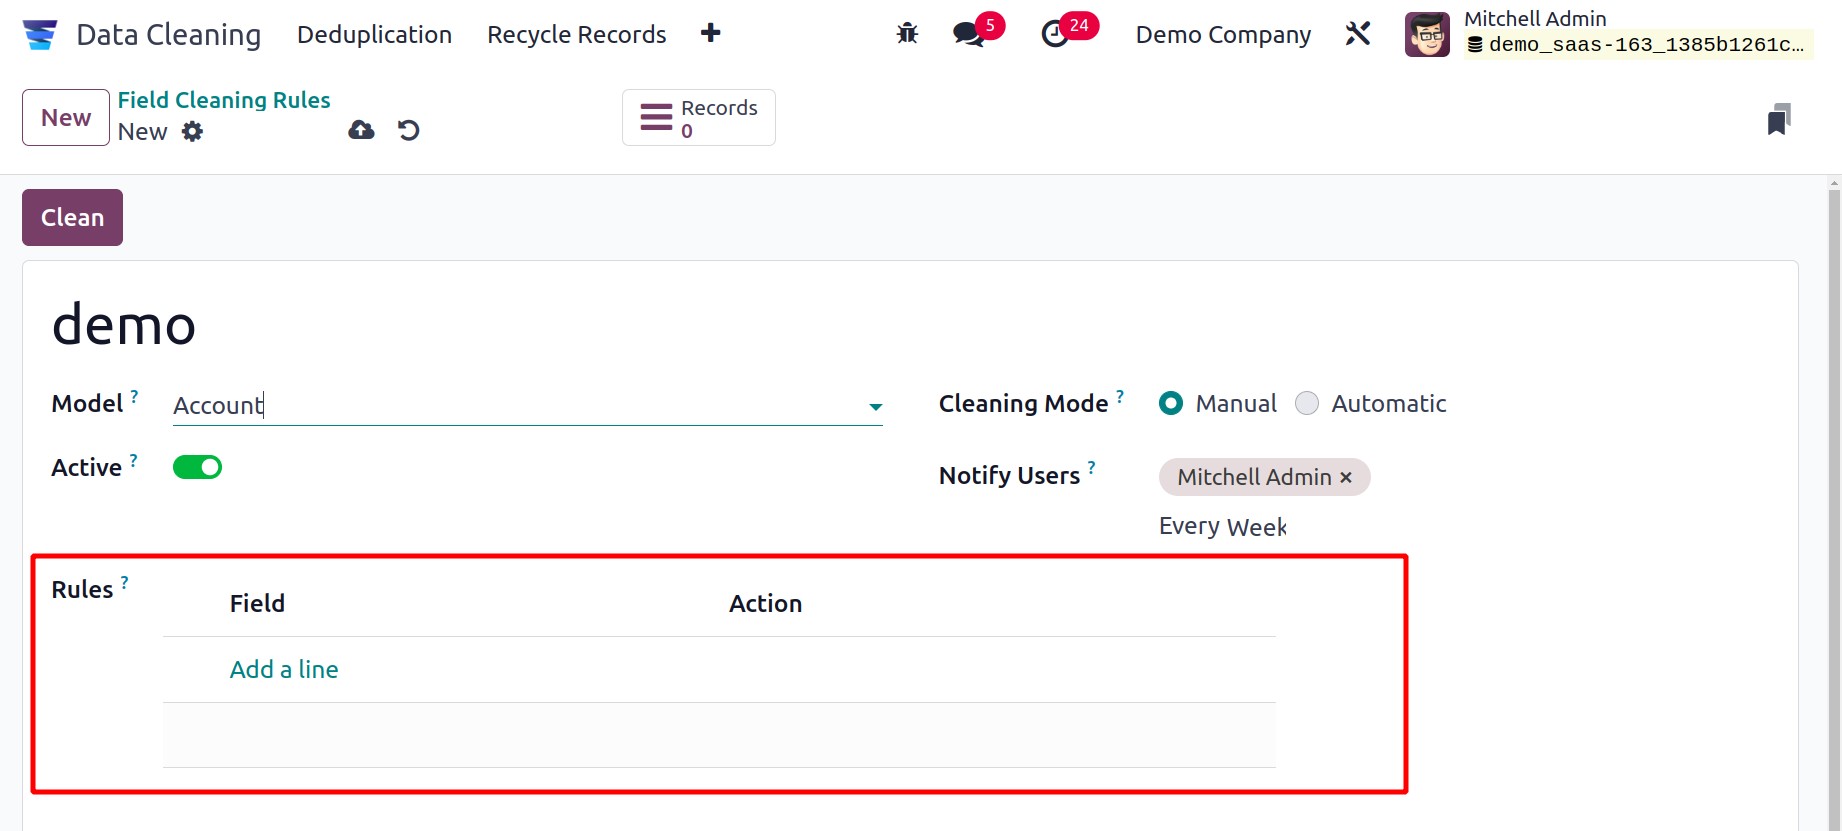
You can use the Add a line option to define Rules. The system will now show a pop-up
window where rules can be created.
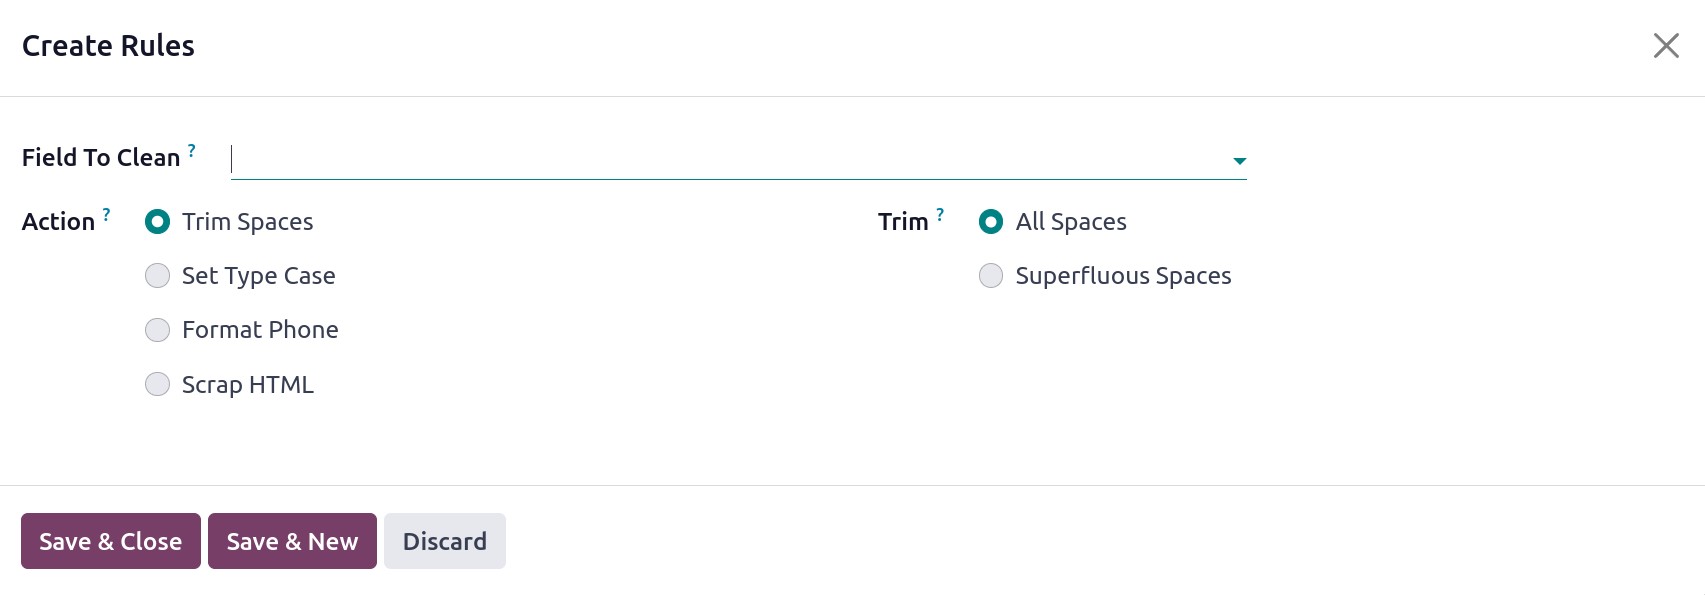
In the Field To Clean option, you can describe the data field here. After that, you have
an array of options. The various Actions consist of
- Trim Spaces
- Set Type Case
- Format Phone
- Scrap HTML
You can eliminate spaces by using the Trim Spaces option. Superfluous space or
All Spaces are the options available to you.
To change the upper and lower case, use the Set Type Cases option. There are three ways
that you can build up cases here. which are All Lowercase, All Uppercase, and First
Letter to Uppercase.
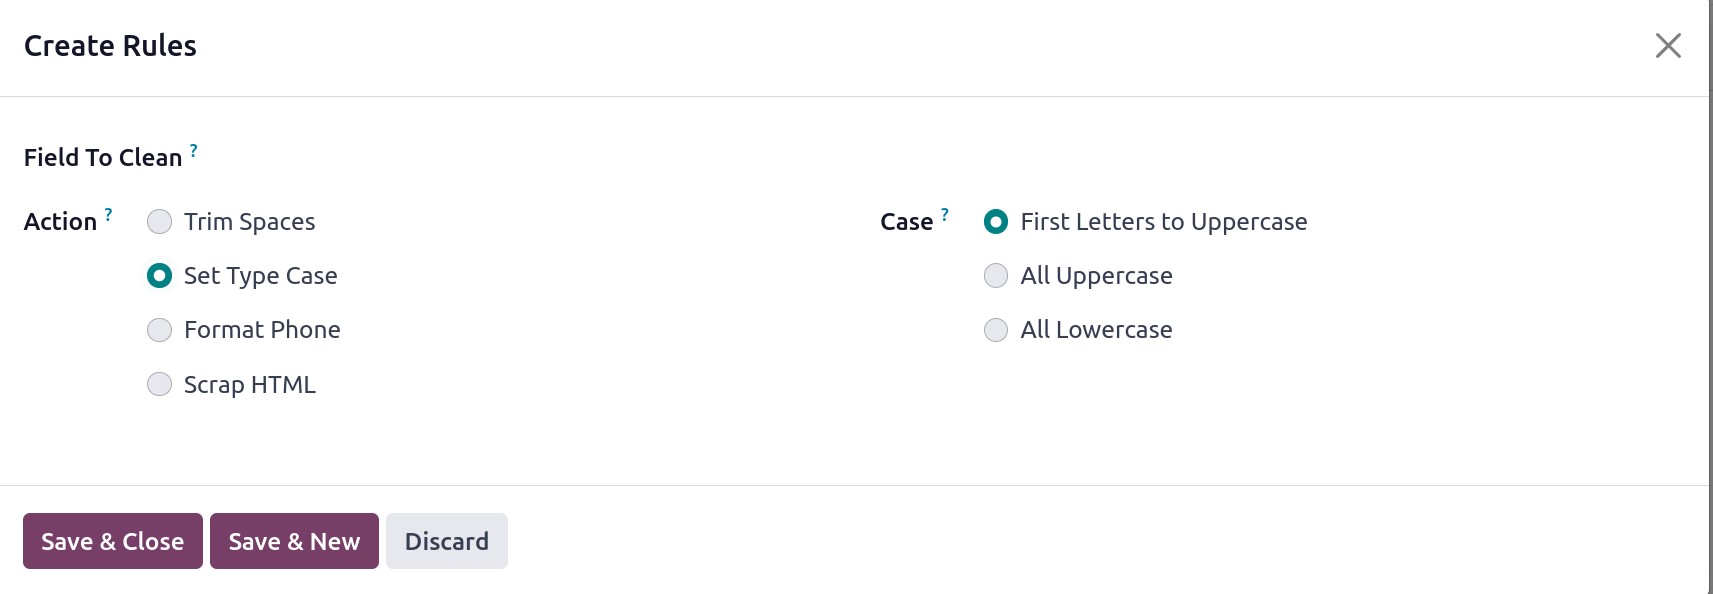
You can also configure the system to automatically format phone numbers. After adjusting
these fields, you may save the information by clicking the Save & Close button. The rule
will now appear as follows under the Rules tab.
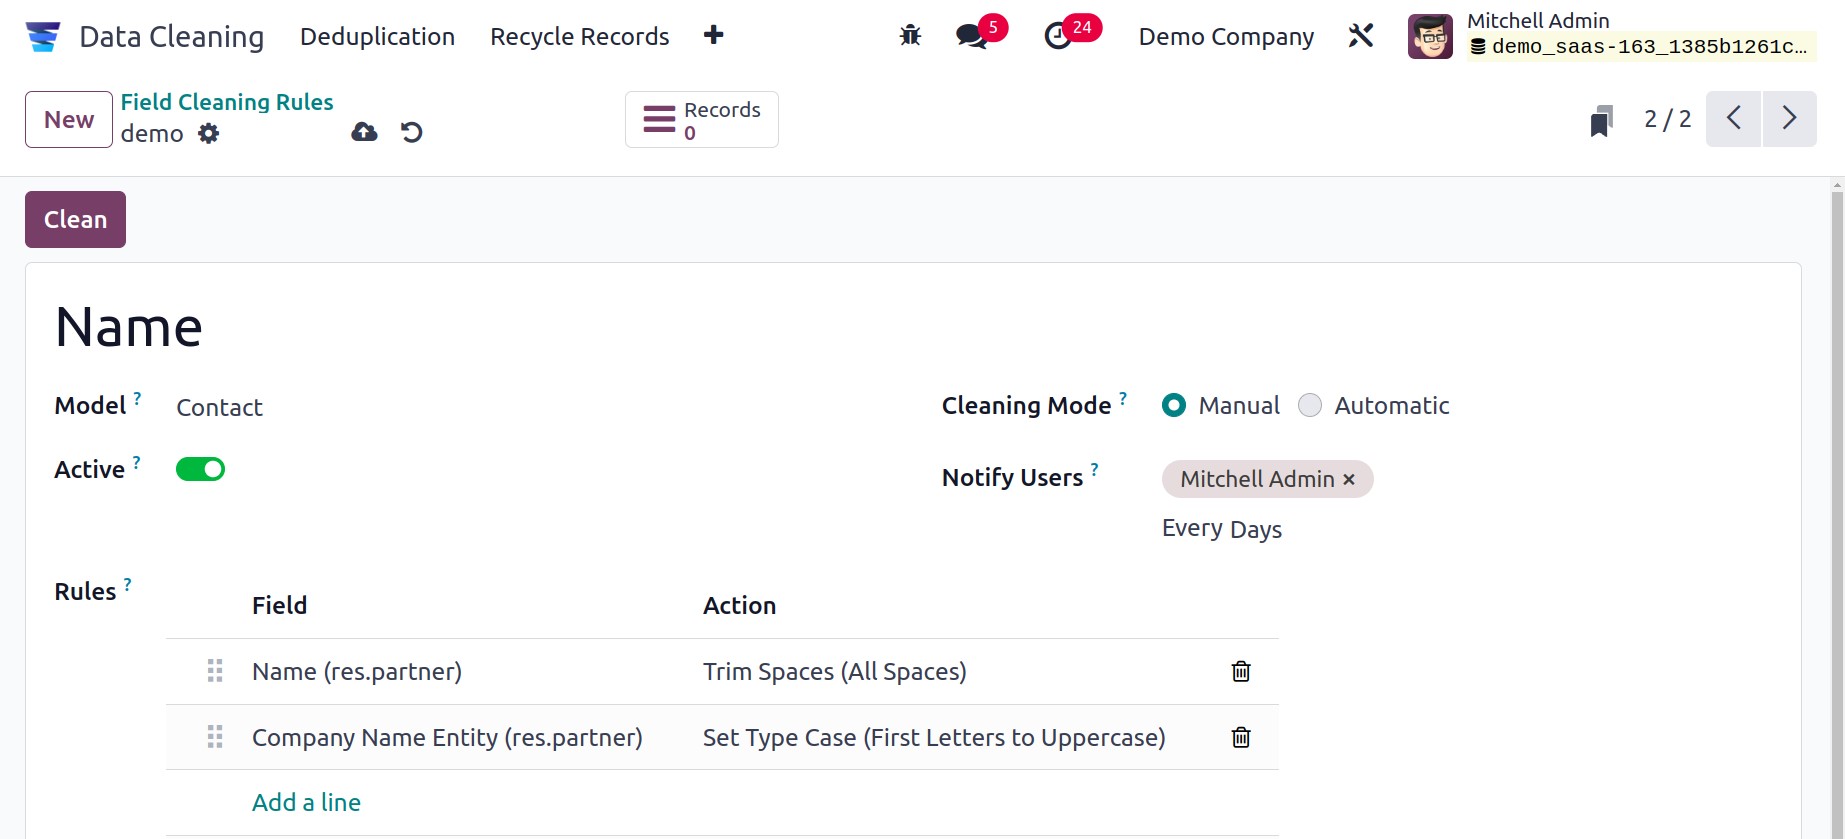
It's time to preserve the recently established Field Cleaning Rule. The Field Cleaning
Records can then be accessed by selecting the Clean button. The Field Cleaning Records
window will open as soon as you click the Clean button, as seen in the
illustration below.
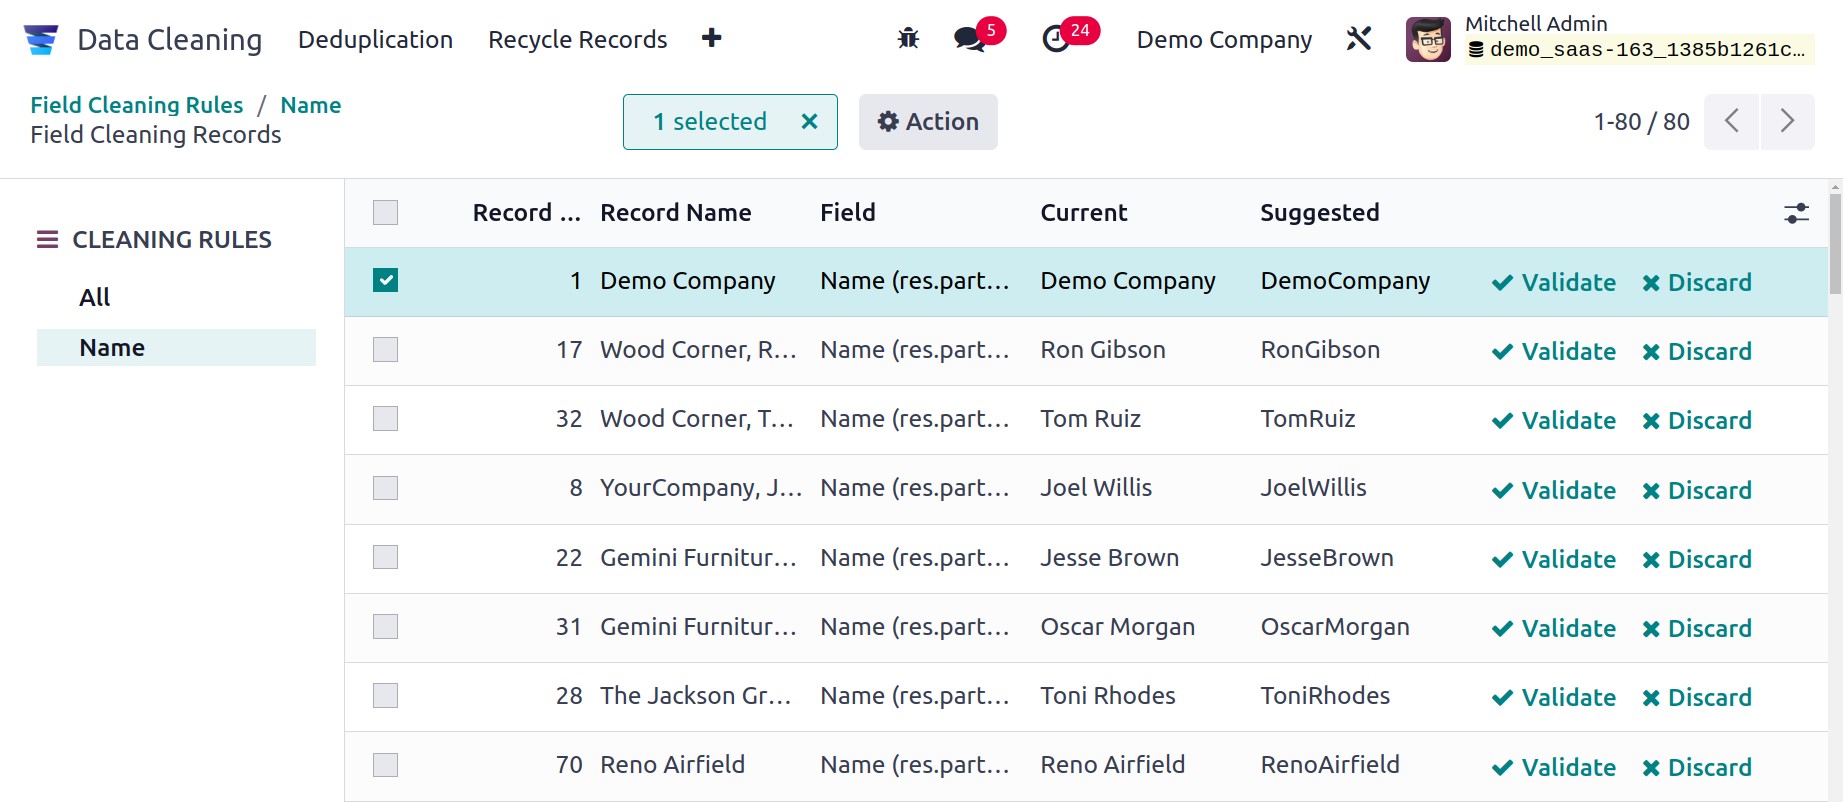
By clicking on the necessary record in this window, you can choose the required record.
The Validate, Discard, and Action buttons will now appear in the window as
they do in the screenshot below. Click the Validate button to verify the field
cleaning procedure.
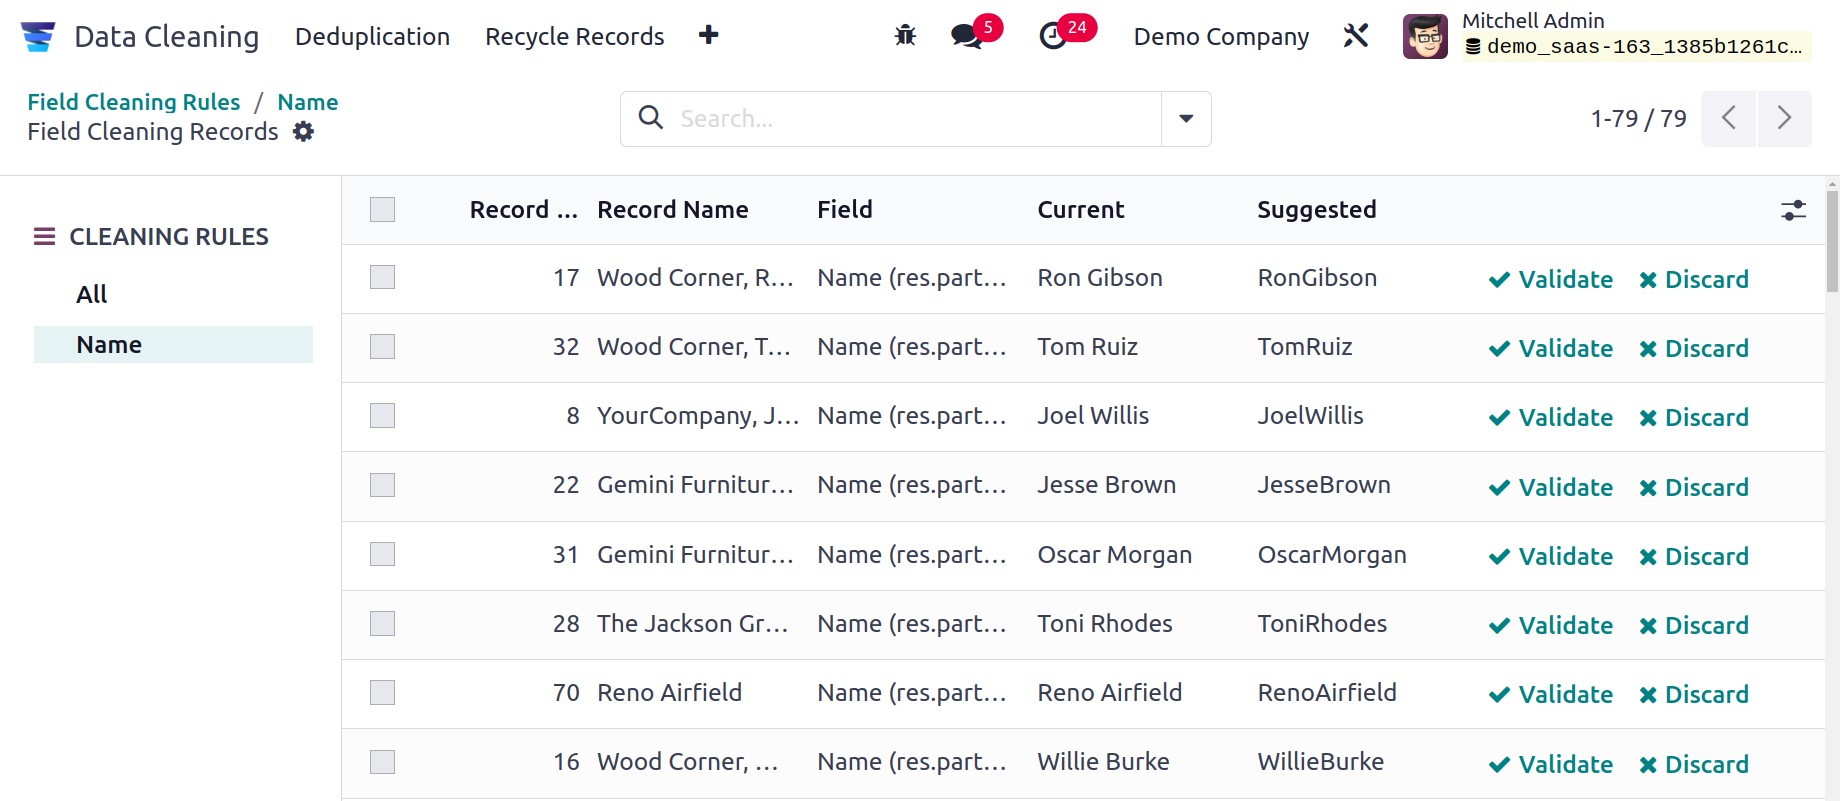
Selecting the Demo Company entry from the list and clicking the Validate
button will allow us to view it. The record has now been deleted from the list, as you
can see.
Deduplication
The Configuration menu provides views and configurations for the Deduplication
Rule. Name, model merge mode, and active state are displayed in the list. To add
a new deduplication rule, click the New button.
Choose the model and enter the name of the deduplication rule; the model aids in the
addition of filters. Duplicates between several firms will be recommended when the
Cross-Company option is enabled. Archive or Delete are the options available for
Duplicate Removal. Both Manual and Automatic Merge Modes are available. To
whom the notification is intended, add people in the Notify Users section. The
Suggestion Threshold will prevent duplicates with similarity below it from being
suggested if it is added.
It is possible to add Deduplication rules.
Then the Deduplication button allows you to deduplicate the documents.
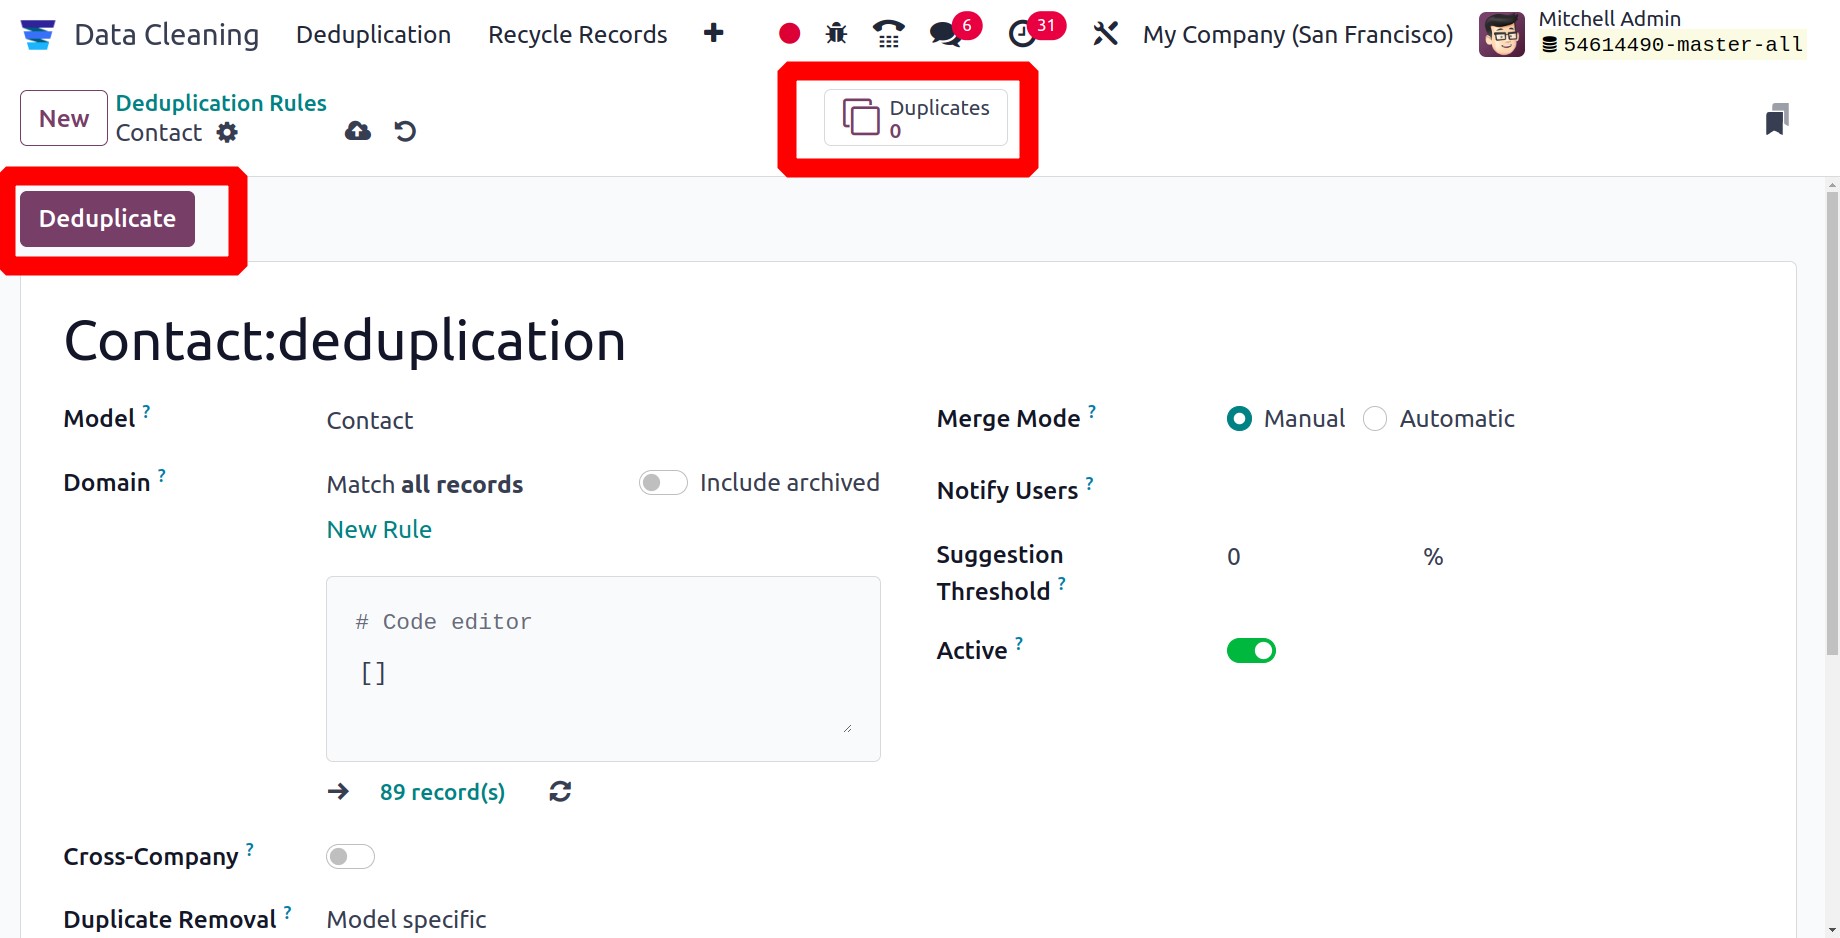
This is how the deduplication rules are configured; next, let's check the Recycle records
rule.
Recycle Records Rule
There is also a Data Recycle Rules section under the Configuration menu.
The data recycle rule identifies the records to be recycled based on the rule set up and
such records to recycle are either deleted or archived. To add a new rule, click the
New button.
To configure recycling activities, add the rule name and select the Model to be
recycled. The model needs to be chosen. There are two options for recycling: manual or
automatic, with Archive or Delete as the possible actions. Users have the option to be
added.
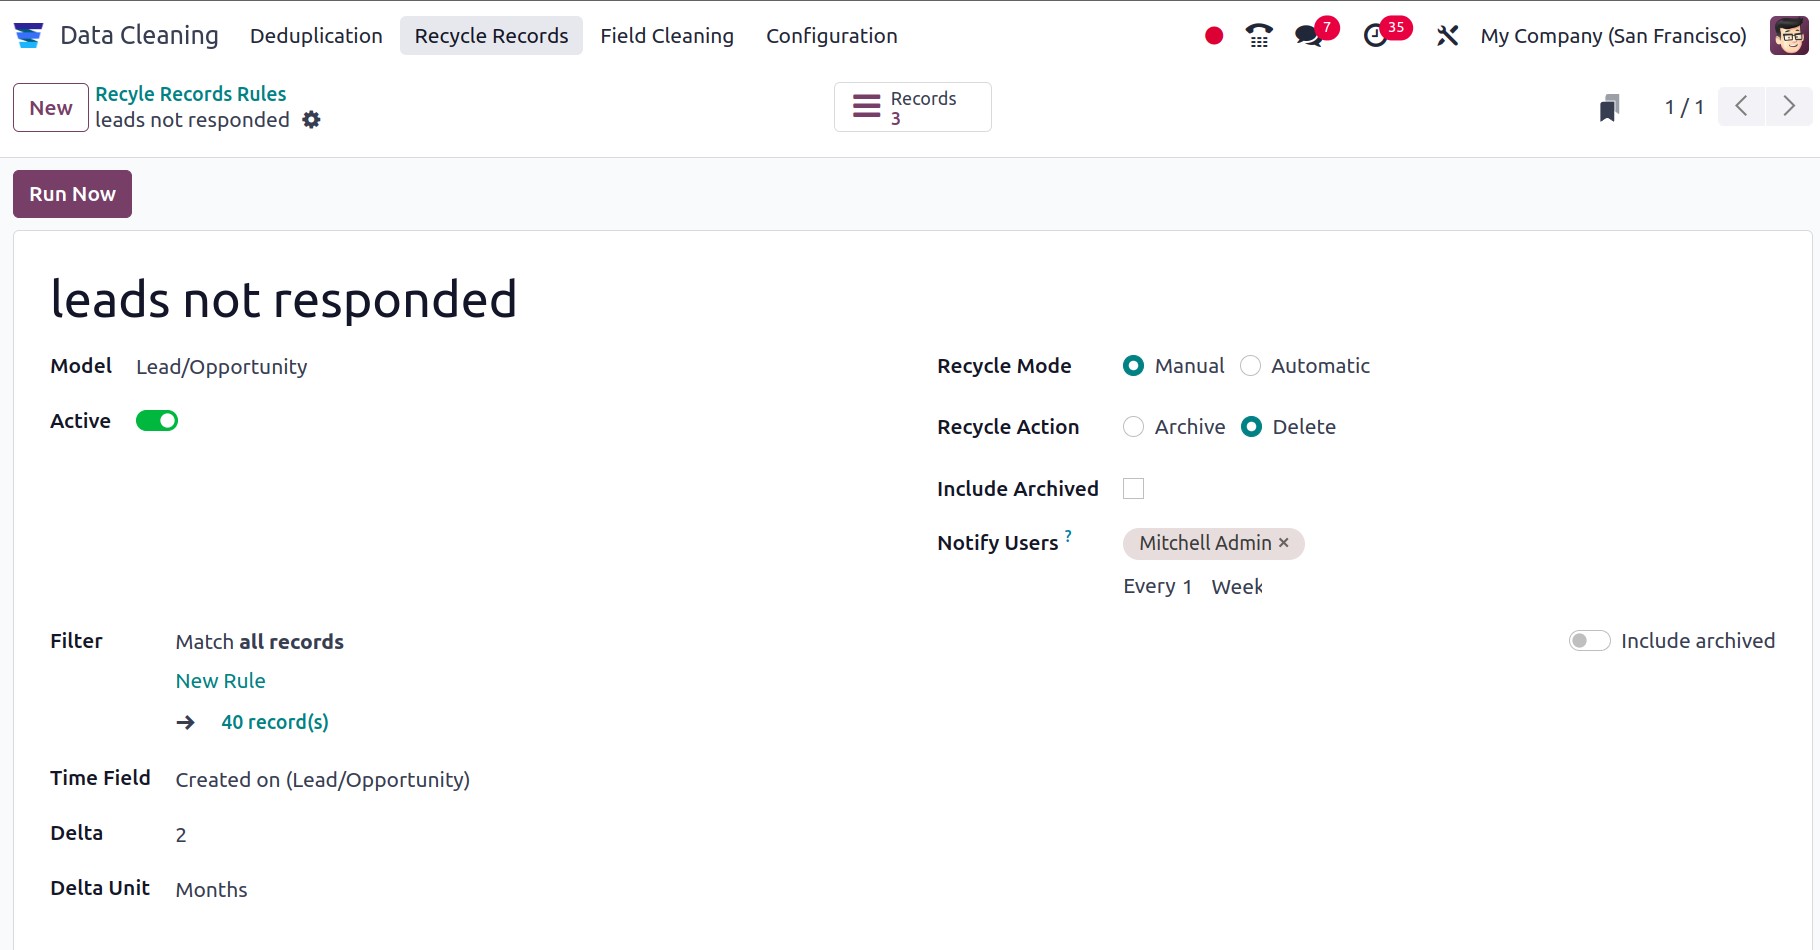
Then click on the Run Now button to recycle the records.
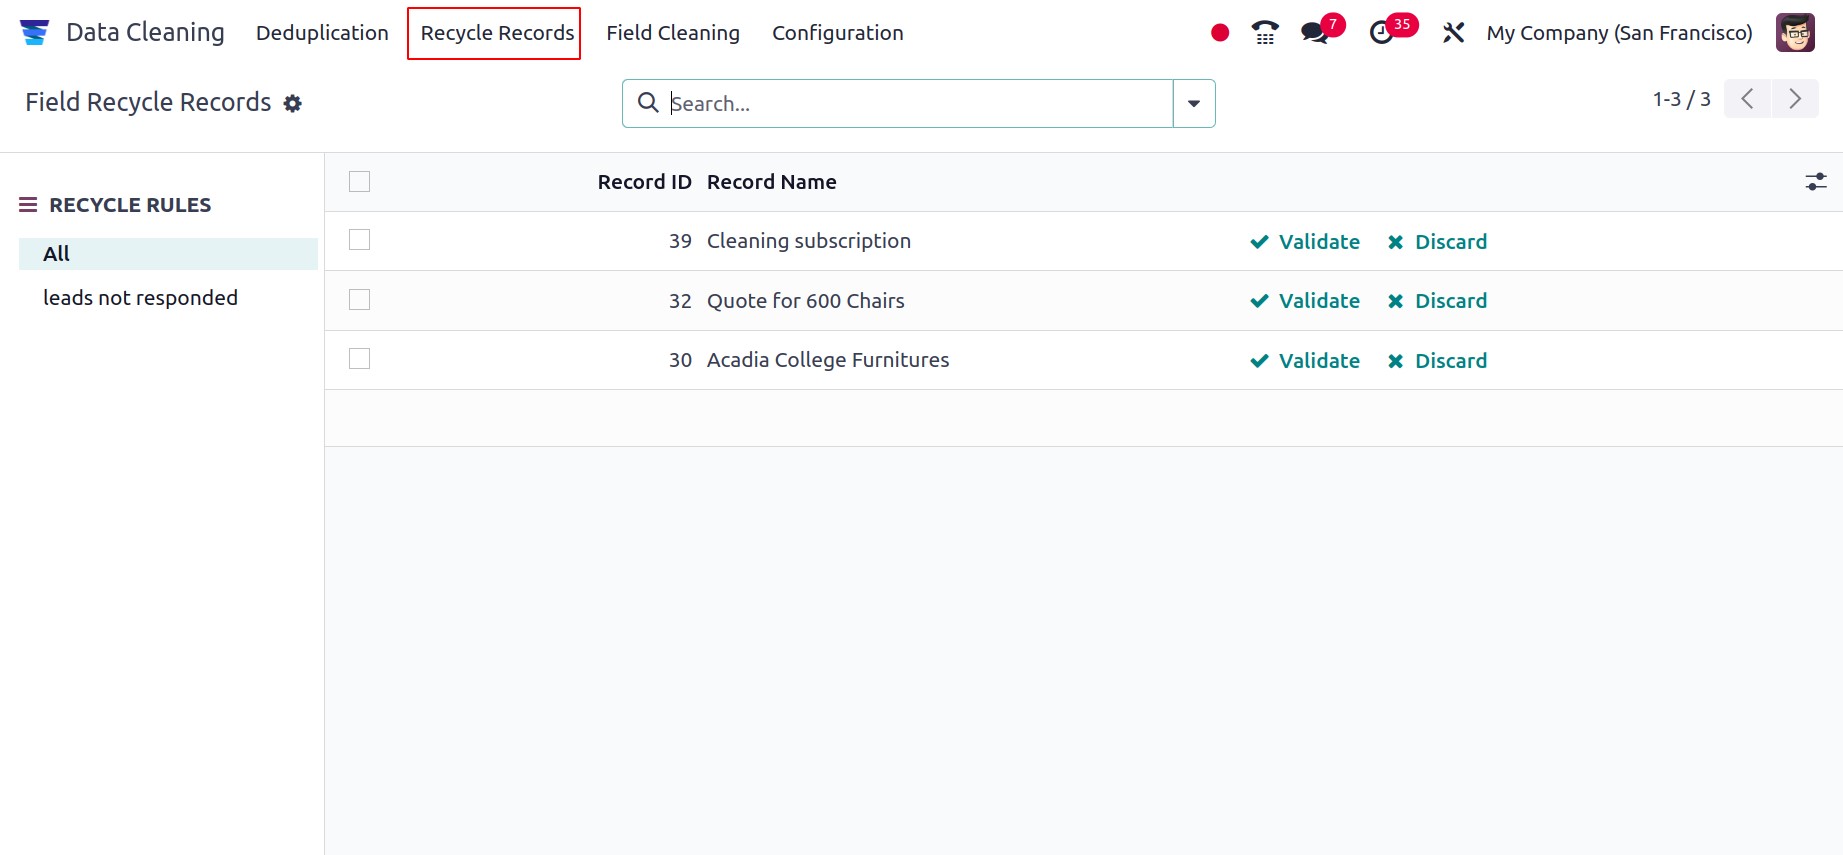
Such generated recycled records are available under the menu ‘Recycle records’
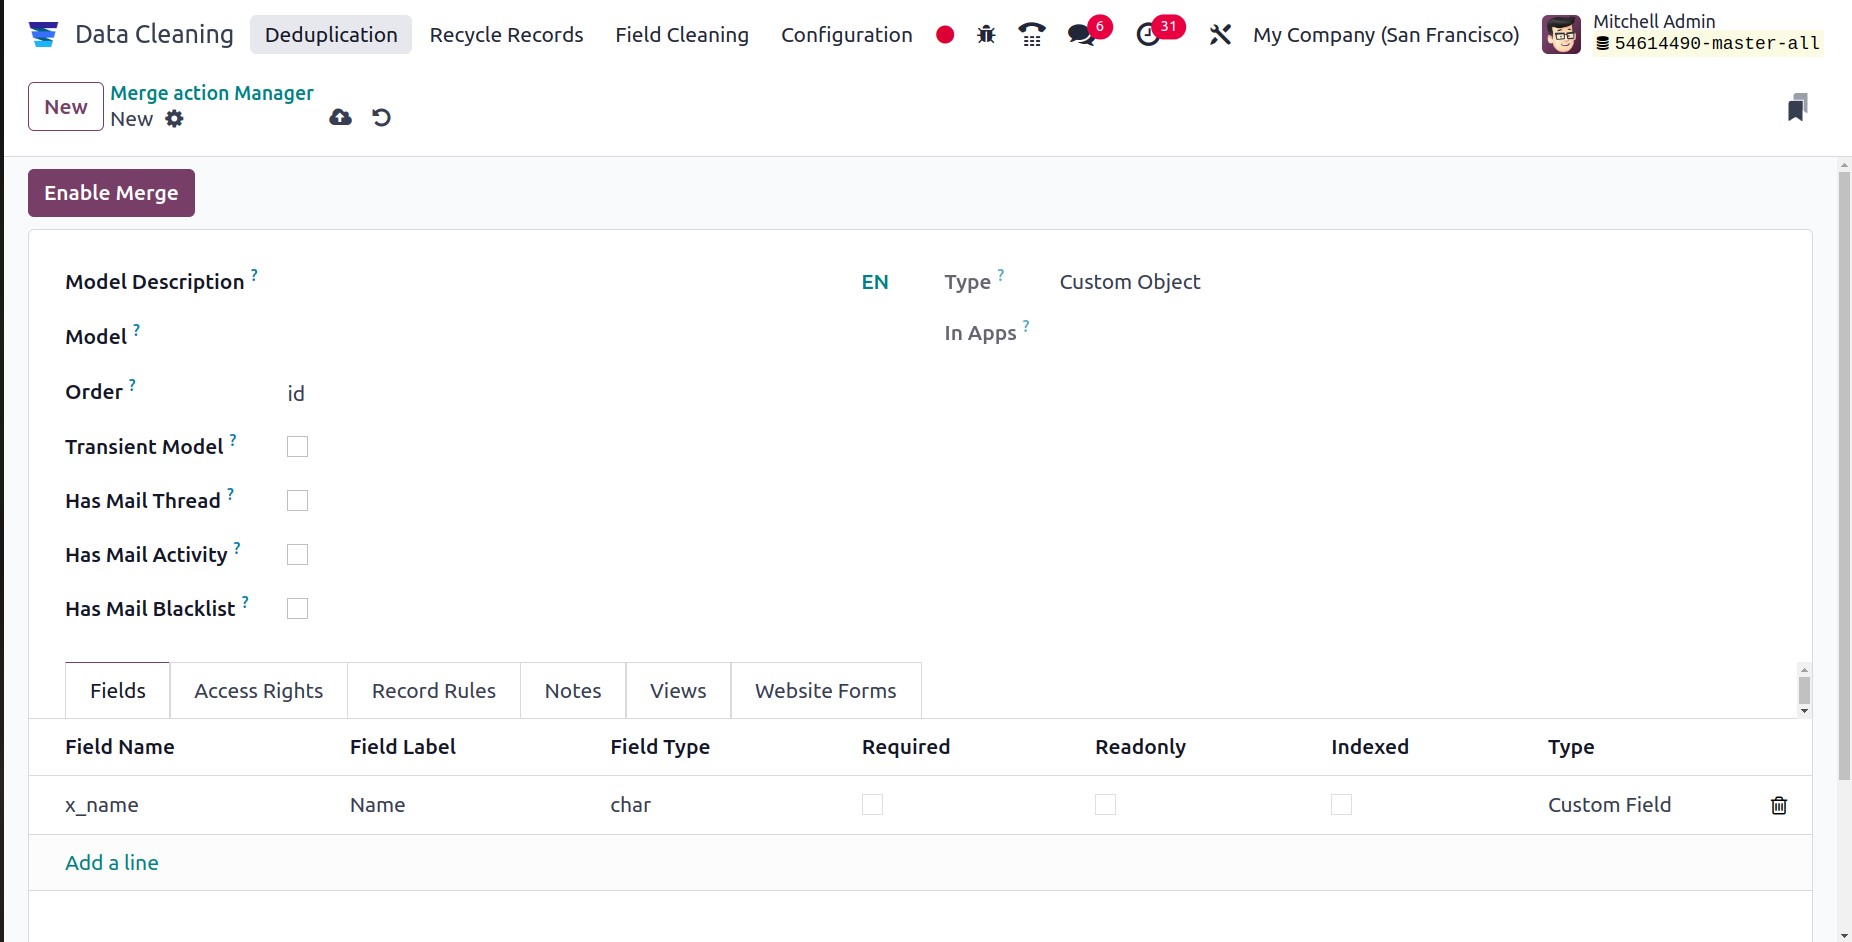
Merge Action Manager
To add rules for combining actions, go to Merge Action Manager next. Include the model
and its description. Rules can be added using the Field tab, and access privileges can
be specified using the Access Privilege tab. It is possible to merge the records after
configuring the Enable Merge button.
It is evident that the Odoo17 Data Cleaning module is regarded as a small module with a
limited feature set. However, the module provides a wealth of features and adjustments
to guarantee the accuracy of your data. You'll learn how to keep your data consistent
and organized with the ability to merge duplicates and clean data fields.