CRM Leads/Opportunities Pipeline
The CRM module's main dashboard is the window that appears when you access it. The pipeline activities can be thought of as being staged. In Odoo 17, leads and opportunities are organized in accordance with how far along in the sales pipeline they are. Odoo's highly integrated design makes it possible to gather leads from a variety of sources, including the corporate website, social media accounts, live chat, email, SMS, and many other channels. With the use of Odoo17 CRM, leads from all of these channels may be efficiently managed. Depending on the customer's reactions, these leads can later be transformed into opportunities and, finally into sales quotations. A business's ability to increase sales opportunities is significantly impacted by the CRM module.
There are three primary menus, including Sales, Leads, Reporting and Configuration as seen in the screenshot, available in the CRM module. You can find a variety of alternatives to carry out various customer relationship management-related tasks under each of these menus in Odoo 17.
The screenshot depicts the CRM module's primary dashboard for Odoo 17. This platform can be found in the module's Sales menu under the My Pipeline option. The My Pipeline pane will display a list of all leads that have been generated through different routes.
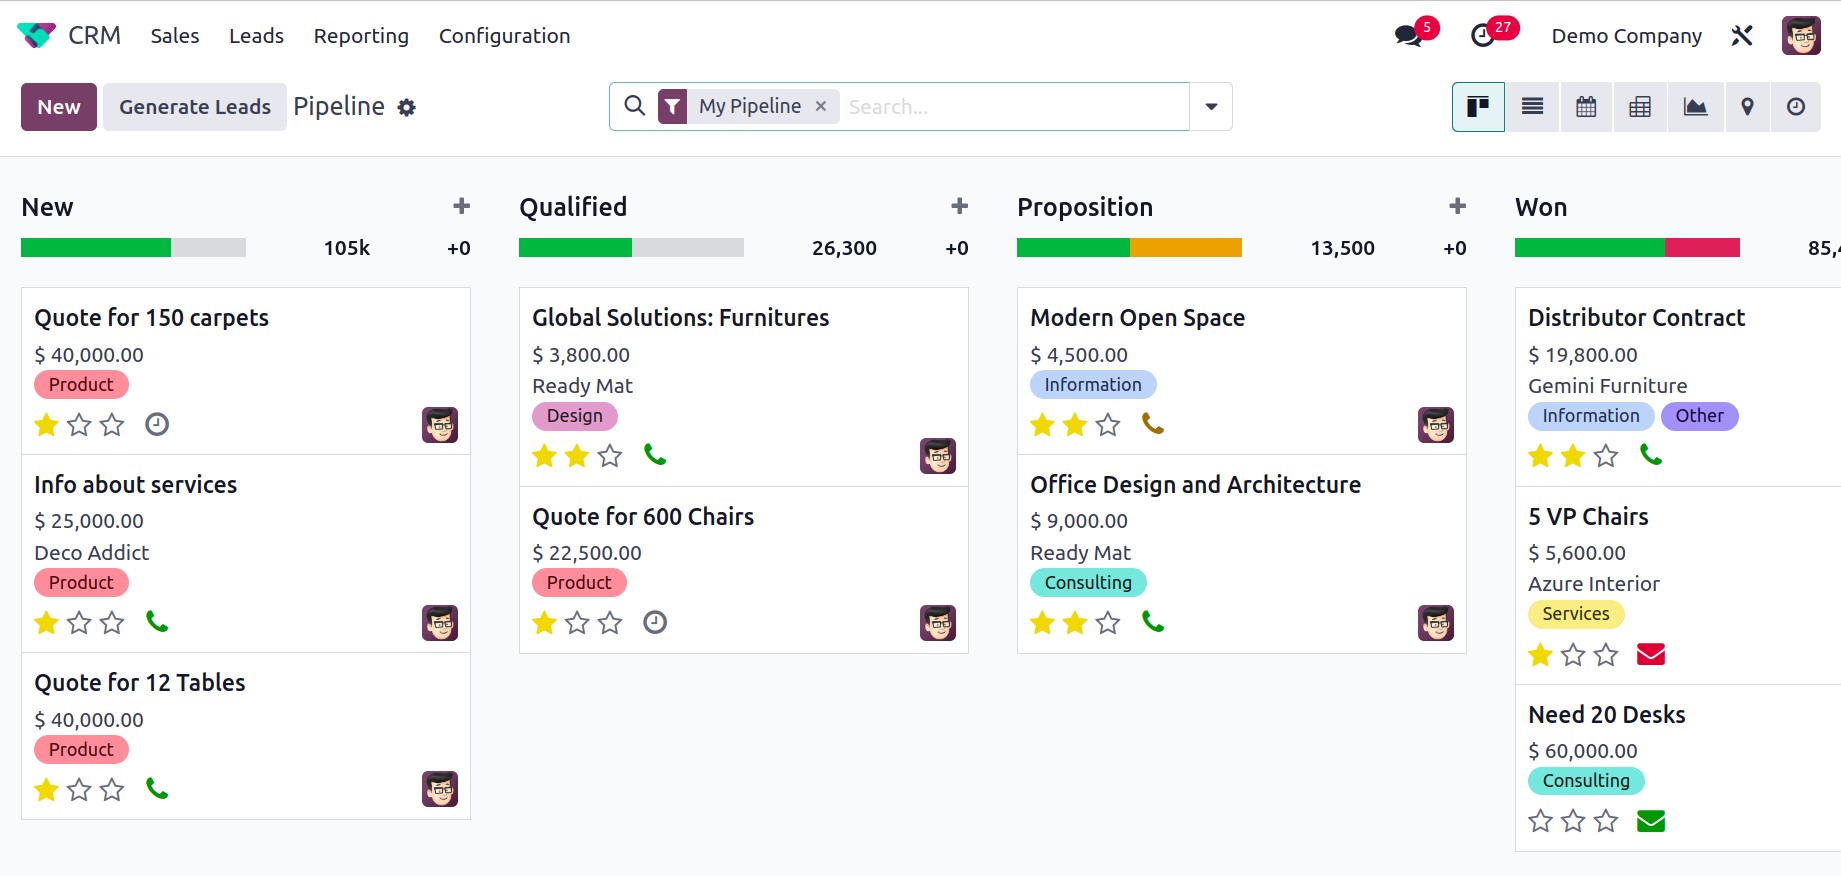
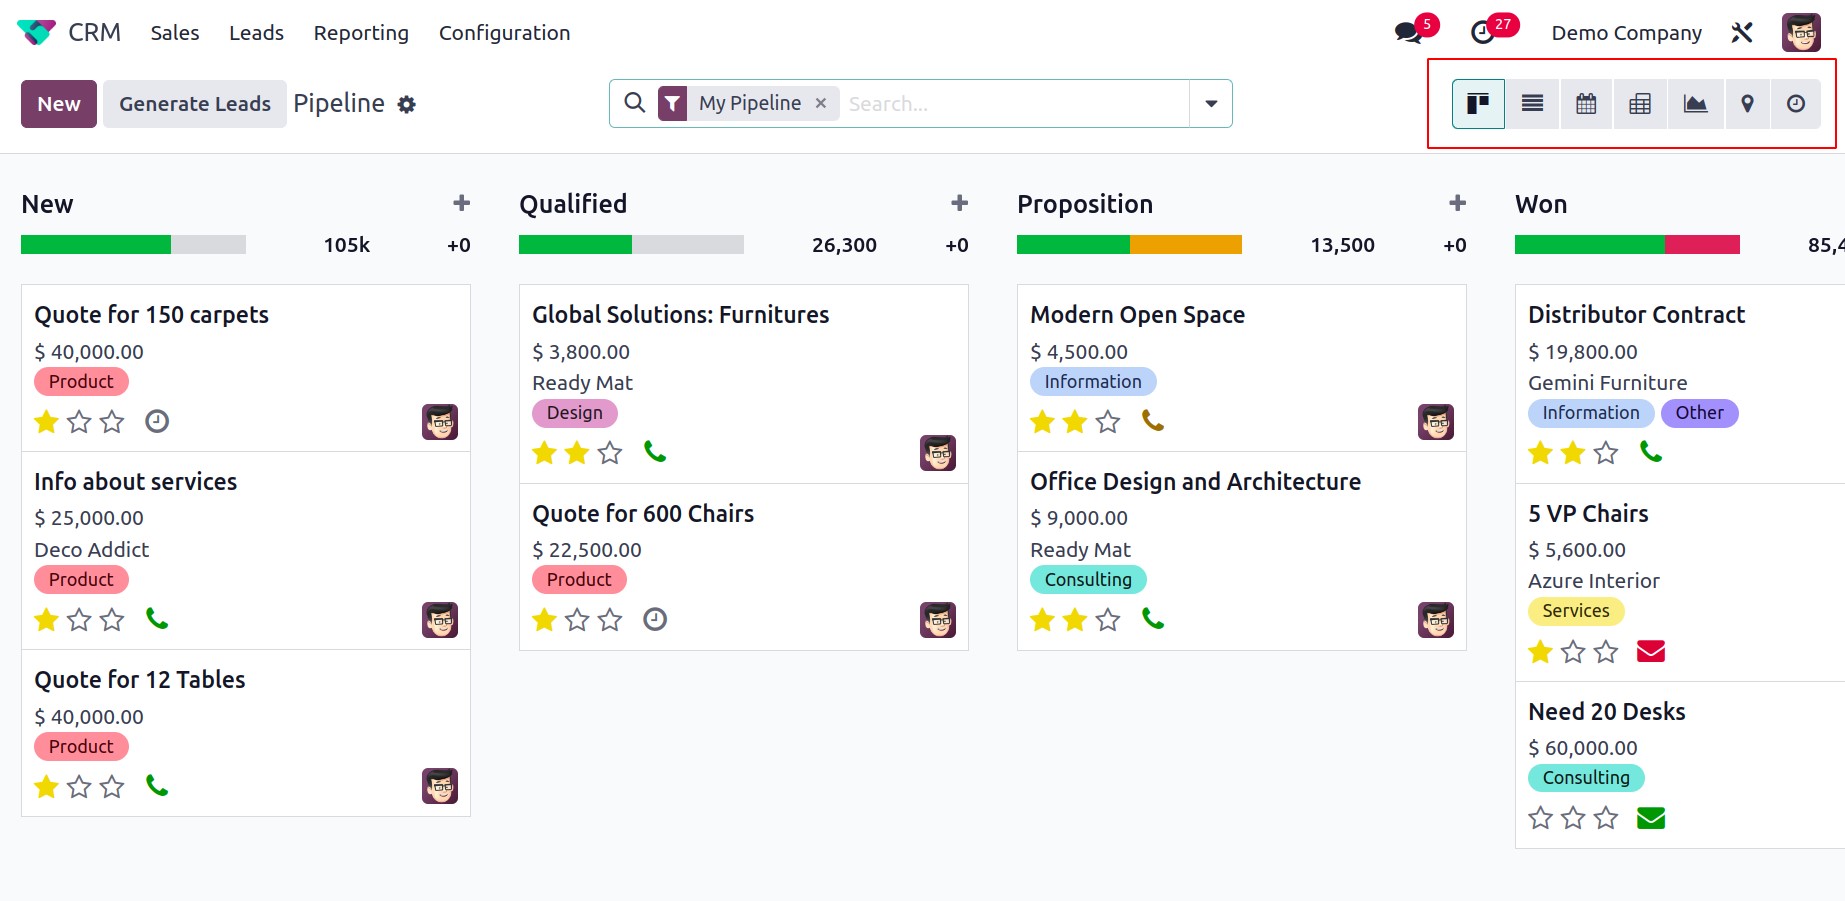
The image above displays the Odoo 17 CRM module dashboard's redesigned colored interface. In Odoo 17, the entire screen appearance is altered. You can change the platform's display into a Kanban, List, Calendar, Pivot, Graph, Map, and Activity much like in earlier versions of Odoo.
We can see that all records are grouped in the window according to their progress in operations when we look at the Kanban view of the CRM pipeline. Leads are arranged so the user can quickly see how each lead progresses. It's simple to assign multiple stages to leads in the CRM module. You can alter the stages and group leads into the appropriate stages based on your business needs.
The New, Qualified, Proposition, and Won stages are included in the screenshot. All fresh leads will show up under the fresh stage, as indicated by the stage names. Only qualified leads from the new leads will move on to the Qualified stage, which is the following stage. Once the matching customer has confirmed it, the profitable business leads can be advanced to the stage ‘Won’.
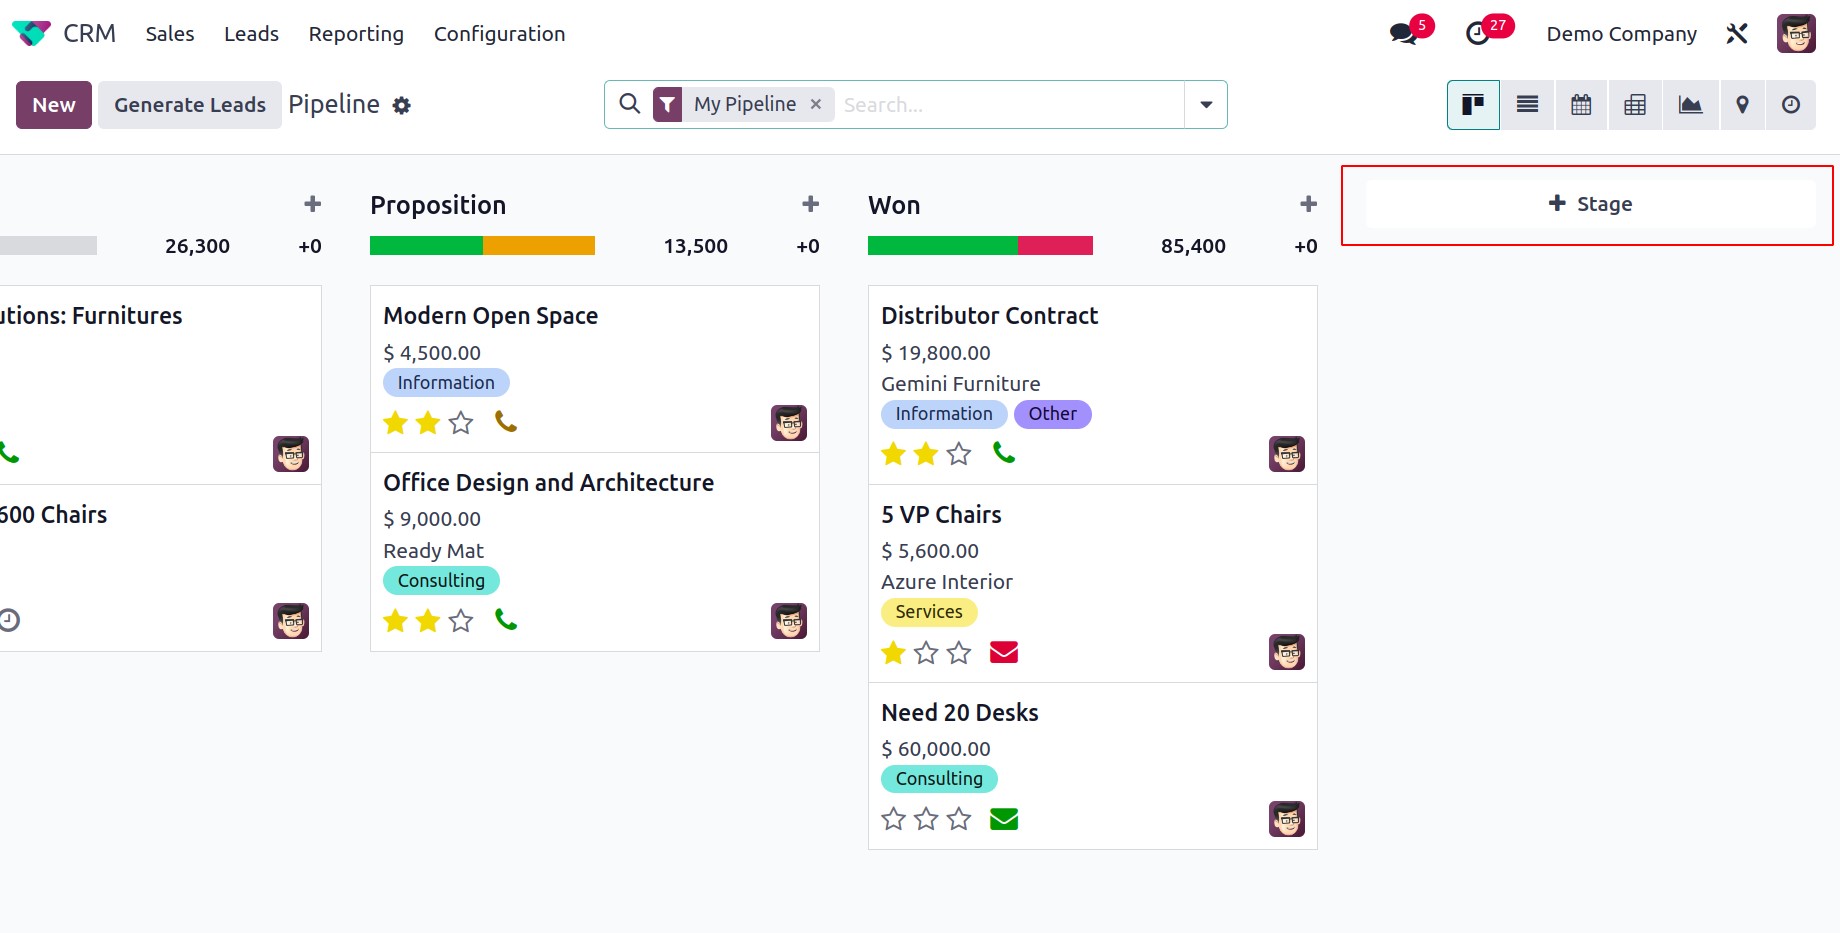
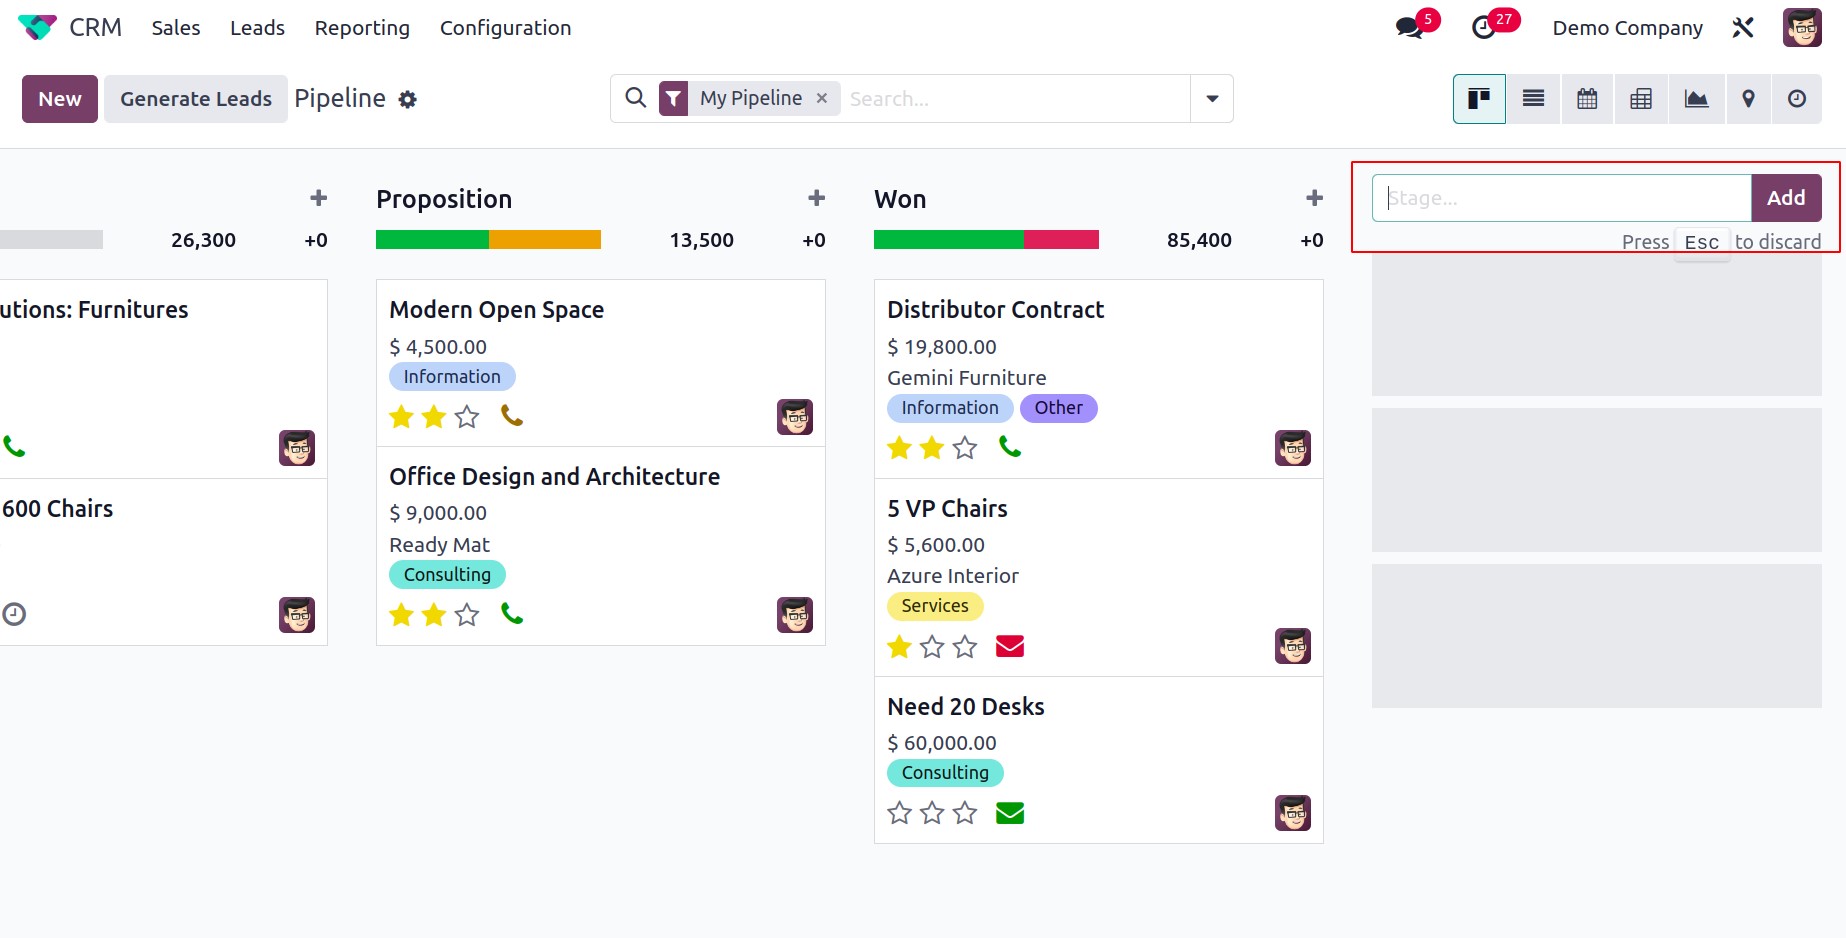
Similarly, by utilizing the +Stage button, you can quickly generate the necessary stages for the leads. A new field will open when you click on this button, as seen in the image, where you may enter the name of the new stage.
Enter the title in the provided field, then press the Add button. By using this technique, you can add as many new levels for leads as you like.
As seen in the screenshot below, after creating a new stage, you may modify its settings by clicking the gear icon that displays next to the stage's title.
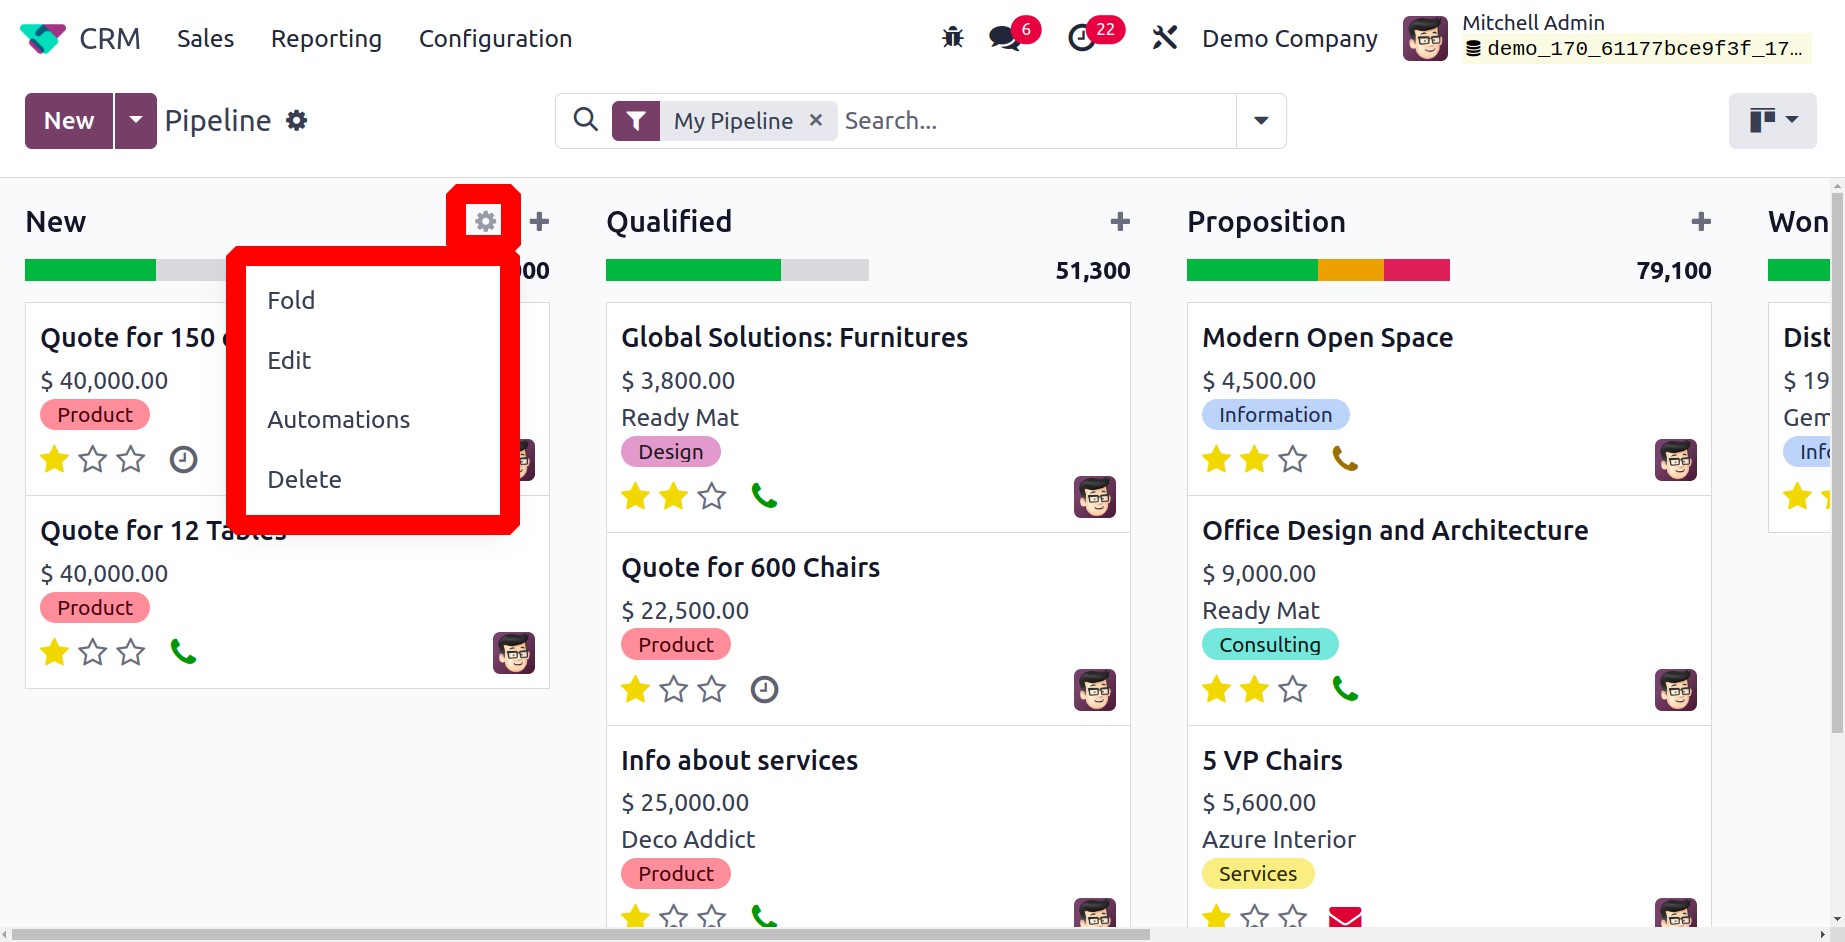
Depending on your needs, you can Fold, Edit, Automation AndDelete the stage with this symbol. You can edit the appropriate stage in the pop-up box that appears when you click the Edit button.
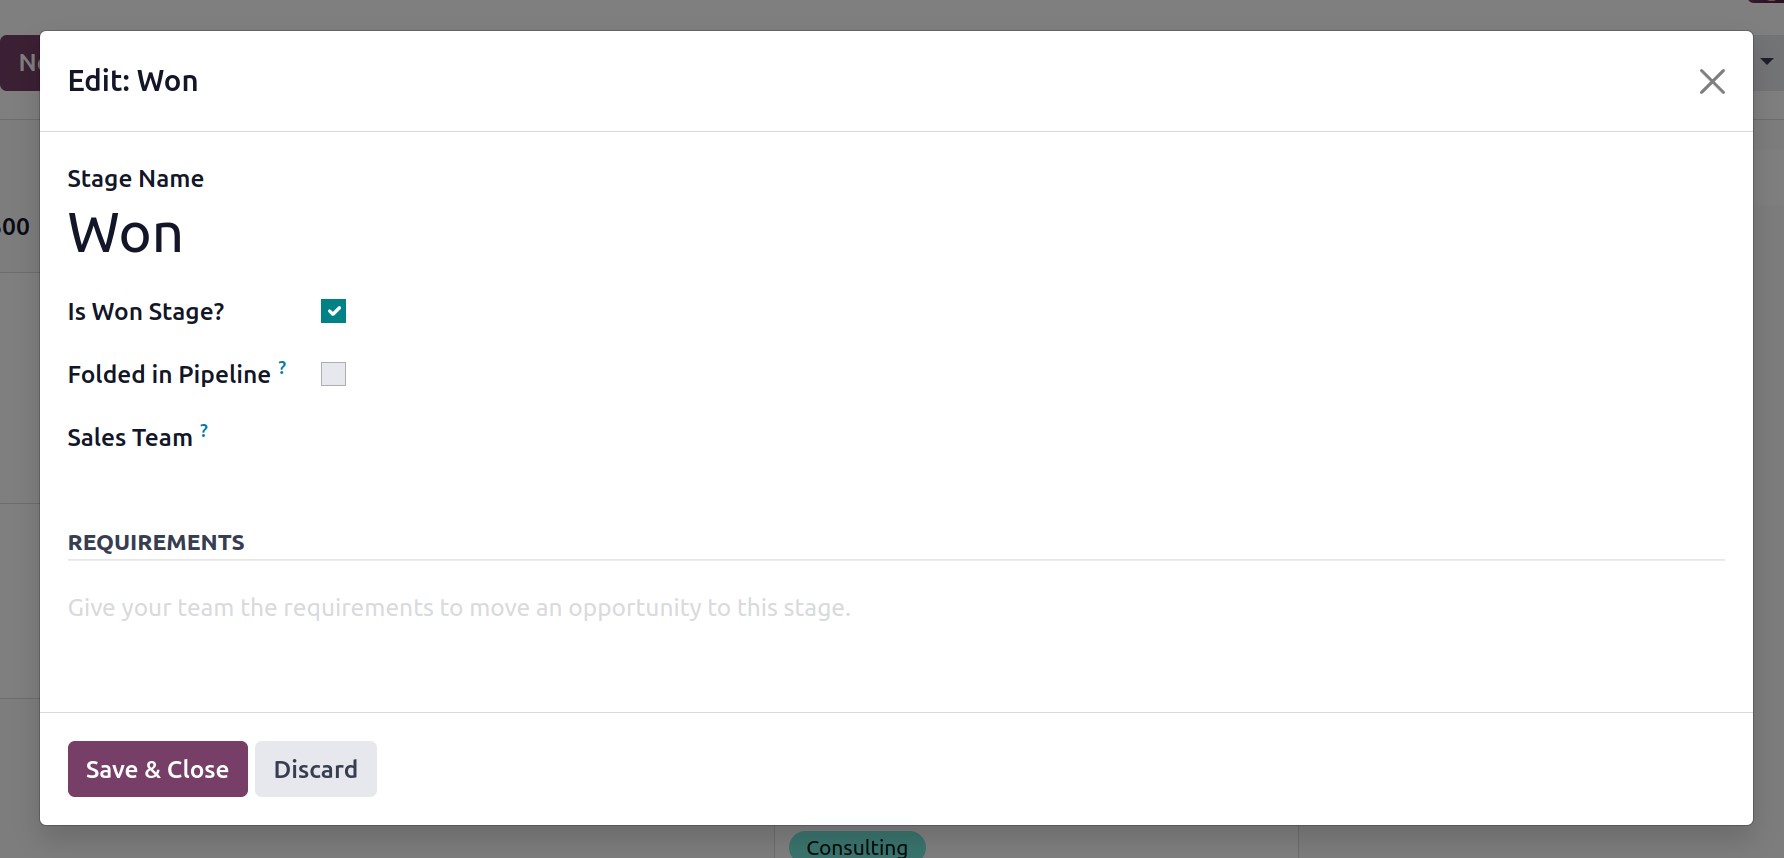
You can turn on the Is Won Stage? field if you wish to treat the chosen stage as the Won Stage for leads. Turning on the Folded in Pipeline field allows the corresponding stage to be folded in the Kanban view. You are permitted to identify a specific sales team that utilizes this stage in the Sales Team section. Other sales teams not specifically indicated in the supplied field will not be able to see or use this stage. In order for the team members to have a clear understanding of the criteria for this specific stage, the requirements to transfer leads to this stage can be given in the criteria section. Don't forget to click the Save button once you've finished modifying the column to save all of your changes.
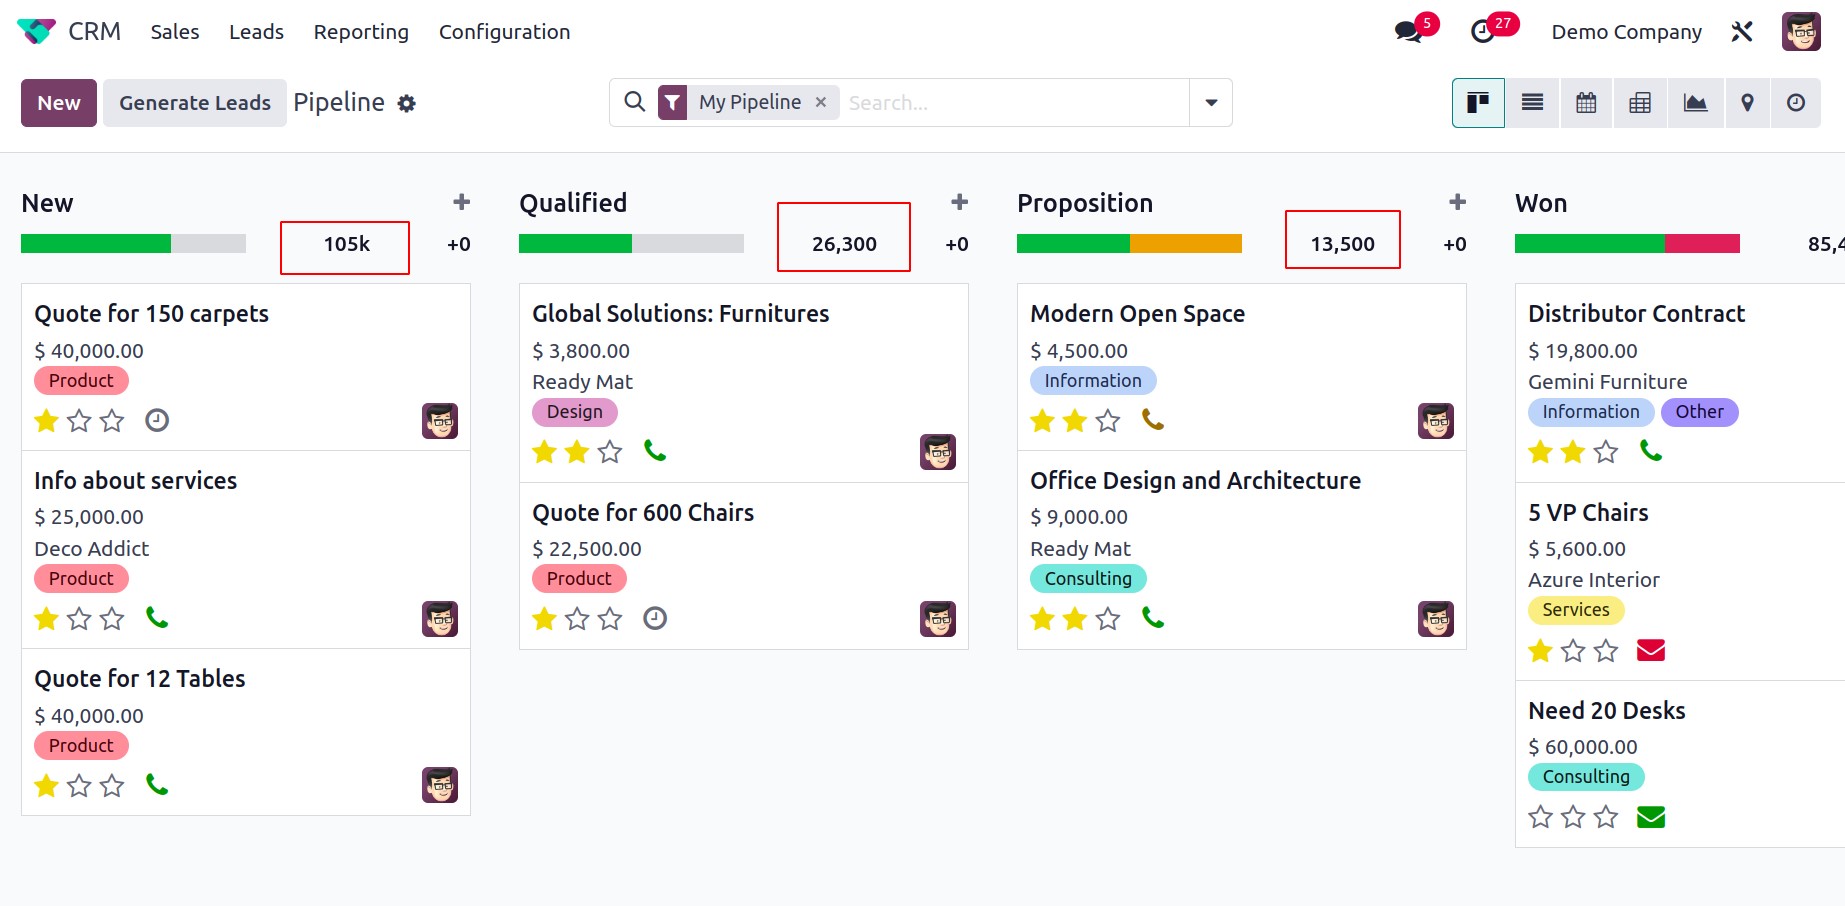
The top right corner of the relevant stages, which is emphasized in the figure below, displays the Expected Revenue from each step. By using the drag and drop functionality, you can adjust the phases of leads. The estimated revenue will be immediately adjusted depending on the new record by altering the stage of one lead.
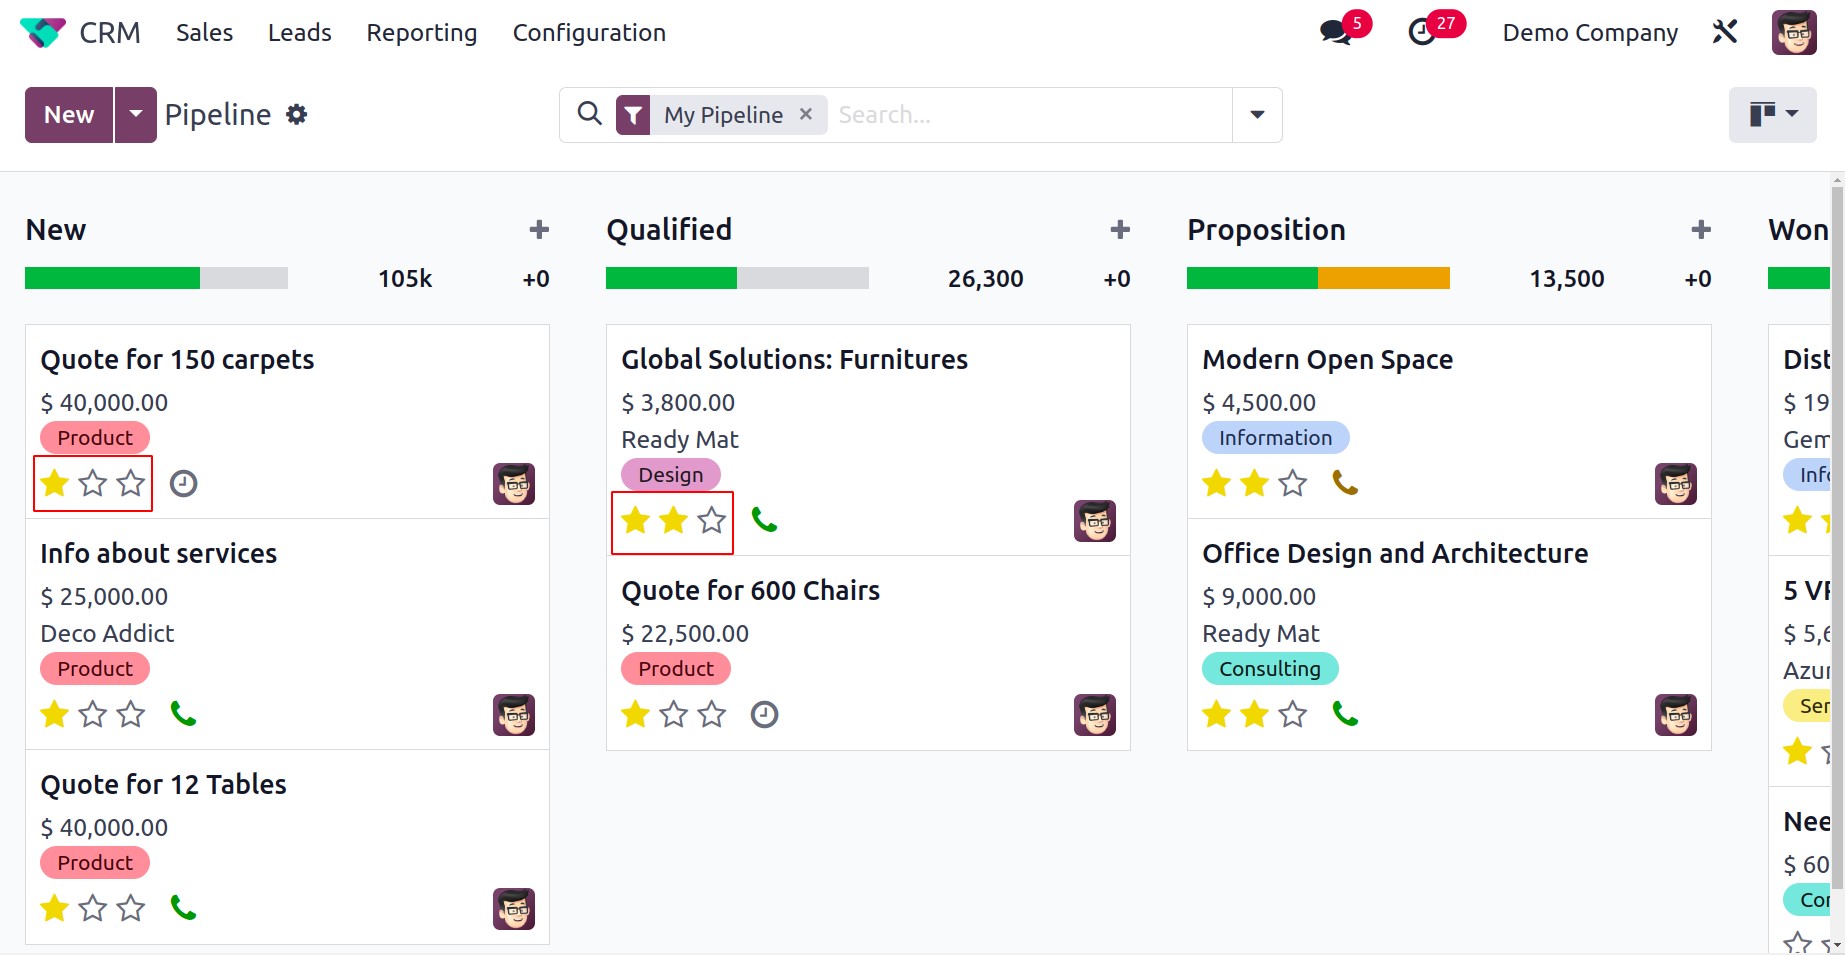
You can find three stars to indicate the lead's Priority on each lead record. You can assign Medium, High, or Very High stars based on the lead's priority. This will make it easier to find high-value leads.
You may arrange several lead activities right from the main dashboard. The tiny clock indicator, which is displayed in the image below, will let you schedule various activities. If there are any scheduled activities, Odoo 17 will display a list of them as soon as you click on this icon.
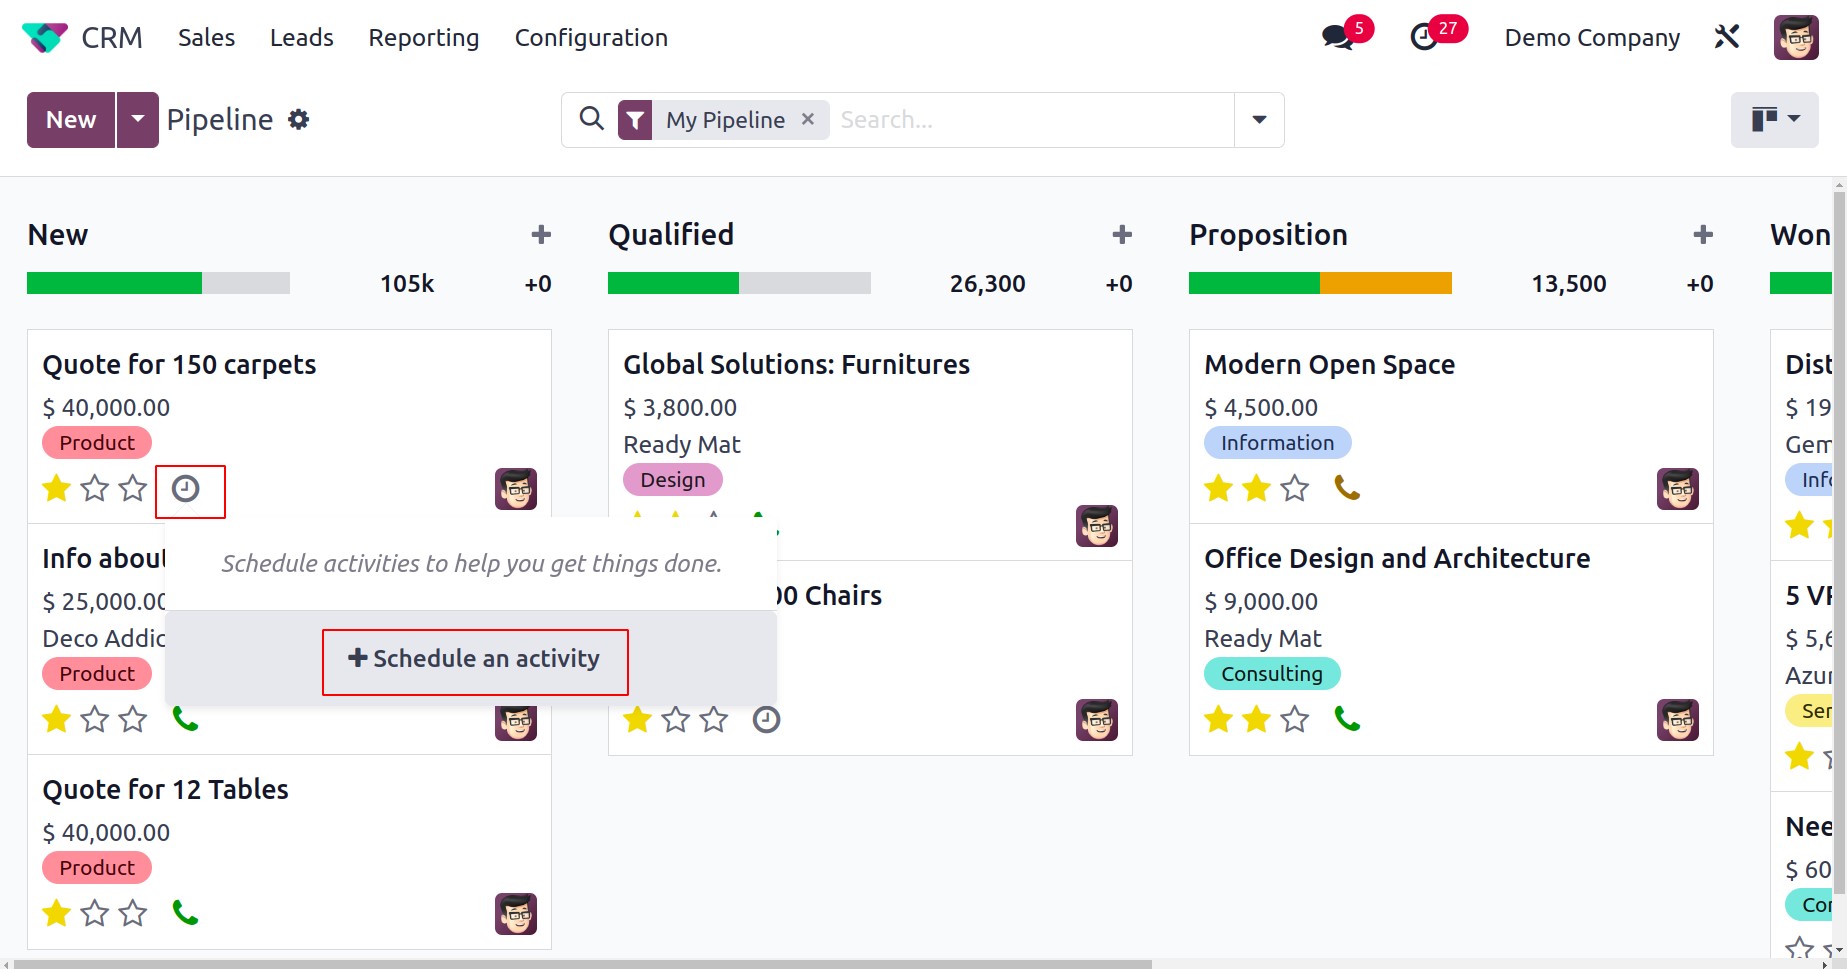
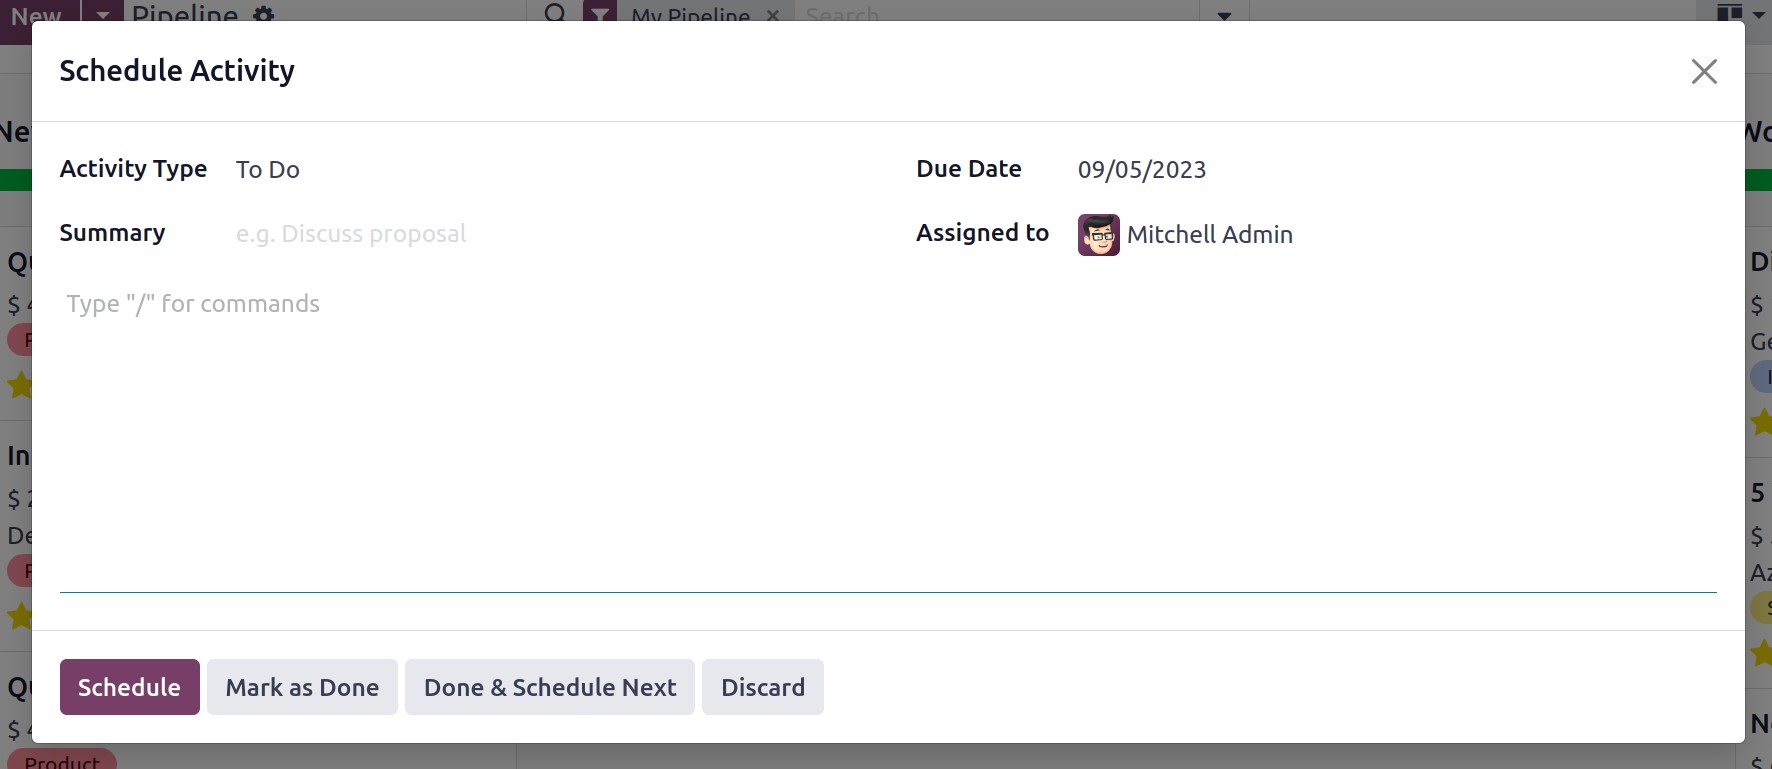
If not, you may create a new one by selecting the Schedule An Activity button. You can create new activities by using a new wizard that Odoo 17 will send you to.
Odoo 17 provides you with a dedicated platform in theConfiguration menu, which we will cover later, to configure various activity types.
You can choose the necessary activity you intend to schedule in the Activity Type box of the new activity schedule dialogue. Along with this, you may use the provided space to briefly describe the activity's Summary. In the Assigned To area, designate a worker who will keep an eye on this action. Last but not least, don't forget to provide the activity's Due Date. Finally, by selecting the Schedule button, you may set the activity into your schedule. The Mark as Done button can be used once the task is finished. The Done & Schedule Next button can be used if you have already finished one scheduled activity and wish to arrange a new one. Use the Discard button to stop the planned activity. The planned activities are highlighted in green. Overdue actions are shown in the red color. Today's scheduled activities will be displayed in brown.
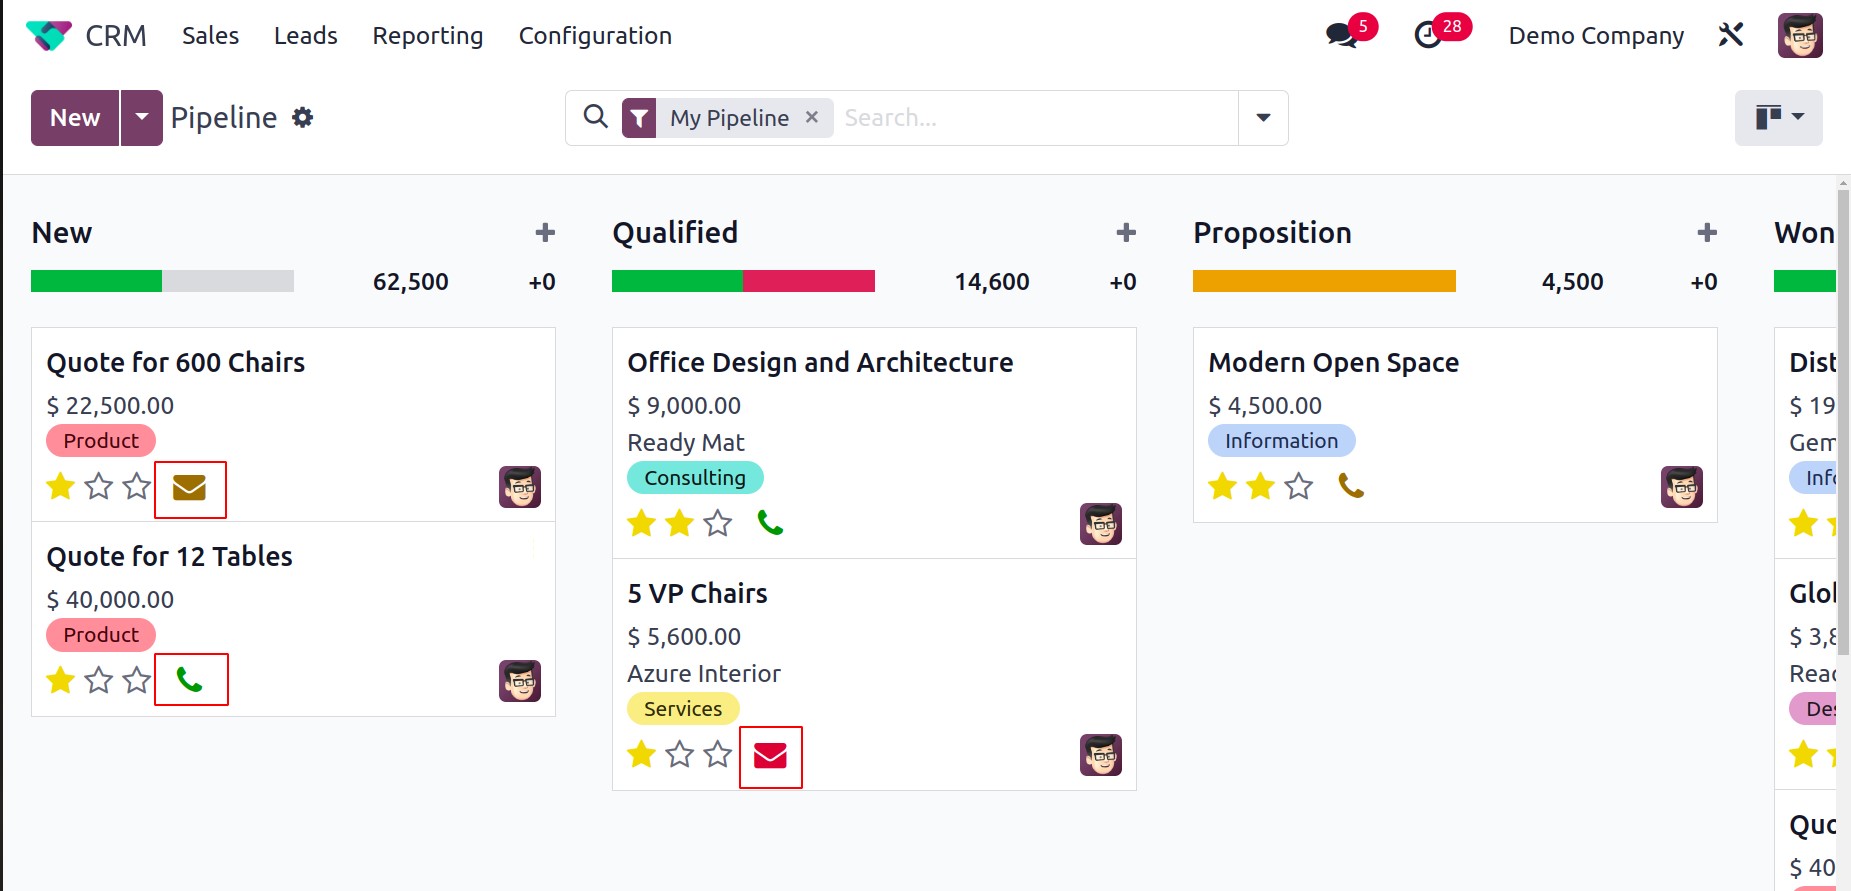
You may now add clients to the call queue, which is a new functionality added to the Odoo 17 CRM module. The clock symbol, which is used to schedule activities, is close to this choice. You can add leads to the call queue with only one click. If you click it again, the icon will be removed from the call queue. Each column will have a Quick Add option that allows you to quickly add leads under particular phases. This choice will be presented as a "+" icon next to each state's title, as illustrated below.
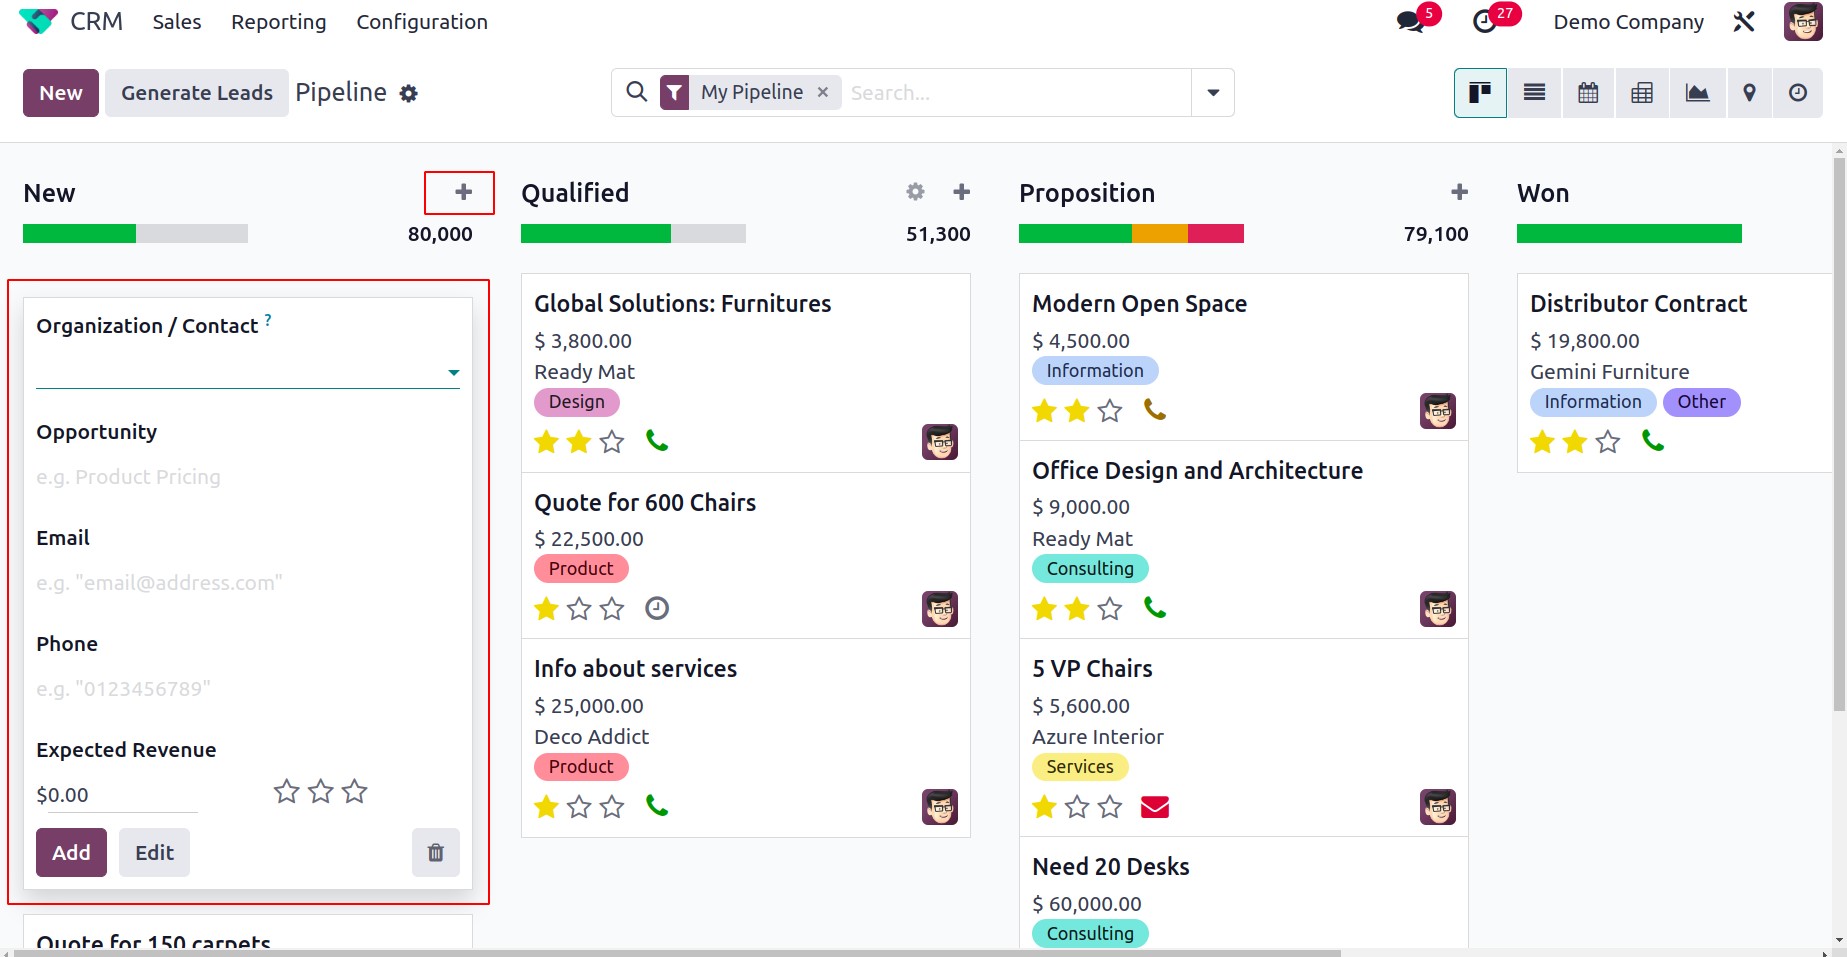
Using this feature, you can easily add new leads under each step. In the space provided, enter the name of the organization or Contact. You can also fill in the appropriate boxes with the opportunity's title, email, phone number, and expected revenue. By selecting the Add button, the new lead will be added to the appropriate stage. Use the Edit button to alter the lead details if you want to.
The provision of sophisticated sorting options will help to make Odoo's search process easier. In Odoo 17 CRM, the Filters, Group By, and Favourites options include a number of sorting options to quickly and simply access the needed data.
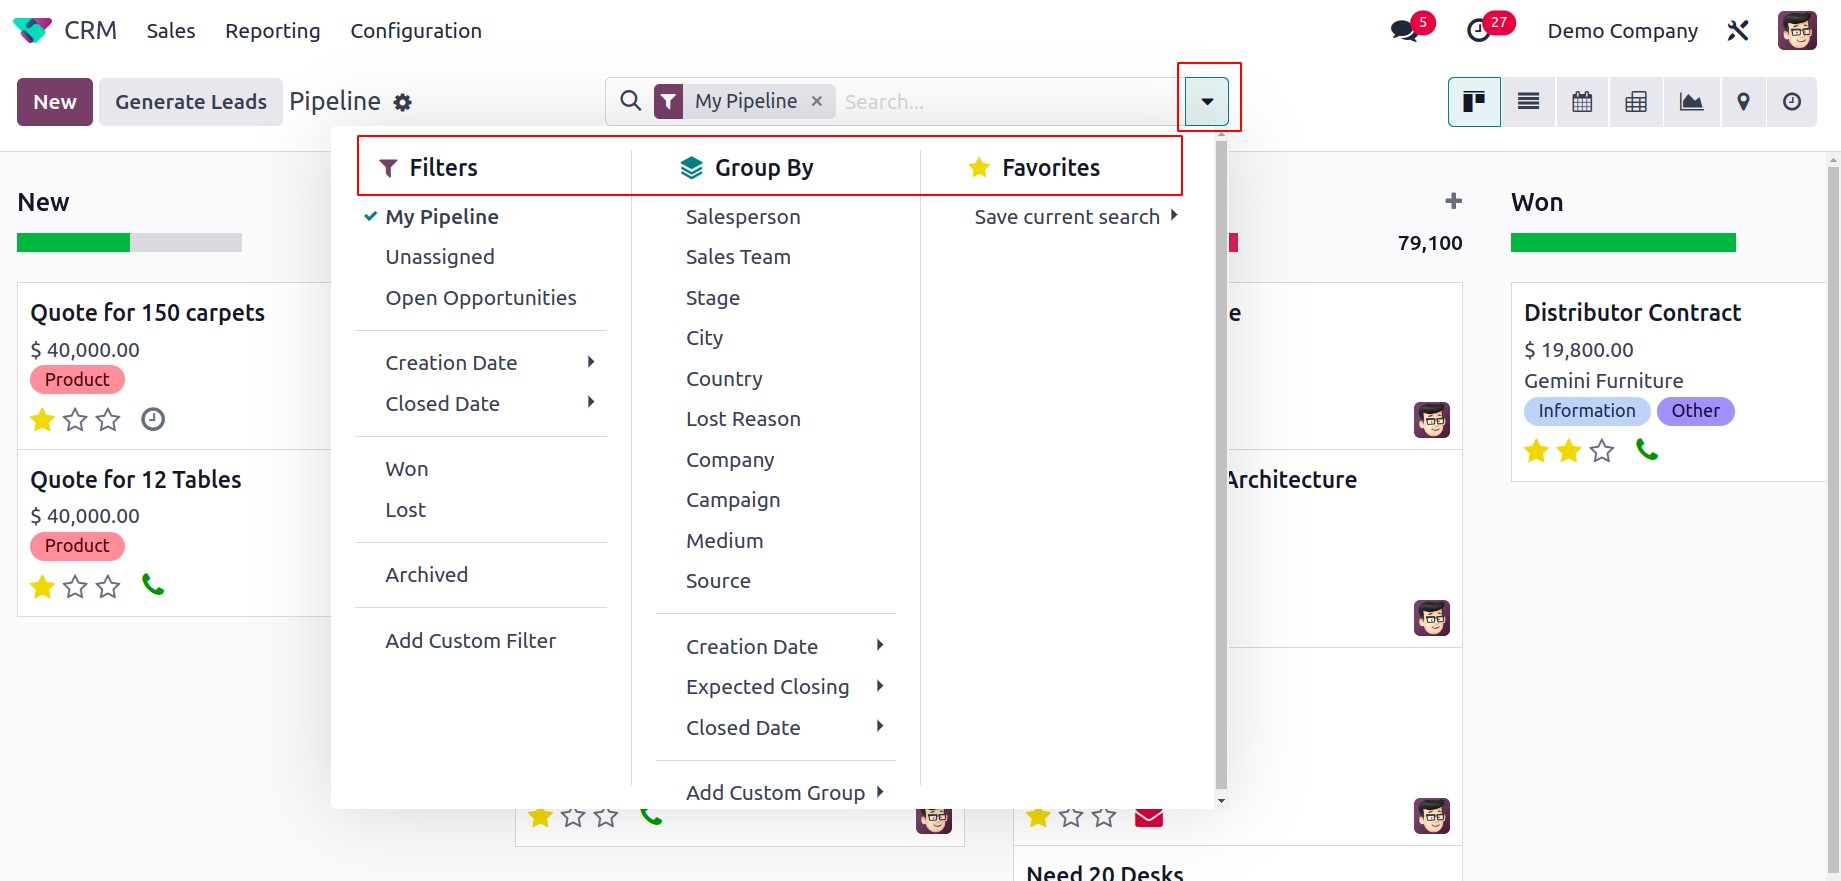
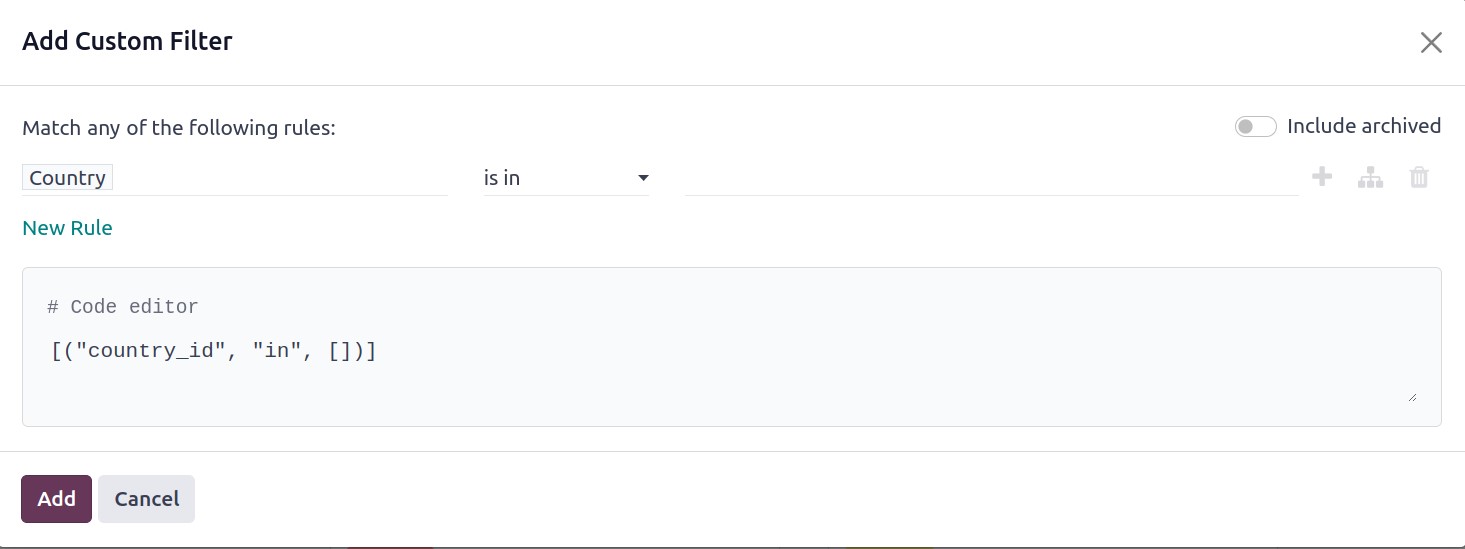
When the Add Custom Filter option is clicked, a new popup window opens where the user can add certain rules for filtering.
You will see an advanced preview along with information about the Opportunity, Contact Name, Email, Phone, Company, Salesperson, Next Activity, My Deadline, Expected Revenue, and Stage when we look at the List view of the CRM pipeline.
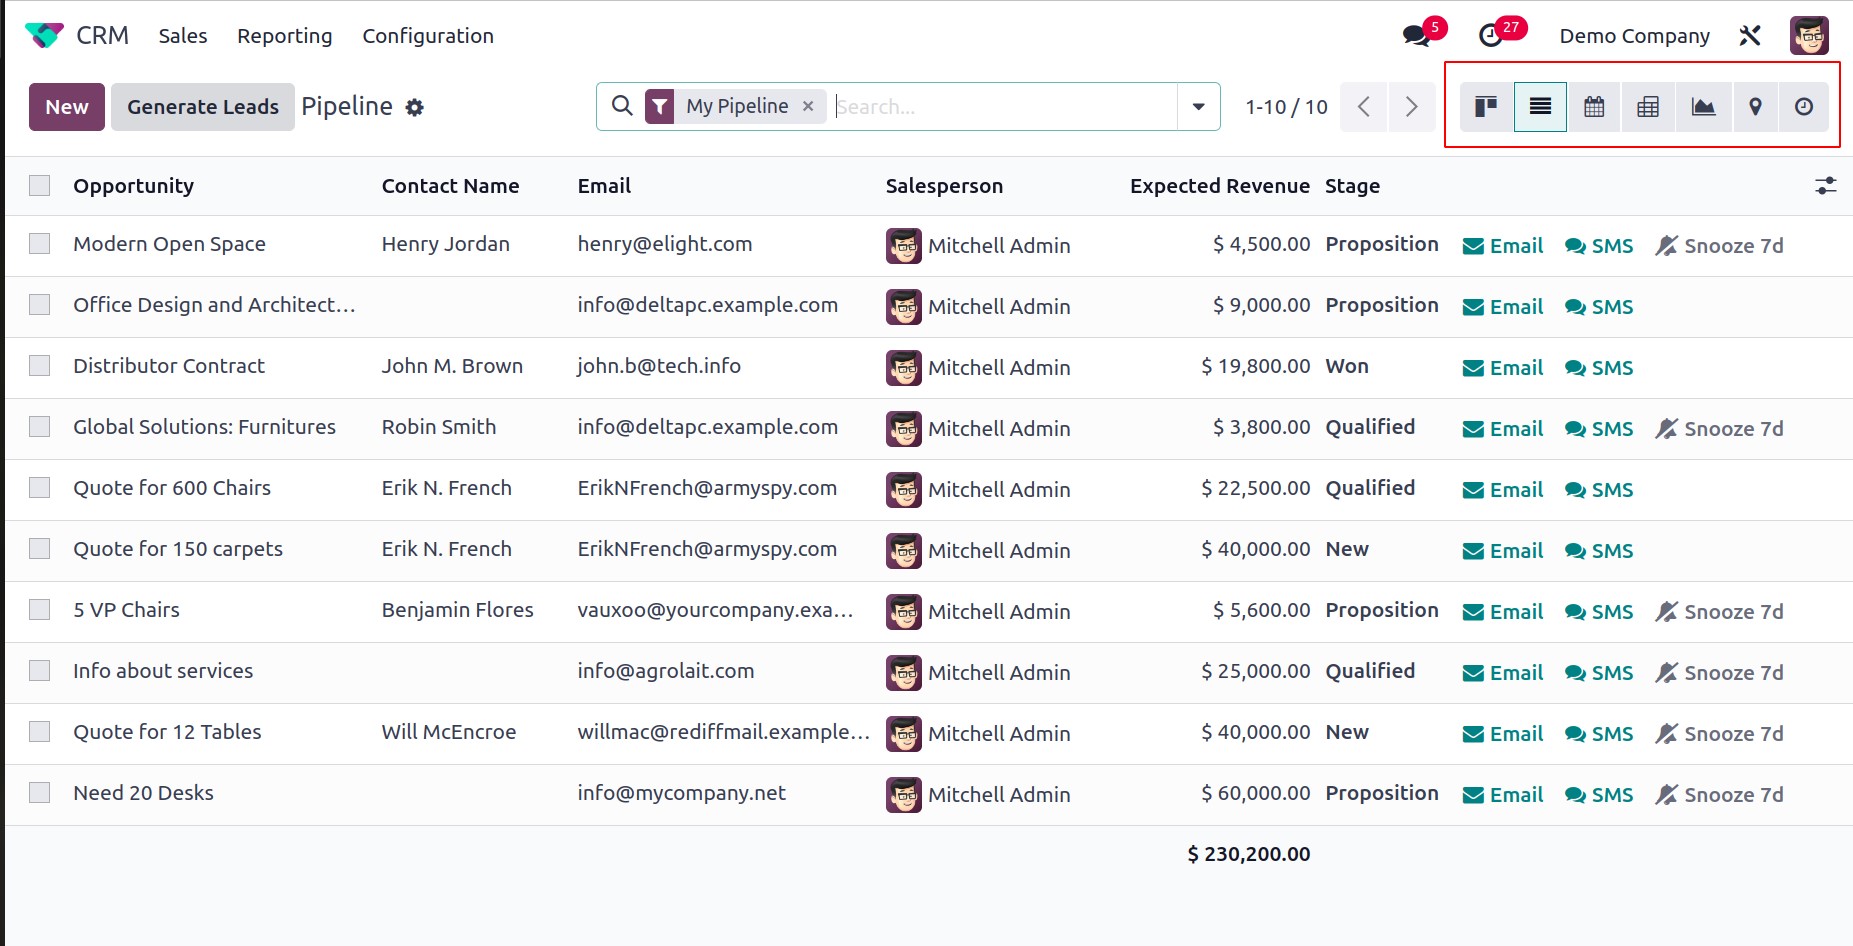
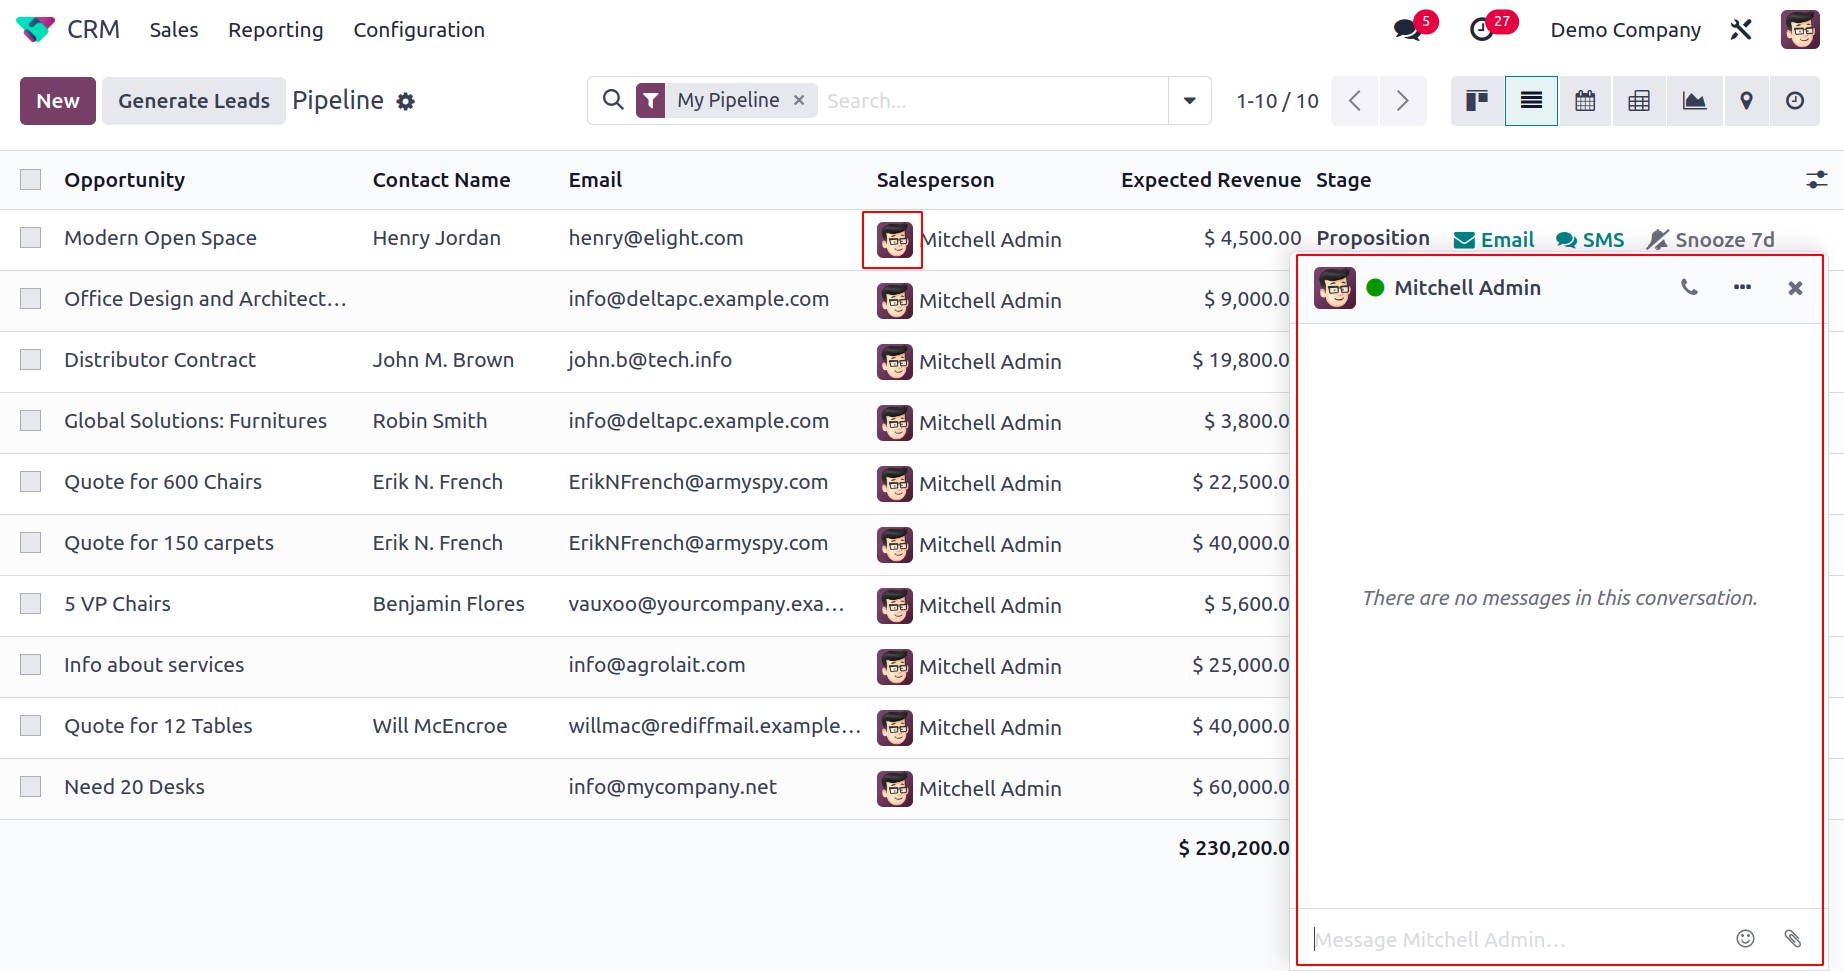
Clicking on a salesperson's name will open a message box that will link you with that salesperson directly if you want to get in touch with them. You will also find Email and SMS options on each lead, which you may use to contact the relevant customer.
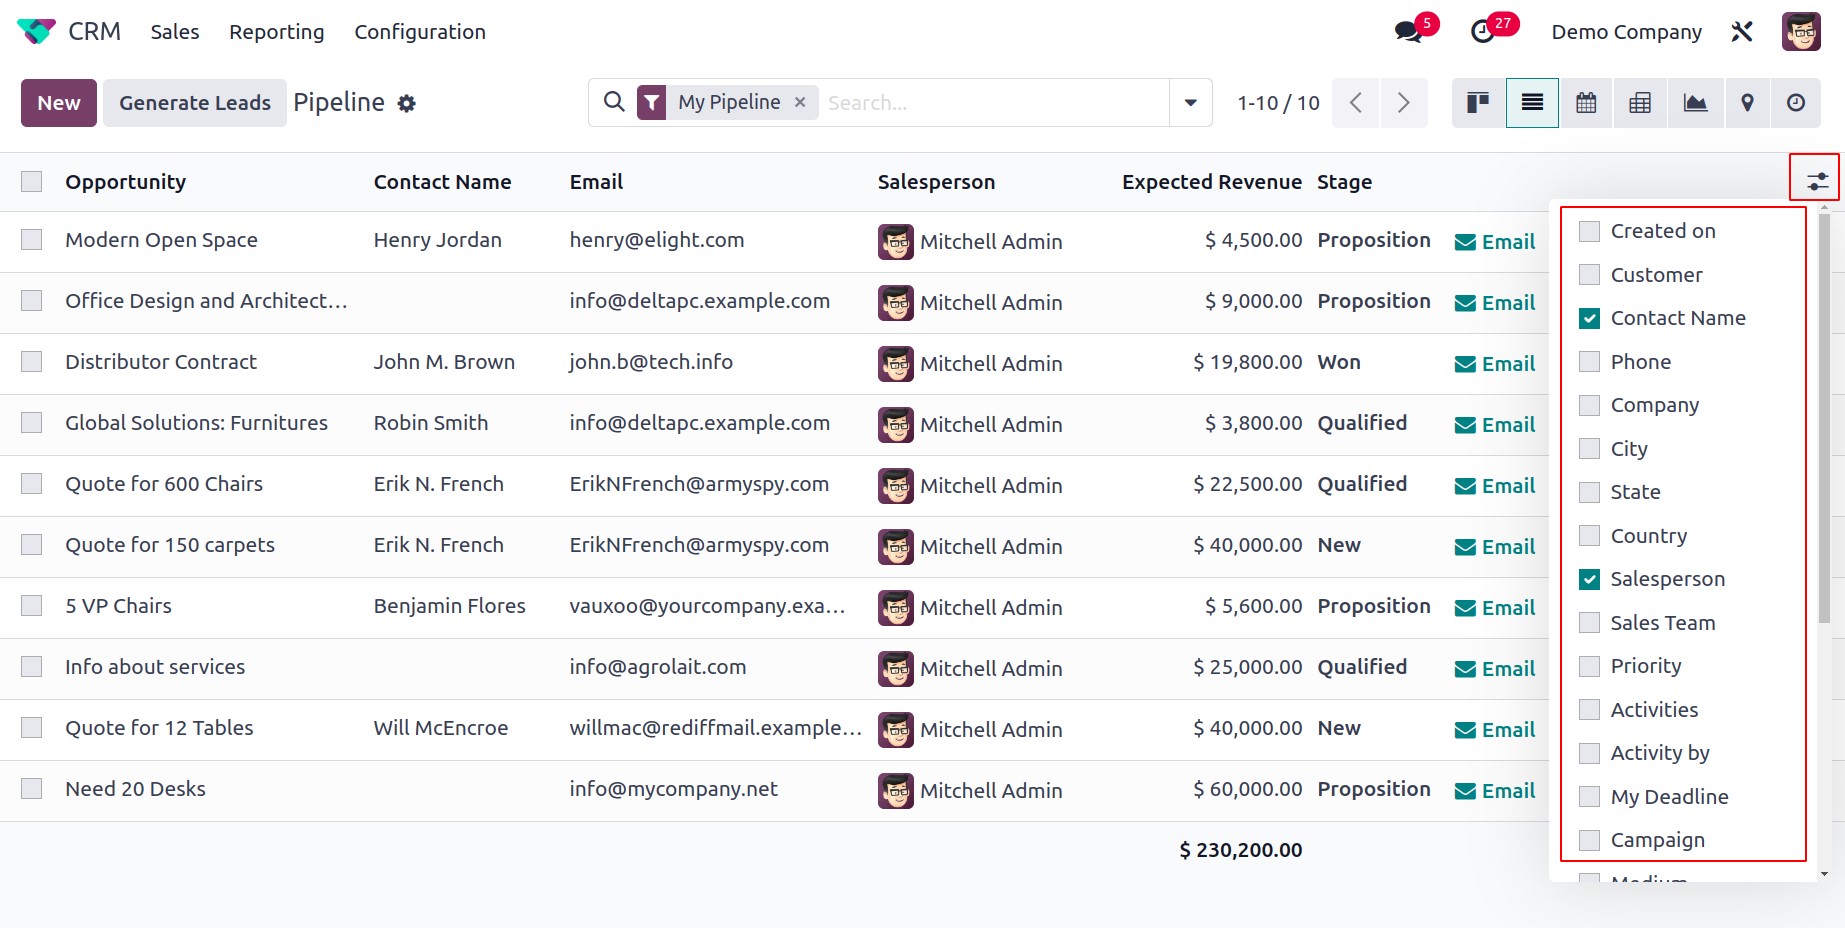
By including more information about a lead, such as Created On, Customer, City, State, Country, Sales Team, Priority, Assigned Partner, Activity By, Campaign, Medium, Source, Expected Closing, and Probability, you can improve the list's preview.
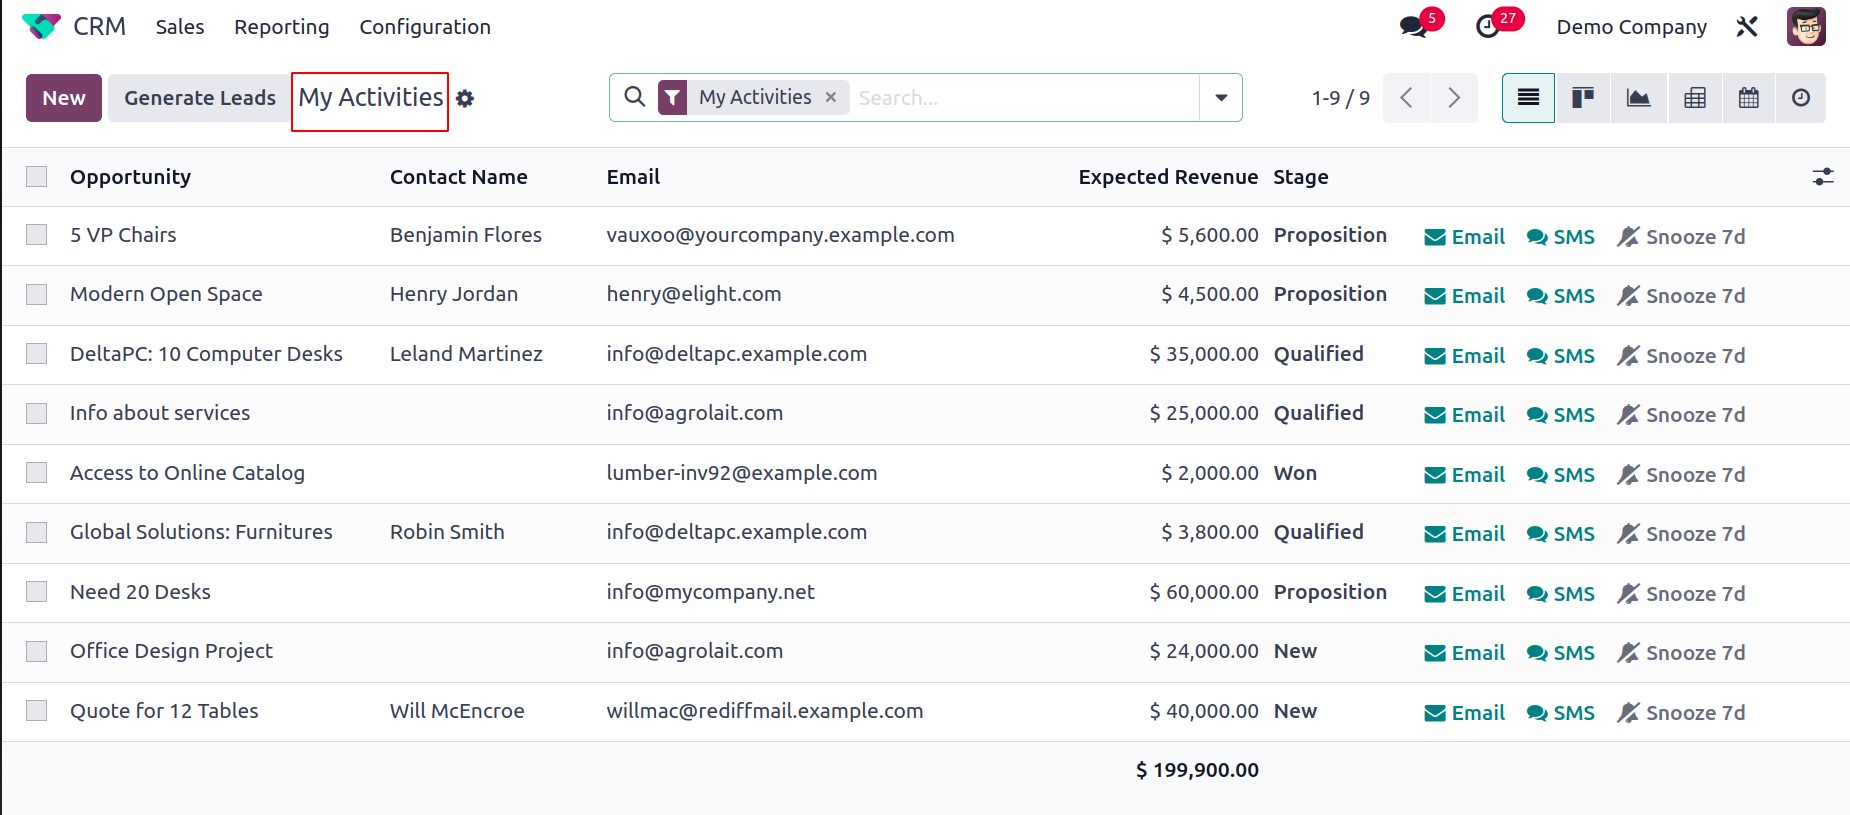
As of right now, we have been talking about the CRM module's My Pipeline window. Let's now look at theMy Activities window.
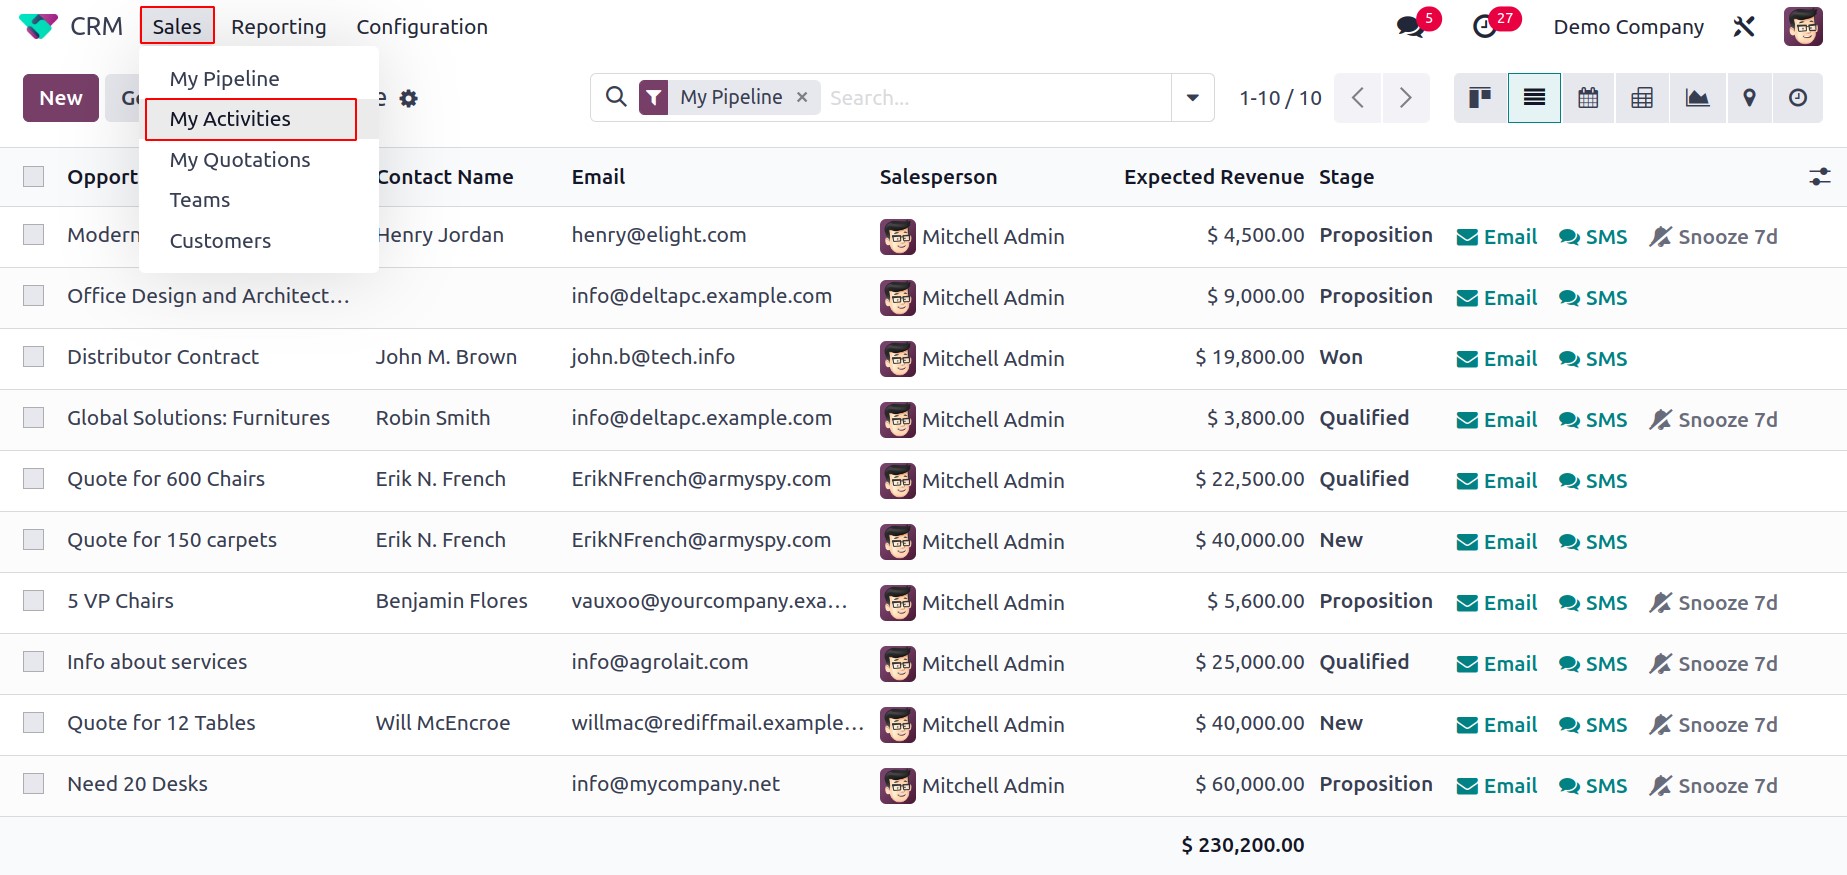
The My Activities window and My Pipeline window are essentially identical. But only the leads and opportunities that are given to you can be found here.
