Consolidation
Odoo 17 Consolidation
Through its accounting features, the open-source business management software Odoo
makes financial consolidation easier in situations involving multiple companies.
A unique "Consolidation module" is available for Odoo 17. Nonetheless, in a multi-company
situation, you can accomplish financial consolidation by utilizing Odoo's accounting
features.
Consolidation gathers financial data from various businesses to produce a single
financial statement. As a result, customers may simply handle this financial report
and, in turn, manage several company branches jointly.
In this chapter, we will go over every feature available in the Odoo 17 Consolidation
module. When you click on the Odoo17 Consolidation module from your main dashboard,
Odoo17 will take you to the Consolidation dashboard of the module, as seen in the
image below.
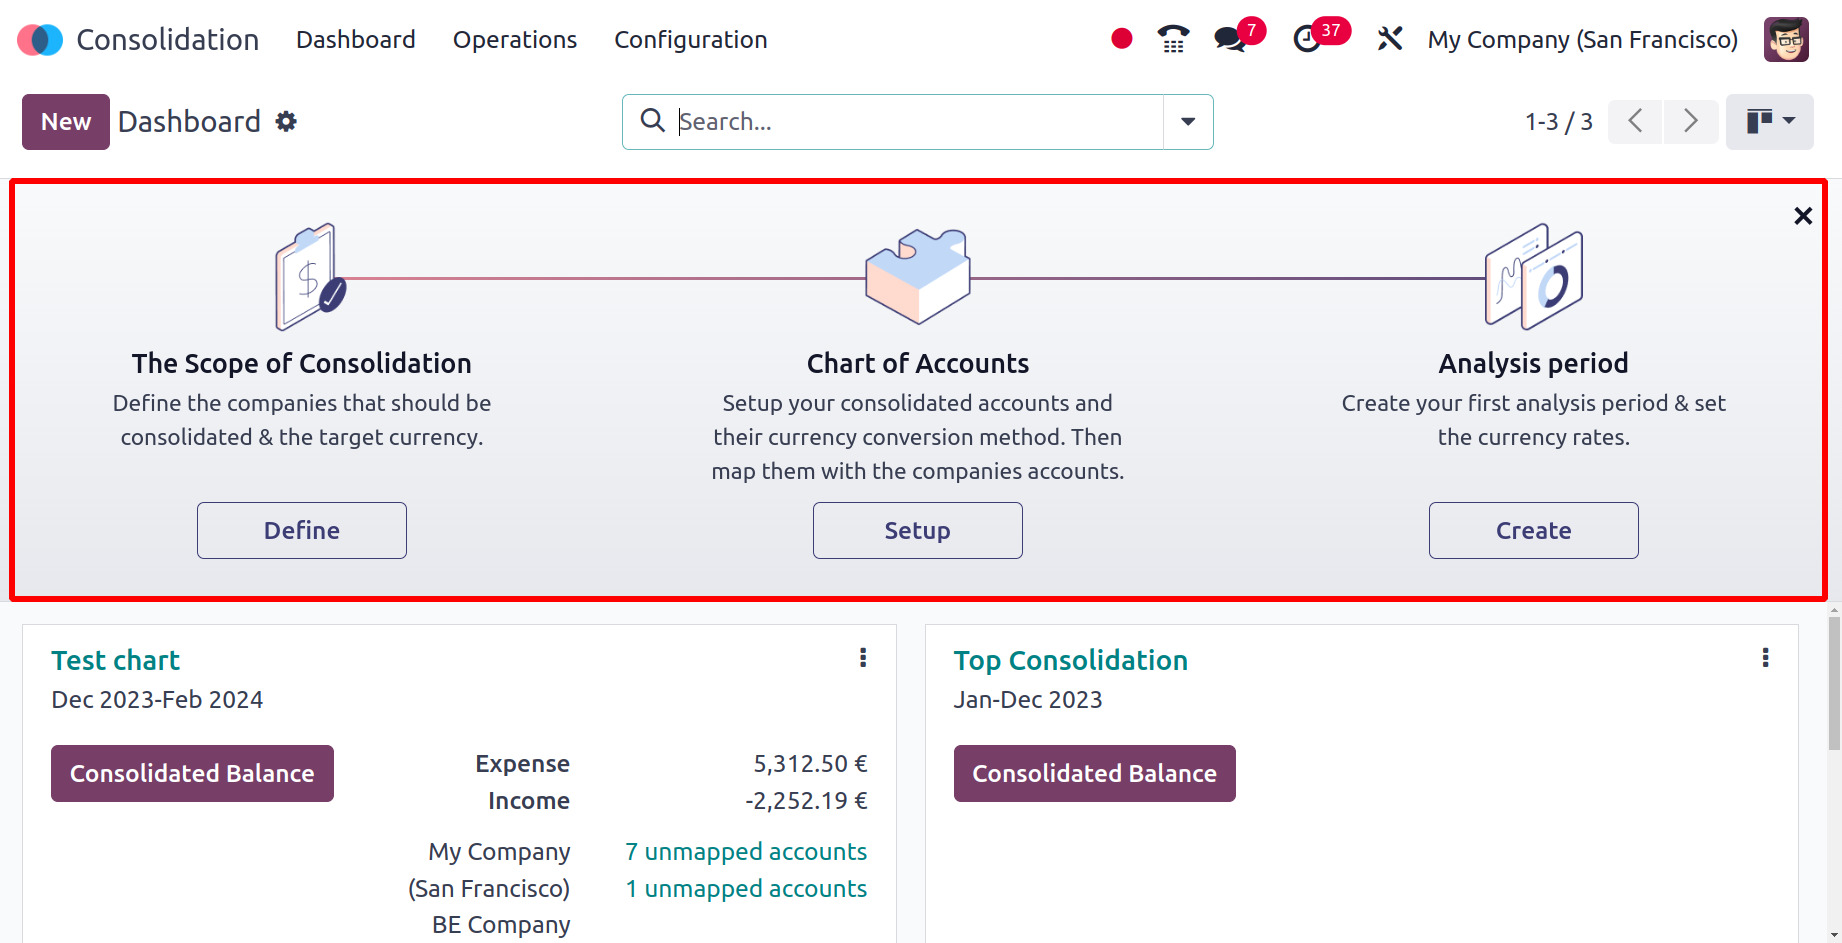
This image shows the accounting dashboard for the module. You can set up The Scope
of Consolidation, Chart of Accounts, and Analysis period, in this settings panel
before starting any accounting procedures.
First, let's clarify what The Scope of Consolidation is. The accounting period must
be specified in any kind of accounting management action. When you select the Define
option in Odoo17, a new pop-up window will open, and you can specify a new consolidation.
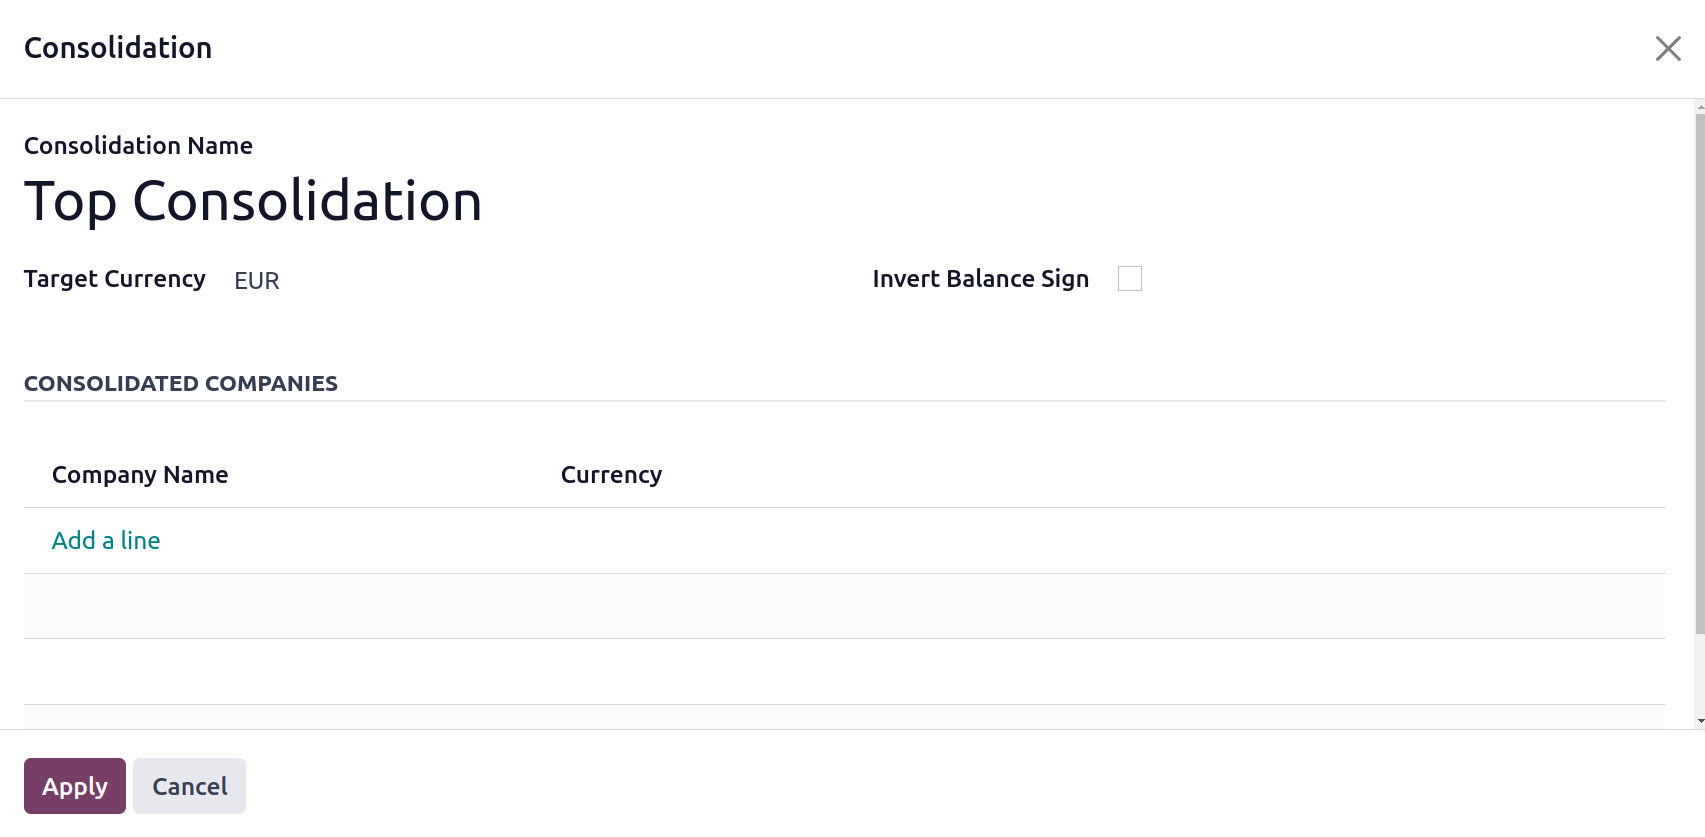
Add the Consolidation Name, Target Currency, and Consolidated Companies to create
a new consolidation.
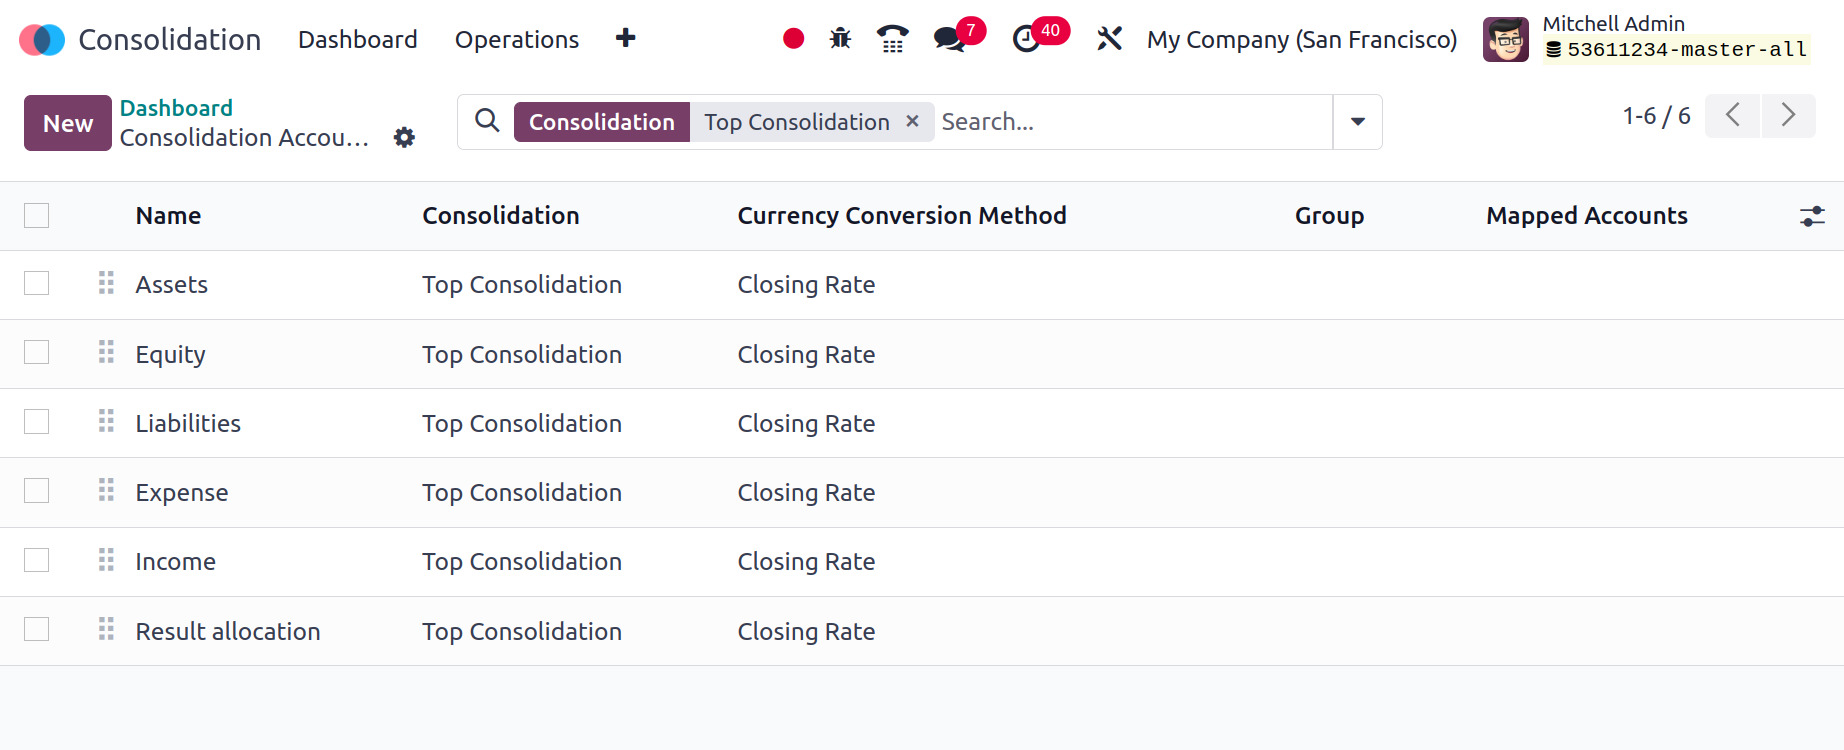
The Configuration Panel's second choice is the Chart of Accounts. The list displays
a list of Consolidation Accounts.
The next step is to create an analysis period. In the popup window, enter the target
currency, and the start and end dates of the period.

The Consolidation dashboard provides a concise description of the major actions
of the module.
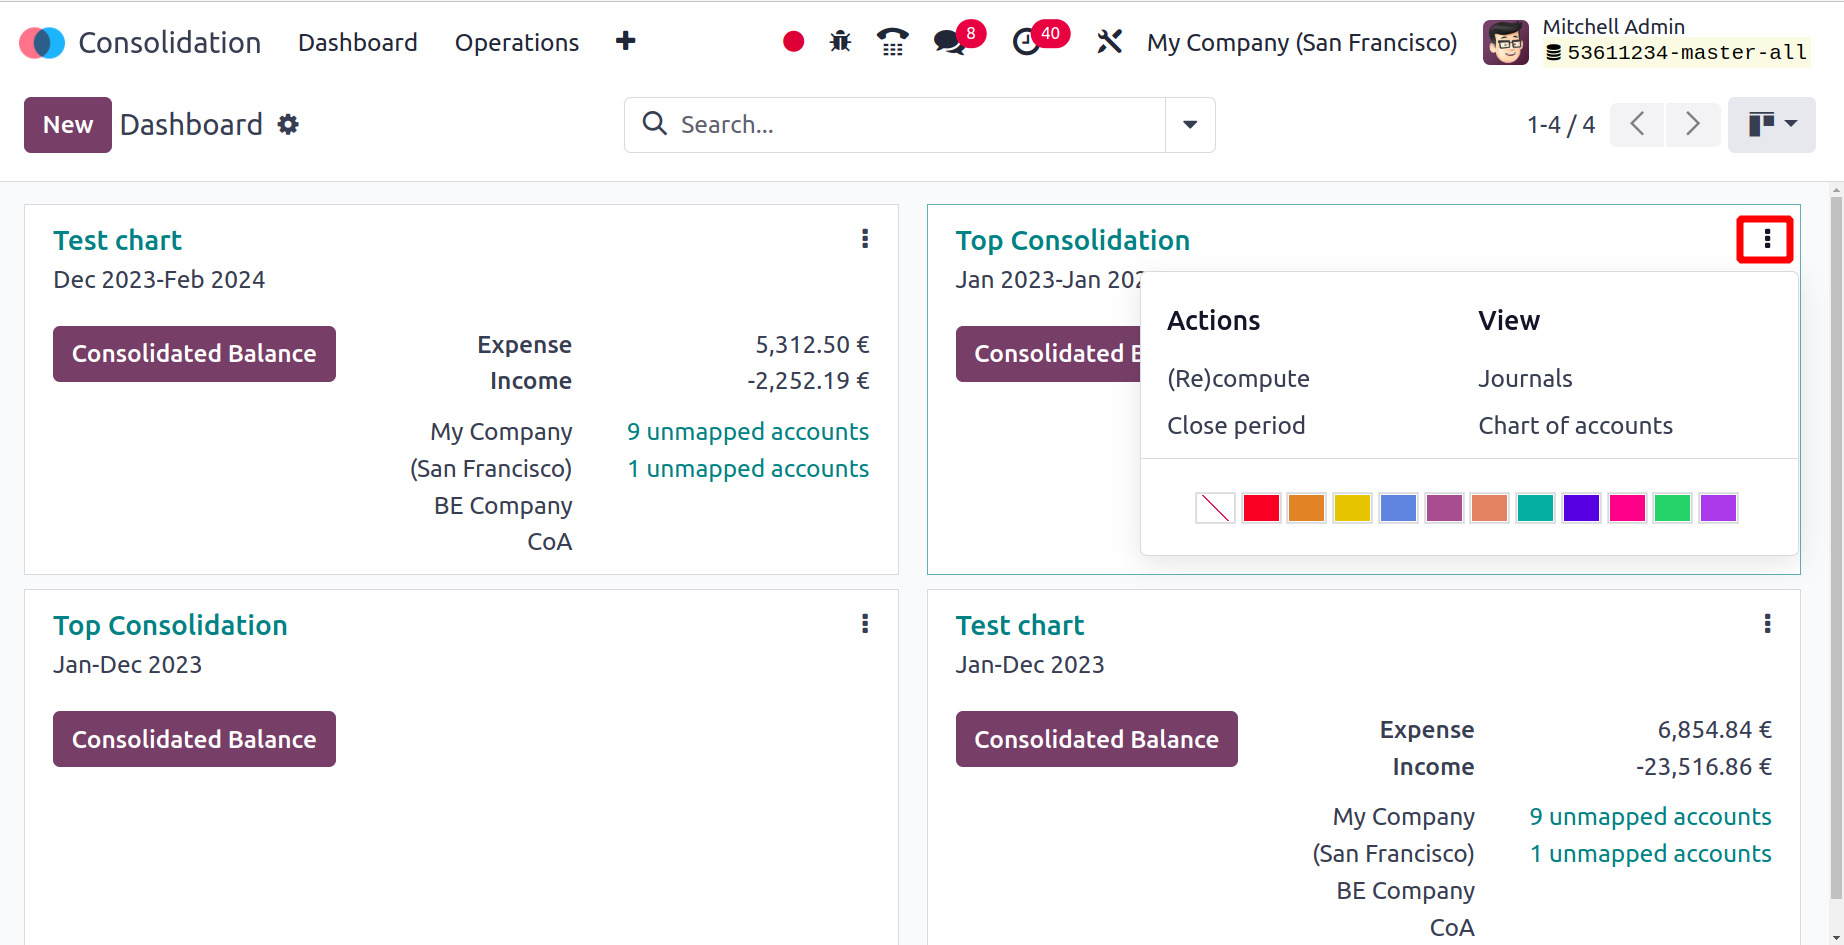
The Consolidation dashboard provides a concise description of the major actions
of the module. You may manage every created period from the dashboard. There will
be equivalent operating tools available for every tab related to an accounting activity.
There are additional options for Favourites, Group By, and Filter.
Consolidation
The Consolidation option, found inside the Configuration, allows you to inspect
every consolidation that has been created. The target currency analysis period,
consolidated accounts, and consolidation name are all displayed in the list view.

Click the New button to start a new consolidation. There will be a new creation
window displayed.
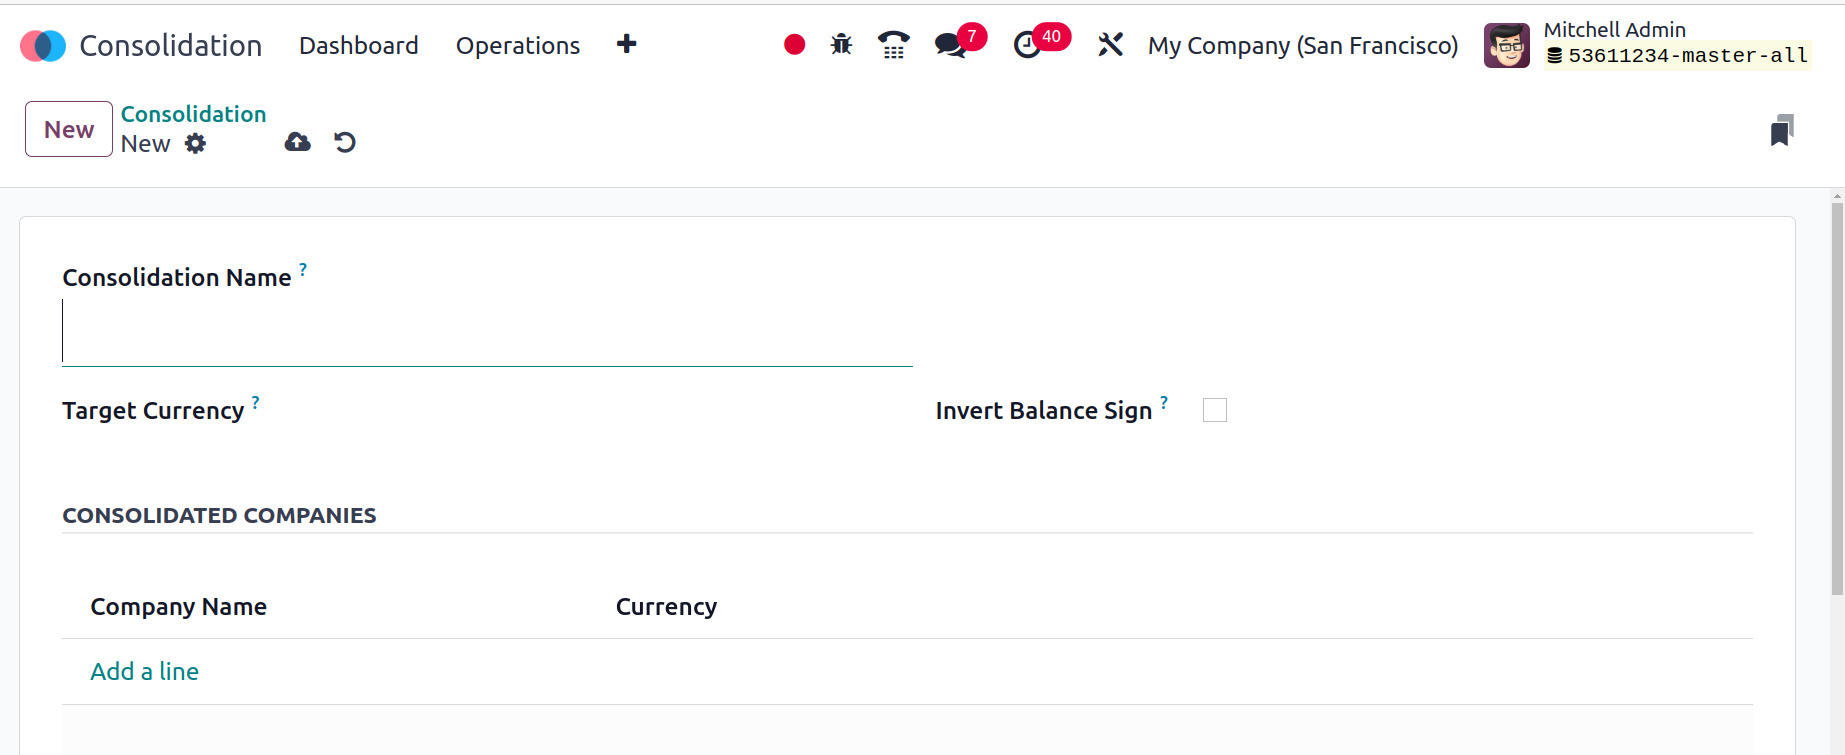
First, enter the Consolidation name in the designated field. Select the target currency
next. To make the Invert Balance Sign, tick the box. Include the consolidated company
in the CONSOLIDATED COMPANY section with its currency.
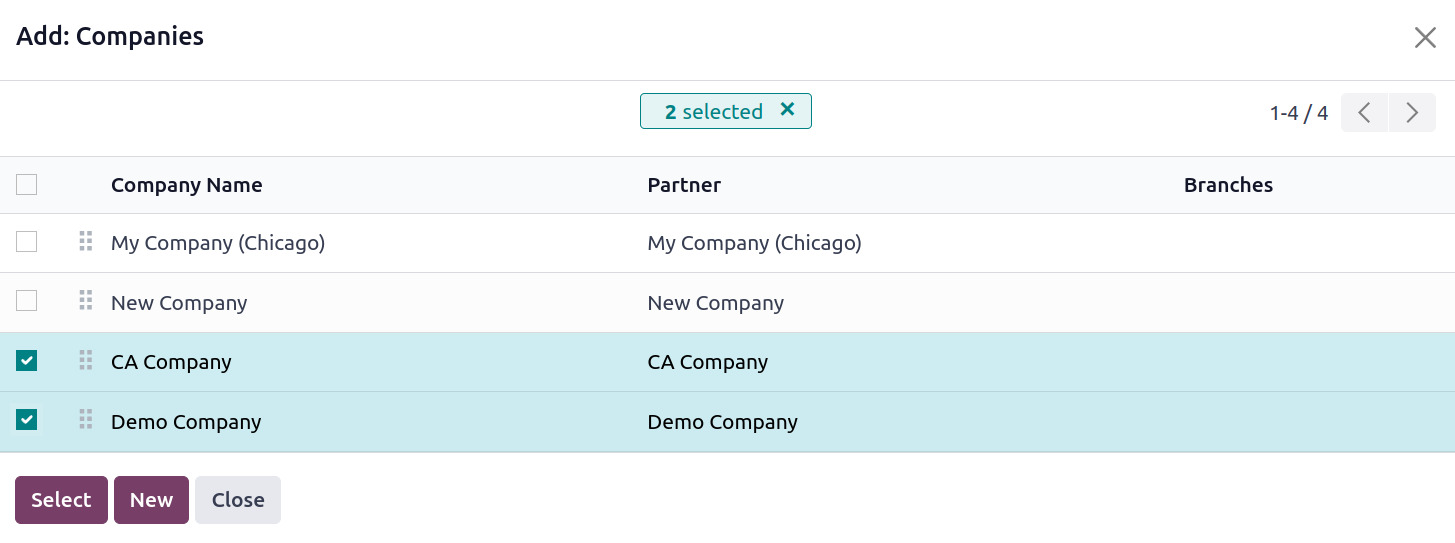
By selecting Add a line, you can add a new company or select an existing one using
the Select button and the New option. The popup box that appears allows you to choose
the subsidiary companies.
By selecting Add a line, you can add a new company or select an existing one using
the Select button and the New option. The popup box that appears allows you to choose
the subsidiary companies.
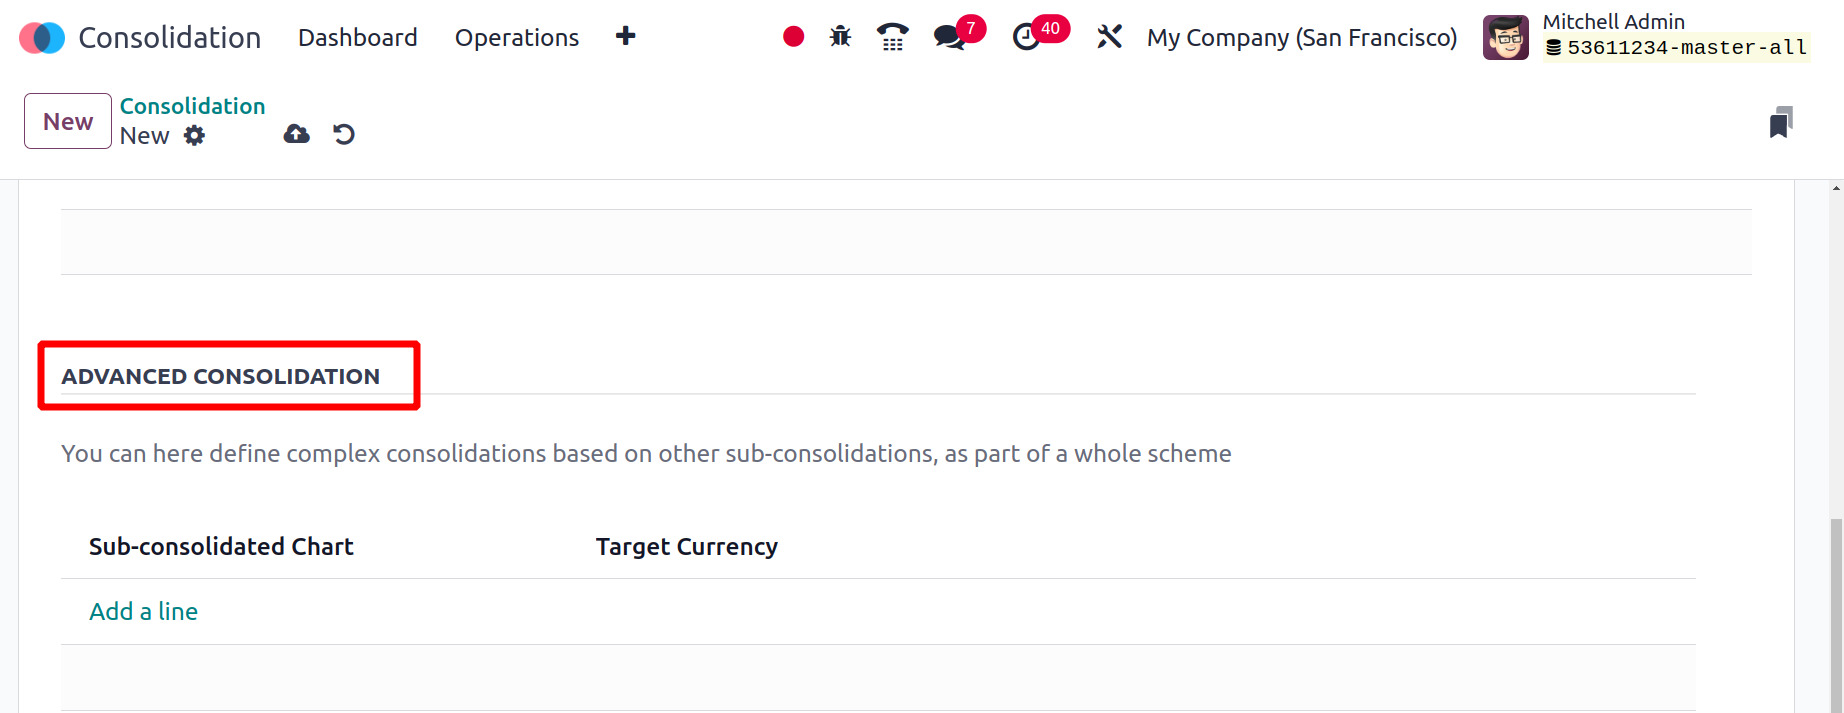
Subcategories can then be added inside the ADVANCED CONSOLIDATION section. Select
the relevant consolidations by using the ‘add a line’ feature.
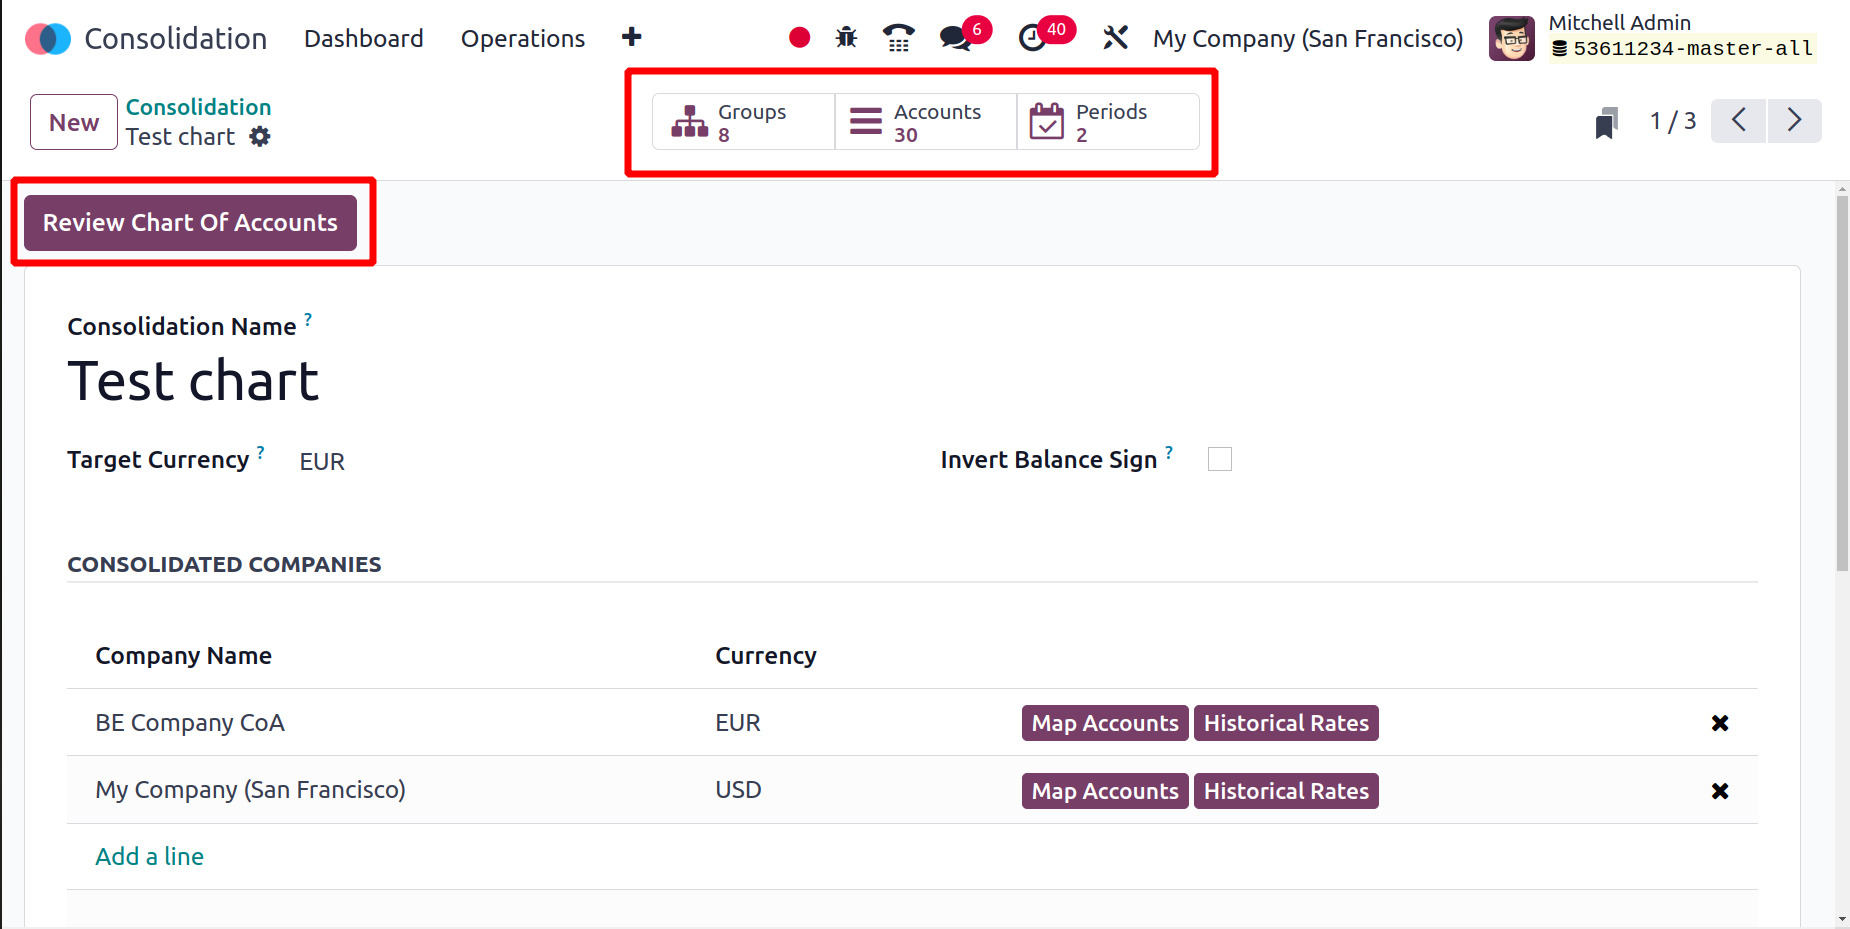
The Review Chart of Account button allows you to view the chart of accounts. Then,
some smart tabs named Groups, Accounts, and Periods are available there.
Let's discuss each one separately.
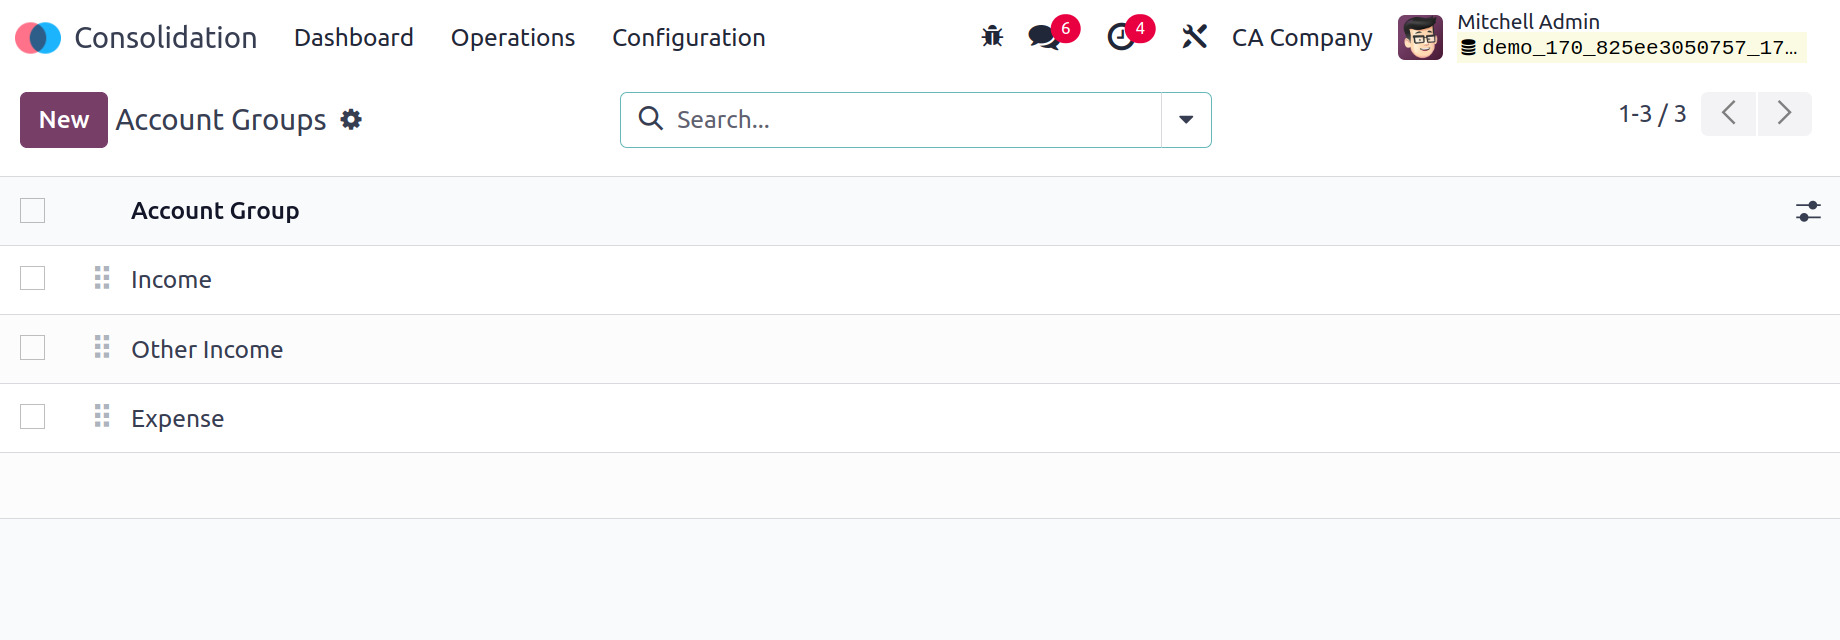
Account Groups
The Account Groups menu inside the Configuration allows users to create new account
groups. The list of created account groups is given there. To add a new one, click
on the New button.
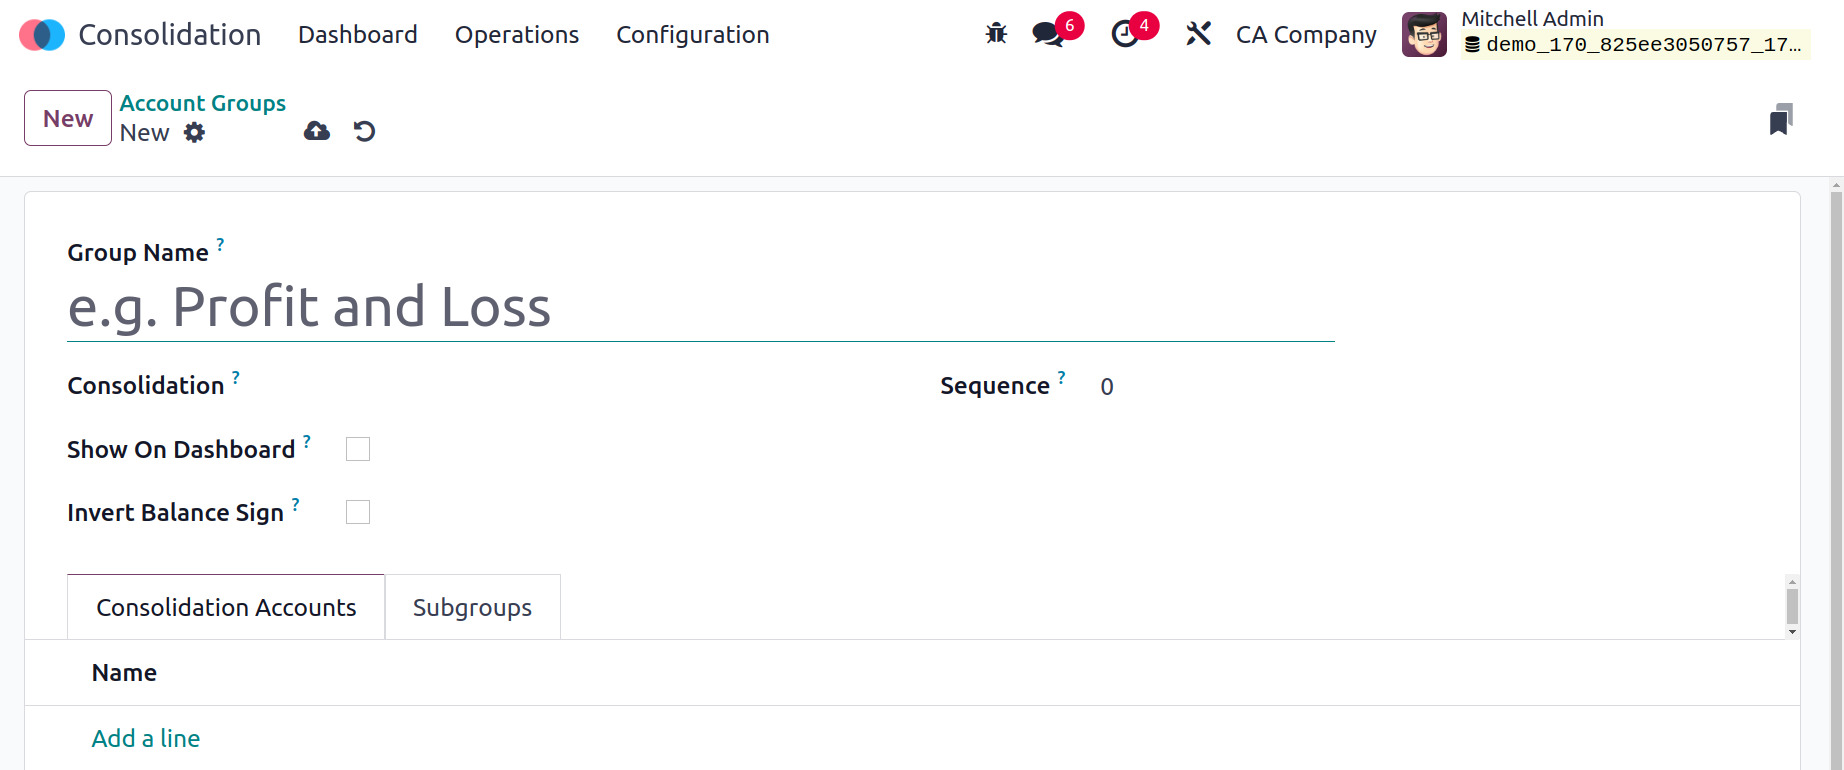
Add the group name and choose the Consolidation. Add the Consolidation Accounts
inside the tab by choosing the Add a Line option. Then subgroups can be added inside
the particular tab.
The group can be viewed on the dashboard by selecting Show on Dashboard, and the
balance can be shown as negative by selecting Invert Balance Sign.
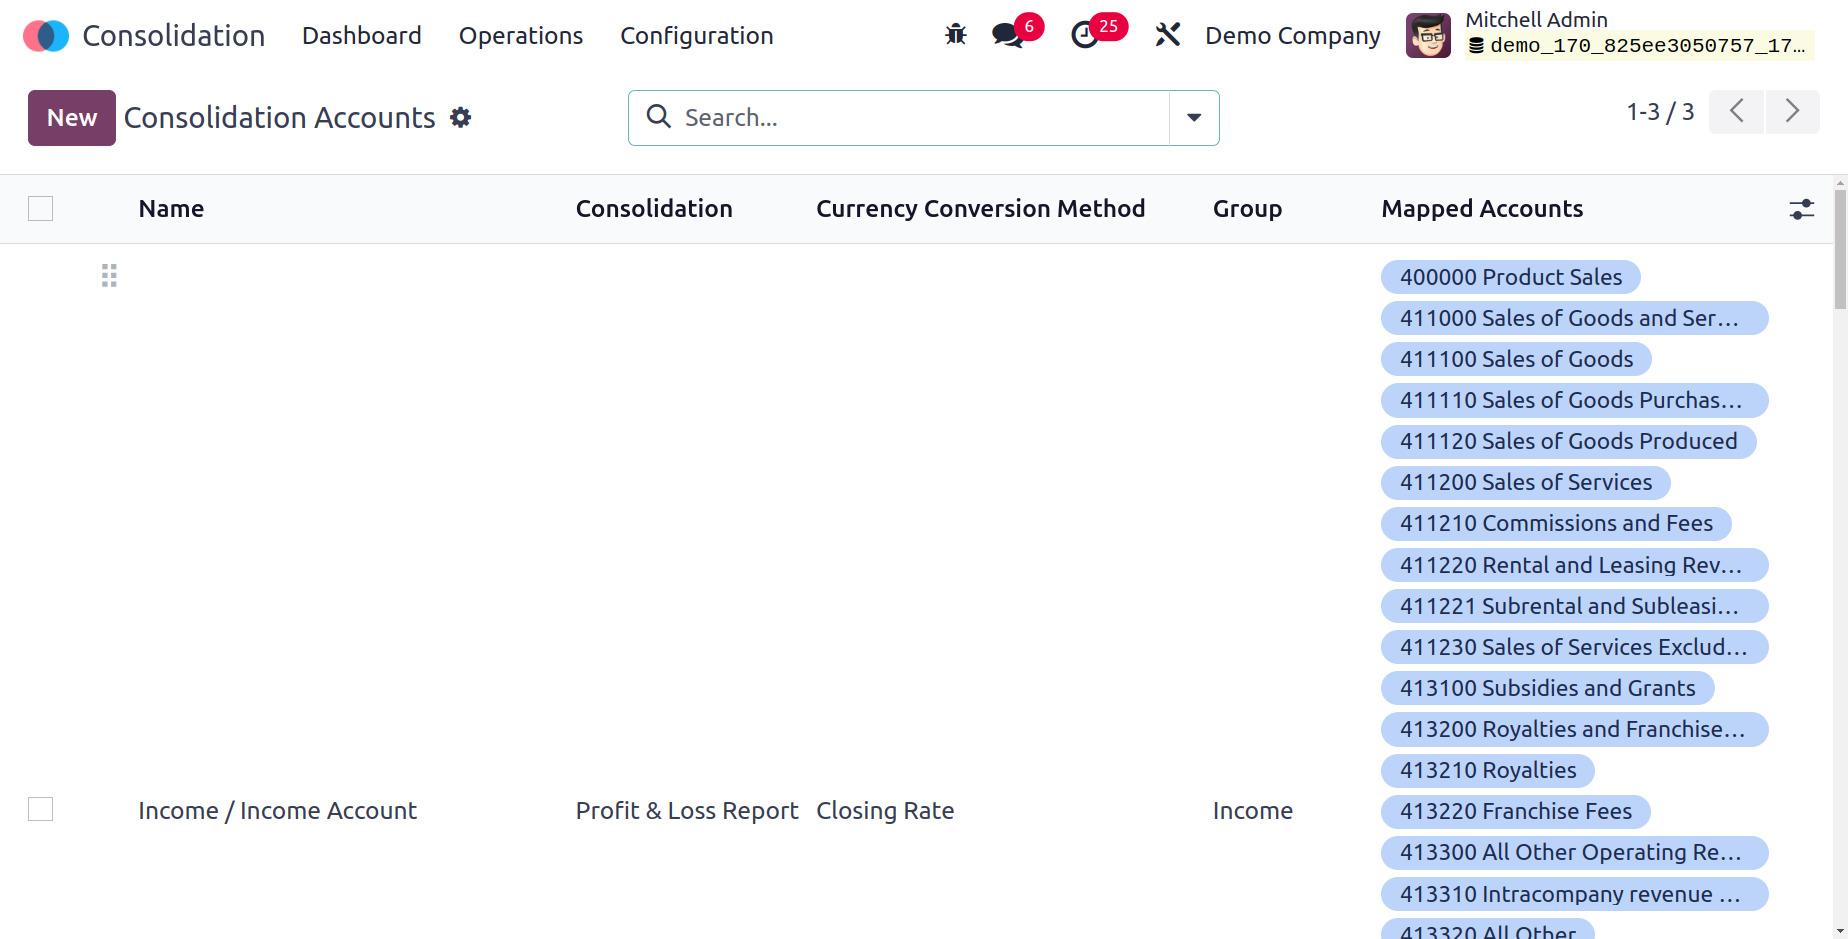
Consolidation Accounts
The Consolidation Accounts are added next, which you can reach using the Configuration
menu. Users have the option to mention several Account categories and create distinct
Consolidation Accounts. Reports are generated based on the Account groupings, which
can have subgroups added within them.
The created consolidation accounts are listed. It is possible to create a new consolidation
account by choosing the New button.
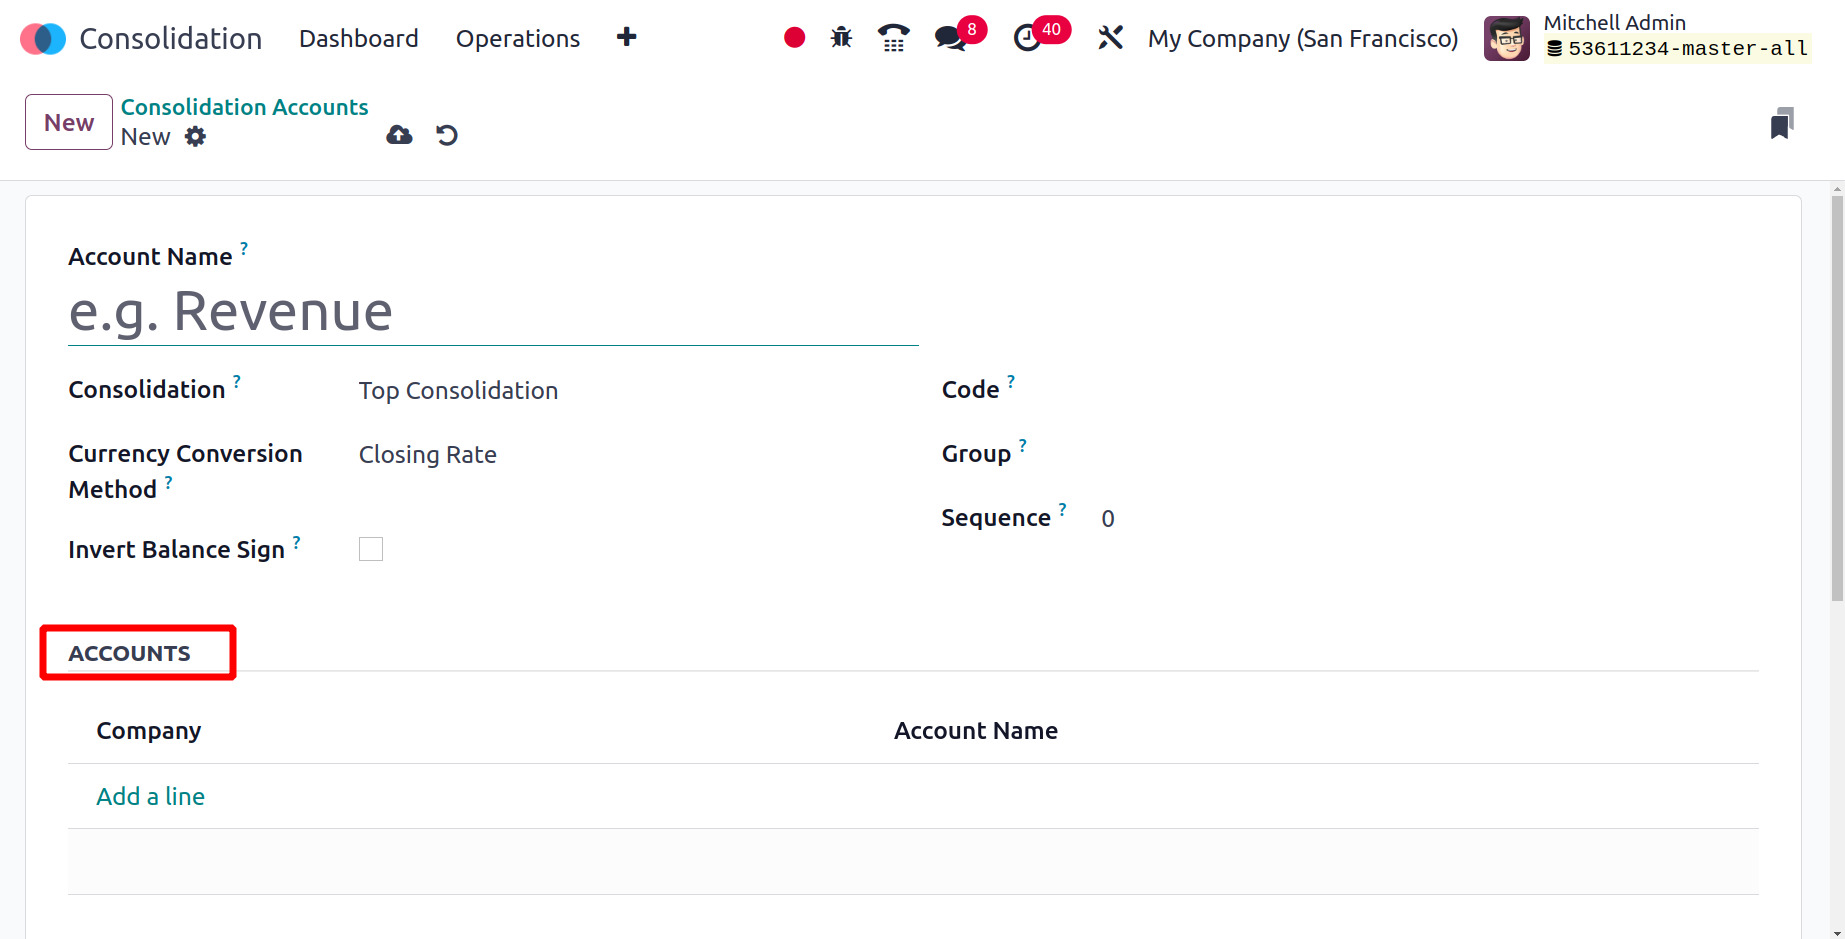
Select the Consolidation and provide the Account name. Mention the account's Code,
Group, and Sequence. The closing rate, the average rate, and the historical rate
are the three ways to convert currencies. You can select the company chart of accounts
by using the Add a line option in the ACCOUNTS.

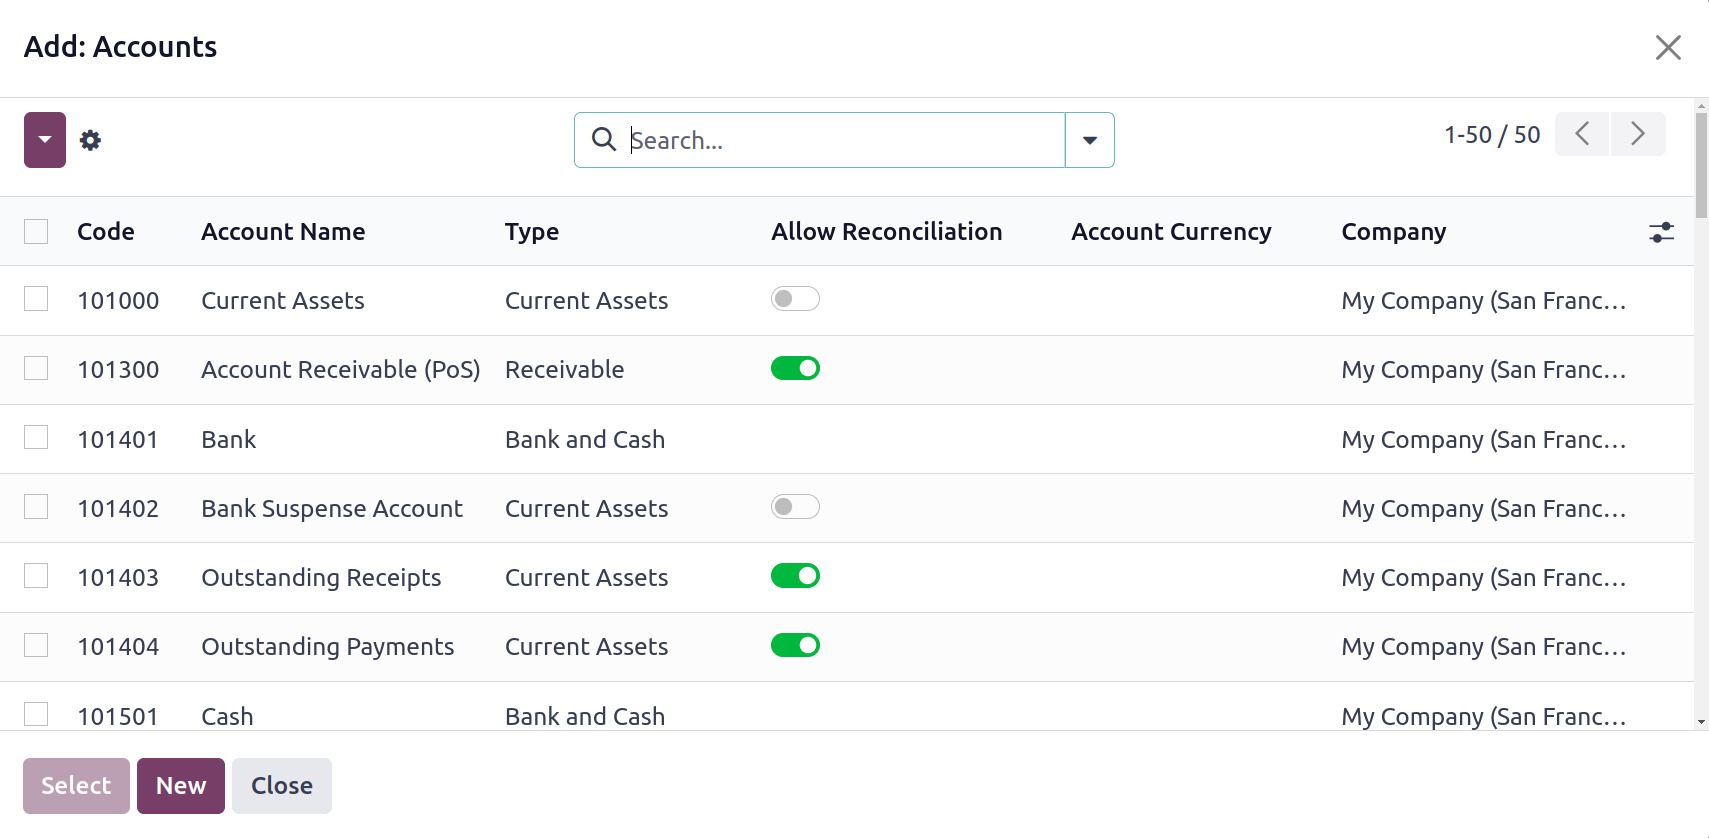
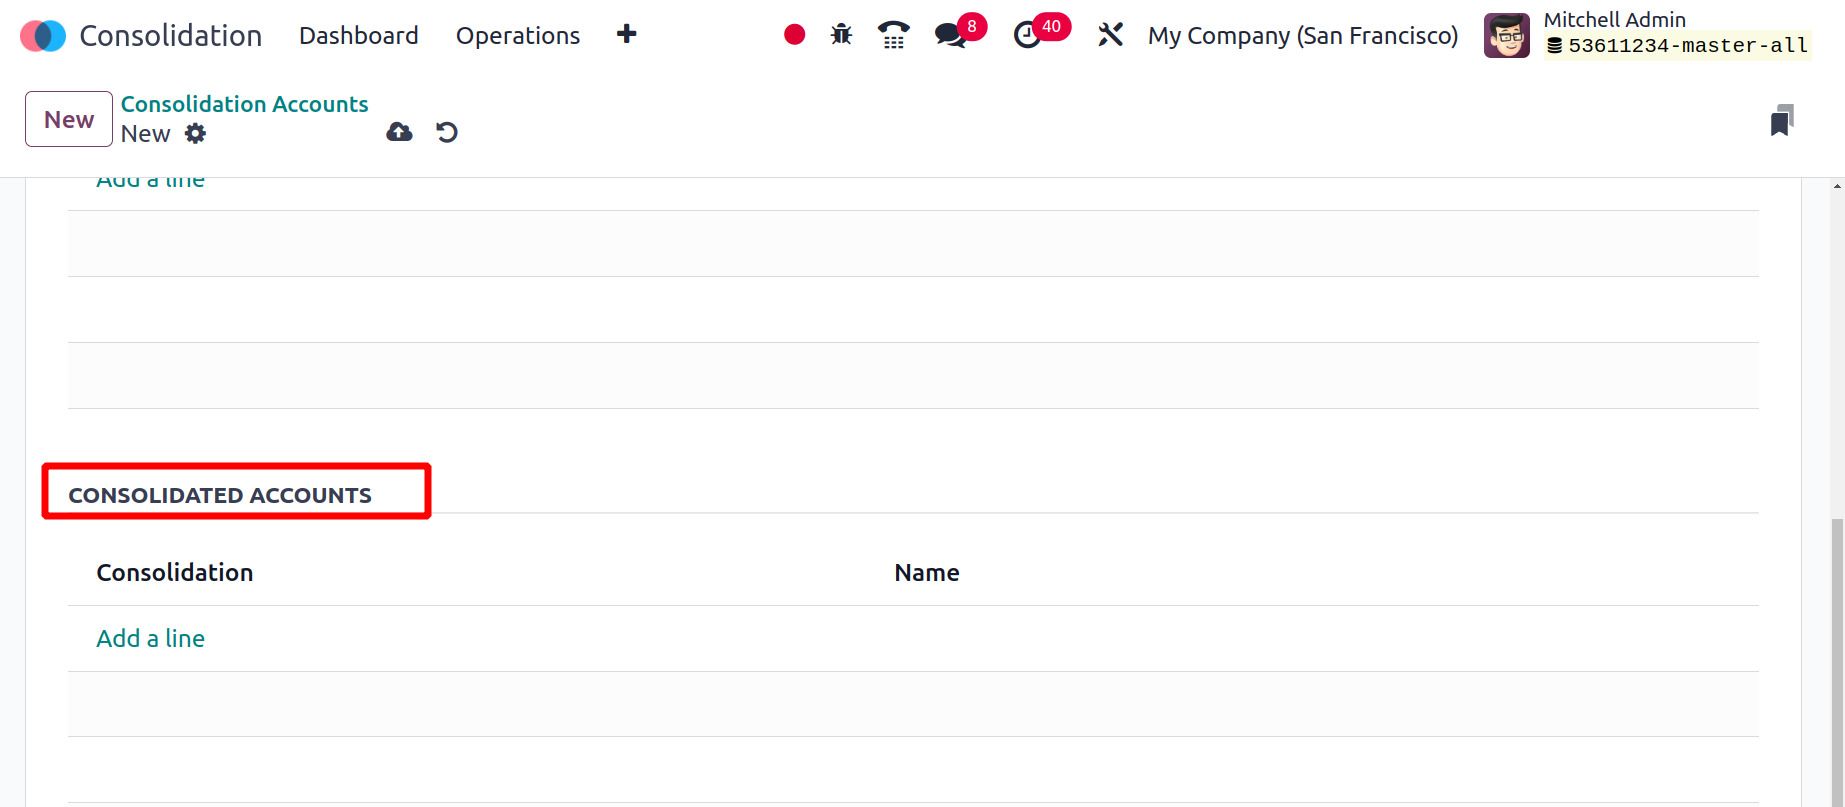
Clicking the Add a line will cause a new popup to appear. The Select button allows
you to select an account, while the New button allows you to create a new one. Selecting
the consolidated accounts is possible in the CONSOLIDATED ACCOUNTS section.
Company Periods
The Company Periods option is available in the Configuration. Company Periods are
the intervals between which the user needs to produce consolidation.
The Company name, Company Currency, Consolidation Rate, Excluded Journals, and start
and finish dates are all provided in the list of formed company periods. In order
to add a new Company Period, click the New button.
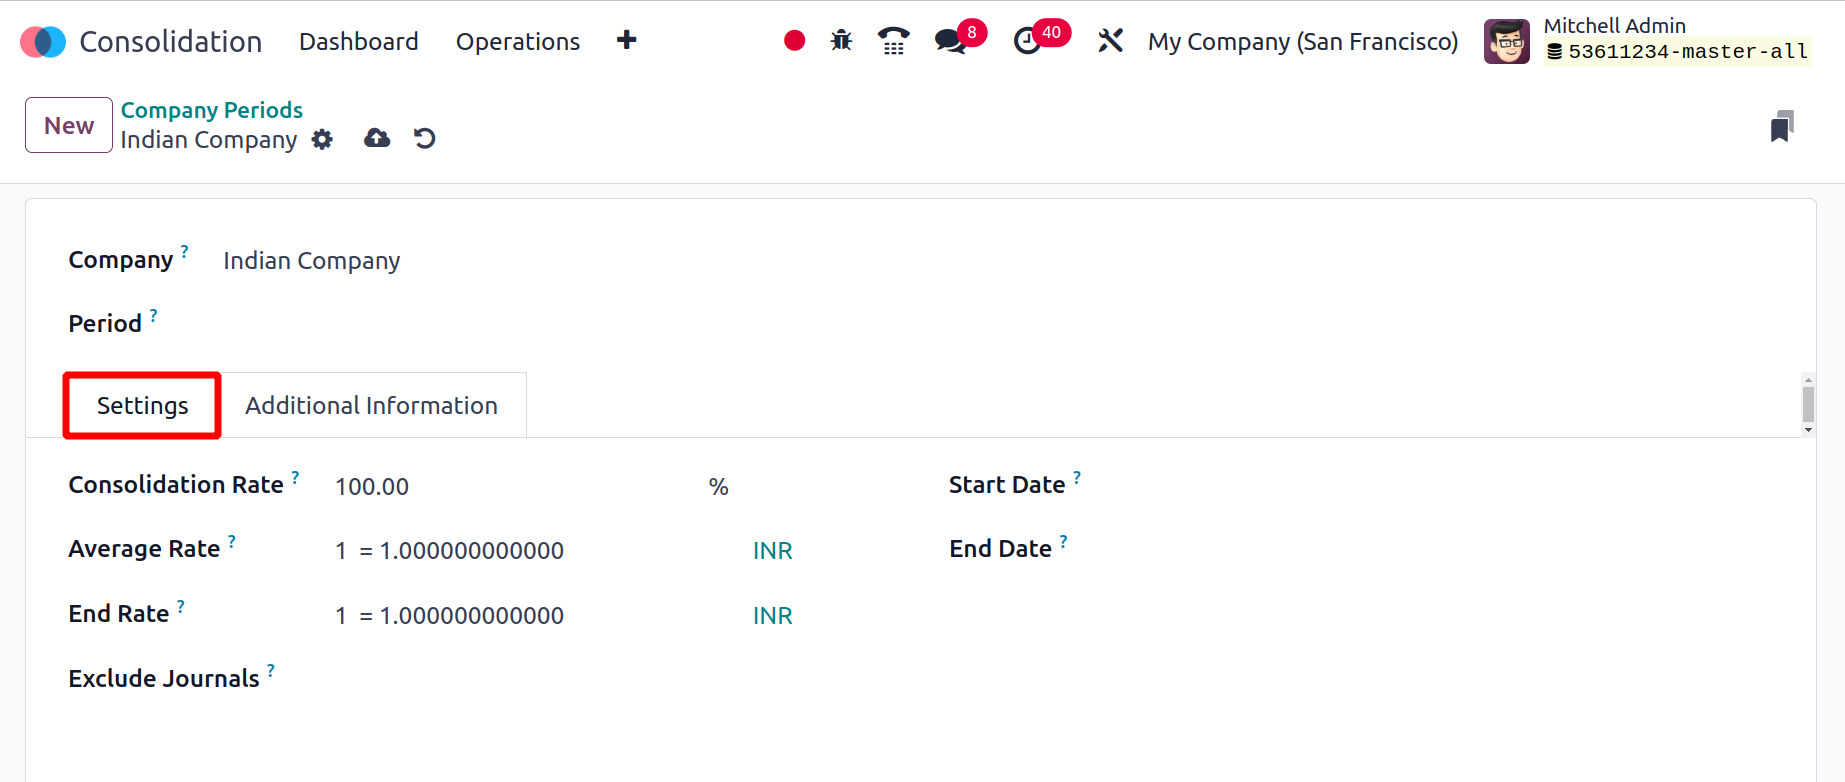
Choose the Company and Period. The Settings tab provides you the options such as
Consolidation Rate, Average Rate, End Rate, Excluded Journals, Start Date, and End
Date.

Enter the percentage consolidation rate in the Consolidation Rate area. The number
of corporate currency units required to obtain one unit of chart currency is then
determined by the Average Rate. The end rate indicates the number of company currency
units required to obtain one chart currency unit. Add the Excluded Journal after
that.
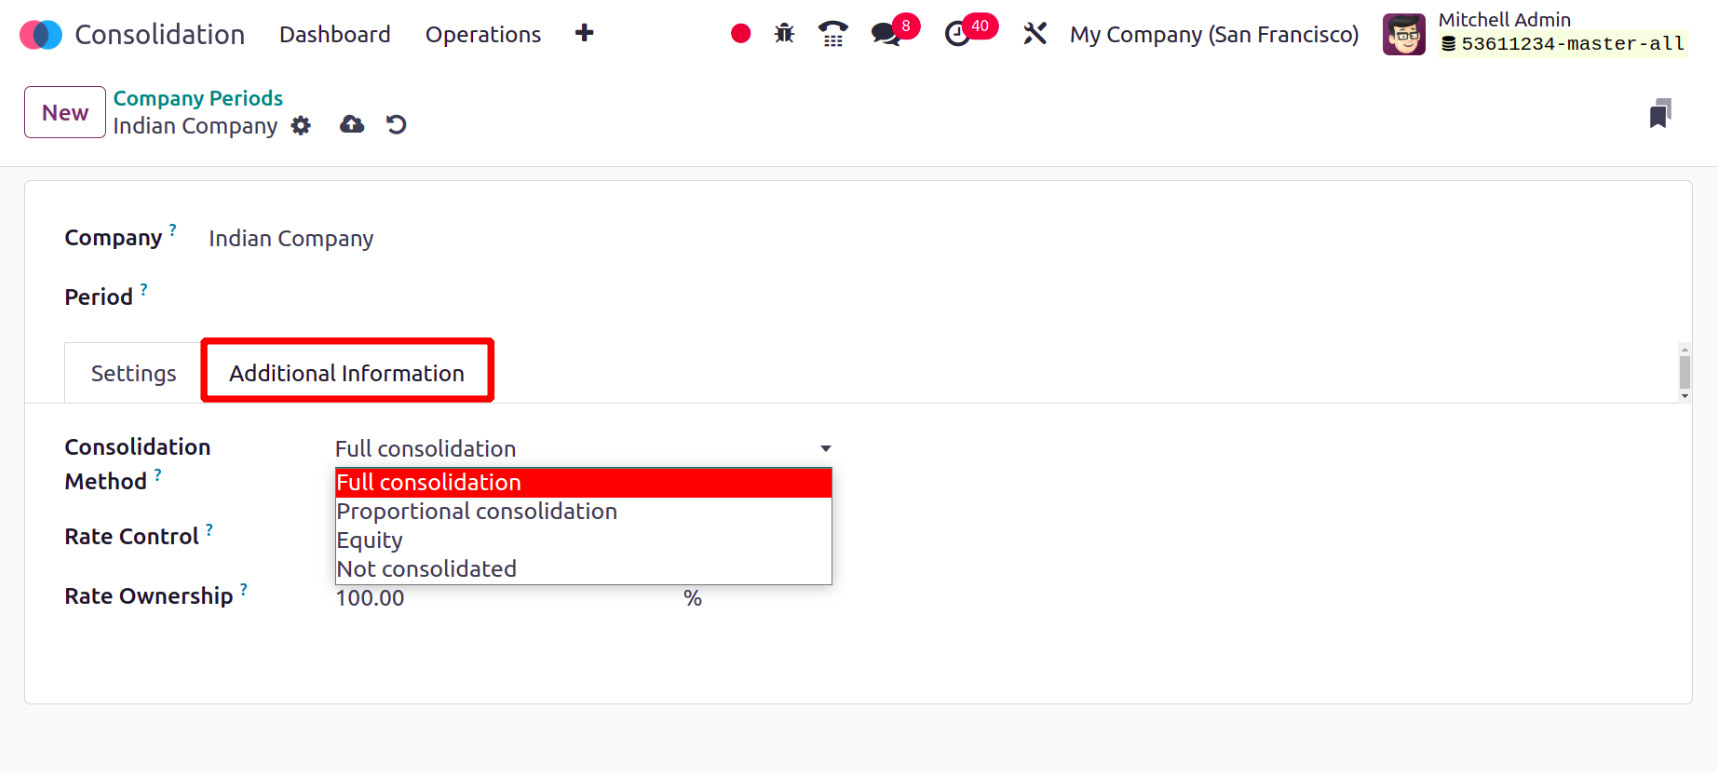
The following tab is for Additional Information. It includes Rate Ownership, Rate
Control, and Consolidation Methods. Full Consolidation, Proportional Consolidation,
Equity, and Not Consolidated are the four consolidation techniques.
Analysis Periods
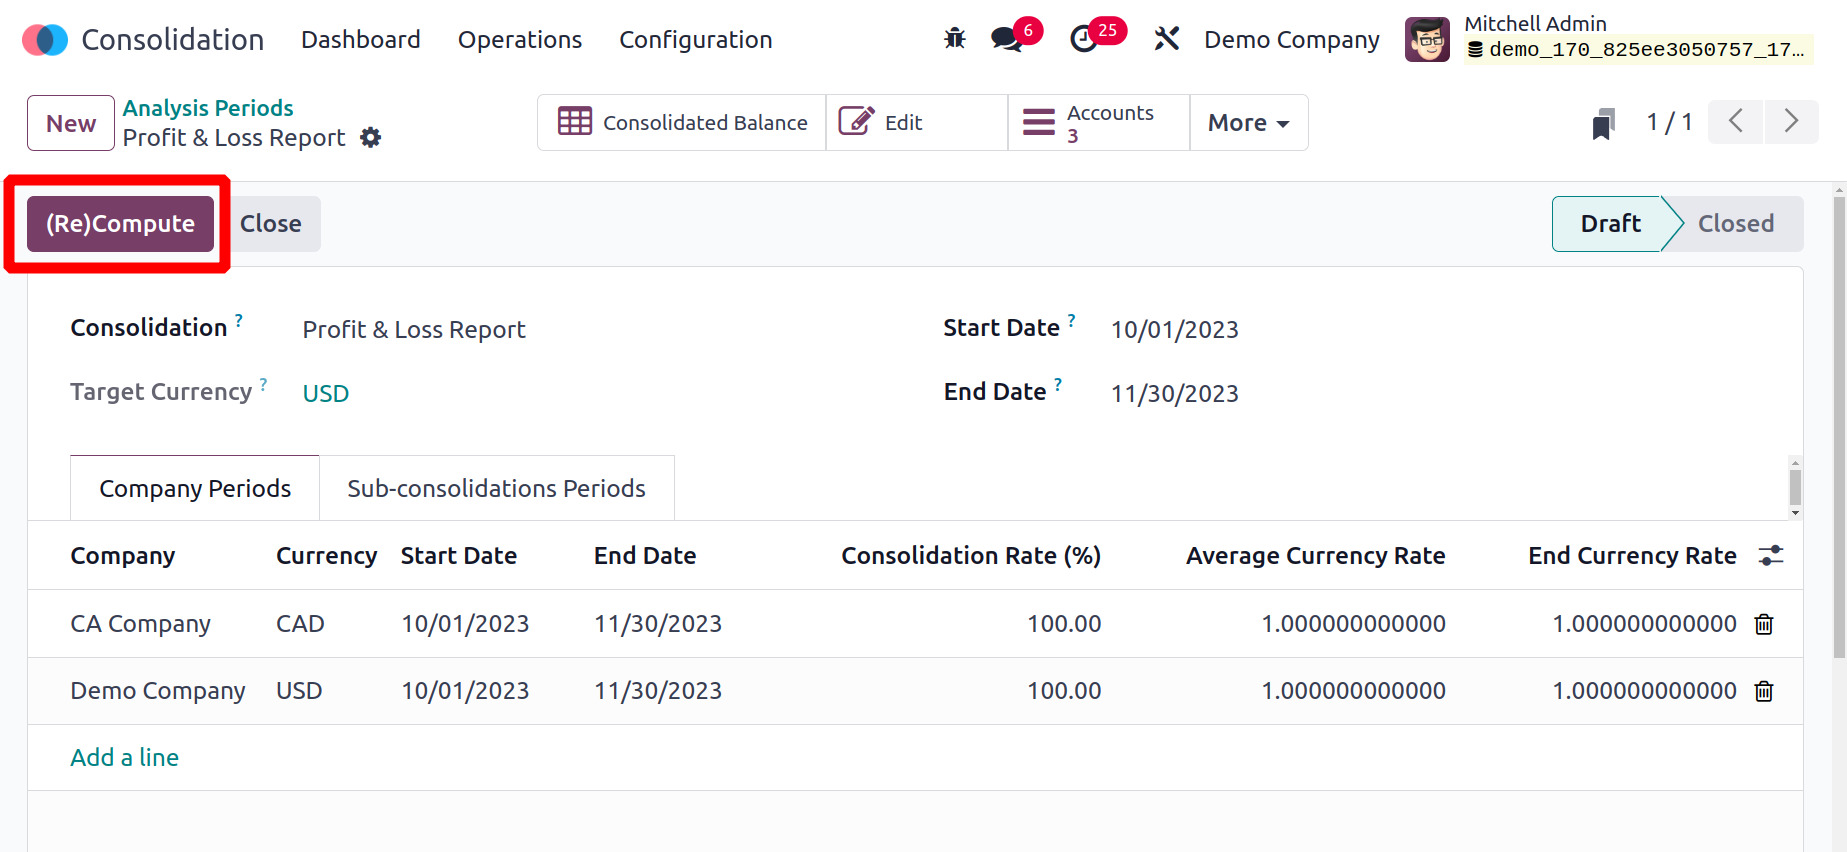
Analysis Periods are used to configure the period or duration of the consolidation.
A list of previously configured periods will open as you select the Periods. Consolidation
name, State, Start Date, and End Date are all contained in the list. The form to
create a new Analysis Period is get on clicking New button.
Choose Consolidation there, then enter Start and End dates. Next, save the newly
created time. Then the Company period will be updated based on the chosen Consolidation.
A Compute button arrives there, using this the user can compute the Consolidated
balance.
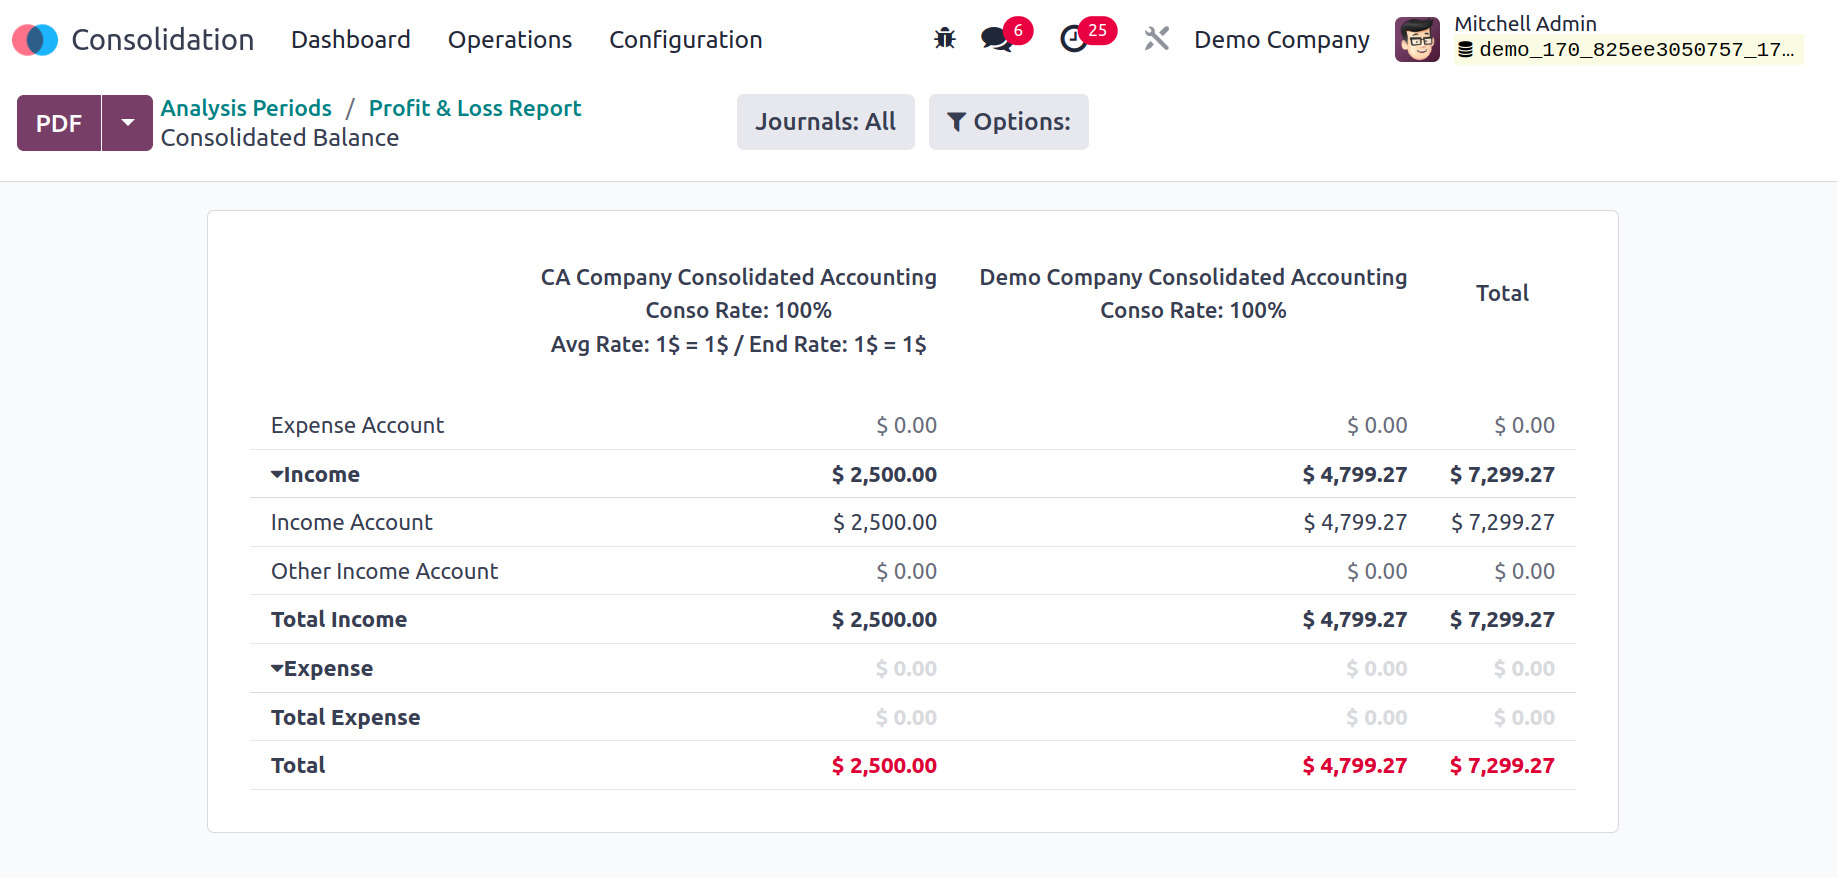
The smart tab Consolidated Balance will show the Consolidated report as shown in
the below screenshot. The entries from both companies are separately visible here.
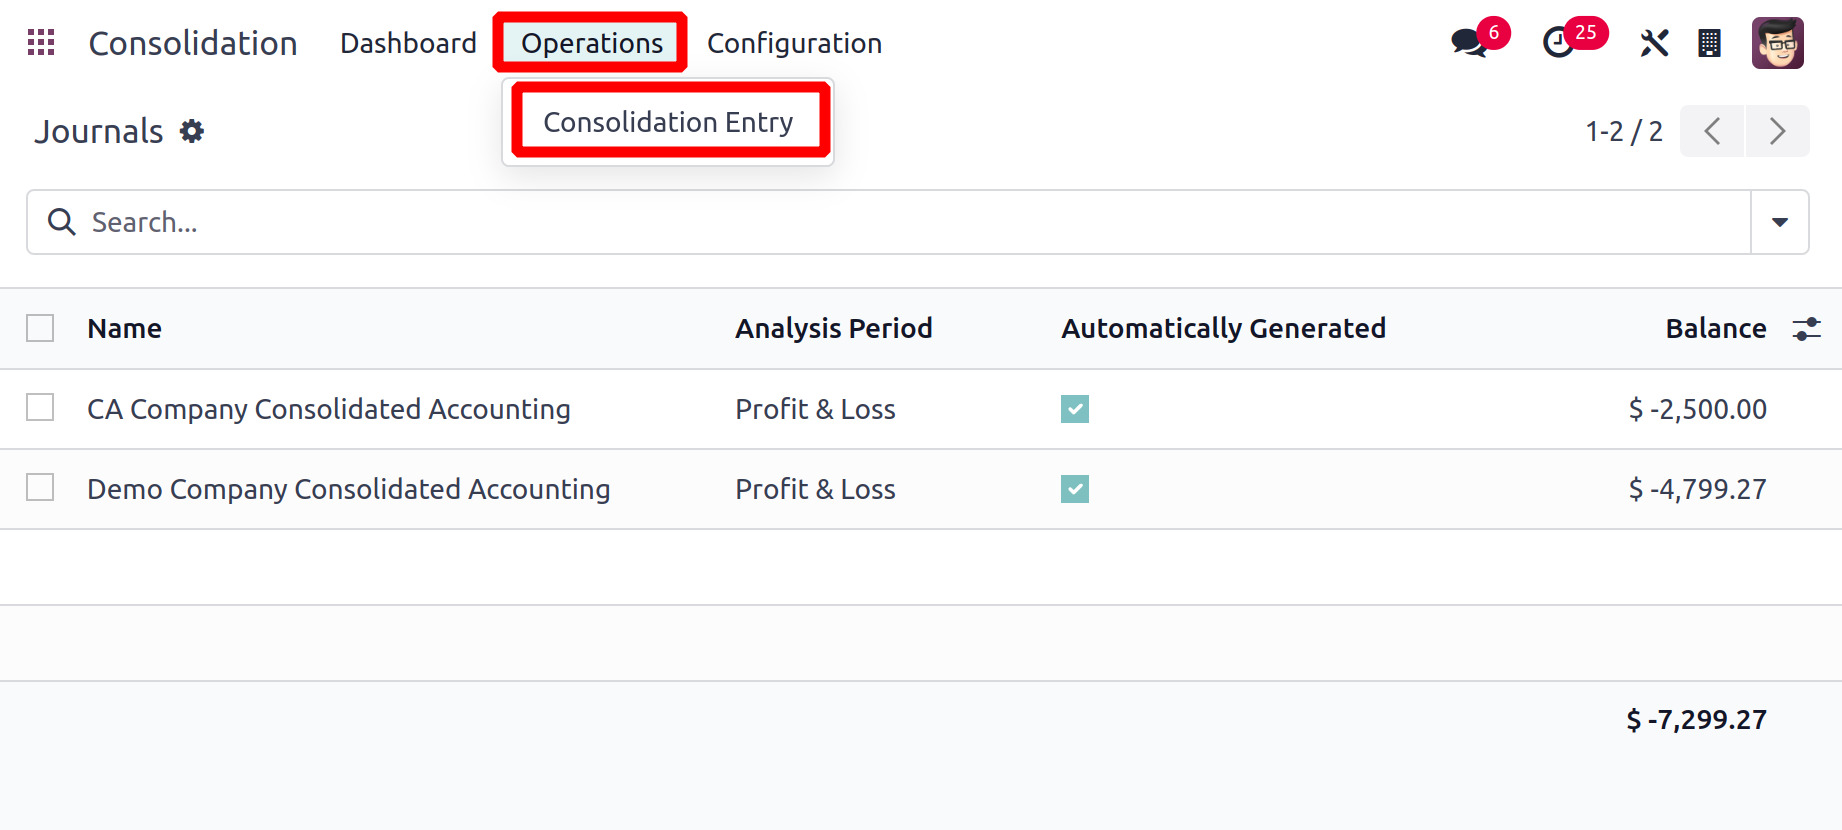
The consolidated entry can be viewed from the Operation menu.
Operations
Consolidation Entry is available via the Consolidation module's Operations menu.
By selecting this option, a journal entry with the name, and analysis period, is
automatically generated, and a balance of every created journal entry is created.
The opening allows us to simply comprehend each entry on its own.
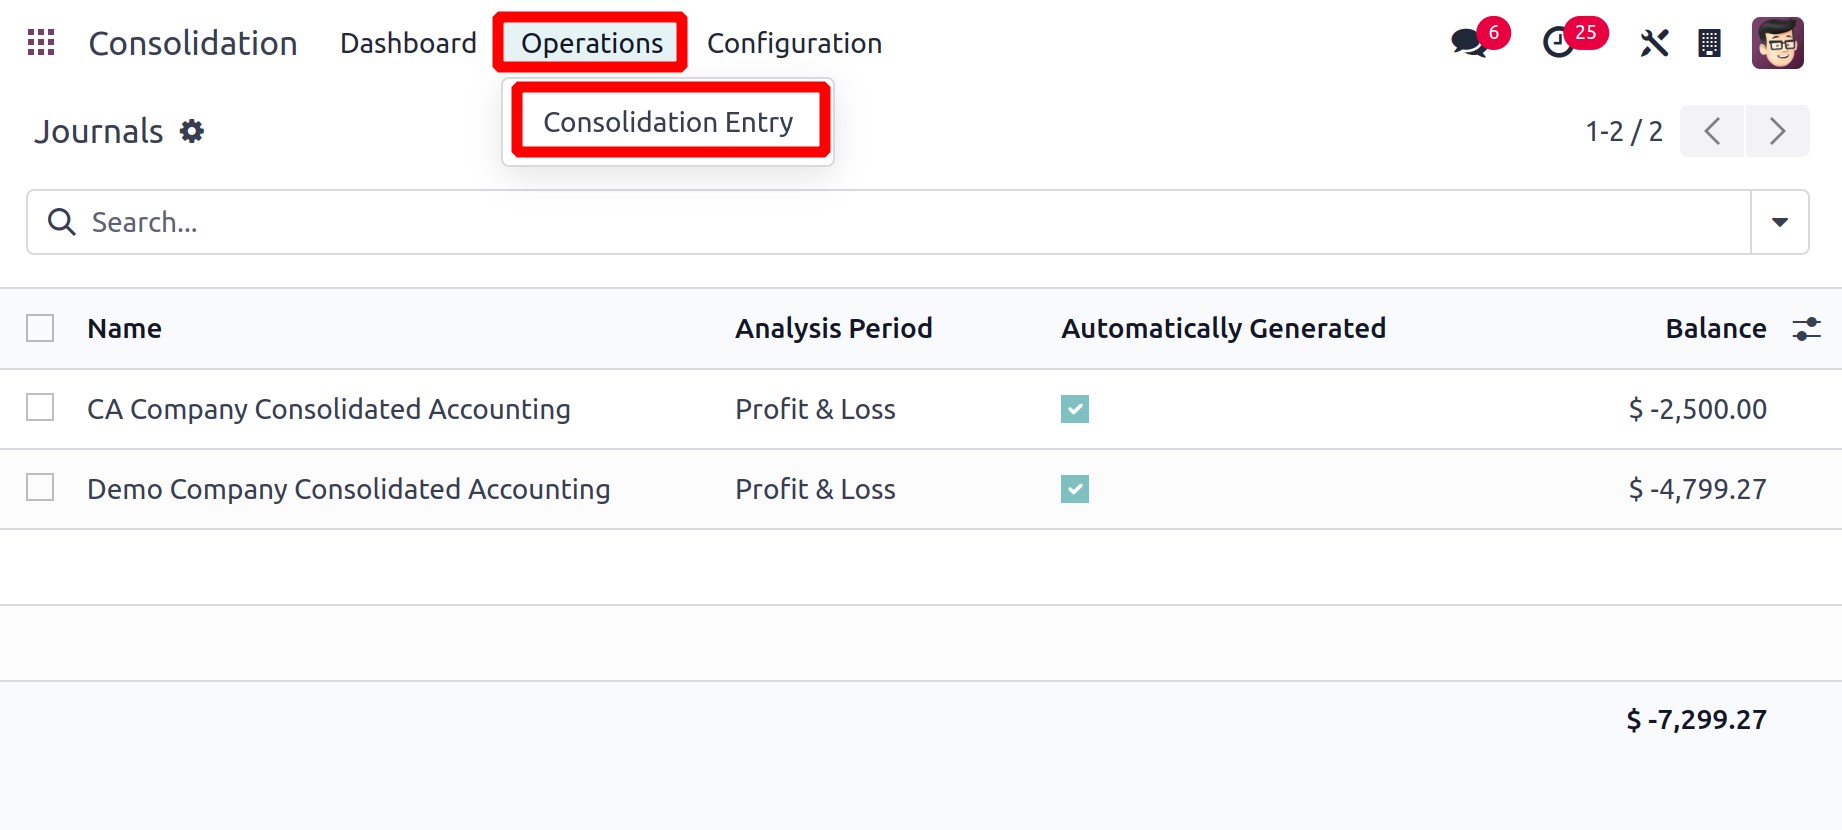
Consolidated entries of each company can be viewed from there.
The consolidation process is managed more precisely and efficiently by the Odoo
17 Consolidation modules.