Odoo 17 Blog
With Odoo 17, Blogs are a great way for companies to share industry insights, build thought leadership, and improve their online presence. Businesses may engage with their audience, increase website traffic, and create a sense of
community by publishing timely and relevant blog entries that present their knowledge in an engaging and approachable way.
You can find the Blogs module in the Odoo 17 app store. The Blogs module will be installed with the website if the Website module is selected.

The Odoo17 Website module's Configuration tab contains the Blogs menu, where you can establish different categories for your blogs. It will be quite helpful to organize blogs according to their subjects, making them easy to find. After selecting this option, a Blogs window will appear, similar to the one in the illustration below.
All of the configured blogs, along with their names, the number of posts for each type of blog, and the details of the relevant website, are listed in this preview of the Blogs window. You can click the New button to configure new blogs.

You will now illustrate a creation form like the one in the picture below.
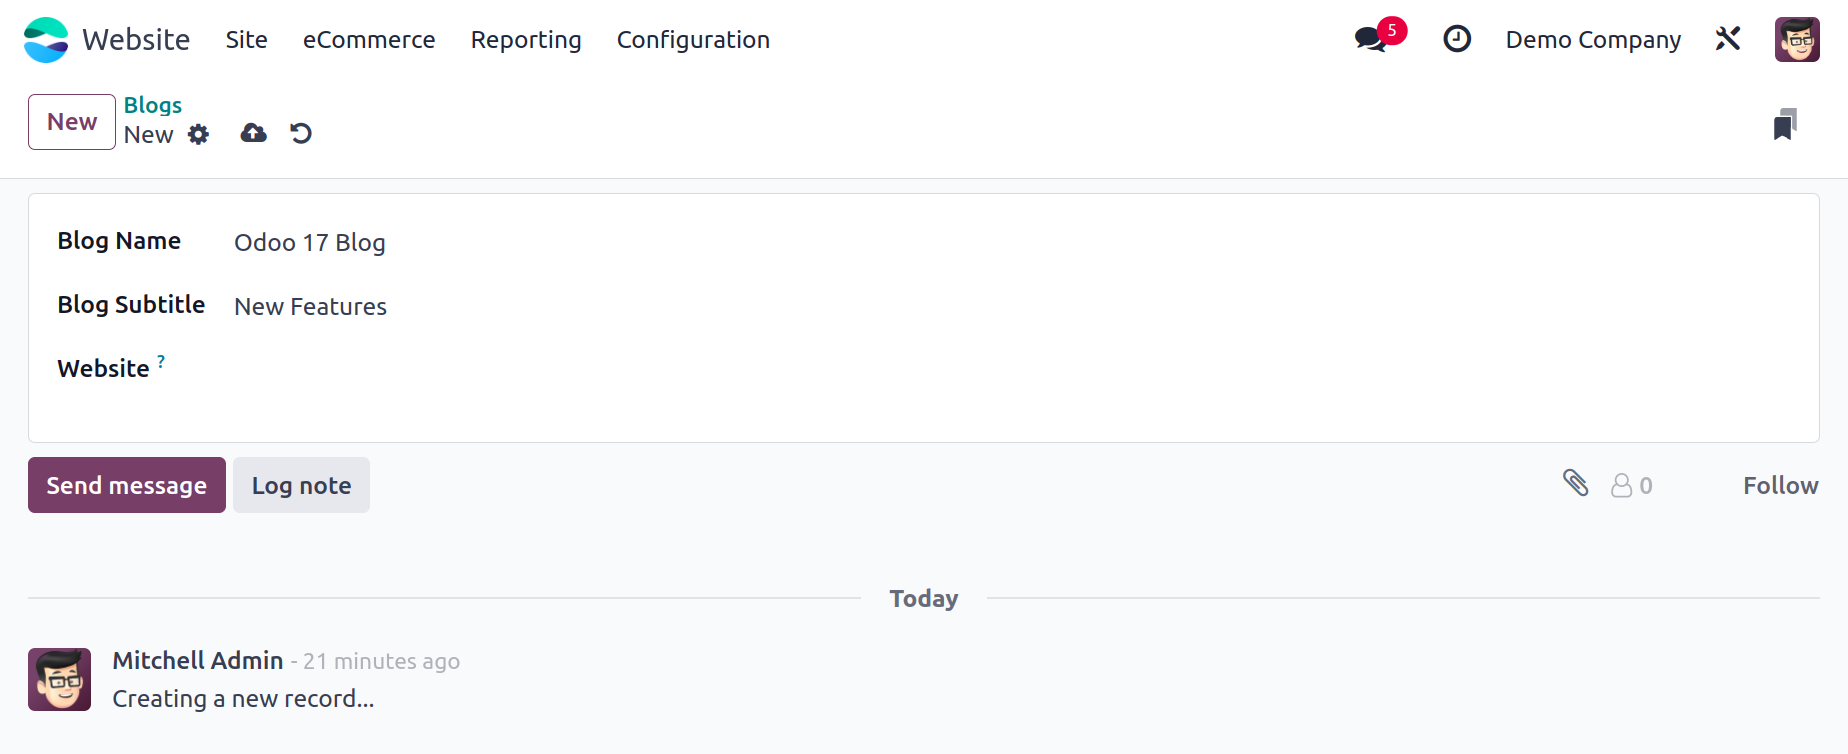
You can add the Blog Name, Blog Subtitle, and Website name in the creation form if the system employs numerous website alternatives. You may save the details by clicking the SAVE button after entering these details.
We can verify if it appears in the Blog posts window if you designate it as a Technical blog.
Every blog that has been created and displayed on the website. To view all of the blogs, select the Blogs menu from within the website. By selecting the Edit
option, users may now modify and add customizations to the blog page. The edit button is located in the screen's upper right corner.
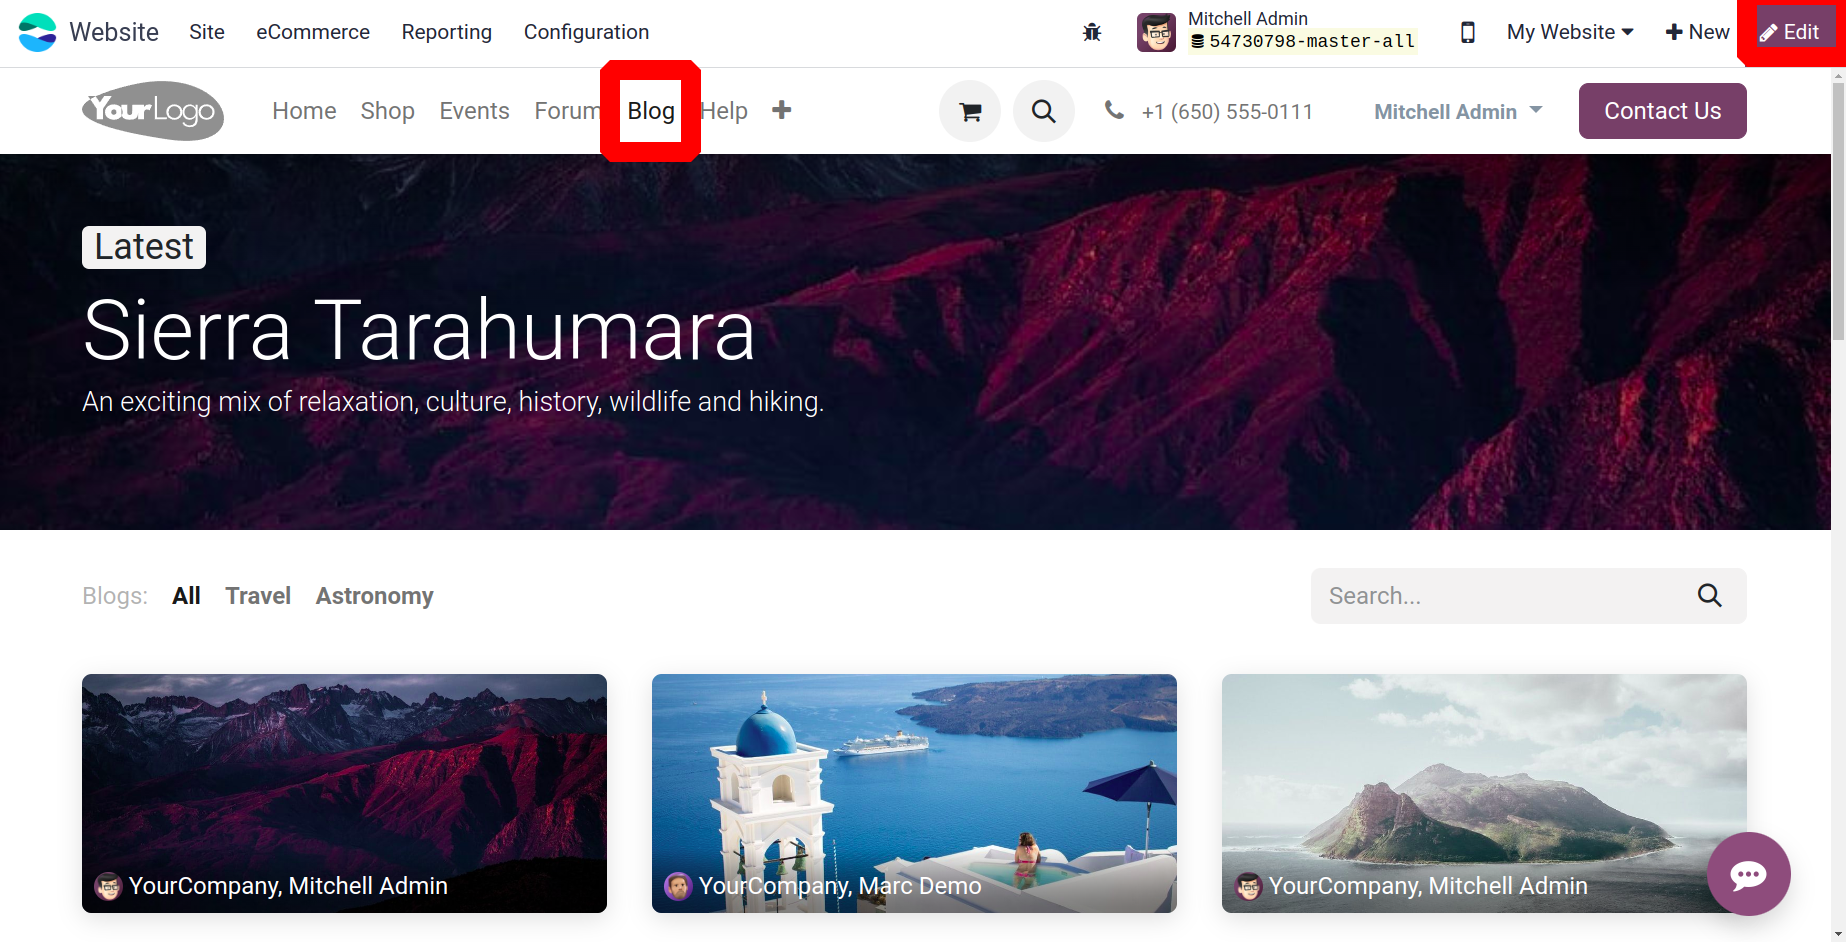
Through customization, the blog page can include features like layout, full width, cards, slide bar, posts list, author, views, comments, teaser, and tags, among other options.
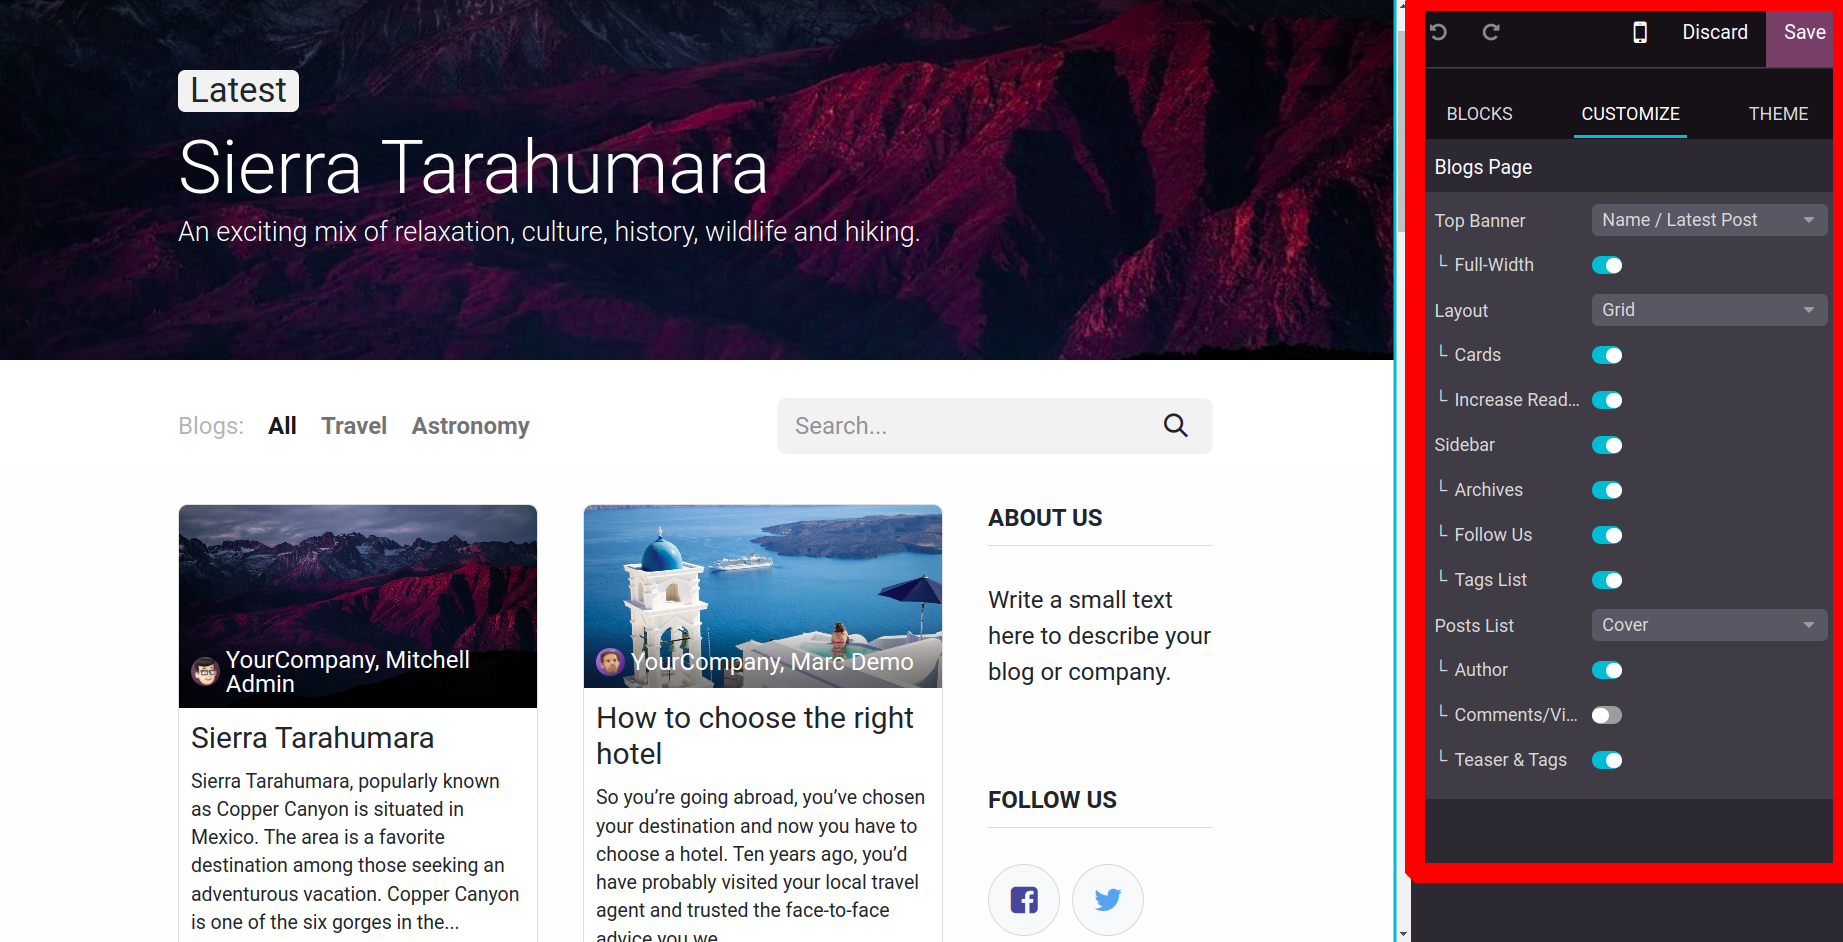
Either the Name/Latest Post or the Drop Zone for building blocks can be selected for the Top Banner. After that, the alignment will shift. The new blog or the most recent blog will appear at the top of the page if the Name/Latest Post option is used.
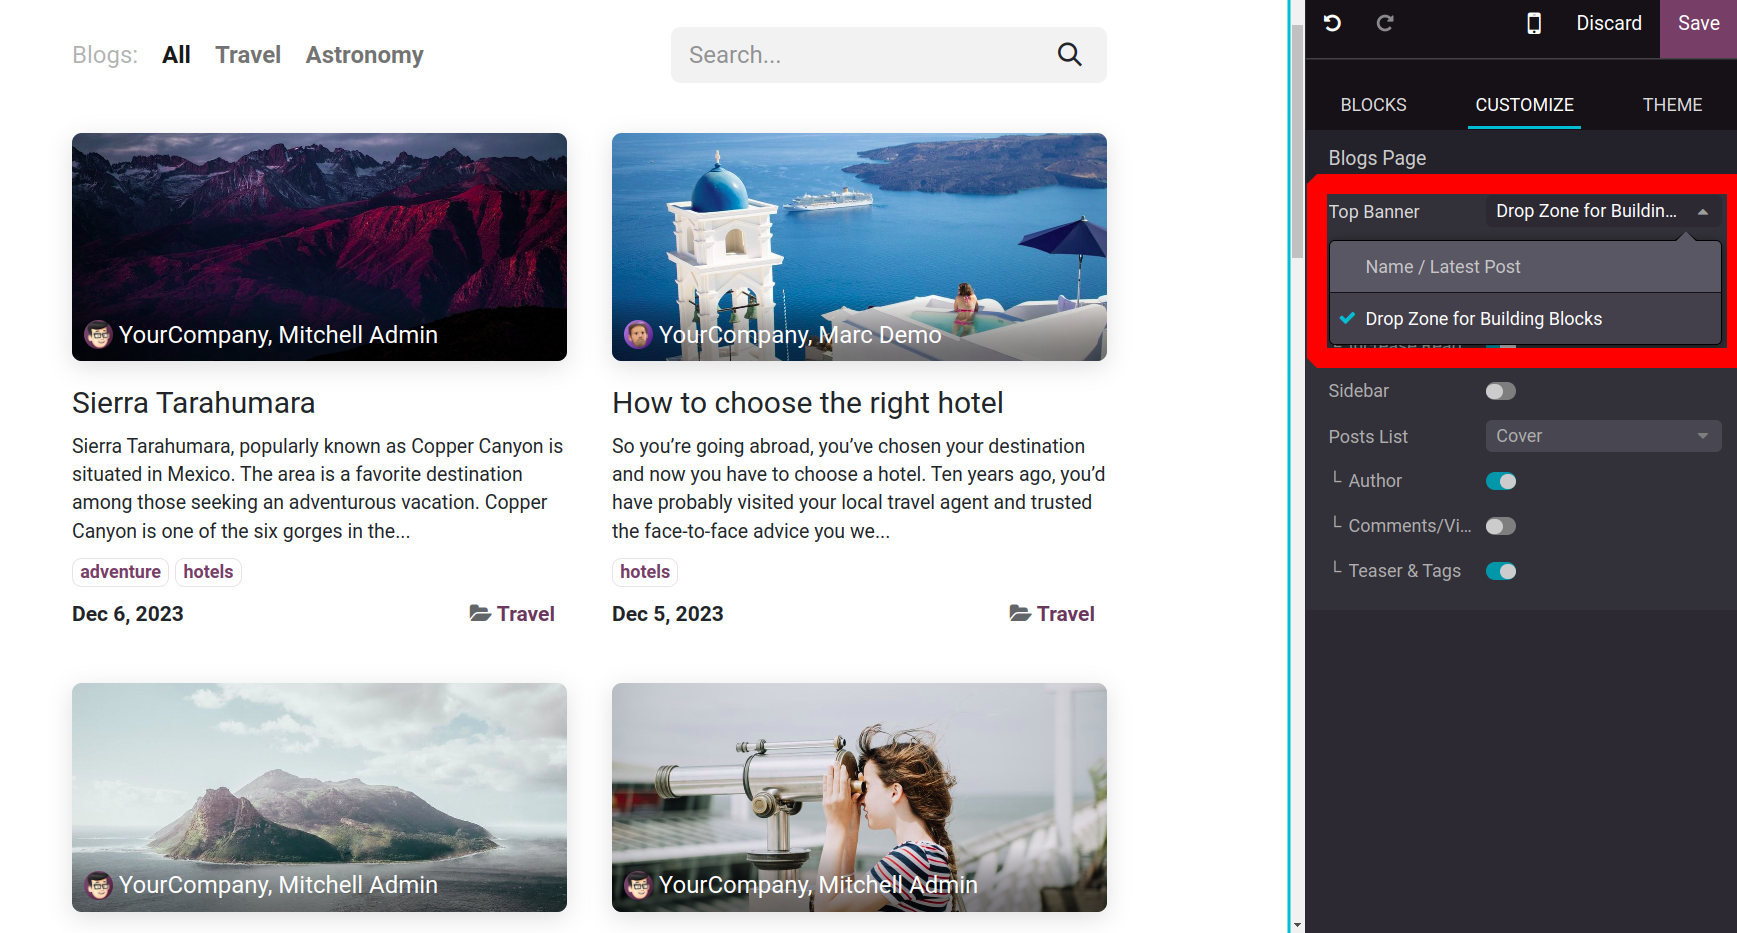
The customization tab offers the option to select the Layout as either Grid view or List view.
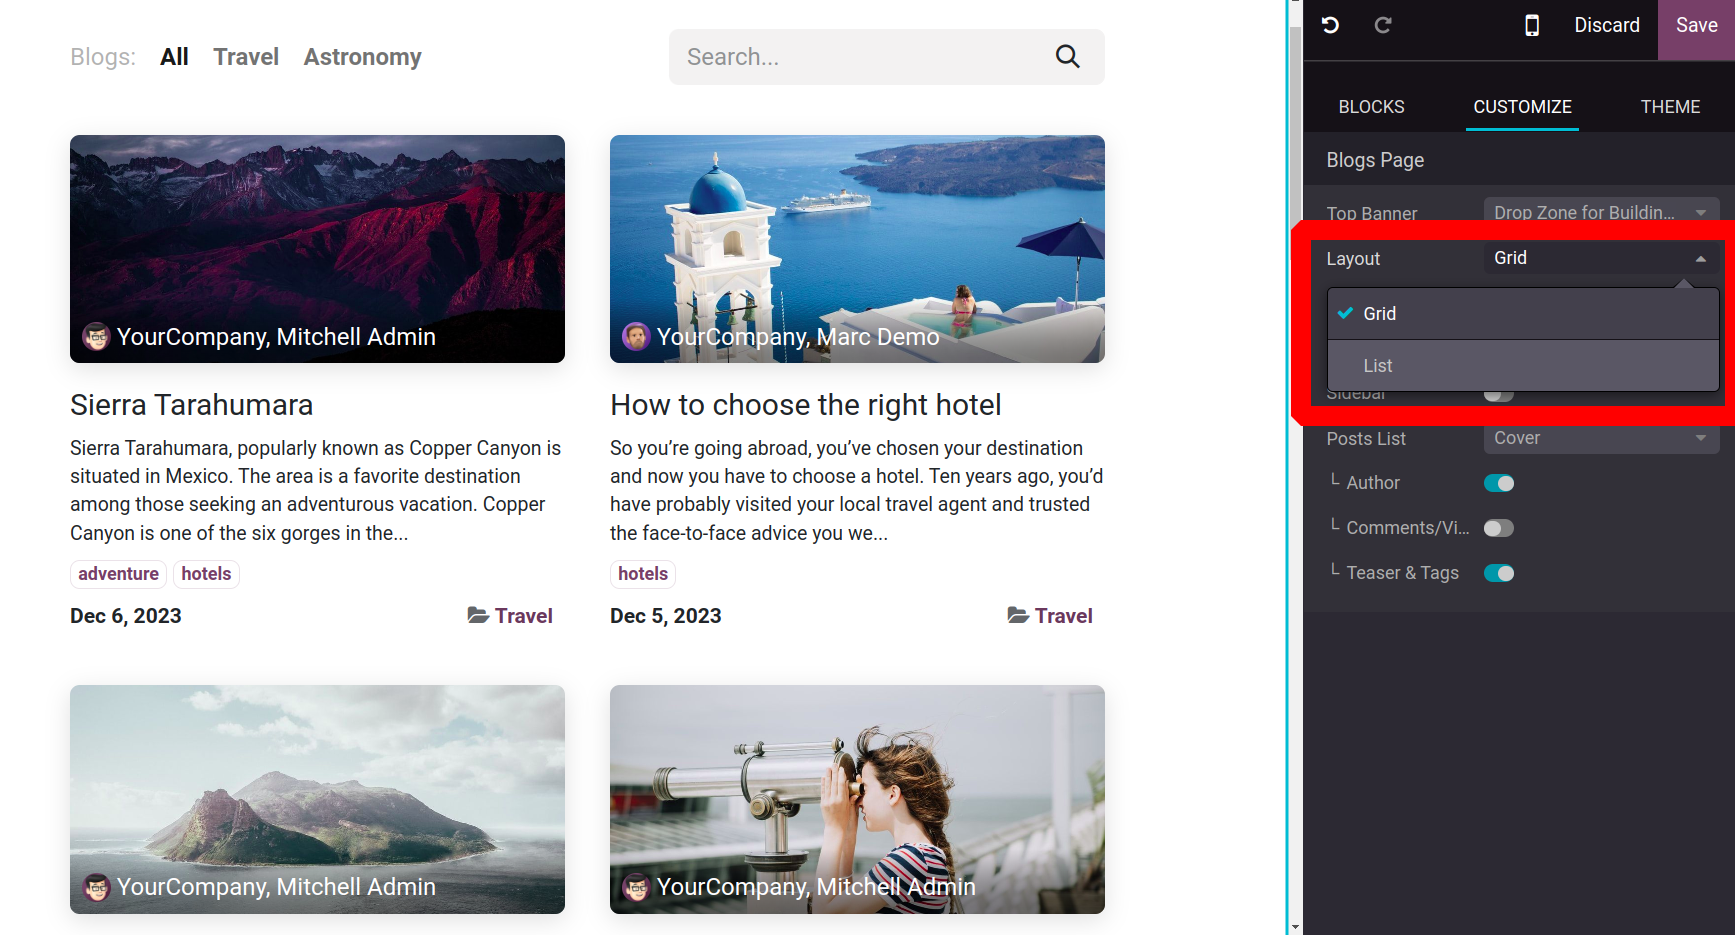
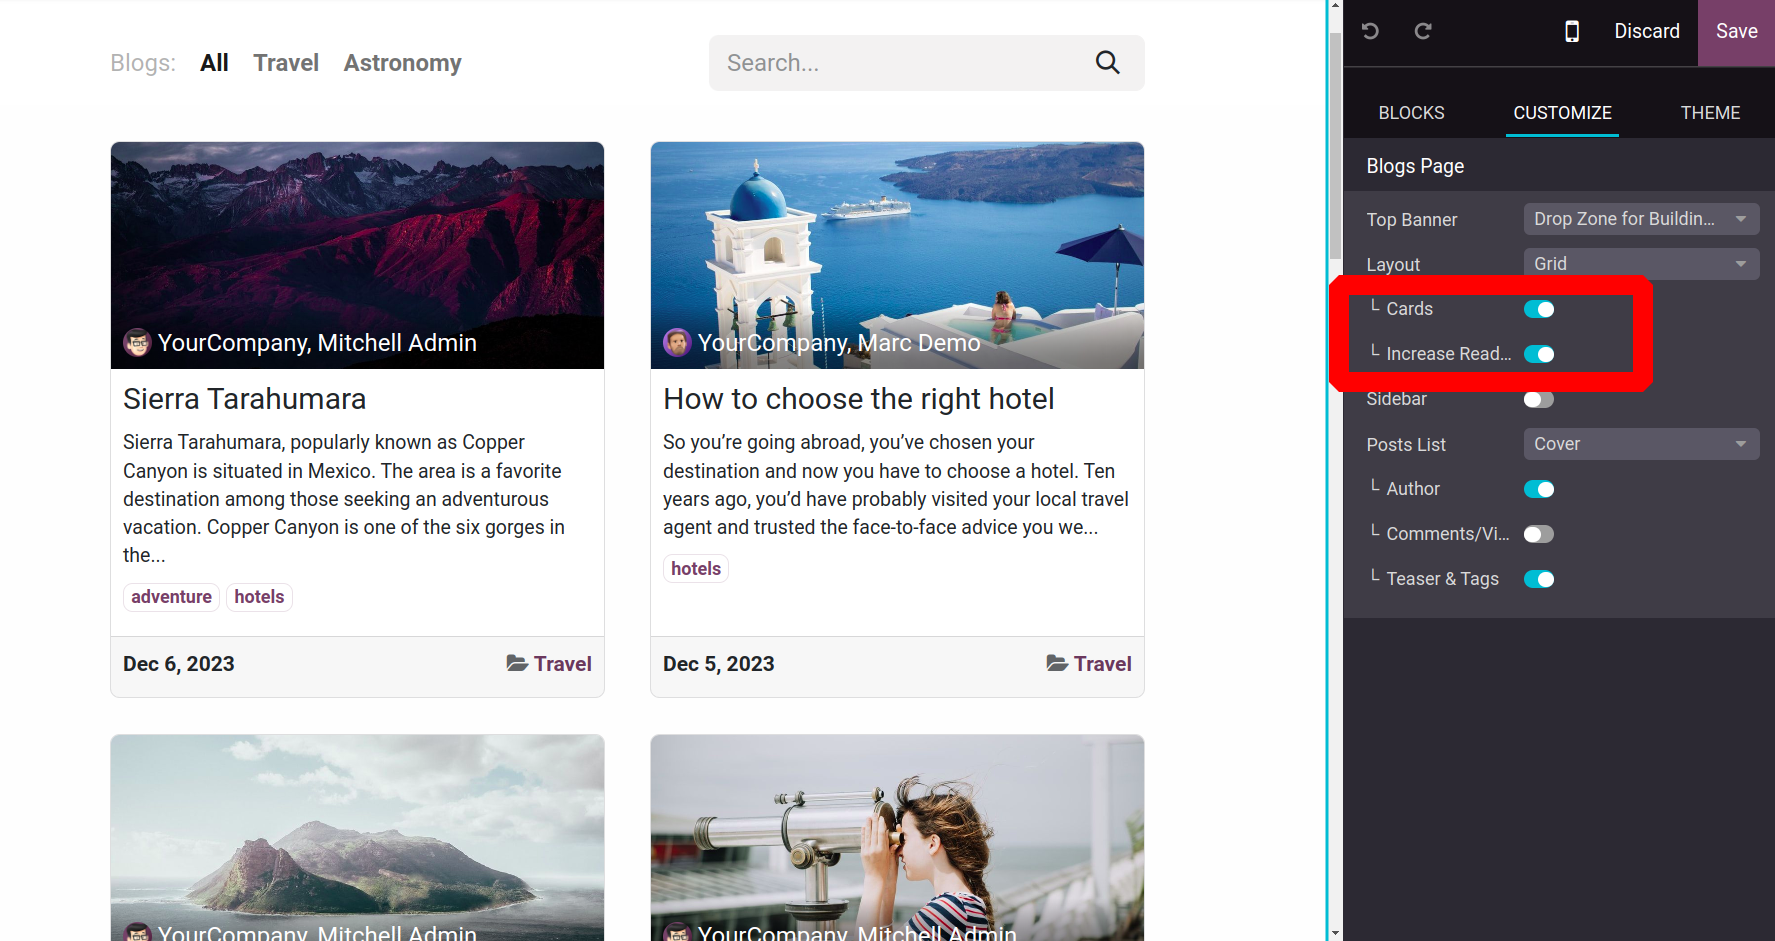
The way the blog page appears will change as a result of the Layout Cards and Layout Increase Readability. The Blog page will look better with these features.
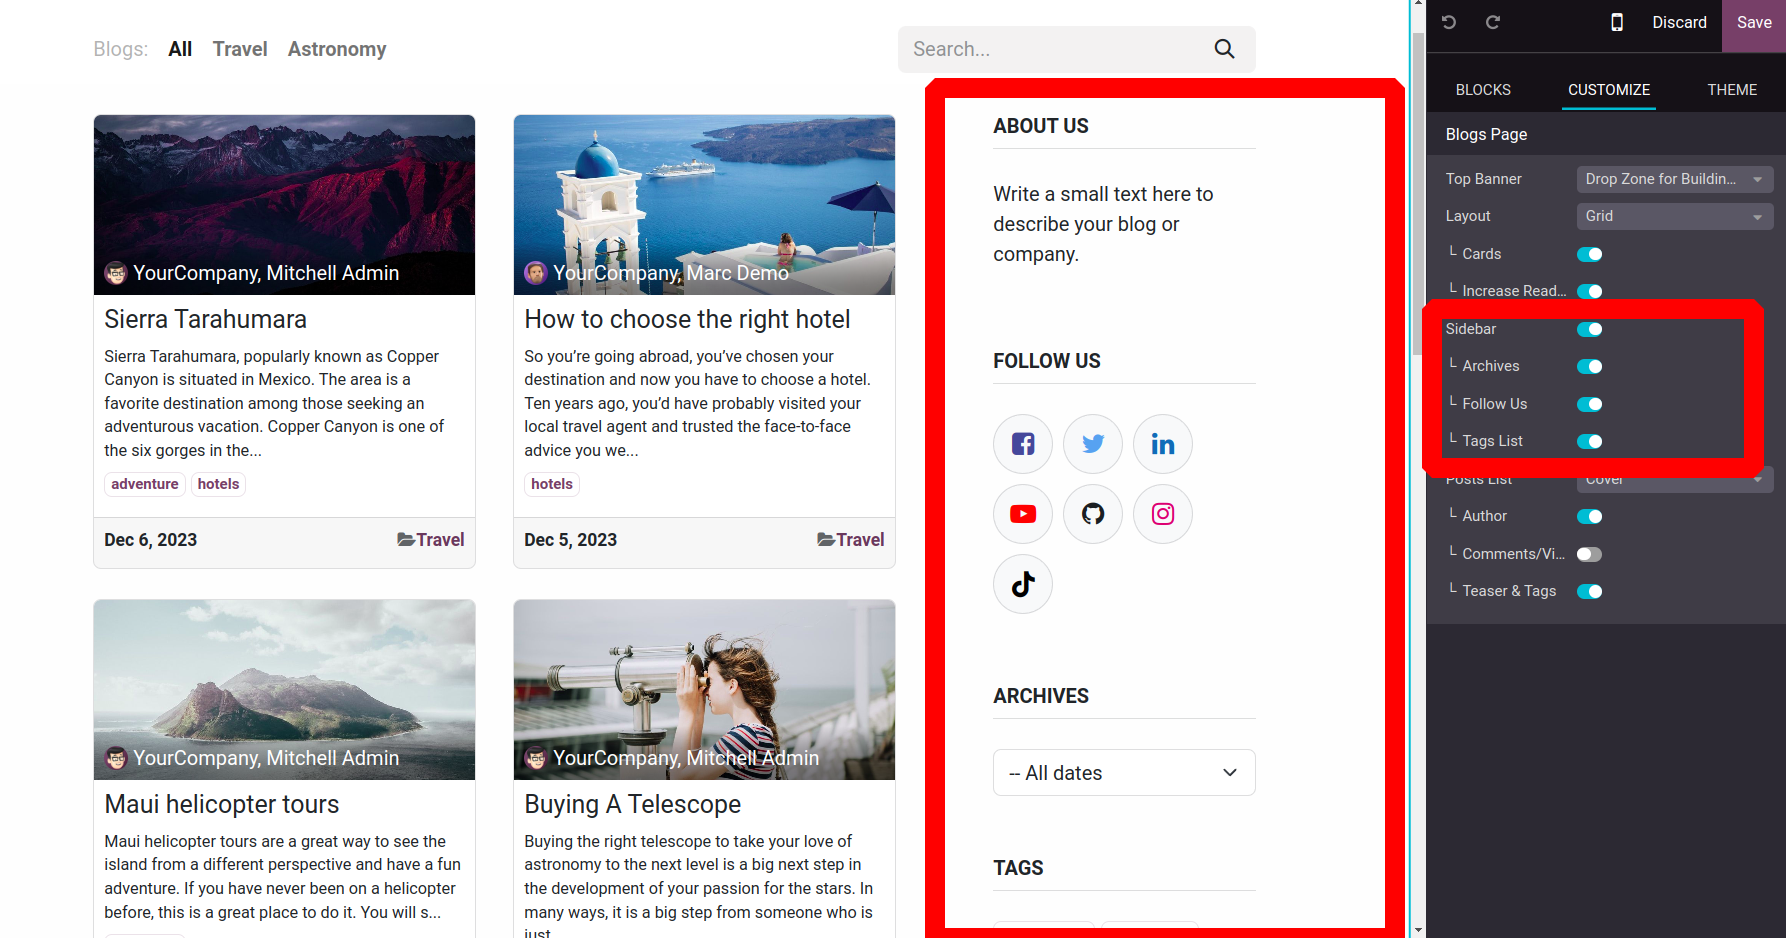
An extra sidebar will show up on the right side of the screen if the Slidebar is enabled. The options that are enabled in the sidebar are Archives, Follow Us, and Tag List.
It is possible to select the Post List as Cover or No Cover. Only when the Cover option is selected will the blog's cover image be
visible. Only when the Author option is activated will the author's name appear on the blog cover image, as indicated in the screenshot below.
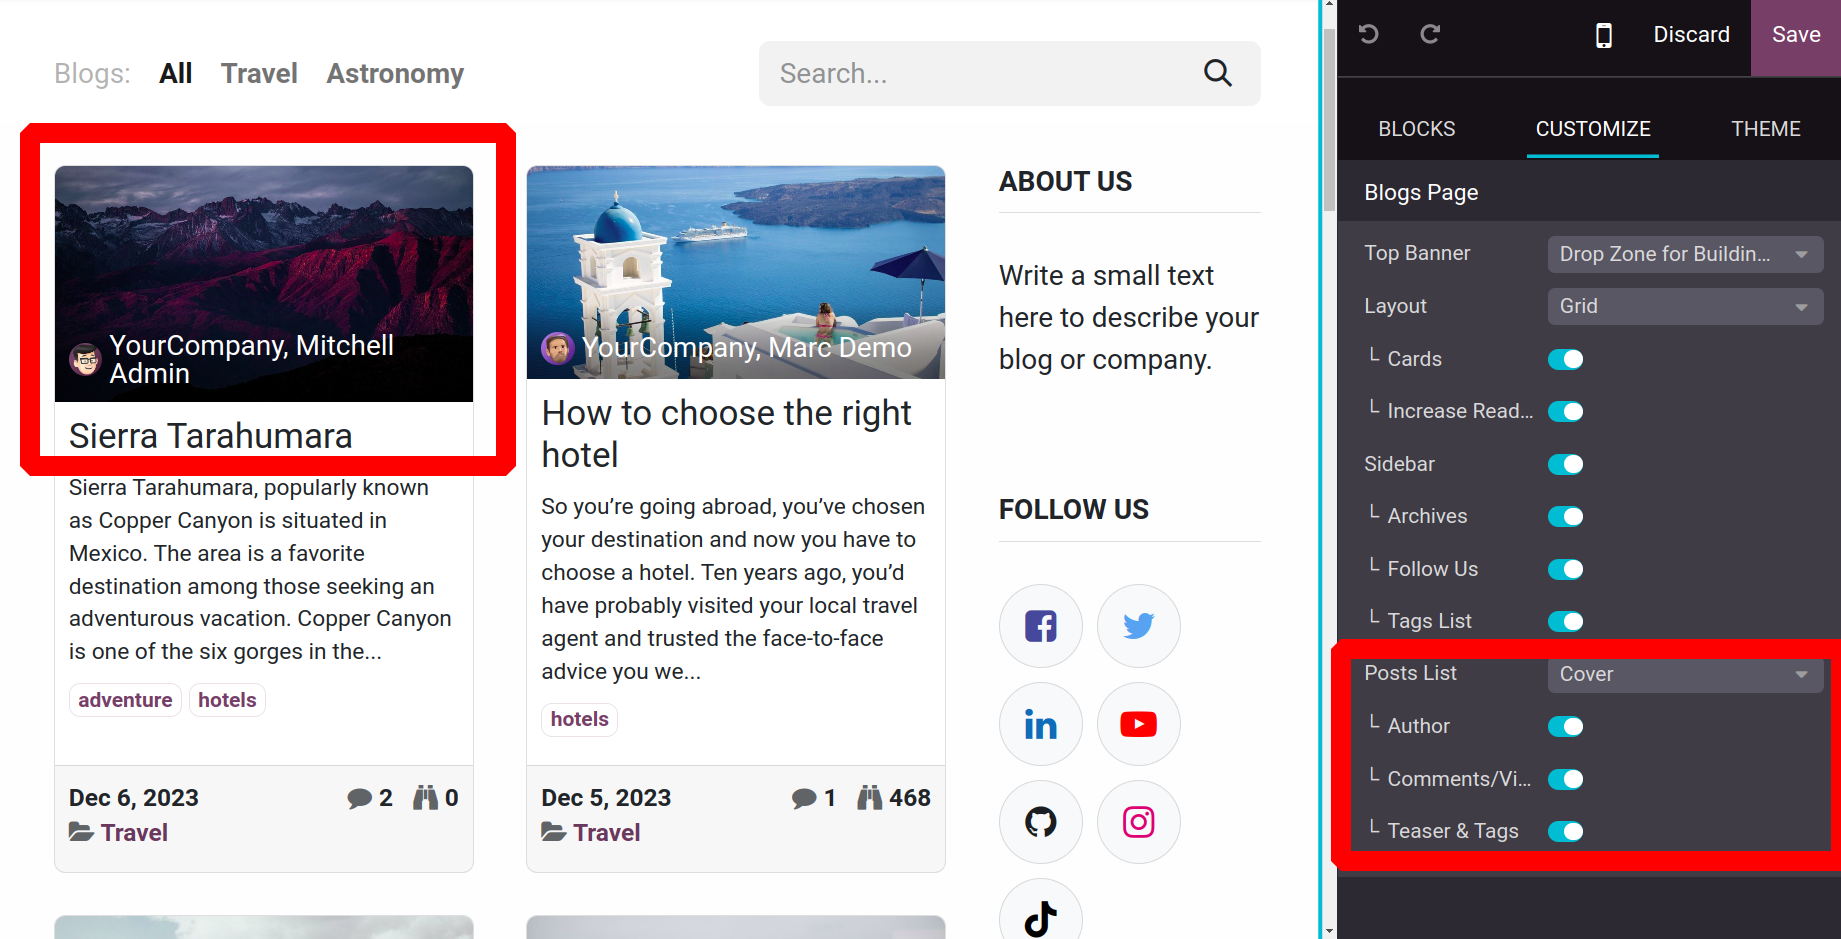
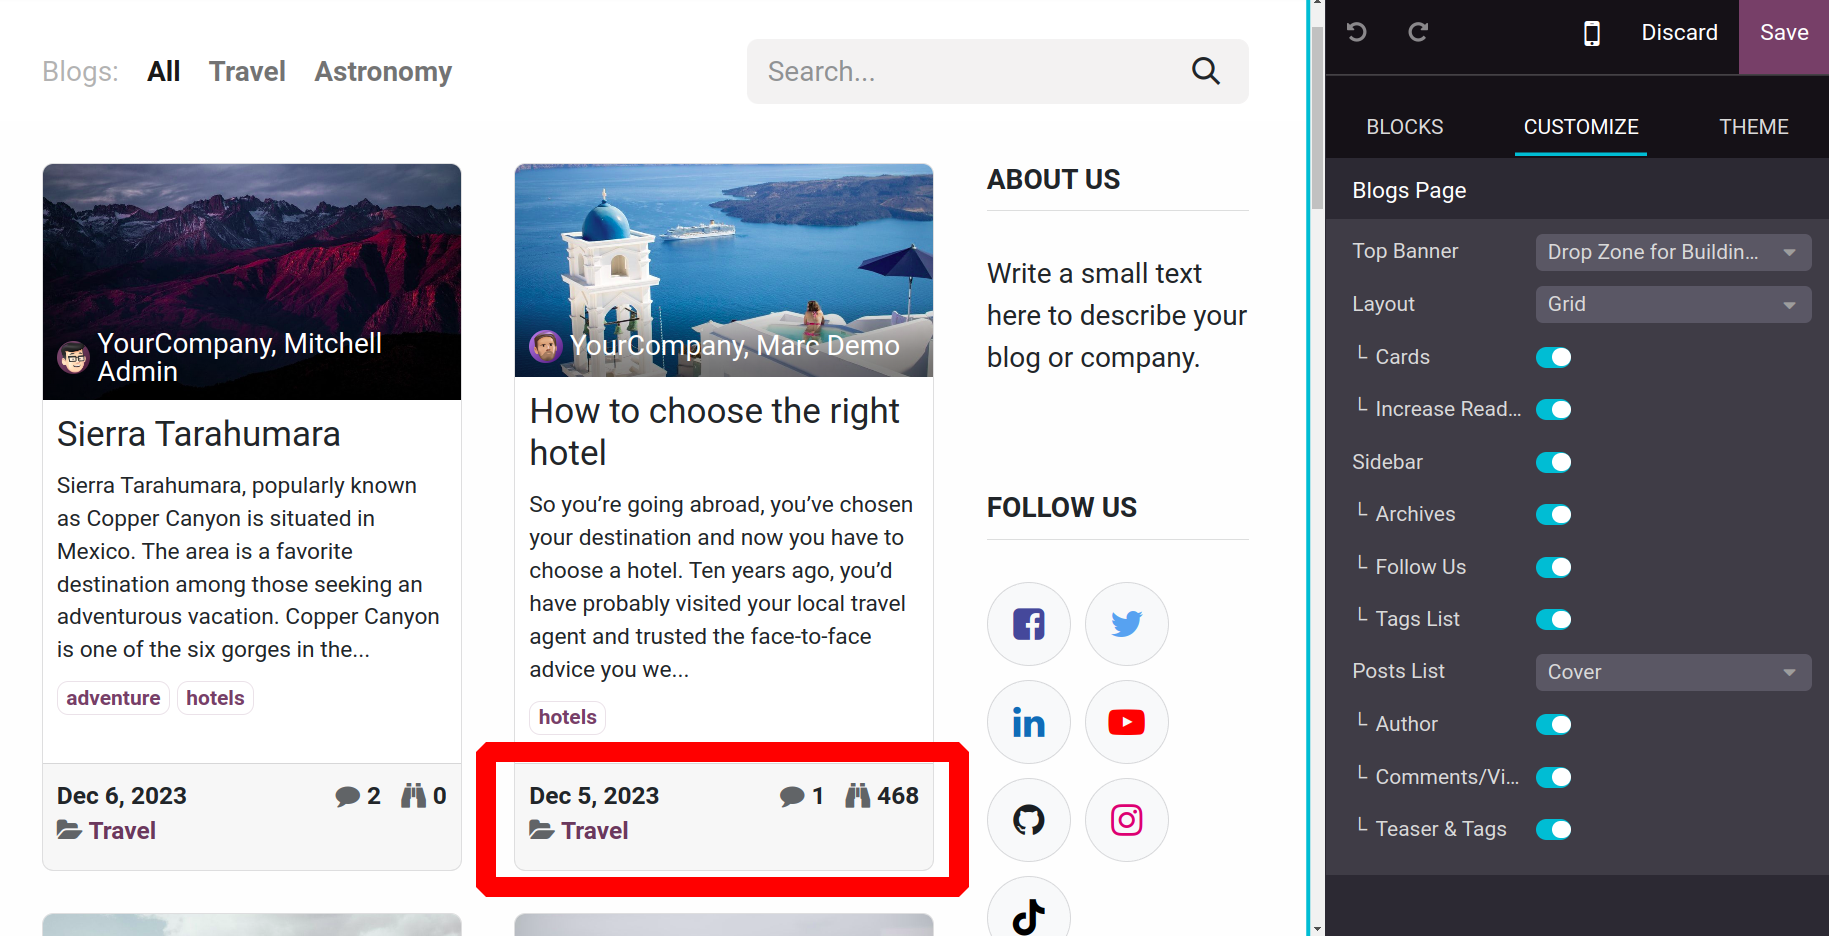
Every blog displays the comments and view details as a bar at the bottom, as seen in the image below if the Comments/View state is enabled.
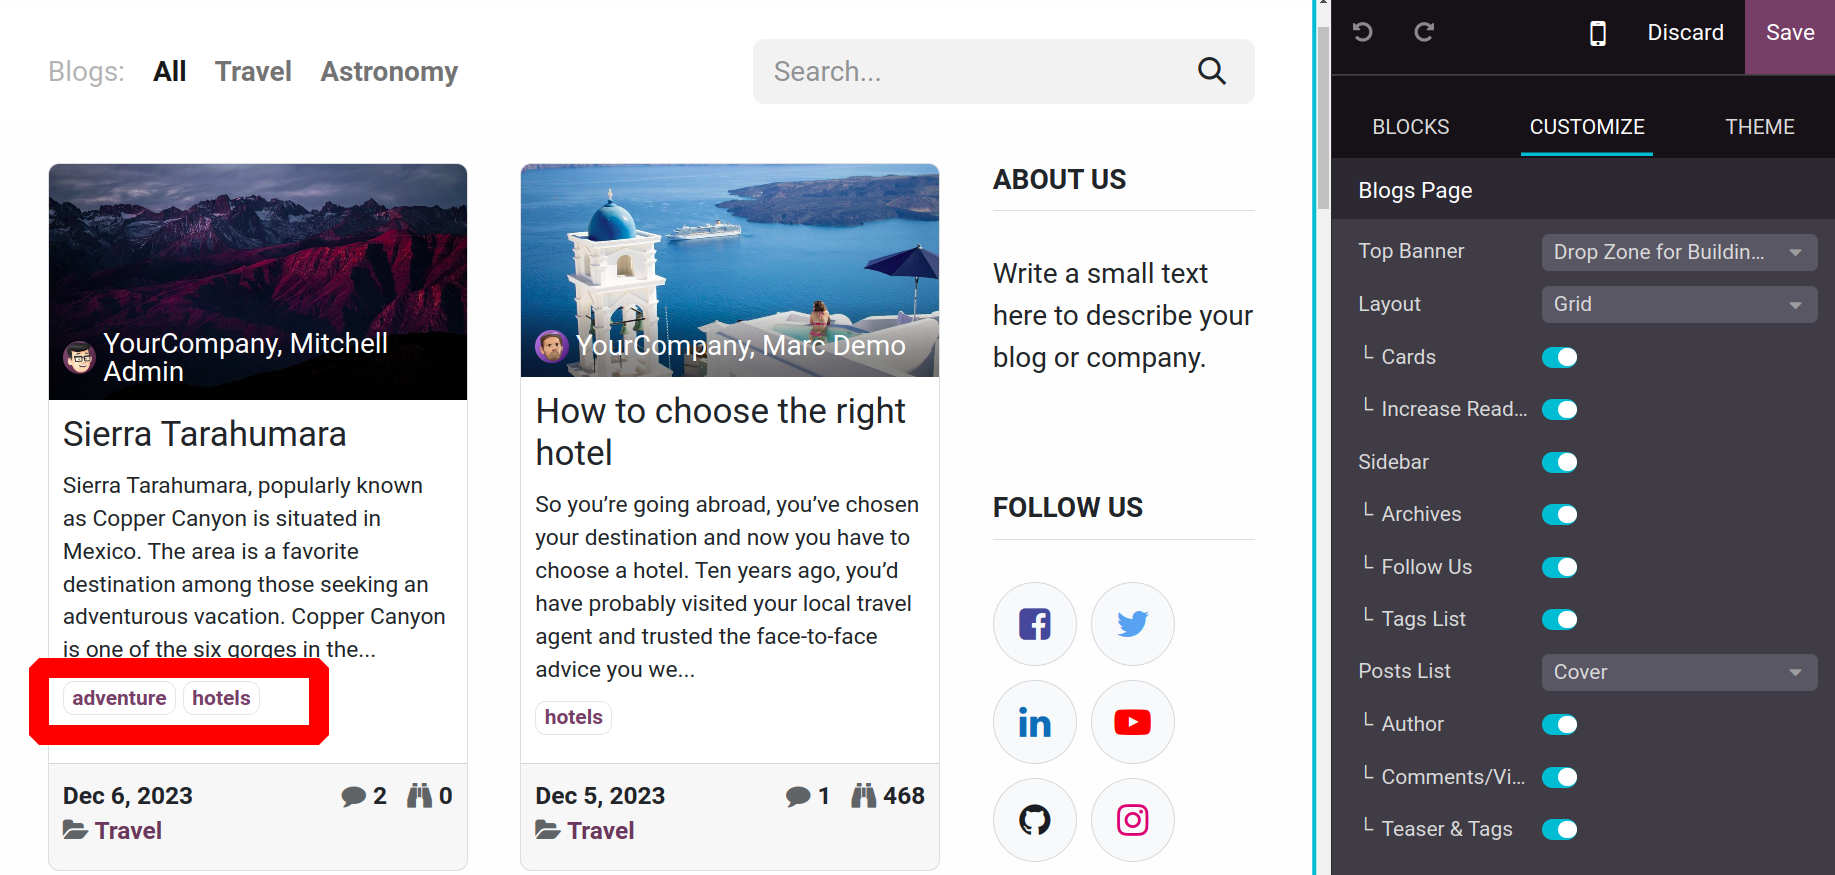
The added tags will subsequently appear on the blog, as indicated in the image below, if the Teaser & Tags feature is enabled.
Blog tags
You can set up different blog tags that are appropriate for the blog entries you are writing with this system by using the Odoo17 Website module. The Odoo17 Website module's Configuration tab is where you'll find the Blog Tags menu. The Blog Tags window can be accessed by clicking on the menu; a screenshot of the window is shown below.

All of the Blog Tags that you have previously defined in the platform are also shown in the Blog Tags window. You can choose to view each record in the window in further detail. You can click the New button to create new Blog Tags. The form for creation is provided below.
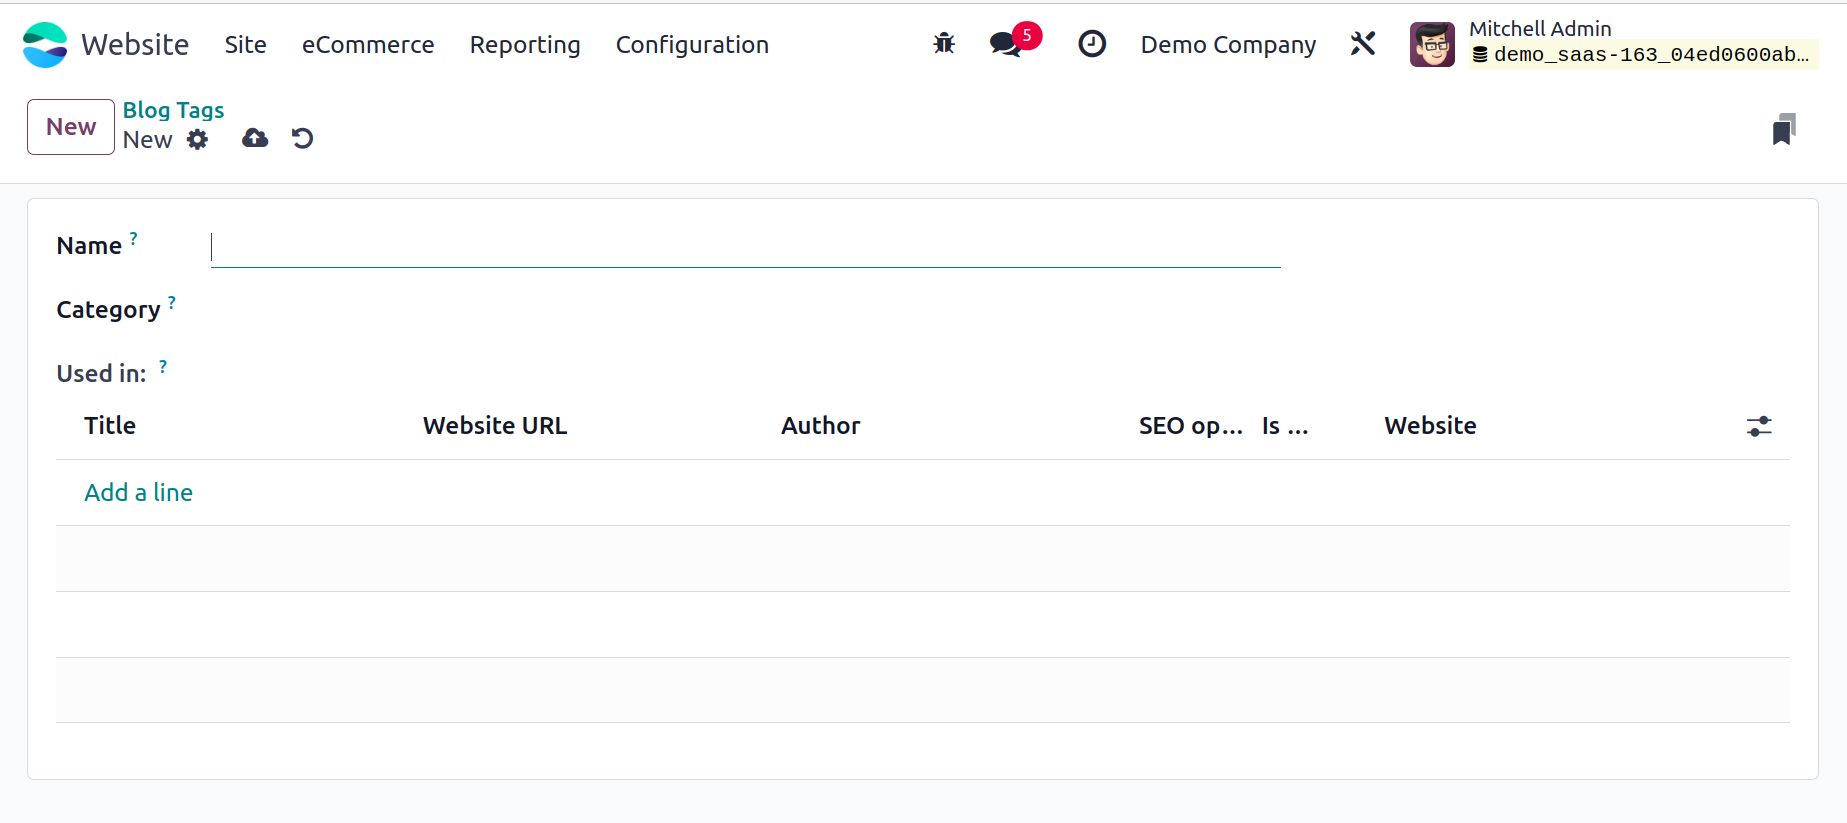
It is possible to enter the tag name and Category in the creation box. You can also include the specifics of the blog that uses the tag. You can click on the Add a Line menu to accomplish this. After it's finished, click the SAVE button to save it.
Tag category
It is possible to enter the tag name and Category in the creation box. You can also include the specifics of the blog that uses the tag. You can click on the Add a Line menu to accomplish this. After it's finished, click the SAVE button to save it.

In the designated space, you can enter the Name of the Tag Category and save the information. Now that we understand every facet of the system's Blog Post setting.