Online Appointments
You may simply schedule online appointments under Odoo17 ERP's Calendar module based on the presence of clients and staff in the firm. You can simply control and manage the appointments once you've finished installing the Odoo17 Appointment module, which is accessible through the Odoo17 Software's app store. Their function assists you in lowering the hazards during meetings with coworkers and other parties. The Calendar module's home page is where you'll find the choice. Certain information is provided on the page, as indicated below.
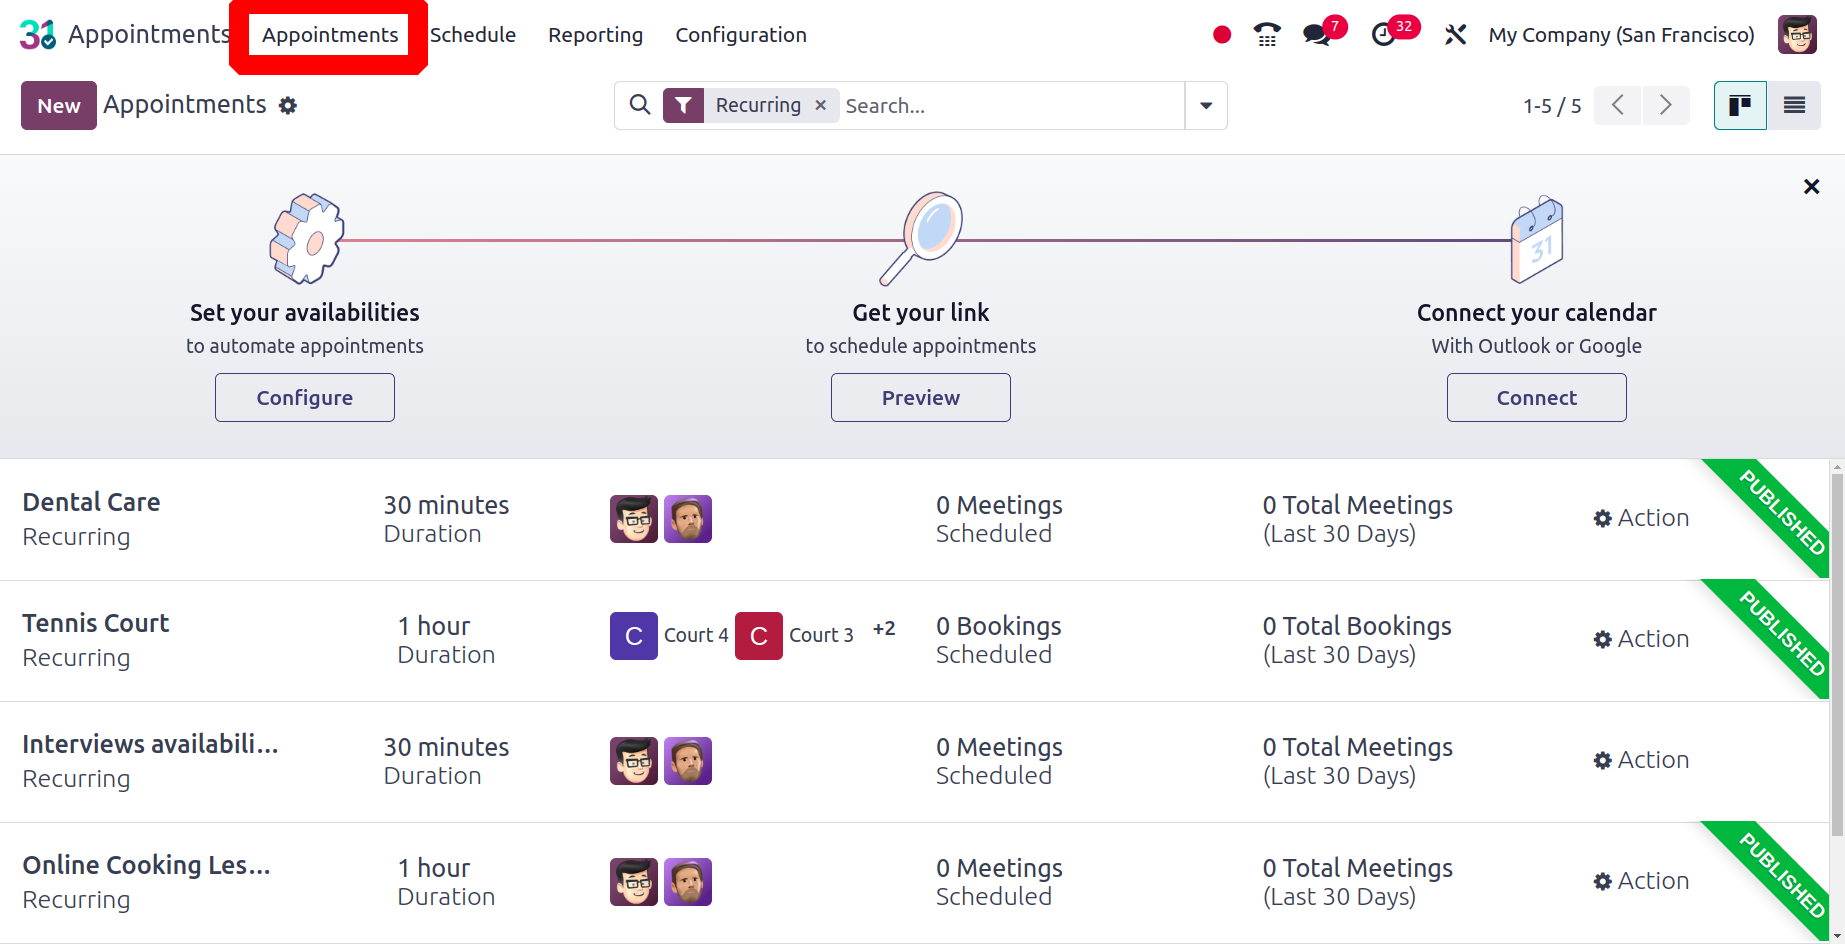
You will be presented with a list of previously created online appointments, as seen in the screenshot above. To schedule a similar appointment, simply select the New icon, as seen in the image above.
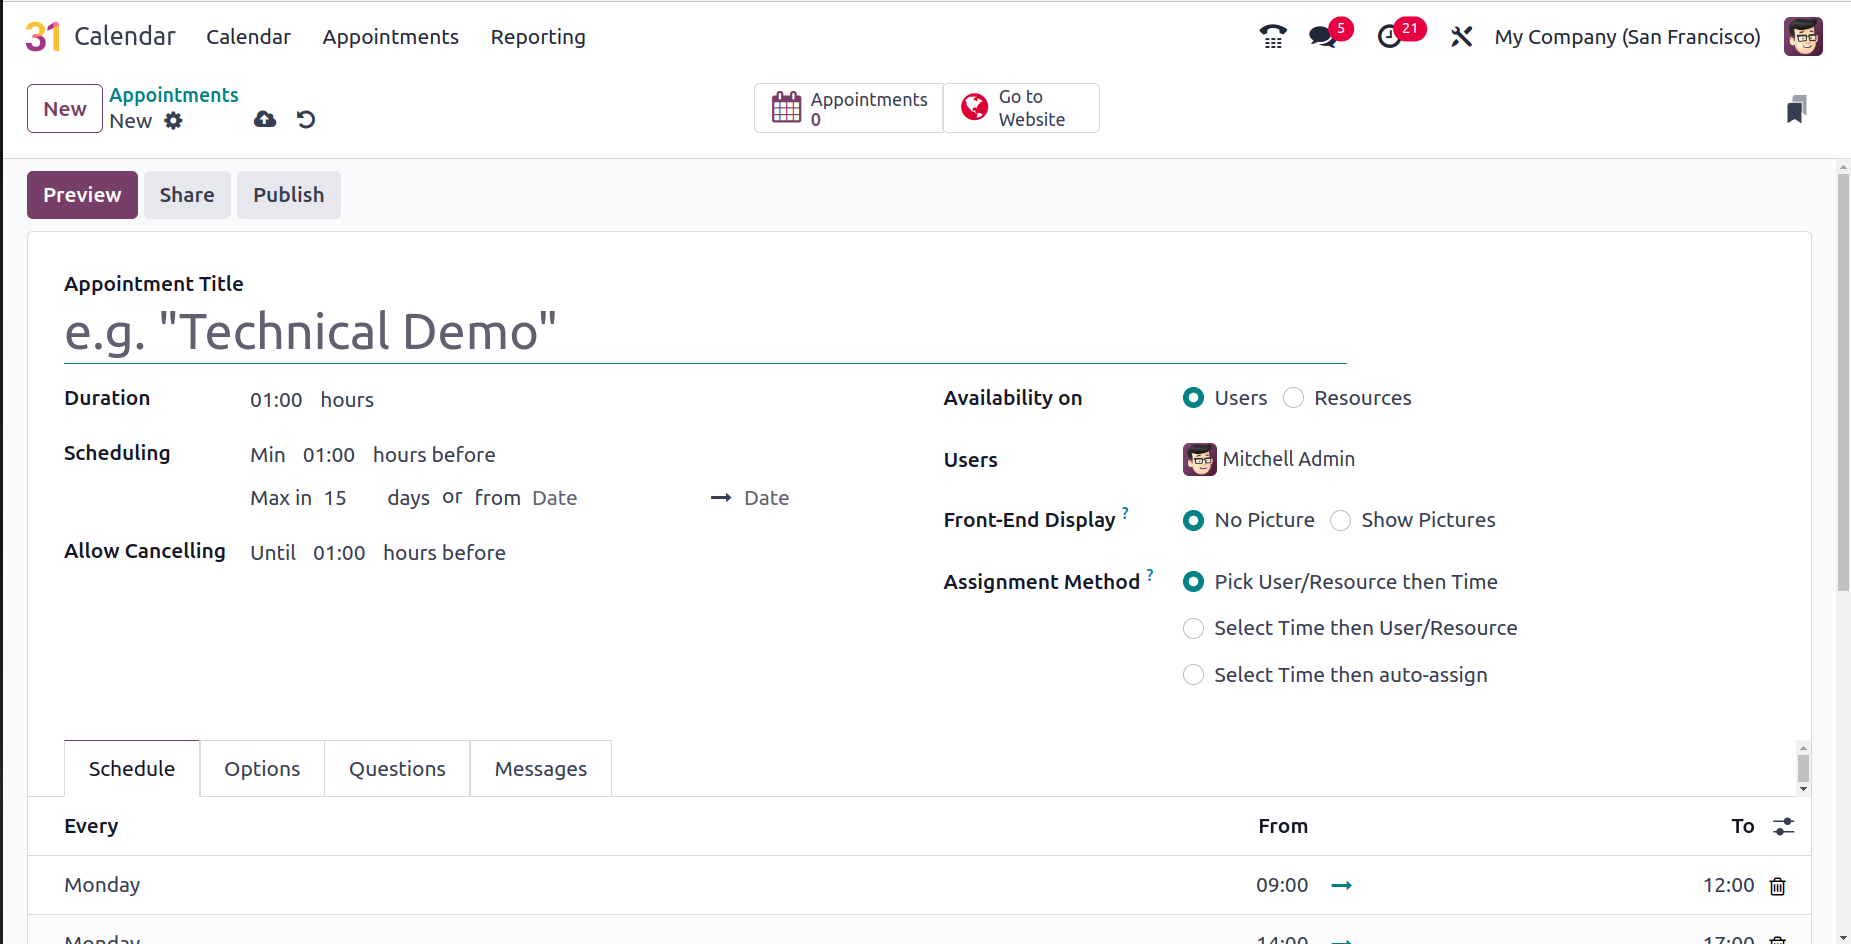
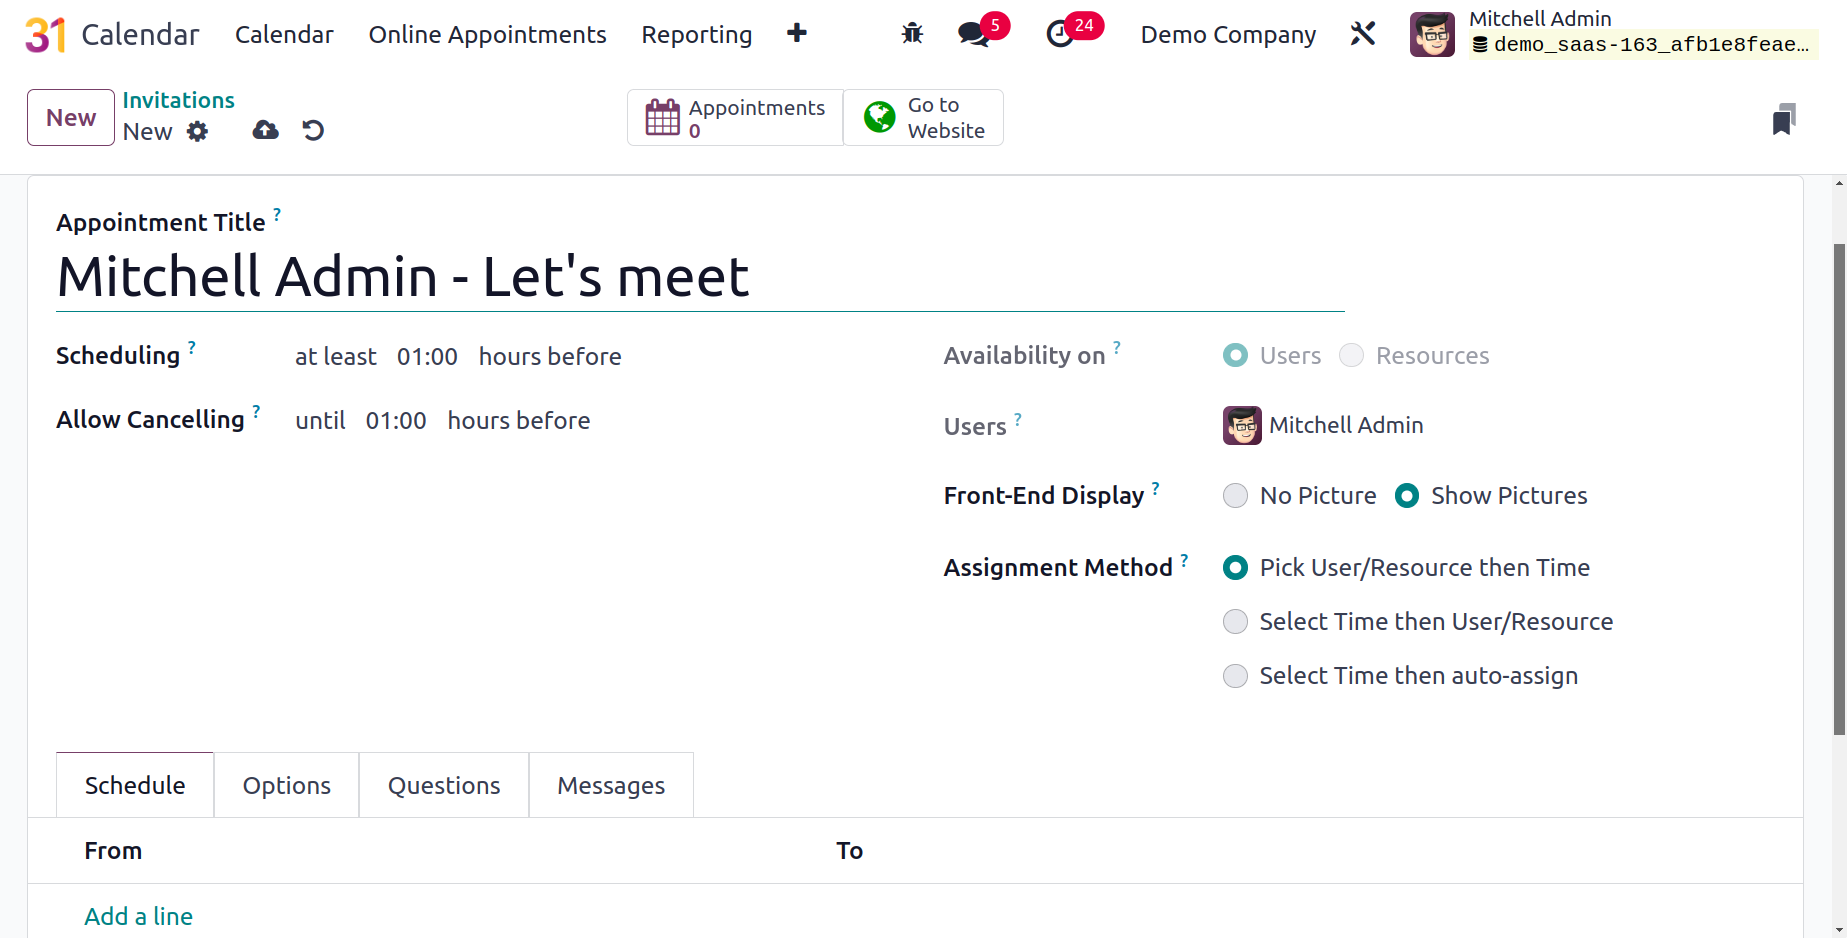
You will find a section on the creation page where you can enter certain information about creating online appointments. Under the Appointment Title option, you must enter the name of the appointment. The Duration option allows you to specify how long the meeting will last. You can schedule the meeting in the designated area based on how long it takes for the appointment. If you need to cancel the appointment within the allotted time, you can also use the allow canceling option. Users have the option to display their own photographs or leave the front-end display blank.
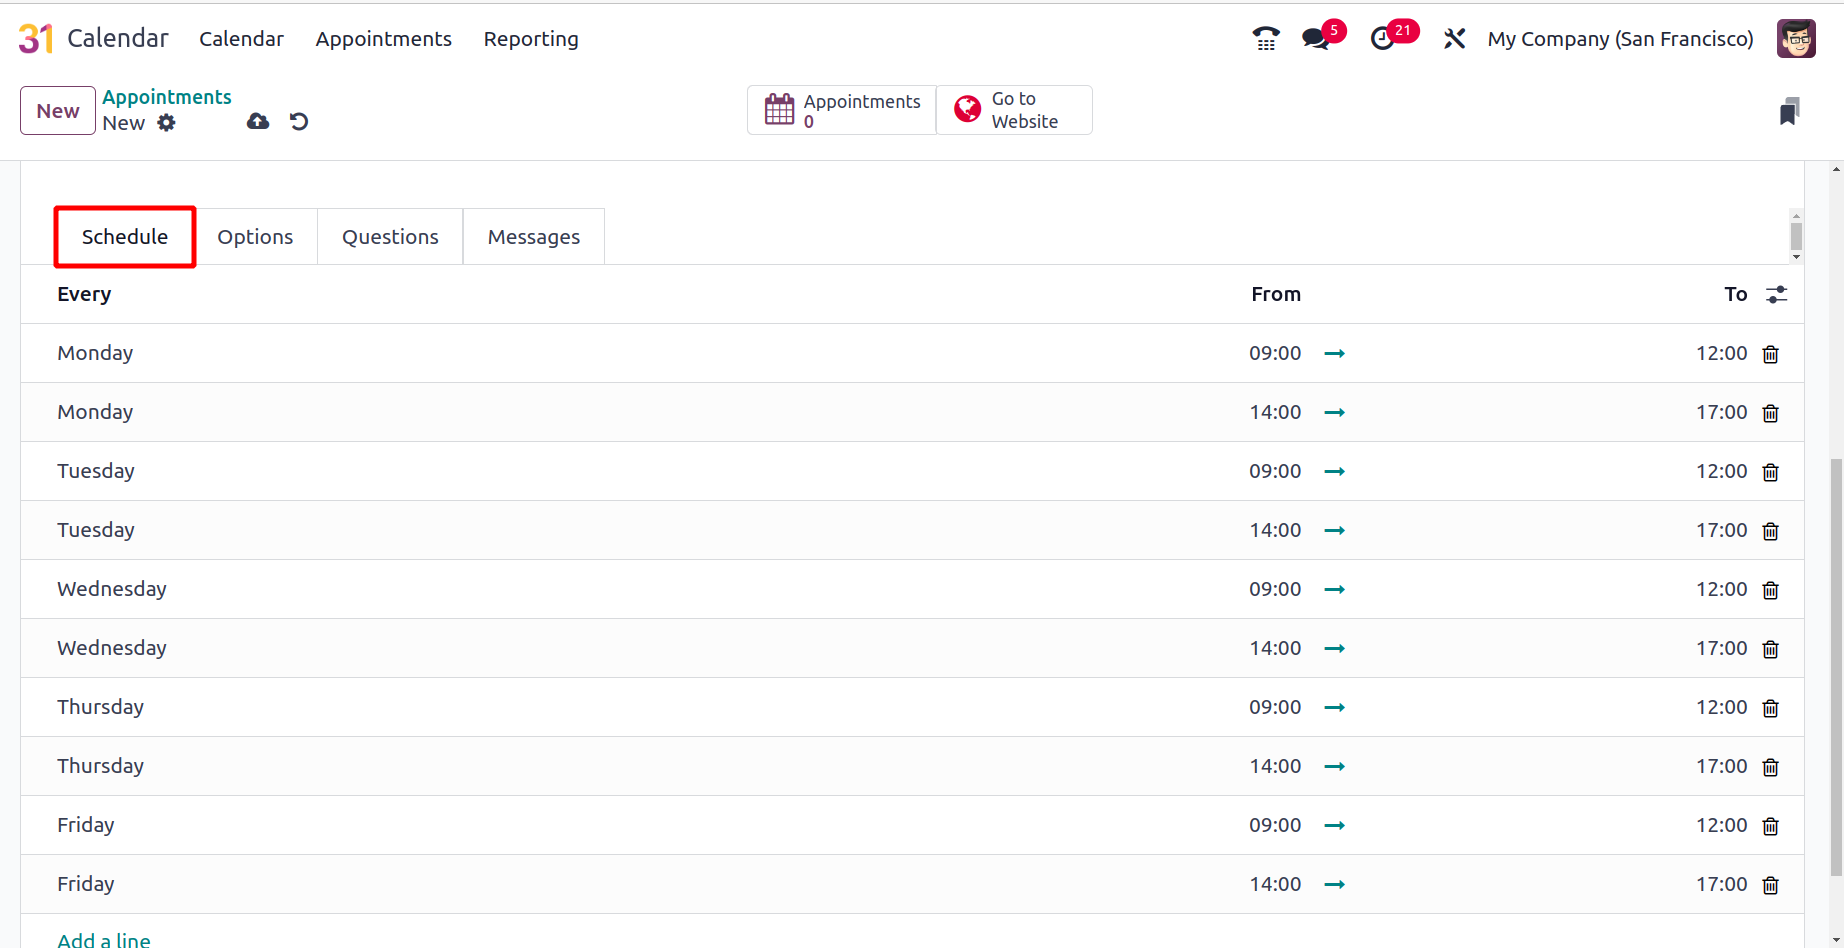
With the aid of the Add a Line option under the Schedule Tab, you may specify the days of the week that the appointment is available.
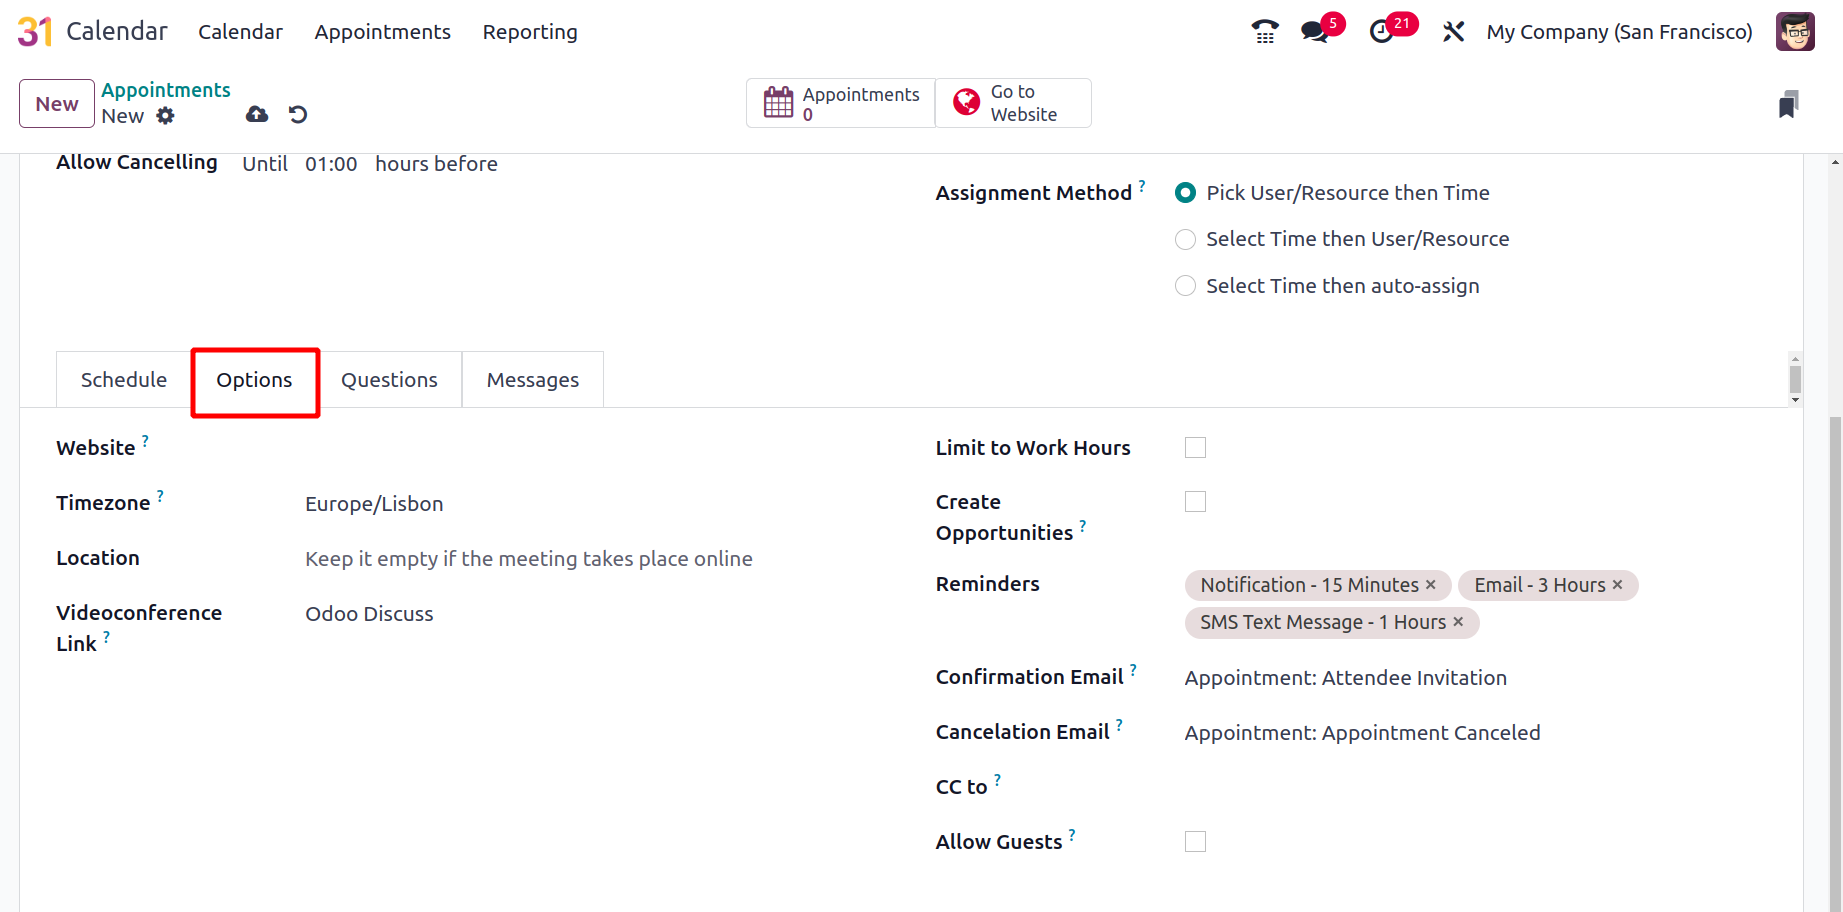
You can adjust the Timezone, Location, Limit to work hours option to trigger, Generate opportunities option to trigger, and Reminders to add in the designated spaces under the Options Tab. Sending the appointment to the person you designated on the CC as an option is another alternative.
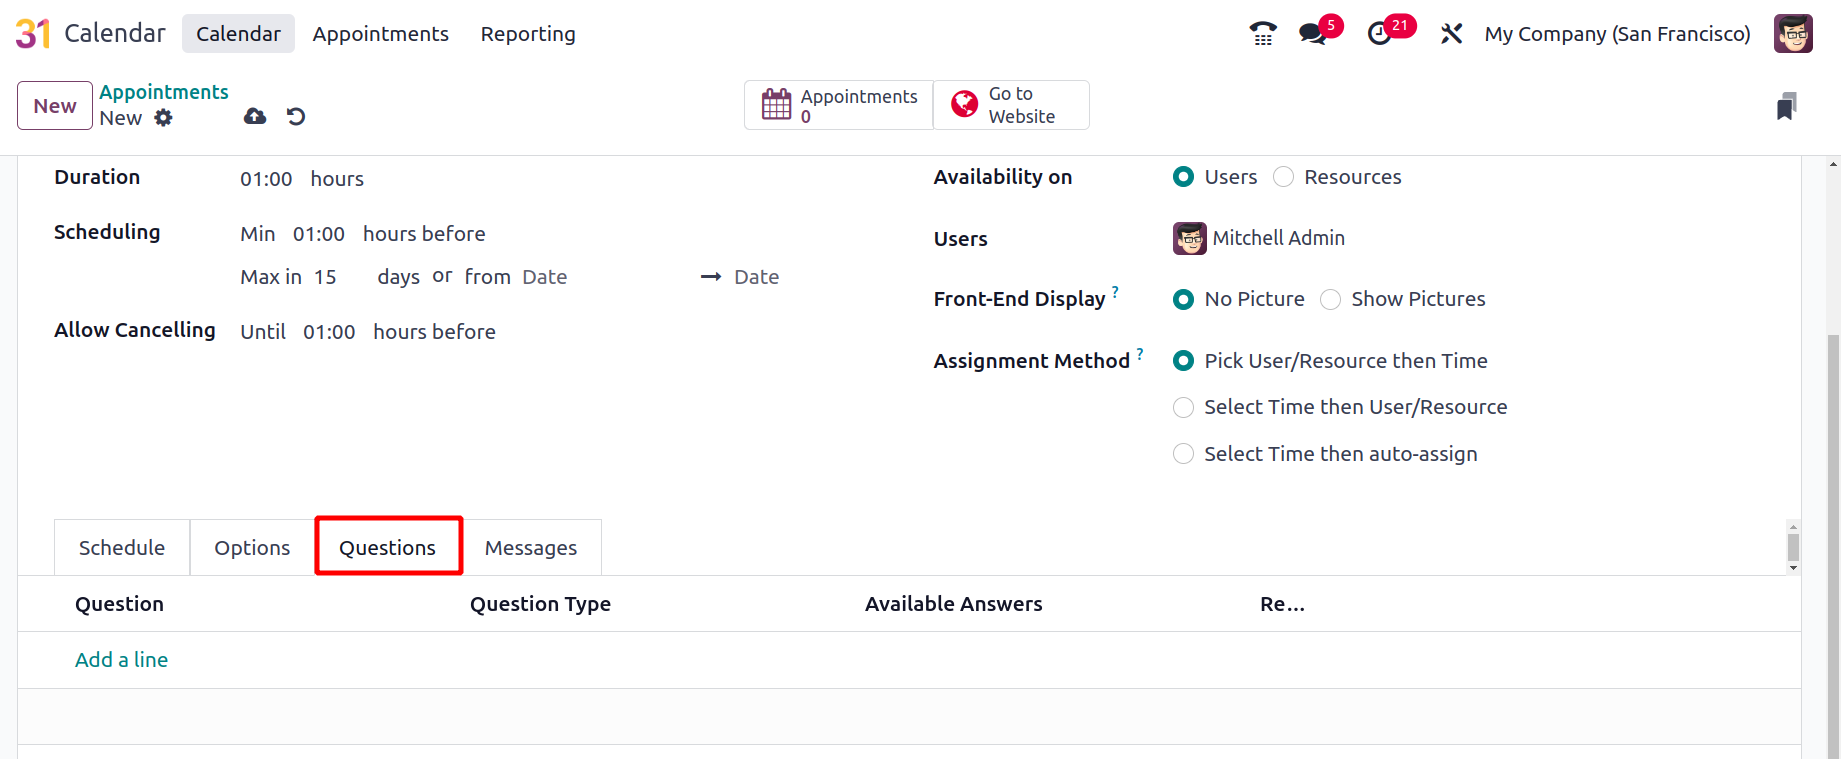
You will see the Questions Tab, as seen in the image above, which enables you to add questions about the next visit. You can select the Add a Line option to include the questions; this will take you to a new page, as seen below.
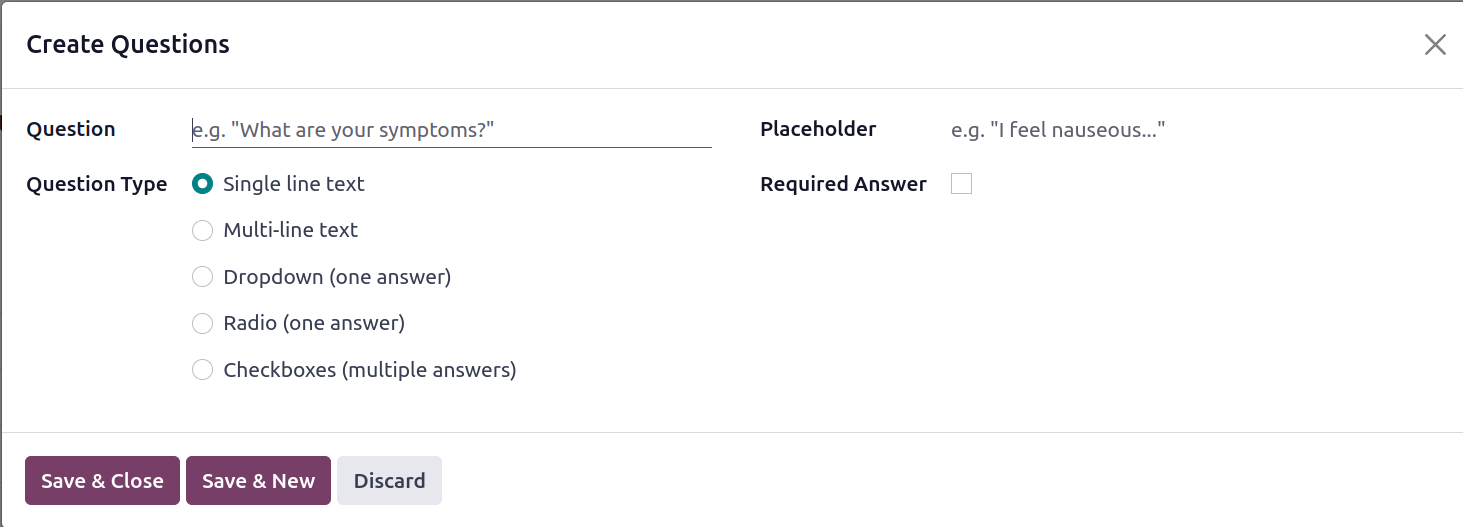
You can mention the questions in the designated space on the questions creation page. You have the option to set the question type to a single line text, multi-line text, radio, dropdown, or checkboxes. If the question requires an answer, you can answer it and select the required answer option.
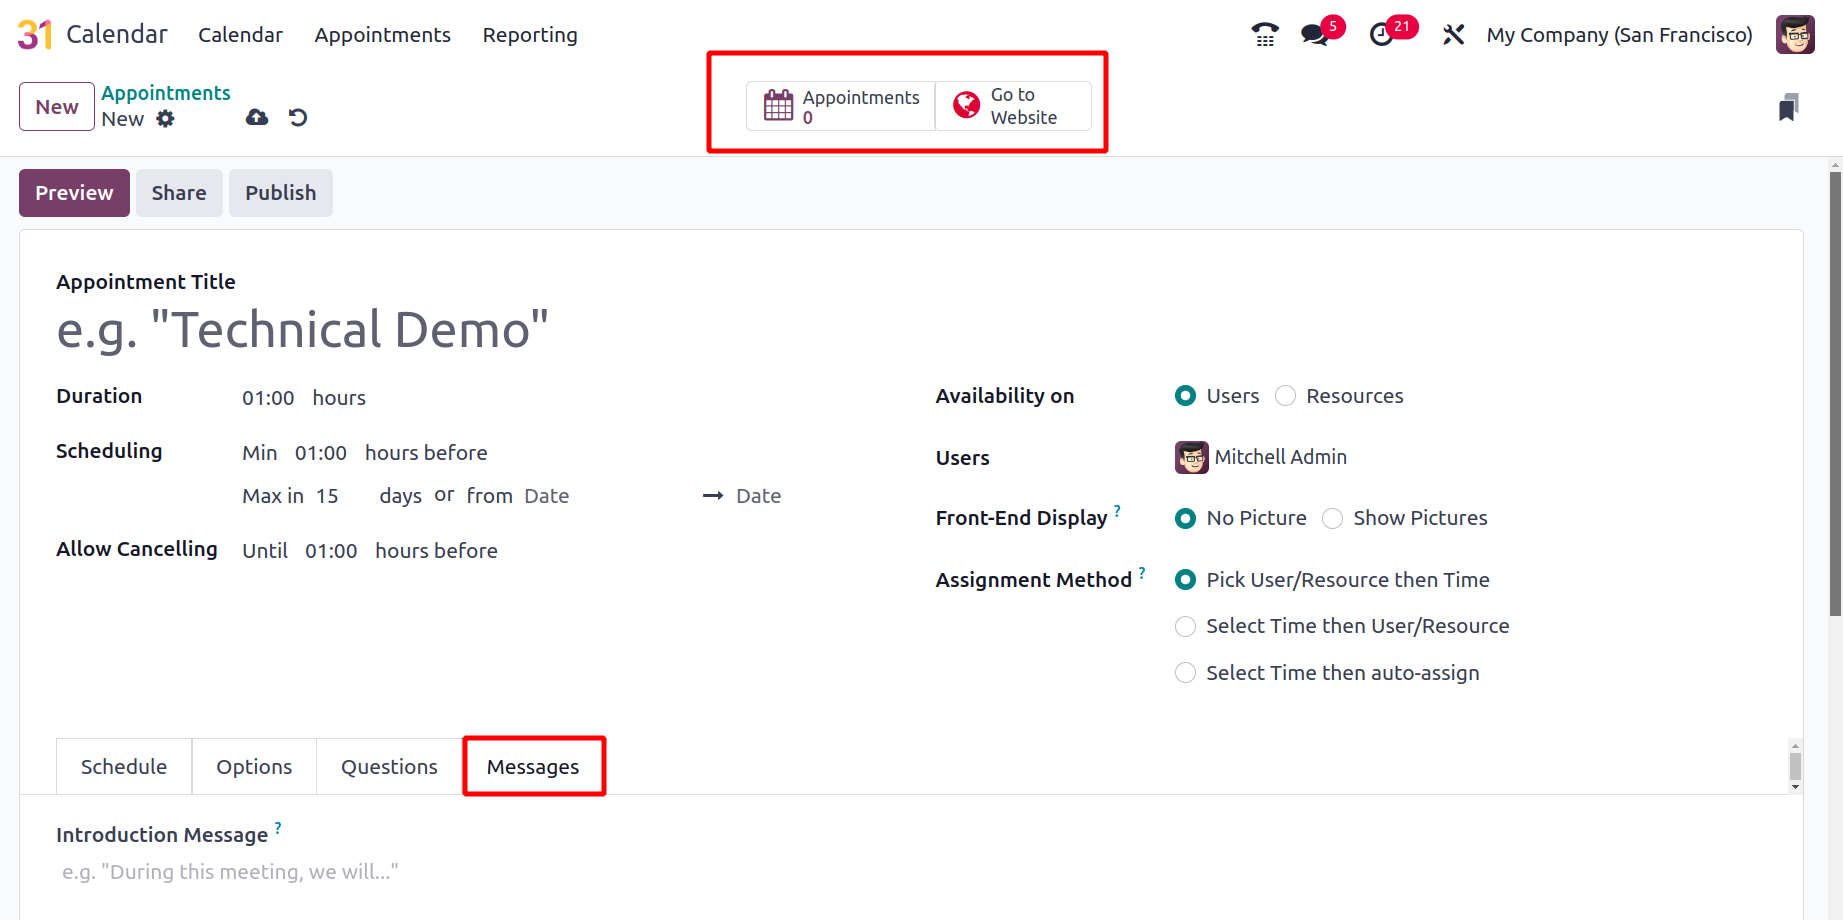
The Message Tab is now the next tab on the online appointment creation page. With this option, you can include an introduction and a confirmation of the appointment you have scheduled. After the creation process is finished, you can select the Save icon.
Simply select the Go To Website option, as indicated in the image below, if you want this appointment to be posted to the website.
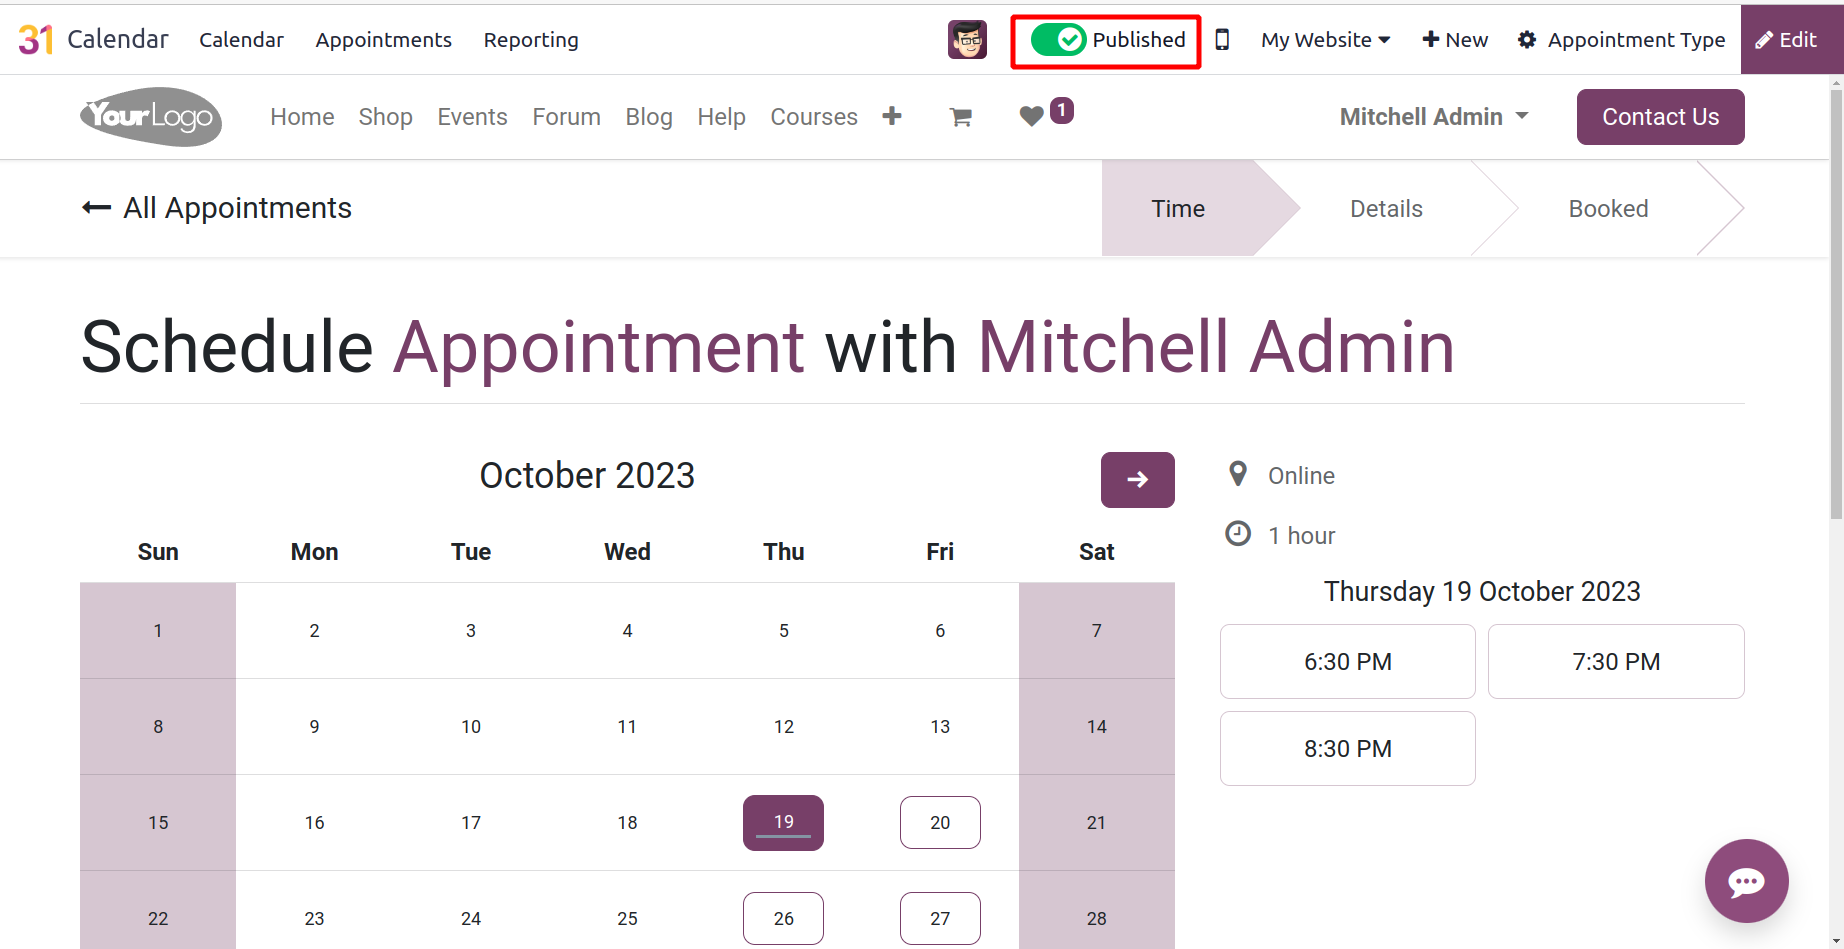
The image below shows the indicated location where you can make the unpublished status on the page seem as published.
You will have the option to share after the online appointments have been published.
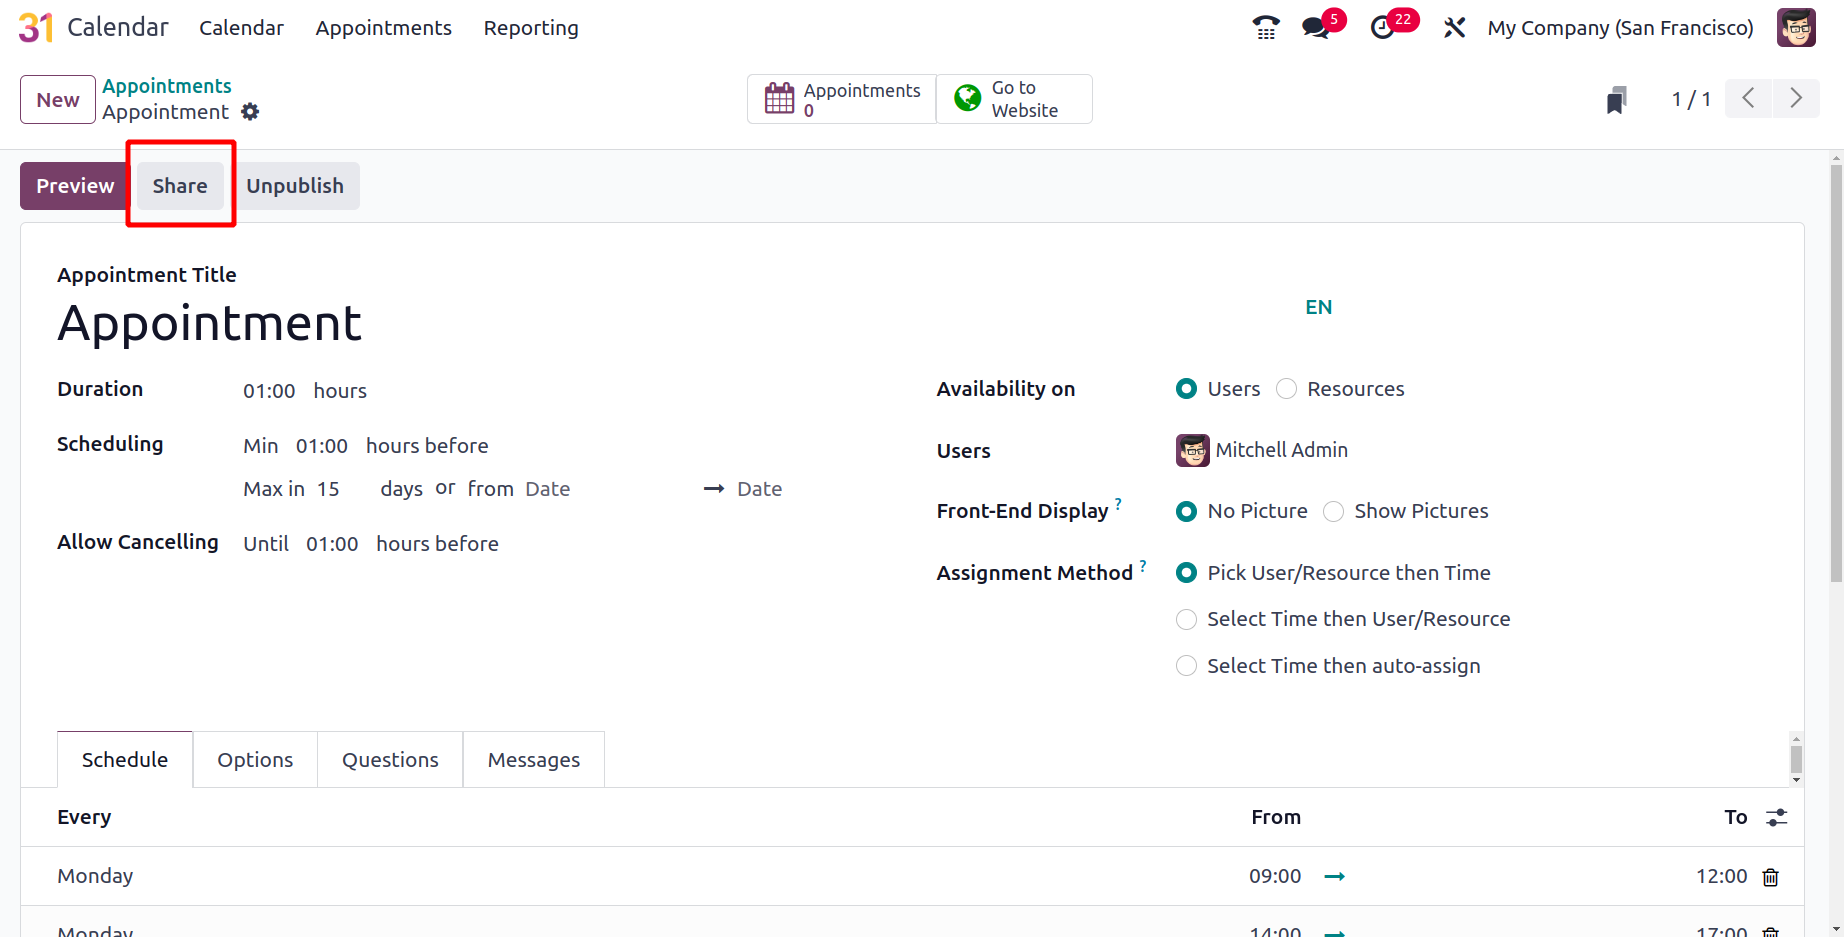
You may share the URL to your created online appointment with other members of the firm by using the share option.
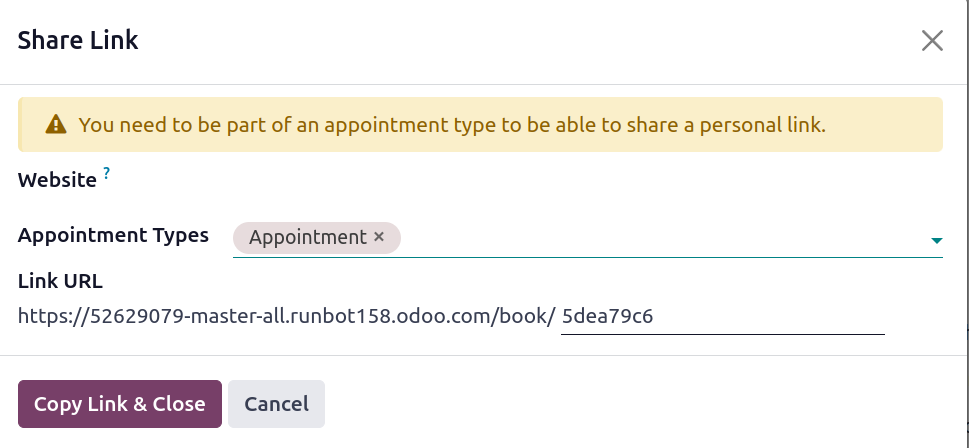
The supplied URL can be copied and forwarded to others, just like the image.
Schedule
The online appointment scheduling based on staff and resource booking will be displayed in the menu schedule.
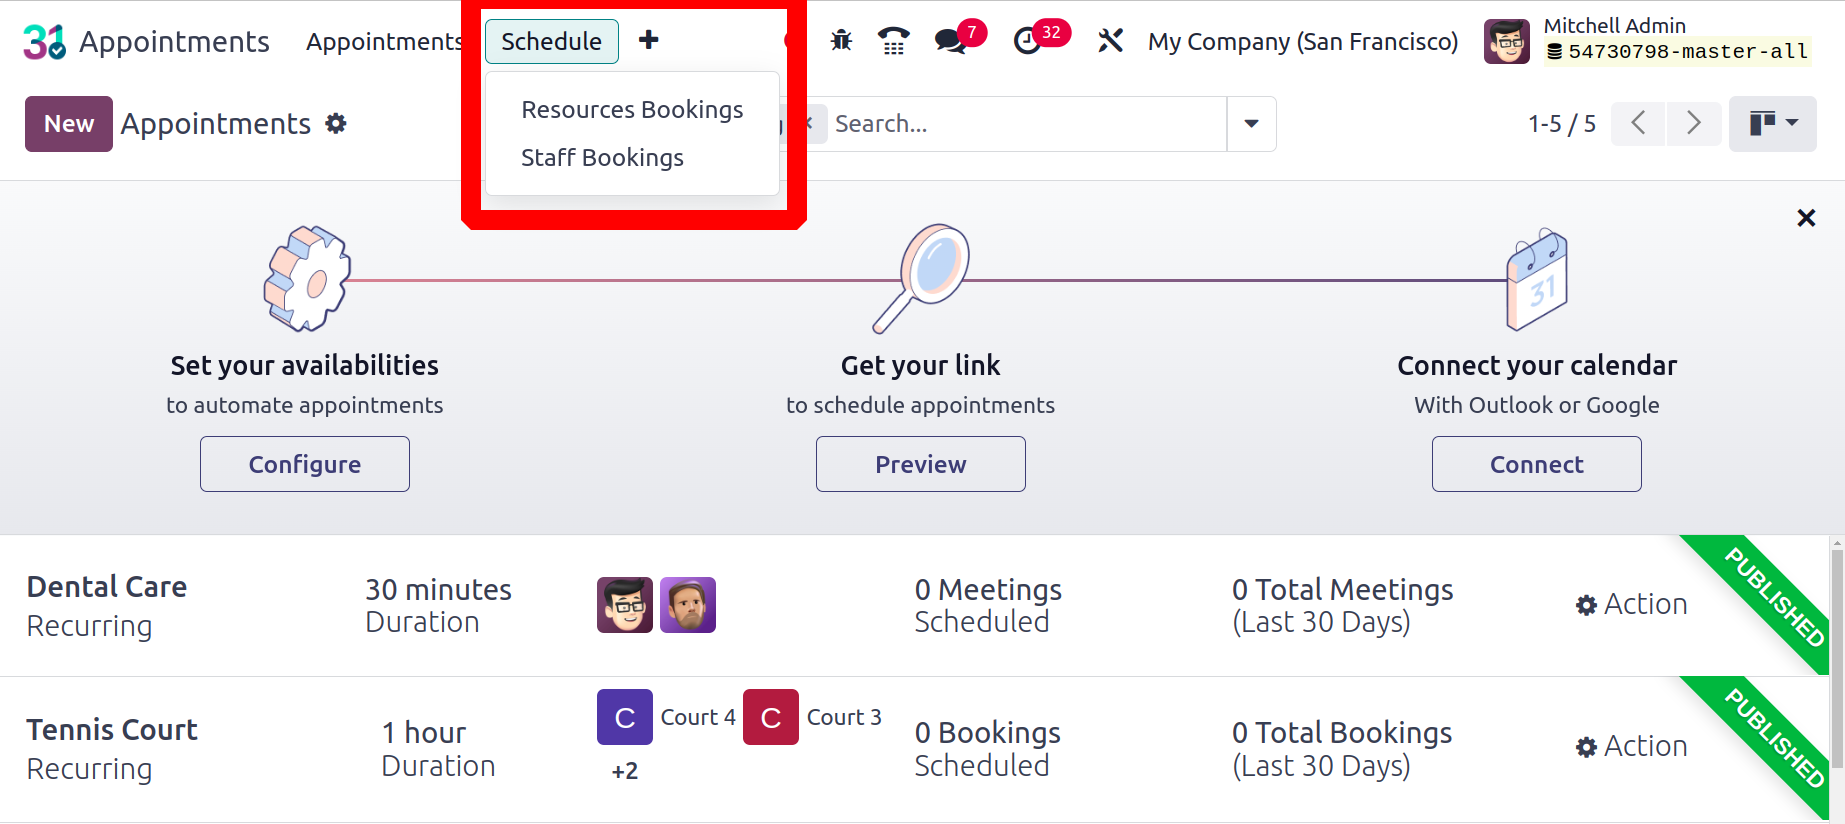
Resource Booking
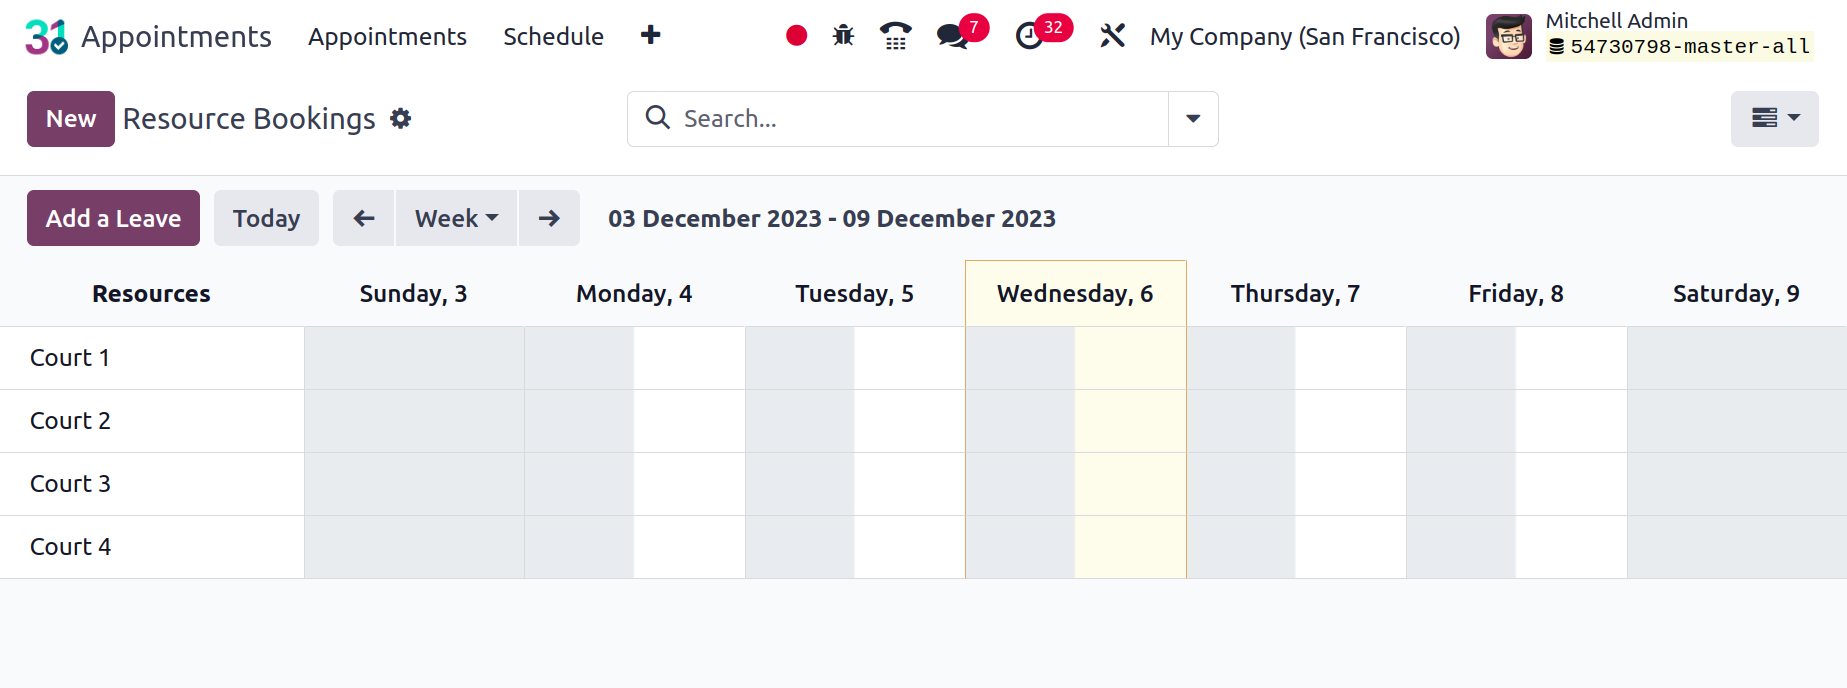
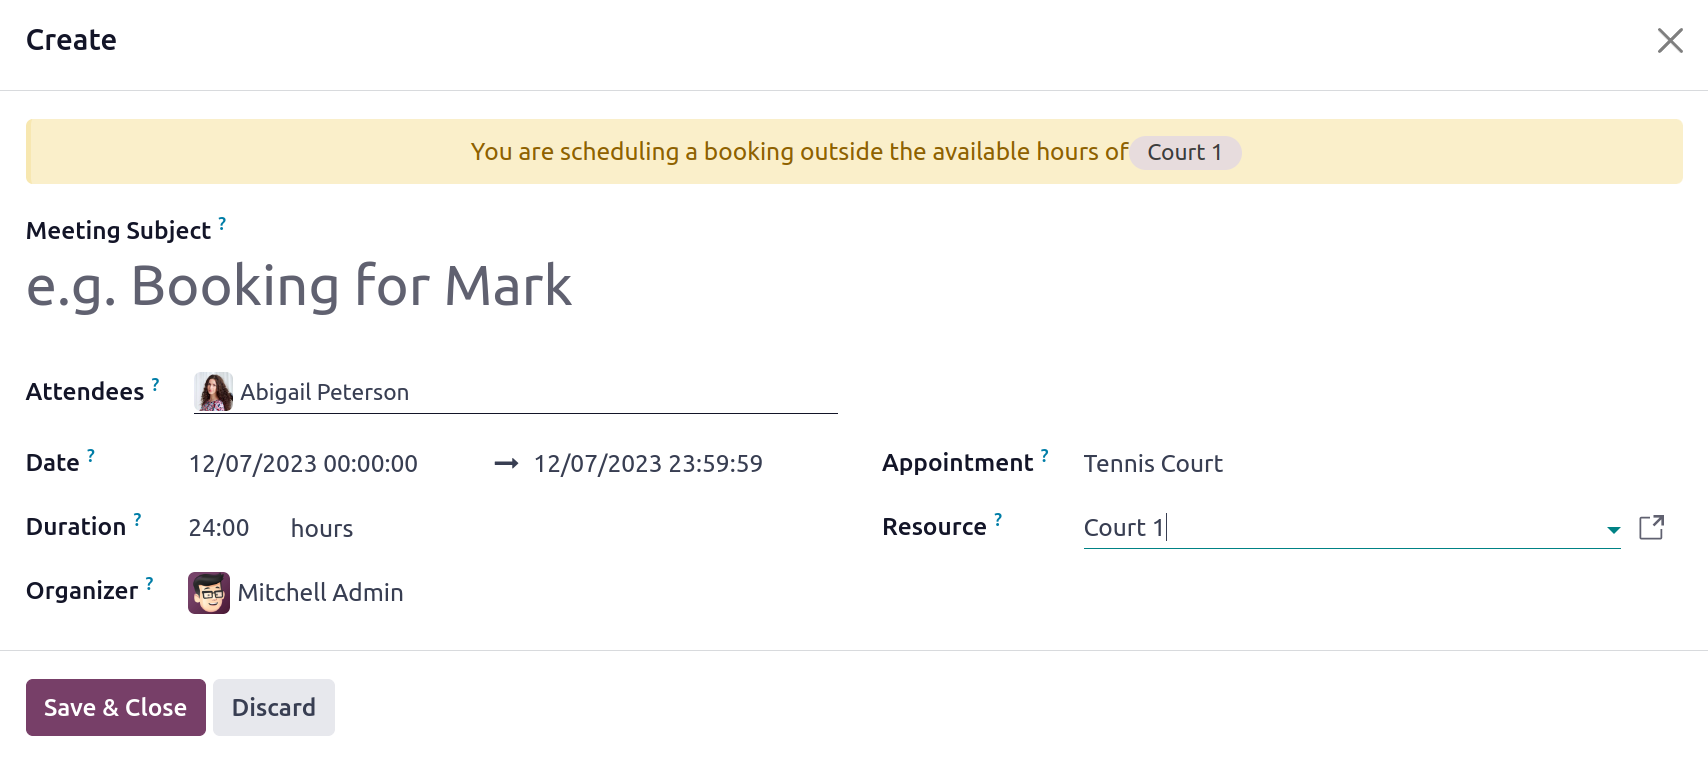
On this resource booking, you can find all the booking details for the resources arranged according to Day, Month, and Year. Every Resource. To incorporate a fresh Resource Booking, select the New option.
Add the topic of the meeting, then choose the participants, time, date, and host. Within the box, you may also select the type of appointment. Save the appointment after that.
Then the booking will be shown in the Resource Booking calendar as shown below.
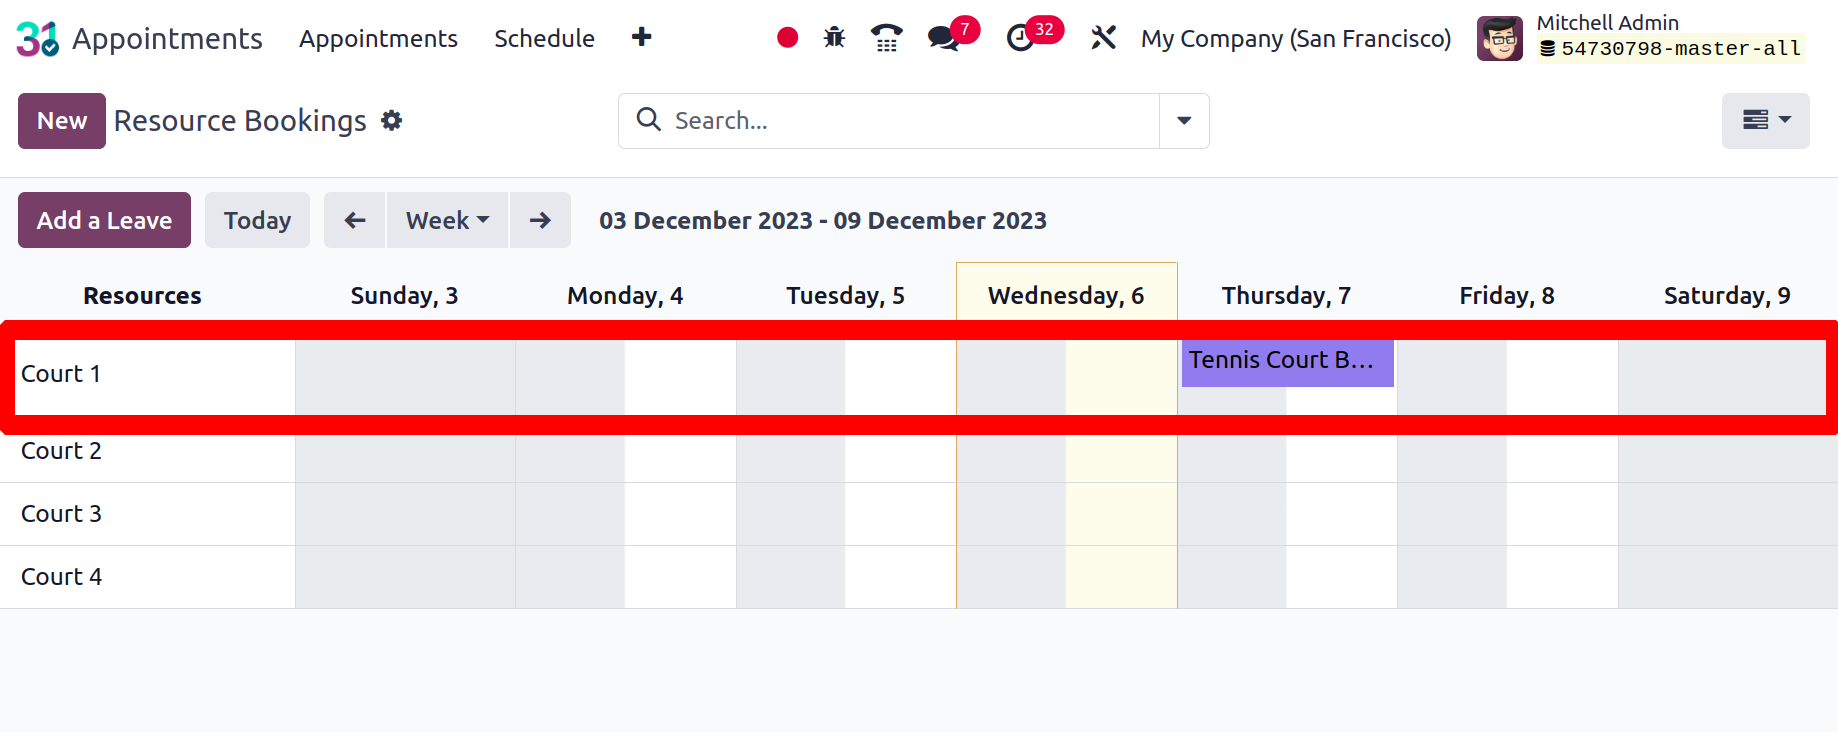
Click the "Add a Leave" button to add a leave. Next, select the Resource Calendar. The dates that follow will indicate the cause of the leave. Next, preserve the leave.

Staff Bookings
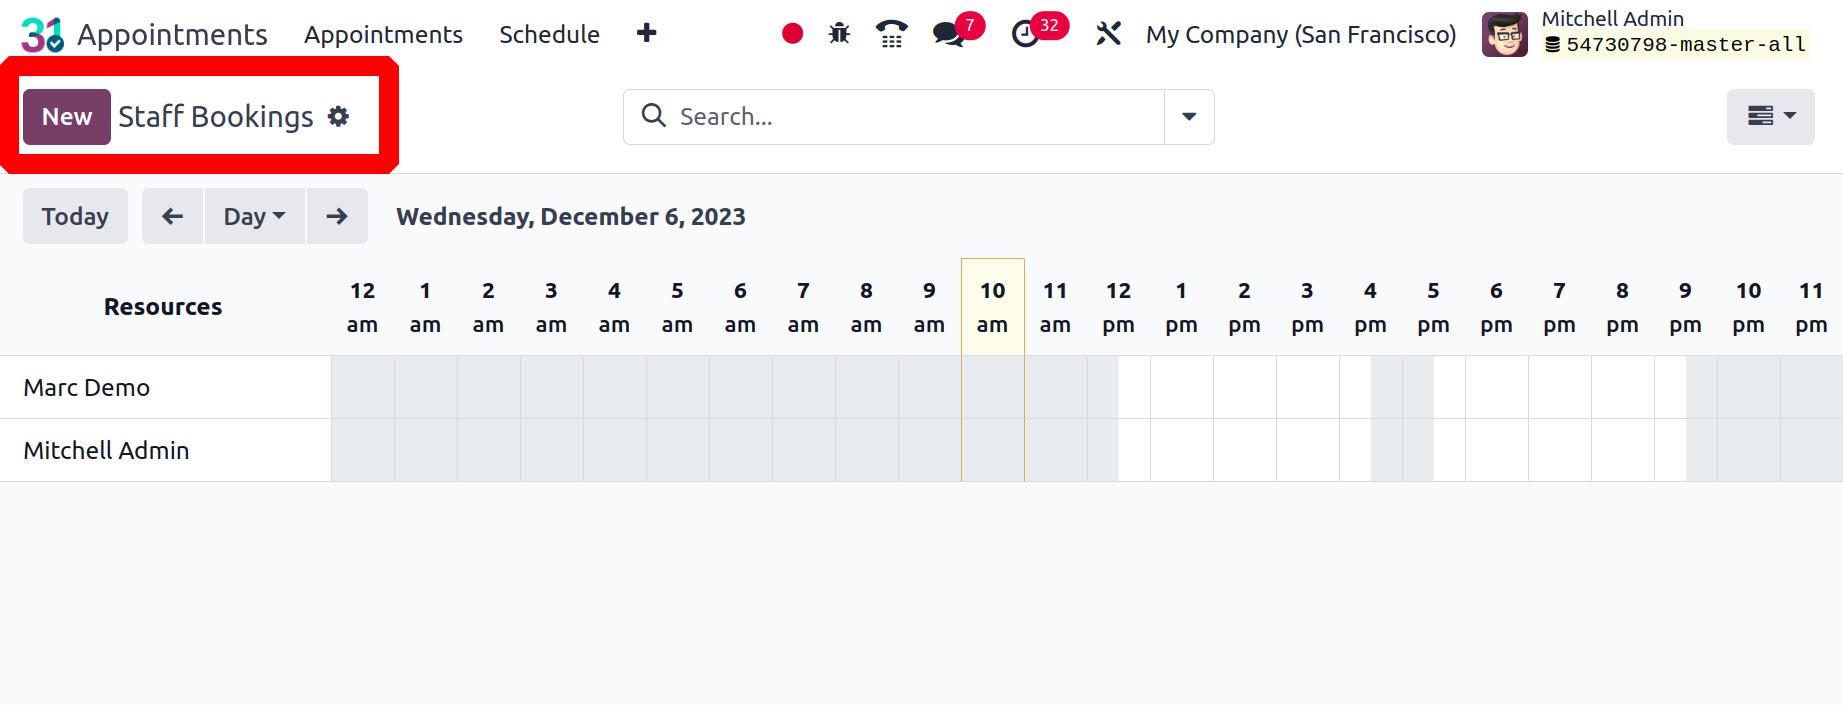
Resource booking and staff booking are comparable. Here, staff is the basis for booking rather than resources. When you select the "New" button, you can make a new reservation here.
Configuration
You can establish online or offline alarms for appointments by selecting the "Reminders" option under the Calendar module's settings options.
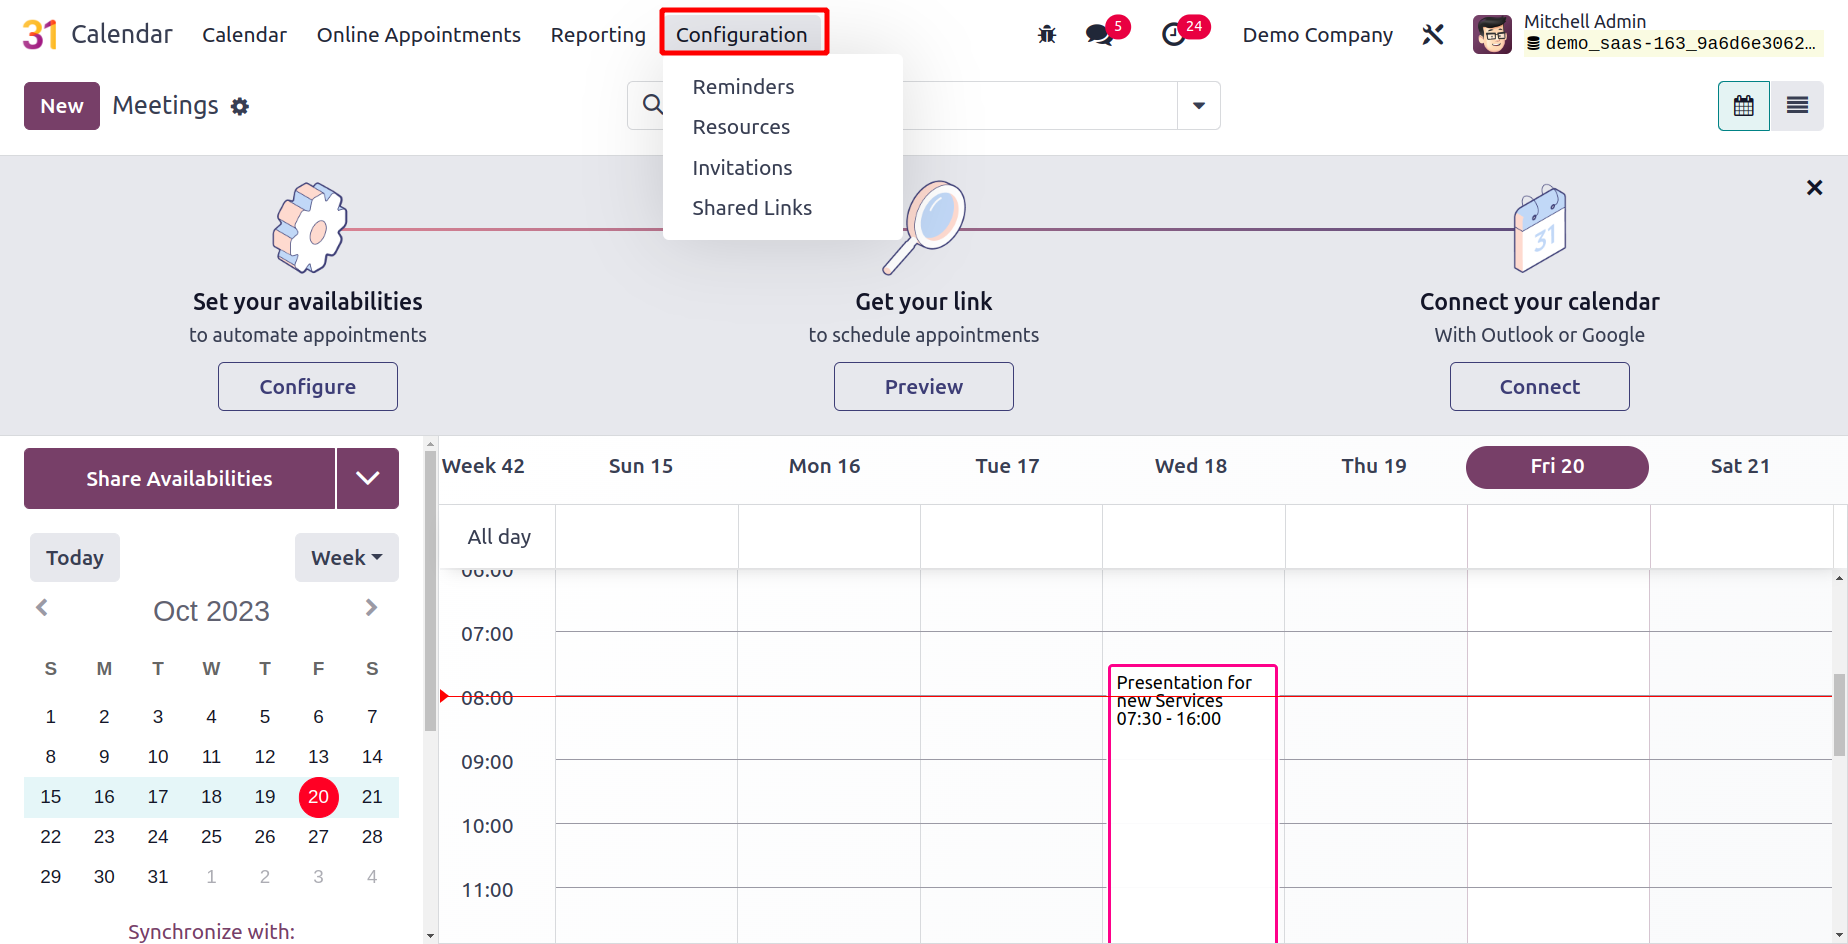
You can be reminded of upcoming appointments by using this feature in the Calendar module. It is possible to set multiple reminders to help staff members remember certain appointments. The setup menu's reminders option is where you may set up calendar alarms, as seen in the screenshot below.
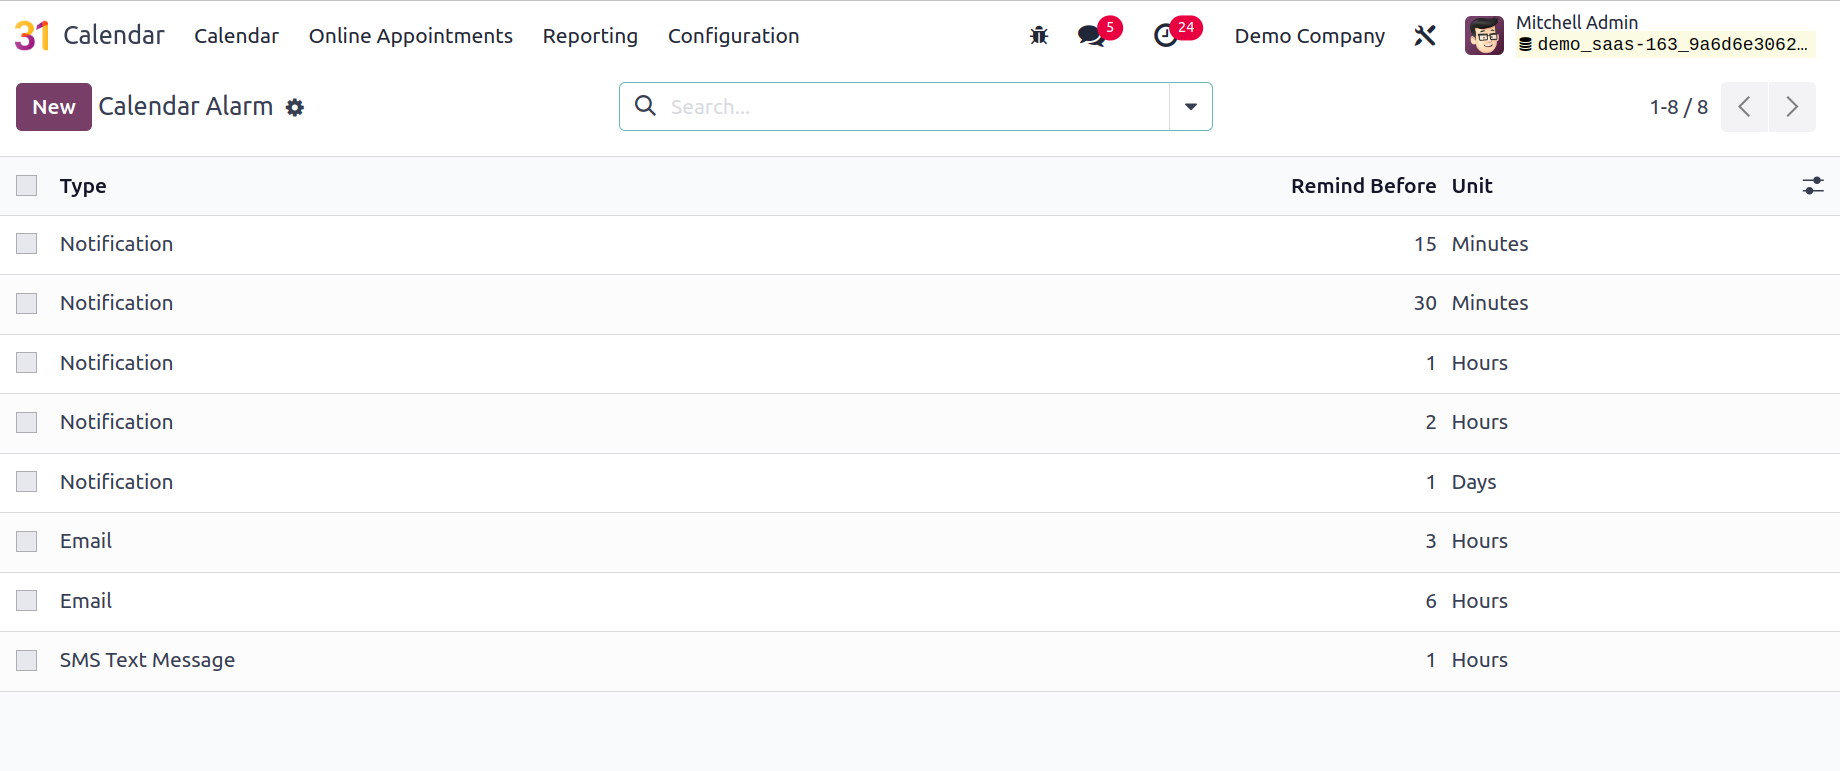
You may see all of the alerts that have been set for certain appointments on this page. The information on the page offers options for units, types, and prior reminders. Simply select the New icon located on the left-hand side of the screen to create an alarm or reminder comparable to the appointment.

Here, in the first available space, you can choose the ‘Type’ of reminder. Notifications, SMS, or emails can be the format. Additionally, there is room for you to include the Email Template. You may now schedule the alarm to go off at a certain time, even minutes, hours, or days in advance of the appointment by using the Remind Before option. To add alarms to new appointments, you can also activate the new appointments default option. To add this freshly made alarm to the current list, select the Save icon now.
Under the configuration menu, you also have options for sharing links and sending appointment invitations. The Shared Links page will have access to all of the appointment's shared links.

Resources
With Odoo 17, a new feature called The Resources was added. There is a resources option in the configuration. Appointment resources and capacity are listed on the page. To create a new resource, you can search or filter the group based on your preferences. select the "New" button.
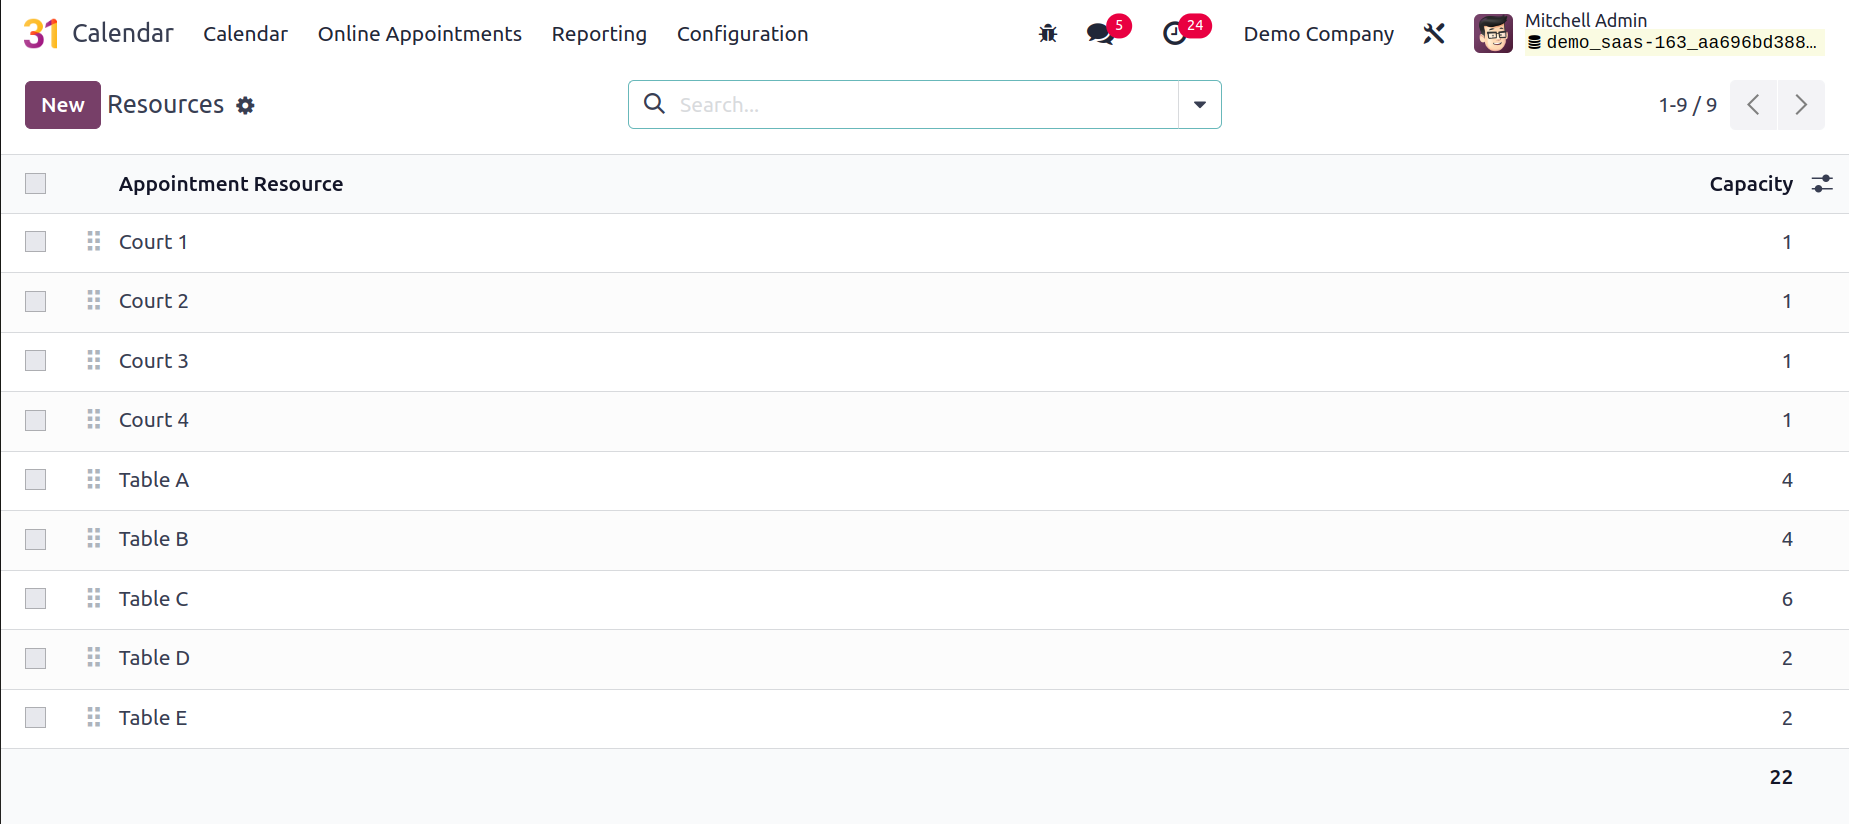
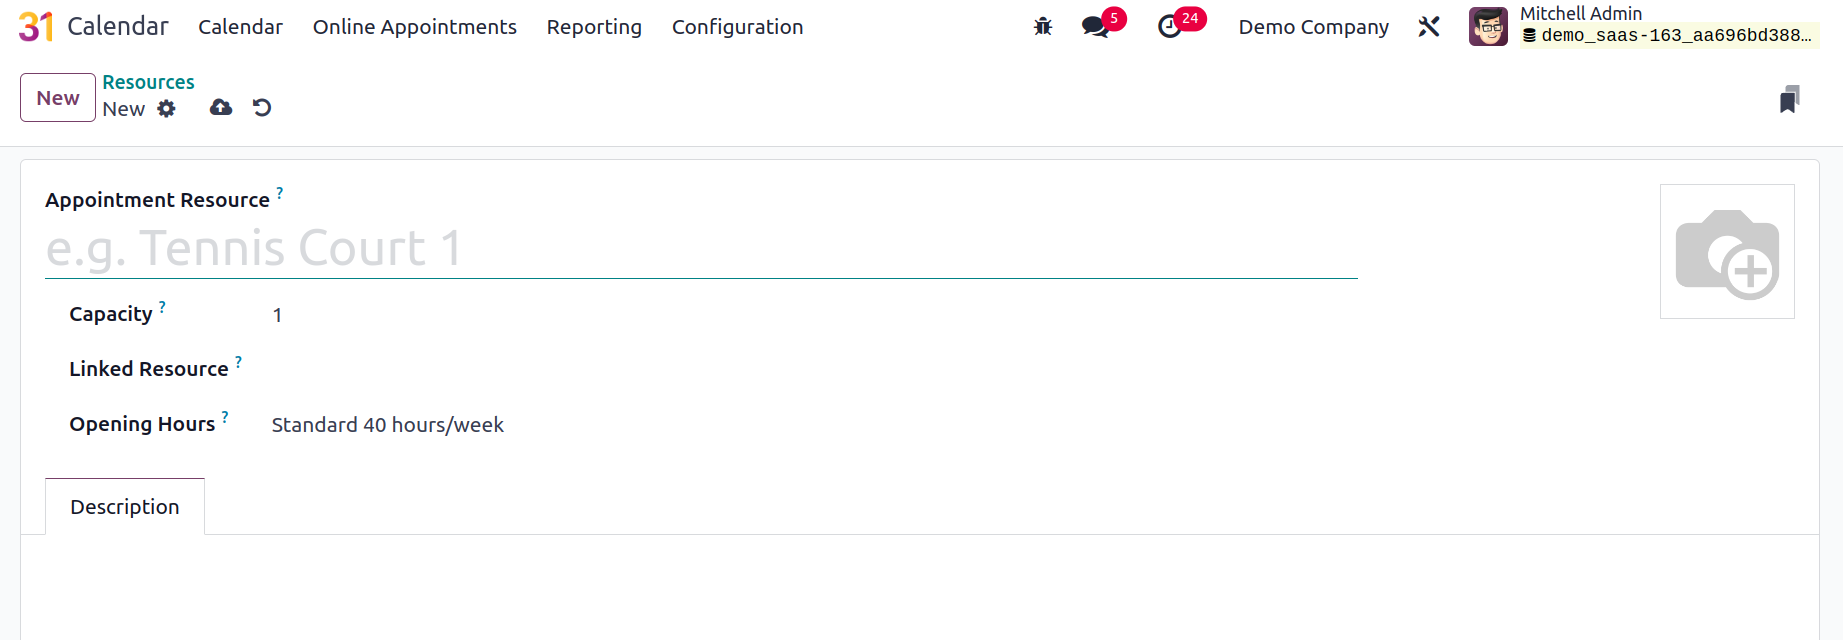
The resource name is added to the Appointment Resource field on the creation page. You can choose the maximum number of users for this resource in the Capacity section. You can add a list of resources to Linked Resource that work together to handle large demands. You may also choose the Opening hours from the provided field. Any description of the resources can be put under the Description tab.
Invitations
A new offline appointment can be created inside the Invitations, which is available in the Configurations menu. To create a new invitation click on the New button. The creation form is similar to an appointment form.
Reporting
You can examine and comprehend the appointments established using the Calendar module with the aid of its reporting feature. This feature will allow access to all appointments, including those made online.
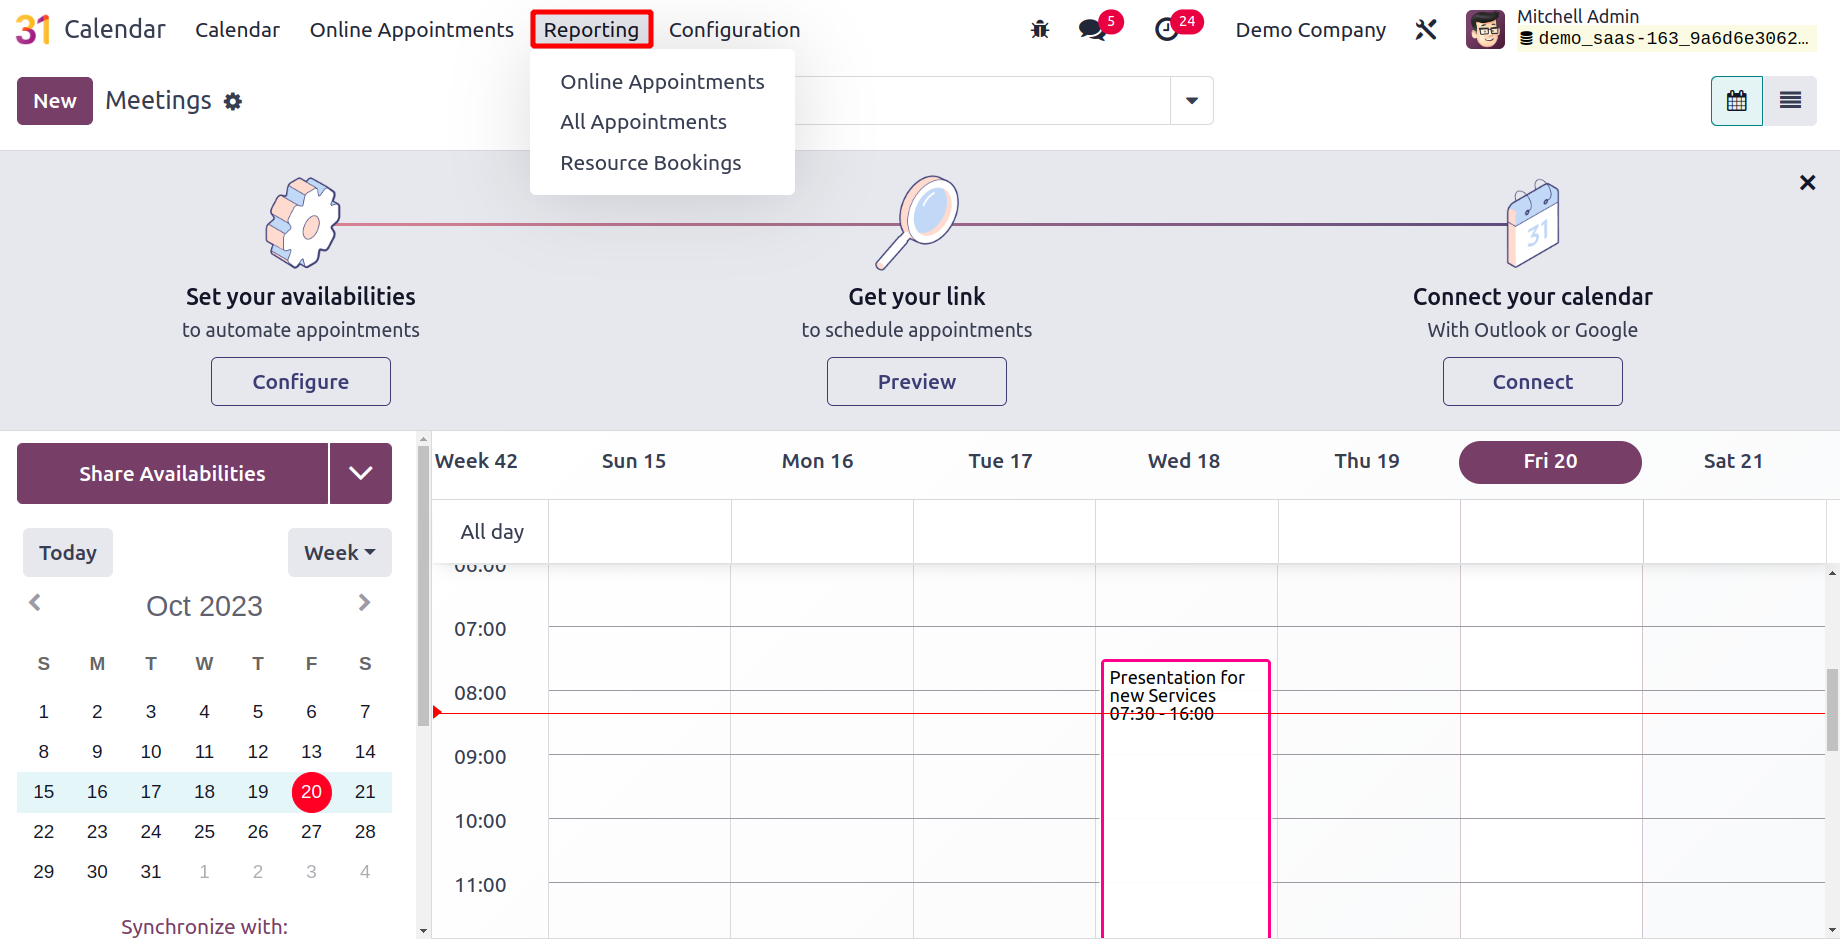
The online appointment option under the Reporting option is where you can view the online appointment reports.
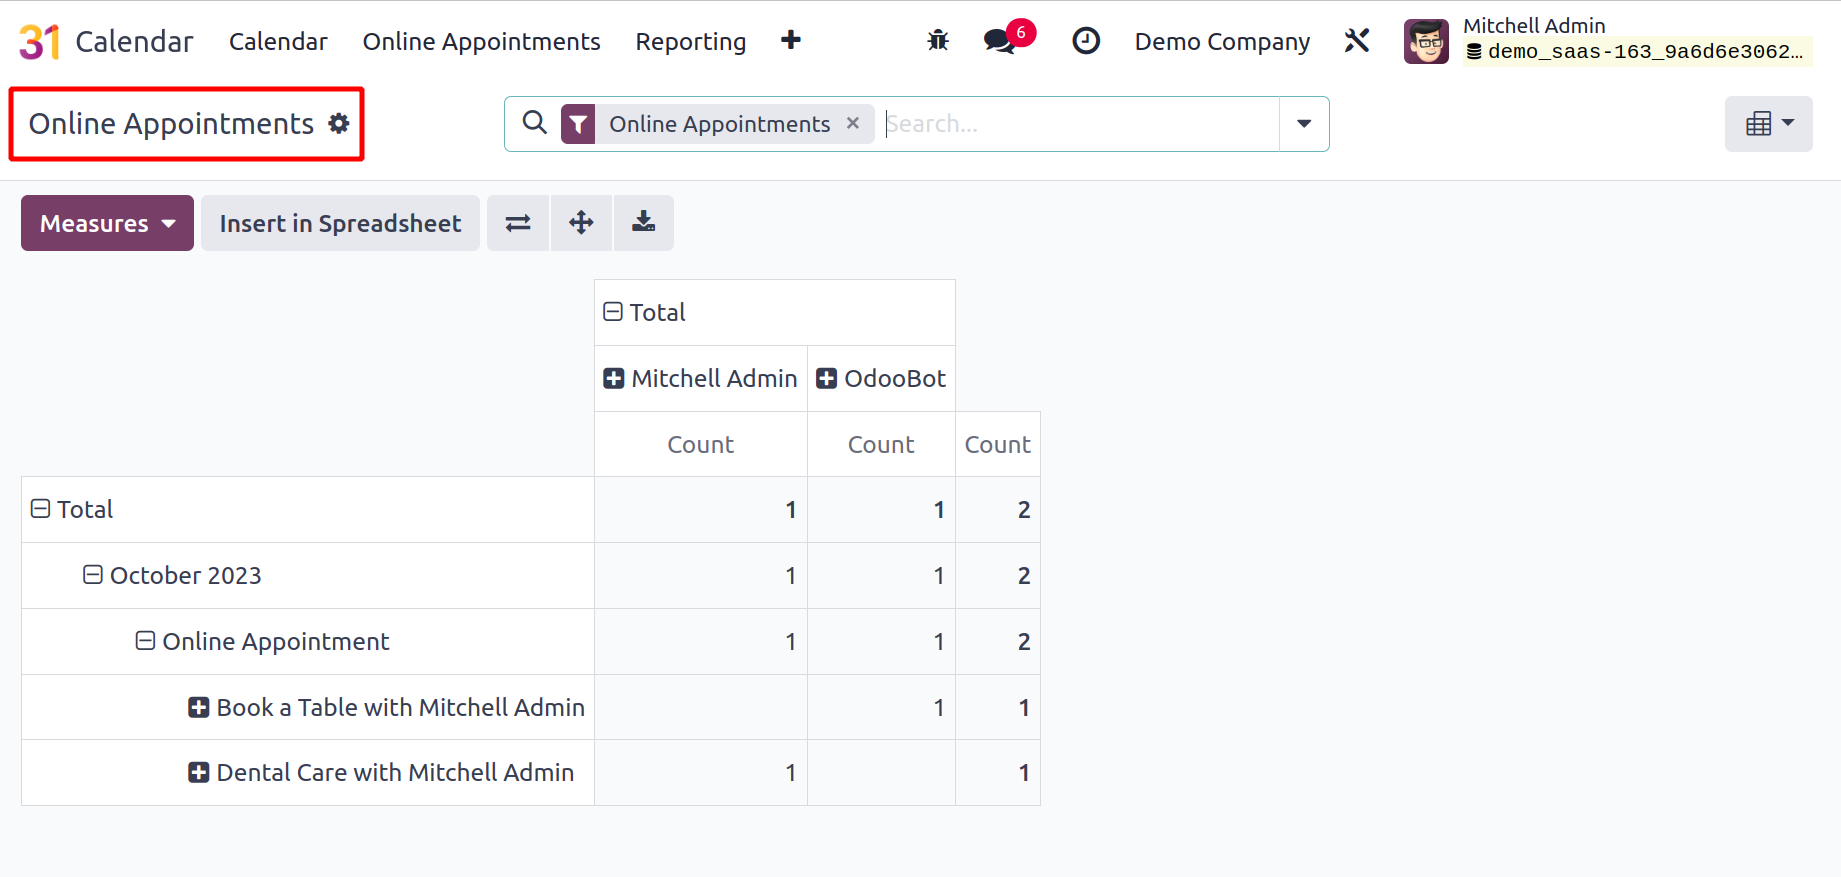
You will receive the reports in graphical, pivot, calendar, and list view, just like in the picture. There is a pie chart, bar chart, and line chart under the graphical view. You can choose the count and duration options under the MEASURES option based on our requirements. Additionally, the reports are viewable on a daily, monthly, or annual basis.
The All Appointments option under the Reporting option will display the All Appointments reporting. The screenshot below shows the graphical representation of every appointment.
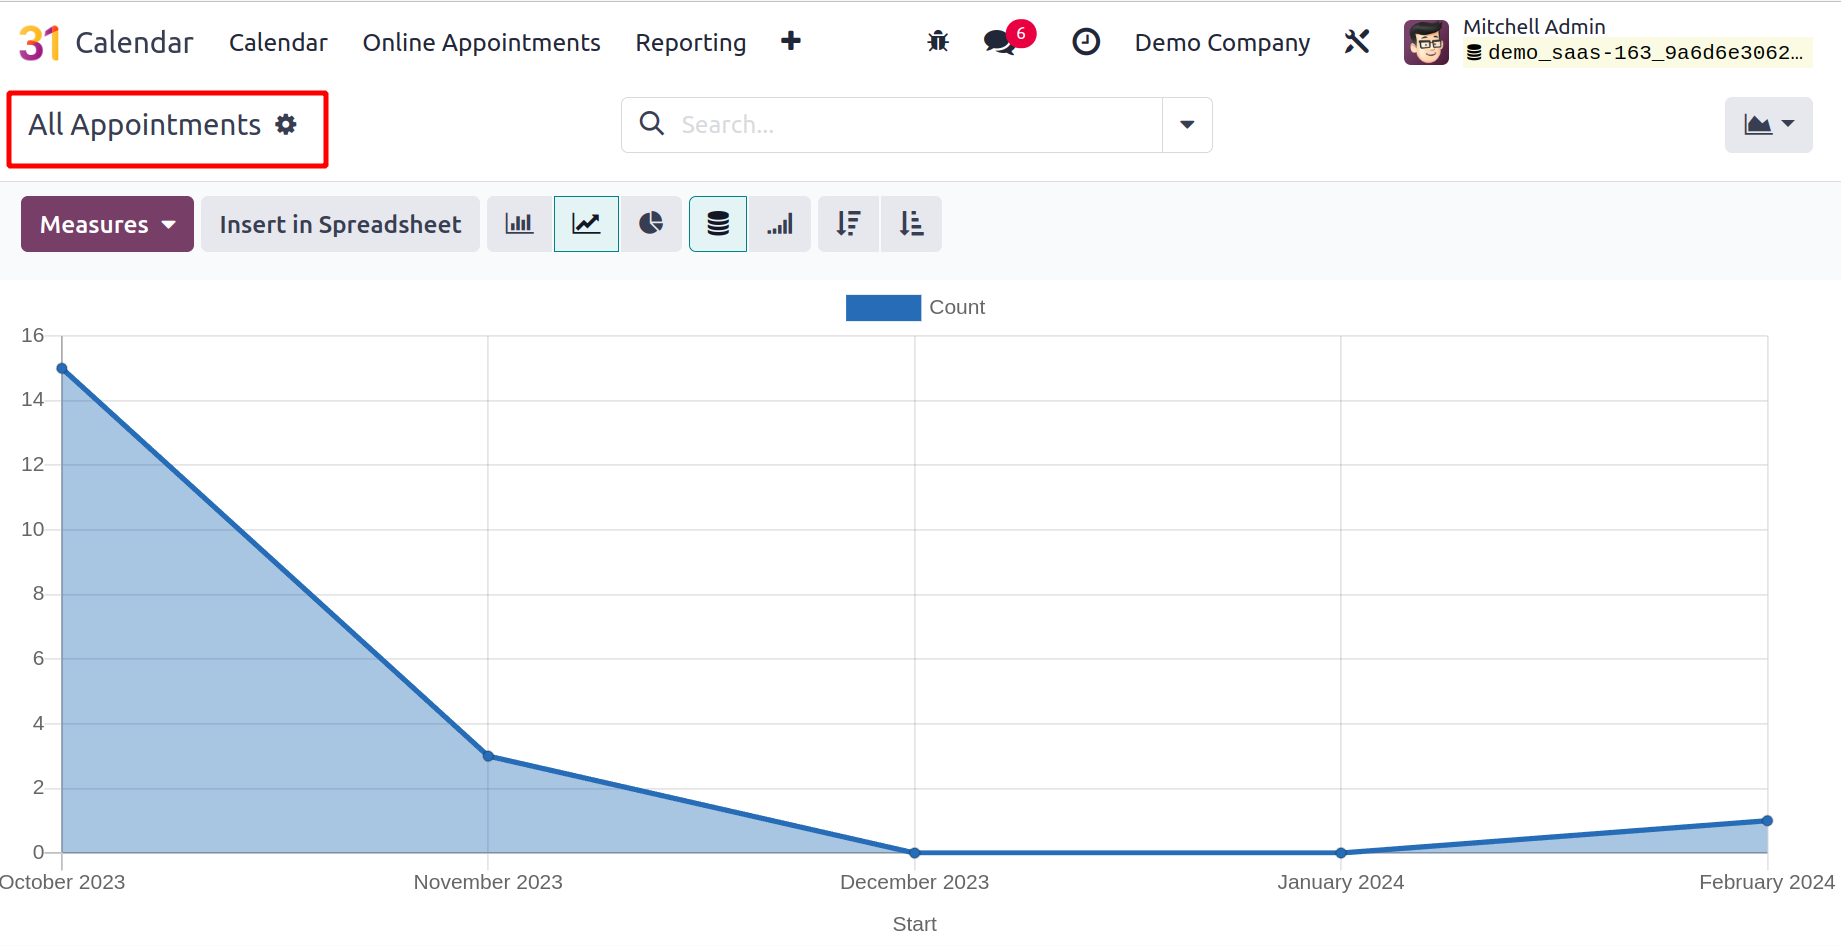
Pivot, calendar, and list view are all accessible here, just like in the picture. There is a pie chart, bar chart, and line chart under the graphical view. You can choose the count and duration options under the MEASURES option based on our requirements.
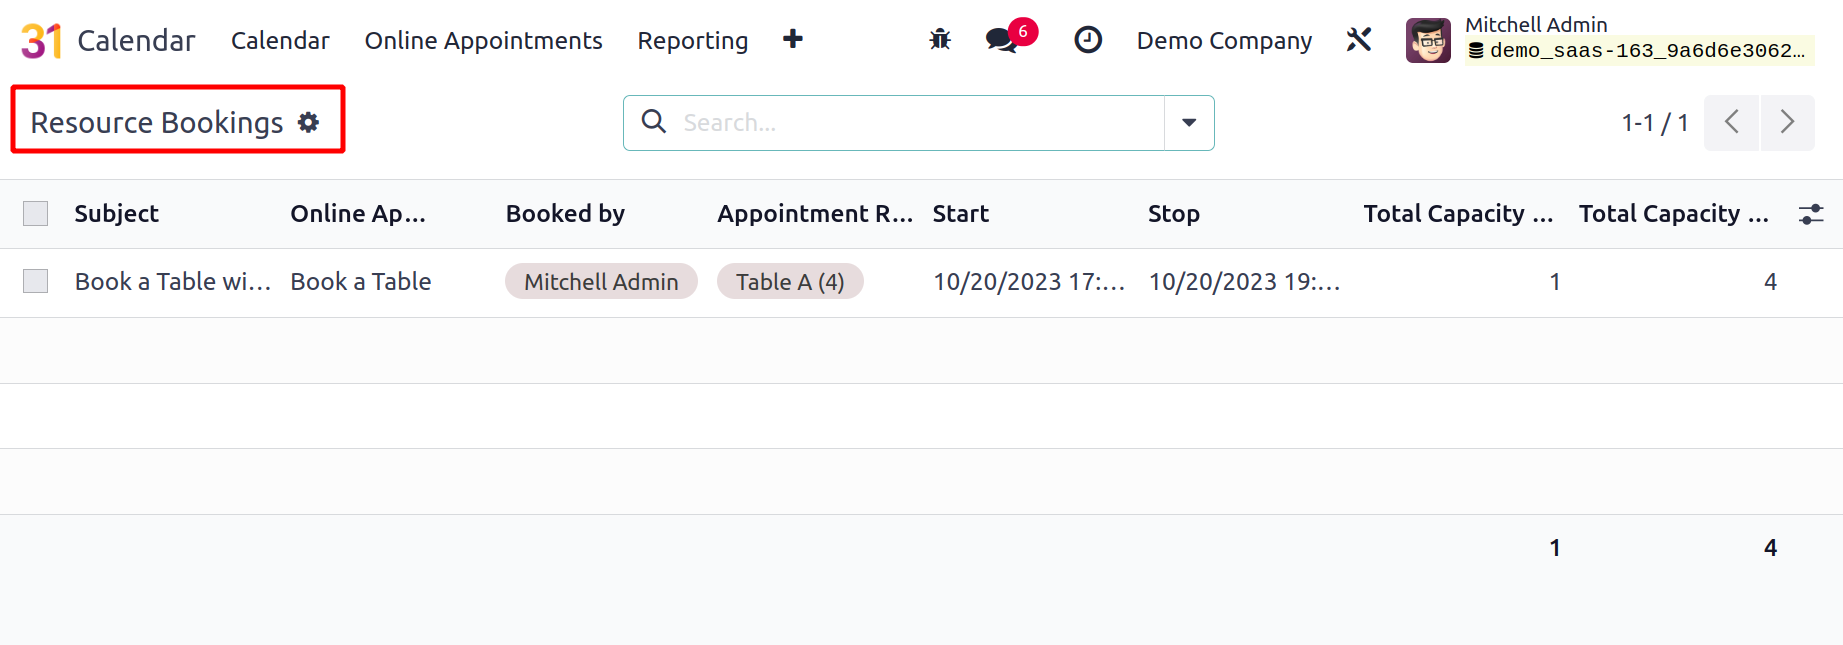
A report based on the reserved resources will be provided by Resource Booking. The subject, online appointment type, booked by whom, appointment resource, start and end dates, and other details are shown on the website. This page contains the Filter, Group By, Favorite, and Search options.
Thus far, we have explored the diverse applications of the Calendar module within the Odoo ERP Software, as well as its unique characteristics. The module will undoubtedly be very helpful in organizing and managing appointments, some of which may be made online. The reports of those appointments will also be sent to you, which will aid in the analysis of the appointments scheduled on specific days.