Journals
Recording all of your accounting transactions in accounting journals is crucial. A
record of transactions organized by date is called an accounting journal. For client
invoicing, vendor bills, bank transactions, and other ad hoc activities, you can
establish a Sales Journal, Purchase Journal, Bank Journal, Cash Journal, and
Miscellaneous Journal in Odoo17. You can record your business transactions in
these journals by adding journal entries after generating the appropriate accounting
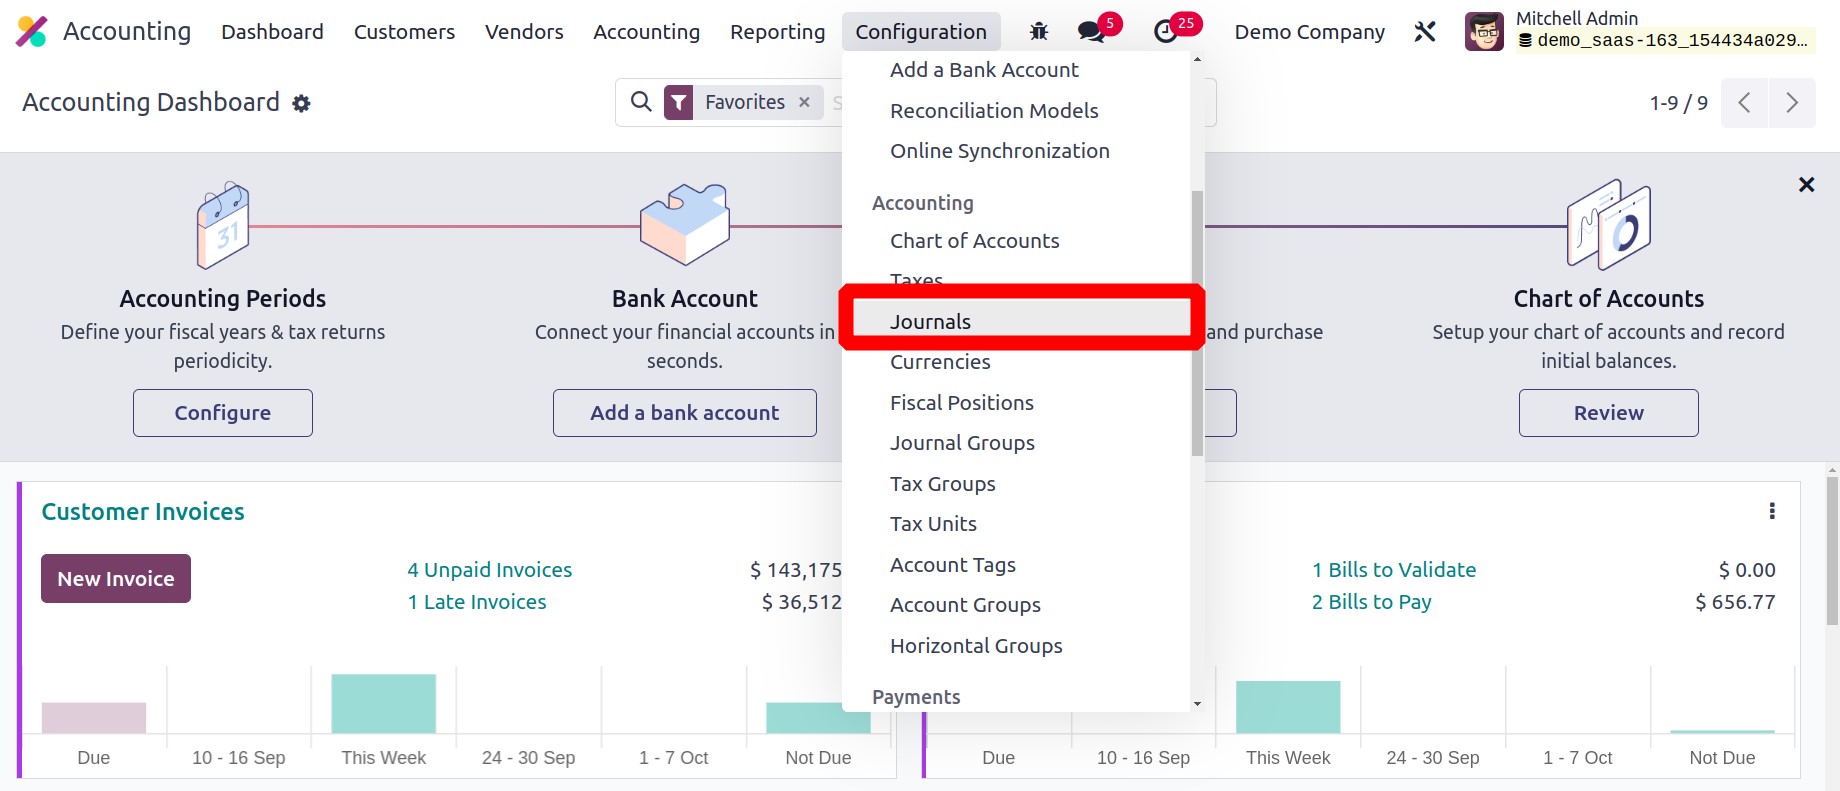
journals. In Odoo17, you can go to the Configuration menu of the Accounting
module and select the Journals option as seen in the screenshot below. From
there, you can view and create journals.
Here, you may see a list of already-configured journals together with information on
their Name, Type, Journal Groups, Short Code, and Default Account. Using the New
button, you may make a new Journal to keep track of your accounting entries.

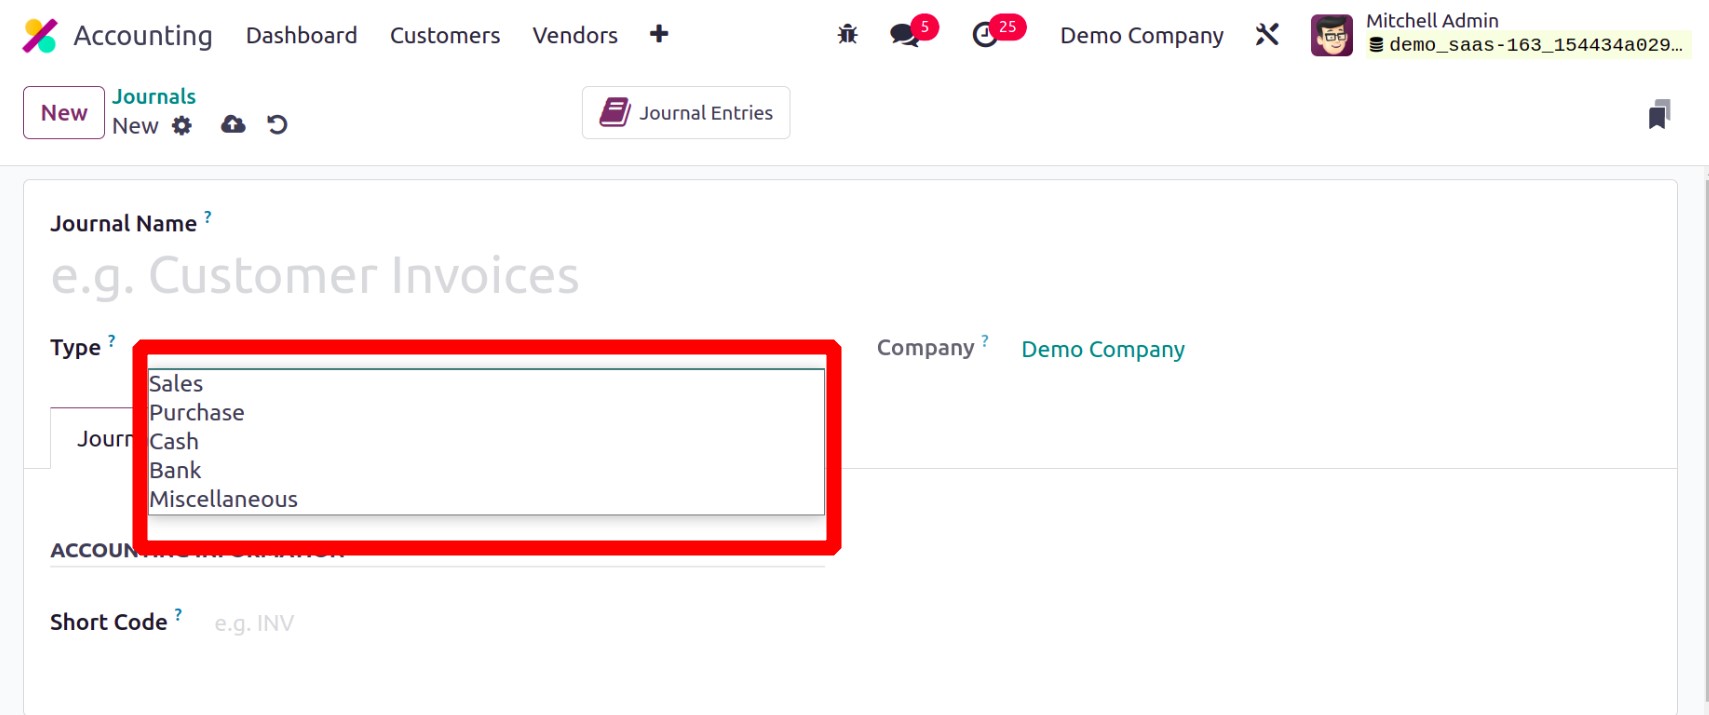
You need to specify the journal type after providing the journal name. The Company form
will automatically fill in with your company name. You can create journals in Odoo for
Sales, Purchase, Cash, Bank, and Miscellaneous.
The journal type you choose will affect the remaining setting options. Where to use this
journal while entering an accounting transaction will depend on the journal type. Let's
examine each journal type's settings separately.
Sales
You can set up sales journals to accept entries for customer invoices. You can
choose the Sales journal type for this. Both the Advanced Settings and Journal
entries tabs will have some extra fields.
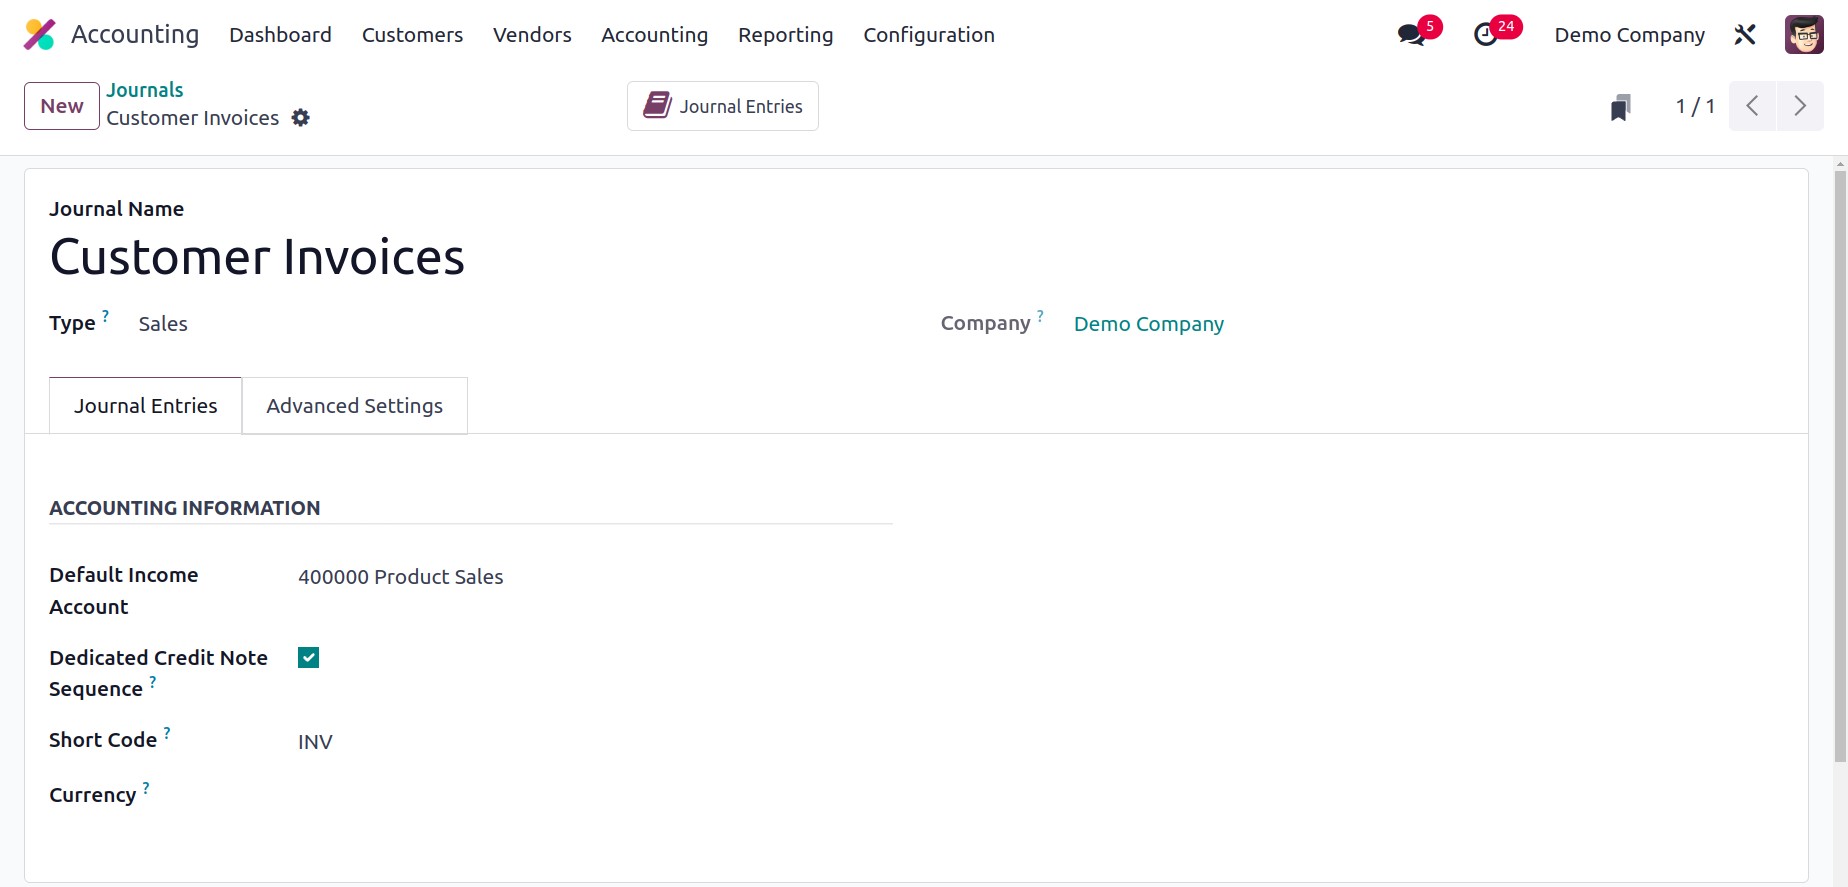
You can specify the Accounting Information for the entries in this journal under
the Journal Entries tab. On this page, you can specify a Default Income
Account for the sales journal. If you don't want to share the same sequence for
invoices and credit notes from this journal, you can enable the Dedicated Credit Note
Sequence feature. By turning on this setting, credit notes that are added to
this journal will have a certain sequence assigned to them. In the Short Code field, you
can indicate a shorter name that will be shown. This prefix will be used by default to
name the items in this journal. You can specify the currency in the relevant
field that was used to record the accounting statements.
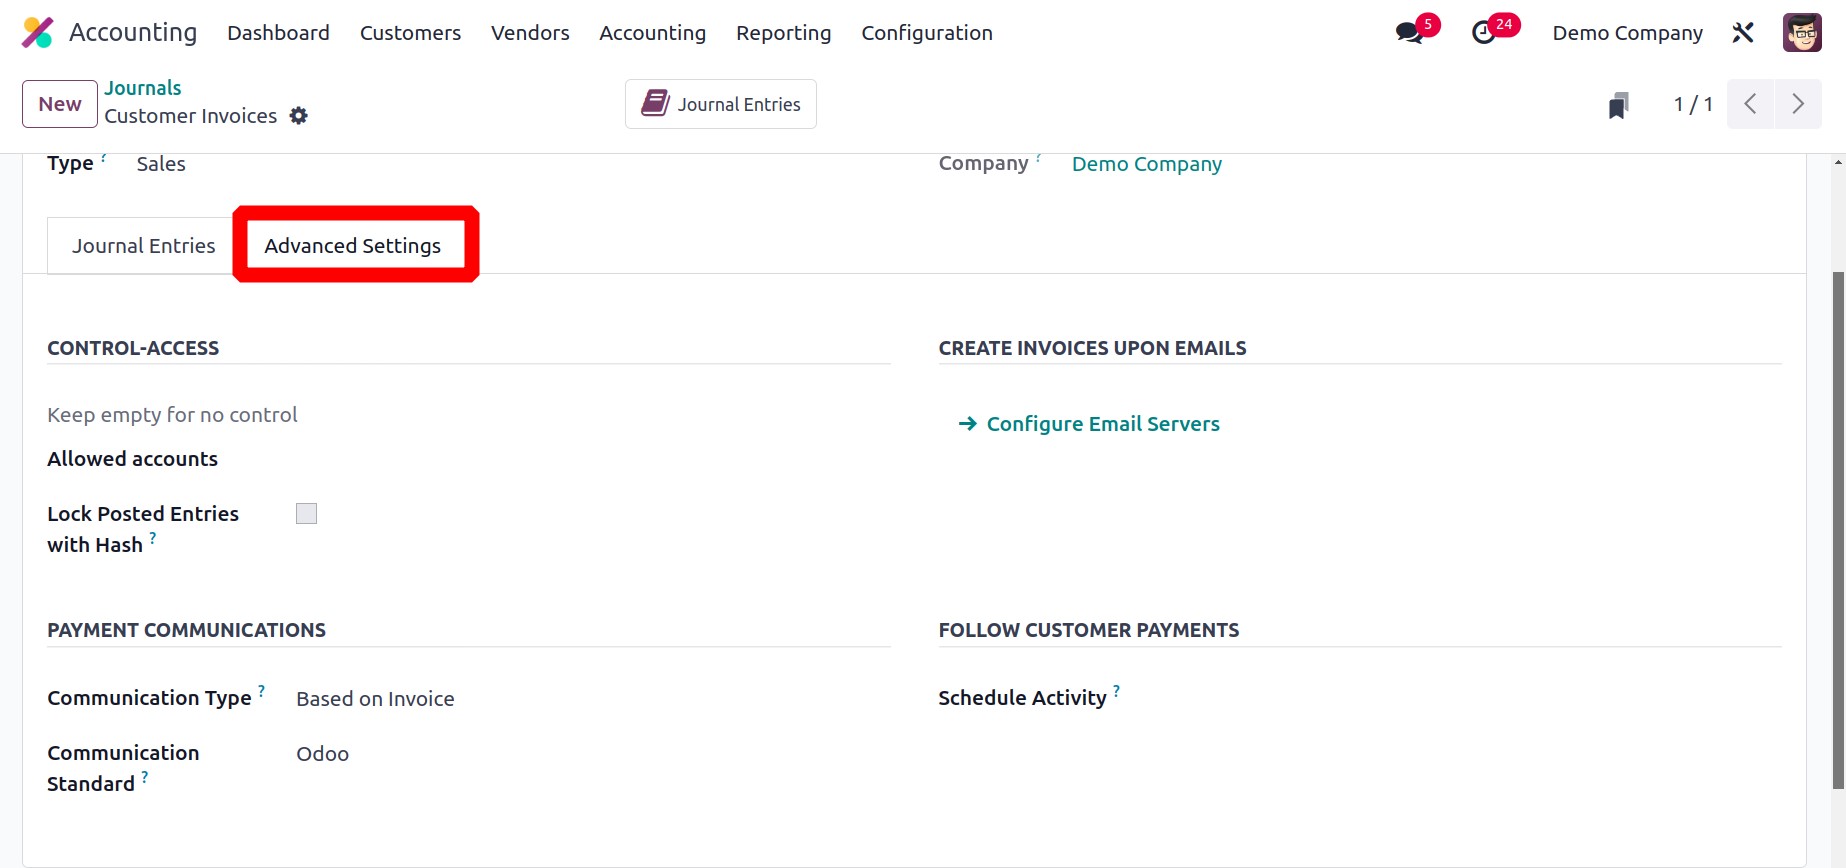
You can manage access by stating the Allowed Accounts in the Advanced Settings
tab. Keep the field blank if you don't want to set any controls for the accounts.
Enabling the Lock Posted Entries with Hash option will result in the accounting
entry or invoice receiving a hash as soon as it is posted. The entry that has been
posted will then become locked and cannot be changed any longer.
You can specify the payment communication method in the Communication Type
section. To make it easier for the customer to remember to refer to that specific
invoice when making the payment, you may select the default communication that will
appear on the customer invoice once it has been validated. Open, based on invoice, or
based on customer settings are all options. For each sort of reference, you can select a
different model in the Communication Standard column. The Odoo reference is used as the
default one here. It is possible to make invoices based on emails by specifying Email
servers in the provided area. You can arrange several actions with the consumer
to keep track of payments. In order to optimize the collection process, the activity
specified in the Schedule Activity box will be automatically scheduled on the
payment due date.
Purchase
You can make a purchase journal to keep track of vendor bill entries. Purchase can be
chosen as the Journal Type. The Journal Entries and Advanced Settings sections resemble
the Sales Journal nearly exactly.
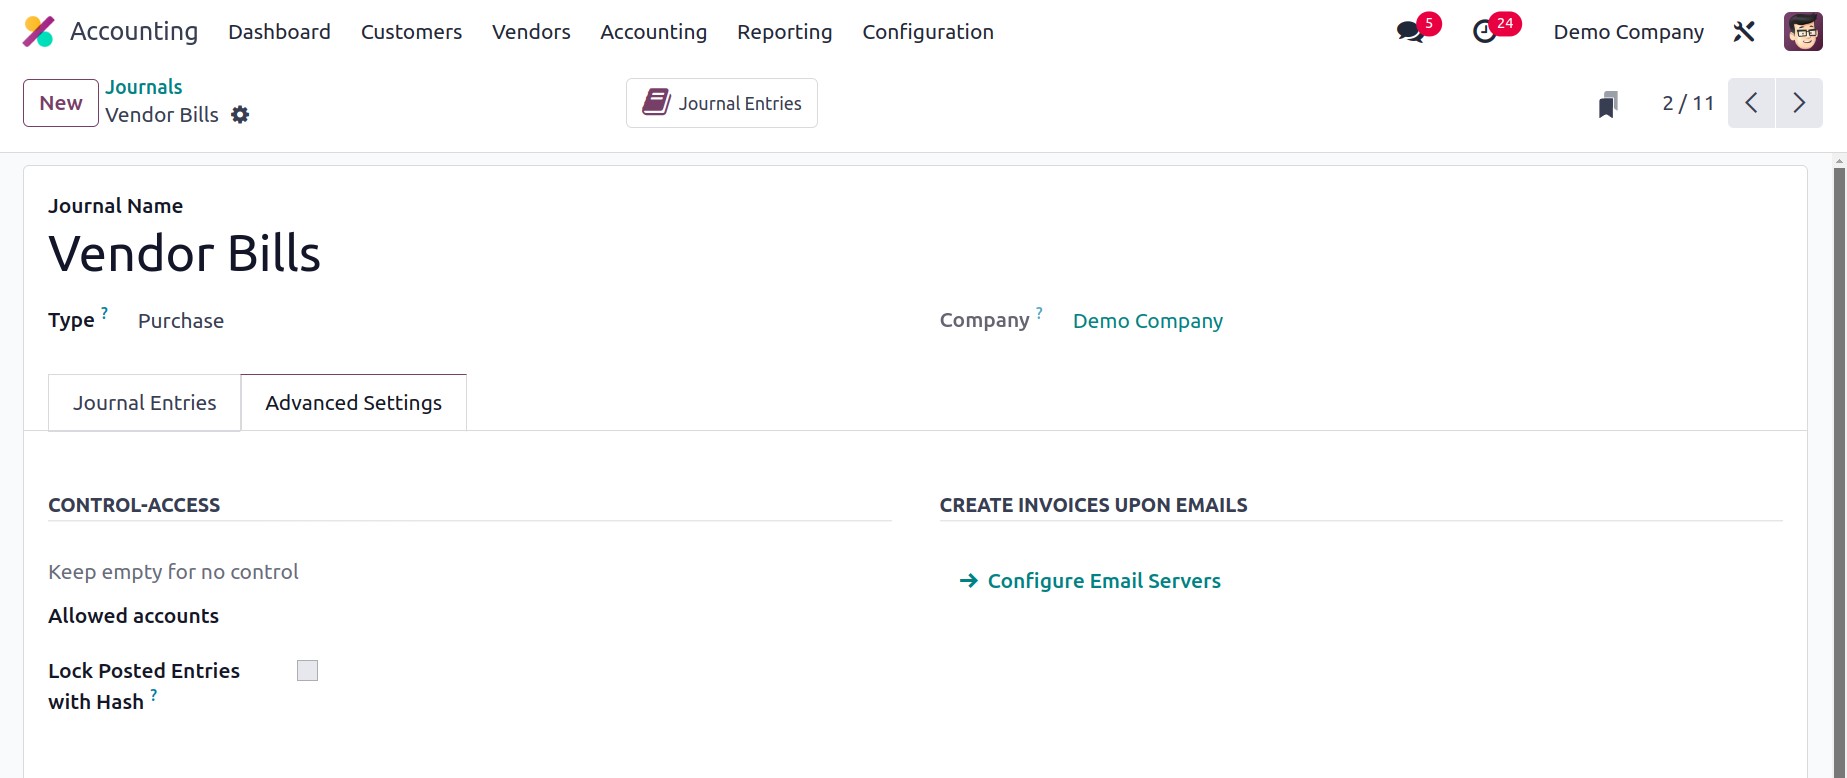
In this case, the accounting information section asks you to mention the Default Expense
Account.
Cash
Using the Cash journal, accounting entries resulting from manual cash transactions can
be entered. You will receive several more tabs while configuring a cash journal, as seen
in the image below.
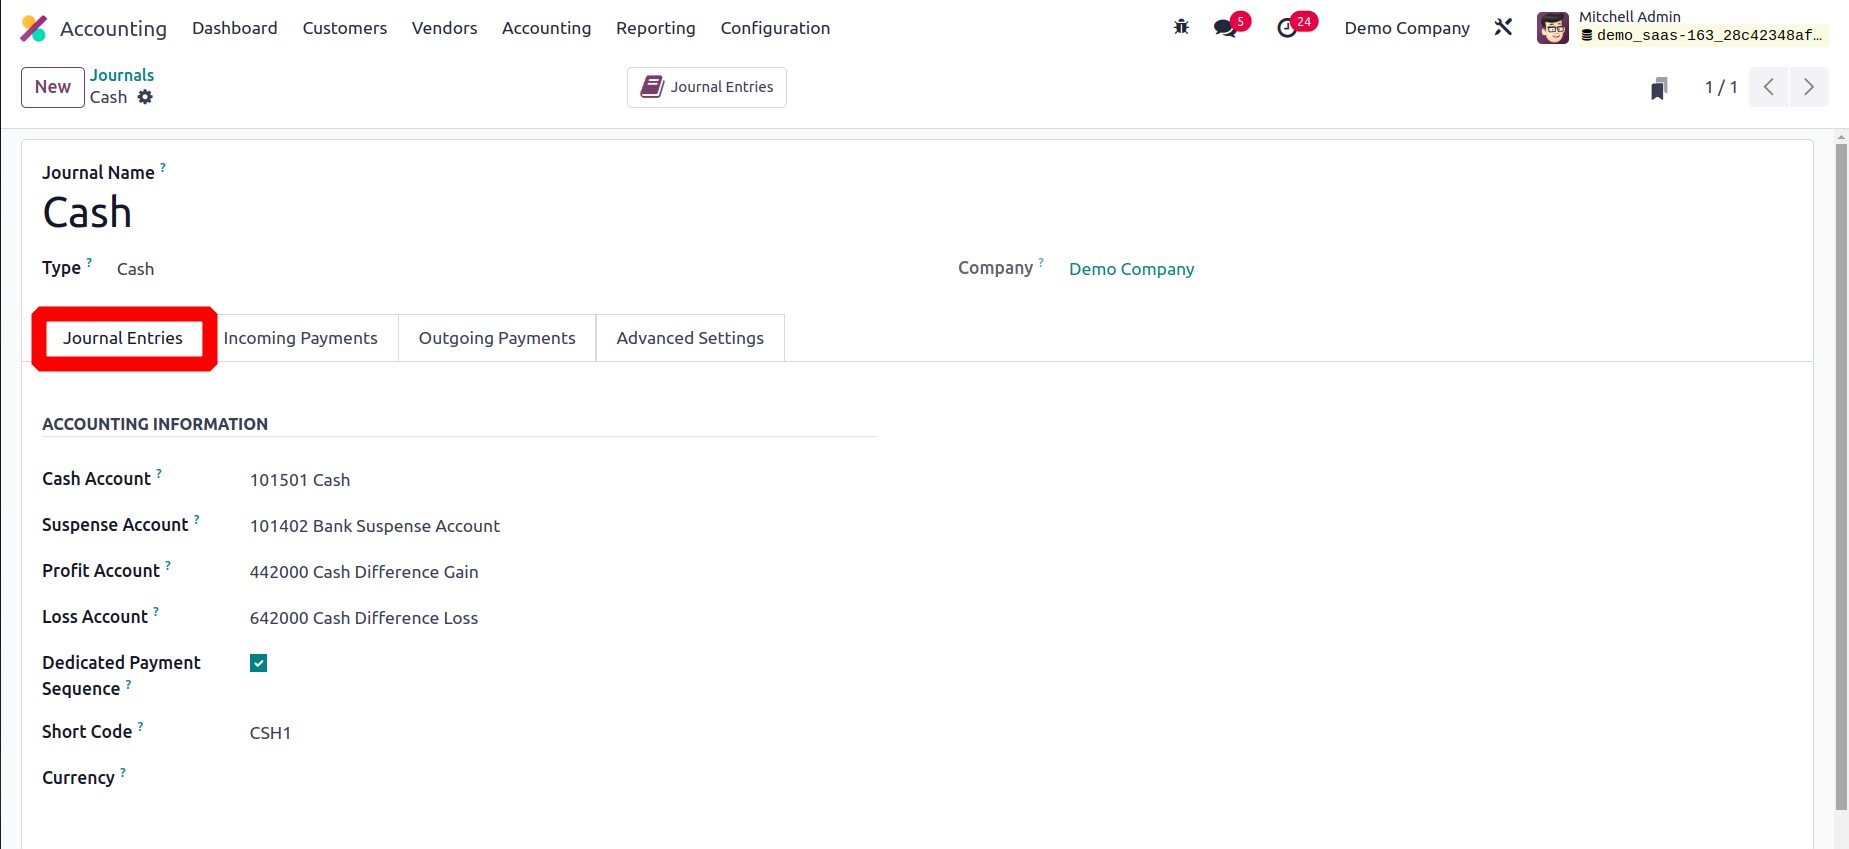
The Cash Account can be chosen on the Journal Entries tab. A Suspense
Account can also be specified for the cash journal. Until the final
reconciliation locates the correct account, the bank statements and transactions will be
placed on the suspense account. When a cash register's final balance deviates from what
the system calculates, a profit or loss is recorded in the relevant Profit
Account and Loss Account specified above.
You can enable the Dedicated Payment Sequence option to have a dedicated payment
sequence for payments and bank transactions posted in this journal.
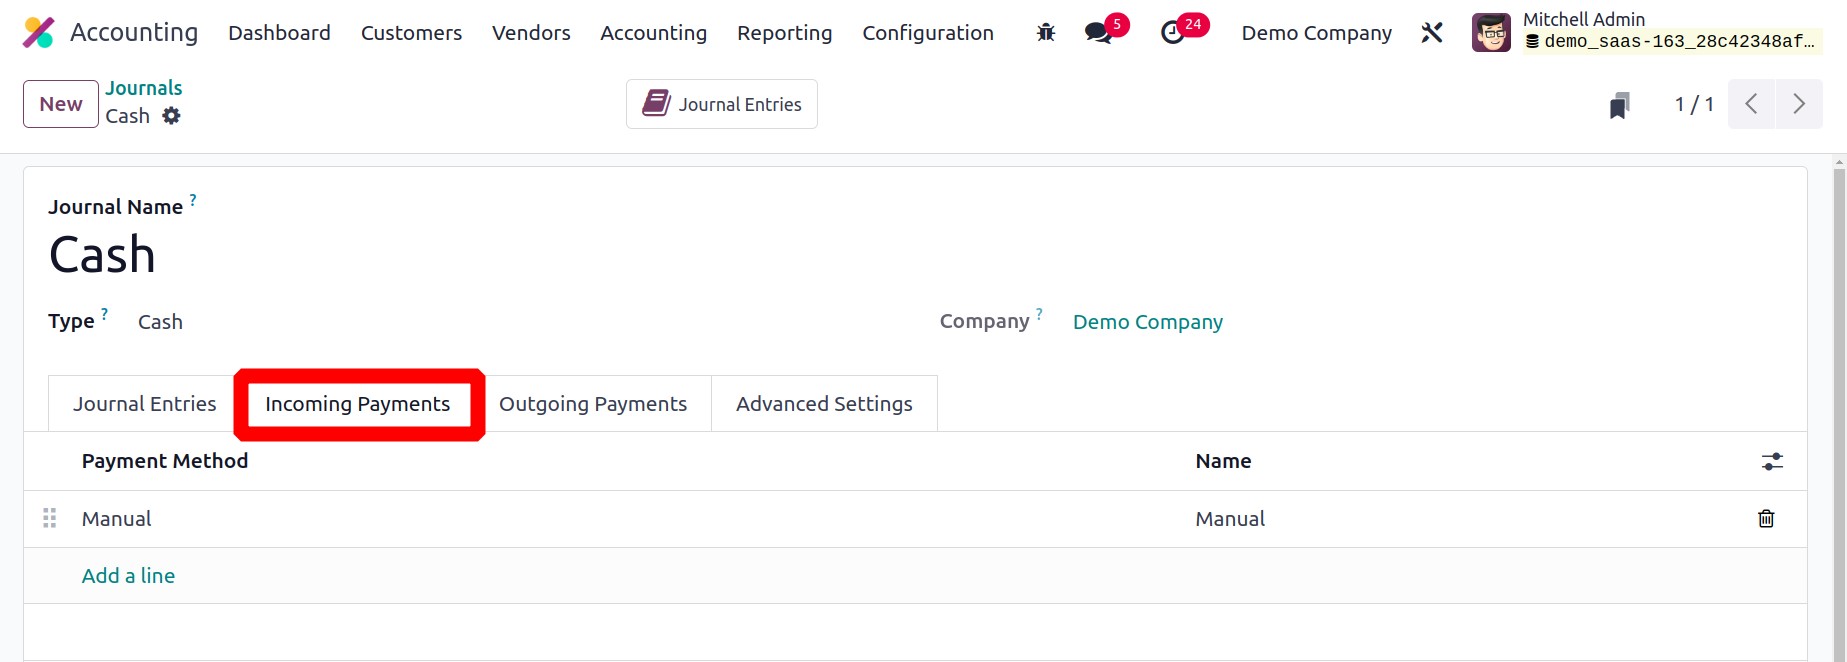
Under the Incoming Payments tab, the names of the incoming payment methods can be
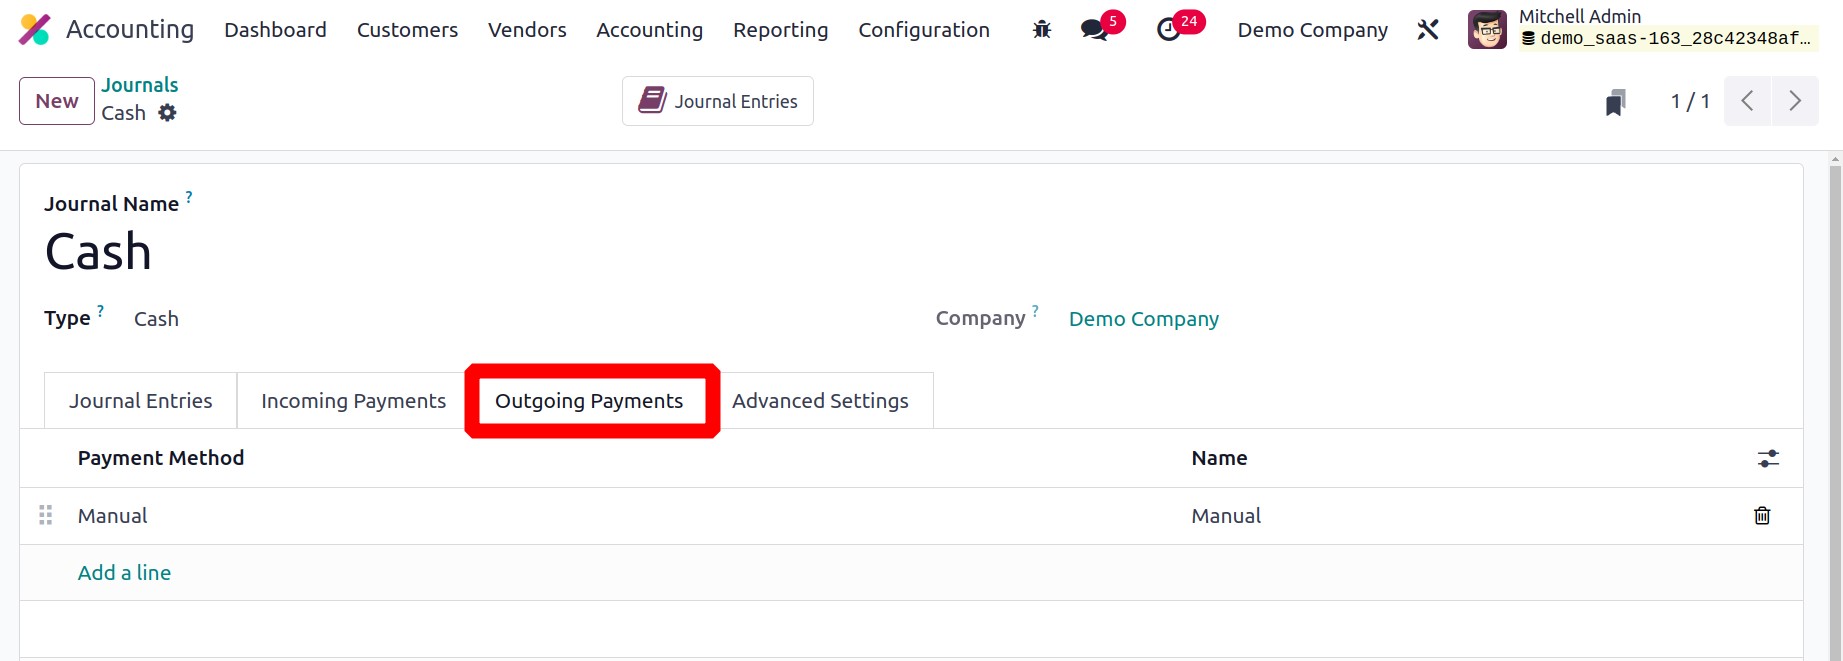
specified. Similar to that, the names of the Outgoing payment methods can be added under
the Outgoing Payments tab.
By listing the permitted accounts in the Advanced Settings tab, you can limit who has
access to the cash accounts.
Bank
Bank journals can be used to record bank transaction entries. You can choose Bank as the
journal type for this.
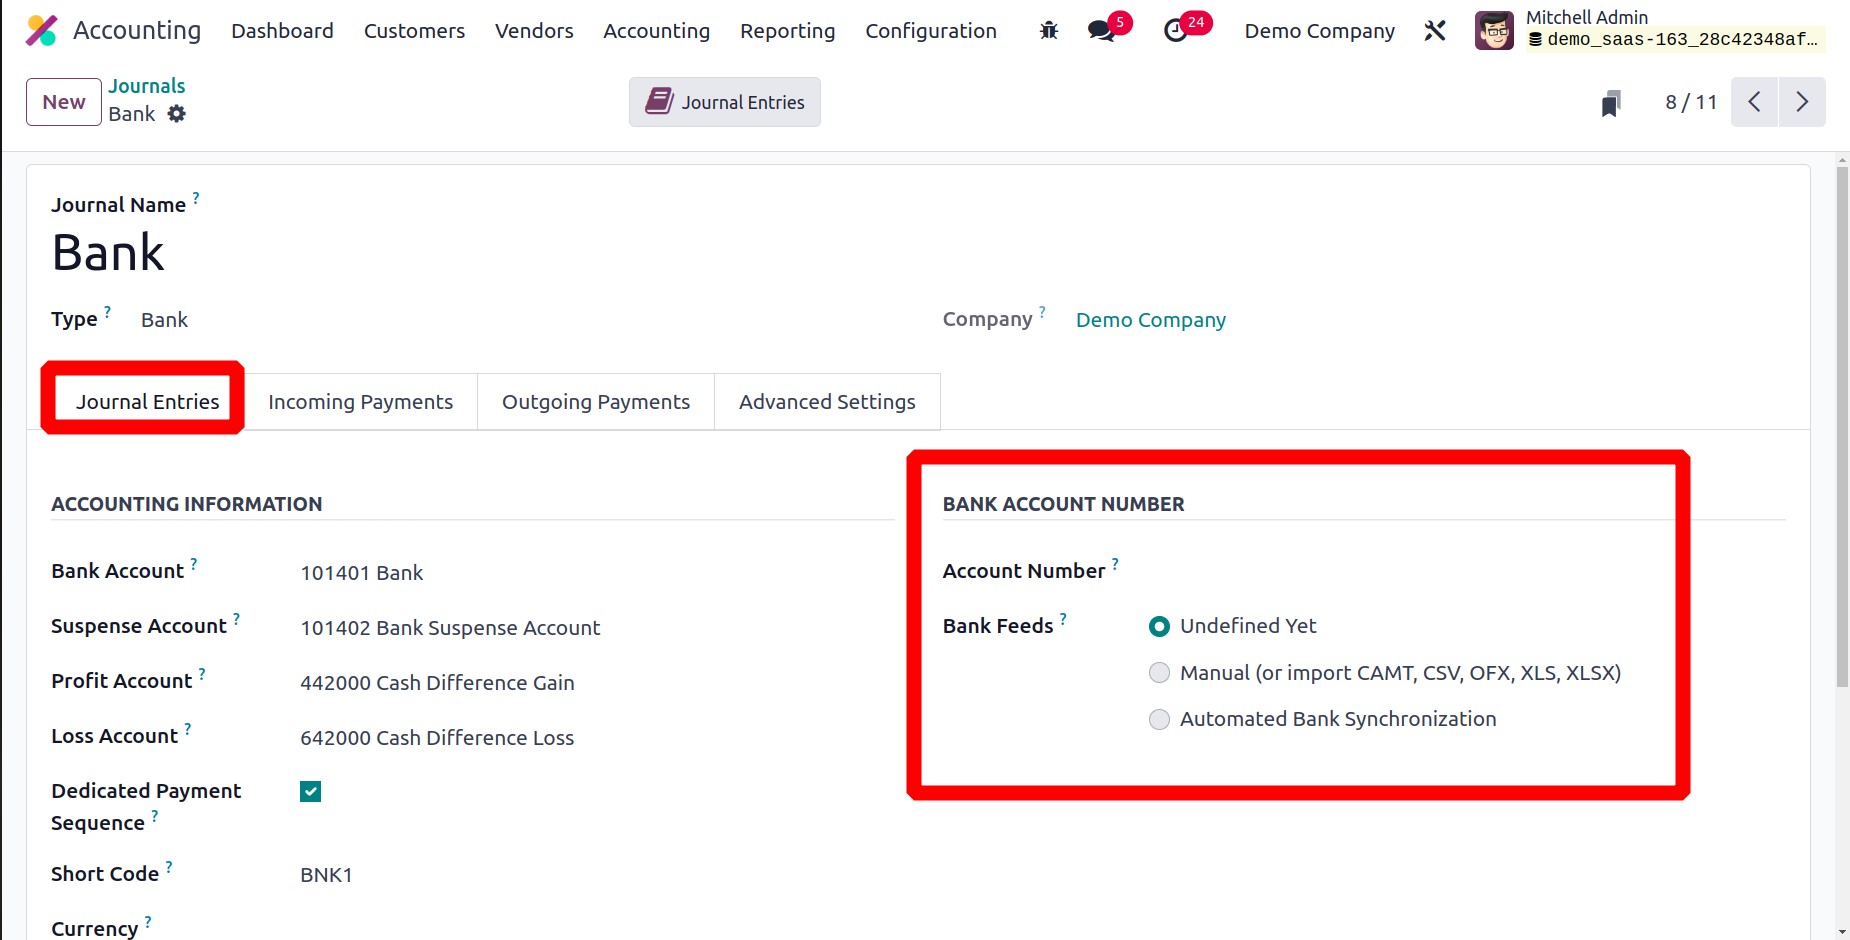
Here, you must include both the Account Number and the Bank Account. How
the bank statements are registered will depend on the choice you make in the Bank Feeds
section. The bank statements can be imported or bank synchronization can be automated.
If you are unsure about registering bank statements, you can select the option Undefined
Yet.
The relevant tabs allow you to choose the payment options used for incoming and outgoing
payments.
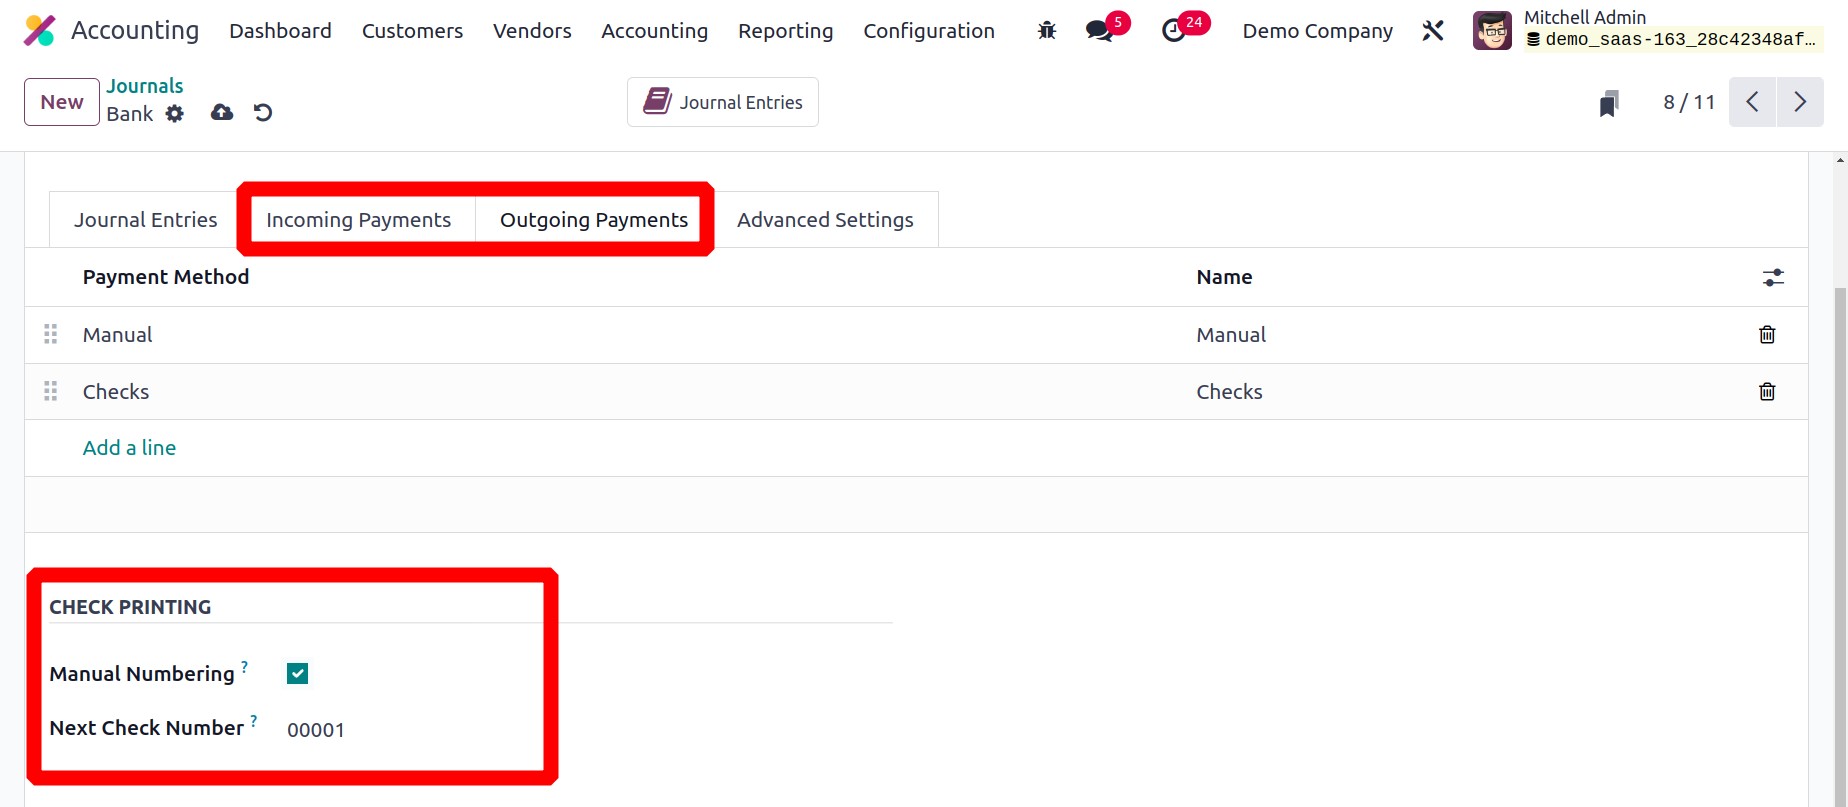
You will be given extra setup options based on the payment method you choose when
choosing from the available payment methods.
Miscellaneous
Use the miscellaneous diary to record any invoices or payments that don't fall under a
single category.
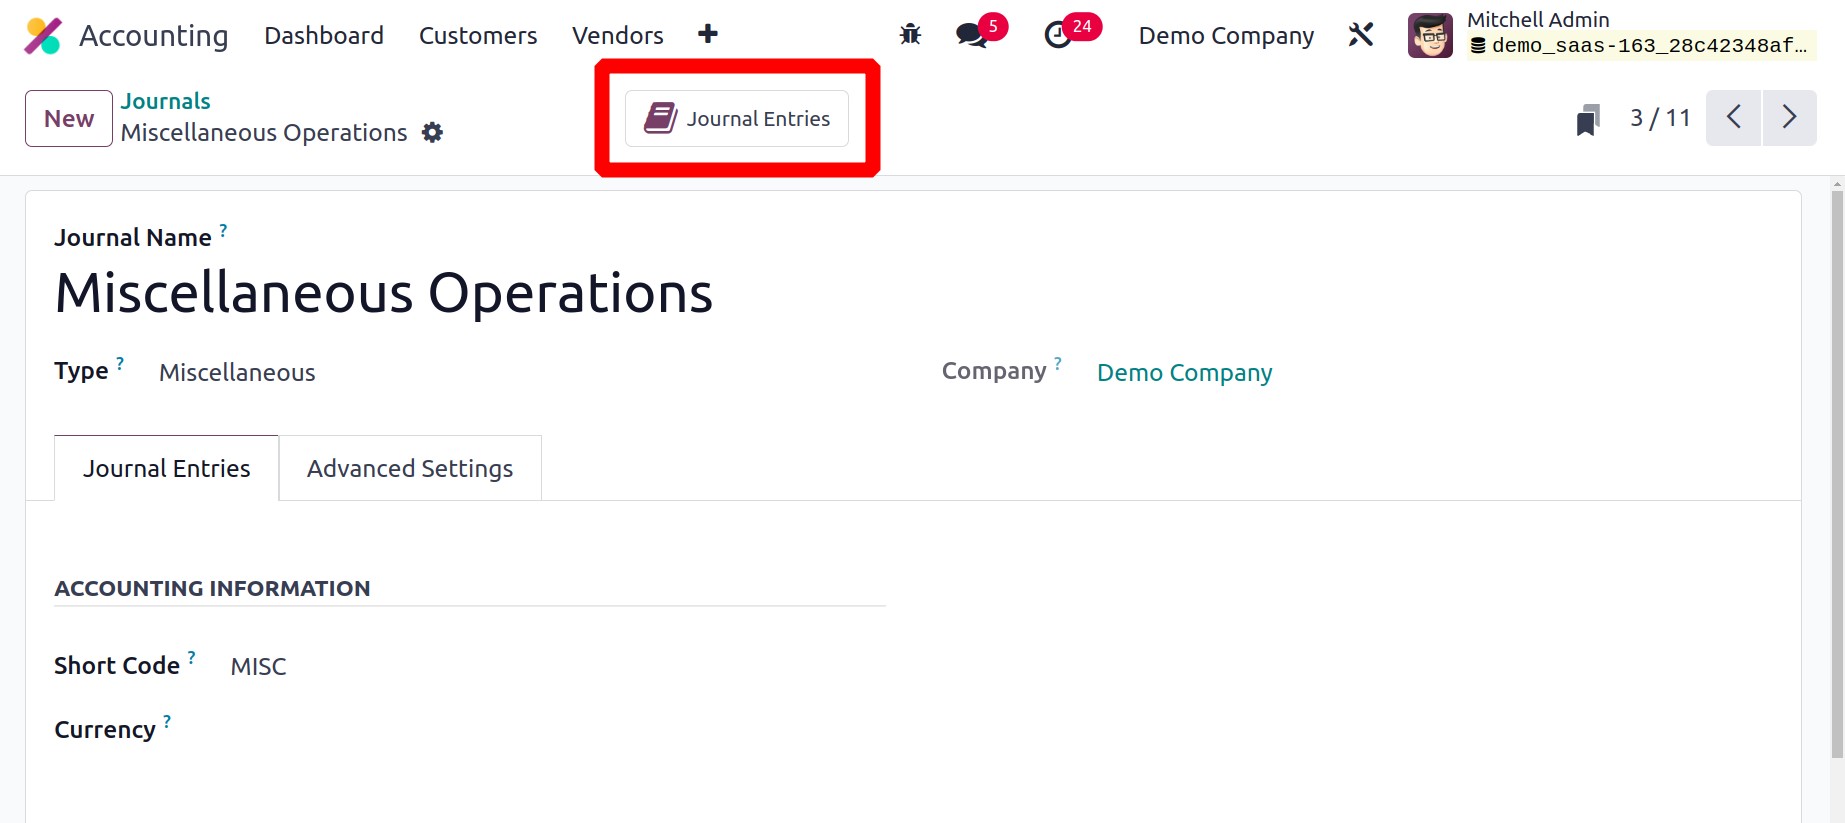
When you've finished setting up the Journal, your system will automatically save it.
Using the smart button Journal Entries, you can see every entry that has been added to a
journal.
Journal Entries
A transaction can be entered as a journal entry in a journal. The accounting date, the
amount to be debited and credited, the reference information, and the description of
transactions are all recorded in a suitable journal entry. The Double Entry Bookkeeping
System in Odoo requires at least one credit line and one debit line. A journal entry
needs to have an equal amount of debit and credit. Journal Items are the individual
lines that make up a journal entry. The Accounting menu of the module gives you access
to the Journal Entries platform.
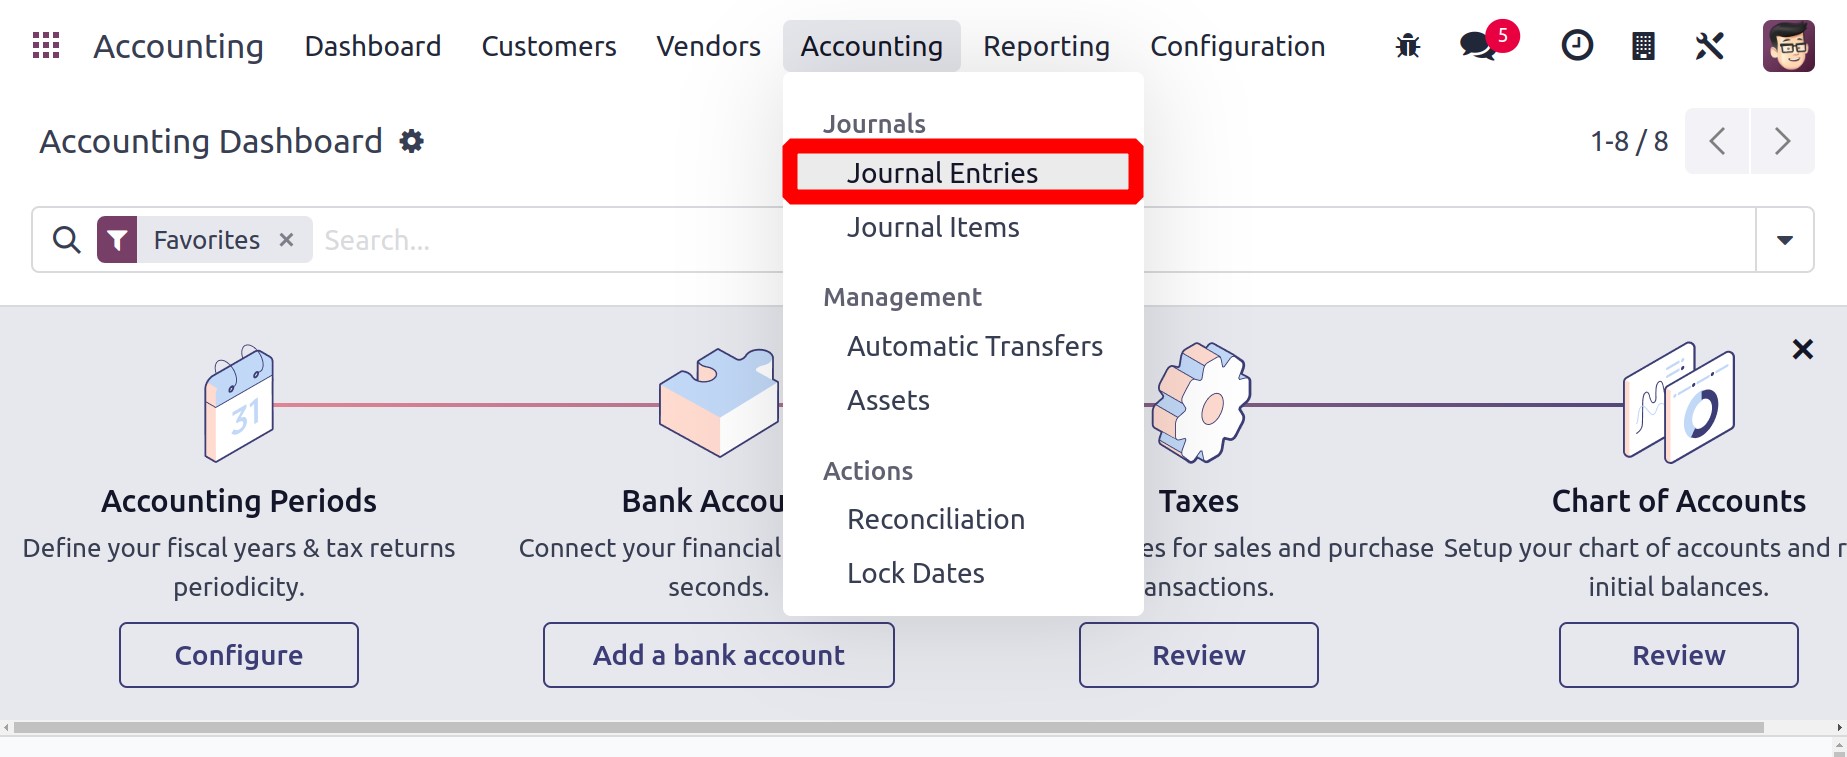
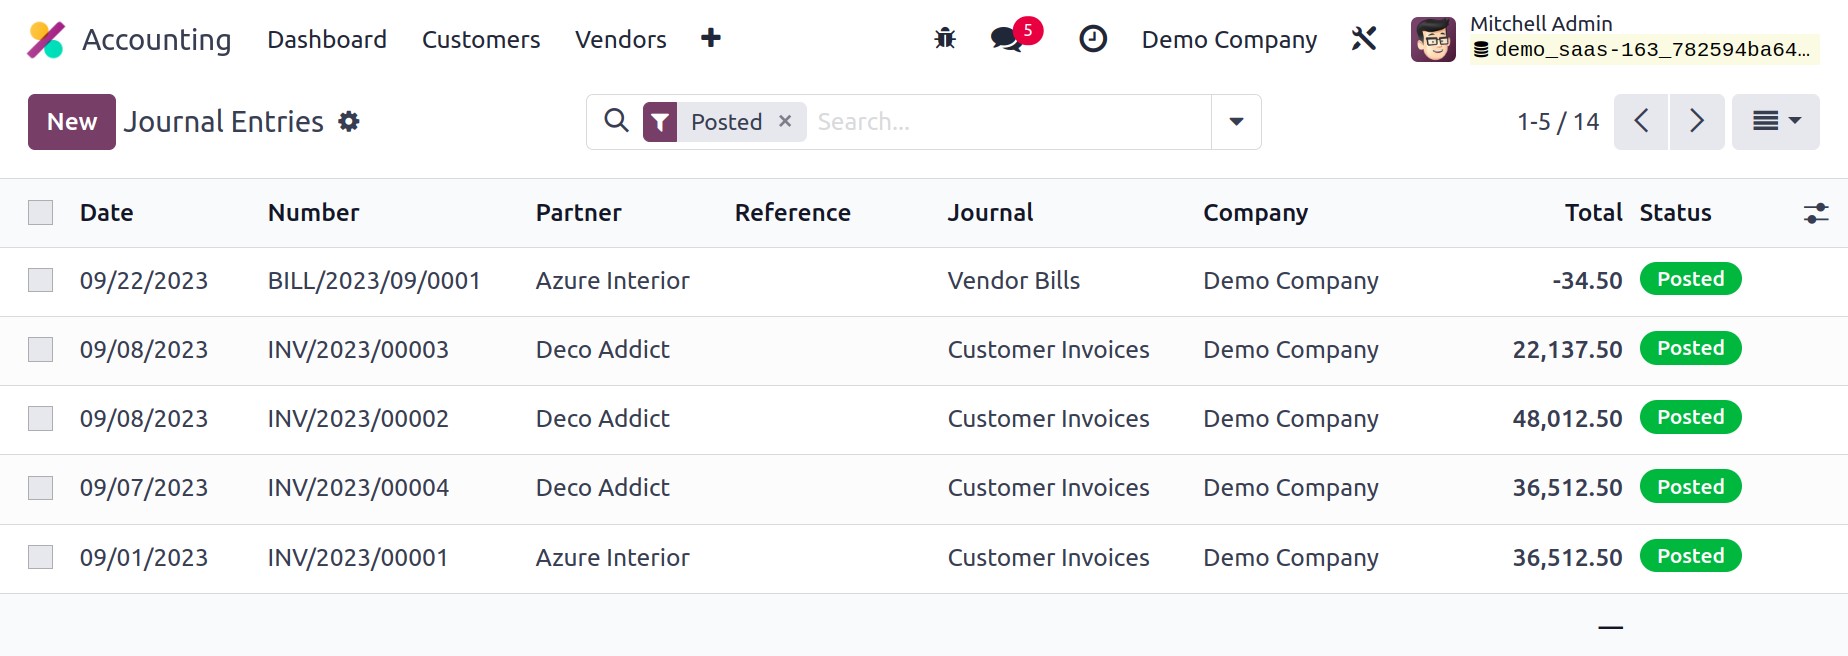
Each journal entry's Date, Number, Partner, Reference, Journal, Company, Total, and
Status information is available in the list view. You can click the New button to start
a new journal entry and record it in a certain journal.
The Reference section can be used to cite any sources that are relevant to this journal
post. The relevant field will display the entry's Accounting Date. To enter this entry
in your journal, choose an appropriate journal from the options provided. Using the Add
a Line button under the Journal Items menu, you can add journal entries one at a time.
These sentences make up one journal entry.
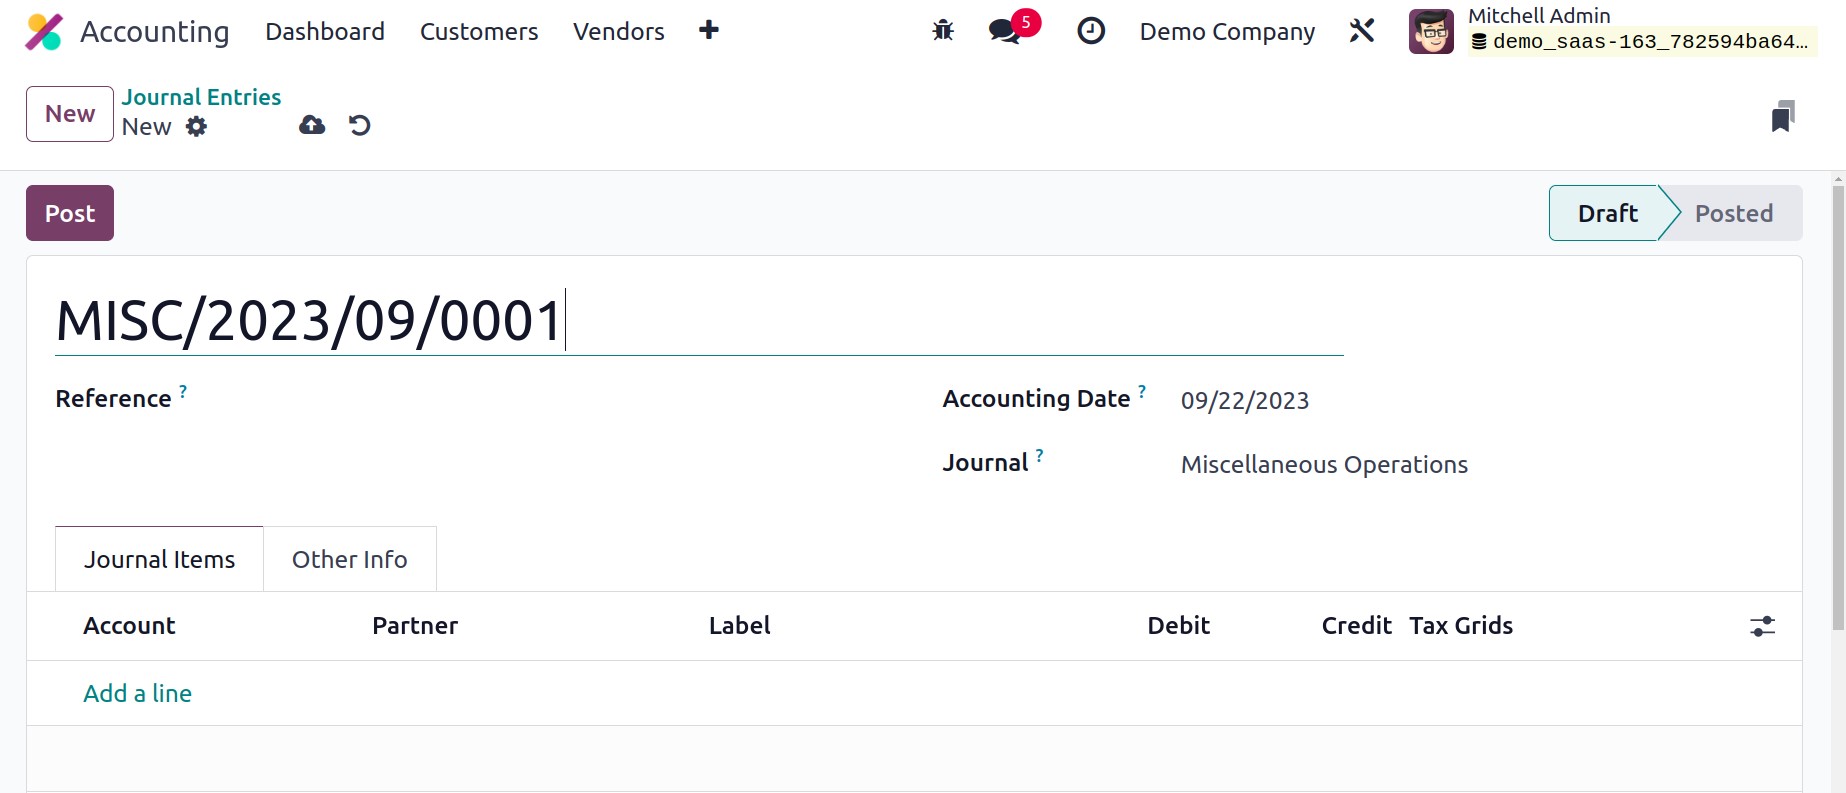
On this page, you can specify information about Account, Partner, Label, Analytic,
Debit, Credit, and TaxCloud.
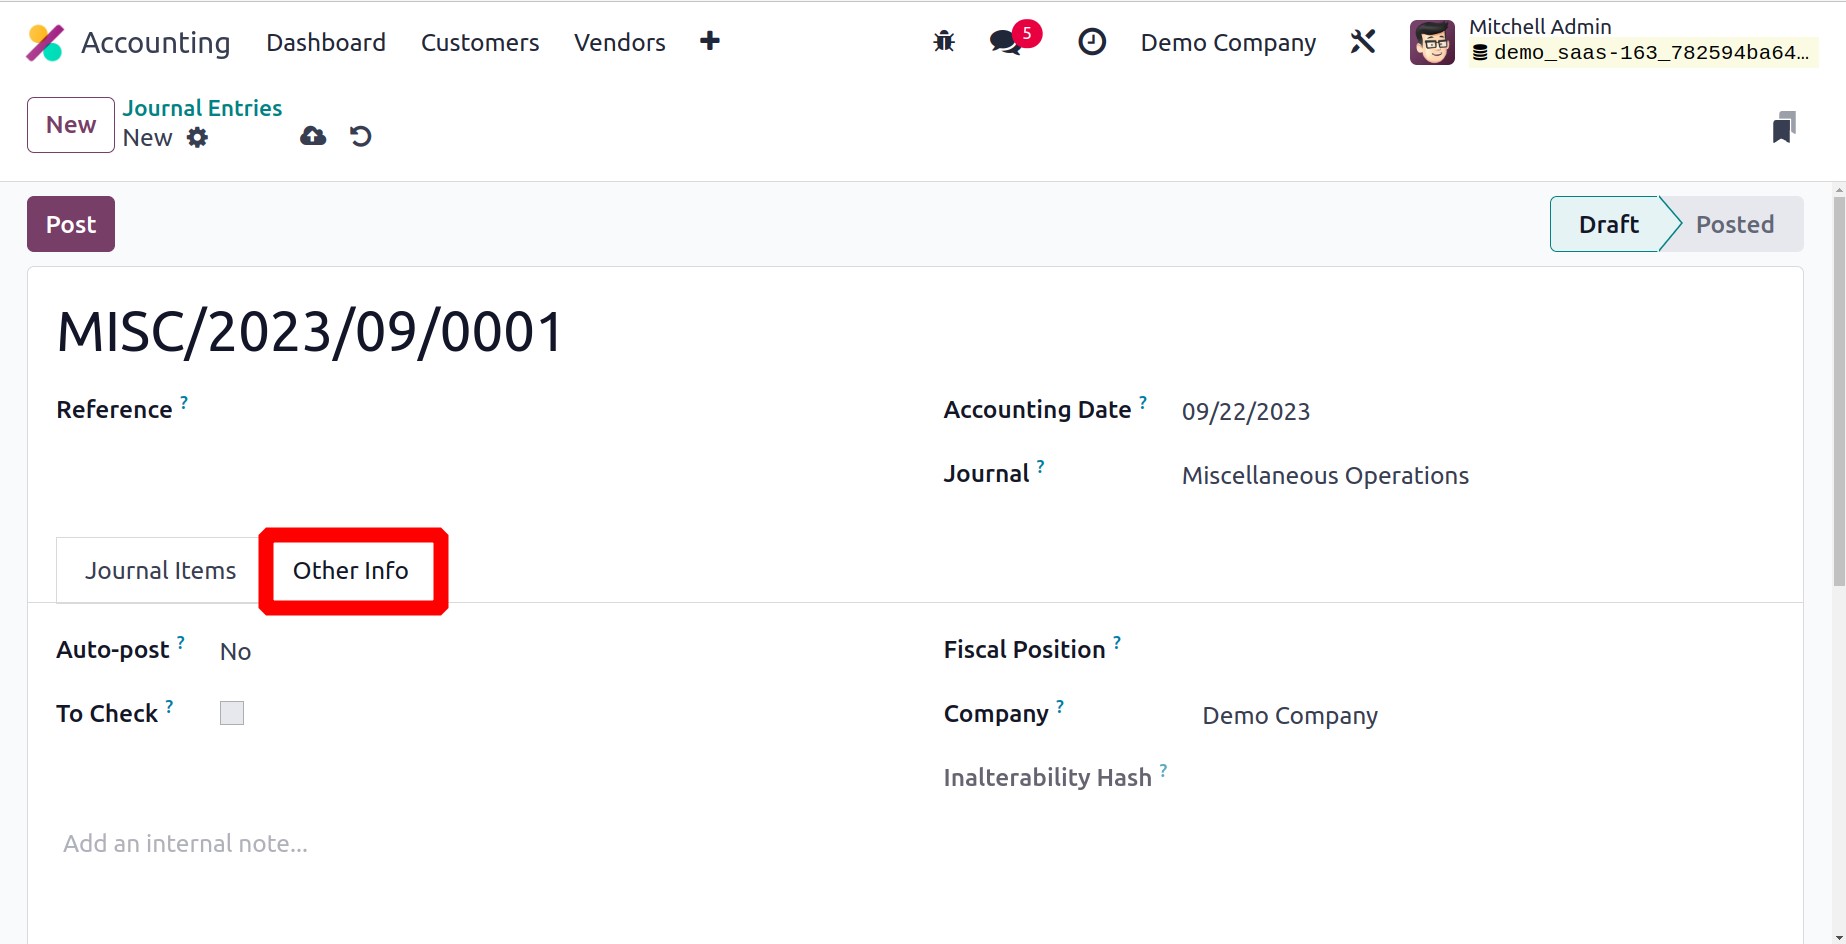
You can select the Auto-post option, which will automatically post the entry on
the relevant accounting date, under the Other Information page. You can turn on
the To Check field if the entry needs to be double-checked. Clicking the
Post button will post the entry in the appropriate journal after you have
specified the Fiscal Position and Company.
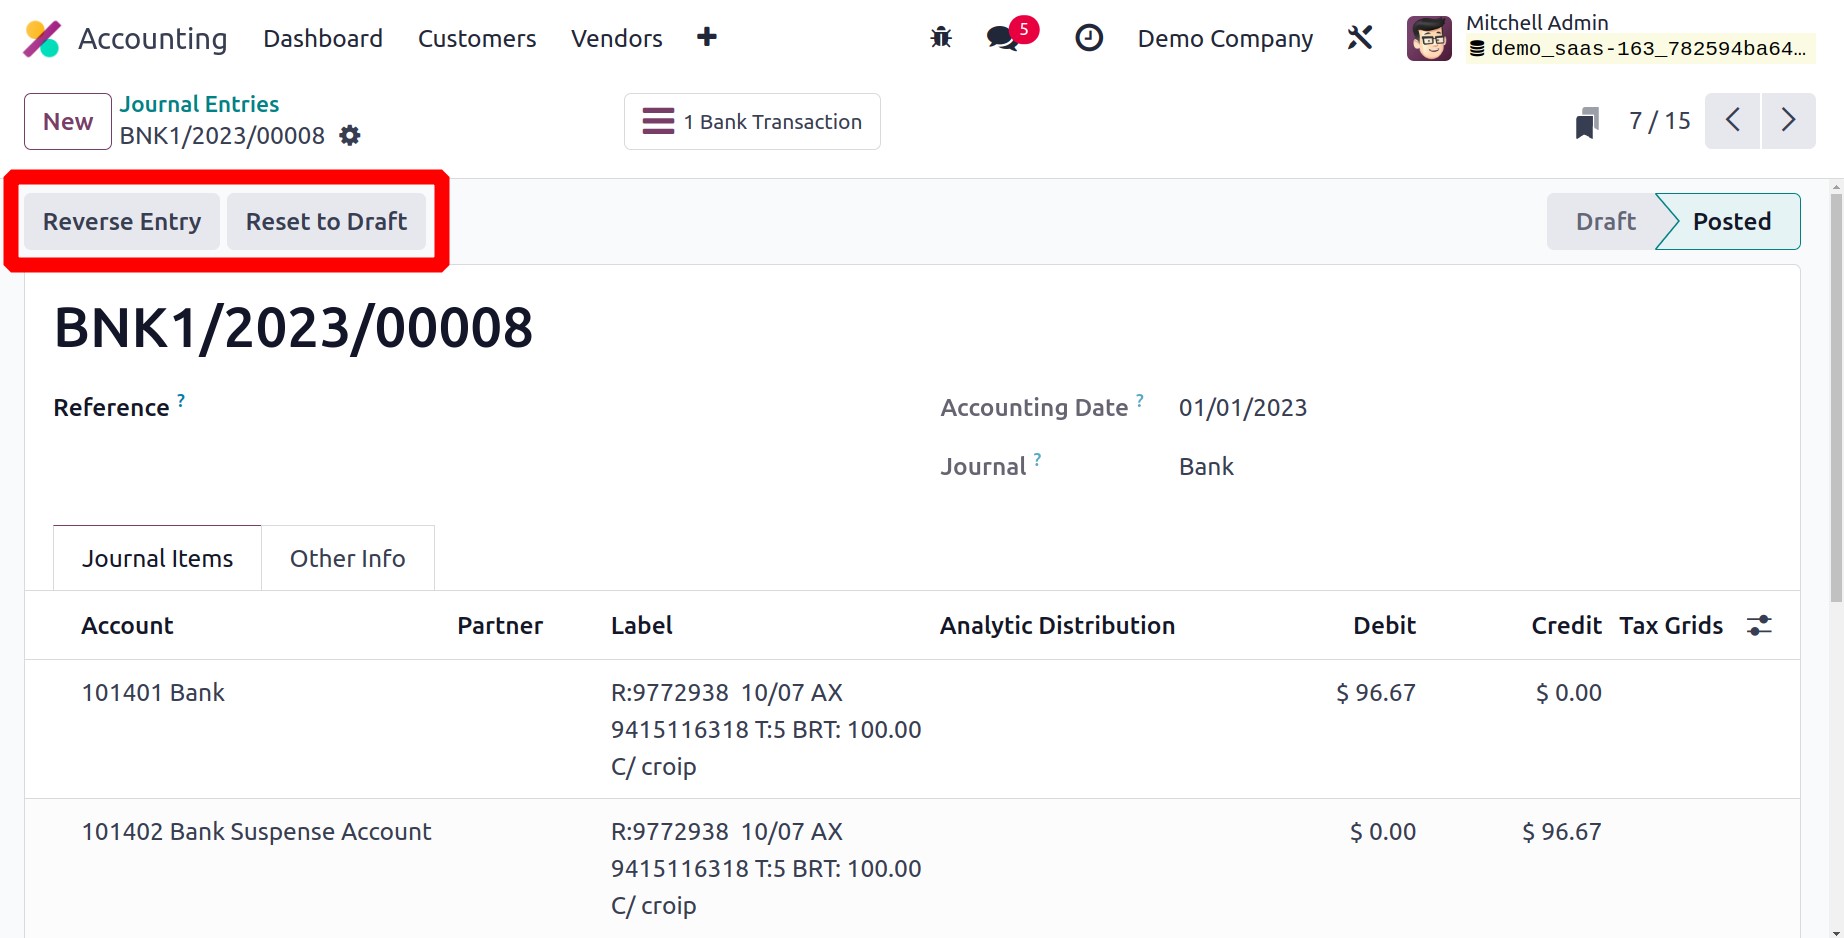
You will have the option for Reverse Entry after publishing the journal entry. You
can quickly undo a published journal entry with this button. The Reversal Date and
Specific Journal can be entered in a pop-up window.
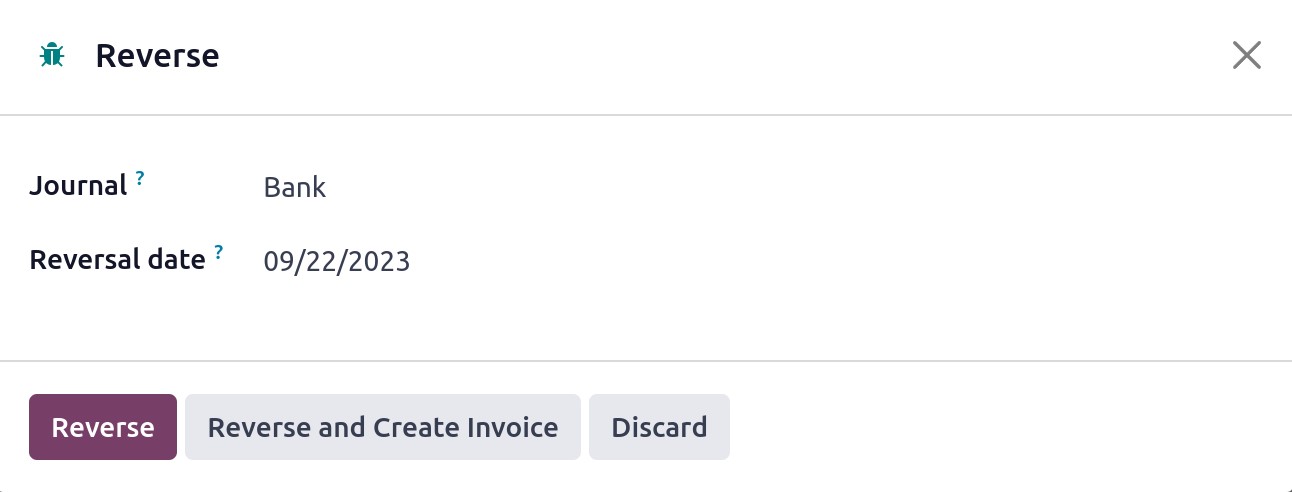
As soon as you choose the Reversal Date as Specific, the Reversal Date will be displayed
immediately. By choosing the appropriate option, the Reversal Date can be set to the
same as the Journal Entry Date. The diary entry will be reversed when you click the
Reverse button.
Journal Items
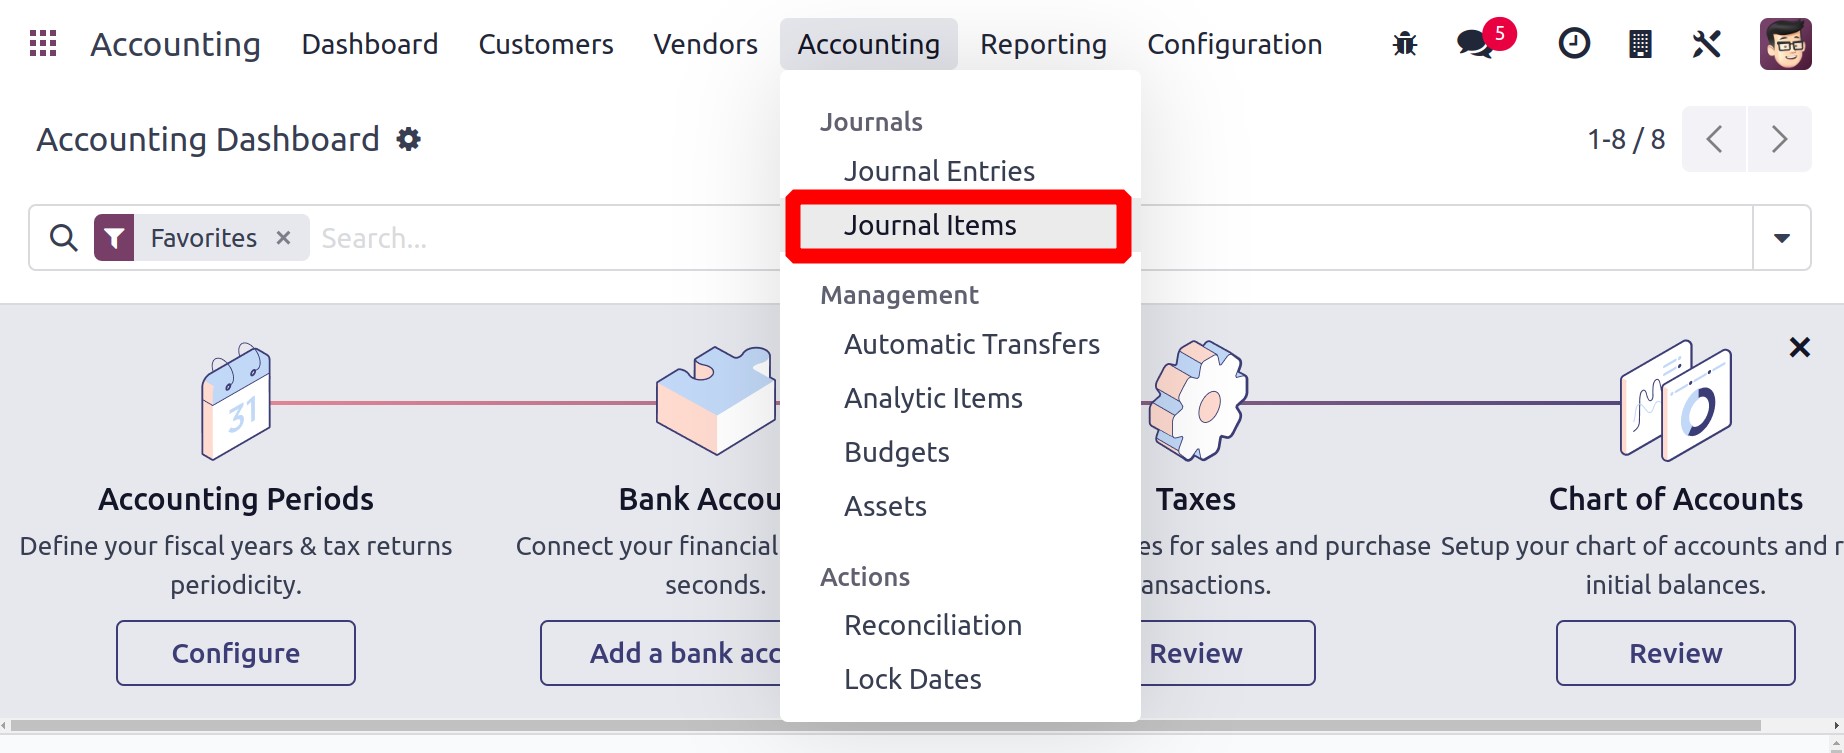
The Odoo17 Accounting module includes a separate platform where users can view the
journal items that have been added to various journal entries. The Journal Items option,
which will record every journal item of your accounting entries, may be found under the
Accounting menu.
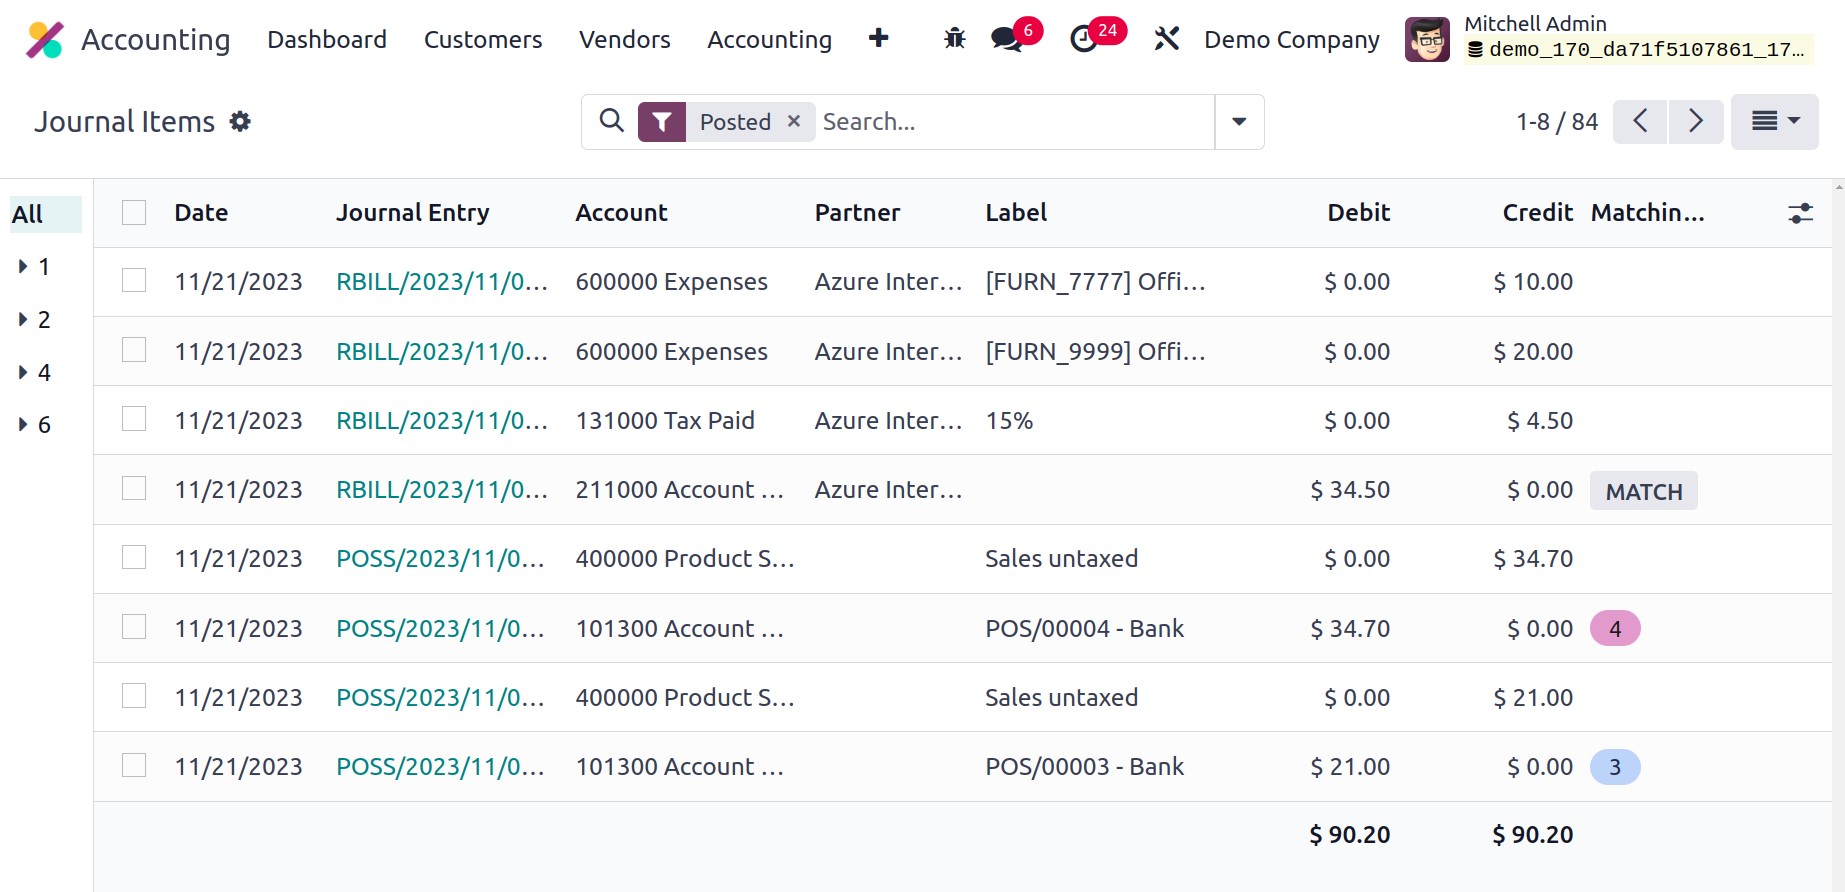
The data of the Date, Journal Entry, Account, Partner, Label, Amount in Currency, Debit,
Credit, Matching Number, and Analytic will be displayed in the list view. You can match
a journal entry with a specific bank statement by using the Match button.
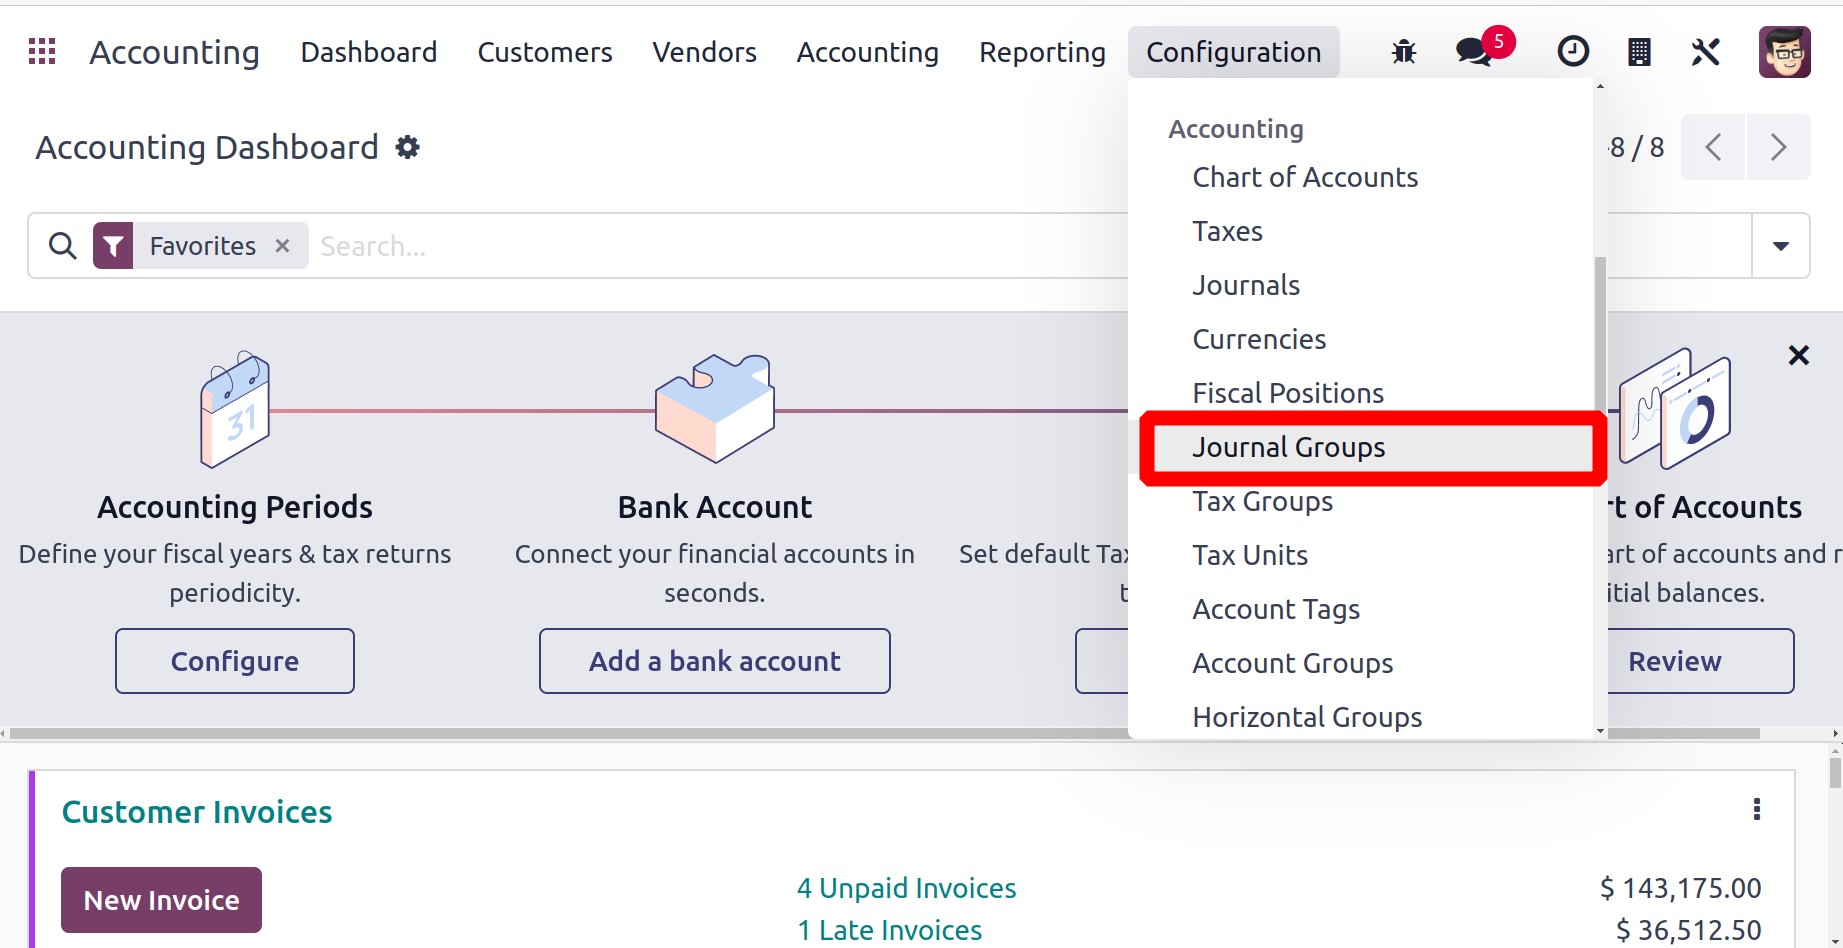
Journal Groups
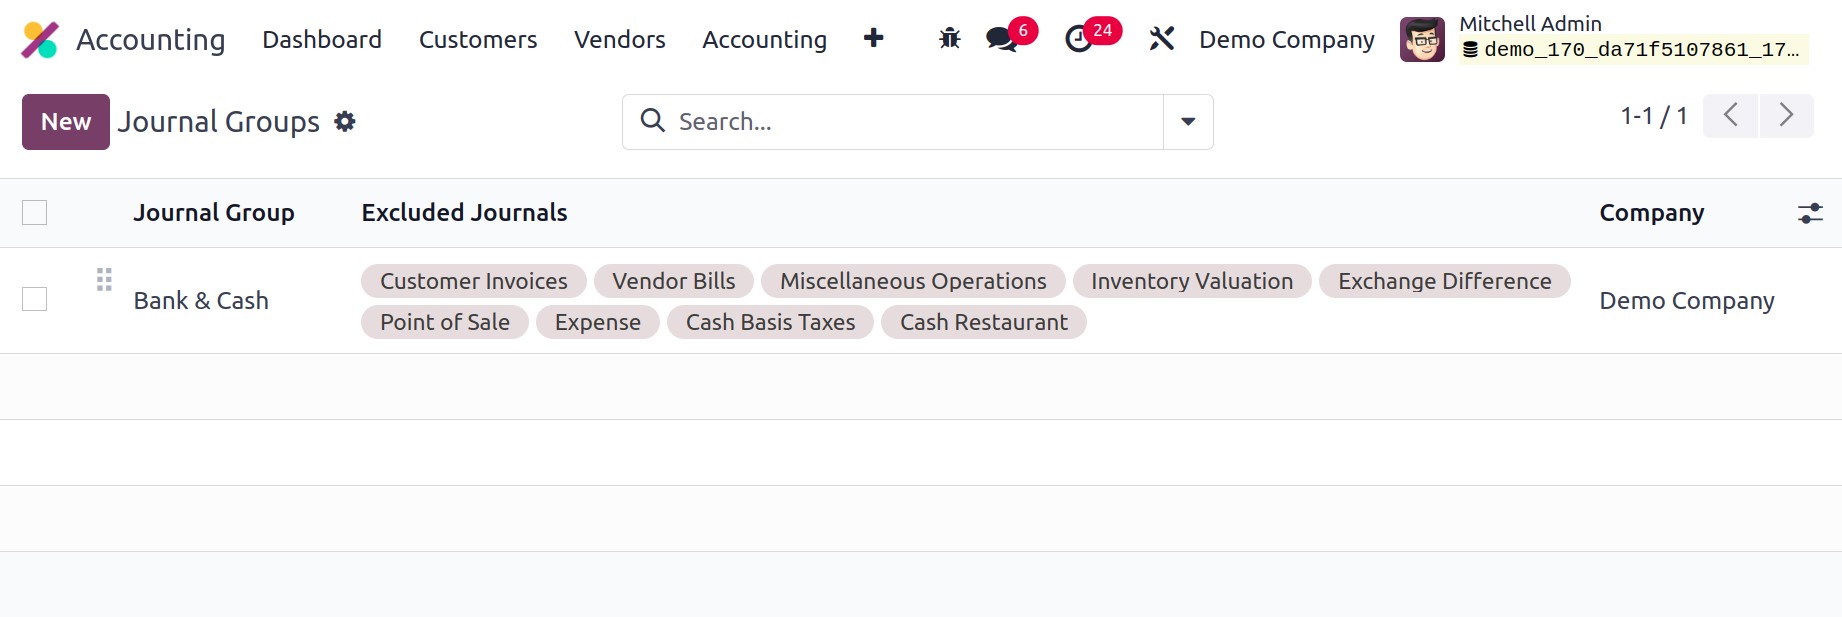
You can establish specific groups for the journals using the Journal Groups
option found under Configuration. In reporting, journal groups are used to bring
pertinent data together.
You can enter a name for the Journal Group using the New button. You can
enter the journal IDs you want to exclude from this group in the Excluded Journals area.
The appropriate field will automatically contain the Company's name.
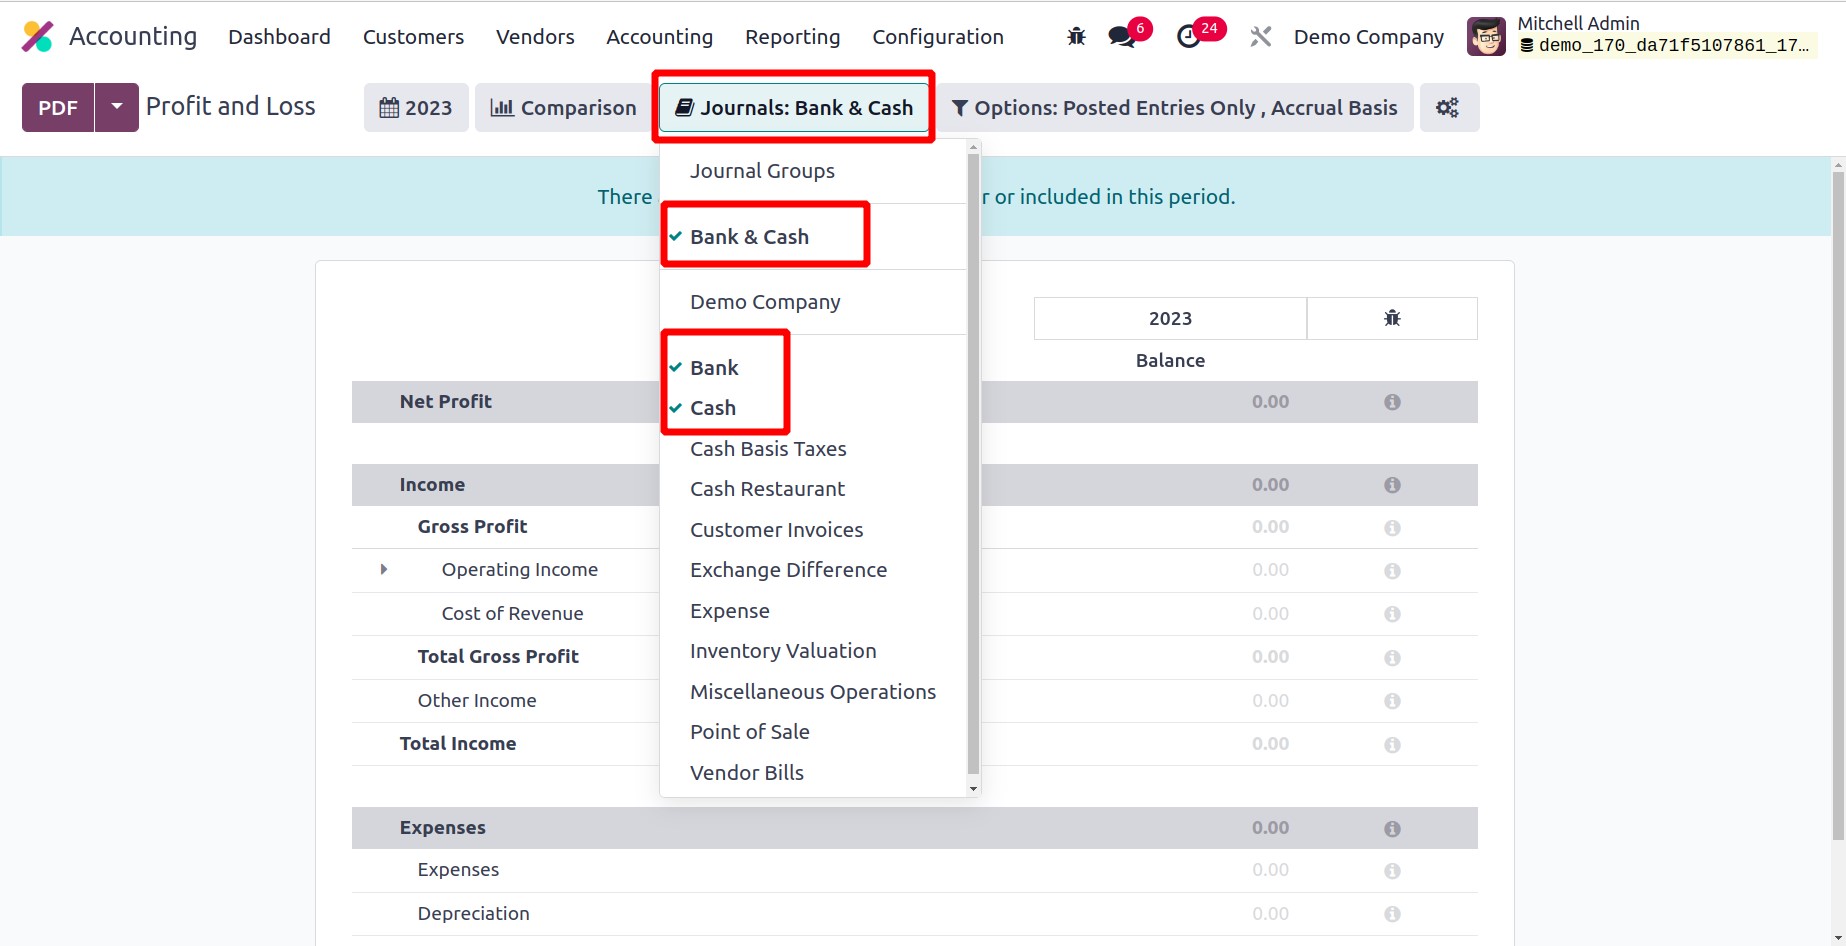
Subsequently, the Journal Group addition appears in the Reports. Upon reviewing the
Profit and Loss statement. You can proceed with the journal group from there. It
demonstrates that these journals have not been chosen to be excluded.
We have been talking about setting up journal entries in Odoo17 Accounting, so let's go
to the module's Automatic Transfers function.