Automatic Transfers
You may arrange transfers using the Automatic Transfers function in the Odoo17
Accounting module, which can help you automate bookkeeping tasks. When you need to move
money between accounts over a predetermined length of time, you can utilize this tool.
You can go to the Accounting menu to have access to this feature.
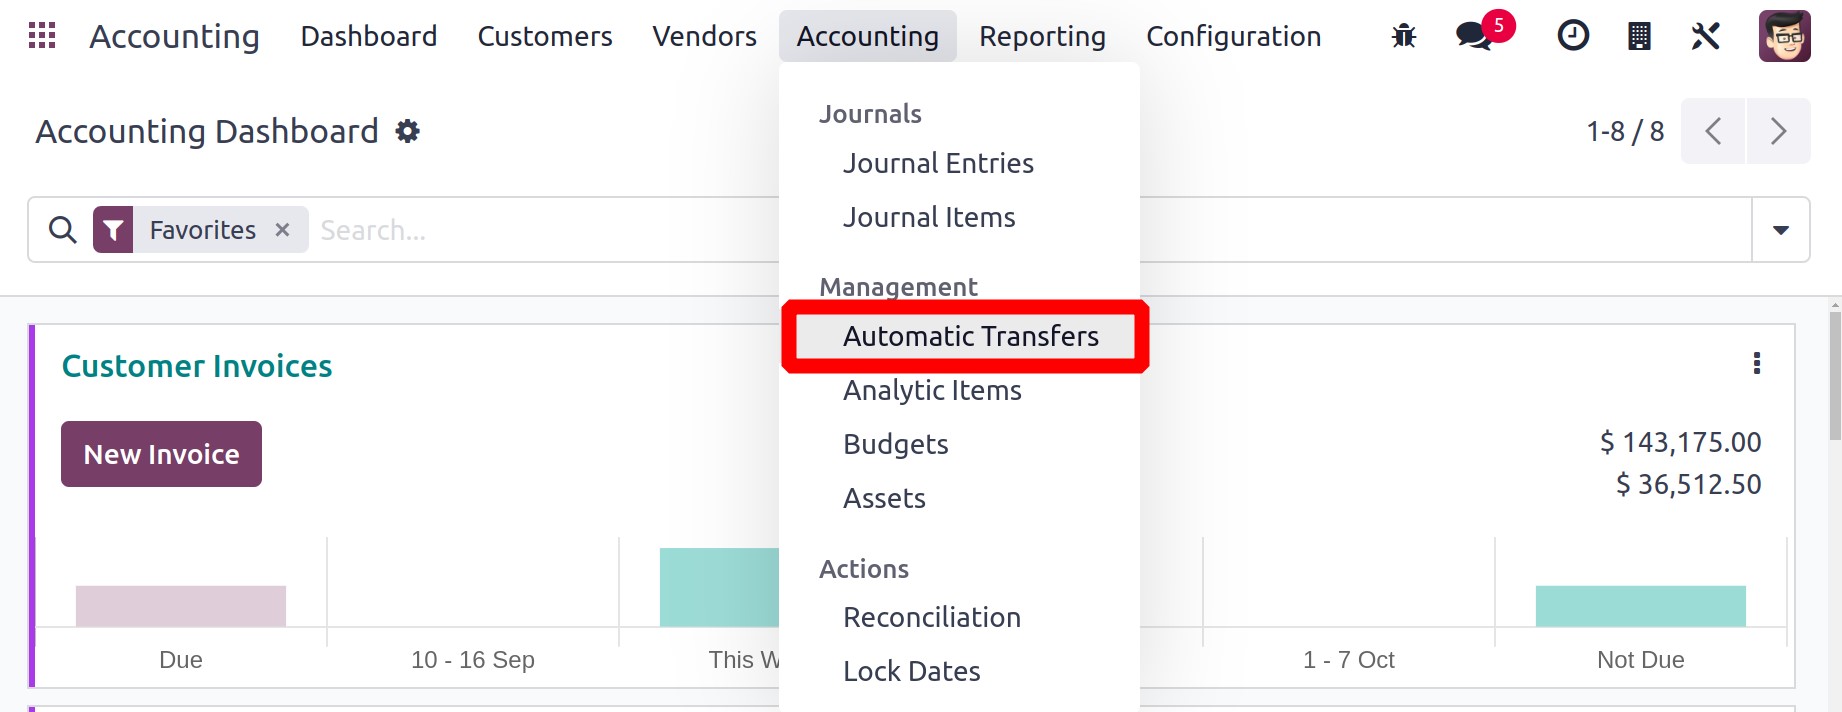
Odoo17 takes you to a new platform where you can check a list of the automated transfers
that have already been booked when you select the Accounting Transfers option. Each
automatic transfer's Name, Company, Start Date, Stop Date, and Frequency are listed in
the preview. By selecting the New button, a fresh automatic transfer can be
planned.
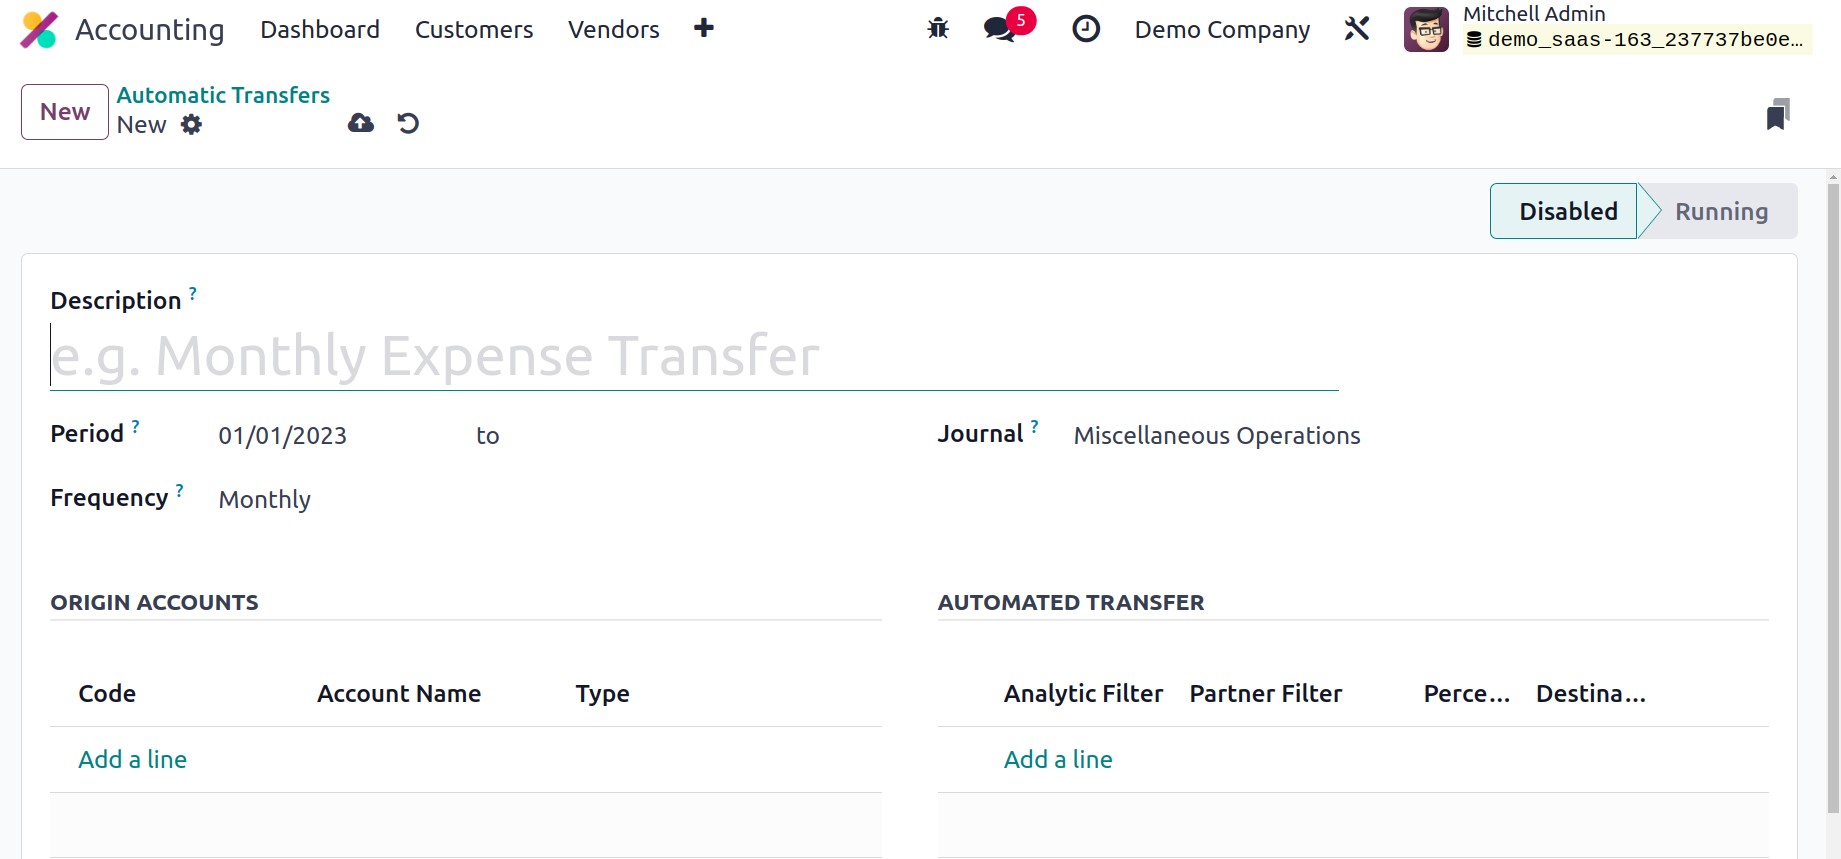
Give the transfer a brief title in the Description area. The Period box allows
you to choose the transfer's beginning and finishing dates. The transfer might be
planned for every month, every three months, or every year. The Frequency field
can be used to specify this. You can also include a journal to note the accounting
entries for this transfer along with these specifics. Use the Add a Line button found on
the Origin Accounts page to add the source accounts for this transfer. To choose
the appropriate source accounts for the transfer, a wizard will emerge.
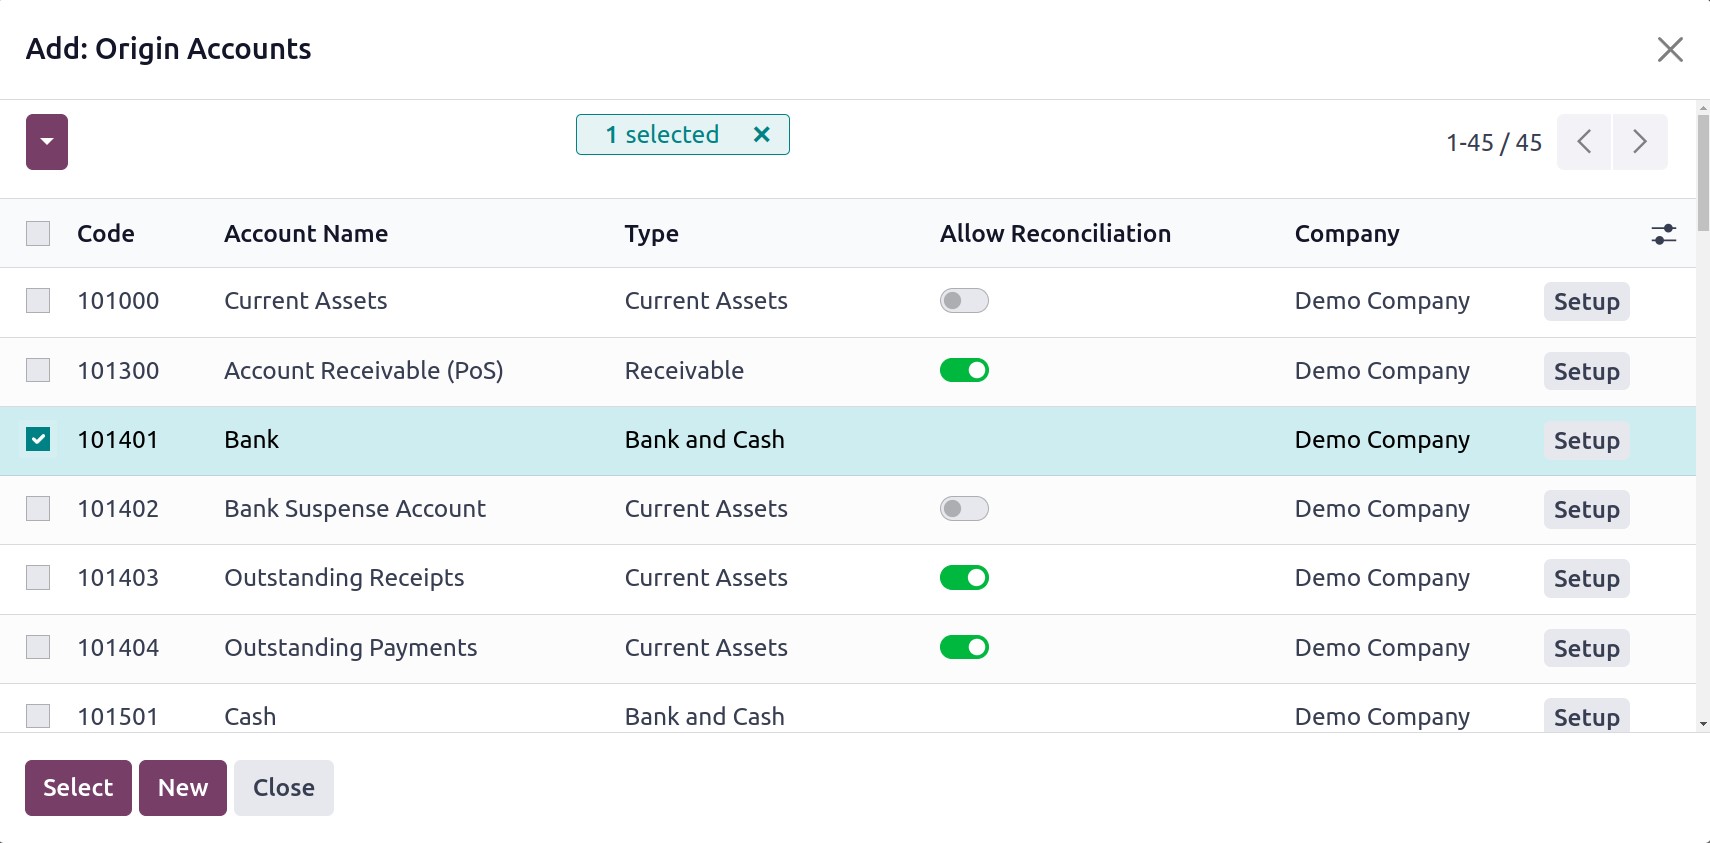
Clicking the Select button after choosing the accounts will add them to the view
of the automated transfers form. Under the Origin Accounts page, you can see the Code,
Account Name, and Type of the source account.
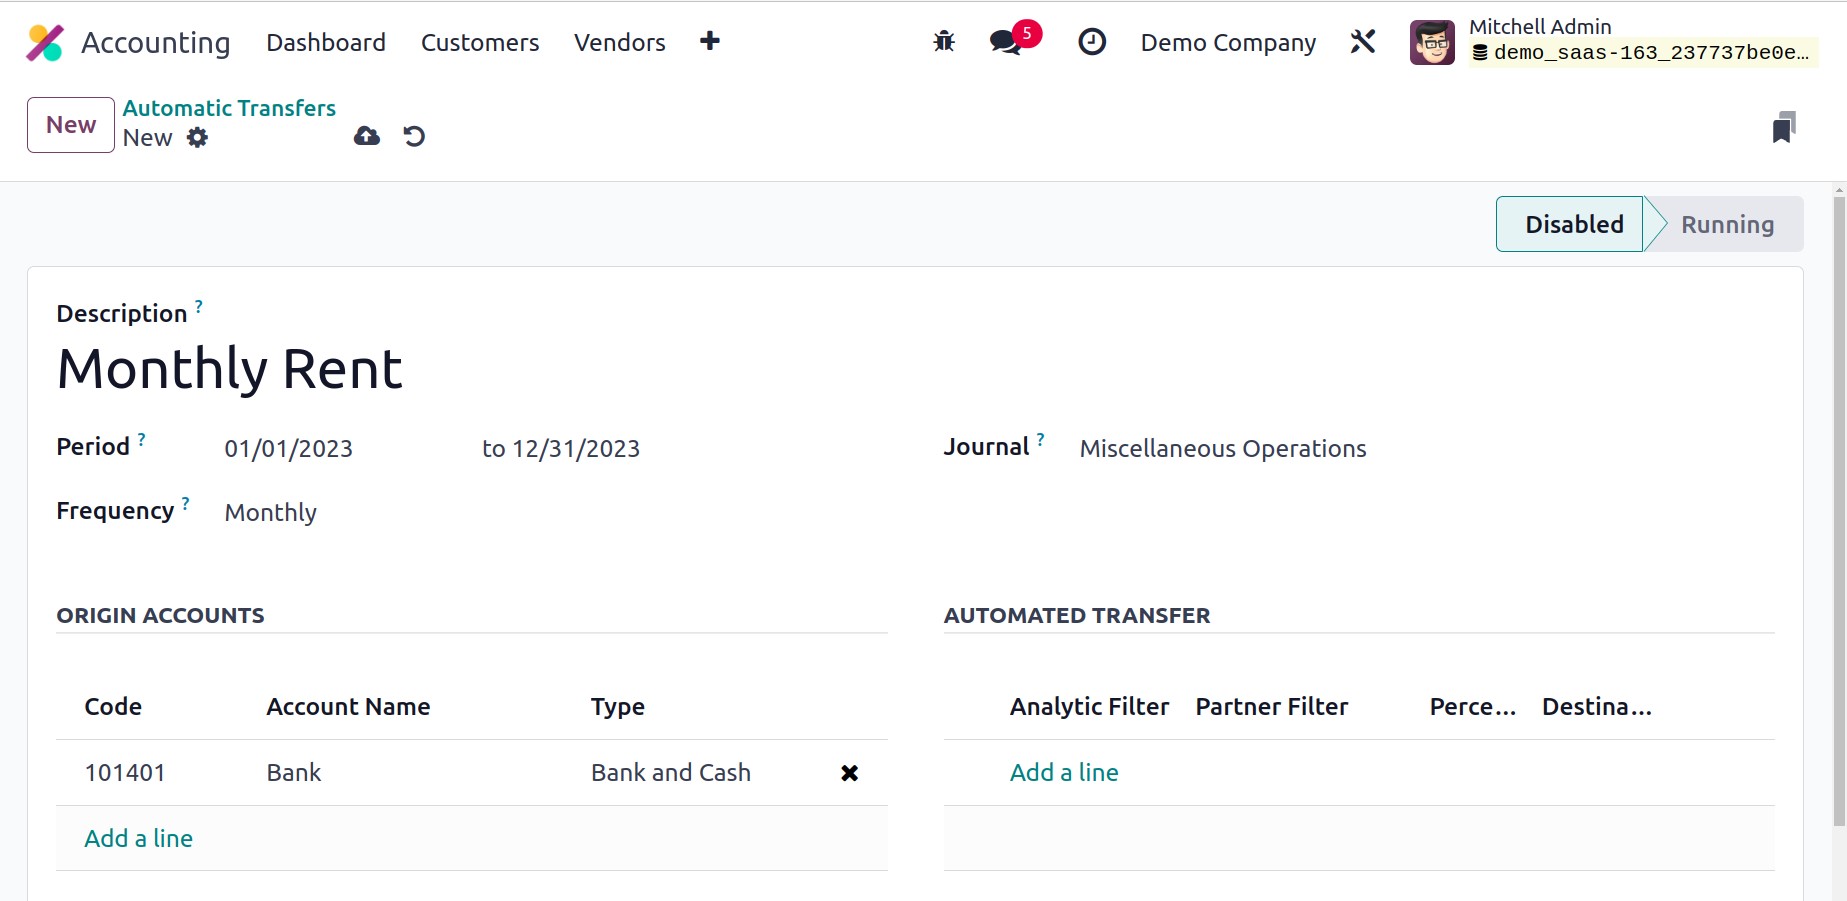
The Add a Line button now allows the destination account accounts to be added under the
Automatic Transfers page. The addition of a constraint to only transfer the total
of the lines from the origin accounts that match the given analytic account and partners
to the destination account is made possible by the setting of Analytic and Partner
Filters.
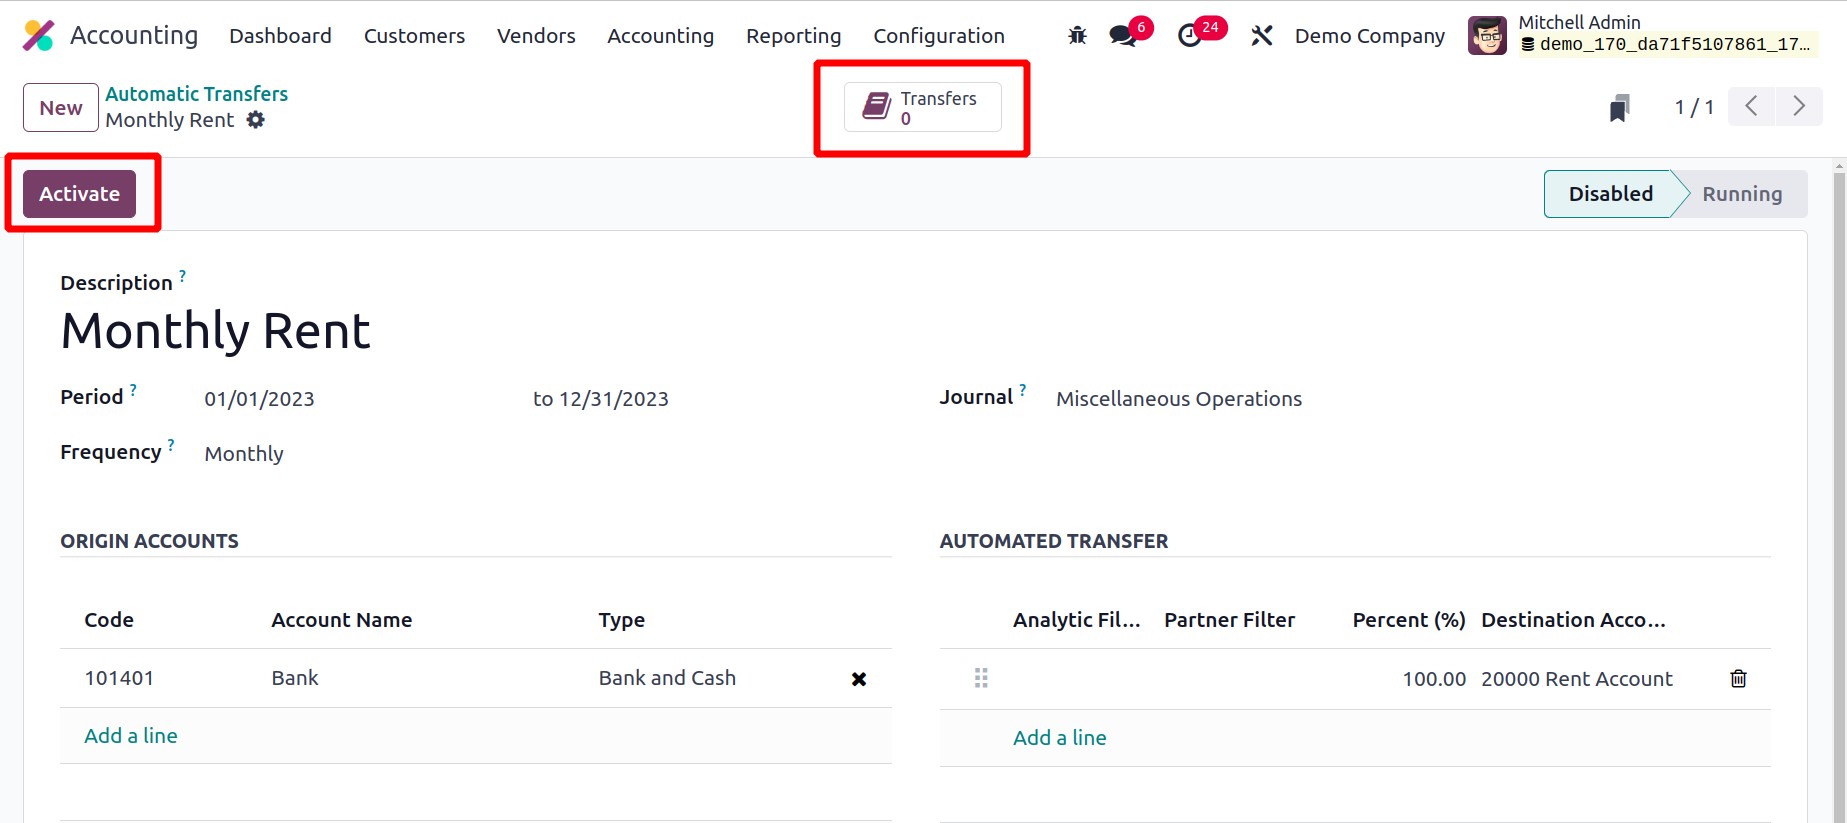
The Percentage box allows you to specify the percentage of transactions. As a result,
the destination account will get the specified proportion of the sum lines from the
origin accounts. You will receive the Activate button to start the automatic
transfer once you have finished the configuration process. The Compute Transfer
button can be used to calculate the transfer to the destination account once the
transfer has been activated. The Transfers smart button, which is shown in the
screenshot below, allows you to view the transfers carried out using this scheduled
plan.
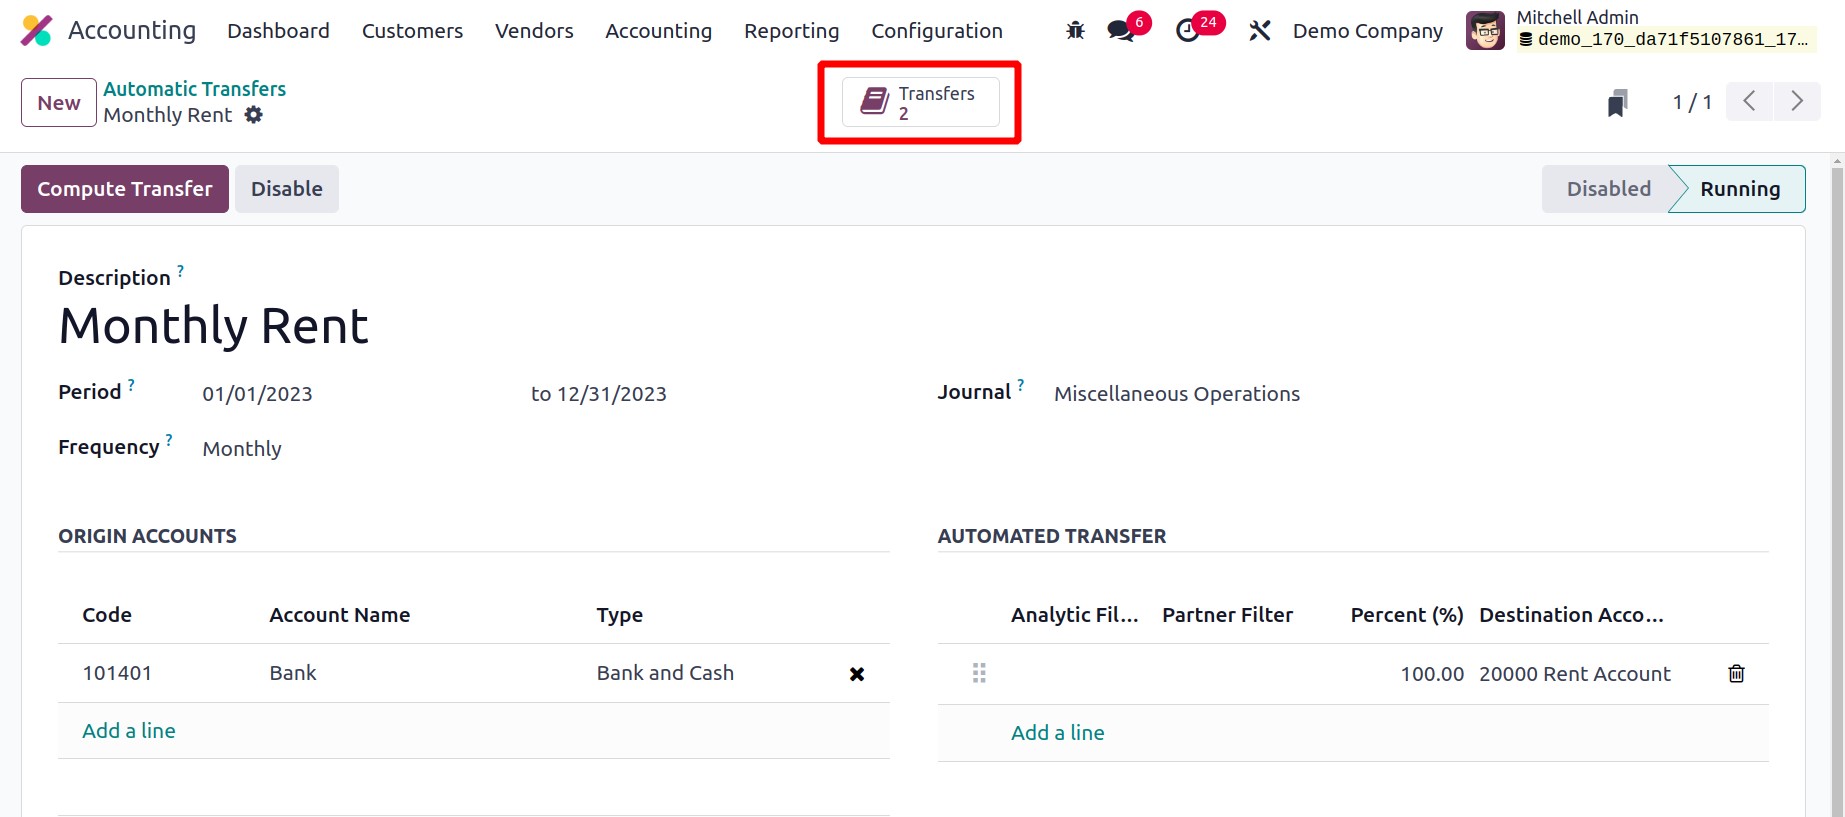
Utilize the Disable button to stop the automated transfer before the expiration date.