My Time Off
You can better control and manage leave requests with the aid of this tab in the Time Off
Module. Controlling every time in the company is quite simple. You can see the
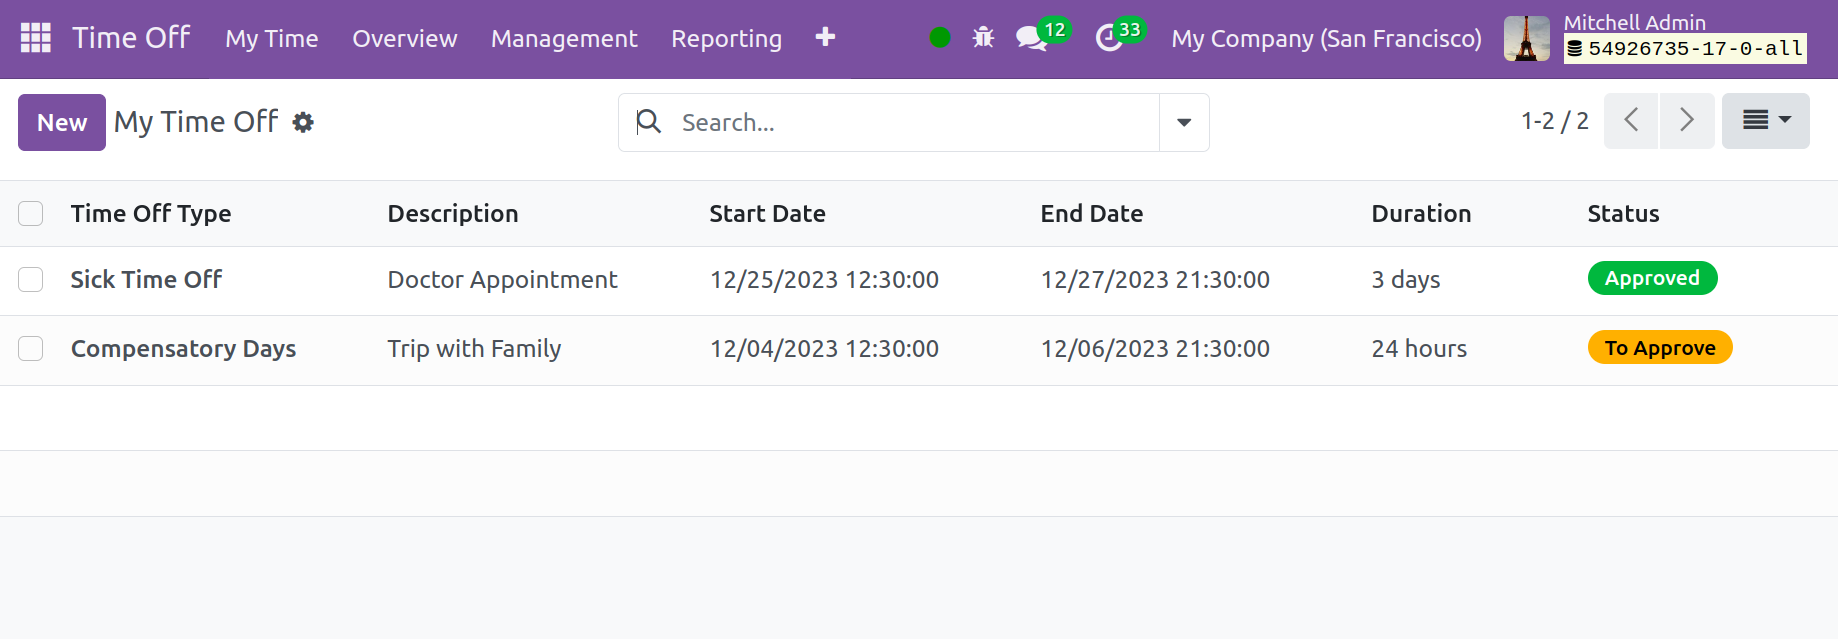
pre-configured time-off request in the following image by selecting the My Time
Off option from the My Time Off menu in the menu bar.

You may see the view in Kanban, List, and Activity as well, as the screenshot
illustrates. You can select the filters to view only the pertinent records in the filter
option. You will find further information in the already configured Time Off, including
the Employee's Name, the Type of Leave, the Leave Description, the Start and End Dates
of the Leave, and the Status of the Leave, including approval or rejection. If the
management allows you to request a leave of absence, you will have the choice to accept
or reject the leave as appropriate.

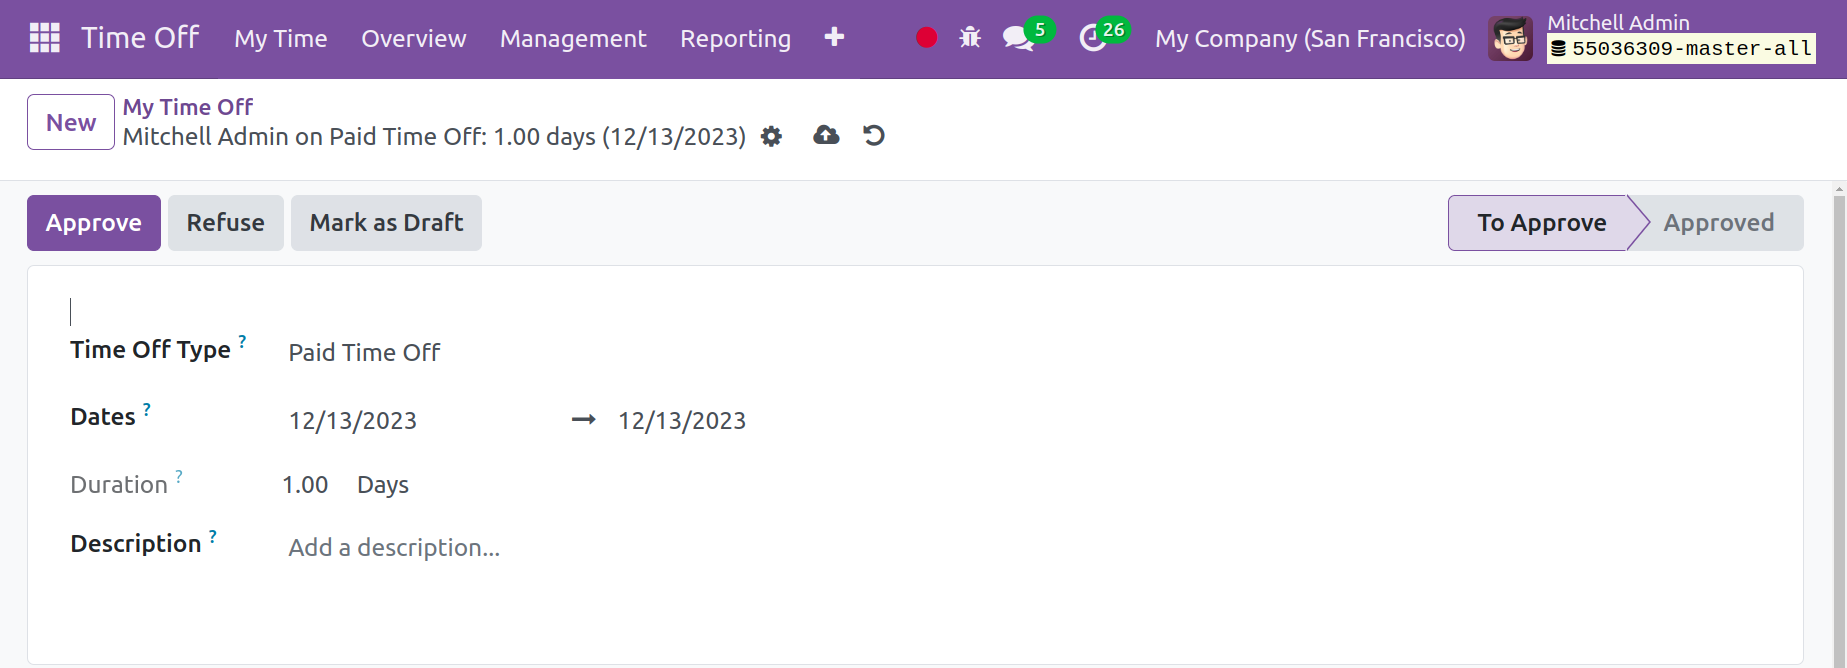
You can select the New button, as seen in the above image, to submit a new leave
request. Upon choosing the "New" option, a window will appear requiring you to
select the type of time off from a drop-down menu. The possibilities include "Paid Time
Off," "Compensatory Days," "Sick Time Off," "Extra Hours," and "Unpaid," among others.
The date and length of the leave must be entered below. Next, use the description option
to give the reason for the leave. Lastly, select the Save button.
Depending on the situation, the leave may be granted, denied, or designated as a draft.
In the Odoo 17 Time Off Module, we submit new leave requests in this manner.
My Allocation
The My Allocation option is the next one on the My Time Off Tab, and it
allows you to quickly submit an allocation request to obtain a specific permit for more
leaves than what is offered. For example, if a worker has taken two authorized leaves
and would like to take three more, he can use the leave allocation feature. It's fairly
simple to request a leave of absence using the My Allocation option.

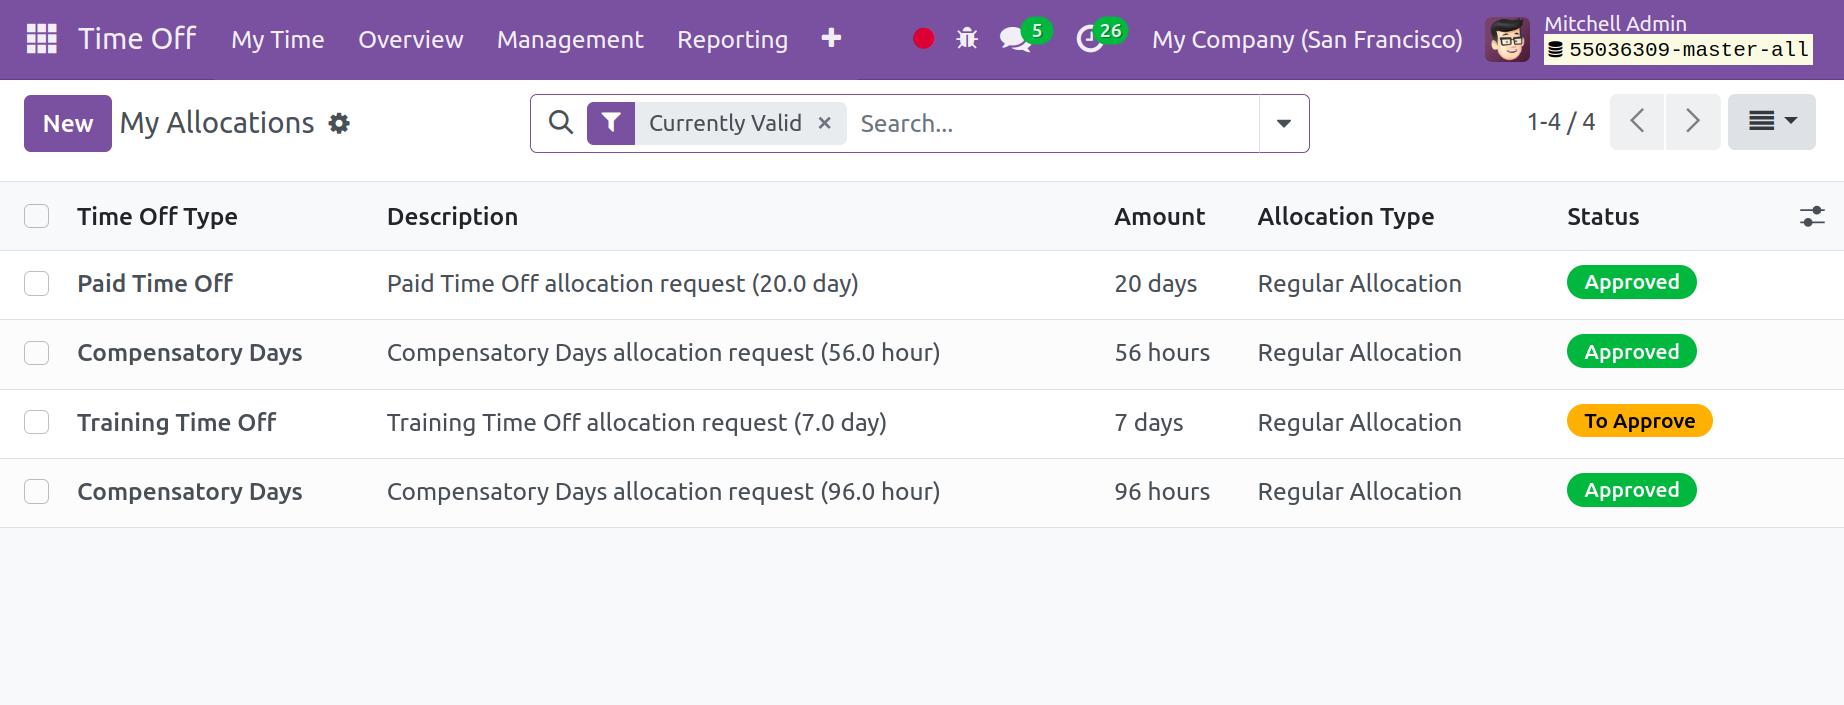
You can see all of the leave allocations on the page, just like in the picture above. You
will find information on this leave allocation, including the type of time off, the
description of the leave, its duration, the allocation type, and the status of the leave
request, among other things. The Kanban View will display the page. Click the New
button, as shown in the image, to create a new leave allocation.

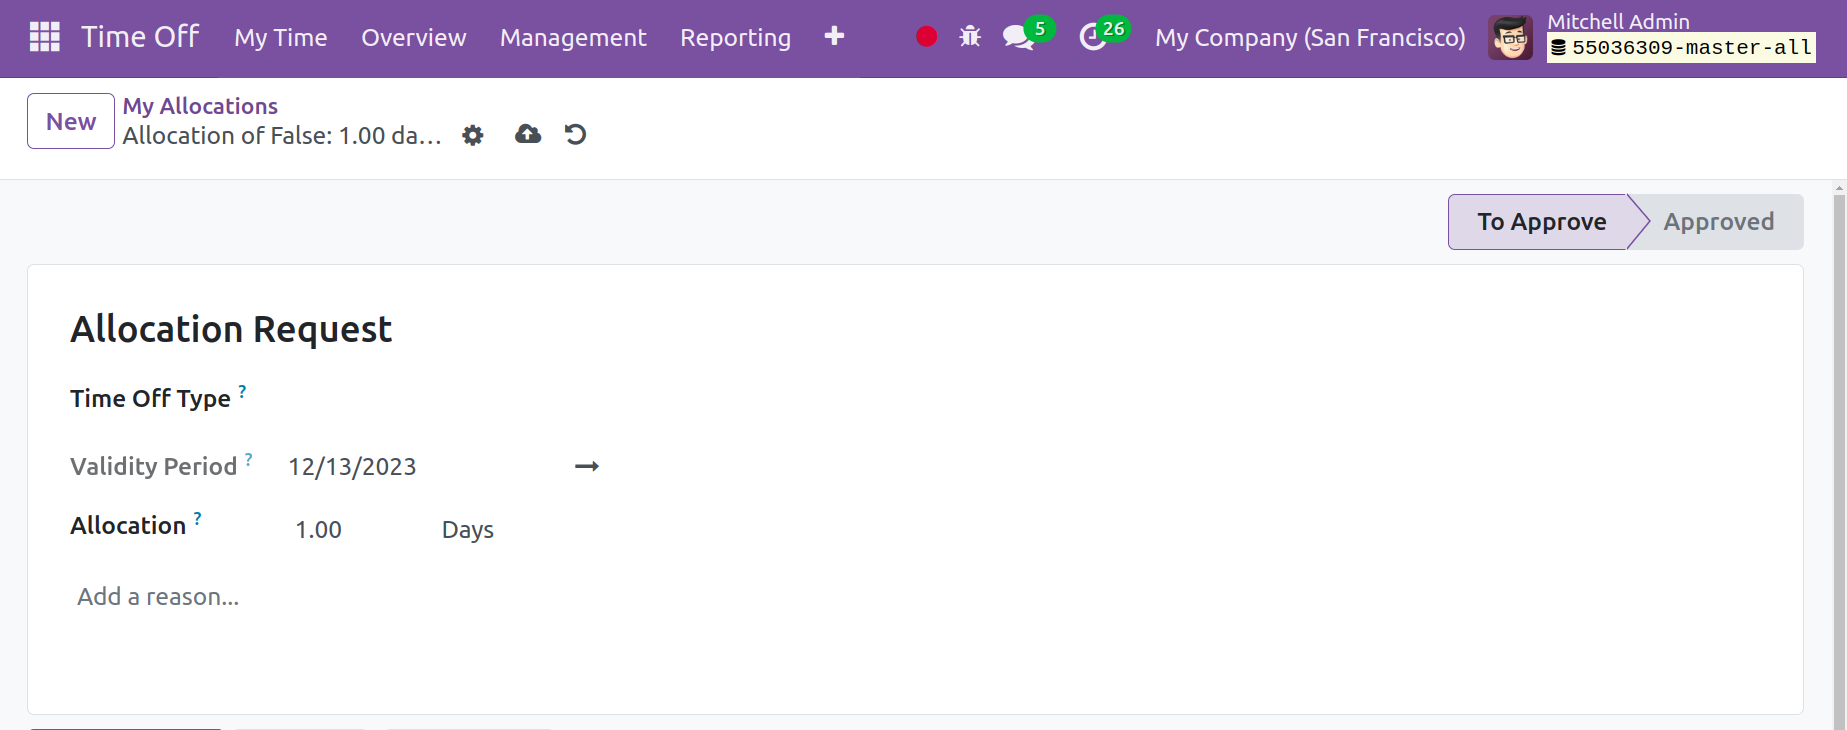
The name of the allocation request, the kind of time off, and the validity period must be
entered on this page in the designated spaces. The validity period we enter in the above
area will determine how the Duration appears on the screen. There is also a space for
you to include the justification for the allocation request. Lastly, select the Confirm
icon, which is indicated in the picture above. The status will automatically switch to
"To Approve" after that. Thus, the request for a leave of absence can be approved or
denied by the company management via the Approval Tab.