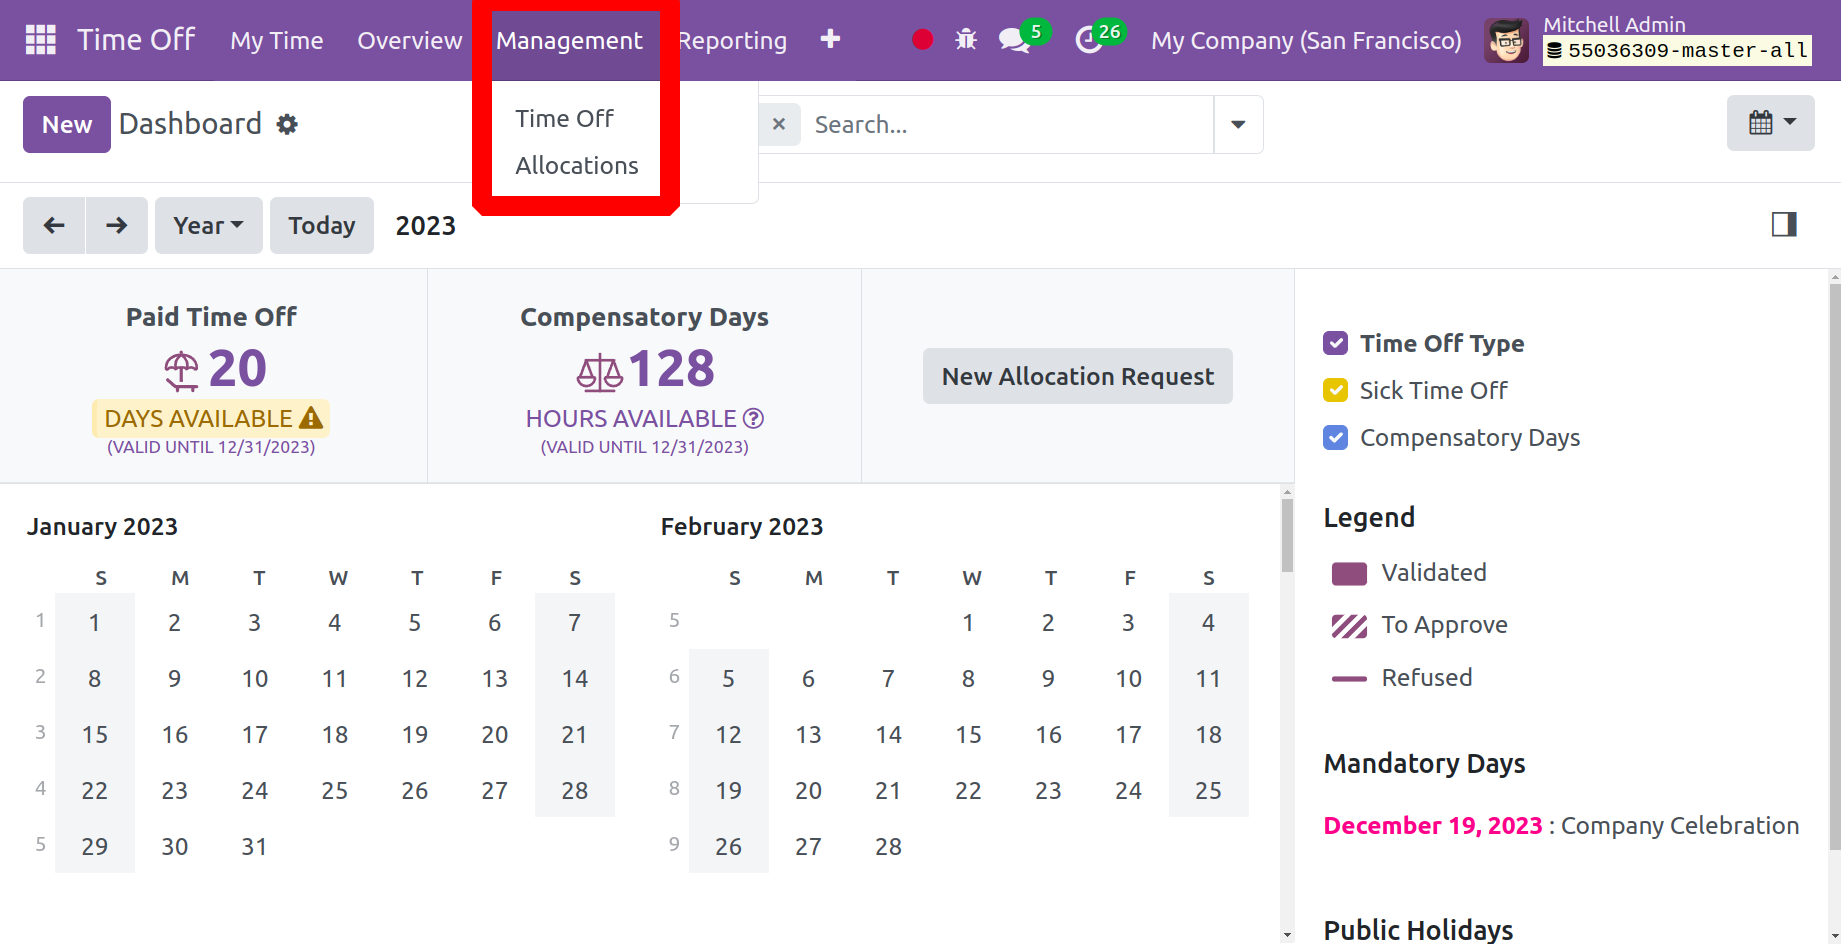
Management
A Management menu allows you to easily handle leave requests that employees submit using
the Odoo 17 platform. This page will contain all the information on time off and
allocation requests, making it easier for the concerned officers to take action.
Time-off
Every employee in the company has their total vacation time shown on the All TimeOff
page. There, you may view the employee's name, the type of leave, the added description,
and the start, end, and status of the leave length. By using the Validate button,
the user can confirm their time off, and by selecting the Refuse button, they can
reject their time off.
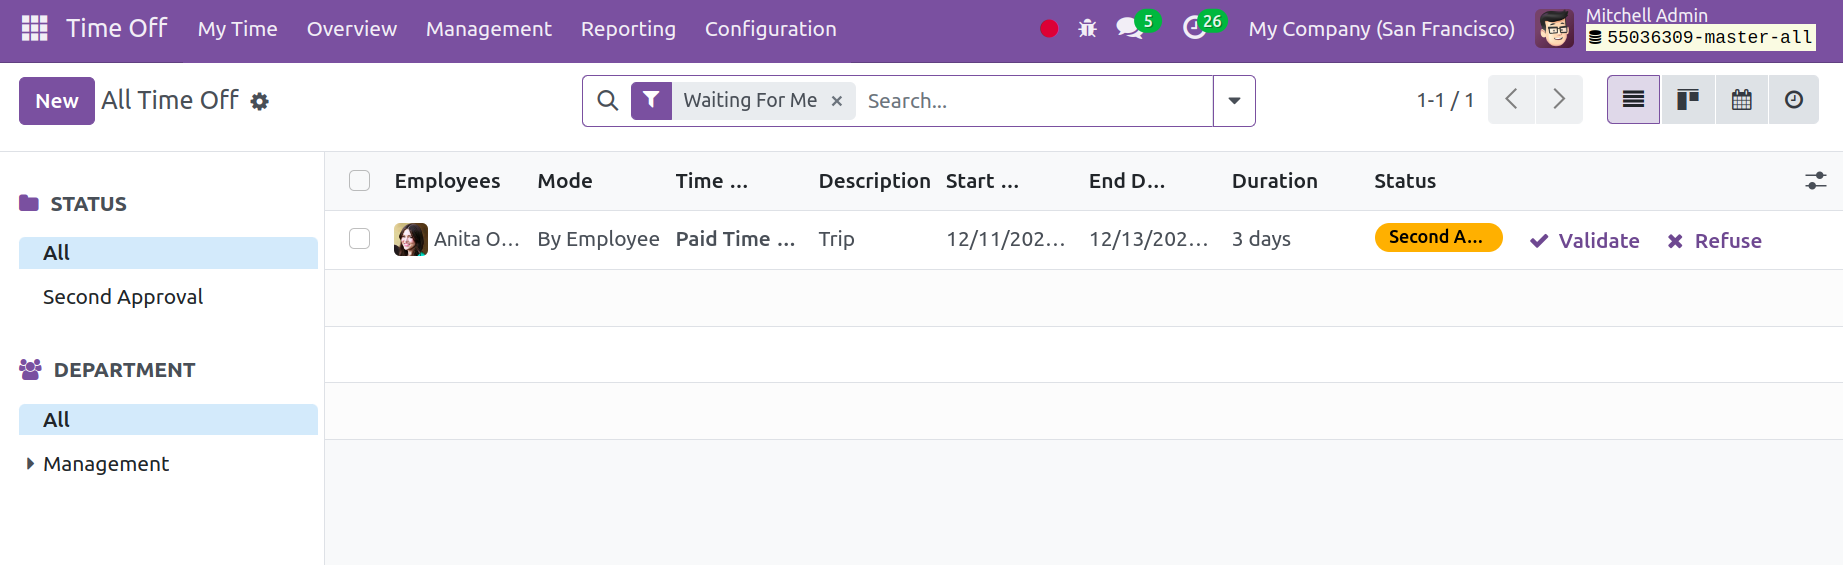
Using the menus on the left side of the screen, the user can filter the time off by
department and status. To add a new time off, use the New button.
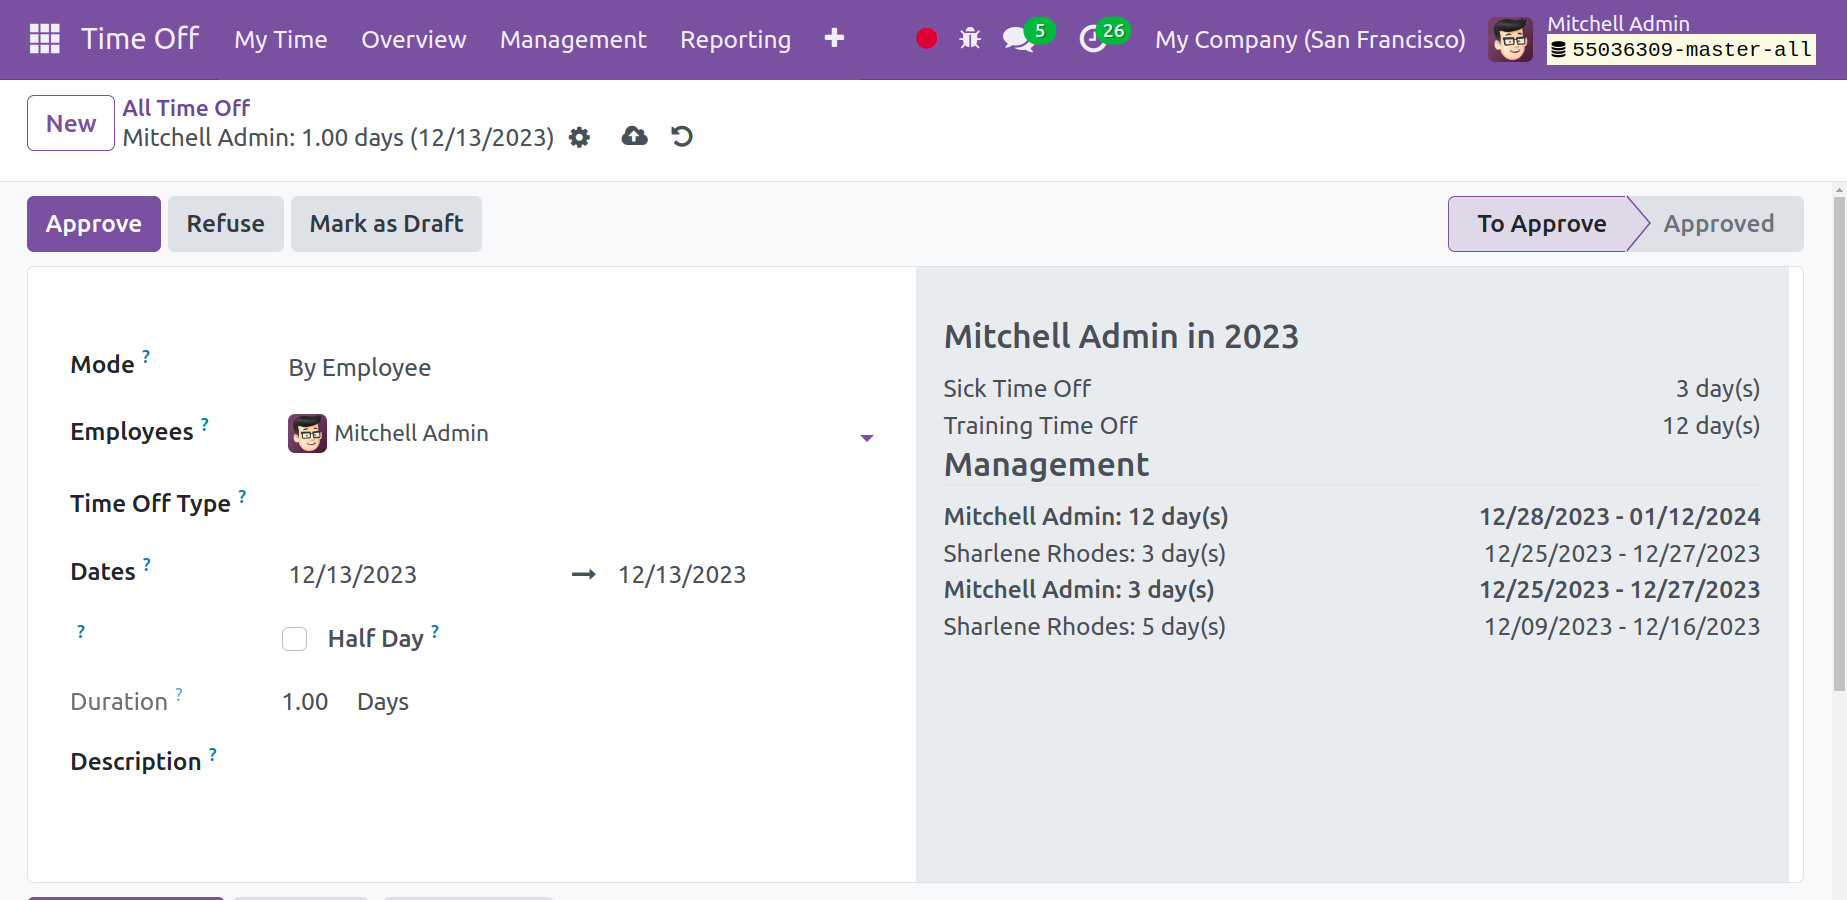
Choose between the following methods to plan your time off: By Employee, By Company, By
Department. Select the employees if the mode is By Employee. Choose the dates and type
of leave after that. The dates you have chosen will determine the addition of the
Duration. After that, determine whether the worker requires a half-day off by checking
on the half-day.
The user can choose to accept or reject the request for time off by selecting
theApprove or Refuse option.
Allocations
You can view accepted time off requests or allocation requests in the Allocations
menu even if you don't have access credentials. The list of leaves that the employees
have previously requested will appear when you select the Time Off option in the
Approvals menu from the main window, as illustrated below.
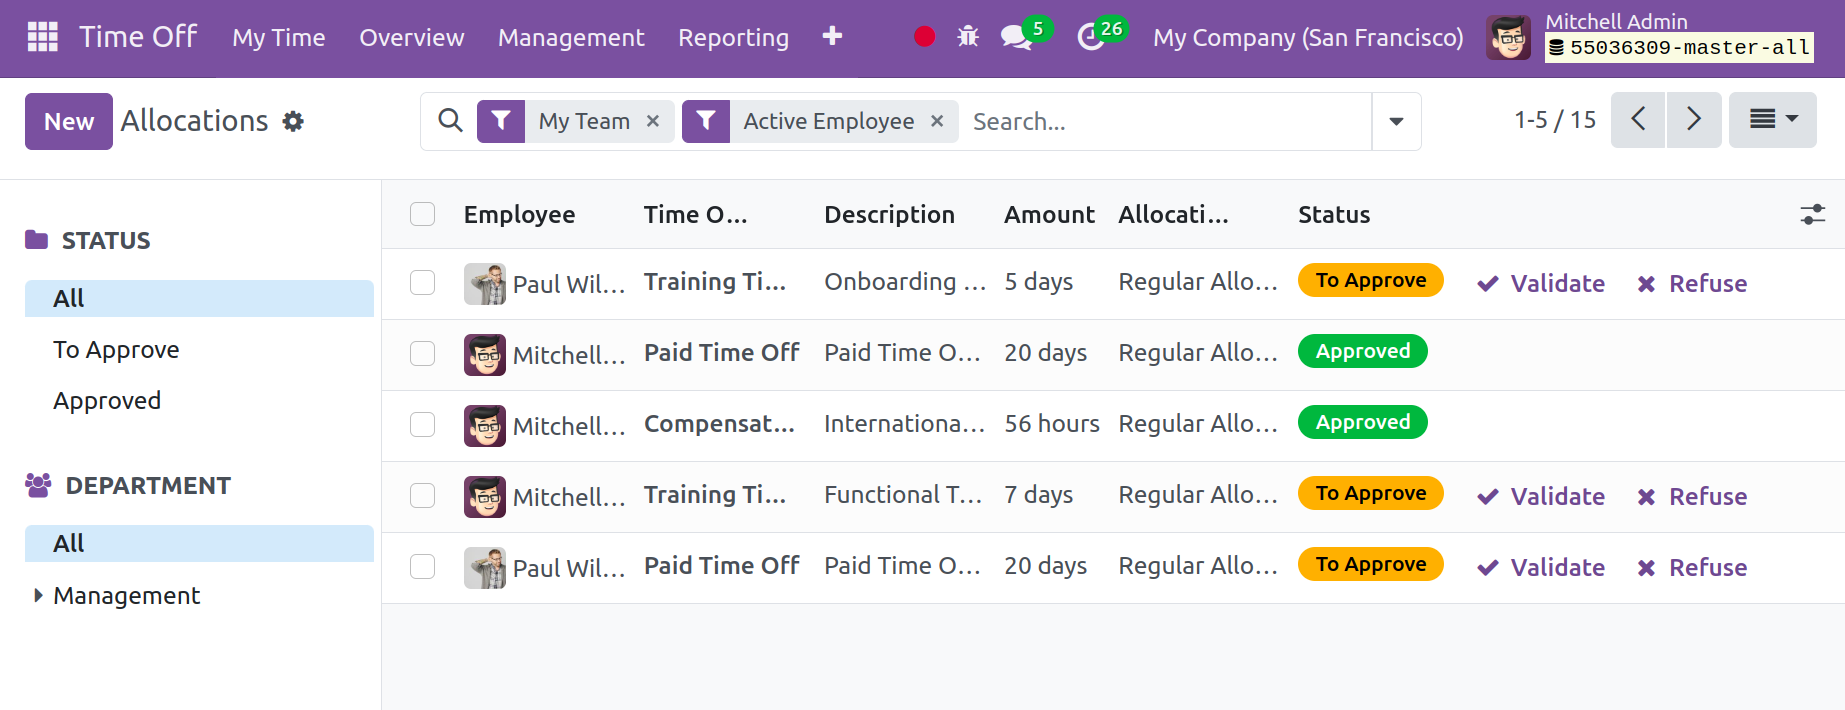
You will find information on the page, including the options to approve and refuse. You
will also see the appropriate leave status in the left-hand corner. As indicated in the
upper right corner, the page can be seen in List, Kanban, Calendar, and Activity. Once
multiple employees have their time off created, the employee's avatar will be displayed.
The time off that hasn't yet begun can be readily deleted by users. You will now see a
page that resembles the window that was previously explained when you select the
Allocation option from the Management menu. The allocations that an employee submits
will be accessible on this page, as indicated below. Requests may be approved or
rejected in accordance with that.
To assign leaves, use the "New" option.
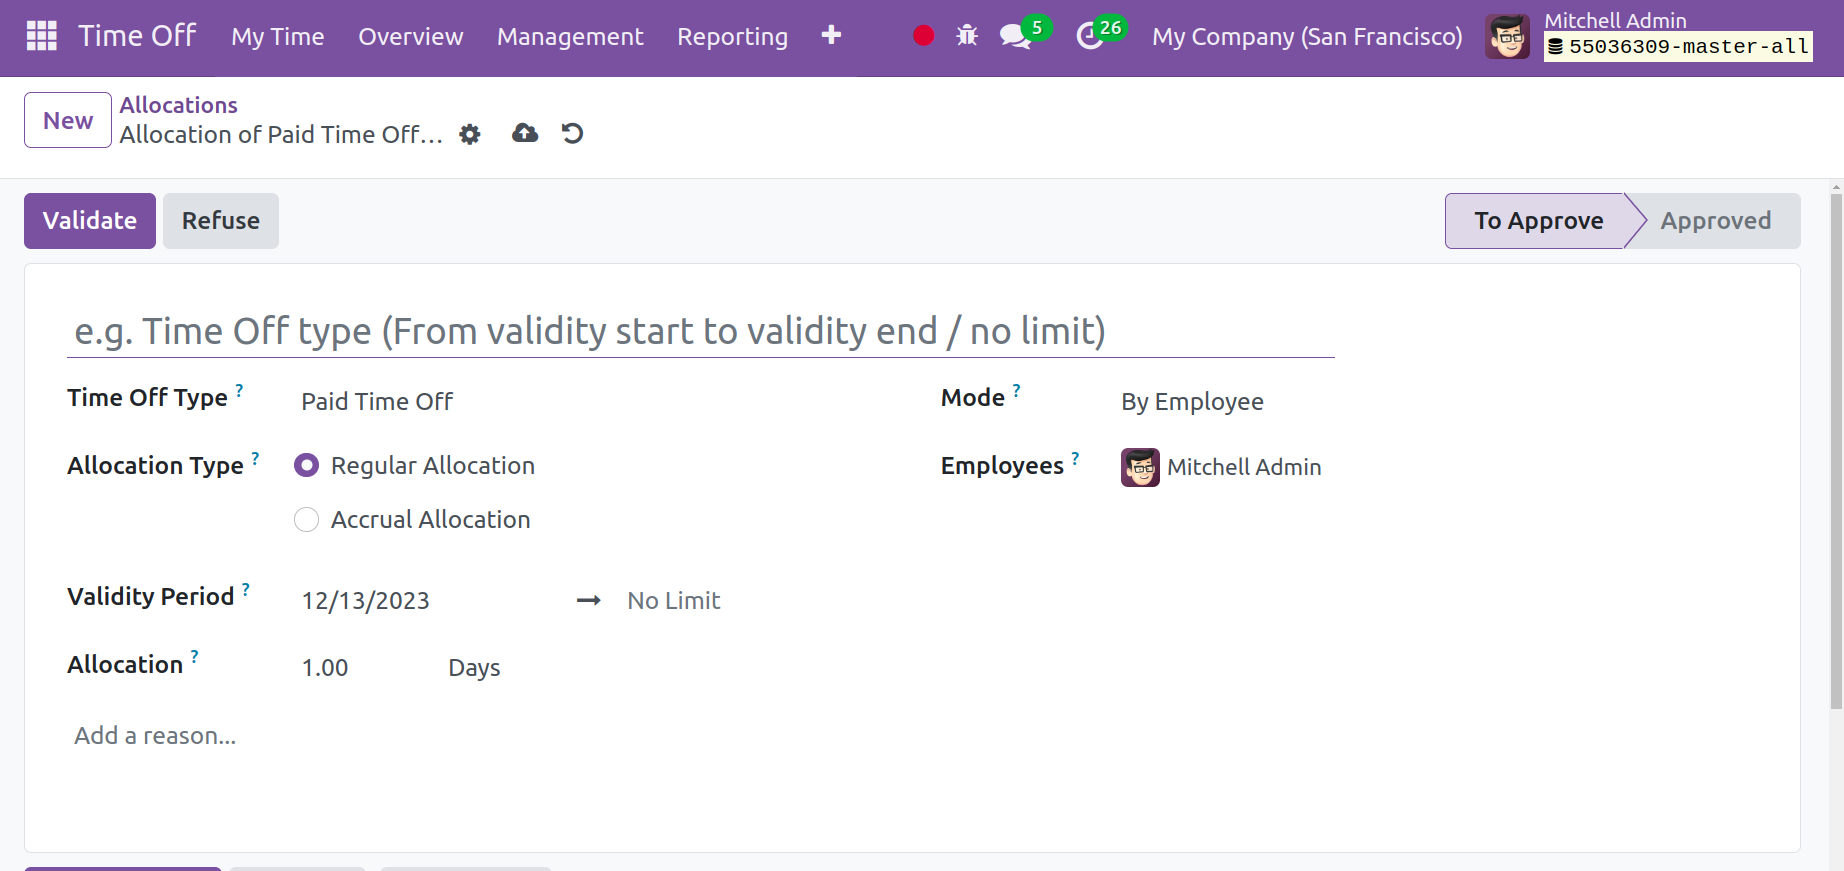
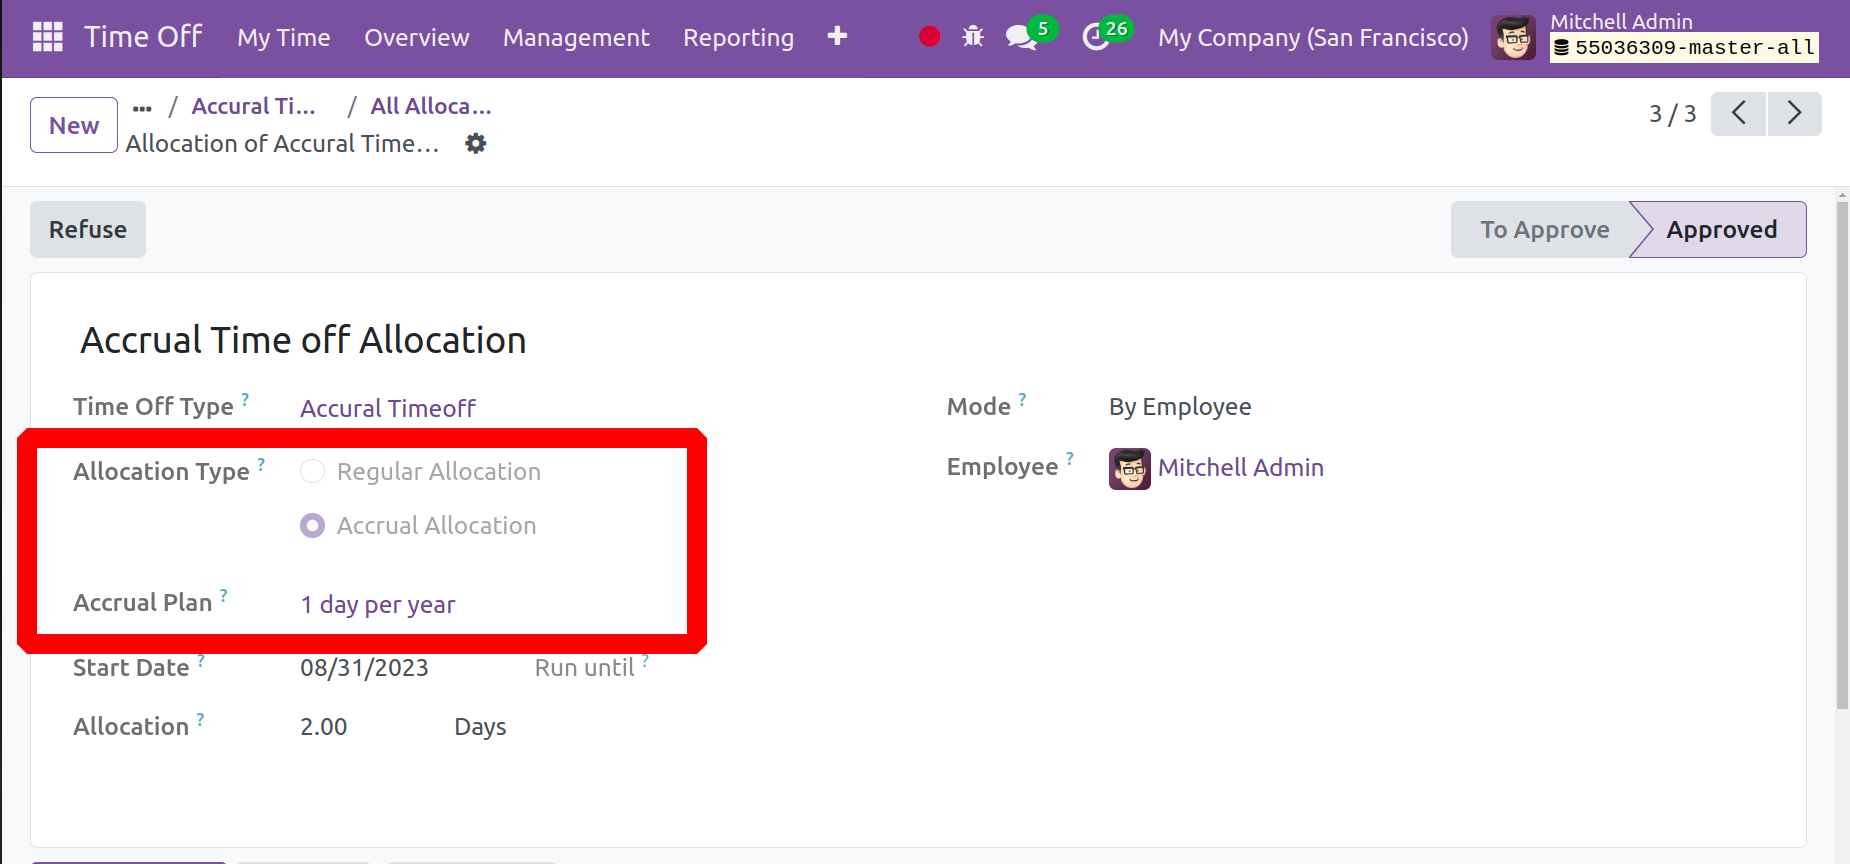
Incorporate a citation and select the type of leave. Select between Regular and Accrual
Allocation as the Allocation Type. Choose the Accrual Plan if the allocation type
is Accrual Allocation. Then give the allocation and justification for the Start
Date and the To Dates. There,mode can also be selected. The allotment is currently in
the approval phase. The Allocation stage changed to the Approve stage when you clicked
the Validate button.
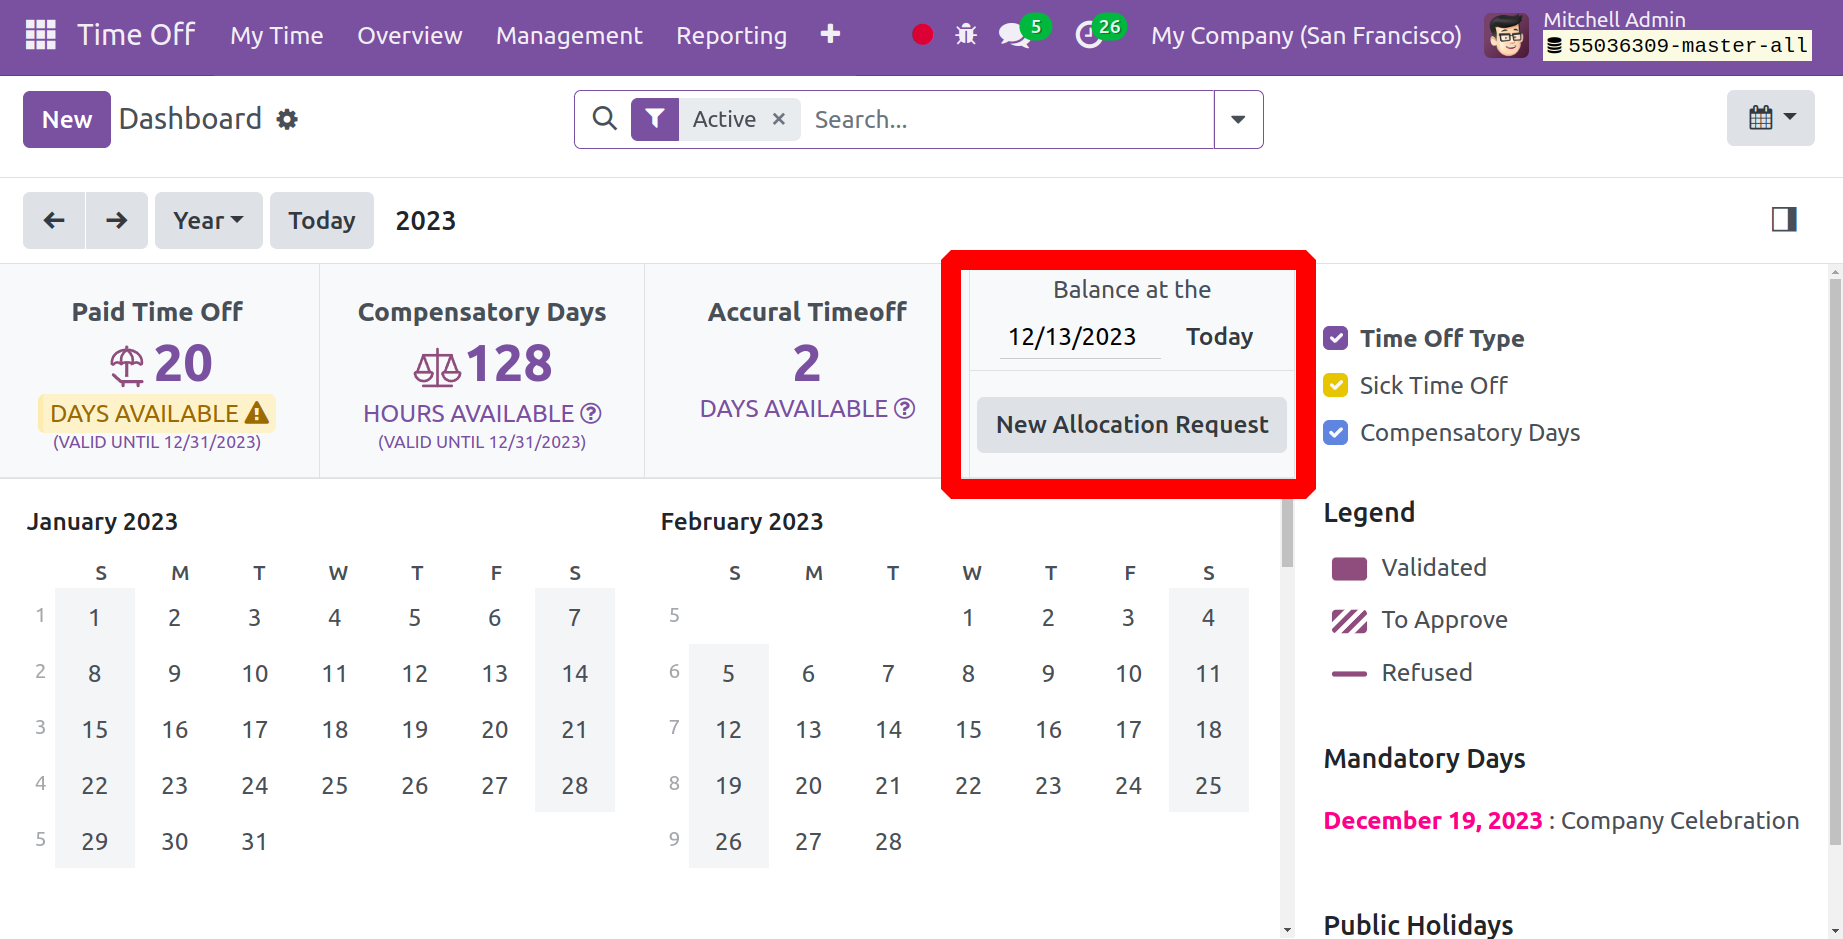
The leave allotment from the previous year will be shown on the dashboard concurrently
with the balance when it is still pending. By adding a date to the Balance field, it is
now possible to verify the employee's future leave allotment.
In this case, the dashboard shows a negative allocation, which happens when an employee
requests more time off than the number of days allocated; a negative value is then
presented for the remaining days.
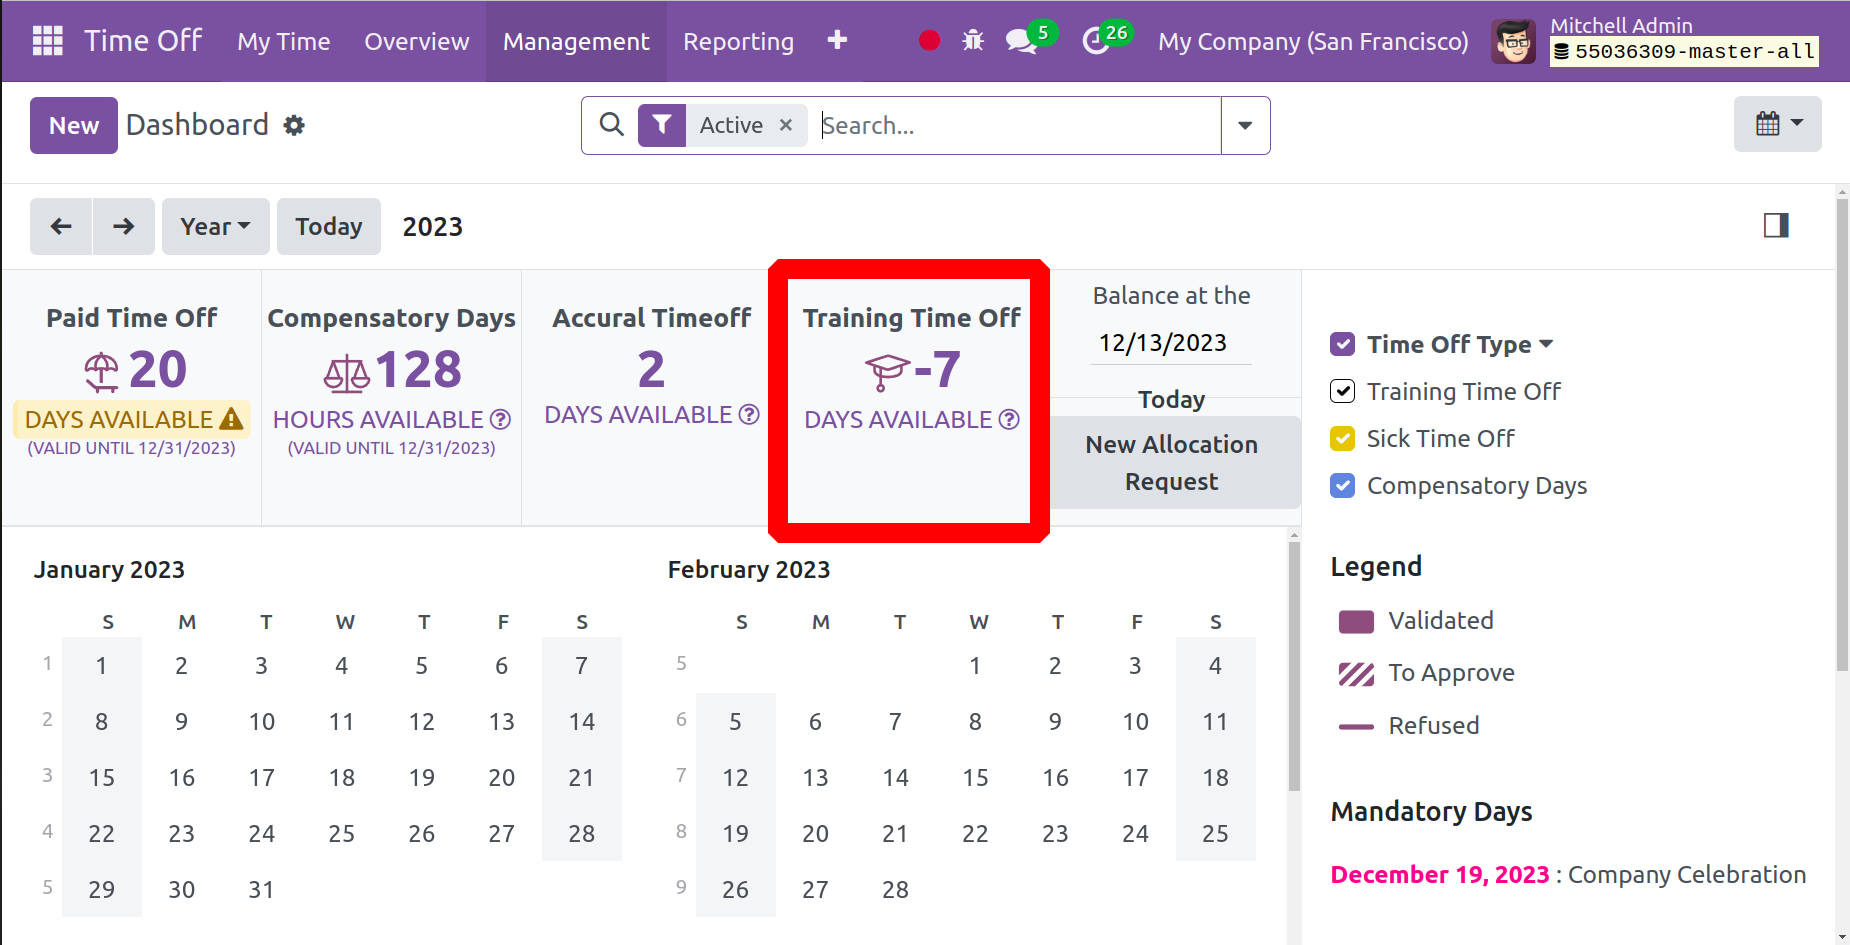
As an example, the worker was granted 10 days of Training Time Off, but the worker asked
for 17 days. Hence, the next seven days are seen negatively in this case. The employee
would only receive 3 days of training leave if HR had granted an additional 10 days.