Invoices
Once the Sales Order has been confirmed, the following step is to generate invoices for the orders. The moment you complete the sales order, the button to generate the invoice will show up on the screen.
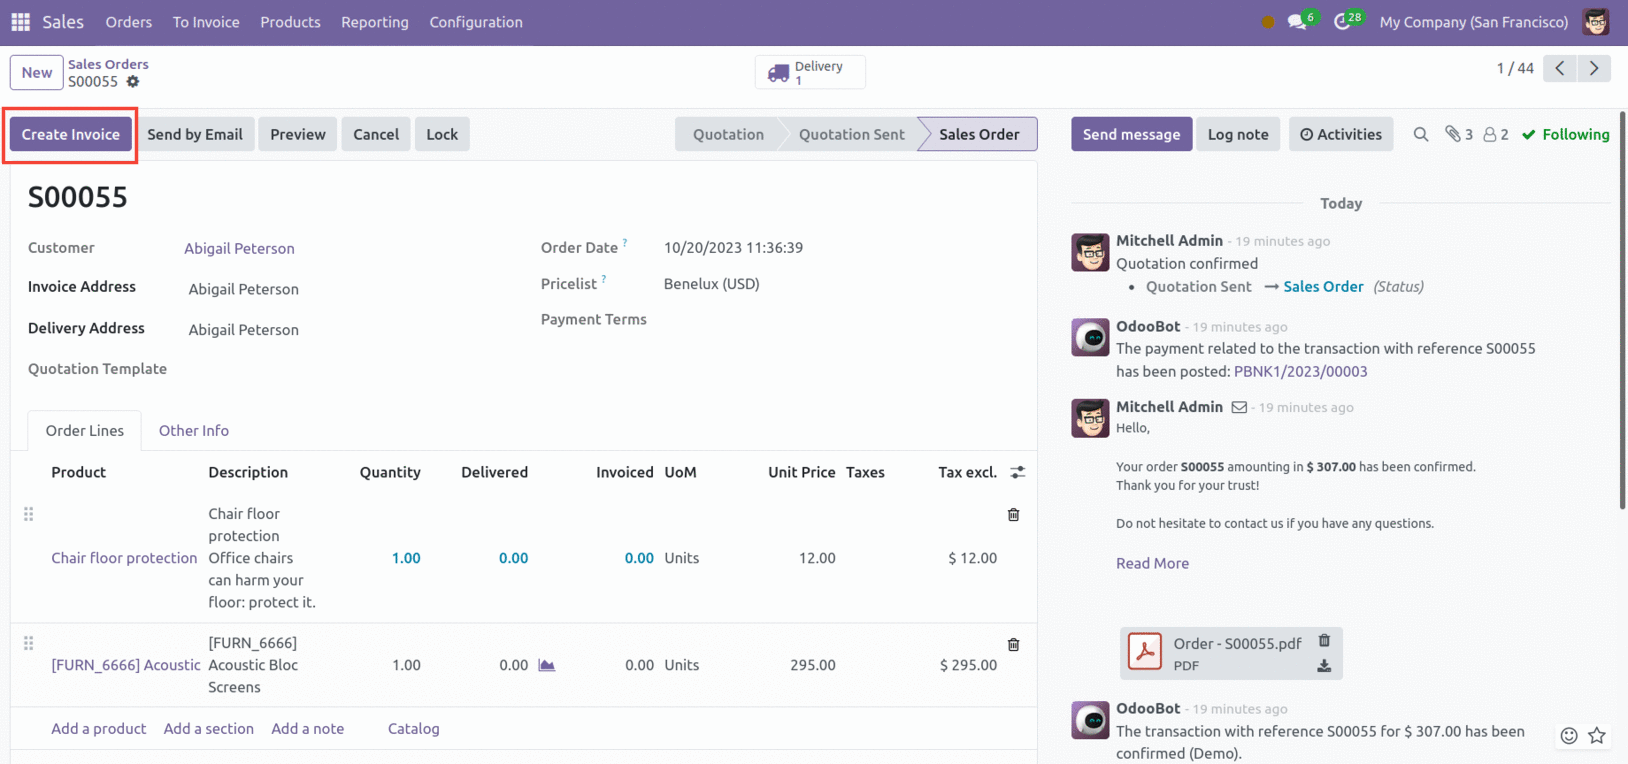
When you click the Create Invoice button, a pop-up window will appear.

You may choose the invoice type here. There are three options: percentage-based down payment, fixed-amount down payment, and regular invoice. Click the Create and View Invoice button after choosing the appropriate payment method.
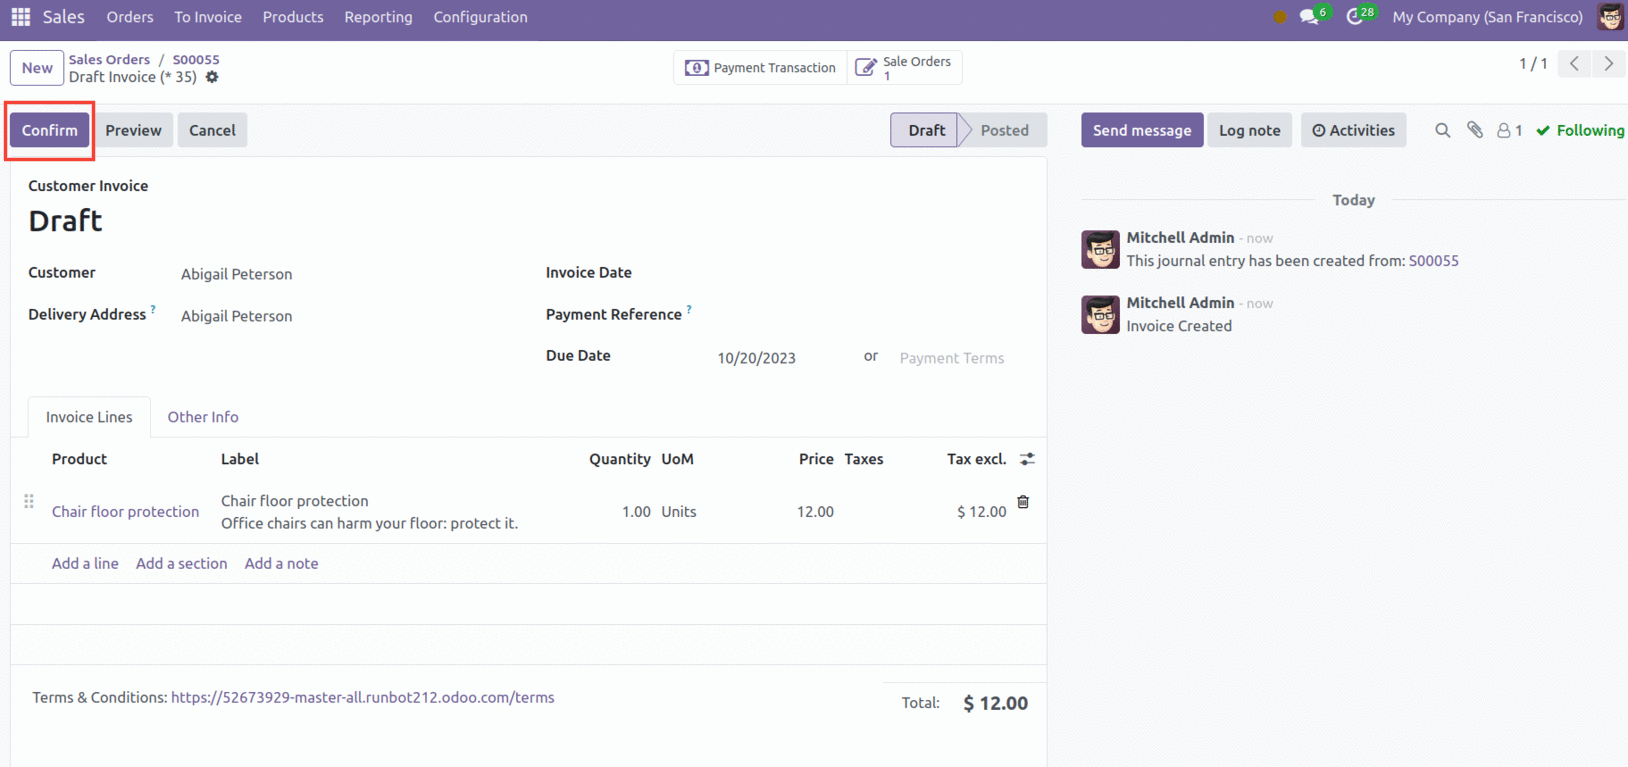
This will generate a draft invoice, which may be verified by clicking the Confirm button.
After you confirm the invoice, you will be given the opportunity to Register the Payment.
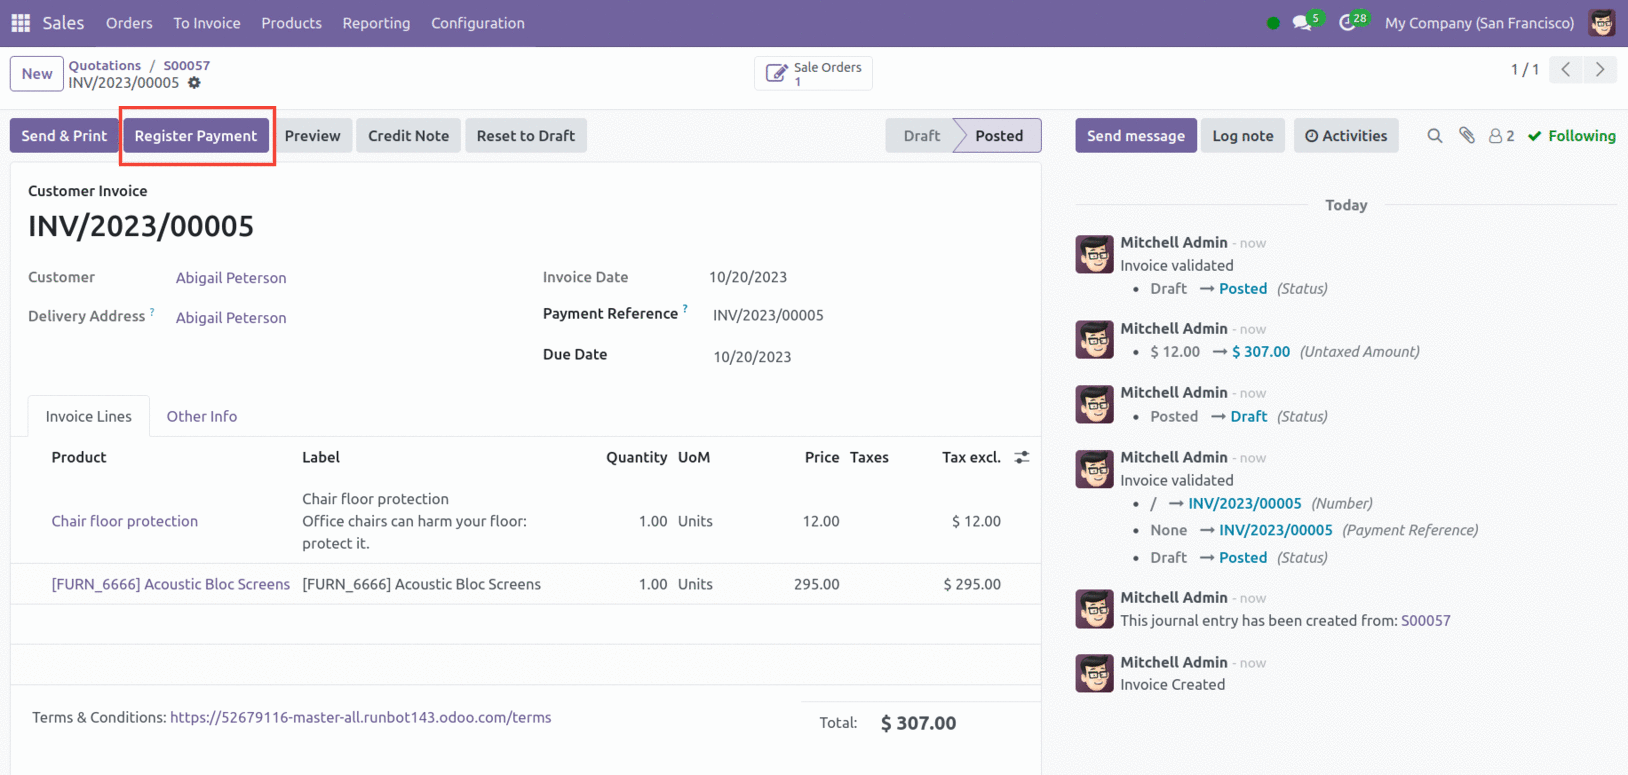
You may record the customer's payment by using this button. In the pop-up box, you may add the payment details.

This window will provide the specifics of the Amount, Payment Date, and Memo. The Journal, Payment Method, and Recipient Bank Account can all be specified. Press the "Create Payment" button now.
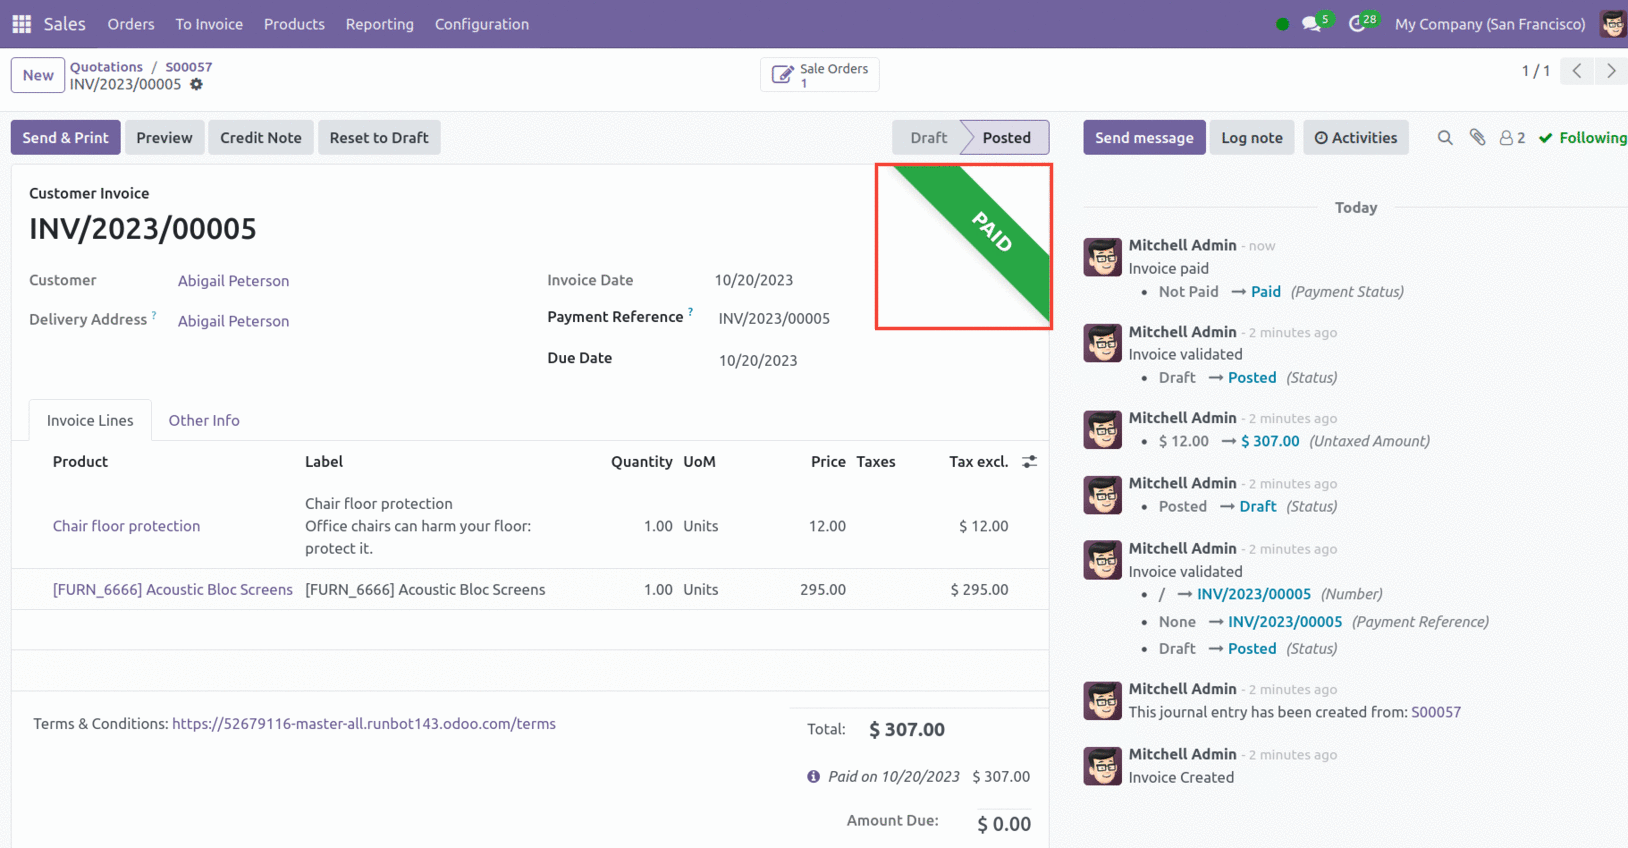
After making the payment, the invoice will be marked as Paid, as seen in the screenshot above. Use the Send & Print option to send the invoice to the appropriate customer.
In the To Invoice menu, you will see a distinct platform for viewing all Orders To Invoice and Orders to Upsell.
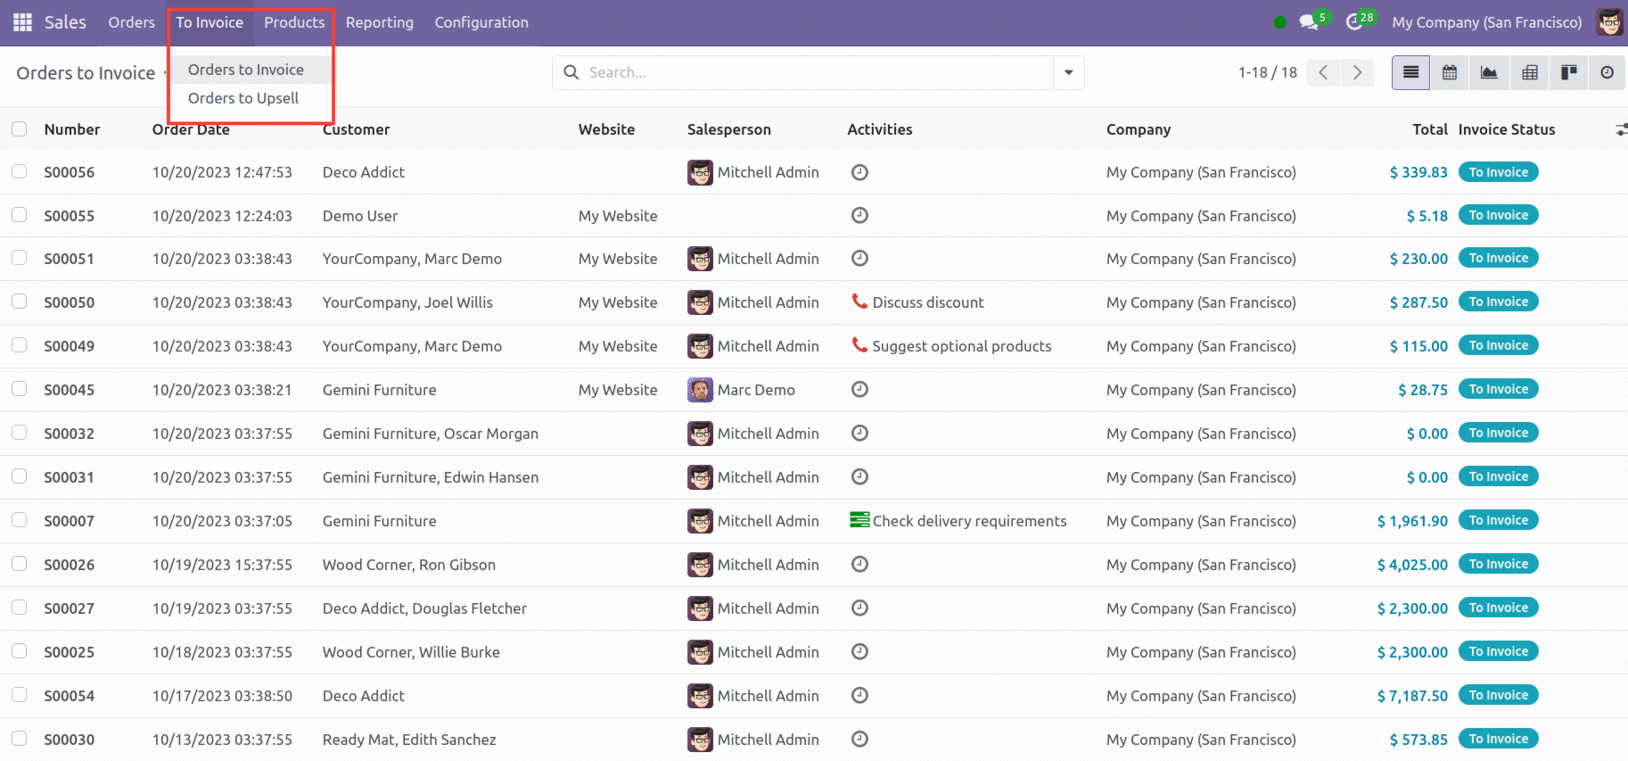
All invoices are viewable on all platforms, along with their Number, Order Date, Website, Customer, Salesperson, Activities, Company, Total, Invoice, and Status. The orders that are awaiting an invoice will be shown on the Orders To Invoice portal. Orders where the the delivered amount exceeds the billed quantity will be transferred to the Orders to Upsell option. In these situations, you must create an invoice for the excess amount that was sent to the client. Odoo will instantly create a sales order for this additional amount, which you can locate under the Orders to Upsell option.