Discounts, Loyalty & Gift Card
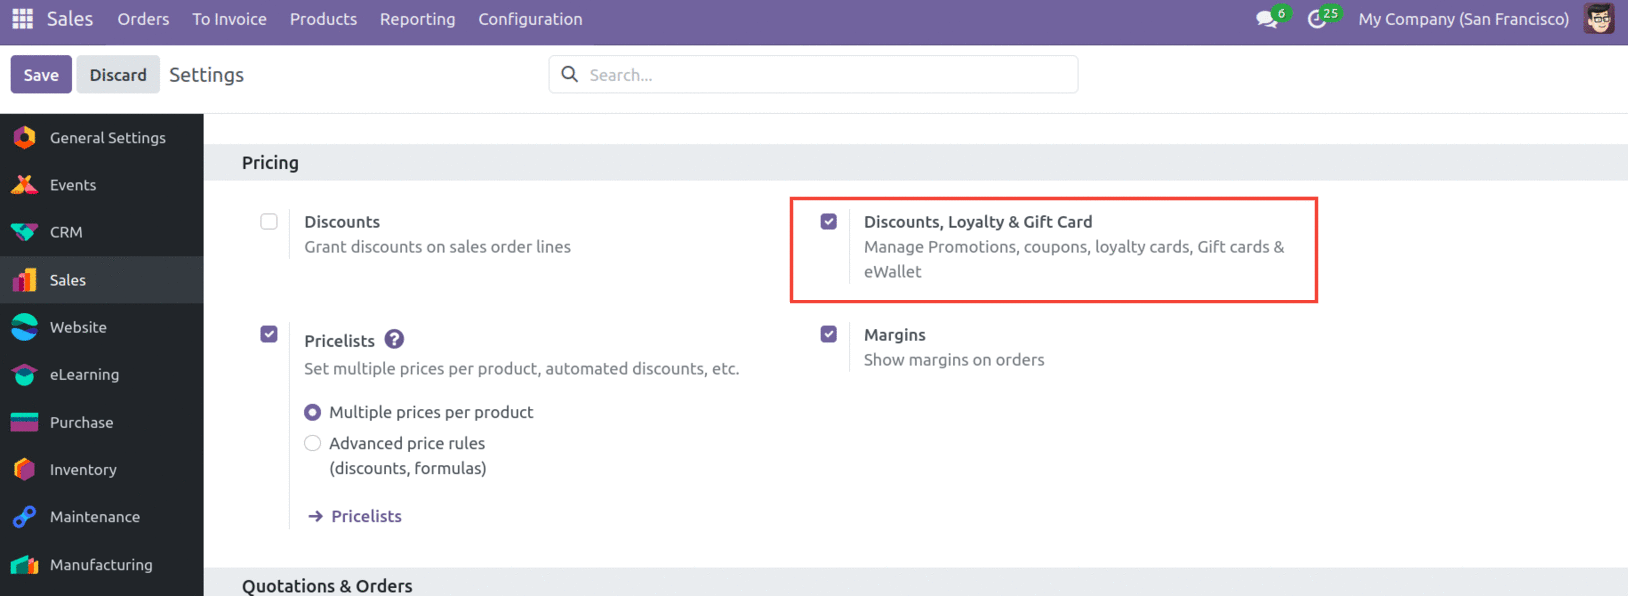
Promotions, discounts, gift cards, and so on may help your product reach a wider audience and increase sales. Choose the Settings option from the Configuration menu to activate this function. "Discounts, Loyalty & Gift Card" should be activated in the Pricing section.
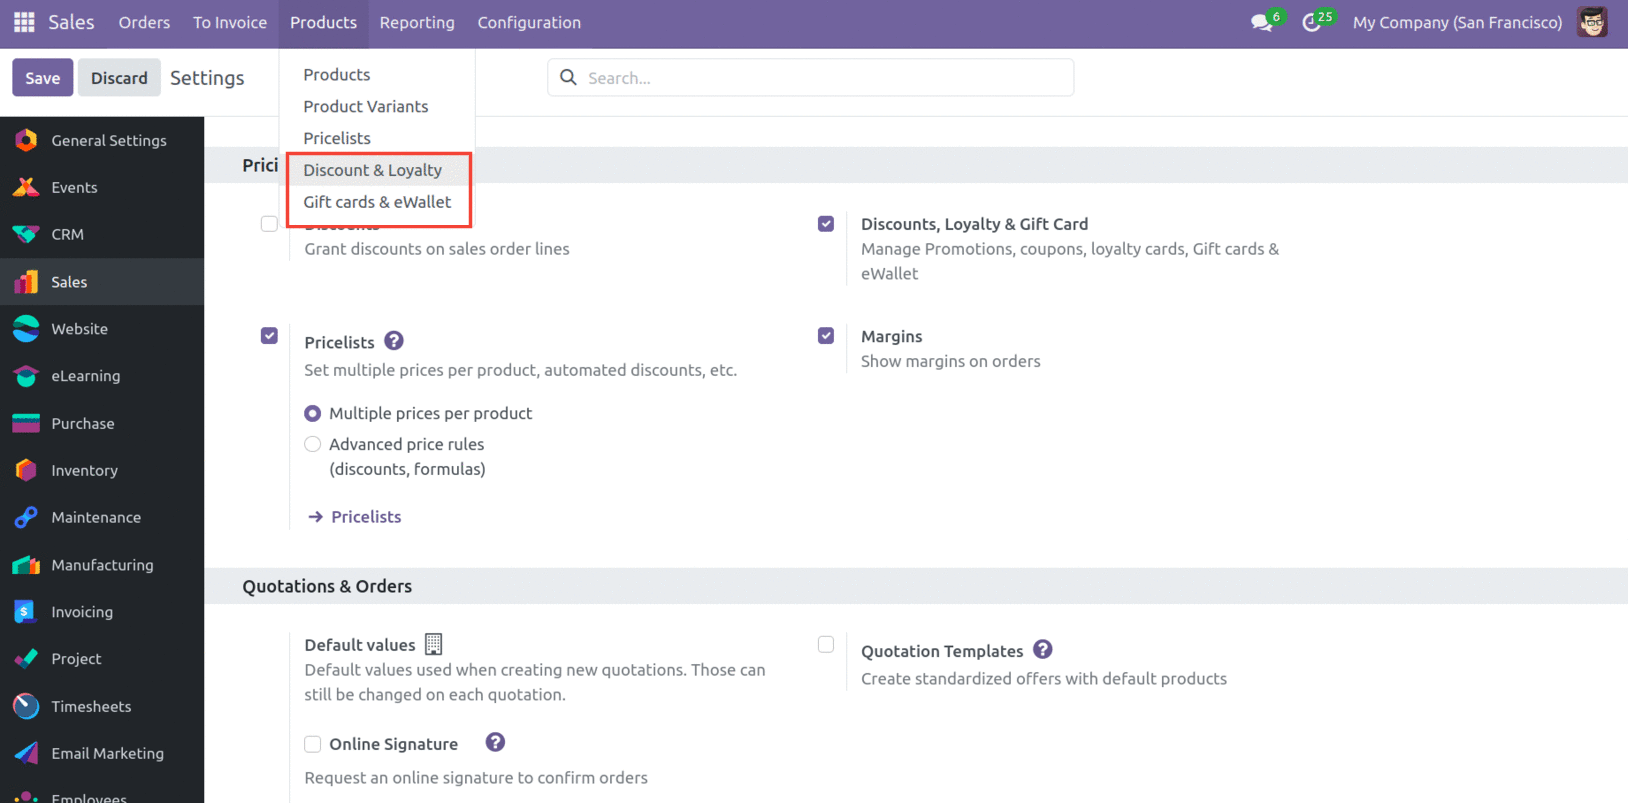
With this settings update, the Products tab's dropdown list will have two more options: "Discount & Loyalty" and "Gift cards & eWallet."
Let's take a closer look at each of these characteristics.
Discount & Loyalty
This function aids in keeping track of discounts and giving devoted clients exclusive deals. The already-created promotion programs, along with the discounts, coupons, and loyalty cards linked to them, are listed in the Discount & Loyalty window.
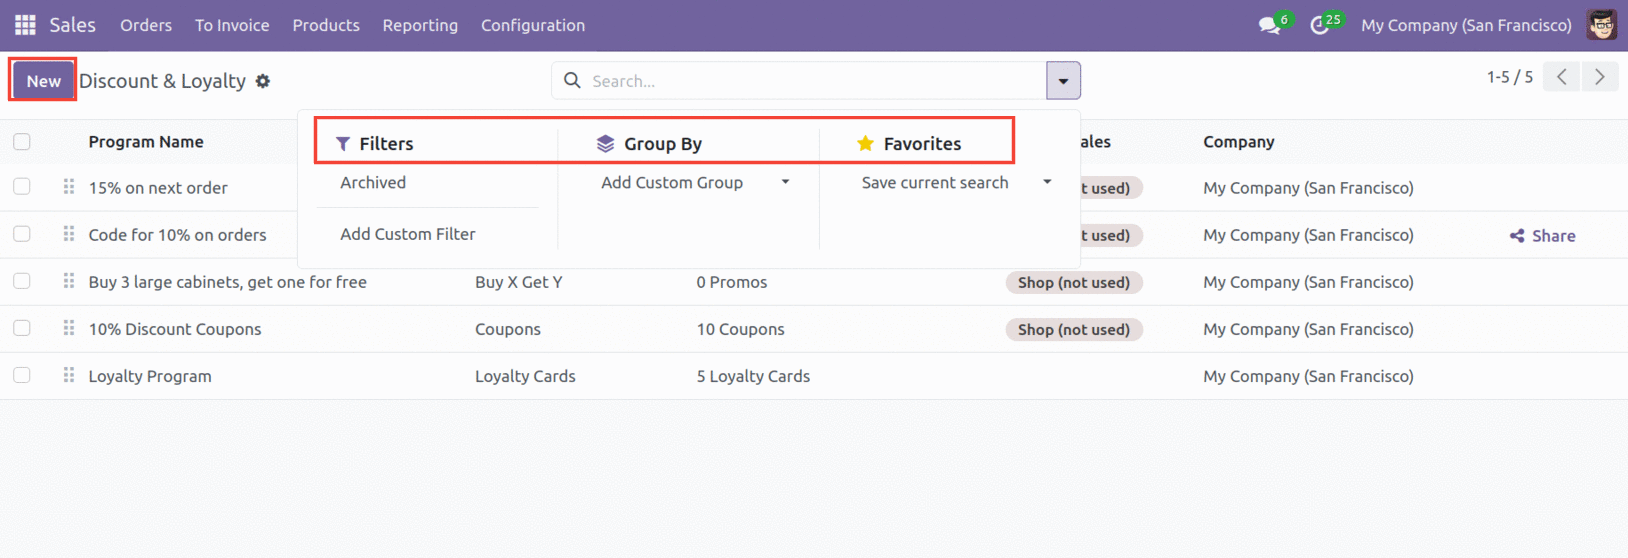
This section contains information about the program, including its name, type, items, website, POS, and company. You may filter and group these entries based on a variety of criteria by using the "Filters" and "Group By" functions. You can easily access your most often used filters and groups by saving them using the Favourites option. In order to add a new program to the list, click the Create button.
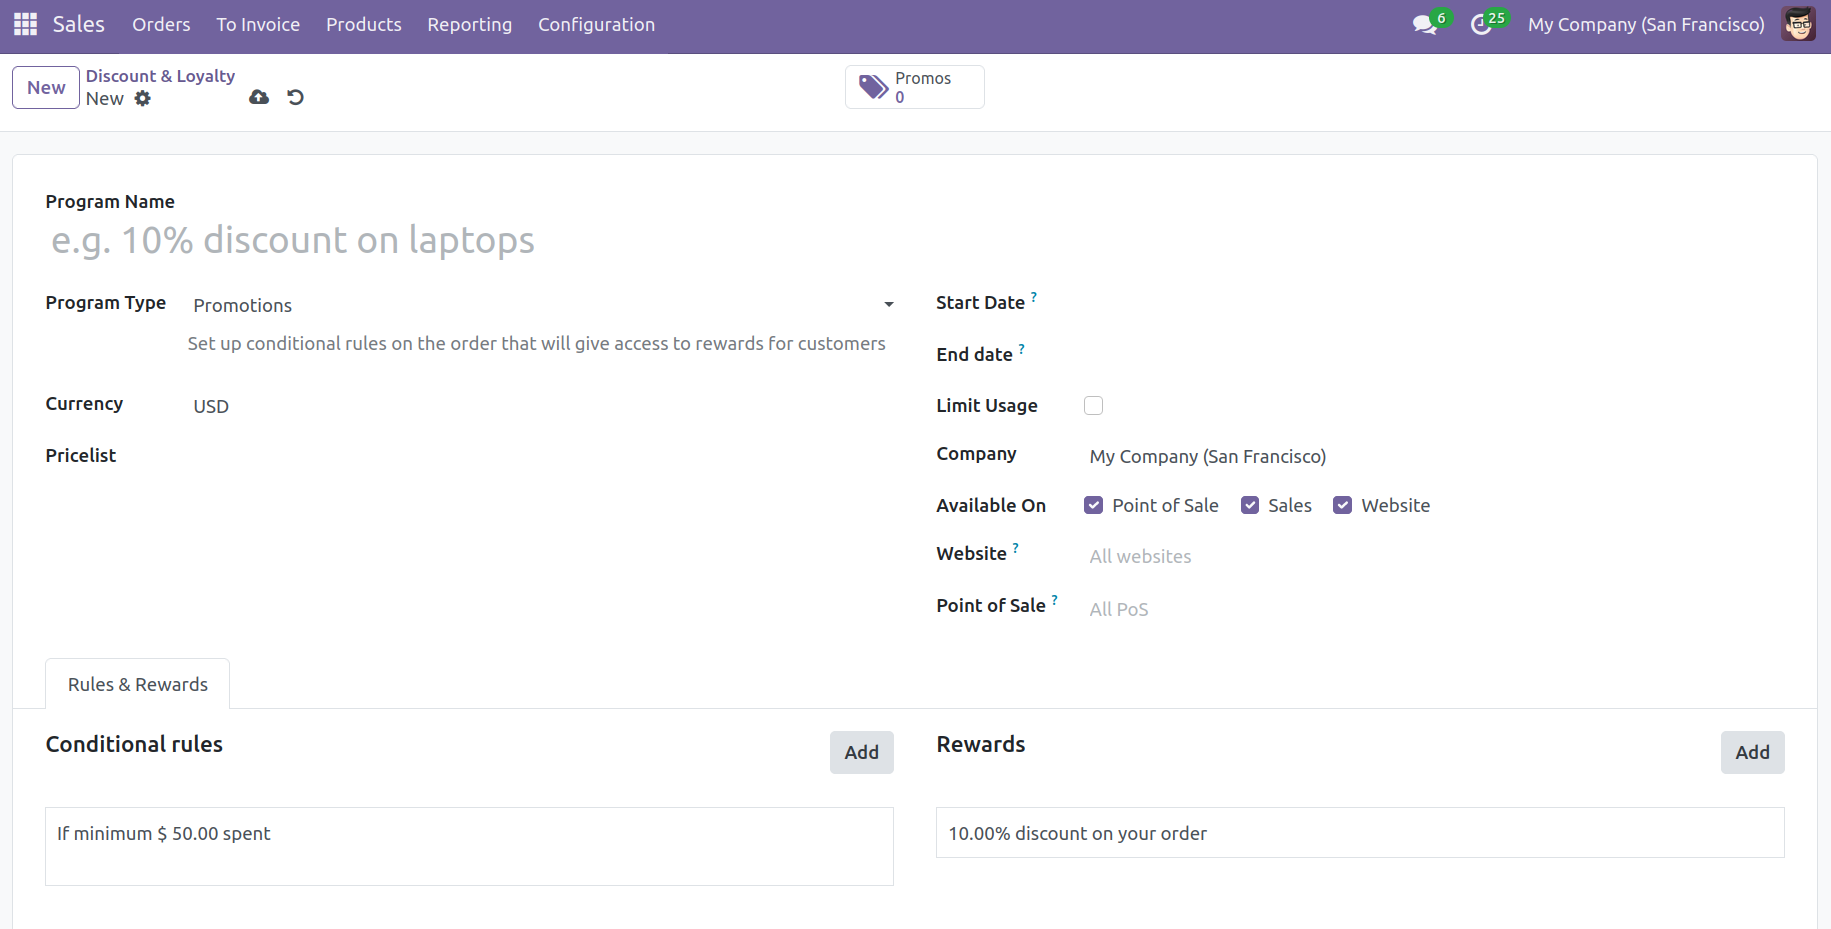
Enter a name in the Program Name area for the new program. You may choose the appropriate program type for the record from the dropdown list labeled "Program Type," which includes the following options: coupons, loyalty cards, promotions, discount codes, buy X get Y, and next order coupons.
Using coupons, you may manually create and distribute coupon codes. To redeem the offer, use these coupons for conventional orders, Point of Sale transactions, or eCommerce. Through "Conditional rules," you may specify limitations on how it can be used. When making a purchase, loyalty cards allow users to accrue points that they may use for incentives on subsequent purchases. You may create conditional restrictions for an order using promotions to provide your consumers access to prizes. Customers may receive points for each rule, which they may then redeem for incentives. Use a "Discount Code" that has conditions attached so that buyers may redeem it for rewards. With "Buy X Get Y," you may give the consumer one credit for each item they purchase and give them Y goods in return for X credits. Using 'Next Order Coupons,' you may send a single-use promo code to the consumer after they order a product to encourage repeat purchases.
Choose a currency from the dropdown menu. The Points Unit field automatically updates based on the 'Program Type' (for example, Coupon point(s) for Coupons, Loyalty point(s) for Loyalty Cards, and so on). When you enable 'Show points Unit,' you will be able to view the number of points available and utilized by reward in PoS customer tickets, the online portal, and eCommerce checkout.
The "Program Type" determines how the Programme Trigger is updated. Customers will immediately be qualified for a reward in their basket if the trigger is set to "Automatic." Customers will only receive incentives if it is set to "Enter a code." In a similar vein, the "Use points on" section also updates automatically. Define the following terms: available on, company, point of sale, limited usage, and validity.
You may establish the circumstances under which customers can use the incentives under the Rules & incentives page. Click "Add" under "Conditional rules" to create and manage these point-granting rules.
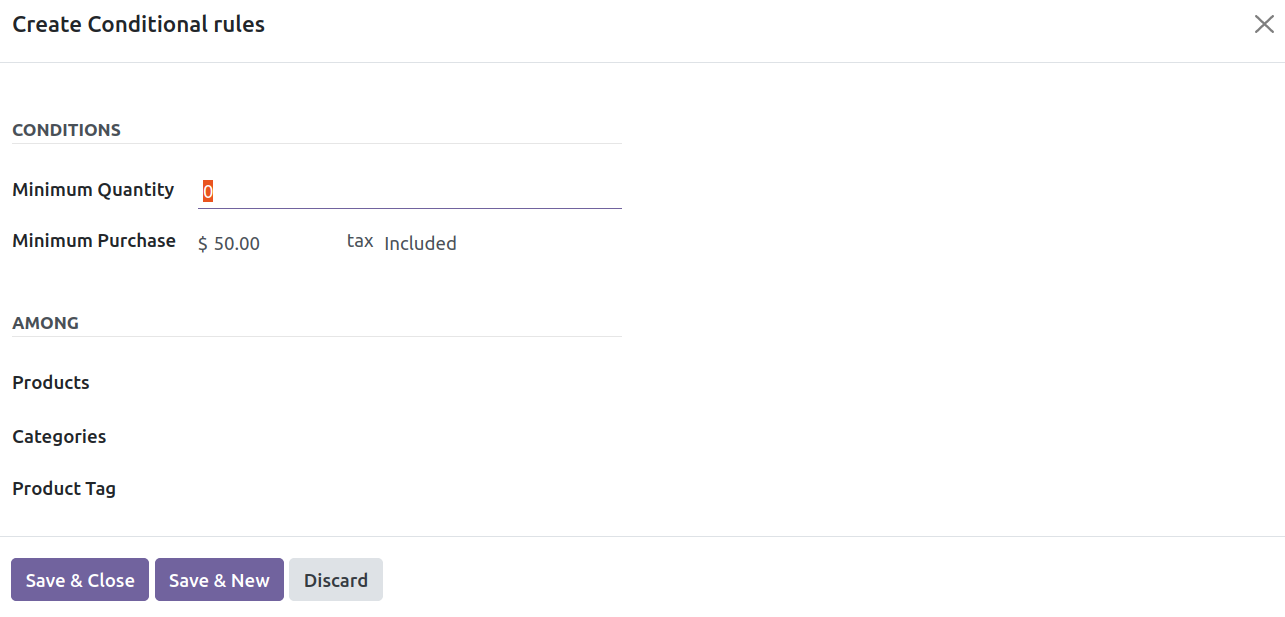
Under 'Conditions,' enter the Minimum Quantity and Minimum Purchase (rate). The 'Among' section allows you to input information about the consumers to whom the rule applies. Specify the products, categories, product tags, and product domain. In the Point(s) area, you may configure the reward points and their specifics. Provide the criteria of the grant, such as "per order," "per $ spent," or "per unit paid," along with the number of points in the grant field. Once these details have been added, select "Save and Close."
You may choose what benefits (such as a discount) to offer in exchange for reward points under the Rewards section. To handle these transactional perks, select "Add" under "Rewards."
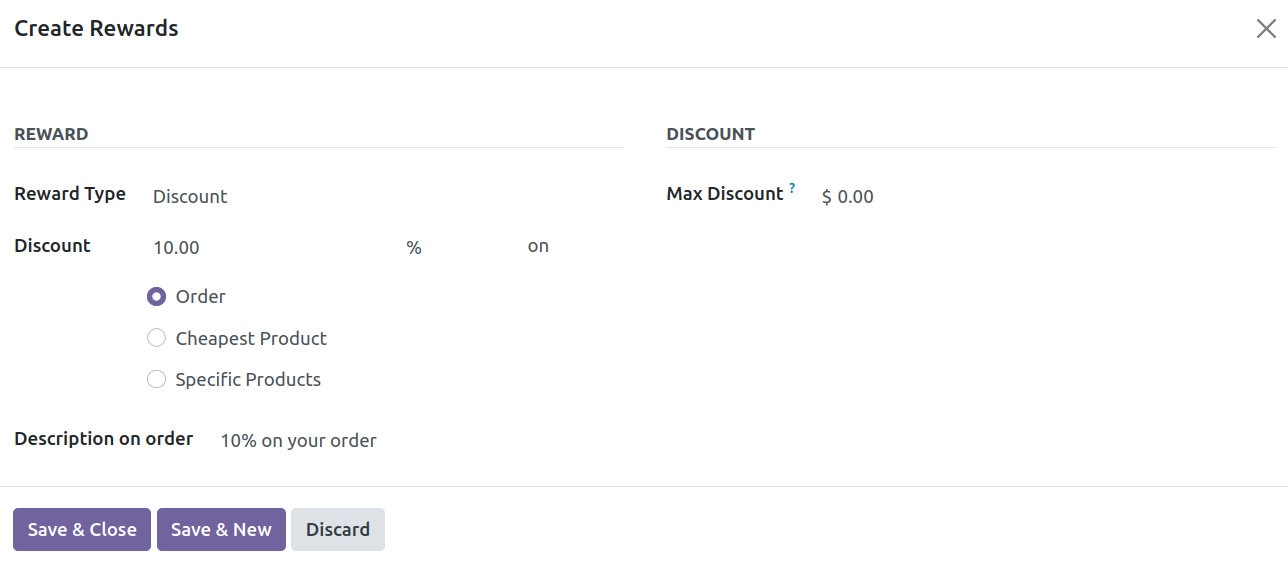
Choose the appropriate reward type from the dropdown selection of 'Reward Type.' Three possibilities are available to you with this attribute: Free Product, Discount, and Free Shipping. Let's use "Discount" as an illustration. You may select a specific discount value on Order, Cheapest Products, or Specific Products, as you can see above. In the Max Discount area, enter the maximum discount.
You may specify how many promo points the consumer must exchange in order to receive the reward by using the phrase "In exchange of." You can click the Save button after indicating the Clear all Promo Points and Description on Order.
Gift Cards & eWallet
Odoo 17 will provide a dedicated platform for creating and managing Gift Cards and eWallets. As illustrated below, the platform will display the Programme Name, Programme Type, Items, Website, Point of Sales, and Company of all pre-configured gift cards and eWallets.

When you click the Create button, a new form view will appear.
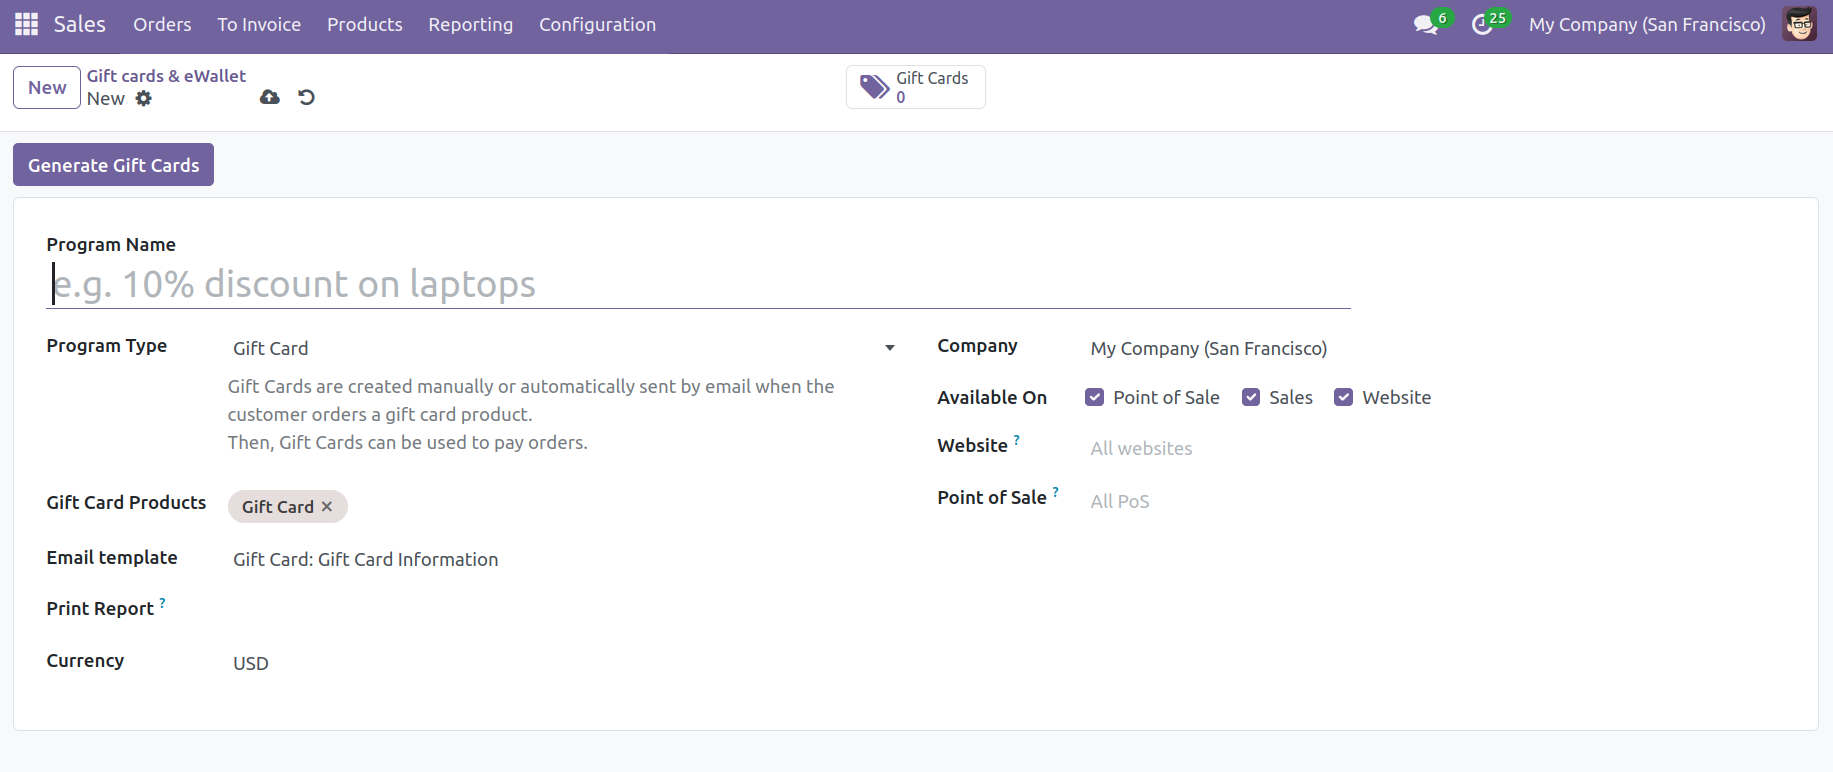
In the appropriate areas, enter the program name and program type. There are two options for the program type: eWallets or gift cards. When a customer orders a product that falls within the gift card product category, you have the option of creating gift cards manually or automatically. The consumer can use them to pay for orders when you send them to them through email. You can put your gift card products in the appropriate section. To deliver the gift card to the eligible consumer, set up an email template in the provided box. The created gift cards from the point of sale will be printed using the Print Report. Set the Program Trigger to Automatic or Use a Code, and mention the Currency used for the actions. The Automatic will trigger a reward in their cart when customers become eligible for this gift card. Another option is for the customer to enter a code to obtain this gift card. To make the gift card available on the platforms that are enabled, mention your company and turn on the PoS, Sales, and Website options. This page contains information on the relevant Website and PoS. The point portal name can be specified using the Displayed as field. You may select the Generate Gift Cards option after the setting is finished. As seen below, a pop-up will appear as a result.
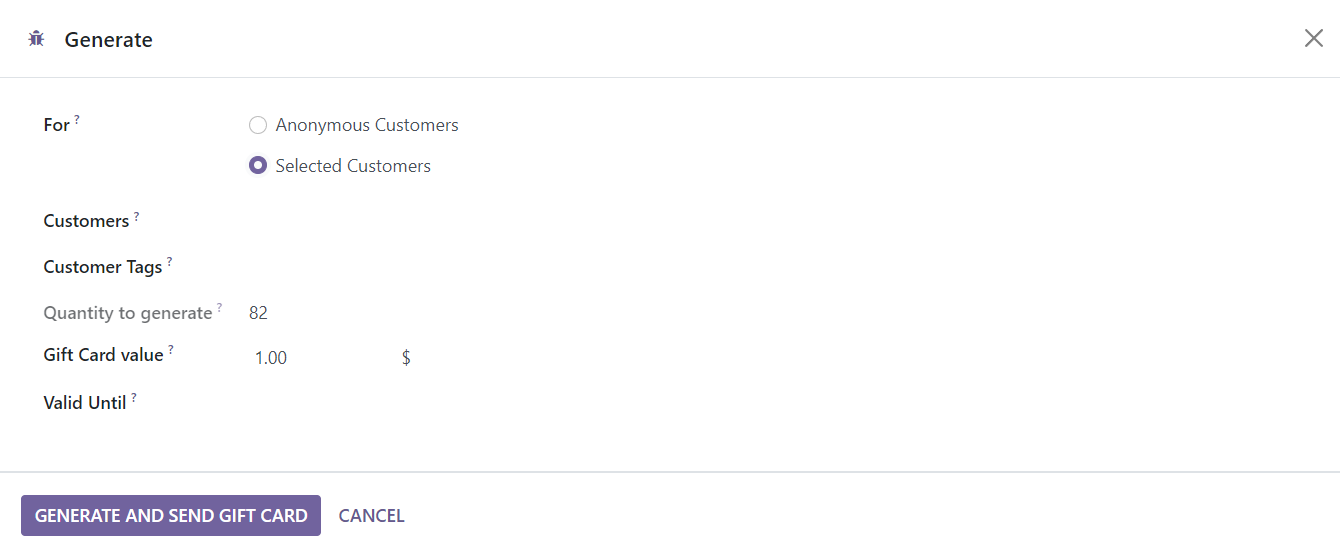
You can generate gift cards for both anonymous and chosen consumers. You can enter the names and tags of the chosen customers in the designated fields. In the Quantity to Generate section, specify how many gift cards you wish to create. You may add the number of points awarded for each gift card in the Gift Card Value field. To specify how long the produced gift cards are valid, use the Valid Until field. To generate and send a gift card, click the button now. This will print the specified number of gift cards and deliver them to the designated recipients. Using the smart button in the form view, you may see the freshly made gift cards.
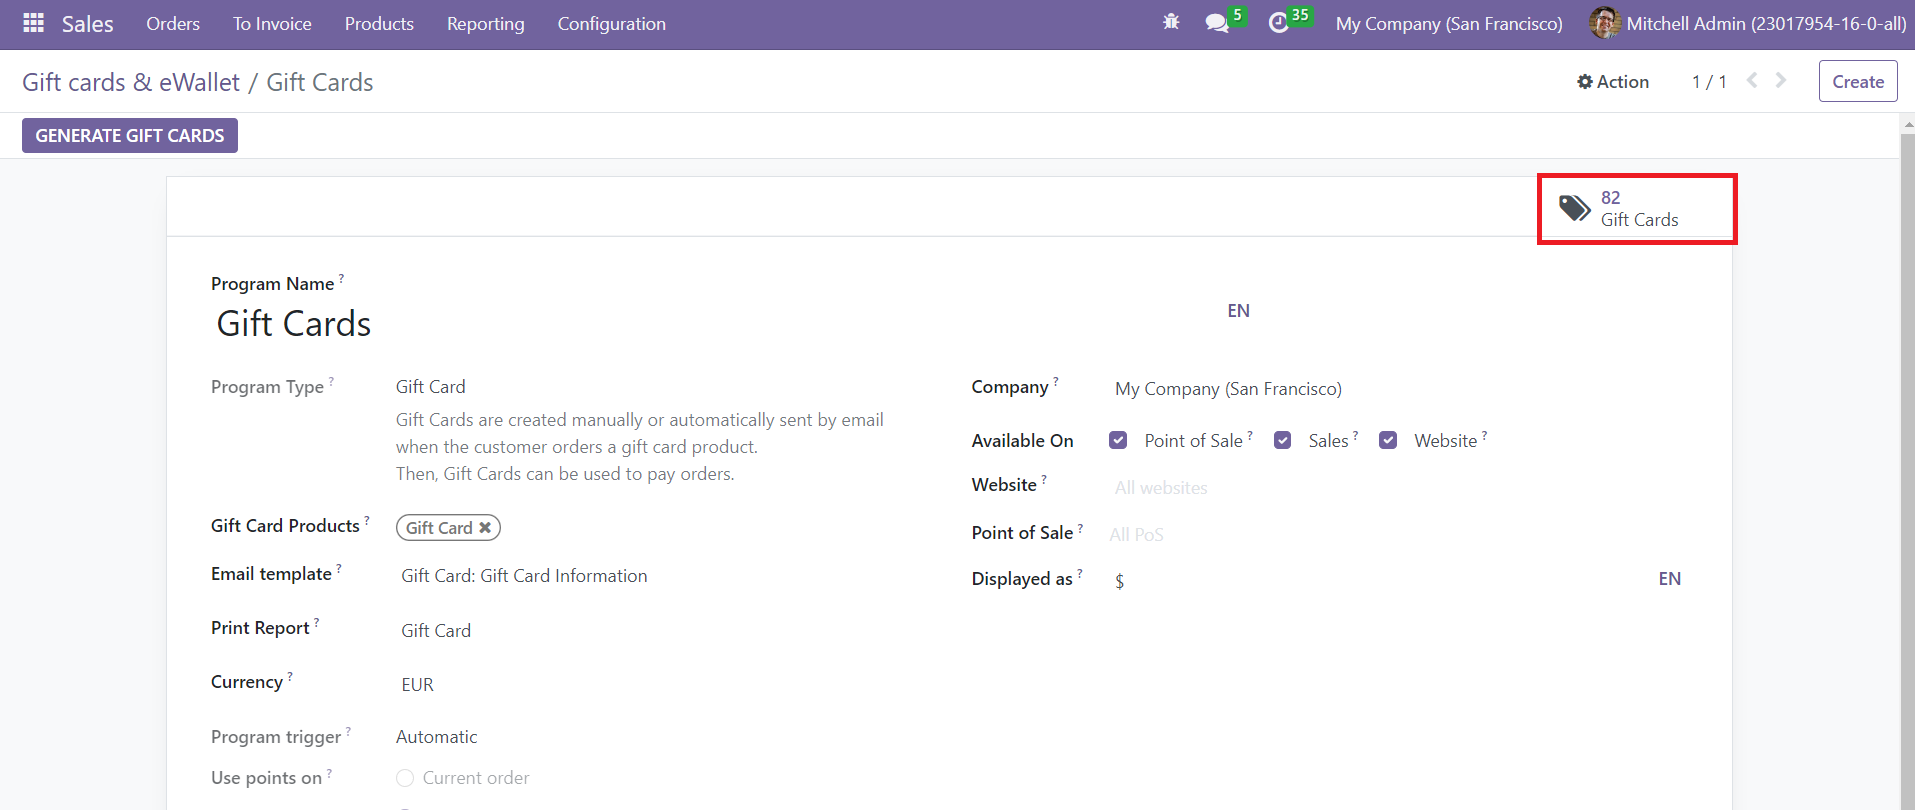
It will show all newly generated gift cards.
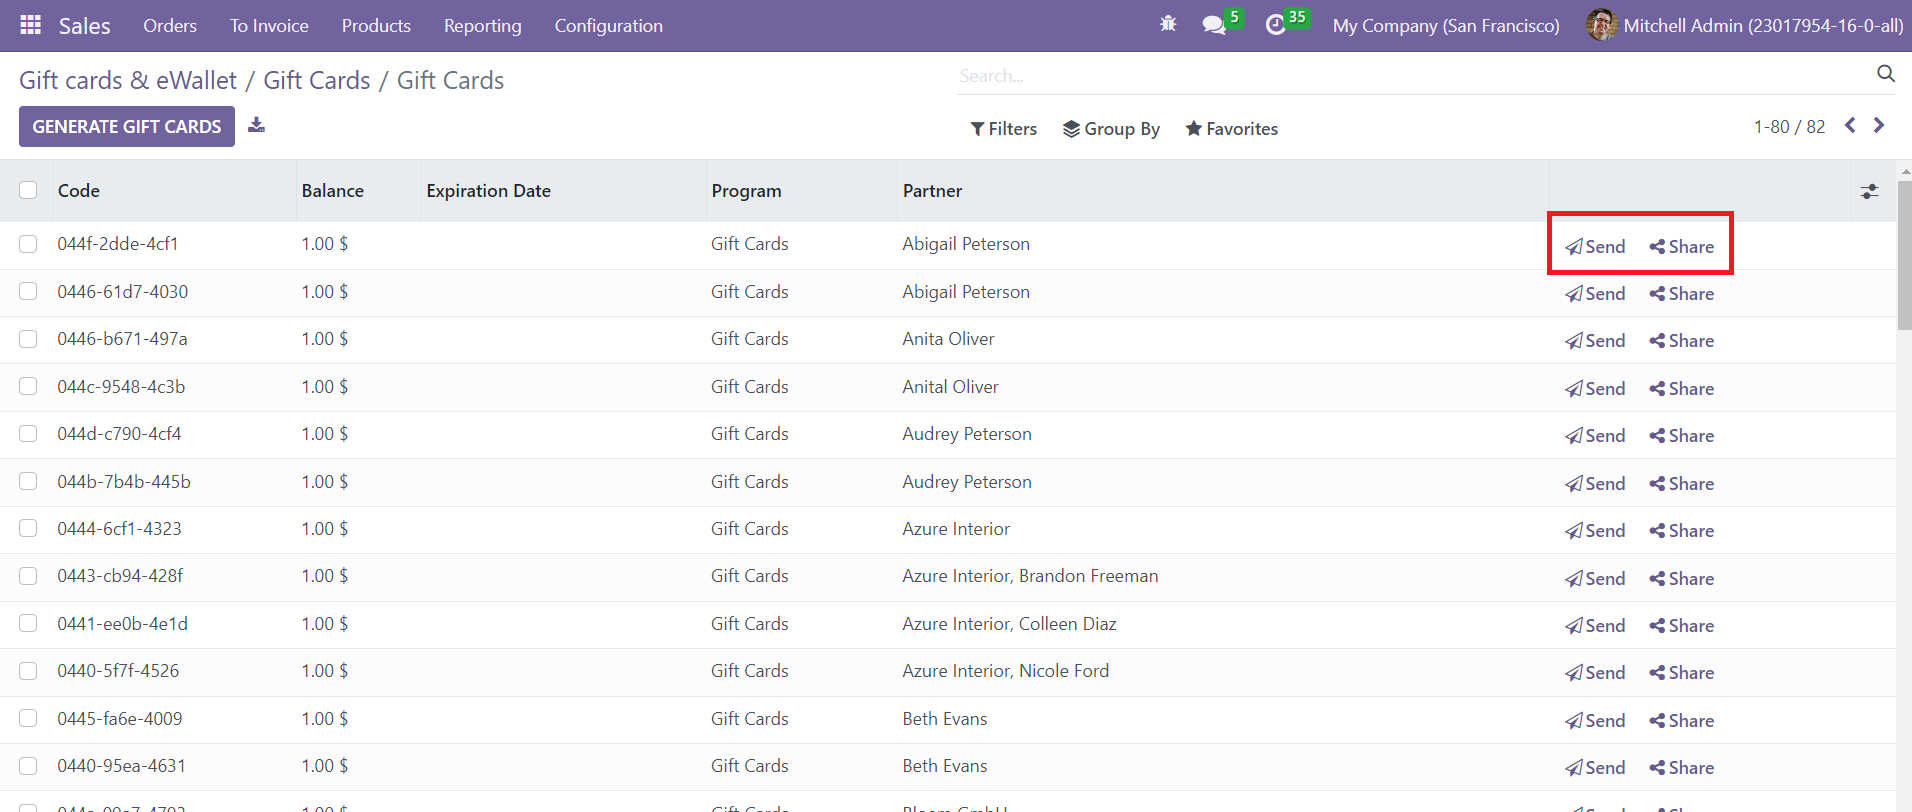
You may share the gift card of numerous platforms by clicking the Share button. You may send the gift card to a specific consumer by clicking the Send option.
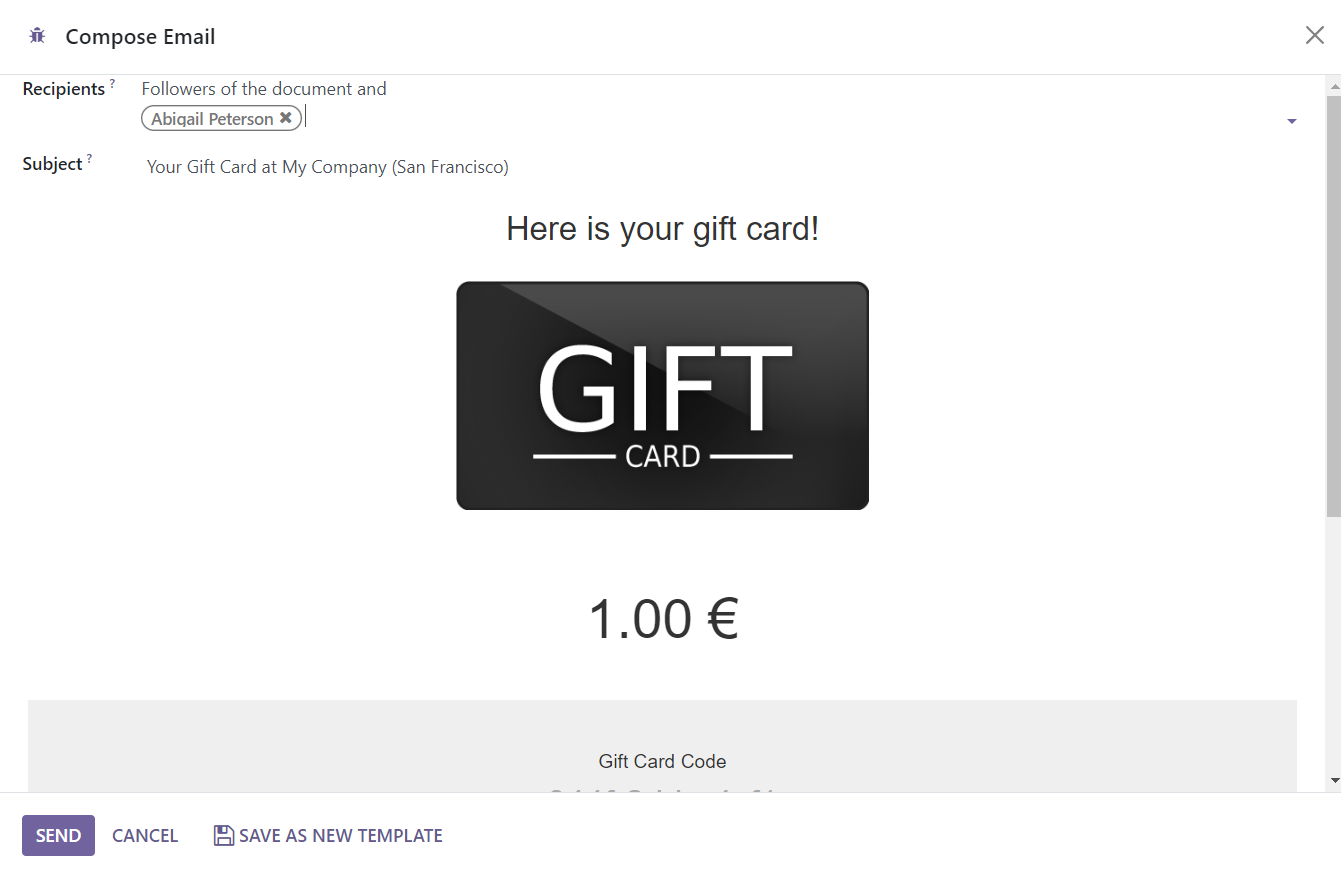
Here, you may add recipients and customize the email's subject. A gift card with a gift card code will be included in this automatically produced email. Send to the specified people by clicking the Send button.
If you wish to make eWallets, you may utilize the same platform as for gift cards, but this time you will be asked to pick the Programme Type as eWallet. Order payments can be made by the consumer using eWallets. The eWallets and the gift card have the same configuration.
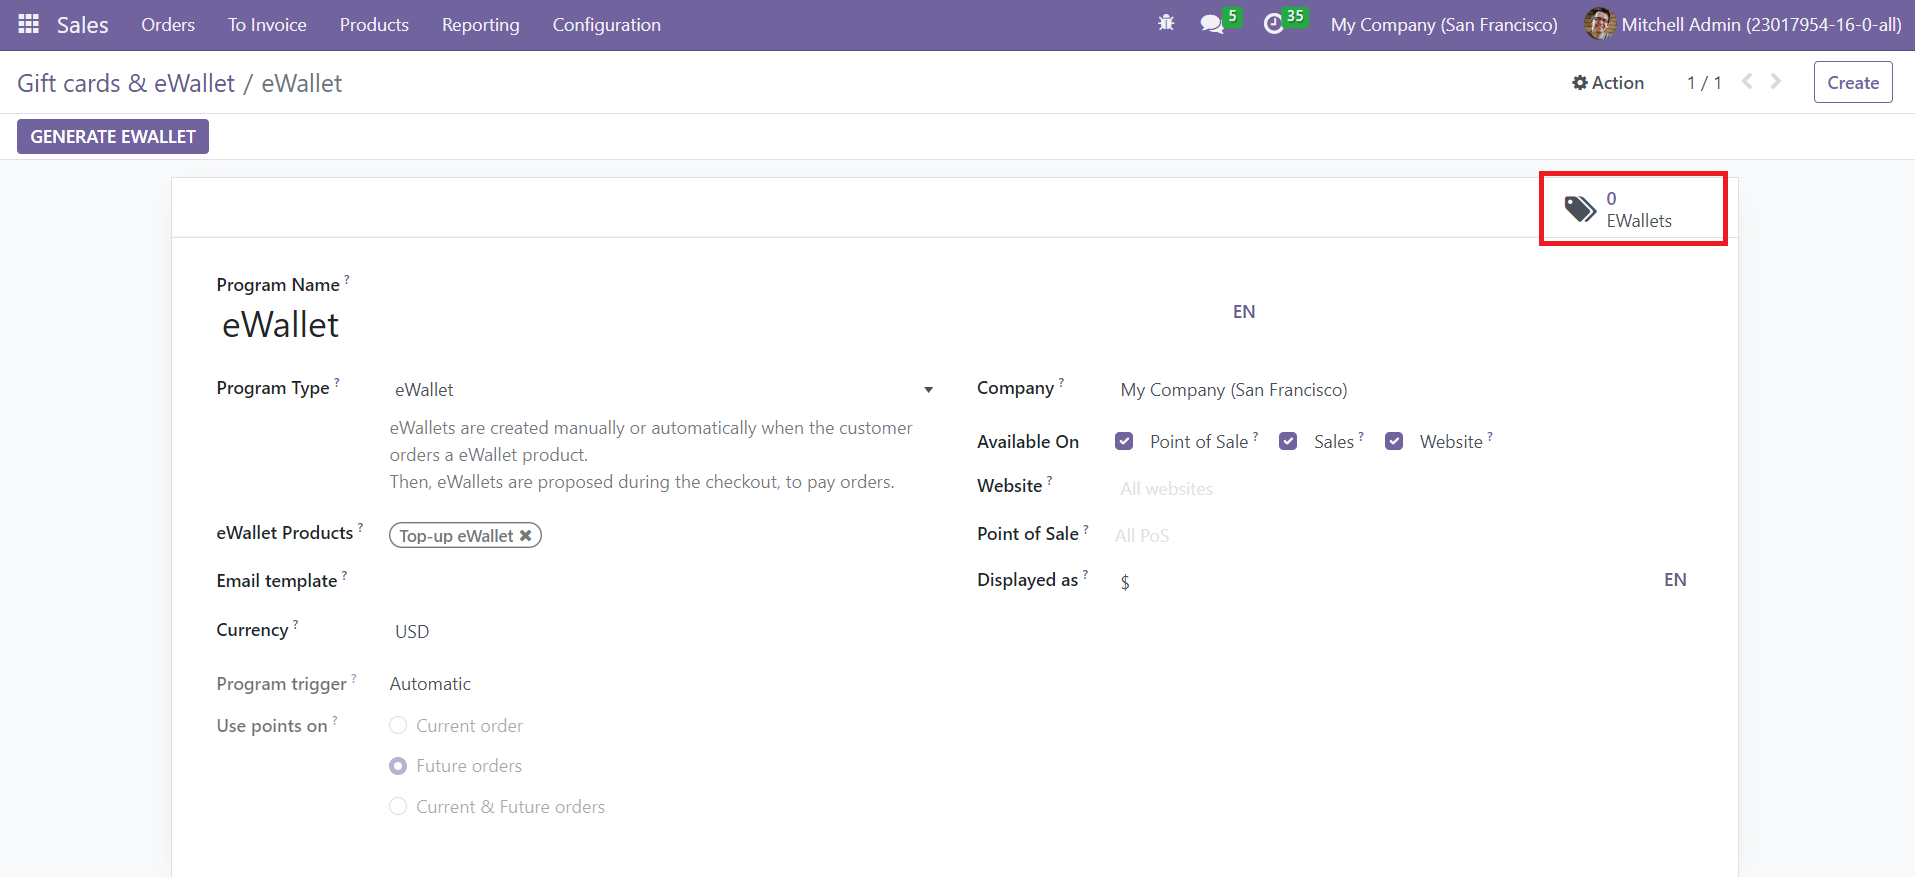
The total eWallets created by this programme may be accessed by using the smart button on the window. The Generate Ewallet button makes it simple to create new eWallets.
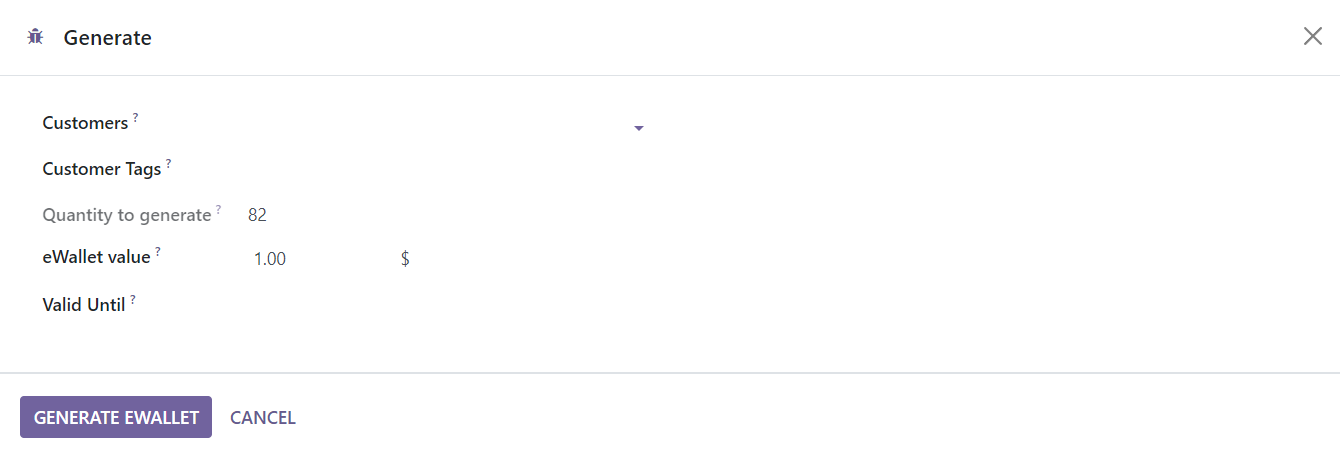
You will see a pop-up box where you may enter Customers, Customer Tags, Quantity to Generate, eWallet Value, and Valid Until in the appropriate areas. To increase sales, you may mail gift cards and eWallets that you've created and promote them on other networks.