Odoo 17 Repair
The Repair Module is a feature that Odoo 17 offers its users to help them retrieve
damaged devices and equipment. For the module to function properly, it is simple
to connect this module to the manufacturing and inventory modules. The Warehouses'
long-term storage environment increases the likelihood that the commodities may
sustain harm. Therefore, you can use the Repair Module in Odoo 17 ERP to fix this
damage issue. By using the repair services, you may monitor the actions at different
phases. This allows you to swap out goods that were partially or totally degraded
during production.
You can make repair orders to swap and repair the deteriorated commodities under
the Repair Module. The repair work can be maintained within the warranty period.
To quickly address the damages, you can take the required actions by utilizing the
Repair Orders. We will go over the features of the Repair Module and its implementation
in this section.
In the Repair Module, it is simple to place Repair Orders for a specific product
that has been fully or partially damaged. You will get a popup with the Repair Orders
list when you pick the Repair Module.

The list of repair orders is displayed in the screenshot in the Kanban, List, Pivot,
and Graphical views, respectively. Details like Repair Reference, Schedule Date,
Product to be fixed, Customer, Delivery Address, Warranty Expiration, Sale Order,
Company, and Repair Order Status are all visible in the window. You can select the
Star button located in the left corner to add each Order to your favorites.
Additionally,
the filters and Group by option are given to you in order to obtain a specific Repair
Order.
You can select the New symbol to create a new Repair Order. You will now be presented
with a window asking for some information.
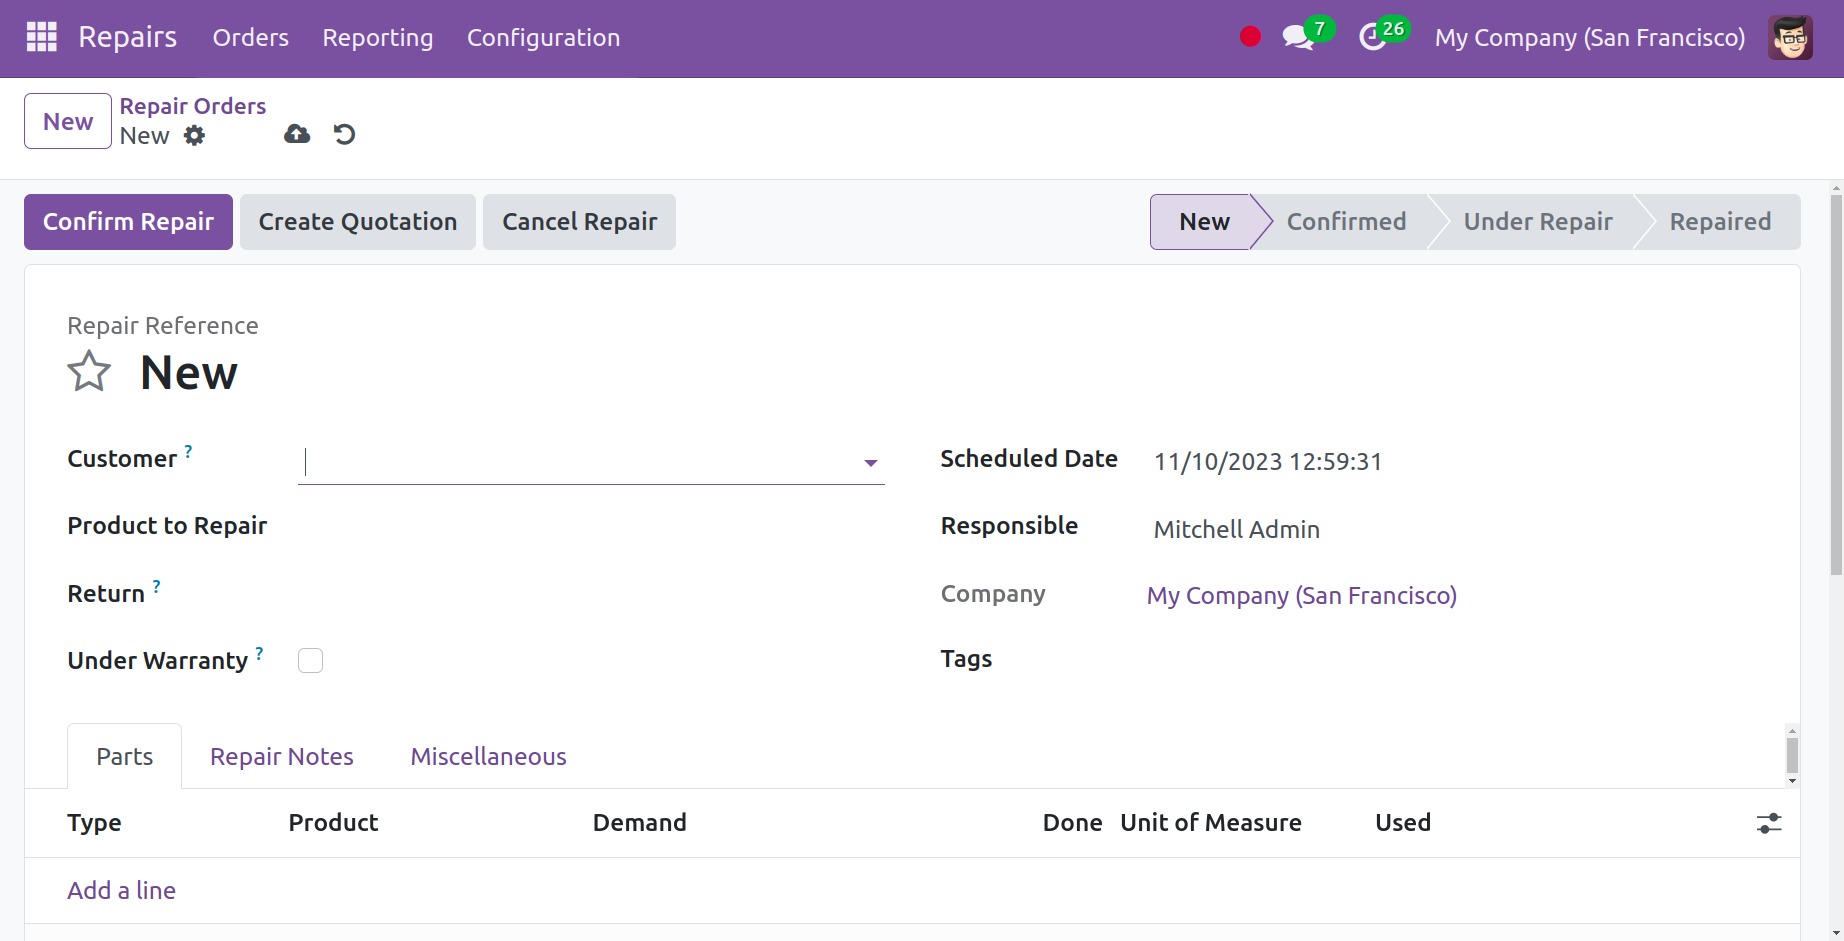
You can enter the product that needs to be repaired in the Product to Repair option,
along with its quantity. Mention the customer to whom the order is delivered, and
an invoice is sent in the Customer area. The accountable official is in the designated
area and on the appointed day. Company in their designated place, along with the
Warranty Expiration. If the product has a warranty one can enable, this will not
add any charge of repair in the invoice, since it is under warranty. Additionally,
an appropriate tag can be added using the Tags option.
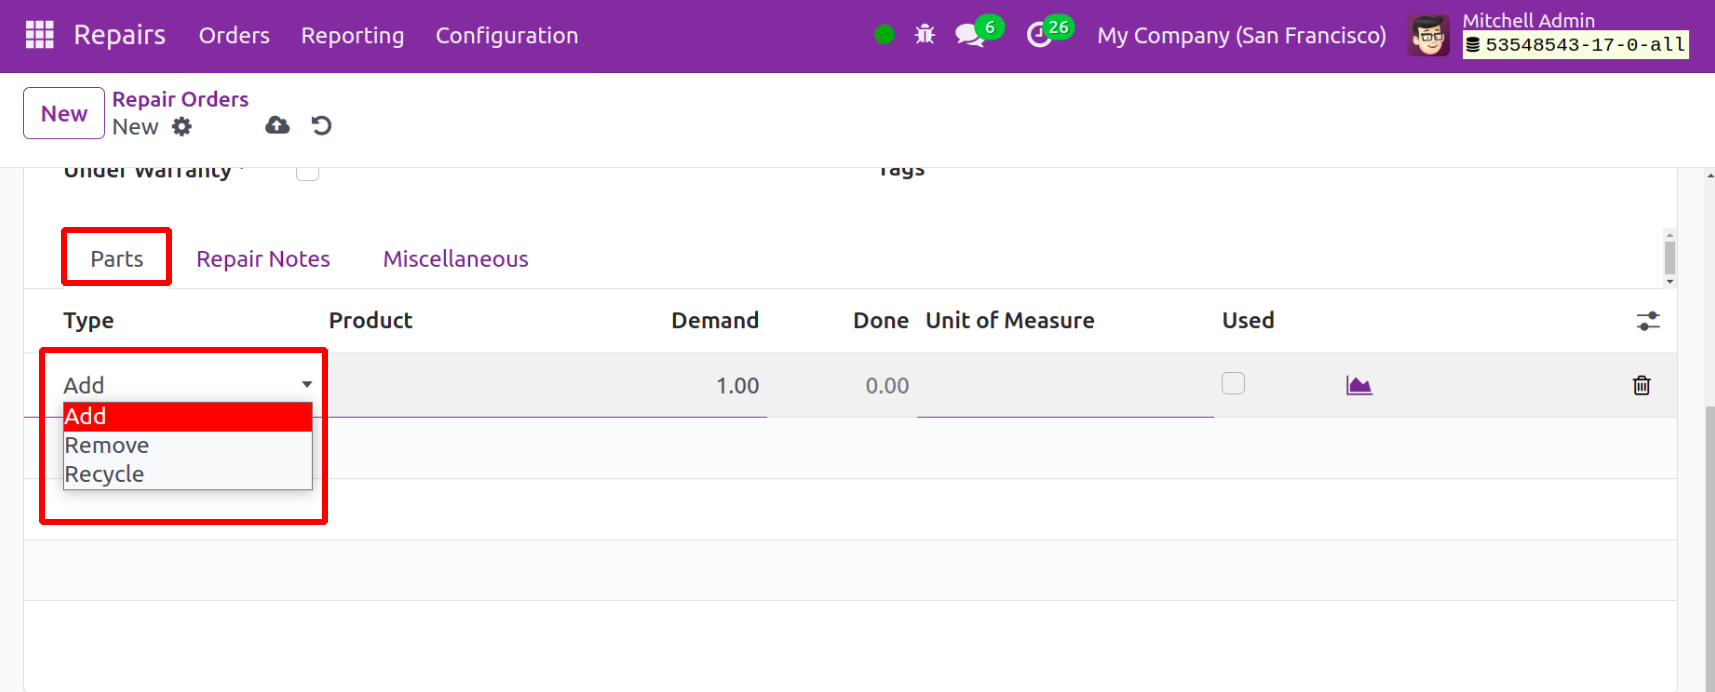
As you can see below, you can list the product parts that need to be Add, Remove
or Recycle in order to fix the problem under the Parts tab. They can Name the product,
Type, Description, Quantity, Units of Measure, Unit Price, and Taxes, in that order,
with the aid of the Add a Line feature.
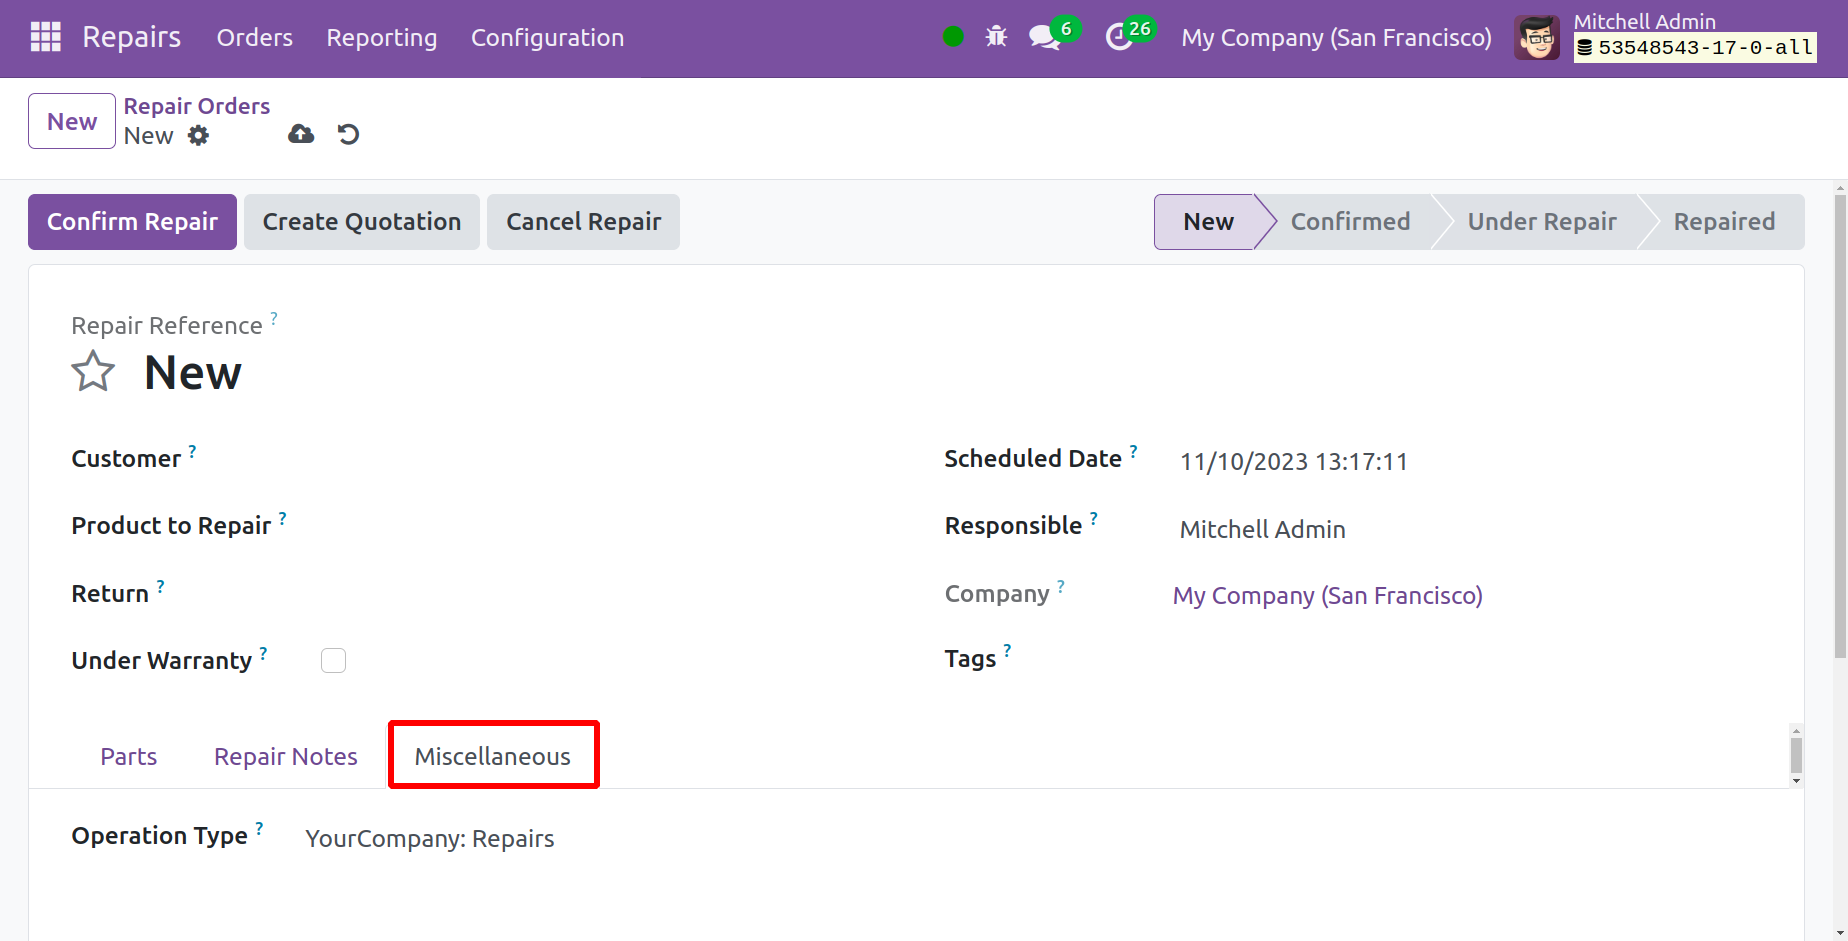
You can now provide a description and additional instructions for mending the particular
commodity beneath the Repair Notes Tab.
The cost of the repair may vary depending on the extent of the product's damage.
In certain instances, you will have to supply the component parts of the goods and
alert the client to the additional cost when generating an invoice.
Confirm the order by clicking the Confirm Repair button placed on the upper left
corner of the window.
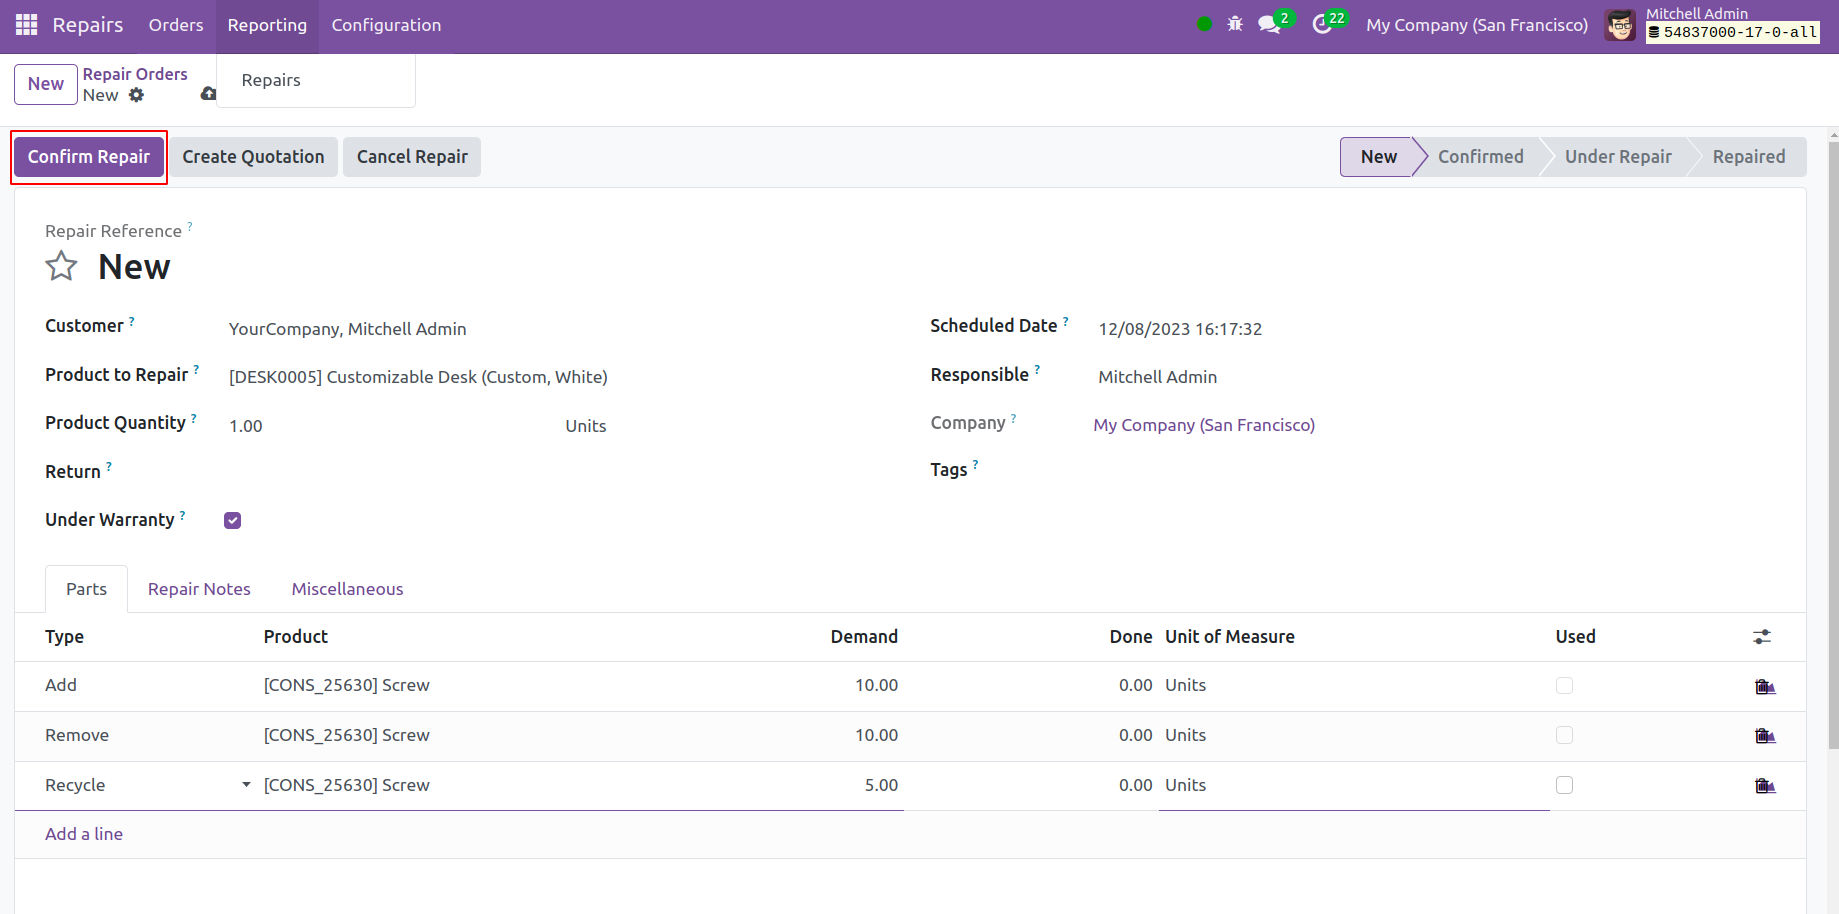
When you choose this Confirm Repair option, the quotation status changes to Confirmed
and the order is confirmed.
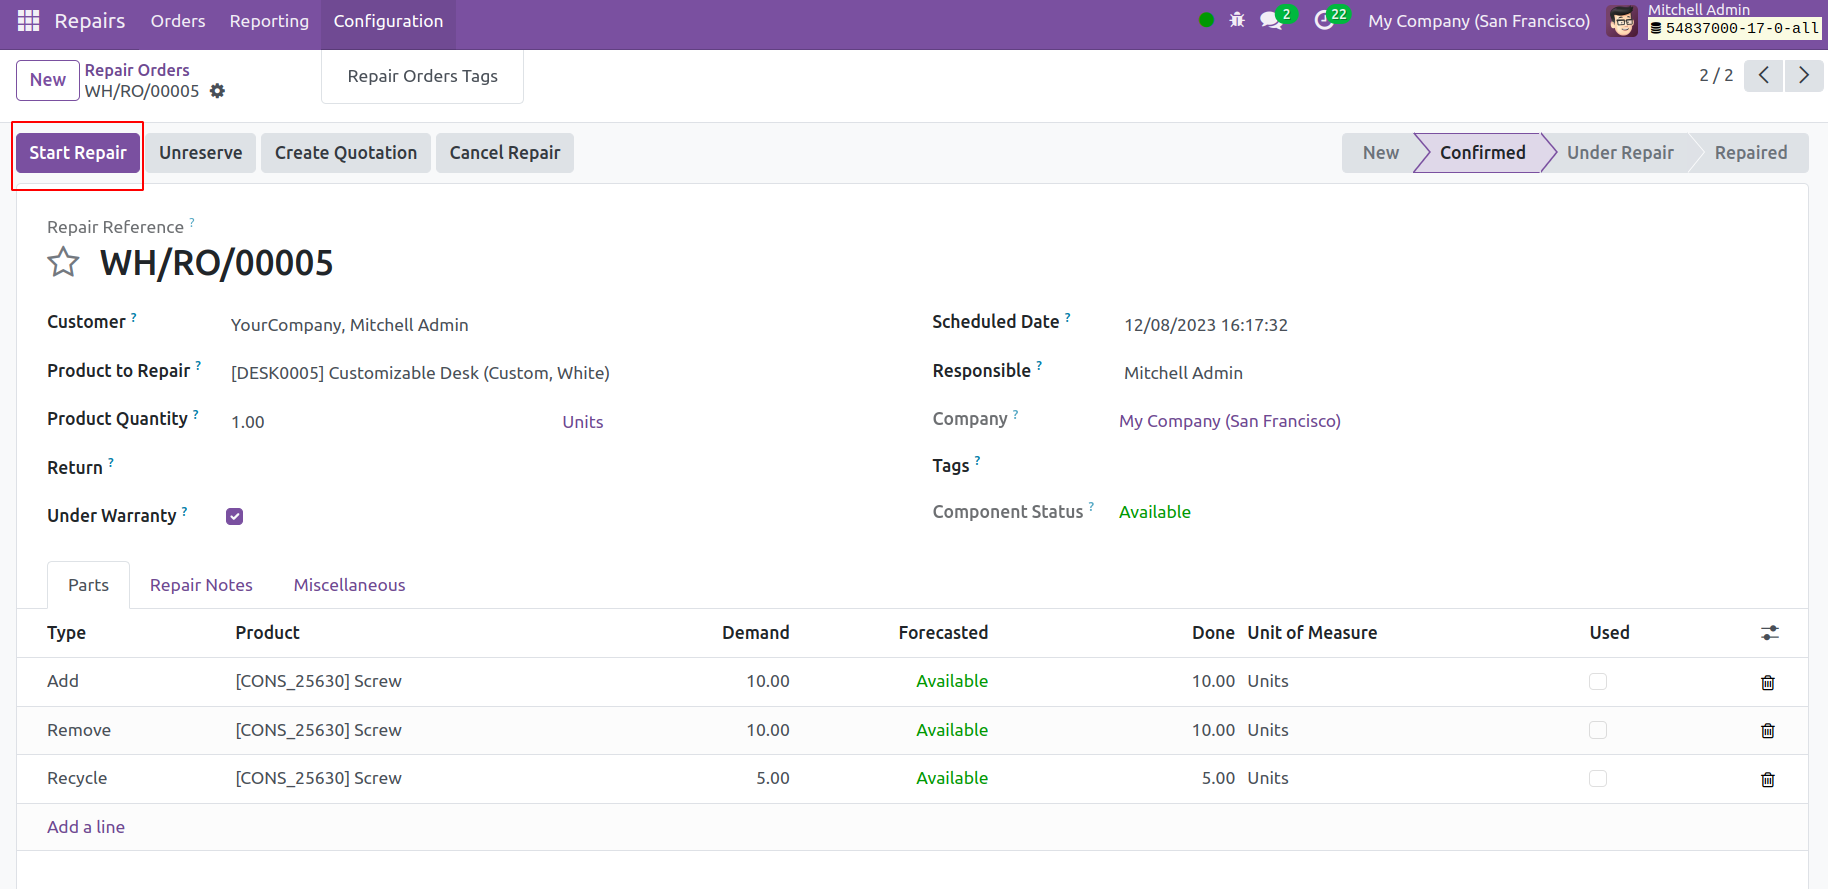
Select the "Start Repair" option to begin the repair. The product repair will be
canceled when the Cancel Repair option is selected. The status will read "Under
Repair" if you have selected the "start repair" option.
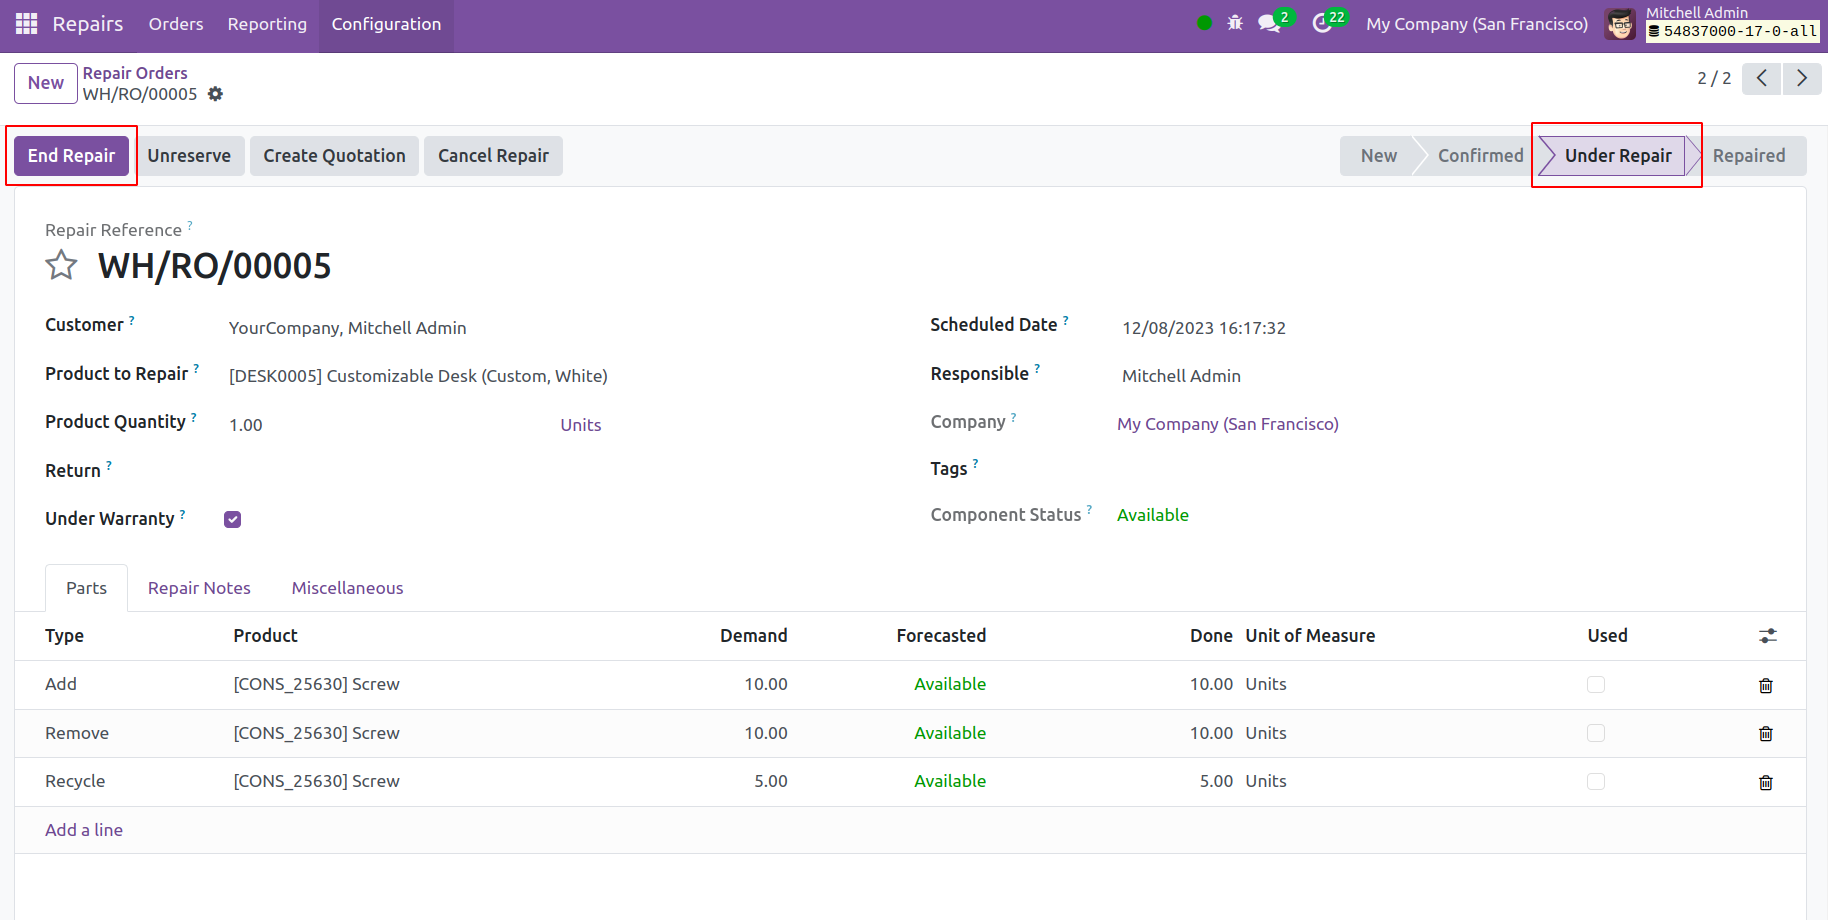
The status will show as Repaired once the reporting is finished, so select the End
Repair option to end the procedure.
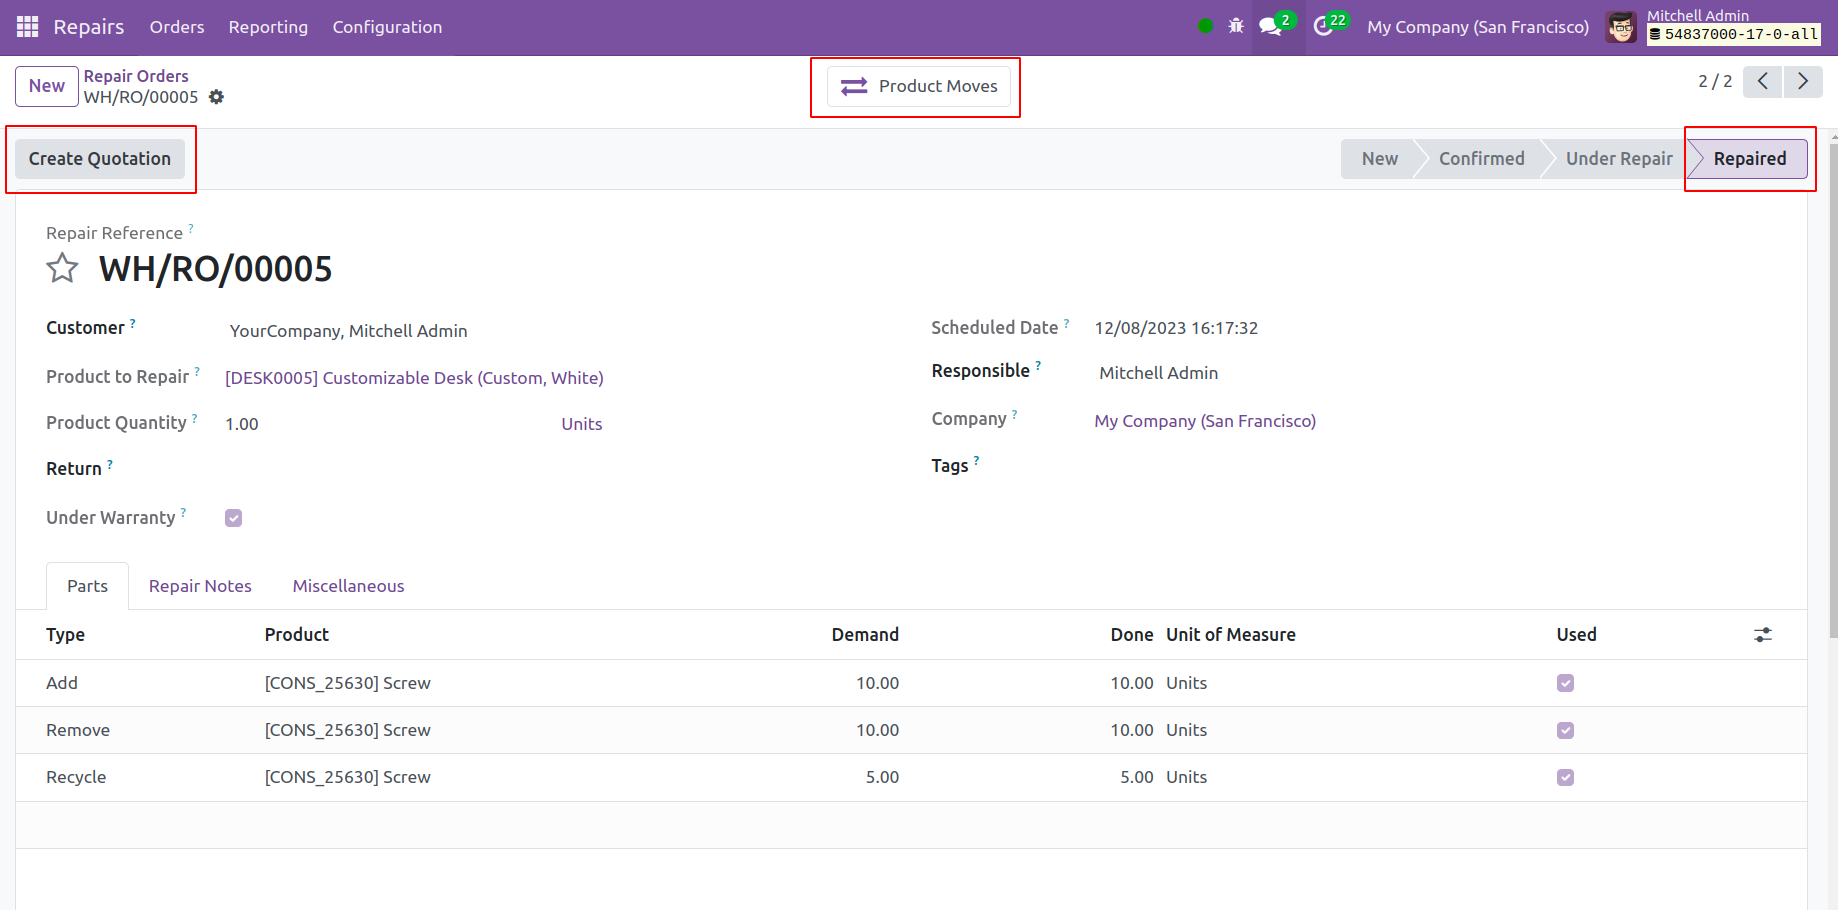
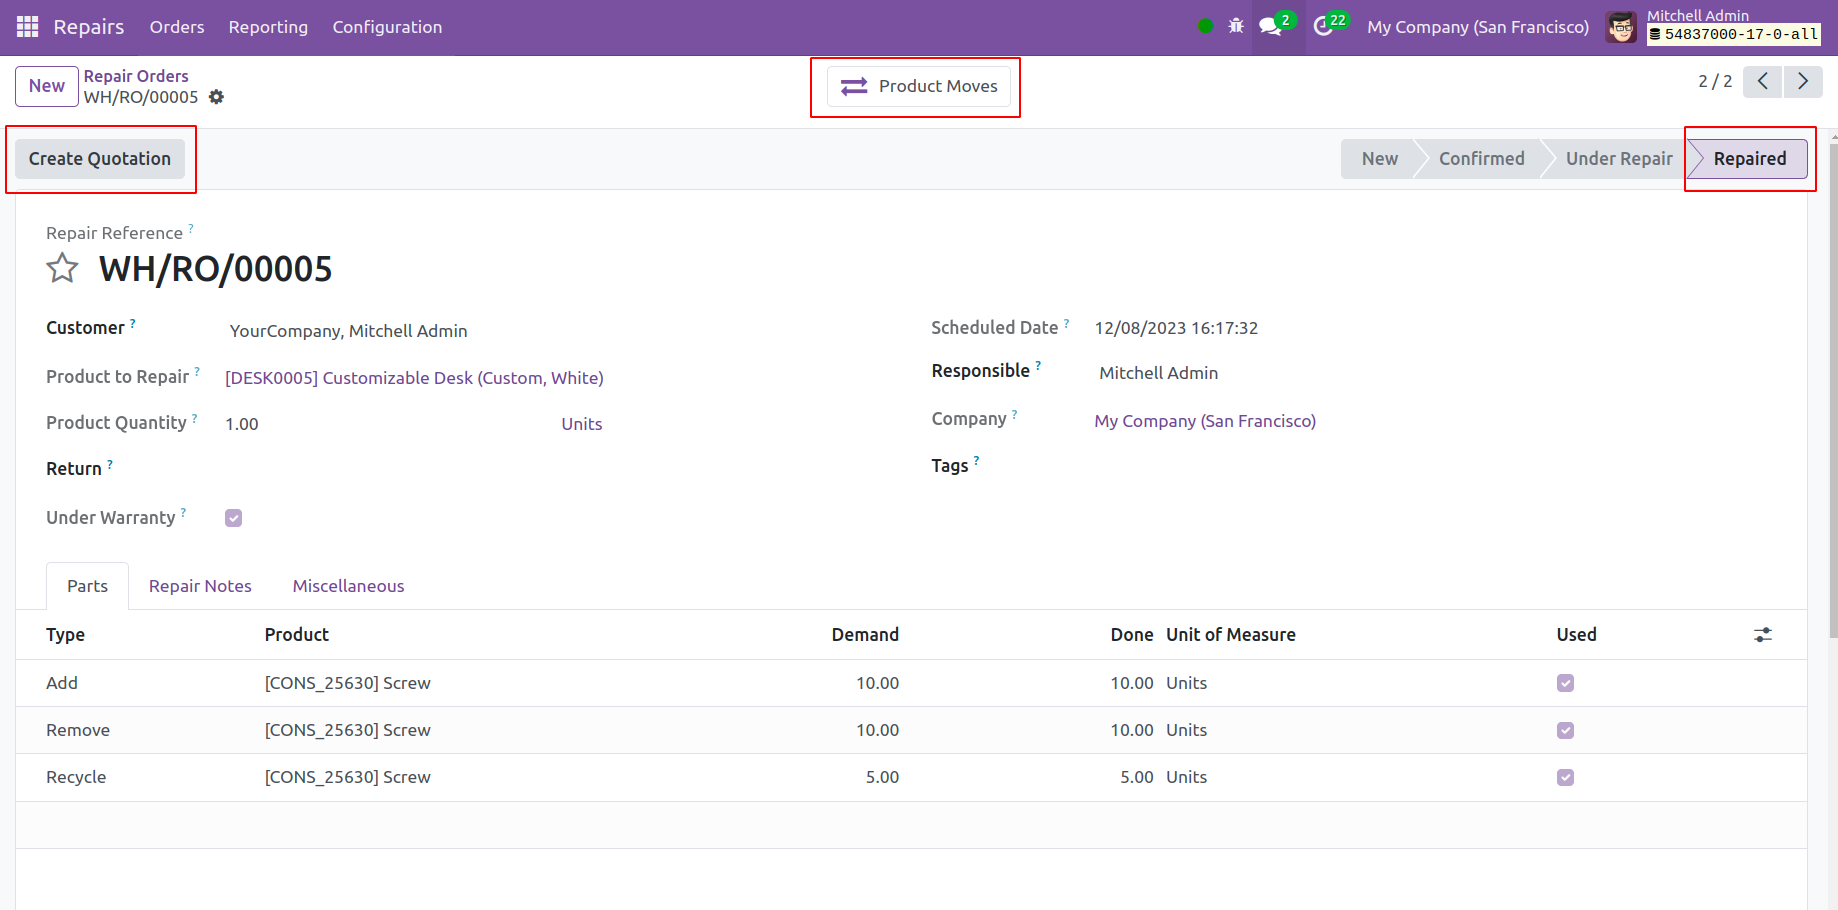
The Smart tab Product moves shows the movement of goods during repair.

After completing the Repair, the status changed to Repaired. Then a Create Quotation
button will appear there and create a quotation for the repair order.
Repair order from Quotation
It's possible to create a repair order directly from a quotation. A new field was
introduced in the product section. So let's open the product.
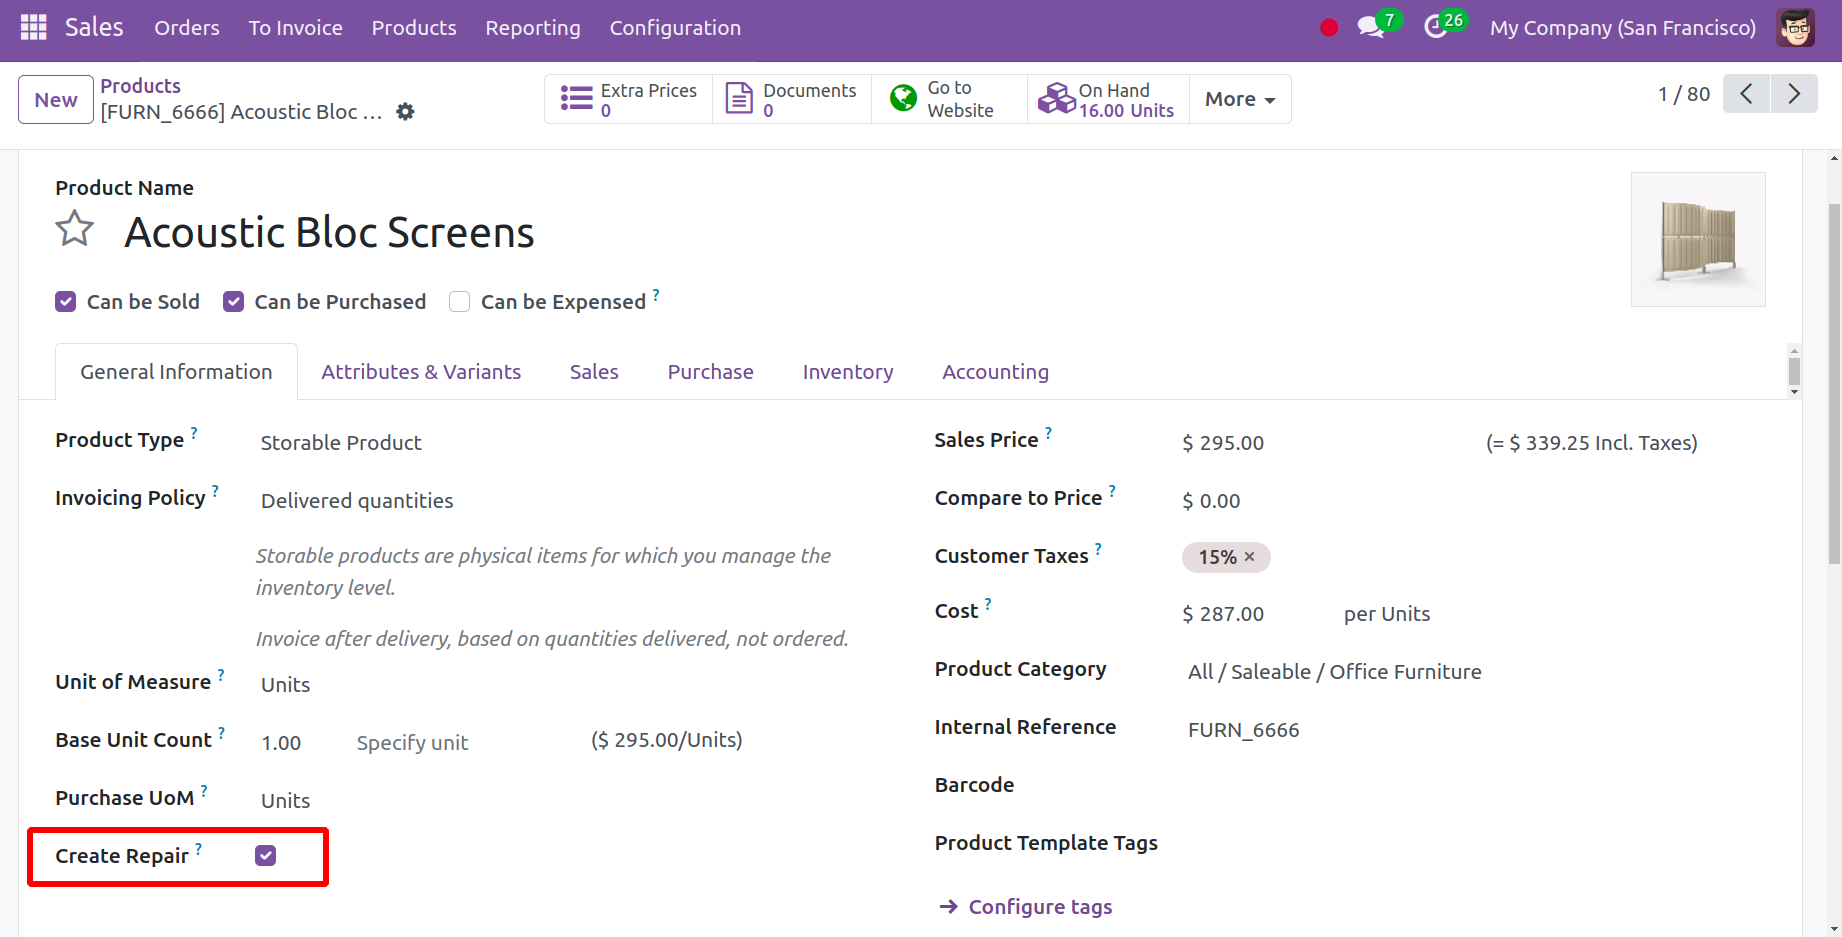
If the Create Repair checkbox is enabled, it helps to create a linked repair order
on the sales order confirmation of this product.
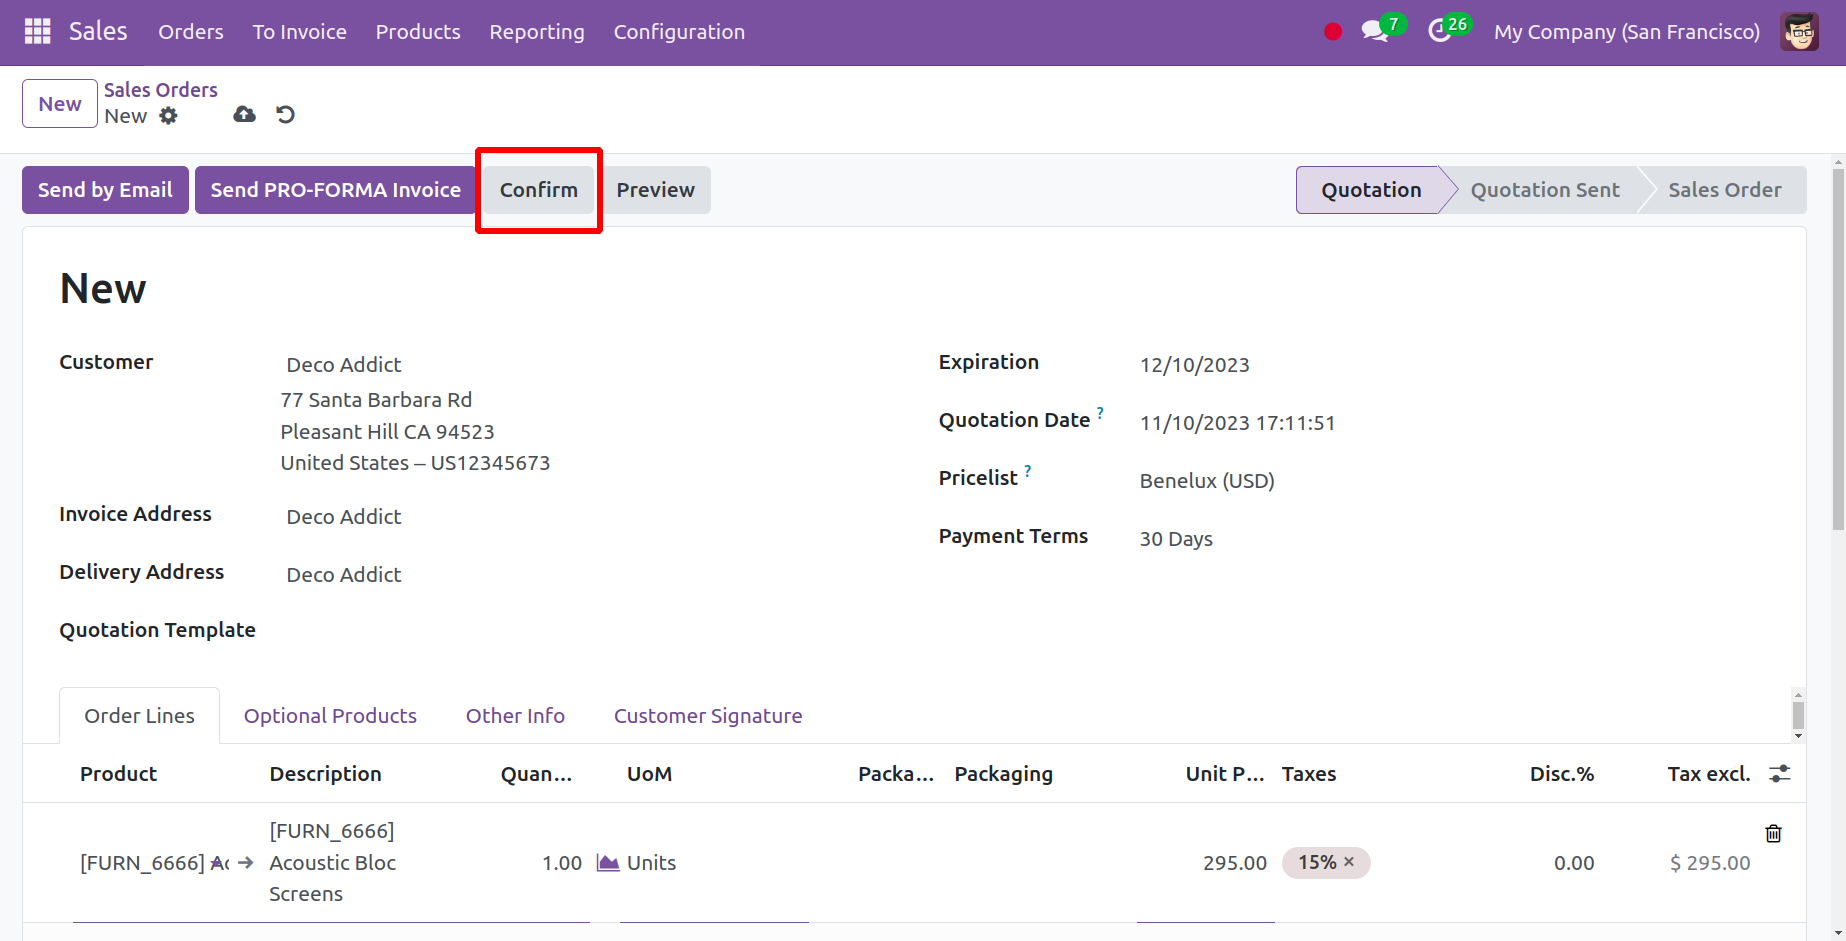
Create a quotation and choose the product inside the order line. Then click on the
Confirm button.
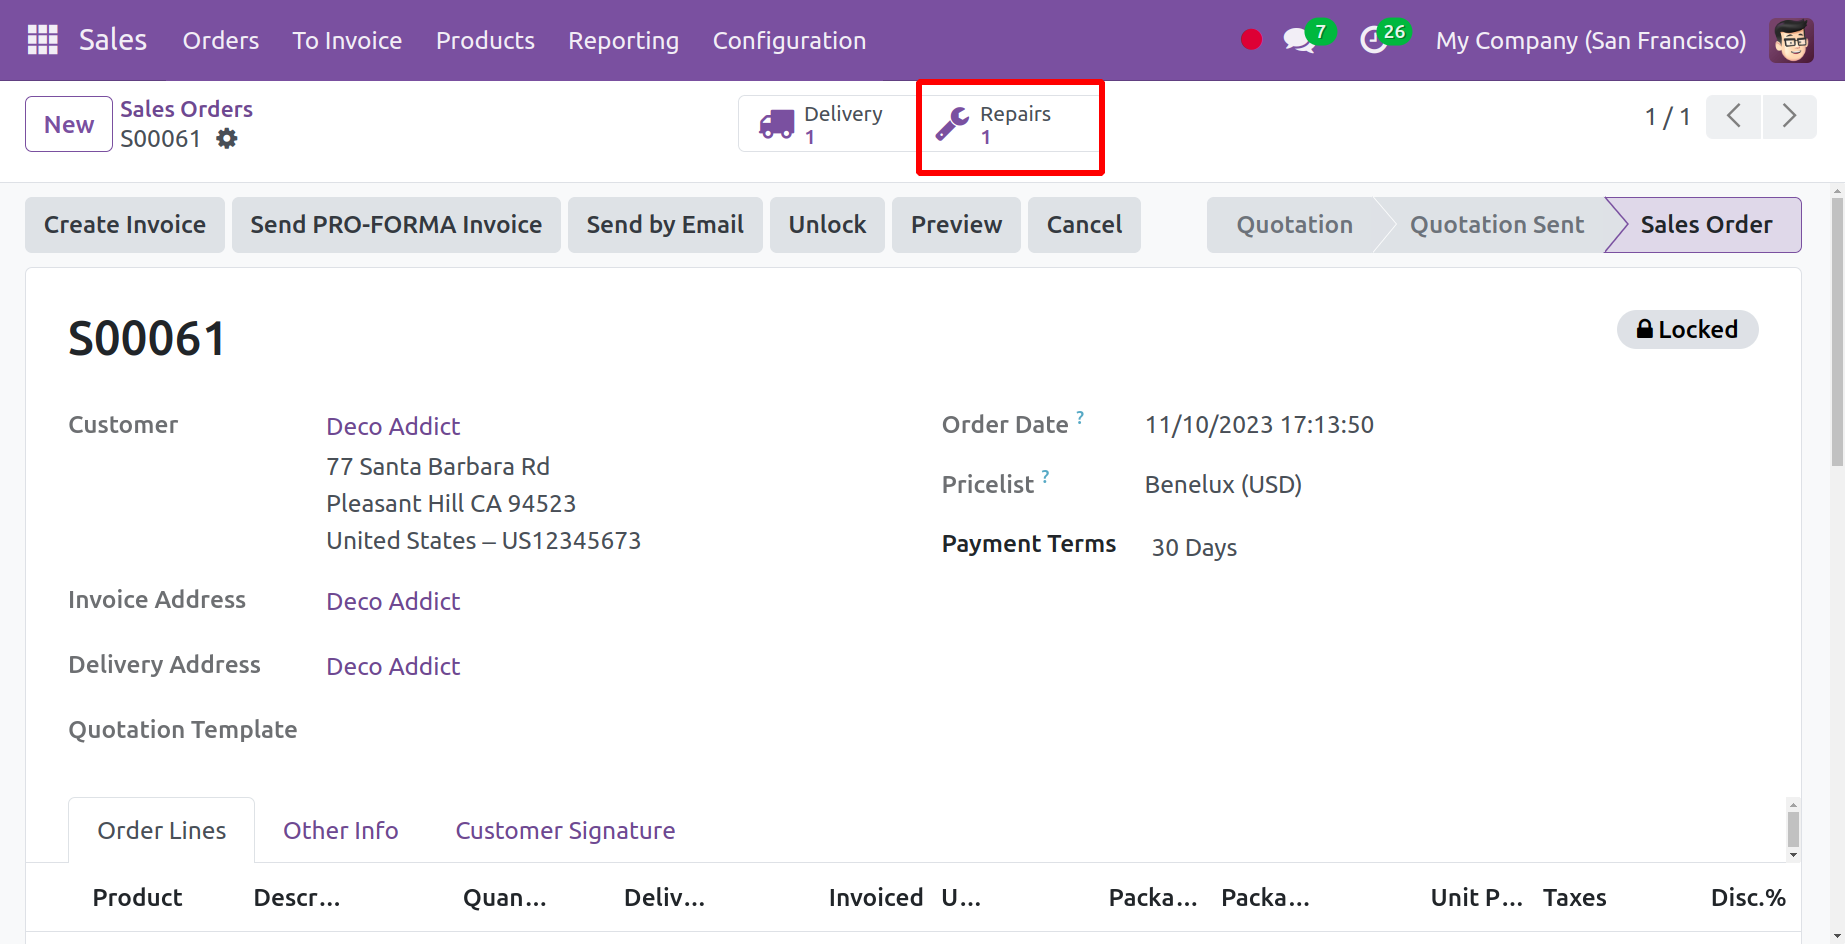
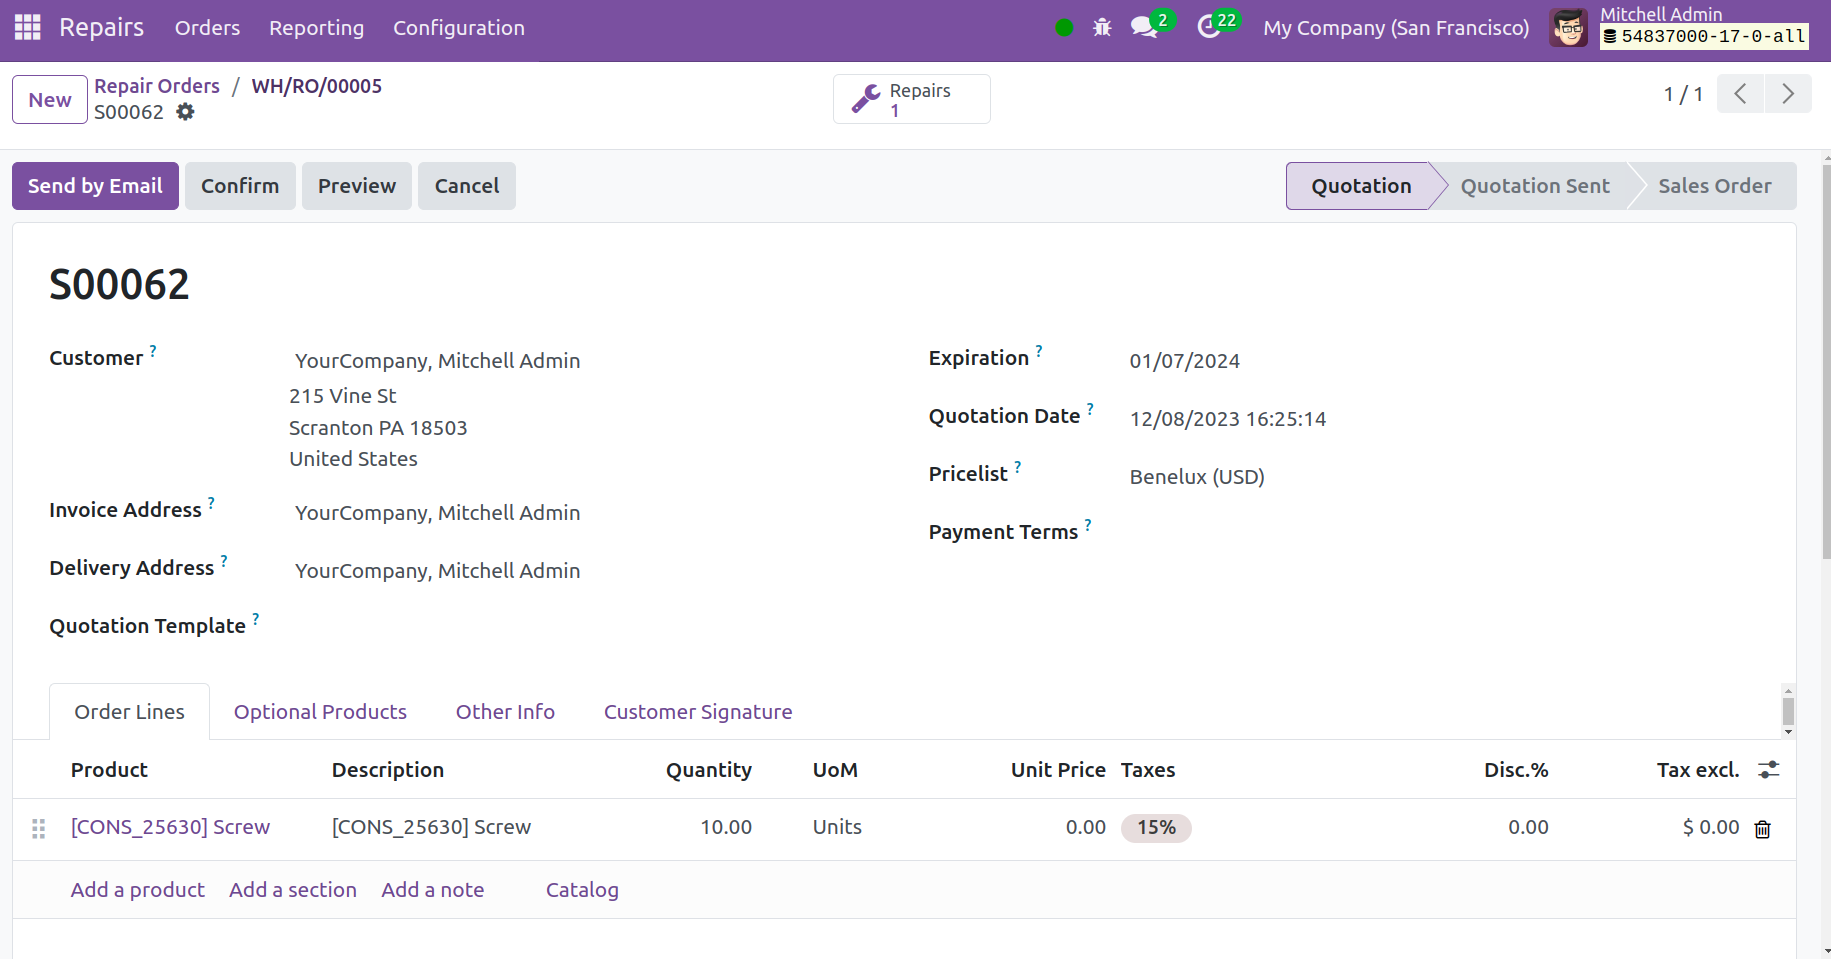
Then click on the Confirm button. Then a smart tab named Repairs is created along
with Delivery.
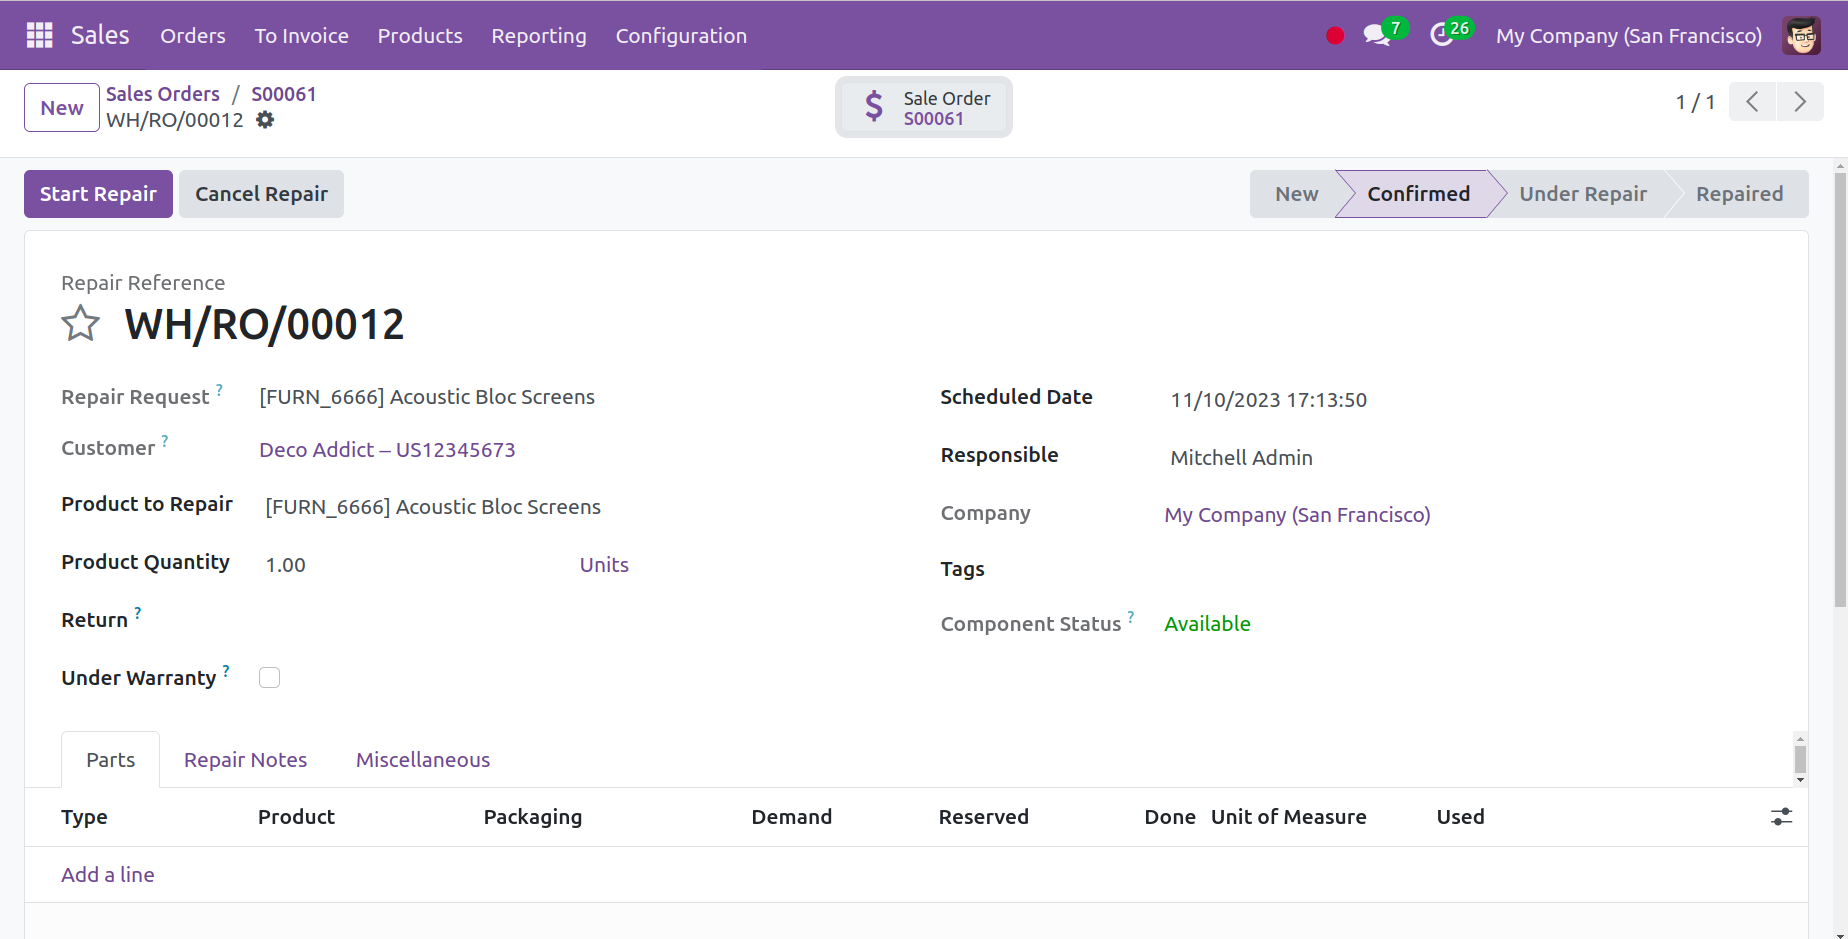
Open the Repairs tab, which contains a new repair order for the product.
Repair Orders Tags
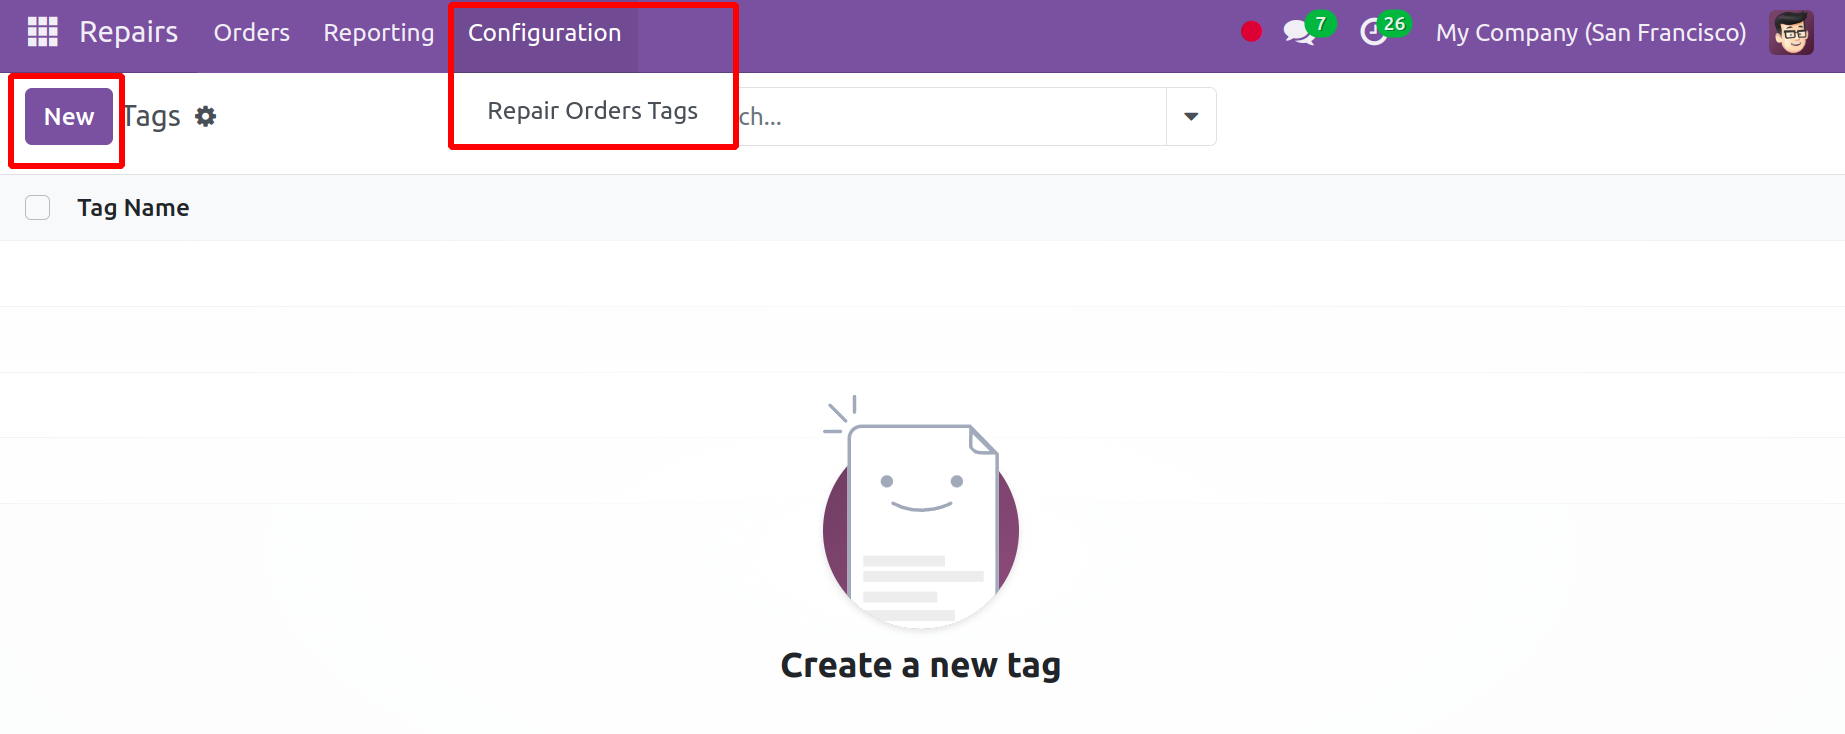
You will find the Repair Order Tags option in the Configuration menu. The New icon
in this box is all you need to add new tags to the repair orders.
As seen in the figure below, adding tags is simple in the creation window.

It is now possible to incorporate pre-configured tags when creating a repair order.
Reporting
Reporting is another tab in the Repair Module. This Tab assists you in understanding
the repair's state and producing an independent report. The reporting option can
be used to study the repair process. To help with the necessary modifications in
the works, the reporting feature will be quite beneficial.
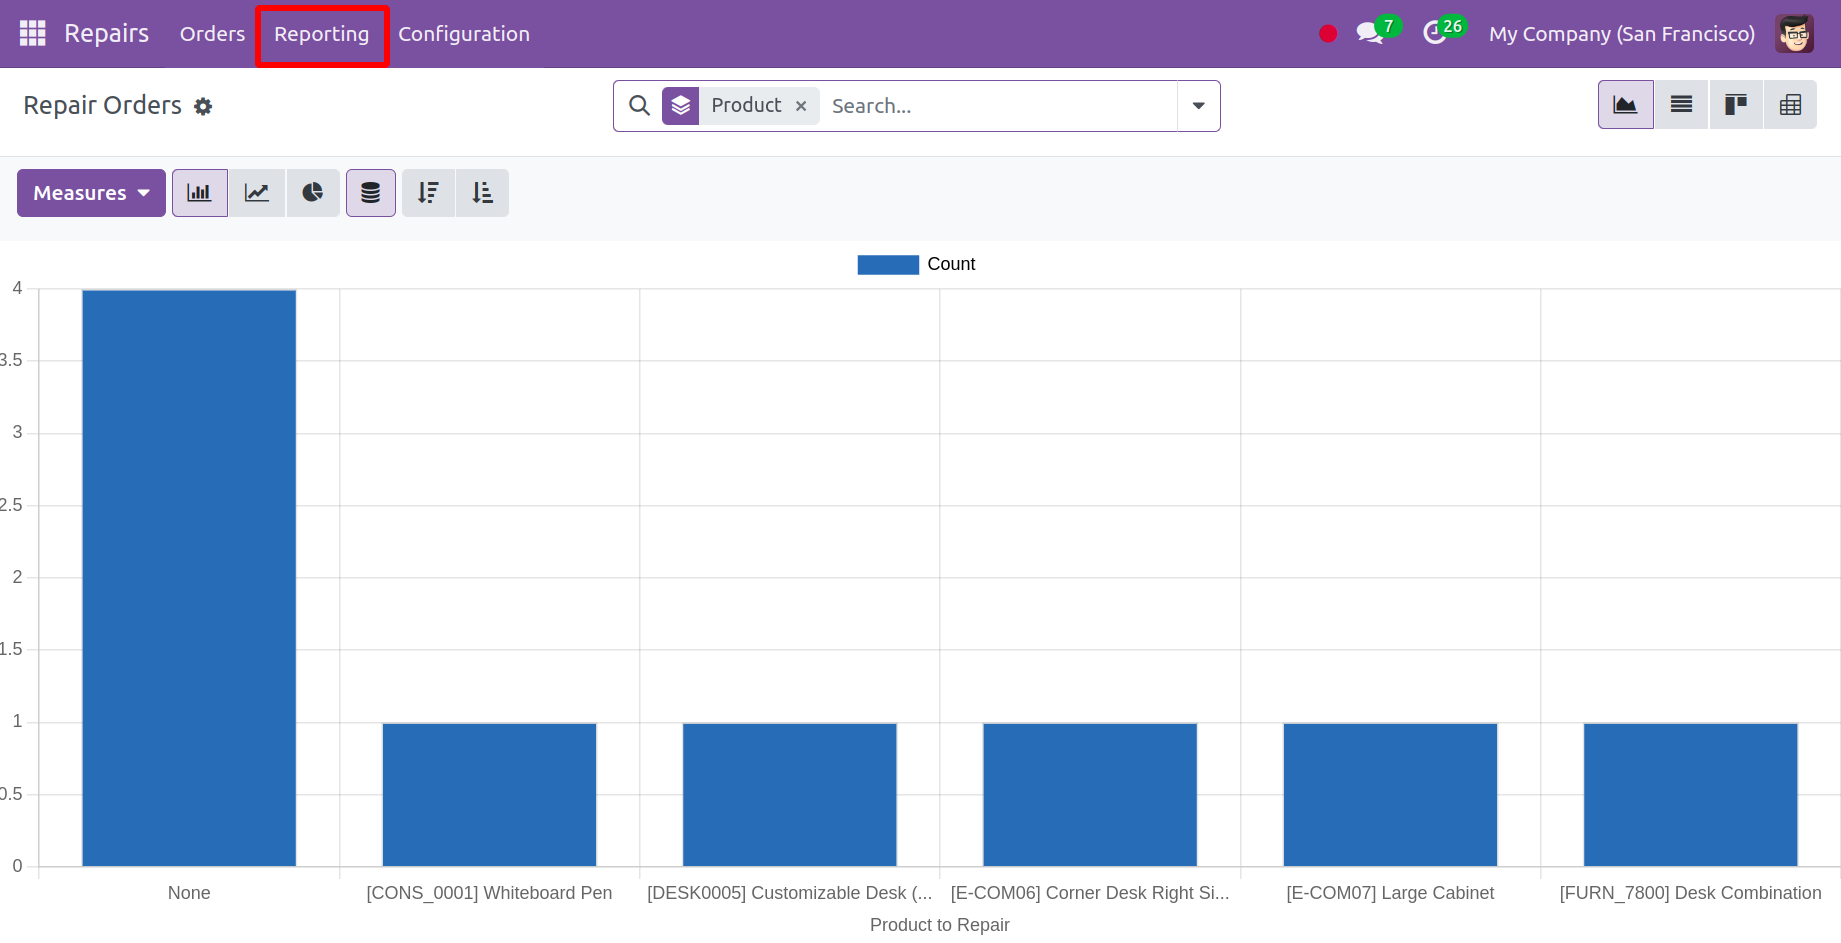
Reports that have previously been configured are shown in a graphical manner, as
shown in this image. You can use the Filters and Measures option to make the reports
better. You will find options like Product Quantity, Taxes, Total, and Untaxed Amount
under the Measures icon.
The Kanban, List, and Pivot views also display the window. It can also be seen in
Pie, Bar, and Line chart form in the graphical view, as in the example image. One
axis shows the product to be repaired, while the other axis counts.
The Kanban, List, and Pivot views also display the window. It can also be seen in
Pie, Bar, and Line chart form in the graphical view, as in the example image. One
axis shows the product to be repaired, while the other axis counts.
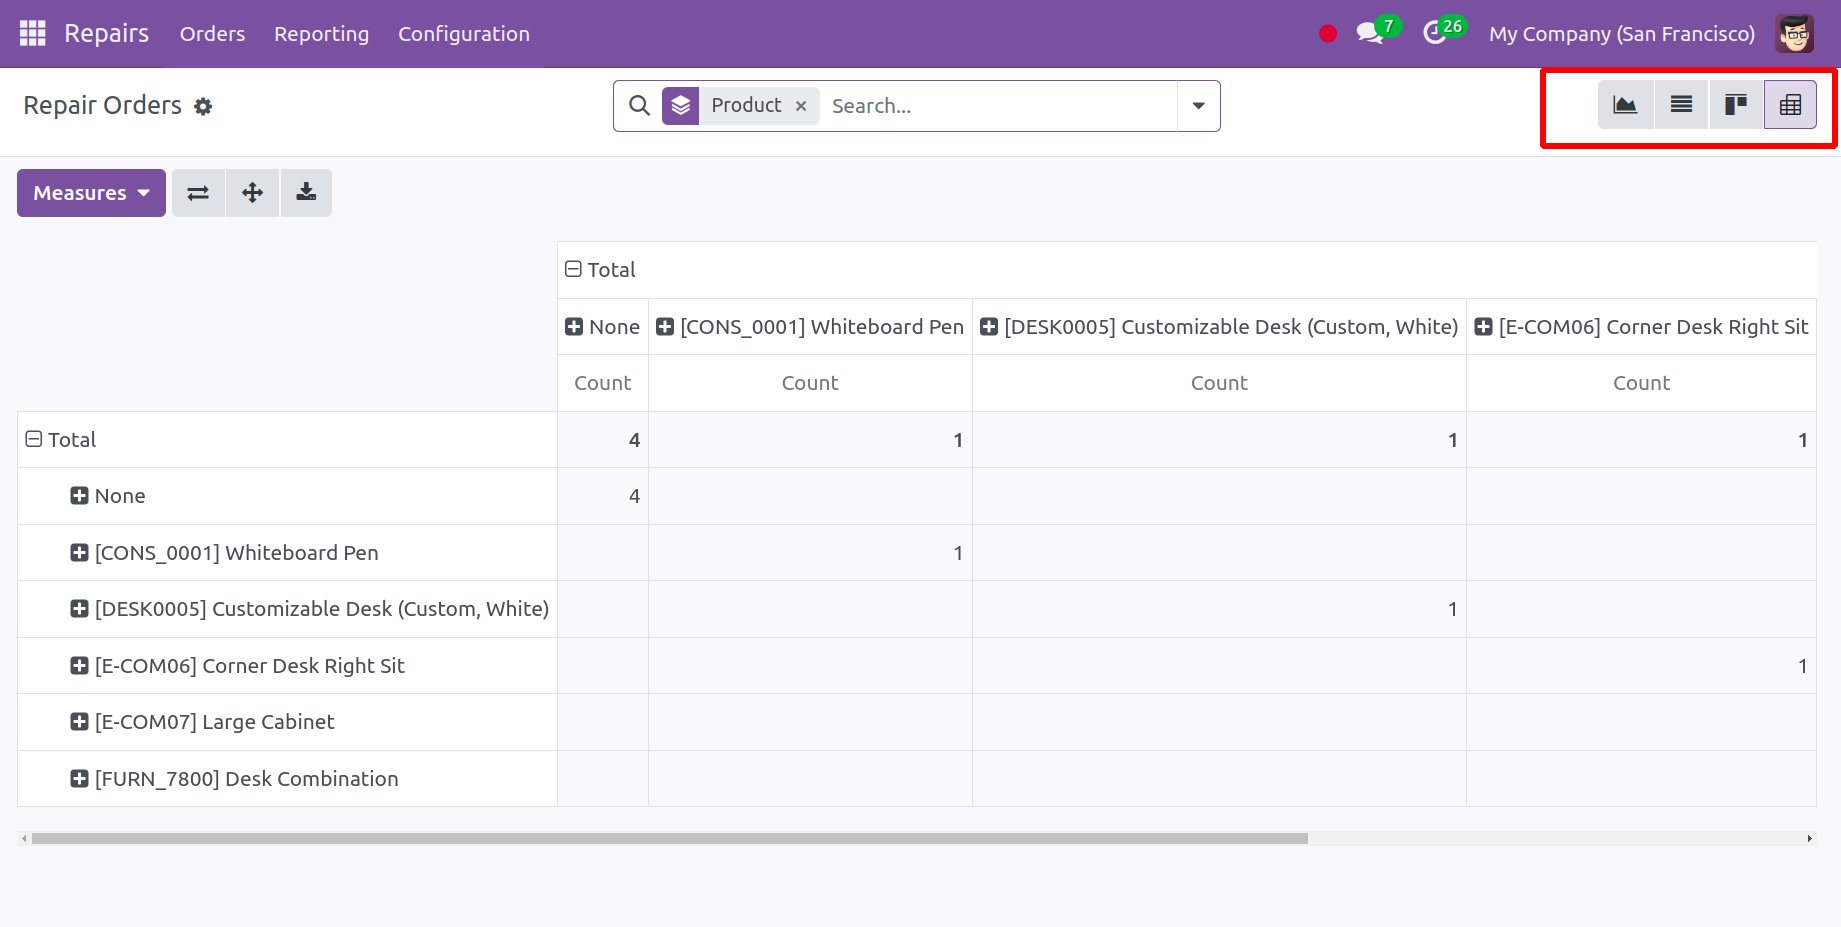
You may see the analytical data regarding the repair order in the pivot view. You
will also find several metrics on this page. As you can see, Odoo 17 Repair helps
you with the process of creating and overseeing repair orders for all broken goods.
Additionally, you may quickly sort through all of the product damages with this
module.