Vendor-bills
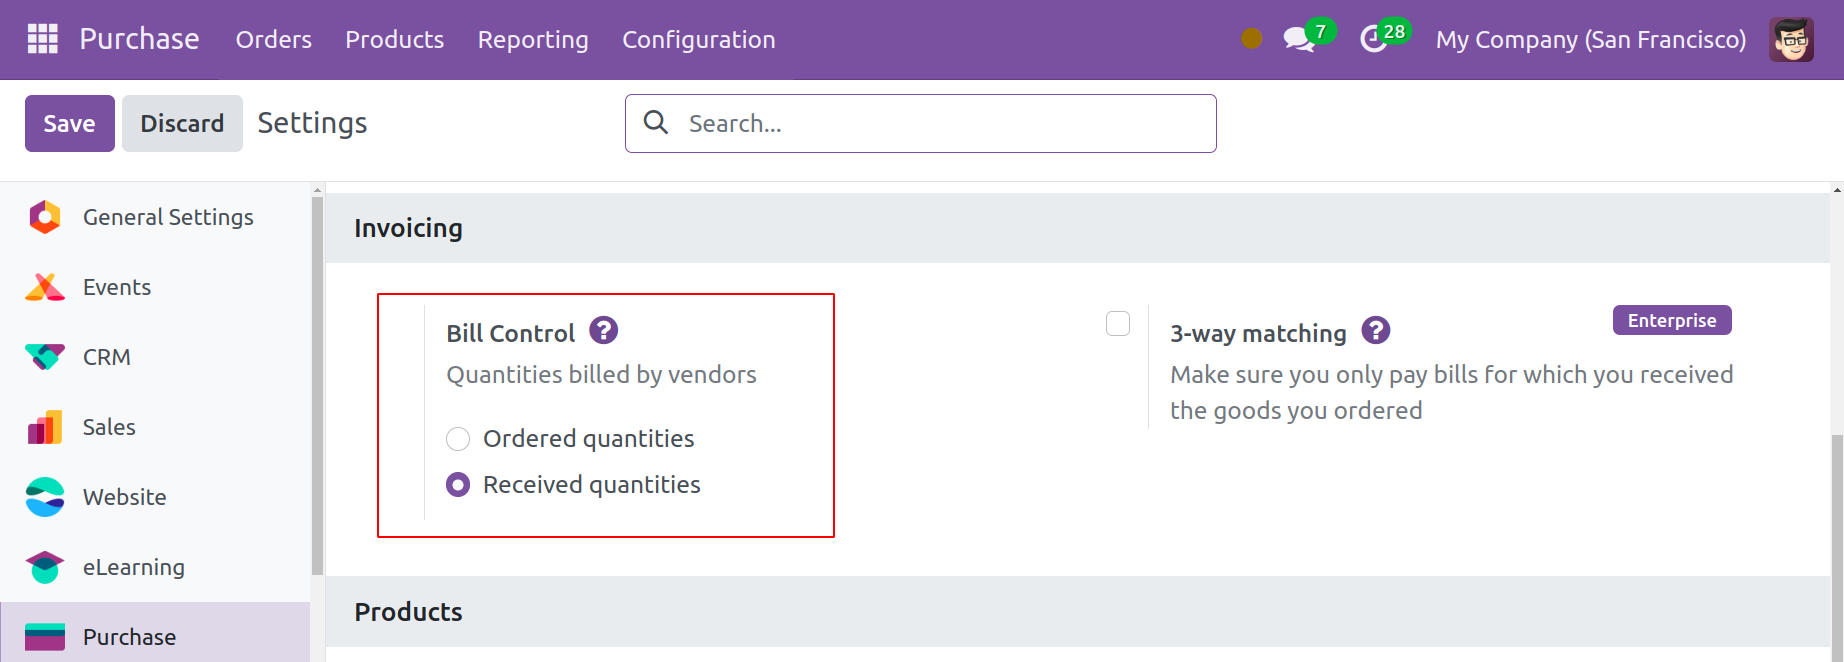
You can create vendor bills in Odoo based on delivered and ordered quantities in accordance with business regulations. To set the Bill Control policies, navigate to the Purchase module's Settings menu.

The Bill Control option can be found on the Invoicing tab. This section will assist you in specifying the method for creating purchase invoices. The default bill control policy that you select here will be applied to all items. Subsequently, you can modify a product's invoicing policy from its form view. You can create bills both before and after delivery here. You can choose the Ordered Quantities as the Bill Control if you wish to create vendor bills for each and every order quantity. You can create bills for each quantity specified in the purchase order by choosing this option. Odoo, however, will only bill for the delivered amounts in the case of the Received Quantities.
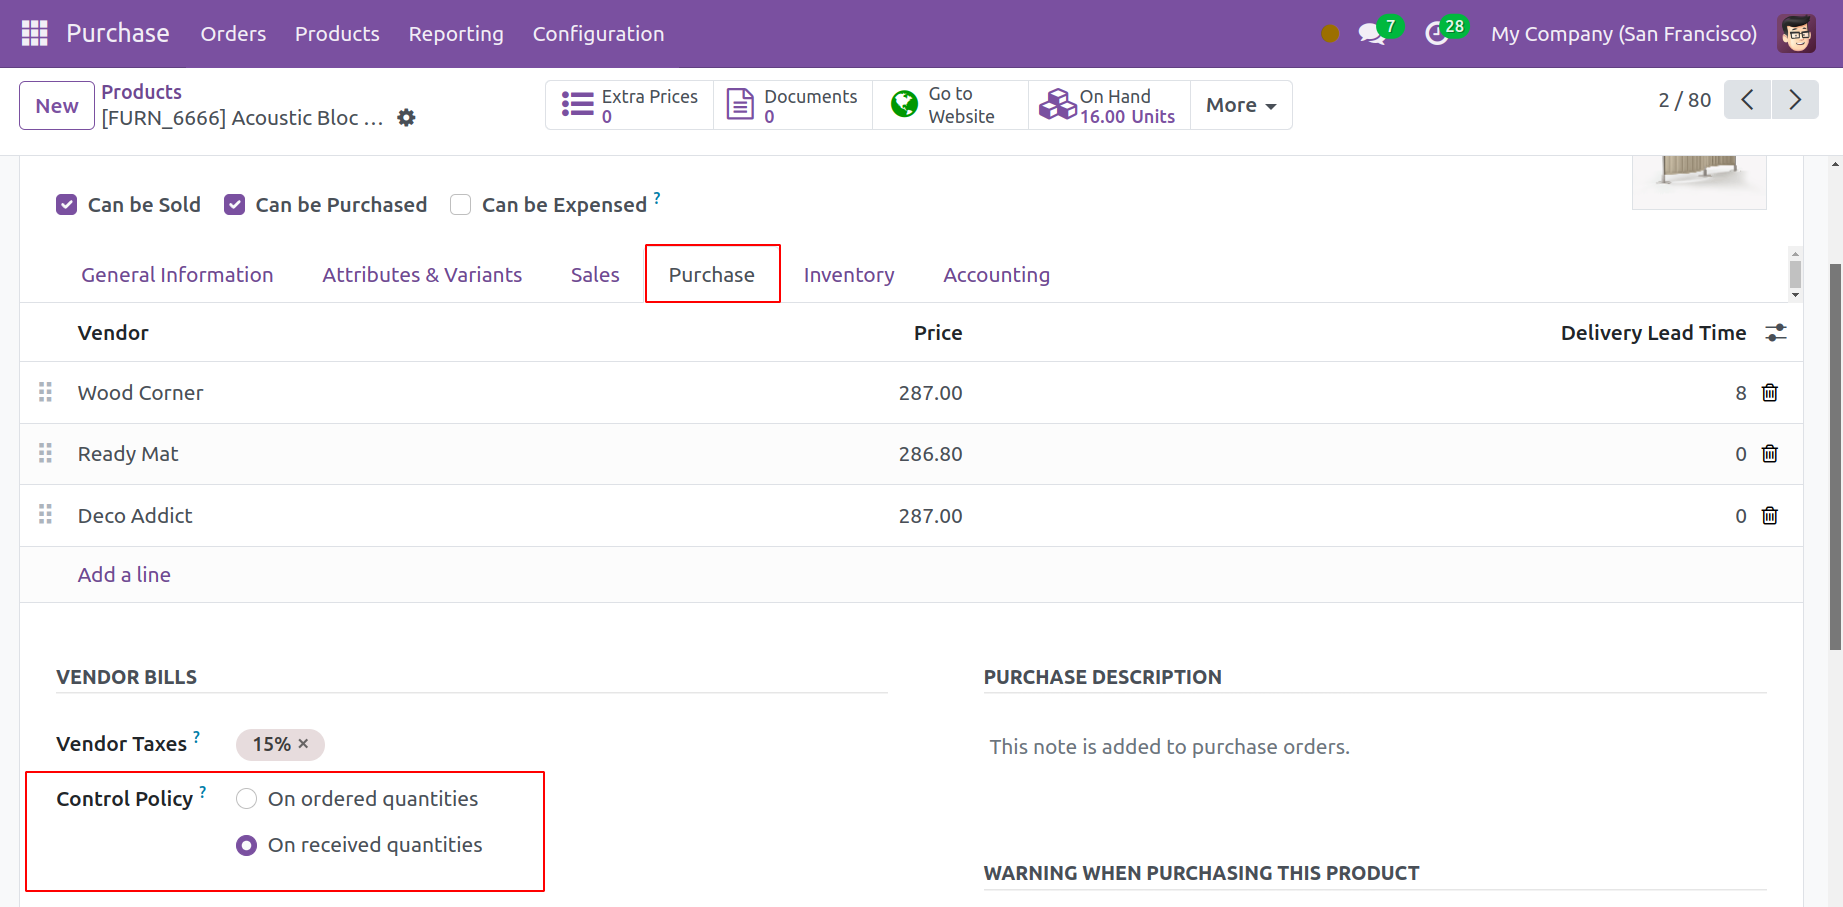
From each product's form view, the control policy can be set. You will see the appropriate option under the Purchase tab, as seen below.

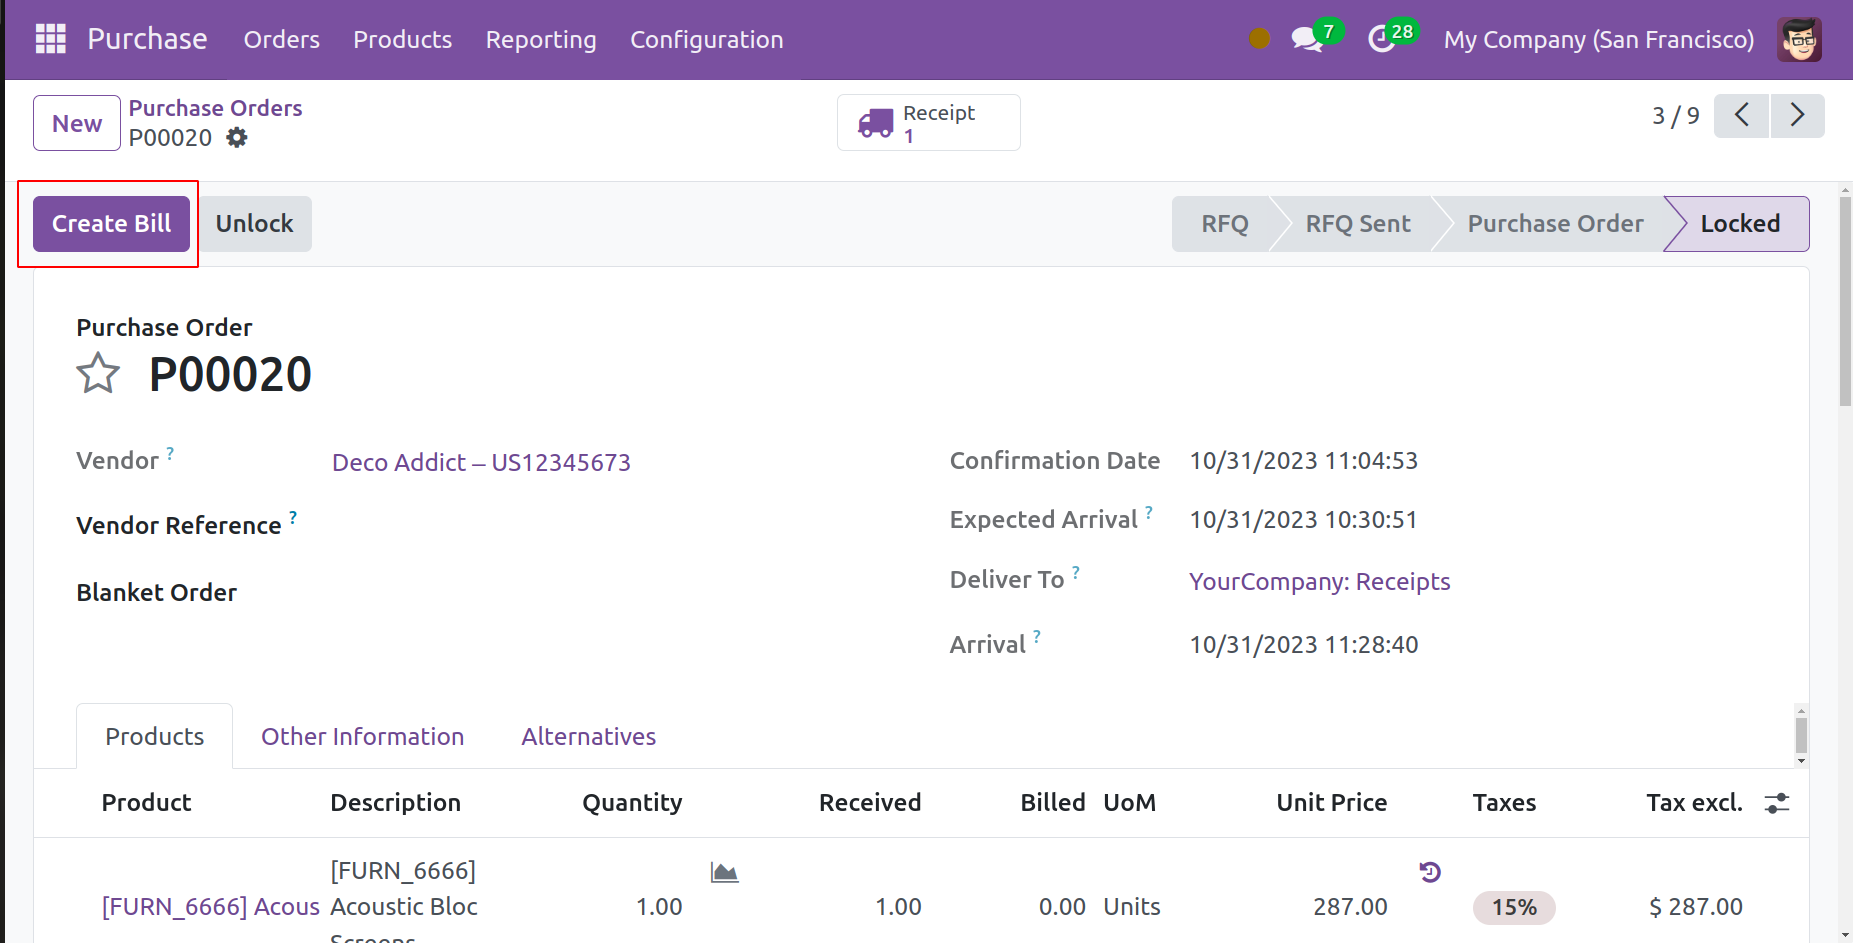
Let's now examine the process of creating a vendor bill for a purchase order. The Create Bill option will appear when you complete the transaction.

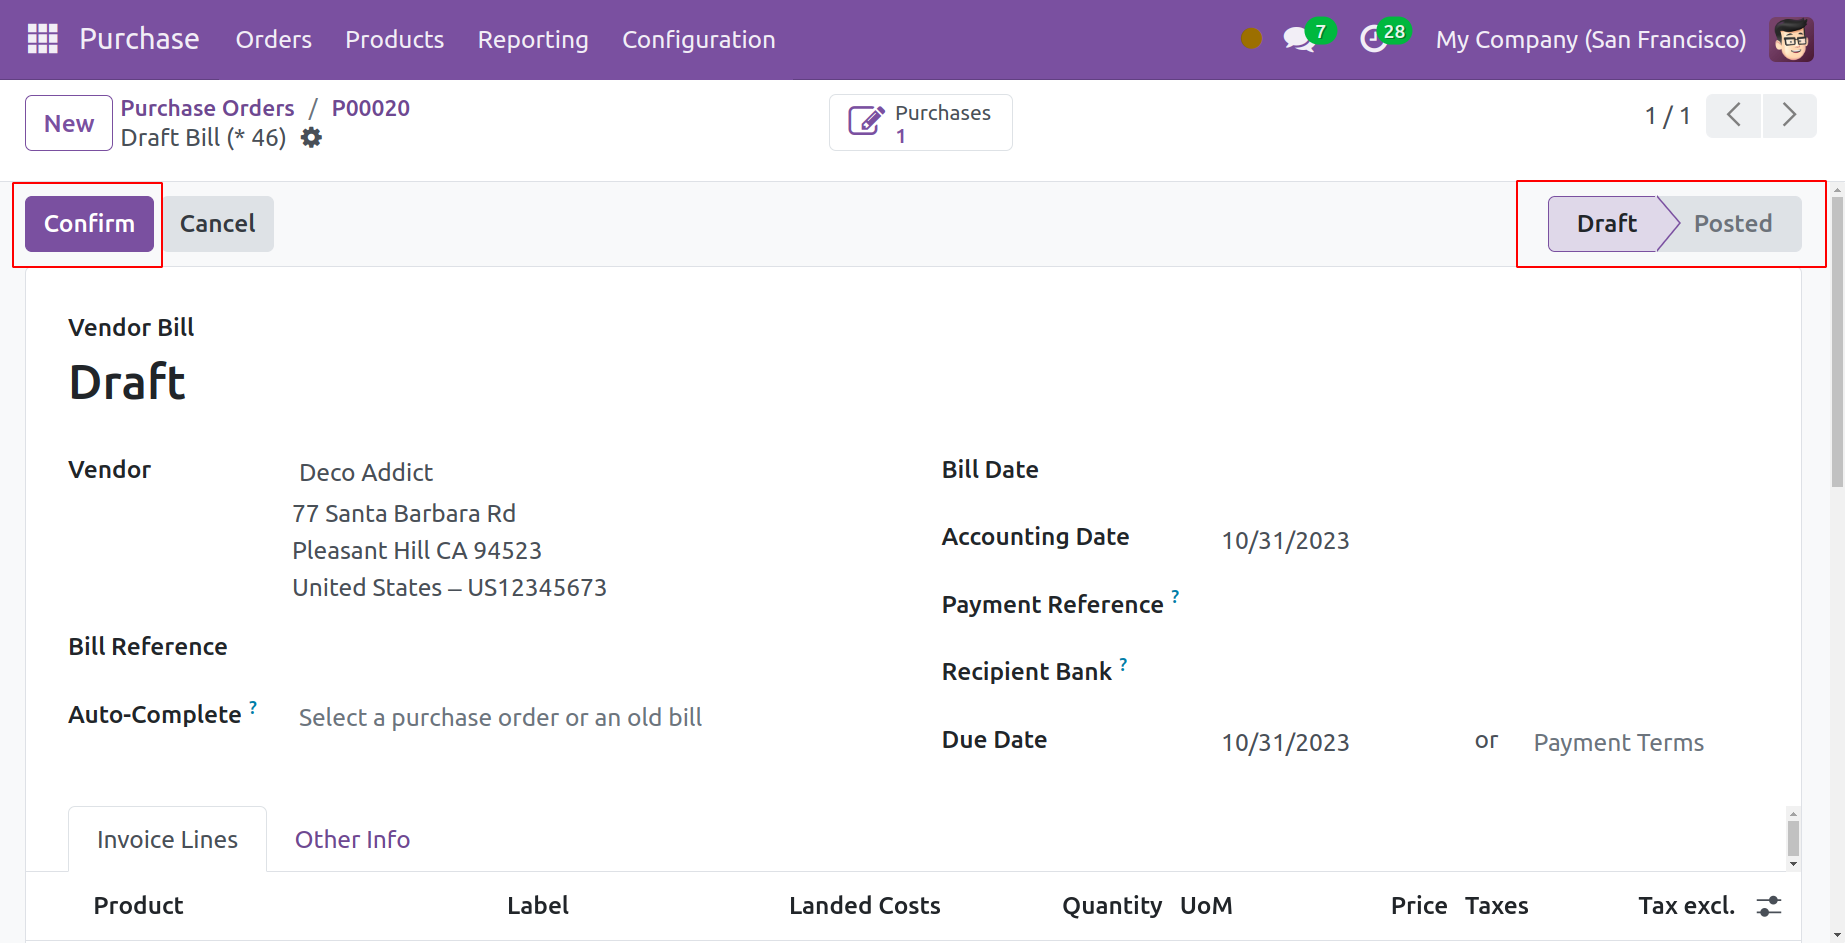
When you click this button, a new window with the vendor bill's draught form will open.

The vendor, bill reference, accounting date, payment reference, receipt bank, payment items, and journal are all included in the draft bill. In order to verify the bill, don't forget to provide the Bill Date. The tabs for Invoice Lines, Journal Items, and Other Info will have more information. Press the Confirm button now. Payment for your vendor bill is now available.