Odoo 17 Manufacturing
You are given an effective method of managing production, orders, invoices, tracking,
and each stage in the line of commodities under a firm to control and regulate all
the manufacturing processes. Manufacturing practices must be given a lot of weight
inside an organization to guarantee the quality of every product at every stage
of production. You can do this by managing your manufacturing processes with the
Odoo ERP Software, which will boost productivity and generate higher-quality output
in the process. The module will assist you with bills of materials, manufacturing
orders, managing maintenance, scrap orders, repair, and other related tasks associated
with producing a high-quality product.
Let's take a closer look at a few operations and their purposes now.
Manufacturing Orders
A product's manufacturing process involves several steps, including obtaining high-quality
raw materials, setting up the workstation appropriately, monitoring the product's
progress and routes, checking in, ensuring the product's quality, and many more.
Each of these processes contributes to the appropriate handling of high-quality
products. Therefore, a production order needs to be created to manufacture a comparable
kind of product configuration. There are two ways to place manufacturing orders.
One way to finish production is to concentrate on the defect stages organized under
the Odoo 17. When you are finished customizing the work center and operations to
carry out the activities in the items, you can also create production orders. Let's
now examine how to use the Odoo ERP Software to make a manufacturing order. You
will see a page similar to the one in the screenshot below when you launch the manufacturing
module from the Odoo ERP app list.
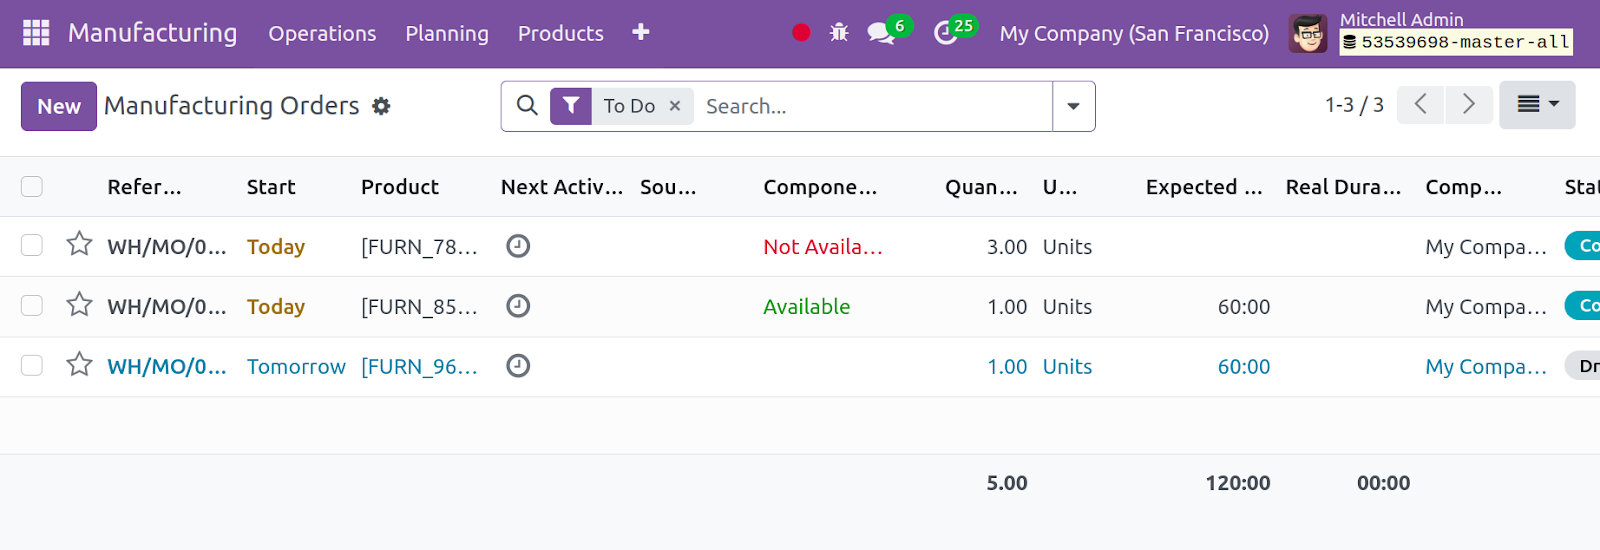
As may be seen in the above screenshot, the page displays the production orders.
You will find preconfigured production requirements there. Reference, schedule date,
product, next activity, source, availability of components, quantity, UoM, estimated
duration, actual duration, firm name, and manufacturing order status are among the
details in that sequence. In addition to the Kanban view, the page is also visible
in the list view. You can use the calendar, activity, and pivot views in addition
to the list and Kanban. The view can be chosen based on the user's requirements.
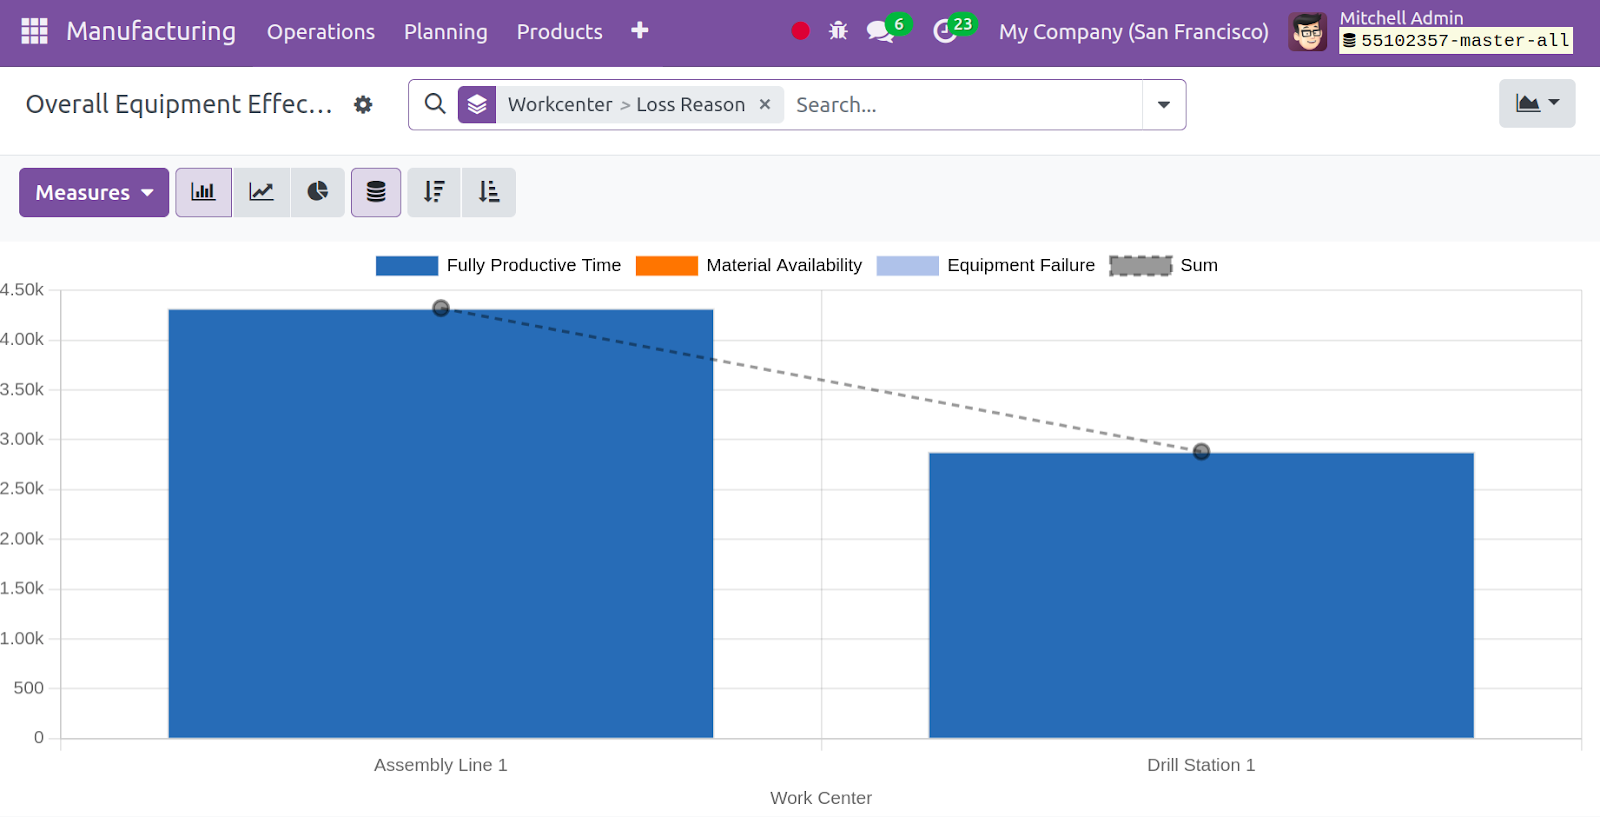
Every manufacturing order placed in the module can be reported using the pivot view
and graphical view.
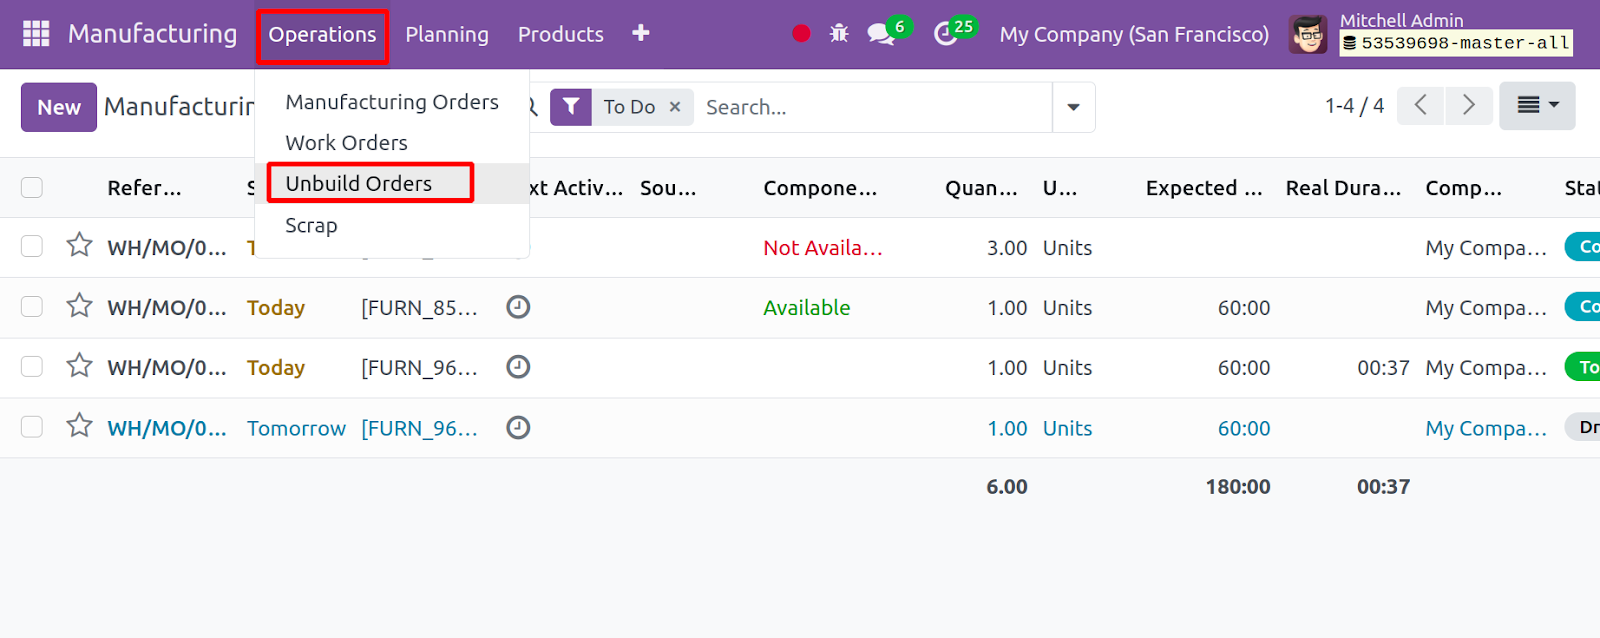
If necessary, you can also utilize the Group by and Filters. To do, starred, unbuilt,
draft, confirmed, planned, in progress, to close, done, canceled, waiting, ready,
delays and schedule date options are among the sub-options available under the filtering
option. You can choose from options like the product, status, material availability,
procurement group, and scheduling date, and add custom groups under the group by
option section. If necessary, you can also use your favorite alternative.
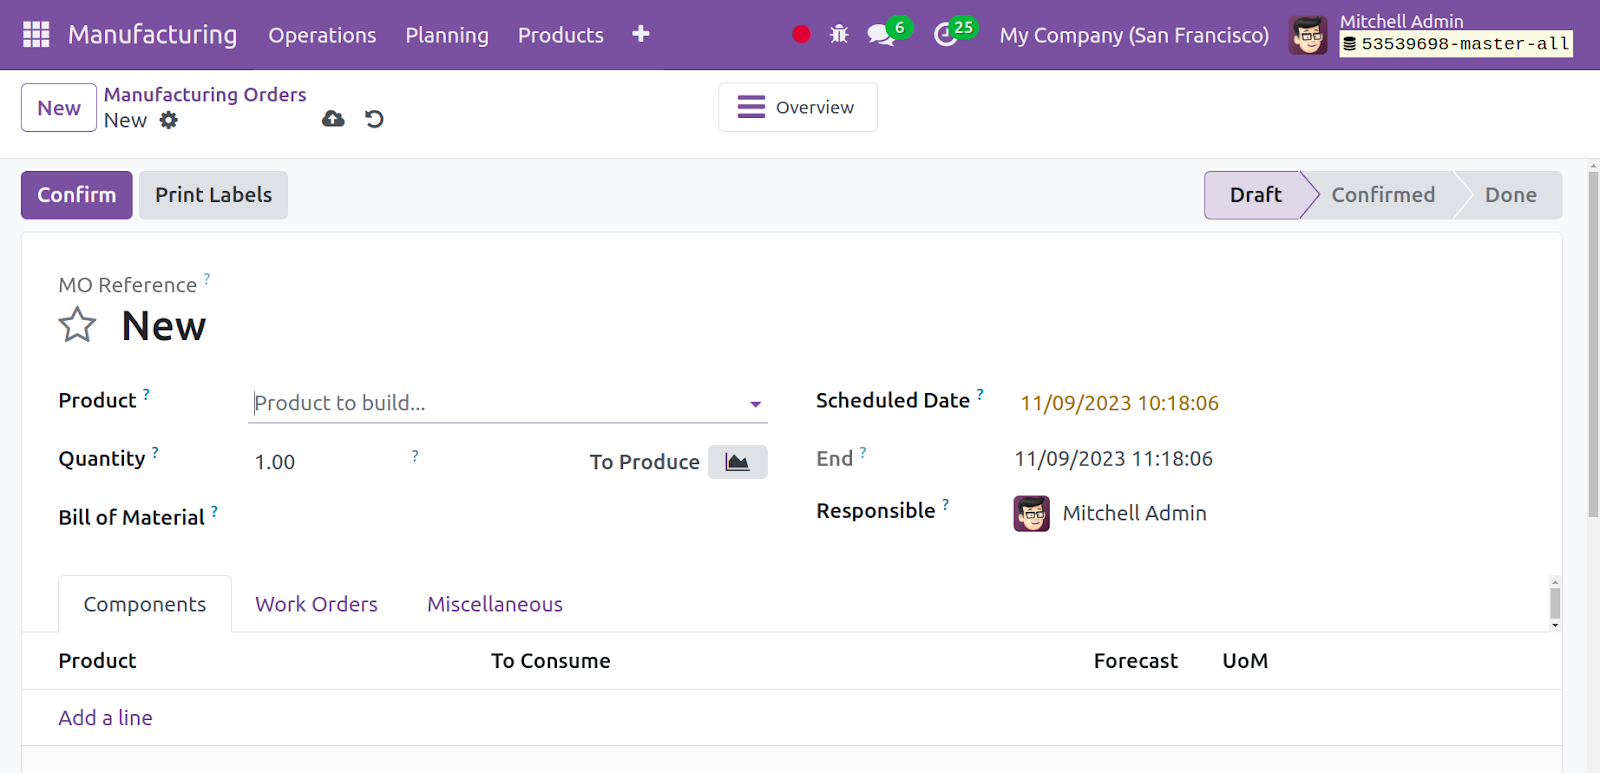
Let's now examine the process of establishing a new manufacturer order. You must
select the option for creation from the manufacturing module's operating menu. The
creation page will look like the screenshot below.
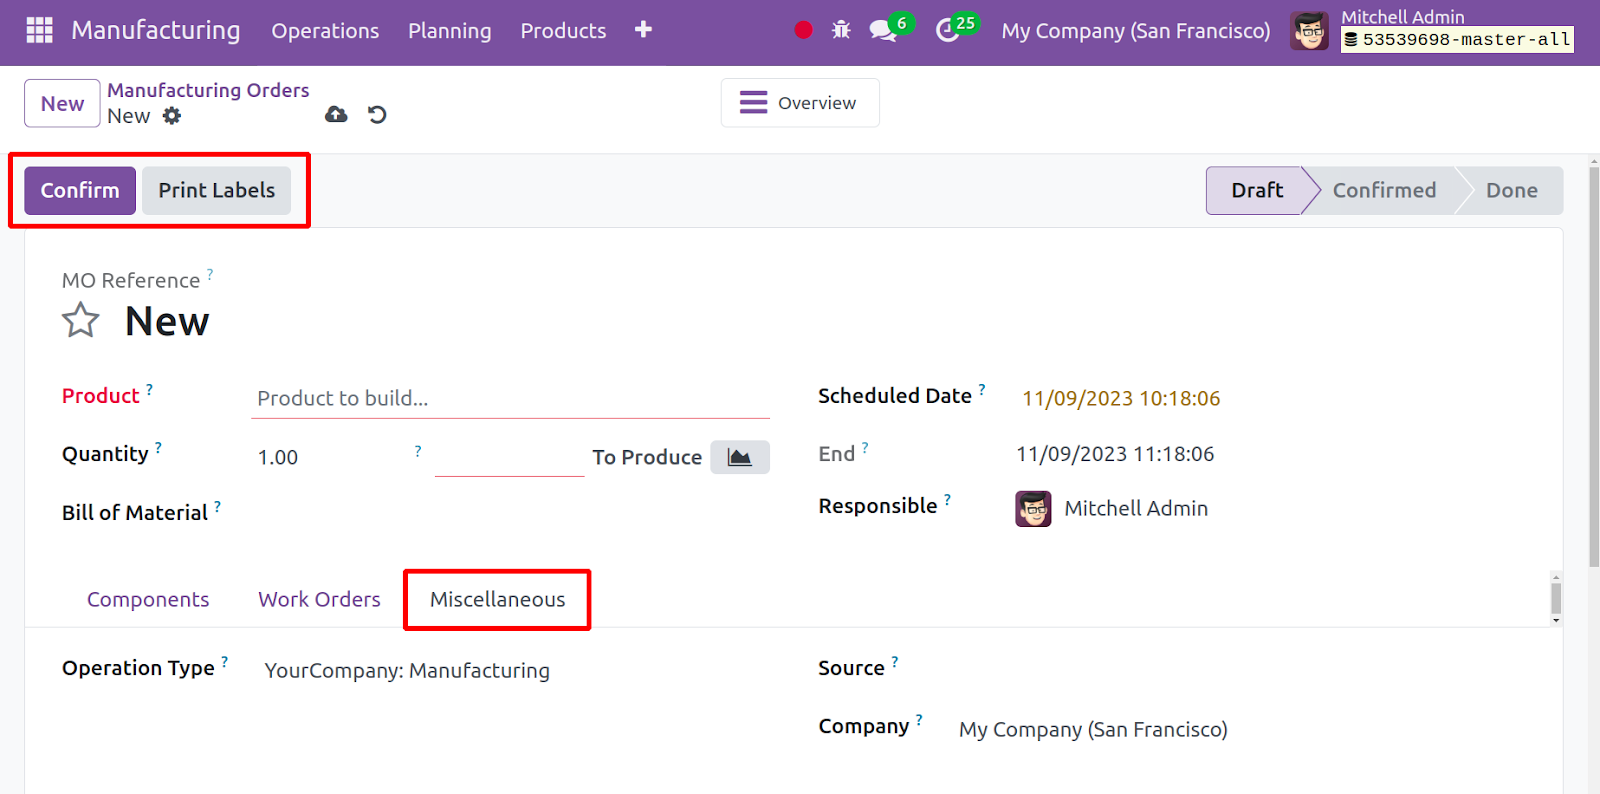
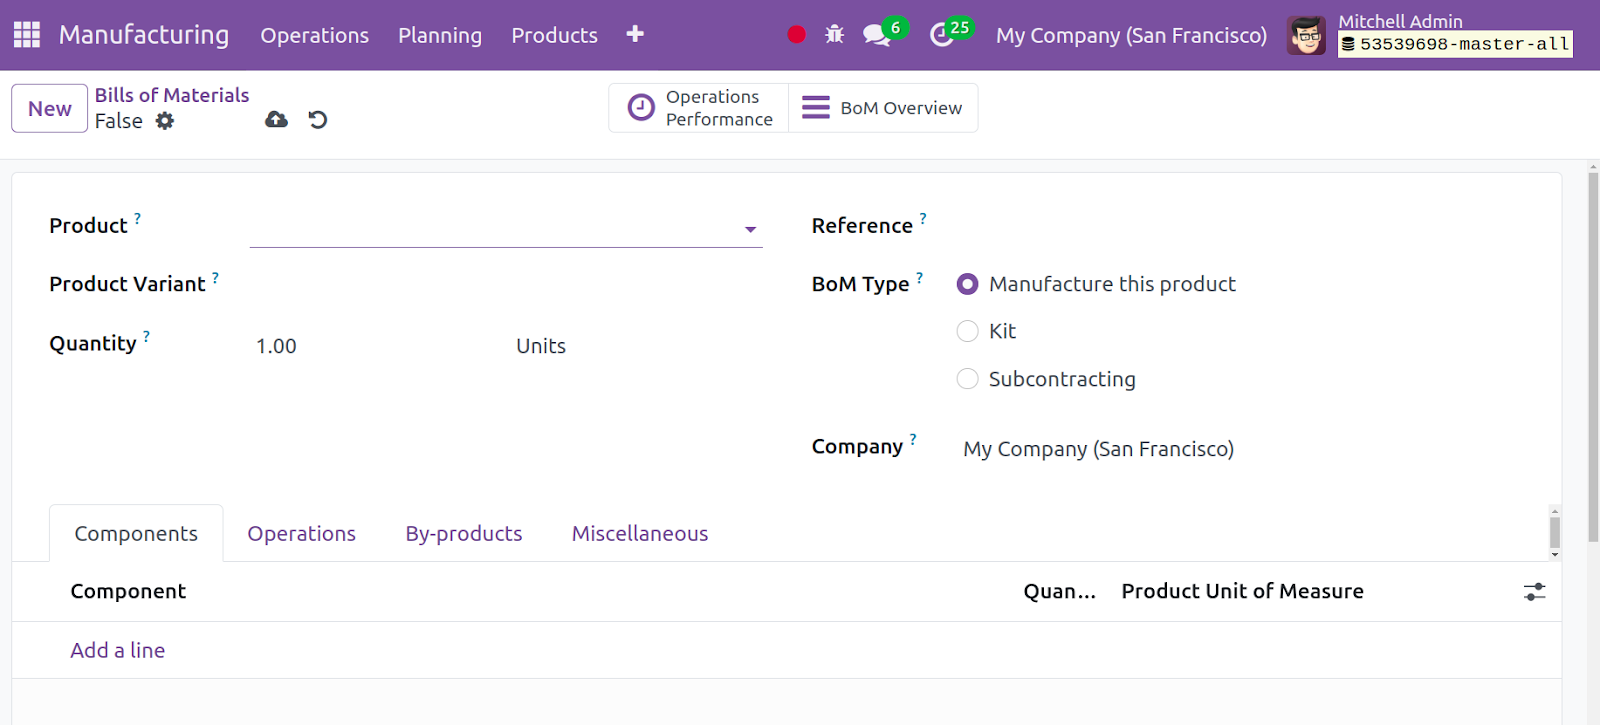
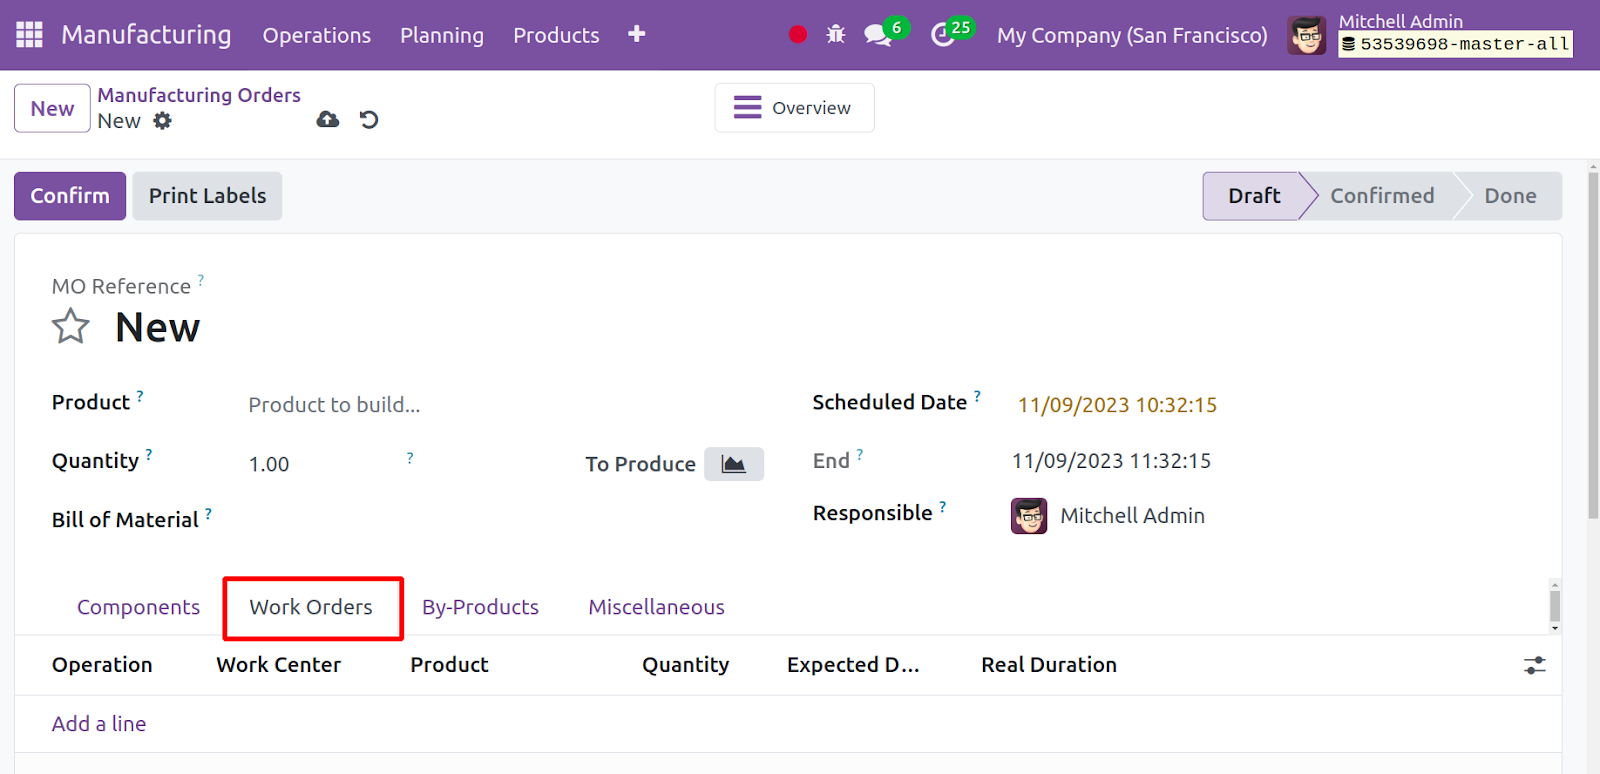
There are certain options to fill out on the creation page. The Product's name,
Bill of Materials, Quantity, Scheduled Date, Responsible User, and Company name
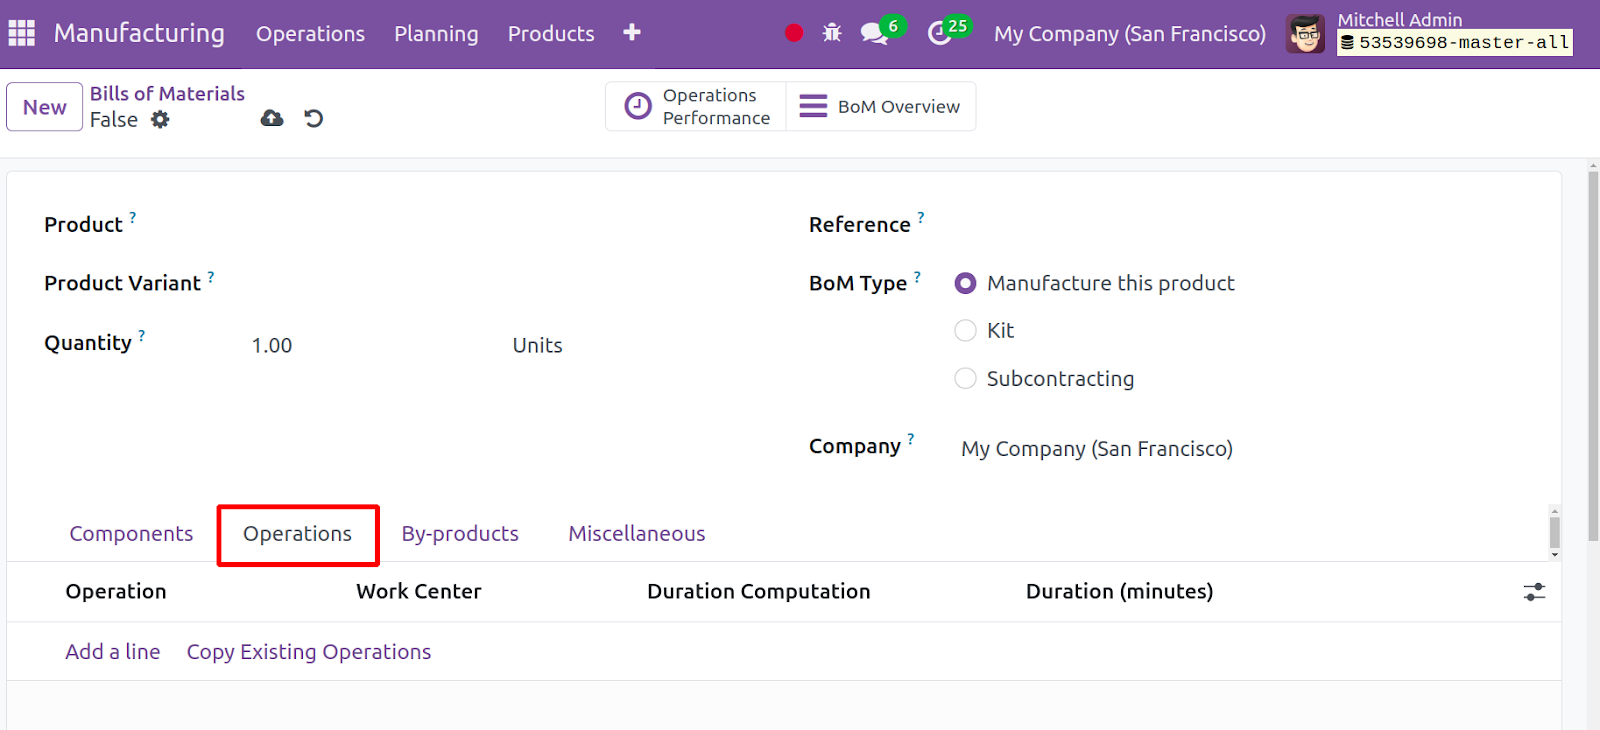
are among the alternatives. You now have a few tabs, like Components, Work Orders,
and Miscellaneous underneath that. You can add the components required for the creation
of specific products using the Add a Line option found under the Components option.
Next to that, you have the Miscellaneous option, which enables you to enter the
sources and operation type in the designated areas. The screenshot below illustrates
what the tab will look like.
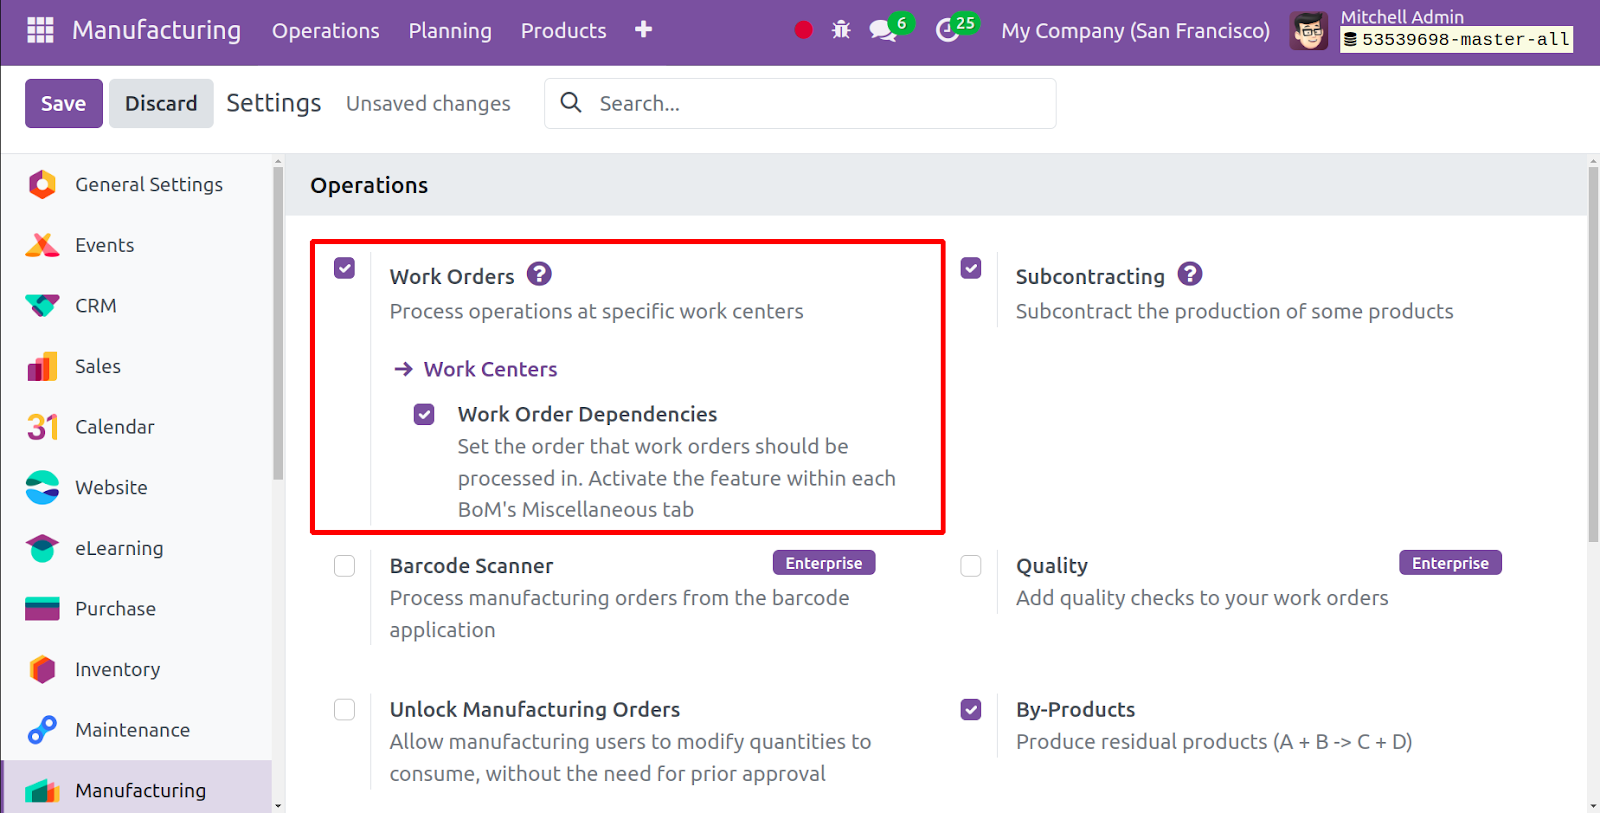
You now have the option to choose by profit in the options menu, which can be activated.
As seen in the image below, the options will be found under the settings.
As seen in the screenshot below, adding by-products that accompany the primary product
is now possible when the by-product option is triggered. This option is displayed
in the production order.
This page allows you to create a manufacturing order with the option of a By-Product.
There, you can enter the product's name, UoM, serial number, and other details.
You can make it by selecting the "add a line" option. Additionally, you can now
choose to activate it via work orders from the settings menu.
You can include the operation, work center, product name, quantity scheduled to
start, expected duration, and real duration, accordingly, under the work order option.
The actual time will automatically be adjusted based on the tasks involved in the
production process. Once all the details are completed, select the Save icon. Once
the manufacturing order has been created and saved, you will have the choice to
confirm. The confirmation option facilitates your ability to verify the just-generated
manufacturing order.
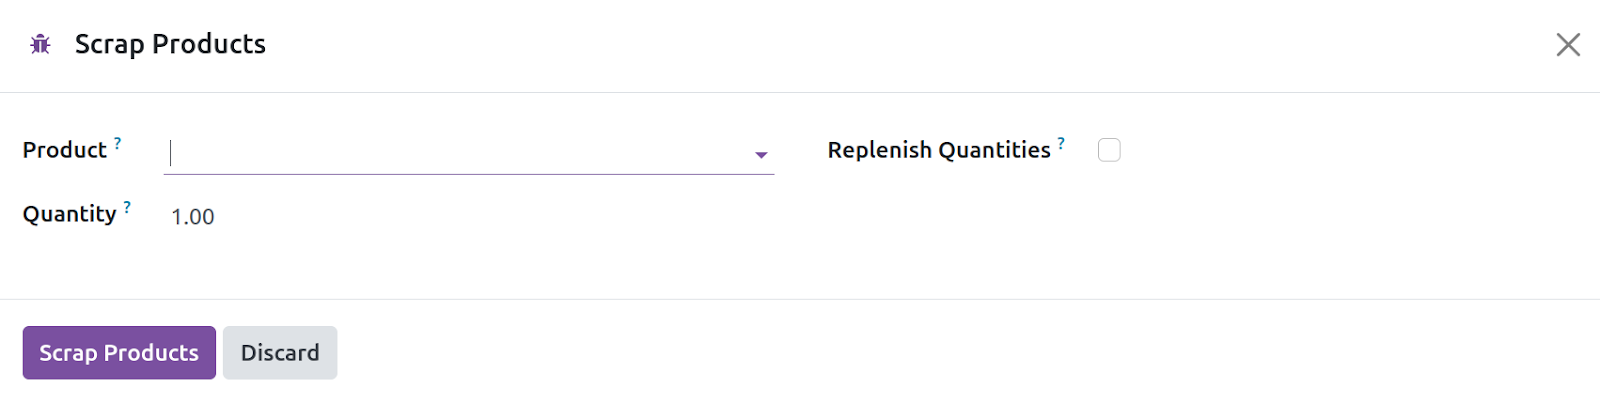
Once the freshly made manufacturing order has been confirmed, you will see options
like PRODUCE ALL, SCRAP, UNLOCK, and CANCEL, in that order once you have completed
the mark as a completed option. You now possess the smart button, which includes
choices for product moves and traceability. The traceability option, as seen in
the screenshot below, enables you to deliver trustworthy reports that include the
specific product's lot, present position, and serial number, if available.
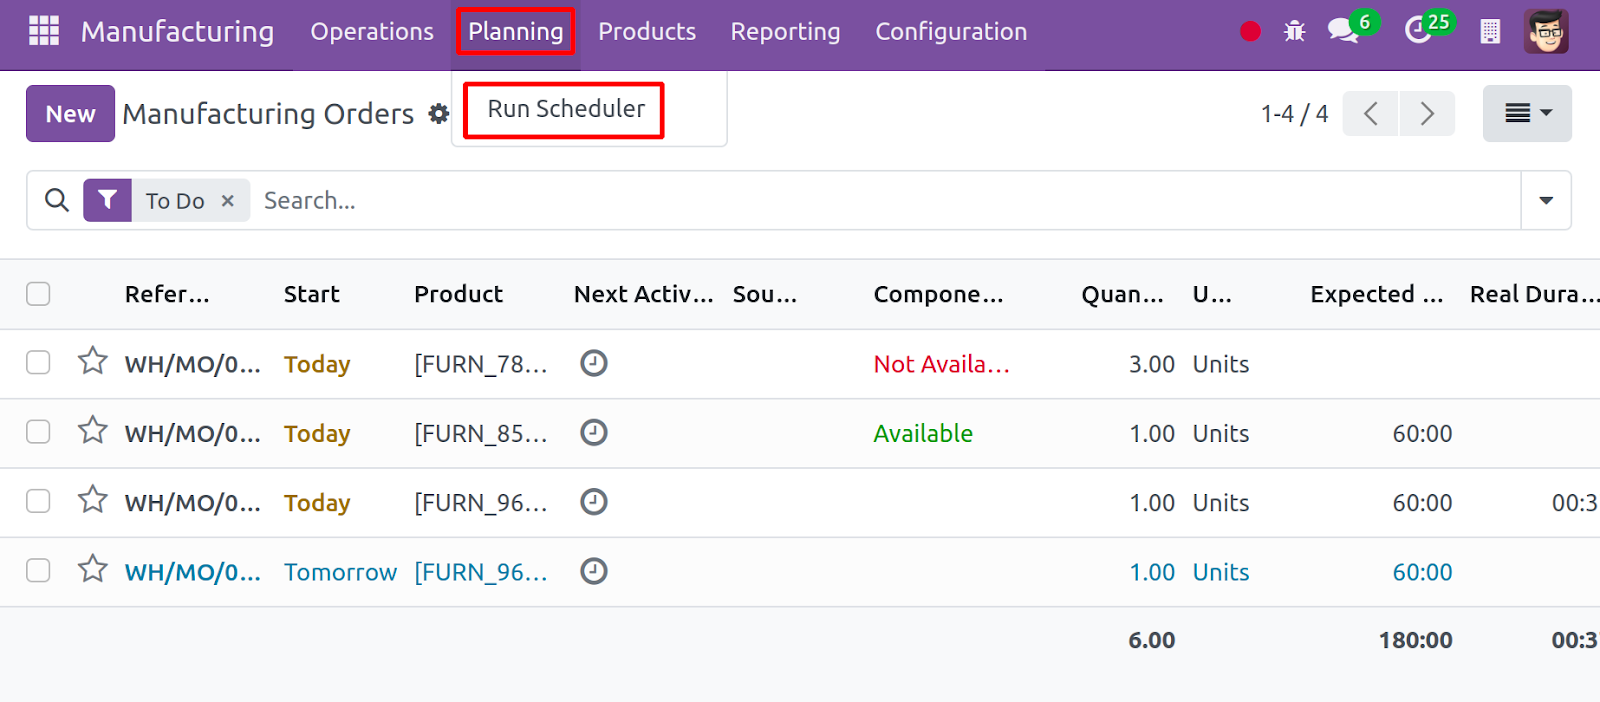
These are the procedures that must be done in the manufacturing module to generate
a manufacturing order. The planning option in the module's main menu aids in automatically
reserving stock for operations that are awaiting the arrival of the product. The
reordering rule will take effect when the Run Scheduler option is enabled.
You will be able to execute the scheduler from the manufacturing module's main menu
when you choose the planning option, as previously described. When you choose the
run scheduler option, a pop-up window will appear.
As you can see, it will automatically activate the reordering rules and reserve
stock for operations that are awaiting availability.
Next, under the Configuration menu's Settings options, you will also find the Security
Lead Time option. This feature aids in scheduling production orders ahead of time
to prevent manufacturing delays. It is quite easy to offer the security days for
each manufacturing process here. As seen in the screenshot below, the option is
visible in the Settings option.
We will now examine an easy method for creating and managing work centers within
the manufacturing module. Work centers, as we all know, are the locations or organizational
units where manufacturing activities often take place. You will require different
kinds of workspaces and equipment for every step of the manufacturing process for
producing a certain product. Therefore, we can ensure the quality of the product
at every stage of the manufacturing process by identifying the work centers for
each activity. The manufacturing module makes it simple to create different workspaces
for each task under it in order to produce a specific product. By creating distinct
work centers, the module can also be used to handle several activities. To do that,
navigate to the settings option and select the work center option. From there, you
may activate it.
You will see the option in the manufacturing module's setup menu after turning on
the work center option in the settings menu. As seen in the screenshot below, this
is the page of the work center where you can choose from the setup menu.
The page displays a list of work centers that have already been constructed. A manufacturing
order includes a number of tasks necessary to create a flawless final product. In
the Odoo 17 Manufacturing module, while establishing a manufacturing order, all
of these processes can be designated as Work Orders. In medium-sized to big organizations,
the activities of multiple work centers are coordinated to control the manufacturing
process. It is possible to assign and manage each manufacturing step to these work
centers with the help of Odoo 17.
You may quickly categorize with the aid of the filters, group by, and favorite options,
which are intended for the necessary functions. You will find information on the
page about the work center's name, code, linked tags, alternative work center, cost
per hour, capacity, time efficiency, and OEE target, among other things. Along with
other views in the Kanban view, the page is shown in the list view. If there is
a work center that has already been created and needs editing, choose the specific
one that needs editing.
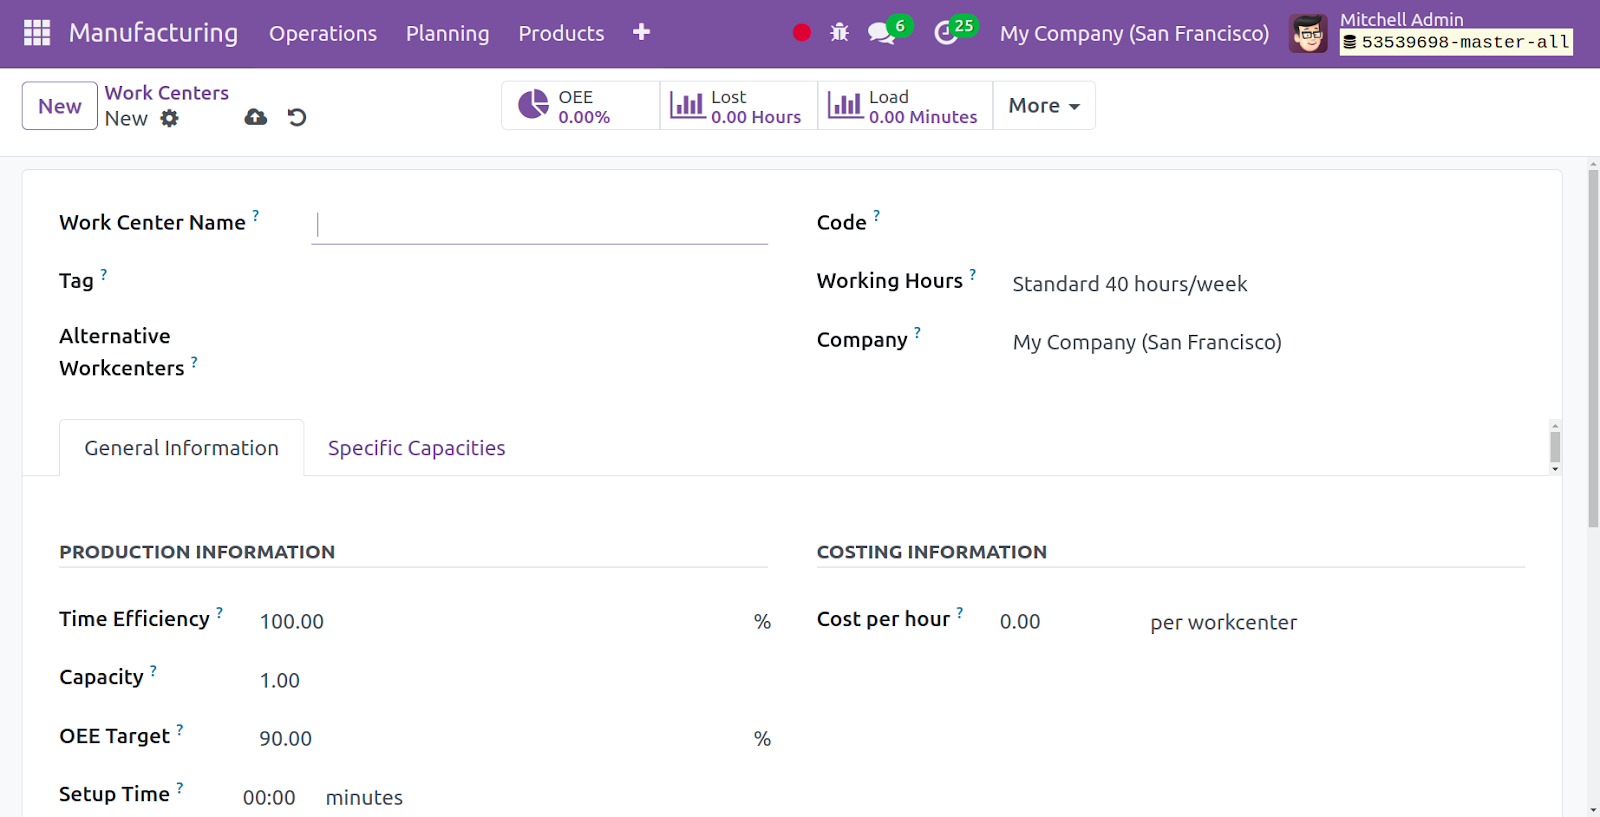
Go to the New Option to establish a work center of a similar kind. The screenshot
below illustrates what the work center's creation page will look like.
The Work center's Name, associated Tags, Alternative Work center, Code, Working
Hours, and Company name can all be entered on the creation page.
Alternative work centers in Odoo 17 allow the system to select other work centers
according to availability or certain requirements during the manufacturing process,
enabling flexible production routing.
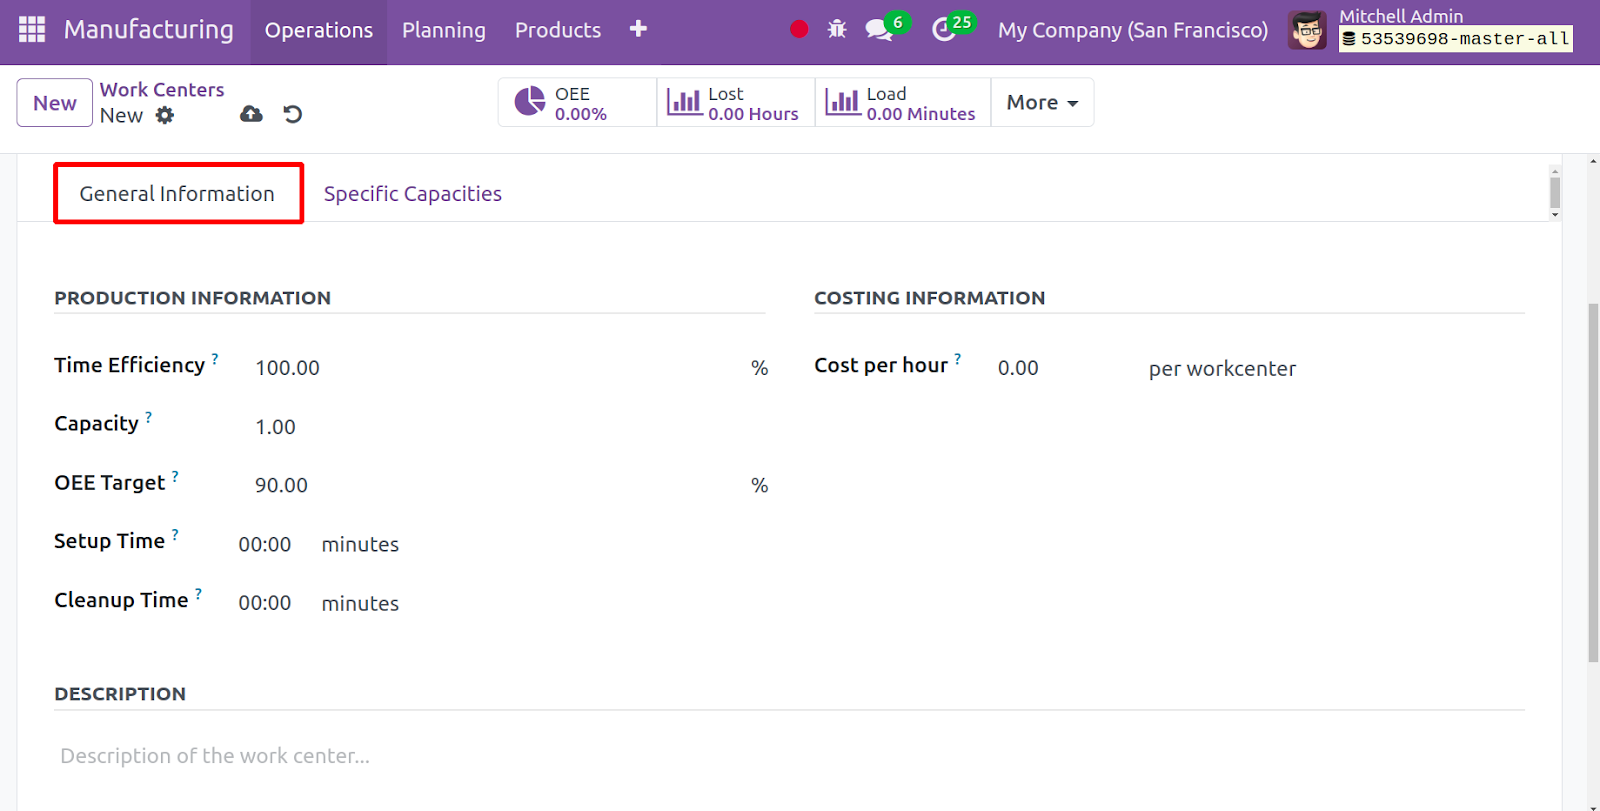
You can also provide facts about the product, like its Capacity, OEE Targets, and
Time Efficiency, in the General Information tab. You can include the Cost per hour,
Setup Time, and Cleanup Time under the costing details.
The Time Efficiency column will provide the anticipated duration of the work orders
finished in this work center. The Capacity of this work center indicates the default
number of things that can be produced simultaneously. The overall effective efficiency
target (%) is shown in the OEE Target field.
The cost of the work center and the employee per hour may be included in the COSTING
INFORMATION session. Choose the proper analytical account to post component and
operating cost inputs into using the box provided. In the corresponding fields,
enter the work center's setup and cleanup times. You can add any details you choose
to provide about the work center in the Description section.
The work center's particular capacity can be found on the following tab, Specific
Capacity. Use the Specific Capacities tab to specify the work center's capacity
in more detail. You can use the Add a Line to discuss the Products and Product UoM,
and capacity there.
Once you have completed entering all of the necessary information about the work
center, select the Save symbol to quickly and simply add the newly created work
center to the list of work centers that have already been created.