Lunch Management
There is no denying that a company's success is greatly
influenced by its workforce. For the business to achieve its
pinnacle, their efforts must be very significant. Thus, a
healthy environment is essential for them. They need to have
engaging and healthful leisure time to keep their minds calm.
The purpose of the Odoo 17 Lunch Module is to make your free
time enjoyable. Employees who work for the corporation are
entitled to a nutritious lunch. You can arrange your favorites
in this module, which is one of its appealing characteristics.
You can designate your food suppliers and the goods they
provide. Ordering any meal you like from the provided menu is
quite simple. They can pay the money for the food item using
the account balance. You will be presented with a list of
previously made food lists after choosing the module.
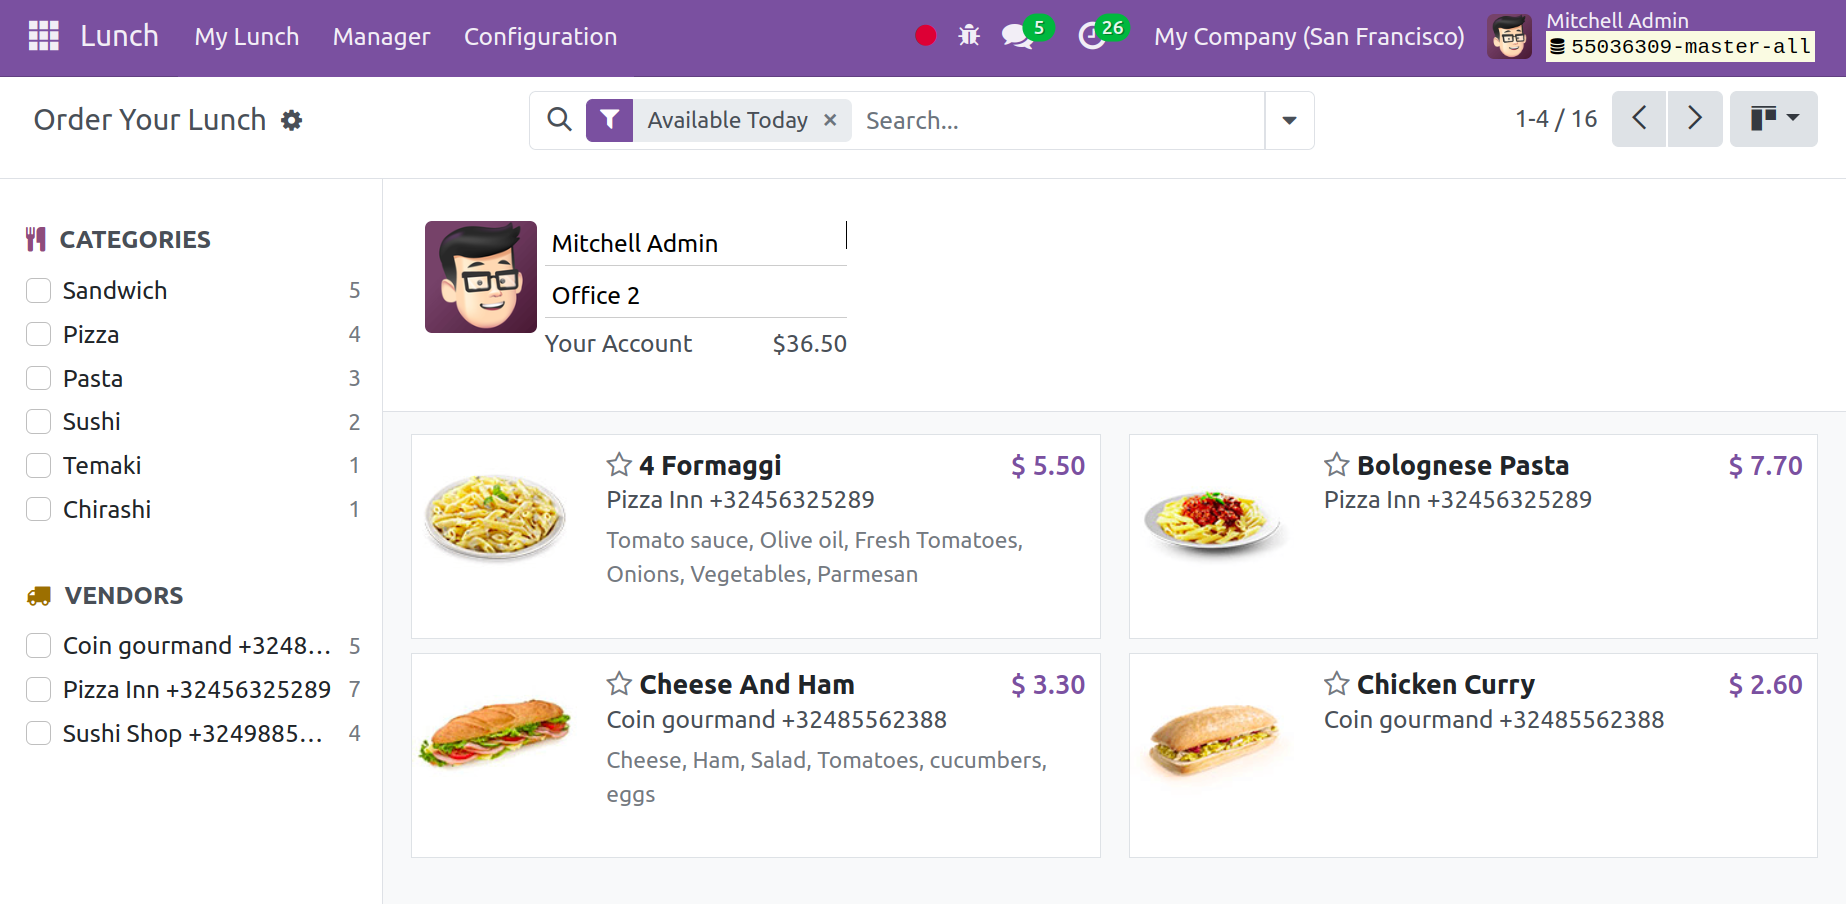
As you can see, the list of food products, together with the
employee's name and address, is viewable on this page. On the
page, you can also view the account balance. The page is also
available to view in List and Kanban views. You will find the
name of the food item and its price in each product. To get in
touch with the merchant, you may also view their phone. You
can add cuisine to your favorite list by using the star symbol
on the left.
Food that is available every day will be supplied using the
Filters. A panel listing the many types of food items and
merchants is visible on the left. To find out more information
about any of the food, you can choose it. You will receive the
meal that the vendor offers after choosing a certain vendor.
Let's examine the lunch module's product management process.
My Order
You can see the ordered summary from the My Lunch menu
by opening the My Order window. Here, you may also
control the order.

You can choose a date, and the order will be made on that day.
You will find information in the provided list, including the
Ordered date, Vendor details, Product, Extras, Notes, User,
Lunch Location, Food Price, and Company, in that order.
Options such as Re-Order and
Send Notification may be available.
The sorting choices can be customized by using the
Filters and Group By options.
My Account History
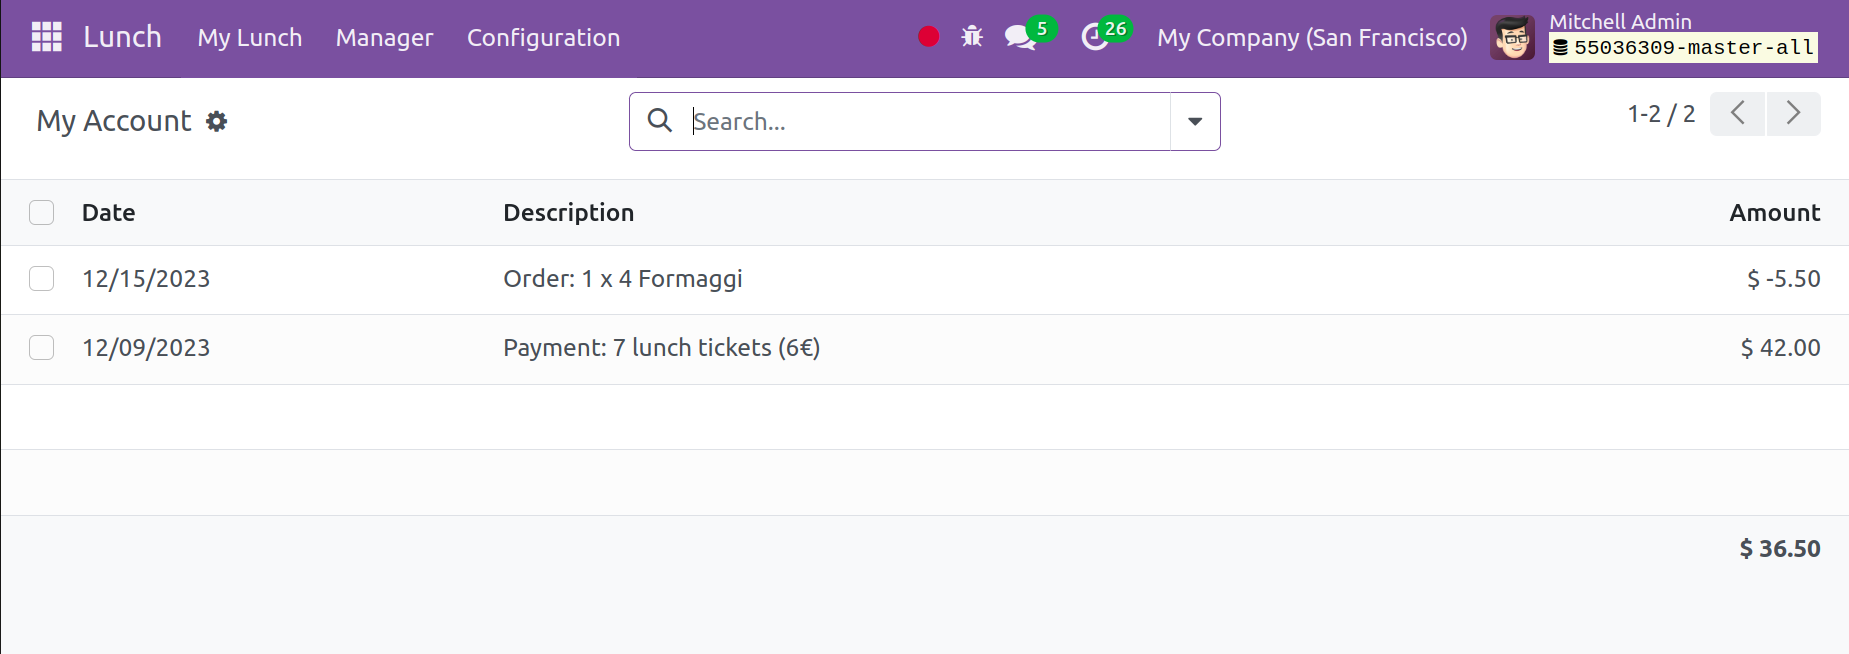
You may view the history of orders placed using your account
balance under My Account History. This page will provide a
history of all of our orders as well as the total amount we
have spent.
Manager
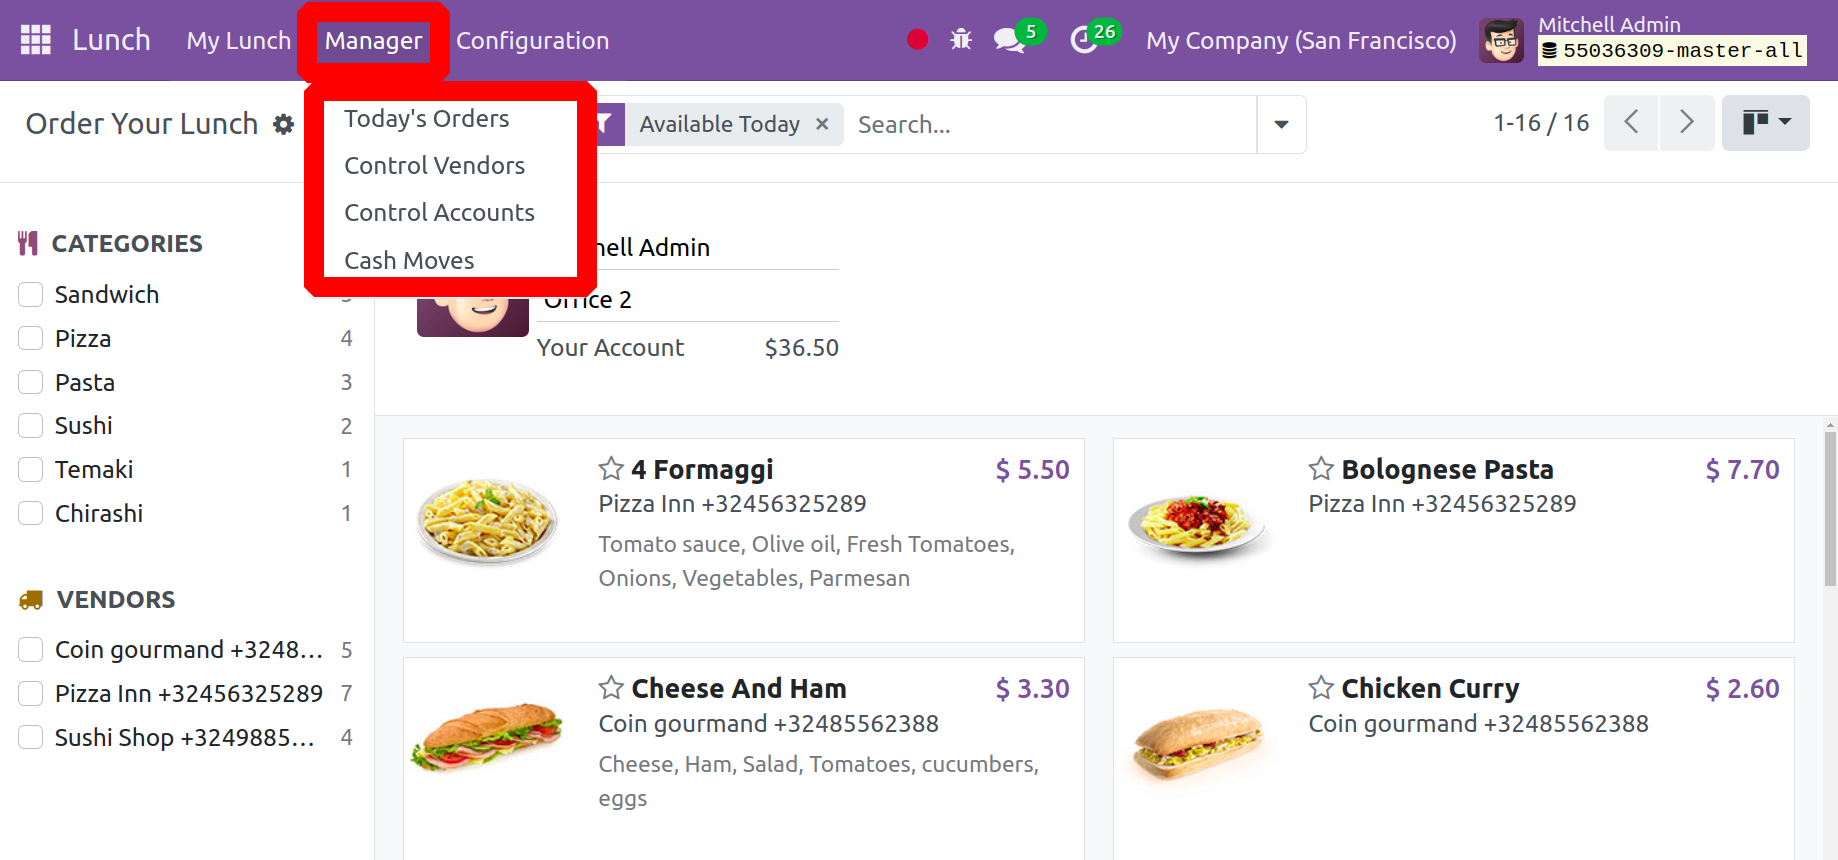
The manager has a place to oversee all business orders as well
as each employee's lunch account. The manager can view the
order for today, manage the vendor, oversee the account, and
watch the cash movements all from one page.
Today’s Orders
You can view all of the employee orders placed on that
specific day by going to Today's Order. You will find
information on the page about the order date, the vendor, the
product, extras, notes, the user, the lunch location, the
product price, the status, and the company. This is where the
manager can view all of the orders.

Control Vendors
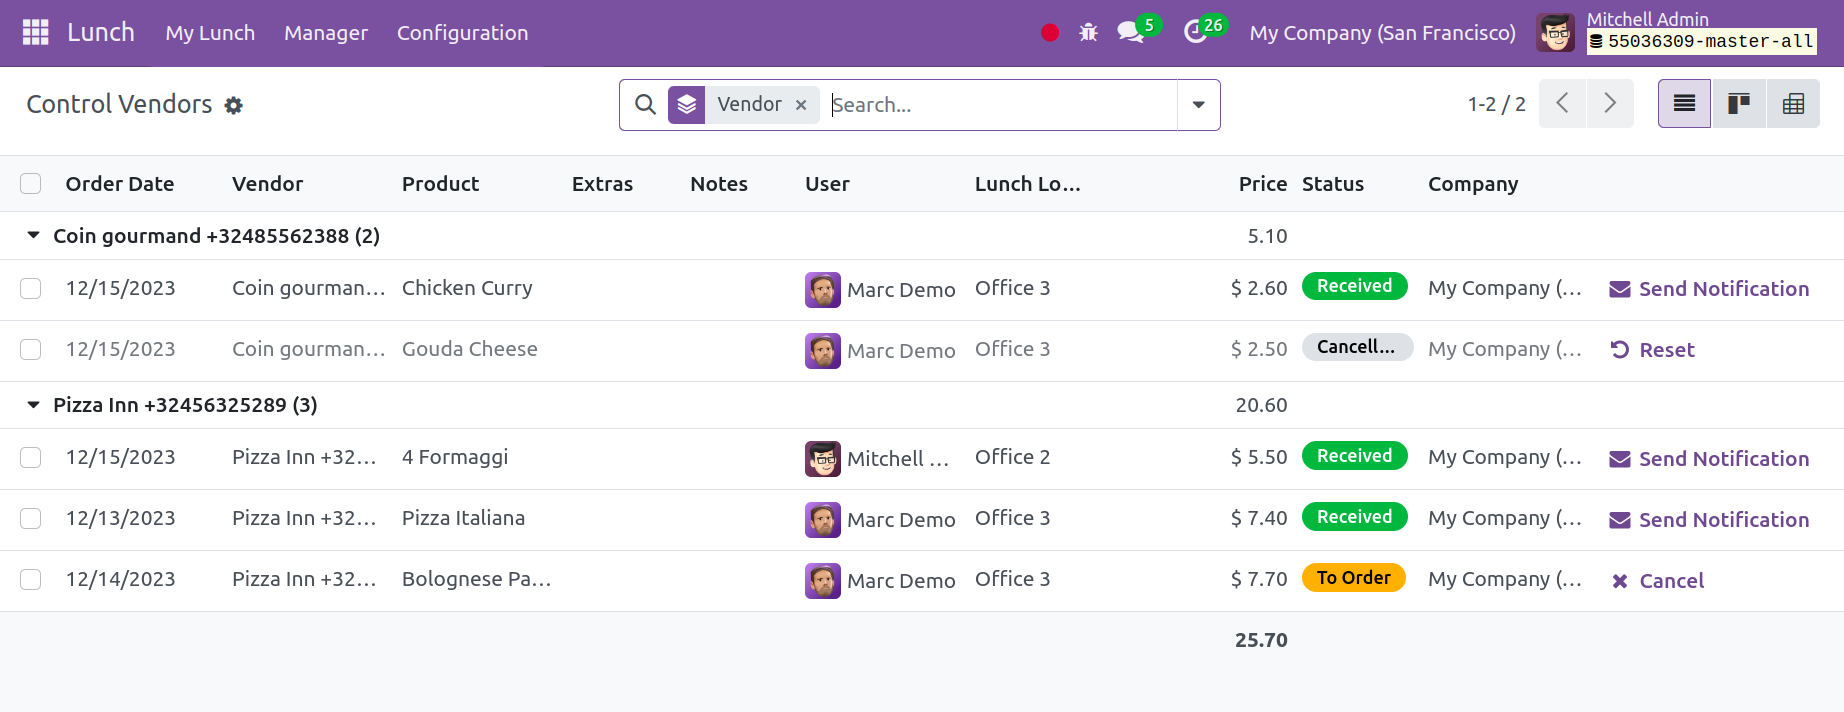
You can see all of the information about the orders placed by
employees with different vendors by selecting the
Control Vendors option. You can choose any individual
product from the merchant to obtain the specifics.
Control Accounts
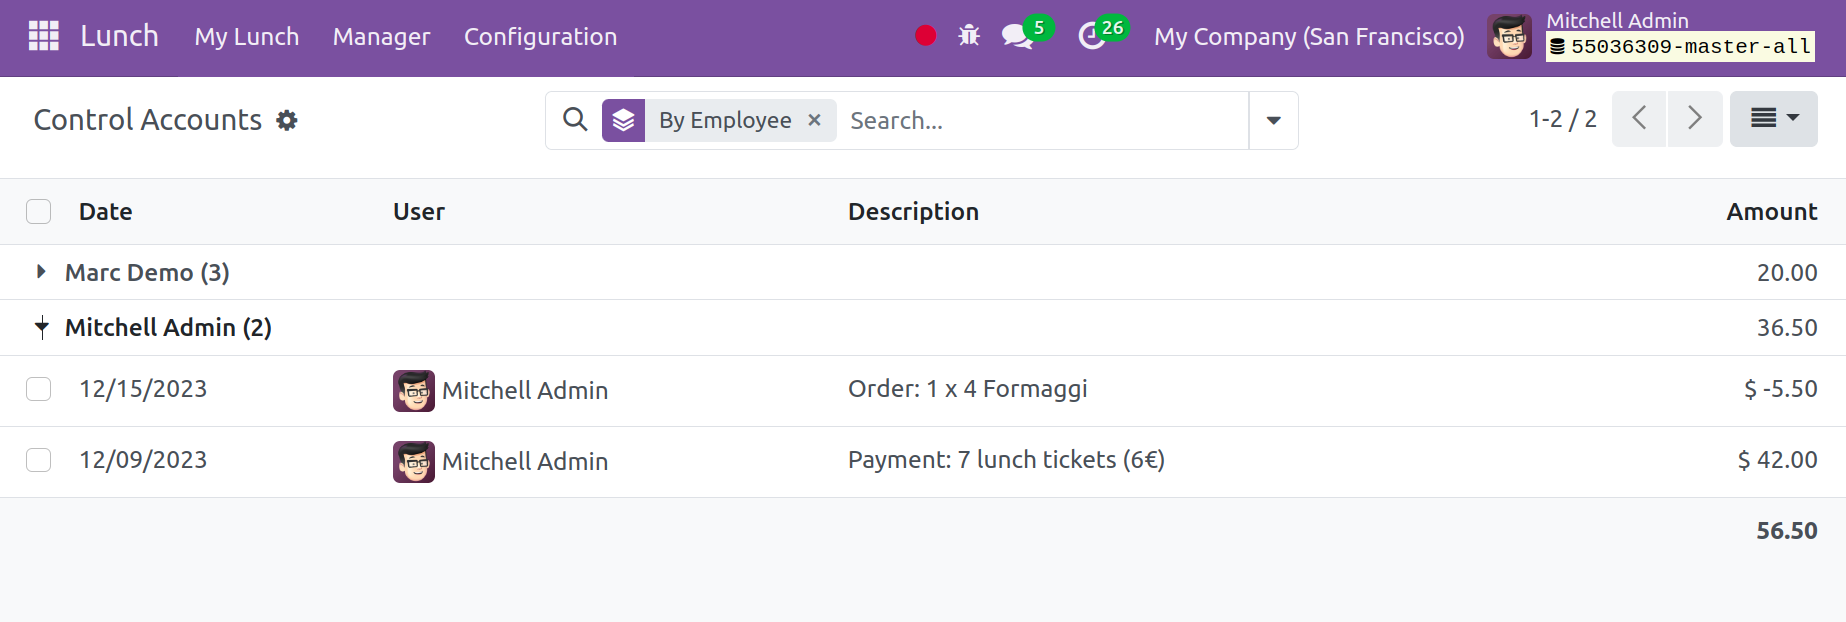
You can review each employee's account using the Manage menu's
Control Accounts option. You will find all of the
employee accounts' details on this page. You may quickly see
an employee's orders and account balance by selecting that
specific employee.
Cash Moves
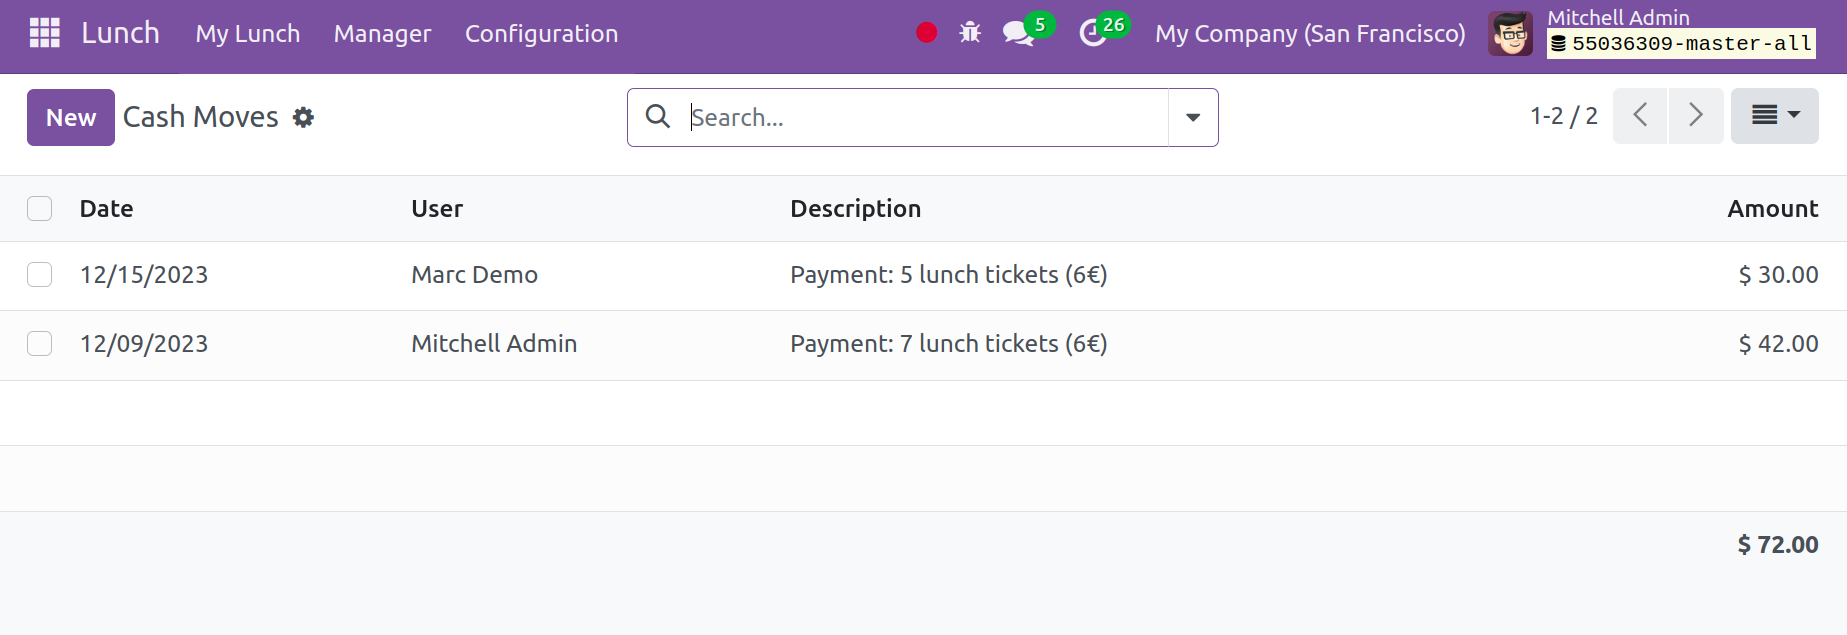
You can monitor and control the cash moves by using the
Cash Moves option found in the Manger menu. It
serves as a record of every cash movement. You can see all
cash movement records in this window, along with the Date,
User, Item Description, and Item Amount.
You can use the New button to create a new record.
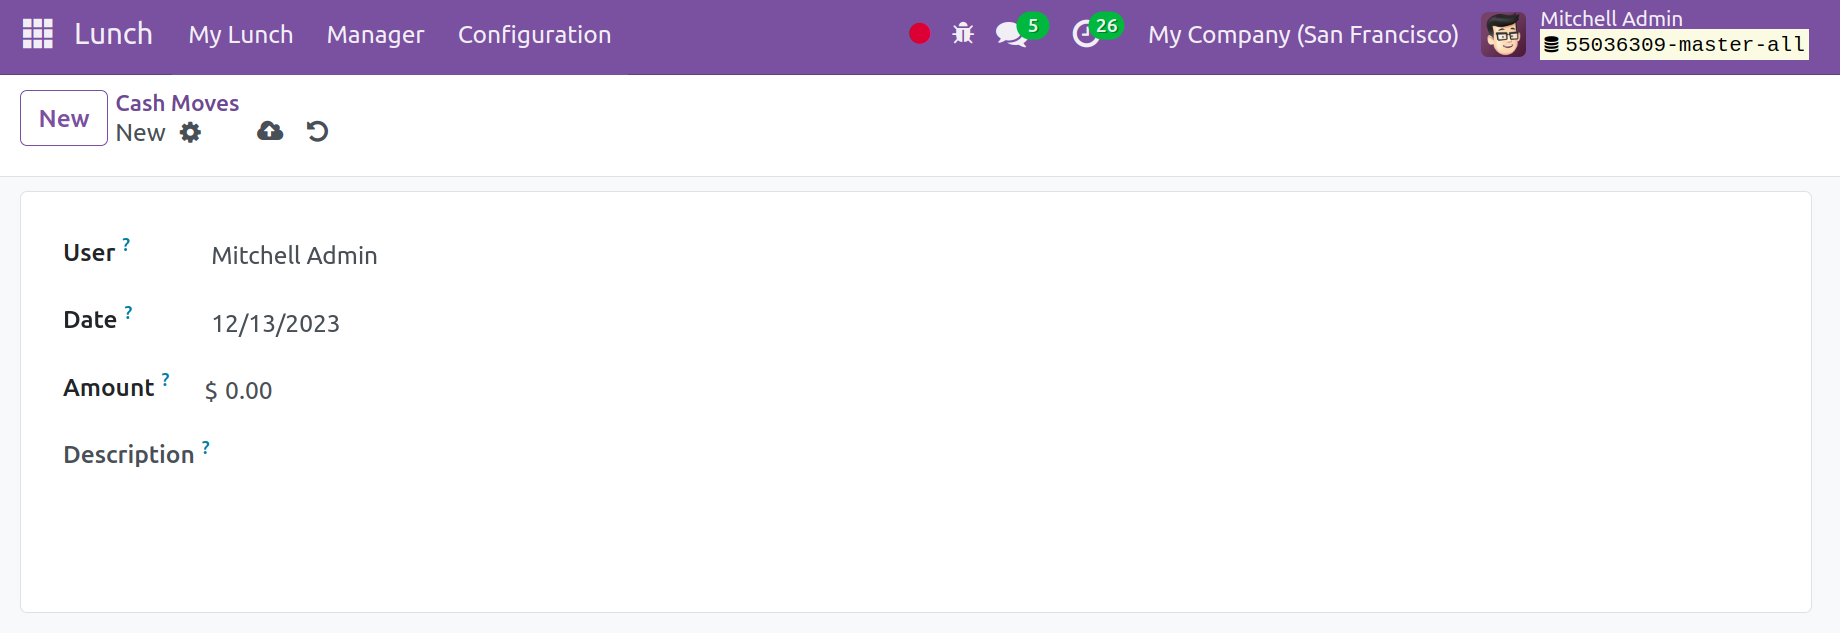
You will find the fields to enter the User's name, Date,
Amount, and Cash Move description in the Creation box. Lastly,
click the "Save" button.
Vendors
Vendor details must be included in the product's information.
Odoo 17 Lunch has a setting under the
Configuration menu for that.

You can view all of the available merchants' details in the
window. The page is also available to view in List view and
Kanban view. The vendor's information consists of their name,
email address, address, and phone number. You can choose the
New button to start a new one.
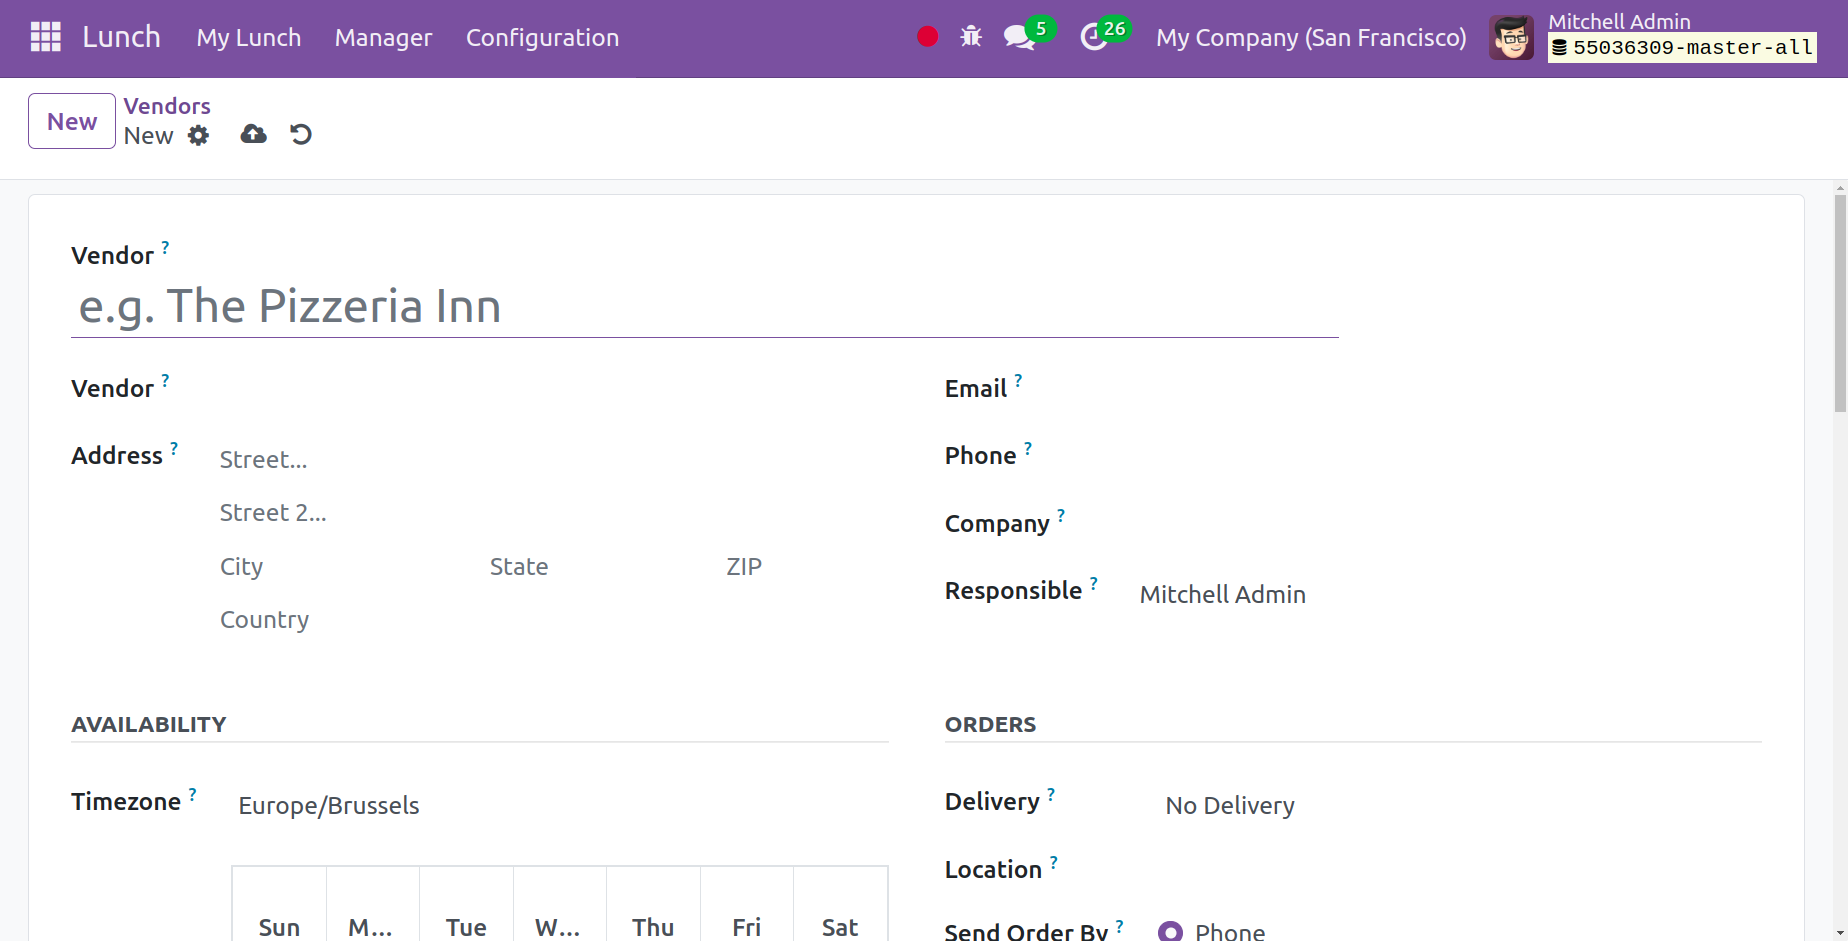
You are required to enter the vendor's name on this page. In
the designated box, you can also provide the company name,
address, phone number, and email.
The vendor's available day might be mentioned in the
AVAILABILITY Tab. You can choose the Delivery option in
the ORDERS Tab to have the food delivered along with
the destination. The order is to be sent to the phone number
or email address you specify.
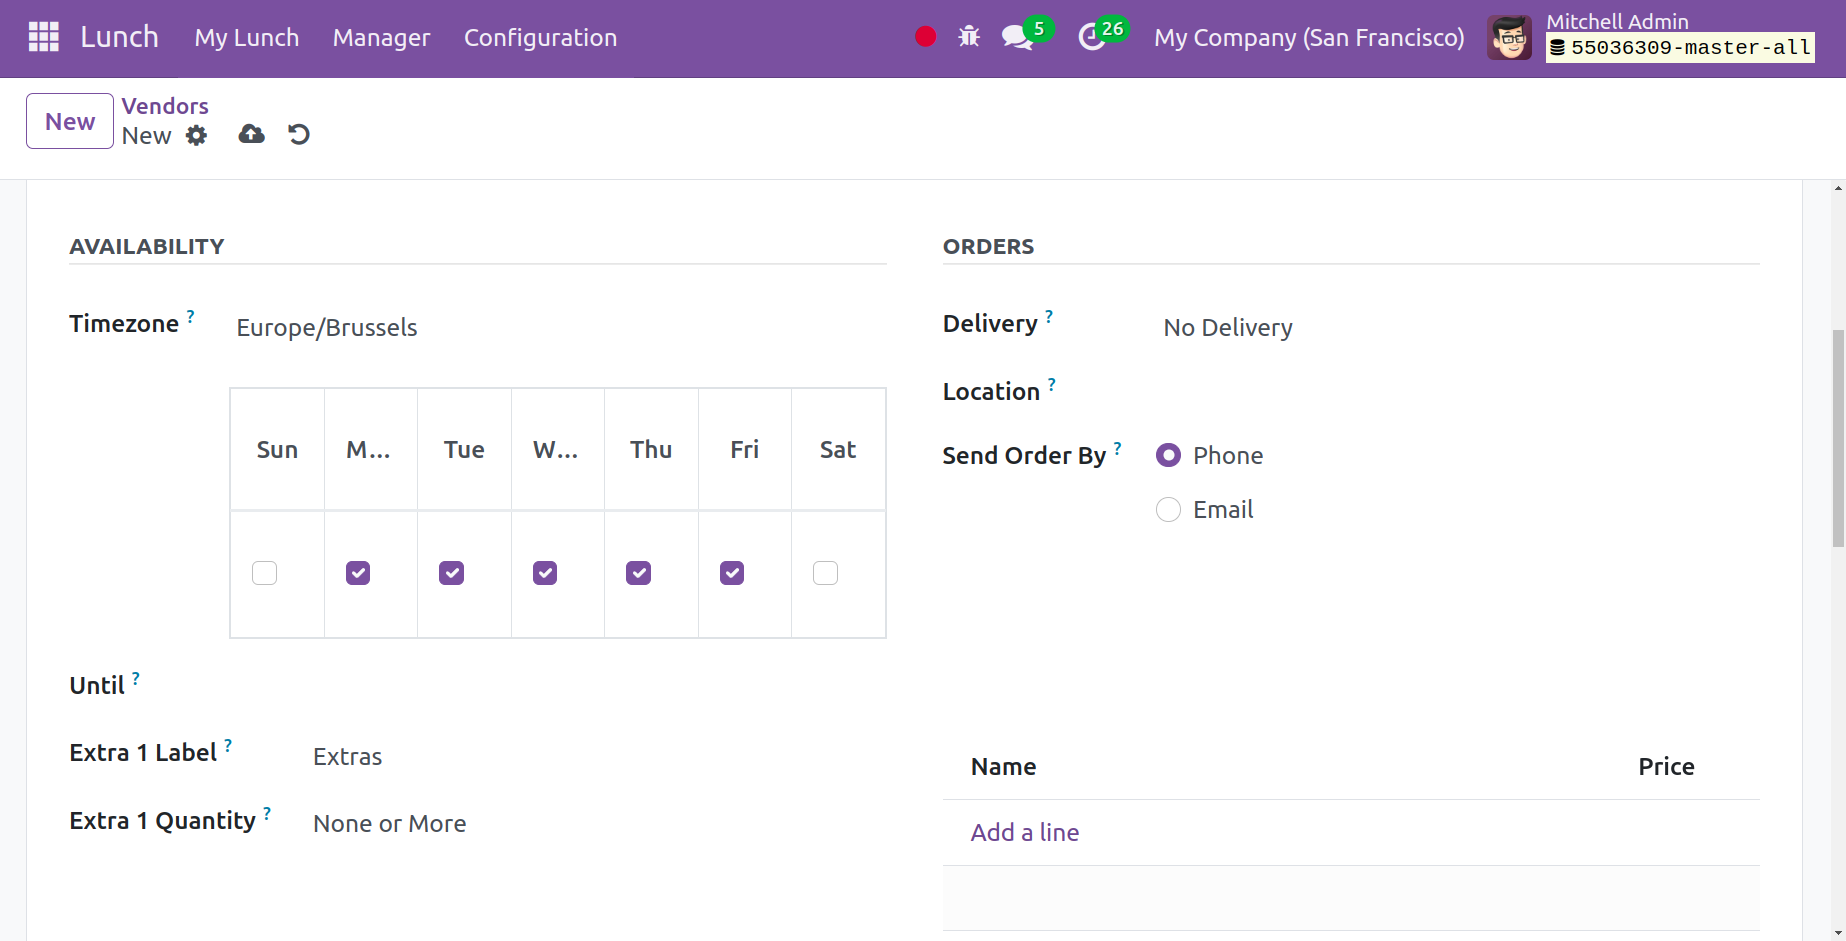
You can specify more products and their quantity under the
Extra label option. Lastly, select the Save icon.
Location
A company may have multiple offices and branches. Orders must
include the lunch location for the caterer to deliver meals
promptly.
The Location option is located here, under the Lunch
module's Configuration menu. The Company, Address, and
Location Name will be shown on the list. You may add the
specifics of the new lunch spot by clicking the New button.
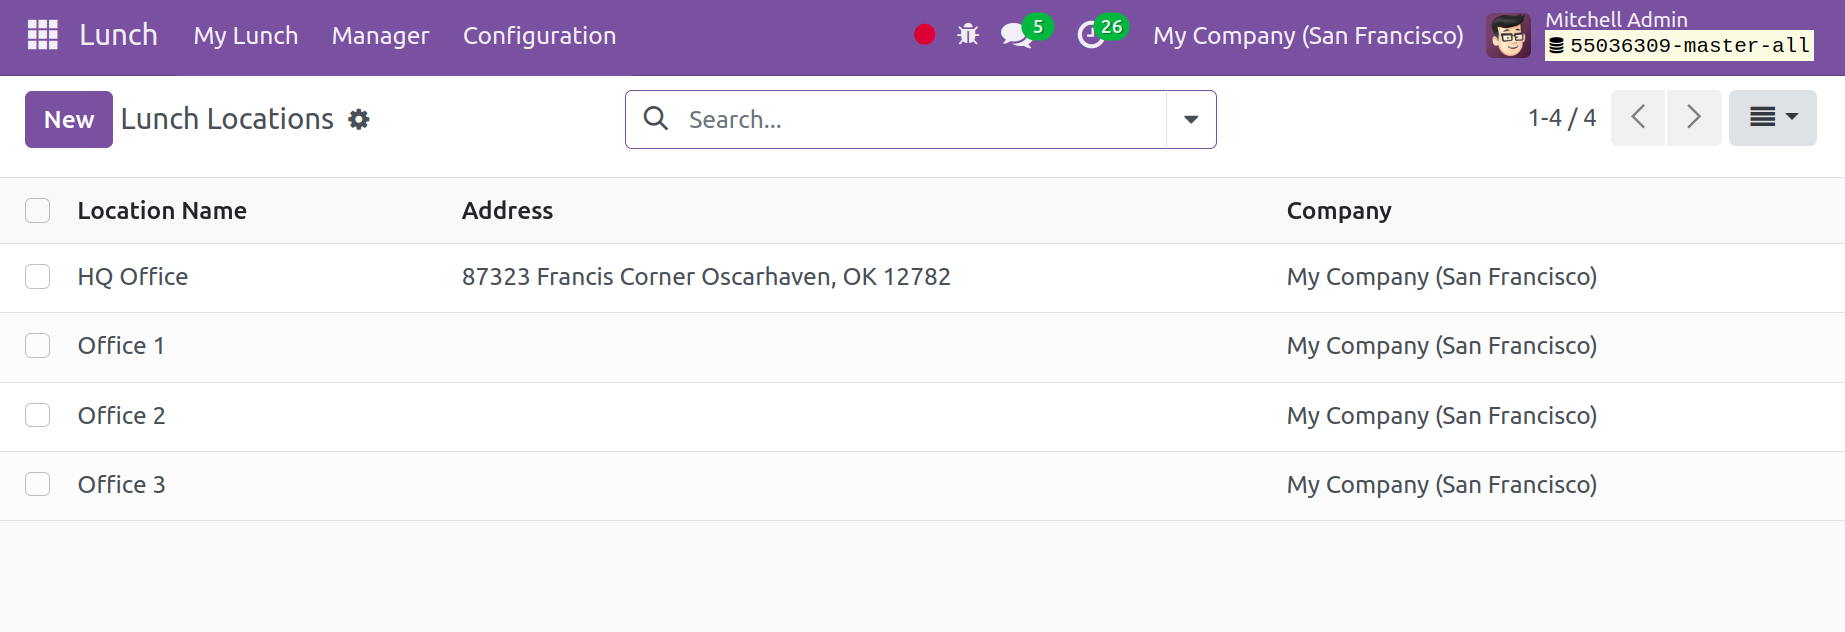
The list of available sites will be followed by a new line.
Here, in the appropriate areas, is where you can enter the
lunch location information. Store the location.
Products
In the Odoo 17 Lunch Module, adding new food items is simple.
To do that, select the Configuration Menu and look for
the Products option below.
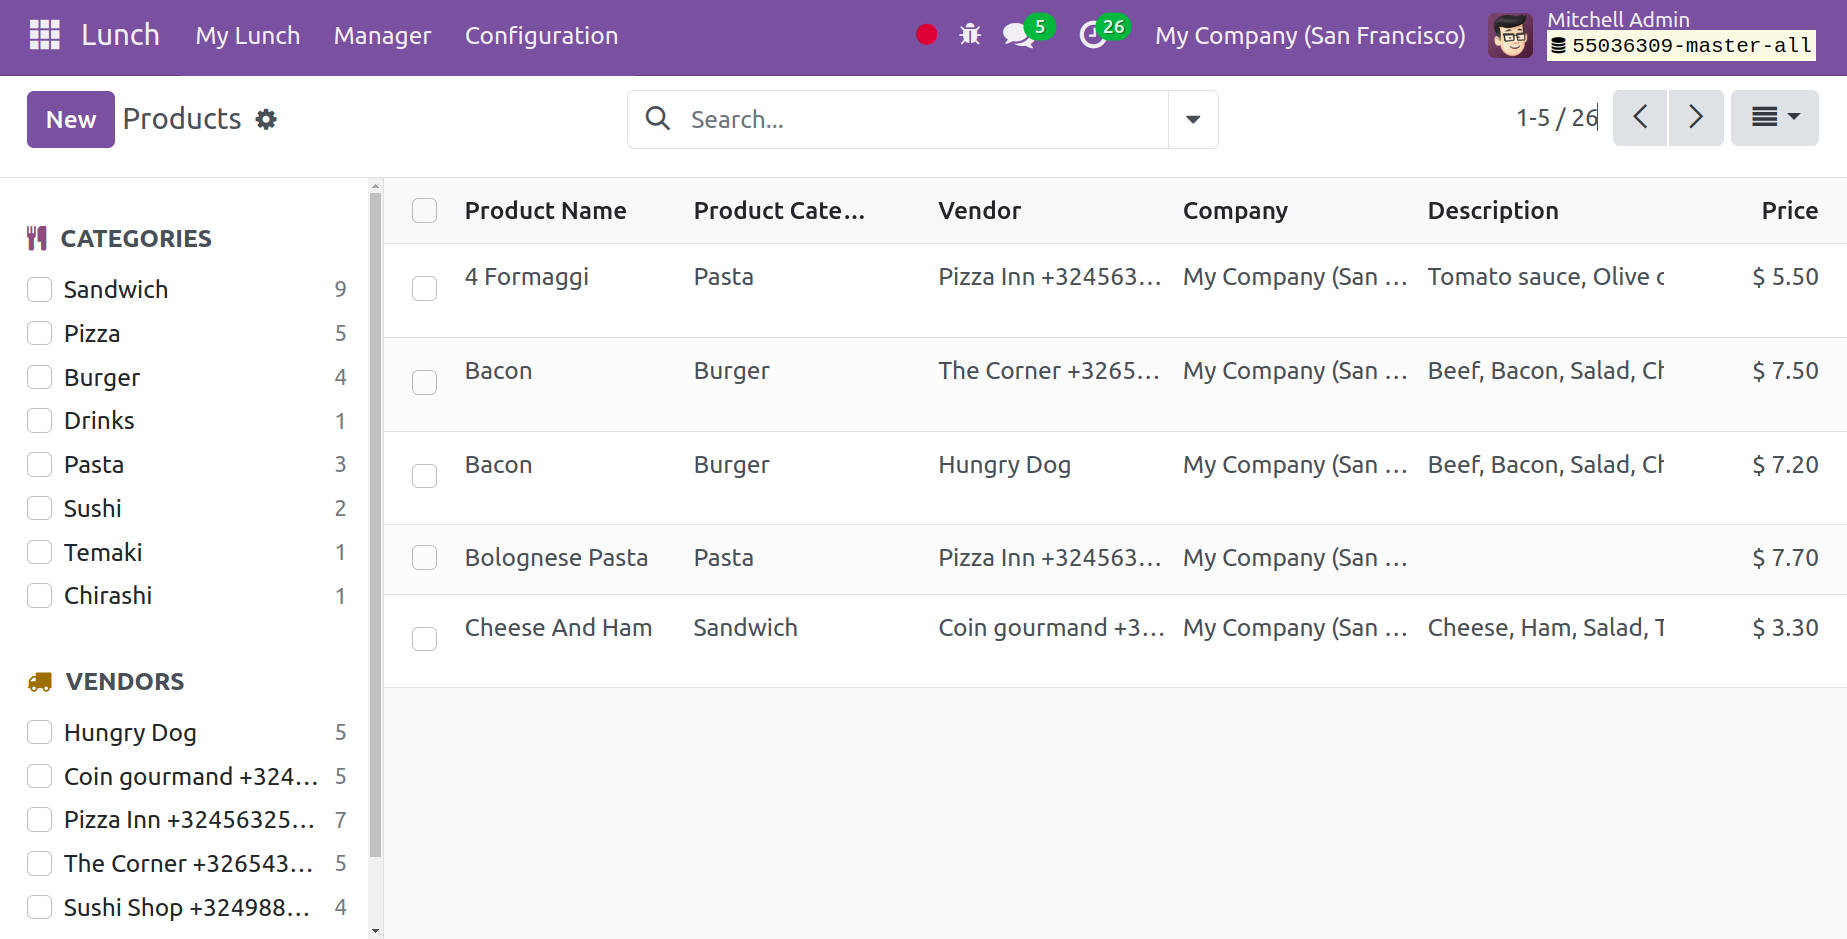
This is a list of every product that has been produced. On the
left side of the page, there are categories. Another display
option is the Kanban view. You may find the product name,
category, vendor, company, product description, and price in
the provided list. Using the Edit icon, you may select any
product on the list to make more adjustments. Click the New
button to start creating a new product.
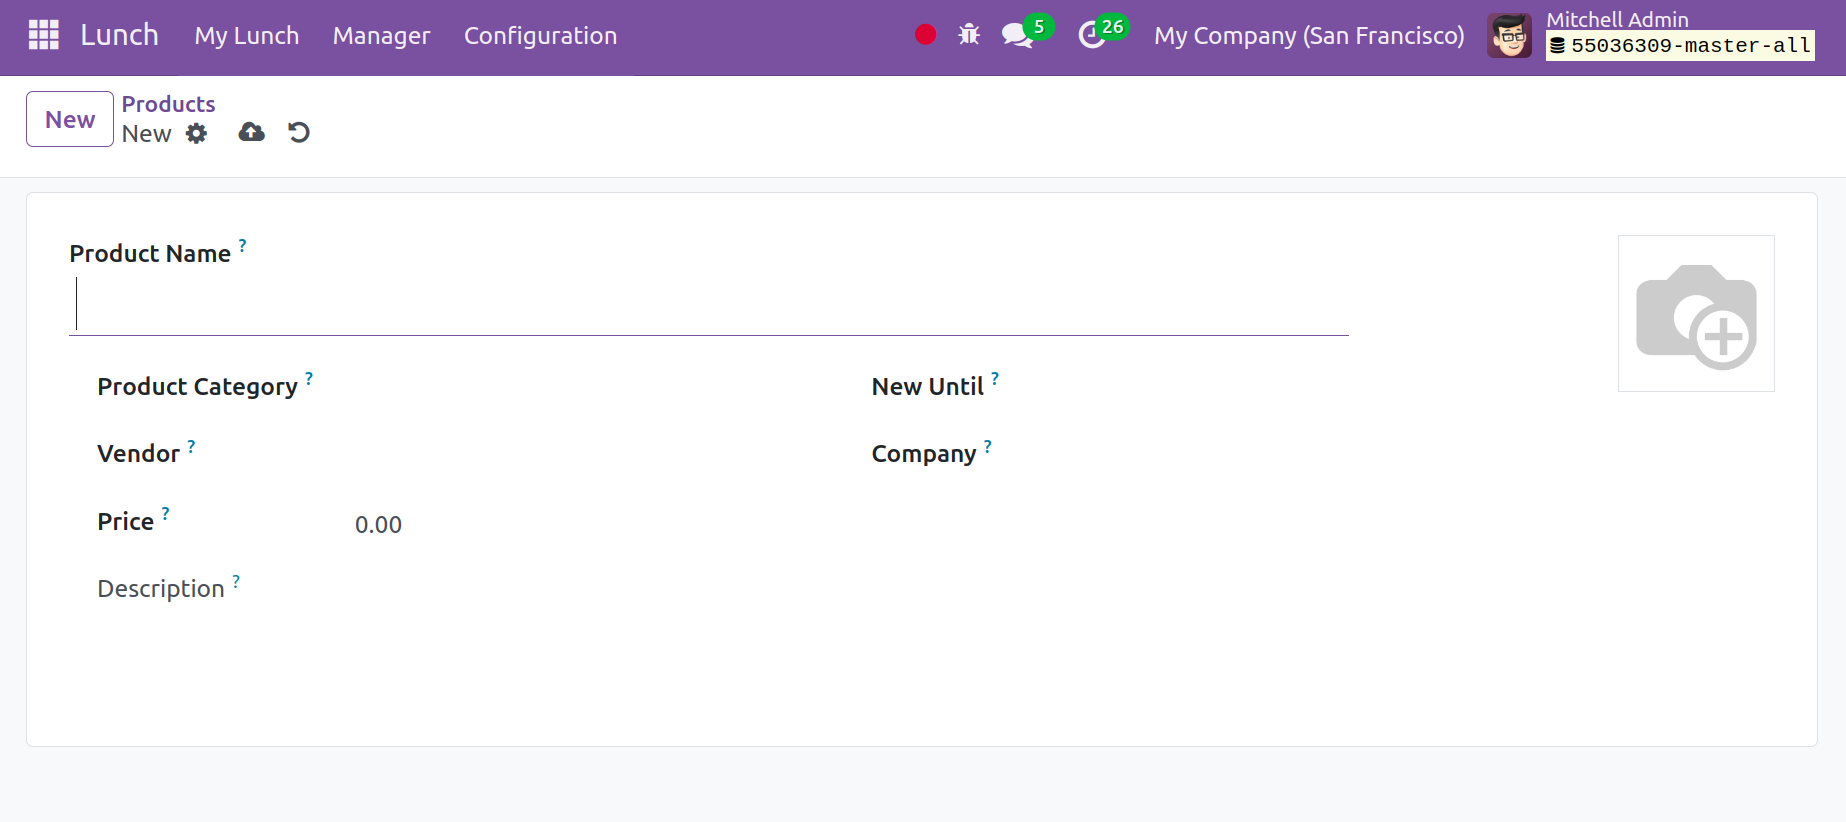
You can enter the product's name on this page. Choose the
product category and vendor from the supplied list. You can
enter the product type's pricing in the designated space. You
can specify the product's expiration date in the New Until
field. Next, mention the firm name as well. You can provide
more details about the product below the description. You can
also include product photos in the designated area. Lastly,
"Save" it.
Product Category
Let's now see how to use the Odoo Lunch Module to add a new
product category. You will find the
Product Category option in the
Configuration menu.
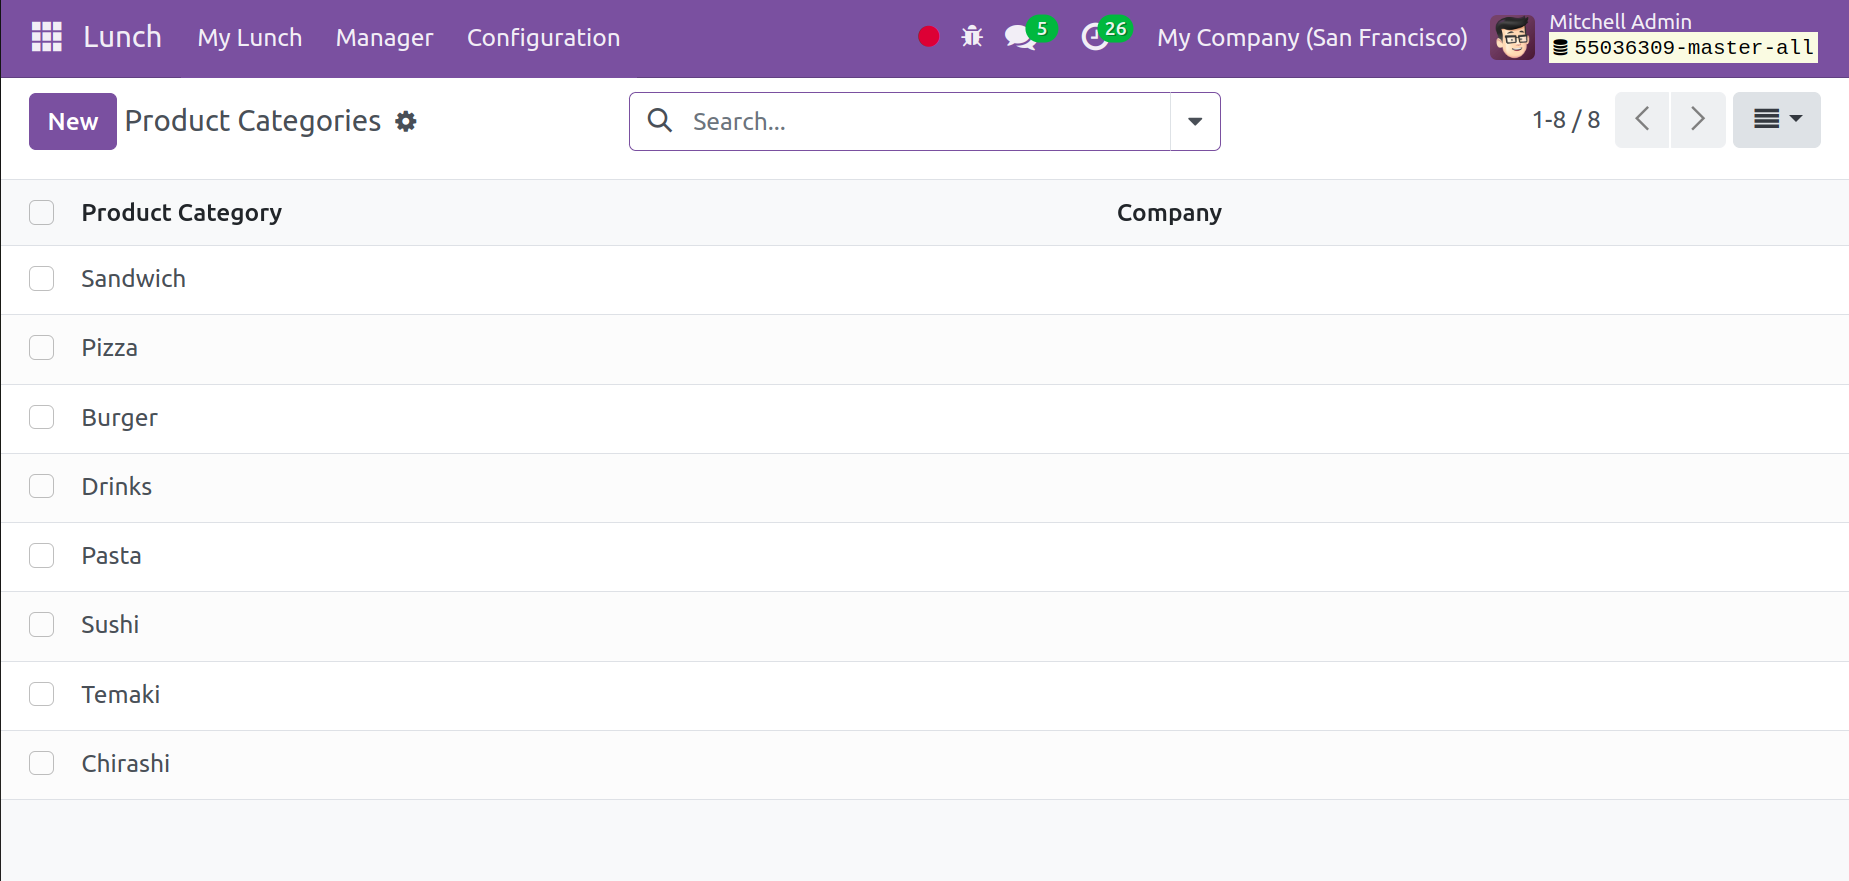
You will see a list of previously created product categories
on this page. Now, select the New button, as seen in
the figure above, to create a comparable type. You must fill
out the creation window with the required data.

This is where you have to name the product category and enter
the name of the company. Additionally, there is room for you
to attach an image for the same. Lastly, select the Save
option to include it in the current product category list.
Alerts
You can set up reminders to be reminded to place the order by
using the Lunch Alerts feature. To prevent delivery
delays, this option would be highly beneficial. This choice
will ensure that the orders are placed on schedule. The
Configuration menu will provide the option.

All of the previously produced alerts are visible in the
window. The alert's name, type, whether it is displayed today,
and active status are among the details. You can quickly and
easily create a new lunch alert by using the New icon.
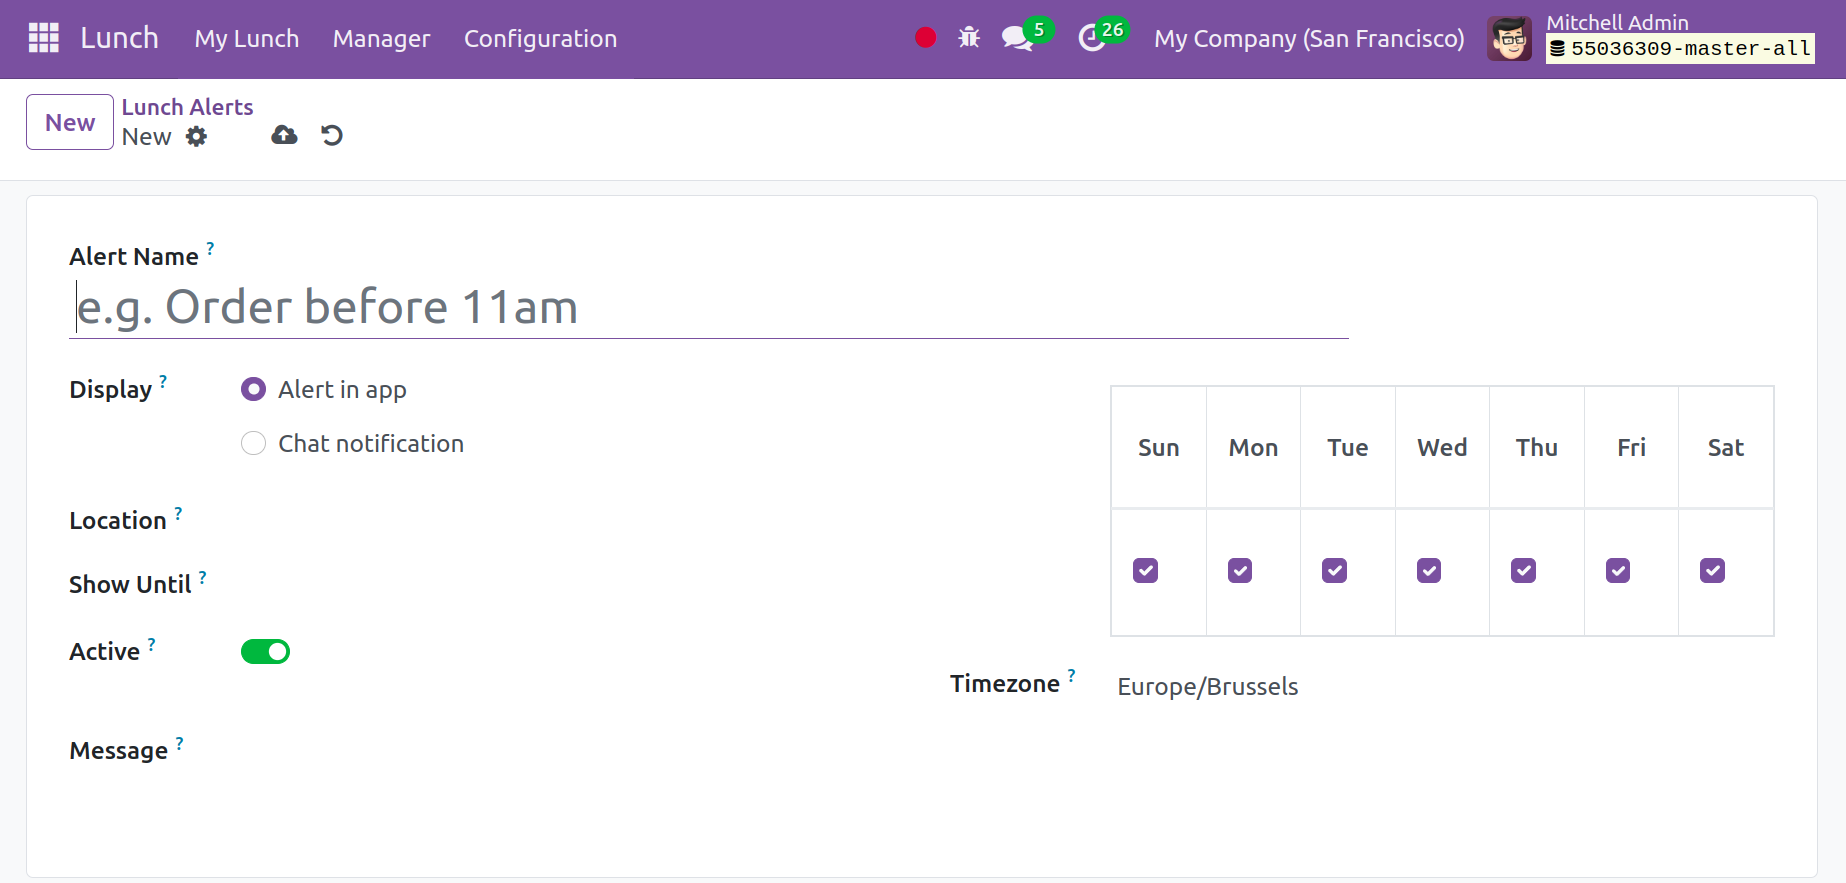
Here, you must provide the Alert's name. Show it as a chat
notification or as an alert within the app. In the
Show Until section, indicate the location and date. The
alarm is activated when touching the Active icon. The
day that the alert should be sent out can then be labeled.
Fill in the message field with a Message as well.
Lastly, select Save the alert.
Settings
The maximum overdraft that an employee is permitted to make is
specified in the Lunch Settings. You also have a say in
whether or not to send messages via a reception notification
upon order delivery.
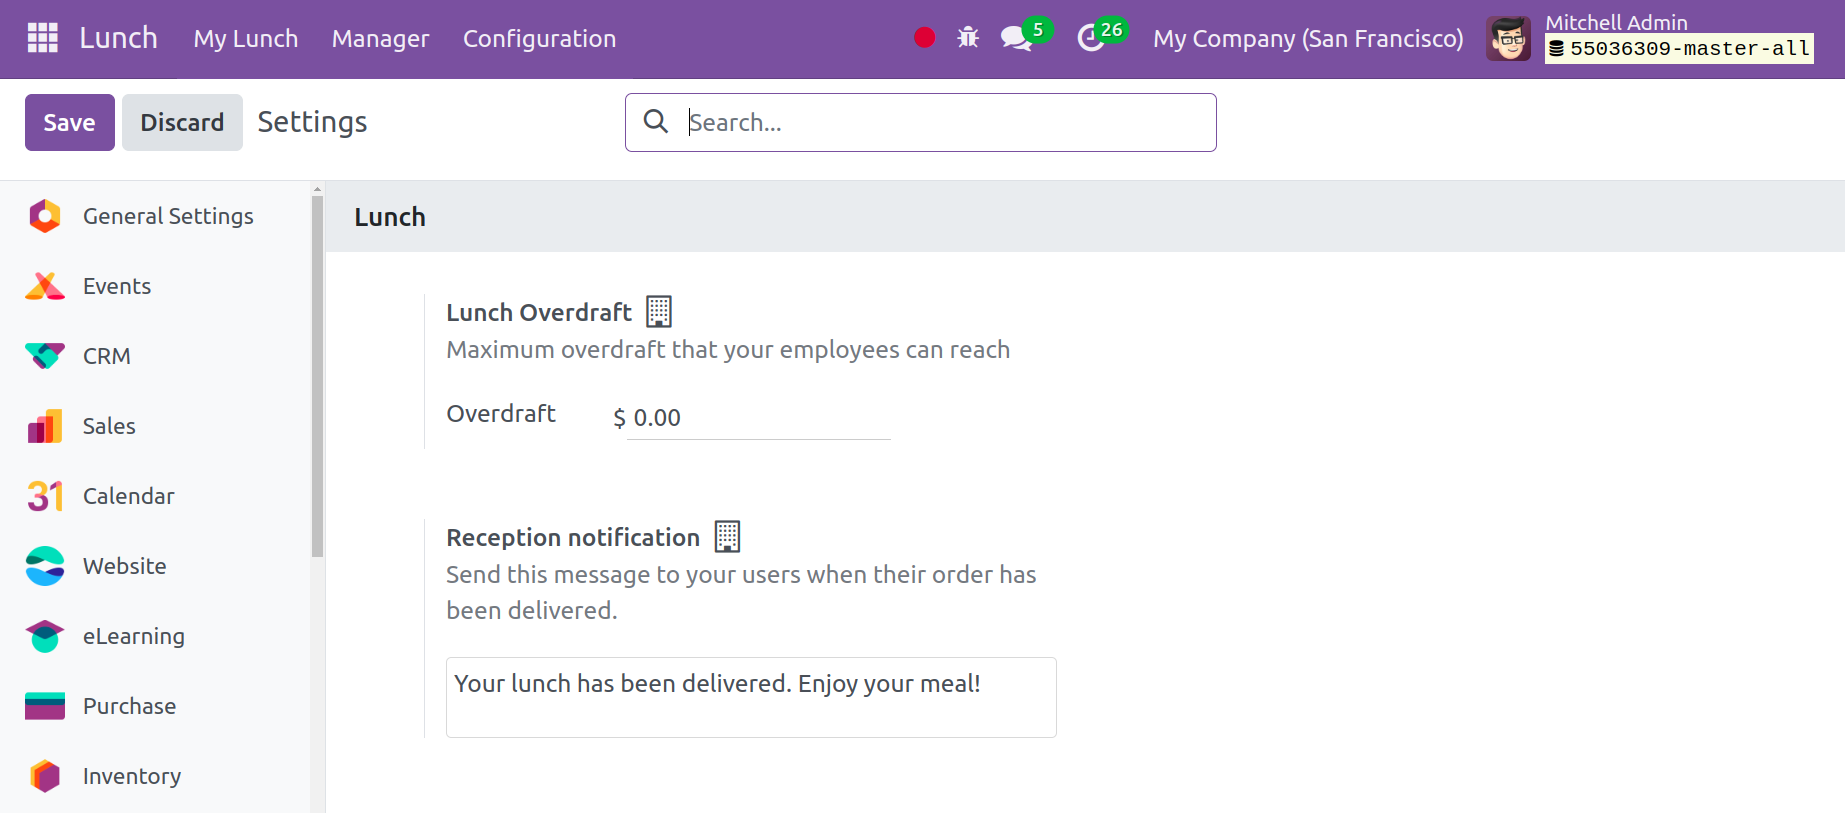
As you can see, Lunch modules readily allow employees to place
orders depending on their preferences and control activities
around their lunch breaks.